herchammer Posted November 20, 2008 Share Posted November 20, 2008 I know this has been addressed multiple times, and there's probably a blueprint for it, but here I am asking again. I have a friiend ready to fabricate a side draft hood for me, and I haven't the foggiest idea what dimensions I should lay out for him. The hearth is three by three. This will be the top venting design as opposed to Hoffi's through the wall design. So, here I stand hat in hand, AGAIN:confused: Thanks All. Quote Link to comment Share on other sites More sharing options...
Hofi Posted November 20, 2008 Share Posted November 20, 2008 I will answer u later today . With photo's and dimentions Hofi Quote Link to comment Share on other sites More sharing options...
rthibeau Posted November 20, 2008 Share Posted November 20, 2008 A side draft forge doesn't necessarily need a hood as in a hood that covers the firepot area. It can be as simple as stovepipe sitting on the forge table and going straight up through the roof, the bottom of the stovepipe facing the firepot has an arched opening cut out. 10 inch diameter stovepipe is ok, 12 inch would be better. Photo 1 is my forge, Photo 2 is Dave Roeder's. Dave's is more of a hood style for working on the front side. Mine is a strict side draft designed to work from the side. Both accomplish the same thing. Quote Link to comment Share on other sites More sharing options...
Mark Aspery Posted November 20, 2008 Share Posted November 20, 2008 I use a 1/8 inch wall 10 inch diameter pipe that sits on the forge table. I have a 14 inch tall 8 inch (across the chord) opening. Of that I close 2 inches at the bottom with a piece of 2x2x1/4 angle iron. This helps the flue's stability. PDF document attachedBlackmiths flue article.pdf Quote Link to comment Share on other sites More sharing options...
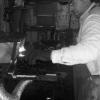
Hofi Posted November 20, 2008 Share Posted November 20, 2008 1 Start the fire with chanks of wood (I use cokes only) 2 The same from the side .one can see the 25 degrees cut of the tunnel that brings the top of the tunnel over the center of the fire and will produce a better suction 3 After cover the smoke alone is olso being suked very good 4 ready for heat 5 from the front the tunnel is 12 1/2'' squar and the chimney 12'' 6 from a distance 7 into the roof 8 the semmi round tool is to suport the steel in the fire inthe right angle according to the need Hofi Quote Link to comment Share on other sites More sharing options...
Frosty Posted November 20, 2008 Share Posted November 20, 2008 Thanks for the PDF Mark. Will it be alright if I include it in our Newsletter one day? Thanks, Frosty (editor of the Iron Press, Newsletter of the Association of Alaskan Blacksmiths) Quote Link to comment Share on other sites More sharing options...
Mark Aspery Posted November 21, 2008 Share Posted November 21, 2008 Just fine Frosty. I have other PDF articles if you ever need them. Quote Link to comment Share on other sites More sharing options...
keykeeper Posted November 21, 2008 Share Posted November 21, 2008 Thanks Mark, from me as well. It will be added to my homemade book (binder) of blacksmith knowledge. Nice, simple design that from the pictures looks like it draws very well. Quote Link to comment Share on other sites More sharing options...
herchammer Posted November 21, 2008 Author Share Posted November 21, 2008 Well folks thank you for the input. I had looked at several designs, and really wanted the type that penetrated the wall and then went vertical, but that just wasn't going to work with my overall plan. Hofi, I actually went with a hood of the design that you show in the pictures you posted. Something I was curious about, was whether or not the one pictured has a smoke shelf in it? Mark, Richard, thank you both for your input. As always, the questions I have, receive prompt and informed answers. Quote Link to comment Share on other sites More sharing options...
Hofi Posted November 24, 2008 Share Posted November 24, 2008 NO there is no shelf at all !!! If you want any more information I''ll just be happy to give. Hofi Quote Link to comment Share on other sites More sharing options...
Arbalist Posted November 25, 2008 Share Posted November 25, 2008 Hhm, I like the curved work support Hofi, very nice idea, reckon I'll have to make one of those myself! Did you give it a name?! Vic. Quote Link to comment Share on other sites More sharing options...
divermike Posted November 25, 2008 Share Posted November 25, 2008 The smoke shelf in fireplaces is for the detritus to fall out of the air stream onto. With wood, this helps keep the larger sparks from leaving the system, as the cool air comes down the chimney, it hits the smoke shelf, creating turbulence in the airstream, which then slows the vertical passage of detritus, in a coal system, generally we don't have the same volume of debris, so it is speculative if we need smoke shelfing on a coal system. I built one with, and one without, and have observed little difference in the systems. Any one have other opinions that differ from mine? I 'm always willing to learn. Quote Link to comment Share on other sites More sharing options...
primtechsmith Posted November 25, 2008 Share Posted November 25, 2008 We (Yesteryear School of Blacksmithing) build our hoods with NO smoke shelf. And we also have 12" square going out and up above the peak of the roof on all 7 forges. With all the doors open and wind blowing they still draw that fire sideways. I think no matter what it all comes down to the throat size of your pipe and how high you go with it. We do sell them ready for a 10" round pipe to mate up to it... Here are some photos.Black Smith Guild of Viriginia - GalleryBlack Smith Guild of Viriginia - Gallery (Nevermind the ugly guy in the black T shirt...) Peyton Quote Link to comment Share on other sites More sharing options...
TASMITH Posted November 25, 2008 Share Posted November 25, 2008 My forge originally had an over head hood which was really not very effective at drawing off the smoke. Any breeze at all would blow the smoke around and fill the forge with smoke. The side draft hood I made is very simple in design.I followed a blueprint made by Lester Beckman and posted on anvilfire.com. The only modification I made was to use 10 in. stovepipe instead of the 12 in. he recommends. It works very well with the ten inch pipe though. Super Sucker Hood: Super Sucker Side Draft Coal Forge Hood Terry Quote Link to comment Share on other sites More sharing options...
Hofi Posted November 25, 2008 Share Posted November 25, 2008 Arbalist No name yet .just TOOL SUPORT The incisions are forged from both sides so one can use it left and right Hofi Quote Link to comment Share on other sites More sharing options...
HWooldridge Posted November 25, 2008 Share Posted November 25, 2008 I do not have a smoke shelf but I did put a couple of fire bricks on the lower part of the sheet metal. They heat up and have a tendency to keep the smoke drafting when the fire is idle. I used 12" pipe for the stack and do not have a coolie hat so the suction is significant and very little smoke goes into the shop. Quote Link to comment Share on other sites More sharing options...
Neal L Posted November 25, 2008 Share Posted November 25, 2008 I made my side draft using the plans on this web page and it works like a charm.Steel s-draft drawing Quote Link to comment Share on other sites More sharing options...
herchammer Posted November 26, 2008 Author Share Posted November 26, 2008 TASMITH, I used that exact drawing. It's good to hear that the design works well. I'm anxious to get it back from the fabricator. I had him omit the legs on that design, it will sit flush on the hearth. Quote Link to comment Share on other sites More sharing options...
Recommended Posts
Join the conversation
You can post now and register later. If you have an account, sign in now to post with your account.