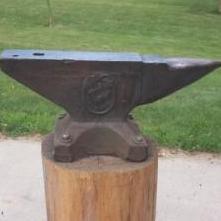
Charcold Posted August 2, 2017 Share Posted August 2, 2017 I am planning on making a plate to fit over the top of my anvil to protect the face (what's left of it) while doing any punch or chisel work on it. I am blessed to have a fabrication shop downstairs at work that can do this no problem, I'm just curious what thickness of steel I should go with, and perhaps the base material. As this is a sacrificial plate I'm thinking regular mild steel, versus a more hard stainless steel, would be best. We stock 16 ga. (.063"), 11 ga. (.125"), 7 ga (.188"), and 1/4" thk. plate that would all be available and bend-able in our brake press. I was leaning towards the 7ga material, mainly because we can cut up to that thickness on our laser, versus using the waterjet with a bevel on the cut and a larger chance of a burr. As for the design itself, very simple. Just a plate with 4 lips bent down. 2 over the sides of the anvil, one down into the hardy hole, and one small lip just over the step. About a 1/16th or 1/8th of an inch wiggle room or more all the way around is what I was thinking. Not a tight fit but not something that's going to wobble off either. Something like this: Quote Link to comment Share on other sites More sharing options...
Steve Sells Posted August 2, 2017 Share Posted August 2, 2017 7 ga will be plenty Quote Link to comment Share on other sites More sharing options...
JHCC Posted August 2, 2017 Share Posted August 2, 2017 I wouldn't bother getting that fancy. Whatever you use is going to get all banged up and scarred anyway, Quote Link to comment Share on other sites More sharing options...
Charcold Posted August 2, 2017 Author Share Posted August 2, 2017 9 minutes ago, Steve Sells said: 7 ga will be plenty thanks! 9 minutes ago, JHCC said: I wouldn't bother getting that fancy. Whatever you use is going to get all banged up and scarred anyway, that's true i'm sure it will get used up pretty quickly. I may still go ahead, just because it can be fit in on a sheet pretty easily with our regular fabrication schedule without any problems. we cut a lot of pieces with sacrificial "slugs" in the middle that are then cut out after rolling for radius'd pieces. I can fit this 1/2 a sqft piece right in there and do the work on the brake press myself. If for some reason the shop head hassles me for a bit of cash i'll skip it though, and just grab something out of the scrap pile instead. Thanks for the advice Quote Link to comment Share on other sites More sharing options...
JHCC Posted August 2, 2017 Share Posted August 2, 2017 A while back, I made what I thought would be a nifty cutting plate to fit over my anvil: it had curved sides with a bit of spring, so that it would hold itself snugly on the anvil. What I found out when I went to actually use it was that if it's soft enough for cutting, then it would easily deform and the clips would lose their effectiveness, but if if were hard enough not to deform, it would be too hard for cutting. I'd just grab a piece of the 7 ga. and keep it handy for when you need to cut something. Quote Link to comment Share on other sites More sharing options...
Glenn Posted August 2, 2017 Share Posted August 2, 2017 You must ask yourself how wide is your chisel? IF you cut through the metal, which you should not do anyway, the cutting plate should be soft enough not to harm the chisel or punch, and thick enough to protect the surface of the anvil. I use a piece of 3/16 or 1/4 inch aluminum plate 3 inches wide and the length so it goes across the anvil face. Small tabs hold it in place on the anvil face. It is light weight, and bright so you can find it. When you make one you like, be sure and make two more so you always have a spare. Quote Link to comment Share on other sites More sharing options...
ThomasPowers Posted August 2, 2017 Share Posted August 2, 2017 A lot of folks just use a piece of channel iron that will saddle the face. Adding a hardy stem is just gravy. Your "simple design" is one of the fanciest I have seen. Quote Link to comment Share on other sites More sharing options...
Charcold Posted August 2, 2017 Author Share Posted August 2, 2017 7 minutes ago, ThomasPowers said: A lot of folks just use a piece of channel iron that will saddle the face. Adding a hardy stem is just gravy. Your "simple design" is one of the fanciest I have seen. HAHA that's what I'm picking up on! It's simple from the perspective of our fabrication potential in house. all 90 degree bends and a pretty basic flat pattern that the laser can handle in no time flat. We on occasion have to make much more complex things with a 1/32" tolerance or less. But it's fairly overkill design wise from a blacksmith's perspective for something that's sacrificial and temporary. ty Glenn and JHCC, good things to consider Quote Link to comment Share on other sites More sharing options...
ThomasPowers Posted August 2, 2017 Share Posted August 2, 2017 I'd have them cut out a stack of them with a tab you bend down for the hardy hole and have a wedge to lock them in place Quote Link to comment Share on other sites More sharing options...
Charcold Posted August 2, 2017 Author Share Posted August 2, 2017 there's a great idea. skip the tab on the step altogether and wedge it. Seems like that would make for a tighter fit and simpler design! Thanks Quote Link to comment Share on other sites More sharing options...
ThomasPowers Posted August 2, 2017 Share Posted August 2, 2017 Want to get fancy? Put a tab on either end and bend 1 up and the other down so you can flip it around when one face gets scarred up and use the other. (of course the tabs have to be less than the step depth---probably easier and better to just have a stack of them with 1 tab and replace as necessary as you have access to the tech to do them.) Quote Link to comment Share on other sites More sharing options...
Charcold Posted August 2, 2017 Author Share Posted August 2, 2017 I think that's exactly what I'll do, have them make one, see how it fits, and then if I like it just have a stack made. I'll get some solid dimensions tonight and have it made this week hopefully. Will update with some pictures once it's done Quote Link to comment Share on other sites More sharing options...
Recommended Posts
Join the conversation
You can post now and register later. If you have an account, sign in now to post with your account.