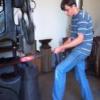
Rhettbarnhart Posted May 24, 2013 Share Posted May 24, 2013 So as Royce Unruh said,him and I built new forges this week.I thought I would show mine :) I had the firepot cut from 1/2 in and the table from 1/4 on a plaz table(royces).All the other stuff was scrap I had layin around. I decided not to make a clinker breaker on this one because I wasn't sure about some of the details on makin one(aircontrol etc.) his forge has 3 pieces of mild flat welded across the air hole. Here are some pics this is without the side gates this is with the sidegates thoughts comments or criticism welcome :rolleyes: I will try to post some pics of it with a fire soon Quote Link to comment Share on other sites More sharing options...
MLMartin Posted May 24, 2013 Share Posted May 24, 2013 It looks good Rhett, But you might find that it starts to heat the side of the pot up to much. If this becomes a problem I would suggest welding up the two outside holes in the air inlet. The two center air inlets look more than big enough to feed the forge with air. You might have a look at one of the threads ( Moving clinker breaker or stationry grate? ) one of the fellows shows his forge where he uses a pipe cap with little holes drilled in it. This is very much like a old industrial forge that used interchangeable half round air inlets. You could make some drop in half round air inlets. There is no need for them to screw on. They could just slip into the hole in the bottom. Quote Link to comment Share on other sites More sharing options...
Jim Coke Posted May 24, 2013 Share Posted May 24, 2013 Greetings Rhett, Great build... ML covered the clinker breaker thing.... Only suggestion that I could make is to put a split rubber hose over the re-bar hammer hold.. That stuff is hard on handles... In the words of Jeremiah Johnson..... IT WILL SERVE YOU WELL PILGRIM... Continue the great work Jim Quote Link to comment Share on other sites More sharing options...
Rhettbarnhart Posted May 24, 2013 Author Share Posted May 24, 2013 I think I will probably use that pipe cap mac thanks for the idea jim thanks for the compliment and advice I will look for some hose now Quote Link to comment Share on other sites More sharing options...
Frosty Posted May 24, 2013 Share Posted May 24, 2013 Looks good to me. Do you have plans for dealing with smoke? I'd suggest a side draft, it could sit right on the table behind the fire pot. My only criticism would be, it's a little dusty. <grin> Frosty The Lucky. Quote Link to comment Share on other sites More sharing options...
Rhettbarnhart Posted May 24, 2013 Author Share Posted May 24, 2013 Frosty,at the moment I work in an open air shop(pole barn);so smoke really isn't an issue Also,the firepot is just under 4in deep this is about the right depth for me;I am afraid that if I put that pipe cap in it the firepot will be too shallow,ideas? Quote Link to comment Share on other sites More sharing options...
Charles R. Stevens Posted May 24, 2013 Share Posted May 24, 2013 Peace of 1/2 plate with a 3/4 hole drilled in it. Cut it out as a round, relive the edges, most of the slag should run off to the side just like the cap. Otherwise just heap your coal higher on the table. I find a few fire bricks are wonderful for tweaking the fire for different tasks as well as fuel conservation. Quote Link to comment Share on other sites More sharing options...
Dale M. Posted May 24, 2013 Share Posted May 24, 2013 Think your tool rack may give you some headaches as hammers turn and drop through slot.... Maybe some dividers to form a small opening so just handles can drop through.... Otherwise look very good... Dale Quote Link to comment Share on other sites More sharing options...
Rhettbarnhart Posted May 24, 2013 Author Share Posted May 24, 2013 Sounds good Charles I think I will do that. Dale,thats not a bad idea if it gives me problems I will know how to fix it. thanks guys here are some finished pics after I painted and lit it Quote Link to comment Share on other sites More sharing options...
Rhettbarnhart Posted May 24, 2013 Author Share Posted May 24, 2013 I also built this handy shelf Quote Link to comment Share on other sites More sharing options...
Jim Coke Posted May 25, 2013 Share Posted May 25, 2013 Greetings again Rett, Now your cookin on the only burner... You should be proud... Jim Quote Link to comment Share on other sites More sharing options...
Rhettbarnhart Posted May 25, 2013 Author Share Posted May 25, 2013 cookin on the only burner?Im not sure I know that phrase,and yeah Im pretty proud of it after using it a couple hours Quote Link to comment Share on other sites More sharing options...
Jim Coke Posted May 25, 2013 Share Posted May 25, 2013 Greetings Rhet, The term ( now your cooking on the front burner } It comes from the old times when people used wood stoves.. All the burners did not get equally as hot but it seems the front burner was the hot one... What it means that if you are on the front burner your making great progress.. Keep a knockin Jim Quote Link to comment Share on other sites More sharing options...
pjh66 Posted May 25, 2013 Share Posted May 25, 2013 G'day mate good work. It is great to build your own forge. Seems like you had fun with the project. One comment for you to think about, on the front of the table where you cut out the front which you need to do you may need to put a support brace across under it as I think it will bow over time. On my forges I have built I have a cut out on the back as well with a removable plate across it so if I have long stock to put through I can. just something for you to think about. Have fun & keep it hot. Quote Link to comment Share on other sites More sharing options...
Rhettbarnhart Posted May 27, 2013 Author Share Posted May 27, 2013 ahhhhhh now see jim,Thanks for the compliment pjh66 if you look close you will see I have a cutout on both sides but I have the little door I built closed on the other side;also the sides are angle iron and I just cut out the top angle for the opening so it still has the bottom flat part for support:) Quote Link to comment Share on other sites More sharing options...
Recommended Posts
Join the conversation
You can post now and register later. If you have an account, sign in now to post with your account.