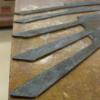
Don Nguyen Posted April 27, 2012 Share Posted April 27, 2012 Hello all :) Been working on a gyuto for a while now. I broke the previous one, and then revised my design since then also. Here is the (finally) finished prototype for a right hander. Forged from Aldo's 1084 237mm cutting edge (9.33 in) 50mm overall height at choil (1.96 in) 2.0mm thickness at spine above choil (0.080 in) 1.3mm thickness at spine one inch from tip (0.050 in) 0.05mm thickness above cutting edge (0.002 in) Blended flat grind on right side Slight convex grind on left side Rounded choil biased on right side Balance point right above choil Fully tapered tang Handle is Indian Mountain Laurel 147mm length (5.80 in) Saya carved from Spanish Cedar Quote Link to comment Share on other sites More sharing options...
bigfootnampa Posted April 27, 2012 Share Posted April 27, 2012 It's a beautiful knife! Quote Link to comment Share on other sites More sharing options...
Stormcrow Posted April 28, 2012 Share Posted April 28, 2012 Darn good job there! Quote Link to comment Share on other sites More sharing options...
jimmy seale Posted April 28, 2012 Share Posted April 28, 2012 that is fantastic!! Quote Link to comment Share on other sites More sharing options...
Loneforge Posted April 29, 2012 Share Posted April 29, 2012 Well done! Keep em coming! Quote Link to comment Share on other sites More sharing options...
pkrankow Posted April 29, 2012 Share Posted April 29, 2012 Stunning and beautiful. Phil Quote Link to comment Share on other sites More sharing options...
Don Nguyen Posted April 29, 2012 Author Share Posted April 29, 2012 Thanks for the kind words everyone. Although there are many things I did on this one that I didn't like too much, it should be a solid performer. In the hands of someone who know's how to sharpen a kitchen knife with 60+ HRC, it'll cut very well. I, however, am not that good, and have problems with the wire edge. It wedges slightly on the tip when cutting up onions, but that could be my technique. We will find out soon when I ship out the knife next week for testing. Slices tomatoes no problem, and glides through potatoes without sticking much at all. Quote Link to comment Share on other sites More sharing options...
Robakyo Posted May 5, 2012 Share Posted May 5, 2012 Beautiful knife. It looks like a high performance race car! Very sleek lines. Did you make your own mosaic pins? Robert Quote Link to comment Share on other sites More sharing options...
Don Nguyen Posted May 7, 2012 Author Share Posted May 7, 2012 Hey Robert, thanks for the reply! The mosaic pin was made by a knifemaking friend. Unfortunately, I ran into a lot of trouble when I was finishing up the knife. One of the pins fell out, and superglue wasn't working. Another pin fell out, so I look out all 3 and filled them with black epoxy. In the future I will be using mosaic pins from Sally Martin. Quote Link to comment Share on other sites More sharing options...
Robakyo Posted May 7, 2012 Share Posted May 7, 2012 Don, I'm sorry to hear your pin problem, but I find your mosaic pin issue interesting. I have not worked with them yet, but really like how they dress up a knife. Did you create enough tooth on the outer surface of the tubing? I've use coarse grit sandpaper for all pin material, but I always peen the pins down a bit while the epoxy is wet. So, I don't really know what is holding the pins more securely for sure. Of course, peening mosaic pins would be a disaster. Anyway, I would like to know how this kind of thing can occur. How deep were the pins? What was the outer tubing made of? I really don't know the right questions to ask yet. IMHO, You have a very bright future ahead of you Don! Robert Quote Link to comment Share on other sites More sharing options...
Don Nguyen Posted May 7, 2012 Author Share Posted May 7, 2012 Robert, I don't know all the complete details, but as far as I've understood my friend just sticks all the pins in there without extra prep. The whole pin itself is rigid in the handle, but the inner pins (which go all the way through), were the main problem. If you can see the three black circles in the mosaic pins, they were supposed to be 3 small brass pins. The outer tubing I believe is brass. Mainly the issue with the homemade mosaic pin is that it's difficult to get the inside completely filled with epoxy. There are voids and gaps in there, which probably caused the pins to go loose. Done correctly there shouldn't be any voids or gaps, but it's difficult to do it correctly using the 'homemade' method. Of course, there's the possibility of me causing the problems by inducing too much heat during shaping. You have to be very careful with mosaic pins. Quote Link to comment Share on other sites More sharing options...
gearhartironwerks Posted May 8, 2012 Share Posted May 8, 2012 Don, I'll be happy to take that on off your hands...when you get tired of it. :) John Quote Link to comment Share on other sites More sharing options...
Robakyo Posted May 9, 2012 Share Posted May 9, 2012 Don, thanks for relating your first-hand knowledge regarding the pins. I'm under the impression that you are using a belt grinder to shape your handles. I wonder how much heat is actually generated. Rich Hale just informed me on a thread I started, that most epoxies lose their adhesion @ around 400 F. I think however, in your case, that your friend may have skipped a step or two. Please keep in mind that I've never made mosaic pins, but read everything available that I could find on the subject. Maybe he didn't degrease the rods & pins. I wipe down the tang, as well as the scales with acetone prior to using epoxy. Scuffing up the surface really helps as well, but of course, you know all this. You already do outstanding work. I've followed your other thread. You received a wealth of great advice from many knowledgeable Bladesmiths, which even more people benefitted from, my self especially. Sorry, I seem to be rambling when using this iPad. I really dislike the whole hunt and peck method of typing. Anyway, buy pins if that suits you, but quite a few Bladesmiths can and do make their own mosaic pin stock. Robert Quote Link to comment Share on other sites More sharing options...
Don Nguyen Posted May 9, 2012 Author Share Posted May 9, 2012 Robert you give me too much credit :) I'm still a beginner in the early learning stages, and this is barely my 5th knife. I appreciate your thoughts and comments! Quote Link to comment Share on other sites More sharing options...
Greenbeast Posted May 10, 2012 Share Posted May 10, 2012 Tidy! Very nice. Quote Link to comment Share on other sites More sharing options...
Recommended Posts
Join the conversation
You can post now and register later. If you have an account, sign in now to post with your account.