gearhartironwerks
-
Posts
691 -
Joined
-
Last visited
Content Type
Profiles
Forums
Articles
Gallery
Downloads
Events
Everything posted by gearhartironwerks
-
Hi, I haven't been posting recently, but still look at the pics. I have a suggestion for warping based on the machinery I have in my shop and the school of hard knocks and wasted steel. I start by profiling the blade and bring the thickness to about 1/8" for chef blades. This is where I heat treat. I heat the blade to 1500 deg (1095-15n20) and quench in AAA at about 120 deg while agitating up and down for about 10 seconds, then immediately place the blade between 2 pieces of 1.25" aluminum plate and apply pressure. I have a hydraulic press which makes the process easy, but heavy weights will work. I flatten one side then flip the blade and do the other. No edge grinding is done until after tempering. If you still have warping, repeat the heat treat. Another mitigating factor to minimize warping is to thermal cycle several times, normalize and anneal.
-
would like to move to stainless steel
gearhartironwerks replied to Shamus Blargostadt's topic in Knife Making
Jph, Are you dry welding by using a tig to go all the way around the billet? 440 and what other alloys? Thanks, john -
Just a couple of suggestions for finishing: I use 3M film backed belts that come in micron sizes...60, 30, 15, and 9. These are used for polishing and not stock removal and are relatively inexpensive. I usually buy online from TruGrit. The 9 micron will not give you a mirror finish, but close to it. I then use a cork belt loaded with the white compound to polish the blade from there. Some smiths say to not polish before etching as they think it muddies the etch. I haven't found that to be true. I wipe the blade using lacquer thinner, then scrub with 409 and scouring powder before etching. I etch using ferric chloride that I buy from MicroMark (on line). Their ferric is much stronger than R.Shack and about half the price. I dilute at least 1:10 distilled water, sometimes greater as I like a slow etch. After 10-15 min, I pull the blade out and sand it with 2k grit paper and Windex. This polishes the more noble 15n20 highlights, then back into the etch. This is the only hand sanding I do.. When finished, I neutralize by scrubbing with baking soda on a sponge, then rinse with water and spray Windex (with ammonia). I never grind using 36 grit to start. It will leave micro scratches the never seem to come out. Also, I have work lights on my grinders use halogen spot lights. They make a big difference. Steel that has been heat treated will etch differently (better) than than that which hasn't been. Hope this helps. John
-
That is beautiful! If you haven't already, you should also post this on Kevin Casey's "feather damascus steel" on FB. Outstanding work. Looking forward to seeing more. Thanks, John
-
Another suggestion would be to buy a pid reader and thermocouple to manually control your forge temp. Weld at 2315-2330 deg and forge at slightly under those temps. Soak time is also important for consistent results. John
-
I feel for you...it happens. But the good thing is that you learned what not to do. That's a good day. John
-
I made one of those jigs as there are enough vids etc to figure how to do it. It works fine. That being said, I went back to free handing as I felt I had more control. fwiw. Also, the cost of the jig if you don't make it, is astronomical. I always have a desire to challenge my skills doing it free hand. John
-
As an 'old guy', I never try to discourage anyone making knives, and always try to encourage those just beginning the journey to the 'dark' side. Why it's called that, I don't know as I've been a blacksmith for the past 25 yrs and have fallen into the abyss...happily. The challenges can be monumental including one to understanding more metallurgy then would be normally associated with blacksmithing. That being said, I think neck knives are a complete waste of time. I cannot think of one good reason for one to carry a knife around one's neck. Personal safety?...hmmm...probably not. Too easy to be disarmed and turned against the carrier. Convenience? Probably not either. A sheath on the the belt will work just fine and not get in your face by flopping around. This seems to me to be a trend that someone thought would be really 'cool'. I'm not there. Those who carry, convince me. John
-
This is tough for everyone. I used to sell in a store that charged a 25% commission. I could live with that. He never sold much and has since gone out of business for various reasons. So now, I'm left to my own devices in marketing. No one sells my knives better than me. I have a shop and gallery of black smithing and blade smithing items. I ALWAYS make it a point to walk people thru the shop so they are aware that all items are hand made and what it takes (machinery, forge etc) to make them. Ultimately, they ask what I am working on now. This is my 'in' and I change the subject to blades which I show and speak of enthusiastically. That may not sell the knife immediately, but it puts the idea in their head that it may make a great present, or for current usage. What you should charge for your blades...getting back to your question...is probably worth more than you think they're worth. Most folks don't understand what goes into making a blade, so the onus is on you to do the education and express your love of the art. You have to sell your art. Over time and feeling out your market, you will come to a consensus regarding price and time making your blades. Give yourself time and aim high. There is nothing worse than selling a blade and thinking afterward that you took in the shorts for all the work you put into it. Just my 2 cents. John
-
Just thinking that maybe you should start with a more modest pattern with goals that are attainable. john
-
First try at a damascus blade
gearhartironwerks replied to dps9999's topic in Heat Treating Knives, Blades etc
Cruising around and coming on this late as usual, but have some suggestions: Using a propane forge to ht, buy a thermocouple and a pid temp reader to manually control the temp. A needle valve for your gas line will refine the process. Prior to the quench, I like to thermocycle 2-3 times to refine the grain, then I normalize for stress relief. This seems to minimize warping. Soak time is important. I like to heat to 1500 and soak 5 min prior to quenching, especially with 1095/L6 combos. 1095 is a hypereuctectoid steel and is not very forgiving. By doing this, I consistently get 64 hrc, then temper back. There are no shortcuts for consistency. I tried. John Gearhart Ironwerks -
Yep, Craigs List. Start watching it regularly. They do come up frequently. A front loader would be ideal. Good hunting (which I think is part of the fun). John Gearhart Ironwerks
-
Not my problem. It is loud! It's an ocean front house so probably not many going by. It's a bit staid in Cannon Beach, OR. John
-
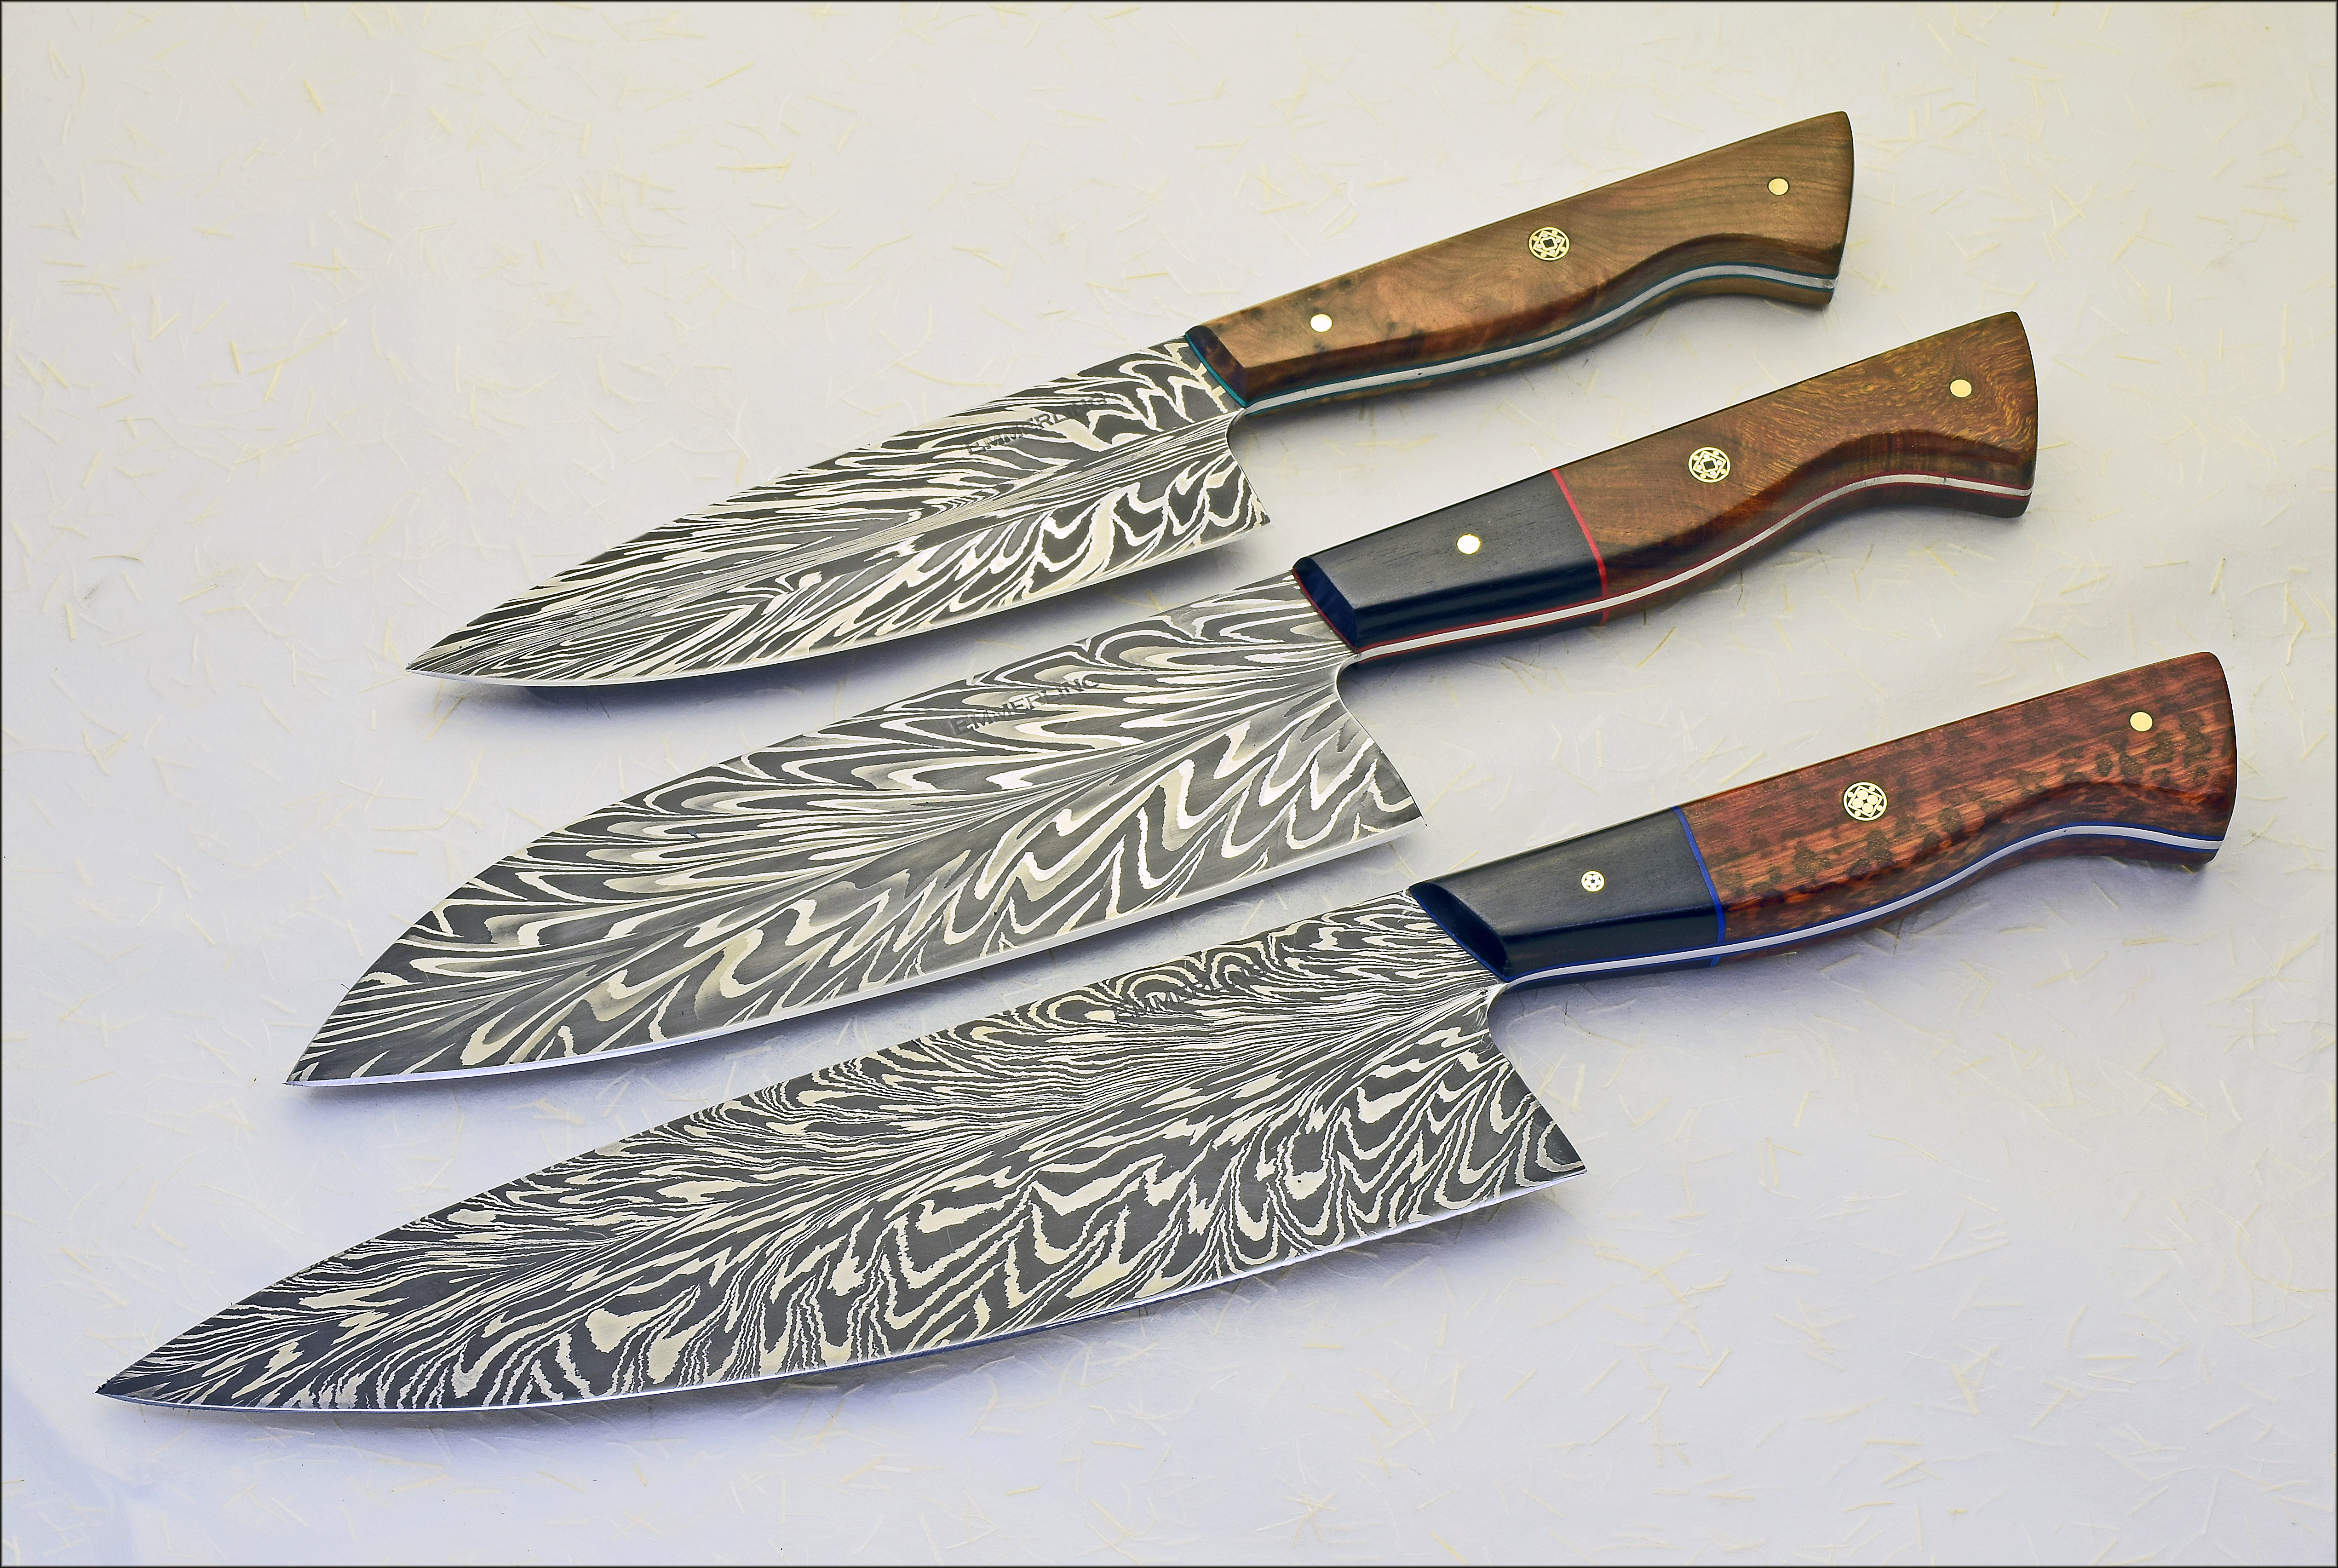
Been working on these all week and finally got them handled. The top blade has a thuya burl handle, the middle is desert ironwood with an ebony bolster and the bottom is snake wood with an ebony bolster. thanks for looking. John

-
I don't know about the differences between L6 and 15N20 as I can get free saw blades from a local mill and I use them. I get really good results from my etching process. I will be demonstrating damascus at the Weaverville hammerin next week and will see MA there. I stabilize all the wood I use with Cactus Juice. Maple, depending on its state can take a little longer in the vacuum pot. I have no idea as to the designations. Maybe that's something you should ask Glenn. I'm certainly 'old' enough. If you're in the area, give me a buzz. John
-
Jhcc, You're right, my bad. Thanks. Wayne Coe once said to me that I should never make the first piece of damascus if I didn't want to make more. He was right. I feel like a kid on Christmas morning opening presents when I pull the knife out of the etch to see the pattern. It never fails to excite me. John
-
rhitee, feather patterns are not that difficult. go to www.kevincaseyknives.com for an excellent tutorial. you don't need a press, but a power hammer helps as you can split the billet with a top tool. after splitting, grind off the flash and flatten the faces with a belt grinder for a tight fit, then mig weld all around the billet for a dry weld. give it plenty of soak time. just remember that it's the ends you want so rotate 90 deg and draw out. please send some pics when you do it. john
-
We'd love to see S.A. How much ammo should we bring?
-
fluxless...yep. I have a little more time now and have prioritized some things in my life after the scare last summer. thanks for the compliment and hope to see you on this side of the pond soon. John
-
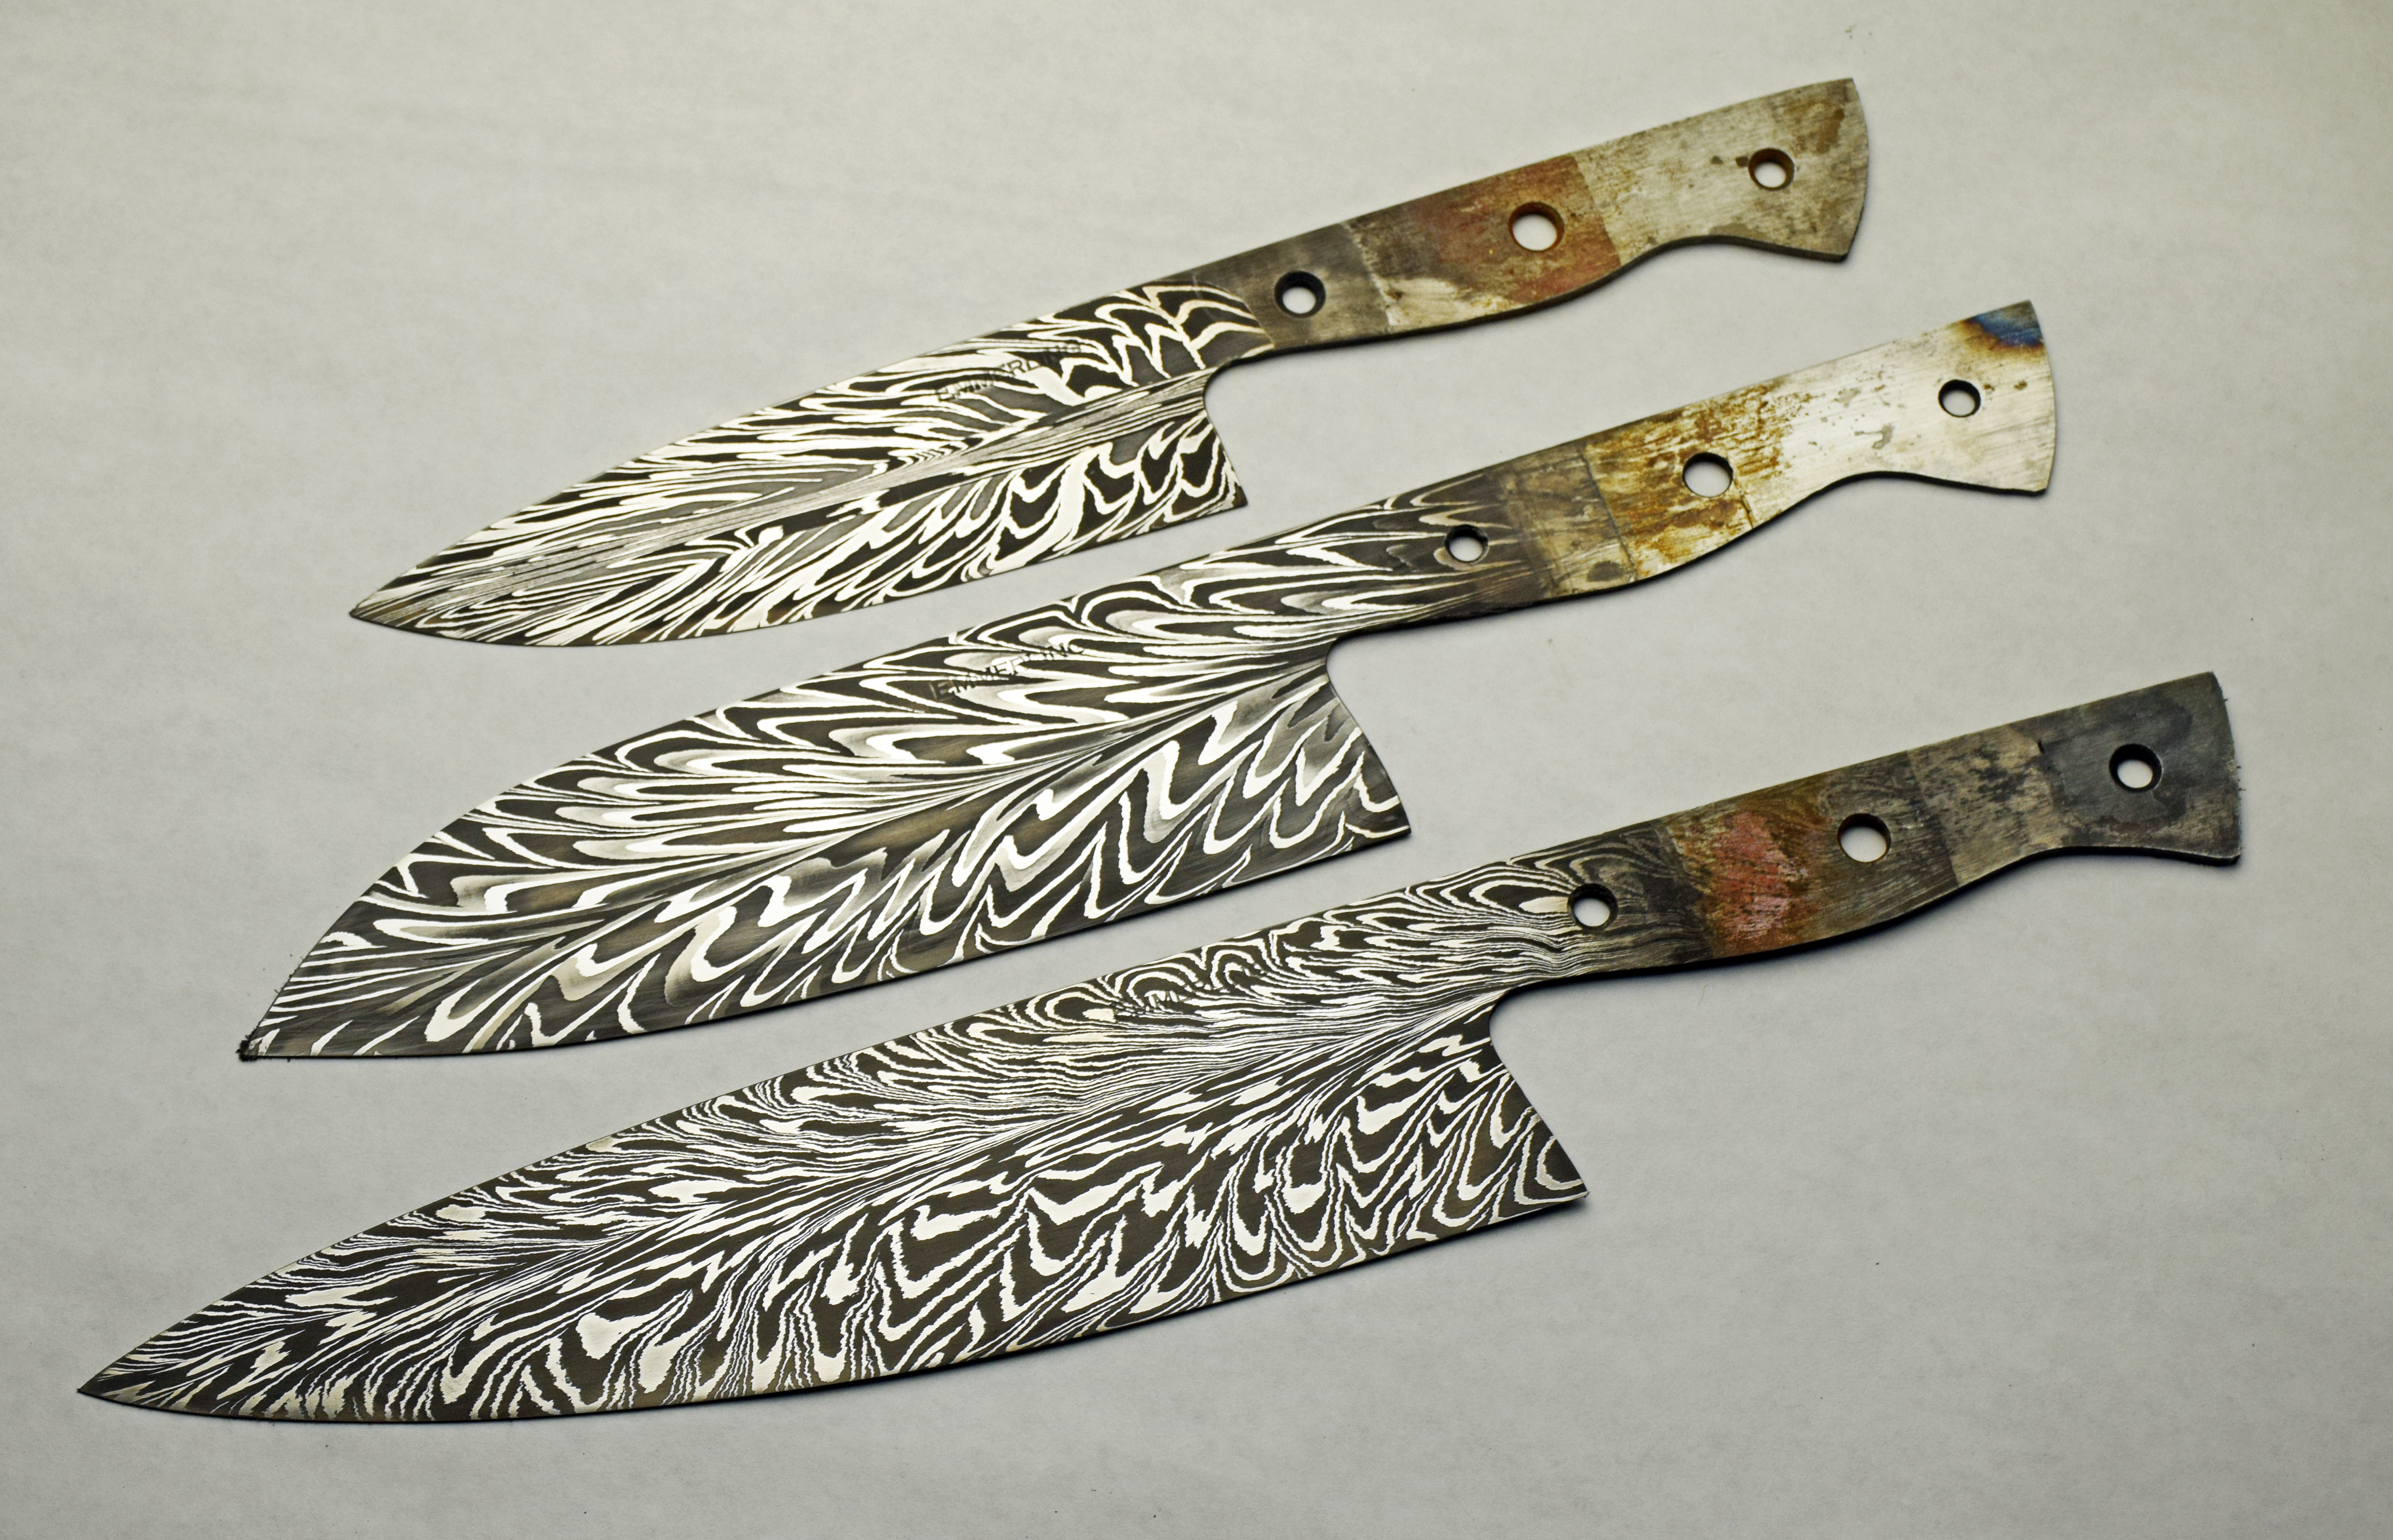
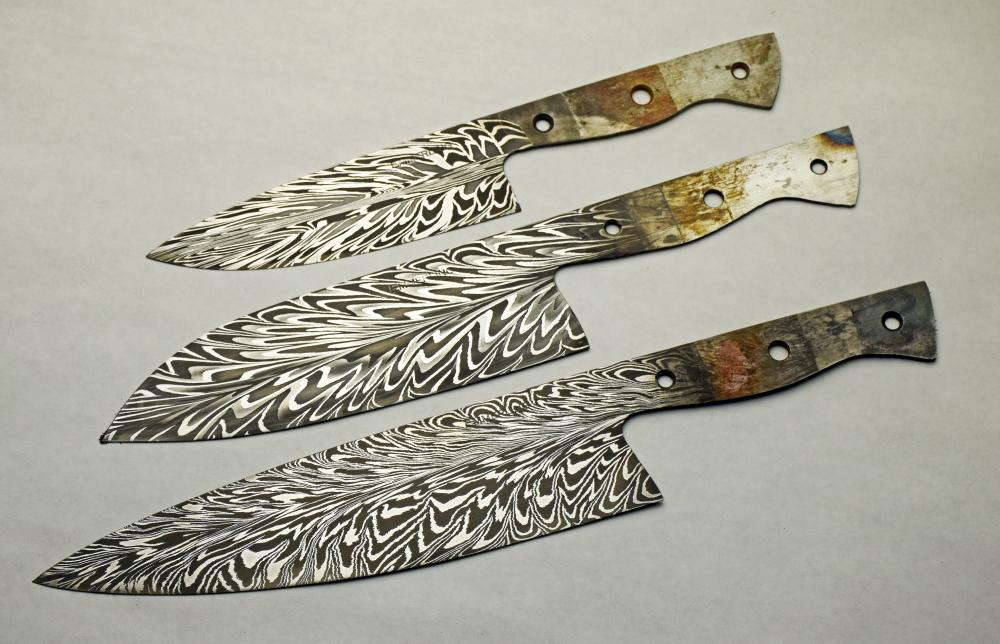
All three are feathers with the top having another piece of damascus inserted between the halves before welding. In retrospect, a more active piece would've worked better visually. Oh well, next time...
-
I hadn't thought about that reasoning, but now I just learned something. Thank you. John
-
Here all 3 new blades out of the etch this week in need of furniture. I'm happy with the etch and overall look of them. Hope to have handles on this coming week. The top and bottom blades are 1095-L6. The middle is 1095-L6 plus several pieces of mild steel. I like seeing the 3 distinct colors. Thanks for looking. John Gearhart Ironwerks

-
Some new damascus chef blades
gearhartironwerks replied to gearhartironwerks's topic in Knife Making
1095 and L6 saw blade from a local mill. Dyed and stabilized buckeye burl + ebony. -
Goofy dragon head firescreen
gearhartironwerks replied to gearhartironwerks's topic in Member Projects
The dragons were forged, for the most part, using a pneumatic gun and tools made for different shapes. Years ago I watched a demo by master smith E.A. Chase at a CBA conference and was hooked immediately on the process/possibilities. It works well if two people are involved...one with the gun and another using a rosebud to keep the work hot. Unfortunately I do not have separate pics of the feet. Thanks for looking and the feedback. John -
Mike...yep SS...yes they do, and it makes a lot of noise. There's no doubt that someone is at the door.