
Ferrous Beuler
-
Posts
1,340 -
Joined
-
Last visited
Content Type
Profiles
Forums
Articles
Gallery
Downloads
Events
Everything posted by Ferrous Beuler
-

What's the going rate these days?
Ferrous Beuler posted a topic in Blacksmithing, General Discussion
This morning I attended a farm auction and came home with an anvil. I believe I paid a fair price for it and certainly can't gripe as I feel the price was fair and the first one I got, 5 years ago cost me $65 at a barn sale, 269 lbs. About a year later a freind of mine got divorced, she got the house in town, he got the cottage at the lake, where he moved permanently. When I stopped by to see him there I saw all the "lawn ornaments" she had put about the place over the years. Among all the garden gnomes, pink flamingos and wagon wheels was an anvil. Of course I asked if he would sell it, "heck, just get it out of my sight, it was hers". Got that one for free, 144 lbs. Today I was the lucky bidder at the action and on the ride home I just wondered how high other smiths might have bid or would pay outright for a good anvil. This one is marked PETER WRIGHT LONDON PATENT HAND WROUGHT 0 8 3. It is in good shape, the edges fair. What would you pay? I'll hold off on saying what I paid, just want to get an idea what anvils are going for these days. Not going to sell it. Thanks, Dan:) -
For sale: numerous handmade blacksmith tools
Ferrous Beuler replied to TomSchneider's topic in Tools, general discussion
I'm interested... Your e-mail address "cornell.edu" puts you in my neck of the woods. How about posting a list/thumbnails? Thanks! Dan :rolleyes: -
I think it is very likely that there are of course many more such film clips from the earliest days of silent movie making. Why I think so is because the nieghborhood blacksmith shop was still a very common part of life in those days, circa 1890-1920. Shops were in every community and film making was in its infancy. There are many many street scenes, etc. because the early film makers shot what they saw around them. So I believe it stands to reason that scenes of smiths, farriers at work could be found if the right archives were accessed. That is the key, where are these archives? Library of congress? Is there a library of Thomas Edison? (Edison was THE big name in early movies, he litteraly owned the industry). Just my 2 cents. Dan:)
-
Making hardies
Ferrous Beuler replied to Ferrous Beuler's topic in Blacksmithing, General Discussion
Now we're getting somewhere! I want to thank all those, Mills, Mlmartin15, Frosty(love your avatar BTW), and easilyconfused, and I hope the replies don't stop on this thread because there is a lot to be learned here of a basic nature which will help a lot of learning smiths. I have the basic makings of a blacksmith shop; Anvil, forge, post vice, hammer, tongs. As a student of blacksmithing I believe I should be learning the basic time honored tried and true methods of FORGING as has been practiced at the anvil for centuries with little change. I worked as a welder for several years and I'm not about to say that welding doesn't have it's place in the modern shop. I will say I prefer to keep my blacksmithing shop a blacksmithing shop and not blur the lines. What I am after here is a step by step procedure that one person can follow using traditional blacksmithing methods to fabricate hardy tools without resorting to reaching for the mig, stick, etc; Let's keep a hammer in one hand and tongs in the other, NO welding, as a student of BLACKSMITHING I am focused on learning BLACKSMITHING. Yes of course I understand how quick and easy it is to use a mig to fabricate a jig, time and money saved, etc. This is not about welding, this is about learning proper forging technique. Many of us don't have a welder with which to make a heading block but I believe anyone wishing to aspire to the title of blacksmith should through instruction by a learned smith in the time honored tradition, aquire the skills to forge one at the anvil by hand. As I said, I know how to weld and could make a hardy in whatever shape I choose with such conveniences as a bandsaw, an oxy acy torch, an angle grinder, etc. How would that further my knowlege of forging? I don't want to muddy the waters and blur the lines by combining the old with the new. I want to learn BLACKSMITHING. Reaching for the mig only serves to keep me from doing so. Certainly I will be using a mig in the future for the simple fact that it joins metal quickly, easily, and cheaply- yet it will NEVER be BLACKSMITHING; Use it on shop fixtures, fine, NOT on Mrs. Smith's garden gate. Mills, yes I understand fullering/ drawing, but gaining the ability to confidently follow the procedures to form the shoulder on all four sides properly and have the hardy tool rest flush on the anvil face with a shaft correctly fitted to the anvil for which it is being made is my goal here. Mlmartin15, "Butcher" is a term I have not yet heard in smithing, but I think I get your drift. One thing I like to do is use modelling clay to work out beforehand what I intend to do at the anvil. First I'll make a pencil sketch of an idea, then work with clay as a 3-D tangible medium to work through the steps it may take to arrive at a finished work. Once I get a grip on this forming the shoulder thing, like you said, any sort of top can be formed. Frosty, Thank you, that is what I had in mind, but also I was thinking of the "butcher" thing, using a hot set or chisel to cut into the stock at the right place to mark the point of the shouler, but what of stock removal from there down by that method? easilyconfused, You put me right onto the BP I was looking for. I looked in the "search" option under "making hardies" but nothing like this came up. It shows the proper technique yet involves use of a welded header which not all of us can make (those who don't have a welder) but all of us should be learning how to make with traditional BLACKSMITHING methods Thank You ! Dan:) -
I would like to make some hardy tools to fit my anvils. I do not know how to form the "shoulder" or "collar". What I would like to avoid is the use of a welder or the use of tubing, angle, etc. Could someone who has some experience in this area please show the rest of us the proper techniques ( B.P. perhaps) of forging the shaft and collar of hardies? Thank you very much! Dan :)
-
I heard about that once I think... "junk metal" is something like "extra money" isn't it?:D
-
Mandoro, ANYTHING you can get for free is to be had "at the right price". Don't look a gift horse in the mouth. When looking to put a shop together take what you can get when the getting is good. If you have succesfully made aquaintences with the boss on a jobsite for access to scrap stuff realise that time is fleeting and the window short. RETURN the favor, (beer, pizza etc.) Perhaps you may parlay this into a continuing relationship from jobsite to jobsite. Yes, even rebar will be usefull in the future ( as stock for making jigs) and rebar doesn't always merit the scorn it recieves in general; When fullered and forged down it serves as perfectly suitable stock for such inexpensive items as planta hangers, etc. at flea markets and such. Money in the kitty for further expansion of your efforts. FREE STUFF IS THE BEST STUFF!!!! Dan:)
-
!!!Need Help!!!
Ferrous Beuler replied to primtechsmith's topic in Blacksmithing, General Discussion
Suggest you querrry the American Farrier's Association. Dan:) -
Electricity? If it doesn't jump up as a "gotta have it need" why fix what ain't broke? Once upon a time we were ALL amish. My shop 'neath the starry skies has what it needs, forge, post vice, slack tub, tongs, hammers, drifts, punches, the rest is imagination and gettin' dirty doin' it (and learning as I go) No need so far for wonderments of newfangled moderns like electric. Seriously though, ironworking has been around now for a long long time and for good reason the basic tools and approach has not changed. No need to fix what aint broke, and sure a shop with lights is nice but not required. Look at Irnsrgns pic elsewhere on this site of the guy in the third world setting using the "spanish bellows". Need I say more? Dan:)
-
Handtools where can i found some ?
Ferrous Beuler replied to STEVENARD SERVICES's topic in Blacksmithing, General Discussion
Bonjour mon ami, Welcome to IFI. As others have sais here you can make your own tools and that is a big step on the road to the point when you can call yourself a blacksmith. I have a LONG way to go on this road and one place I found a lot of help, as Glenn mentioned is in the blueprints section here on IFI. Also you may want to check out "The Blacksmith's Manual Illustrated" published by the Rural Development Commission in the U.K. This is a free download. This manual is a step by step instruction guide that even I can follow. It shows lots of how-tos on tool making. Further, there is a new section on this forum in the making which will be similar, a structured lesson plan. Bon voyage! Dan:) -
The man I bought my handcrank blowers from included a squeeze bottle of lubricant for them and the advice not to be stingy with it. It consists of gear oil with powdered graphite mixed in and seems to work well. Dan:)
-
LOST- one big fat anvil, has arm&hammer strike on side. Kids miss it, please call...:cool:
-
As it was touched on here but maybe not specifically pointed out, you should first "stop drill" the very end of the crack. Then proceed with whatever plan of bracing you choose. to "stop drill" a crack simply means to put a hole at the end of the crack, or just ahead of and inline with the crack. Forces travelling down the length of the crack will cause it to continue in the direction it is travelling. The drilled hole (1/4" or so) will diffuse these forces in all directions and keep them from being focused along the direction of the crack. Good luck. Dan:)
-
Springs for Horse-Drawn Vehicles Don Peloubet, Wheelwright & Susan Greene ISBN 1-880499-17-7 254 pages This is the sort of book which is very specific in its subject matter. It is not a book on general blacksmithing. For the person interested in the various springs used in the gears of horsedrawn vehicles this is by far the most informative and comprehensive tome I have yet seen, it is unsurpassed. The authors have done a magnificent job here and have brought forth an all inclusive study of the subject. Admittedly I have a long way to go in my learning curve on blacksmithing yet crafting horsedrawn vehicles is the main object in my pursuit of blacksmithing. This book is way ahead of me yet is limited to 250 copies so I got one now, while the gettin' is good. At about $60 per copy including shipping I surmise the cost will be much higher later through a rare book dealer. Get one now if you want one. Dan
-
Andrei, If it's local and you can transport it yourself that's a big plus. If you have to have it shipped that can up the total cost quite a bit. Can you see it in operation before you buy? (take along someone familiar with these for the test drive). Reconditioned little giants are available and yes, they cost a few bucks as in $3500-$4000. I would do as much research as possible. If you don't care what brand of hammer you use then build one youself and for that money you'll have enough for a decent compressor too. If what you really want is a little giant, then find someone who actually has one and uses it and like I said, take them along with you to see it. Good luck:). Dan.
-
Very sporting of you to allow your brother to use one of your anvils!
-
It's not Christmas, it's not labor day, it's not anything but wednesday, just another day. Yet somewhere out there a good bunch of folks risk life and limb again in the pursuit of making a living for their families by riding that tram down that dark hole deep into the earth as they did yesterday and today and they will again tommorow so that we may have the coal that we burn in our forgefires. Sometimes some of them don't come back up again. When I buy more coal I always think of where it came from and how hard it was for someone to provide this for me. However much they earn for their labors it ain't enough. So for all you coal miners out there- YOU GUYS ROCK!!! THANK YOU ALL VERY MUCH!!!!!!!!!!!!!!!!:D
-
Jayco, Teusday night blueprints are not to be missed, that's when "the gang's all here"... when this forum really shines and you'll get to talk to everybody- don't miss the chatroom afterwords. Dan:D
-
Cegga, Welcome to IFI, far away iron is still iron and nothing is far away here on IFI. Ted, SEVEN?!?!?! Geesh, I thought I had my hands full with TWO daughters! More power to ya! Dan.
-
JWB, As others have said here, Thank You. You struck the nail right in the header. Dan:cool:
-
Rraven, Welcome! I once heard a rumor that there were actually some blacksmiths in Australia. Nah... Couldn't possibly be true! All kidding aside, there are lots of very talented smiths near you and if you've not found some of them yet, they will find you here. Also you may hear tales of a traveling smith from merry old England who may have passed your way recently named Ian. Here you will learn a lot and your knowlege will prosper, as will all the rest of us for sharing in your experiences. Good Luck! Dan:)
-
Very nice anvil Bear, I especially like the cast eagle on these and those edges... She's right purty!:D
-
trouble starting fire
Ferrous Beuler replied to smithy247's topic in Blacksmithing, General Discussion
Smithy, Sometimes coal can be hard to light and get going. Don't feel bad, I've watched smiths with many years of experience have the same trouble. Not all coal is the same and tends to vary in it's properties a bit, even the same name brand from bag to bag will be a little different I find. Read over all the blueprints here on IFI concerning the subject and you will arrive at a system that works for you. That's where I found the help I needed as I am in my first year of smithing, mostly on my own and had the same troubles. What I found in the BP's was the tip to use charcoal to start your fire. That was just the help I needed. You can forgo coal altogether and just use charcoal exclusively, even make all you need right at home and there is a BP on that too. What I use is a fairly large cast iron firepot/tuyere with an ashdump going straight down through the bottom, like looking down a trumpet. There is a sliding gate at the bottom, a 1/4" plate that closes over the hole. This I open so the pot is open from top to bottom. Up the hole goes two whole sheets of newspaper wadded with a tail hanging down from the second wad out the dump. Now on top of the grate ( 5" dia. 5/16" thick cast iron floor drain grate) I put about two cups of hardwood charcoal that is roughly walnut size pieces, just bust up the bigger ones. I light the pigtail and leave open the gate for now, letting the paper burn upwards. It doesn't take long. Then I slide the gate shut and give air JUST A BREATH, very slight. Quickly all of the charcoal is burning and a lot of snap crackle pop, so have your safety glasses on. Now rake in coal from the sides all around it will readily take with the charcoal booster fire now very lively. Now and then The paper burns out on me if I am too soon with the air or give it too much. No biggy, just reload with more paper and light it again. Ever since I started doing this I have quickly had a coal fire going every time and no more headaches. I believe that as a beginner the most important thing I am learning at this point is how to start and manage/read my forgefire. If you're not doing this properly and with a feeling that you are in control at all times, i.e., the fire is doing what you want it to do when you want it to, then just practice that for now, no actual forging, just work with your fire and learn from it. An important point here is the size of your coal, as Irn said, 3/4" to marble size. I get my coal in forty pound plastic bags. "St. Nicholas" brand by the Blaschak coal corp. located in Mahanoy city, Pa. (570)773-2113. It goes about $6.50 a bag. I get mine from a local dealer that sells mostly anthracite home heating coal in bulk (DON'T USE THAT STUFF) and he sells coal and wood burning stoves. A similar dealer in your area may be able to accomodate you. When I open a new bag it isn't really ready for use, there are a lot of "fines" that have to be separated out from the "beans". What I do is use an old horsedrawn slipscraper, looks kind of like a wheelbarrow with the front cut off, just use a wheelbarrow if you have one. I dump in the whole bag and then use a frisbee to pull it up the sloped sides of the scraper, the let it fall. Generaly the beans roll out at the bottom and a heap of black sand behind it, then scoop out the good stuff with a coffee can or something. That's how I "clean" my coal and am left with little balls of the size Irn described above in his post. Good Luck! Dan:) -
Forged myself a hammer
Ferrous Beuler replied to Tyler Murch's topic in Blacksmithing, General Discussion
Nice work Tyler and congradulations! Looks like a very comfortable size. I am growing tired of using a 3 lb crosspein for most forging. It's too much hammer. I'm learning and soon will be making my own too. Good work! Dan:D -
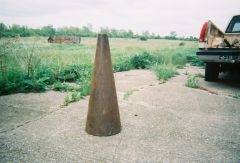 The new addition to my shop. It came out of an old wagon shop in Allegany county, N.Y.