Will Brouwers
-
Posts
221 -
Joined
-
Last visited
Content Type
Profiles
Forums
Articles
Gallery
Downloads
Events
Everything posted by Will Brouwers
-
Ideas Needed for a Grinder Build
Will Brouwers replied to Will Brouwers's topic in Grinders, Sanders, etc
So far, with the belts and the wheels and the motor, I am $200 in. Maybe I am a sucker for pain, but I think I am going to ride this through to completion, if only to learn what not to do. I ran the machine a few times when it was in the horizontal position with a pretty dead 120 grit belt and it did a pretty good job at some light grinding. One of the belts I got was a 36 grit ceramic, in the hopes that I’ll be able to hog some stuff. I am now realizing that 1/2hp. motor and hog don’t necessarily go in the same sentence. I think my reasoning for going the route of a 4 inch wide belt is that it will allow me to make something that is 4 inches wide very flat, without having to go back and forth. Idk. Like I said, I just want this to be an all purpose grinder (which 2x72s are) but also just have it be a step up from an angle grinder. I have never used a 2x72, so I don’t know any different, so anything is better than what I have. -
I did think about that Frosty. I have a piece of plate with a pipe welded vertically in the middle of it, so I was going to put the leg of the vise in the pipe, and was thinking/hoping that the plate would spread the force of the impact. Do you think that would spread the force? I was just going to go for it, but your educated opinion is worth more than mine!
-
Cool! Thank you guys! I will definitely do that! I especially like the idea of being able to store it out of the way! I really appreciate your thoughts and comments, especially as I randomly post all over, and then disappear for a while. The questions and thoughts kind of come in waves. I have my post vise stacked with those cement pavers that I will probably just wedge that piece of wood under.
-
An update and another question! As I previously said, a friend machined the missing part for this shear, so I had two. I sold the original one, and still have the other. Now I am trying to figure out how to firmly mount it to the ground. I have thought about drilling holes in the concrete floor of my garage, but I don’t want to be tied down to anything. I have access to a bunch of heavy concrete pavers, so maybe mount the shear to some wood, and then stack the pavers? I also thought about mounting it to a pallet, and then standing on the pallet to hold it down. Any and all thoughts welcome!
-
Ideas Needed for a Grinder Build
Will Brouwers replied to Will Brouwers's topic in Grinders, Sanders, etc
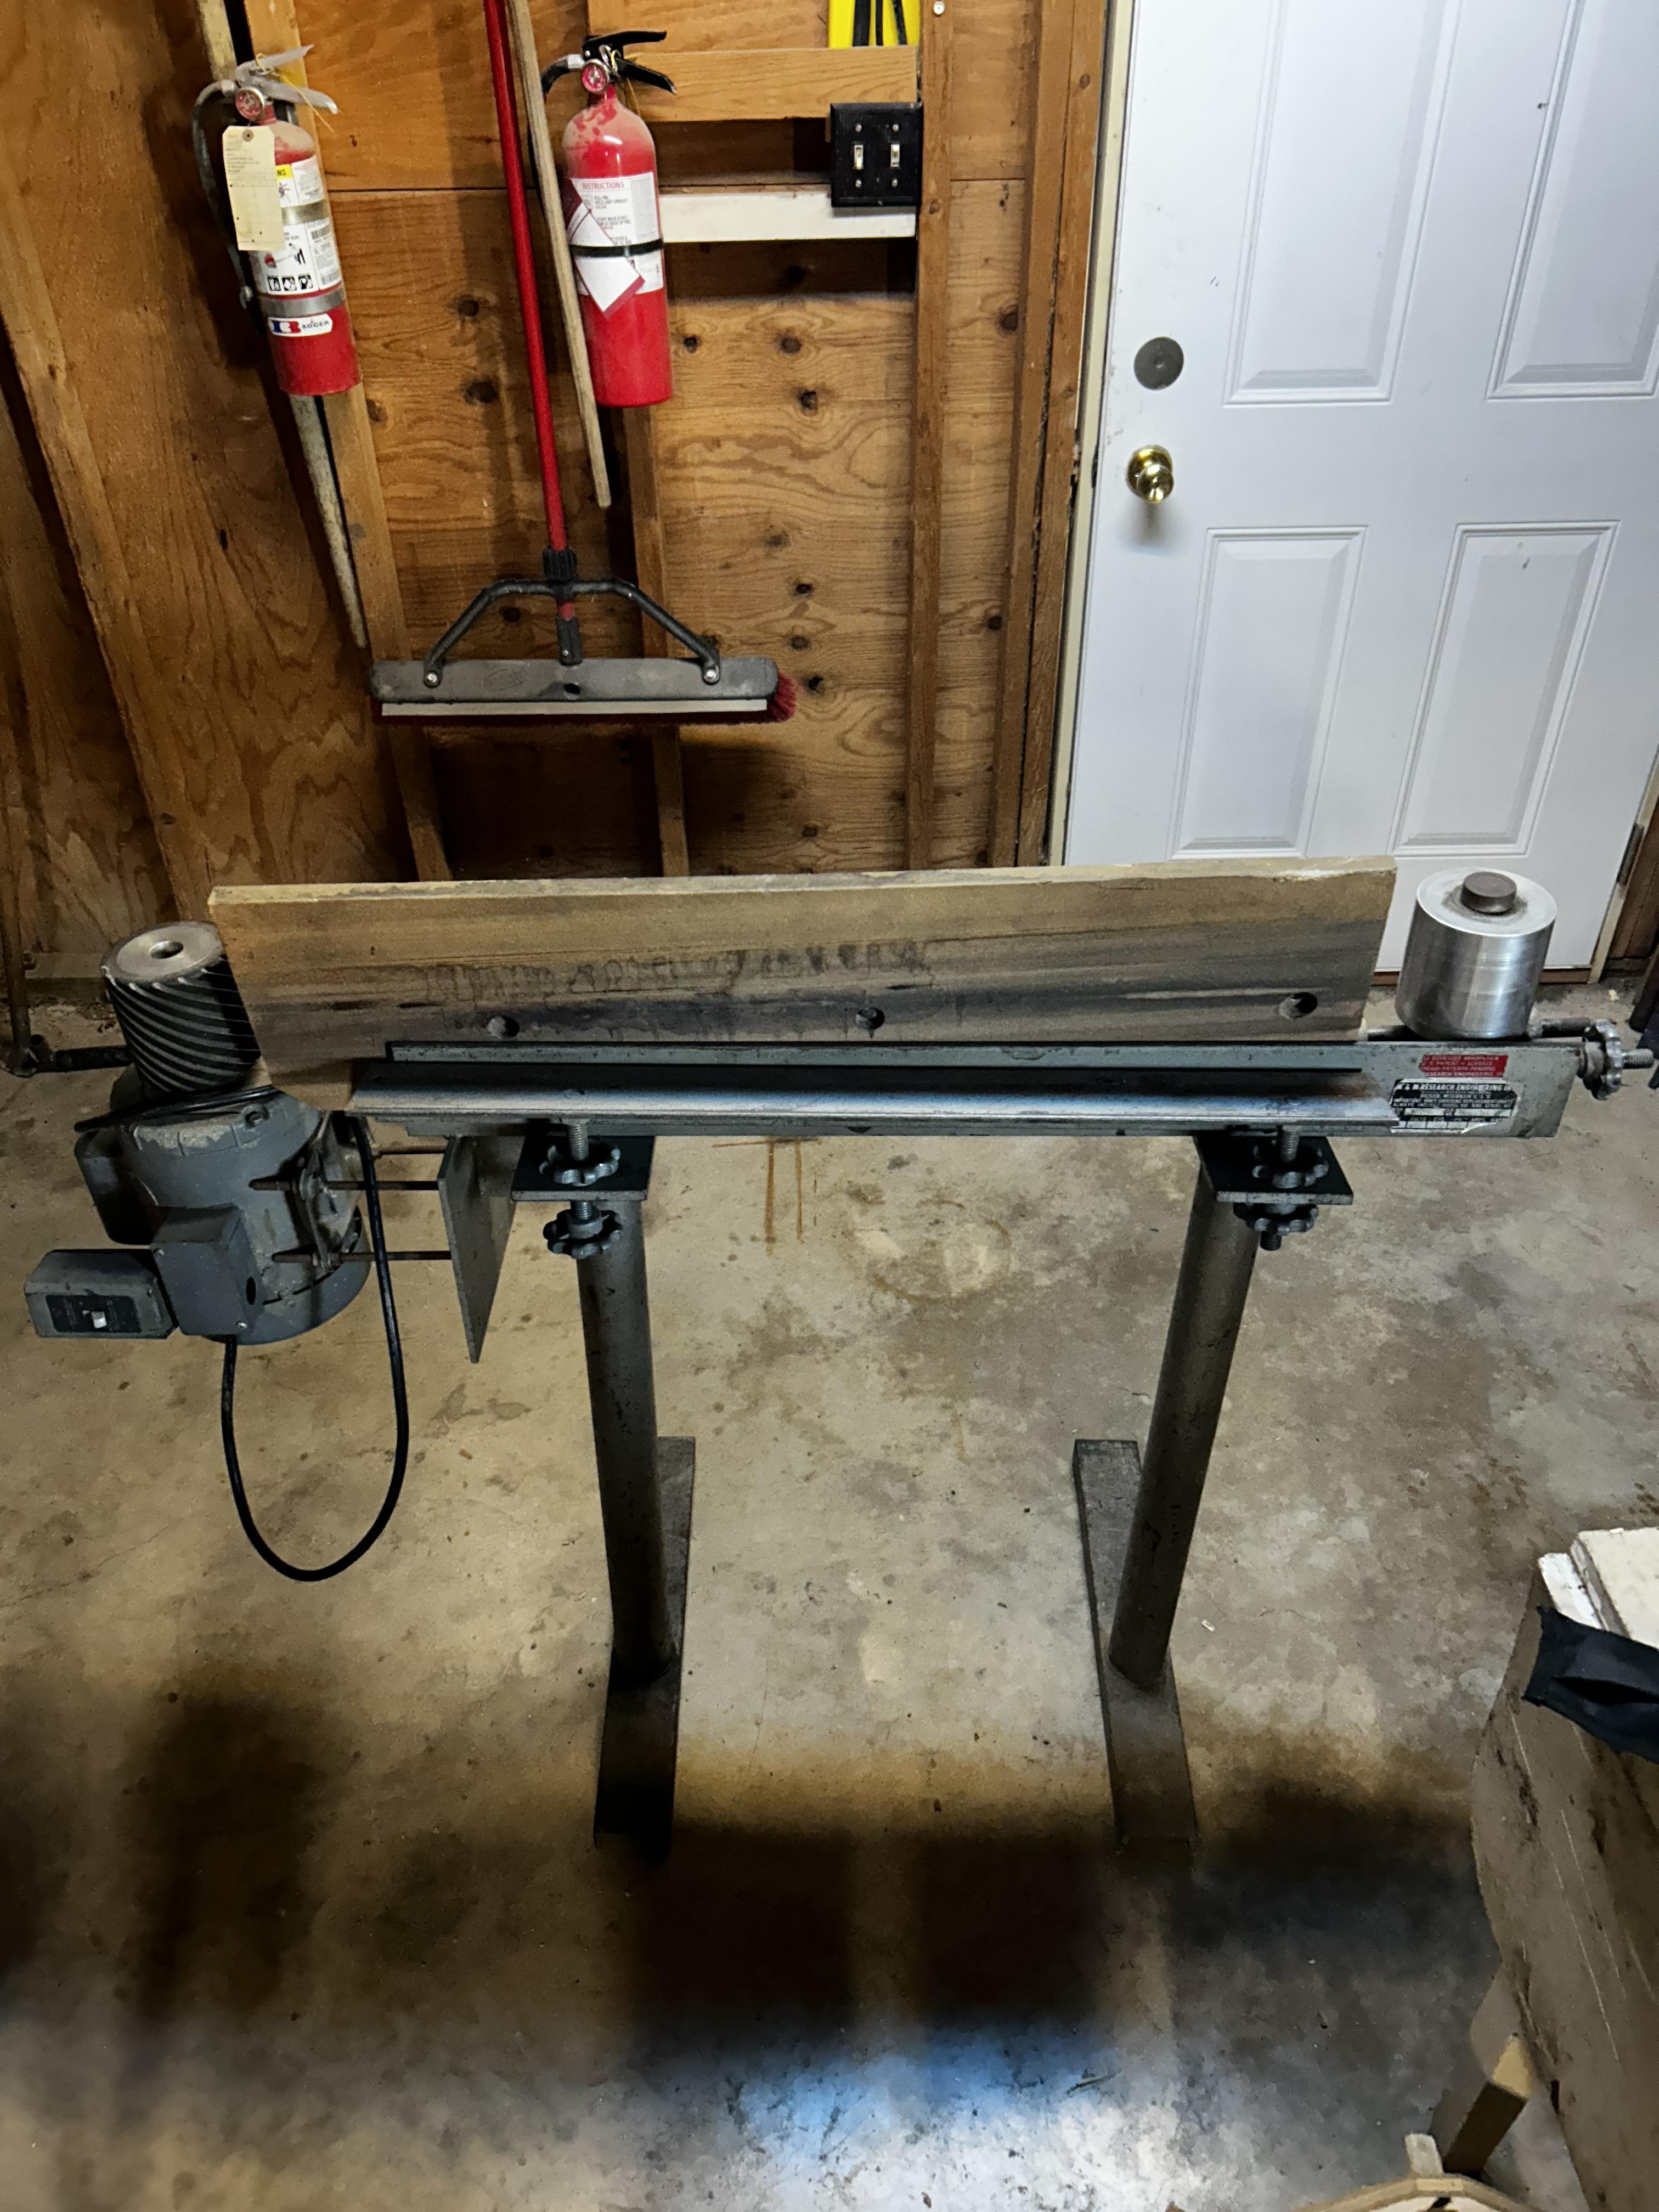
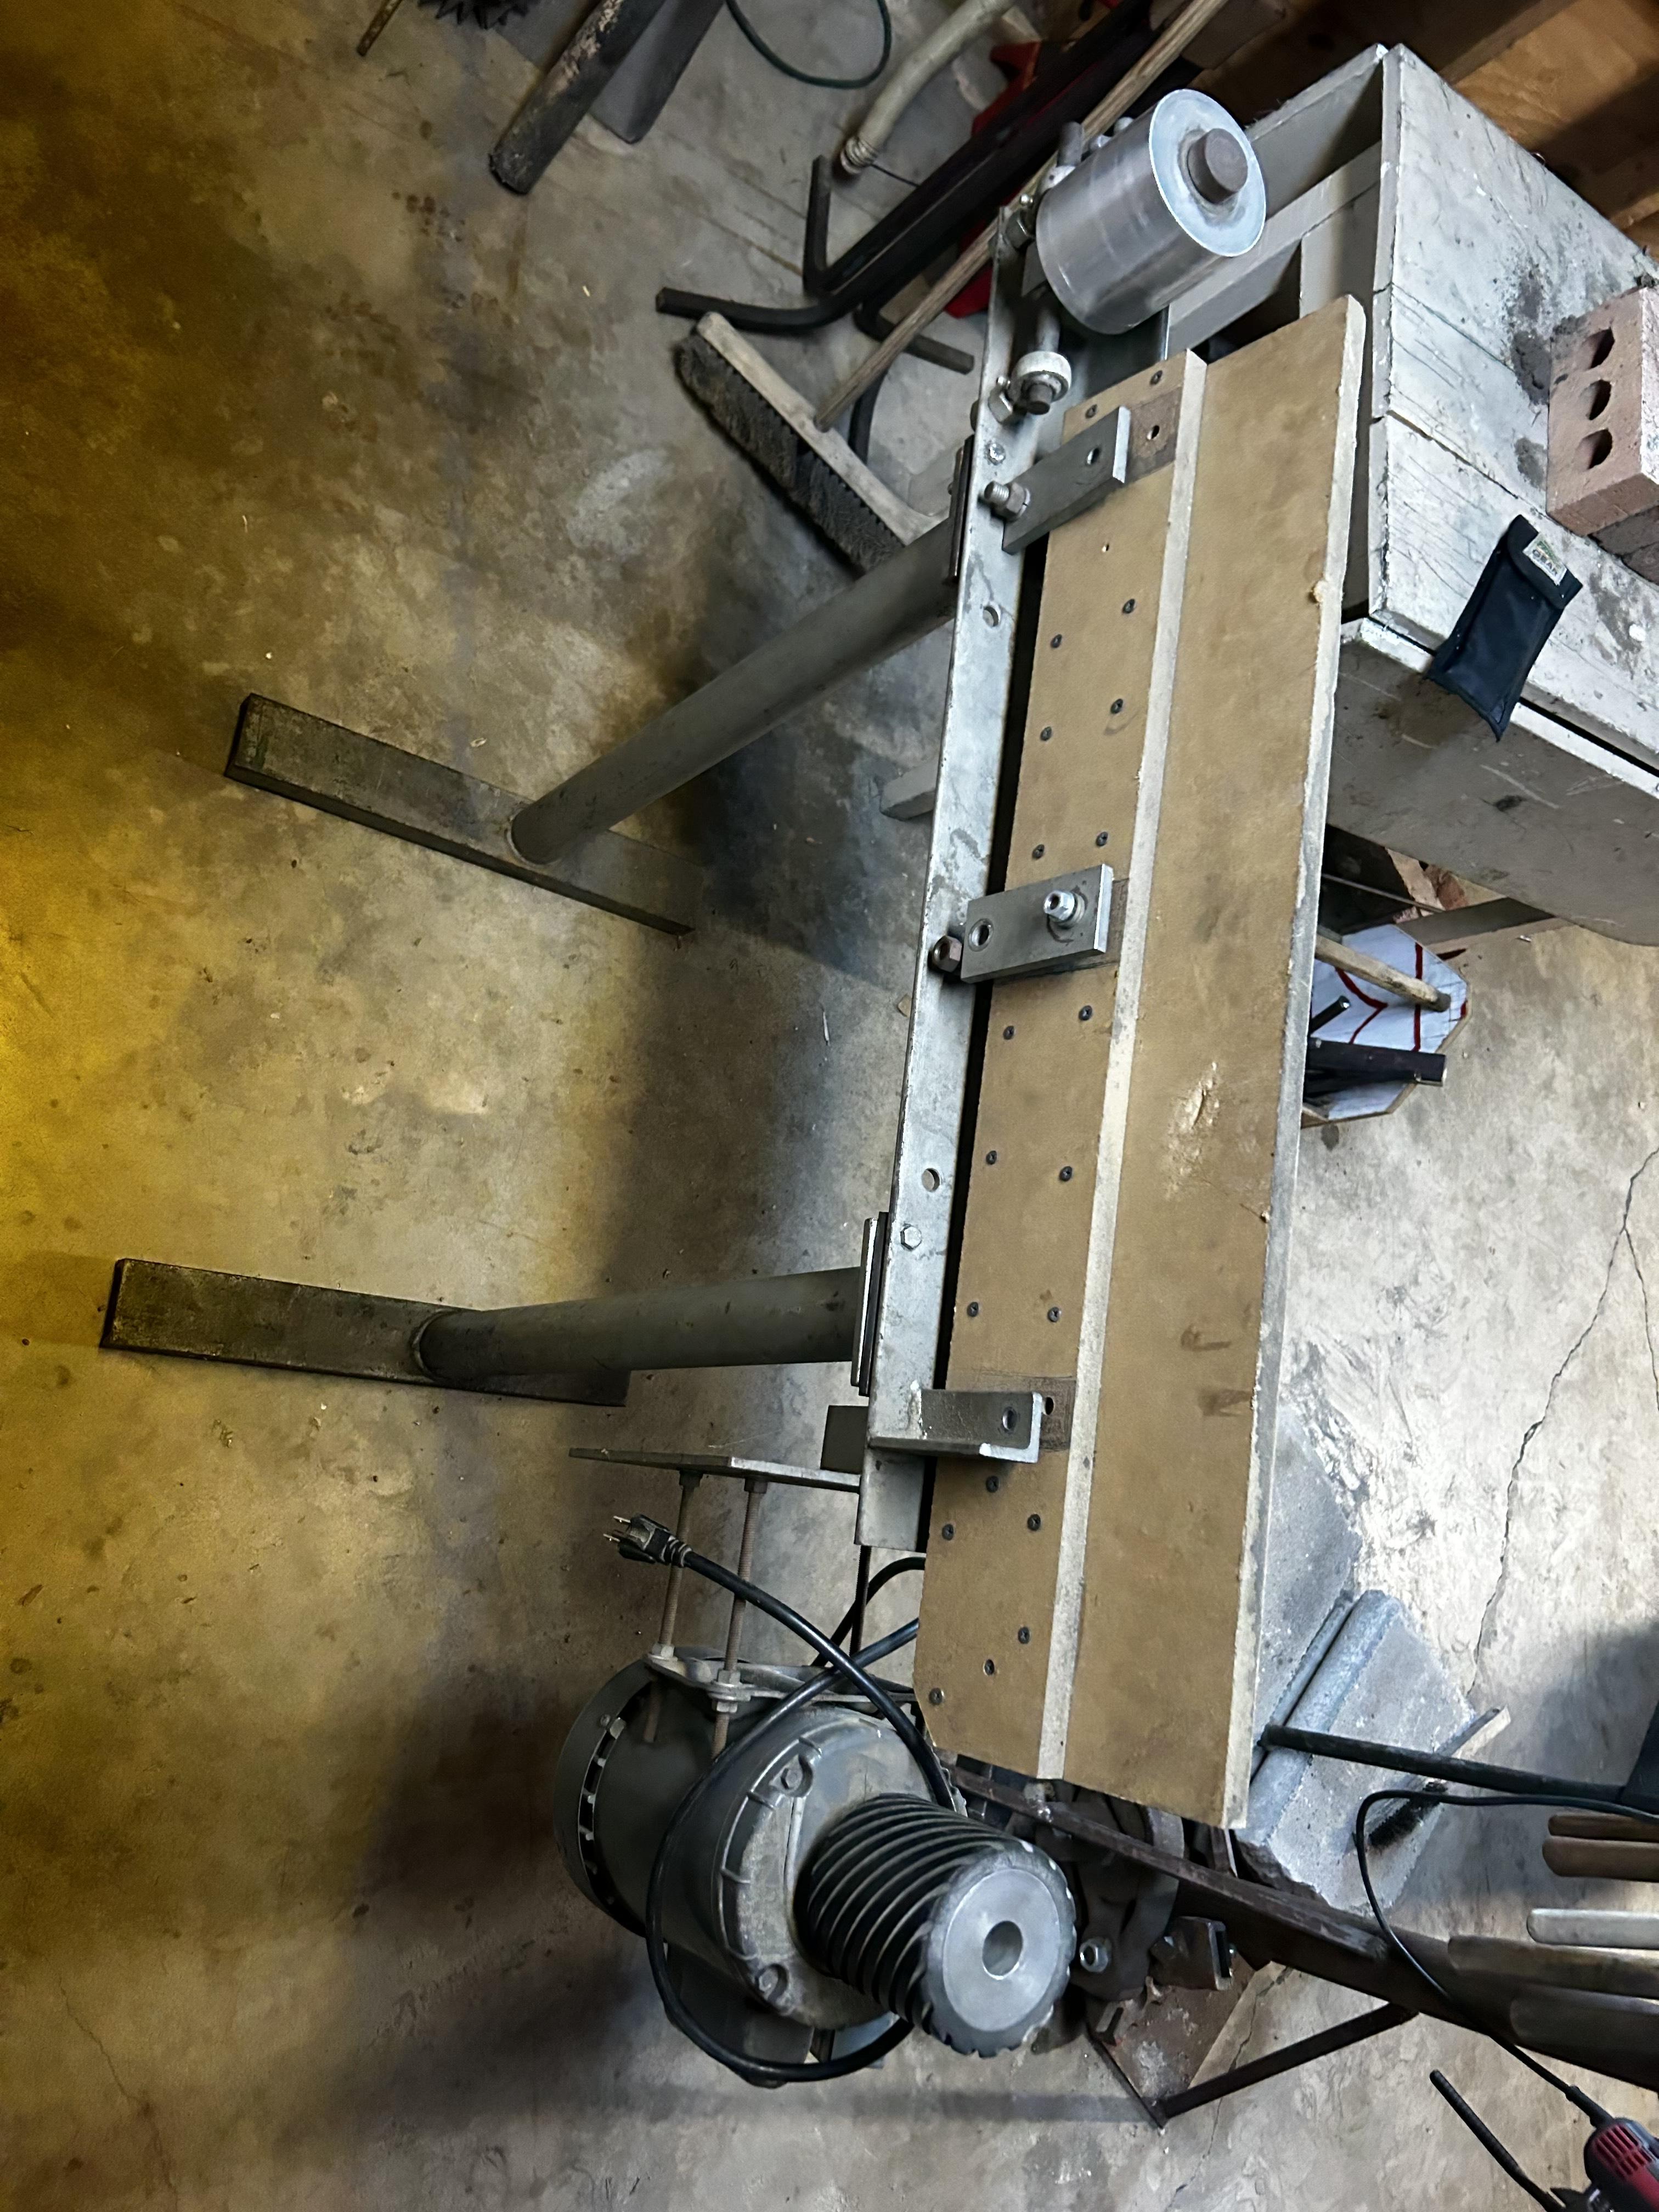
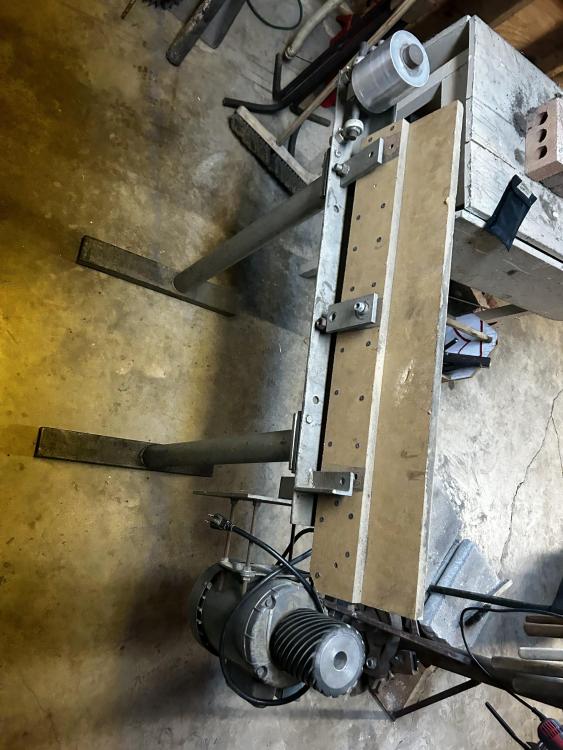
Frosty and Scott, I realized I never responded to your thoughts! I like the idea of having three wheels, but I am trying to keep it as simple as possible. I have thought about scrapping the idea I mocked up and going to an idea similar to the picture I am posting, but that seems to make more work. I have access to a scrap yard, and some friends who are decent welders, but it is also the technical knowledge that is most important. With the parts I have now, the top wheel is both the tension and has the alignment adjustment. Another problem, that I now realize I could have avoided, is that these wheels are 4 inches wide, and not many grinders are 4 inches wide. I could have still just ordered 2x72 belts, but I went with 4x90, which is what this was configured as originally. I guess I could have/should have just done 2x72. I am not looking to make a lot of knives, just looking to have a halfway versatile grinder that is better than angle grinder.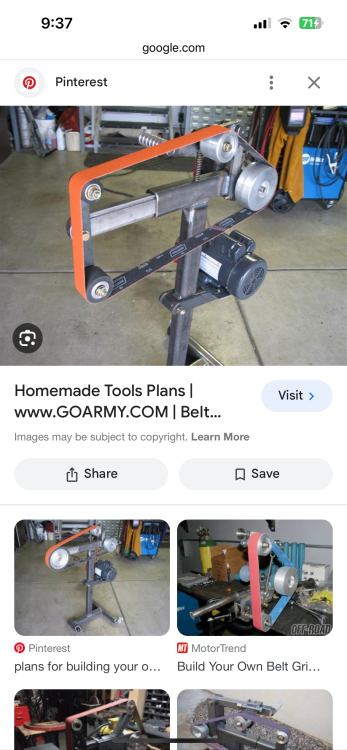
-
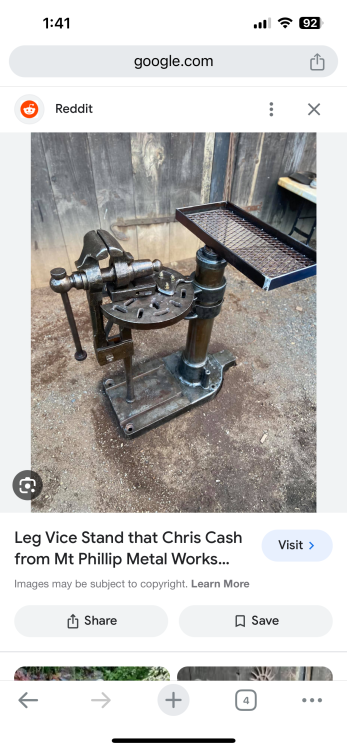
Frosty, I am going to do what Mt. Phillips does for his post vises and cannibalize a drill press from the scrap yard for a little striking vise.
-
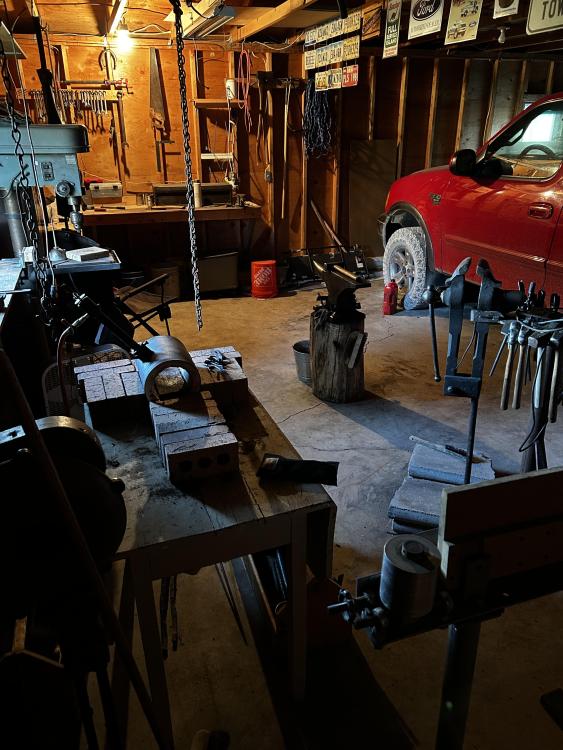
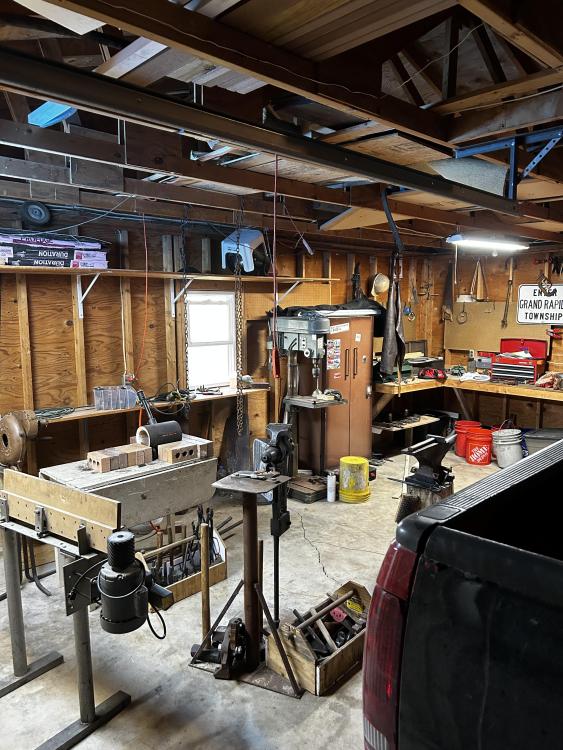
George, The picture doesn’t show how close the anvil is to the forge. When I have a 3’ long piece in the forge, hanging by the chain from the ceiling, I have to be careful at the anvil not to bump it. In the darker picture, the more recent one, I made a tong/hammer/grinder rack ringing the top of the post vise stand. It works pretty well and keeps most things from rolling off! I like the idea, and should done it before posting, about the paper and the moveable pieces on it. Thank you! What should I hang from the rafters? I am 6’4” so I have to be careful with how low things are. I have also thought about making kind of a ladder, putting 2x4’s between the studs so I can get up there easily, but the best place for it, in the middle of the peak, would be in the way. Also, thanks for the tip about grinder dust…I’m sorry you had to find out the hard way! Right now all the steel storage is behind the man door, in the non-visible left corner in both pictures.
-
Well, this is kind of funny! The post previous is me showing my old shop, and now 10 months later here I am showing my new shop in the 2.5 car garage! This time I get to keep all my tools and work benches where I forge! No more hauling stuff up or down stairs just to forge in direct sunlight! The only thing is, this shop is narrow! I want to put the forge, lower left hand corner, on a smaller stand/table and rotate it 90*, but I like having the pass-through, and I am afraid of getting the wood wall too hot. I am also hoping to get a belt grinder going soon, and a portaband, and those will require bench space. I am also in the process of making up a striking vise, and while it won’t always need to be out, it will need a home. I also thought about making the bench/shelf under the window bigger/sturdier and maybe putting a metal top so I have a place to put hot work? So much I want! So little room! Any thoughts or ideas are more than welcome!!
-
Thank you John for sharing this! I just finished reading it! I am still in seminary, and one of the classes I have is called Work and Worship. It talks about how our Sunday morning worship and our weekday work have been separated. [religious content deleted]
-
Ideas Needed for a Grinder Build
Will Brouwers replied to Will Brouwers's topic in Grinders, Sanders, etc
I mocked up an idea that I have for this grinder. Hopefully you can see it against the busy backdrop of my work bench. One other problem is that this motor is a 1/2 hp. motor. It is sealed, but might be a bit underpowered… I would do something like this, or rigging up something to get the top wheel mechanism over the motor, like an arch over the motor to hold it up.
-
Ideas Needed for a Grinder Build
Will Brouwers replied to Will Brouwers's topic in Grinders, Sanders, etc
Hmm. It’s an idea lol! -
Ideas Needed for a Grinder Build
Will Brouwers replied to Will Brouwers's topic in Grinders, Sanders, etc
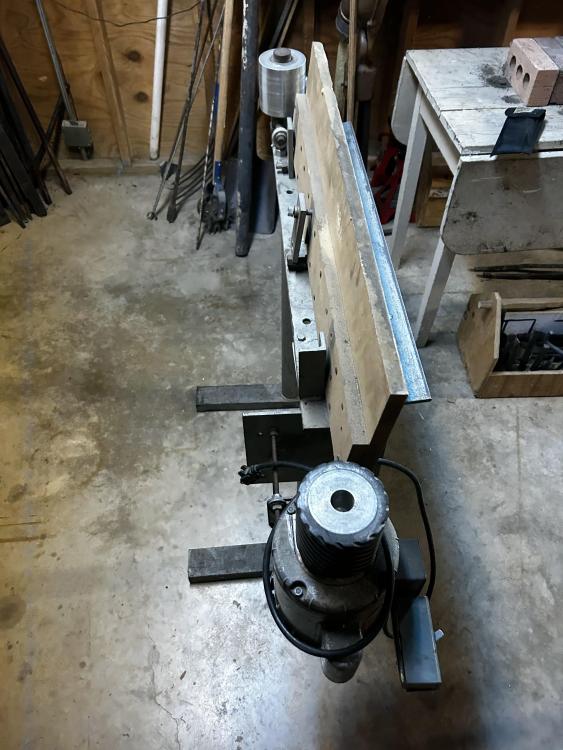
George, I think my pictures and wording weren’t the most clear. The pictures on the bottom are how it currently is, the first picture is an idea for what it could possibly be. I just have no idea how to get there. Right now the whole thing is basically mounted on angle iron. I wonder if I could get a heavy plate as a base, weld a pipe vertical on the base and then attach the grinder (rotated 90 degrees from the bottom pictures) to that pipe so it is useable. I also forgot to add that the motor is sealed, so it has that going for it, and the RPM is 1725. I wonder if I could bump that up with a bigger contact wheel? -
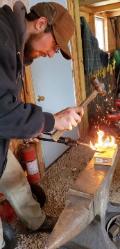
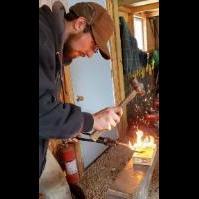
Thanks for clicking on this thread! A while back I got this grinder. It was used for sharpening squeegees for printing. That's all I know. All I was concerned about was that it was a belt grinder. The belt has since worn out, and as I wait for funds to get a few belts, I have toyed with the idea of making the grinder more user friendly. I have thought about somehow turning it 90 degrees and making it into something like this picture below: But, the problem is, I have no idea where to begin. Should I just leave well enough alone? I only used it a couple times before the belt broke and it seemed to be alright. One member on the forum offered the fact that the current grinder I have wouldn't be good for knife making. I would like this to be as versatile as I can get it, with as little work as possible. Also, I do not have a welder, but I live in farming country, where every farmer has a welder in their shop. I also just don't want to get in their way and take up their time. All thoughts and comments are welcome! Thank you in advance!

-
Reasonable price for this Trenton
Will Brouwers replied to Michael_Tricam's topic in Anvils, Swage Blocks, and Mandrels
She's a beaut! I also have a Trenton (Lakeside) I love it, even though the rebound is ~60%. I am in the camp that believes rebound doesn't matter on an anvil. -
Thanks for the replies guys! I look forward to implementing them!
-
Resurrecting this thread!!! I like the idea of hanging my files, but as people have already stated, don’t they come loose from the handle? And then wouldn’t they drop and break?
-
6" of 1/2" square bar challenge.
Will Brouwers replied to BillyBones's topic in Blacksmithing, General Discussion
Irondragon, I have thought about trying a knot, looks like this is a good time to give it a go! -
That's really fun!!
-
What did you do in the shop today?
Will Brouwers replied to Mark Ling's topic in Blacksmithing, General Discussion
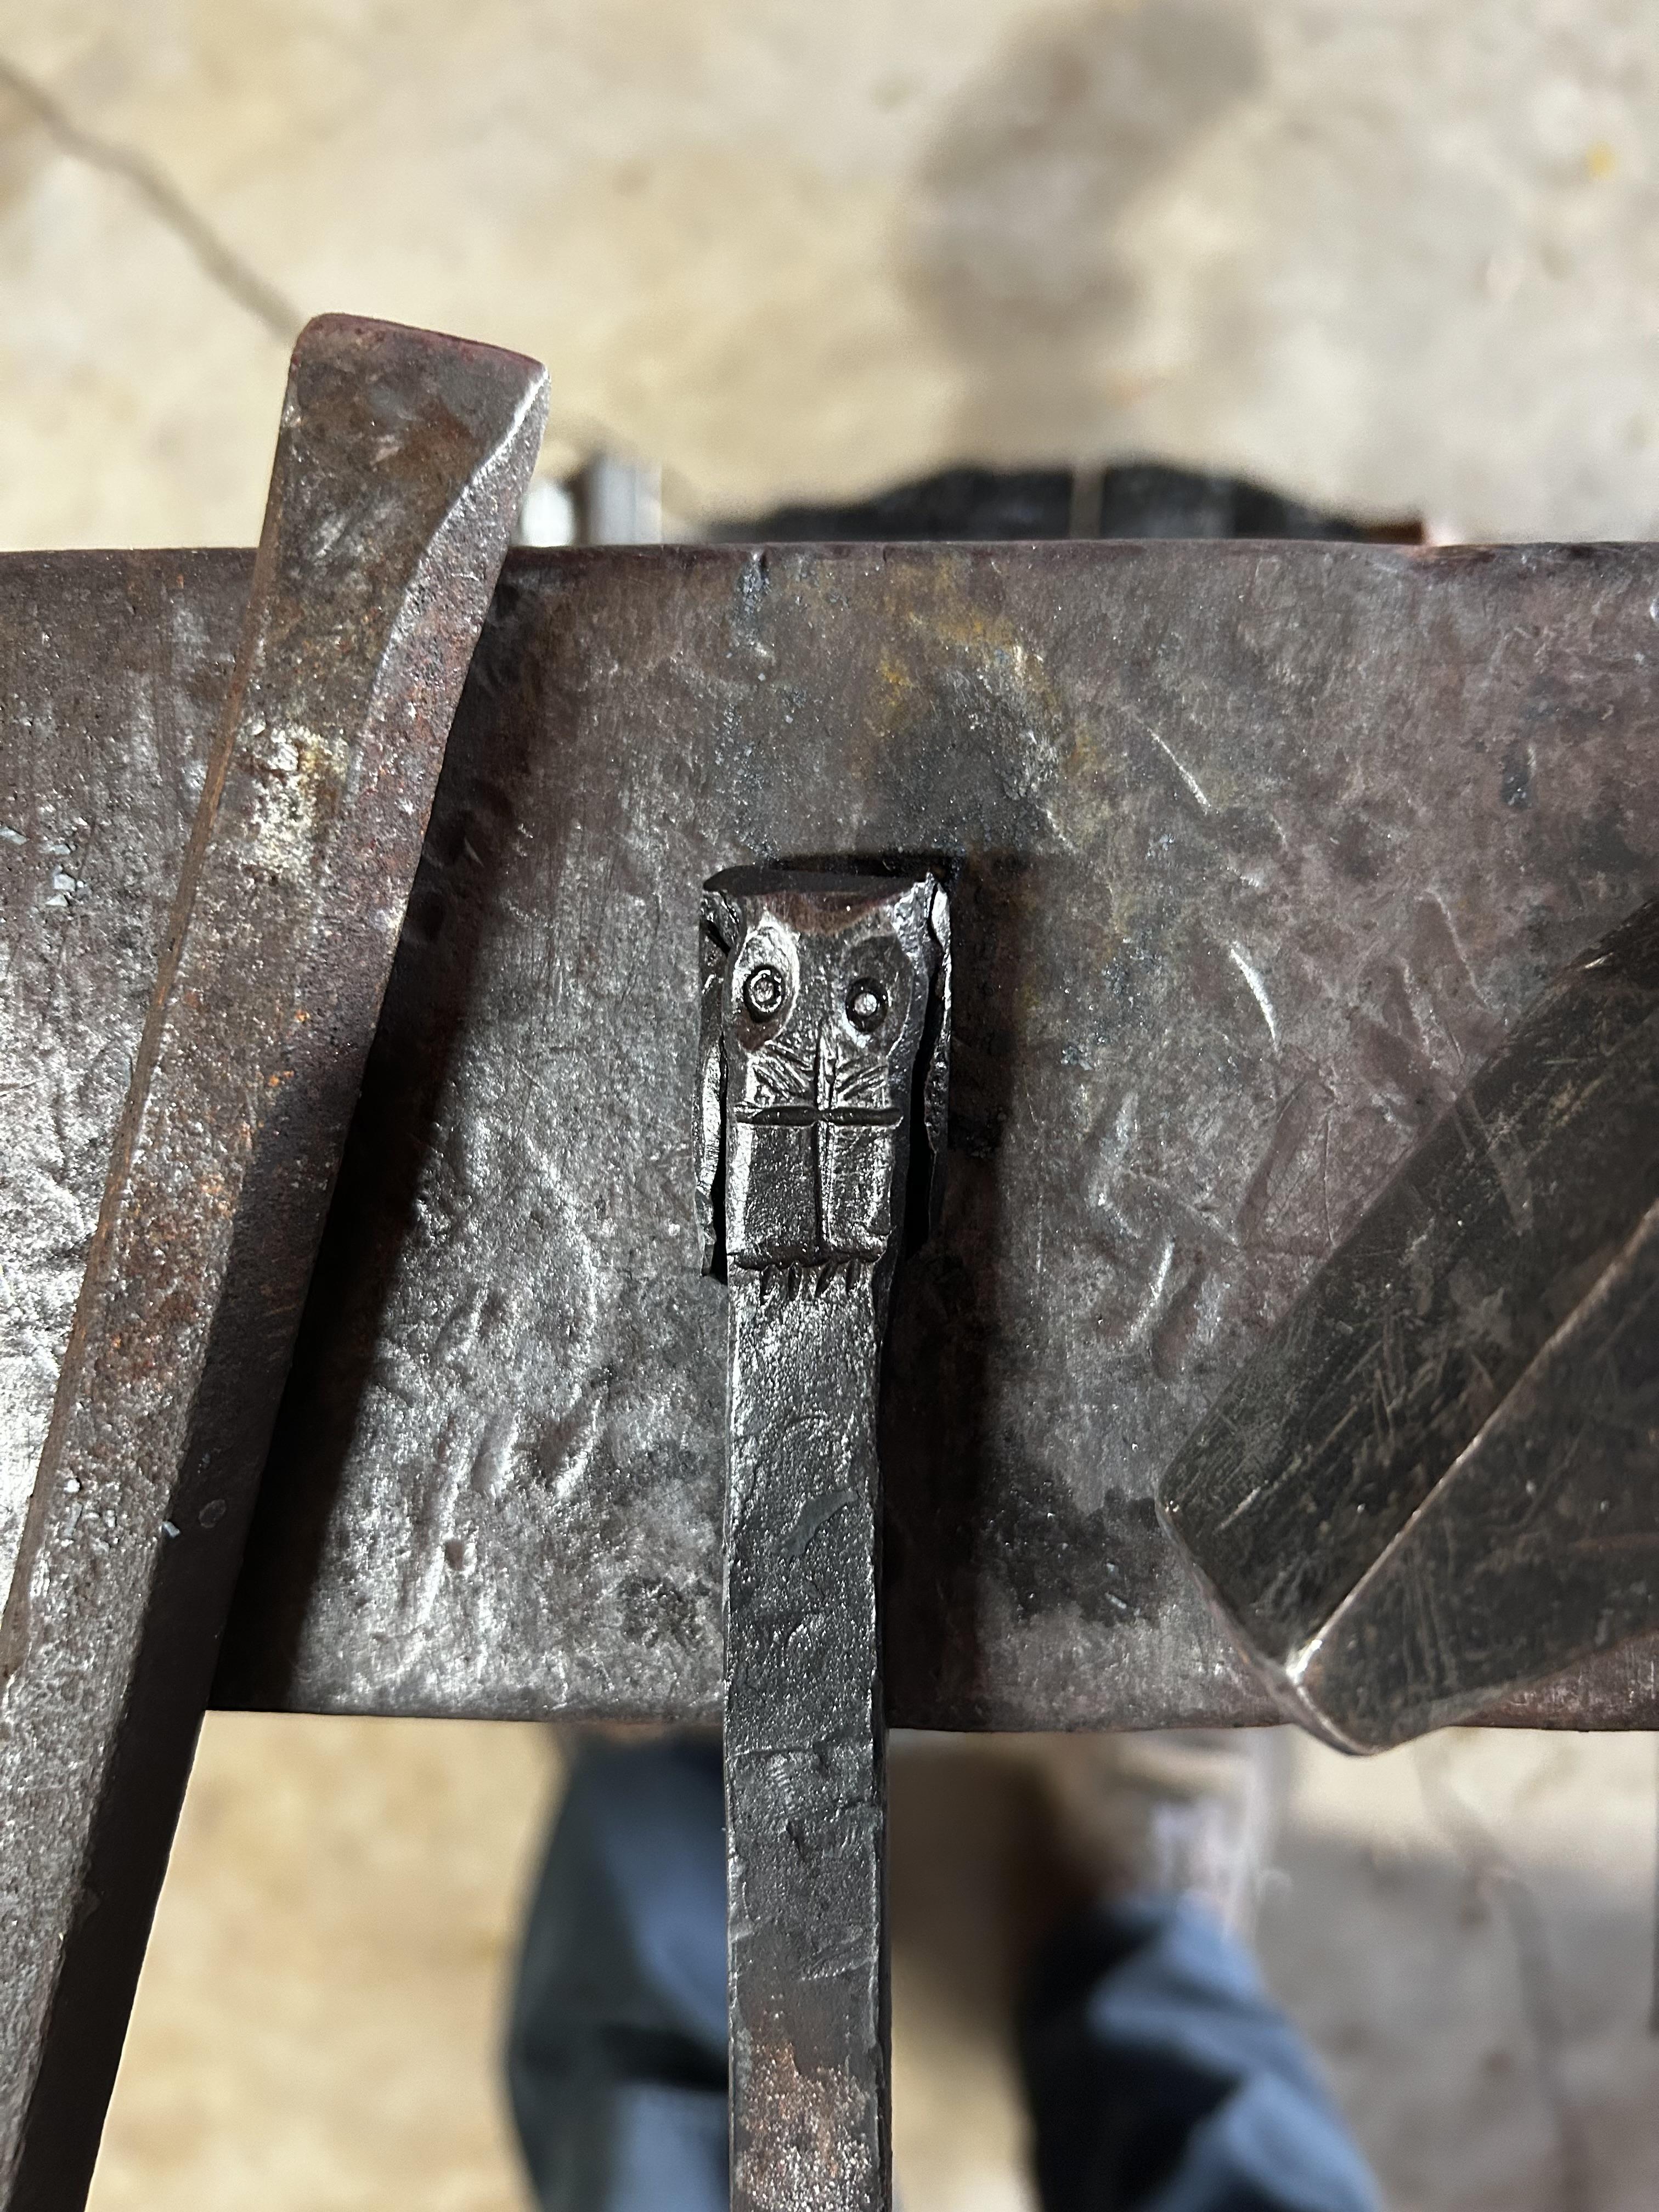
An owl, but you are right, I forgot the beak!!! Ahh! I know what I am doing the next time I fire up the forge! -
What did you do in the shop today?
Will Brouwers replied to Mark Ling's topic in Blacksmithing, General Discussion
Lots of great looking stuff on here! I hope you get better soon John! Can anyone guess what animal this is supposed to be? I’m now trying to figure out if I should show my wife, or get better at them and give her one for her birthday… Its also kind of cool attached to the stick, so I am trying to figure out if I should leave it sitting on a cube, or a longer stick? Make it a letter opener? So many options…
-
I have a vise exactly like that, only it is missing the rod that goes through both handles. It is on my bench to be worked on!
-
Atha 12lb cast steel sledge hammer problem
Will Brouwers replied to Will Brouwers's topic in Hand Hammers
Ok, thanks for the encouragement! It kills me to take more off, but I will do it! -
Atha 12lb cast steel sledge hammer problem
Will Brouwers replied to Will Brouwers's topic in Hand Hammers
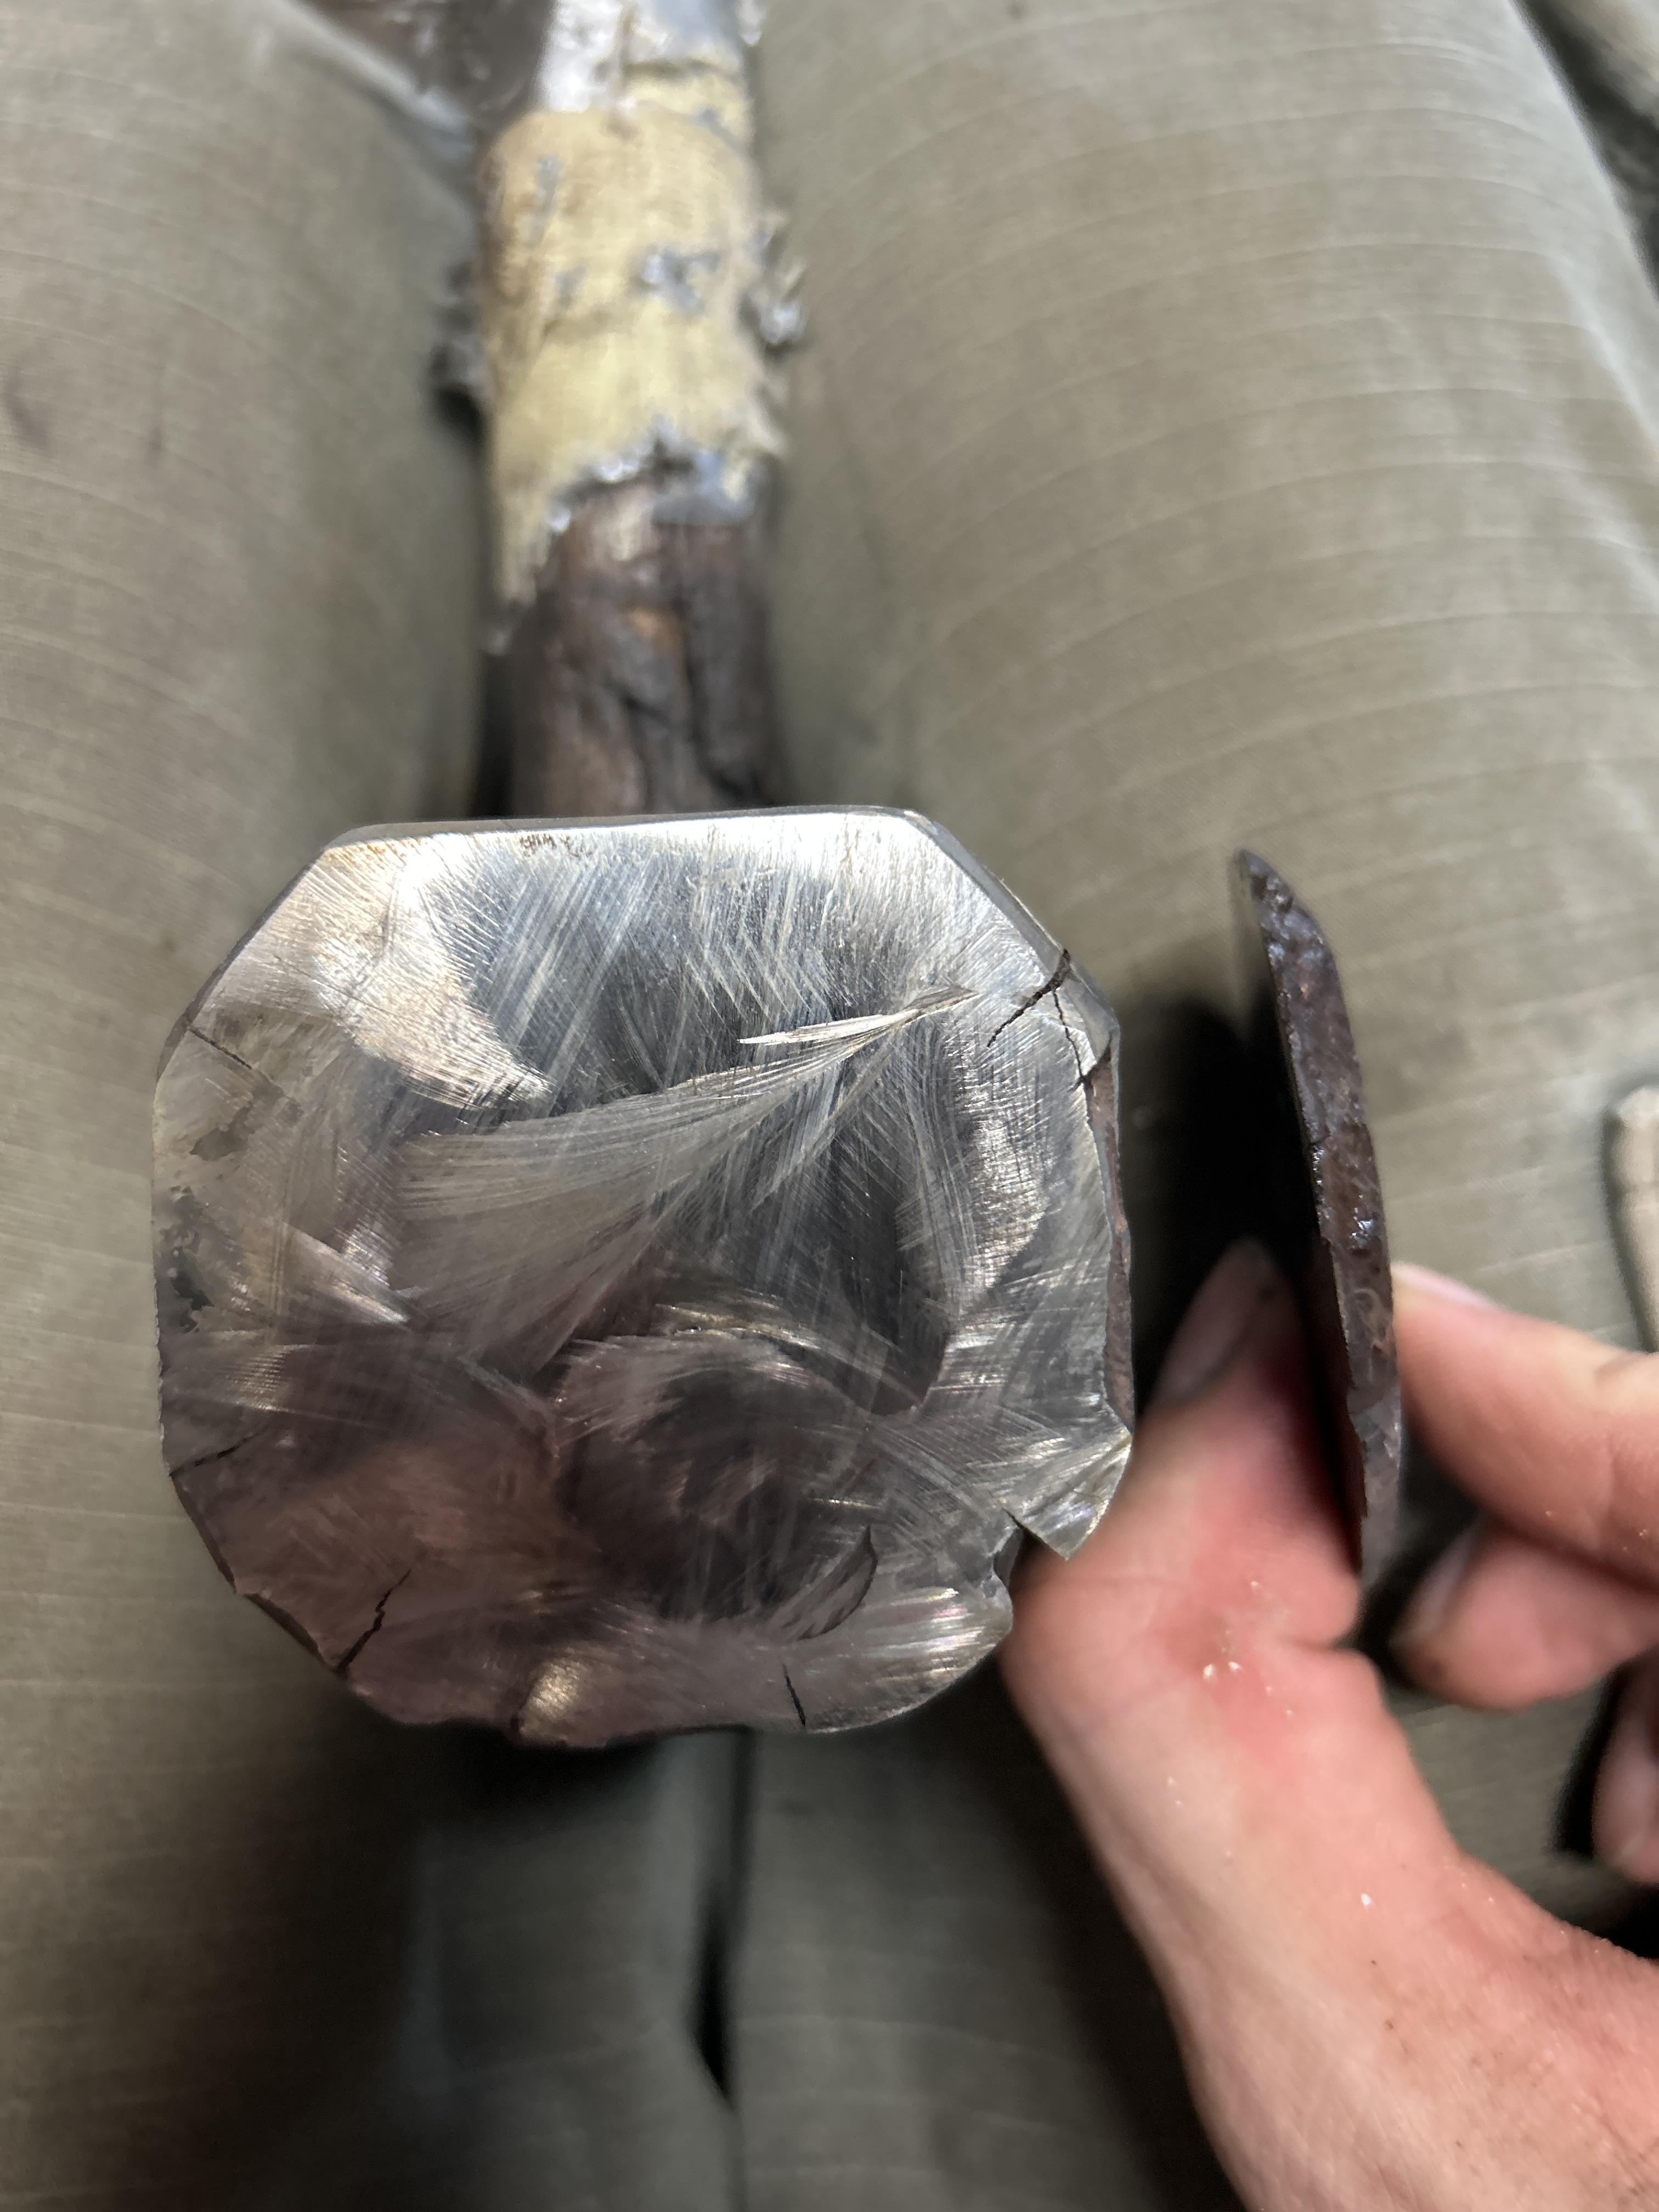
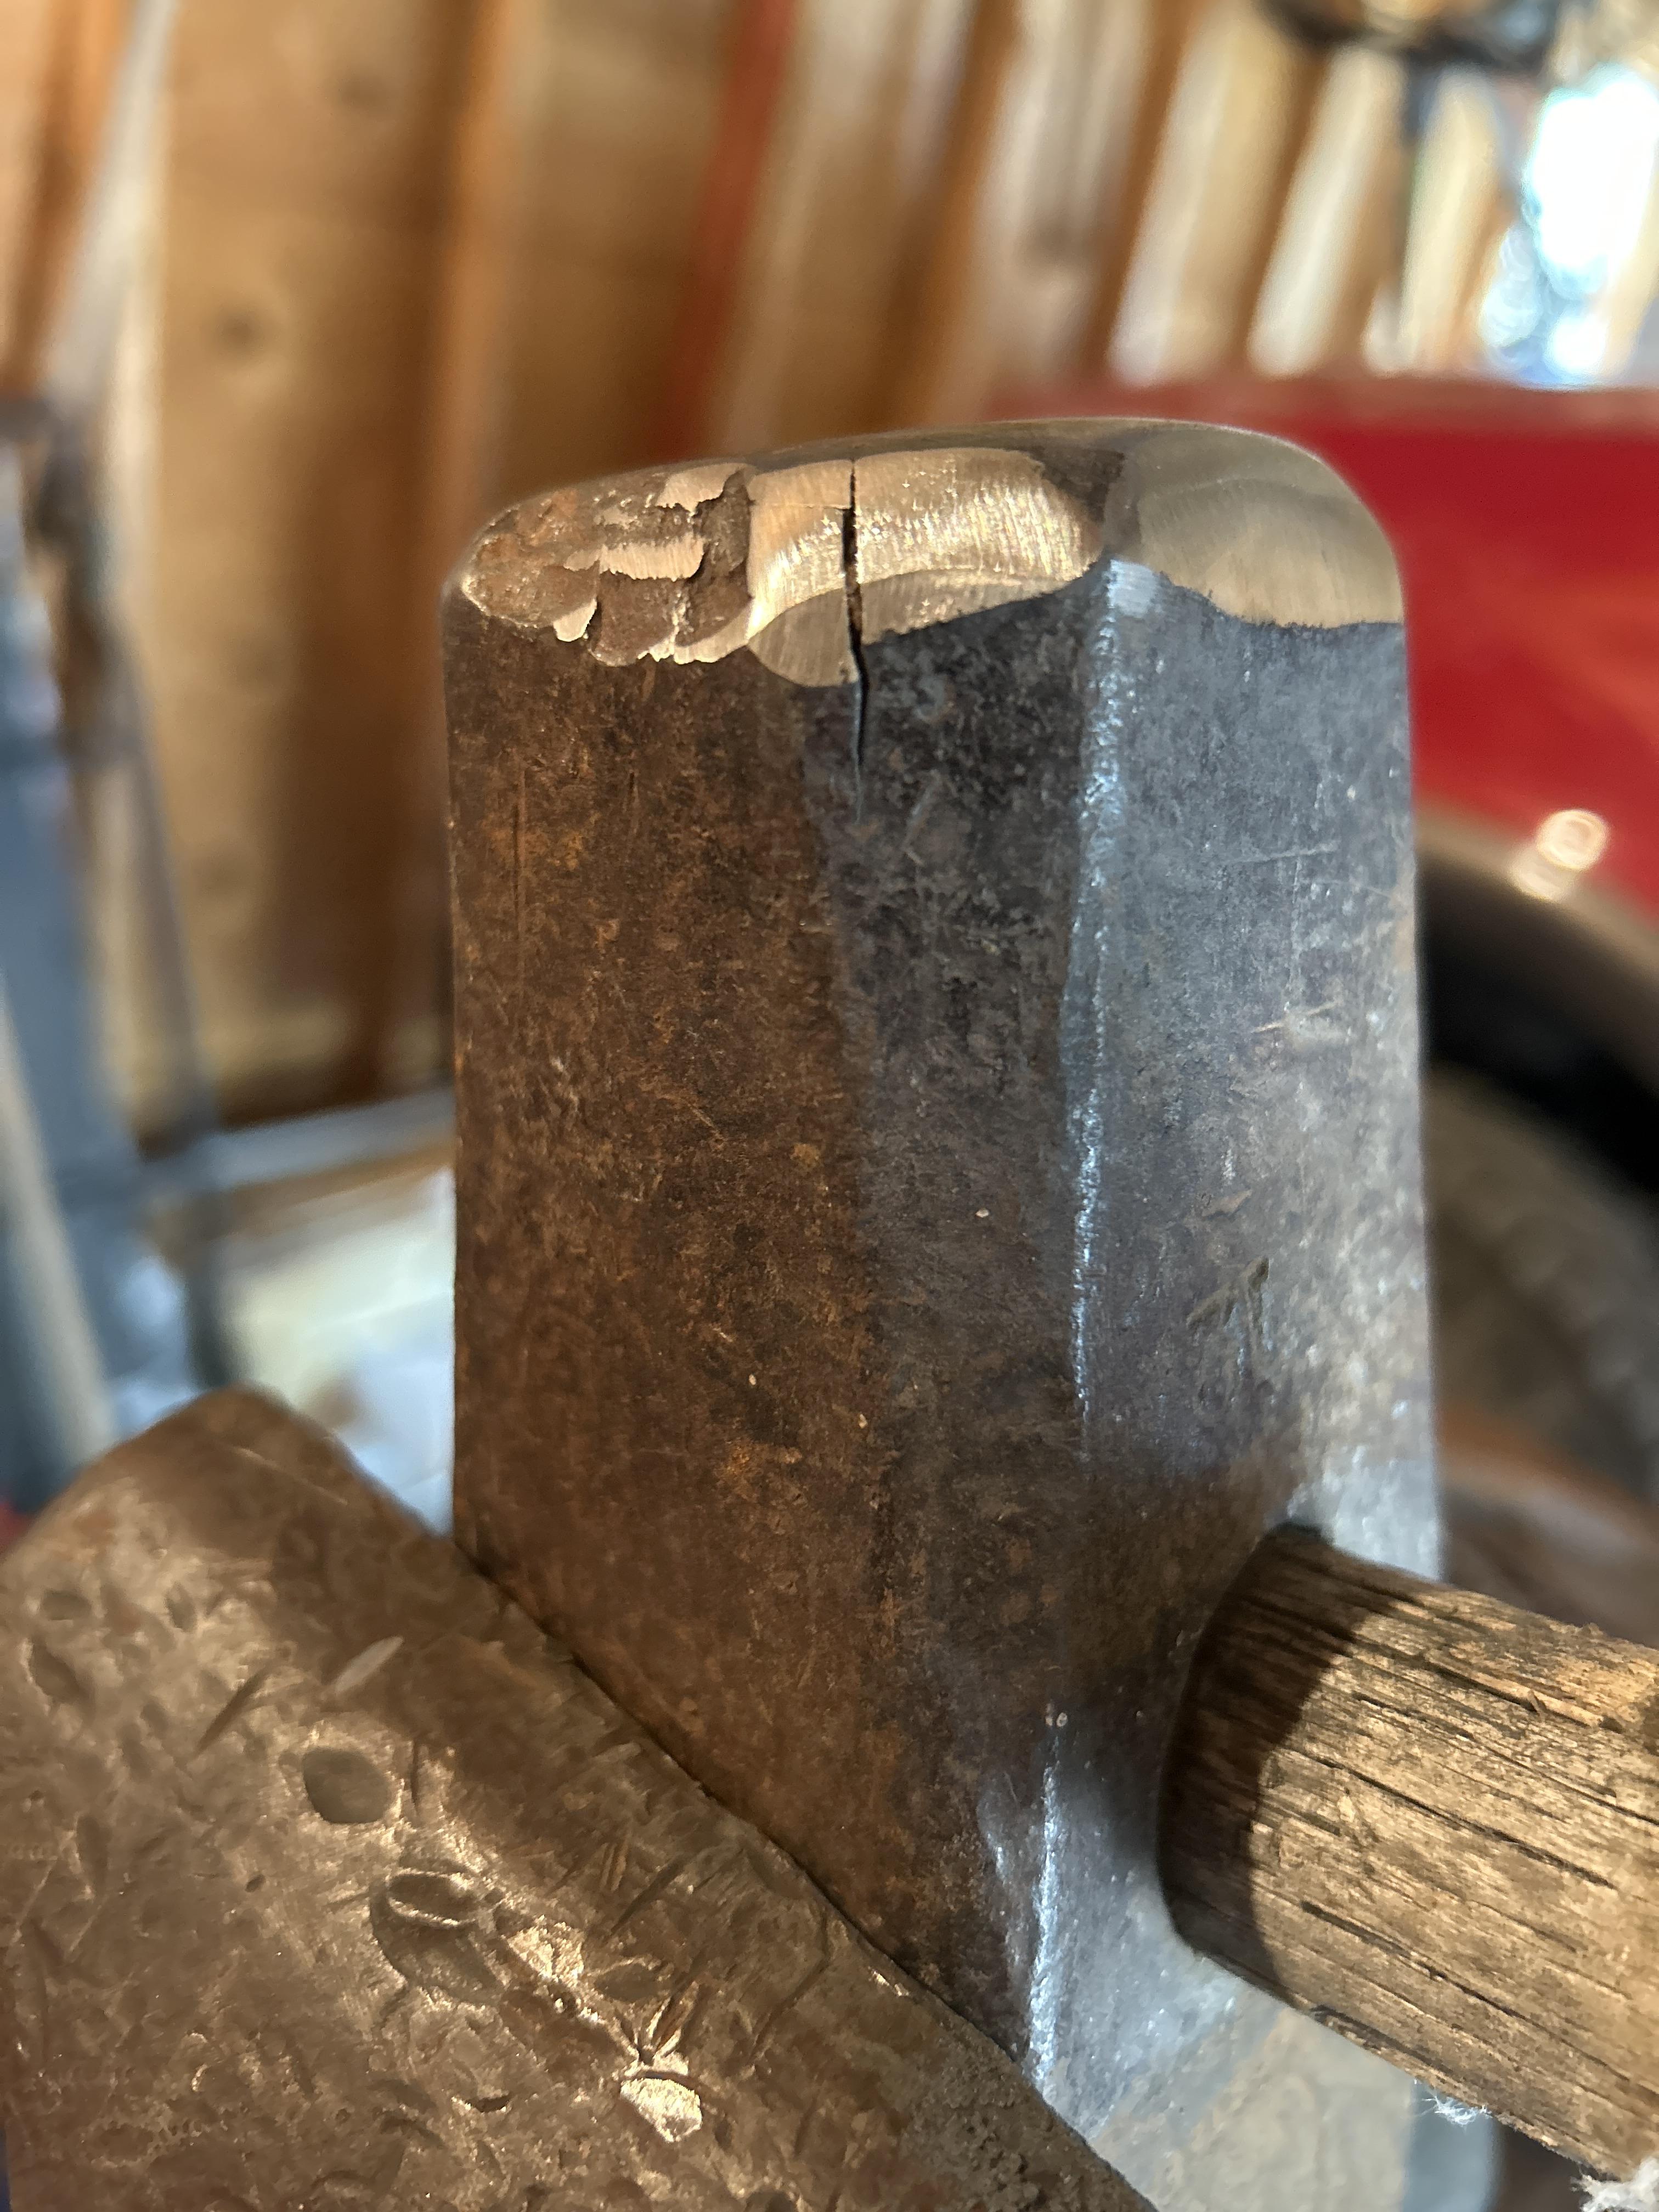
So, I realized there were other threads I could have resurrected. I didn’t know what was better, resurrecting or starting another one. Anyways, the results of cutting a slice are some some deep cracks on the sides. The next question is: do I slice again or radius the edges and hope for the best?
-
Atha 12lb cast steel sledge hammer problem
Will Brouwers replied to Will Brouwers's topic in Hand Hammers
Thanks for all the suggestions! JHCC, I saw your thread, and am considering cutting the face off. It’s pretty bad. I really want to use the hammer, wall art is an absolute last resort, but I don’t want to hurt the hammer. Frosty, I haven’t used it for anything yet. I wanted to make sure I went through the right steps before using it. JLP, that makes sense. I got it in a small town in Kansas, and assume it was beaten on in its life. So, to address the cracks, with the information above and the picture below, it seems that the best option is to grind the face or cut it, quite far back.
-
Atha 12lb cast steel sledge hammer problem
Will Brouwers replied to Will Brouwers's topic in Hand Hammers
Hey! Glad the memories kicked in! Thank you!