Jobtiel1
-
Posts
521 -
Joined
-
Last visited
Content Type
Profiles
Forums
Articles
Gallery
Downloads
Events
Everything posted by Jobtiel1
-
What did you do in the shop today?
Jobtiel1 replied to Mark Ling's topic in Blacksmithing, General Discussion
Billy, great looking hinges! And I agree, these are not as difficult as they look! And they indeed save you a lot of bench work. For anyone interested the process is described in more detail in "the complete modern blacksmith" by A. Weygers. ~Jobtiel -
Without Rex's YouTube channel I doubt if I could've made this thing, his videos have taught me a lot on woodworking. The nailed rabbet construction came from one of his videos as well! I'm on the lookout for a good screw to make one of those leg vises on the flea markets, but haven't found one yet. Concerning a hasp latch, I think it's a nice way to keep the top closed, and with a padlock can also offer some security. If the lock in making doesn't work out like how I want it to I'm definitely making a latch to keep the top closed. Kind of like Torbjörn Åhman on his YouTube channel, the hasp latch to keep the door closed. I think I want to take this chest with me on demo's and stuff, also as an eye catcher. Having a very simple lock on it is a nice way to keep people out of the chest. ~Jobtiel
-
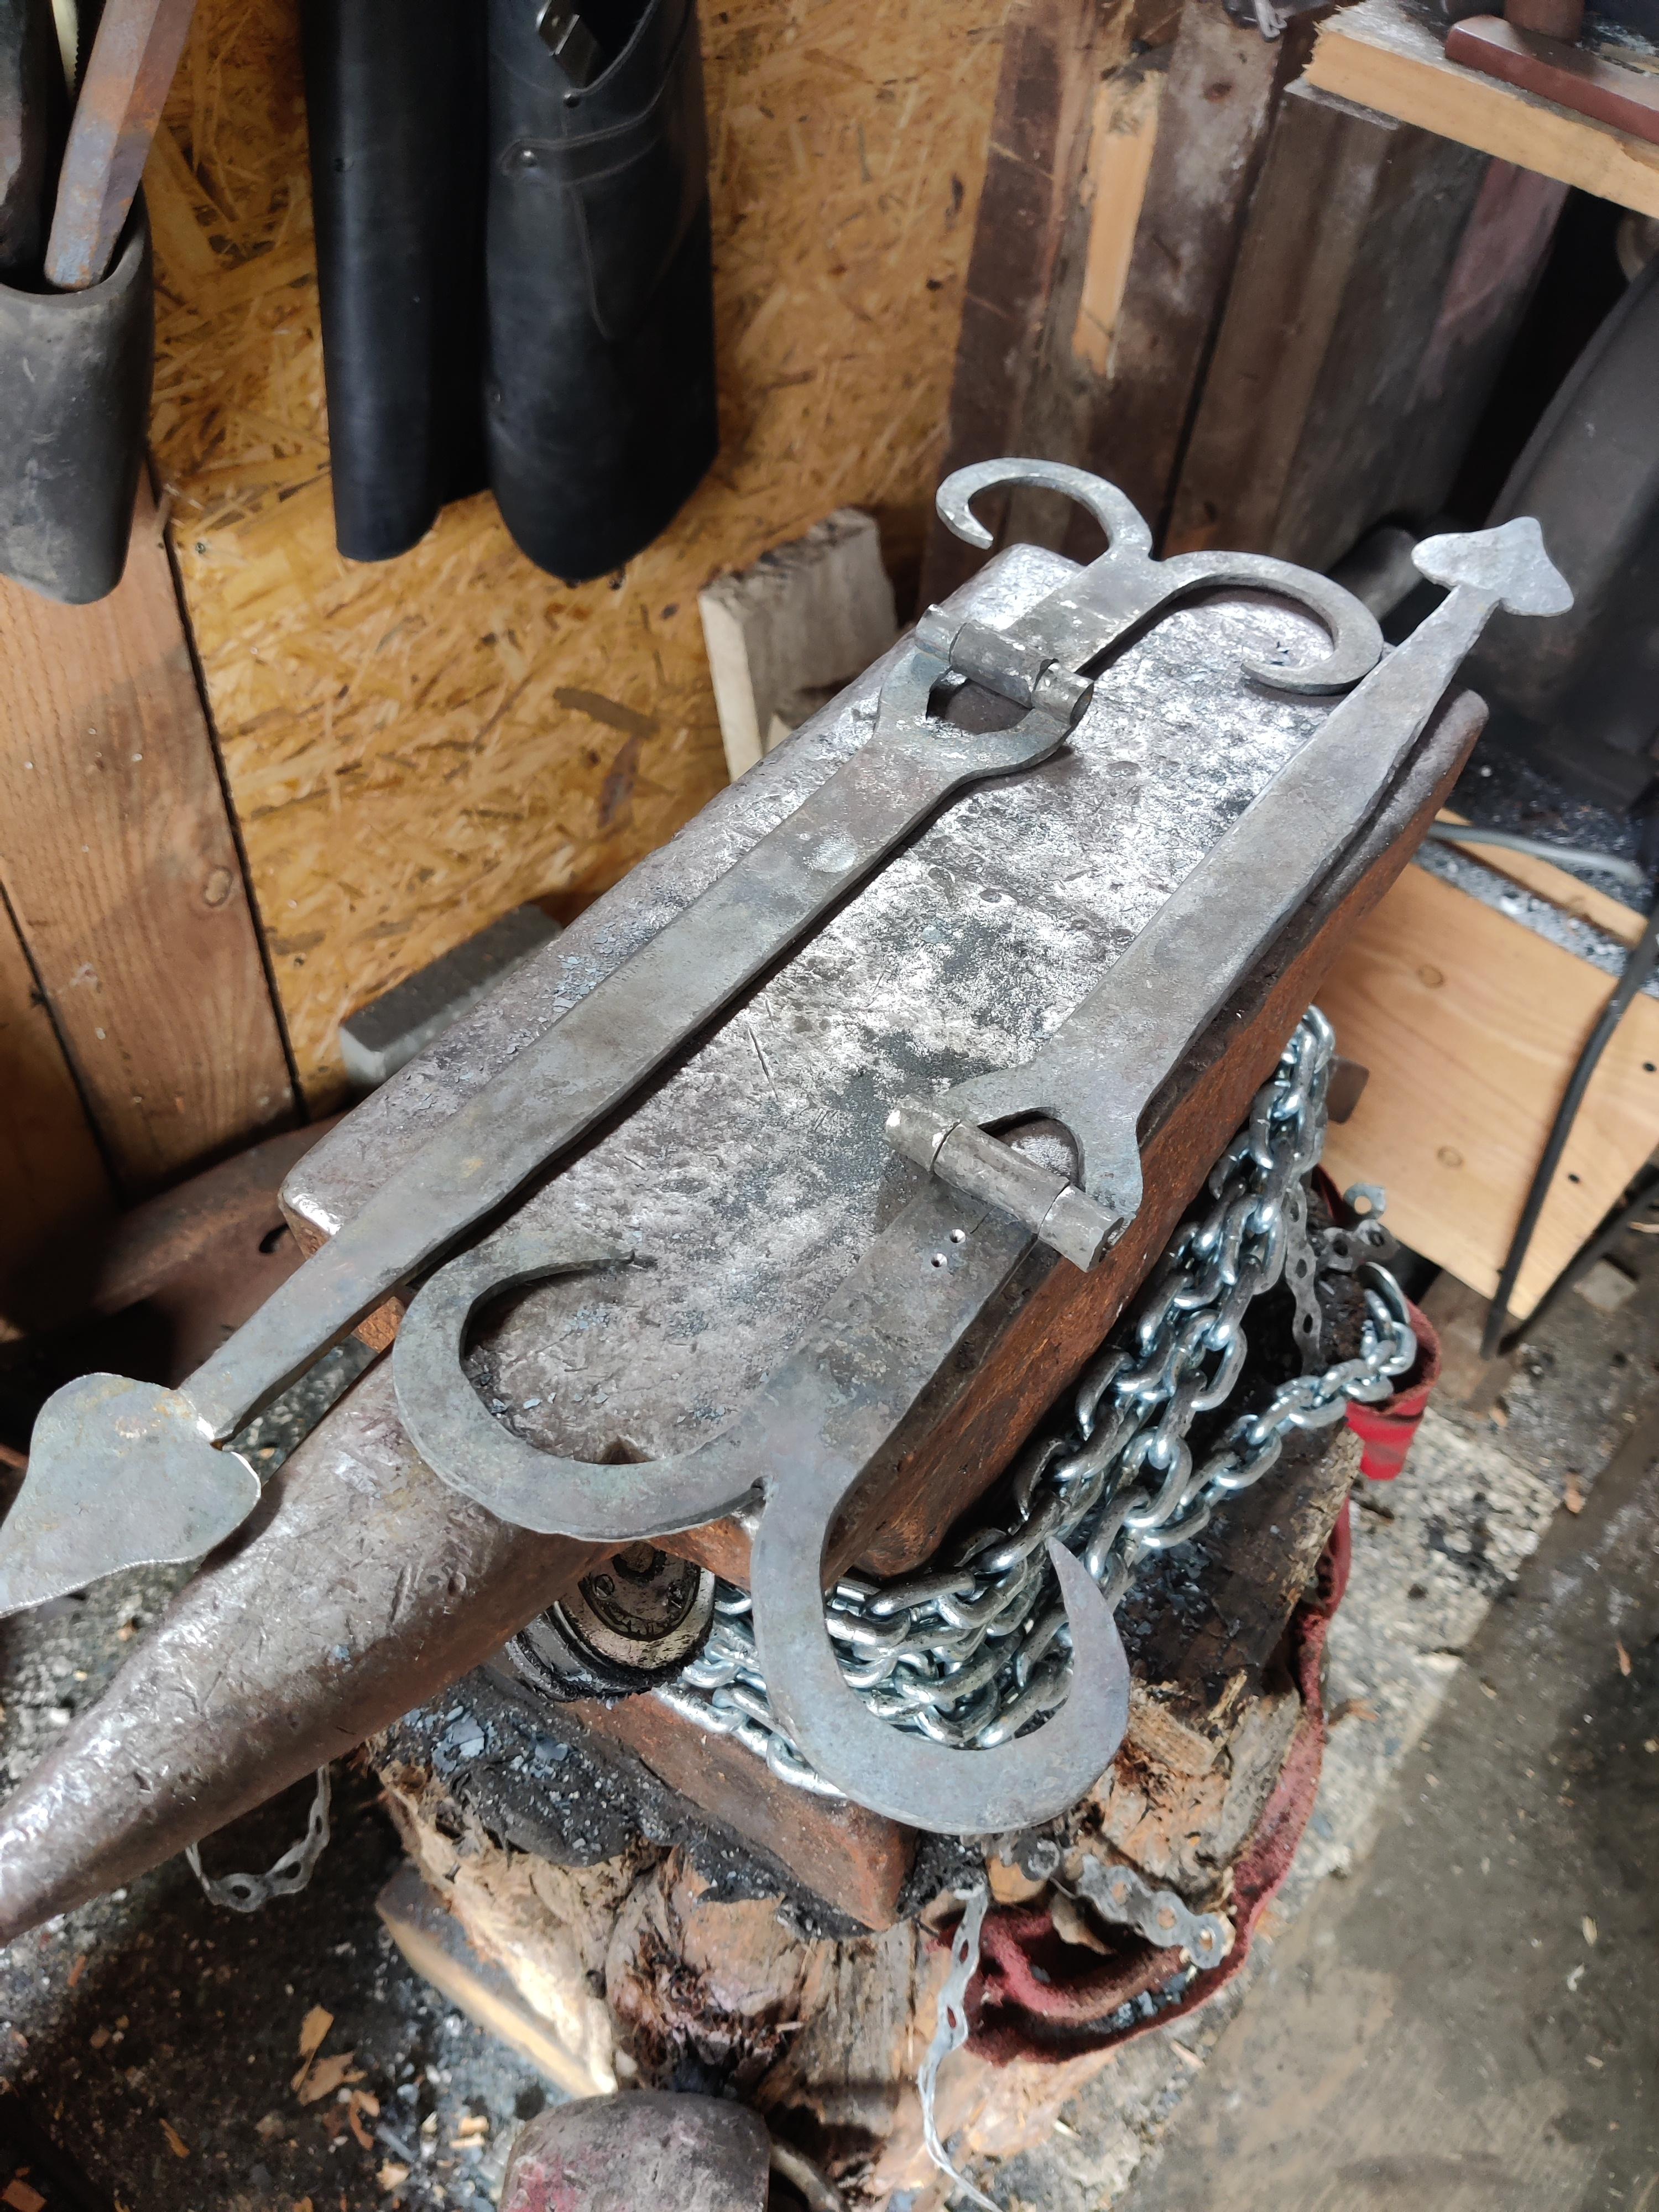
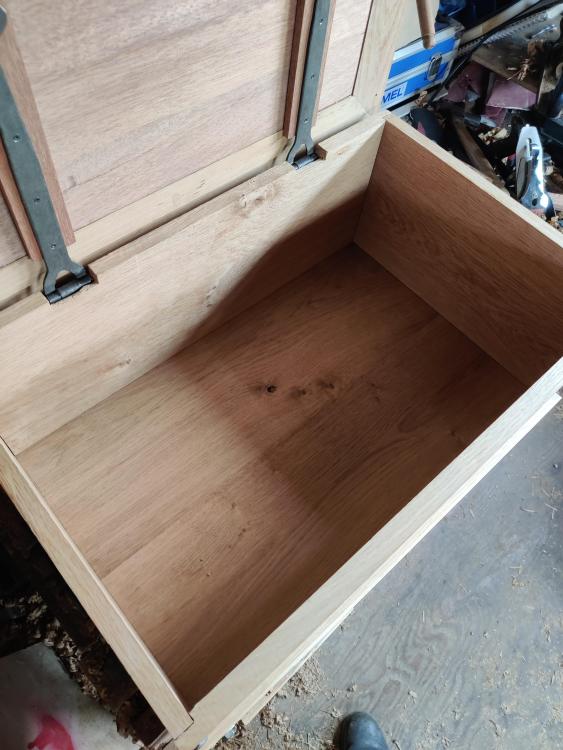
I was debating myself in the design in what I wanted to do with the hinges, I opted for the lid to be overhanging a bit and thus the hinges were a bit easier to make going in the inside. After making I'm thinking the same, hinges on the outside would look way nicer! ~Jobtiel
-
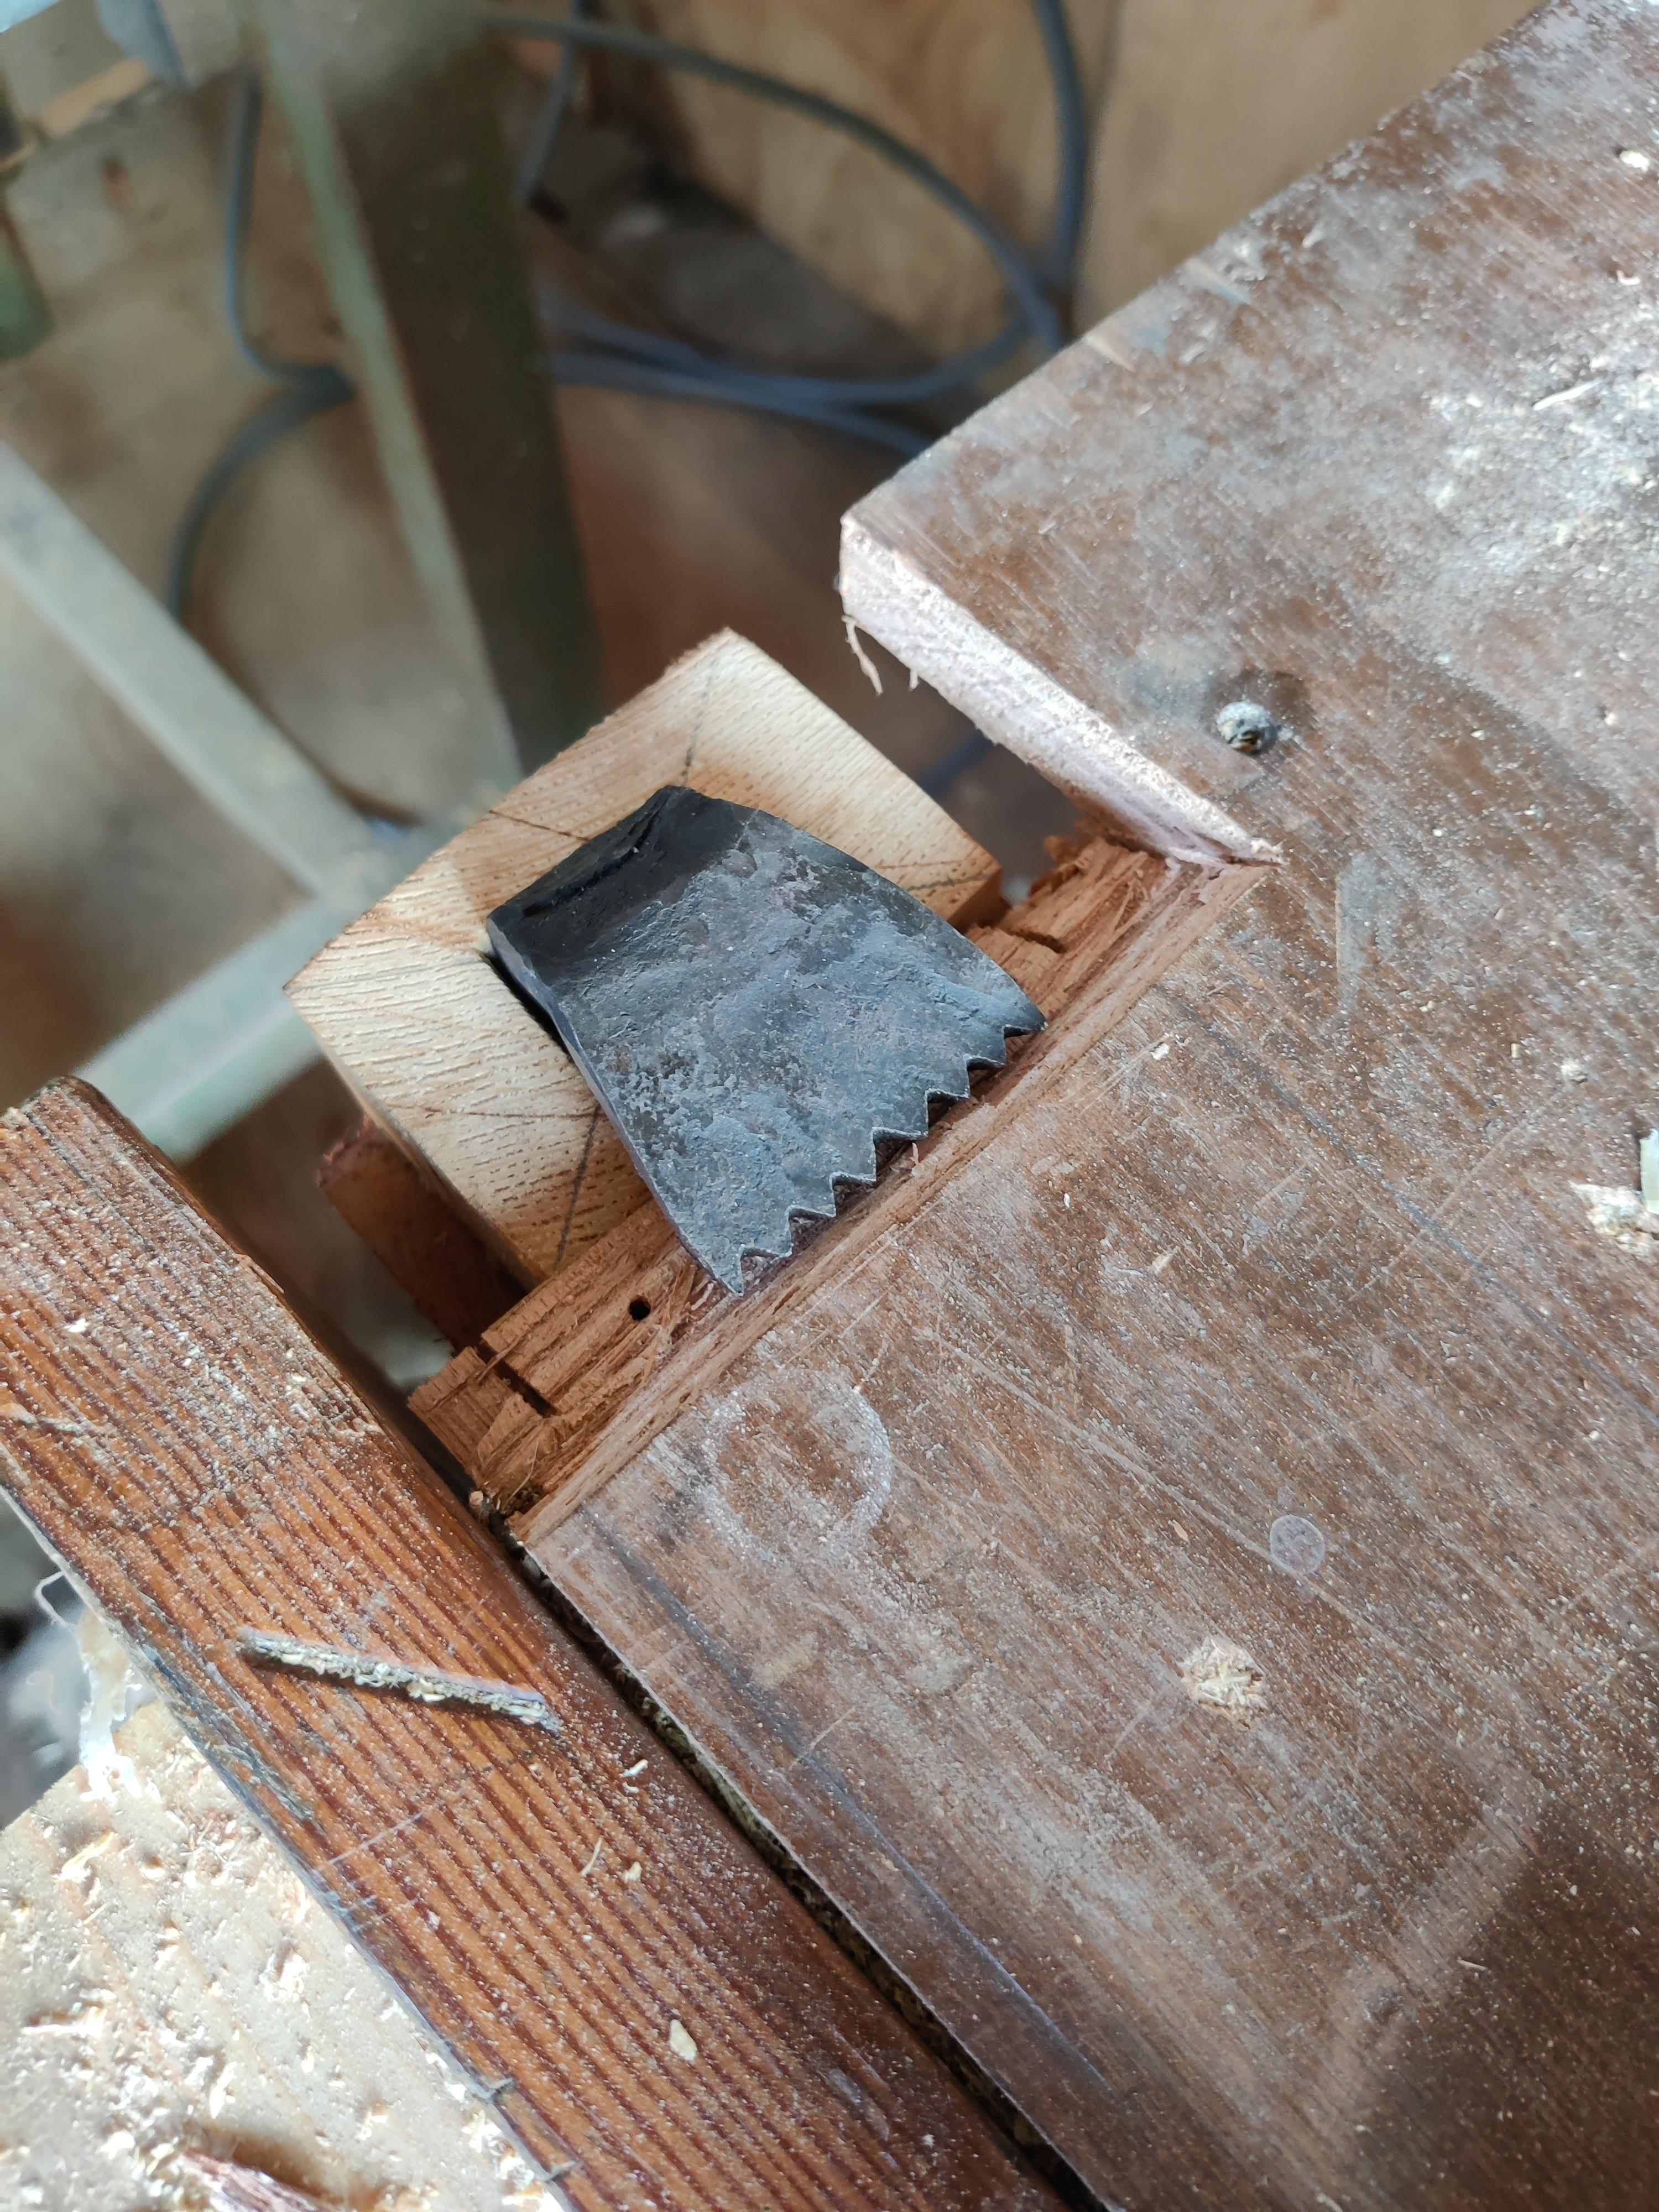
Yes the wood is very prone to splitting, I pre drilled the holes before hammering them in, they also bend quite fast, so you are better of giving softer blows instead of heavy ones. I tested for the hole size on some scraps. ~Jobtiel
-
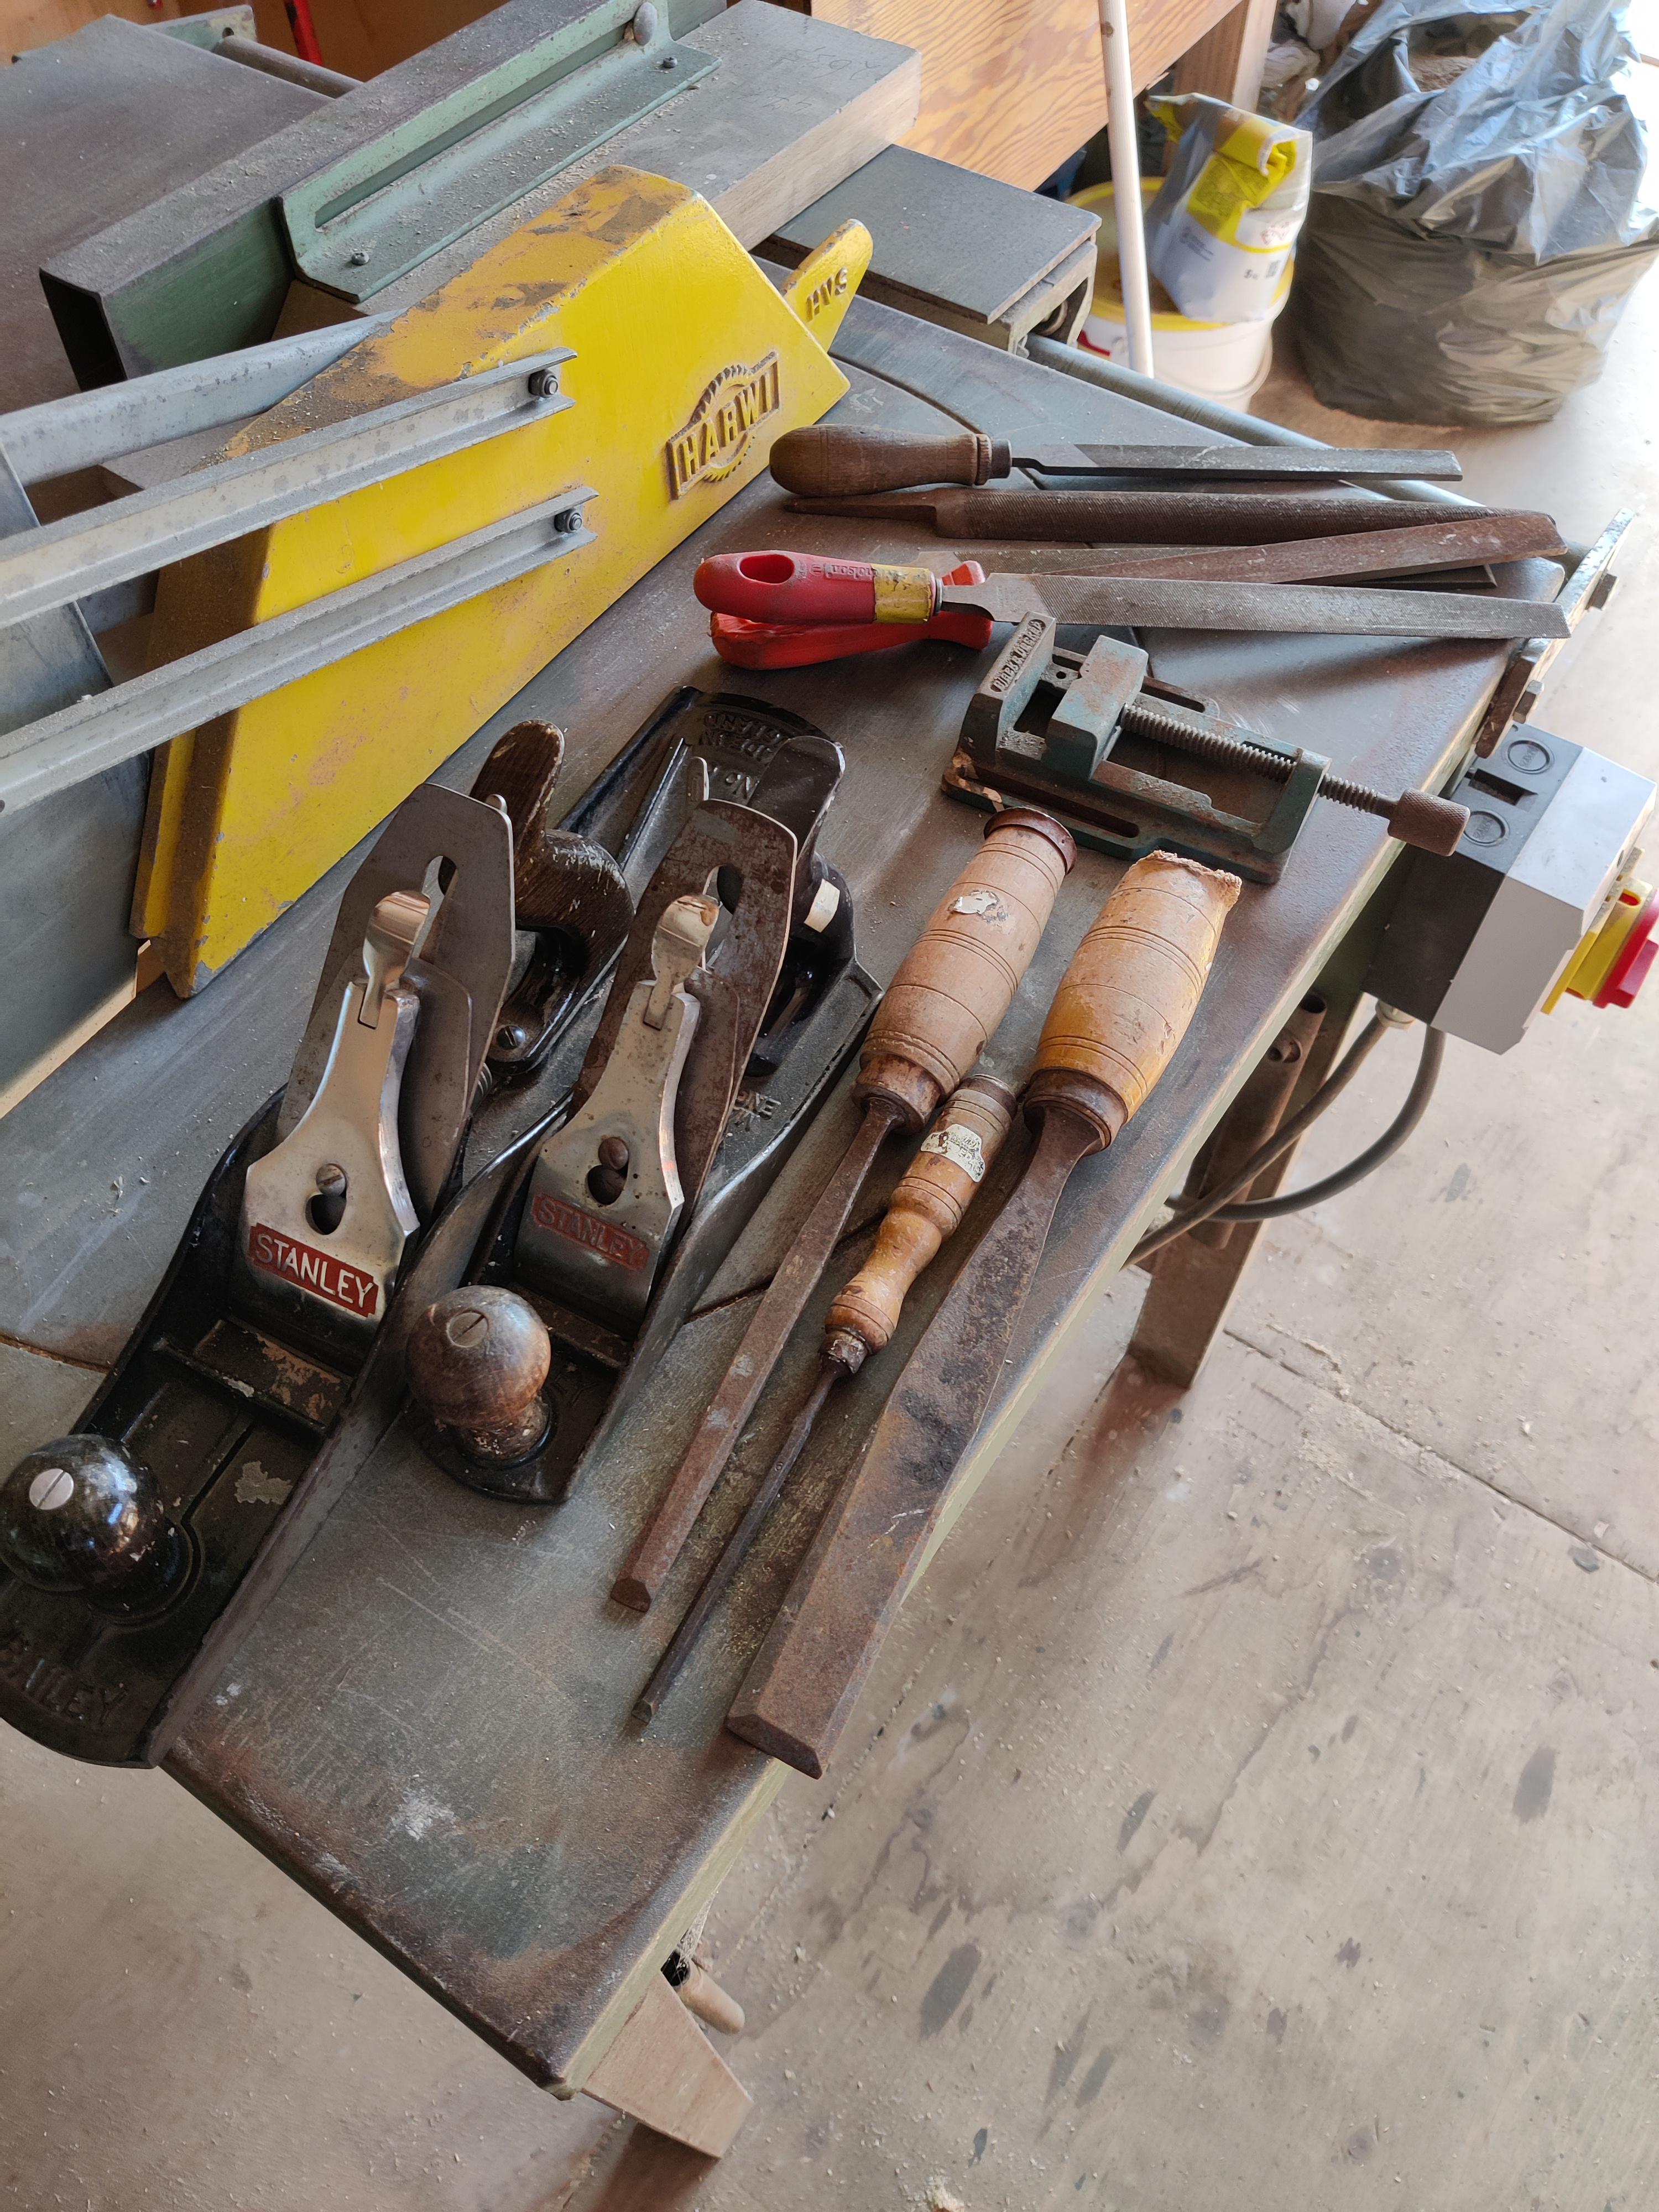
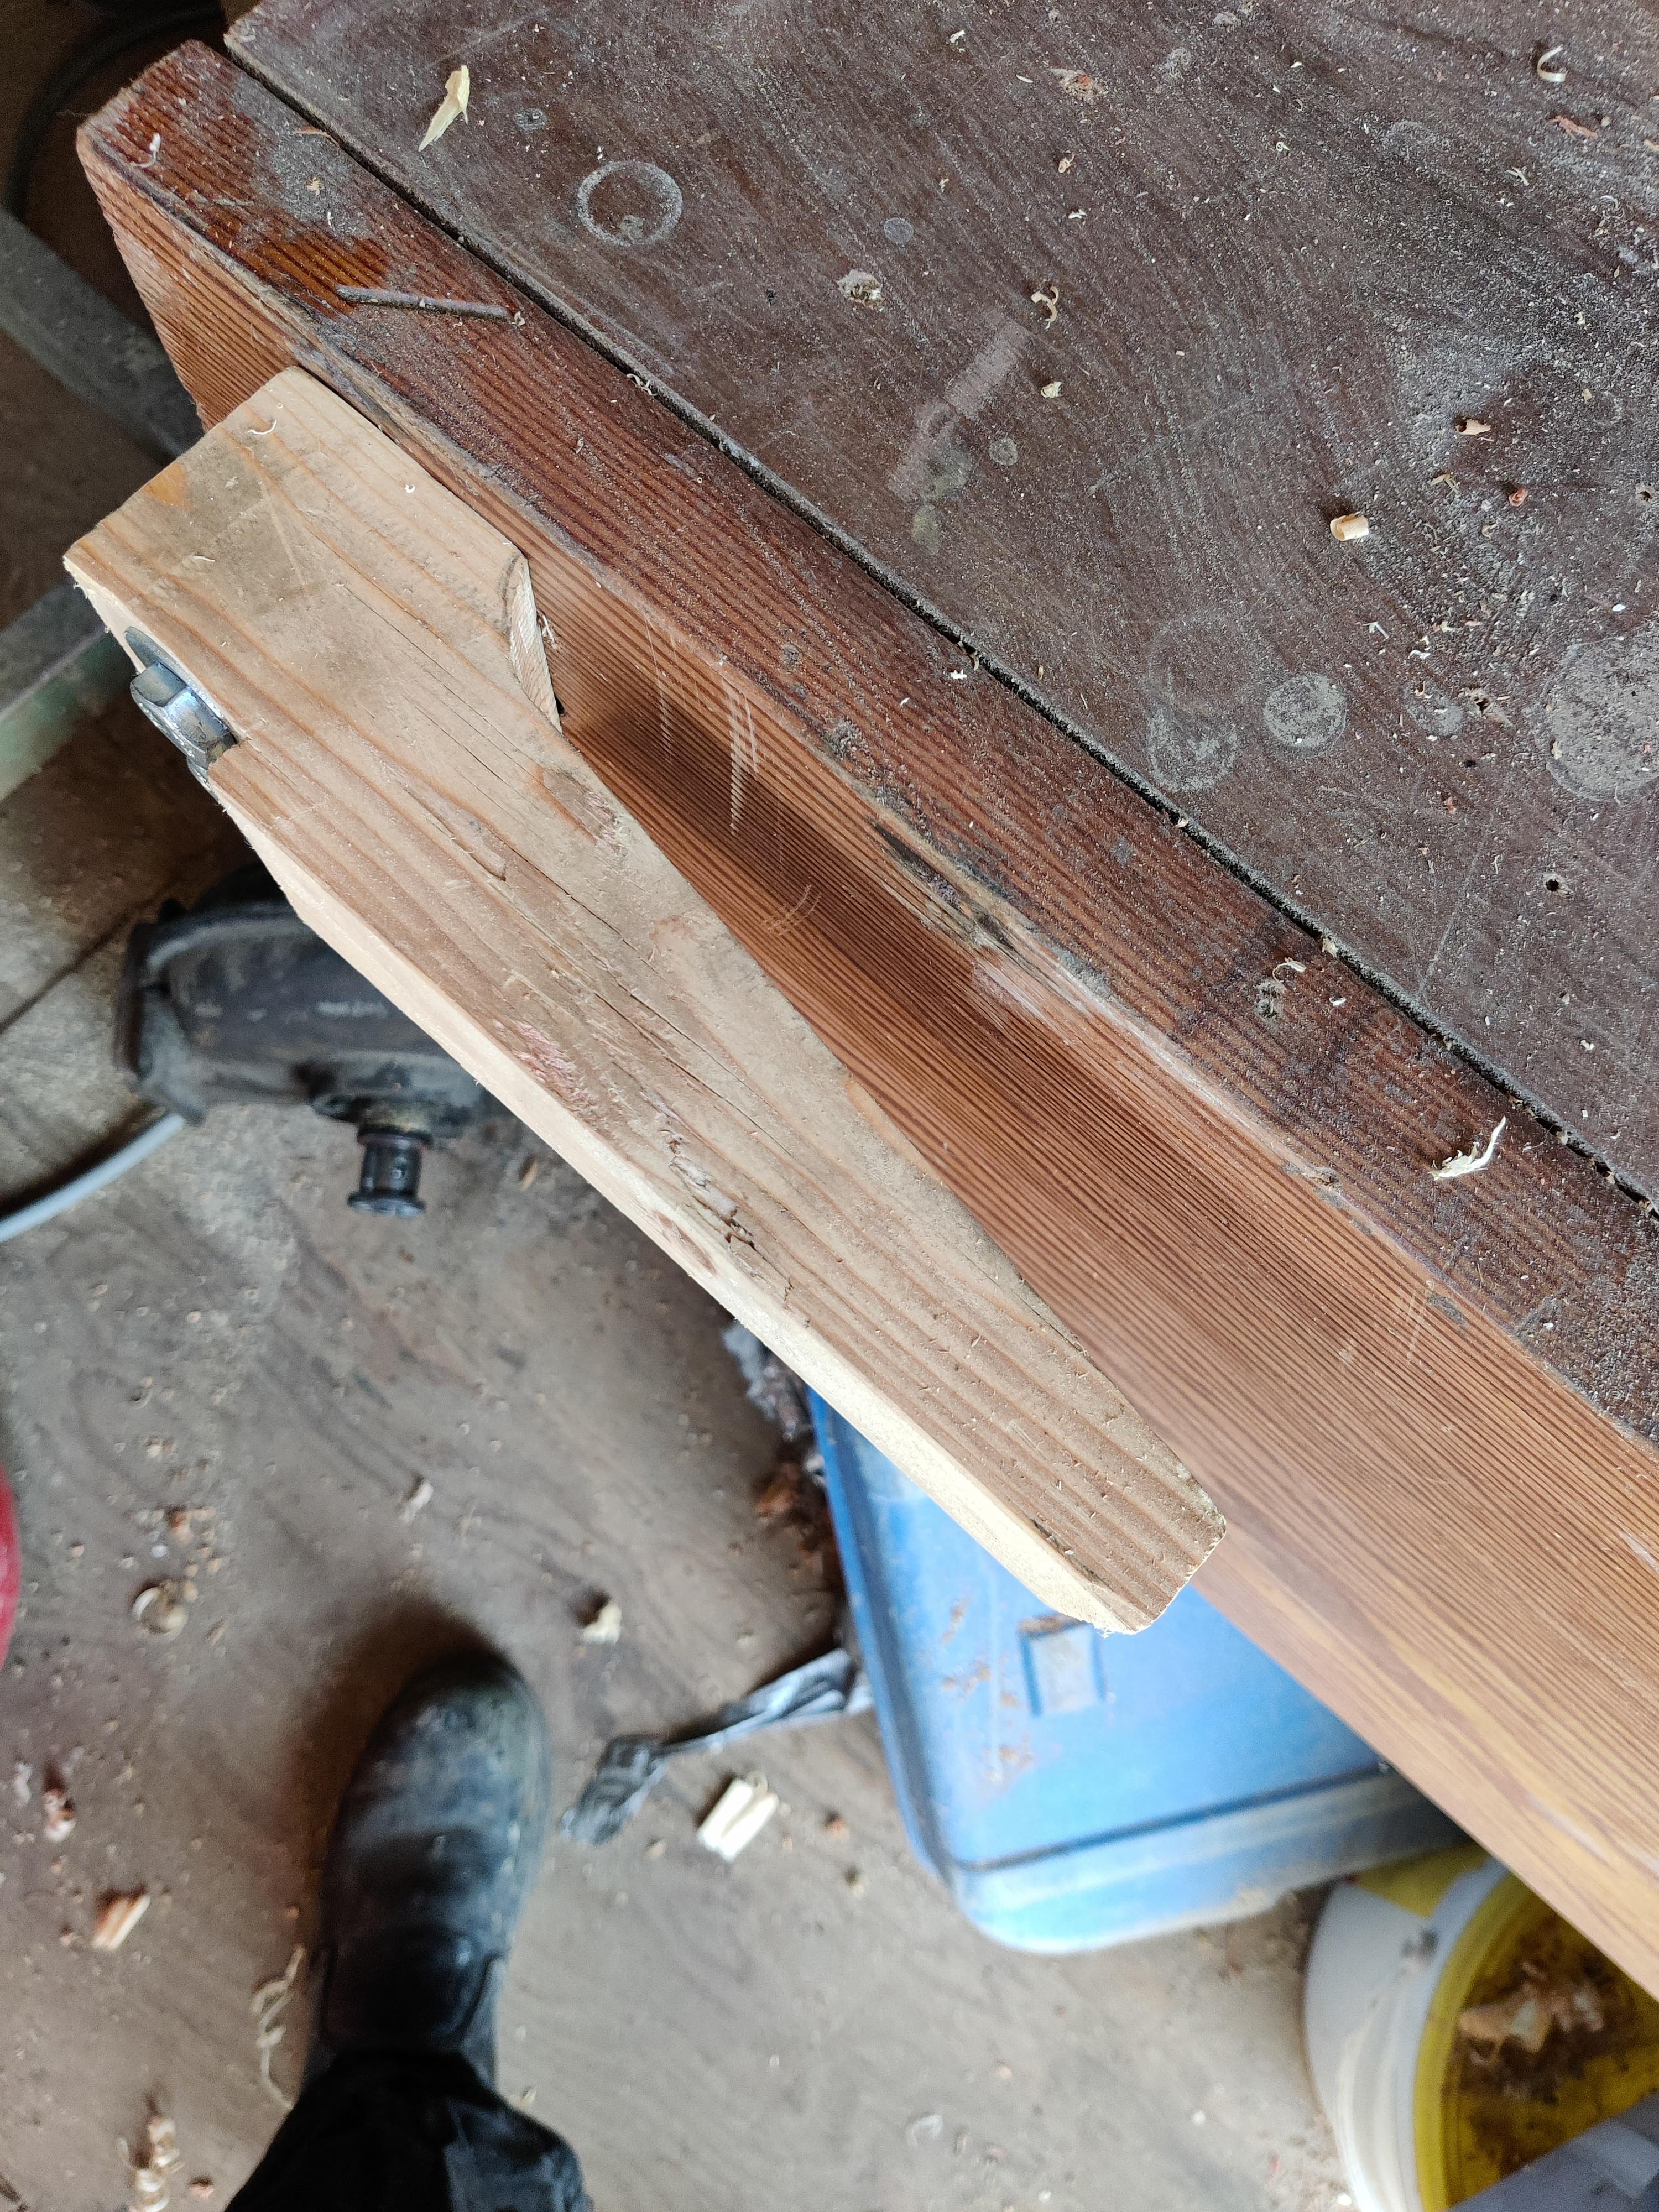
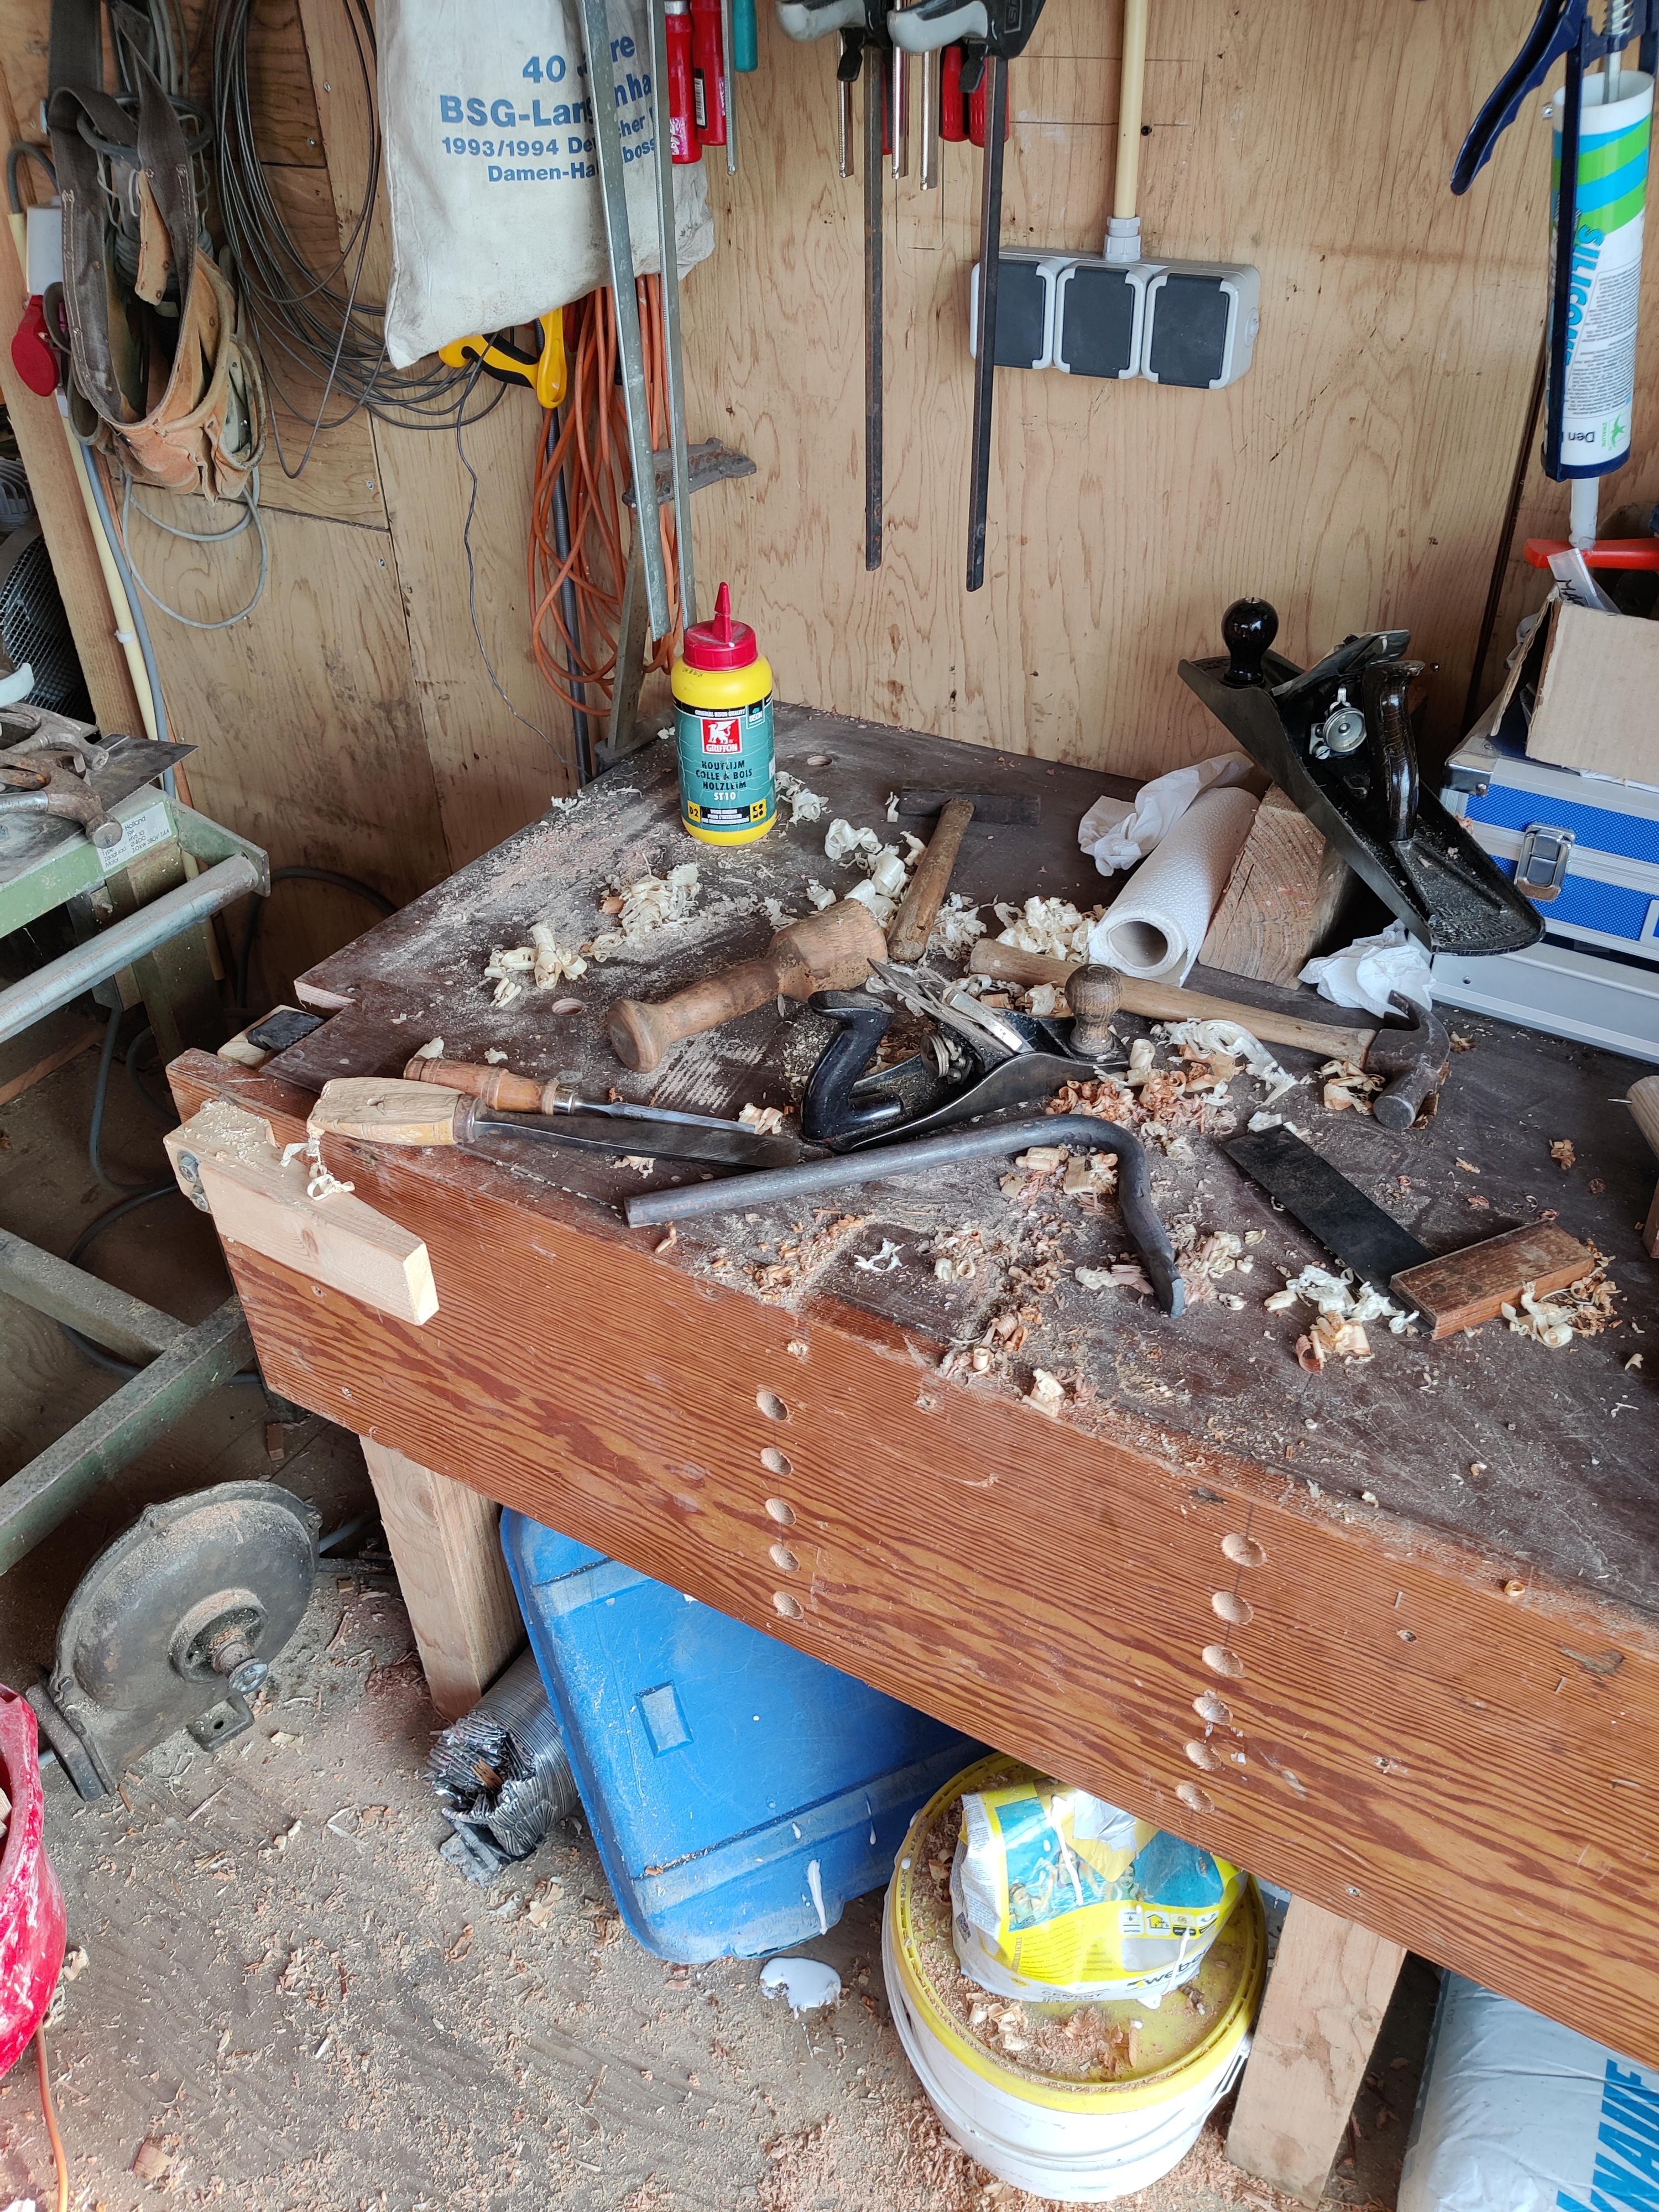
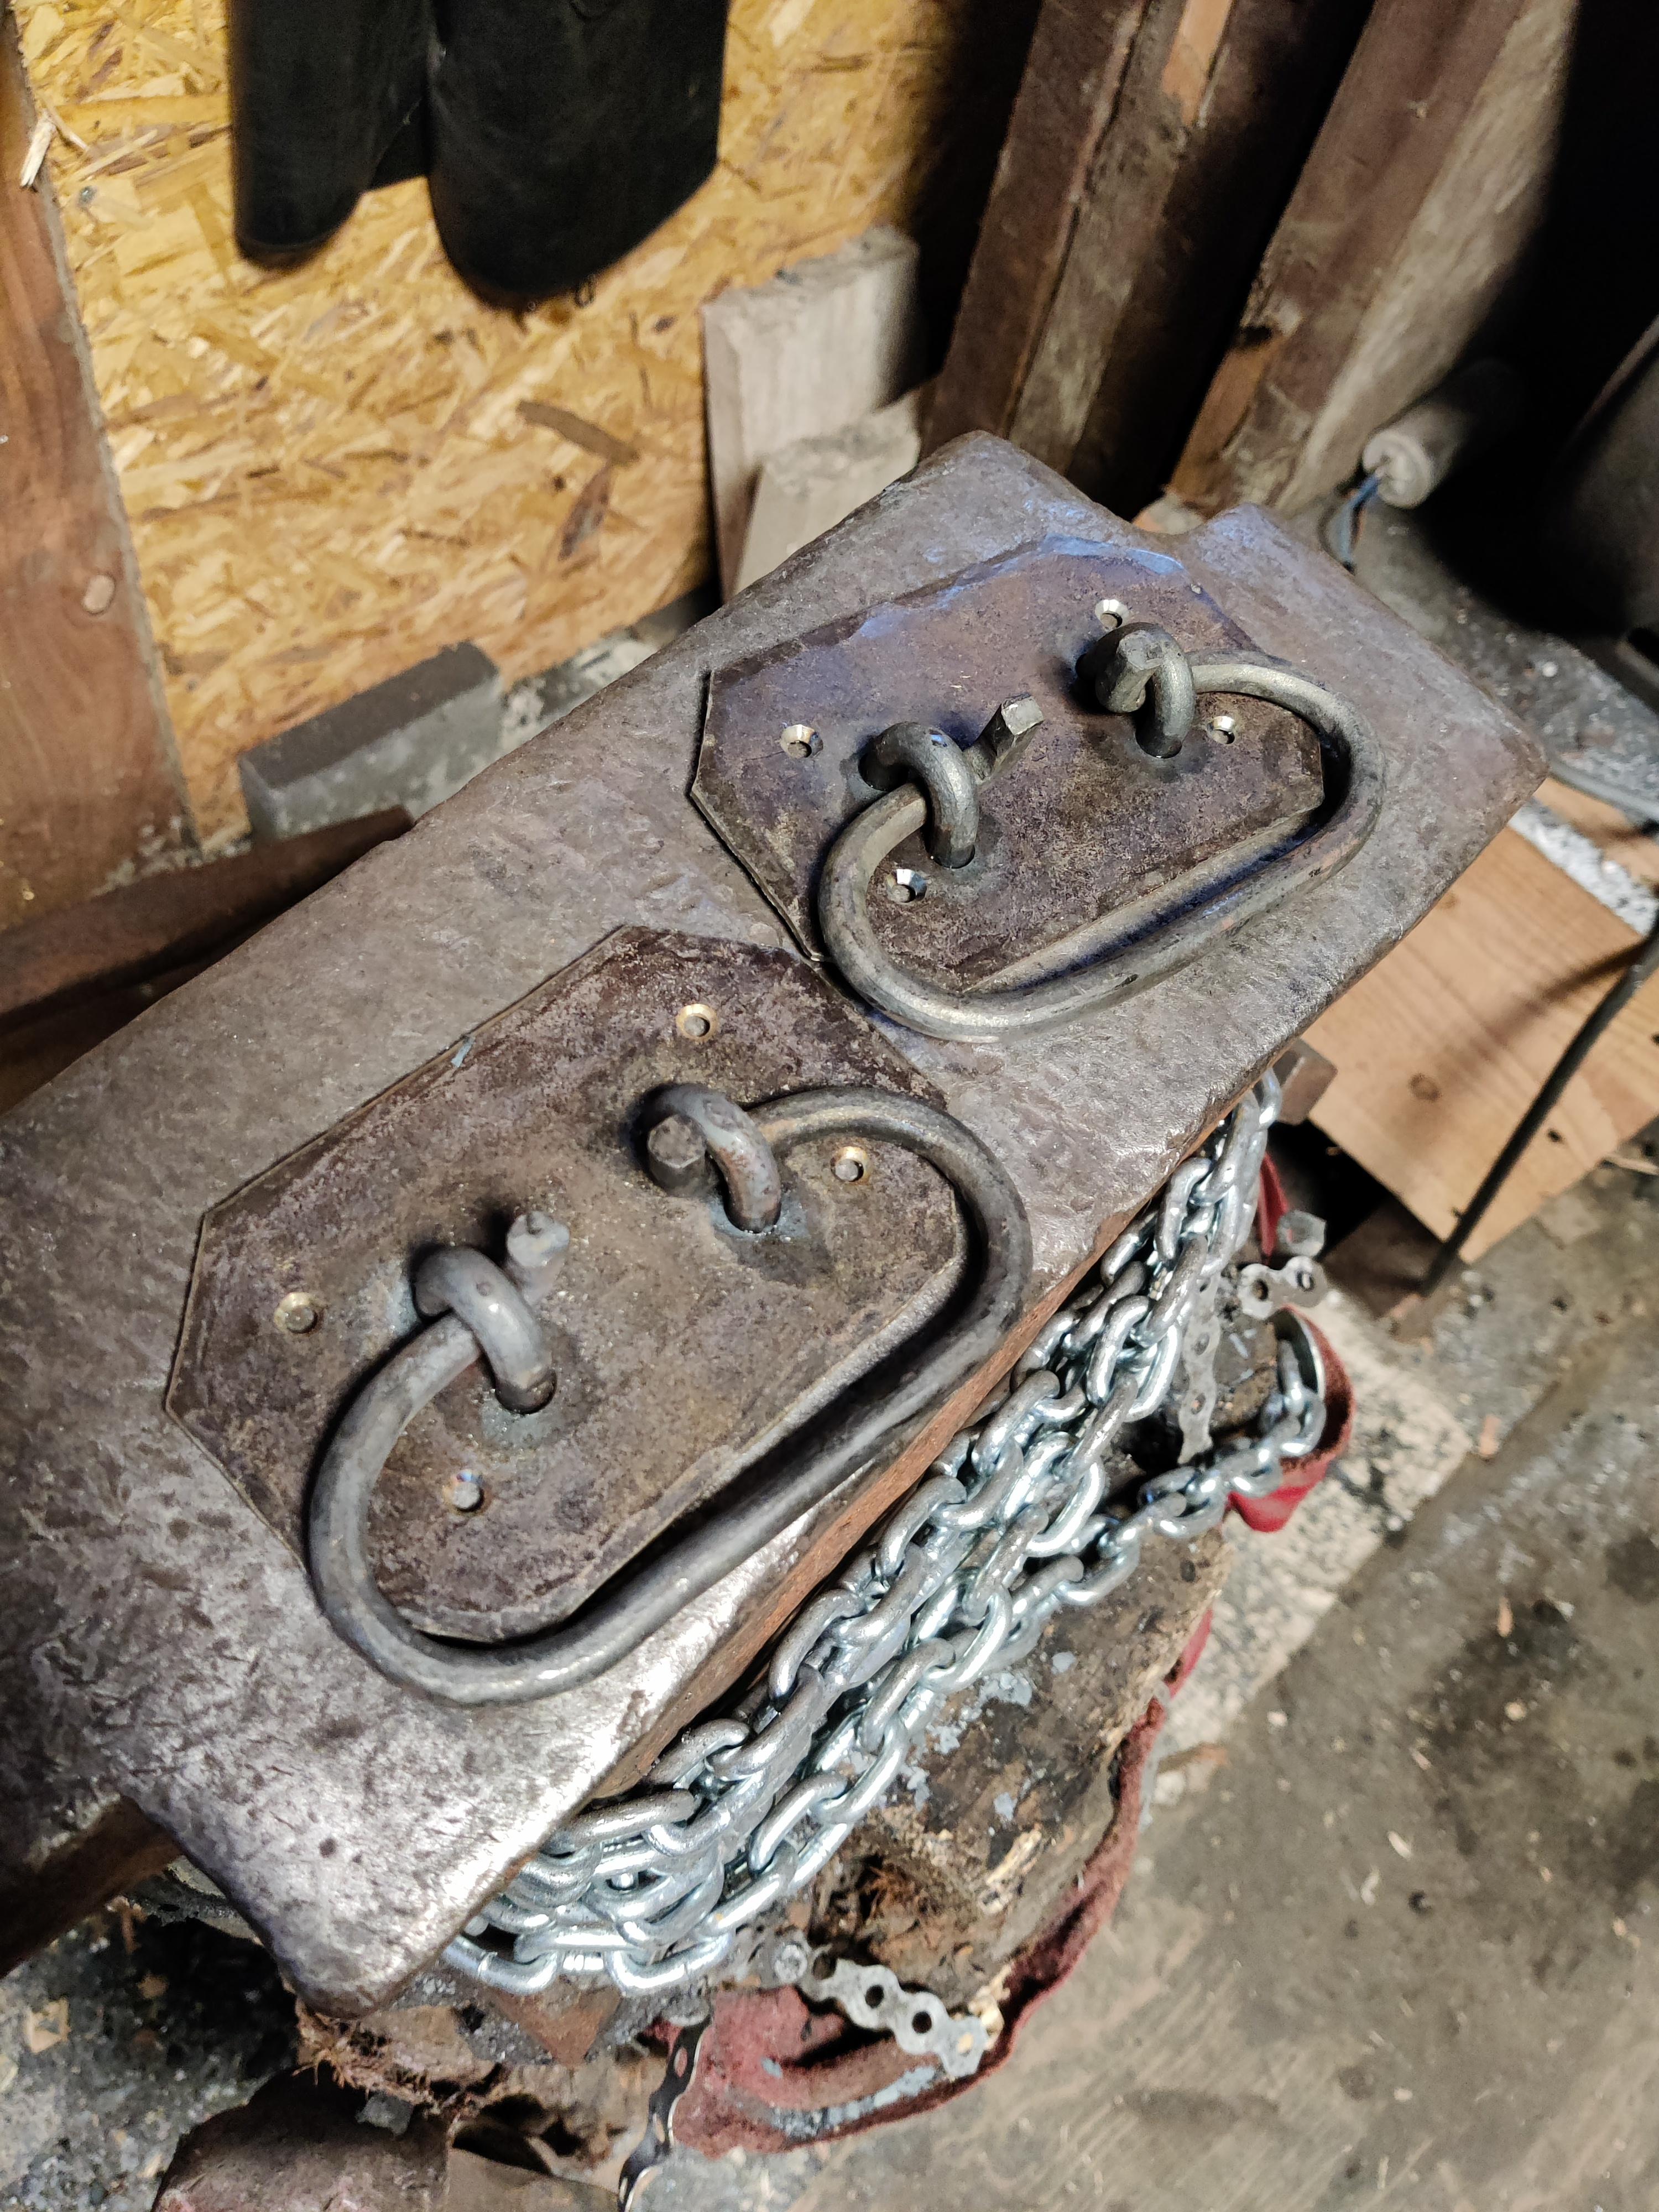
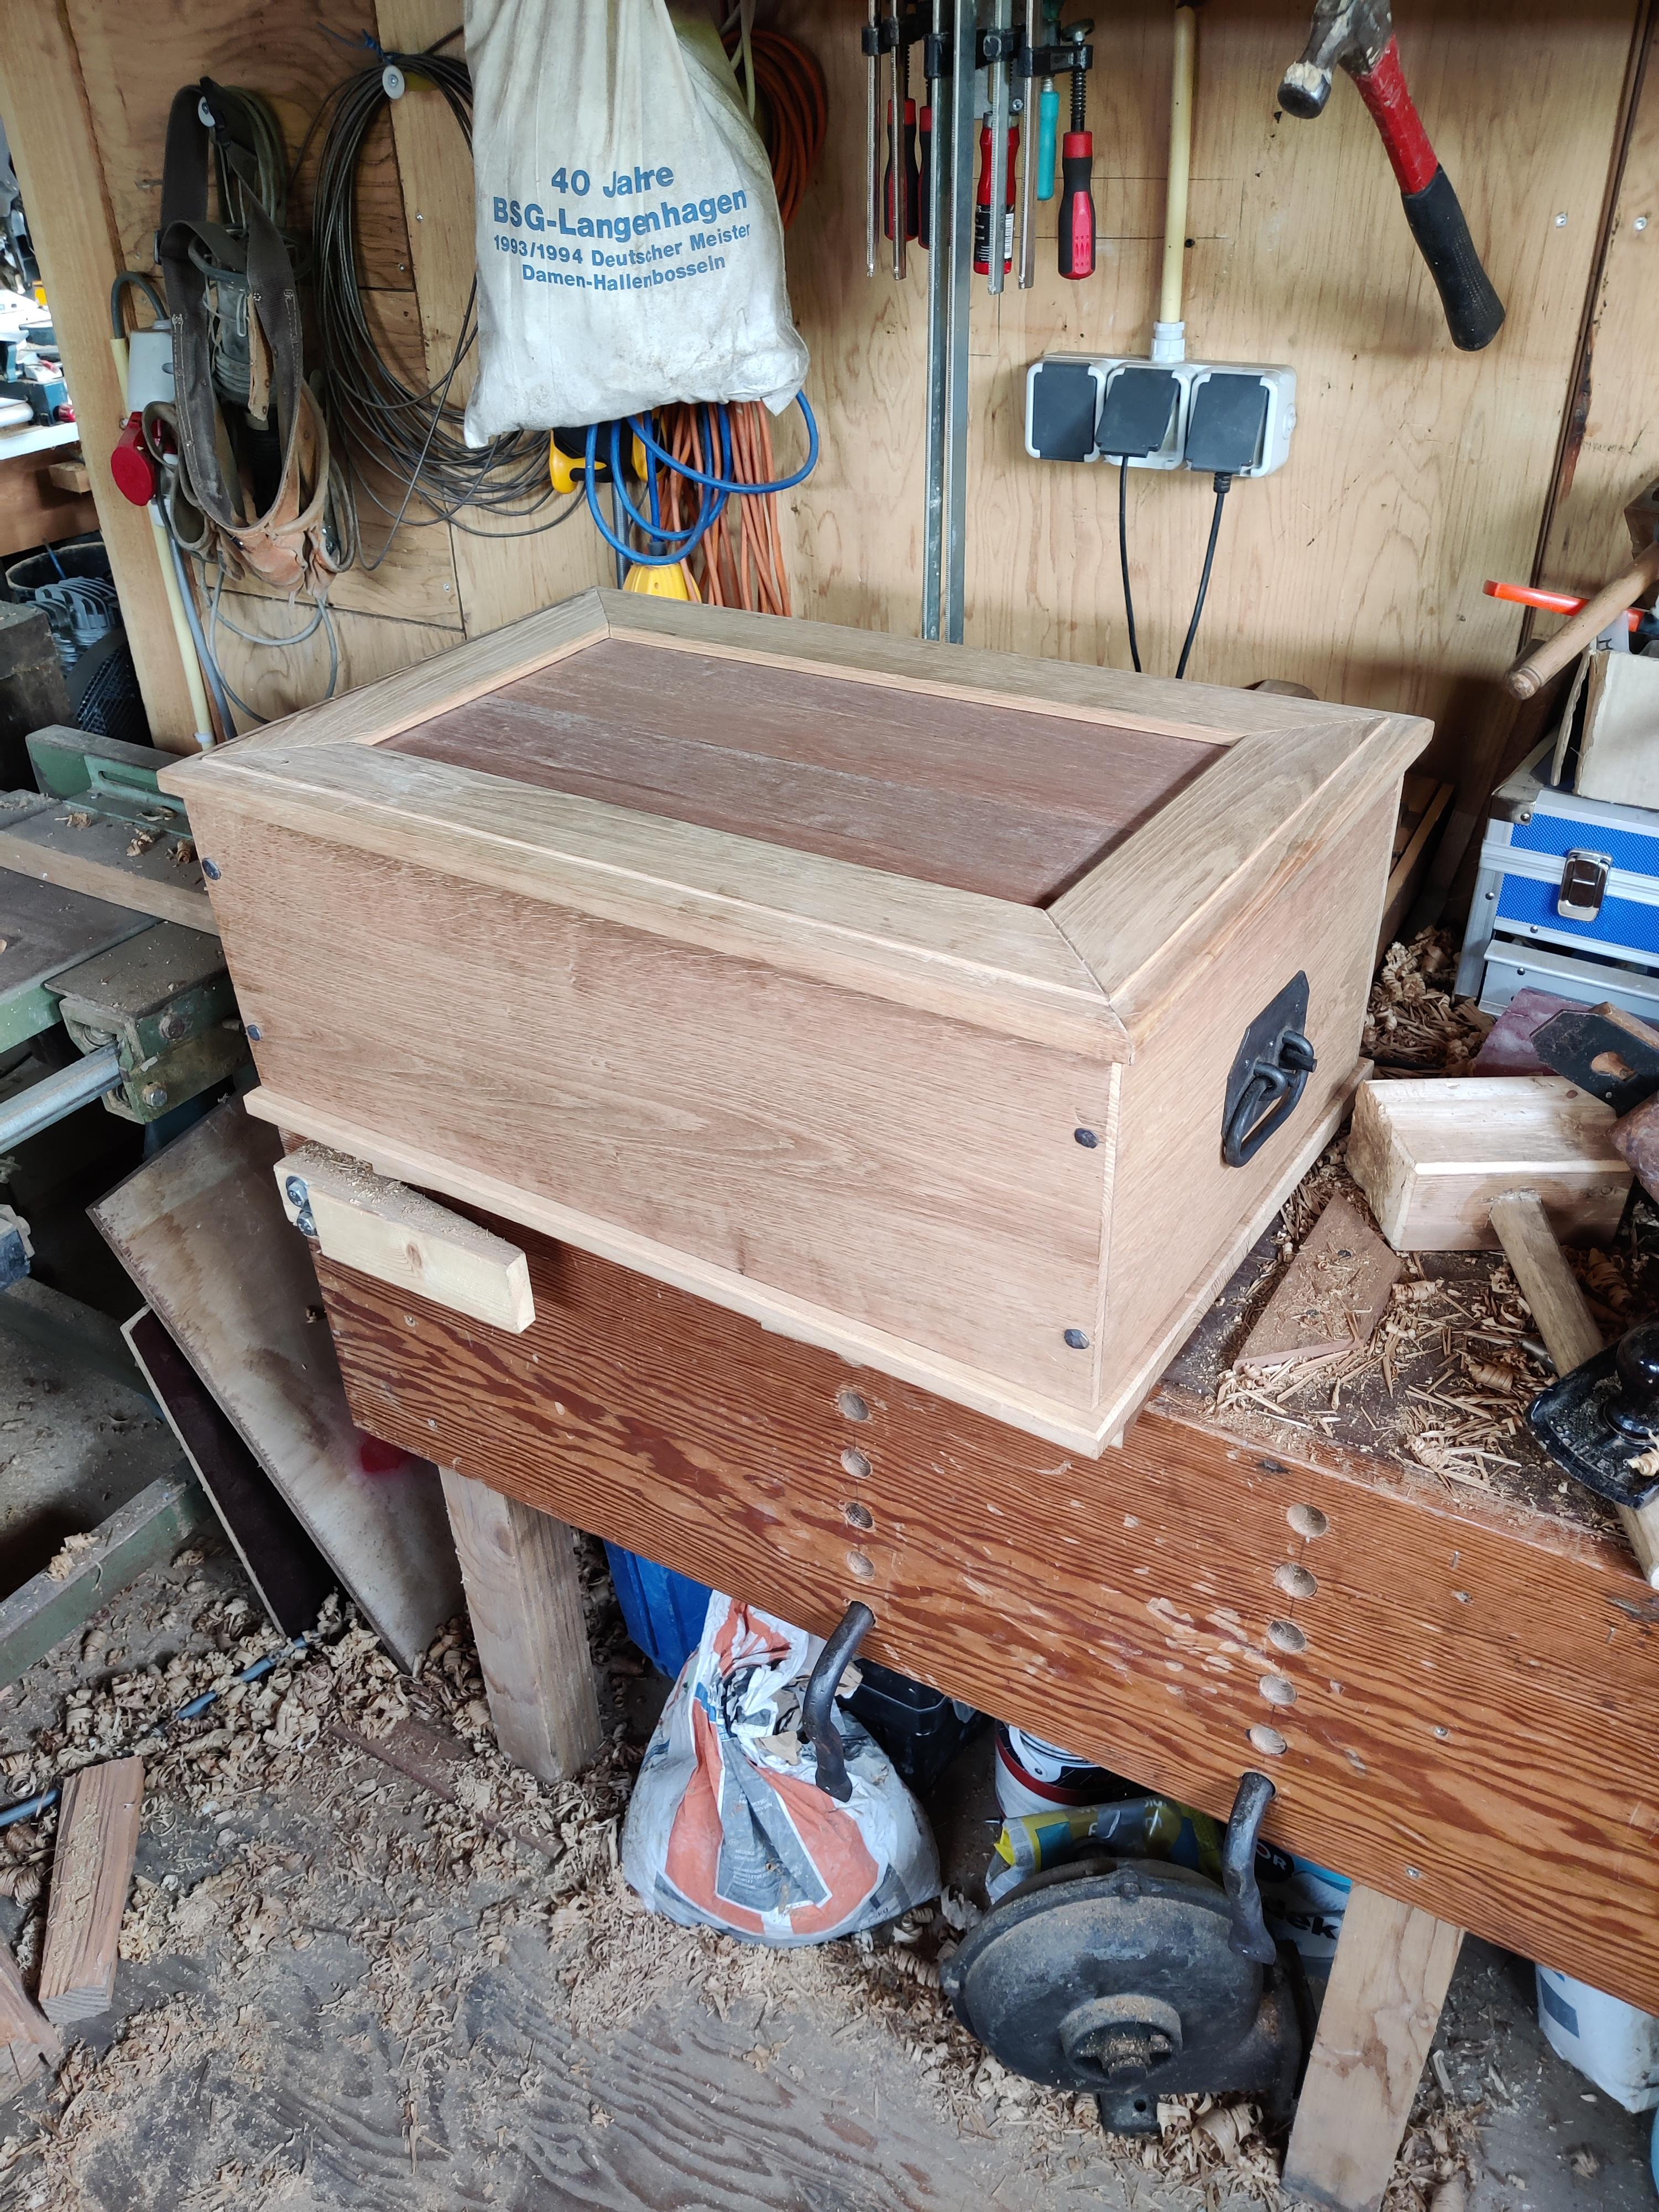
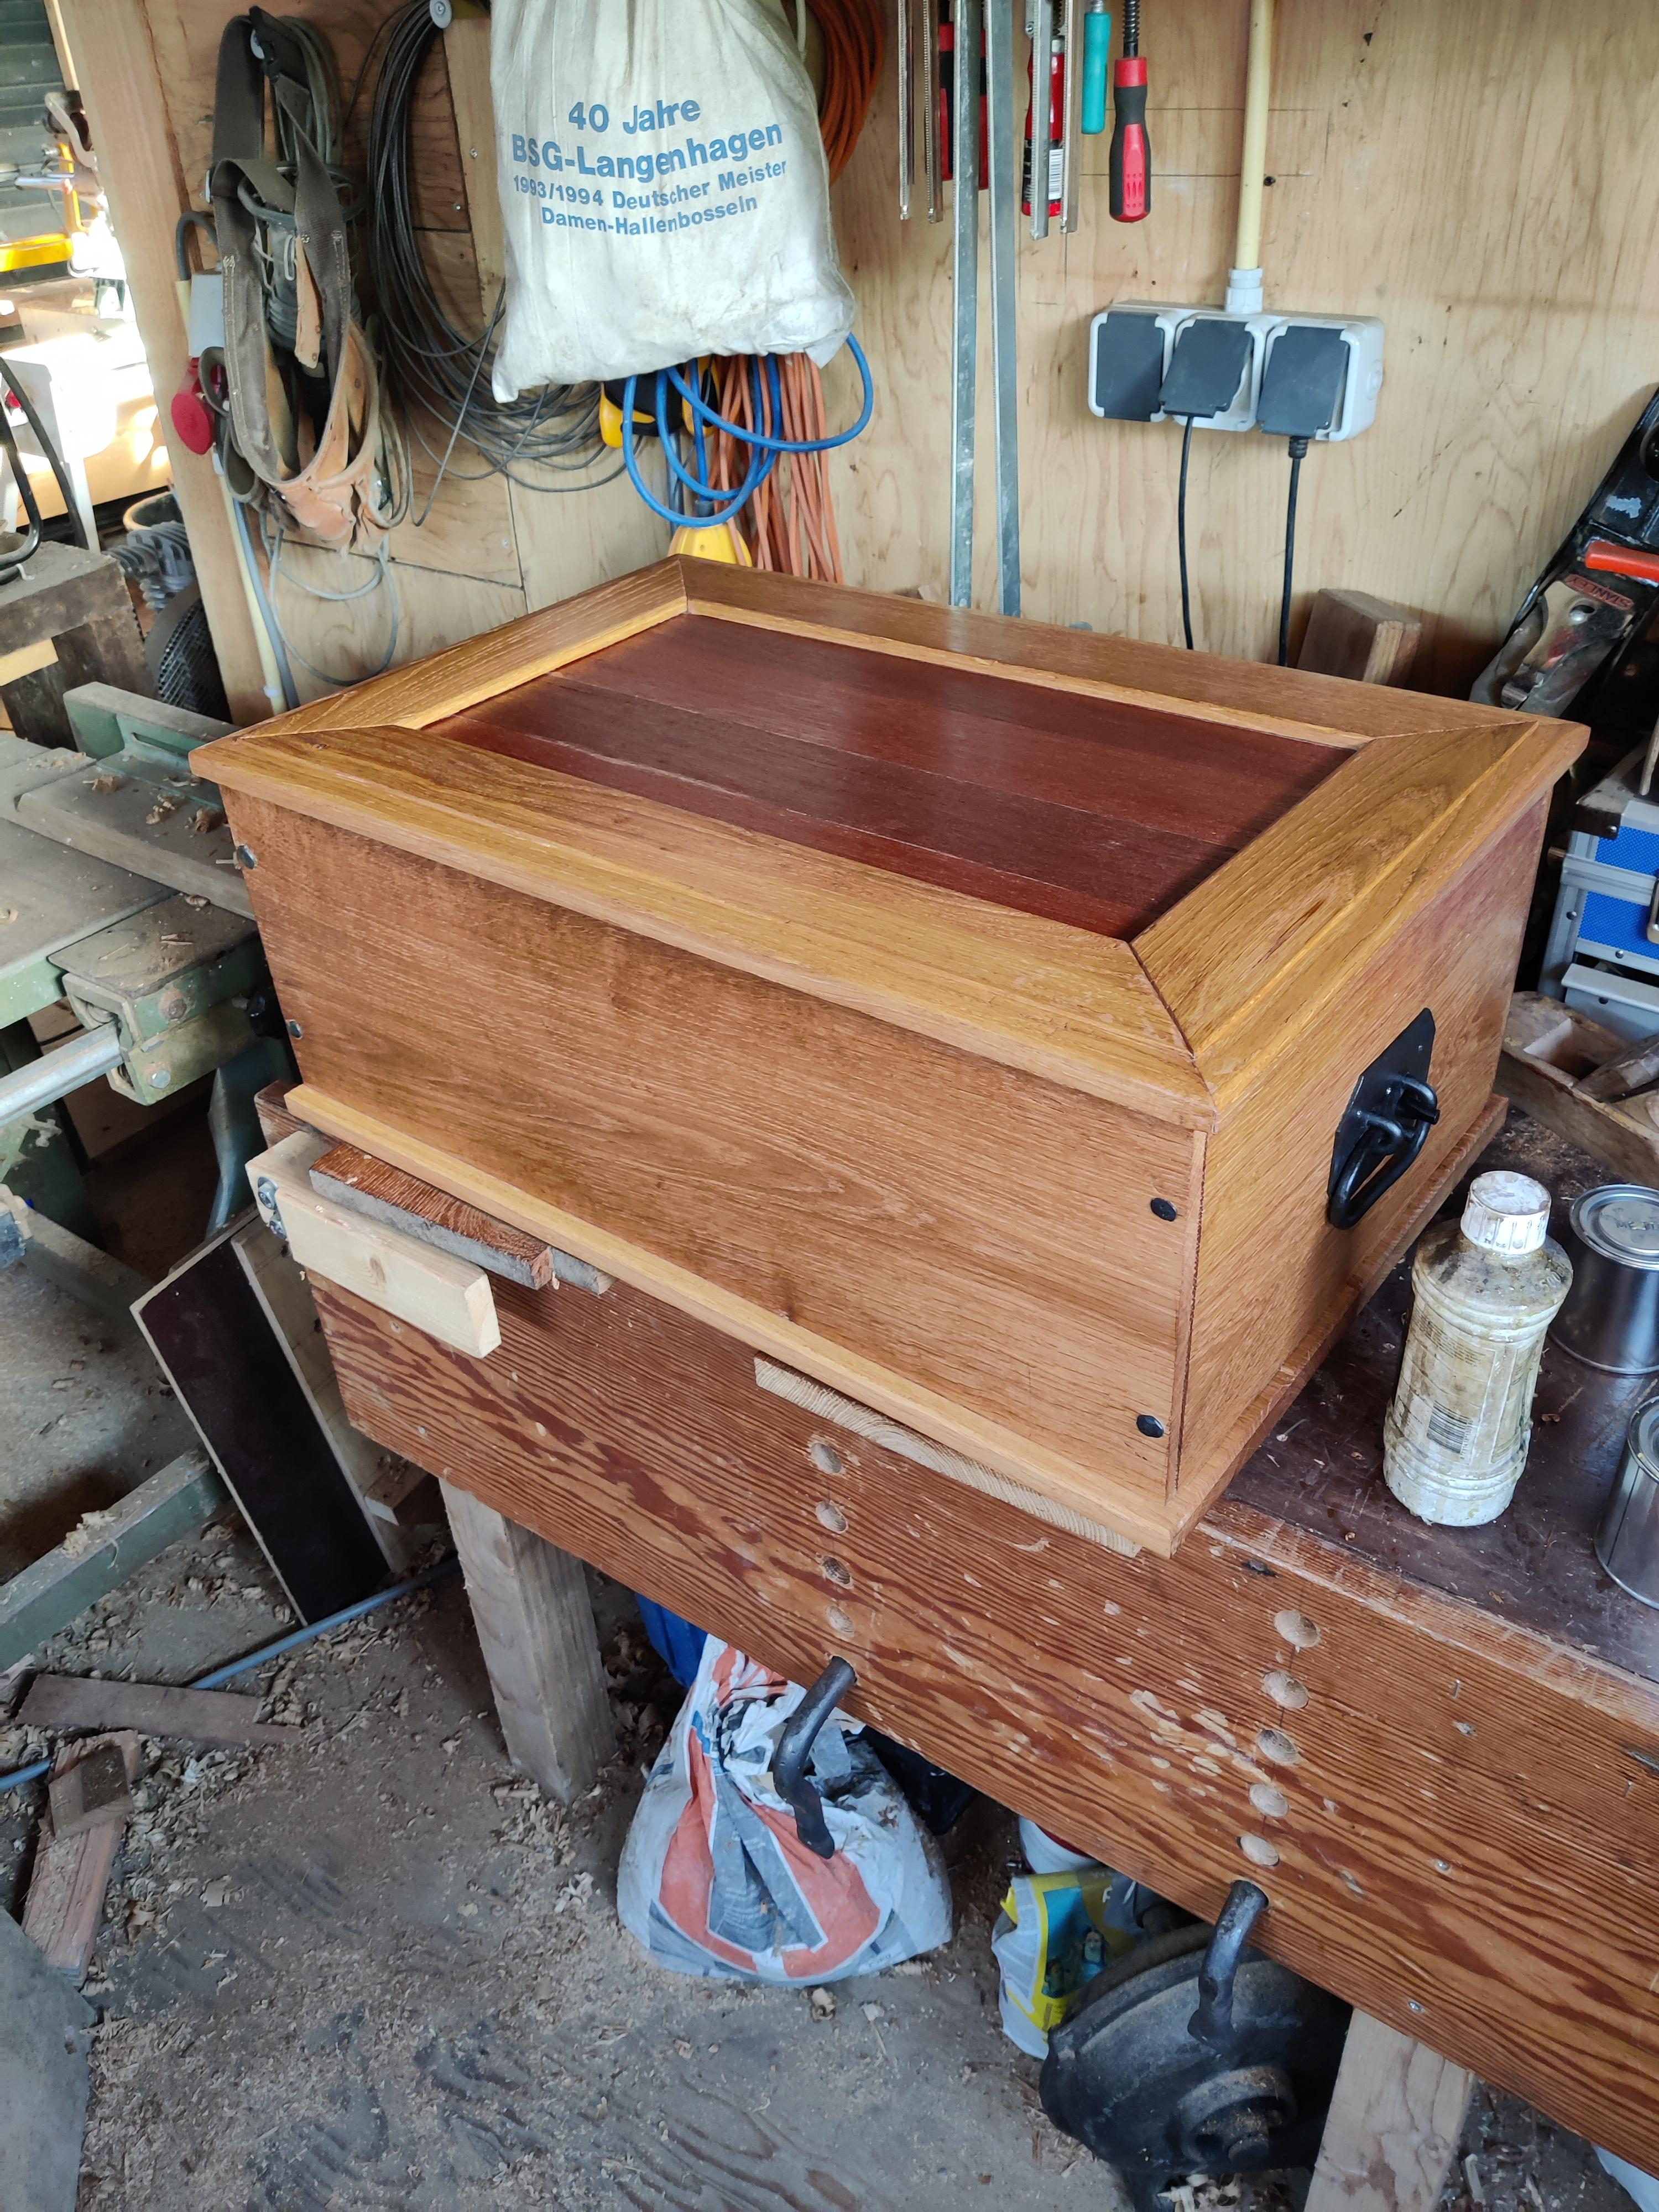
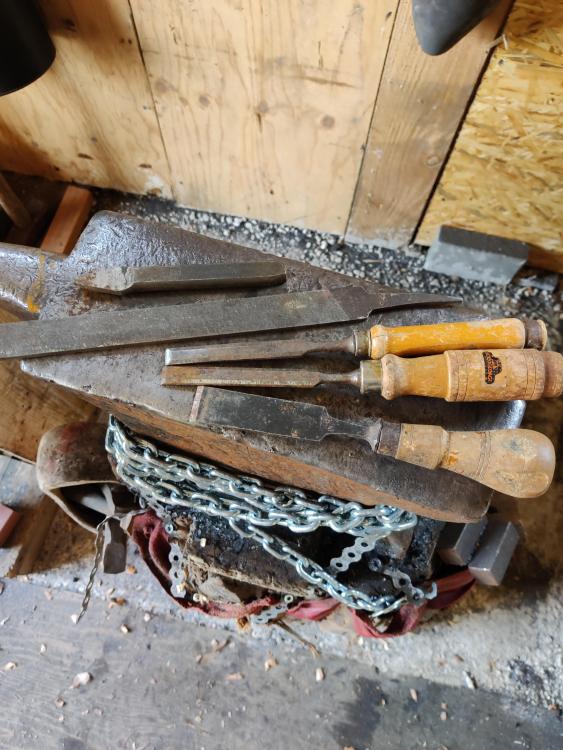
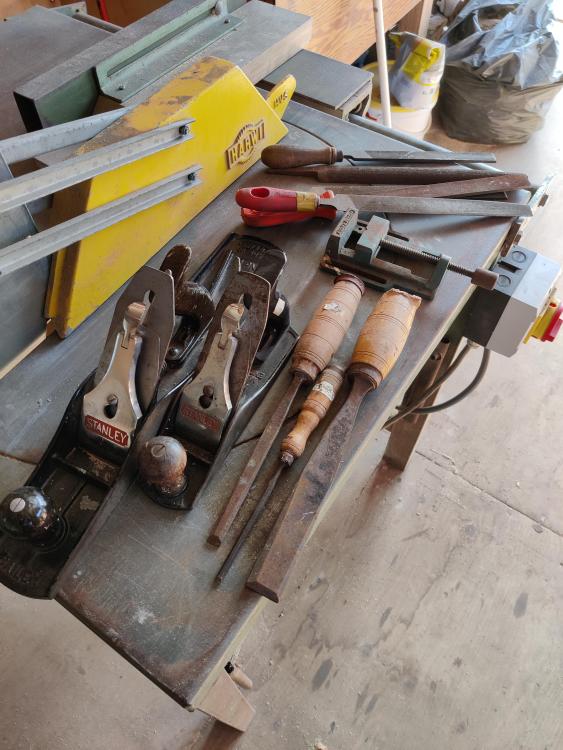
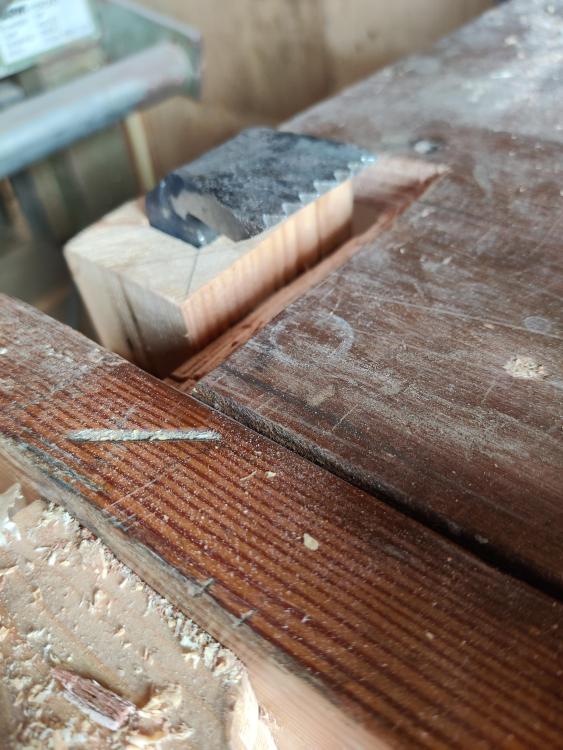
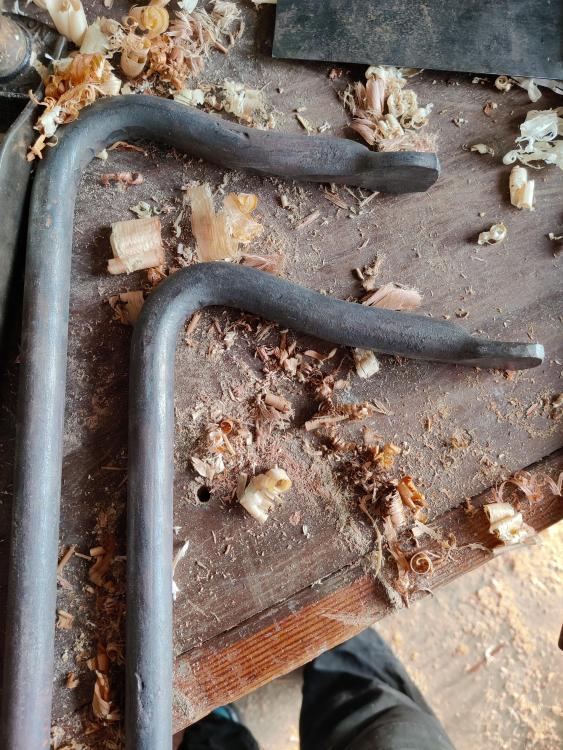
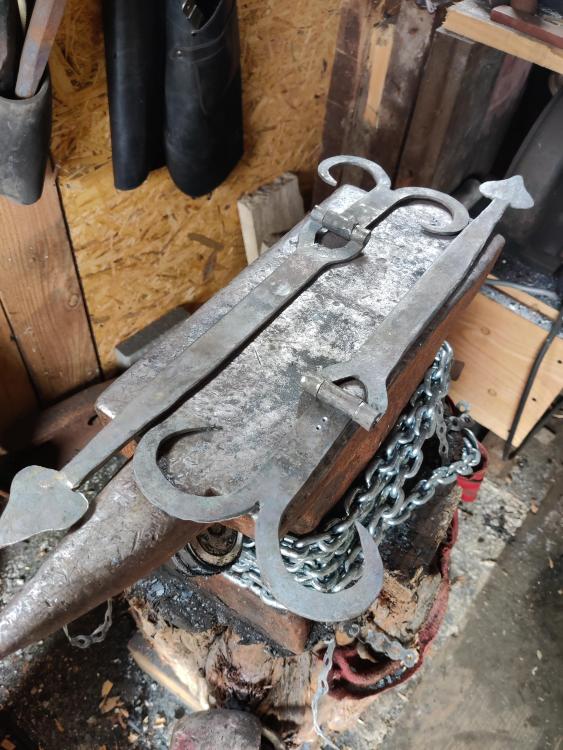
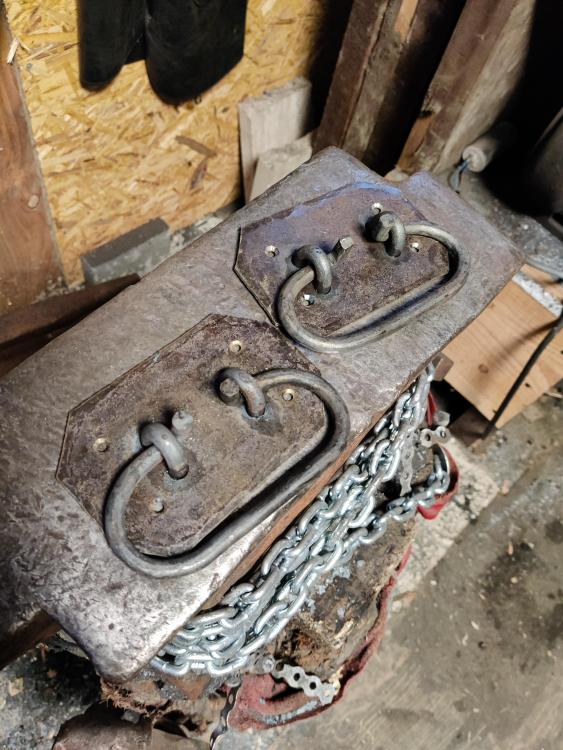
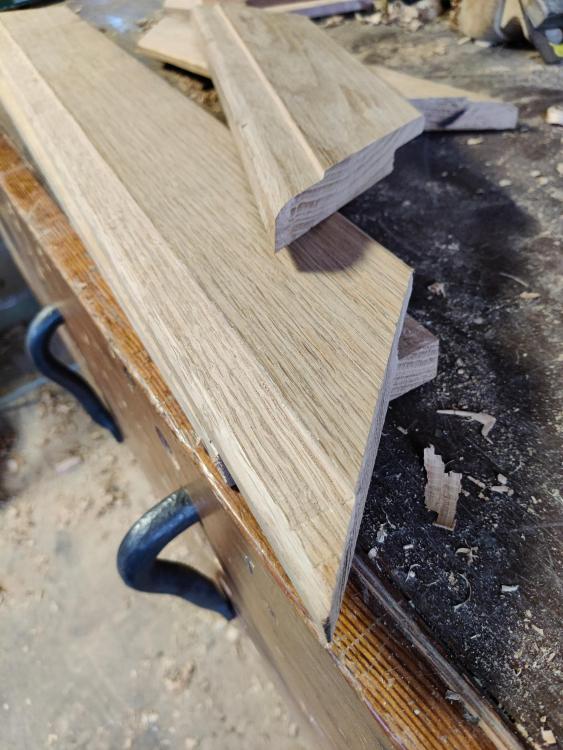
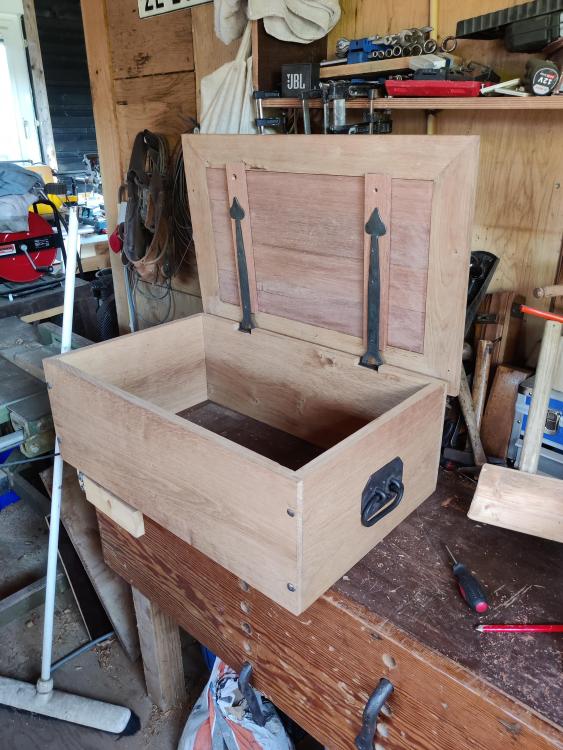
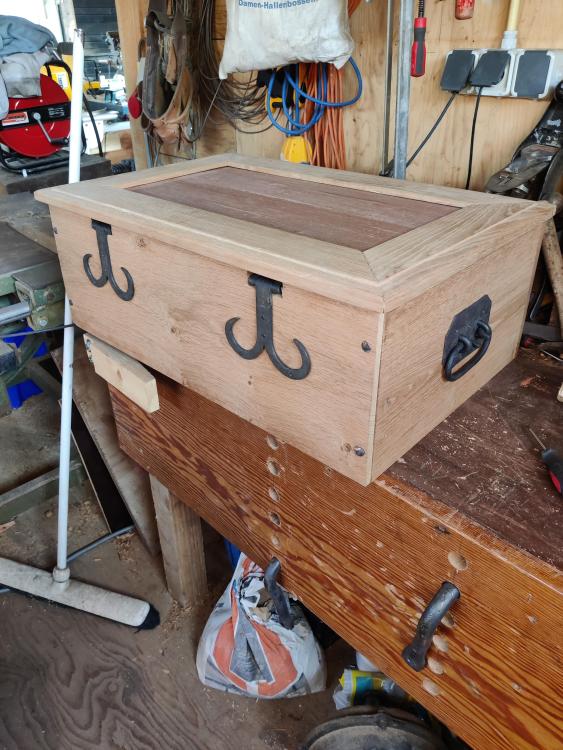
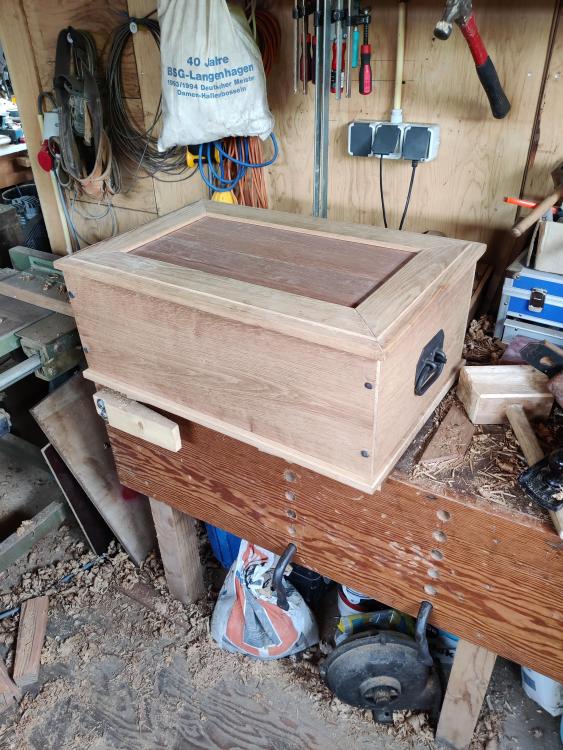
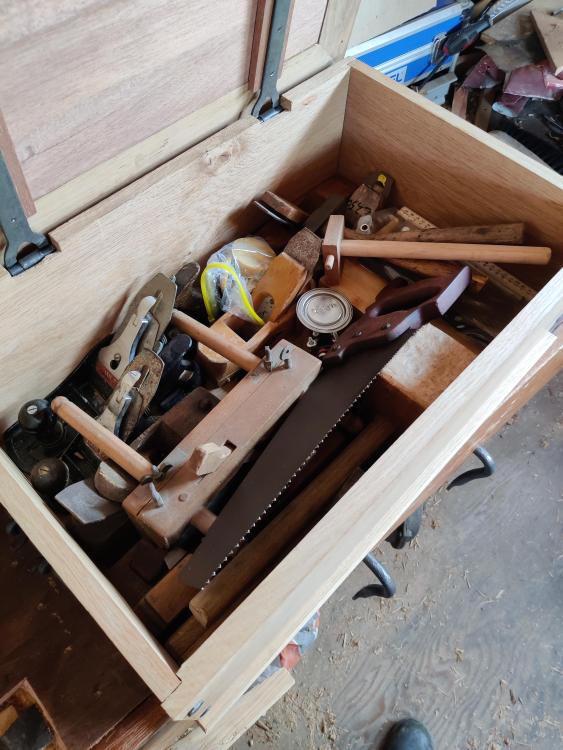
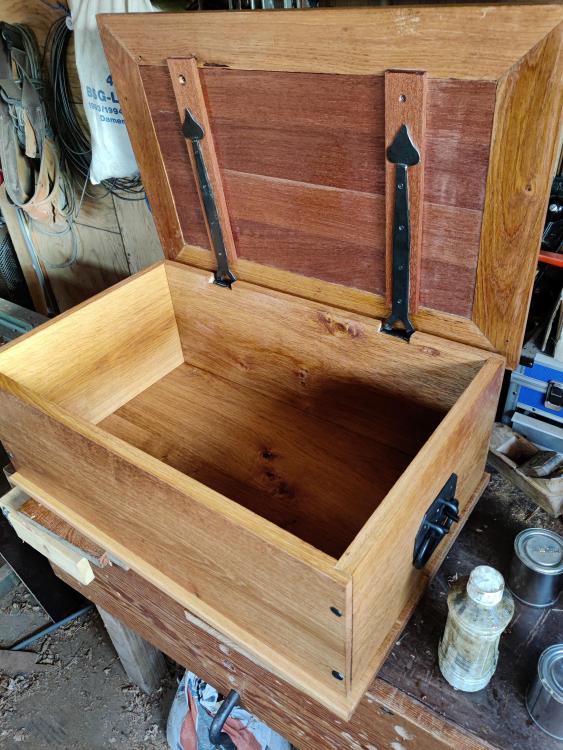
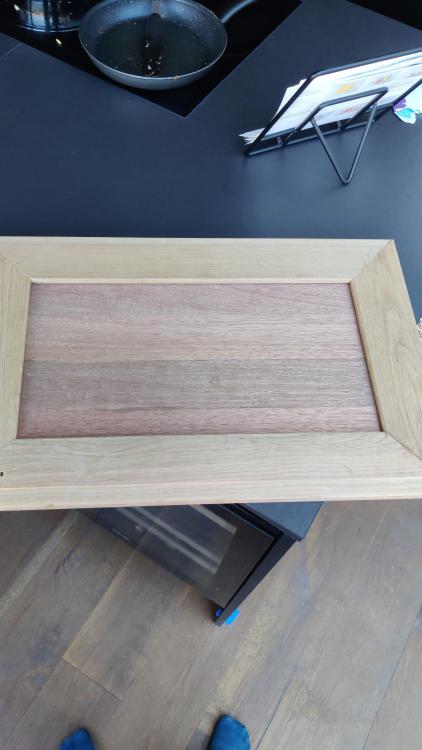
Hi all, I've put a coat of oil on the wooden chest I've been working on these past couple of weeks, and now I'm sharing the entire project in picture here. Like most projects, this started of with tool making and tool collecting, I have collected planes and chisels from flea markets for a while and restored them to working use, as well as setting up a woodworking bench. Since I haven't found a good vise for a woodworking bench, I went with some vise less work holding options, forged a planing stop and some holdfasts, and a "crochet" to work on the edges of boards. Ending up with a small corner to do some woodworking on. Some of the planes and chisels I've used for this project. A stanley no. 6 and no 4., and a "nooitgedagt" (dutch plane maker) rabbet plane and chisels. Now that the tools were done, I started making the hardware for the chest, I followed Alexander Weygers' technique for making hinges, namely splitting and forming around a mandrel. For the chest handles I followed a technique by DF in the shop, bending some round bar for the keepers. Some nails as well, since dovetails are a bit out of my league, next project I'm going to try some of those, since I found my grandfather's backsaw which I lost at some point in the move. Now that the forge work is done, It was onto the lid of the chest, it is the most difficult part, and I decided to make it first, if I had messed it up, I could've used the rest of the wood to make a slightly smaller chest. To make the top I cut rabbets to fit in the middle plate, which was laminated from some smaller pieces of meranti, and some decorative moulding on the outside. to hide endgrain on the top, I cut miters to have face grain on all sides. It would've been better to cut grooves to fit the middle plate to allow it to move around a bit, but at that point i didn't have the tools to cut that, so I opted for the rabbeted construction. The profile of the top edges: gluing up the middle plate in the top: The finished lid: Now only the body and bottom needed to be done, which were significantly easier and quicker to make. Also installing all the hardware in the chest: And finally, a bottom, also laminated, from the oak planks this time, and nailed to the rest of the chest, It has slightly chamfered edges on all sides. And now onto finishing, this is the chest after a coat of BLO, now I only need to do a second coat, a coat of shellac, and a final "polishing" with paste wax. It even fits all of the tools to make it, and maybe a bit more! So that is a (relatively) quick summary of the project, I'm looking forward to doing more of this type of stuff, especially getting into more ornate ironwork for chests and the like. I'm also still working on a lock for the chest, but that project is a bit on the backburner as I have some other stuff that needs doing. Hope you enjoyed! ~Jobtiel


-
yeah, I like files/rasps for that too, makes it easier to weld as they're not moving around, I do still cut teeth in them with a chisel before setting them in though.
-
Wood/charcoal forge build questions and request.
Jobtiel1 replied to Jeff Pugh's topic in Solid Fuel Forges
There are always loads of metal barrels at the scrapyard, maybe it's an idea to go there to pick one up and make a charcoal retort? I think it saves you a lot of hassle. ~Jobtiel -
Contact the maker if known and maybe they know the steel, if not I'd heat it past non magnetic and quench it in oil, if it's not hard enough quench in water, then I'd temper it over the forge to dark straw/ nearly purplish color. I do the axes I make the same way. ~Jobtiel
-
Yeah that works great, and when you mix it with oil it becomes significantly softer. I've been using the paste wax I made for wooden tool handles as a final coat, and the waxiness fills in any gals to give a really smooth finish. For metal, I'm going to use it to protect tools from rust, as I think it's more durable than just oil as rust protection. For finishing a forging I apply beeswax hot. ~Jobtiel
-
Frosty, I can't seem to find the recipe in Alex Bealer's book, do you perhaps remember the page or chapter it was in? ~Jobtiel
-
What did you do in the shop today?
Jobtiel1 replied to Mark Ling's topic in Blacksmithing, General Discussion
Thanks guys! I'm still sort of working on a very simple lock after getting inspired by some videos, I can always cut out the recess for the lock when I finish it, but I do want to make one. Of course, gotta make a few tools first ;). -
What did you do in the shop today?
Jobtiel1 replied to Mark Ling's topic in Blacksmithing, General Discussion
Been working on the chest some more, installed the hardware! Now to finish it by making the bottom part and it's done! I'm thinking about it's use, it was originally for storing cast iron cookware and taking it with me when camping. But now I'm thinking of a small tool chest to store my woodworking tools, especially the planes since they are just standing against the wall now. We'll see when it's finished. I've also been working on an axe, it's nearly done so I'll take some pics when it's all ready. ~Jobtiel

-
No problem! If you want to use the forum more regularly, I suggest you put you location in your profile to maybe make contact with other local smiths. Your name suggest you come from the Netherlands or Belgium, maybe I or some other Dutch smith's are close by! ~Jobtiel
-
These are bolster plates, they keep a hole being deformed when punching or drifting. Can also be used to punch holes cold in thin stock. You can technically use them to head bolts and nails, but a domed top is easier for that as it allows your hammer to come in from the sides too to shape the head better. ~Jobtiel
-
I used raw linseed oil, not the boiled kind. Really interesting recipes, I'll try some of them next time as I have made maybe 200 ml of paste wax now. What does the soot add to the mix, what does it do? ~Jobtiel
-
Hi all, I recently came across a video by Wood by Wright on how to make your own paste wax, since I was looking for some and didn't know what to get here. Do you have any experiences or recipes for home made paste wax that you use? For now I have made three different "hardness" of paste wax from beeswax and raw linseed oil, and it seems to work really well! I'm using it to wax axes and other rust prone tools too. The video in question: https://youtu.be/WiMw71UBj3M ~Jobtiel
-
What did you do in the shop today?
Jobtiel1 replied to Mark Ling's topic in Blacksmithing, General Discussion
That would've been great! I see them online for like 10 or 15 euros a piece but I'm waiting for those 1 euro ones at the flea markets. I think one of these hatchets can be a great all rounder for camping once the edge has been curved a bit. with the poll as a hammer and the chiseled part to use as a stake puller or for removing the leaves and spikes from nettle to make cordage. ~Jobtiel -
What did you do in the shop today?
Jobtiel1 replied to Mark Ling's topic in Blacksmithing, General Discussion
Cool idea for using those carpenters axes, I want one to use still but any other's I come across I'll try that out too. I flattened all the boards for the chest projects and cut some joints to make the box, with some hand forged nails I put it all together. Now to make the bottom and install all the hardware! ~Jobtiel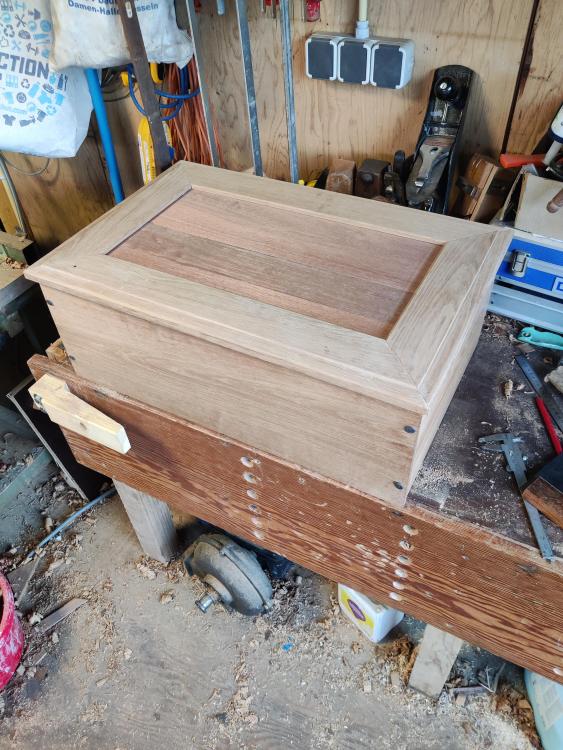
-
What did you do in the shop today?
Jobtiel1 replied to Mark Ling's topic in Blacksmithing, General Discussion
Nice eye drift Chad! You know axes often have a droplet shaped eye? You can make a sufficient sized drift from one inch stock in a teardrop shape as well, this one looks great as a hammer eye drift! -
What did you do in the shop today?
Jobtiel1 replied to Mark Ling's topic in Blacksmithing, General Discussion
Thanks Nodebt, This is my first piece of fine woodworking, I have been talked into trying it out by a friend too, he also gave me my first wooden plane. It went pretty well, maybe due to the fact that my dad's side of the family can be traced back as carpenters for about 300 years, and my surname means carpenter as well, so it runs in the family. My post vise was from my great granddad (a carpenter), and I'm getting a lot of his old planes too next time I'm visiting my Dad (a carpenter). ~Jobtiel -
What did you do in the shop today?
Jobtiel1 replied to Mark Ling's topic in Blacksmithing, General Discussion
I started doing the woodwork for the chest I'm making. This is going to be the lid of the chest. Now it's on to the body of the chest! I'm also trying to make a simple lock for the chest, hopefully that works out as that'll be really cool. I might make a thread in member projects once the whole thing is done. ~Jobtiel
-
What did you do in the shop today?
Jobtiel1 replied to Mark Ling's topic in Blacksmithing, General Discussion
I make "blanks" from bar stock and split the reins, then I cut off what I don't need for each jaw so that the boss and reins are always identical -
What did you do in the shop today?
Jobtiel1 replied to Mark Ling's topic in Blacksmithing, General Discussion
Thanks guys, I was planning on drawing out the handle a lot more. But it was 4140, and alone it was not nice to draw out. Maybe I'll draw it out further once I have a striker coming over. I have seen a nail header in the Mastermyr find book, which had a short handle as well, so let's call this one "historic" then ;). ~Jobtiel -
What did you do in the shop today?
Jobtiel1 replied to Mark Ling's topic in Blacksmithing, General Discussion
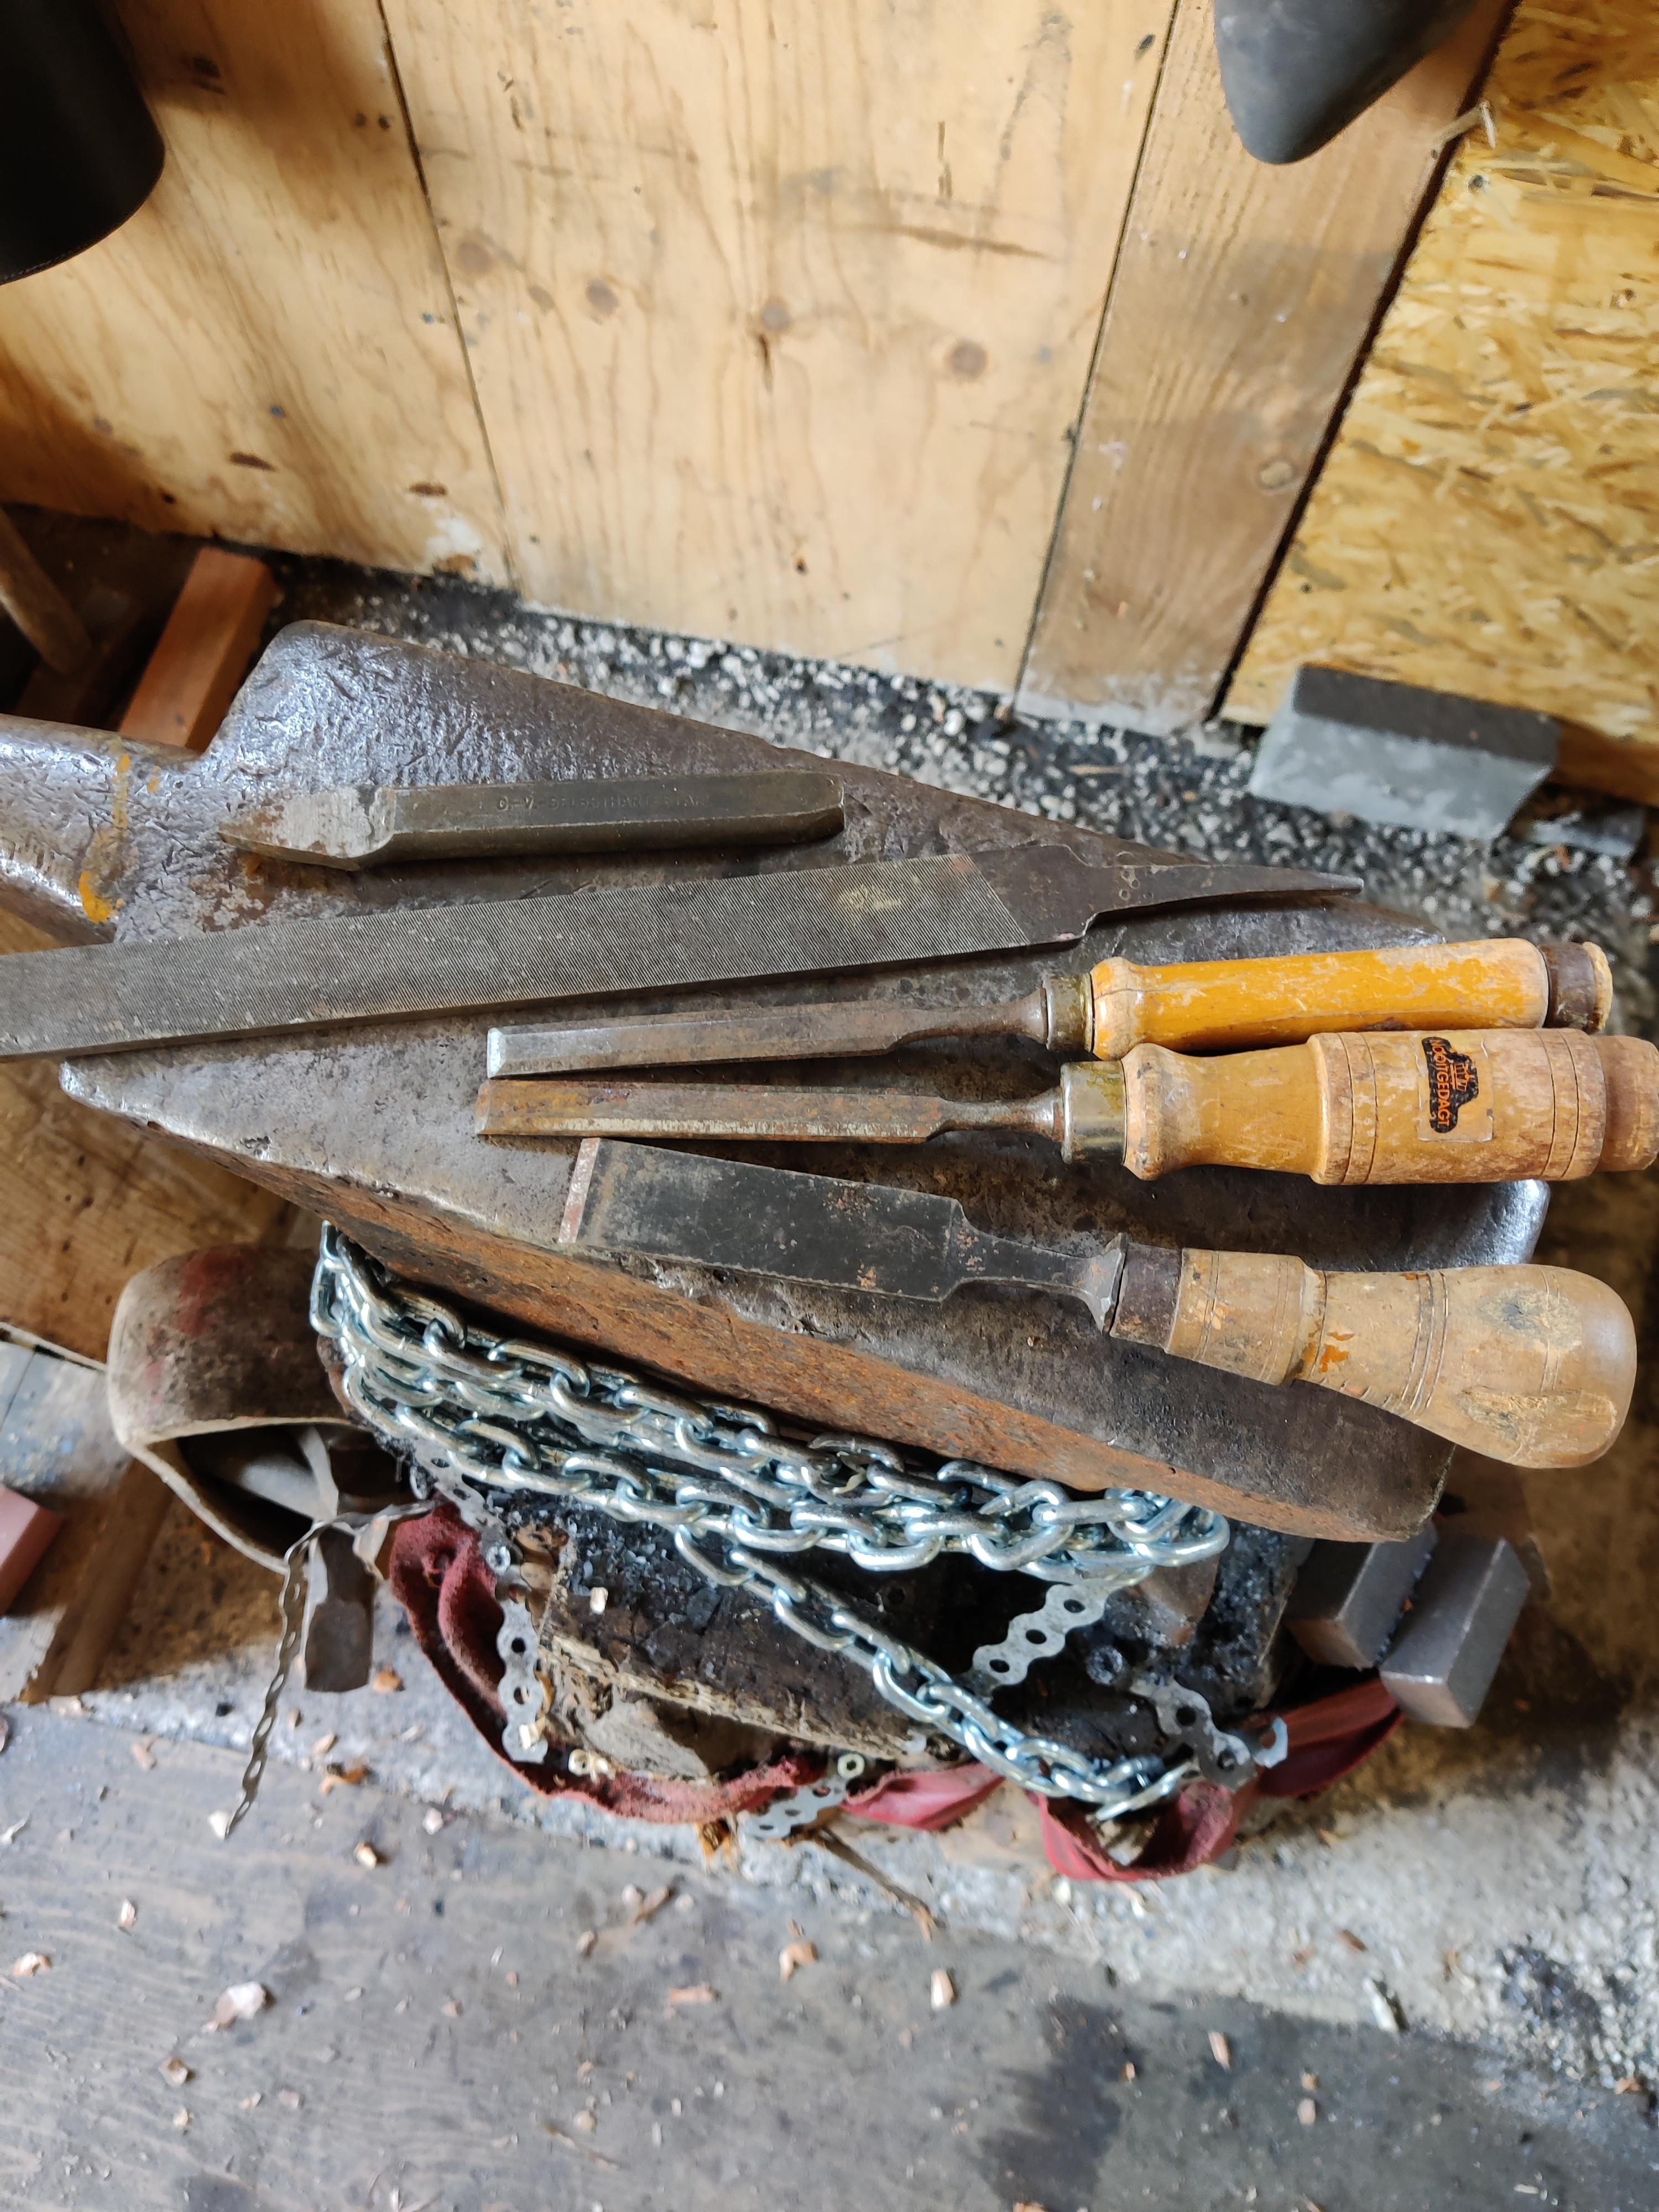
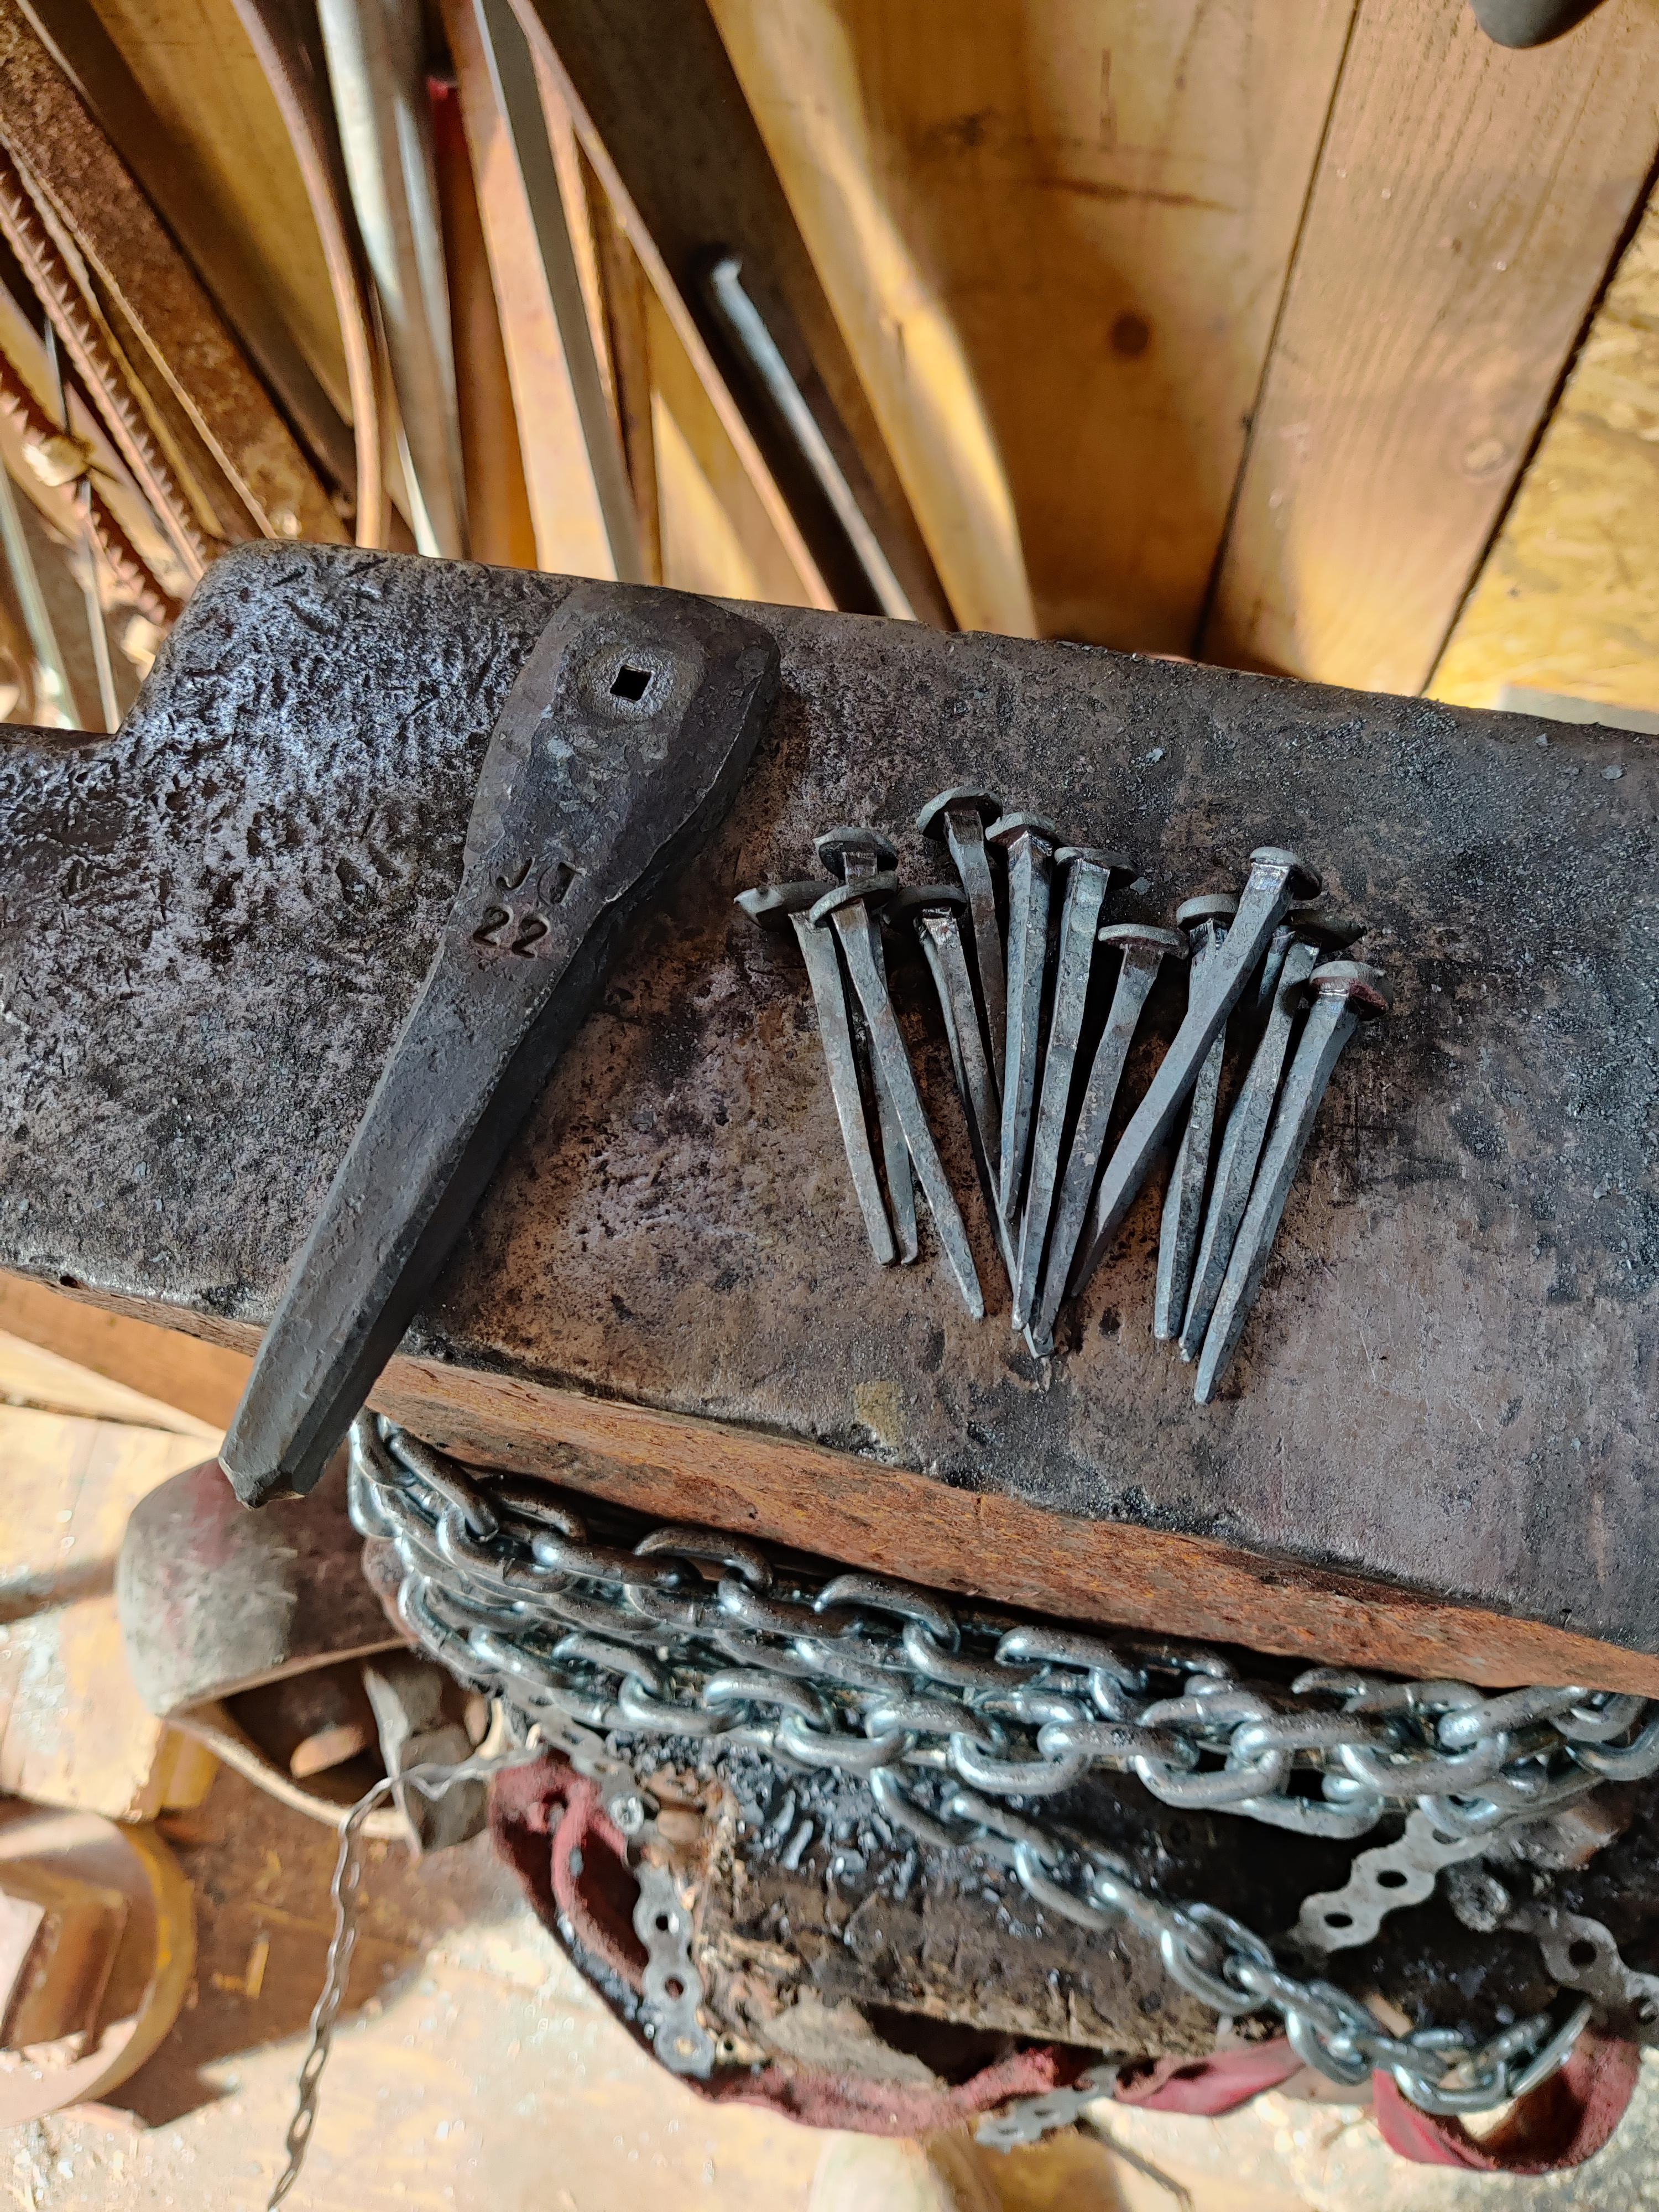
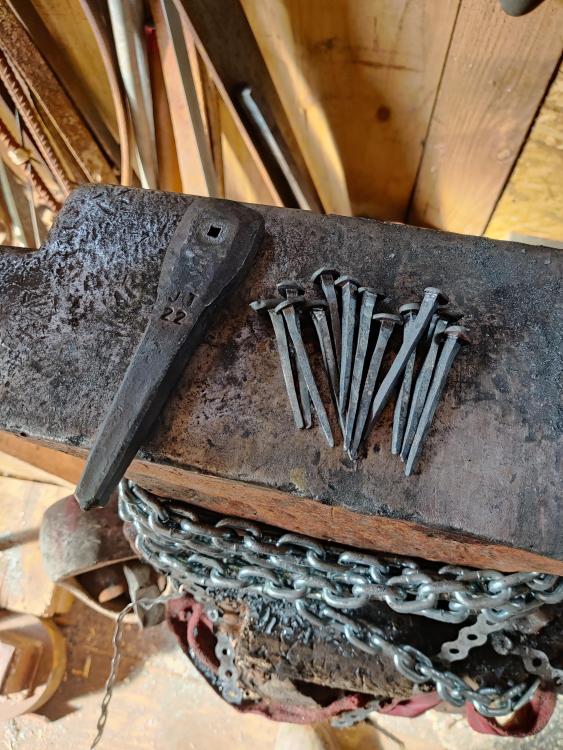
More preparation for the chest build, I reprofiled a rabbet plane iron to match the sole perfectly today. And sharpened all the planes and chisels I've acquired from the flea markets. I also (finally) made a nail header today, this has been on the list for a long time, for I've been making a small amount of nails in the vise jaws. Forged from 27 mm hex 4140. I made a couple of nails for the chest body, and still need a couple more for the bottom, as well as some smaller ones for the hinges and maybe the handles. Next step is making the chest lid, it's the most detailed part and if I mess it up I can change the dimensions of the chest a bit to still have enough wood to complete it. ~Jobtiel
-
It seems there is a Dutch pattern anvil! Now I have to stay on the lookout for one. Great looking anvil btw, and I think the double hardy hole makes production work a breeze, especially since they wont be in the way because they're on the same side. ~Jobtiel