Pat Masterson
-
Posts
244 -
Joined
-
Last visited
Content Type
Profiles
Forums
Articles
Gallery
Downloads
Events
Everything posted by Pat Masterson
-
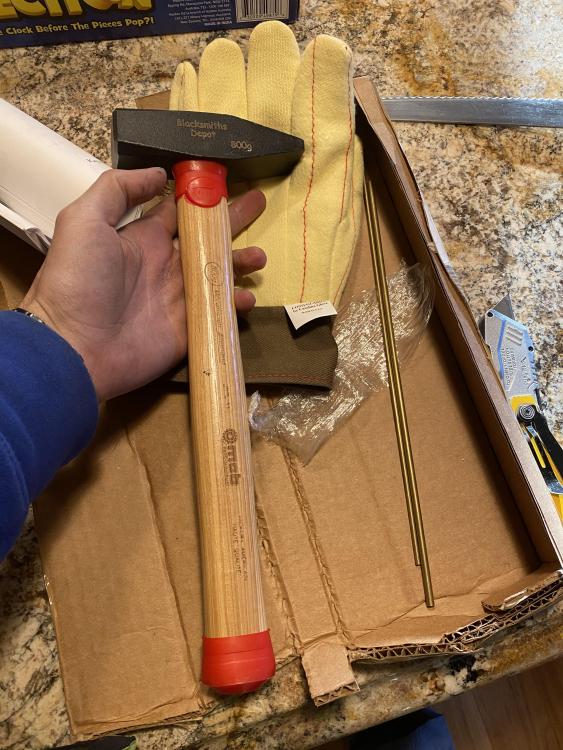
Delivery from an online order. I’m always surprised how sharp they leave hammers. Need a lot of dressing. This is going to be my go to hammer though. Are these plastic rubbery things at the bottom and under the head supposed to stay on? Trying out one of these Kevlar gloves. I’ve heard good things. And I got some some brass pin stock. Also received the 3 inch tubing I’ll use to hold the dies for the log splitter forge press which is on the way also. Excited.
-
What did you do in the shop today?
Pat Masterson replied to Mark Ling's topic in Blacksmithing, General Discussion
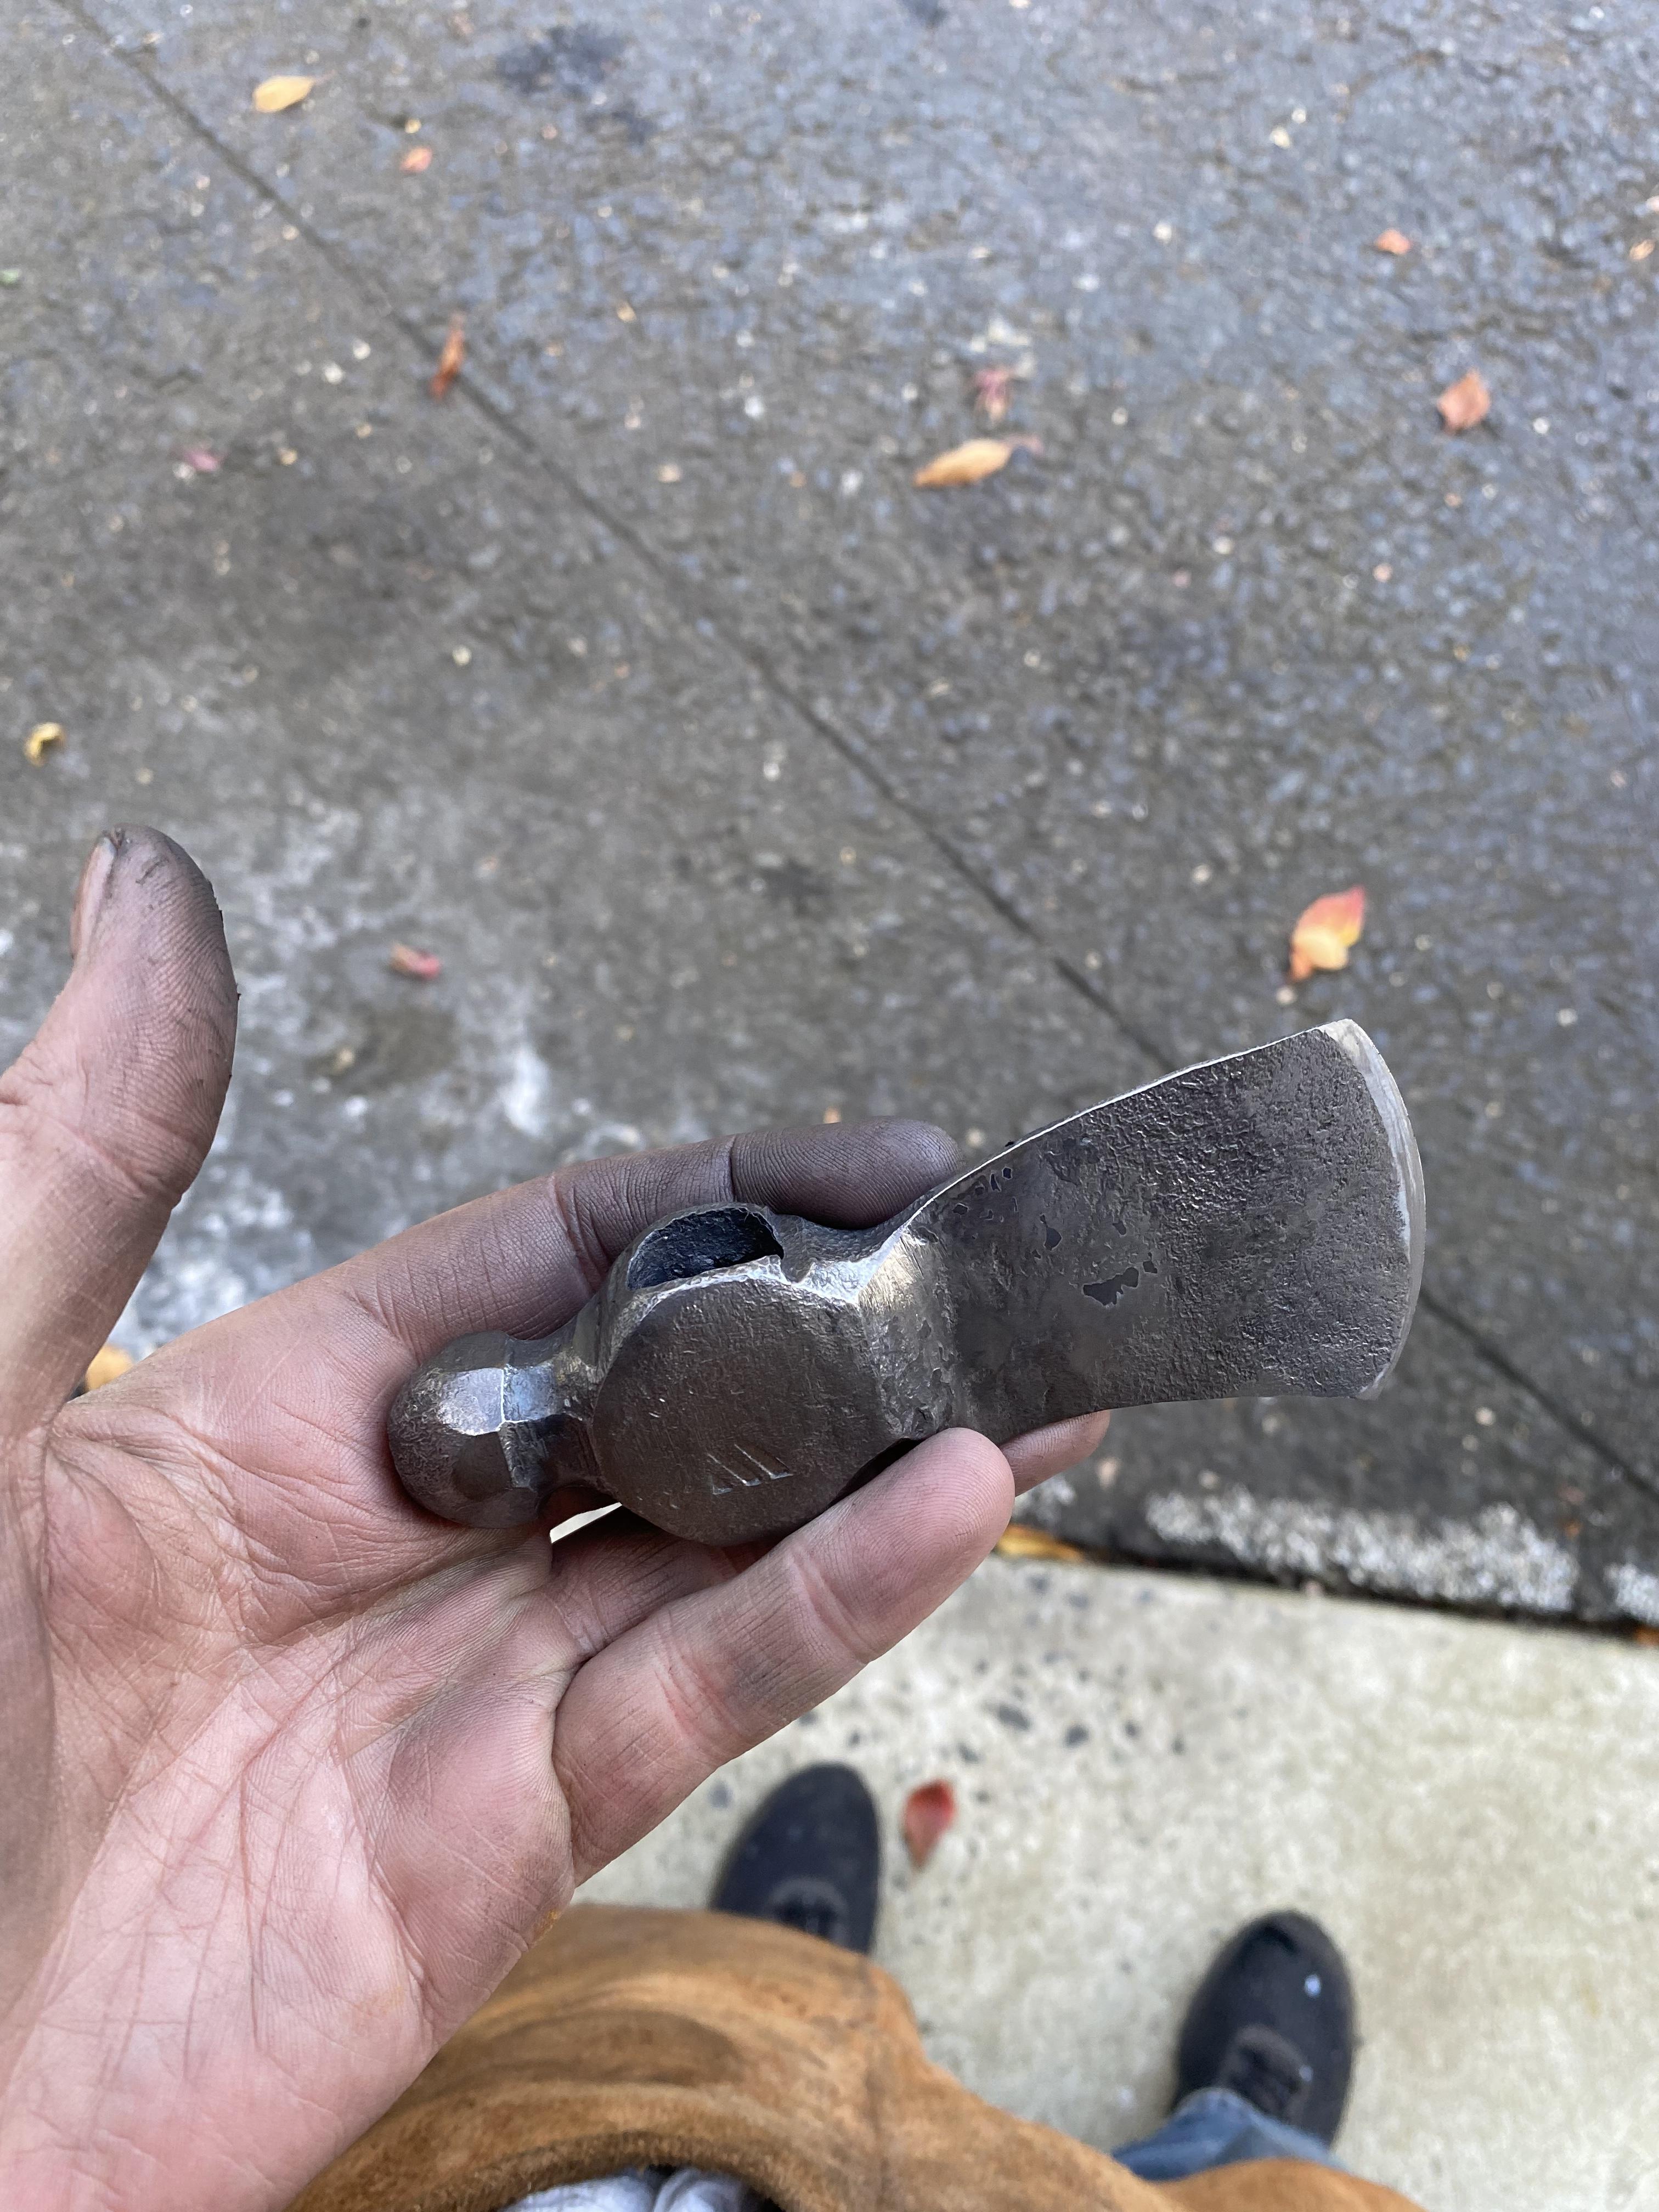
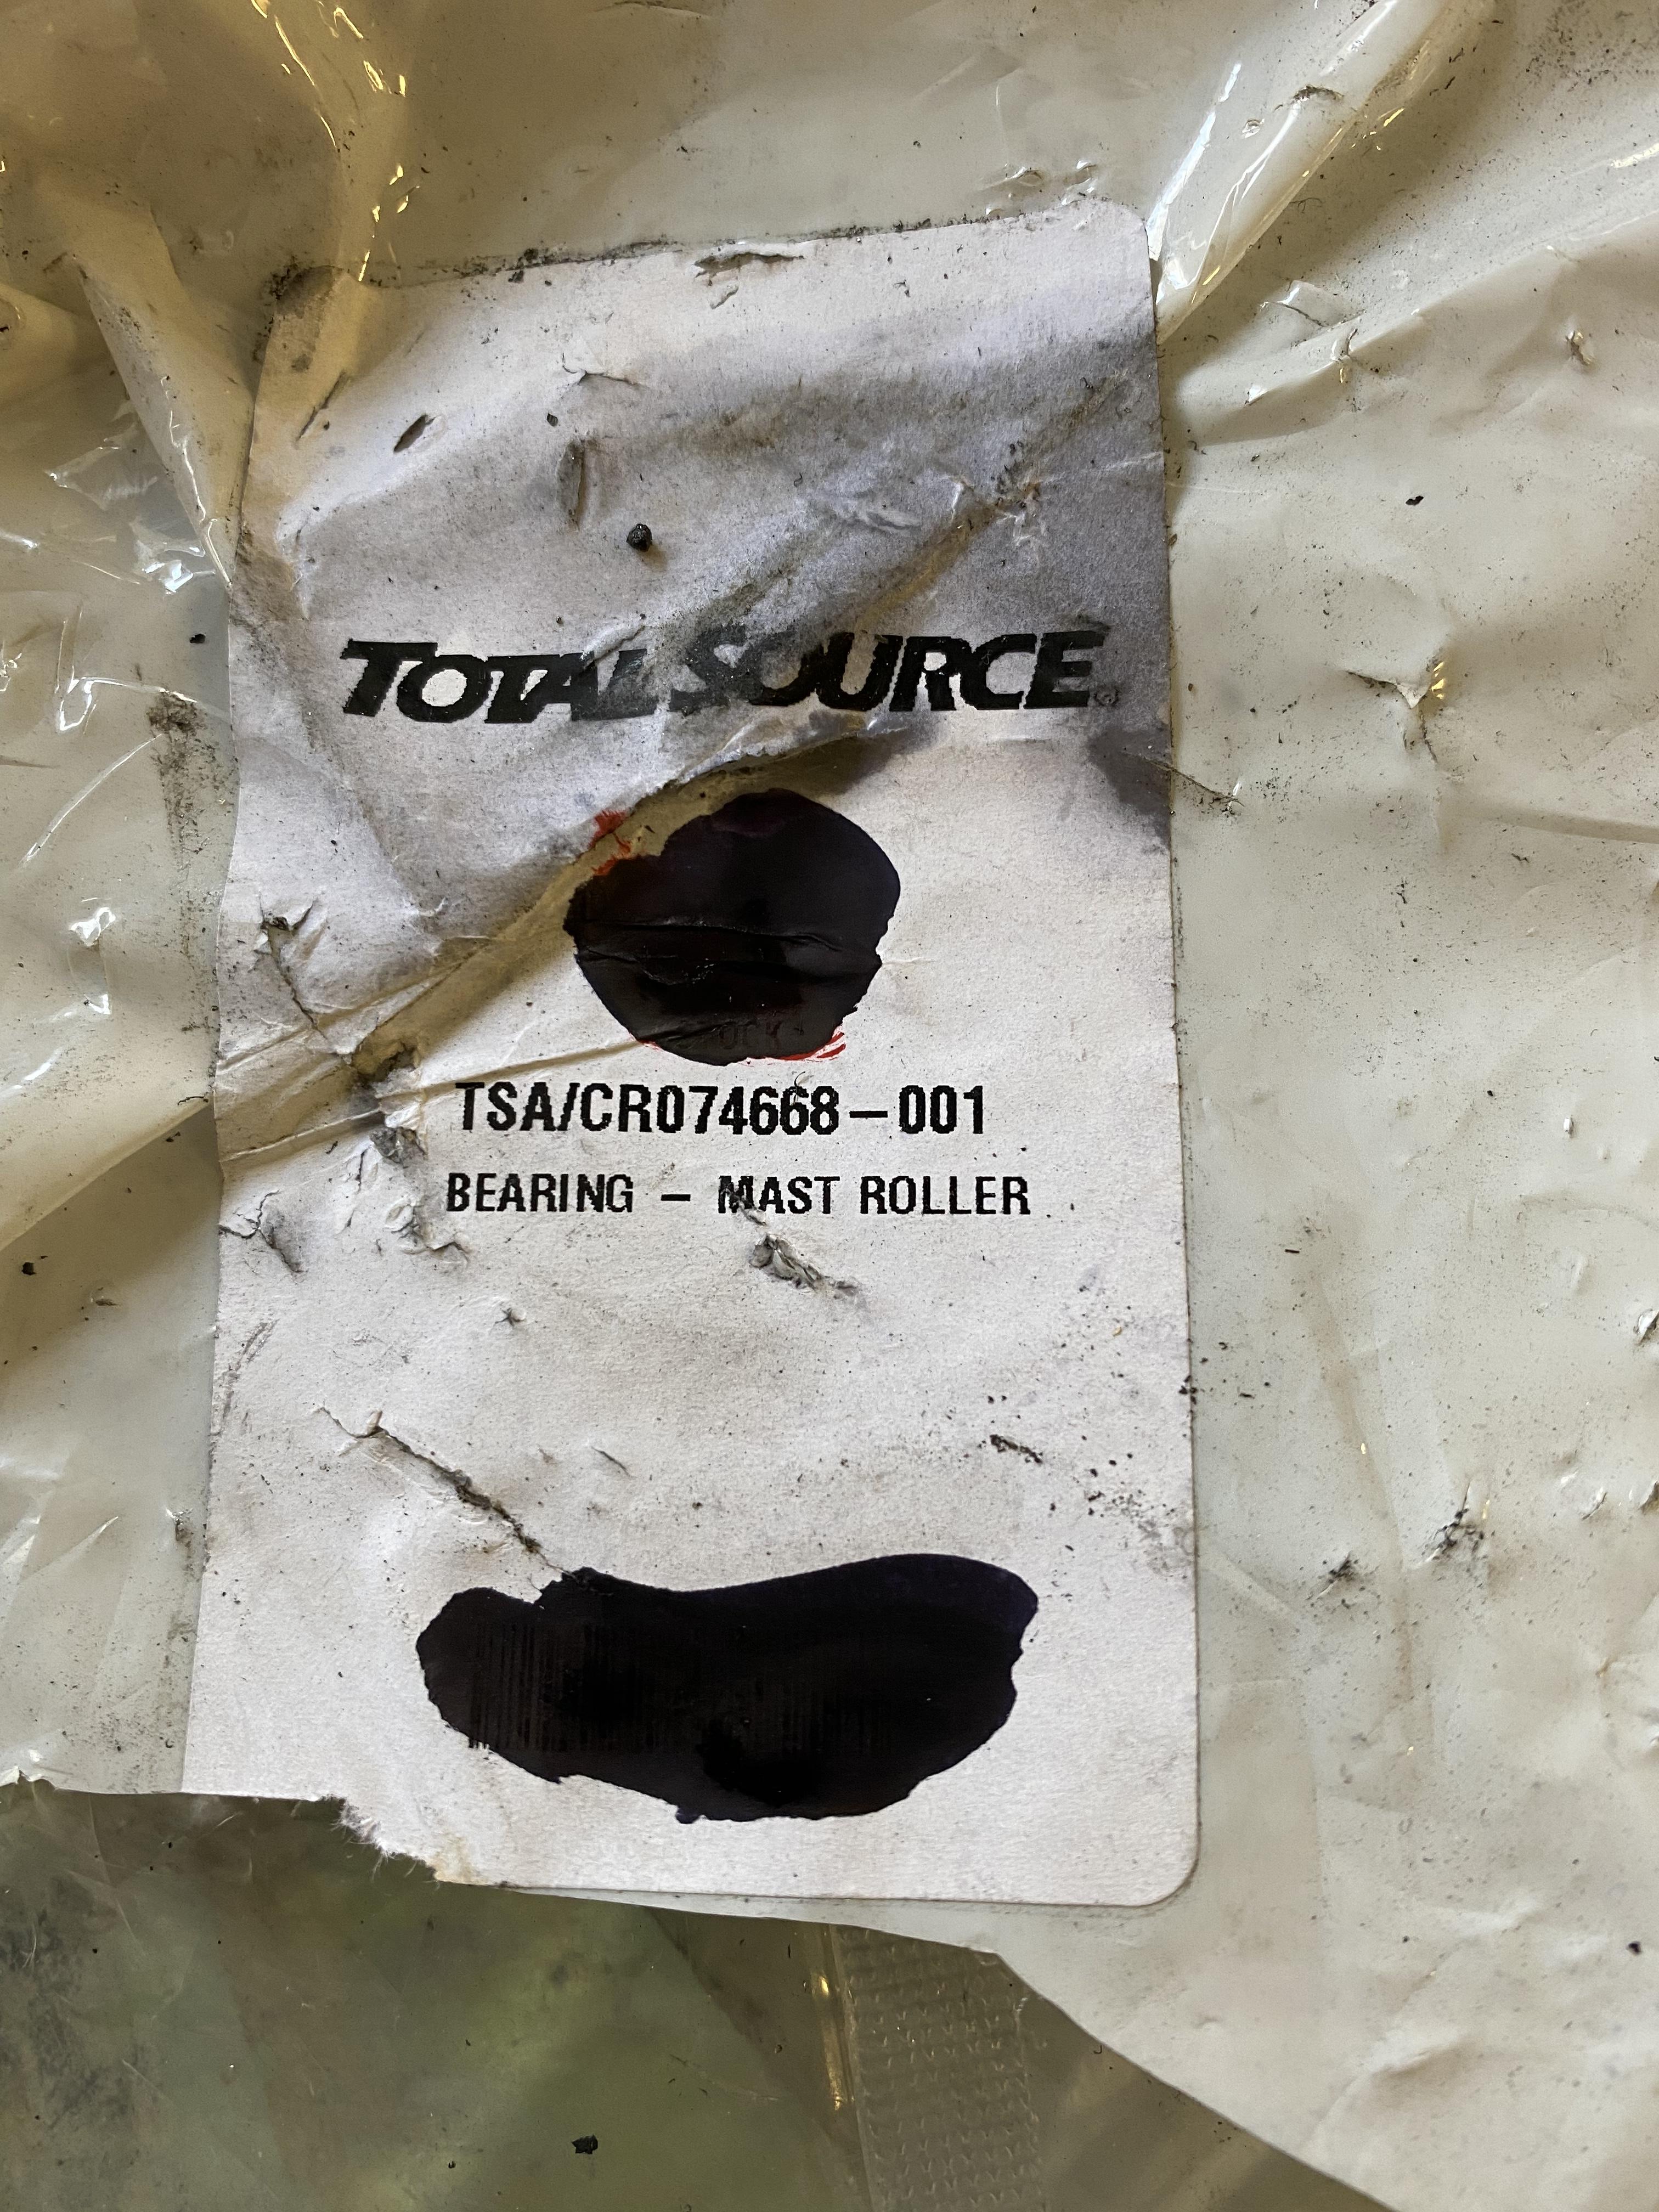
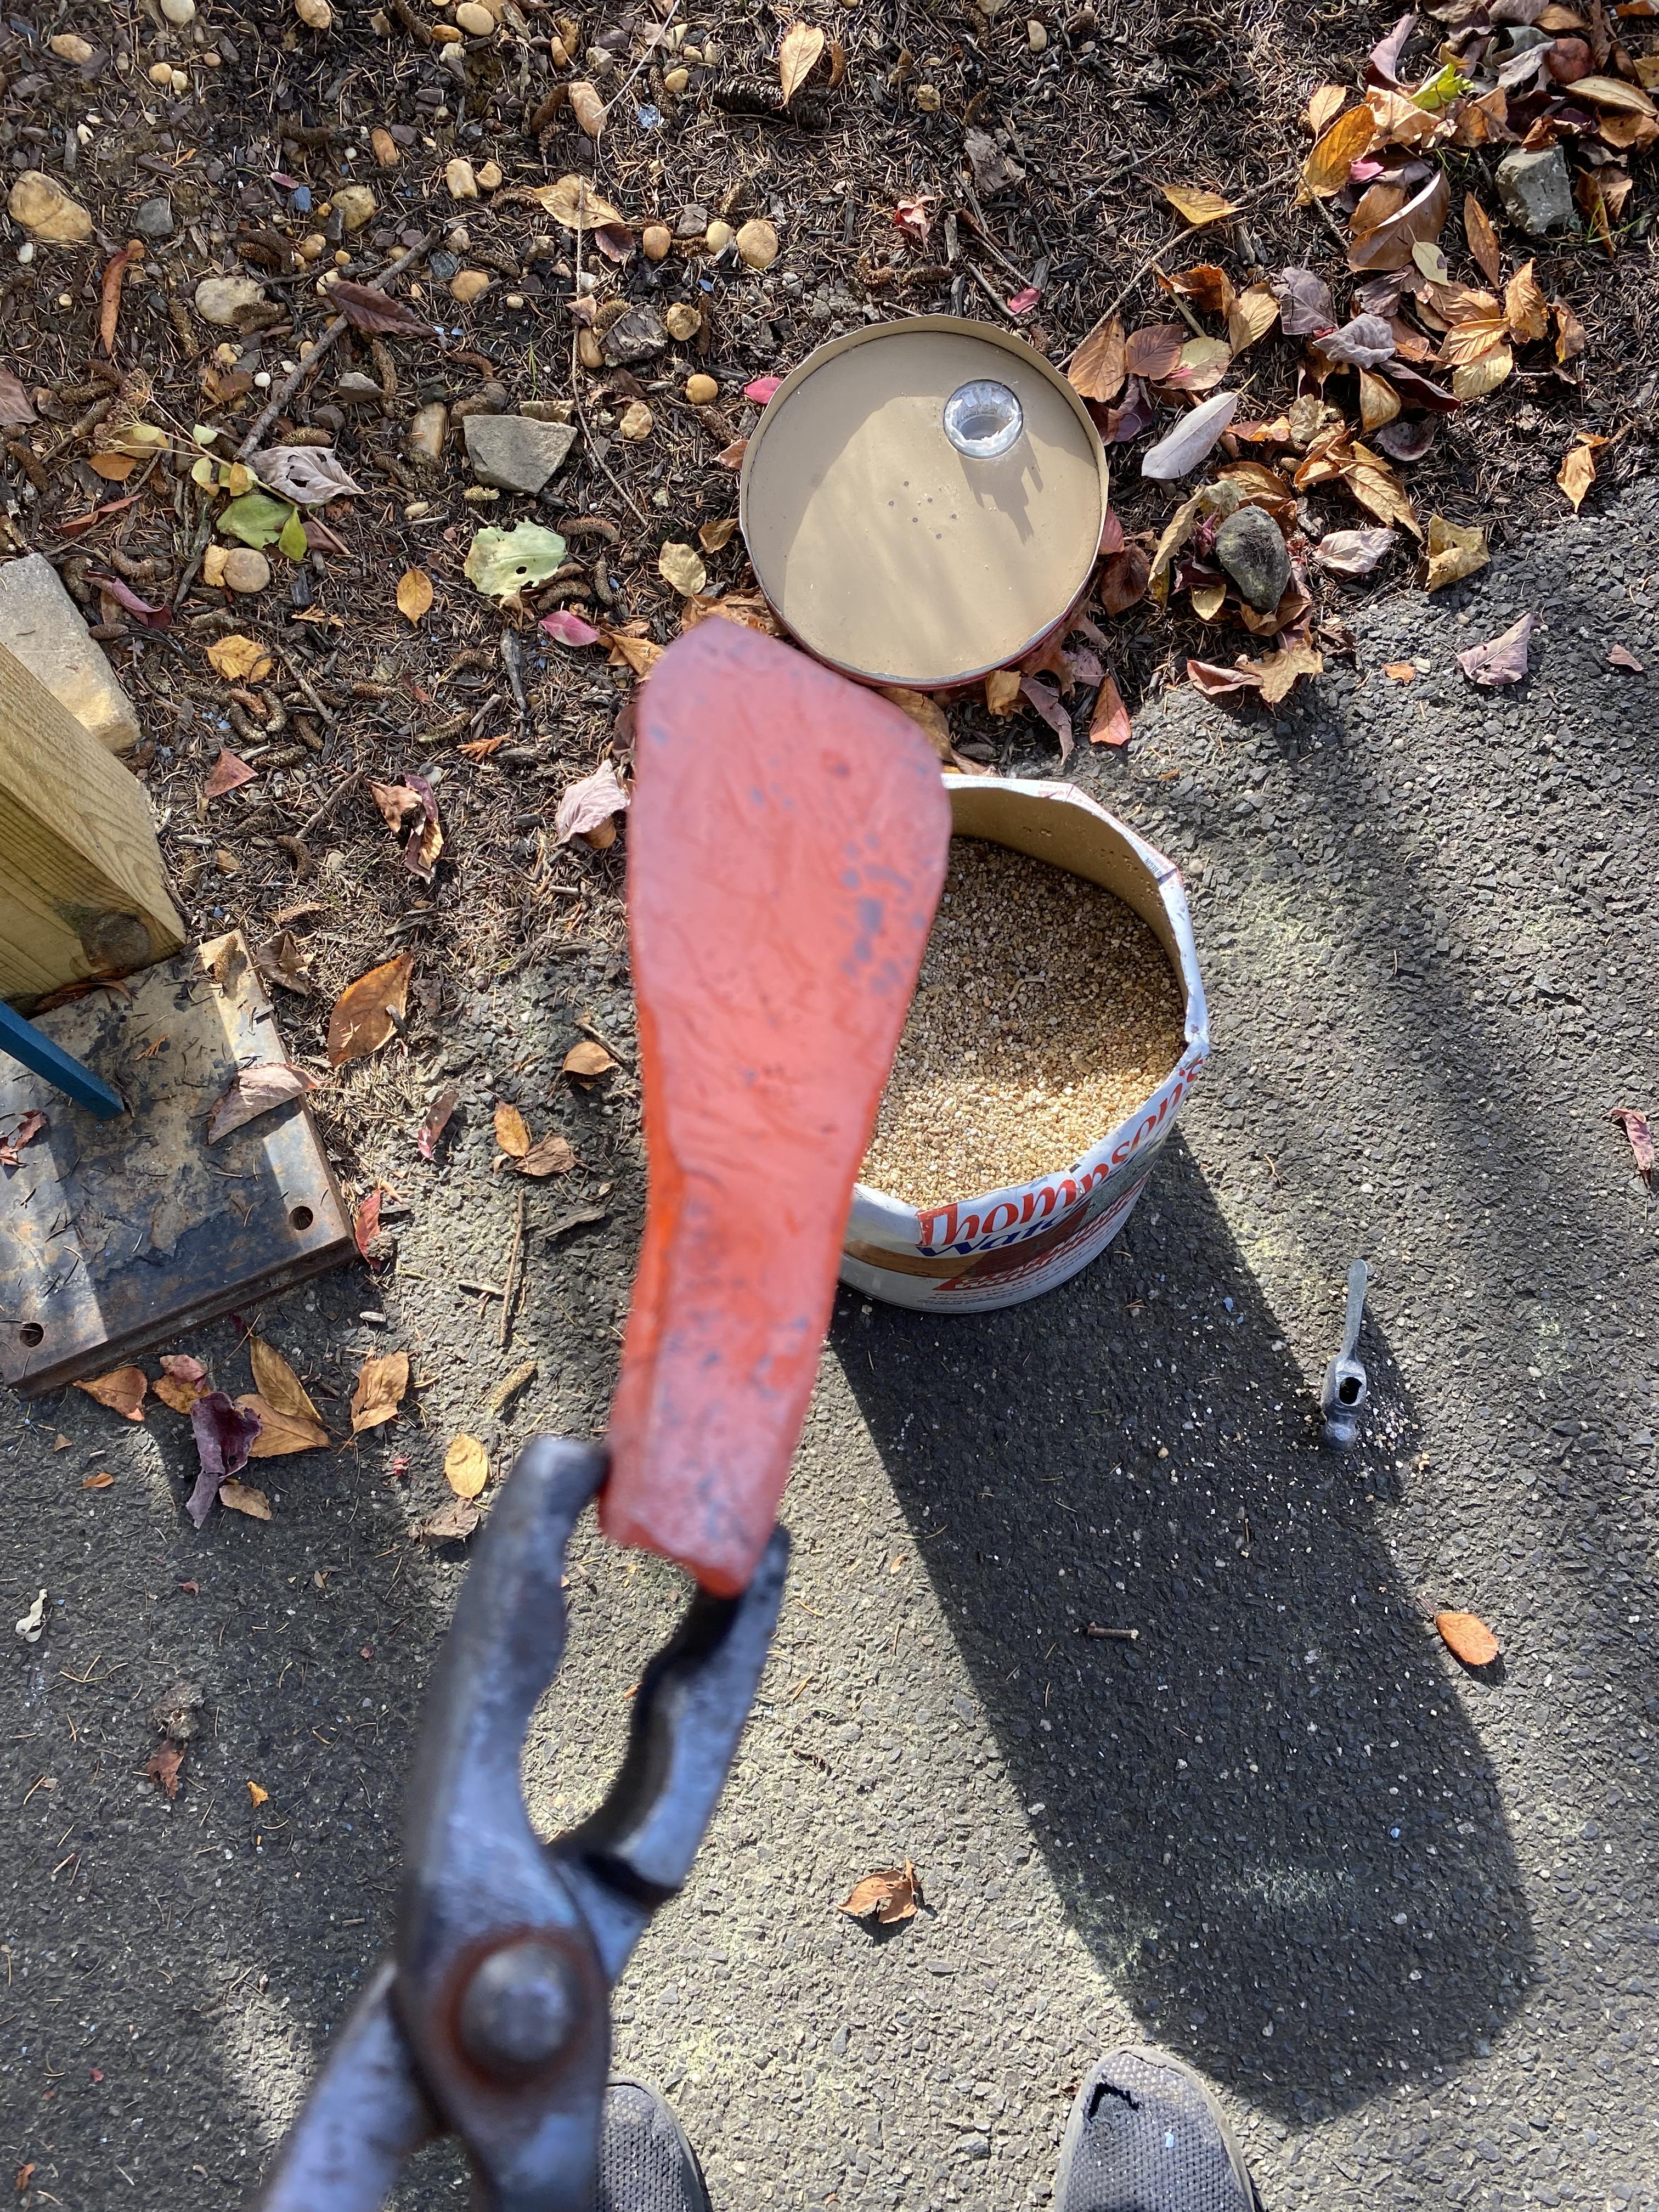
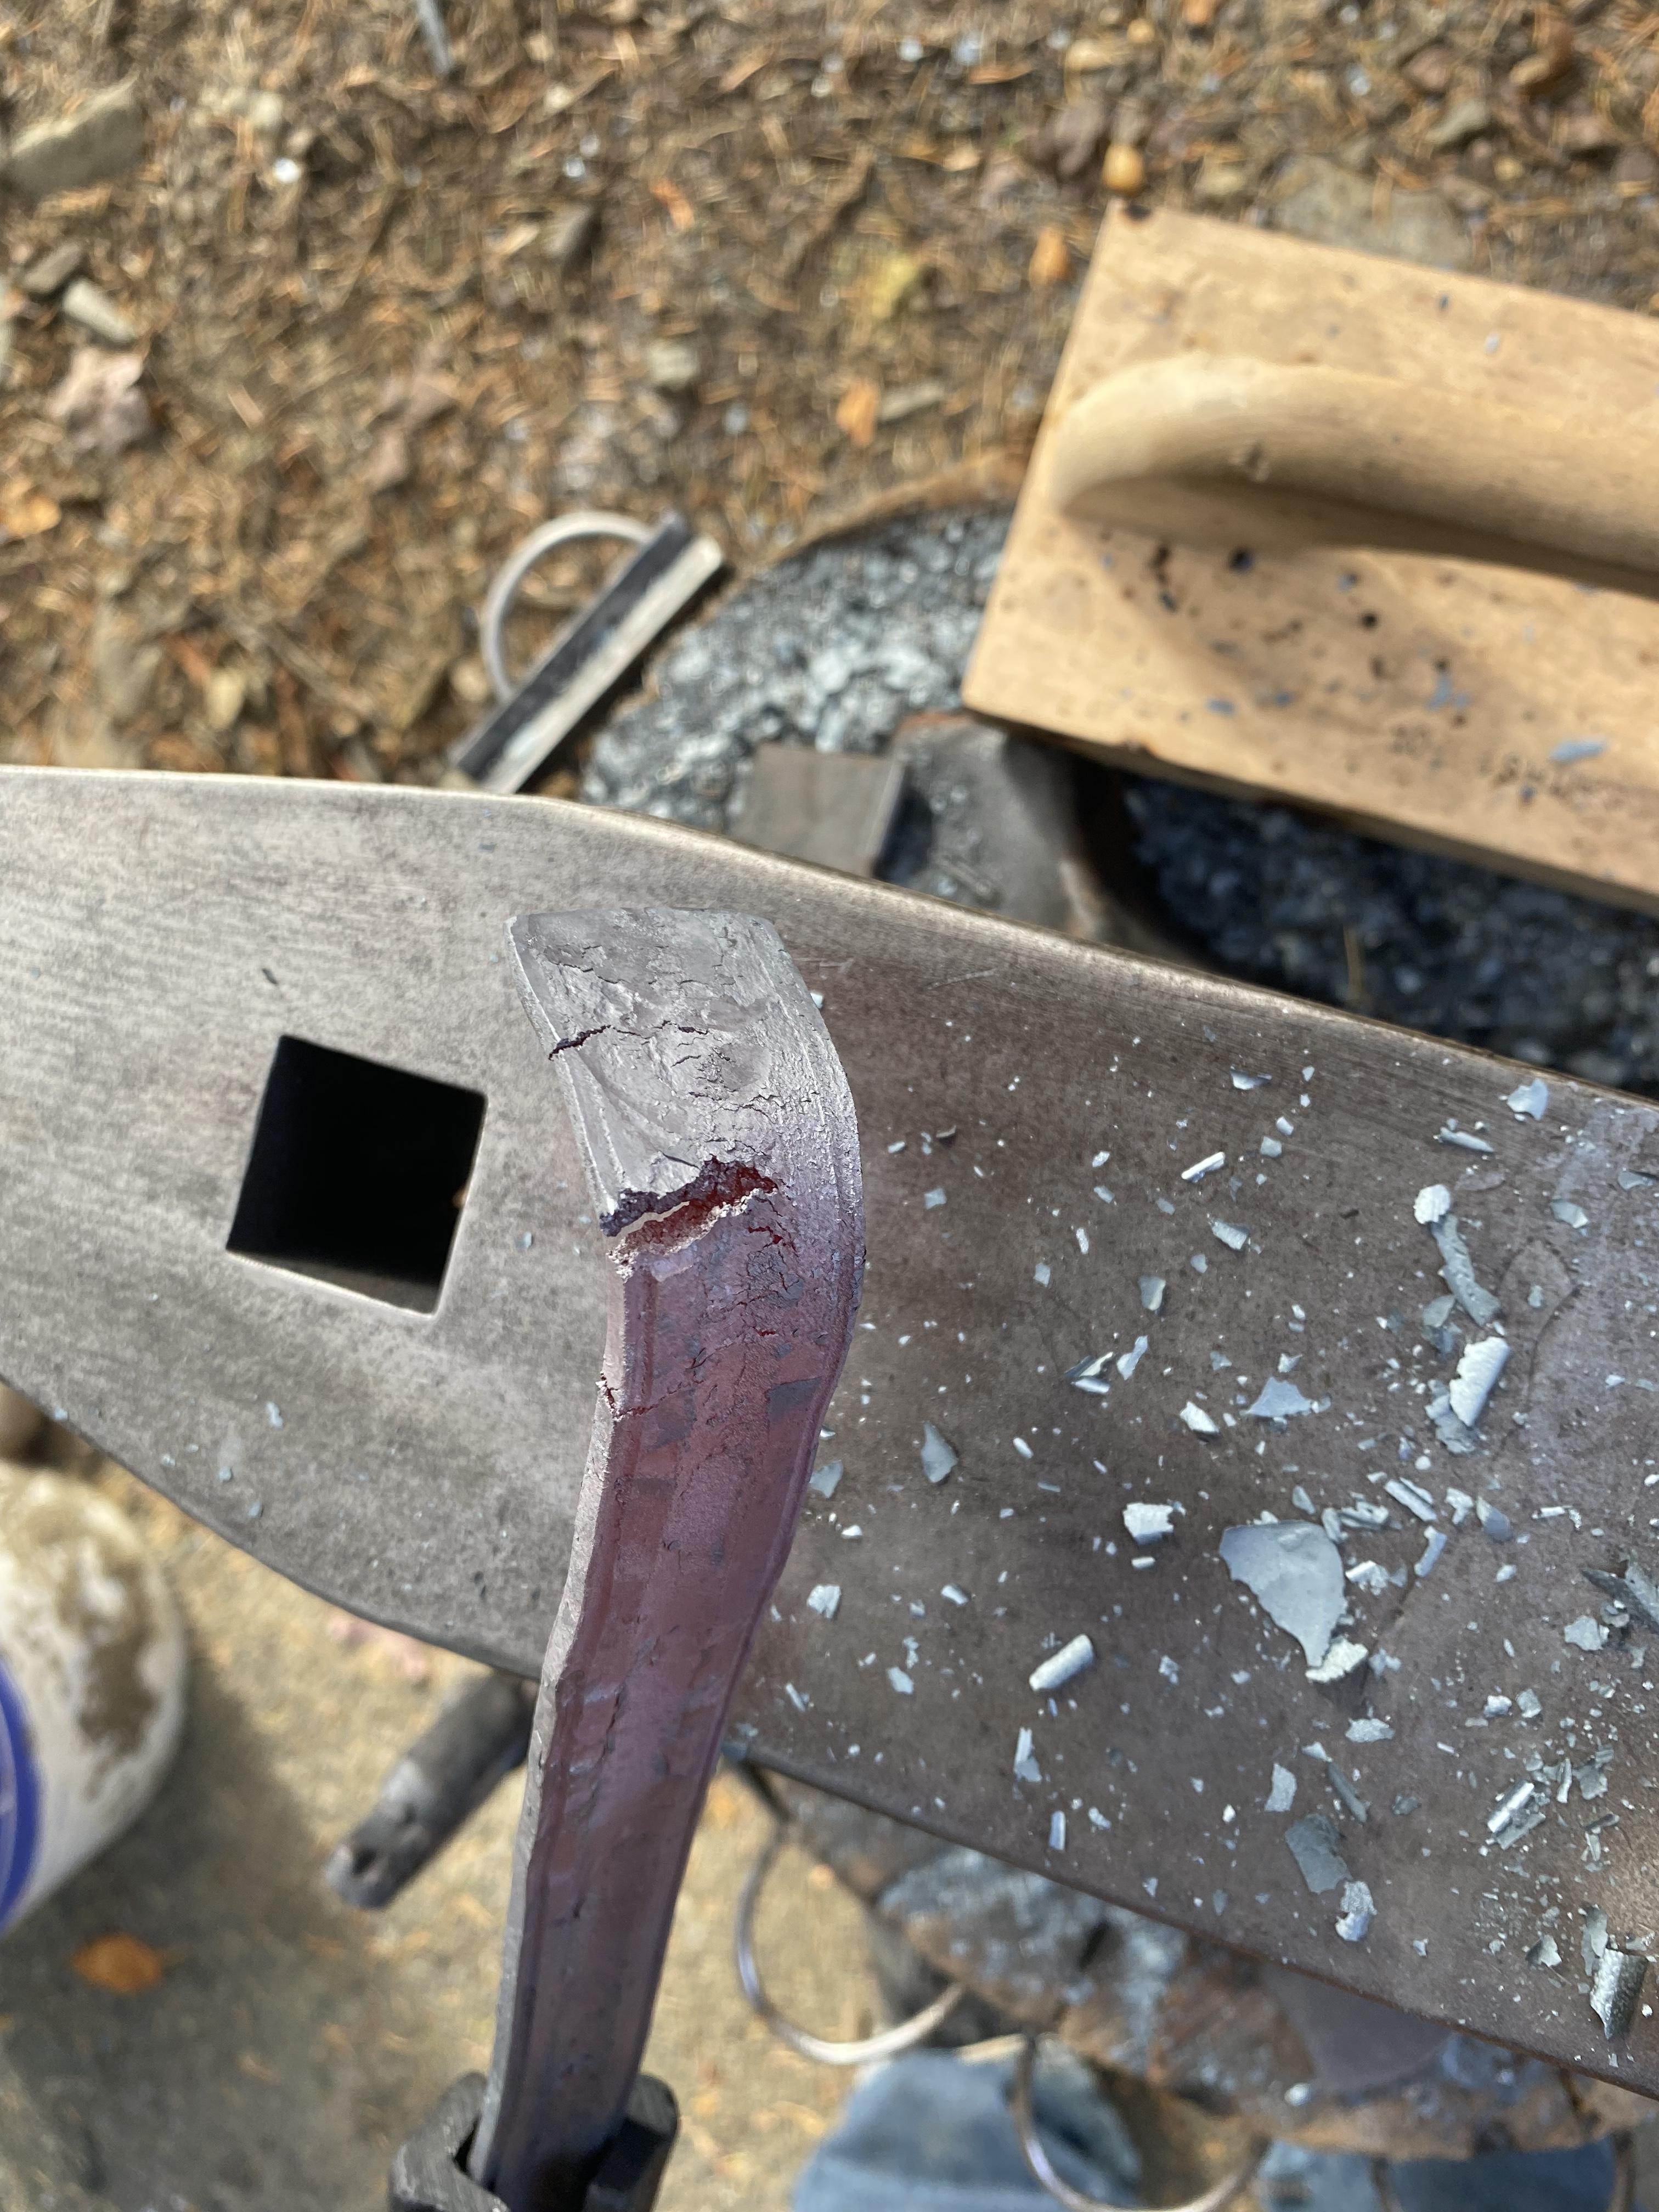
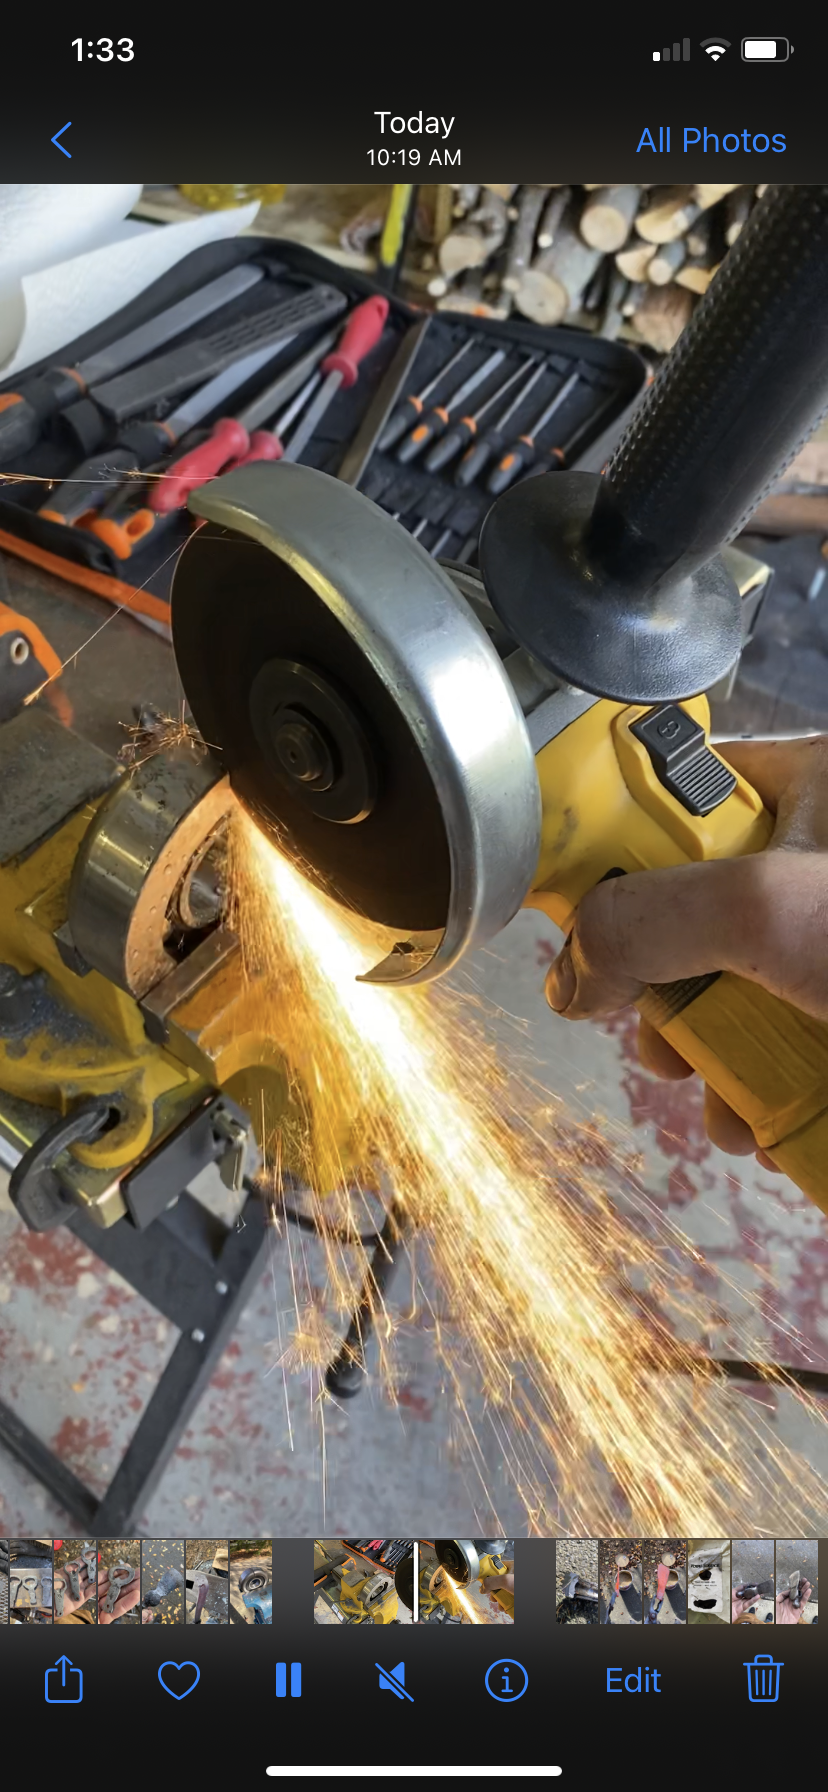
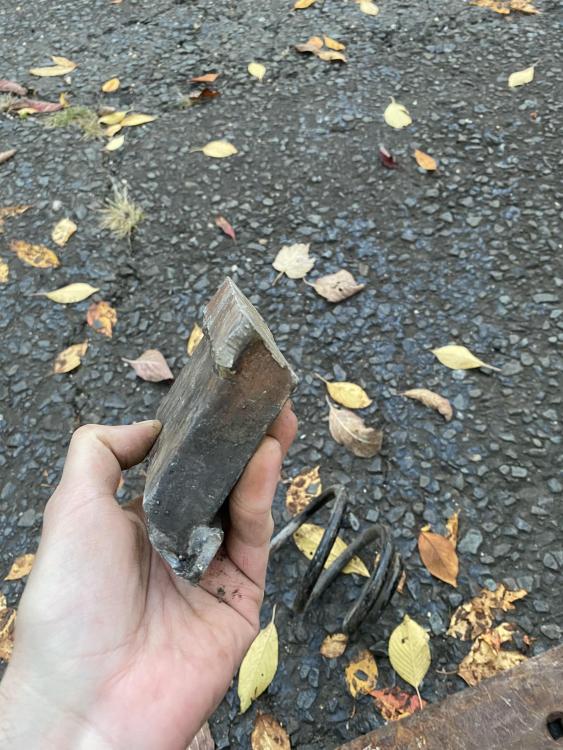
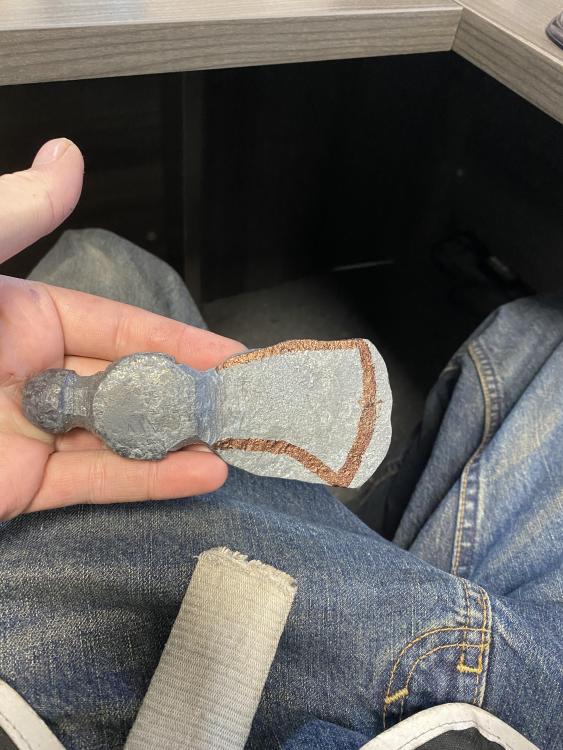
Thanks for the tips guys. Ok hoping someone can tell me what’s going on here. Got these bearings from work - they go on fork lifts and order pickers. Very weird stuff.. 1. it cut like butter with angle grinder to open them up but sparked like high carbon 2. the small piece I heated to past magnetic but that seemed to be even at an incredibly low black heat - tried quenching in oil - not very hard - tried quenching in water - kind of hard. 3.let it normalize once then started forging on it and it just started coming apart like clay at a bright orange 4. thicker piece I thought was the same material but not sure. Also cut like butter but I didn’t quench just started forging and it seems to hold up better. Wasn’t going for an axe but all the sudden it started to look like one so I went with it. Anyone know what material this is? 52100 says to quench in oil. I must be doing something wrong. I tried looking them up. Small one said 6307z on it and the number the first large one is in the pics. Straightened the little hatchet out a bit and heat treated again. Couldn’t just leave it. Just needs a handle now. Also just for everyone’s peace of mind these are USED bearings that are being replaced and would end up in the mechanic scrap load from the warehouse I work at lol. He has no problem with me taking the worn out ones.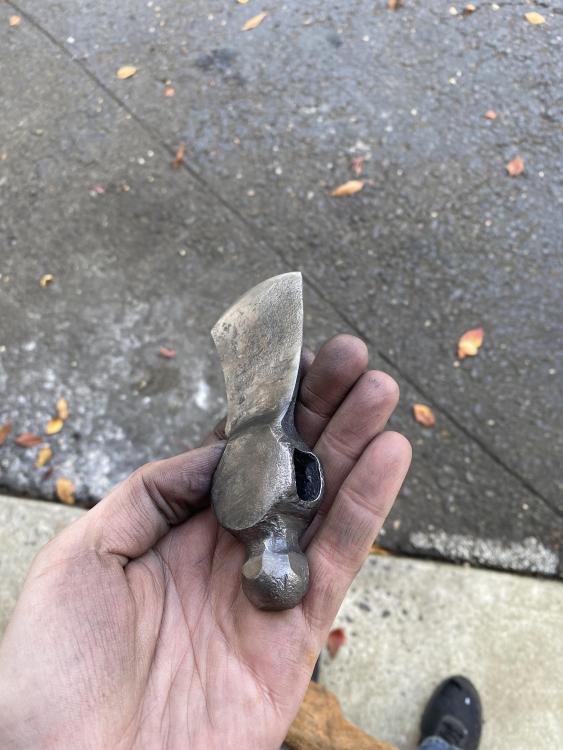


-
What did you do in the shop today?
Pat Masterson replied to Mark Ling's topic in Blacksmithing, General Discussion
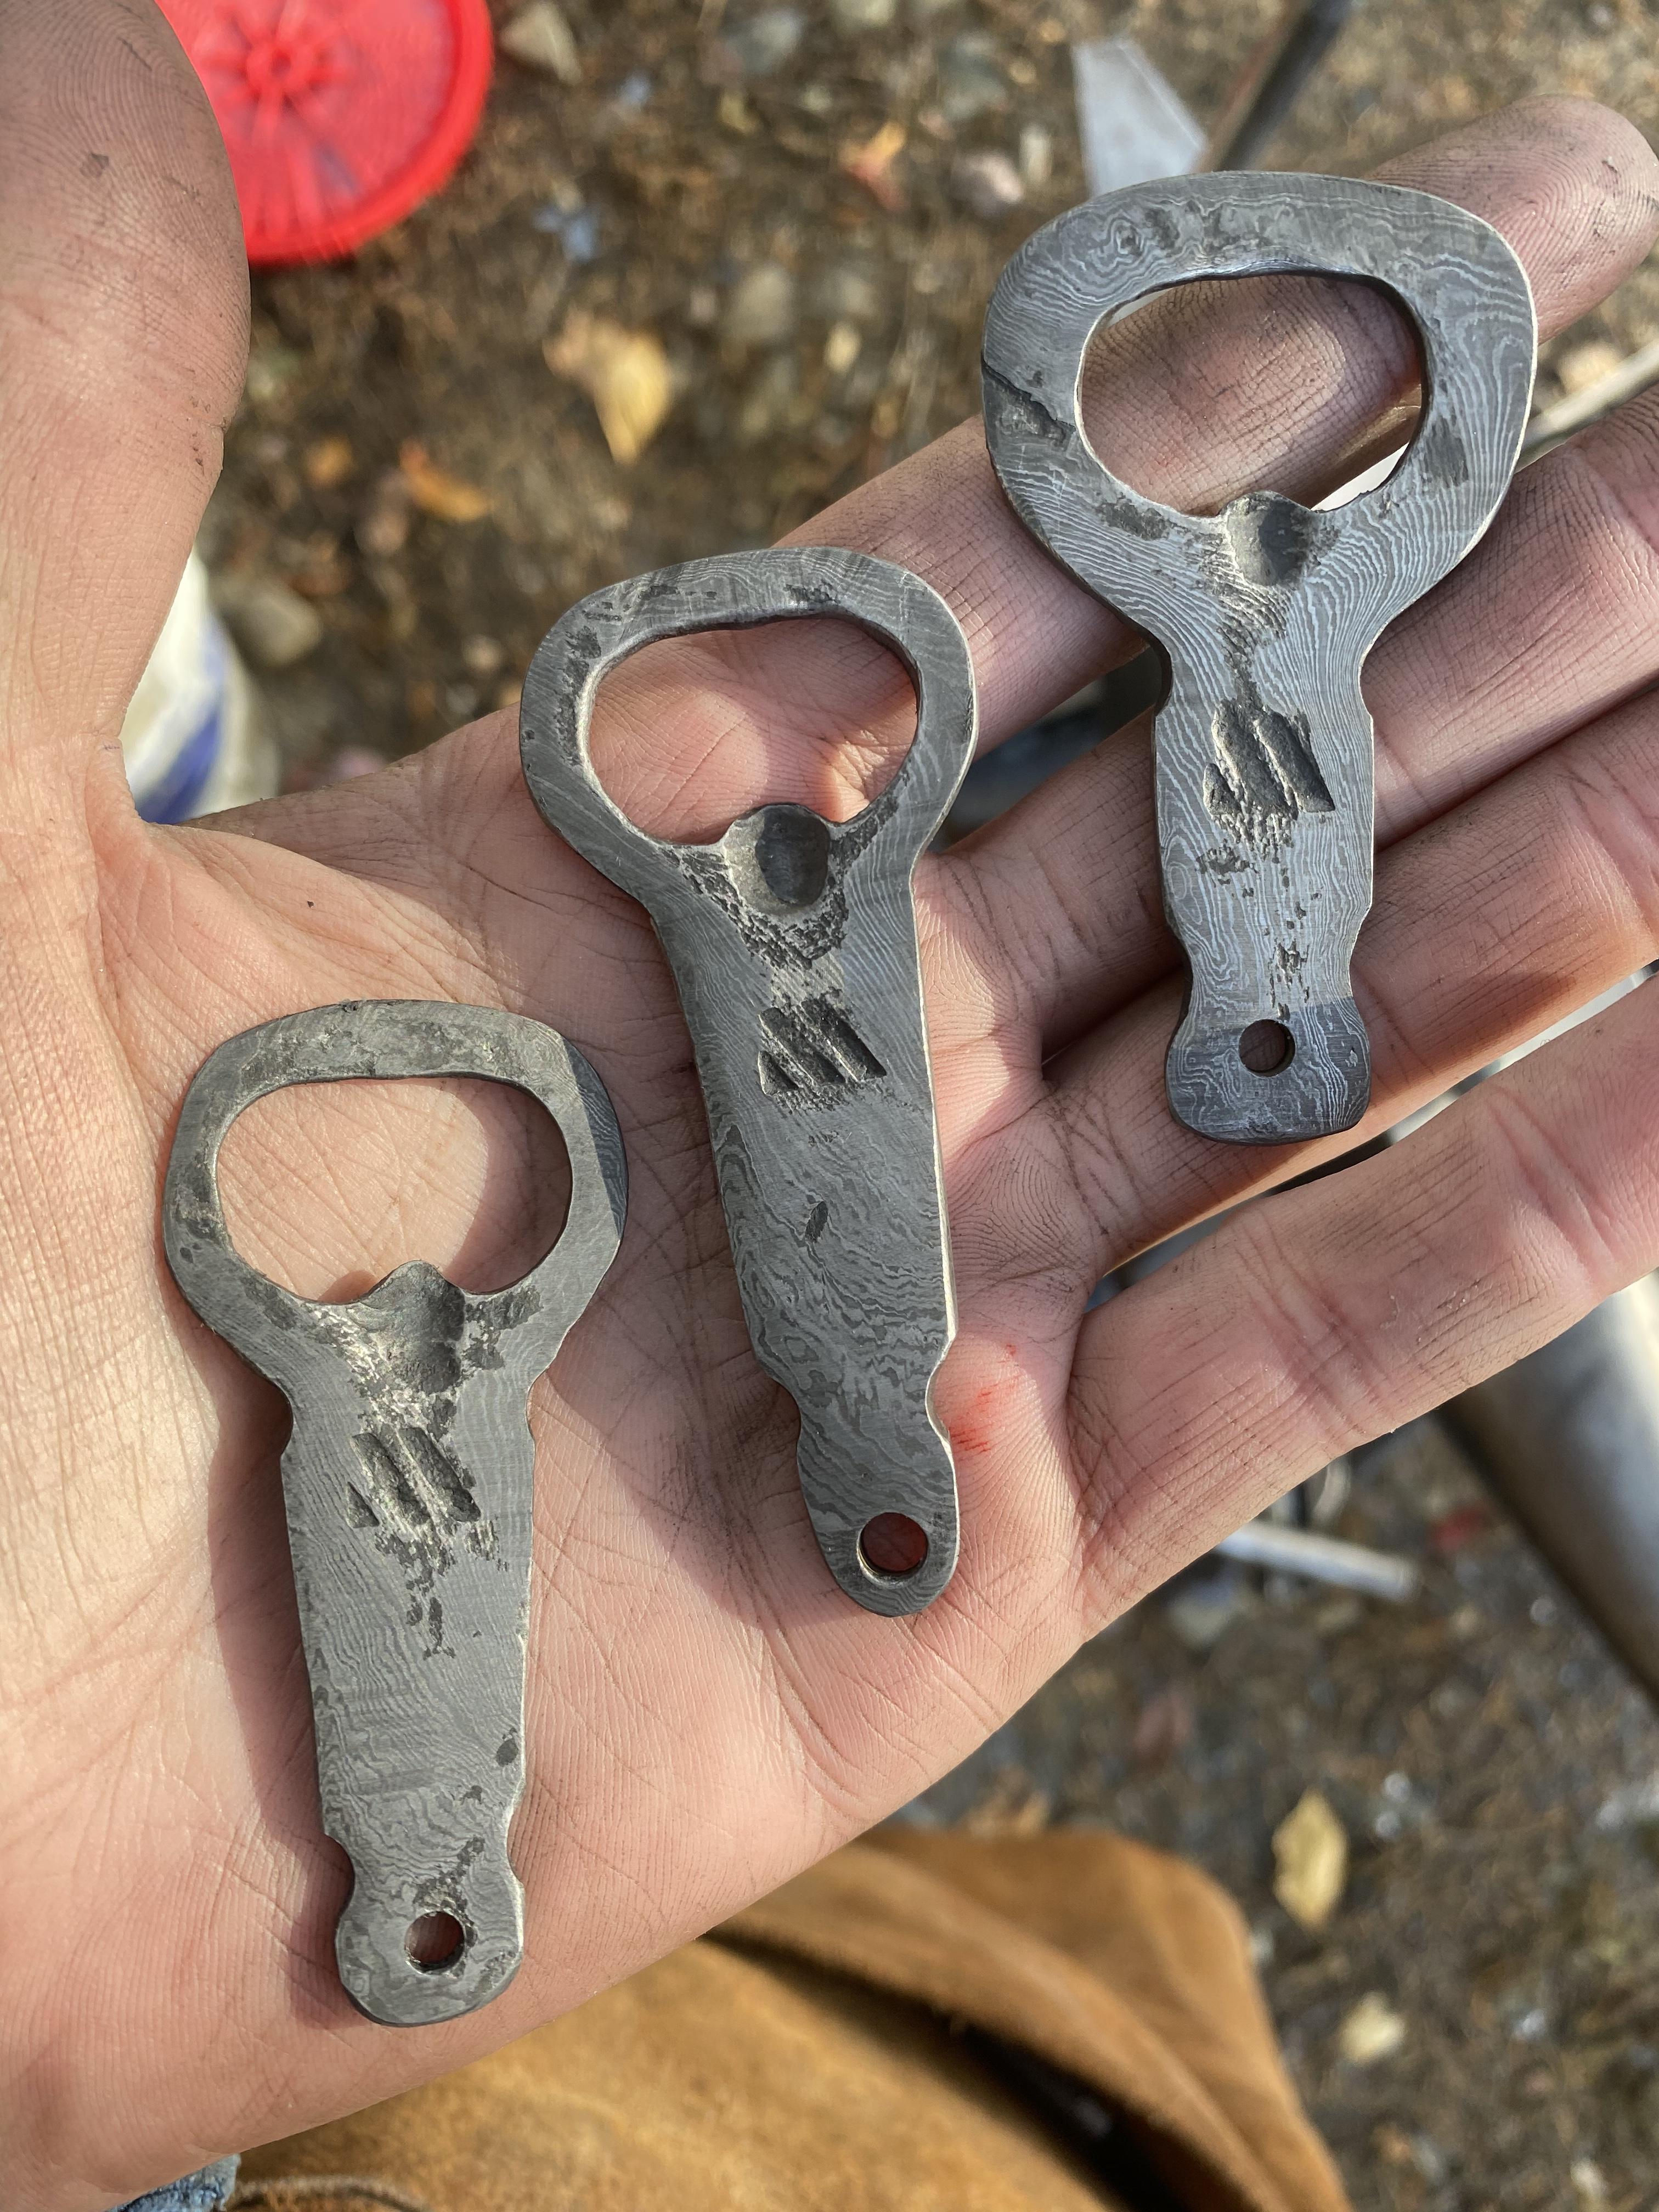
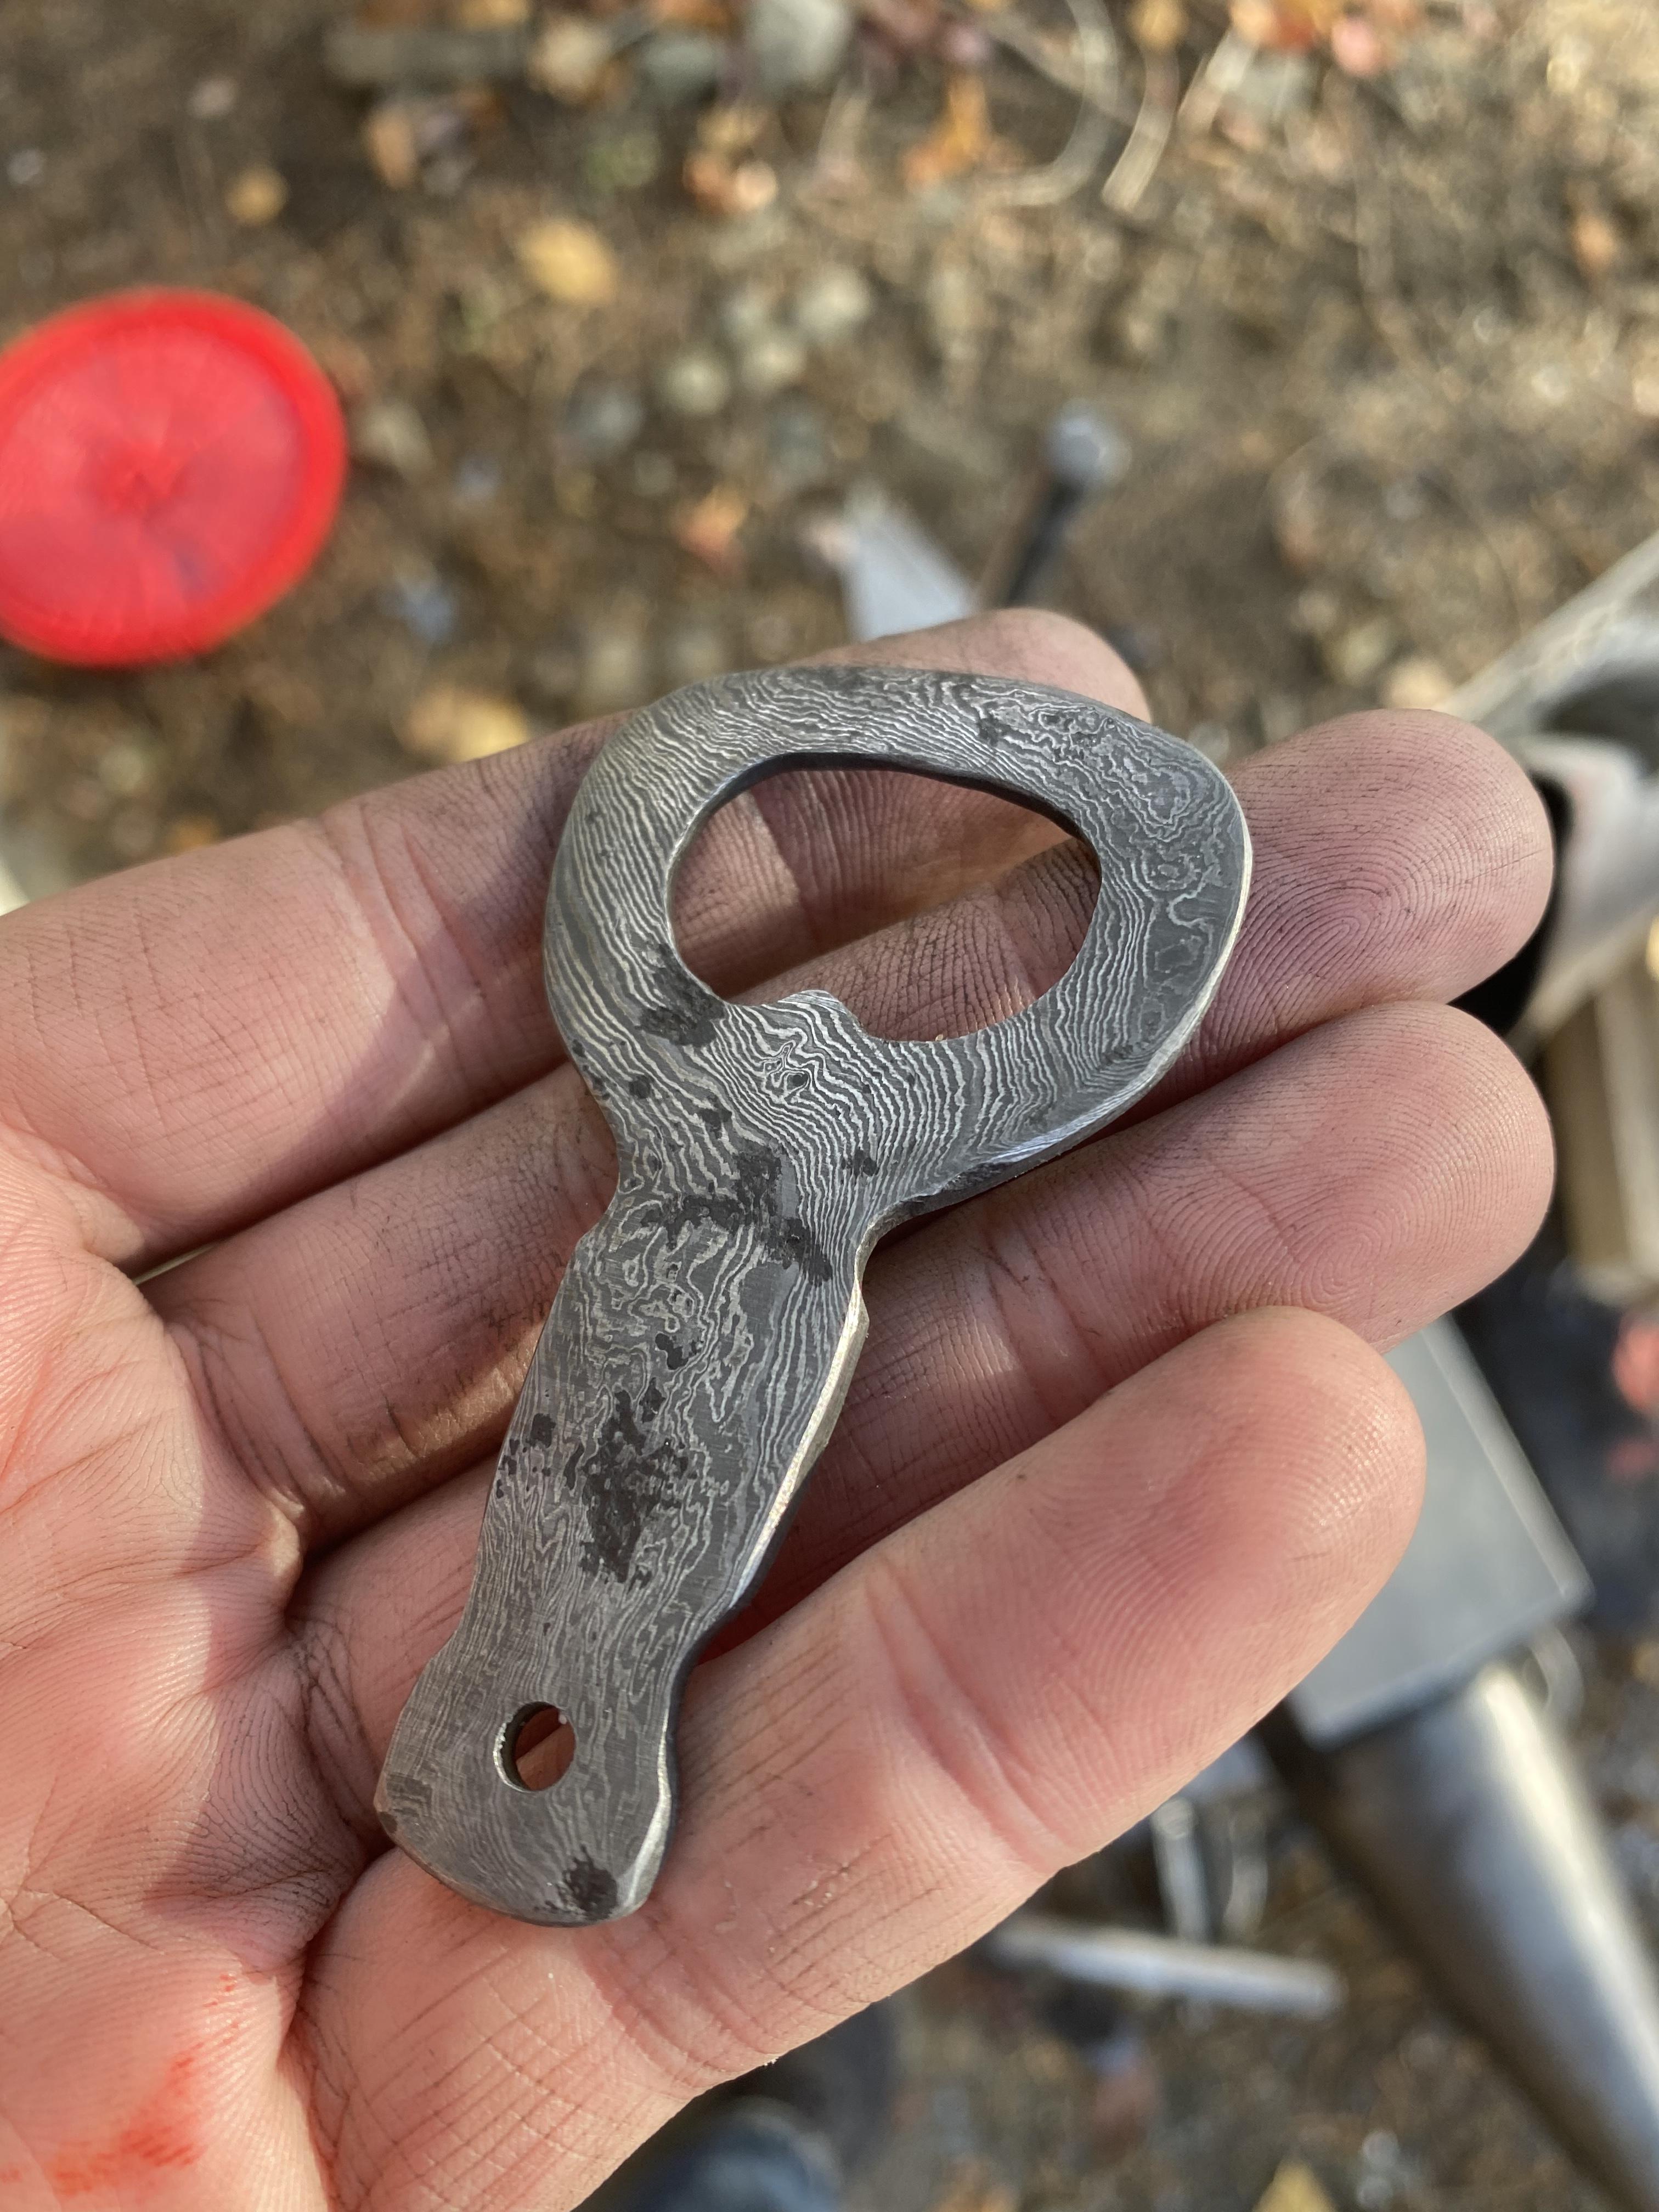
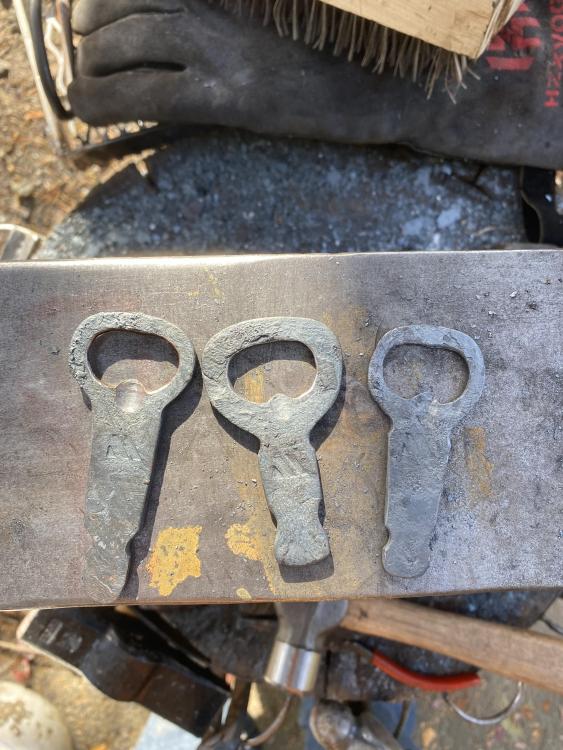
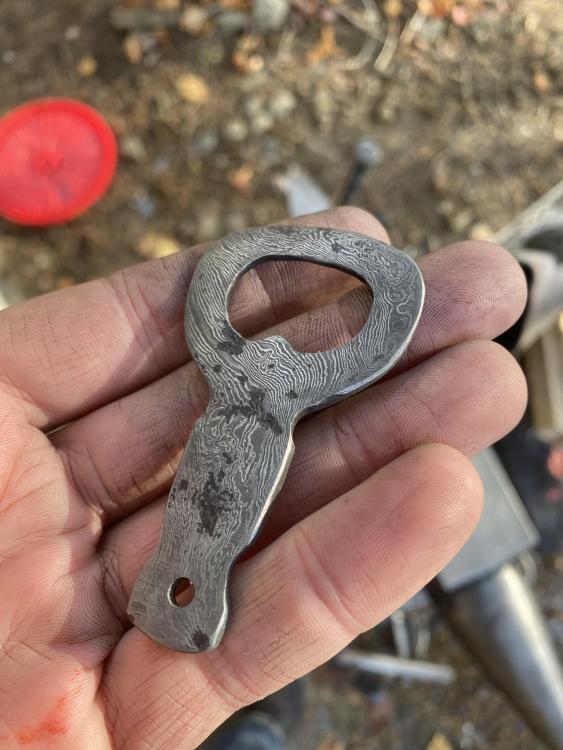
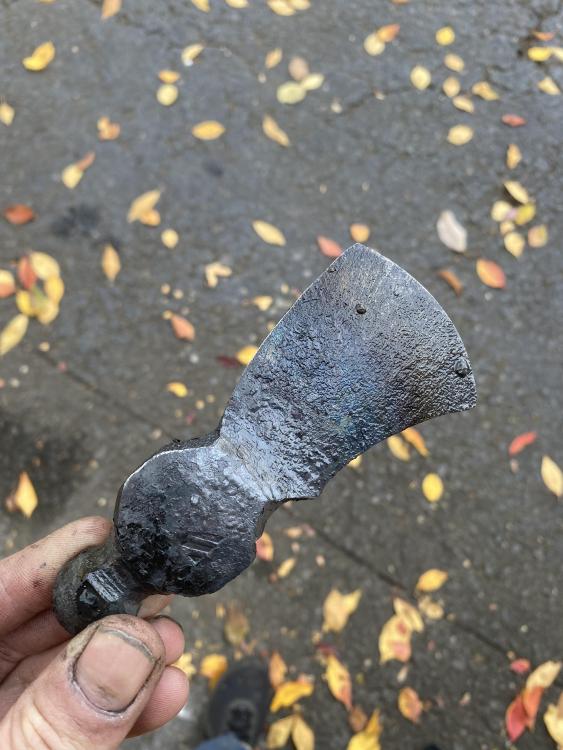
Nice vises Das. I need to order some kind of soft jaws for mine. I bought a brand new Kanca 5” a while back but the jaws on the old ones are always nicely worn and rounded like yours look to be - mine has extremely sharp teeth and edges. I have some thin sheet metal over them for now. On line has aluminum ones that pop on and off but only for a 6”. Getting ready to get back out there this morning but I figured I’d share yesterdays stuff. Made these three little bottle openers for friends and family from some Damascus I had left over. Not Damascus I made myself unfortunately. I burned one a little and it ended up very thin but they came out ok I guess. And I heat treated the little hatchet from a ball peen. I thought getting the blade perfectly straight with the rest would be pretty “straight” forward - it wasn’t and I decided to leave well enough alone. Going to clean it up and sharpen today. I have a lot of firewood but I have no idea what any of it is - I may just buy a ready made handle and fit it up. Kind of funny though - I’m not a big drinker at all but I made 5 bottle openers total yesterday and well, I had to test them on something…by 11am I had to go in and take an early lunch to get my bearing back lol.
-
LOL yes the chains - if I go after one of those bollards you’ll never hear from me again
-
Thanks JHCC. I usually only get to forge on the weekends so Friday nights I literally have trouble getting to sleep bc I can’t wait to get up and get the forge going - kind of like a little kid the night before Christmas lol. I was just tinkering in the garage though looking at this bar of h13 I got. Probably going to try something with it tomorrow but once I set it down next to my little mild steel collection I realized it’s still almost perfectly “chrome” practically no oxidation or rust at all. I forge outside so I don’t think it would matter anyway but I was just curious does this stuff give off any kind of nasty fumes when forging? Like when you weld something that’s chrome plated it gives off some toxic stuff. I know h13 isn’t chrome plated but just saying
-
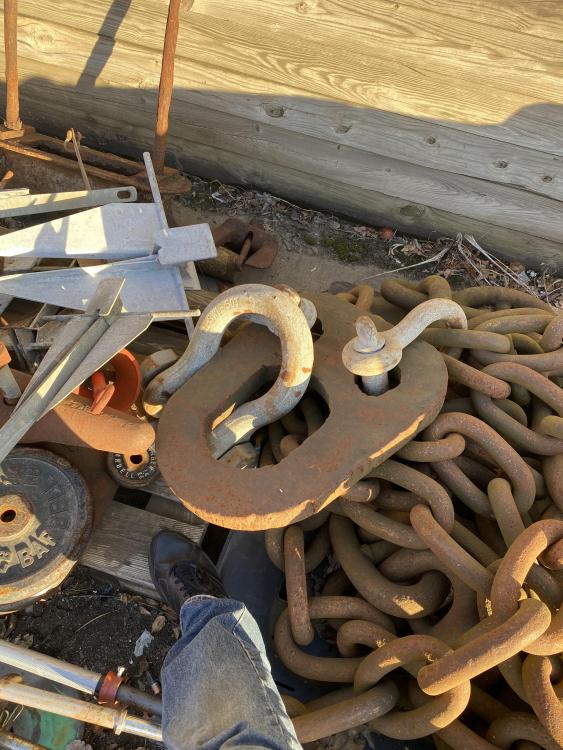
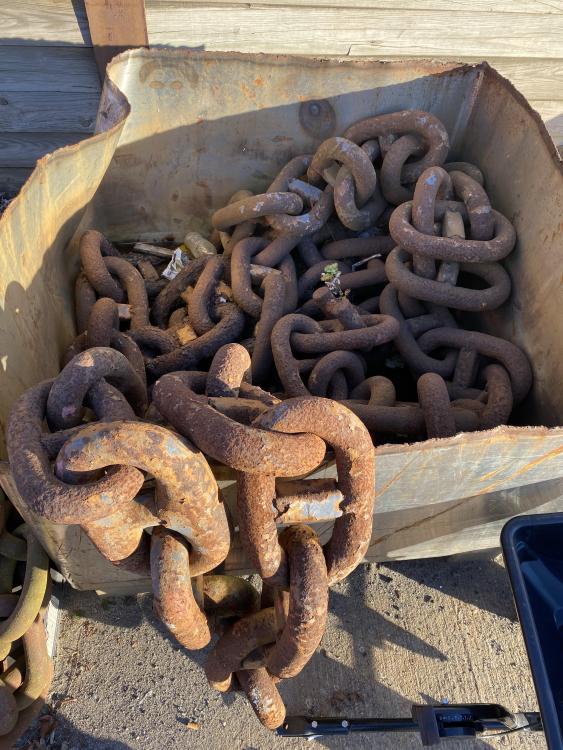
Yes. Bollards is what they were lol. If it is wrought and I get it for just regular scrap price would I be able to sell it for some kind of profit? I don’t really have any interest in forging wrought myself and even if I did that chain is way too big for my set up. Also how do sparks from wrought compare to mild steel? Thomas they had a whole bunch of those too. Also huge. I thought I got pictures of all that stuff but I guess I was a bit preoccupied with everything I was seeing lol.
-
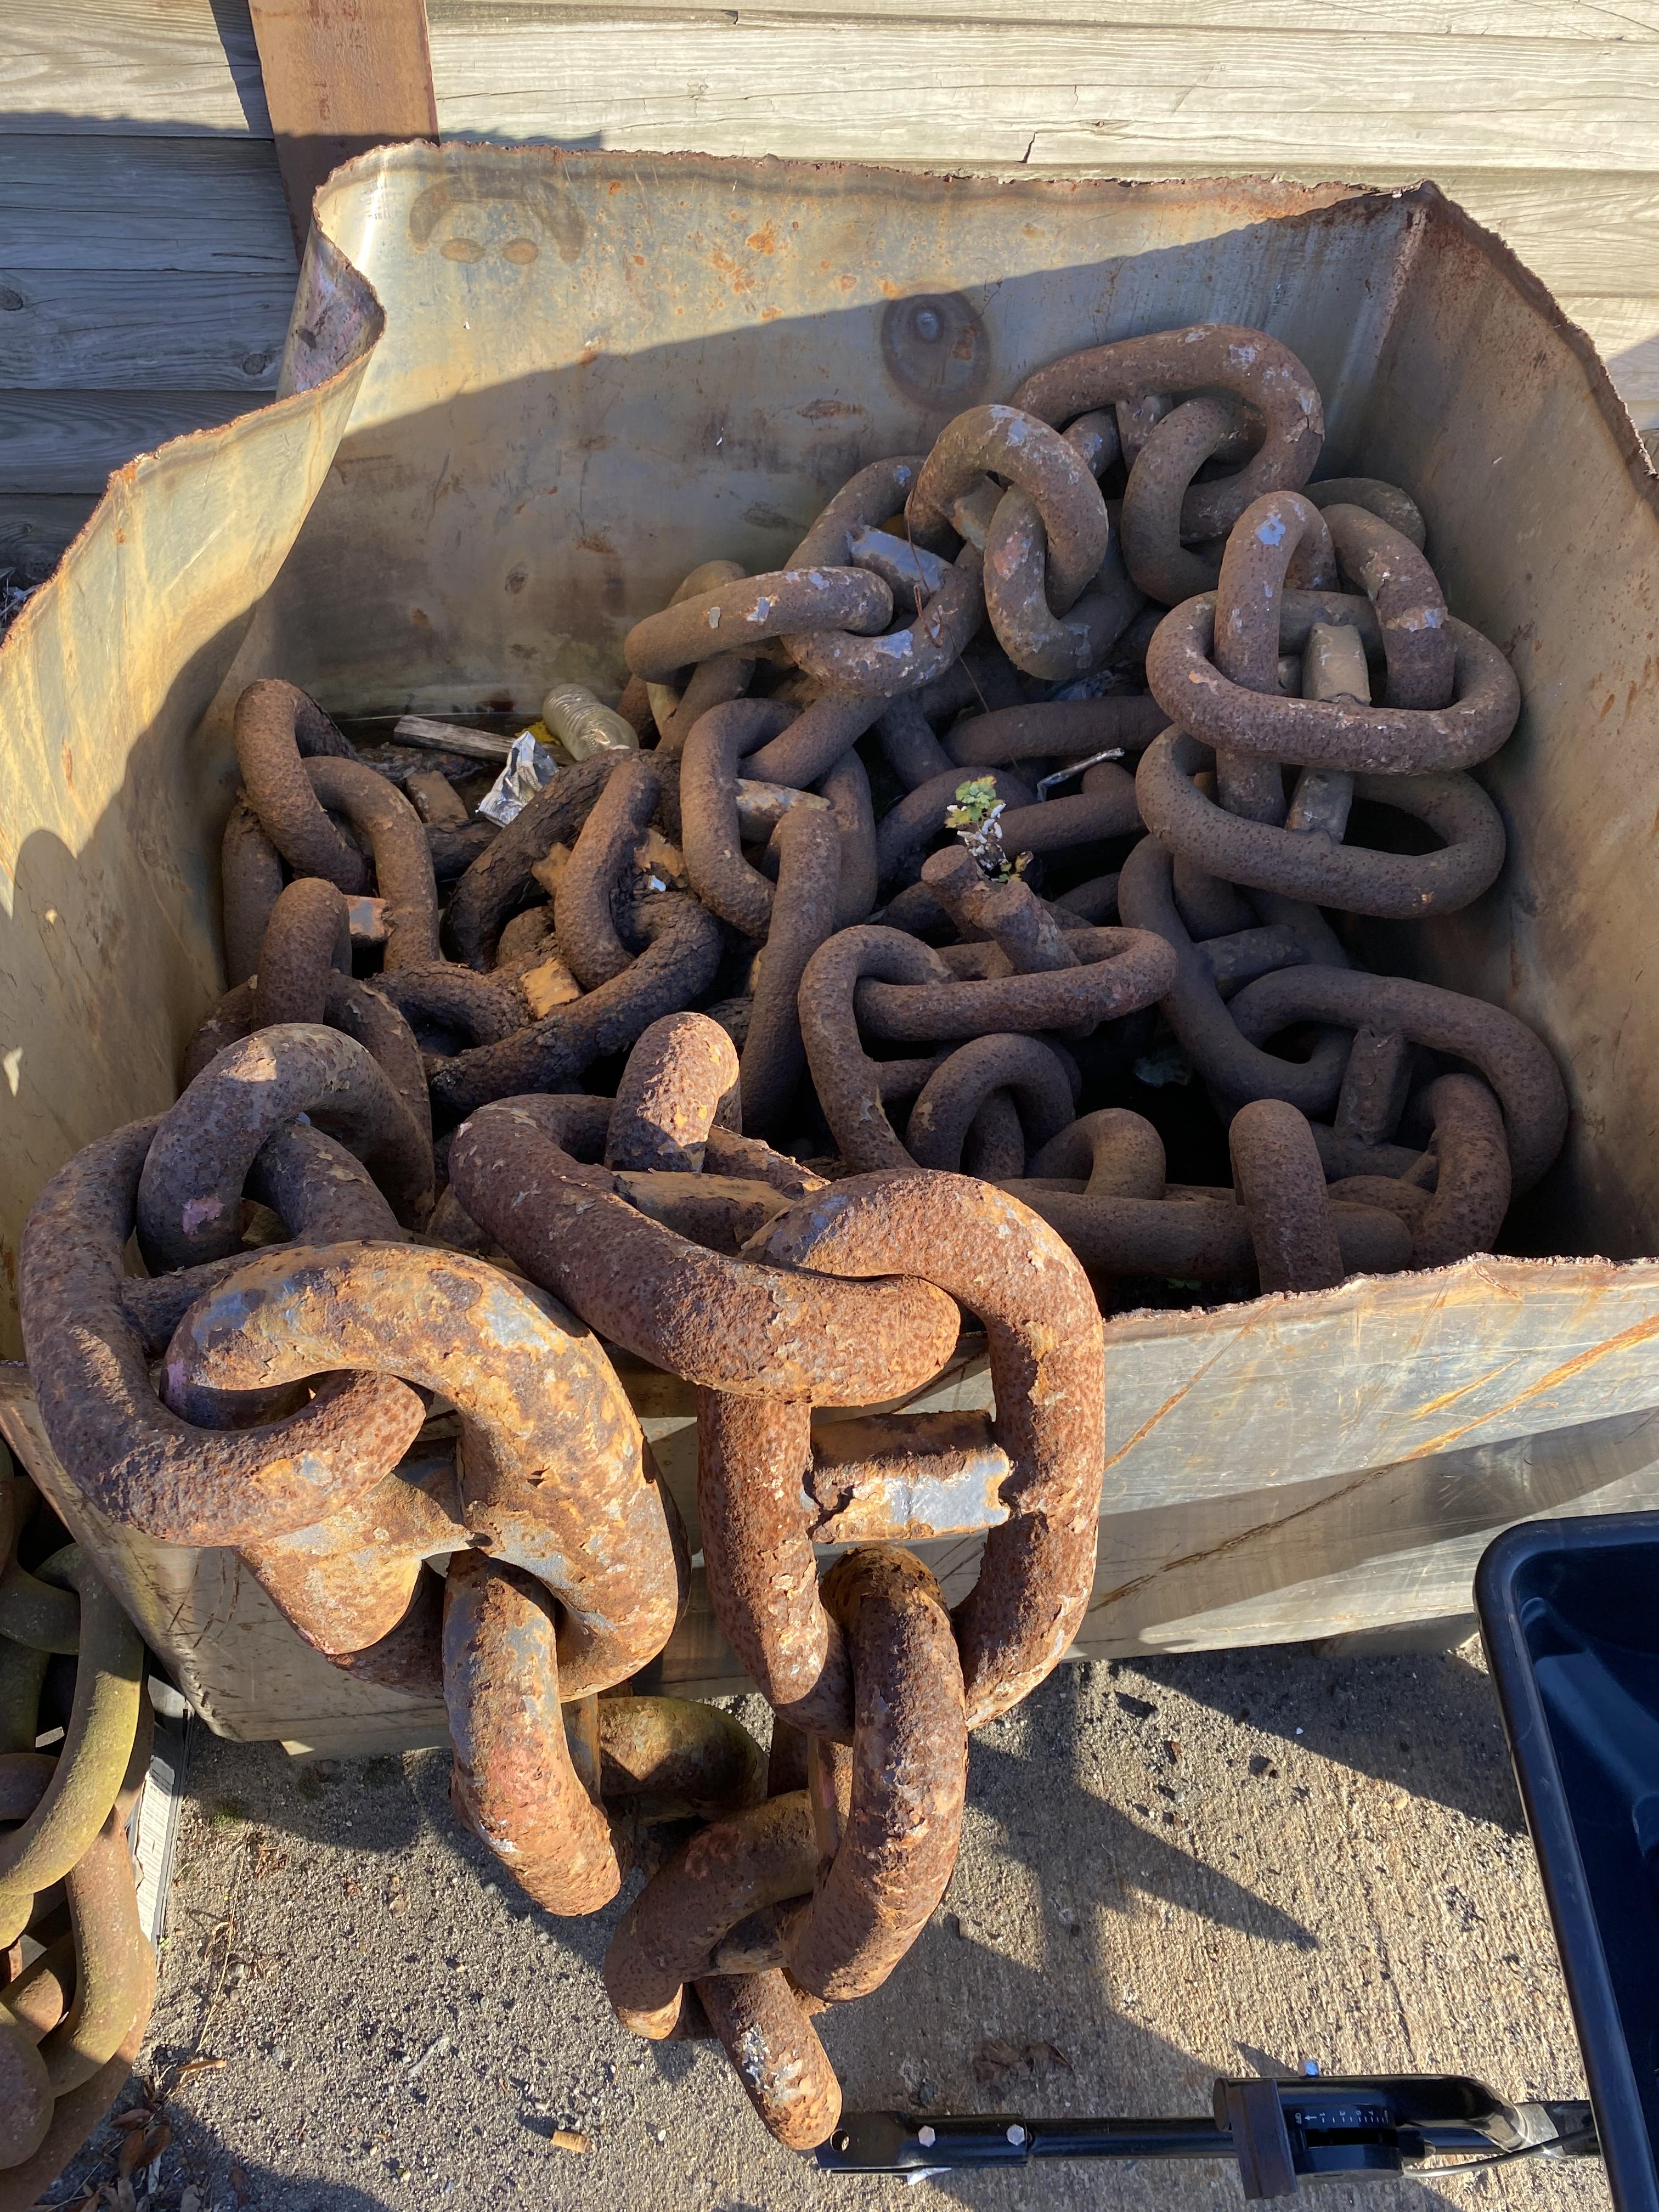
Forgot to add the pics of this other huge stuff that I thought was pretty cool. One chain looks considerably older but I don’t think it’s wrought iron. There were also a bunch of these huge cone typish things that I think are what the chains slide against on a ship when going in and out of the water. Kind of like a giant domed anvil though lol. When I go back I’m going to see if I can find any single links that would be good for shaping bowls shovels etc.
-
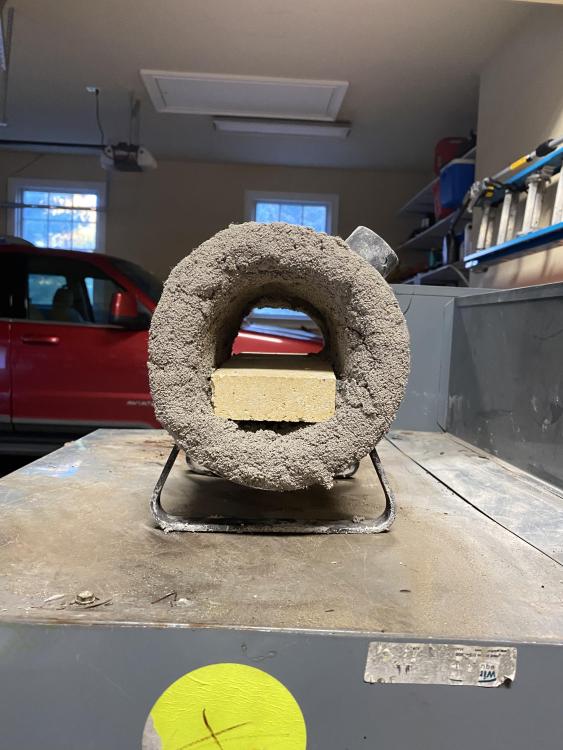
Doughnuts. Great idea.
-
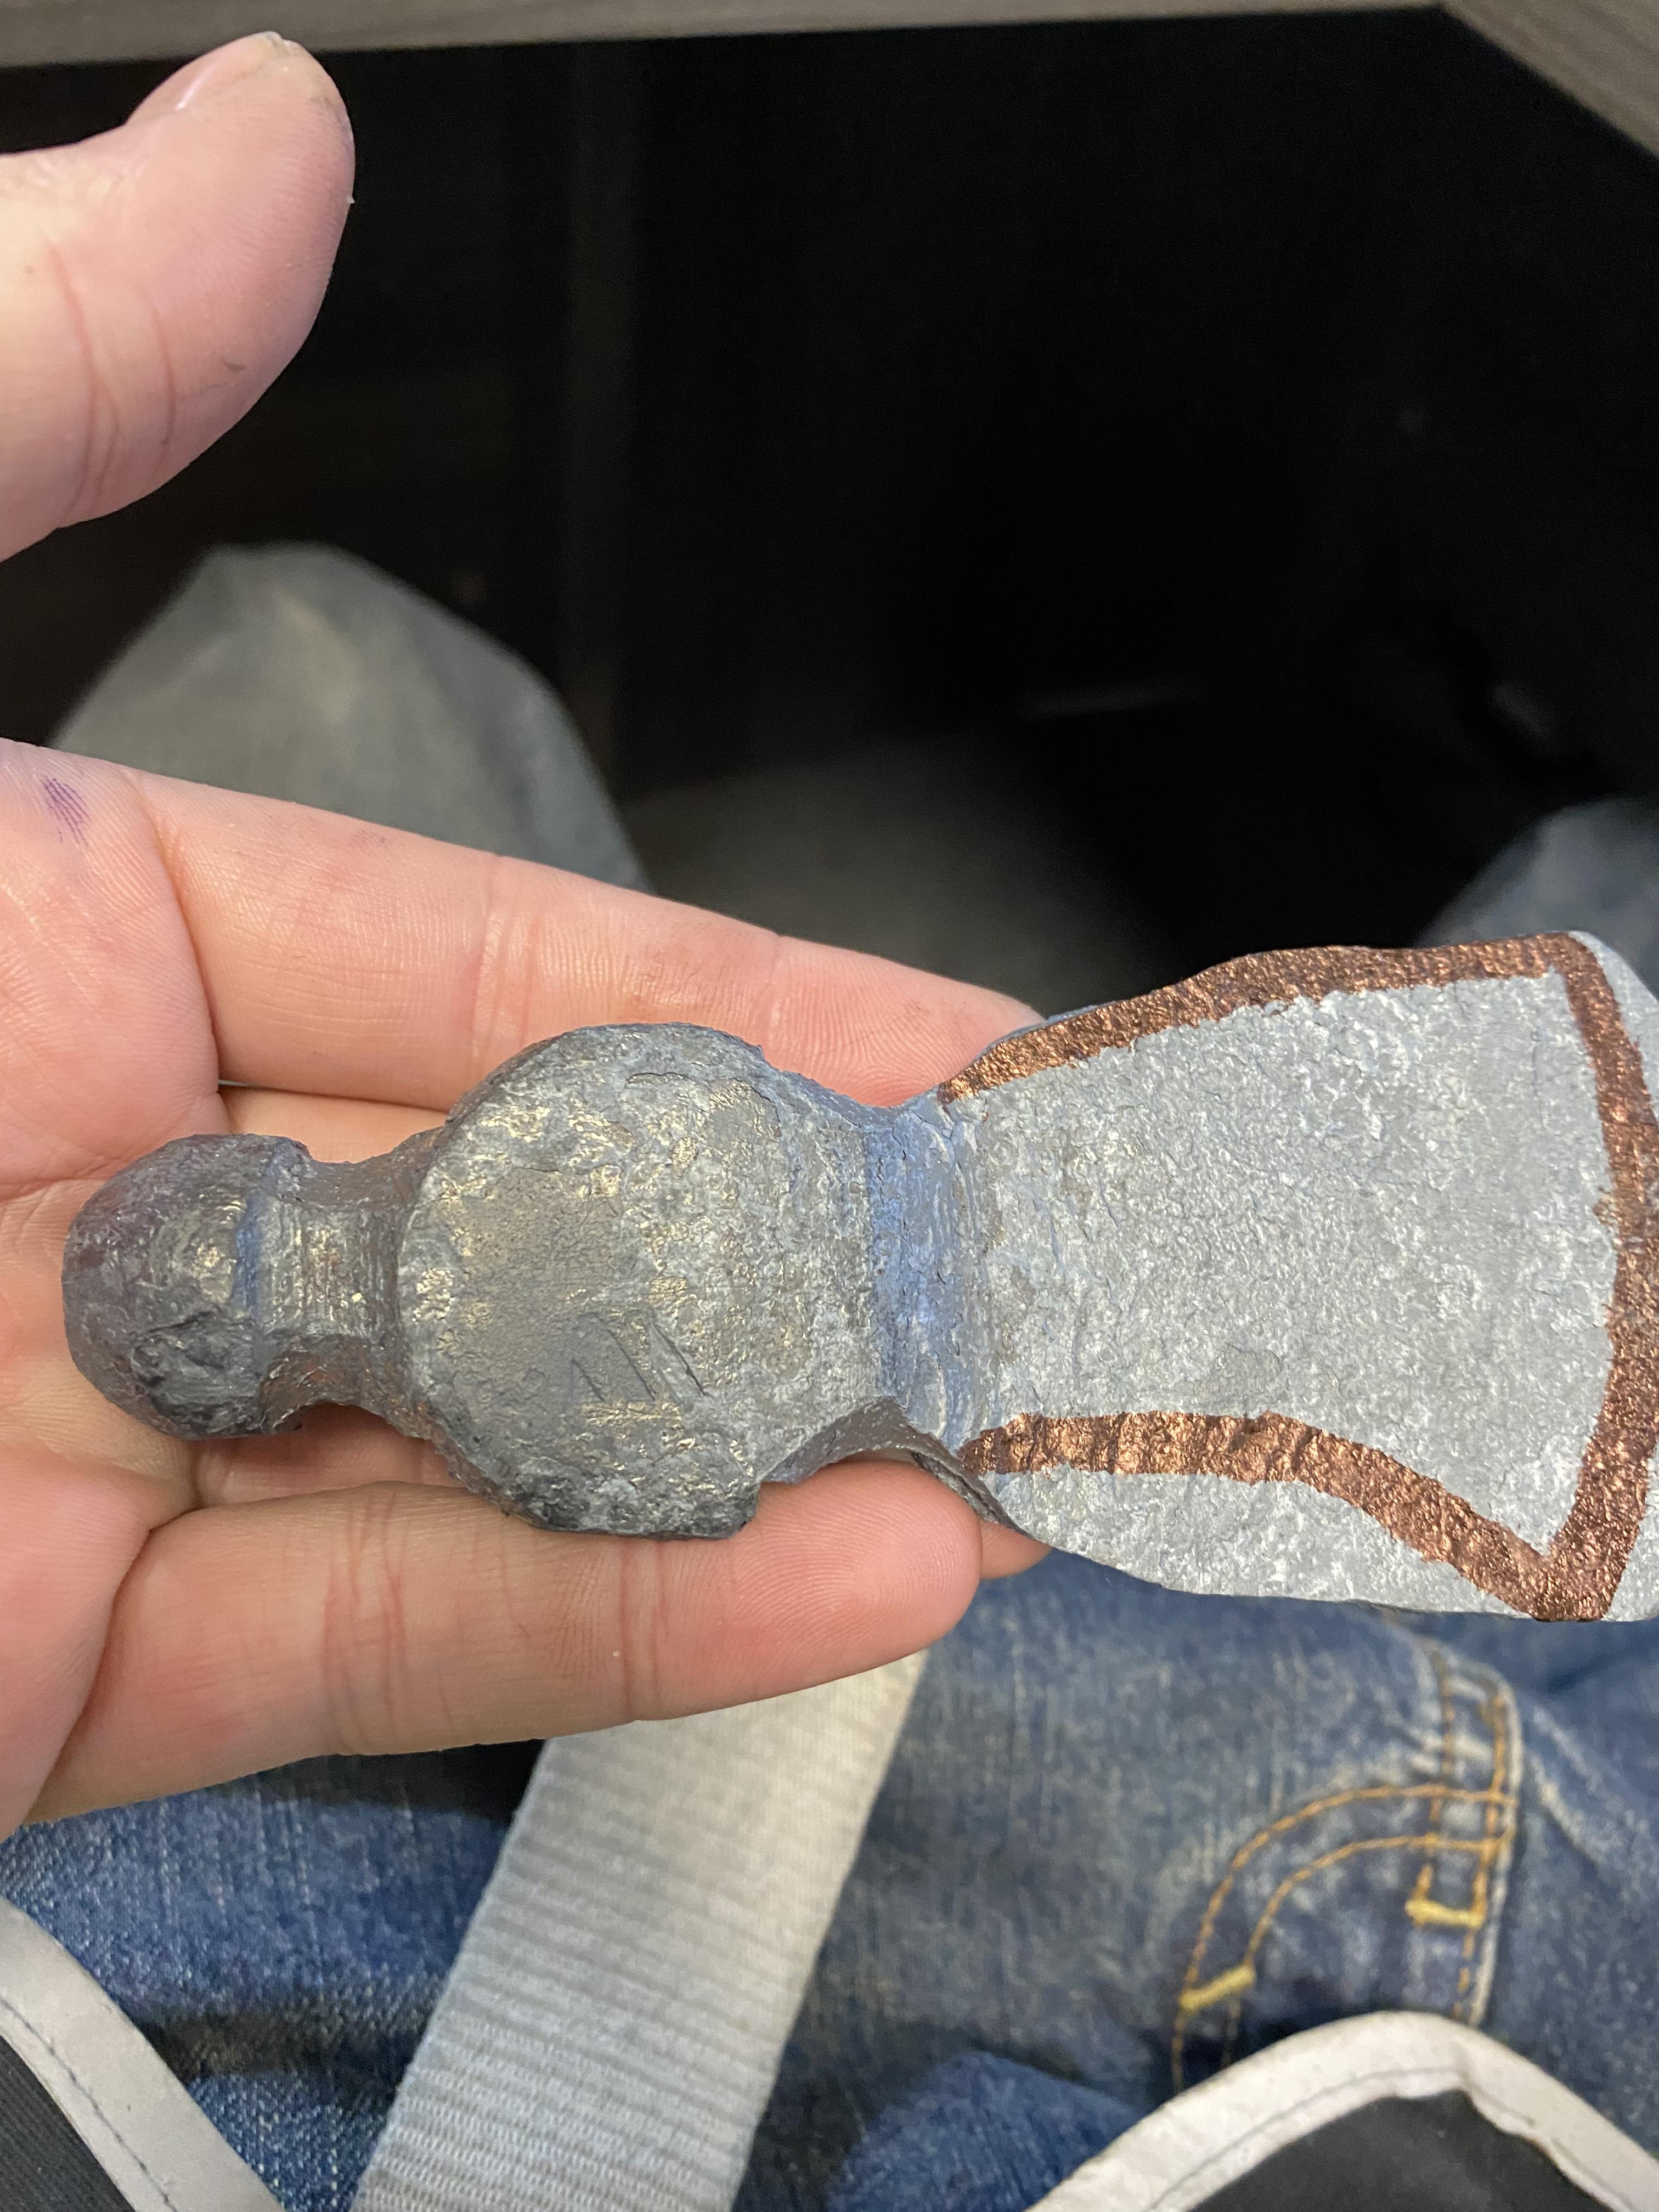
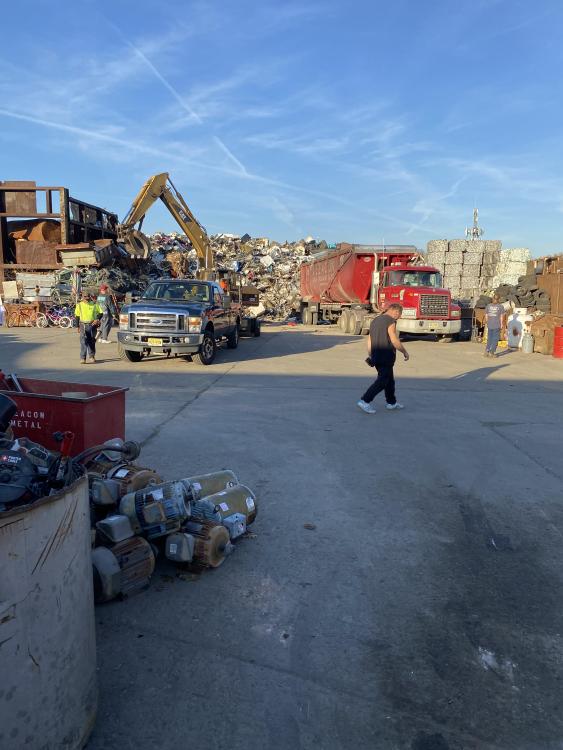
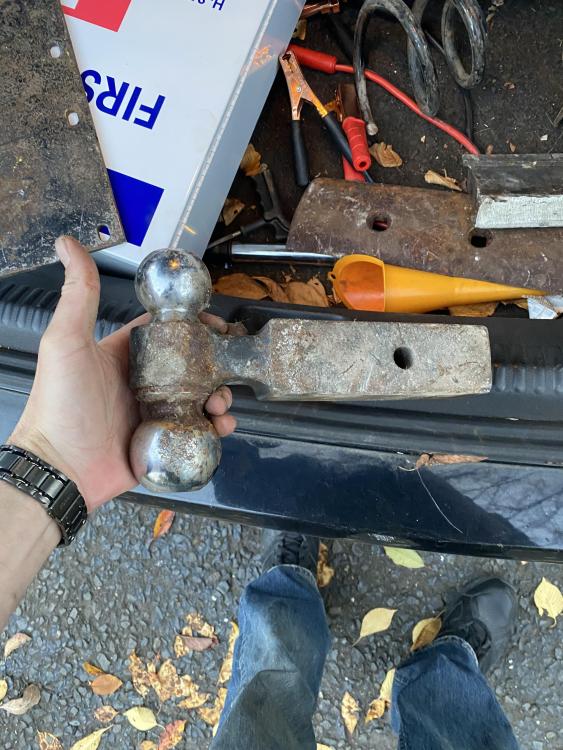
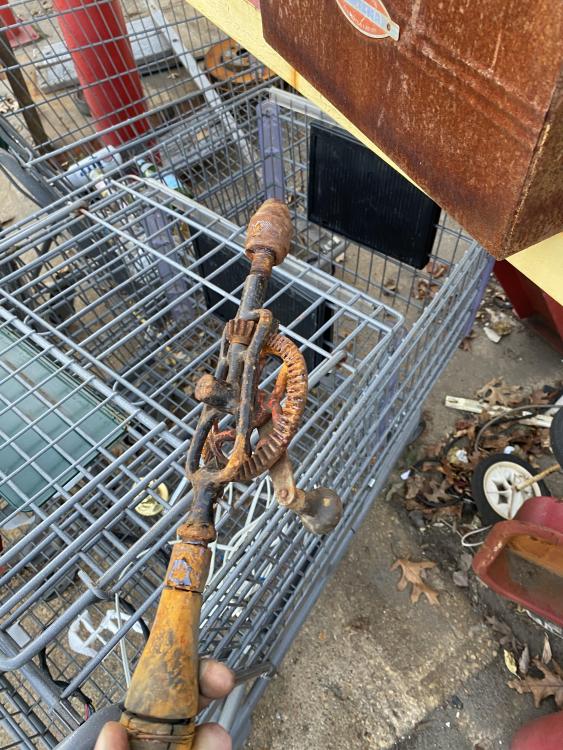
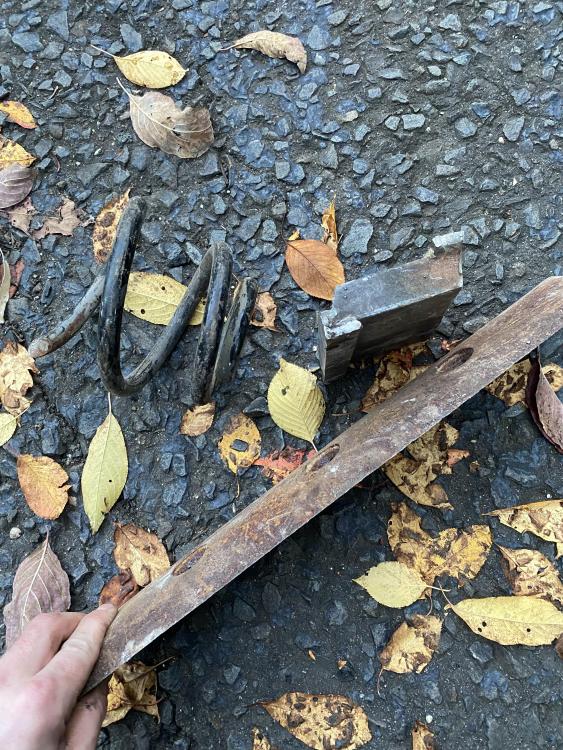
Made my first visit to a scrap yard today. My first visit since I started smithing and actually somewhat know what I’m looking at anyway. I’ve decided I’m going with the log splitter to forge press build so that’s why I went. Didn’t find anything for that but I found a couple pieces of plate, a hitch with two different sizes that I can use for forming and then some stuff that I’m pretty sure should be able to be hardened. Coil spring, some kind of blade for something not sure what and then another blade or cutting tooth of some sort. No idea what it is but after looking at it I’m thinking the mass in the middle may be mild steel and the worn parts that were welded is the good stuff and there’s not much left. Anyone know what these are? Anyway I had a bunch of brake rotors so they took those off the cost so I got this stuff for only 10 bucks. They said they’ve been crazy been and they’re usually much more organized and sorted. I literally was faced with a mountain and it wasn’t safe to go in very deep. I mentioned why I was there and one guy with many more face piercings than I could count said they had dumped “a bunch of small anvils” over the back of the pile earlier in the day - he said he was serious but I’m hoping he was just messing with me because that made me want to cry haha. Fun place though. I’m going to stop by maybe once a week to keep trying for the press parts. Also found this cool old manual drill. Didn’t take it but I thought it was interesting.

-
What did you do in the shop today?
Pat Masterson replied to Mark Ling's topic in Blacksmithing, General Discussion
Wow Dharris that is terrifying. Very lucky. Hope you’re back to 100% soon. -
What did you do in the shop today?
Pat Masterson replied to Mark Ling's topic in Blacksmithing, General Discussion
Would you mind giving some more details on the press build? I SO BADLY want a press as a power hammer just really isn’t realistic for me. I saw a guy on YouTube turn a log splitter into a press. Worked pretty well but what you’ve got there looks like something I might be able to build. -
What do you guys consider “good files”? What brand I mean…I have a cheap Amazon set and they’re ok but I’ll need to upgrade some time soon.
-
What did you do in the shop today?
Pat Masterson replied to Mark Ling's topic in Blacksmithing, General Discussion
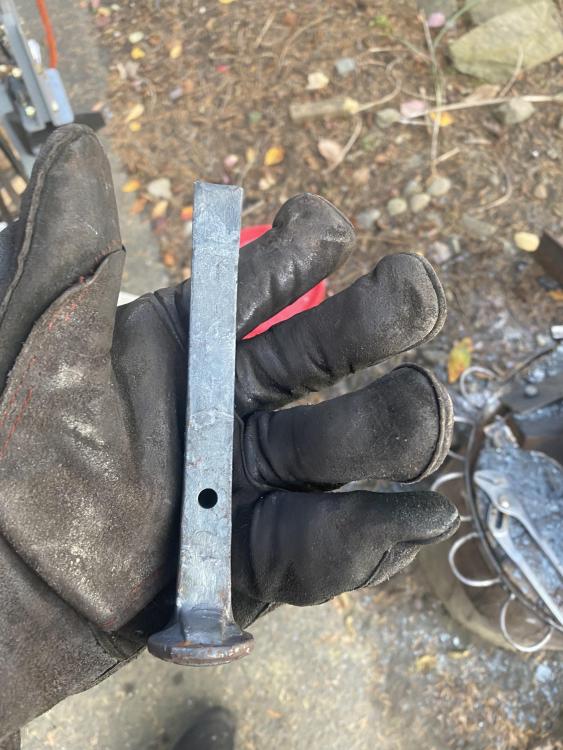
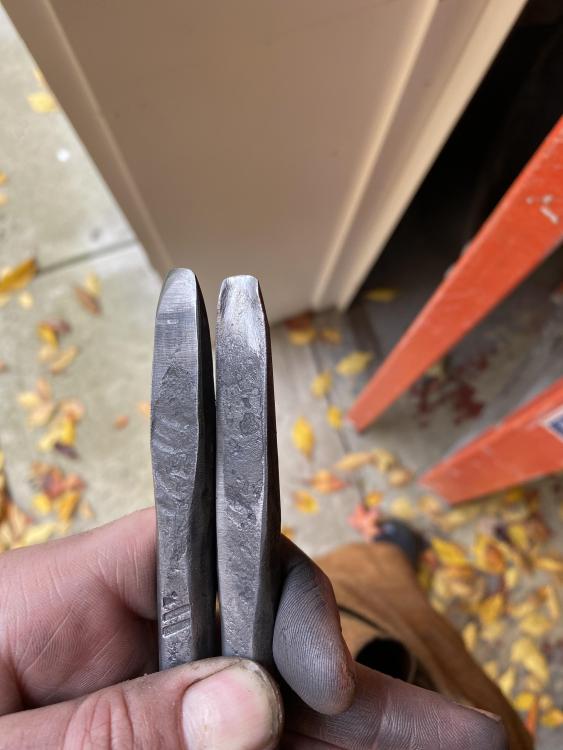
Really nice Jobtiel. Going to start the profiling on this hammer into an axe project. Very small but I still like it.
-
What did you do in the shop today?
Pat Masterson replied to Mark Ling's topic in Blacksmithing, General Discussion
Thanks JHCC. I also meant to add that there were no visible markings anywhere on the head or handle to do any research on so I have no idea what it’s made from. -
What did you do in the shop today?
Pat Masterson replied to Mark Ling's topic in Blacksmithing, General Discussion
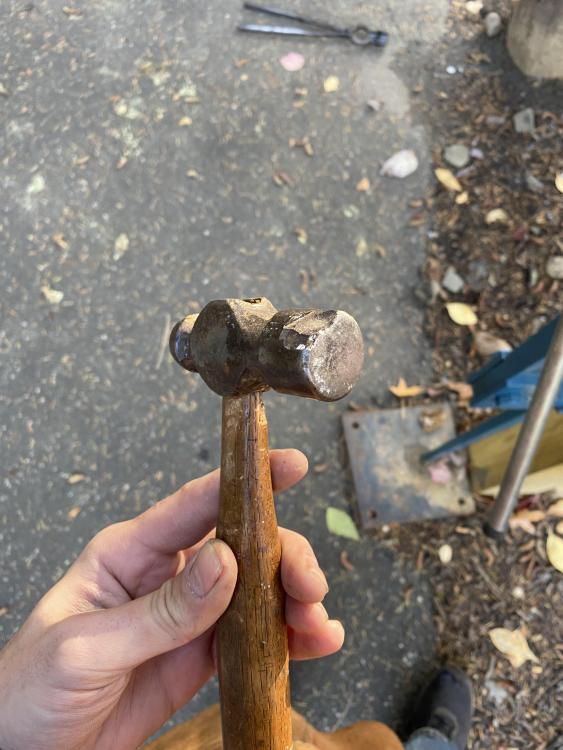
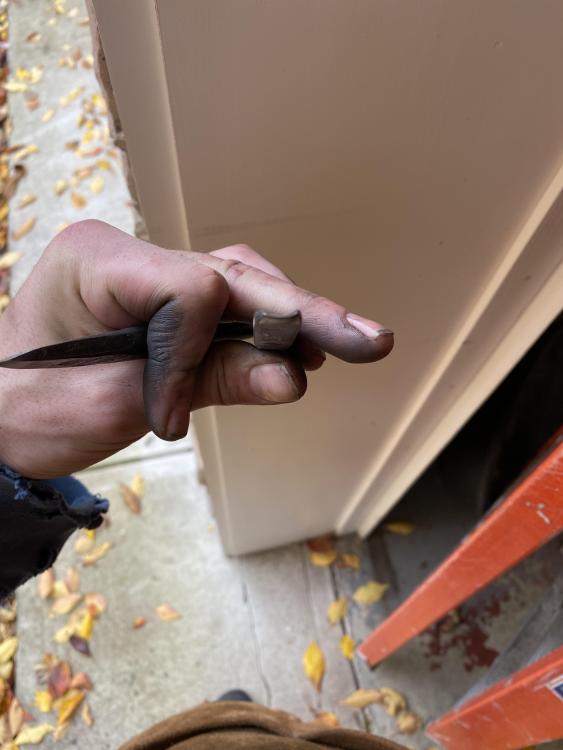
Thanks for the tips Frosty. The kaowool was not rigidized. Maybe a layer of that green patch stuff would help. Ultimately I still have more than enough kaowool and another 30 bucks or so for some rigidizer and more kastolite might be in order to redo it but it’s working ok and getting very hot for now. Gotcha on normalizing too many times and I do have a bucket of vermiculite so I’ll just anneal next time. I was mostly cutting hot and into a black heat. When you say the break looks “grainy” is that a bad thing? I thought small grain structure good large grain structure bad… So other than the globe I made I started what is I think my coolest project so far. My brother has been constantly hinting that he wants a tomahawk. First try from a rail spike didn’t go so well. Decided to try again yesterday, this time first drilling a hole for the eye. But on my first hammer swing to start upsetting the very hot spike flew out of my tongs and went at least ten feet in the air, landed a good ten feet away and immediately set those bushes on fire. It could have very easily hit me right in the face so I’m done with railroad spikes until I have proper tongs. But then while looking through my tools I found this very small ball peen hammer that was my late grandfathers. It had a very large chip off of it and would no longer be good as a hammer. The handle was also in bad shape. So I decided to turn that into a little camp axe. So not only will he get an axe but it will be made from something my grandfather held in his hands for countless hours. I fear I made it a bit too thin but my brother lives in an apartment and this will most likely be more of a decoration/cool factor thing than something he uses. Drifted the eye just a bit larger so the handle could be a bit thicker. Cooled in vermiculite over night and I’ll start the profile soon. I was wondering though…does that chip make anyone think this may have been case hardened? If so what does that mean for me when it comes to heat treat? Very ugly fullering jig which I forgot a picture of worked really well once I put a few shims in the hardy to hold it in place. Will get some better pictures when I’m a little further along. The blade ended up a tad bit crooked and I’m having a really tough time correcting that but I’m hoping I’ll be able to mostly mask that with grinding.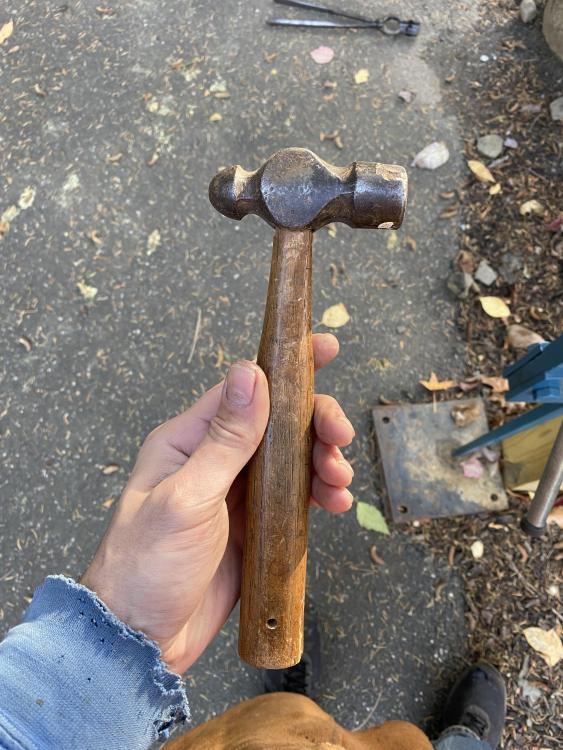

-
What did you do in the shop today?
Pat Masterson replied to Mark Ling's topic in Blacksmithing, General Discussion
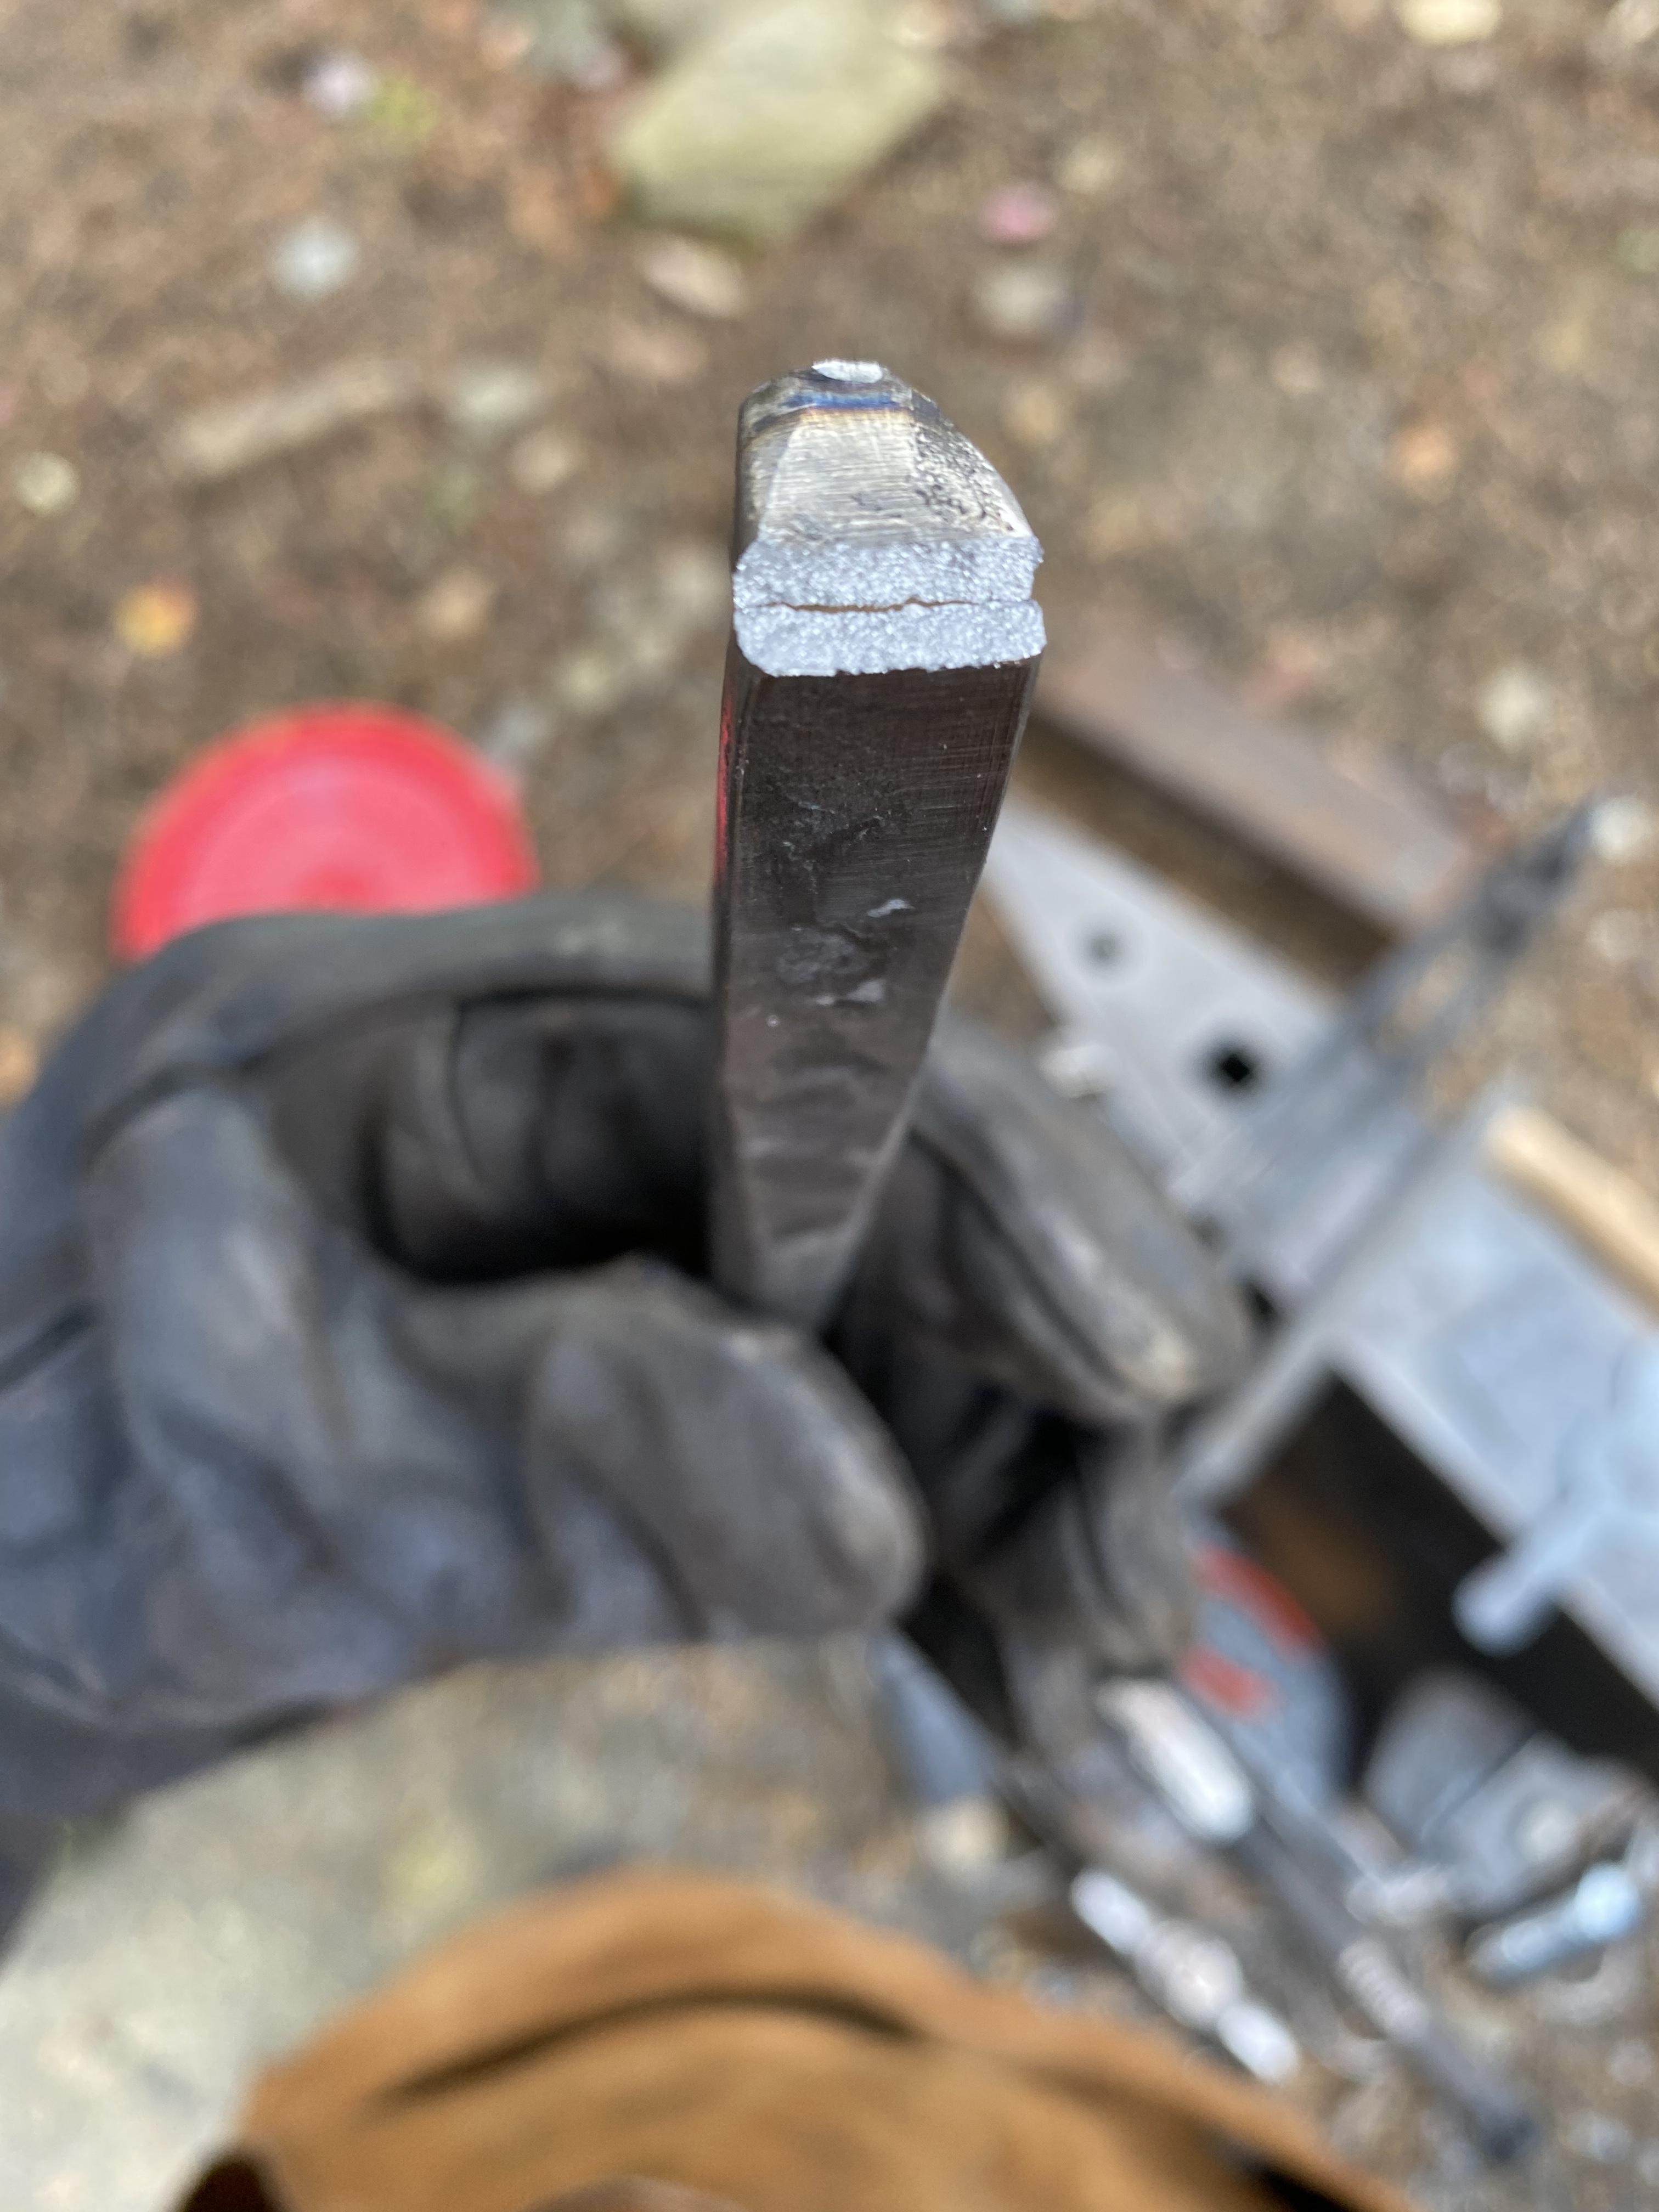
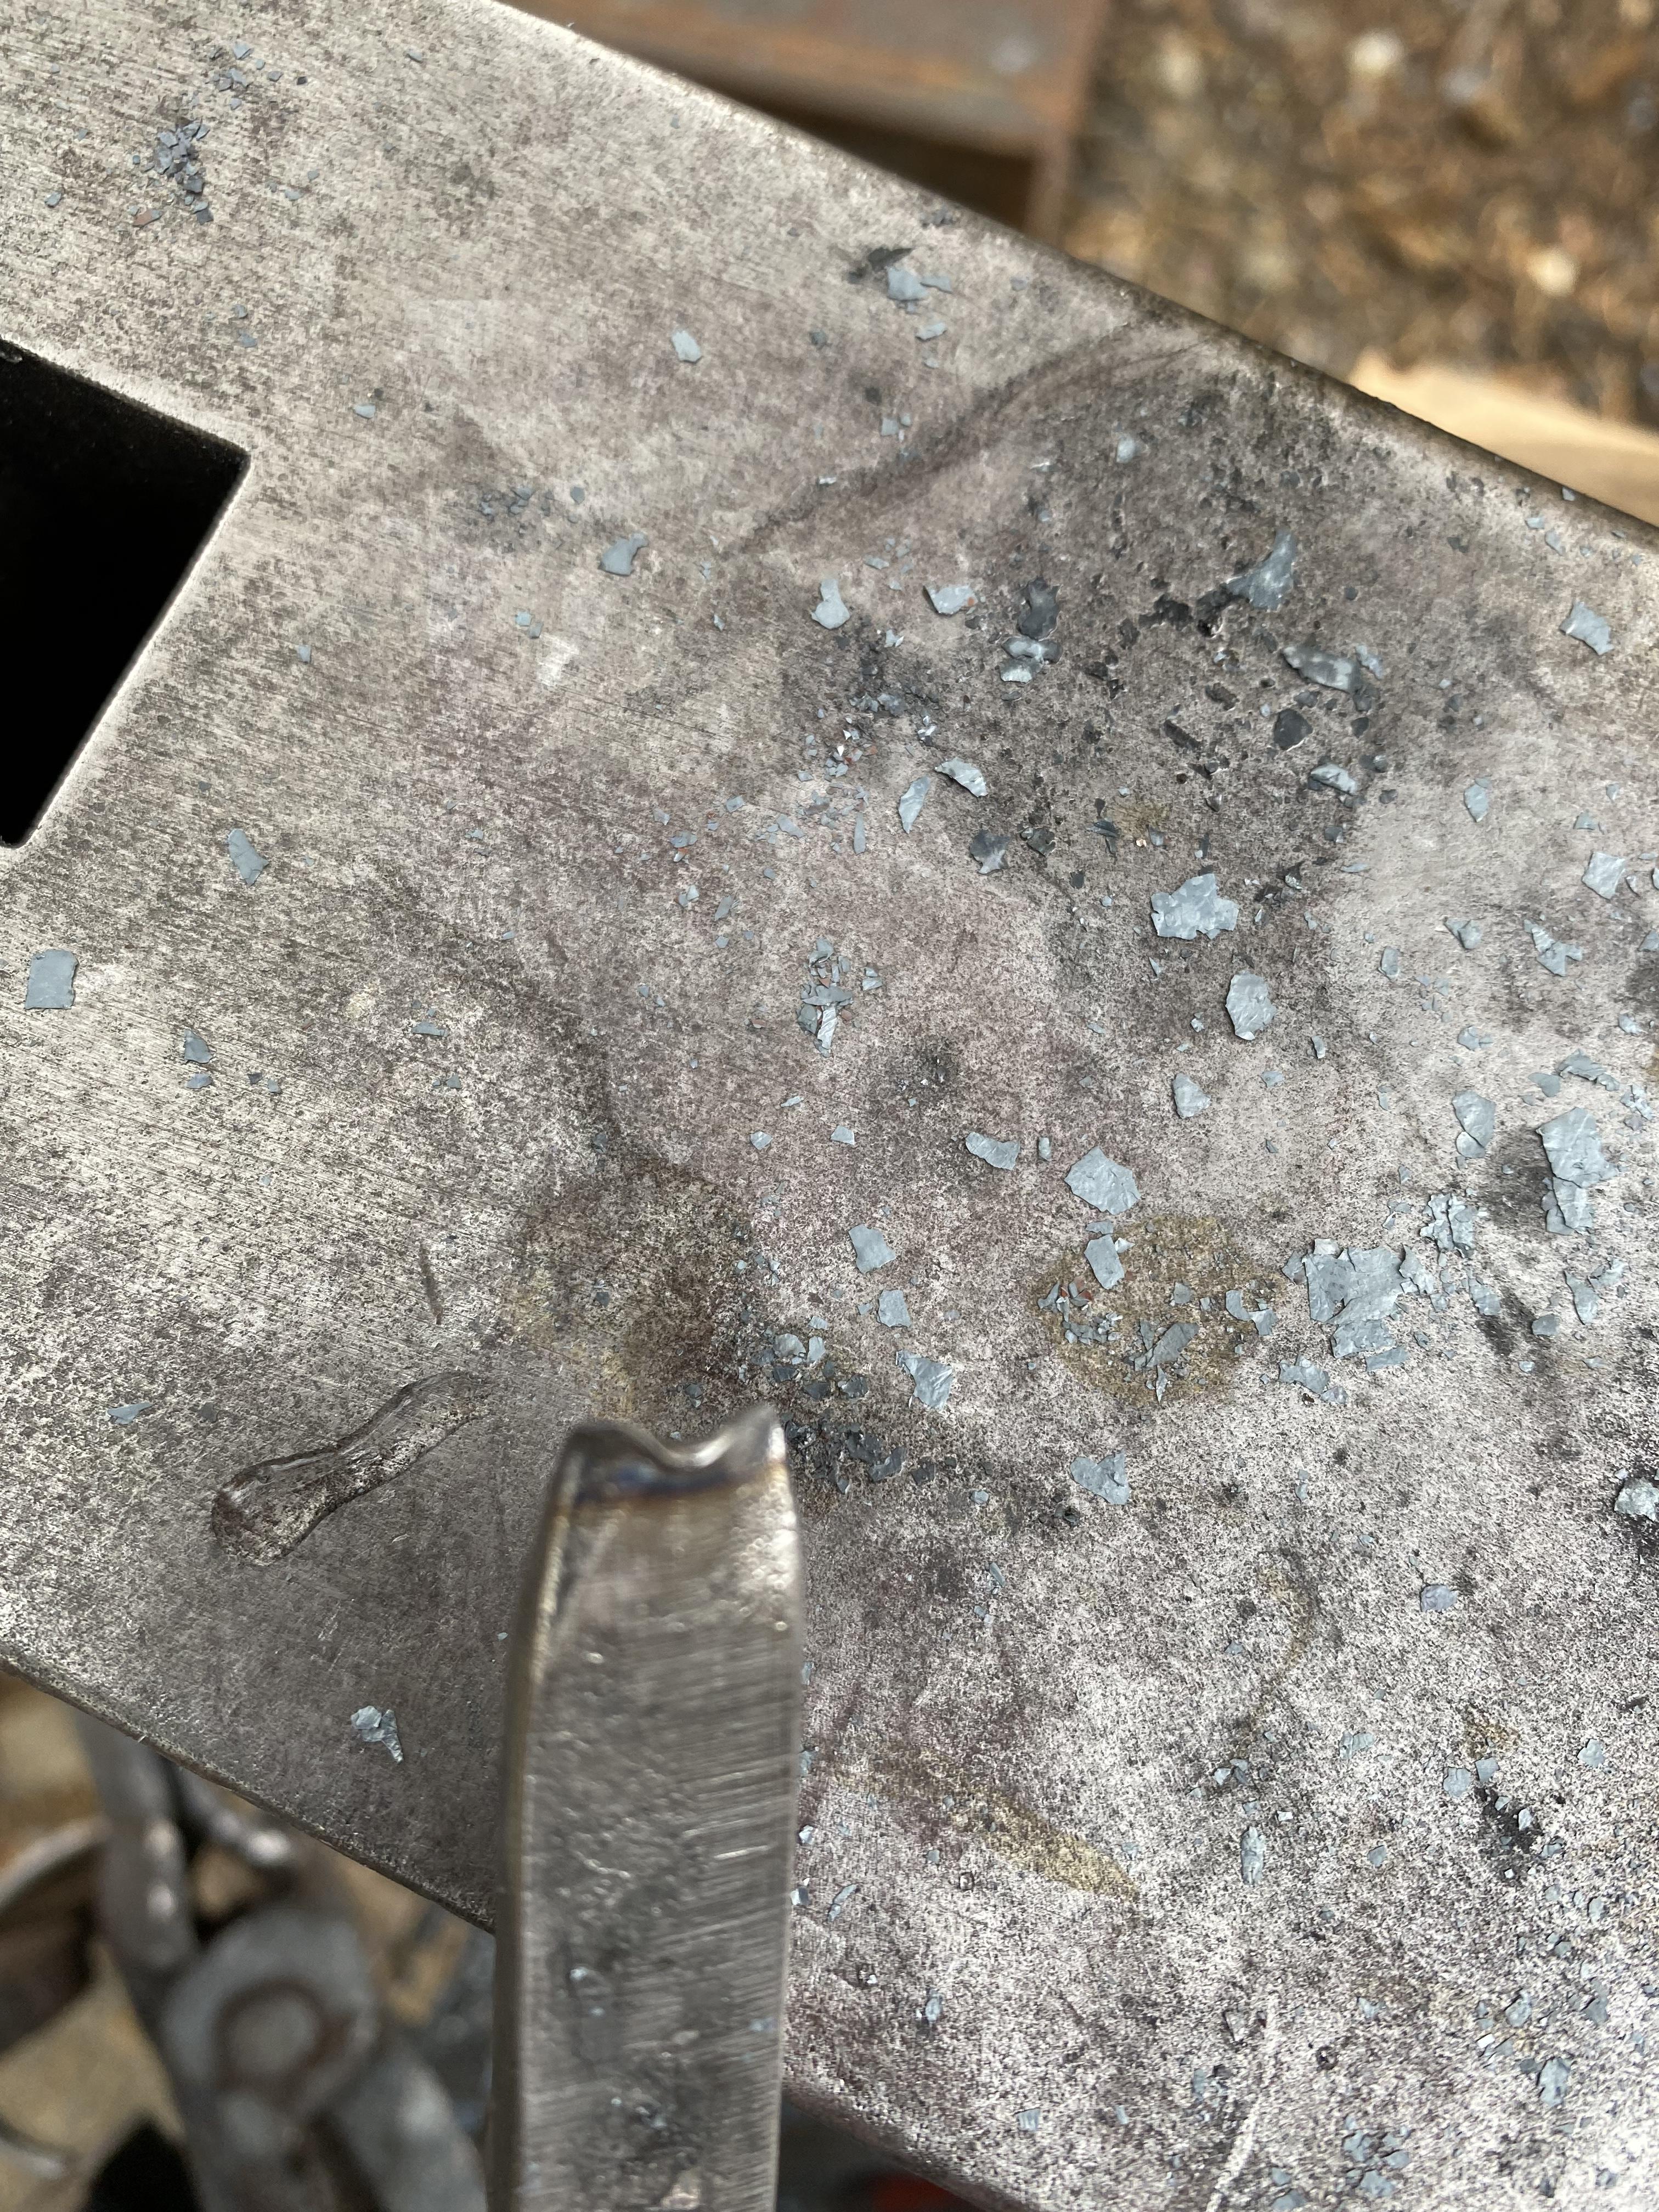
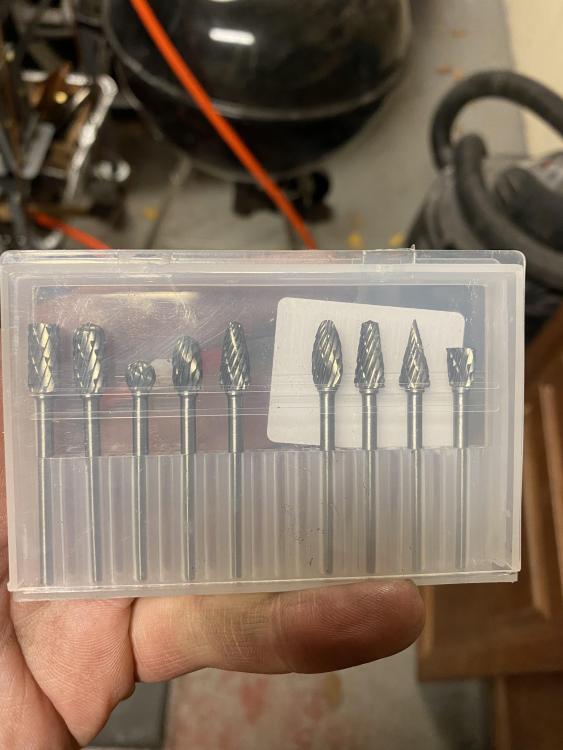
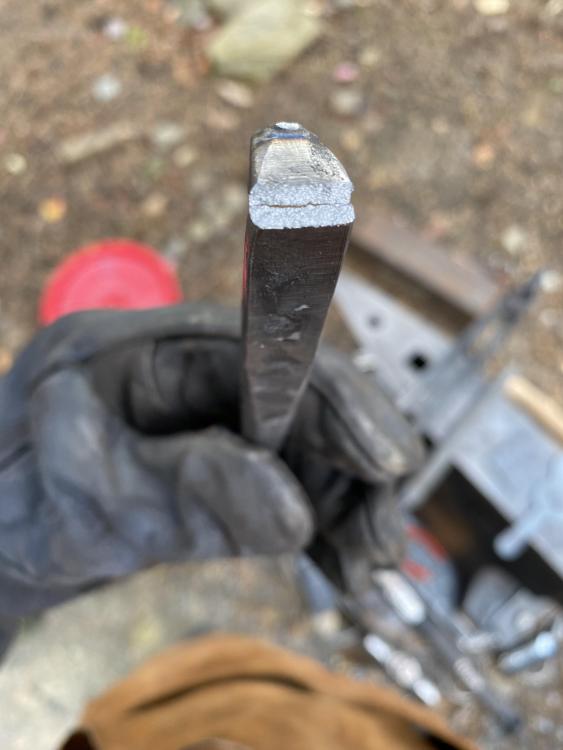
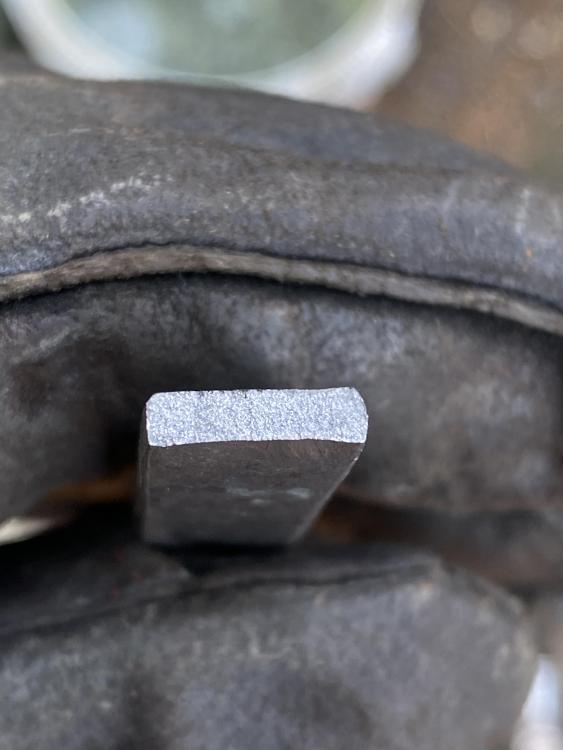
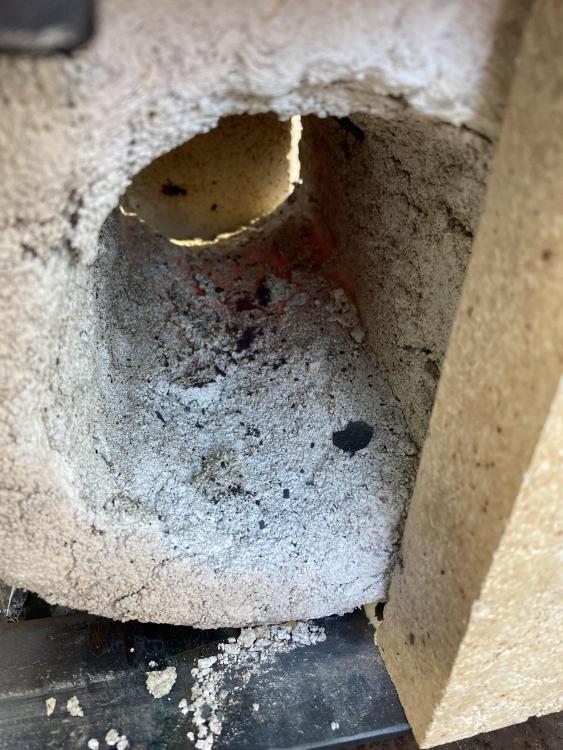
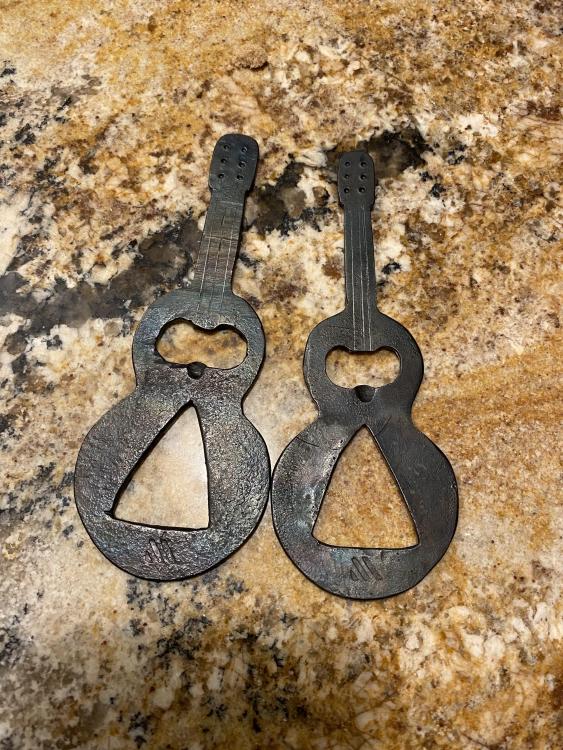
Gandalfgreen congrats man…finally got your forge going that’s awesome! Its only Saturday and I have so much to share already. Ok 1. is the kastolite- doesn’t look as nice as Gandalfgreens but this stuff is awesome. This thing is running way hotter than before and it’s definitely from the kastolite bc I was always using the fire bricks to close it off..one side is just more convenient now with the sliding brick door. not sure if it’s a good thing that you can kind of see it glowing through the bottom though..? If someone can tell me if that means it’s possibly too thin in that spot? Either way though its running much hotter. Almost burned 1/2” material by not paying attention. I never had to worry about burning up 1/2” previously unless I had it cranked all the way up trying to forge weld. 2. got the these little bits for my dremel off Amazon. Supposedly tungsten carbide which I didn’t think was possible for $15 shipped but I’m starting to believe. They’re pretty good. 3. used them to clean up the cut outs in these guitar bottle openers I made for my cousins for Christmas. I can’t cut a straight triangle but that’s ok. Really kind of mad I went with that design just bc it was what I saw a picture of. I have this large square punch and I think turning it 45 and punching a couple Diamond holes would’ve been much nicer. Not usually a beer drinker but hey what kind of blacksmith would I be if I didn’t make sure they worked… 4. ok most important. I posted some chisels I made a week or two back and they have held up really well. So today I needed to make smaller cutting end chisels..one straight and one curved to do these cutouts in the guitars. As you can see one deformation and one total failure. They held up long enough to get the job done but I’m disappointed as these were going to be really useful for me. I’m putting a pic of the grain structure. Hoping someone can tell me what’s happening. I heat treated the same way as before. 3 cycles of up to critical and cooled to a black heat to normalize, did my initial grinds, then brought up just passed non magnetic as slow as I could, quenched in canola and tempered to a straw color. These were made from a big half inch spring that controls the dock plates in warehouses. I had assumed I just didn’t do enough cooling during use, especially with the curved one as it was pretty thin, but then I just barely tapped it to try to straighten it a bit and I got that clean break. Will probably make them again but I don’t want the same thing to happen.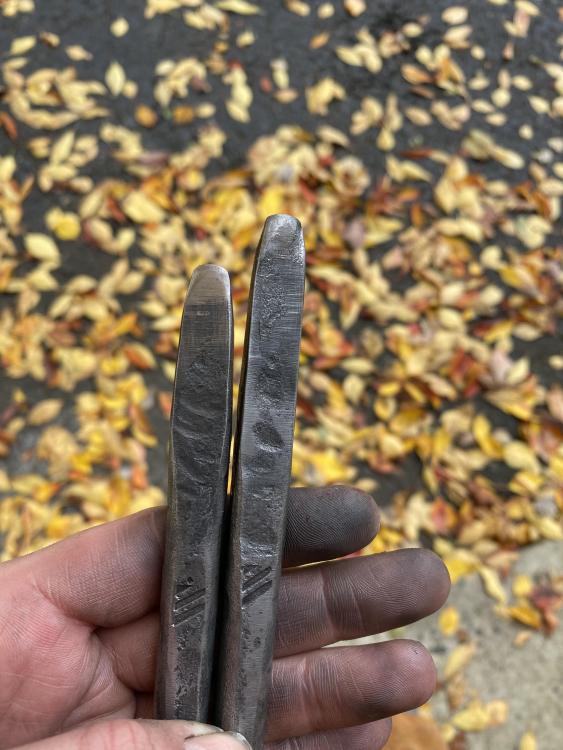

-
What did you do in the shop today?
Pat Masterson replied to Mark Ling's topic in Blacksmithing, General Discussion
Latticino I’m betting I can tell you exactly from where you got that “inspiration” as JHCC correctly stated lol because Ive had a screenshot of almost that exact design on my phone from a Pinterest thread for about 8 months now haha originally from some kind of “blacksmith idea” google search or something - haven’t had the guts to try it yet but it’s an awesome design. Nice work.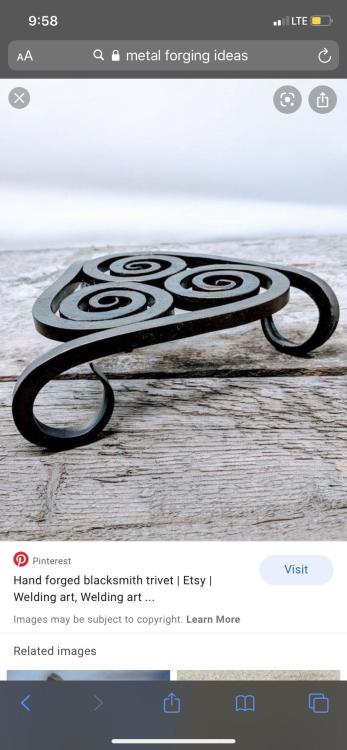
-
What did you do in the shop today?
Pat Masterson replied to Mark Ling's topic in Blacksmithing, General Discussion
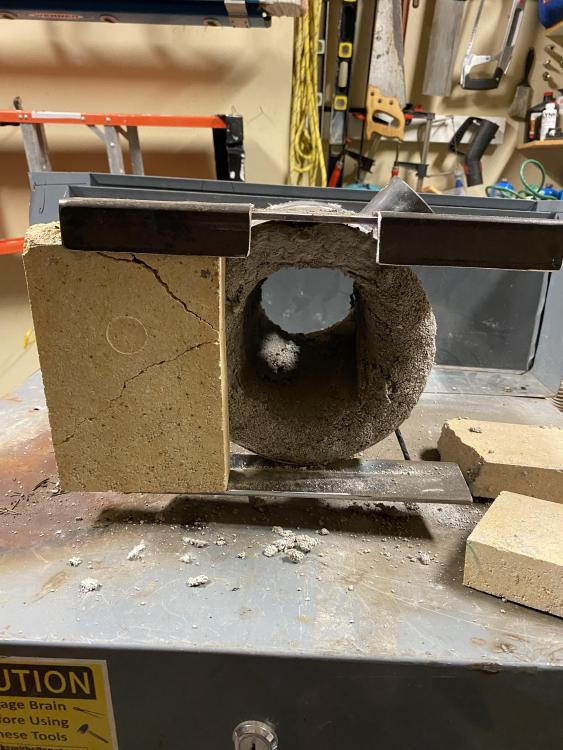
So this kastolite seemed to set up pretty well on the inside but not on the edge where its not actually inside the forge. Hoping that won’t matter too much. I welded up this little bracket to make a firebrick door. Plan to do the same thing on the other side. The fire bricks weren’t quite the the right size so I tried to cut them - hack saw and angle grinder = fail. I guess some kind of masonry wheel would work to cut them? Just scoring a line with the grinder then hitting with a chisel made pretty clean breaks but of course I went for a little more and cracked them.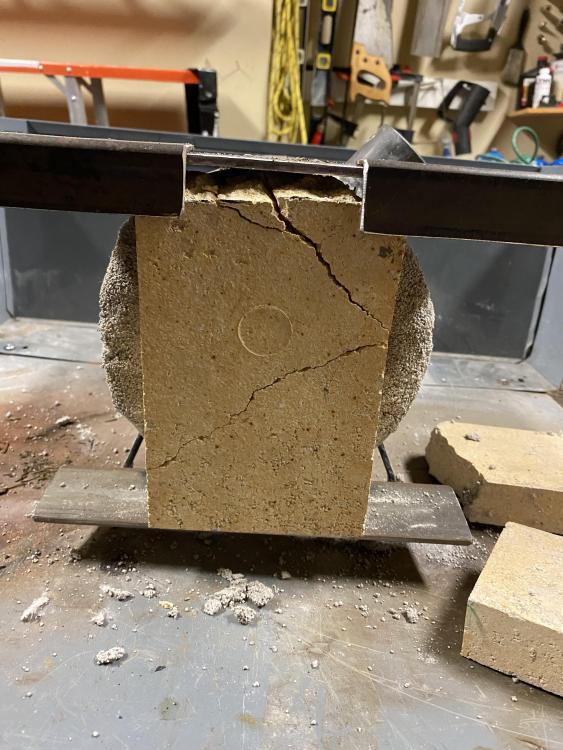
-
What did you do in the shop today?
Pat Masterson replied to Mark Ling's topic in Blacksmithing, General Discussion
Gandalfgreen that looks really good. Thaks for the advice Frosty. I was under the impression the firebrick was a must have because they always advertise the forges with them but If I don’t need it then that just opened up a lot of space. I’ll look into the kiln shelf also. -
What did you do in the shop today?
Pat Masterson replied to Mark Ling's topic in Blacksmithing, General Discussion
Very nice ladle. Well I attempted to reline my forge with kastolite 30 today. It didn’t go well. I read the best way was to make forms but I honestly didn’t even know where to start with that. I also read if you made it a little bit wetter than it’s supposed to be you can kind of paint on a very thin first layer and then hand mold the rest. I guess it’s on and it’s going to cure and should technically work but I’ve lost like half of the space I had inside the forge. Lack of space was my biggest problem with this forge so I can’t have that. It’s partially because this fire brick is much thicker than the one that came with it. I think this kaowool is thicker also and the kastolite is definitely thicker than the refractory that came with it. Maybe the kastolite will contract as it cures and give me a little more space? Don’t think it works like that. I thought the price of the refractory was highly overpriced from the company that makes the forge but I guess not. It lasted over a year with a very very thin layer. So I think I’ll use this for a little bit but I’m definitely going to order some of the other refractory and maybe a thinner kaowool so I have at least the original amount of work space. Firebrick is just for the picture not leaving it in there while it cures. Disappointed but that’s what I get for not taking the time to do it the right way I guess. Although maybe I’d have this lack of space issue either way. I don’t know. Ok what did I do wrong that it posted my text twice? I certainly didn’t type all of that twice lol [Fixed it for you. It's a quirk of the software, and you can always fix it within the 30 minute editing window. If you miss the window, just report your own post to the mods and request someone tale care of it. We may not get to it right away, but we're happy to help. -- Mod 34]
-
What did you do in the shop today?
Pat Masterson replied to Mark Ling's topic in Blacksmithing, General Discussion
I’ve had the single burner devils forge for a little over a year now. The one with the burner at an angle instead of straight up and down. I’m told the angled one is better - not sure how true that is. But it’s been really great for me as a first forge. The small amount of refractory that came with it held up surprisingly well and only really started going bad to the point where I’ve just bought new lining materials once I started doing some forge welding. The only issue I’ve had is the opening not being large enough but from what I’ve seen most forges would’ve given me the same issue for the projects I’m talking about which is why I’m working on a bbq turned into a coal forge. I will always use the propane forge as well though. They have pretty cool ones now with sliding fire brick doors which I plan on just adding my own to my forge when I redo the lining. I don’t think you’ll be disappointed though. The hells forge and devil forge products are very very similar but I think hells forge is a USA company while devil forge is foreign so if I were buying again I would get the hells forge. Thanks Das I’ll check that stuff out. -
What did you do in the shop today?
Pat Masterson replied to Mark Ling's topic in Blacksmithing, General Discussion
The basket twists look pretty cool hanging from each other alternating. Might try to make a few about half the size and welding them together - like a long icicle type ornament maybe.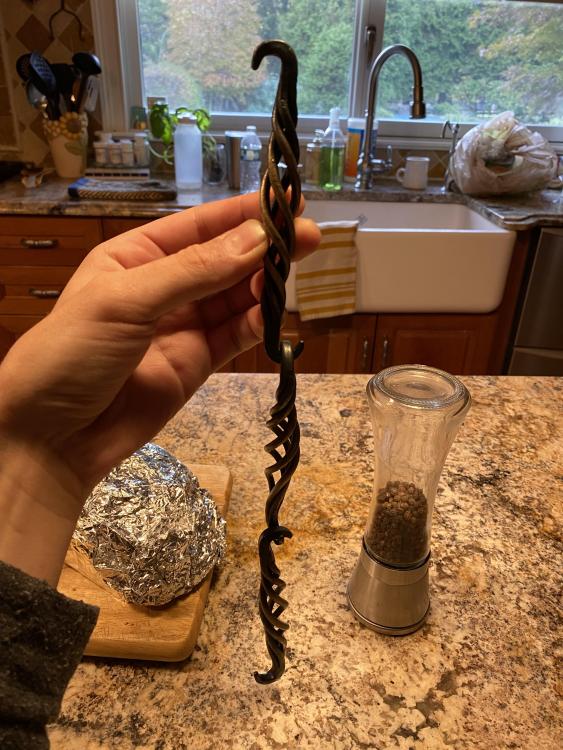
-
What did you do in the shop today?
Pat Masterson replied to Mark Ling's topic in Blacksmithing, General Discussion
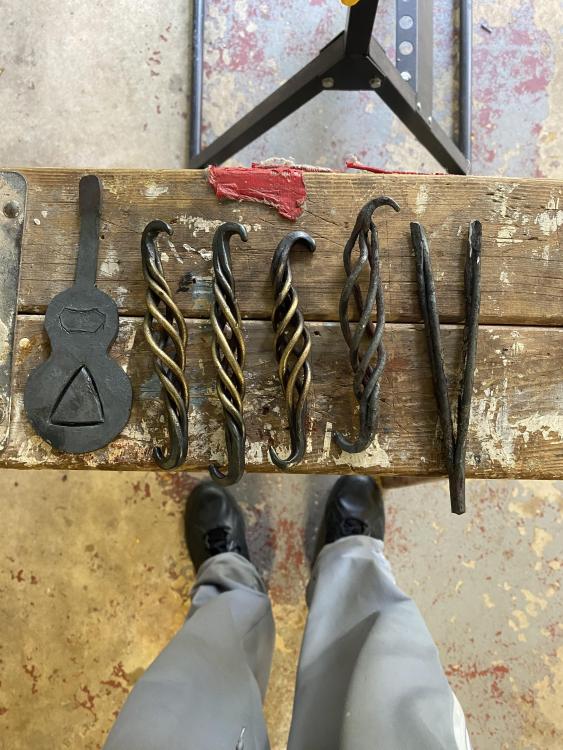
Crazy stuff. Really cool. I’m addicted to machining videos on YouTube. The precision aspect is incredible to me. I got a few more basket twists done this weekend. More Christmas gifts. Two utter and complete failures - one of which just would not weld no matter what I did. I must have had beginners luck on the first one I did a few weeks backs bc it was very graceful and smooth with the twists. Can’t say the same about these. I think I might be twisting too much and therefore the untwisting doesn’t go well. I have a couple cousins who play the guitar so I started one of two guitar bottle openers. Haven’t finished cutting through. Got the idea from a google pic though - not my own. Also saw my brother for the ufc fights - not sure if anyone here is into MMA/UFC but wow what a fight card last night. Screaming at the the TV for five straight fights. Anyway, seeing him meant I saw the rams heads tow hitch thing I made him which needs to be refinished AGAIN. I’ve tried paste wax, BLO and a spray on clear coat - nothing is stopping the rust. I think I’m going to try cleaning it real well and then do a primer and black paint job on it. Maybe a clear coat over the paint. If that doesn’t work then I don’t know what to do next.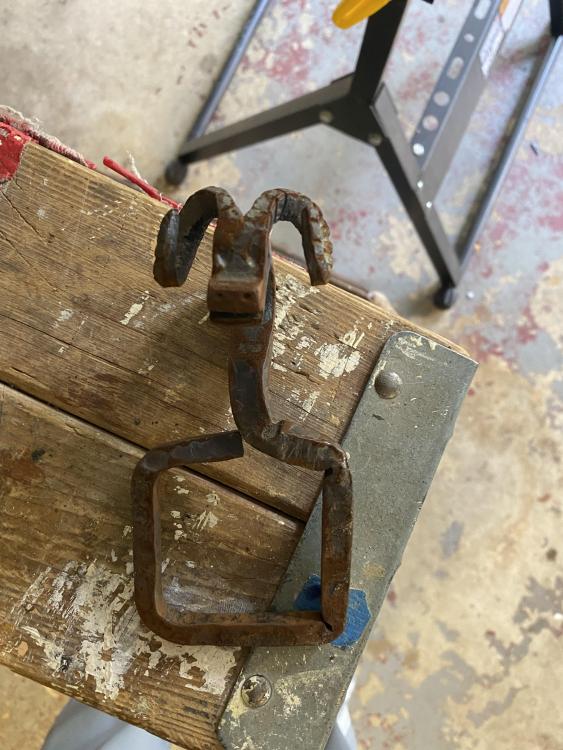
-
How is something like this pulled off? The vertical parts with the flare to each side…obviously doesn’t go thru the punched whole like that. I was thinking the bar went thru then the flares were chiseled out but it doesn’t look like the hole would be big enough for stock that would have enough width to pull those flares out once pushed thru the holes. It’s making me mad that I can’t figure it out haha someone tell me
-
What did you do in the shop today?
Pat Masterson replied to Mark Ling's topic in Blacksmithing, General Discussion
Thanks Les - hopefully one day they’ll look like yours though.