bertie_bassett
Members
-
Joined
-
Last visited
Everything posted by bertie_bassett
-
thanks hojpoj i see your has a few dents in one area but the rest looks clean. is that just the main area you use? or is the hardness just thinner in that area?
-
well for £120 on ebay i think they are probably worth a go. Although all three sellers are chinese and using the same error filled advert they look to be shipping from the czech republic so i assume that is where the foundry is. quality control may not be the best but if i were making 100's of item i couldn't guarantee they would all be the same, the important thing in my mind is that the item functions as intended. if it turns out to be a bit soft ill likely run a carbide mill over the pritchel area to make it more useful for punching holes and give me a step similar to other anvils. if its too soft to be any use at all then perhaps it can be heat treated at home?
-
thanks pnut i too think i read that there were some softer ones out there but i cant find out if this is still a problem or not. I may just take the chance, 30kg would be a good weight for a general purpose anvil that needs to be moved out the way after use. its certainly more maneuverable then the 1 cwt brooks i used to have. im trying to keep things as compact as i can but the additional log or a block of steel is worth considering. Thomas - i would of course add a cutting plate to any anvil i get, i have had to sculpt a copper 'cup' to fit on top of the railtrack to try and save the small face when chiseling.
-
afternoon all does anyone have any recent experience of the 30kg czech anvils with 'acciaio' on them? particularly in the UK? i have seen a couple of posts here showing they are reasonable quality for the money but i cant seem to find anything particularly recent or any reviews from the UK. Amazon has only 2 listed, one has bad reviews and the other is priced at over £400 which is a bit steep for a 30kg anvil of unknown quality. ebay also is rather light on offerings but does have 3 chinese vendors shipping direct from the czech republic. i just dont know if they are of reasonable quality or not. i have a railway 'post' anvil which is working ok for the moment but i miss having a nice flat surface for chiseling and straightening things on. thanks in advance
-
it was a little crooked in the last pic as i was only giving the damaged nozzle a run for fun. All the others were aligned as perfectly as possible. tbh for the moment i have lost interest in further testing, i only really wanted to get a burner running well enough for the forge. There is little point in me swapping things out and making adjustments if i don't know how to interpret which flame is better. maxing out this burner with a 3d printer nozzle would be nice to show what can be achieved but i'm not the man to do it if it is even possible.
-
oh well i was hoping that the pics would have shown some improvement but perhaps id be better off just giving up as im clearly on the wrong path thanks for the help anyway
-
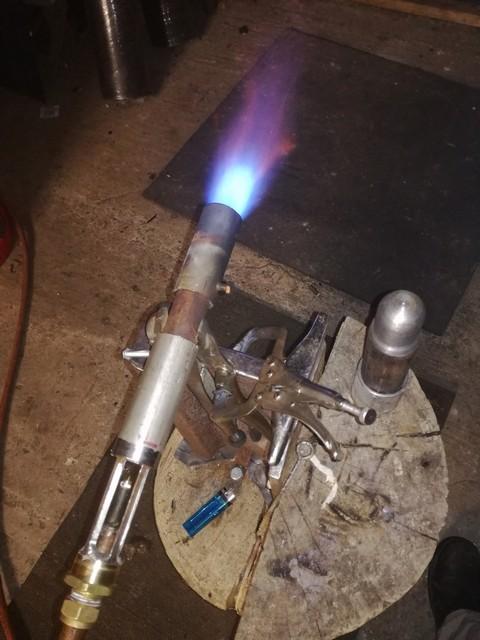
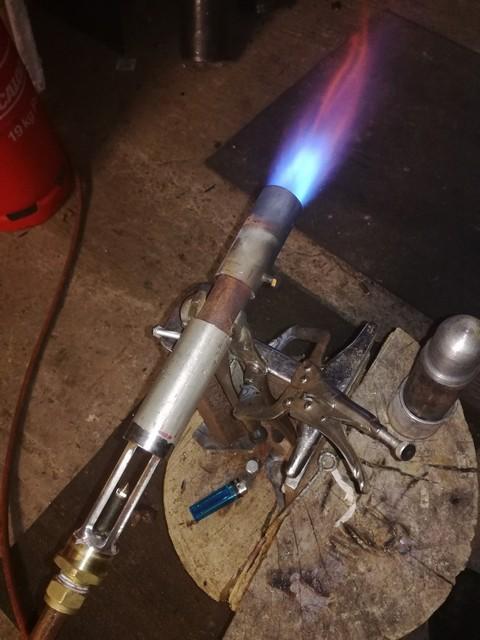
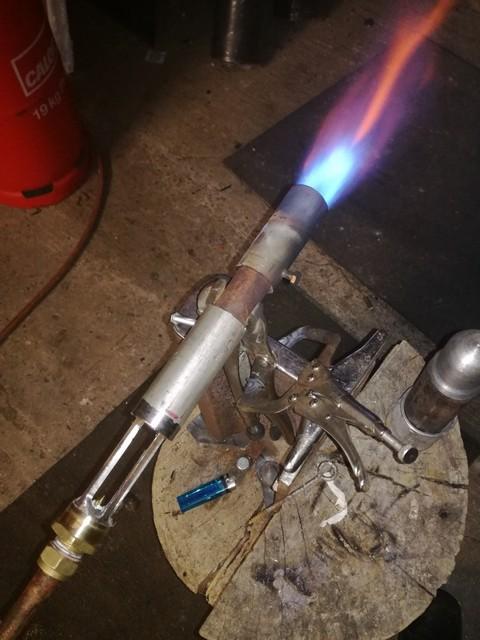
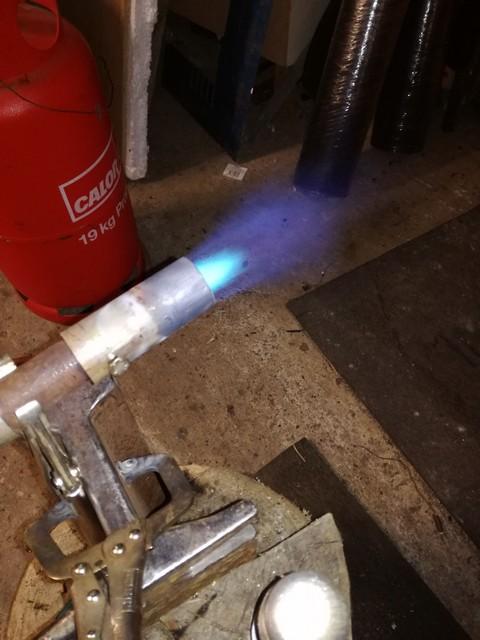
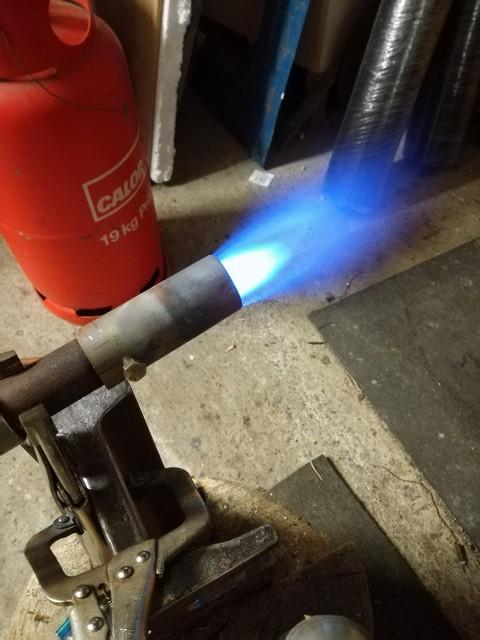
well i had time for a little play but tbh im not sure i am any further forward. tried moving the tip further towards the mixing tube but with a 0.8mm jet, it would either burn in the mixing tube at low pressure or blow out at higher pressures. couldn't find a stable position. so i moved up to a 1mm jet, that initially was very unstable. was about to give up when i noticed the end of the jet was damaged, i must have dropped it at some point and dented the orifice. swapped a new 1mm jet in and it seems to be stable. Pics below show the jet position and the flame achieved. all other settings are the same as i simply slid the jet in and out and took a pic. i then took a file to the damaged jet, seems the 1mm bore isn't very deep and i was soon into the wider opening behind the tip. ended up with something near 2mm which gave an interesting flame. Very lazy with lots of yellow in the end at lower pressures and one huge tongue of blue when cranked as far as i dared inside a wooden workshop. so al in all i have some results but cant interpret them to know good from bad. i also have a suspicion i need to be running these tests longer to prove anything reliably, the flame holder did glow dull red occasionally but
-
-
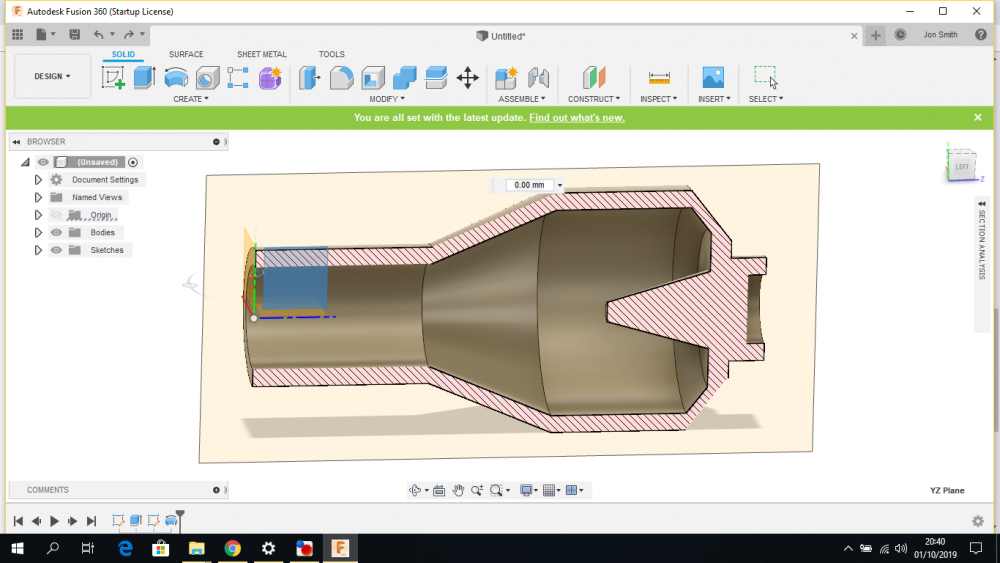
sorry words are not my strong point. by nozzle i mean the orifice/jet. the injector tube is simply the brass tube with the jet on the end. perhaps this sketch will explain better? basically just cast the below in one piece (with air slots), the back end gets drilled through and then just tap M6 for a 3d printer nozzle ( orifice)
-
quite possibly the shaft has come from a sluice valve or similar item. LH threads give a clockwise shut which is perhaps slightly more common then the anticlockwise shut for water mains. ( all depending on what the local authority prefered)
-
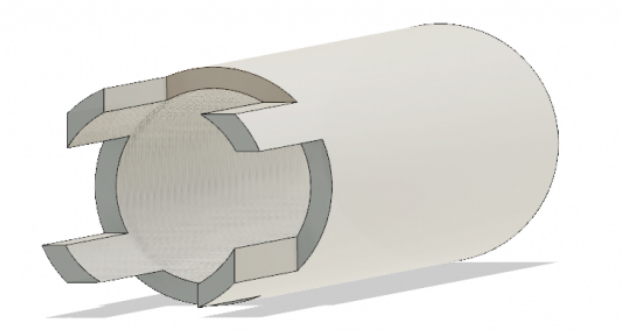
hmm seems ill have to try harder. I can try moving the nozzle further forward to see what that will do, i wont pretend to understand why that would be better but will follow the voice of experience. Only other thing that is different is the side edges of the air slots which were cut on a tangent, perhaps that is causing more turbulence rather than helping the air in. Have made a quick sketch of what i mean below, wont take long to mill off the offending parts and the tube should still be strong enough.
-
again im sorry i misunderstood and thought you were testing on a linear burner. i do however wonder if the injector tube couldn't also be cast along with the inlet chamber? would just need drilling out and tapping for the nozzle to fit directly. of course the perfect nozzle position would need to be ascertained but it might be an idea worth considering? just imagining a single piece cast inlet chamber with a removable nozzle for maintenance/upgrading, all you would need is to add a mixing tube and it would be ready to run.
-
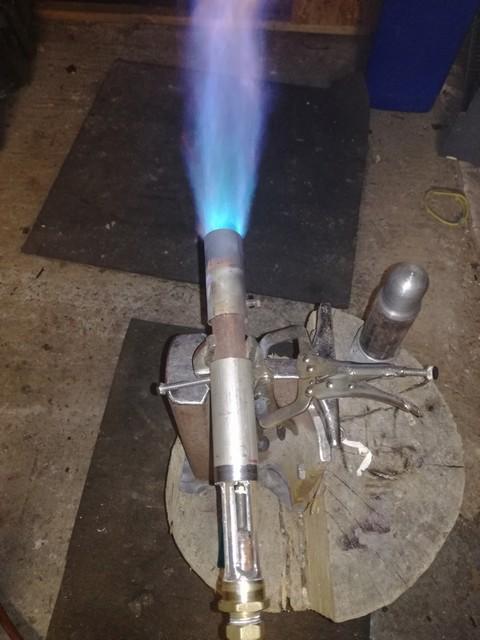
i thought it should be further forward based on the others i had seen, but the flame seemed stronger and louder with the jet where it is now. also seemed more stable at low pressure as i was getting a lot of pulsing as the gas tried to burn in the tube. it also seems prone to blowing out completely if i crank things up too high? pics below show the flame as best as i could get it last night in a dark workshop, couldn't run for too long as it was raining out so had the doors shut. lowest it will go is on the right.
-
ahh i hadnt realised you had brazed the tip in, i had assumed you had screwed it in as i had. im thinking the smaller tips will work well in a tiny burner, if i get a chance ill try to draw someting up and get some opinions prior to machining anything. next question is how will these nozzles work with a printed/cast inlet chamber?
-
-
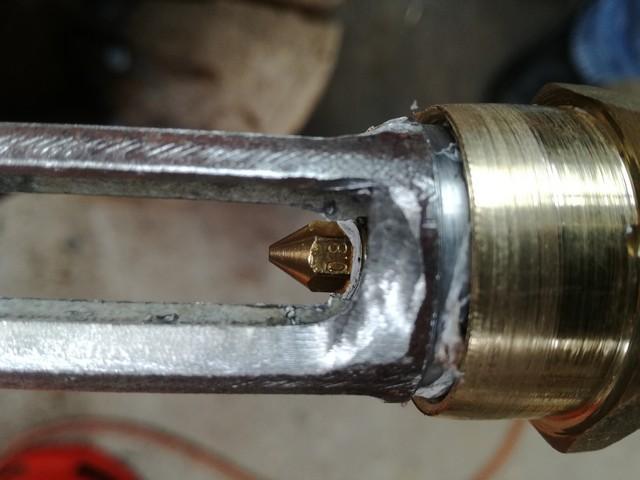
well i had a little time to play today and built a better burner for testing, this one is much closer to a Mikey burner ( i think) The tube is 1" external and approximately 3/4 internal, with four air slots cut with my mill. Rather than just cutting straight down into the tube i cut in from the side which has created a sort of tapered leading edge. Not sure if that is going to create an issue or not but it may nudge the airflow into a slight vortex. anyways i found the 0.8mm and 1mm nozzles both seem to run well, the best placement i found was having them only just showing through the air slots. the 0.8mm seems to be stable at a slightly lower pressure but i haven't got a gauge so cant give any numbers. will have to try some more testing in the dark when i can actually see the flame! hopefully the pics will explain a bit better


-
thanks for the help Mikey ill have to get a copy of your book so i can see a dimensioned drawing. planning on sticking with the larger propane bottles as have some hoses and a standard 'torch ' which i should be able to use the valve body/handle for control. 1/4" was about the size i was thinking. G-son - i expect ill end up using the lathe and mill to machine such a small burner from solid, much easier to maintain concentricity. the nozzles should save on trying to drill tiny holes.
-
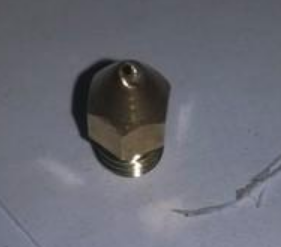
hopefully those nozzles will be of use to you and other Mikey im not sure if has been seen but i did post on my original thread a picture of the internals, the final orifice tube seems to be 1mm long and might be classified as a short tube orifice? i think the sharp edges should allow for a clean exit of the gas jet, thus providing a nice collimated jet rather than a spray. that is just my thought though,i have no way of proving that. im hoping that the smaller options will allow for a small but very hot hand torch, somthing for heating up small localised spots for brazing or just heating up bars for twisting. wont be as hot as an oxy rig but might get hot enough for most tasks? ill have to let everyone else design and test things though, i dont know anywhere near enough to make a decent start.
-
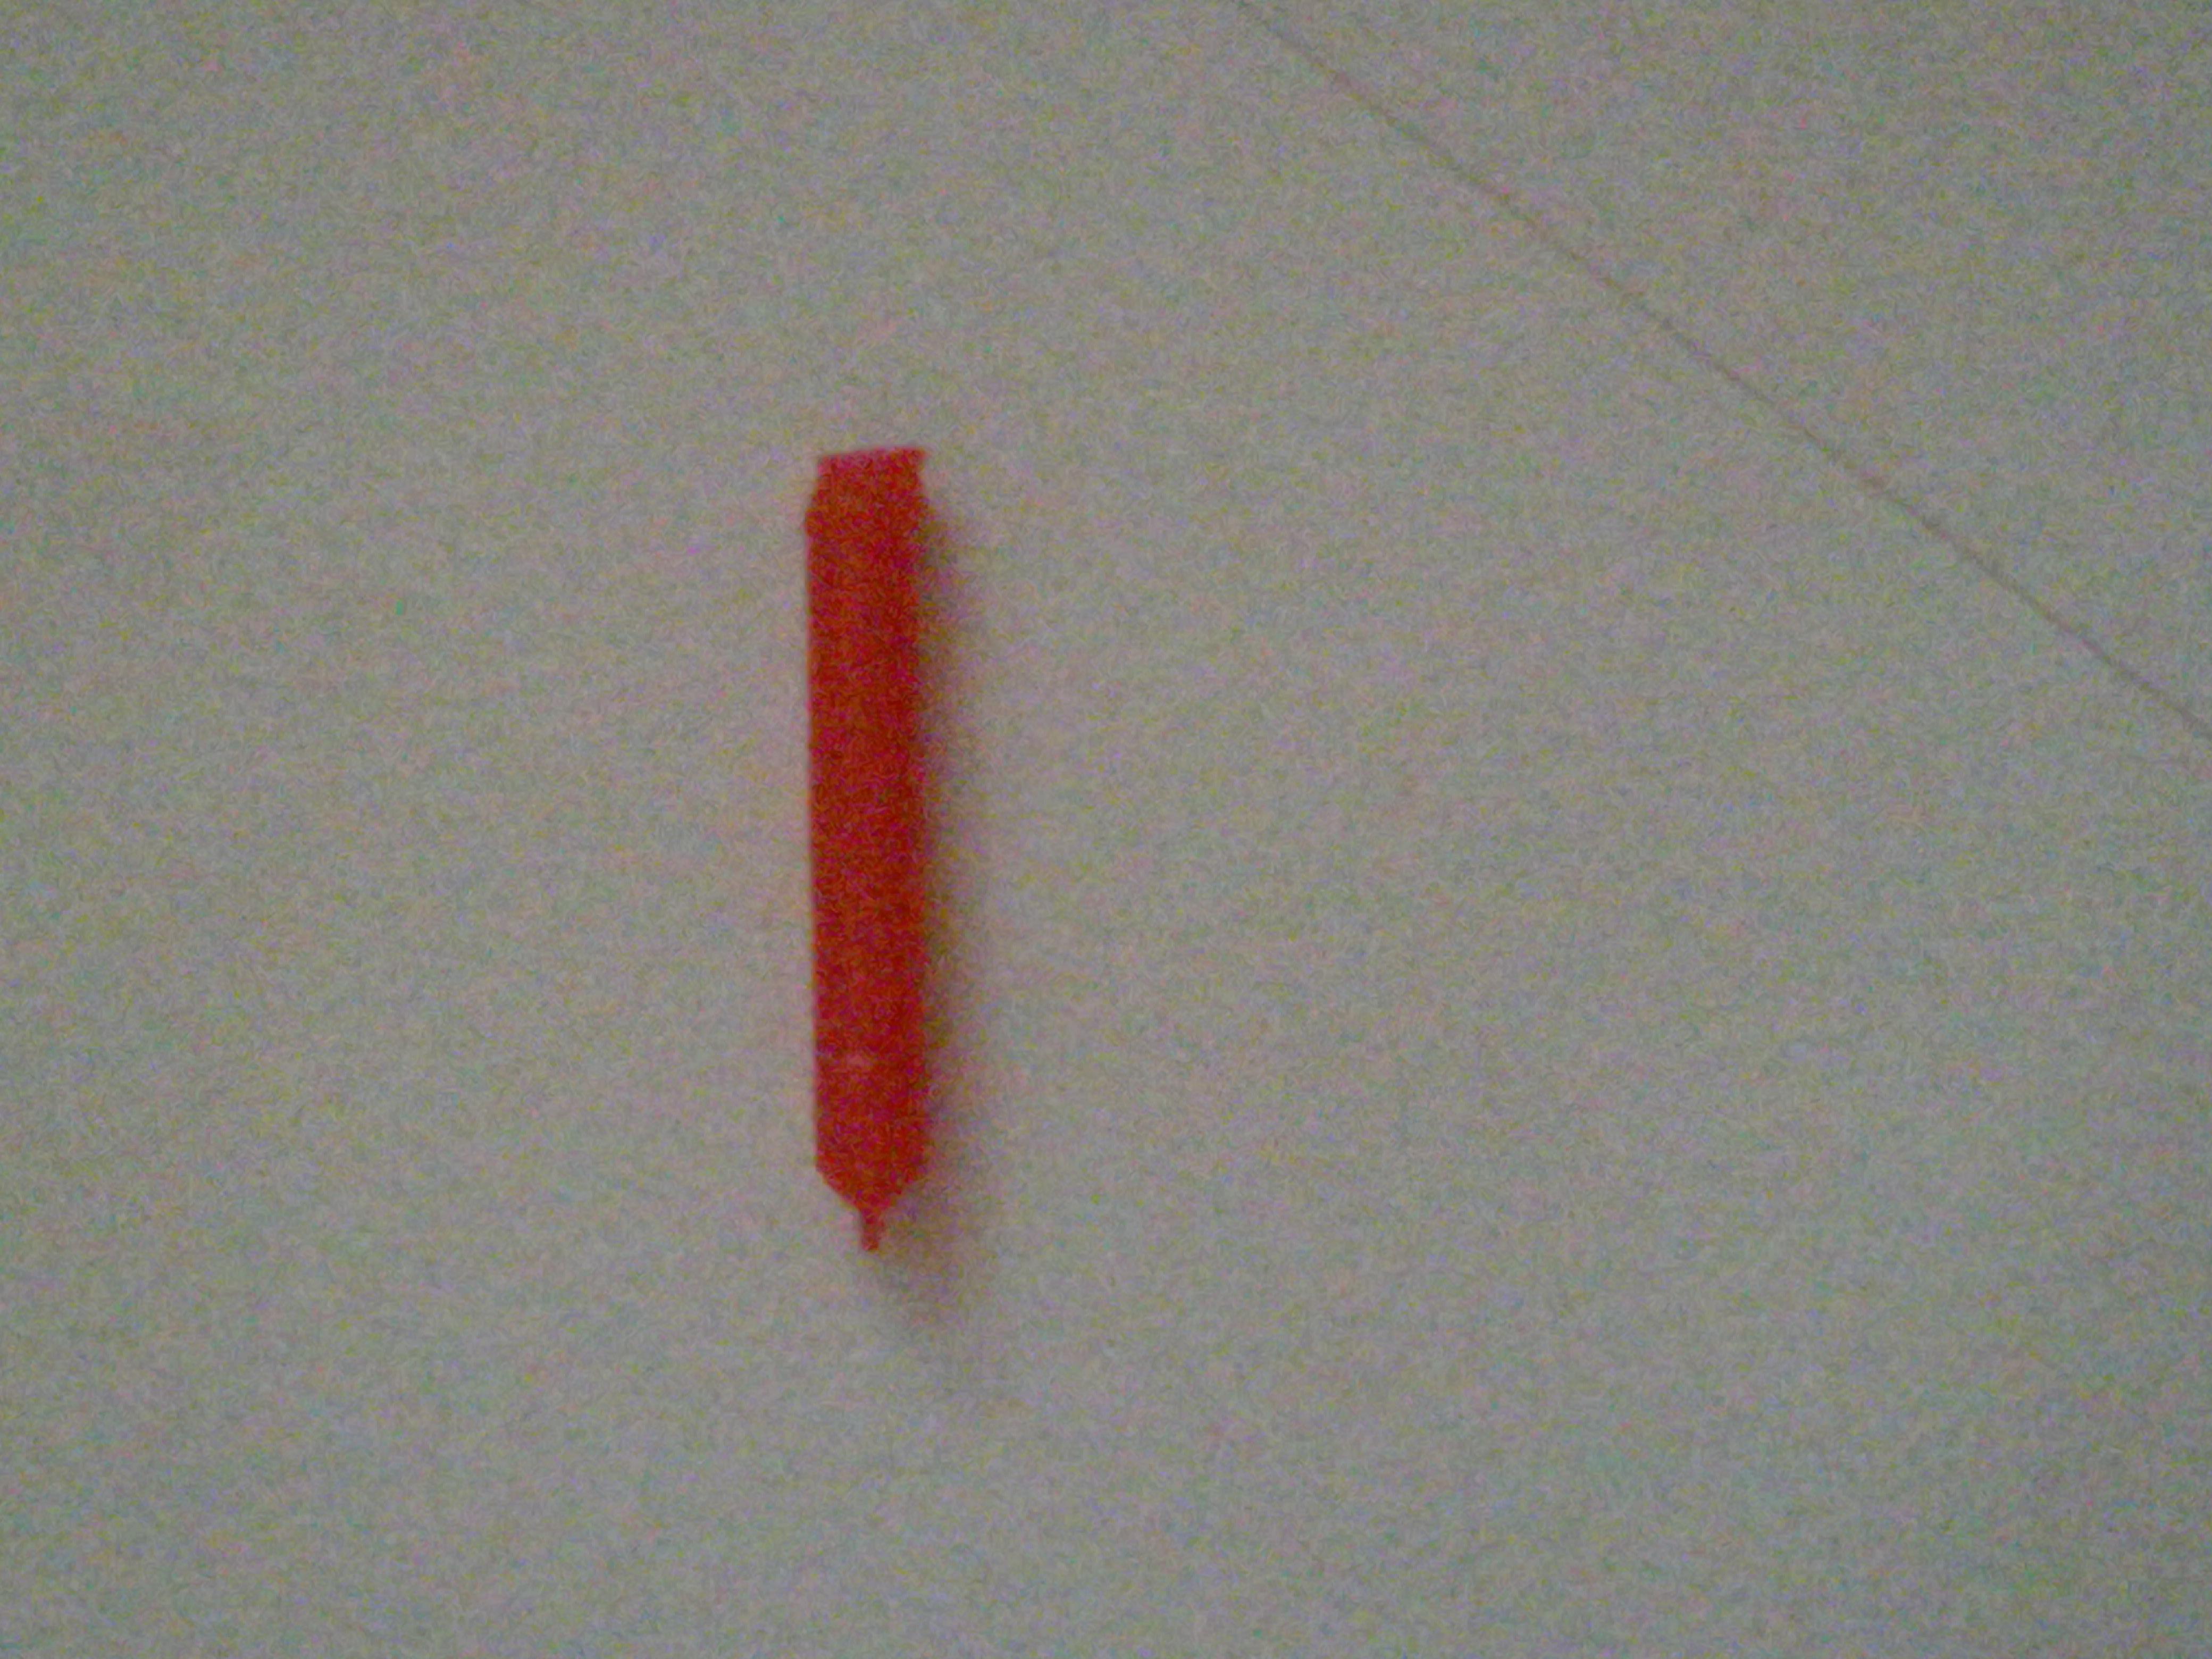
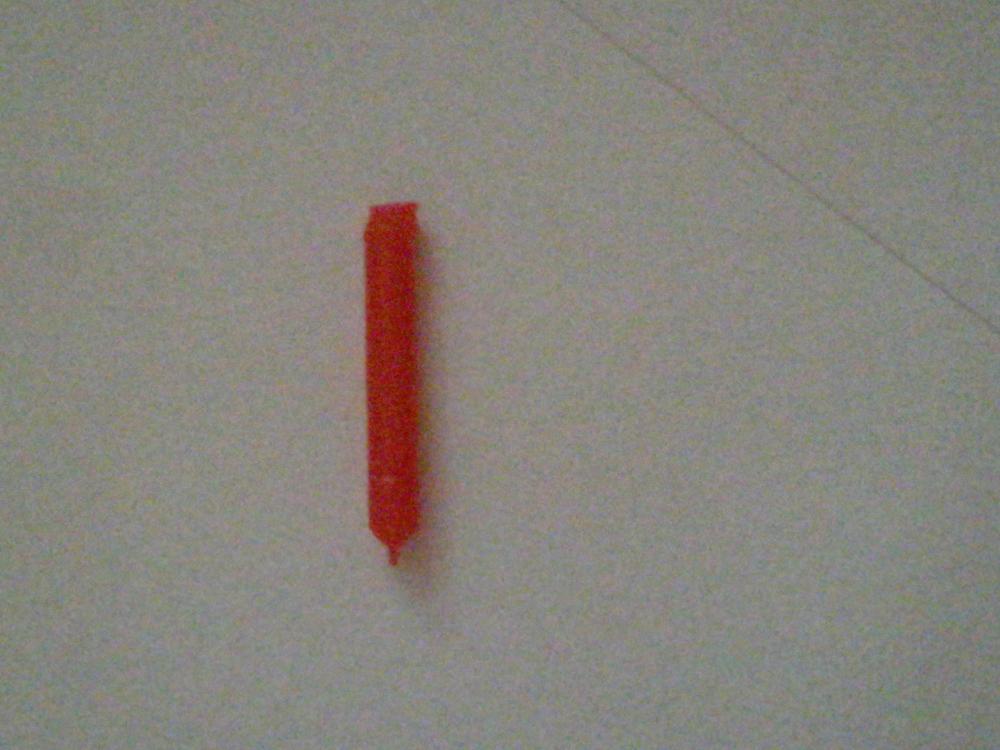
good job im british then :p not really had a chance for any further testing, been too busy and i need to remake the burner as it was only slapped together for a quick trial. i have however had a closer look at the nozzle internals, im no expert of flow dynamics but i think it should give a decent 'jet'. the main bore is basically just a 1.3 x 10mm drilled hole followed by a 0.4 drill (or other nozzles size) final orifice is 0.4x 1mm. pic below is of some filament i managed to remove and should explain things better.
-
well i had another play last night and didnt have any luck at all not sure why but the thing wouldn't run smoothly at all and kept trying to burn in the tube. i think the wind may be affecting it as i am using it outside. oh and i must apologize to Mikey i did not realise the burner was a copy of your design. I simply laid out all the random fittings i had until something looked easily adaptable dn similar to ones i had seen online. Now i know what the origional design was i can check my dimensions and se where i deviate. have also found a 1/2" T along with a smaller swept bend which may make reasonable burners, just need to find the right diameter pipes to go with them
-
thanks Mikey ill pop over there and comment when i have done more testing. if i can scrounge enough parts ill try some other burner designs. G-son - i have only had it lit when in the forge, havent got round to making any sort of flame retention nozzle/flare as yet. more interested in getting it optimum in the forge. the smaller jets seemed to blow out any flame in the forge but perhaps more air was required. i do also have some proper gas jets from a hob, thought they might be worth a try.
-
awwww i thought id had an original idea oh well at least it isn't a totally idiotic idea. ill havent had a good look at the internal shape but id think that as long as the final edge of the orifice is clean/sharp then the gas jet will come out smoothly in a straight line. which as i understand things is all that is needed for an injector? my burner seems to like running with the nozzle only just sticking into the pipe so i don't think i needed the hose fitting. perhaps if i get time over the weekend ill try some other variations and see what works and what doesn't.
-
evening all have found some brass nozzles for 3d printers which i believe could make good replacements for the mig tips everyone seem to be using these days. i know the mig tips are easy to come by but the printer tips seem to have a better range of sizes so should make tweeking/optimisation easier. i picked up a mixed bag starting at 0.1mm up to 1mm for only a few pounds on ebay. They go up in increments of 0.1 mm so have scope for fine tuning. hopefully i have some pics below, its only a simple straight line burner, original plan was to blank off the 15mm pipe and screw the nozzle in but i found a brass hose nipple that was a perfect fit so went with that instead. ( yes it is a little crooked) only had a small chance to play with sizes so far, but had good burn with 0.5mm. originally tried with 0.4 but couldn't get a stable flame, i think the gas velocity was too fast? 1 mm gave a lot of dragon's breath but back pressure was giving some issues with flames coming out the inlet. Oh and 5mm was very interesting! ( some wally forgot to fit a nozzle before testing)
-
just a thought ( from someone with zero experience) you say you brought it up to yellow, then banged on it till it was all touching then cooled it down to check the weld? did you heat and forge it together only the once? or did you heat and forge it a few times?as i understand things you take one welding heat to get everything touching and to initially set the weld. then you get it back up to welding temp and give it some heavier blows to really forge it together.i dont think the initial weld has a lot of strength, and suspect the cooling in water would have weakened it a bit. only real way to tell is to try again though. so good luck ps being my first post here it would be worth a second opinion! Please don't use double spacing.