Gustav
Members
-
Joined
-
Last visited
Everything posted by Gustav
-
Oh xxxxx I received the steel yesterday and tried forgewelding today. Didn't go very well... I used borax and it first took 6 heats to get the two pieces to stick, but when I welded the other side it broke and fell off. After that, I tried it again for about 20 heats and stopped only because my forge broke down. It wasn't because I tried forgewelding, but simply because it has been seeing its last days for quite a while. It's an ugly wheel rim forge driven by a hairblower, and the welds on one leg broke and the hairblower stopped working lol. I put that little guy to work, for sure. Back to the forgewelding: I had troubles reaching welding temperatures and putting the two pieces in good positions inside the forge where they got heated up as much as possible while at the same time being accessible to me when I want to take them out. This probably made them not reach welding temps. It might be because the coke I have are huge pieces (golfball to baseball size) which makes it very annoying to put stuff in and out of the forge. But do you think it has an effect on temperature? Will smaller pieces of blacksmithing coke get hotter with a non industrial blower like my hairblower?
-
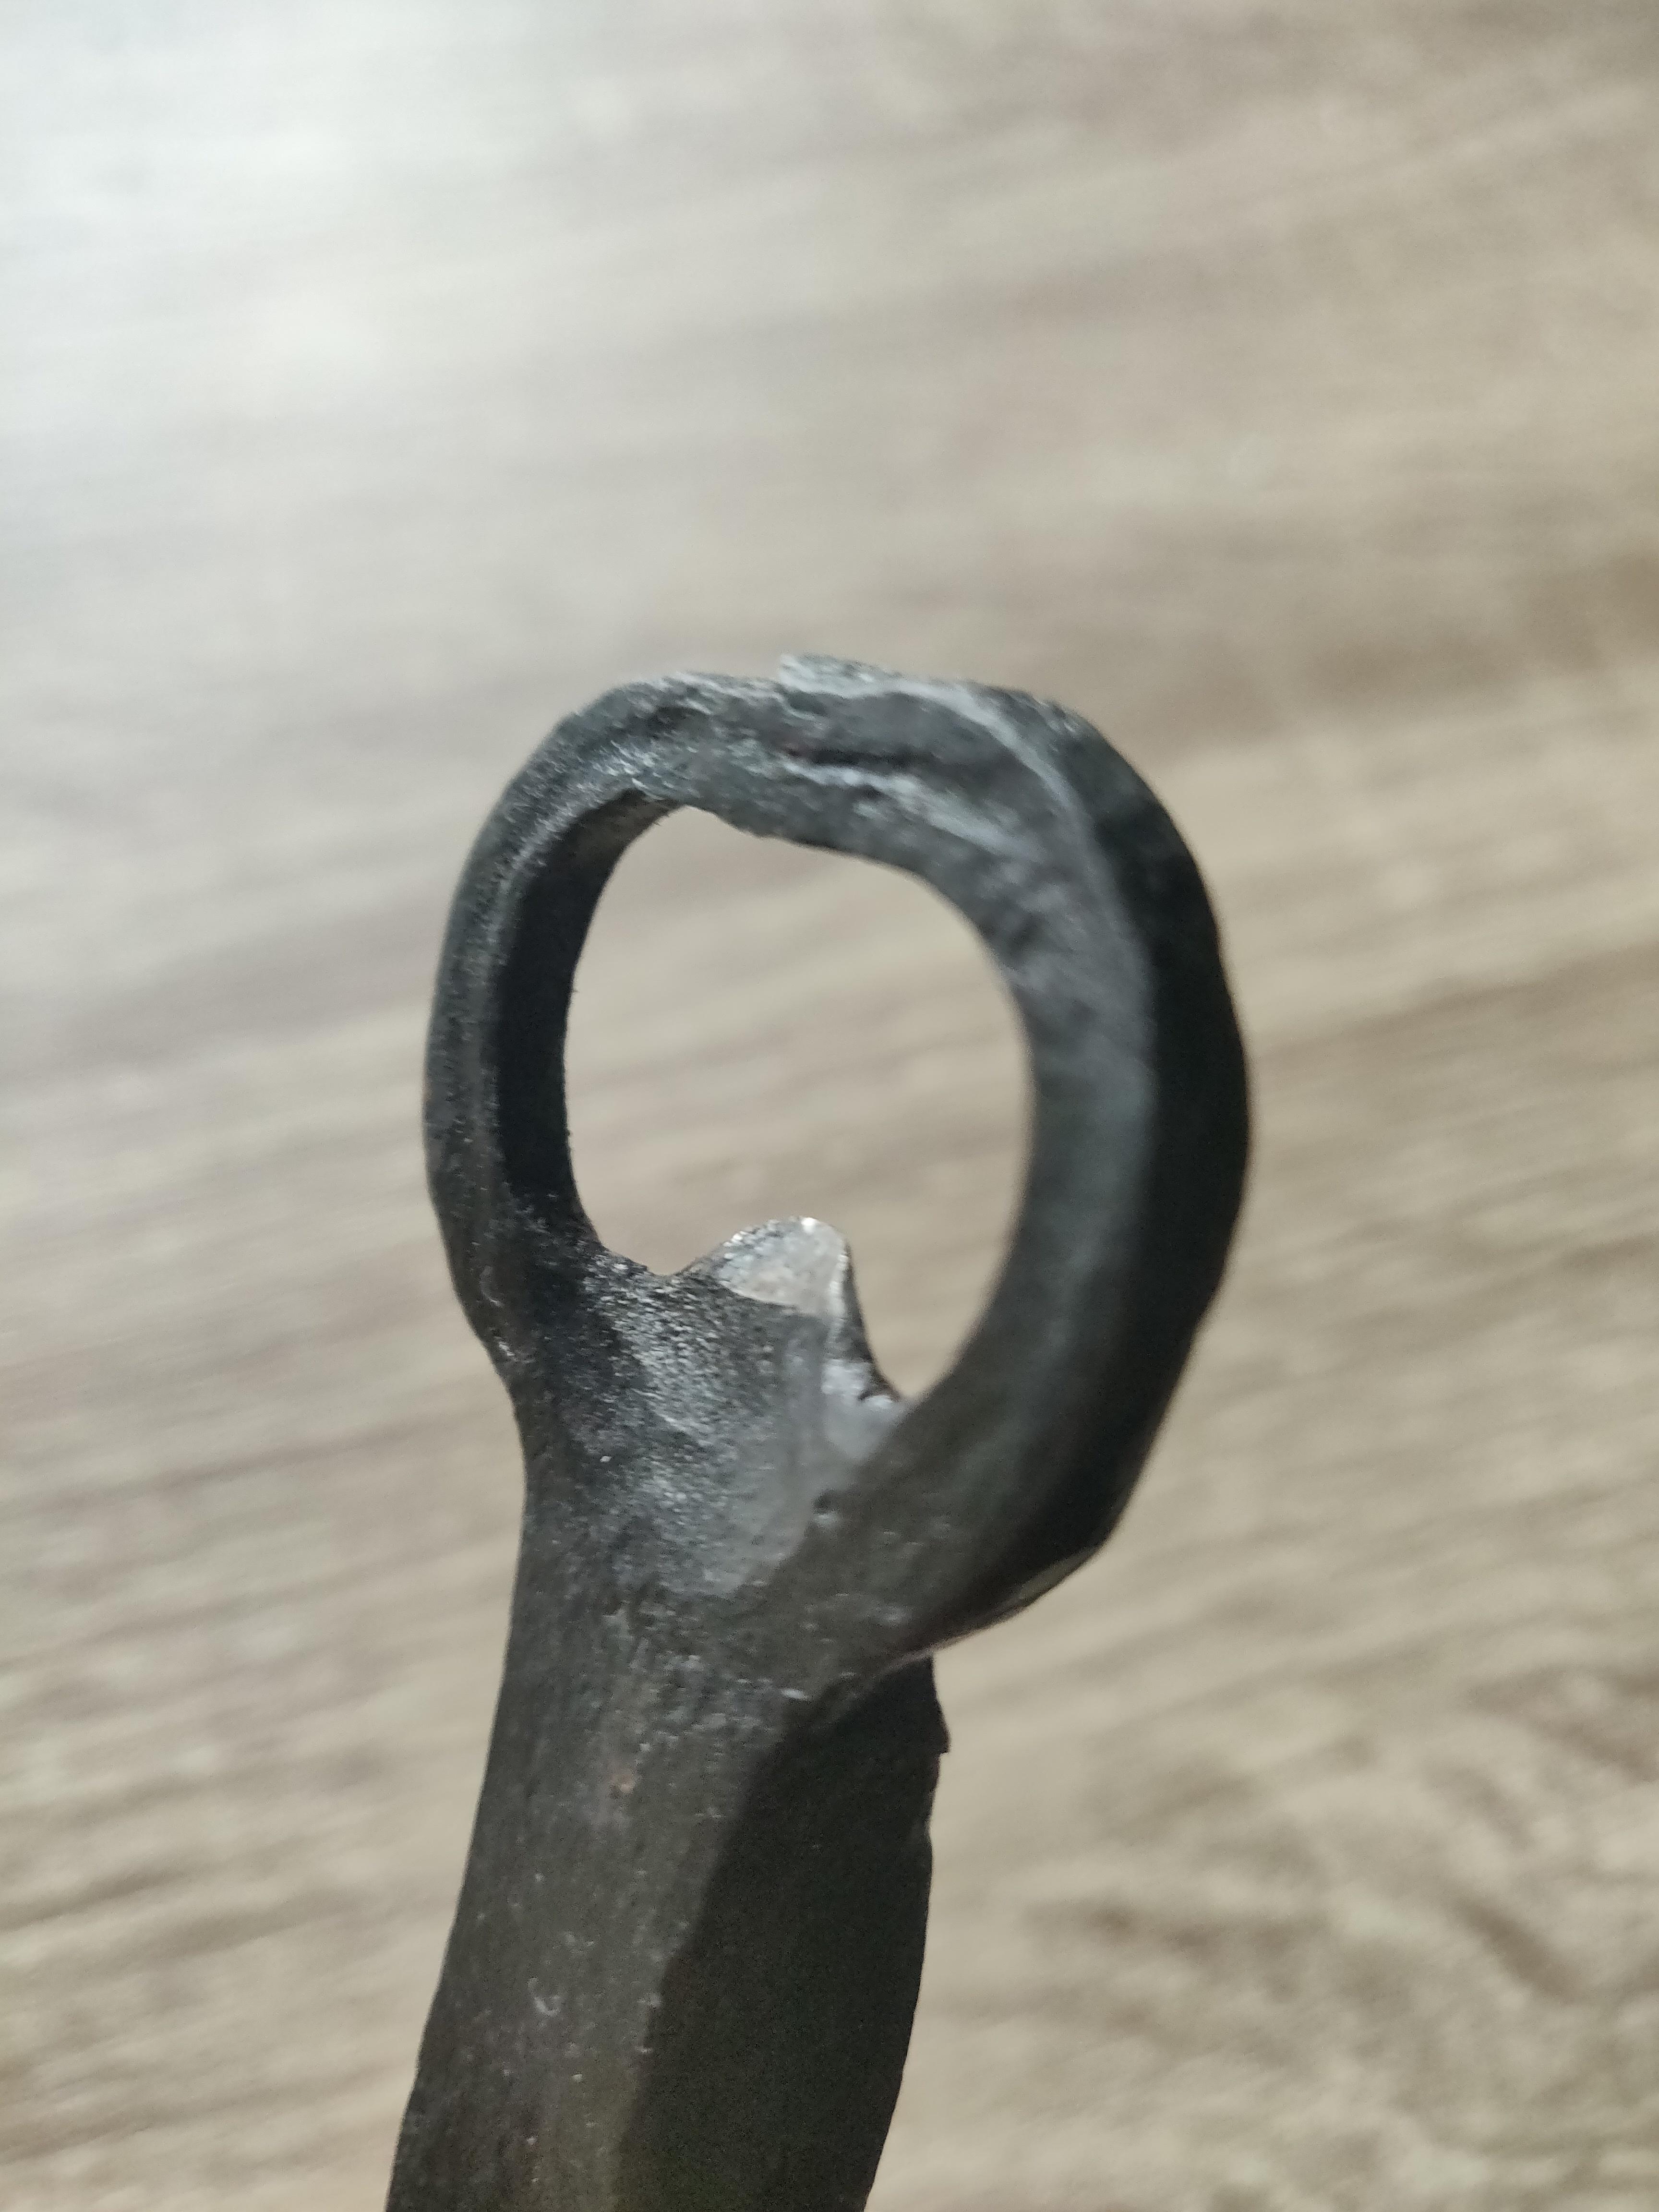
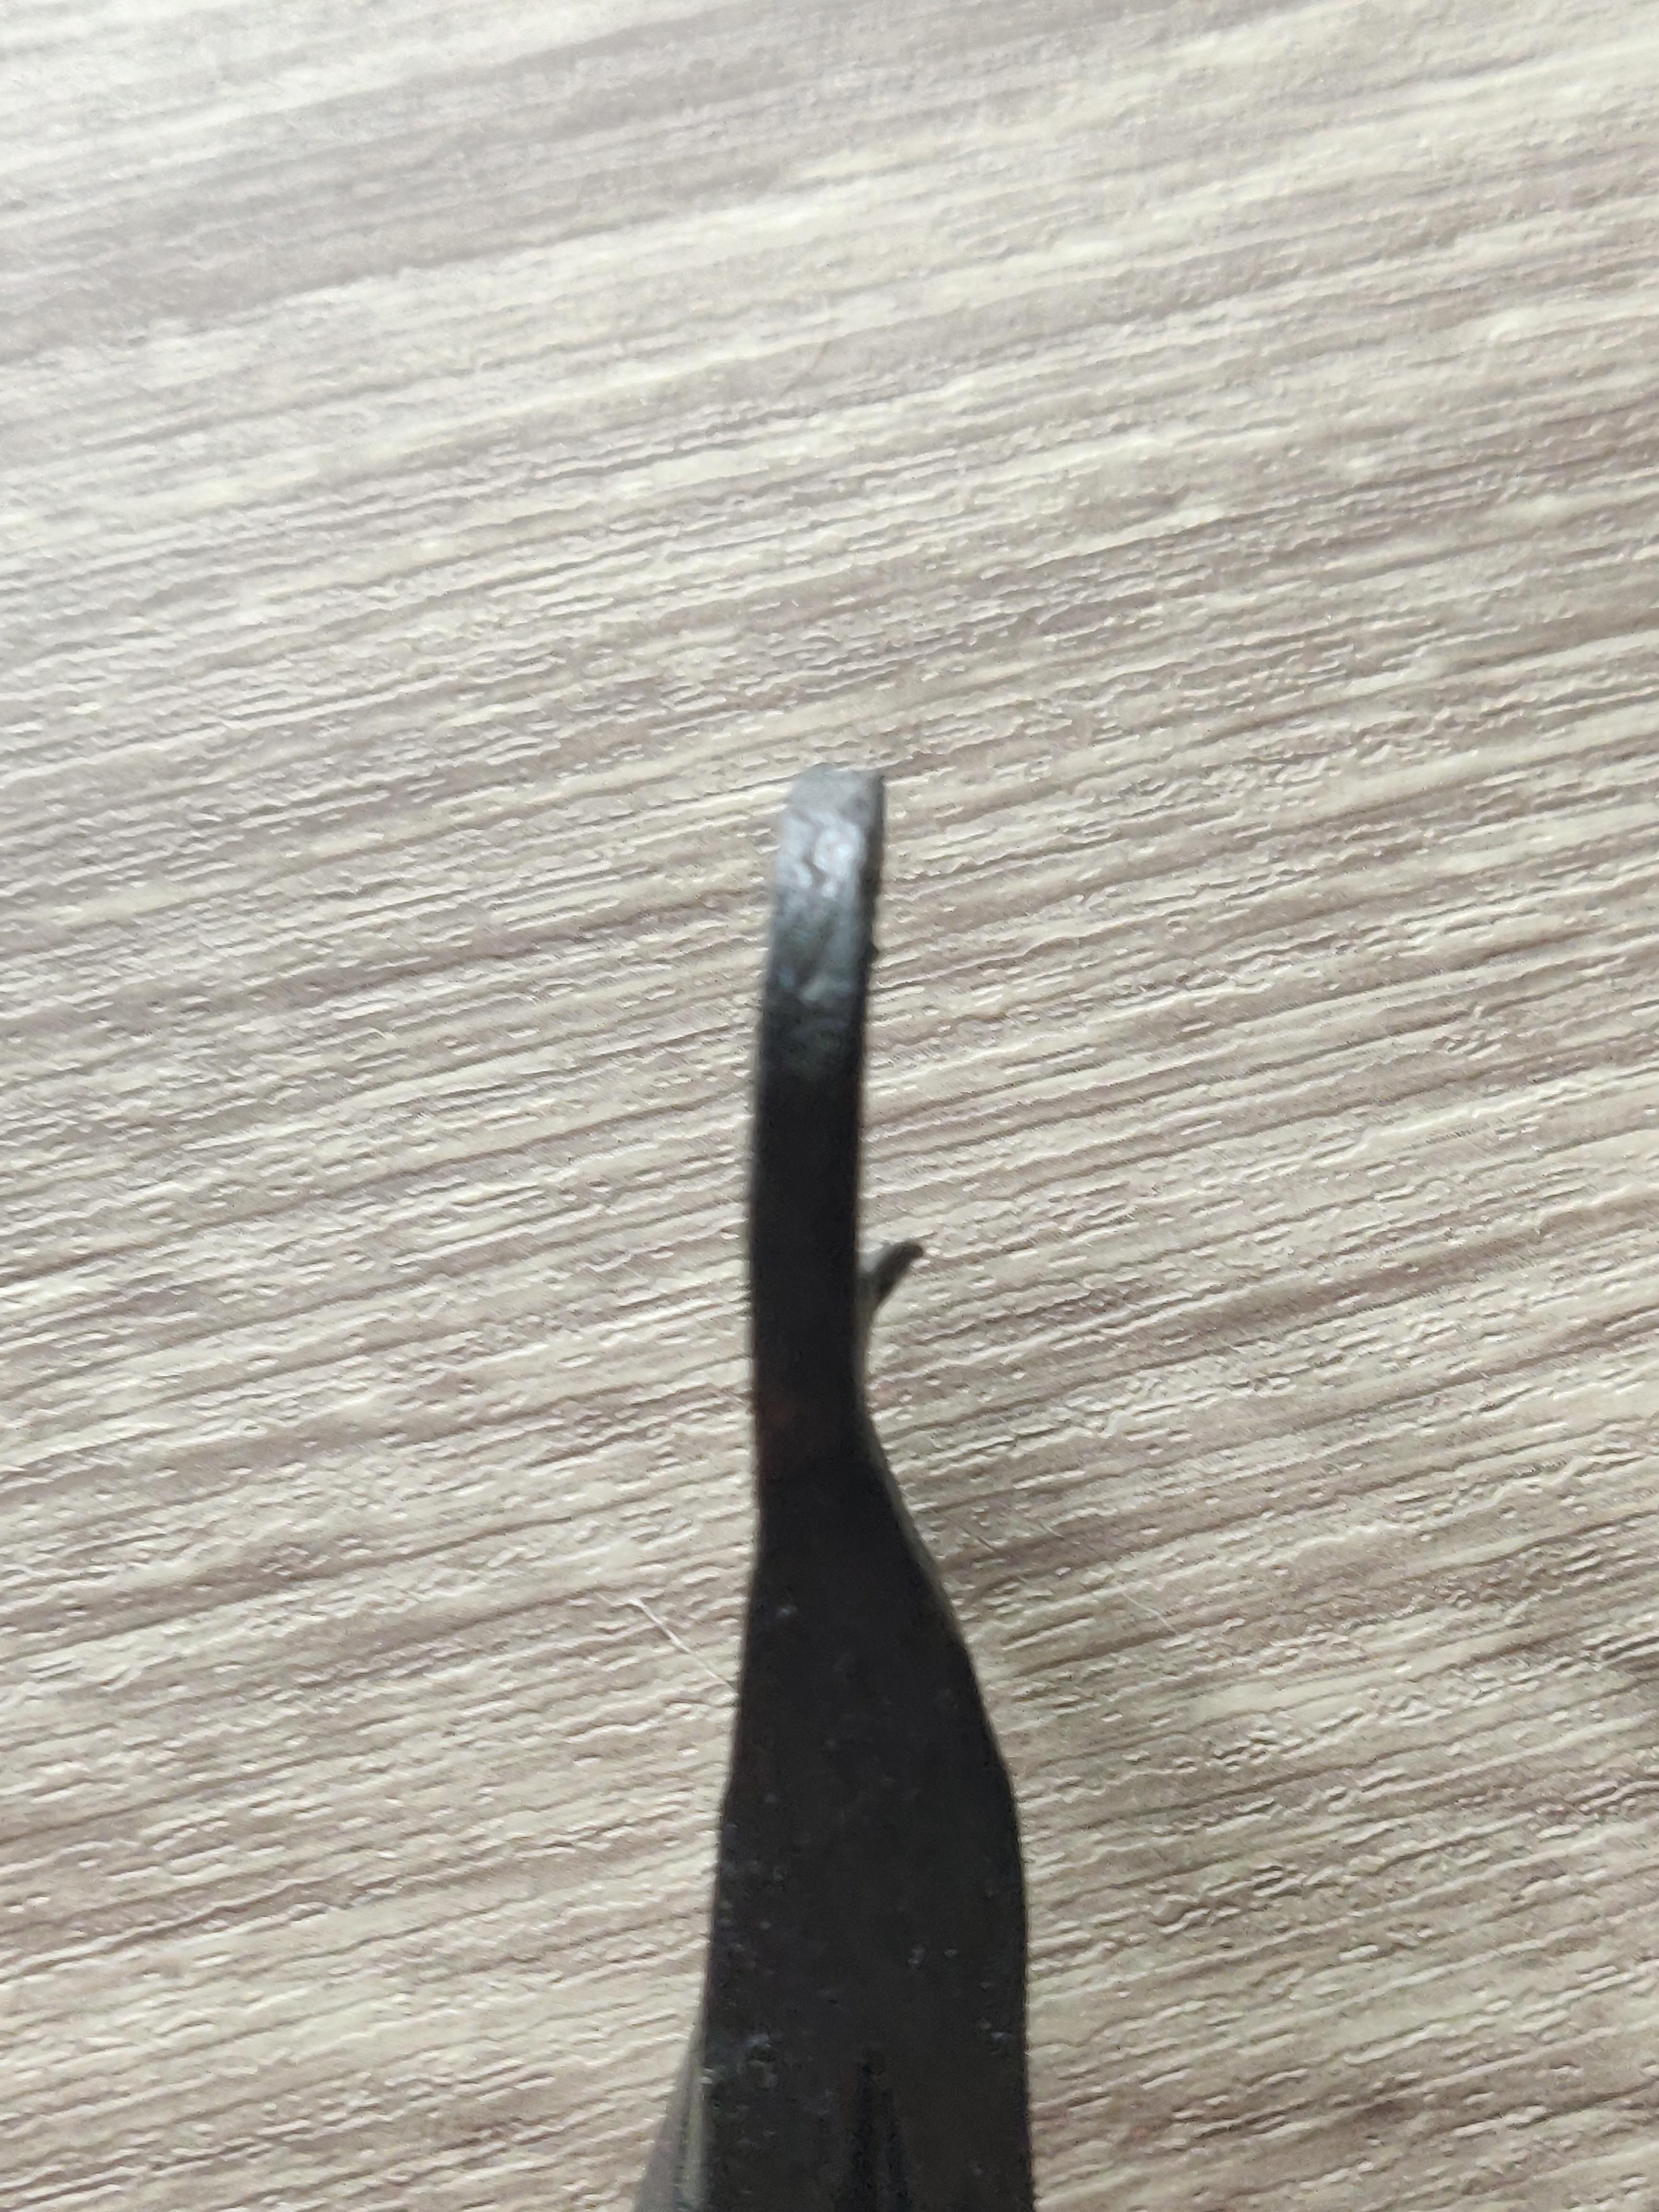
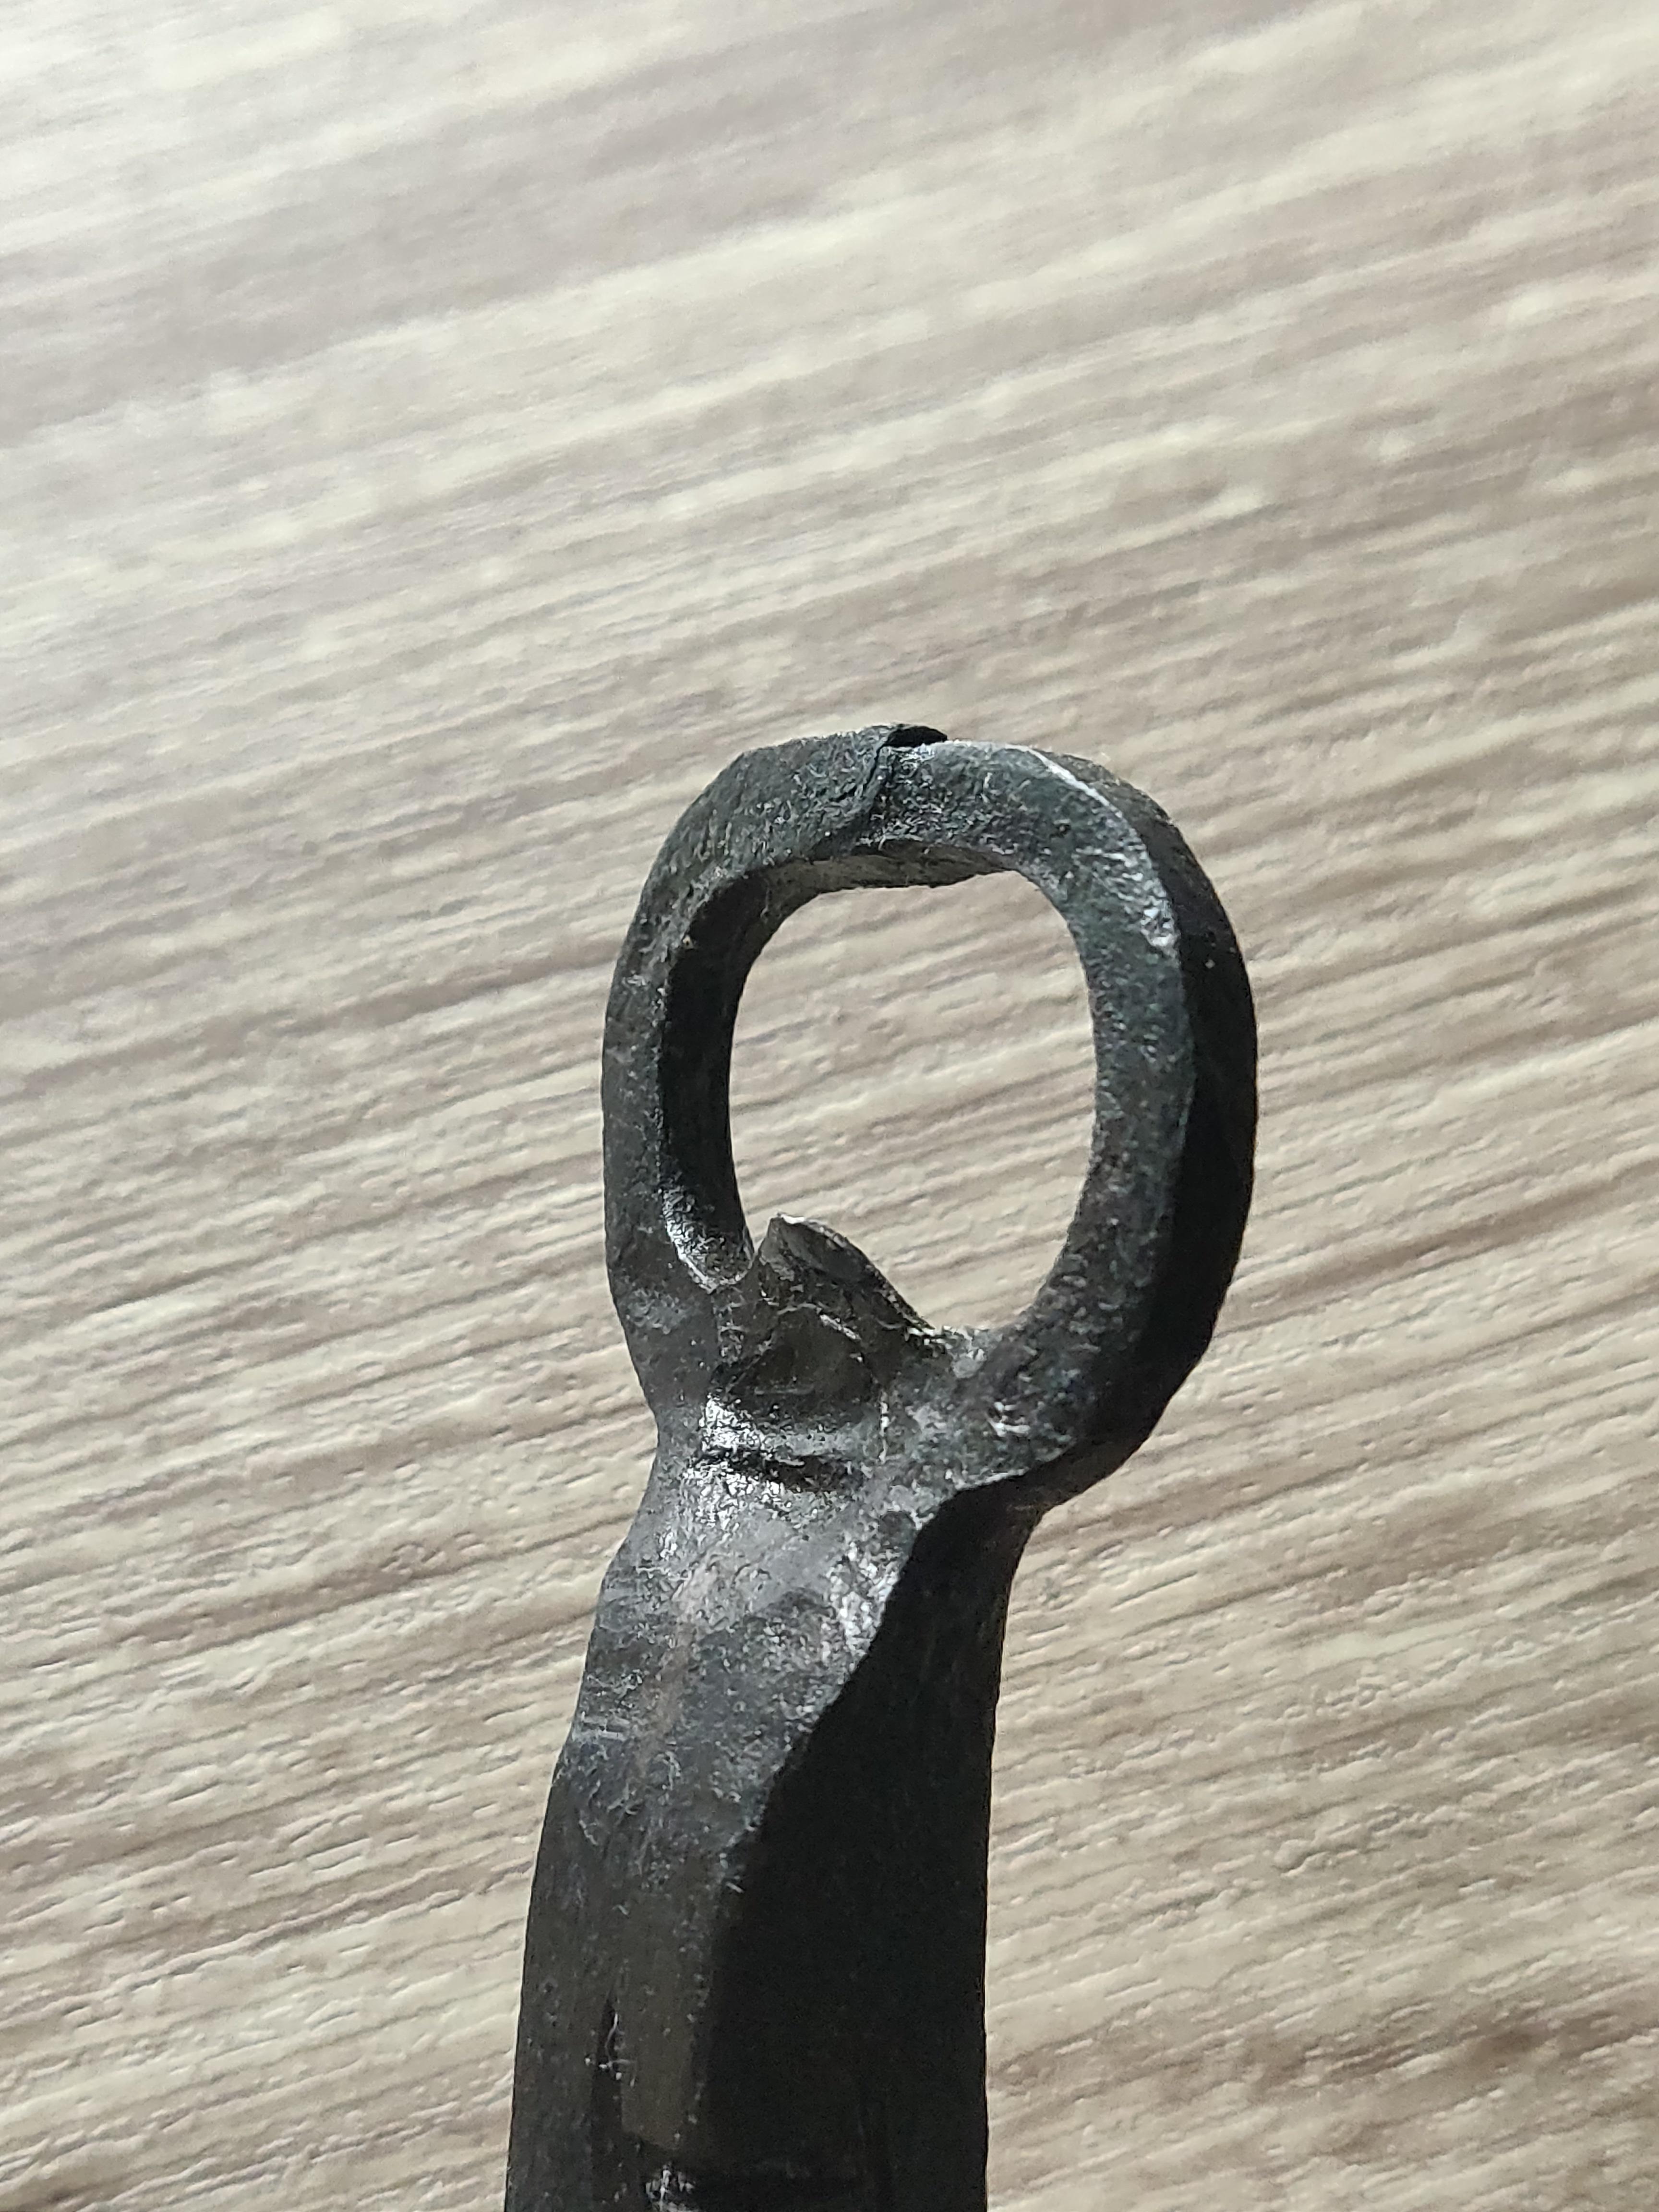
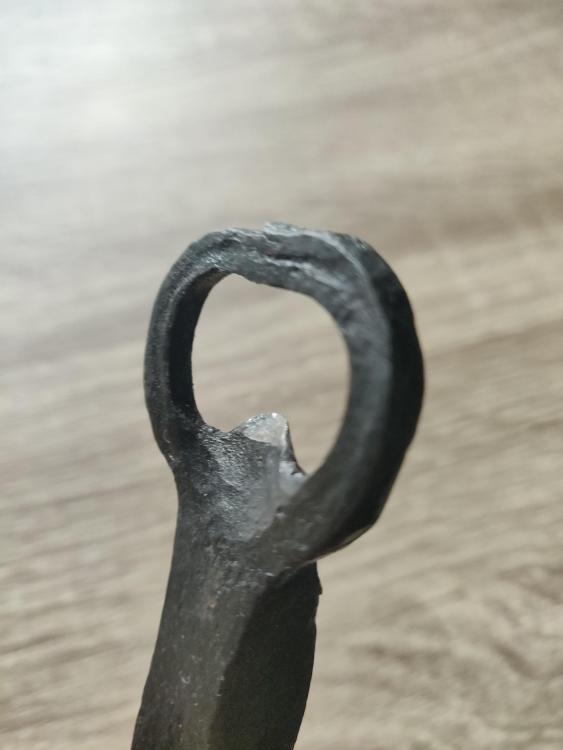
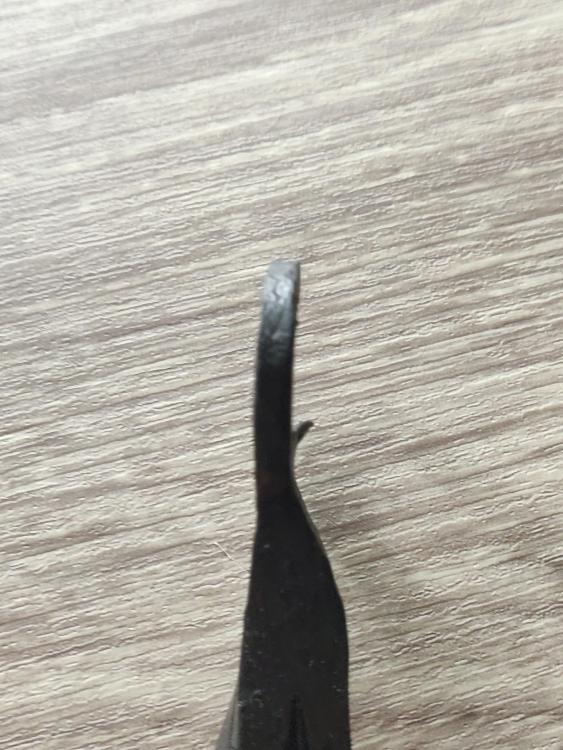
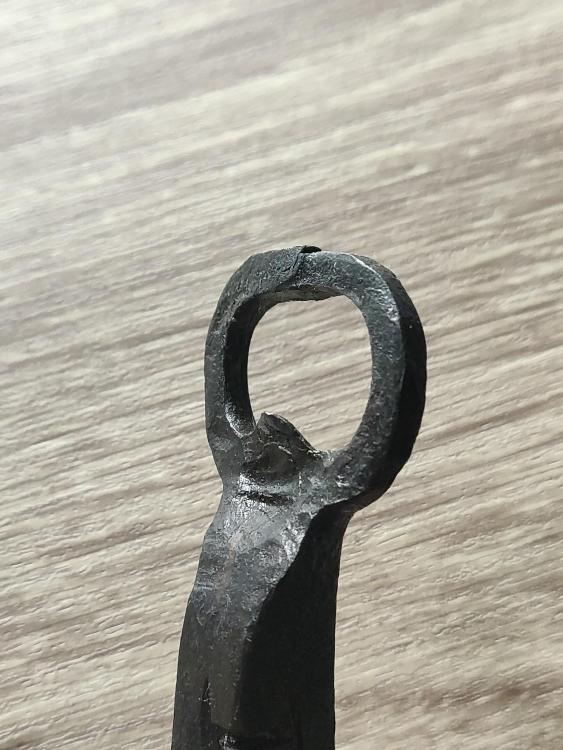
Hello A few months back I made my first rubiks twist bottleopener and was quite pleased with it, but I thought the lip was too thin. It survived me testing it but after my graduation this spring we had 20+ guests and it got used quite a lot so it bent backwards and cannot open any more bottles. How do I solve this? Heating it up and bending it back again will just be a temporary solution, but what if you tac weld the back of it so you add some material? Maybe just fold the tip and push the ring closer? If it was one of my normal bottleopeners I'd just make a new one, but since this is my first rubiks twist it would be nice to fix it.
-
I thought the air from the fan would go up the chimney and pull the air in the super sucker with it, or atleast assist
-
Forgot about something that can help quite a lot: There is a little tunnel right outside the ovens double doors that goes under the doors and up into the bottom of the oven. This is where a large fan (probably around 30 cm / 1' in diameter) is used to blow oxygen into the coke inside the oven when melting metals. It could prove useful since it blows air (don't know exactly how much) right up and with both doors closed, it could push quite a lot of air right up the chimney.
-
I was unsure about the placement of the connection, so I just placed it as all other super suckers. Good to know that it works on the side/back too!
-
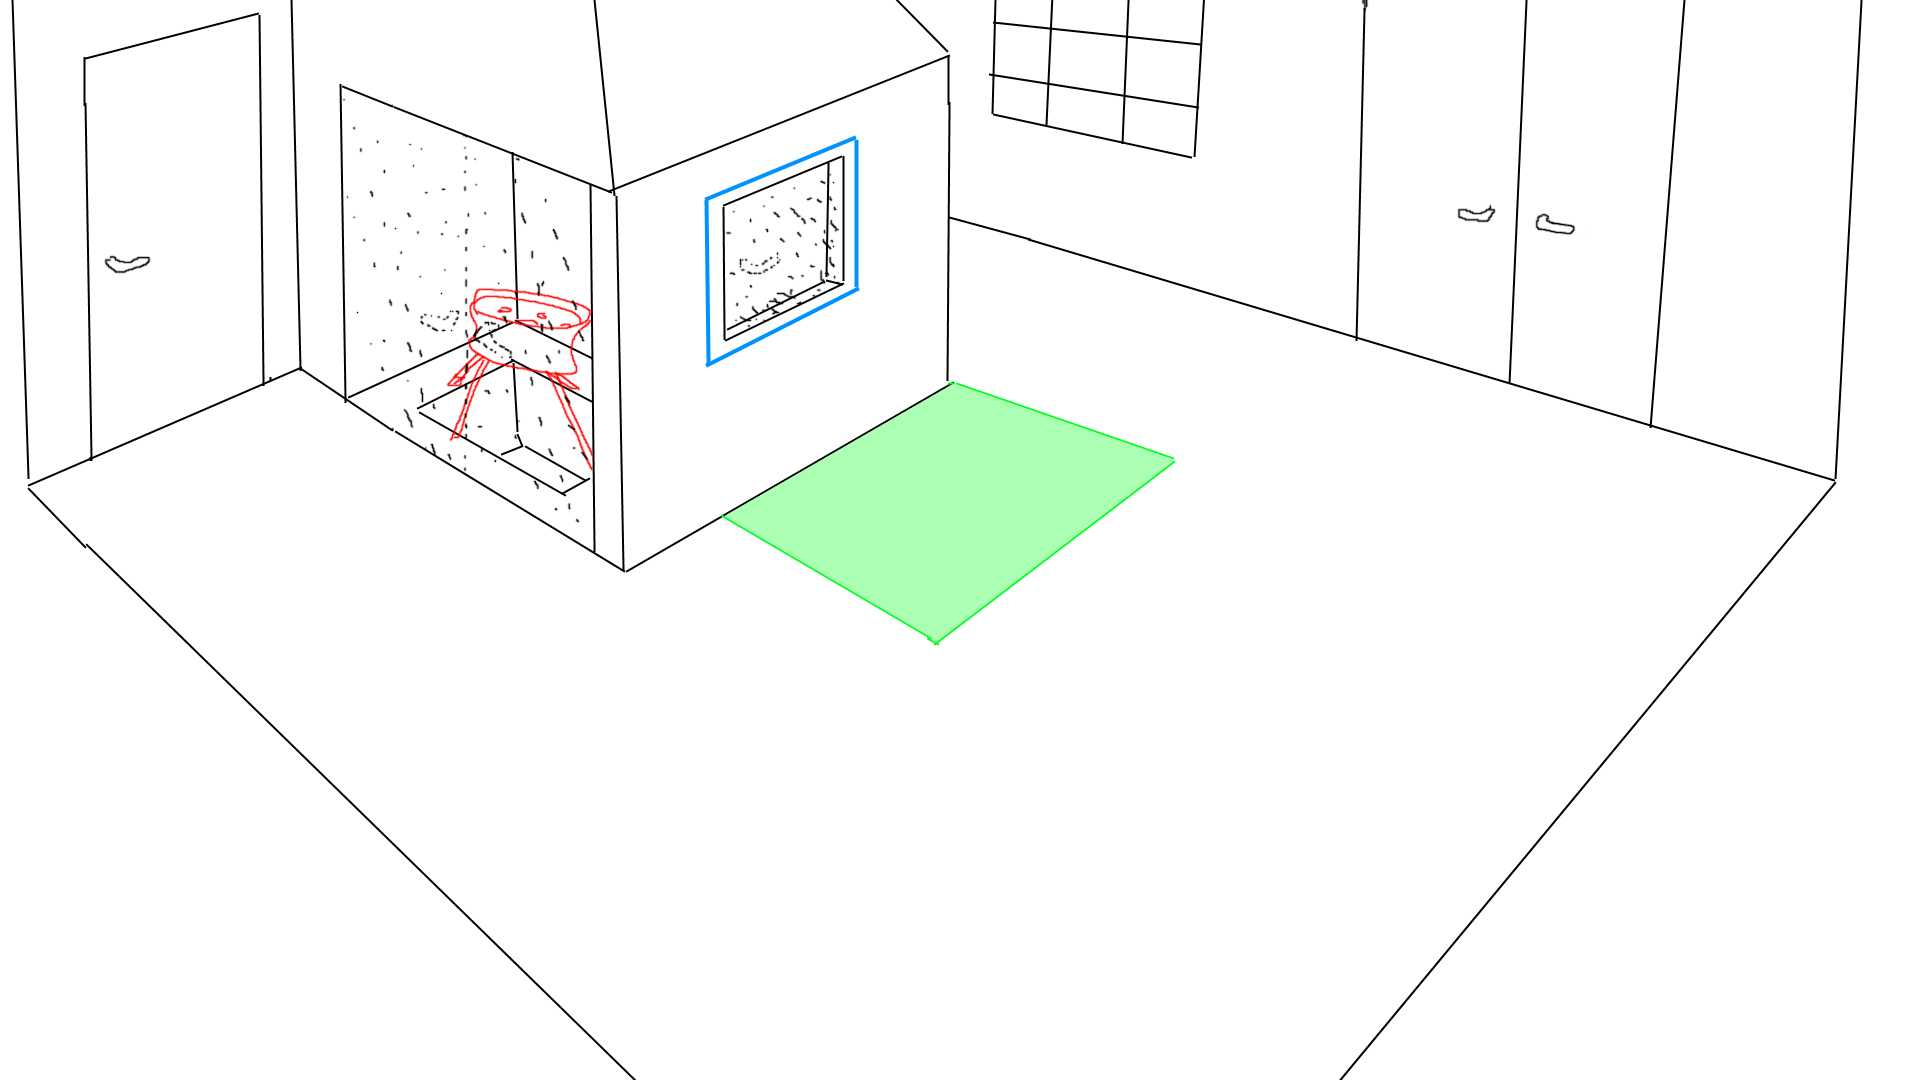
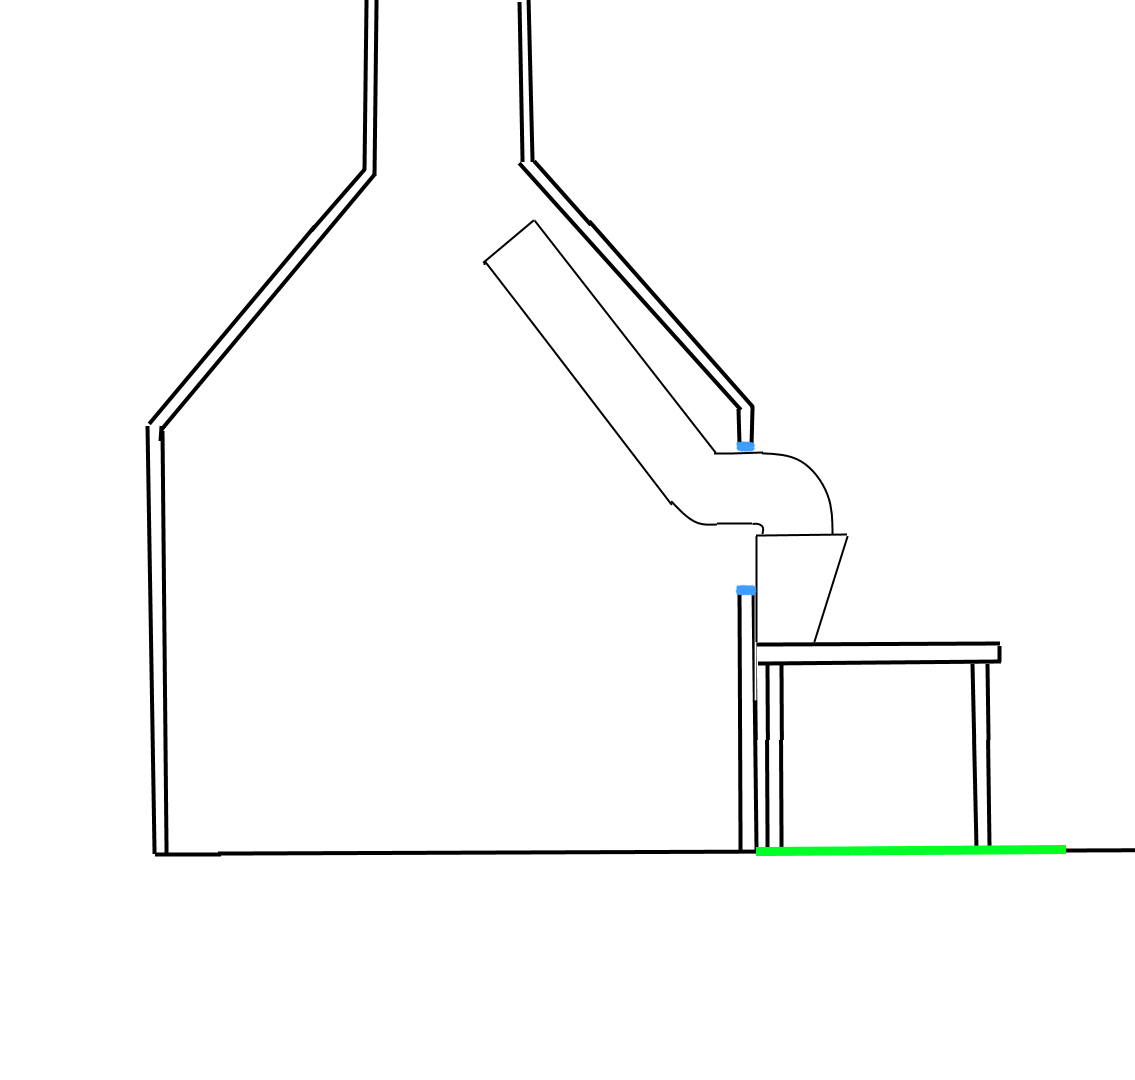
Hello. I've read a lot recently about the super sucker forge hood and I've got some plans, but I need to hear from you guys before I start messing around in our shop. But first, some context: I forge in a family owned foundry (building that focuses on casting is called that, right?) that my father works in from time to time. The picture illustrates one part of the building where the oven and chimney is located. The oven has a main opening with double doors and a smaller door (marked in blue) that's never used anymore. I drew the room in Paint.net since there's so much stuff laying around that's in the way... So: when I want to forge, I move my abomination of a forge (the red rim forge) from some other part of the building into the oven to use the existing chimney. This makes every forgingday into, as you can guess, quite a hassle. It's very time consuming and annoying to get going, not to mension the amount of steps I have to take between the forge and the anvil during the actual forging. Why? I don't want it to get in the way for my father who uses the oven when he melts and casts various metals from time to time. I'm actively looking for a "real" coal/coke forge since I'm tired of the one I have (it was the first I ever built and I've had it for 2+ years) and I've been doing some thinking: I can possibly move some stuff around and place a potential forge somewhere in the green area. This gives the forge easy access to the chimney from the blue window. BUT, here's the catch: the chimney obviously isn't just a 12 inch pipe/tube going directly from the "box". It's a chimney going into a bigger chimney. I don't have any measurements on me right now, but do you think something like in pic 2 will work? Does the tube have to go up further into the "real" chimney or is it enough just a bit into the oven? The doubledoors aren't 100% airtight. I felt in the beginning that this was very much "workshop planning" but still posted it here since it's almost just about forgehoods/chimneys. I also have some questions about the effectiveness of the supersuckers in general. It looks amazing in videos, but let's say I use coal: does it get overly dusty, smelly and dirty even though you use a fully functional supersucker? Do you still get black dust in your noses? I cannot use coal in my current "setup", only coke. Coal produces too much smoke and I inhale a lot of it when I reach for the forge. I know it's a long post, sorry. Sincerely, Gustav
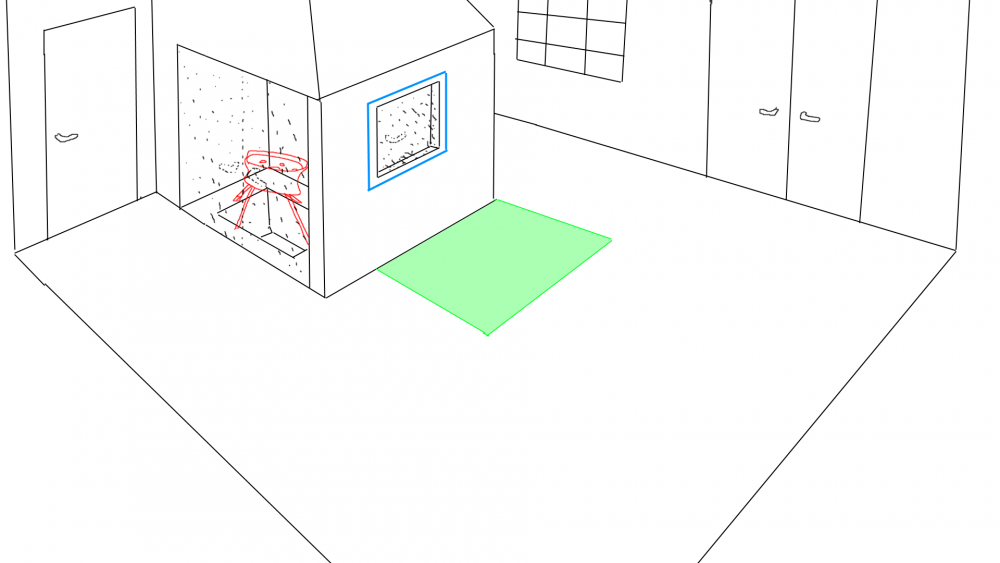
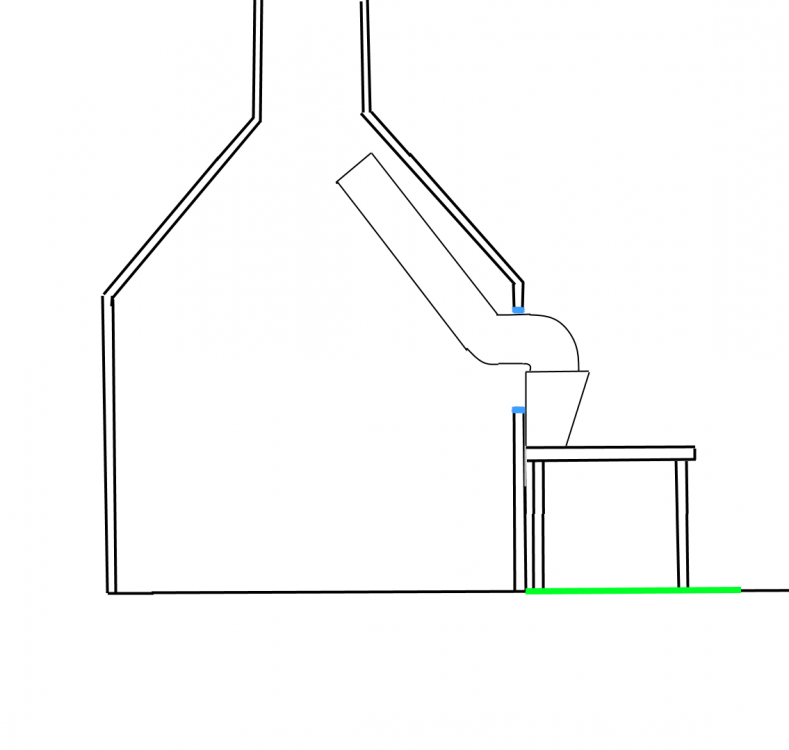
-
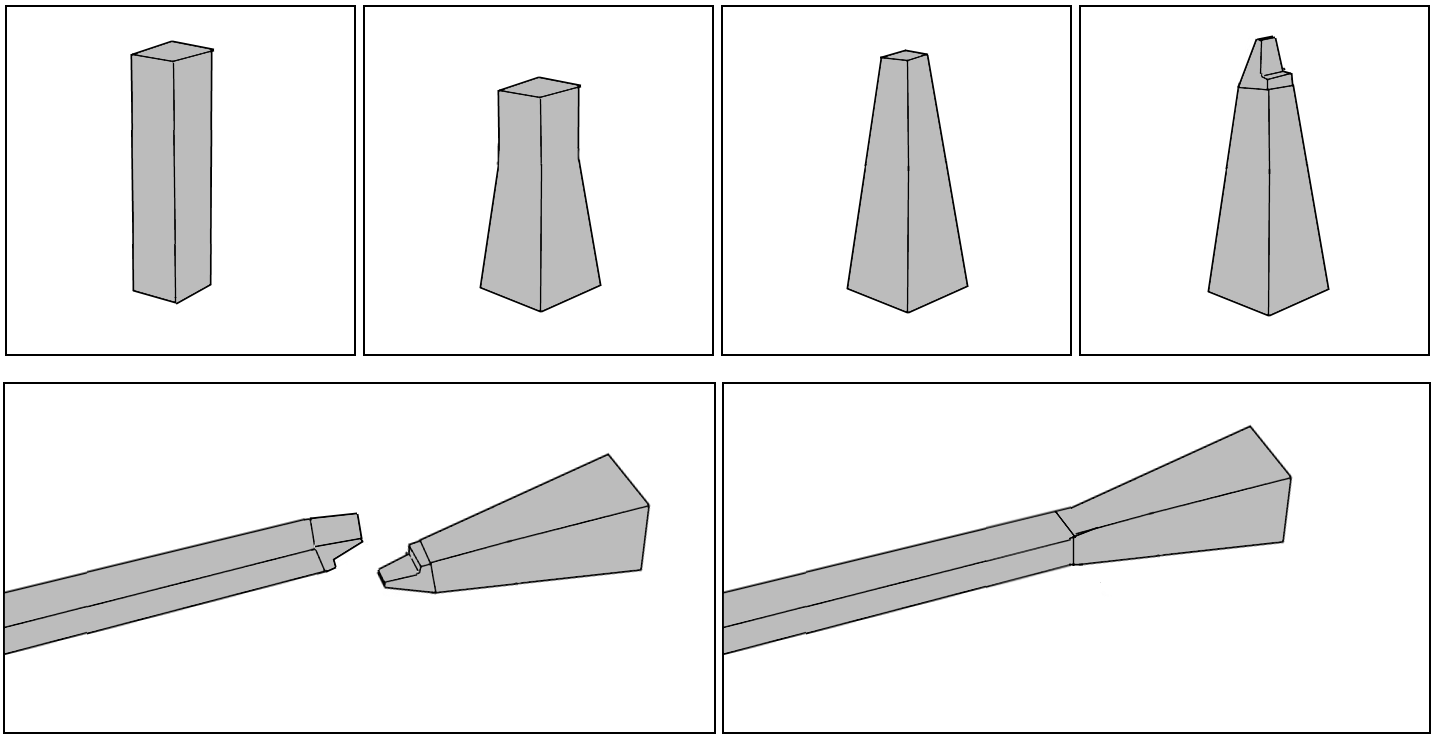
Forgot about the upsetting before scarfing, thanks! I also understand what you mean by not tapering pic 3 all the way down. I've never forgewelded before but I'd like to learn, and I think this is good practice. I'll get back to you when the steel arrives and I have time to forge!
-
I ordered some 10 mm (3/8") and 16 mm (5/8") earlier today and this is what've come up with: Cut off a short piece of 16 mm (5/8") Upset it until the very end reaches 20 mm Taper the other end closer to 10 mm (3/8") (Now this is when I'm uncertain) Forge the end ready for a scarf weld Forge a scarf on the end of a ~450 mm (~17.7") long piece of 10 mm (3/8") Forgeweld
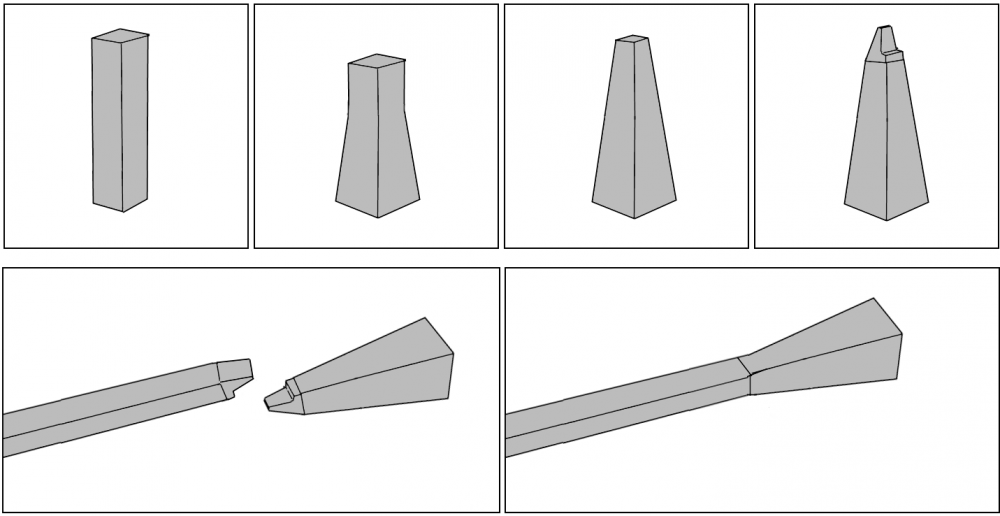
-
I have seen people like Black Bear Forge do candleholders with pipe, but when it comes to candleholders, I really want to make them the traditional way like in the video I linked. It's been more than 2 years now since I built my forge, and I've managed to forge a lot of things just by trial and error. But yeah, you could say I'm new.
-
Hello! This is mainly about candlesticks, which I have made roughly 8 of and they all have been very time consuming, so I want to find other ways to forge them. So far, I forge two at a time, one at the anvil while the other is in the forge. I start with 500 mm long pieces of 10 mm square and begin upsetting one end until it gets thick enough at the very end (17-20 mm). This is not only very time consuming, but also dangerous since I've hit my left hand (that holds the bar) a lot of times when upset the piece (I've tried holding it with tongs, but it's not stable). I then flatten it out with the cross pein side of my hammer until the end resembles somewhat of a circle sector (also takes a lot of time). A problem that often arises during this part is that the metal in the upset piece wasn't enough, which means that I have to either make a tiny cone or flatten out the circle sector until it's paper thin to make it big enough. Obviously, if it's too thin it's going to break during forging or burn away in the forge (has happened a lot of times in my solid fuel forge). After that, just forge the circle sector into a cone and 90% of the work is done. If my explaination was bad or if you haven't seen candlesticks being forged, check this video out. It's in Swedish but atleast you can see the process, but with much bigger stock and power hammers. "But why use 10 mm square?" you might ask. Well, the very first one I made was 14 mm square and upsetting it was easy, but forging down the rest into smaller dimensions was also very timeconsuming since I don't have a power hammer or hydralic press. Forging down very thick pieces of stock into much smaller dimensions is not very convenient for me. I'm probably just bad at it, so if there is any really efficient way I'd love to know. Instead of using 12, 14 or 16 mm square and upsetting one end a little bit before forging down the rest of the bar into 10 mm square/round I start with smaller stock and enlargen one end before flattening it out. Now, here's a few ideas I've come up with, but never tested the first two: Forgeweld a shorter and thicker piece (12, 14, or 16 mm) onto the end of a 10 mm bar before upsetting "a little bit" and continue with the process from there. Draw a circle sector onto a thinner piece of sheetmetal/plate of steel, cut it out with an angle grinder and forgeweld it onto a 10 mm bar and continue with the process from there. Just bite the bullet and start with 12 or 14 mm bar. Upset one end and forge down the rest into a smaller dimension. But is there an efficient and effective technique that I can practice so that it becomes faster? I'd be very glad to hear your thoughts and ideas. // Gustav
-
Hey! How do you guys grind your secondary bevels after HT? I'm thinking about buying whetstones to go from no edge at all to "papercutting sharp", but what grits should I use? I've learned that a stone in the 180-240 (or even lower) range will create the edge, but I don't really know how big the gritsteps should be after that. Should I buy something like two two-sided whetstones, a 180/400 and a 1000/3000? Or should I skip the 3000 and strop on a leather belt instead? Replace the 400 with a 600 side? I really have no clue. One thing that's annoying me is the fact that the extremely low grit stone would solely grind secondary bevels on newly forged knives, and on nothing else. The other grits above will probably get used more in the kitchen or just general knife repair. It just feels weird having a stone that gets used very little, but is it true that you can use lower grit stones (120-240) as a flattening stone for the other stones? I love this hobby but just can't seem to figure sharpening out, no matter how many hours I've spent researching this on the internet. I'd be very happy for all the help I can get. // Gustav
-
-
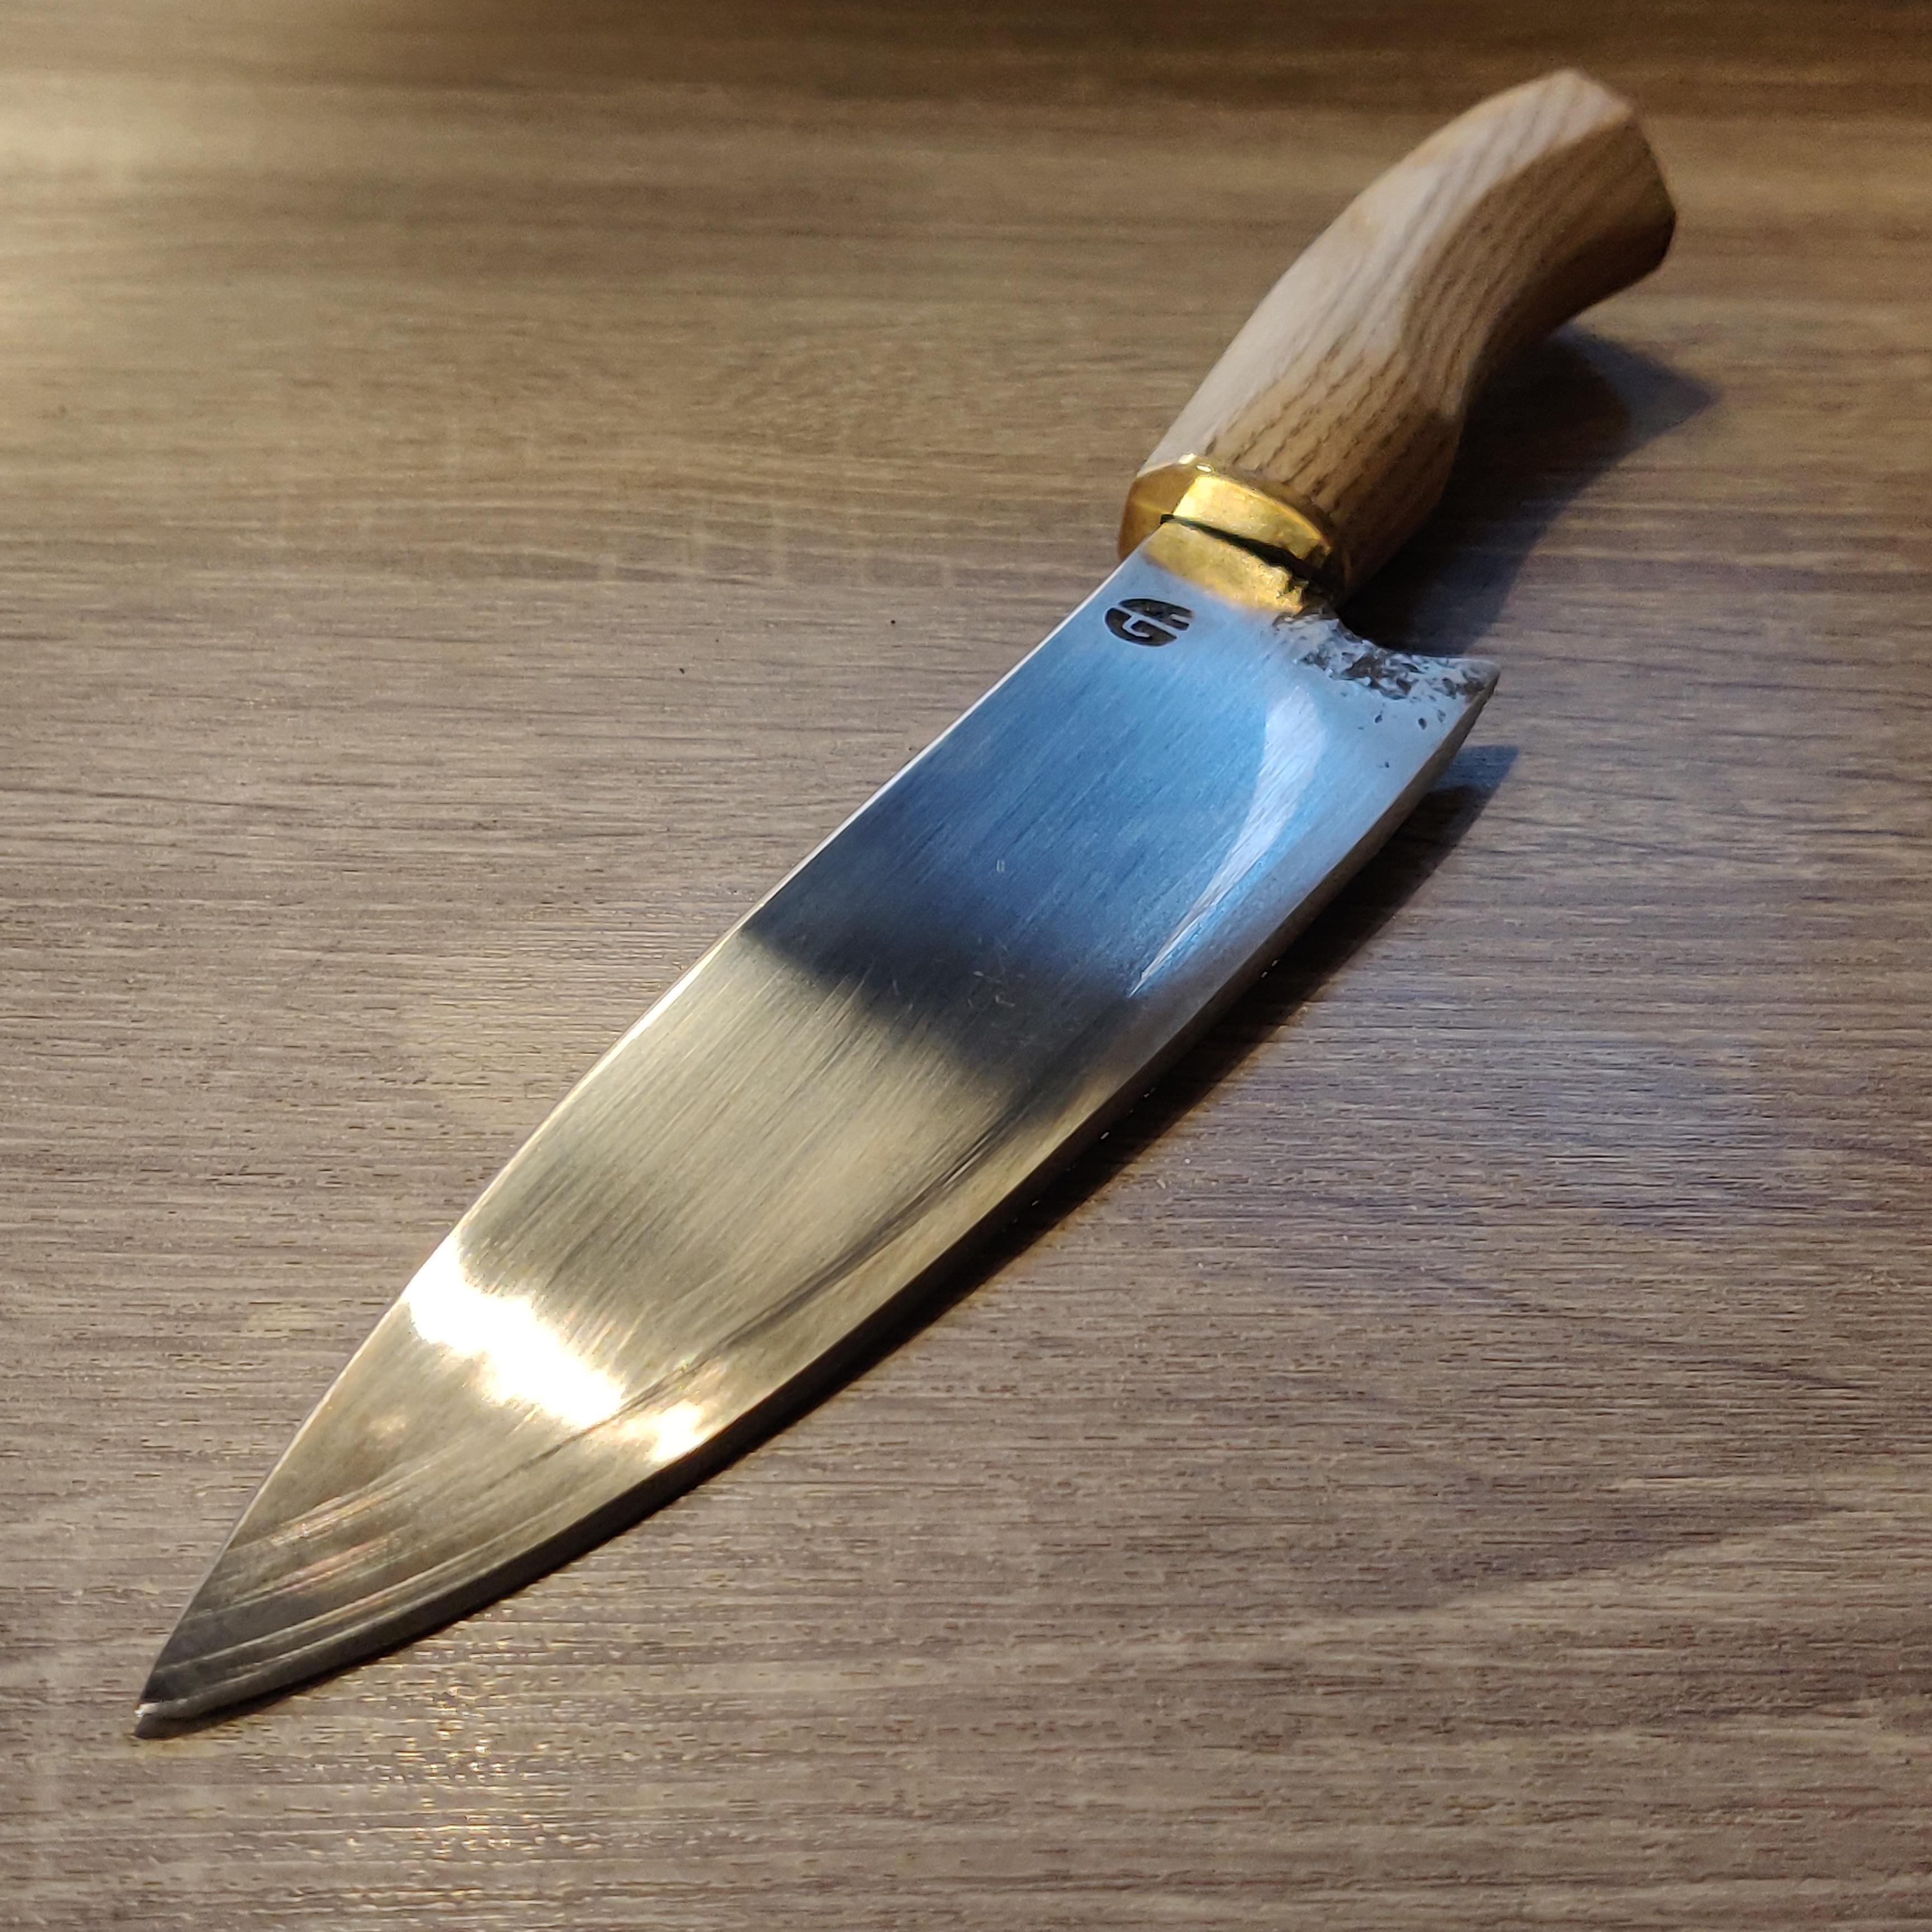
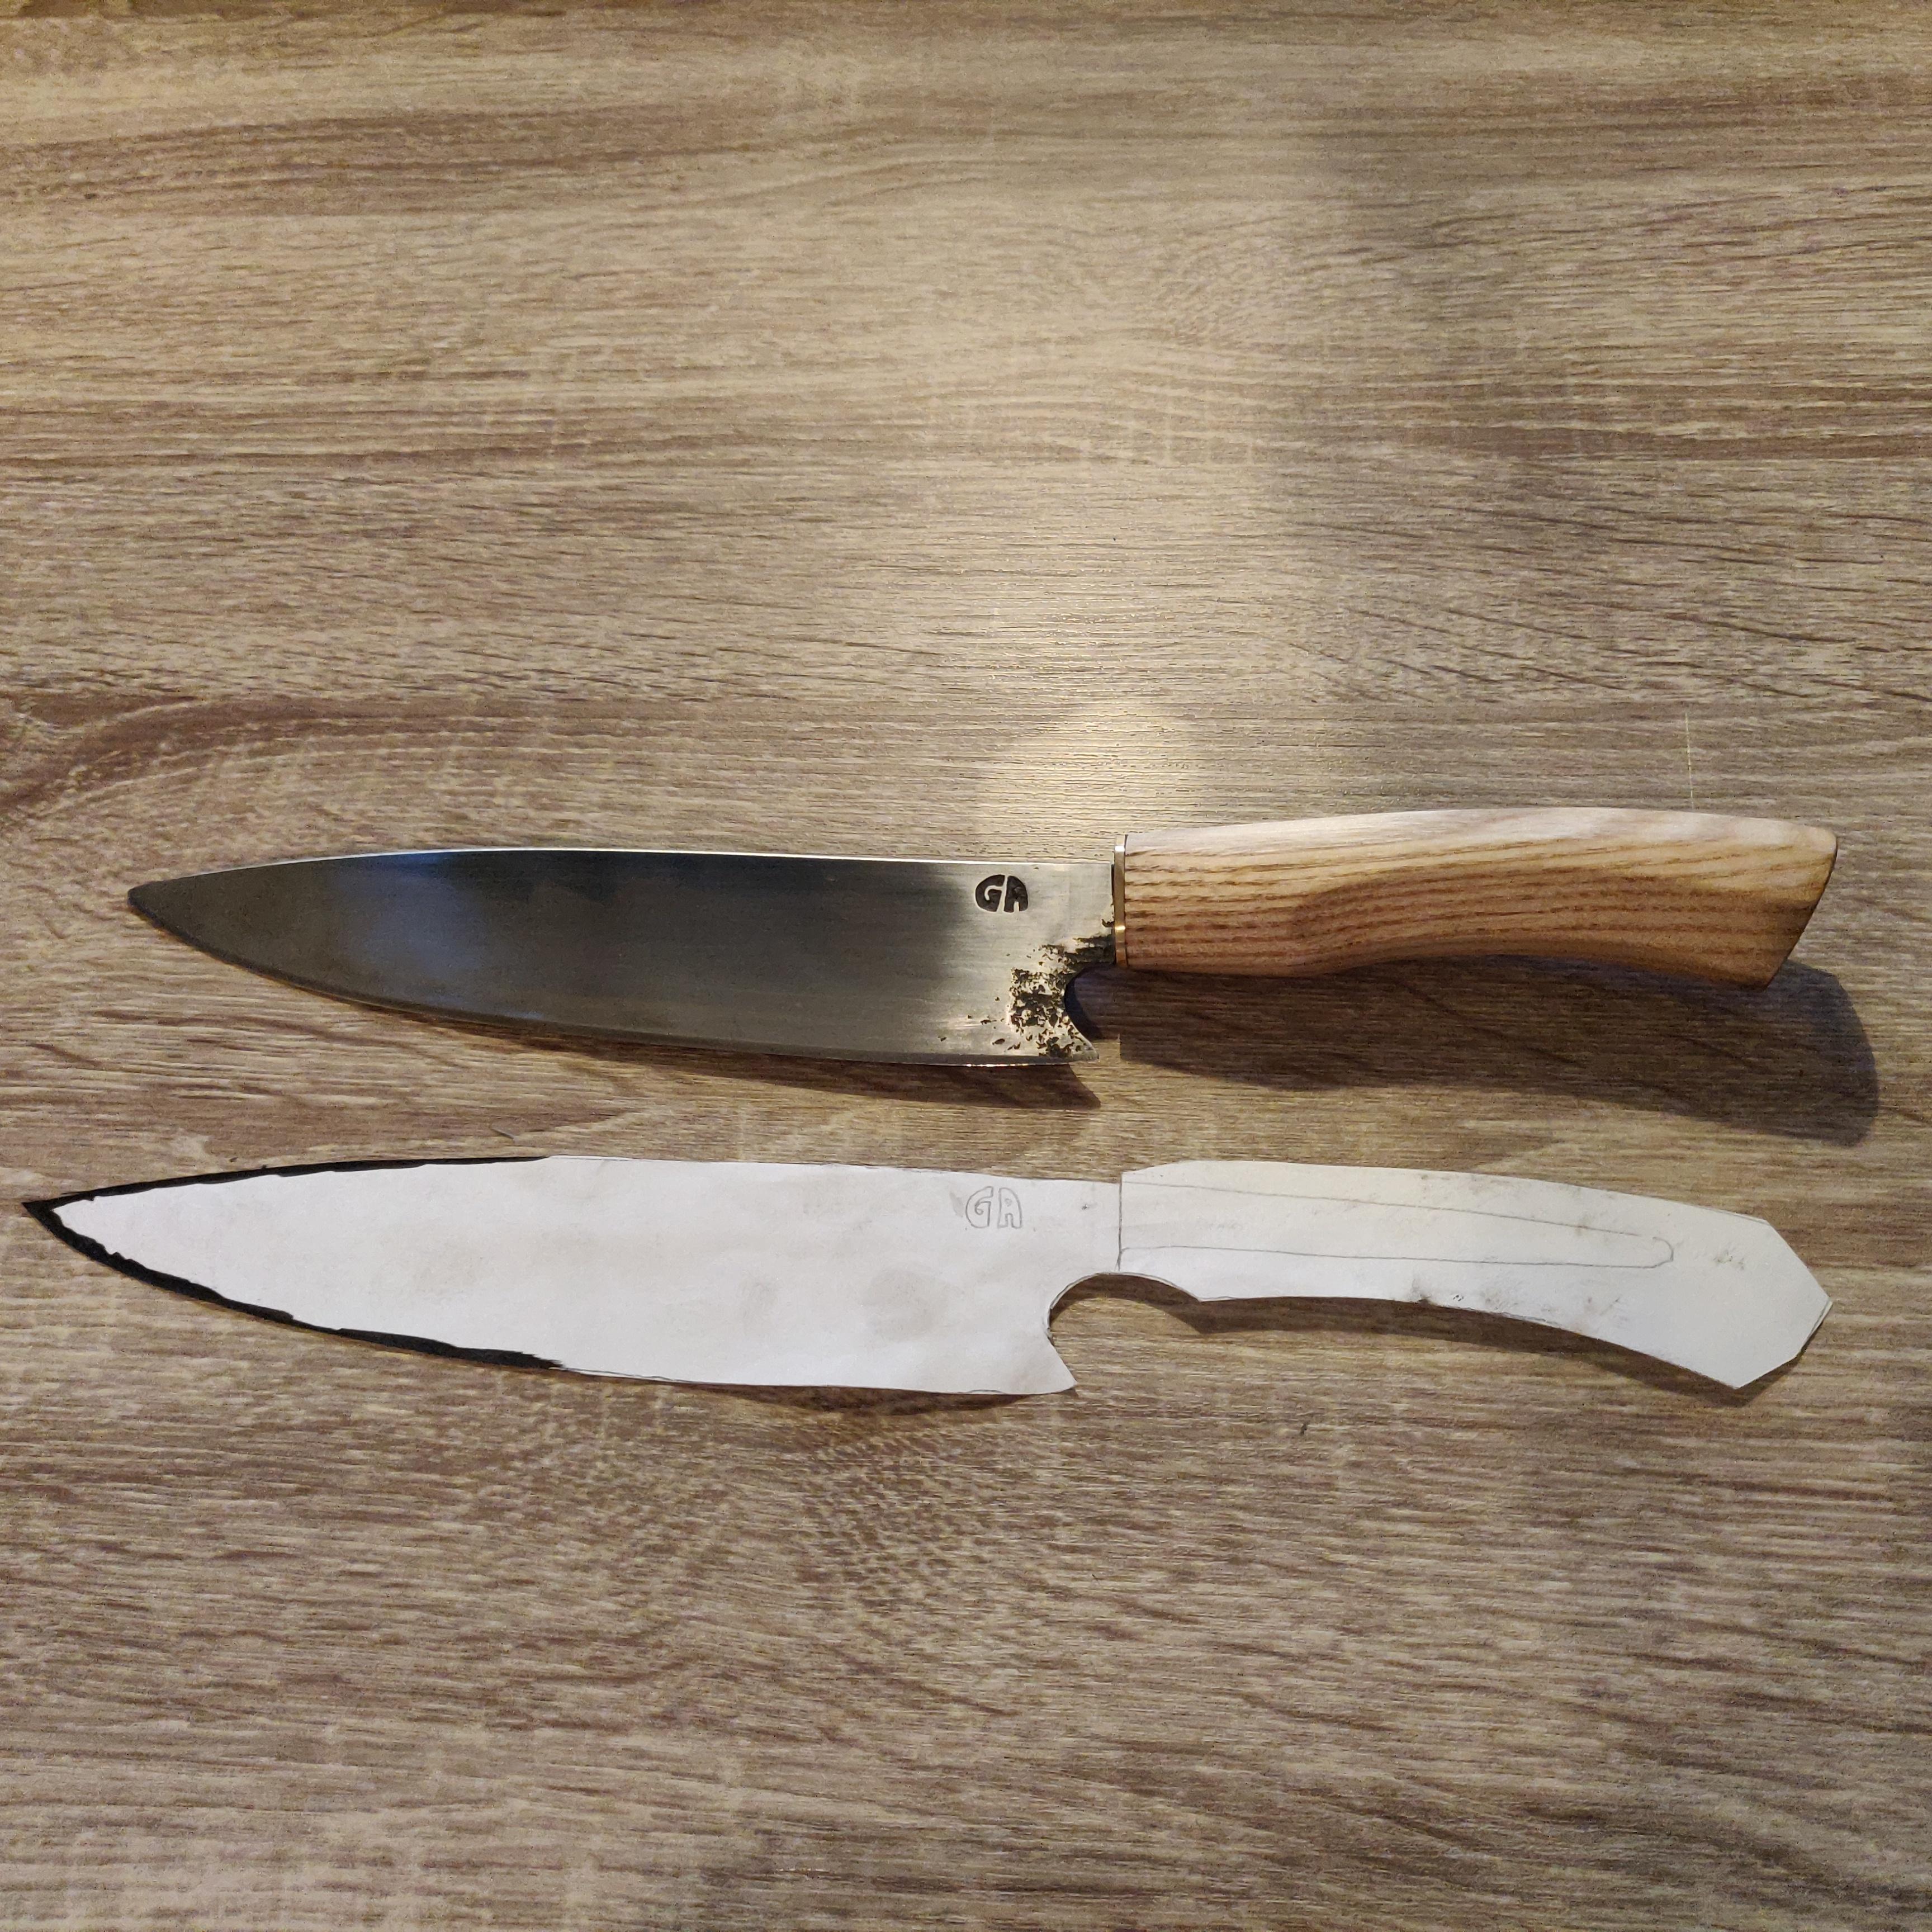
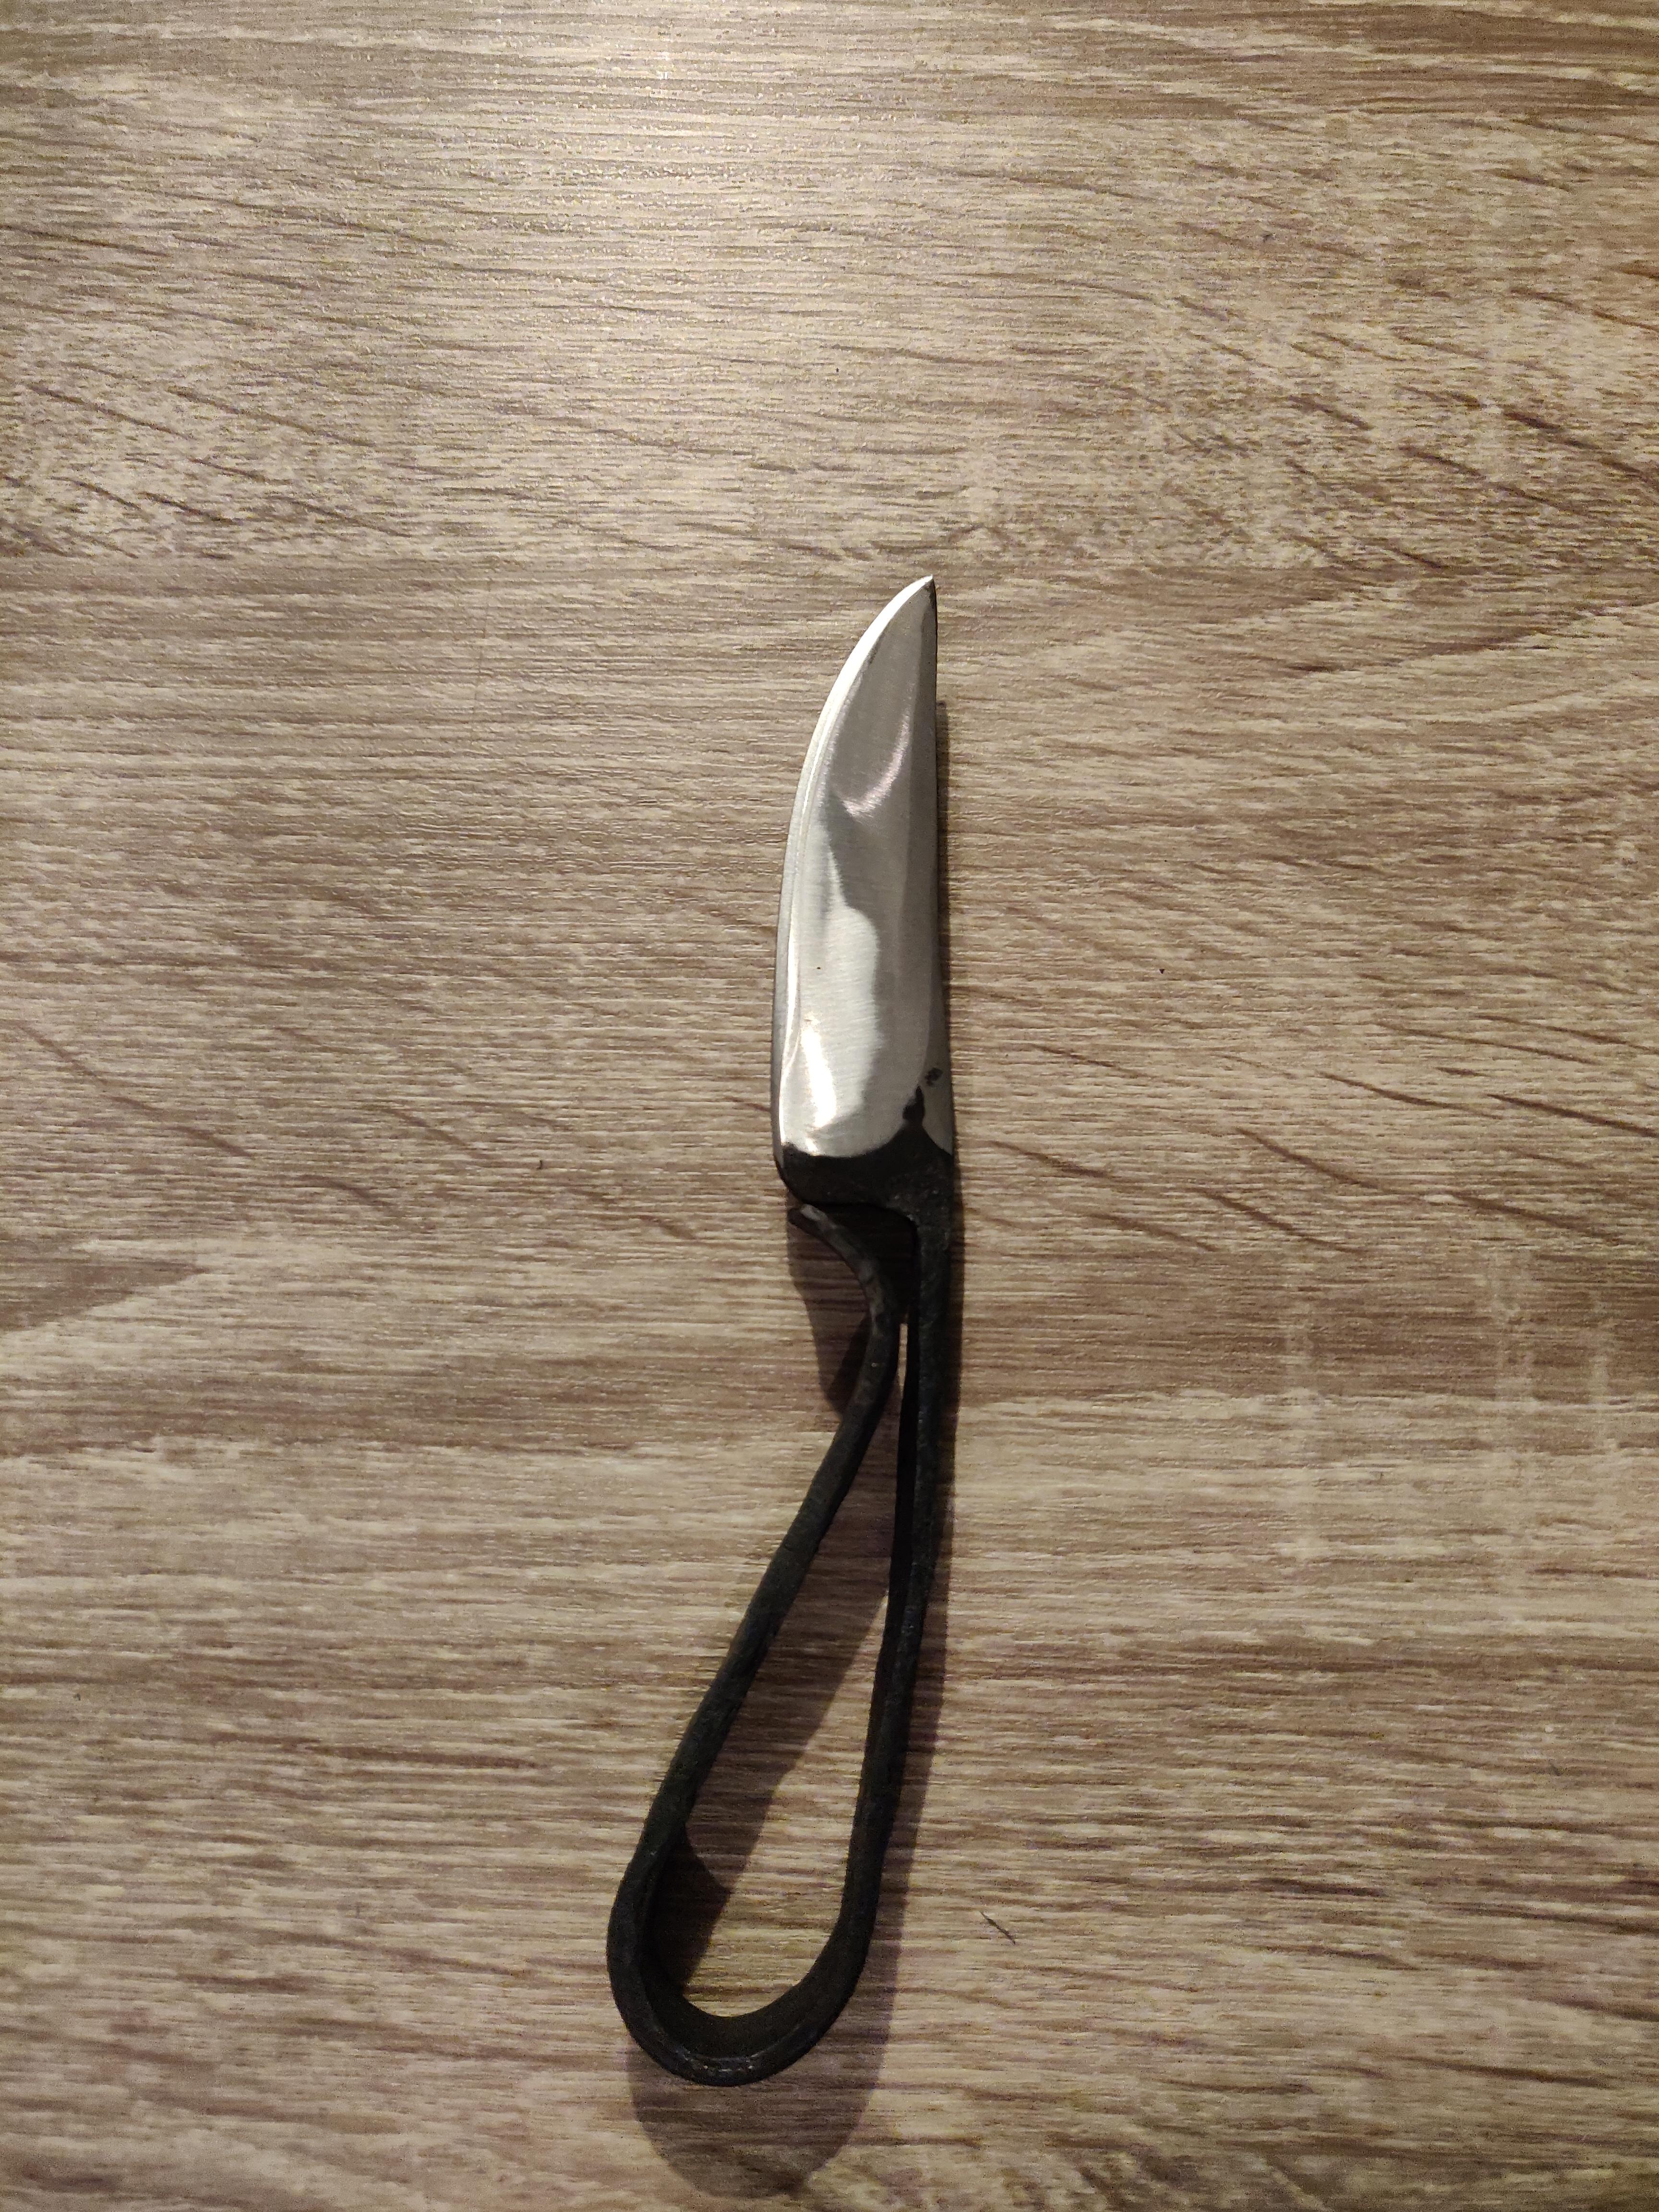
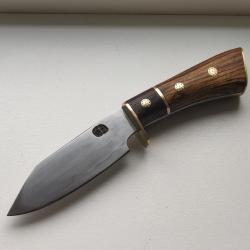
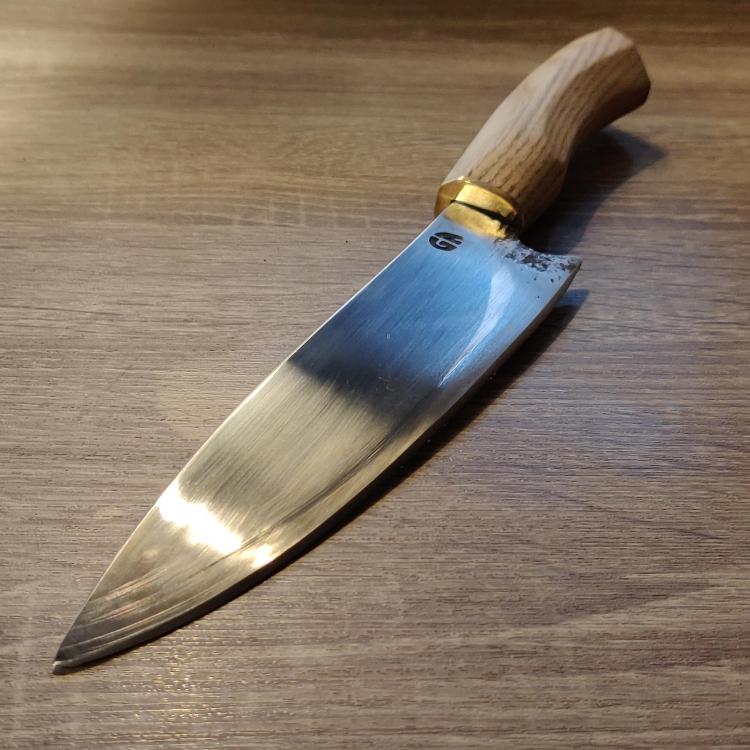
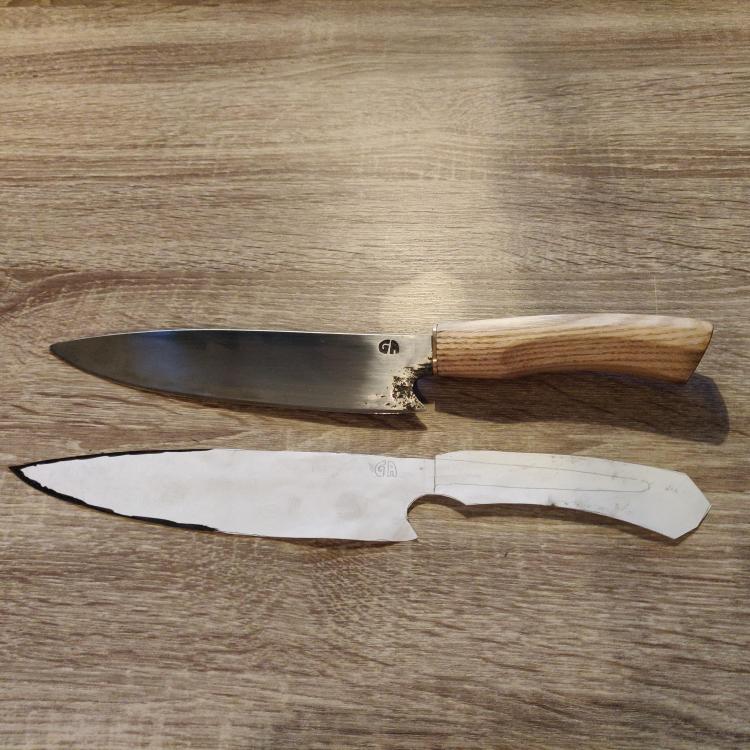
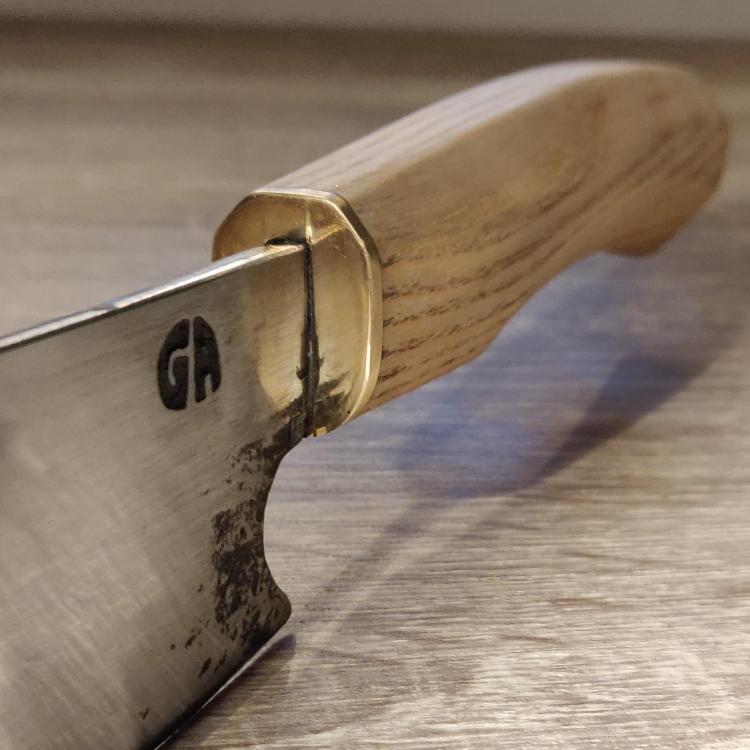
Ok, the knife is finished (two days ago) and I've never been this proud. The thing isn't perfect, but it's perfect for me atleast . I have to get better at sharpening. I used an electric knife sharpener that my parents had, even though I don't like that way of sharpening. It cuts, but the steel has more potential.
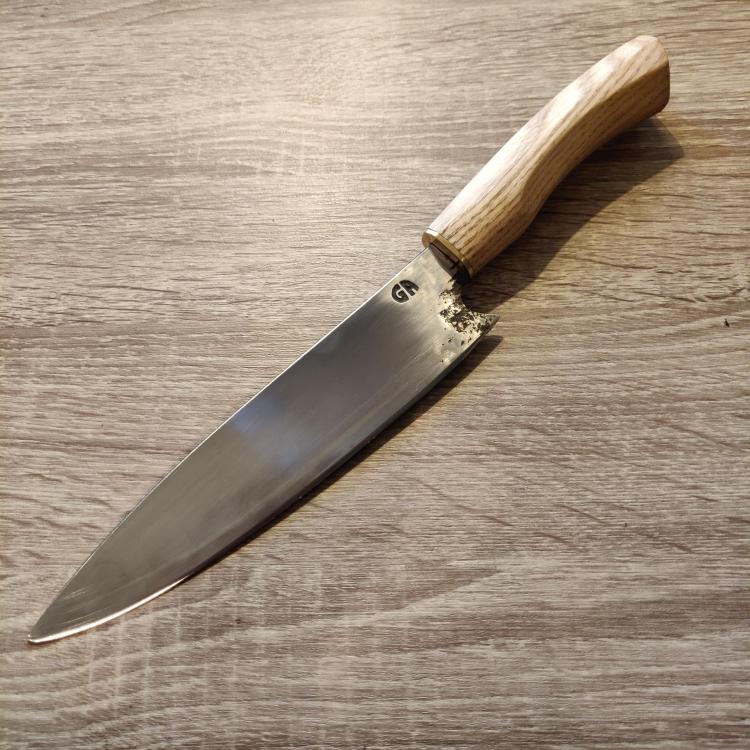
-
So I tried out filing the whole edge by hand and it pretty much worked. I really felt it being harder near the tip and softer in the middle, so I just filed as much as I could. I basically filed until I literally couldn't file more, since the soft metal got removed, exposing the hardened steel. I then hand-sanded it up to 600 grit, and glued everything together. Tomorrow will probably be when I actually finish the knife! One question though, what grit do you think I should go up to on the knife (not sharpening)? I can imagine a mirror finish being annoying in the kitchen with food sticking more easier than on a satin finish, but what grit specifically do you recommend for a chef's knife?
-
I do however have something I'm worried about. When I ground away the surface after HT, i really wanted the edge to be clean. I then dipped the knife in water and quickly ground away some material throughout 70% of the edge with the knife perpendicular to the sander. Later, I tried filing and noticed that the tip (the part I didn't grind) might be a little bit harder than the other part of the edge. I am however uncertain and could just be thinking this, but I'm thinking about how to fix it if 70% of the edge actually got some of its hardness "removed". I did not see any tempering colors whatsoever during grinding, however. One thing I thought about is to file away a bit of the edge to hopefully "get to" harder steel a tiny bit closer to the spine. How should I do this? Use an ordinary file until I can't remove more material, or sand it away? What grits? I'd also like to have those rockwell files that test hardness. What are they called, how many should one have and which HRC should they range from? Or if you have any tips on how to quickly check if the hardness of the edge is "good" and not ruined. HT went well, the problem (if there is any) does not have to do with quenching or tempering. Like if a file shouldn't even bite into the steel at all after HT or if it's fine if it bites a little bit.
-
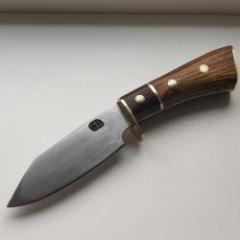
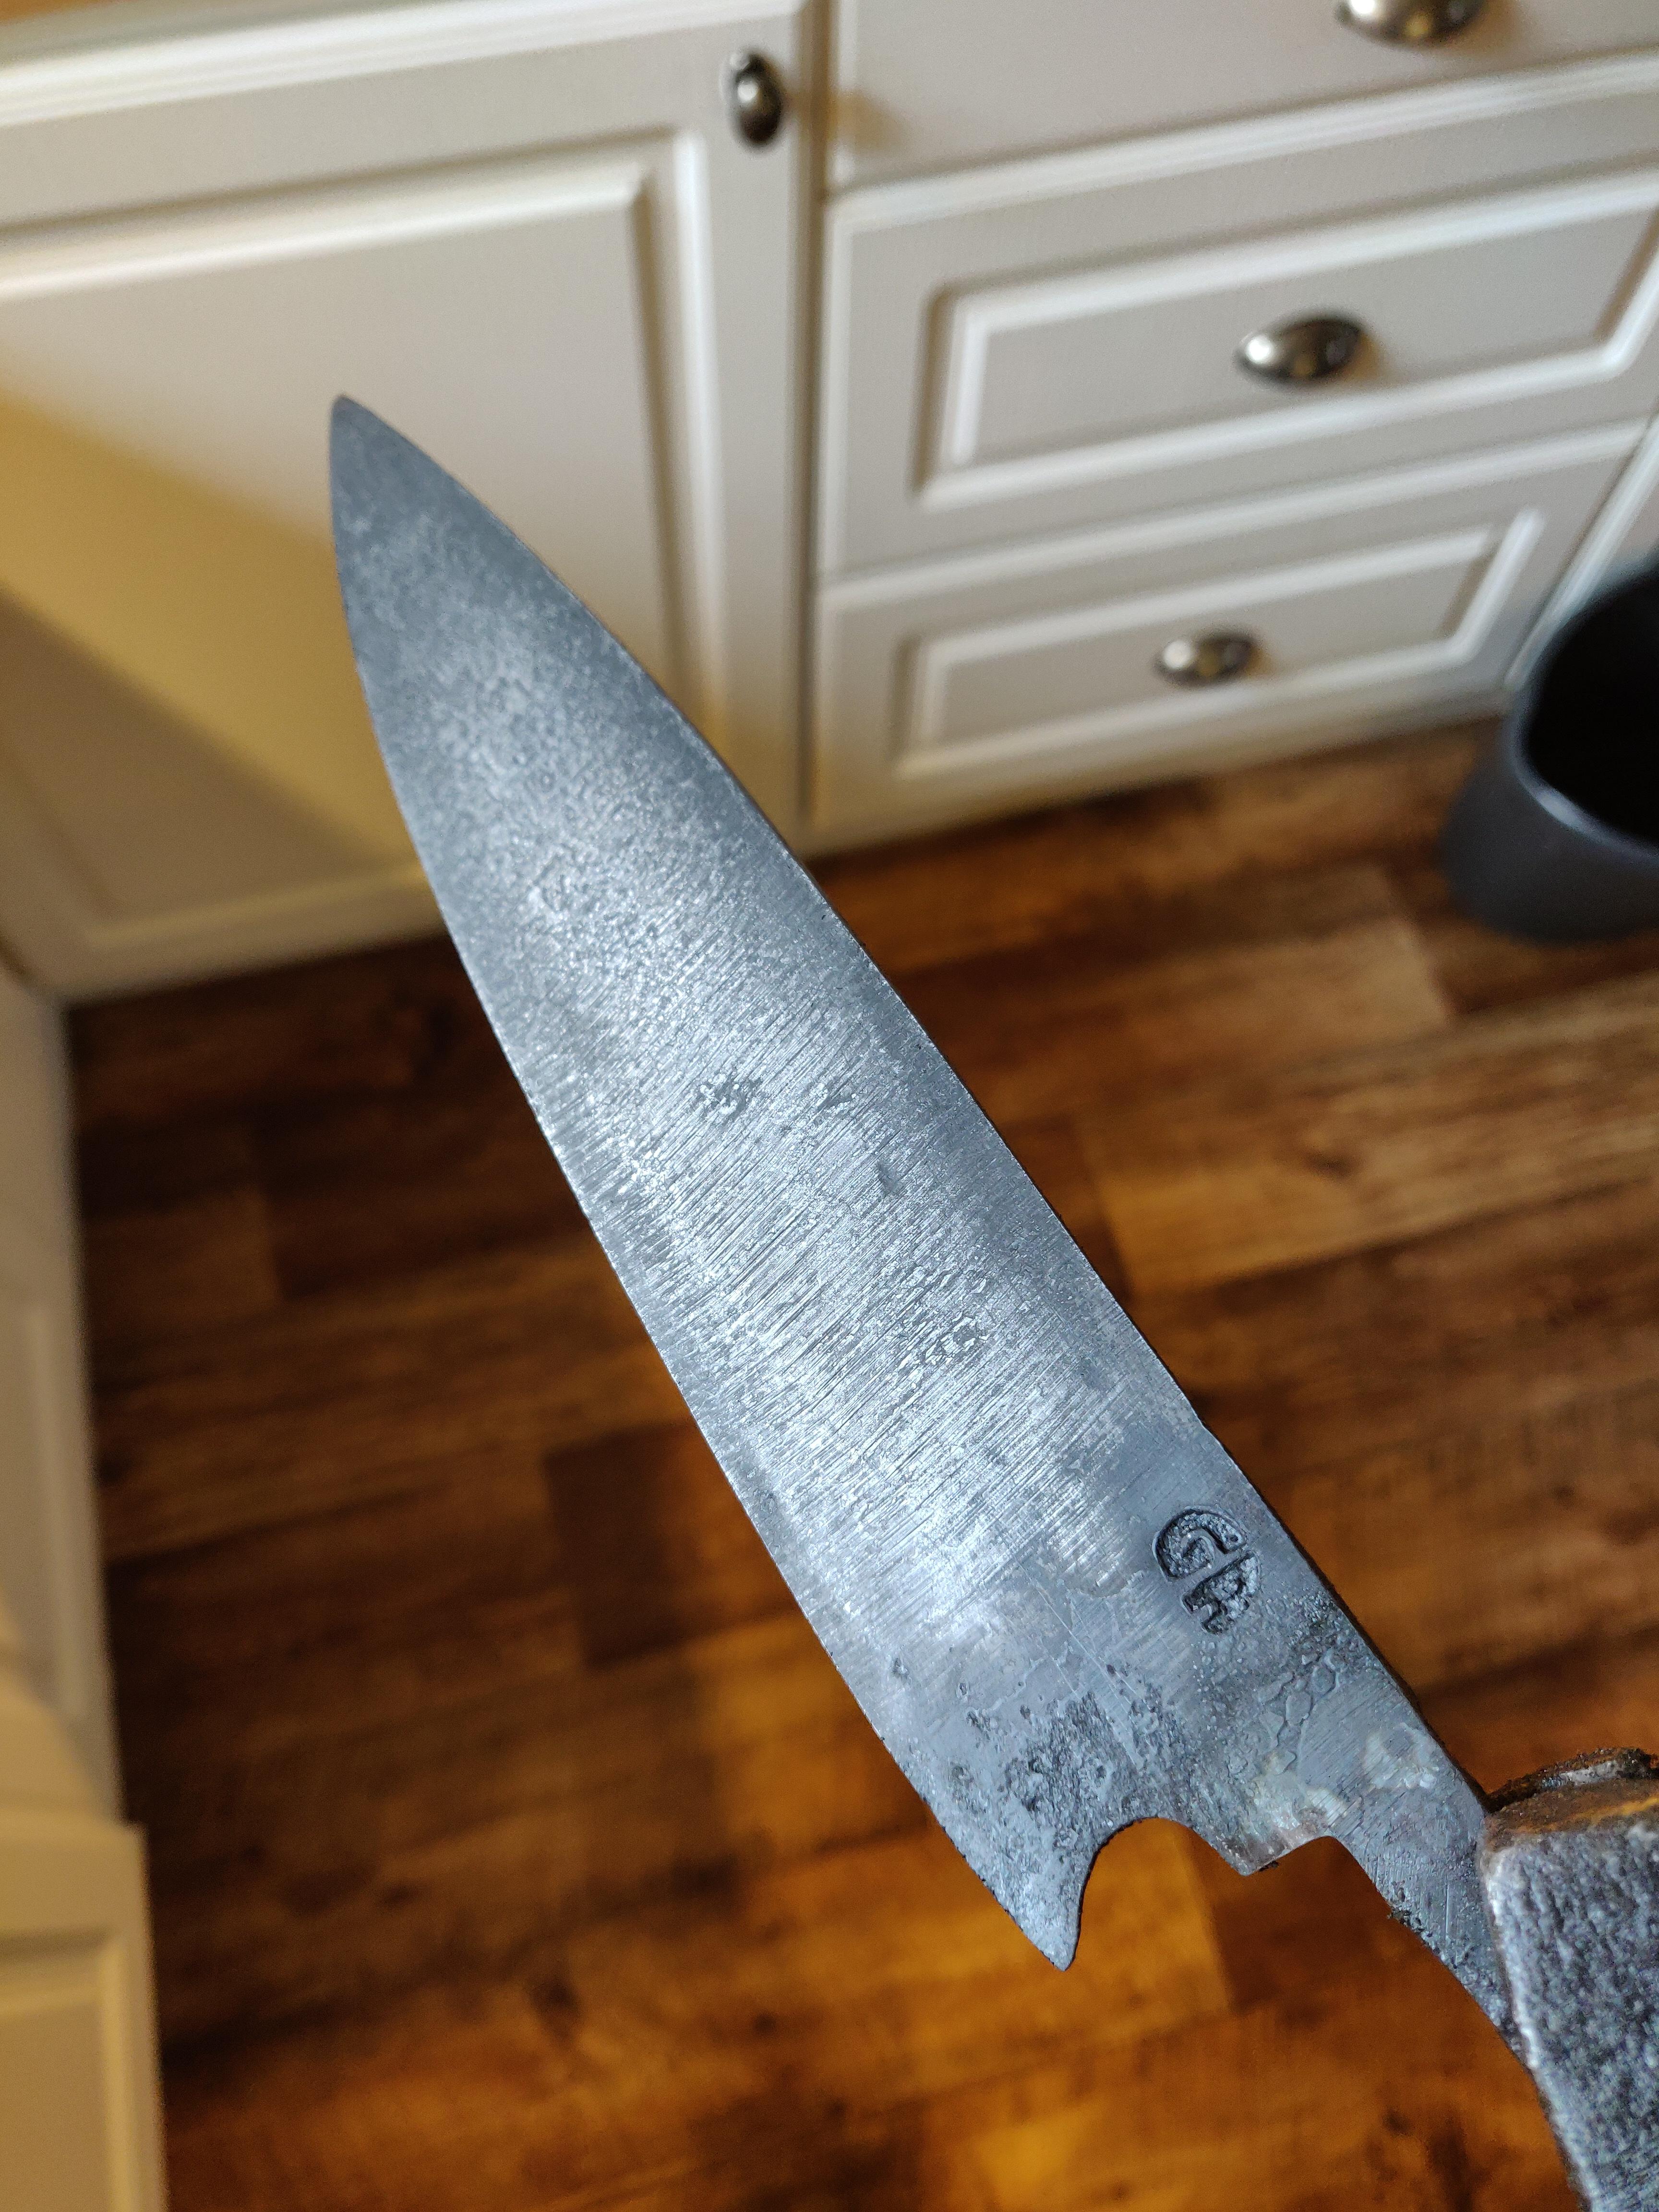
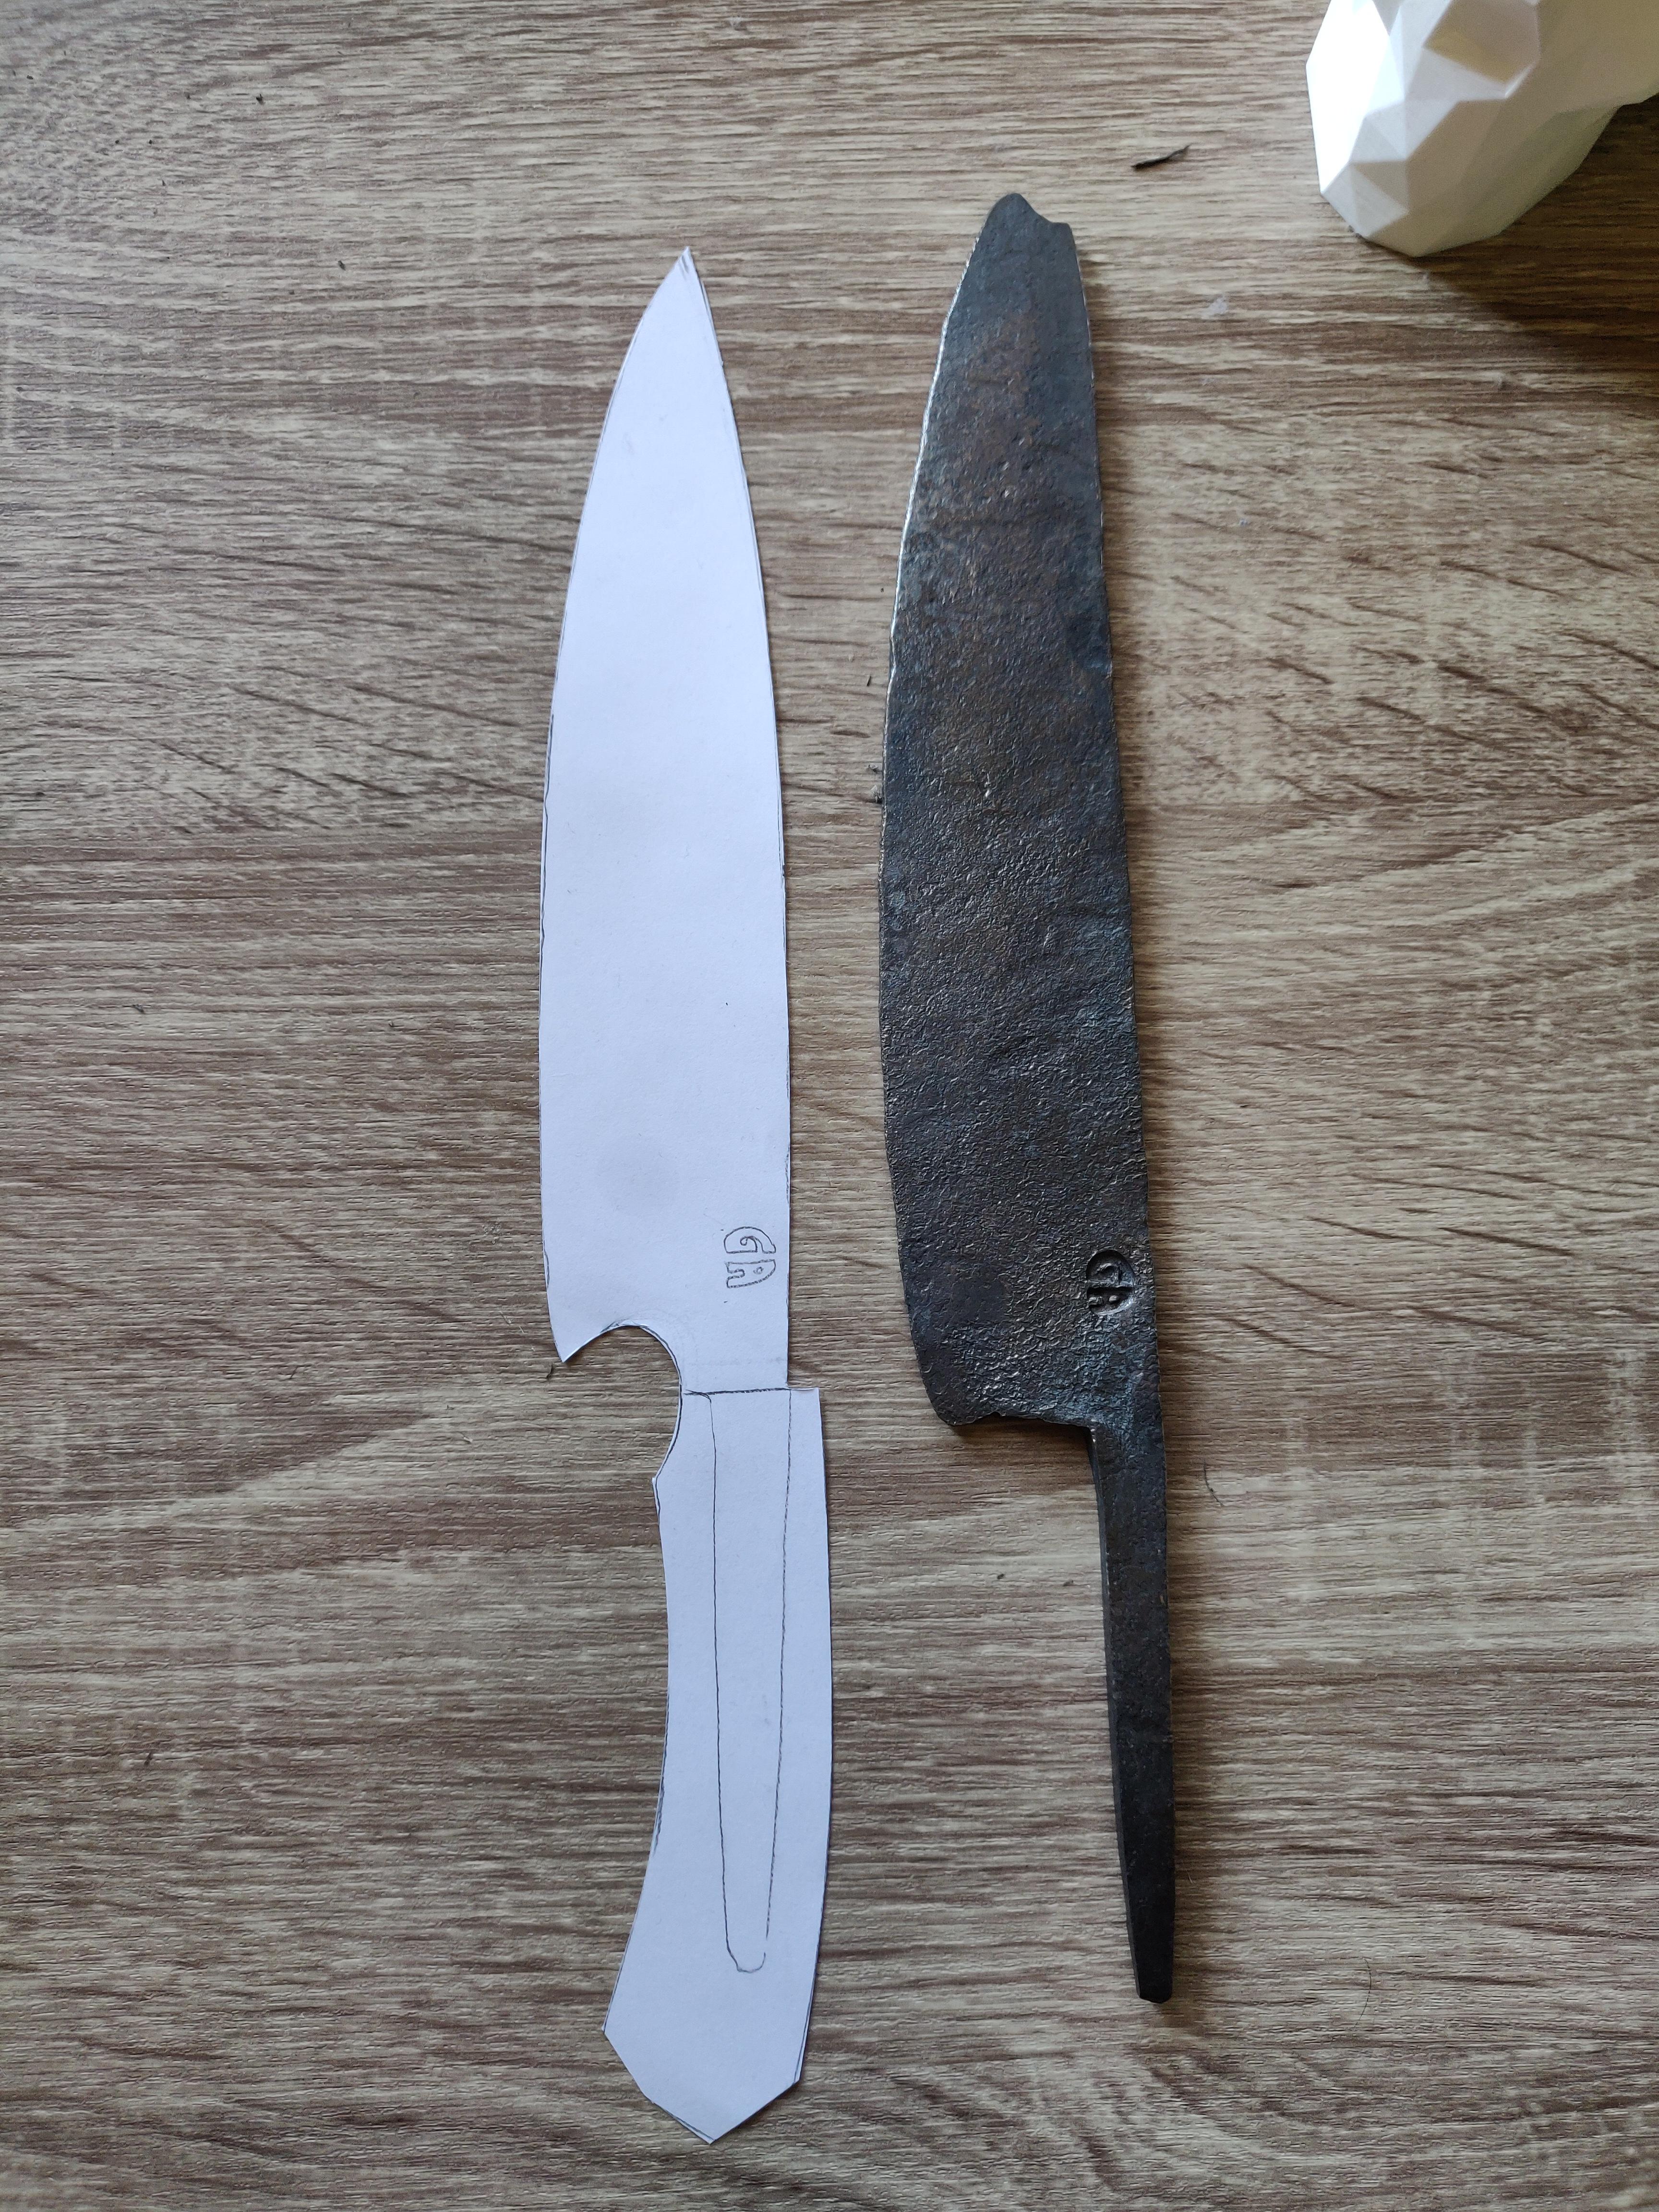
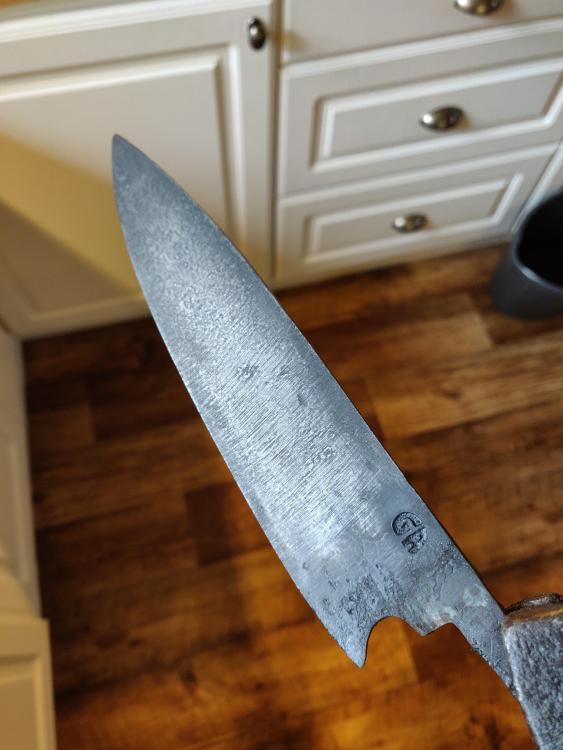
I've been very busy and finally found time to get going on this project. If anyone's still following this I have some results: Forged Normalized (is it really necessary before annealing?) Annealed in vermiculite Ground the knife Normalized x 3 Quenched in well heated canola oil Tempered in oven at 200 °C two times, 1 h each. I got an even heat by placing a square pipe in the coke forge, it was supricingly effective. It pretty much created a propane forge lol. The quenching went good, even though I got a slight warp that I wasn't able to correct. It's probably something I'll have to grind away if I have enough material. However, there were no cracks. Also, the file-test was just wonderful. The high pitch just echoed in the shop and I let out a long sigh of relief. The picture is the knife before the tempering cycles. It is now at a straw/light bronze color with some patches of purple (not on the edge).
-
I normalized in air and then annealed in vermiculite yesterday and took the knife out today. It's soft! One question though: what's the difference if you compare dead soft carbon steel and just regular old mild steel? The knife is soft, but mild steel is softer. This might be a no-brainer, but not for me.
-
-
Now that's something I didn't know. Normalize and then anneal! One question however: after grinding etc, do I need to normalize and anneal again just before quenching? For instance, if the steel gets pretty hot while grinding (maybe not glowing, but hot), is it necessary to redo steps 1 and 2 before hardening? It definitely did!
-
anvil - Ok if I want to shape the knife after forging so a file can remove material, is it air cooling (normalizing) or vermiculite (annealing)? I've always thought of annealing as the process after quenching with the tempering colors and normalizing as the "remove all hardness and stress before shaping and quenching". Before the quench there's the normalizing cycles so it's critical temp then air cool regardless of how thin it is? It feels like it cools down too quickly when air cooled so it's not very soft.
-
Hey. I'm a new bladesmith (with a couple of years experience of traditional blacksmithing) and I've made a couple of knives out of O2 steel. The first one turned out great, but the second one had cracks all over the edge and spine. I've done a little bit of research and people say: the edge hardens first, so when the thicker spine hardens the edge can't flex => cracks. What I think caused it: I had problems normalizing it before hardening. The oil (canola oil) was probably not hot enough. I used a coke forge and struggled to reach an even temperature. Read a bit online and found out O2 isn't for inexperienced bladesmiths. I didn't know this when I began forging my next knife, a kitchen knife. It's not hardened yet, and I'm terrified of doing it. My question is: how do I make sure I don't get any cracks in my new knife? I've bought some vermiculite to normalize in, but someone said online that you shouldn't normalize O2 in vermiculite. He said you should do a "sandwich" with hot pieces of thick metal under and over the knife. Does vermiculite work or was he right? Is there anything else you recommend me doing to increase my chances of a successful quench with O2? I've ordered 80CrV2 steel (which supposedly is a more beginner-friendly steel) so next time will be easier. Very thankful for all answers! // Gustav
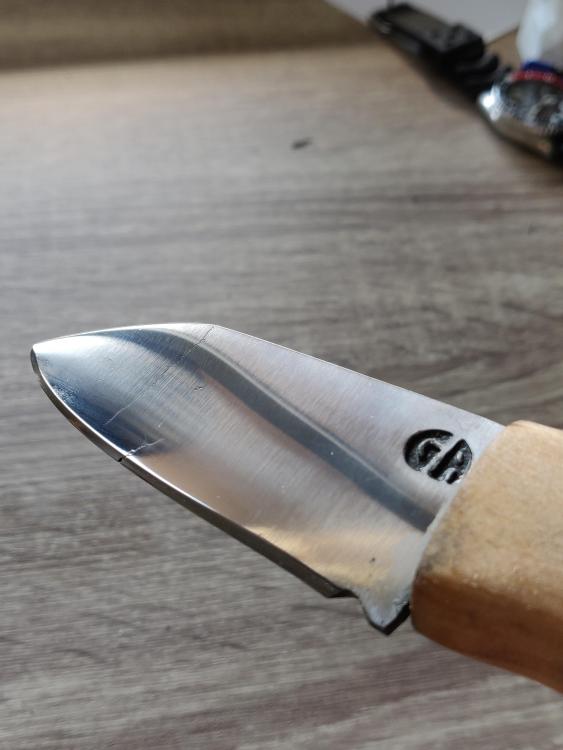
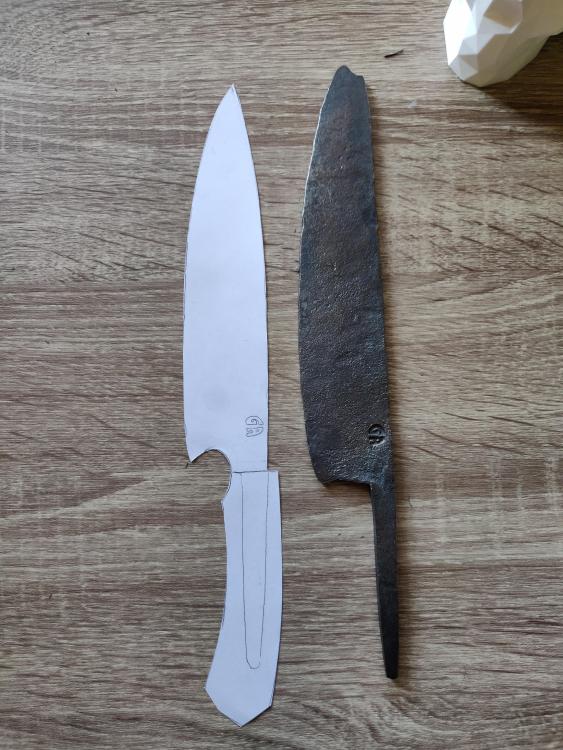
-
Hey! Really happy about my first knife! I've tried twice before but it was pretty much just practice ones on mild steel. This one is made from 5x40 mm O2 tool steel. It successfully hardened and tempered, but I'm not really happy about the sharpening. I went from 120 to 400 grit on our belt sander (the highest grit we had lol), tried honing but failed so it almost cuts paper. So there's a lot to improve and learn from. What do you think about it?
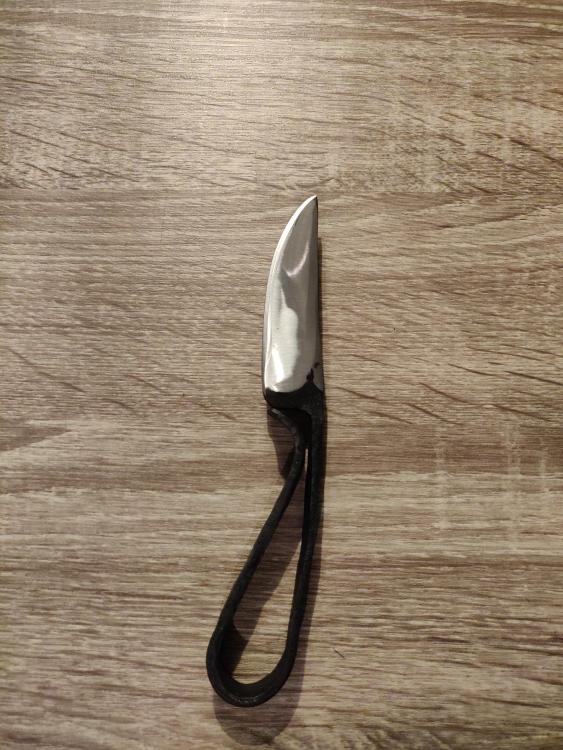
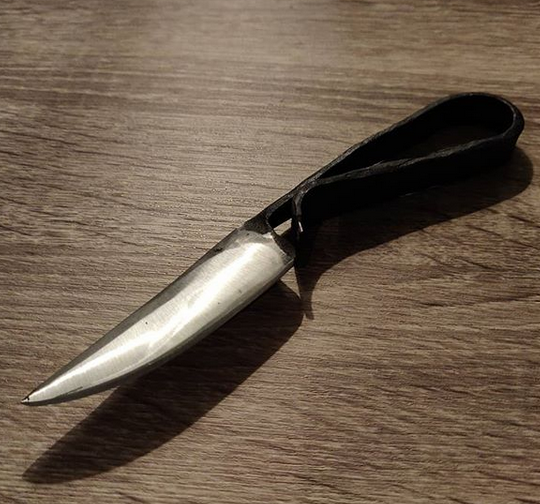
-
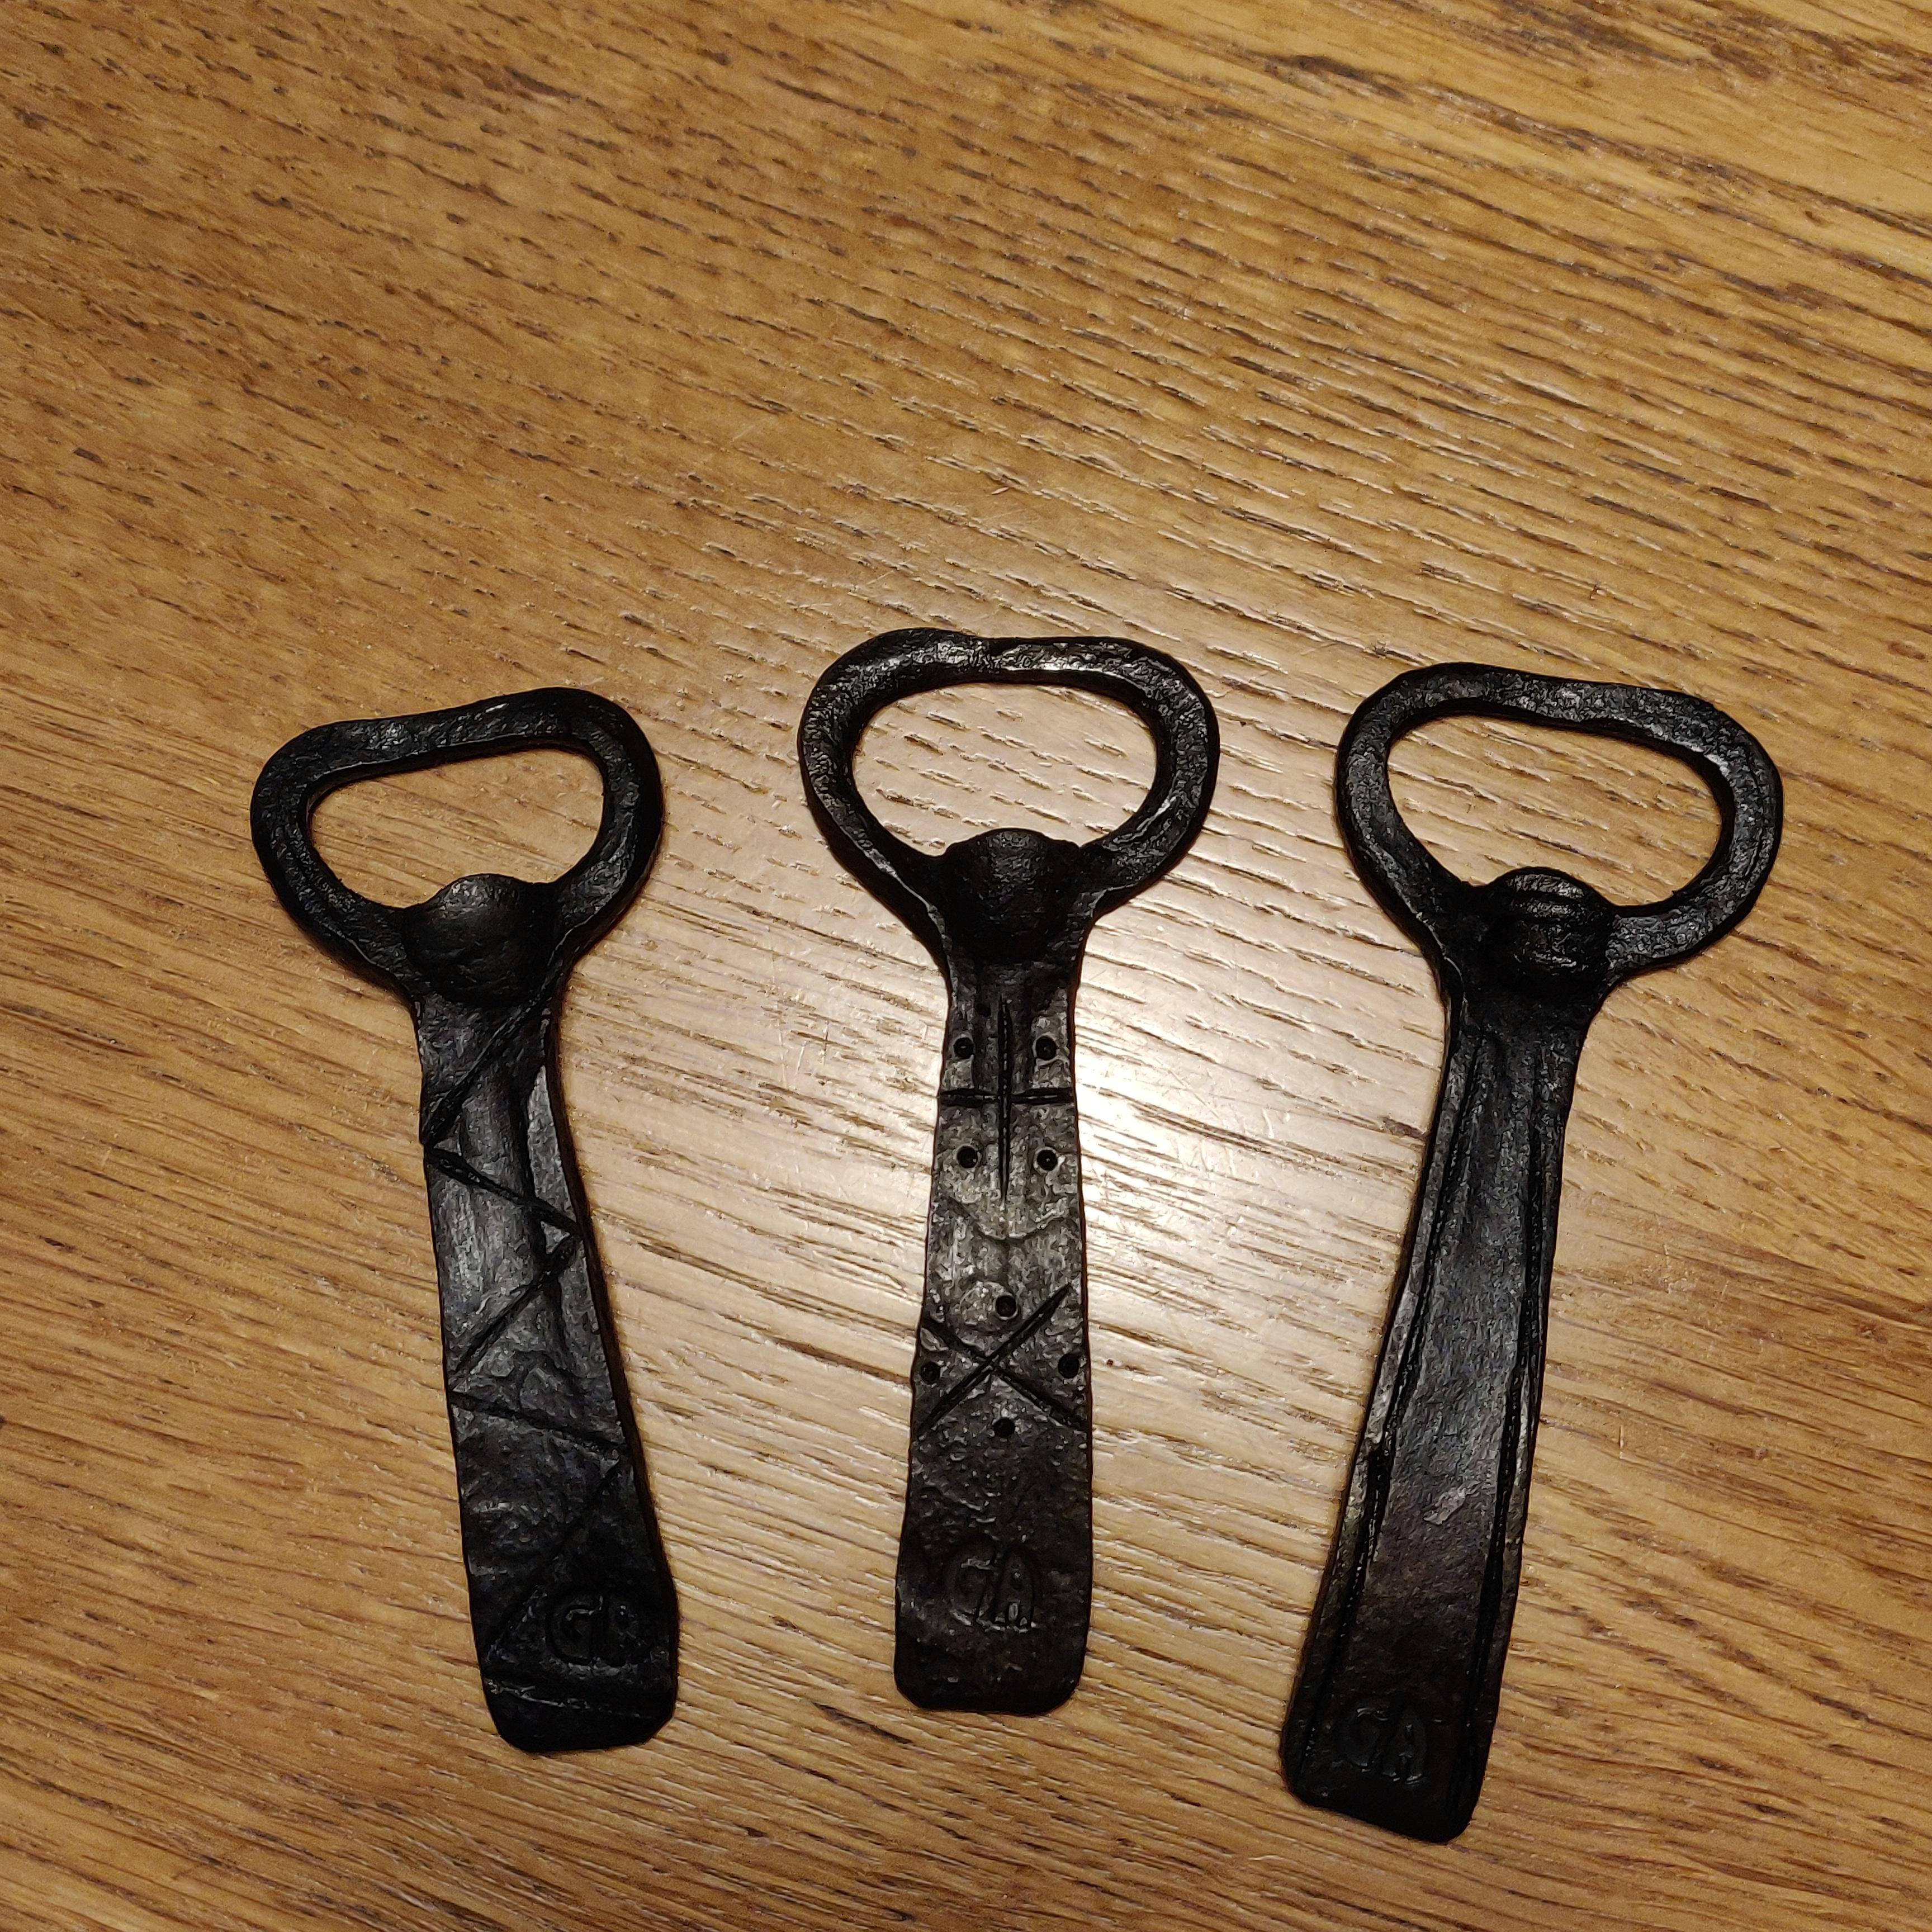
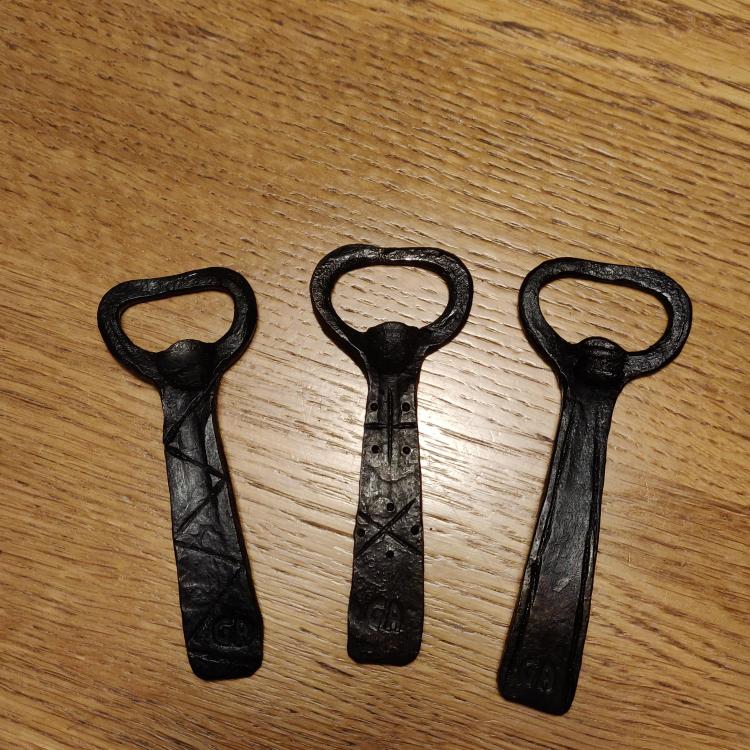
I've experimented with some patters on my openers. I really don't like the zig-zag one, but what do you think? Are there any good looking patterns that are quick to cut with a chisel? The openers will be sold, so it can't be any over complicated ones that take a lot of time. (Any other thoughts on the openers are also appreciated! )
-
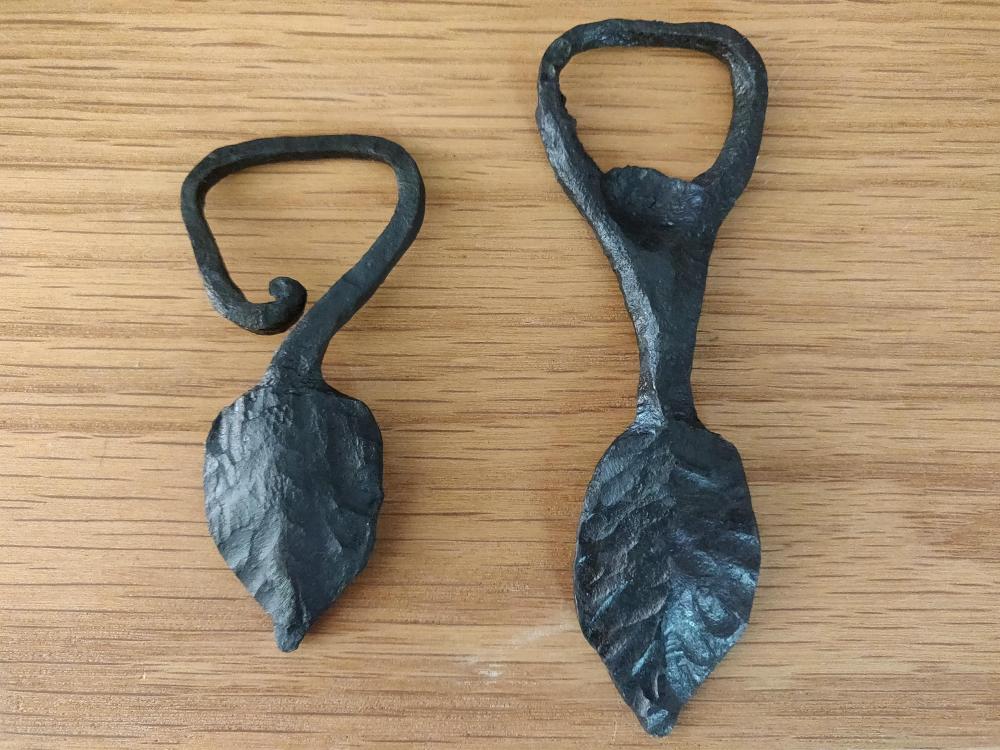
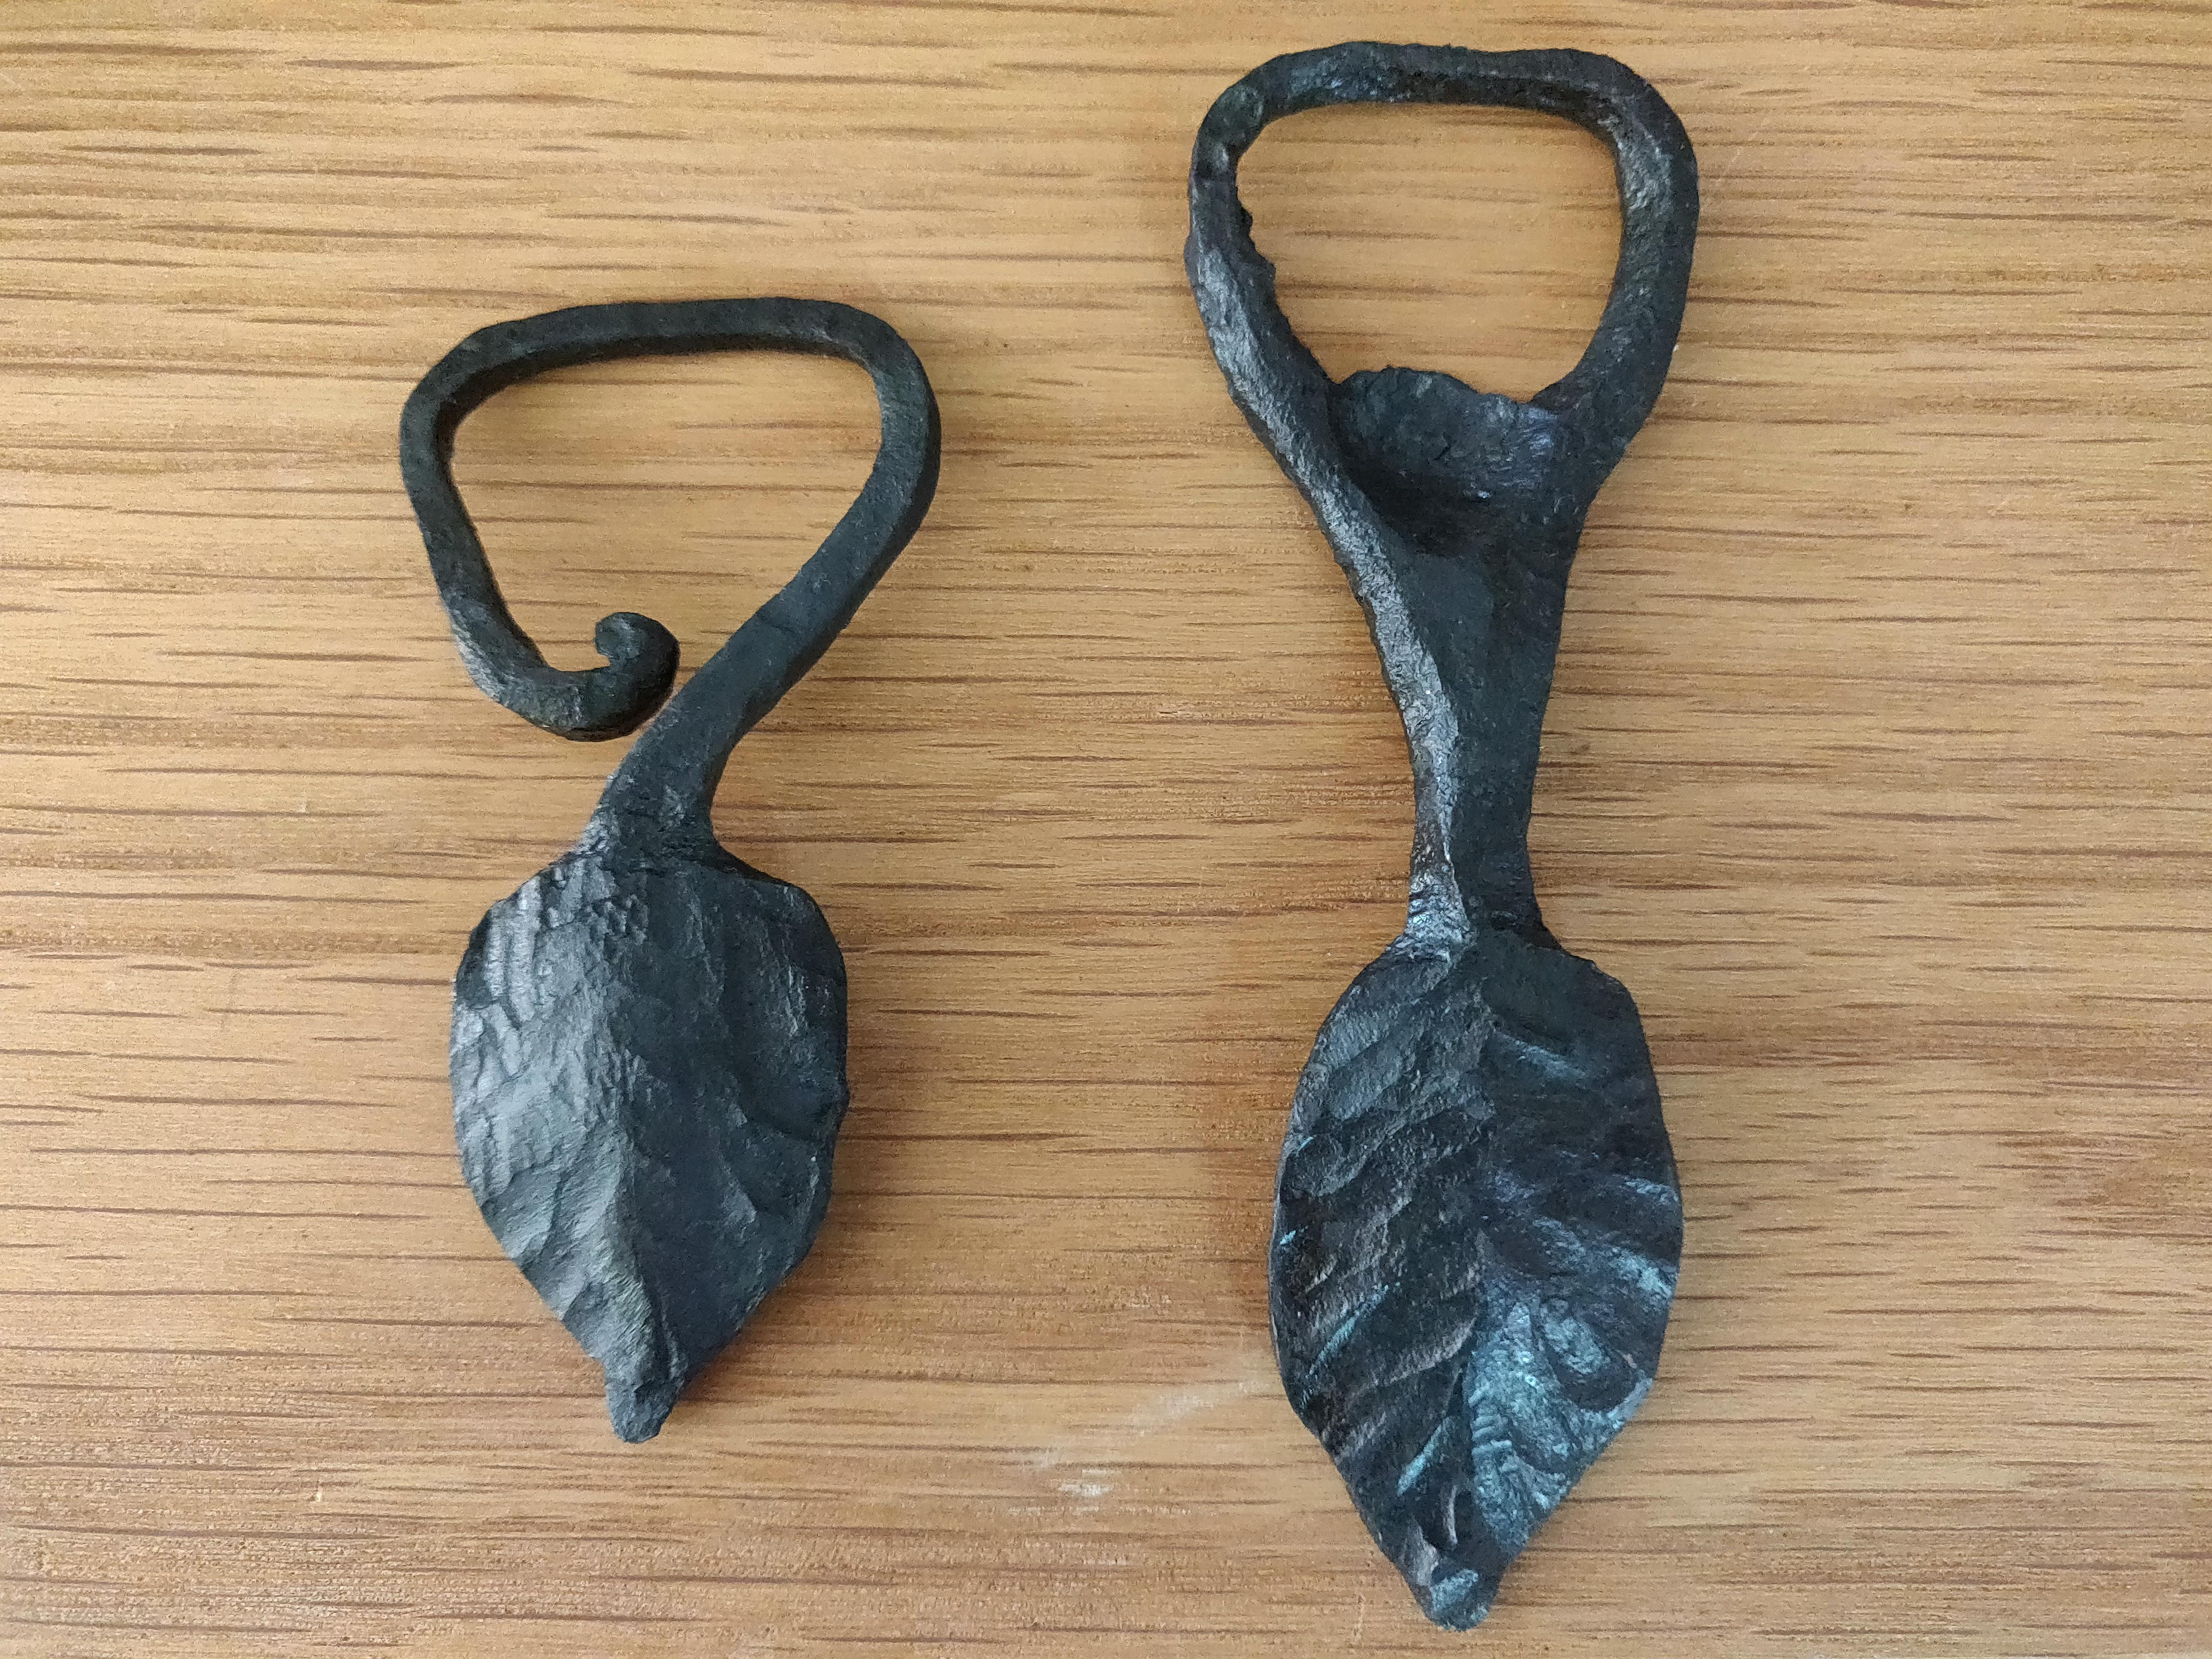
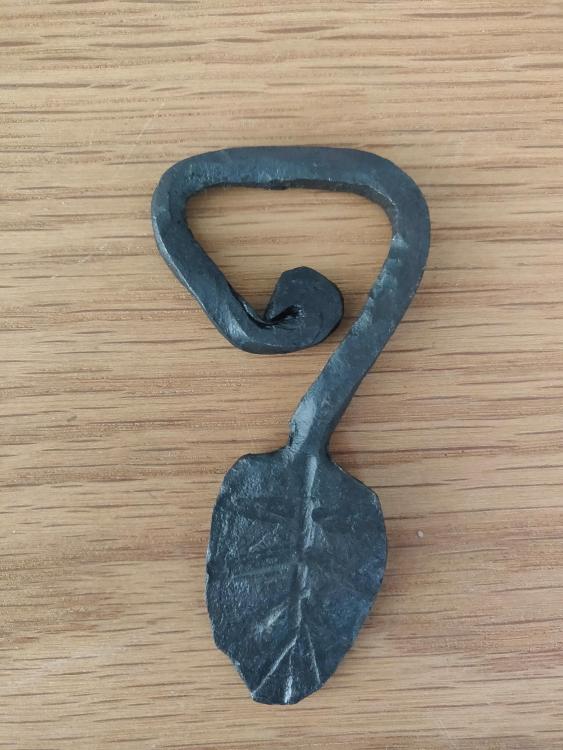
Yes that's working out pretty well when it comes to learning this craft! I made another one today: This one fixed some of the problems I had with the "left one". It's much thicker, it has a smaller "hole" and a wider "tooth" (what's it called?) so it can grip underneath the caps easier. It also works, which is a good thing As for all the things I forge, there are always things to improve and as you said, learn from the recent tries!
-
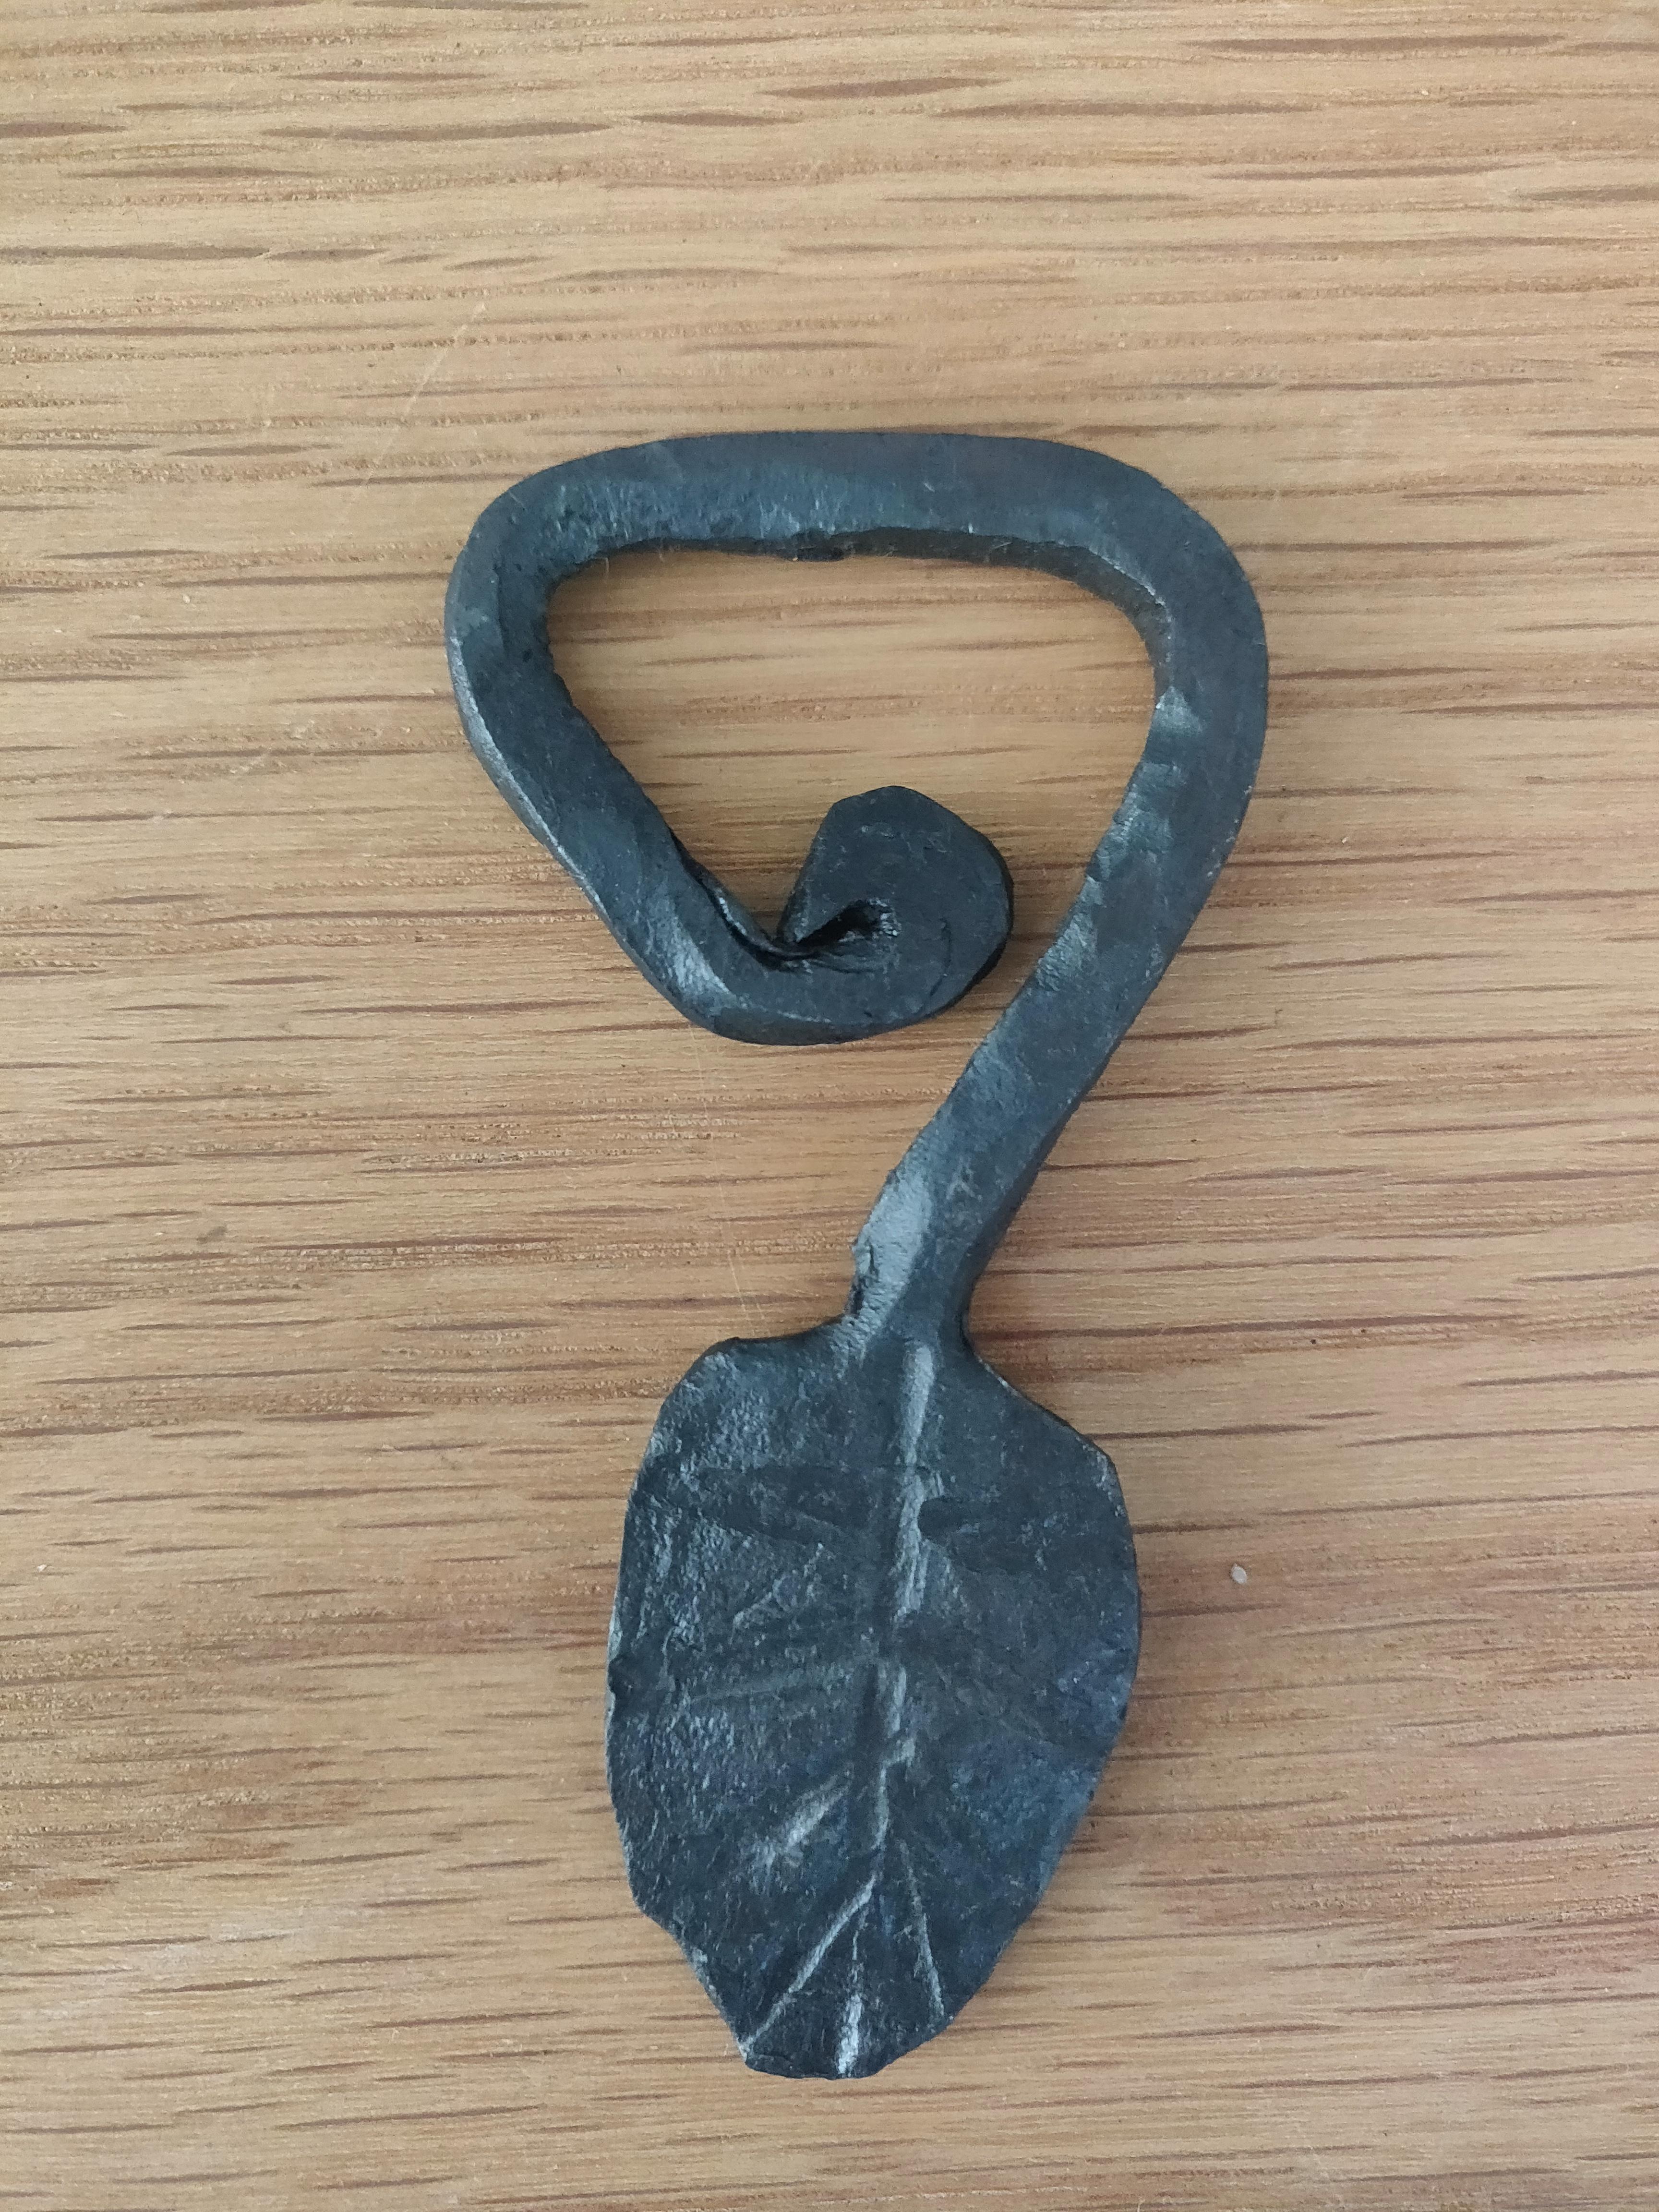
Just forged my first ever! Actually, it's two of the first things I have forged at all. They were forged from 14x14 mm bar and finished with boiled linseed oil. They turned out quite small but the "hole" was a bit too large. On top of that, only the one to the right worked (even if I burned it a bit) since the left one couldn't grip onto the cap with its tiny scroll. It also bent since the whole thing was too thin for an "open" loop. Anything to keep in mind when forging bottle openers? I could use a bit of help as you can see...