Gustav
Members
-
Joined
-
Last visited
Everything posted by Gustav
-
-
-
Some people just have to spread their misery to others. Regarding the forge, I have found some Superwool online that I'll be able to use. There are some refractories I've found that can handle the temperatures, but I'm not sure about the contents. For instance, we have Höganäs Cast CC 50 (I hope your browser can translate if you want to take a look). It's contents are e.g.: 48% Al2O3, 43% SiO2, 6.2% CaO, 1,3% Fe2O3 Anything of this which is too much or too little? I don't believe this one in particular is the best for forges, but it's one I found at least. They make other types with "high alumina" but I couldn't find them available anywhere. This company lists lots of different types of cement/refractory with their contents. Roughly speaking, what should I aim for in terms of the percentages of Al2O3, SiO2, CaO, Fe2O3, etc? If I know this, I could know if some random bag of refractory is suitable.
-
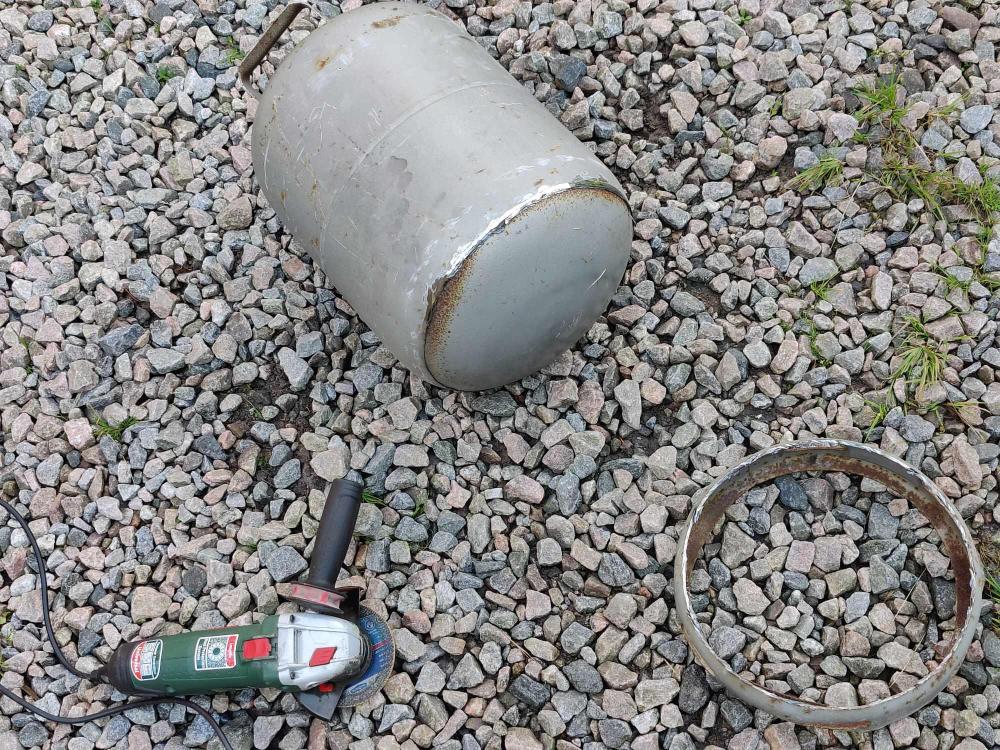
@Mikey98118 Alright, I'll give it some more thought! Just a small update on the progress: The propane tank has been emptied, filled with water, and drained (each with 24 h between). I've cut away the bottom "ring" but have yet to slice the main tank up in any way. Next up: paint stripper and cleanup
-
Mikey: 1. I'll change length of the burner to either 150 mm or 175 mm! 3. I'm not sure I can picture the process of casting without cutting anything. I'll probably end up cutting it in 2-3 pieces. 4. I'll look for high alumnia refractory! I saw one with it as "main binding component", and it was rated for 1300 °C (2372 °F). However, I feel safer with 1400 or 1500 °C (2552 or 2732 F).
-
Thanks for the answers! I'll definitely reconsider the size of the burner. I might go for 175 mm or 150 mm in length instead. And yes, it is indeed going to be a forced air burner. And regarding the refractory; Kast-o-lite is unfortunately not available in Sweden, but it is good to know some key words to look for (high alumnia, calcite). If any mod/admin sees this, please remove THIS post we are in right now. This post is actually a duplicate of the original post. It appeared when I tried to edit the OG post, so let's continue this conversation over there:
-
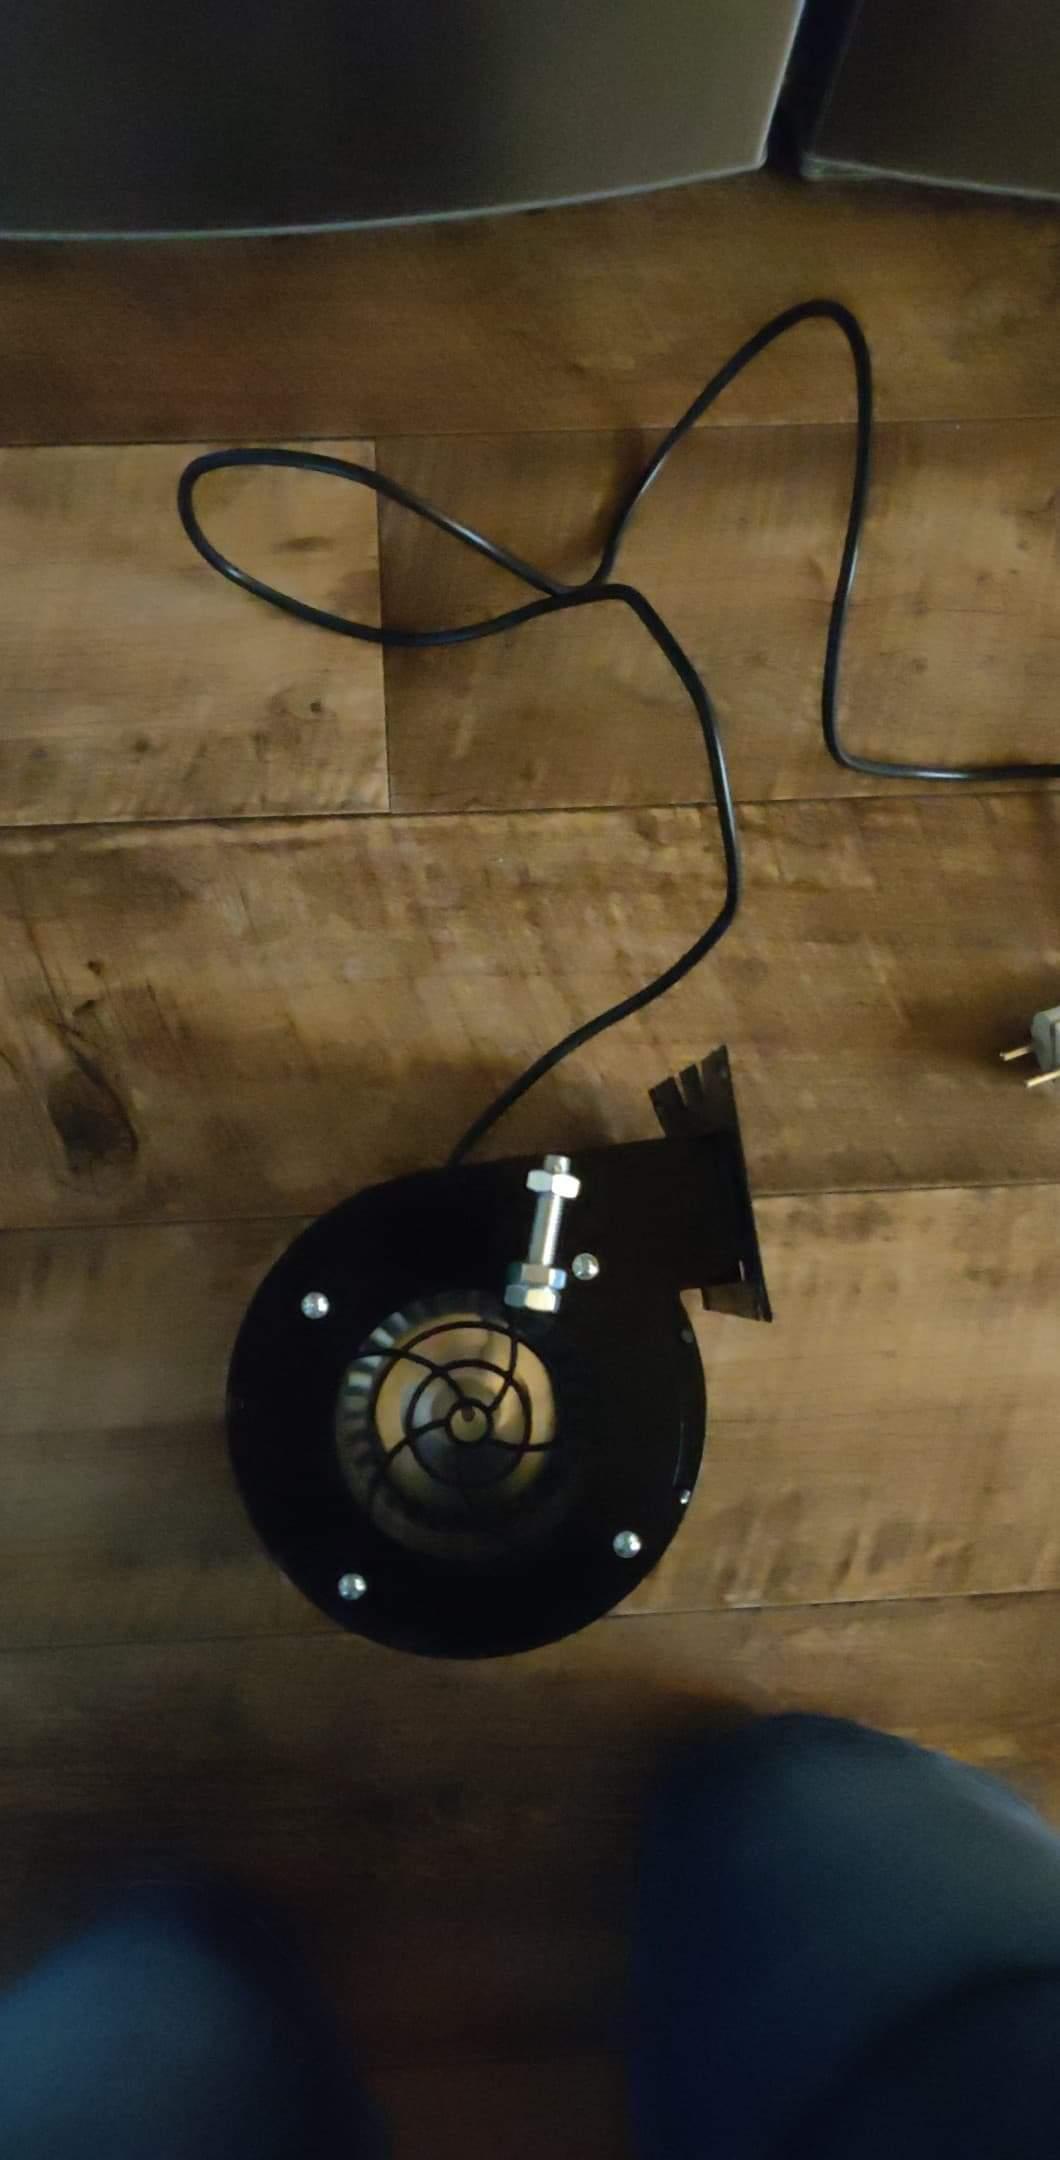
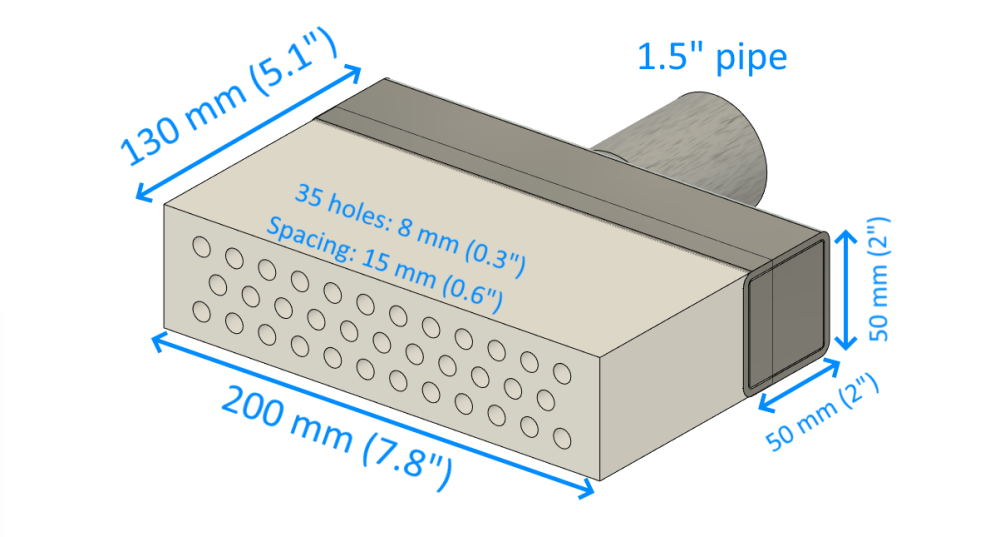
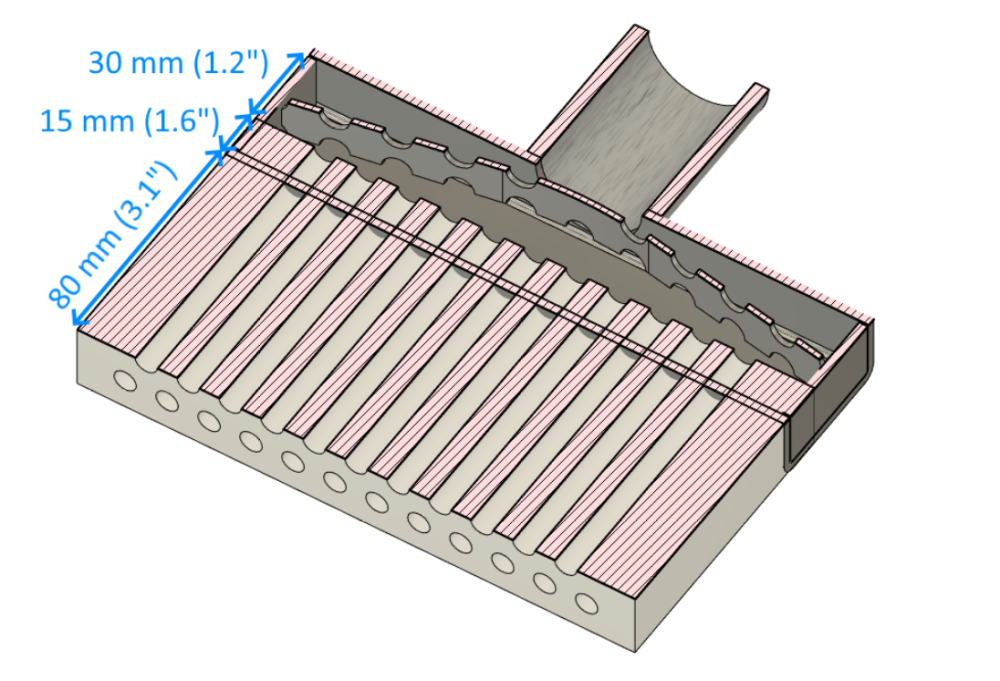
Hi everyone! I've recently started designing a new forge I'm going to build out of a 13.5 kg propane tank. It will only be used for knife forging, so it does not have to be big. I'm writing this basically to get your opinion on what dimensions to change, or if complete aspects of the design need to be changed. I also have tons of questions. Here's where I am at now: These dimensions are a mixture of what I could find online and of what may be suitable for me. For instance, I found some 50x50mm square pipe laying around, so it would be nice to use it for the ribbon burner if it isn't a stupid idea to have so "small". This also means that I can't properly fit a 2" pipe to the burner, but 1.5" should work as well? Here are some questions regarding the dimensions: 1. The inner diameter of the forge (145 mm) feels fine to me, since I will not forge anything that requires a larger volume. However, is it better to change it to improve things like circulation? 2. The thinnest parts of the refractory (15 mm and 20 mm) is something I made up on the go. What is the recommended minimum thickness? 3. I plan on cutting the tank into three pieces and casting them separately, but what about not cutting off the back and casting it as a whole? Anyone who have tried that? 4. I currently plan on having 2 layers of ceramic wool in the middle section. Is this overkill? Only having one lets me have thicker refractory. 5. Some people cast room for firebricks, some don't. Is there really a big need for this, since the forge will be cast in refractory either way? If people use their forges daily, I could understand, but I will definitely not use it that much. For some reason, I wouldn't even mind having a circular inside of the forge instead of flat to enable better circulation (OCD reasons lol). Ribbon burner: 6. I've tried to grasp a general rule on [number of holes] * [hole diameter] with respect to [intake pipe area]. If I go for 1.5" or 2" pipe, what's the recommended amount of holes if they are each 8 mm in diameter? I've seen one youtuber "fill up" the pipe with straws to see how many are needed. Is this a good rule of thumb? 7. The spacing between the holes (15 mm center to center) may be too tight, what's the minimum recommended distance (hole to hole, hole to wall)? Gas piping: 8. Does the gas system have to be designed differently if the burner pipe is either 1.5" or 2" pipe (obviously not talking about the final adapter)? Or will 2" pipe work fine for the entirety of the piping? What about the propane piping, should it be 1/2", 1/4"? 9. Would a 29 mbar regulator from the propane tank suffice? 10. I have a 230V blower that I've used in my coal forge, and I'd like to use it in this forge to avoid buying a new one. There is no "cubic feet per minute" rating of the sort, but I recorded a video trying to show the airflow. Do you think it's powerful enough? 11. The end of the propane piping that "sticks into" the "air pipe"; what should it look like? No MIG-tips as I understand it? As of now, I am struggling to find suitable refractory and ceramic wool. If anyone in Sweden reads this and knows a good supplier, please let me know! I've seen someone use Höganäs Low-Cement but I can't find it anywhere. Also, I have yet to design the front and back "porches" to the openings, a way to fasten the burner, legs to the forge etc. There are more questions that will arise but I'll leave it here for now. Thoughts?


-
-
JHCC, it's the third largest province in Sweden (out of 25) at 29 330 km^2 (~11324 mi^2) but compared to most states in the US it's quite small, yes. Everything is bigger in the US, right? And Frosty, thanks for letting me know!
-
George N.M. Wow, that's interesting. I also have ancestors that immigrated (also from Småland) around the time your grandfather did. I might have heard about a Månsson sometime, but Småland is very big. It's a big chunk of southern Sweden. Buzzkill Okay, it might be the sharpening angle. I thought "oh this is a chopper so it must have a really high angle" but I might have gone too far. I will keep that in mind!
-
Buzzkill - Ok, what angle did you aim for?
-
Buzzkill - It stays sharp, but that's good to know. I chopped a lot of wood when trying to get it in place for the picture and it didn't lose any sharpness. I just couldn't bring it to shaving when I sharpened it in the first place.
-
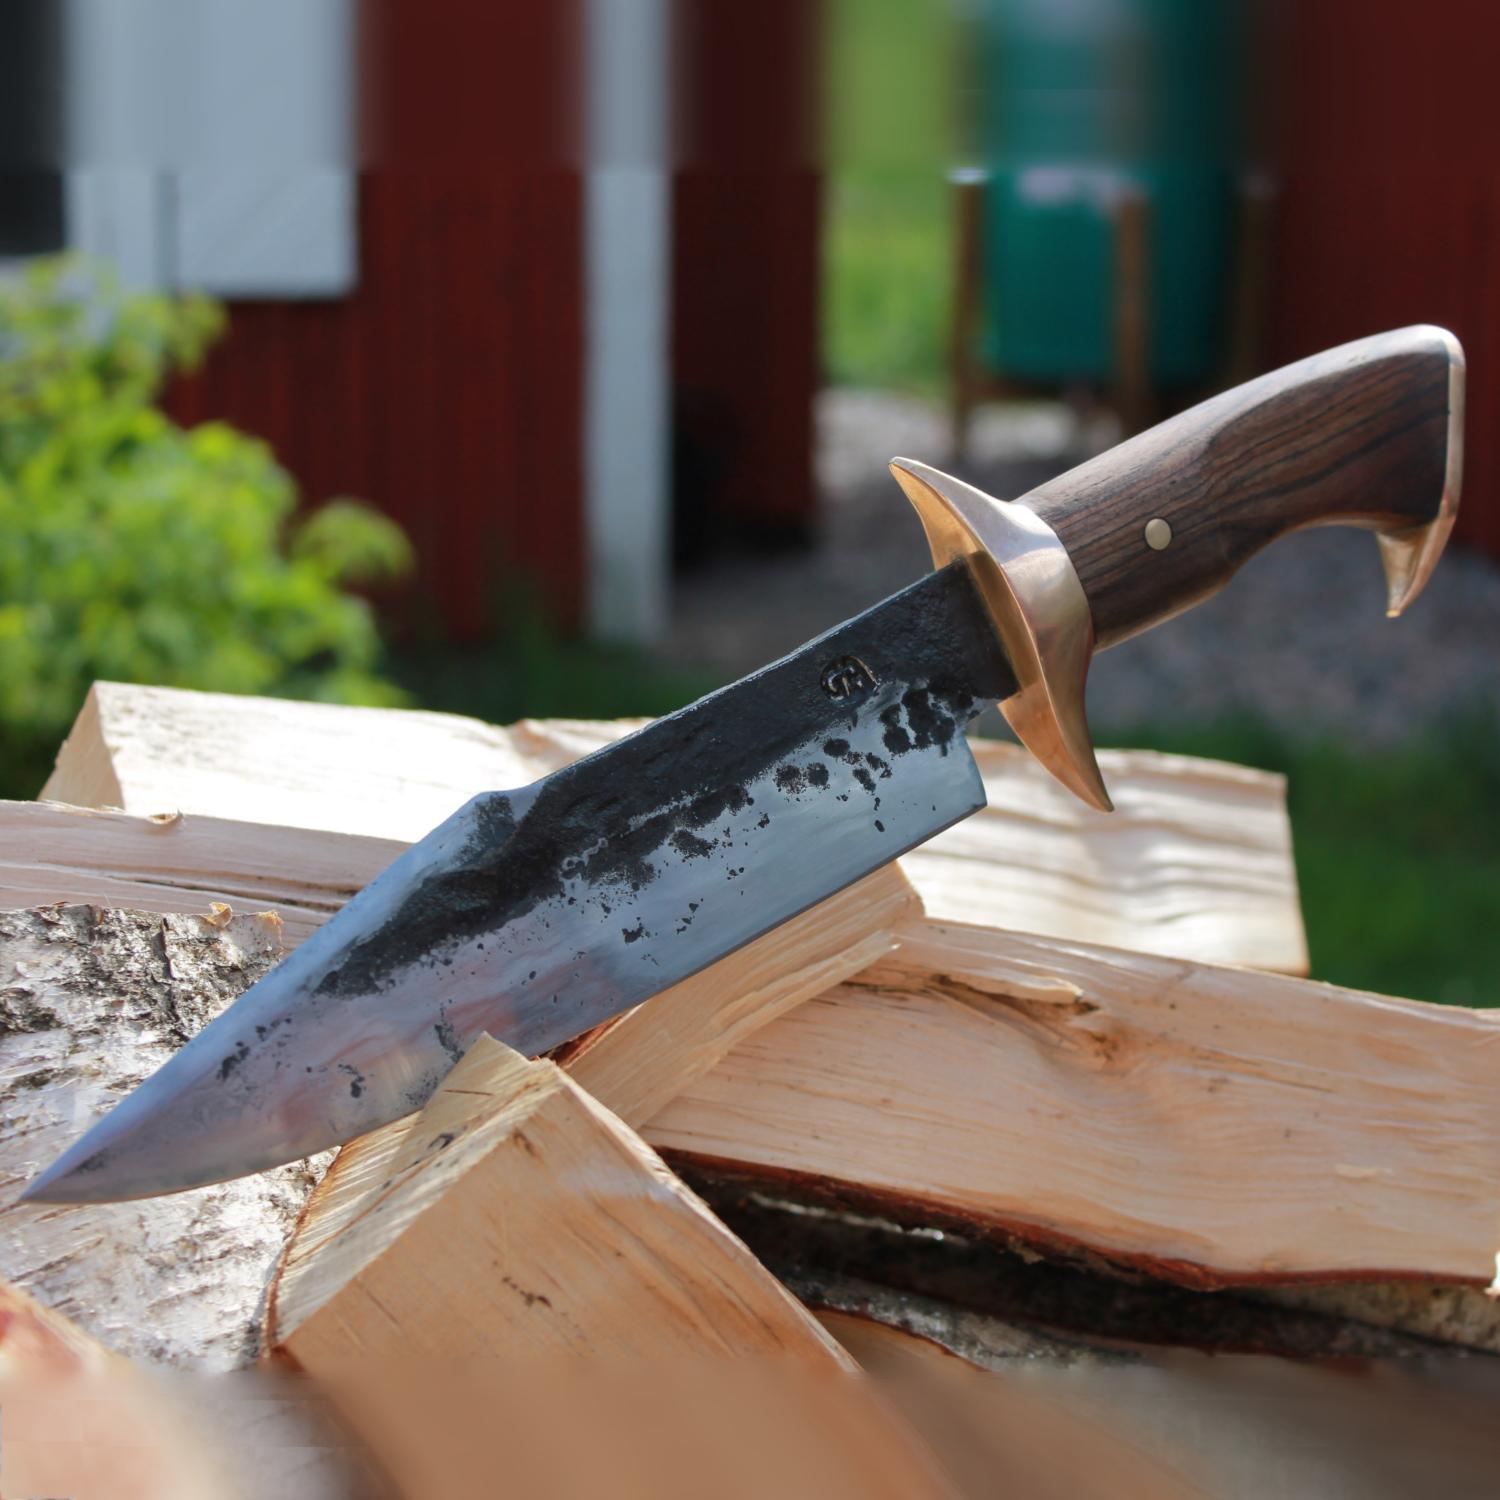
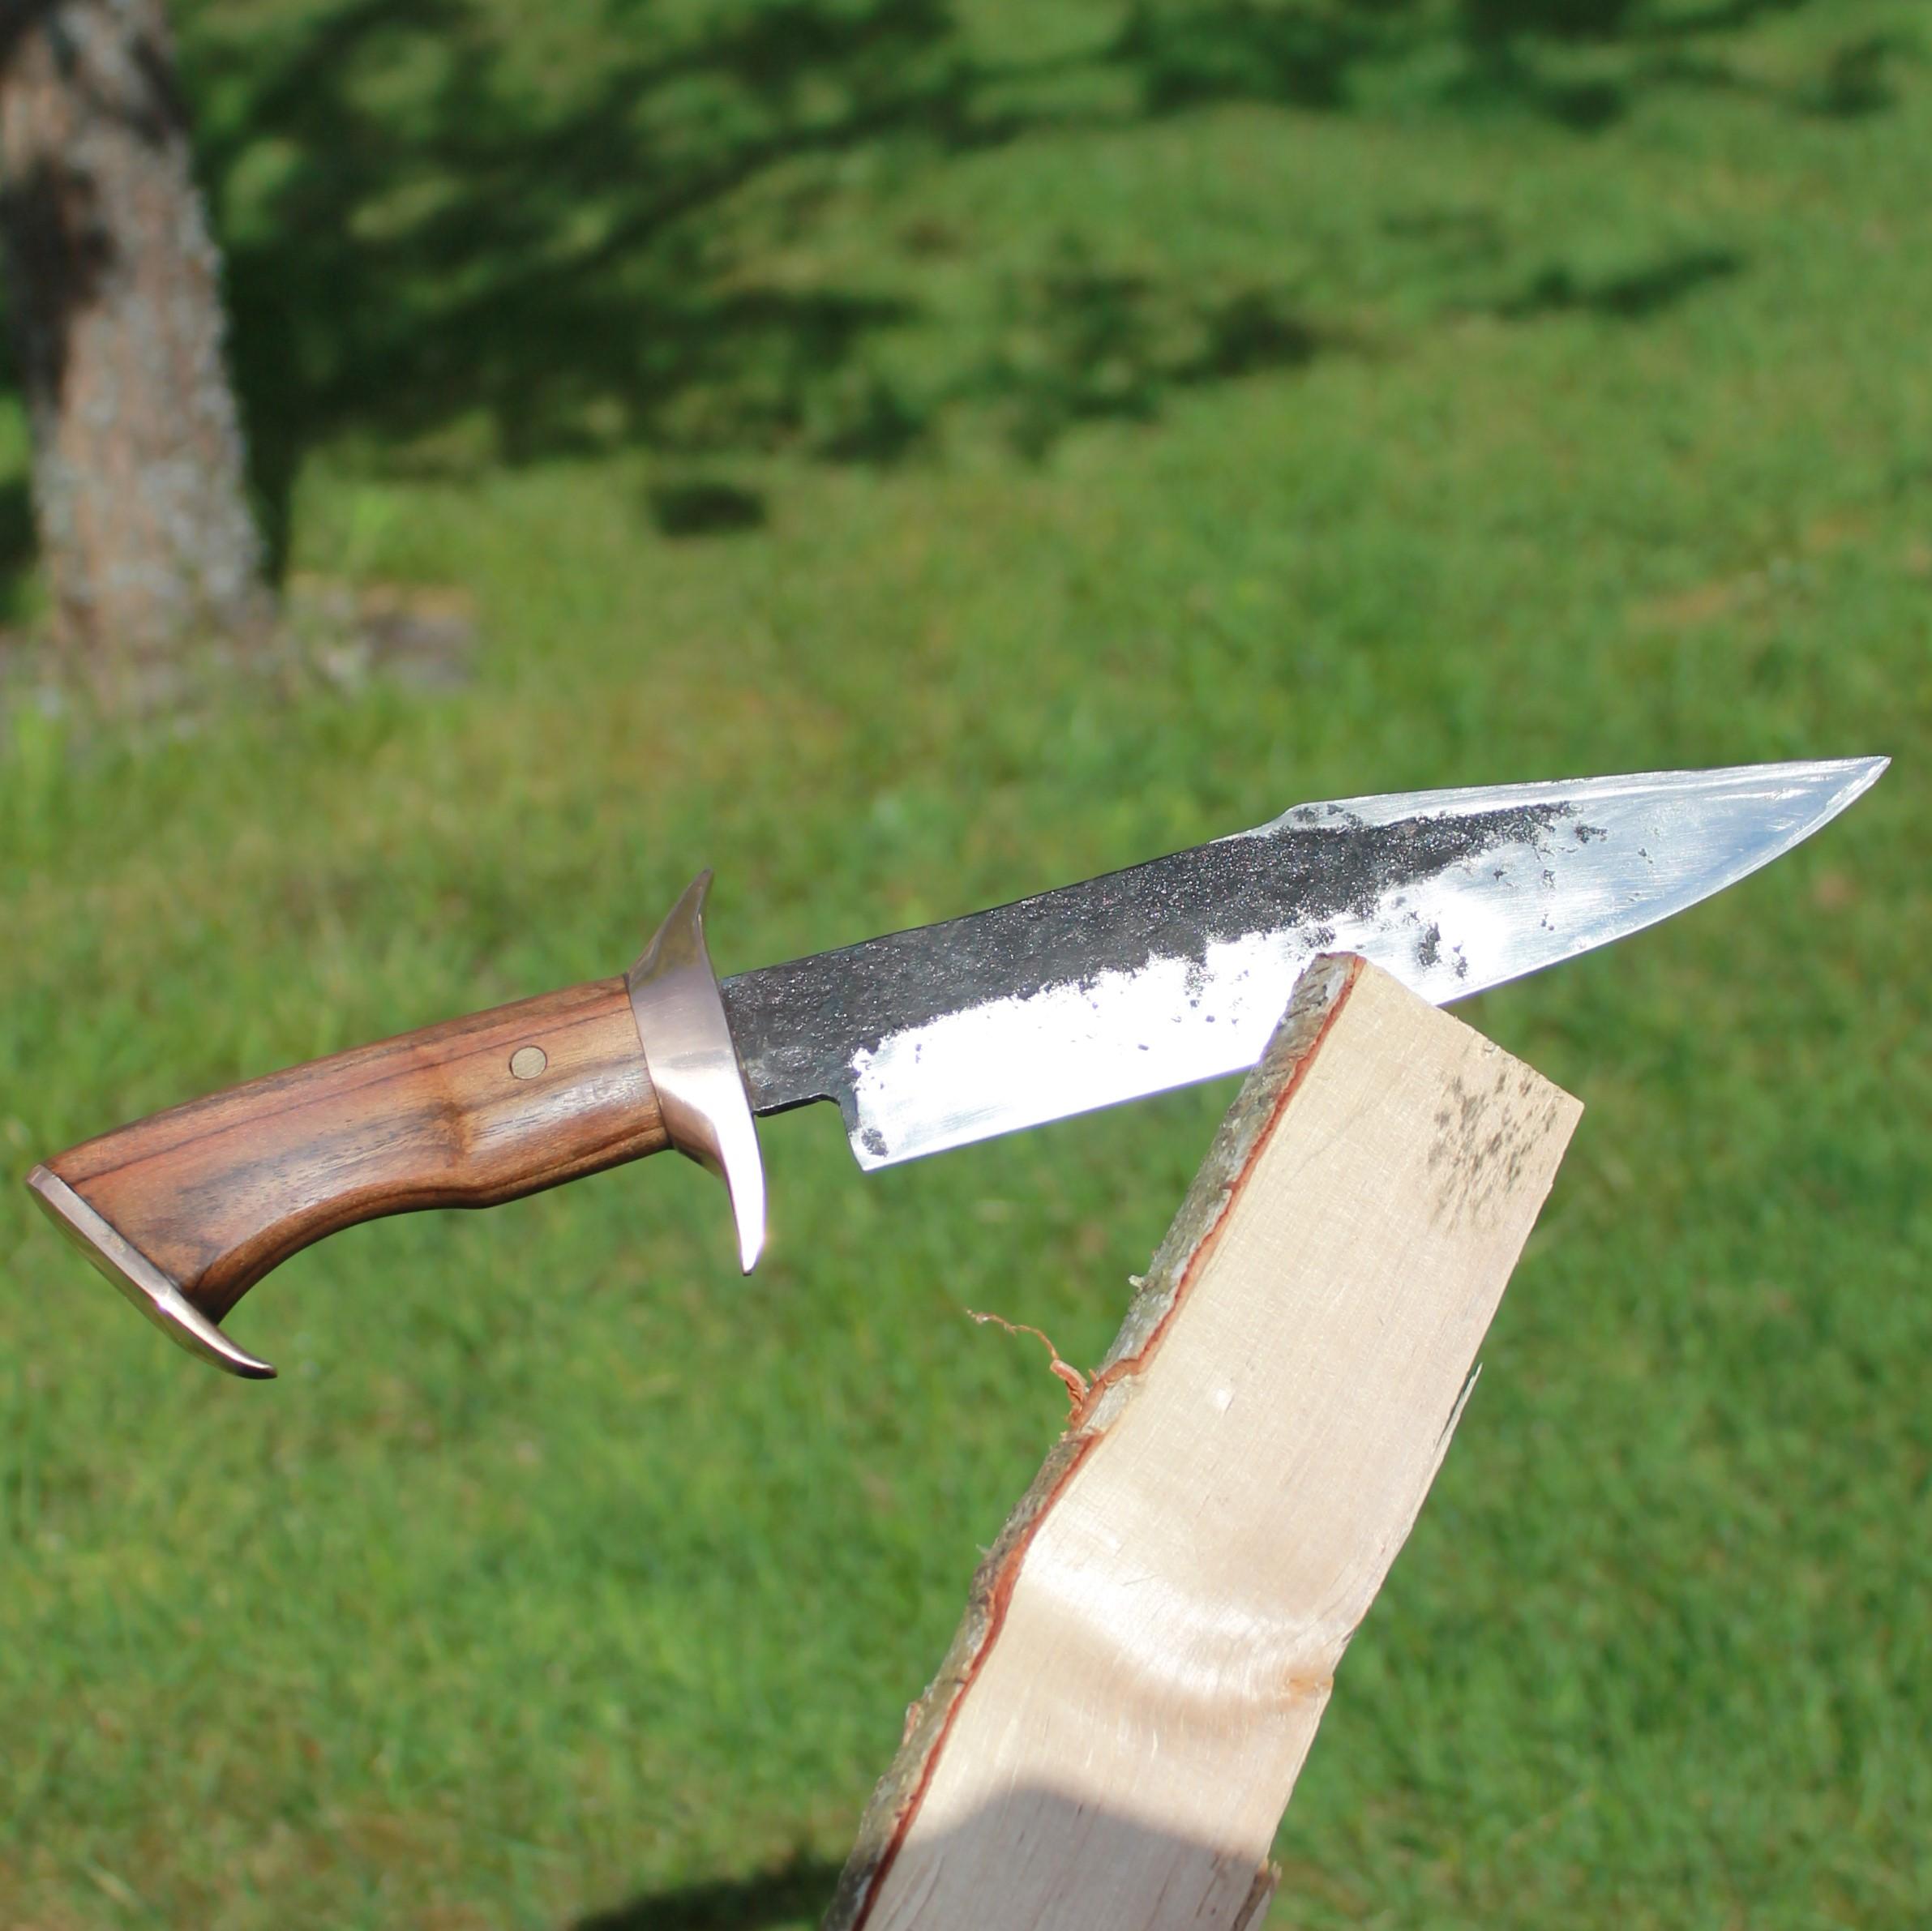
Thomas Powers - Forgot about that. 80CrV2 quenched in canola oil and tempered at 200°C 1h x 2
-
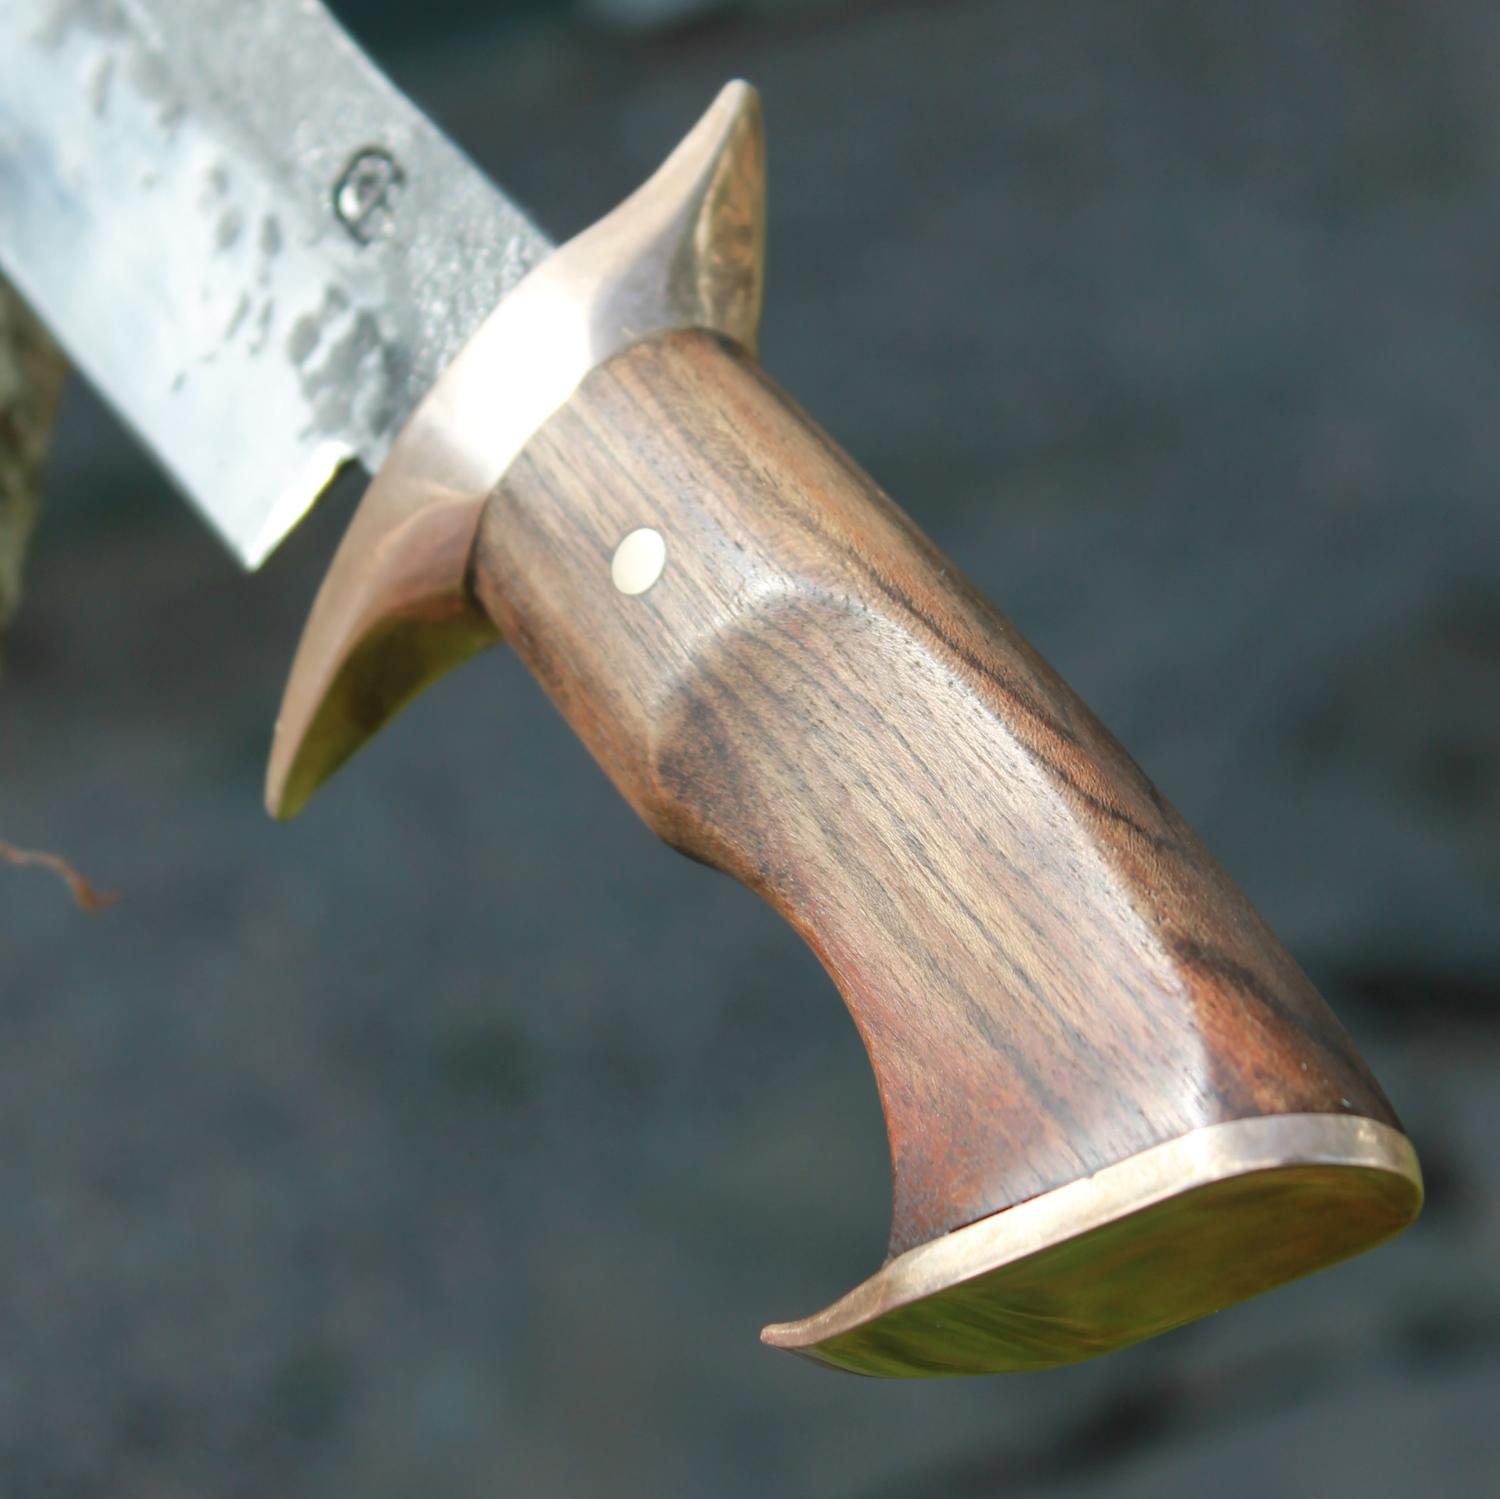
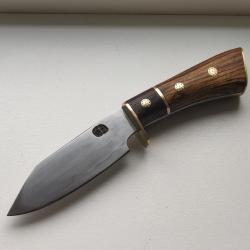
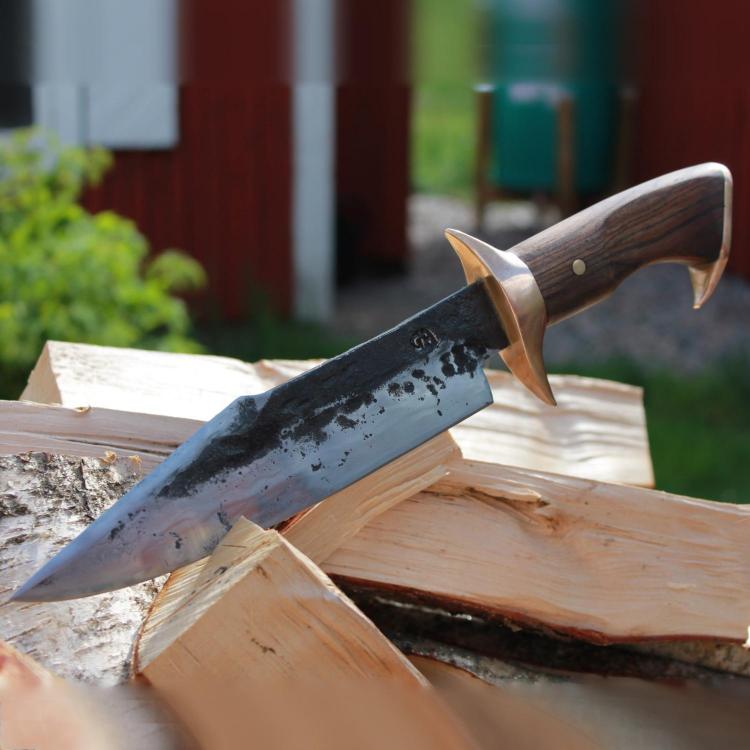
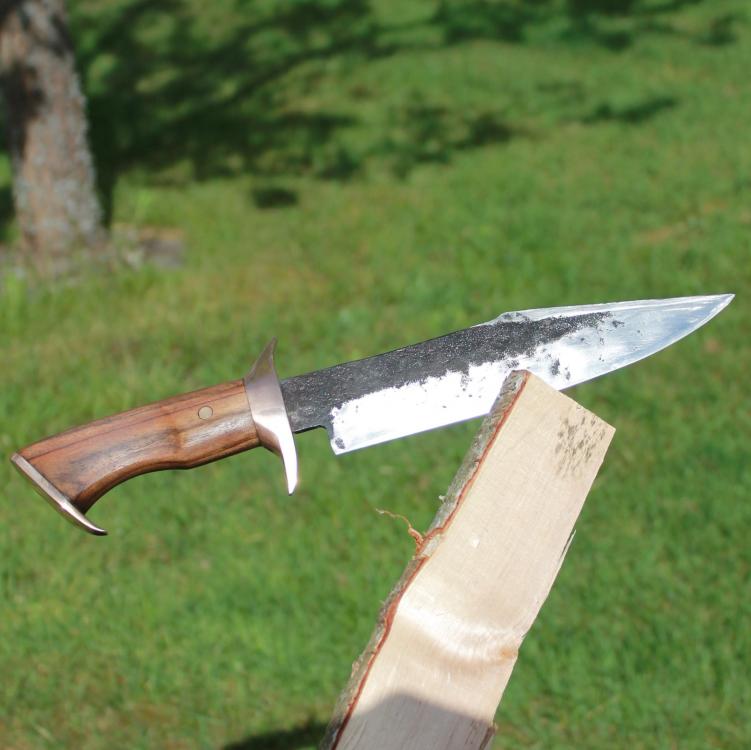
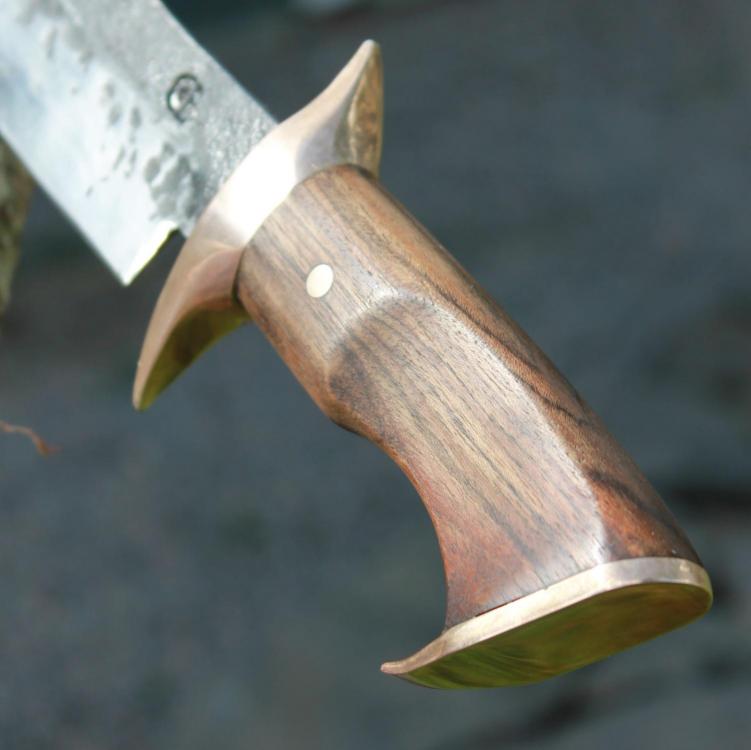
Hey guys! This is my first "weapon", a 35 cm long bowie. It's also the biggest knife I've made so far. The blade has a warp and the "brute de forge" might have been too much. I could probably also have ground and polished the guard and pommel a bit. They were cast in a metal I don't know the name of in English, but it's 85% Cu, 5% Sn, 5% Zn, 5% Pb. It also doesn't really shave, which is a bit lame. I went from 300-600-1200 on diamond stones and finished on a strop with green polishing paste. Go finer? Make sure you have a small angle? What do you think?
-
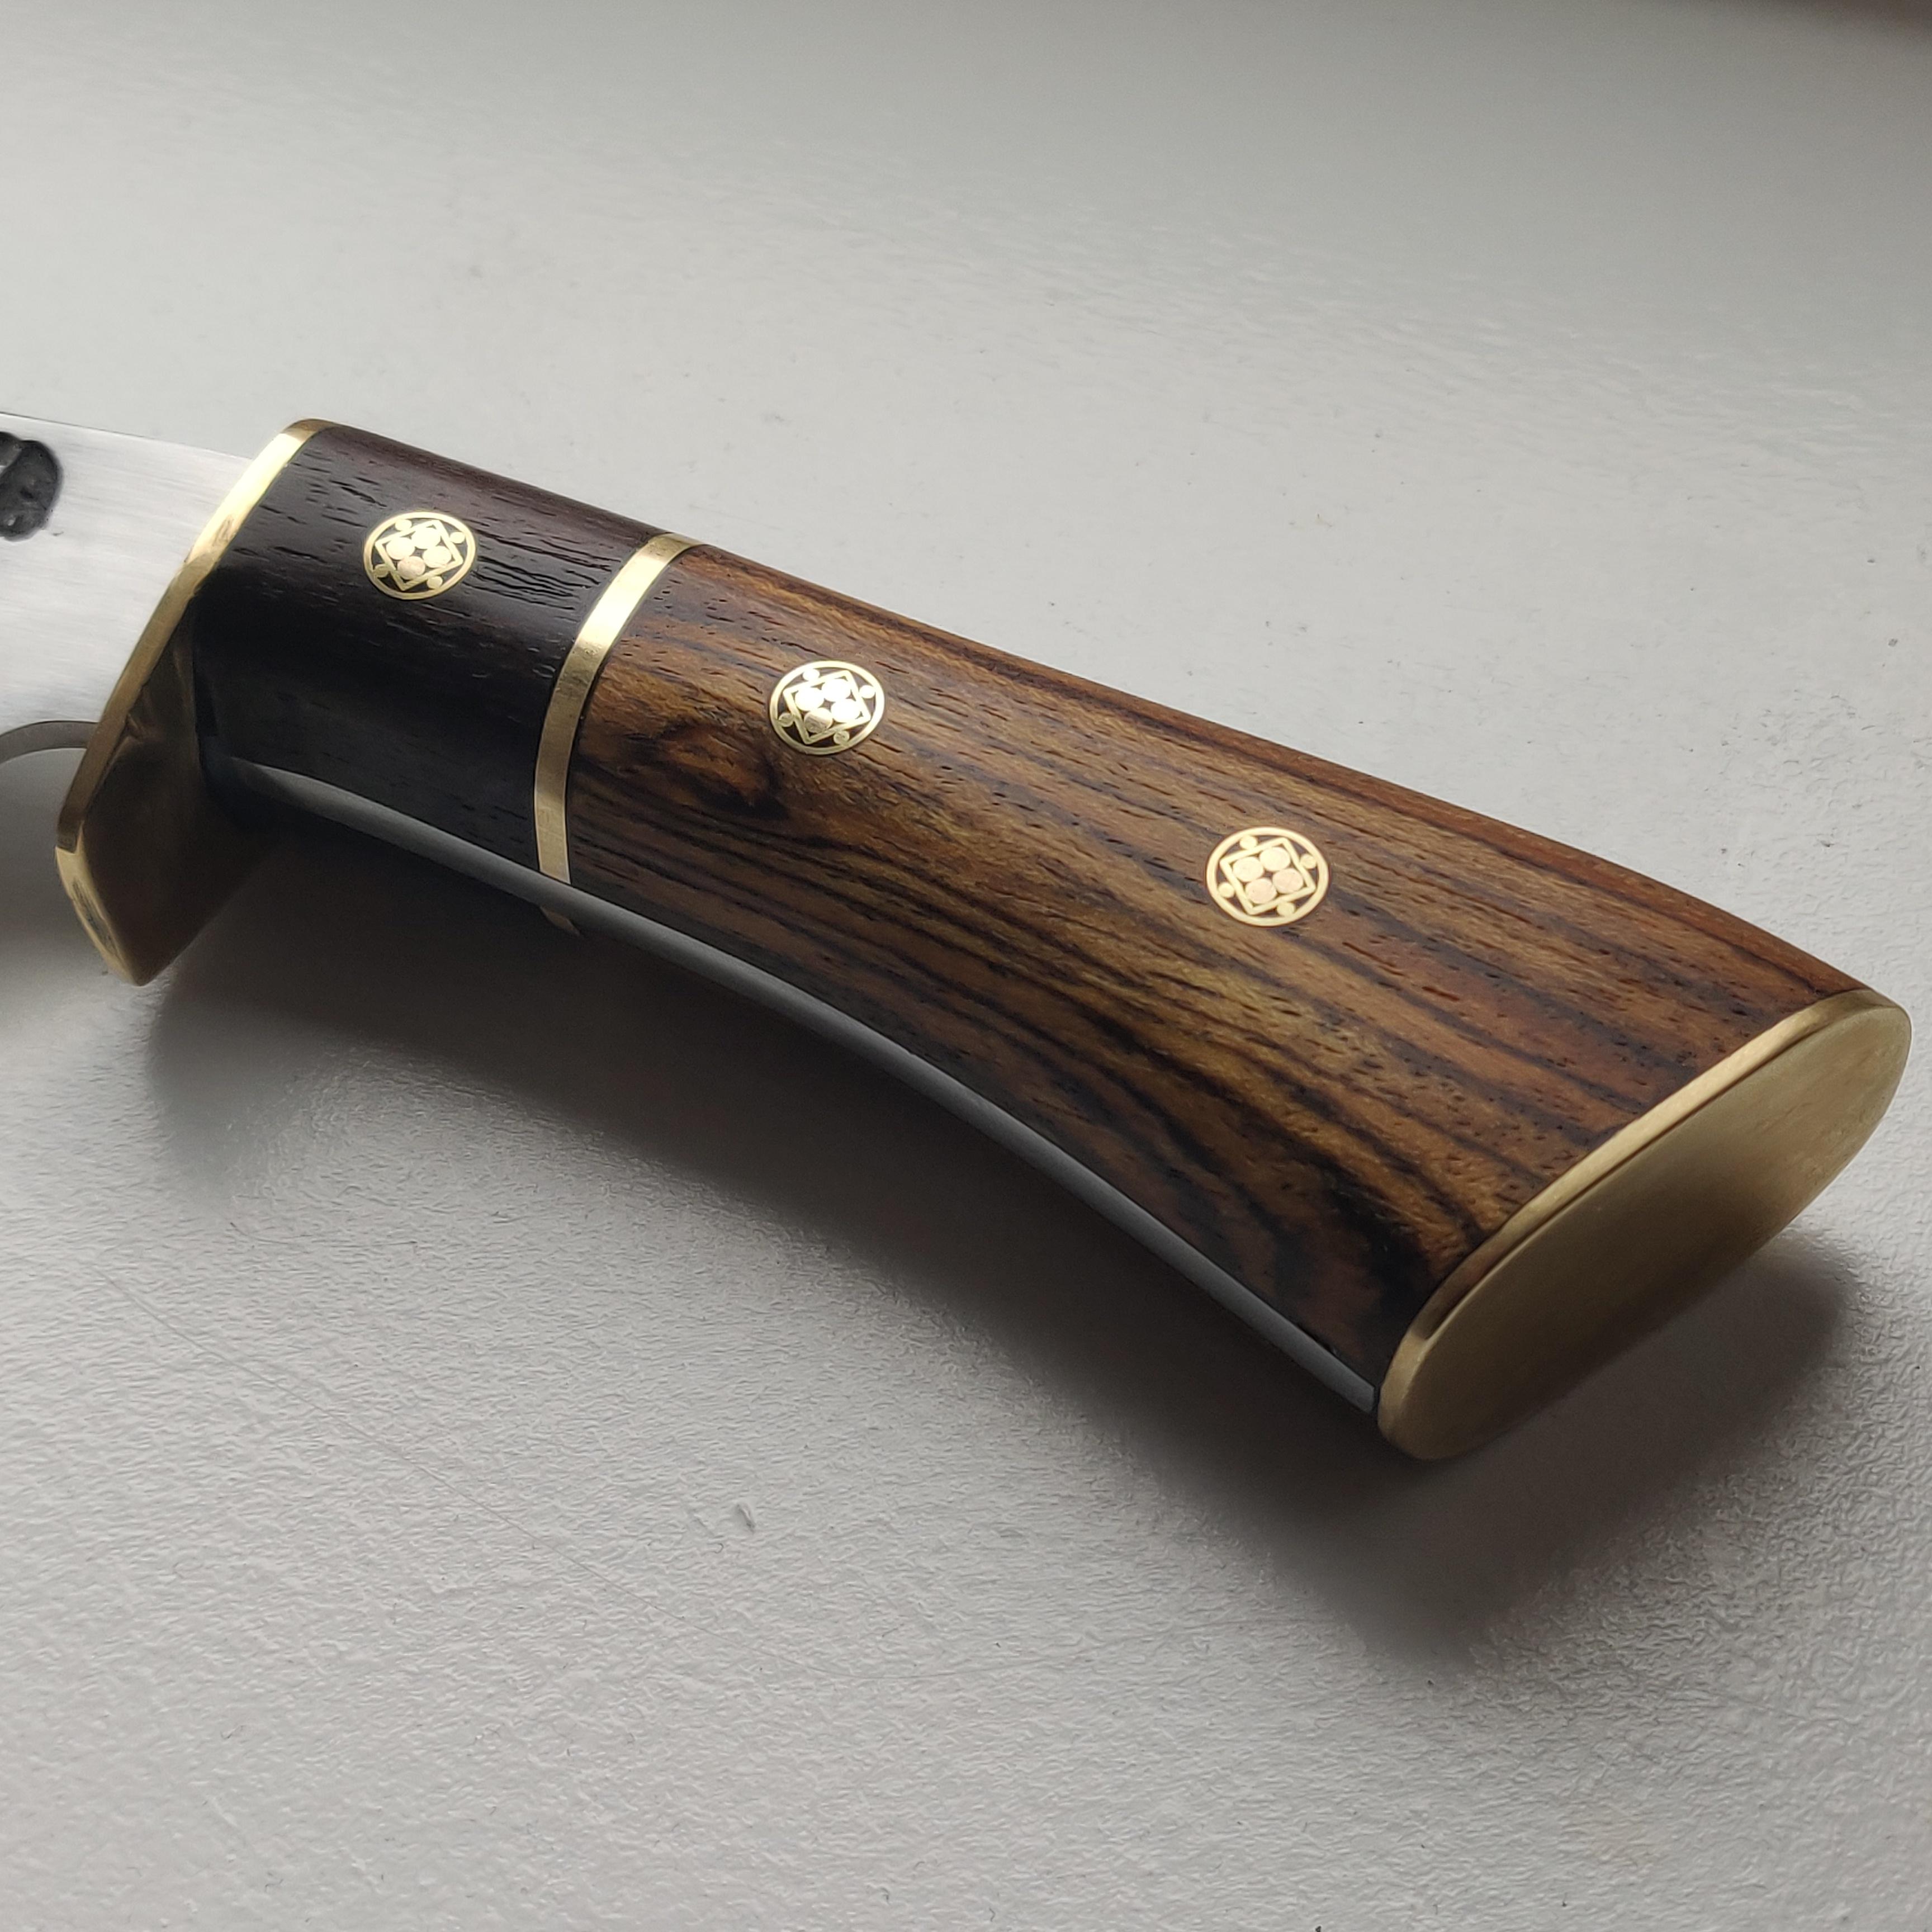
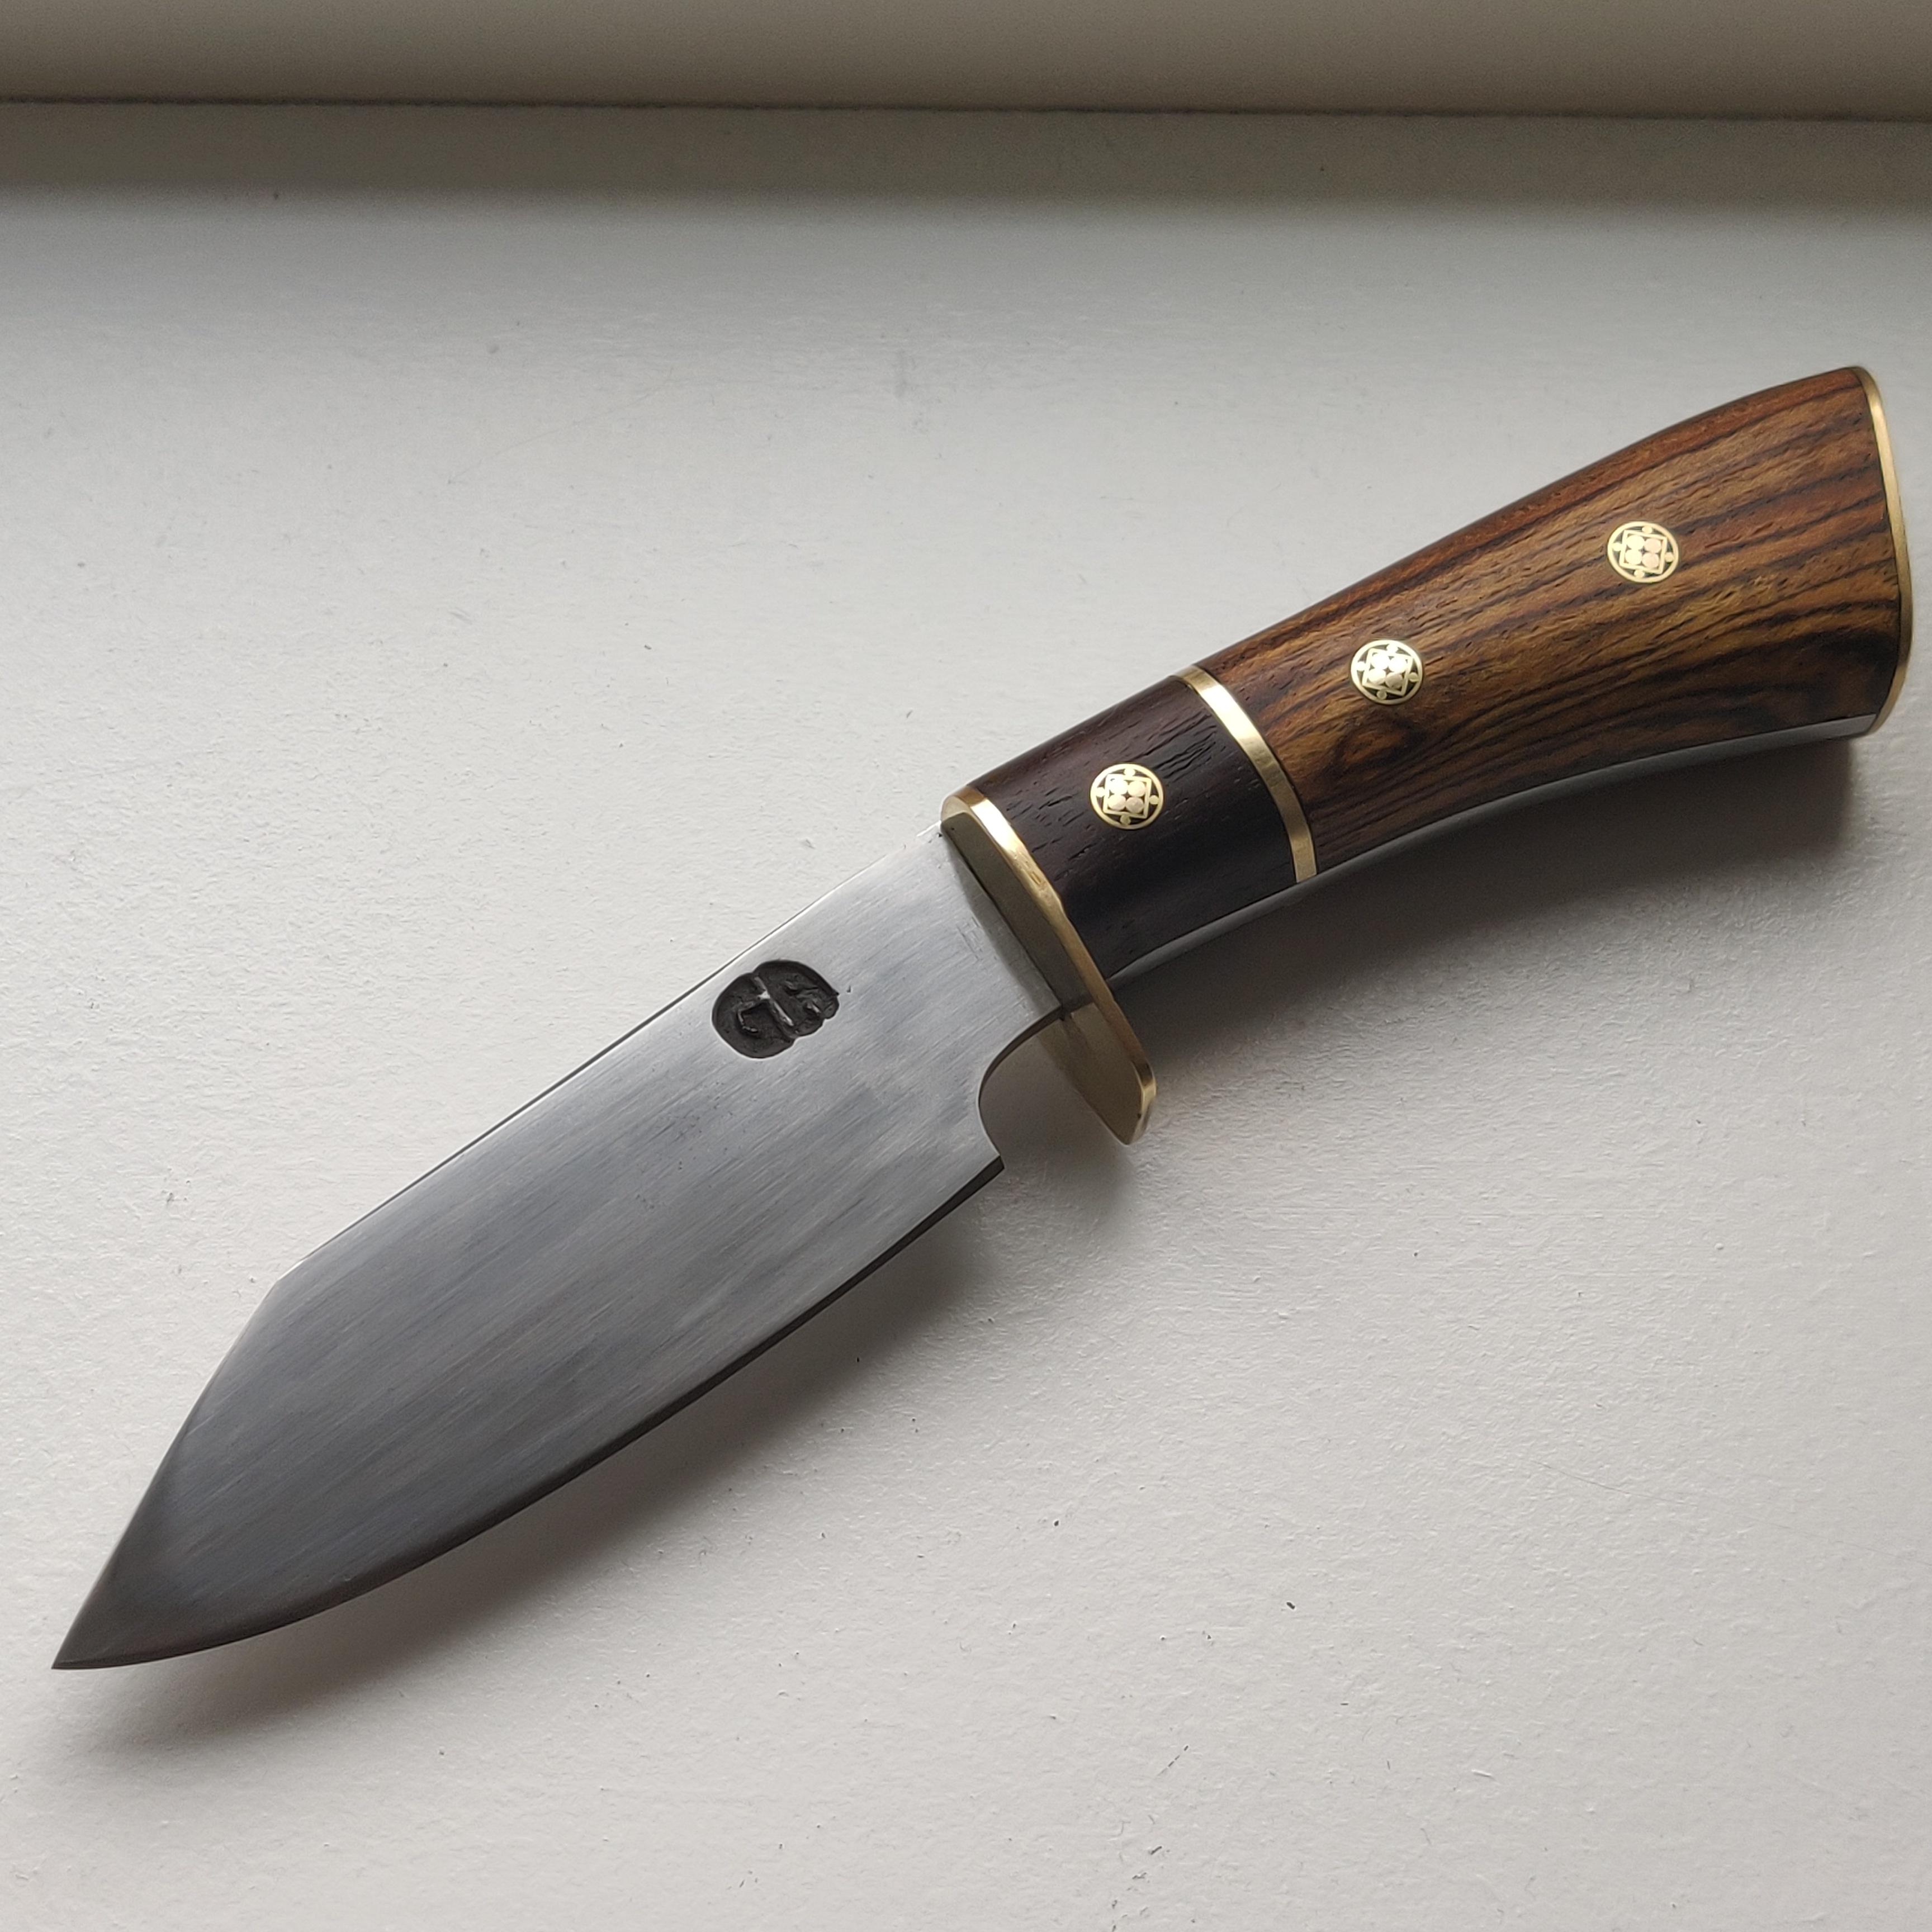
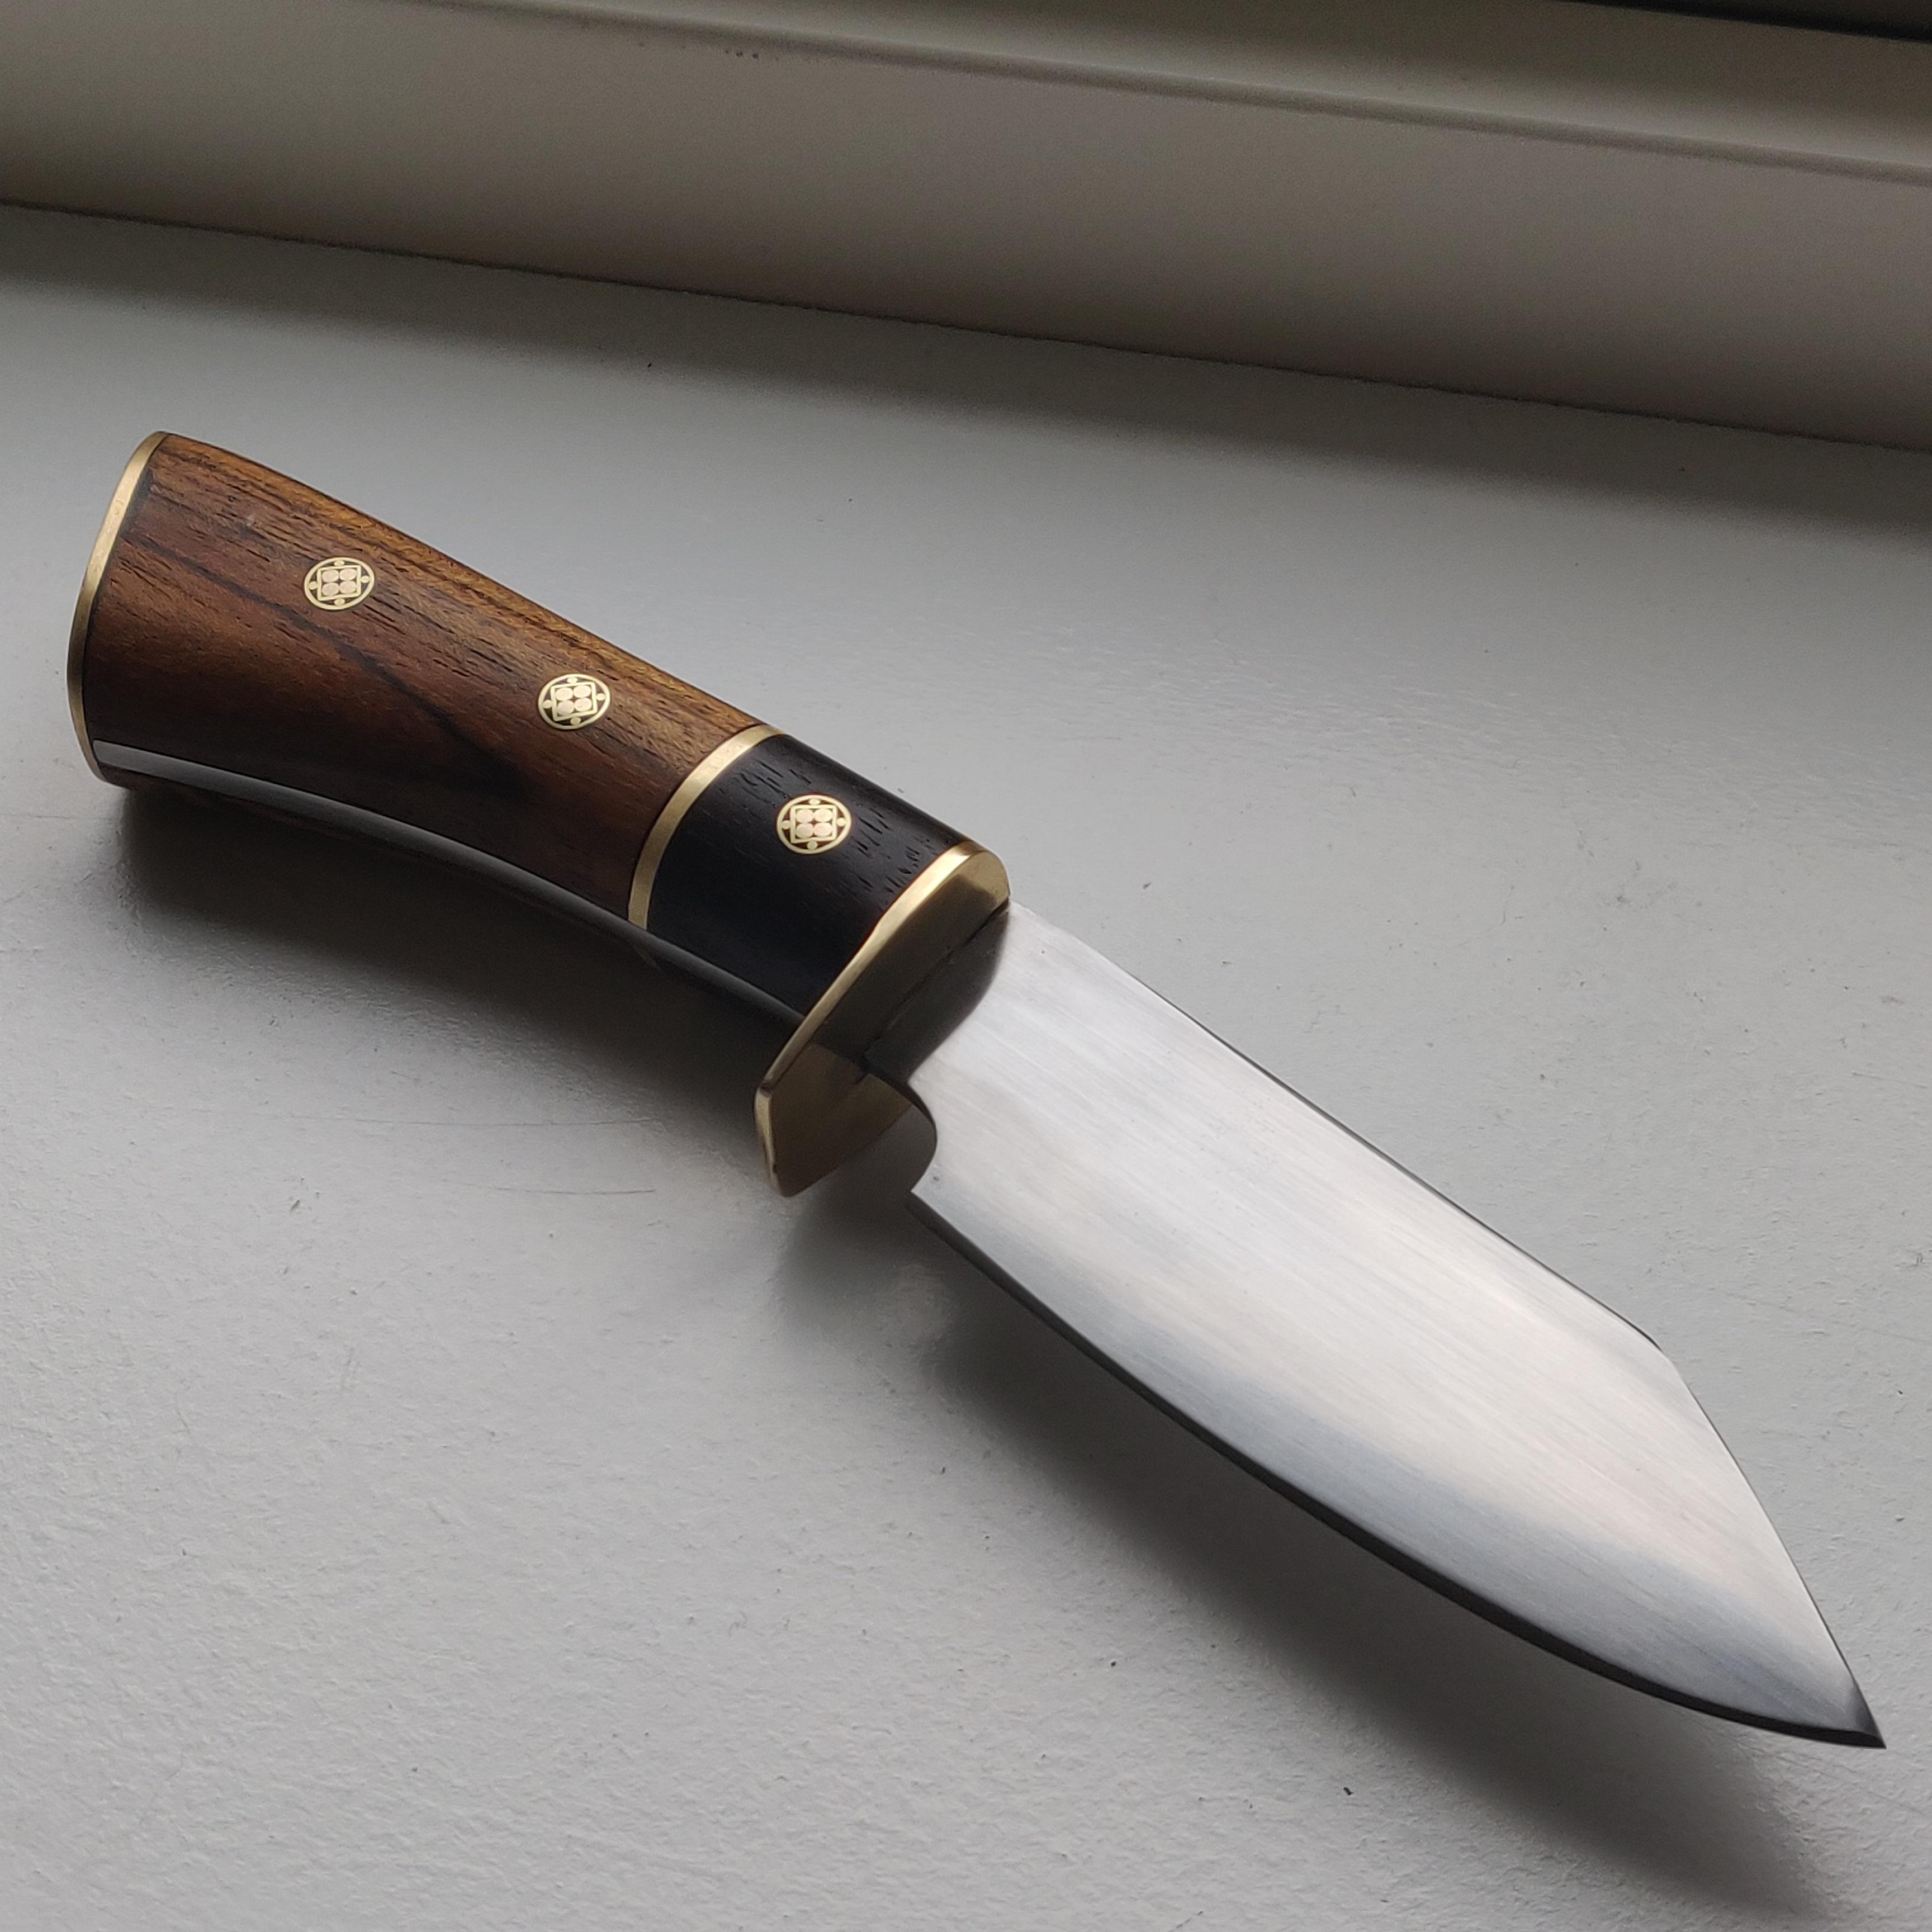
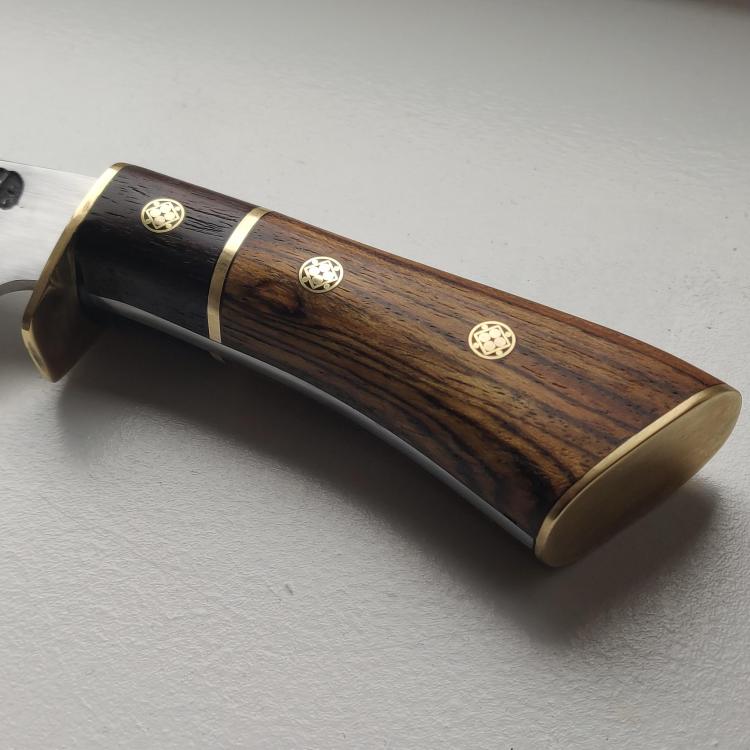
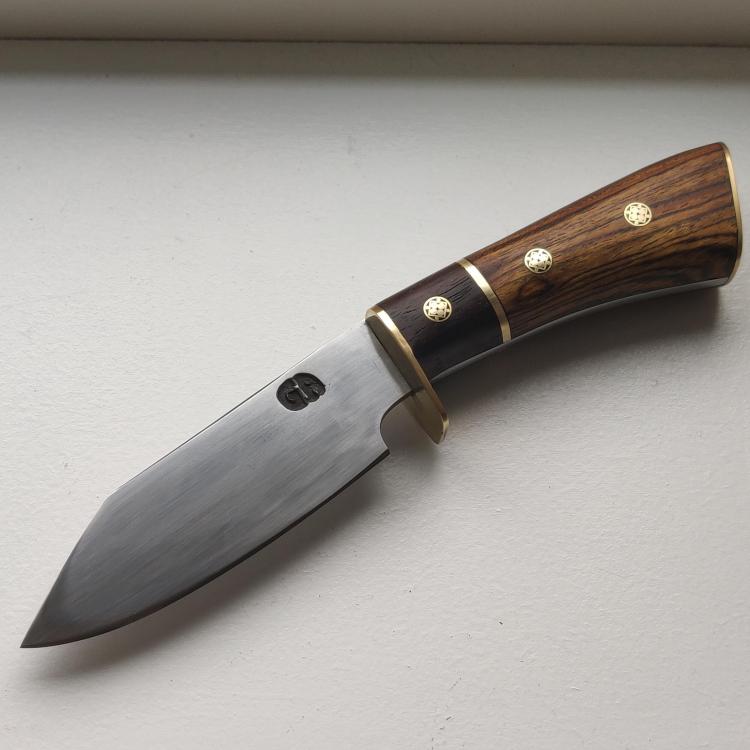
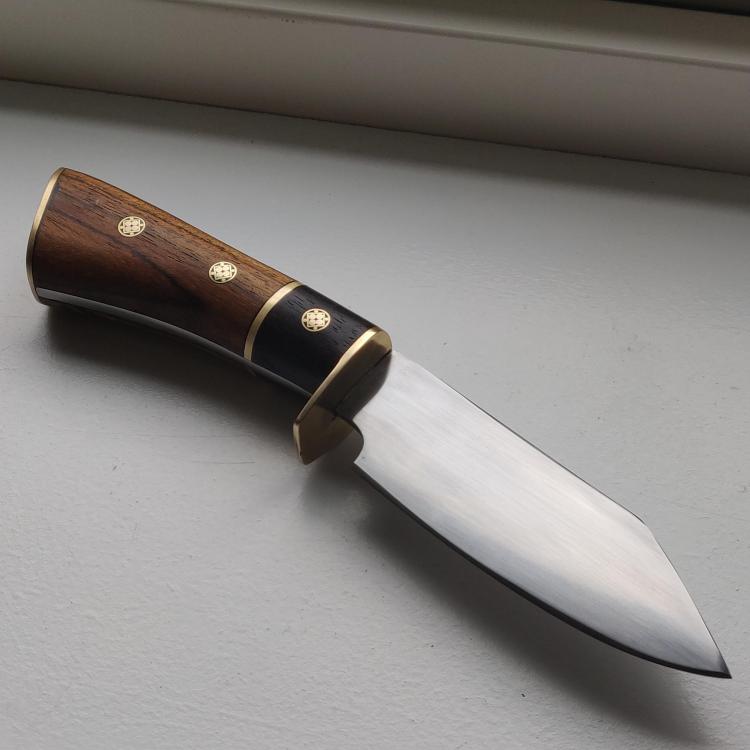
Thanks guys! You might have noticed it too, but my main problems are 1. The brass spacers between the ziricote and bocote don't line up on each side of the tang. And 2. The brass could've been finished better Regarding the "stubbyness"; no offence taken!
-
I've been blacksmithing for almost 3 years, the last of which has mostly been bladesmithing and during this time I always had in mind that I was going to give my dad a knife when he turns 50. It's my first knife I've given away, my other knives are mostly for display (to remember the mistakes each one had) except for my first kitchen knife, which I use every time I cook. They've all been pretty simple. One full-tang and the rest hidden-tang. Turns out, my dad liked the full-tang knife the most, so it had to be a full-tang. So here it is; 80CrV2 finished to 600 grit, brass, ziricote, bocote and mosaik pins, oiled with boiled linseed oil. By far the best looking knife I've ever made, with minimal mistakes (compared to my other knives). Just a bit scared of the unstabilized wood I used. Last full-tang knife I made had wood that shrunk an insane amound, not just so you can feel the edge and the pins, but actually see how far everything sticks out. Fingers crossed! What do you think?
-
Hello! I've had a couple of cheap whetstones (120/400 and one 1000/3000) with a leather strop (with green compound) for quite some time now and I started to get tired of them curving and creating one huge muddy mess when sharpening many knives. It works, but it's a pain xxxxxxxx sometimes. So, I bought a 300/600 grit diamond sharpening stone from Dianova, but it feels like it wont be enough. When you have a newly made knife and want to create the secondary bevel from "no bevel at all", do you think the 300 grit side on that diamond stone will suffice, or will it be too fine of a grit? Maybe getting a extra-extra coarse diamond stone like 120 will do? Also, will the 600 grit be fine enough to go straight to the strop? I'm looking to get shaving sharp edges. Other than that, I'm not interested in "Oh this was sharpened on a 30 000 grit stone wohooo". Maybe getting a 1200 grit diamond stone to use between 600 and the strop? So: 1. Will a 300 grit side on a diamond stone be coarse enough to effectively create edges on newly made knives? If not, what grit will be the most suitable before 300? 2. Will a 600 grit side on a diamond stone be fine enough to go directly to a strop to get shaving sharp edges? If not, what grit-steps are required after 600 and before stropping? Since I've gone up to 3000 on my whetstones and gotten shaving sharpness after stropping, I know that's possible. But I'm not sure what the grits are for diamond stones. People seem to go to higher grits on whetstones and not quite so high on diamond stones, but I'm unsure. The reason I'm asking this and not just testing is because I currently don't have any knives to try it on, I'm away for some time. Commercial link removed per TOS Thanks in advance!
-
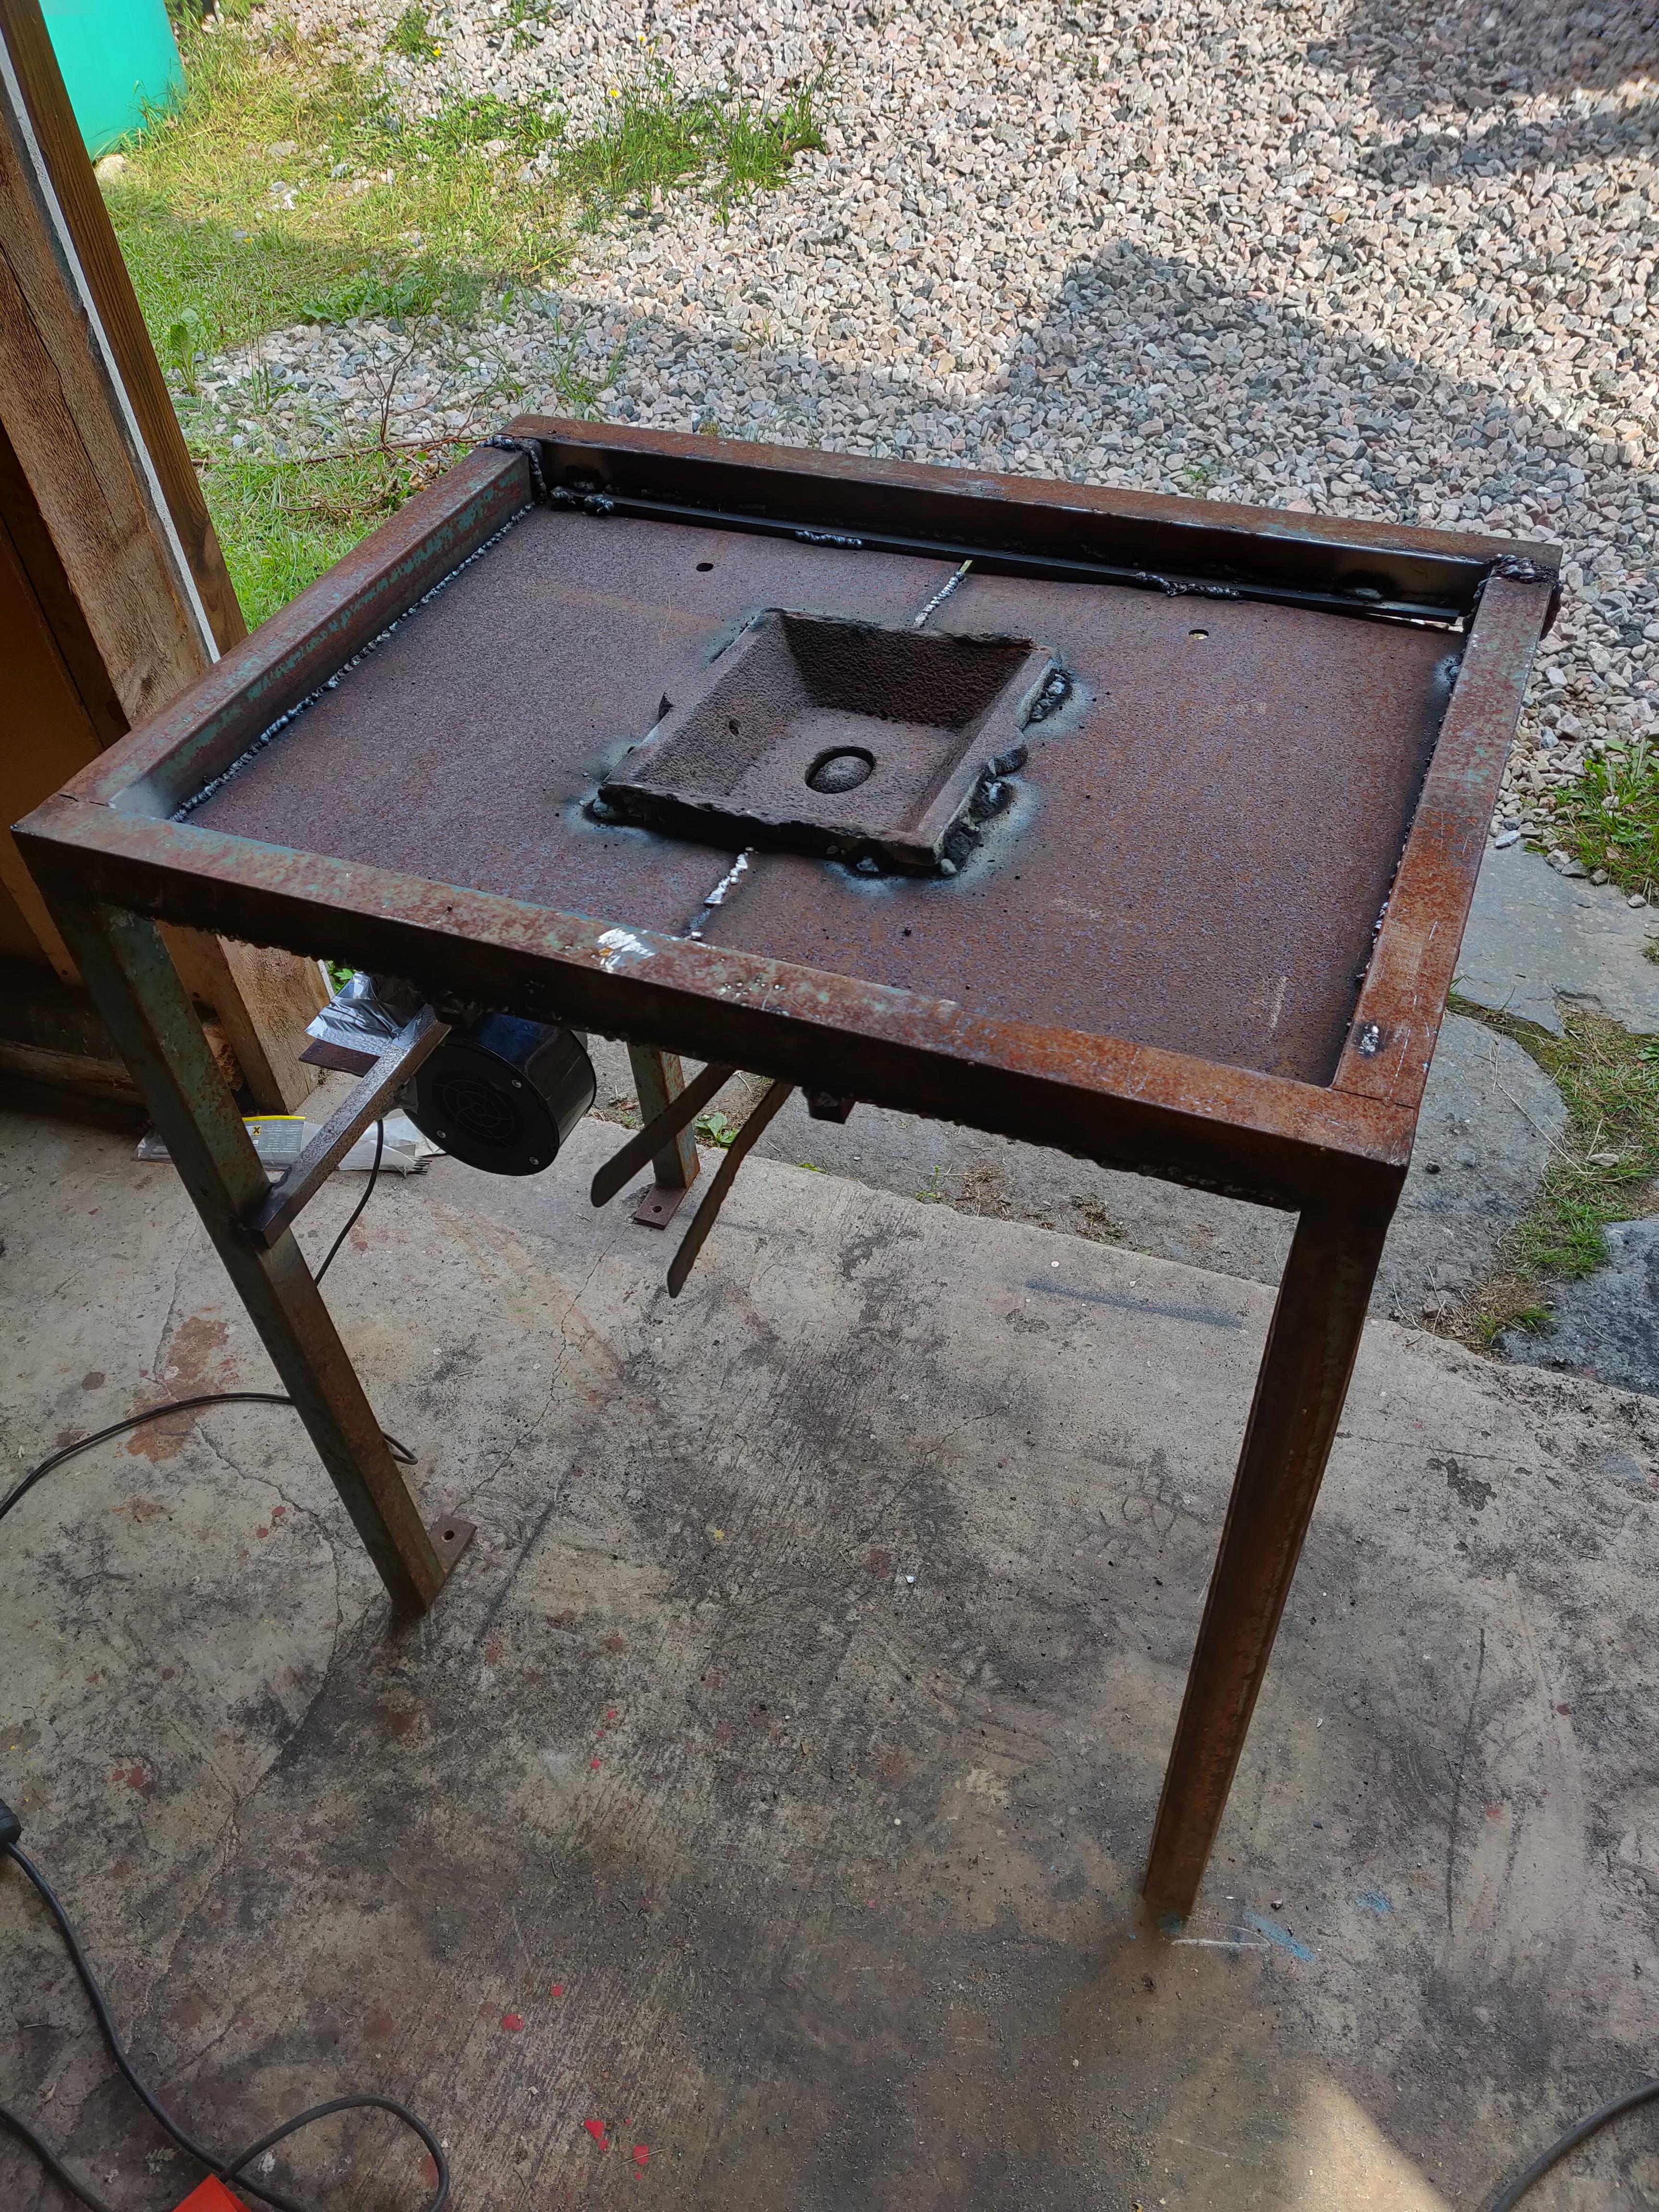
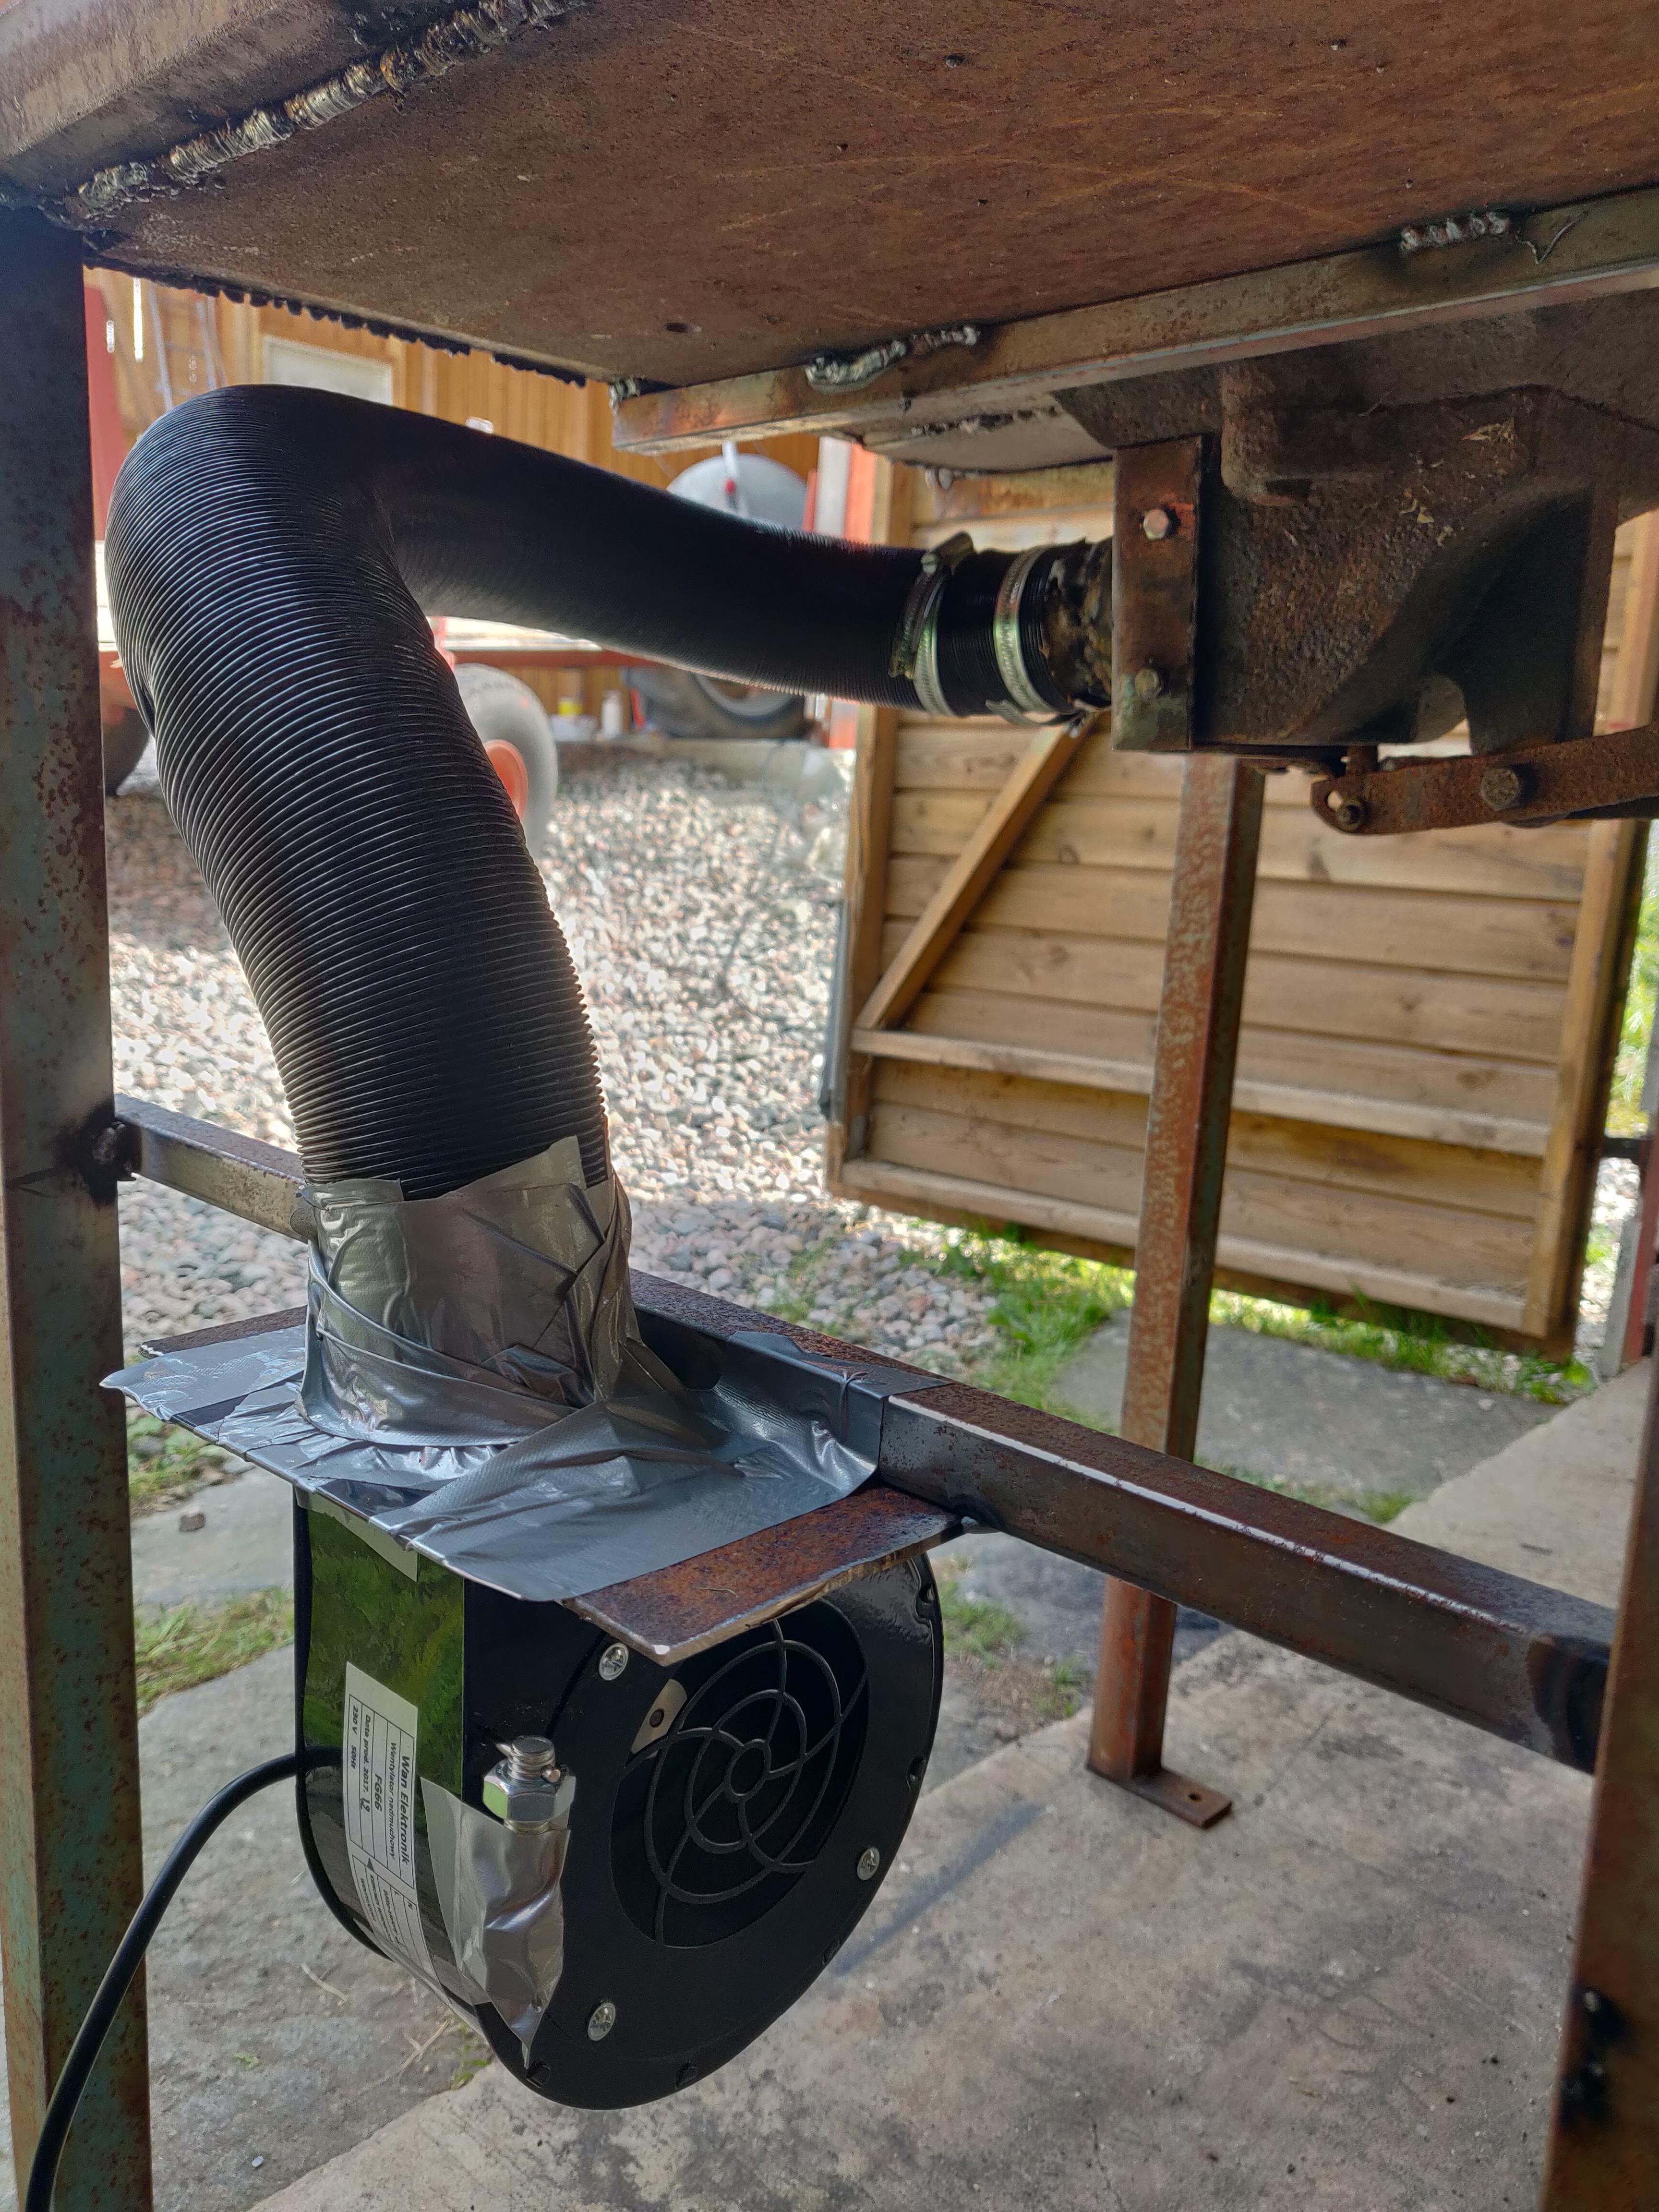
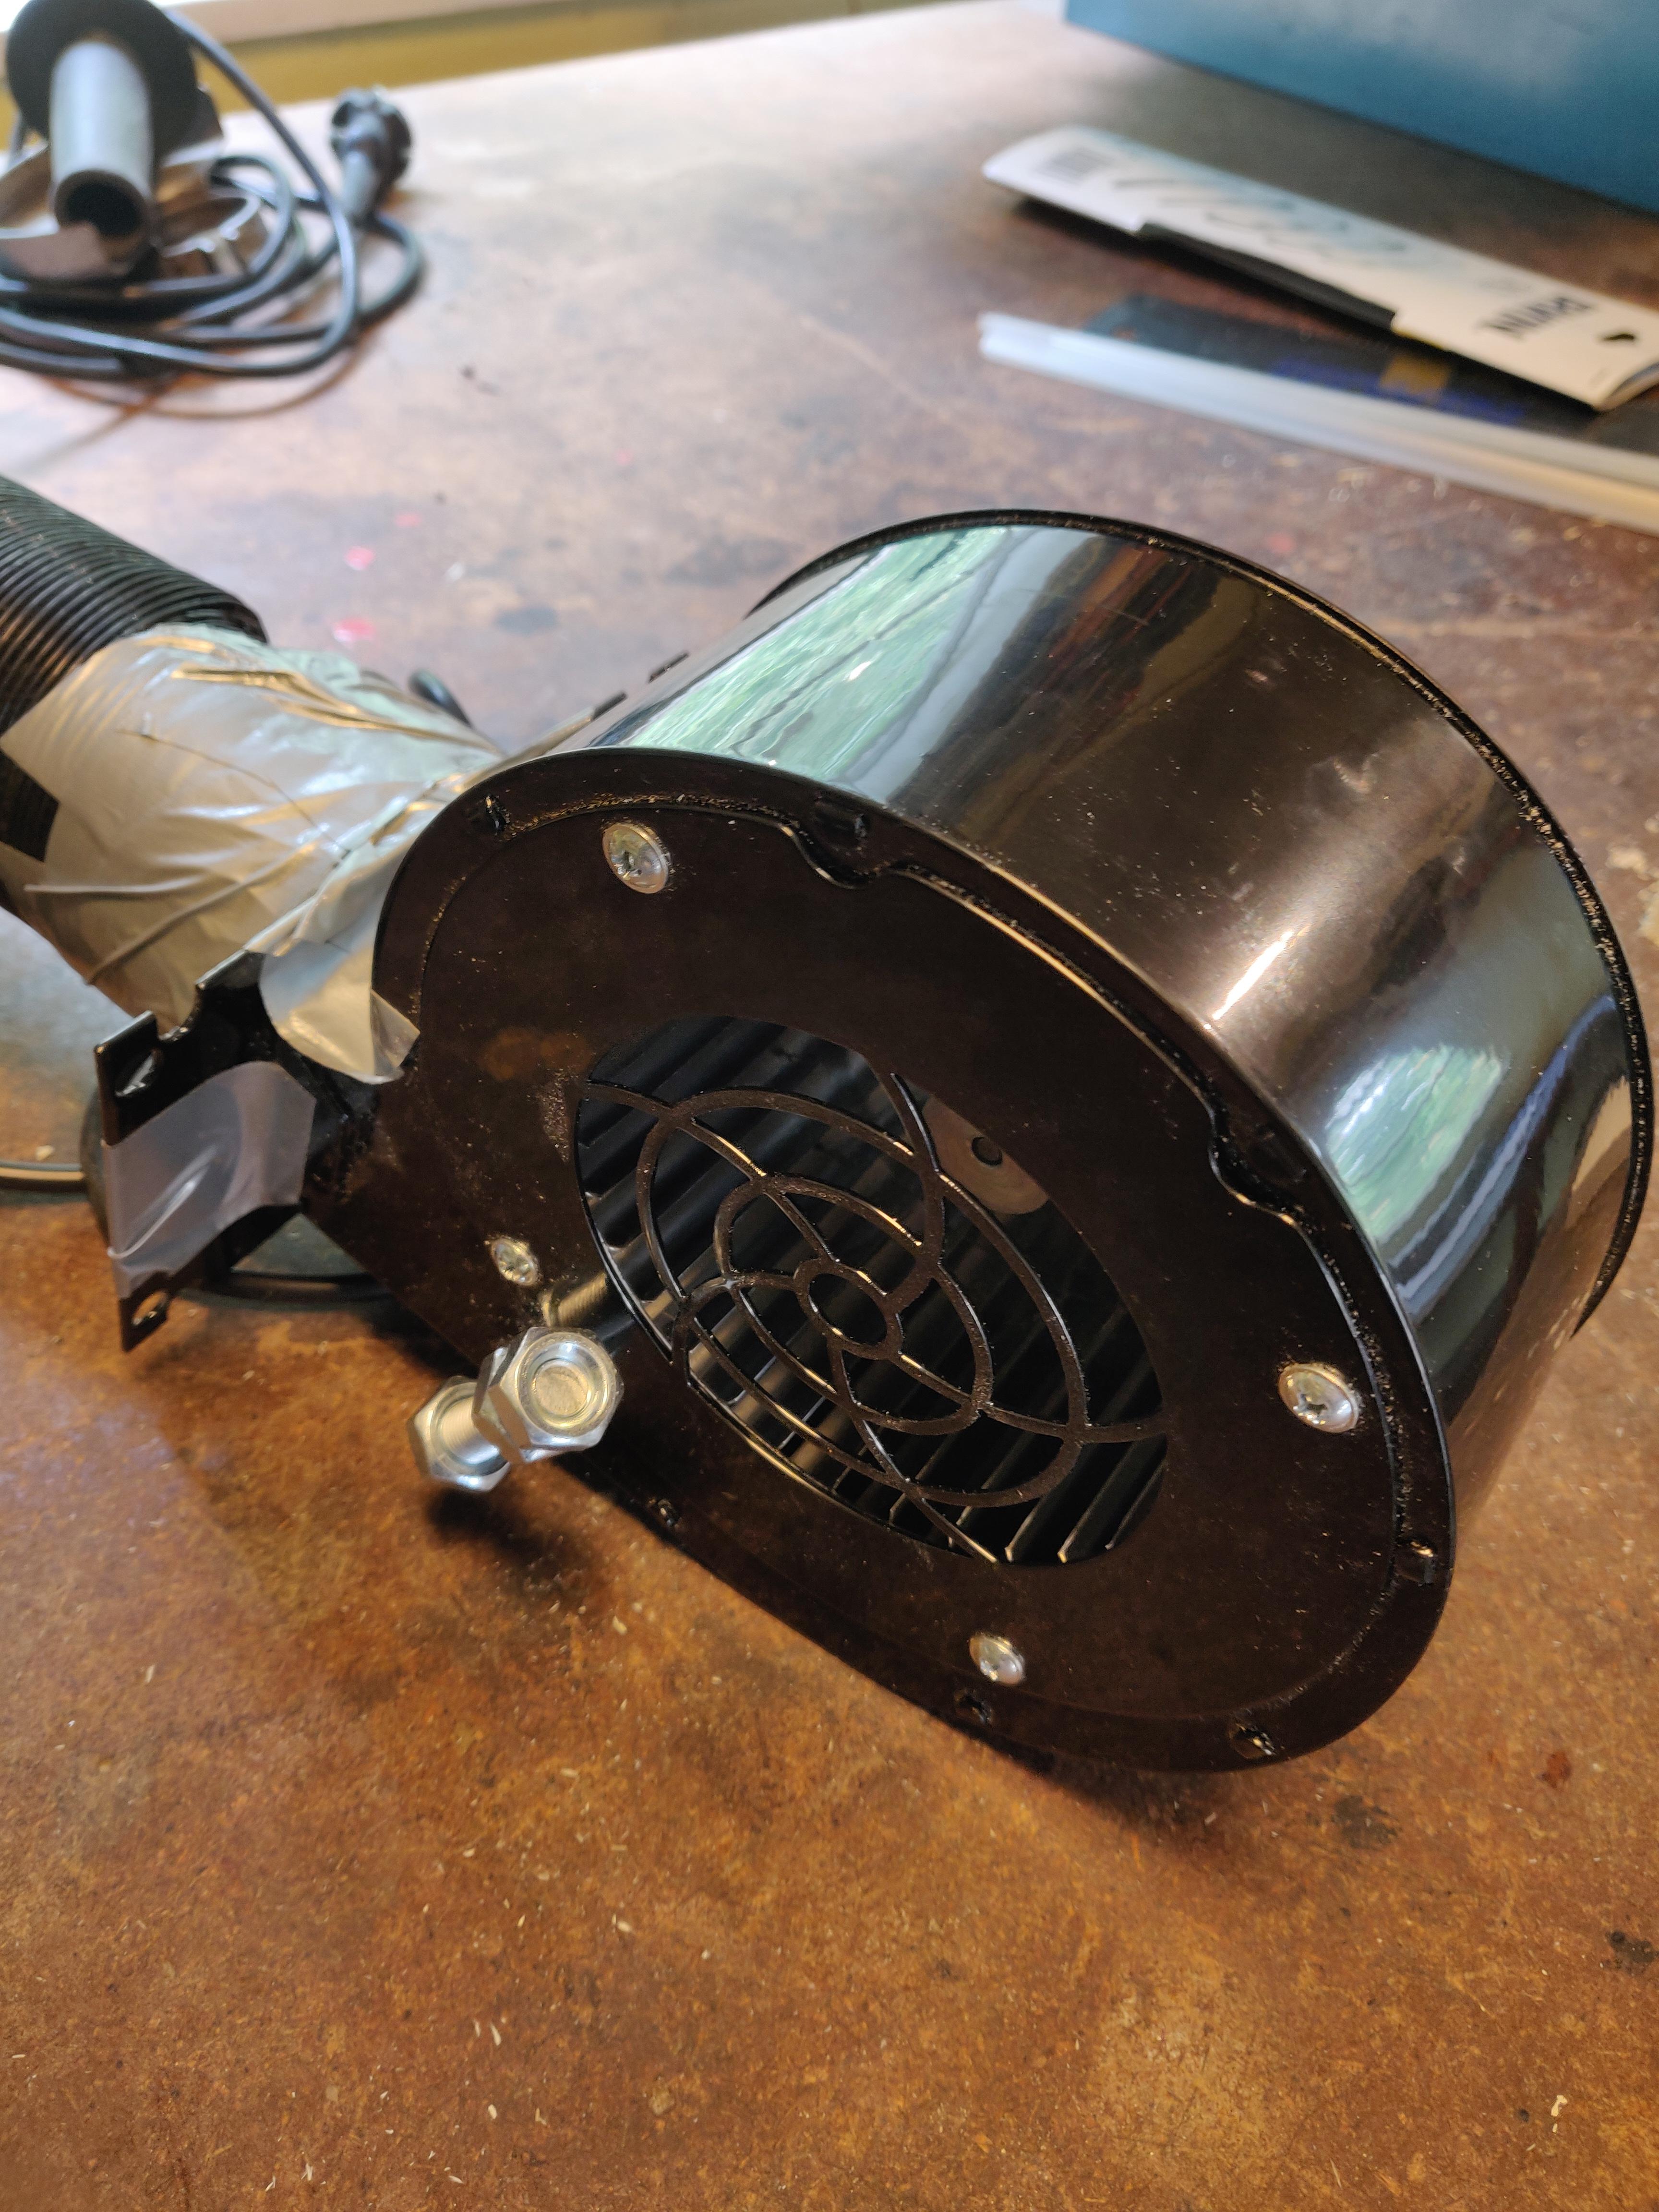
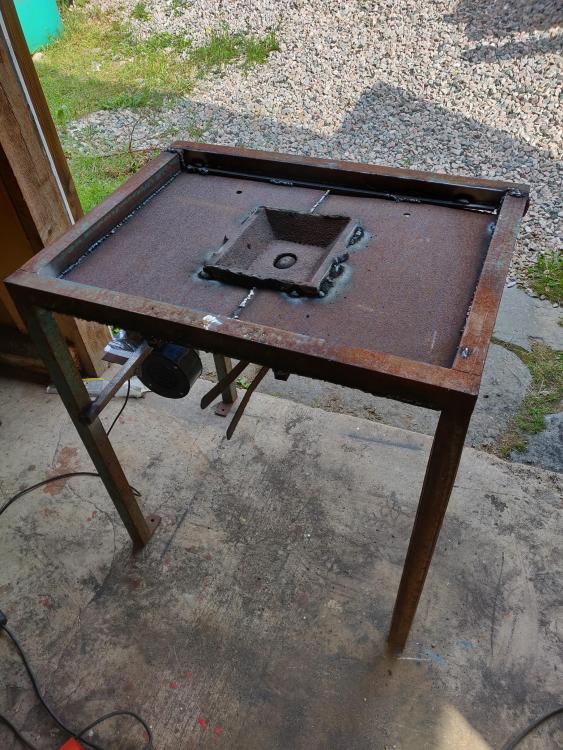
Got really surprised today at how fast things went today, the forge is now completed. It's very ugly and very crude looking, the blower is attached with ducttape and the welds look like bird poop . Now I'll just have to get used to regulating the airflow, the hairblower I had on my old forge was really simple to use (OFF/half blast/full blast) and I only ever had it on full blast whilst forging. On this forge I actually use the ashdump and the clinker breaker to regulate the airflow. It enables me to fine tune, which is new to me. VID_20190804_173944.mp4
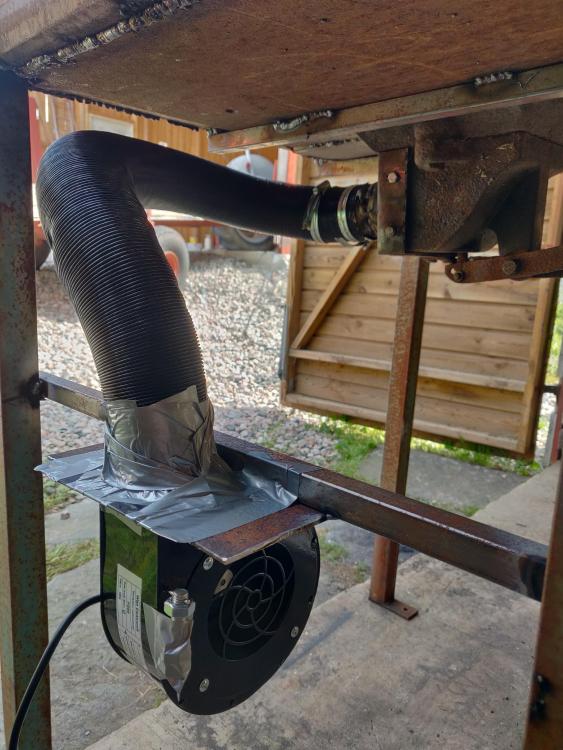
-
Turns out you could adjust the airflow quite effectively with the ashdump and clinkerbreaker, so I just permanentley have the blower at full blast. Problem solved!
-
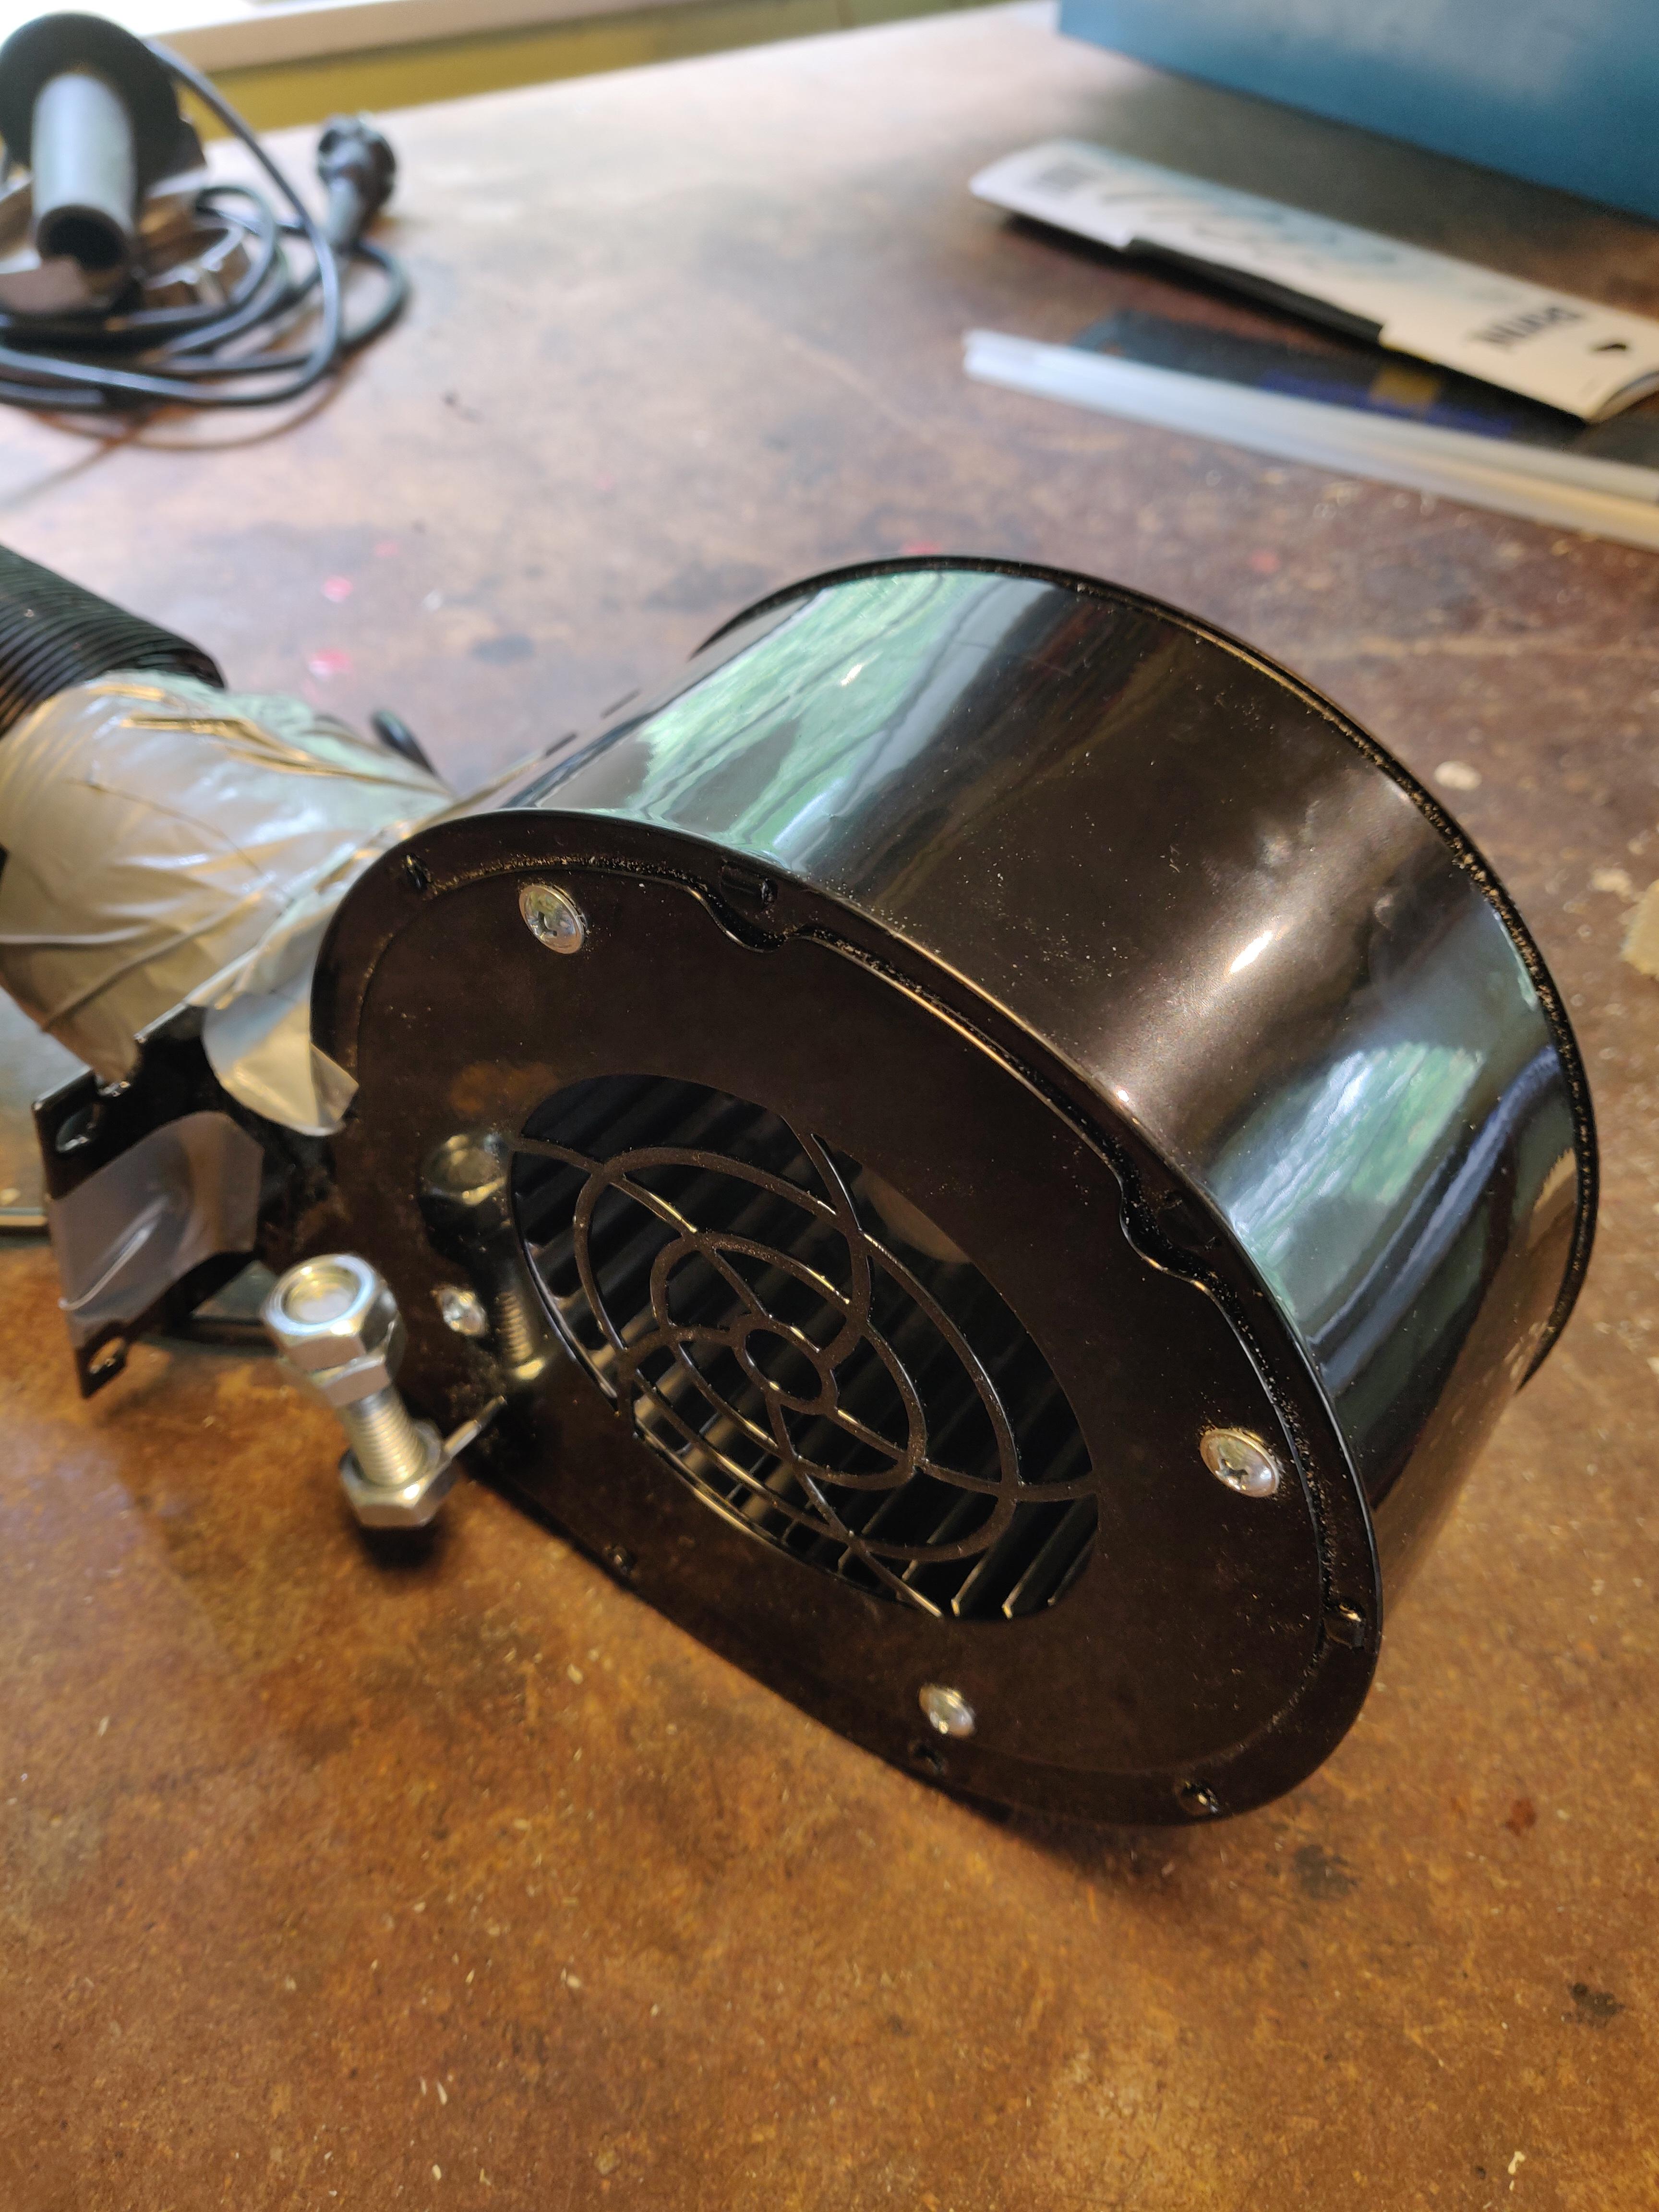
Hello. The new blower I have has an internal gate to adjust the airflow, but it is affected by the air as it pushes through. The air basically opens the gate no matter how I adjust the airflow. This is probably because the hinge of the gate is extremely loose. When the lever is pushed to the left on the pictures, it's 100% open and when it's to the right it's 0%. How can I make sure the lever stays where it is regardless of the airflow? The forge I'm building is in this thread. // Gustav VID_20190804_134719.mp4
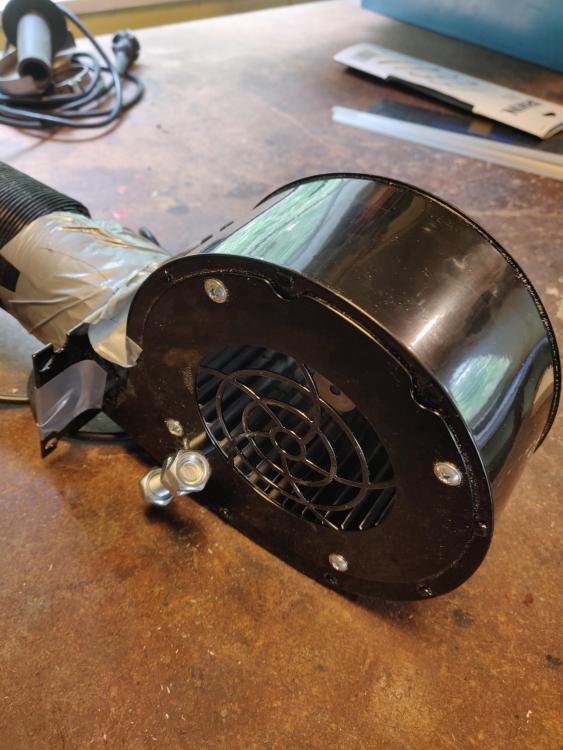
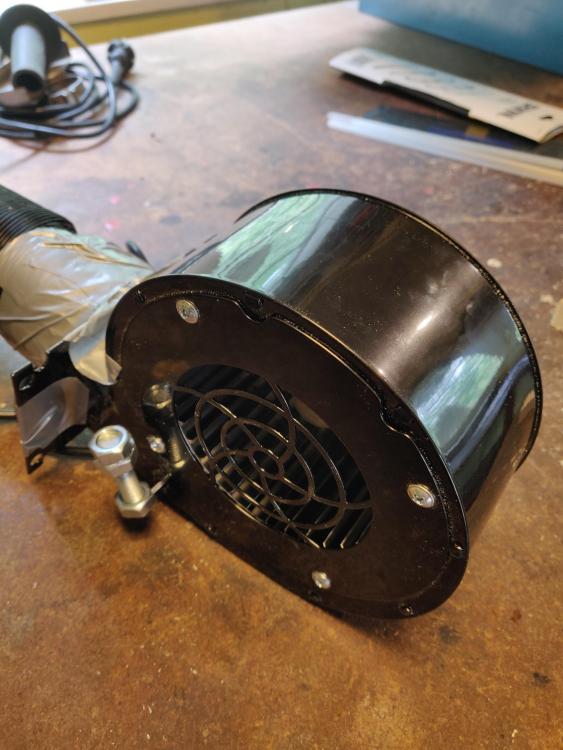
-
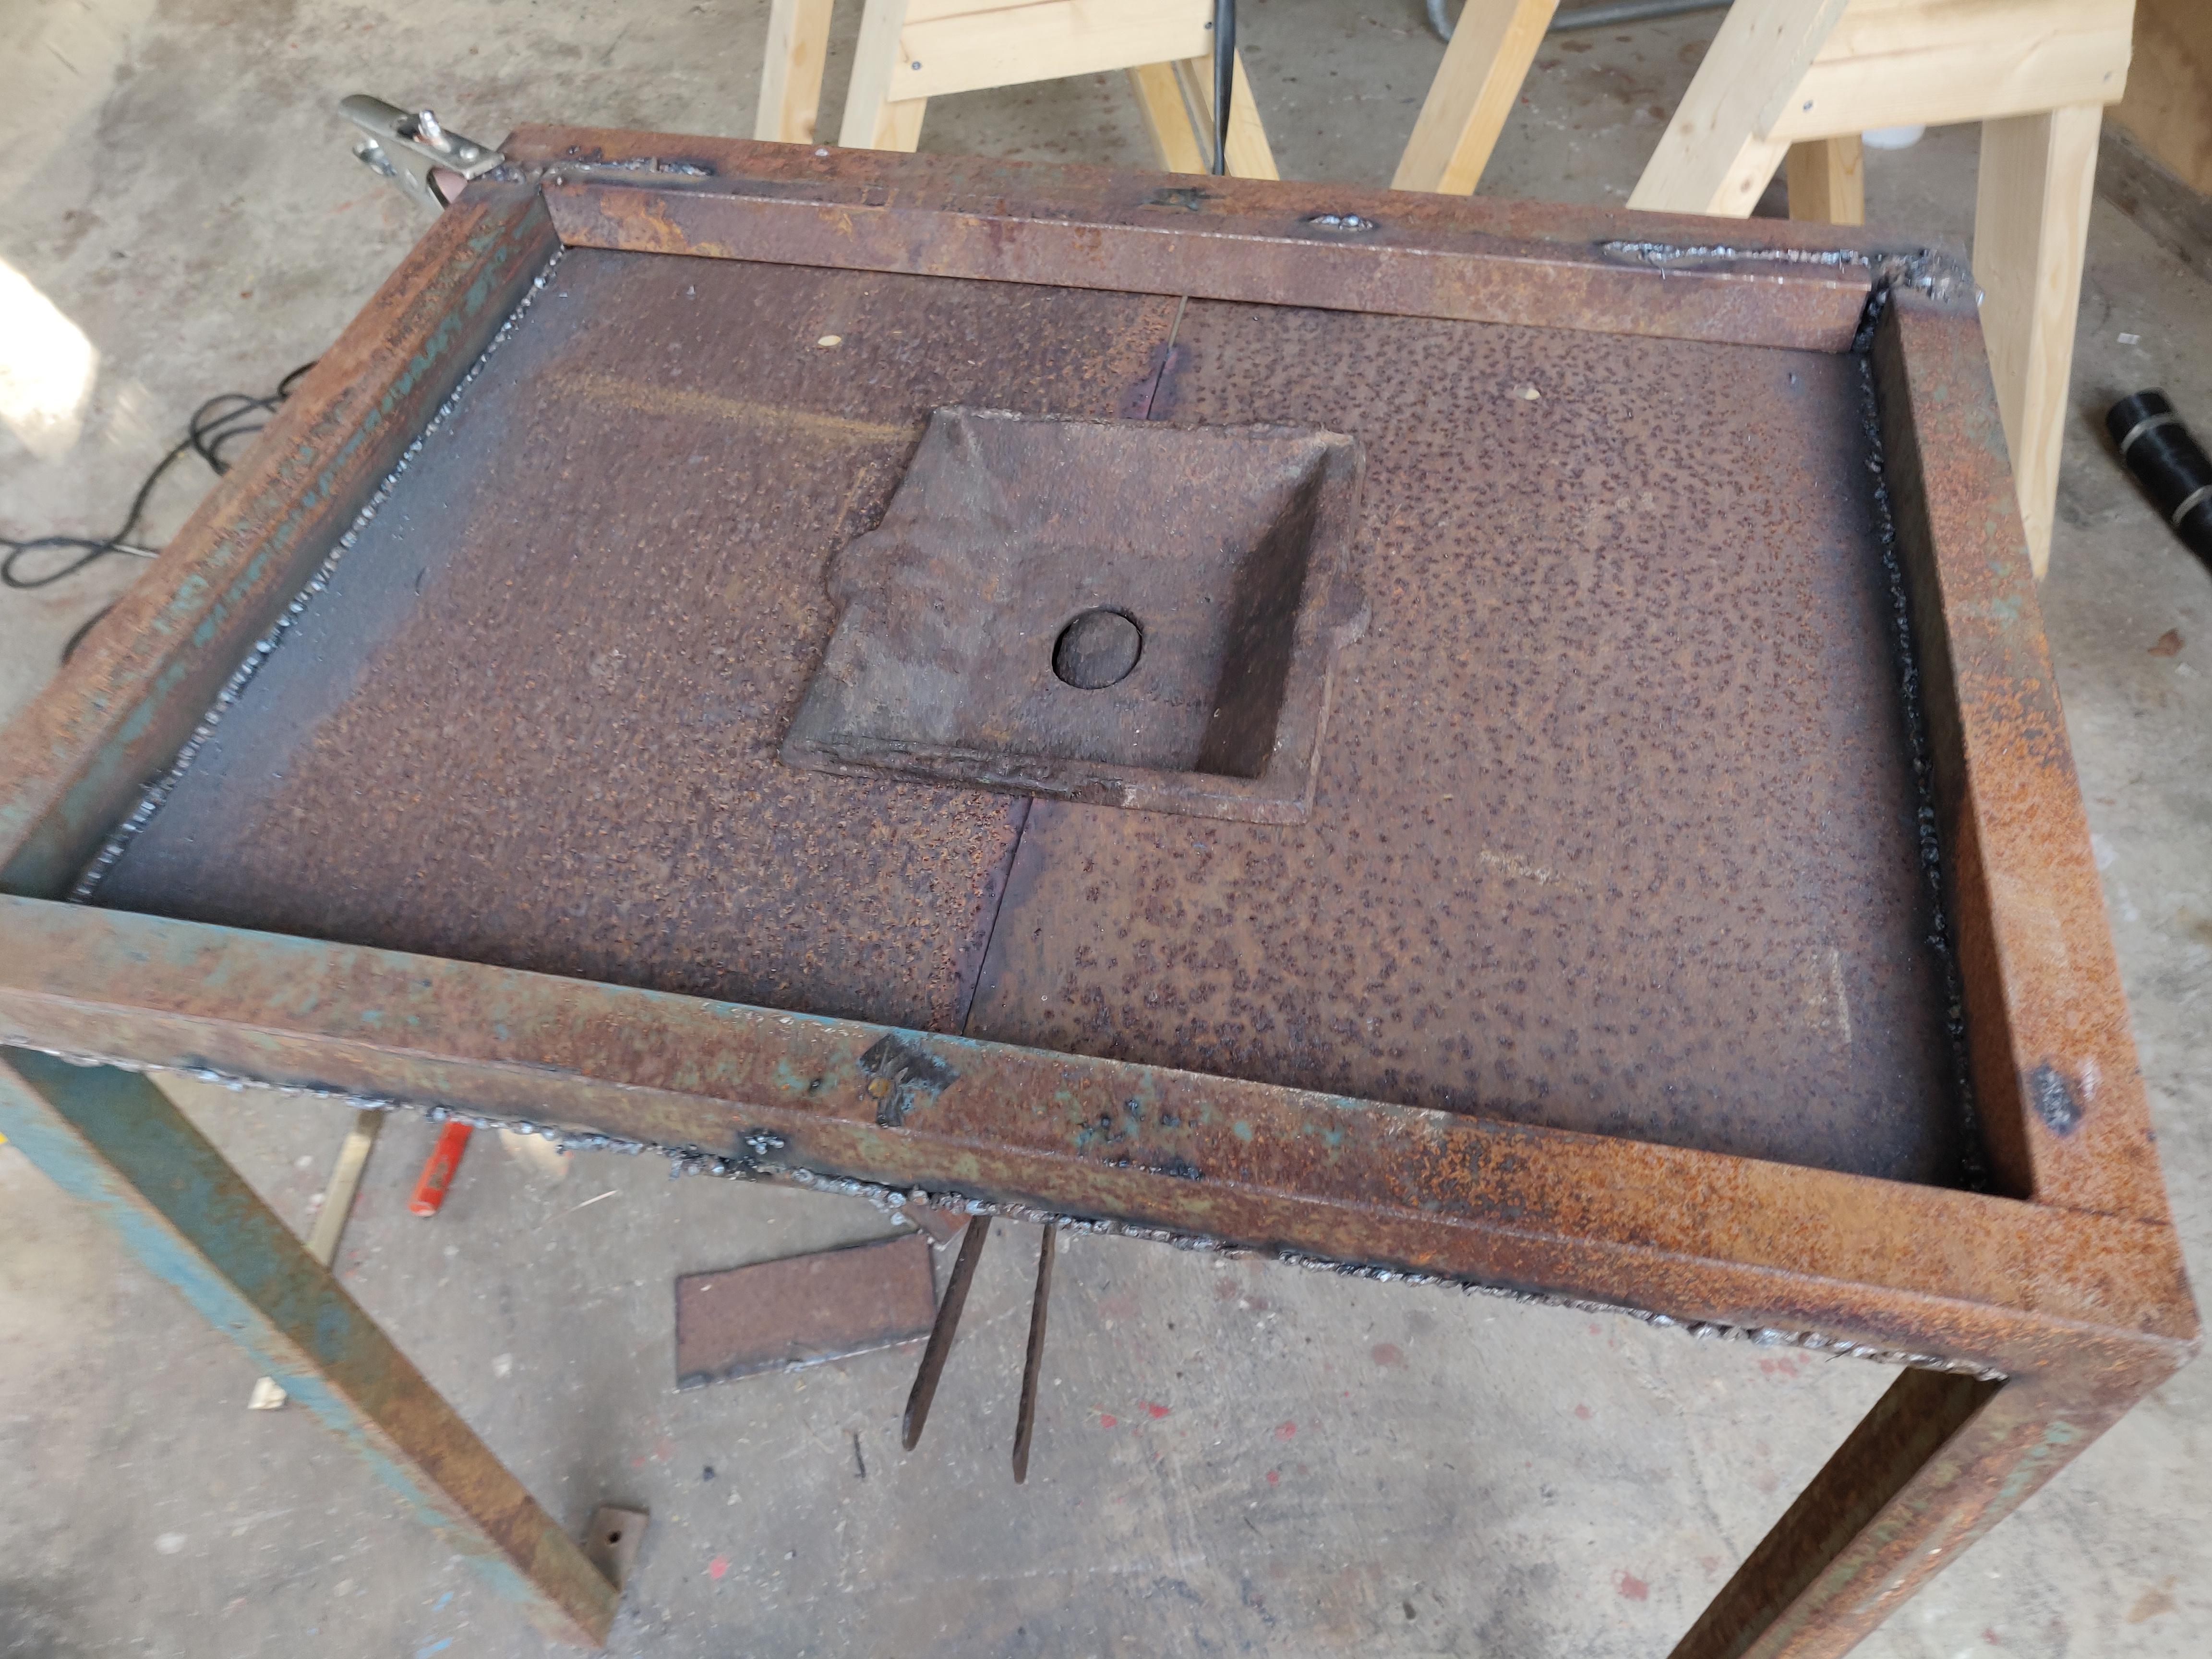
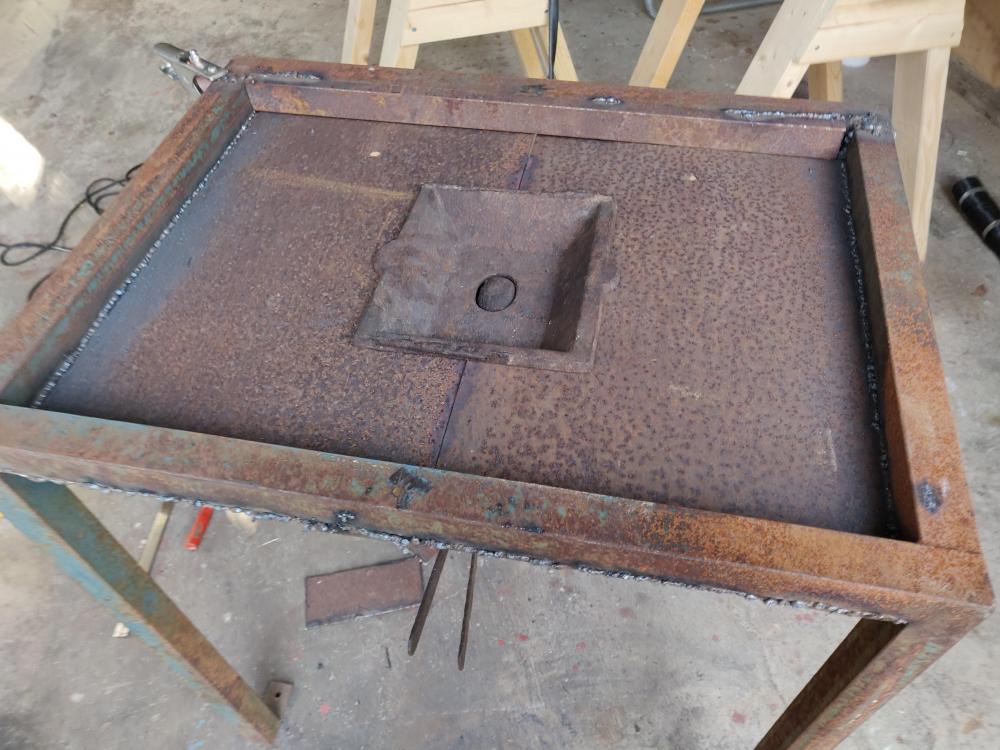
Progress! The firepot isn't fastened down, it is a tiny bit loose if you try to move it since I just placed it in a rectangular hole. That's fine, right? The rectangular pipe you see welded "behind" the firepot on the frame was of some weird steel that didn't want to weld. I filed both sides down to fresh metal but it just wouldn't hold. I had it welded all the way but when I removed the clamps it just snapped outwards and all the welds disconnected . Maybe take some 20x5 mm mild steel instead? I'll figure something out.
-
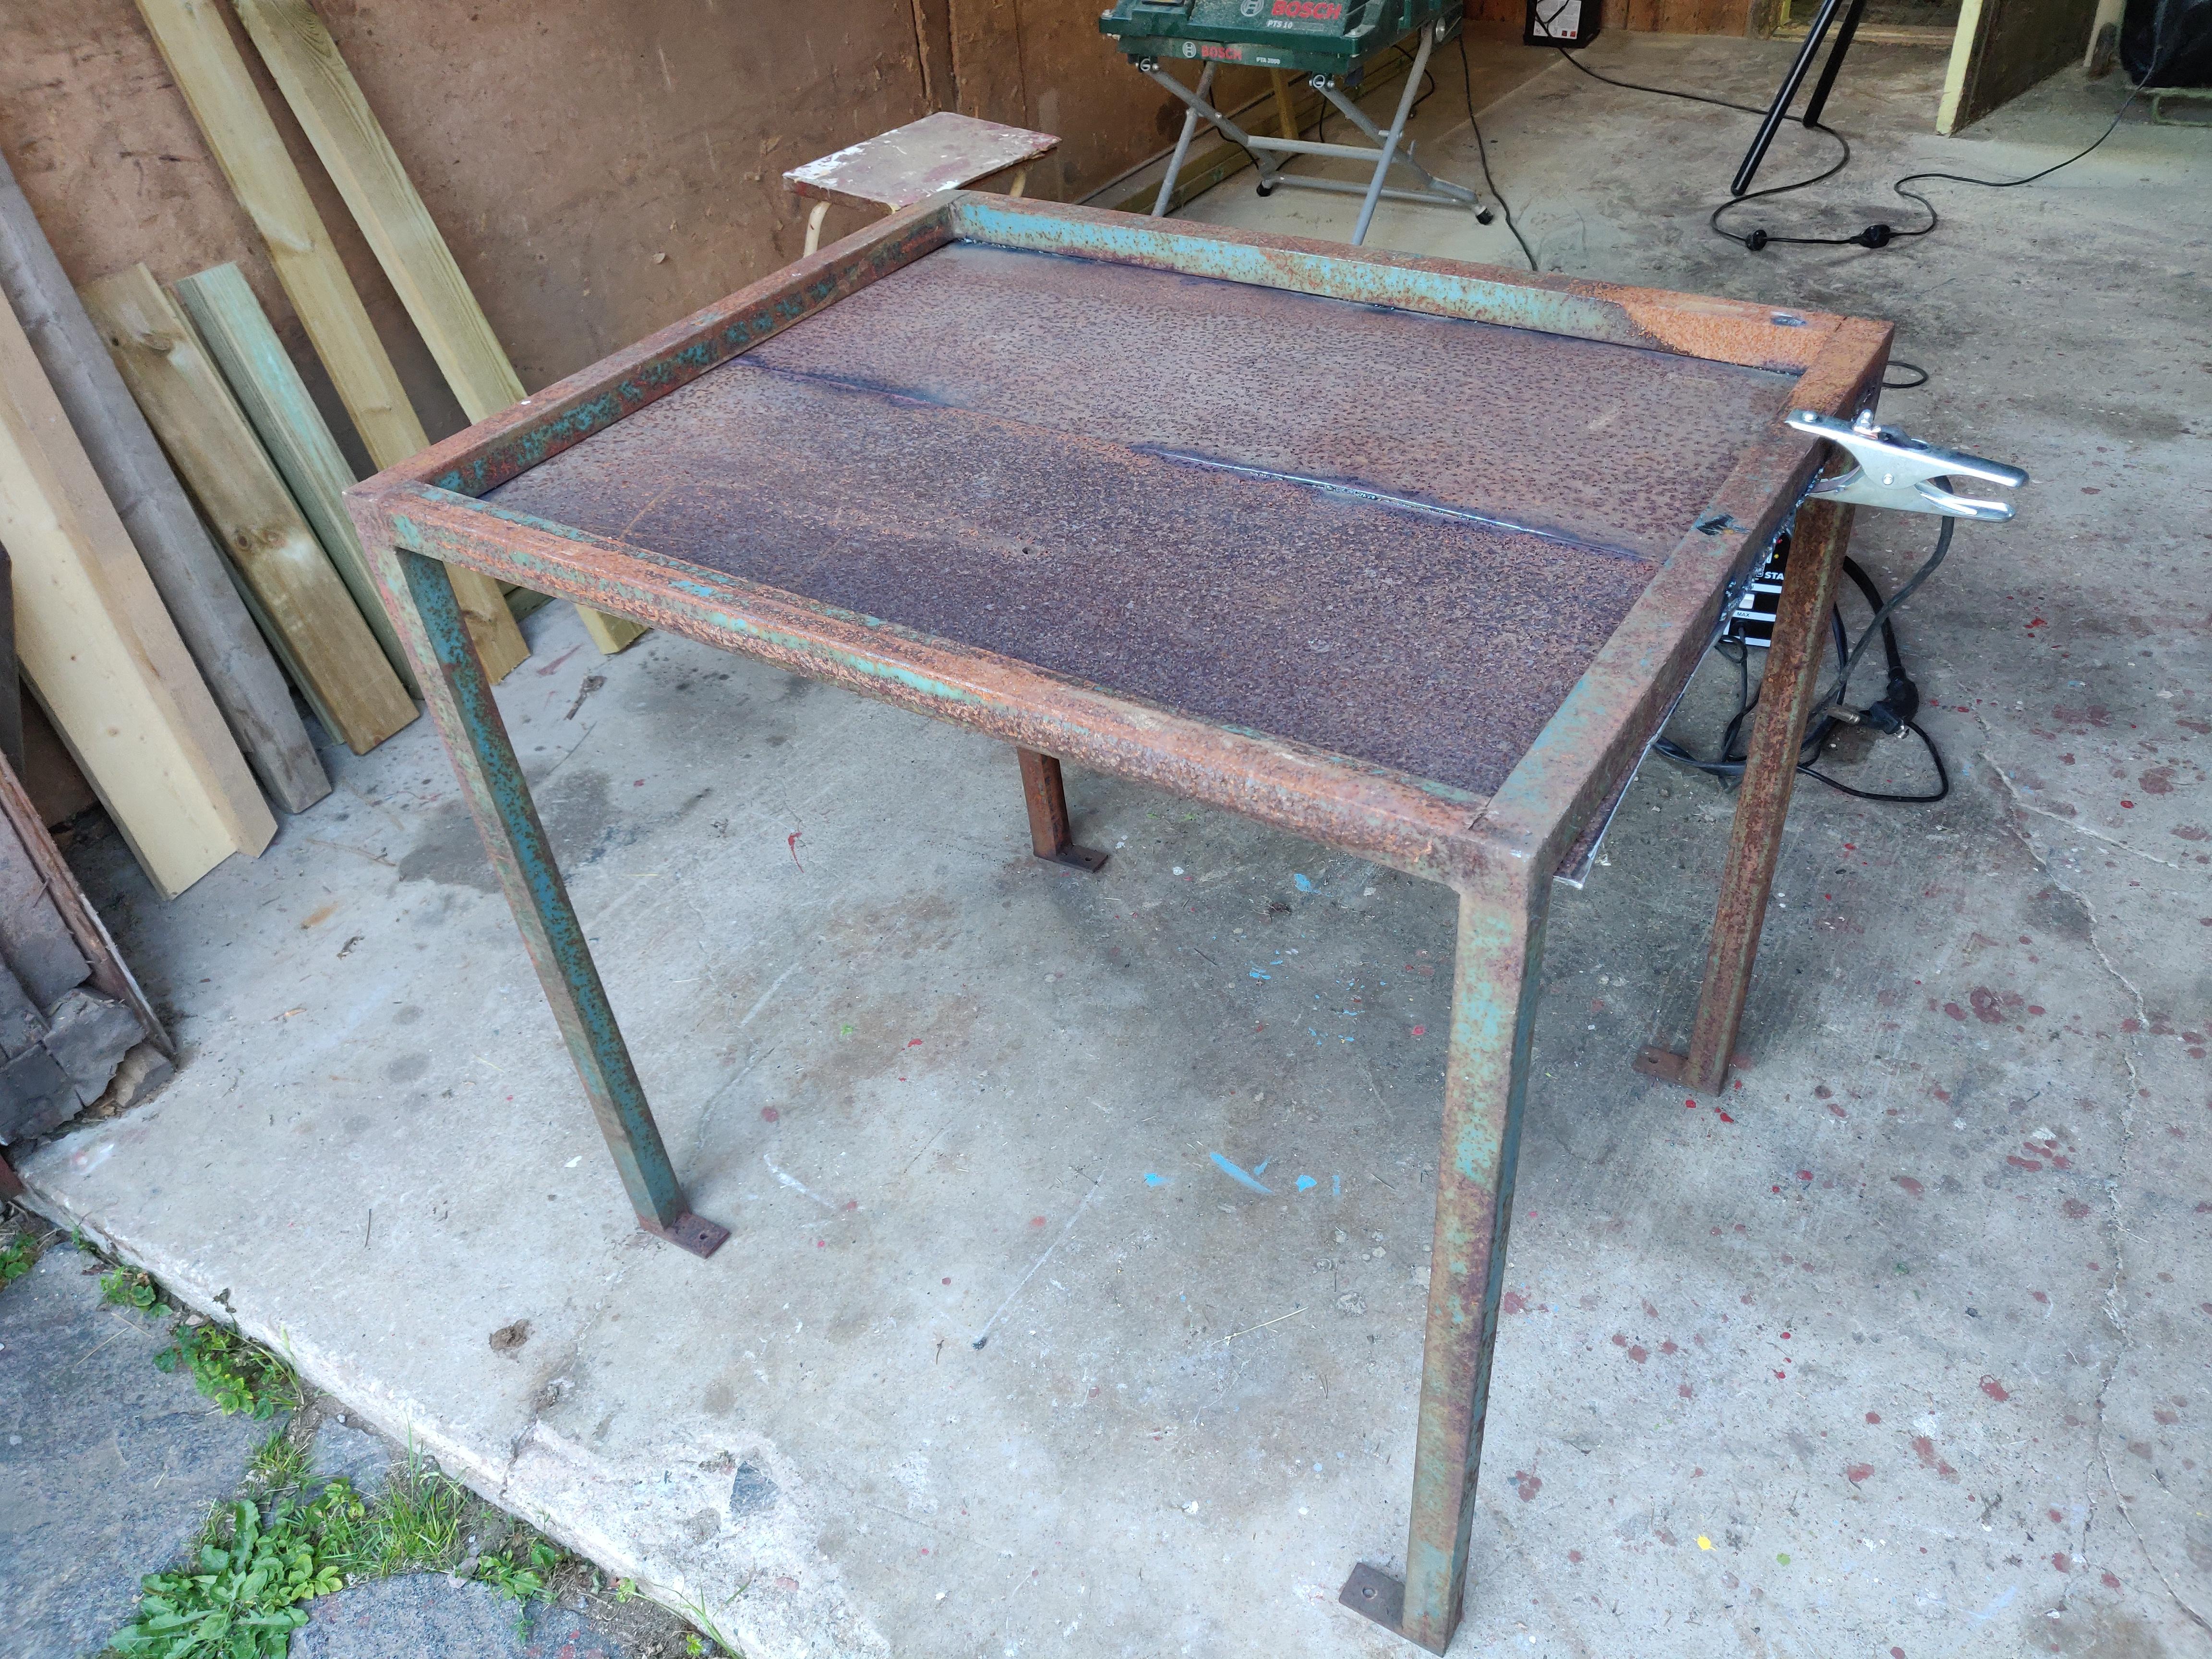
Adding wheels in some way is a good tip, thank you. However, I need to be able to lift and carry it by myself. I won't just be moving it across the floor, but also in and out of a huge oven to benefit from its chimney. I managed to cut the table today and I ended up going for 31x22". I still had plenty of space for my firepot. 27" looked good when I drew the forge in CAD and would probably be the best performing, but when I visualized it infront of me while I were at the table, it seemed too big.
-
Just cover the sheetmetal with vinegar and wait? We actually have a sandblaster, but I didn't want to use it since I thought that sand would end up in hinges etc and mess up the firepot's mechanics. Is it safe?
-
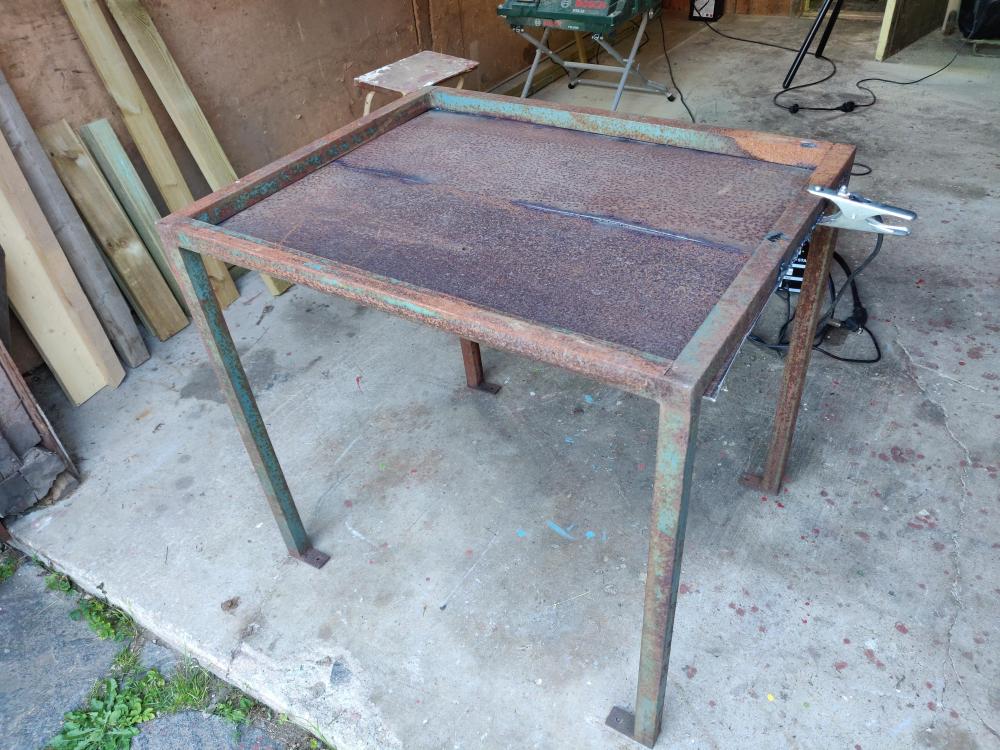
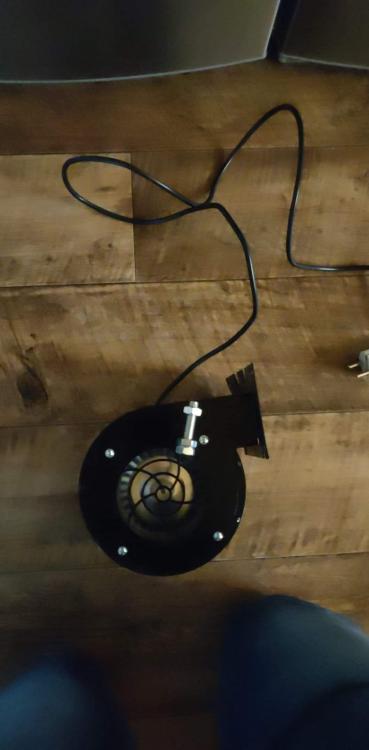
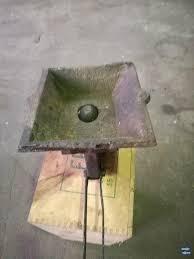
Hello everyone My wheel rim forge I've had since the beginning had broken down, so I began building a new and better forge. I found a 800x1000 mm (31x39")metal frame with four 900 mm (35") legs in my backyard and welded on two 4 mm pieces of (super rusty) sheet metal to make the "table". I also found a firepot with inner dimensions 220x180x40 mm (8.6 x 7 x 1.5"). It also has a clinker breaker, which was nice. All that for $100! Well worth the 2 h drive! The new fan is a $60 forgeblower I found in a Facebook group. When I plugged it in today just to try it I got really surpriced about how quiet they are. I never noticed how loud hairblowers (my old blower) are compared to "real" forgeblowers! Here are some pictures: Now, onto my questions: 1: The table is too heavy right now, even just as it is without firepot etc. It needs to be portable and easily movable by one person, which it won't be if I continue attaching more equipment. I read on IFI that 30x30" or 24x24" is a good size, so, since it's 39" wide and 31" long, I'm thinking about cutting it in half and welding on just the legs on what's left to make it smaller. So that it becomes 31" wide and x" long. I'm thinking that x < 31", since I don't want a square table but how "short" do you think it should be? As long as the firepot fits, how short is too short? Space for my coke is obviously important, but portability is also very important so I don't want it "longer" than necessary. 2: What should I do about the rust on both the table and firepot? Is there any other easier way of getting rid of it except going at it with a wirebrush on an anglegrinder? Happy for all answers. // Gustav
-
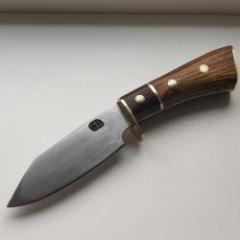
Forgot to post the update. I filled the cavity with some mig welding and it got really ugly (the welds are ugly because the welder can't use gas) but it works better now. In short, if you have to fill in material with a welder, just forge a new piece instead. It might make it usable, but it gets really ugly.


FotonochvideoklipppInstagram.png.d88a039511bb6bacefbffff6dd7f3fb4.png)