paulgatx
Members
-
Joined
-
Last visited
Everything posted by paulgatx
-
Hi all, looking for some quick tips on the best way to apply KOL30 in one session. I mixed it with the recommended amount of water, so it was nice and "crumbly." So crumbly I'm worried about turning the forge right side up to do the floor. I tried securing it with a duct tape "hammock" but I don't feel that will keep it from falling down. Of course I can let this dry and do the floor later, but I'm trying not to waste the mixed KOL. Thanks!
-
Good feedback, this is exactly my concern. However, I did make sure that, in my retrofit, the forge floor is at the same distance from the burner as it was in the stock forge (2.5") since they used a firebrick propped on the edges of the lower half of the oval. Now, that original setup could be total xxxxx, as Mikey would attest to, but I'm at least trying to keep that parameter the same. So now the distance would be the same but the volume would be ~ 1/4 with a much higher thermal efficiency. I'm talking to the manufacturer later this afternoon so I'll see what he says.
-
Ok, one more question on this topic (for now). I've got this question out to the manufacturer as well, so I'll use all inputs. Related to my concern about changing the interior volume, now that I've got the second layer of 1" blanket in, I'm calculating that my interior volume will go from 265in^3 to 124in^3 with the blanket to 70in^3 with the Kast-O-Lite and Plistix. Ignoring the problem of the size pieces I can fit in (I'm planning on small stuff to start anyways), that final volume seems much smaller than any other numbers I'm seeing discussed w.r.t. burner capabilities. Is there such a thing as too small a volume? I assume this thing is going to be hotter than the hinges of hell at fairly low flow with a 1" burner. Maybe not a problem unless the burner doesn't function well at such low flow? If needed I can still pull out the second layer of wool before I apply the refractory. Or I can go with 1/4" refractory instead of 1/2" to get a bit of room back. Thanks again in advance.

-
Tim and Frosty, sorry for the lazy use of the term cure. in this case I am using "cure" as a general term for any heat treatment (I guess it more applies to the food industry where curing by dehydration is just moisture extraction) rather than the more technical term for a chemical transformation. I work in the semiconductor industry and use that term generically for any thermal or UV treatment. But yes, more correct in this case would just be drying or heat treating, so I'll use the more appropriate term from here on out. The 500F number was simply (a) what I could get to in my oven, and (b) what Wayne Coe uses for his drying process. Since the manufacturers recommended schedule is approximately 100F - 1000F at 100F/hr, I figured that first 500F being controlled is pretty important to get that moisture out and then the final 500C with the propane burner is on a wing and a prayer. But then again, I've also read that this stuff is super forgiving and tough, which seems to be why all manners of drying work. No worries, I won't overthink this and I'll get to drying this weekend. Thanks again.
-
Hi idk, thanks for the quick feedback. No worries on the perceived tone of the feedback, I'm learning to grow a thick skin on here. :). I did do some research but didn't feel as if I found a satisfactory answer, so I thought I'd pose the question to the experts (materials and smithing) to get more clarity. I do have the manufacturer's curing instructions, which is why I thought of the controlled 100deg/hr capability of an oven as opposed to the less controlled other methods I read about. I had seen this method mentioned in two other places (see attached), including one of the experts here posing it as a hypothetical question (though I can't find that post again). Other than that, I never saw anything saying it's an absolute no-no, so I figure it doesn't hurt to sound stupid and ask again. Glad to did. I did look at the MSDS, though I'm not an expert in reading them so I didn't see anything as outgassing hazards. But again, I very much appreciate the feedback.

-
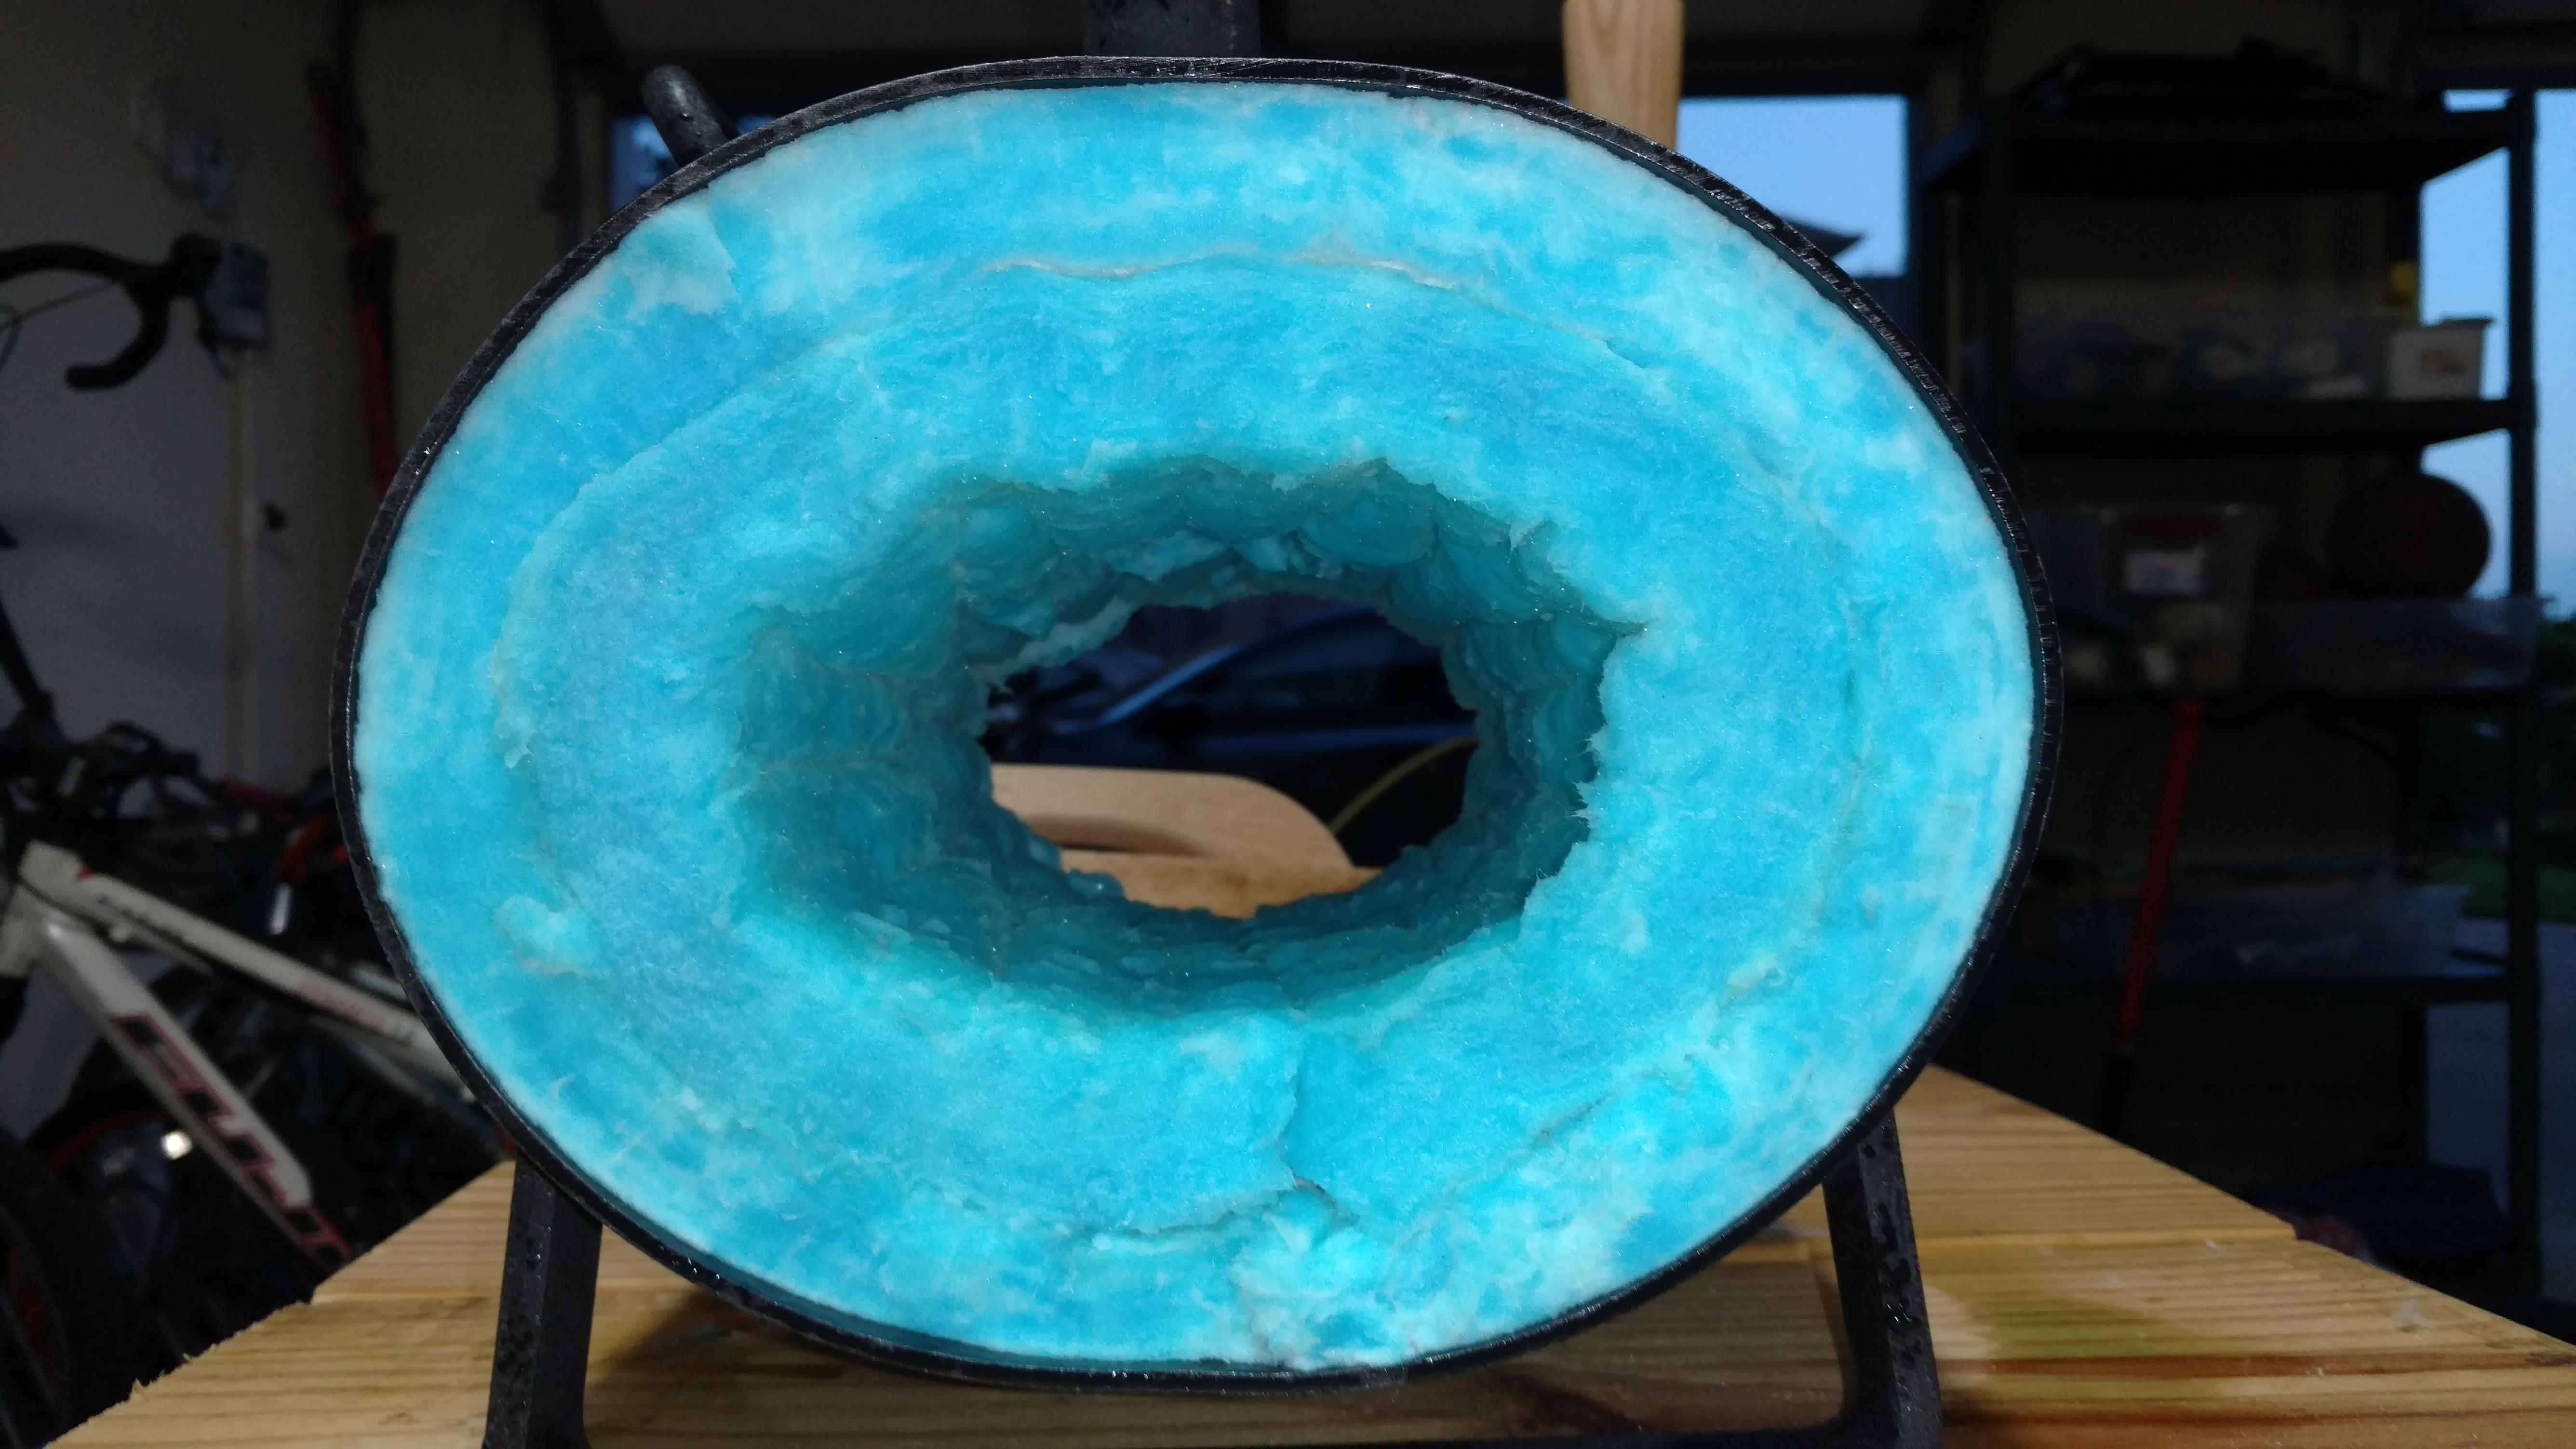
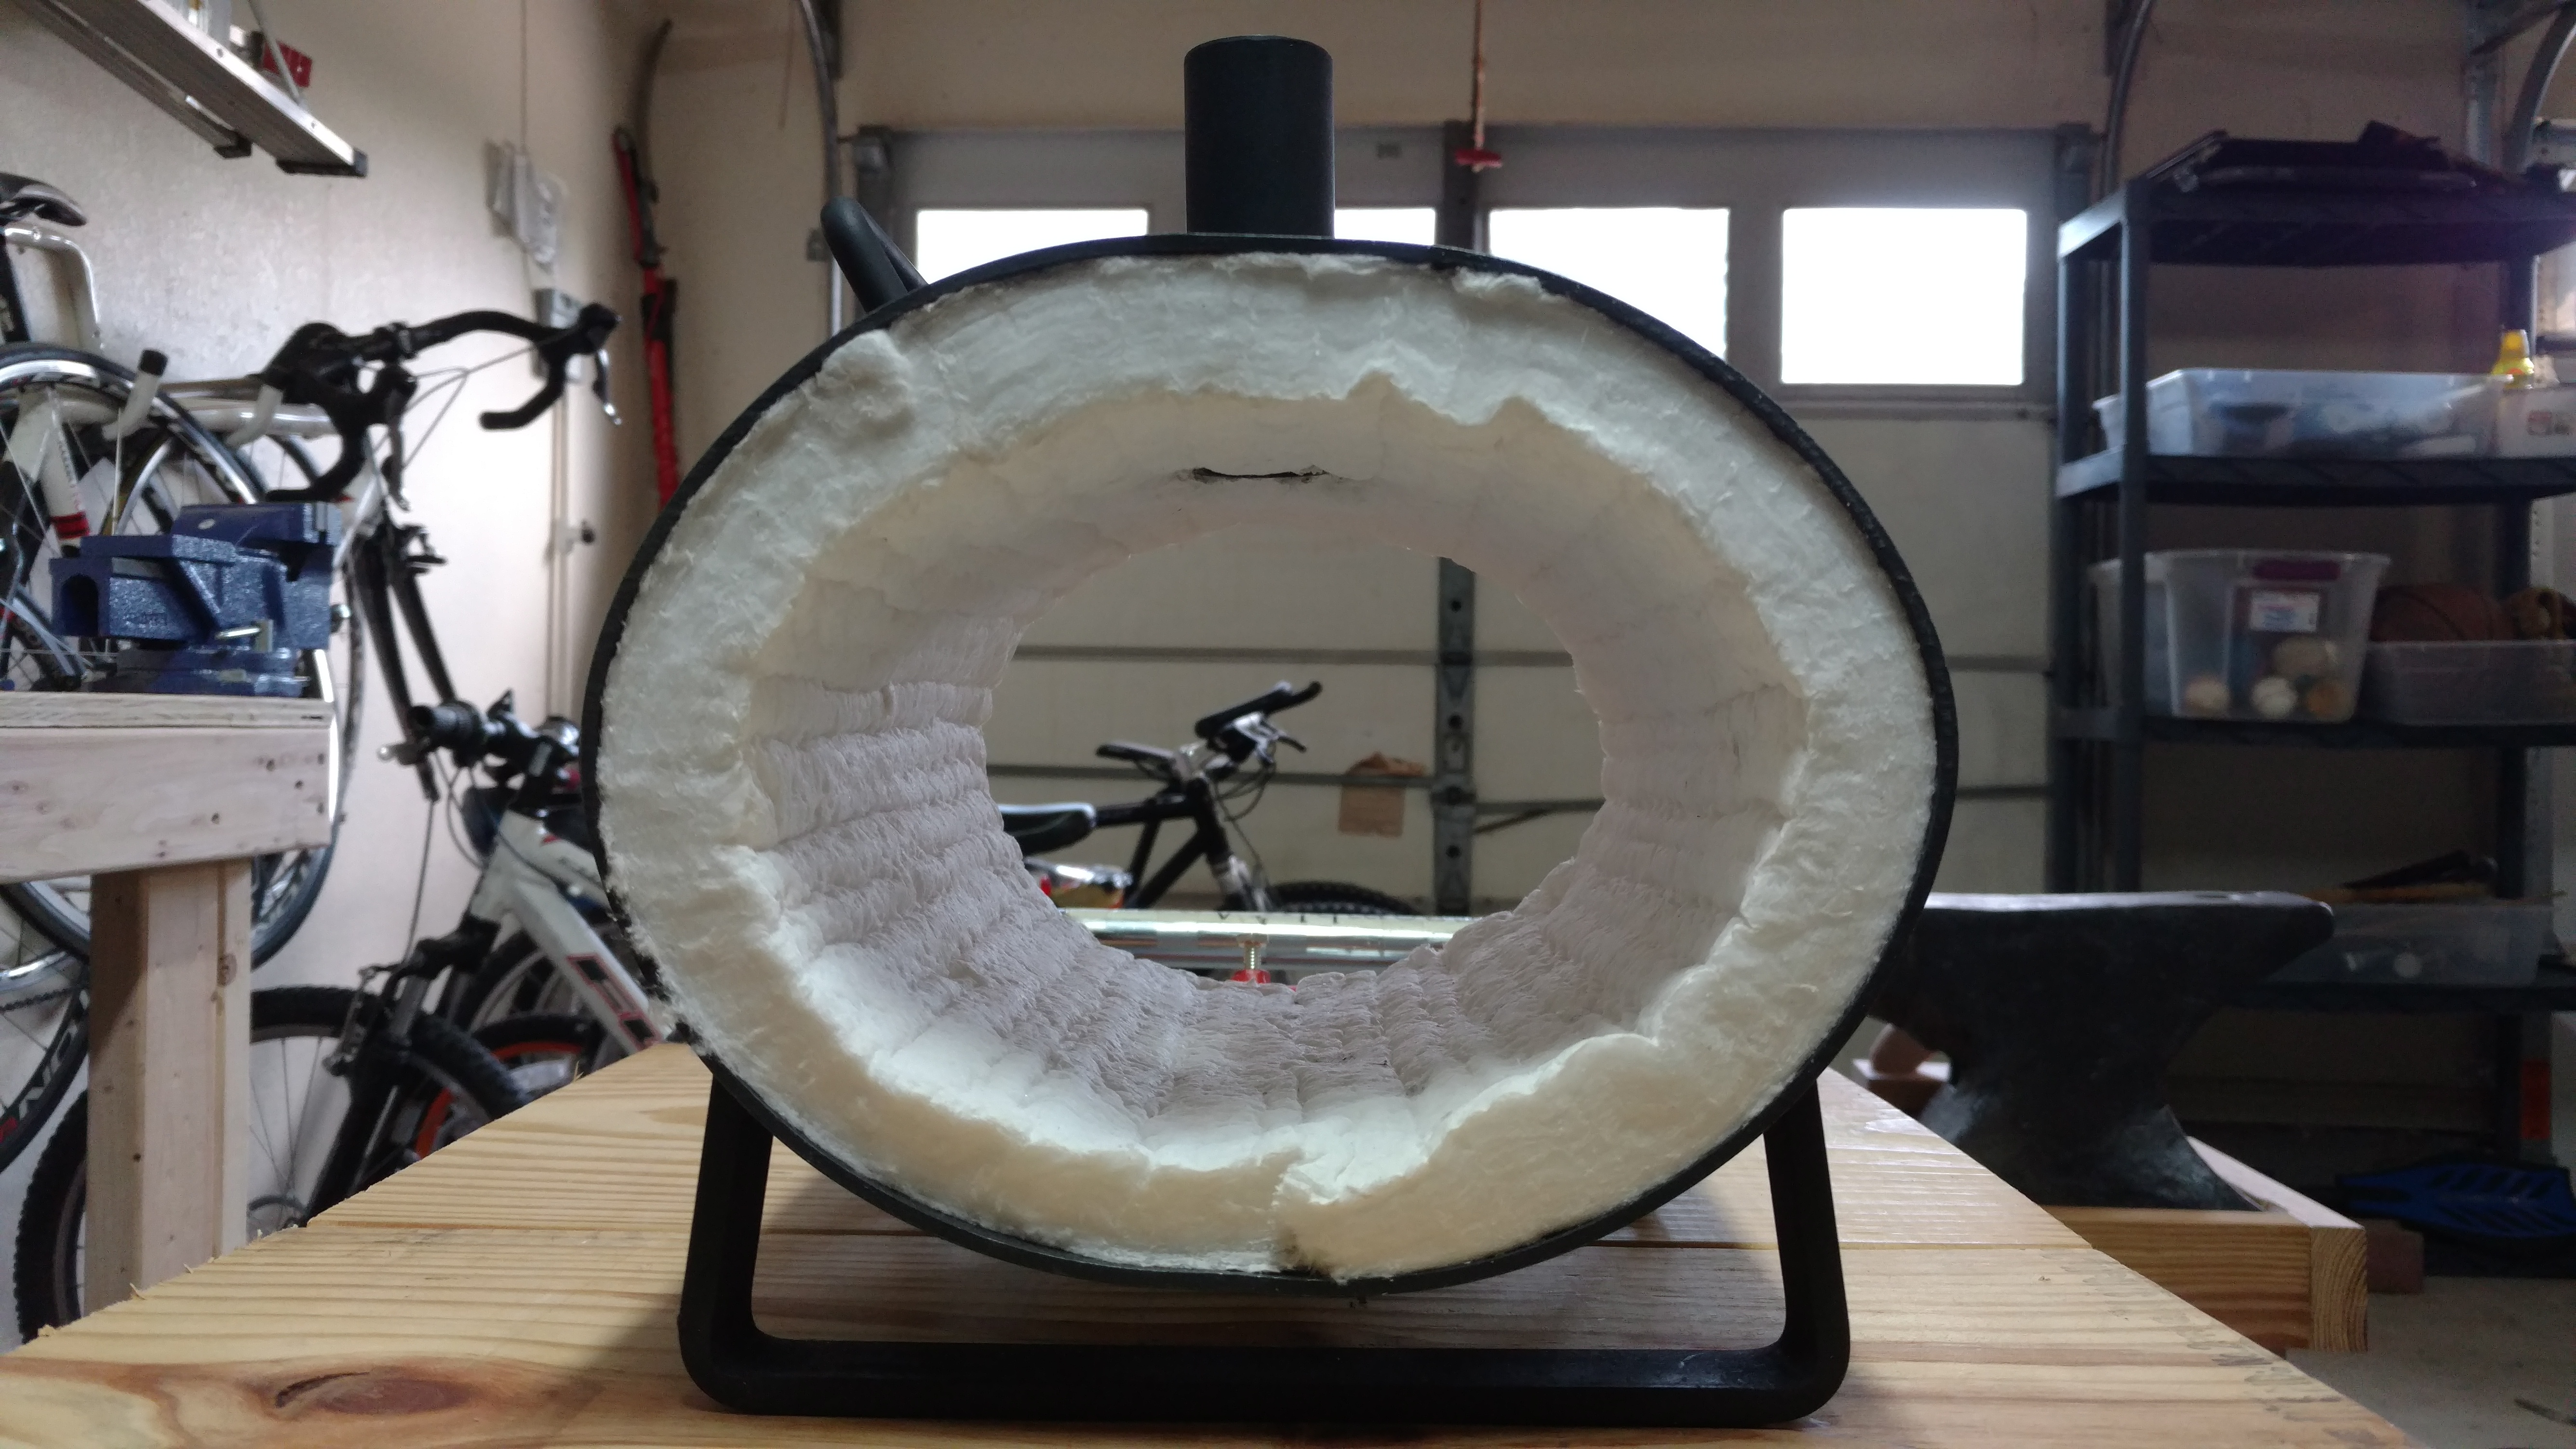
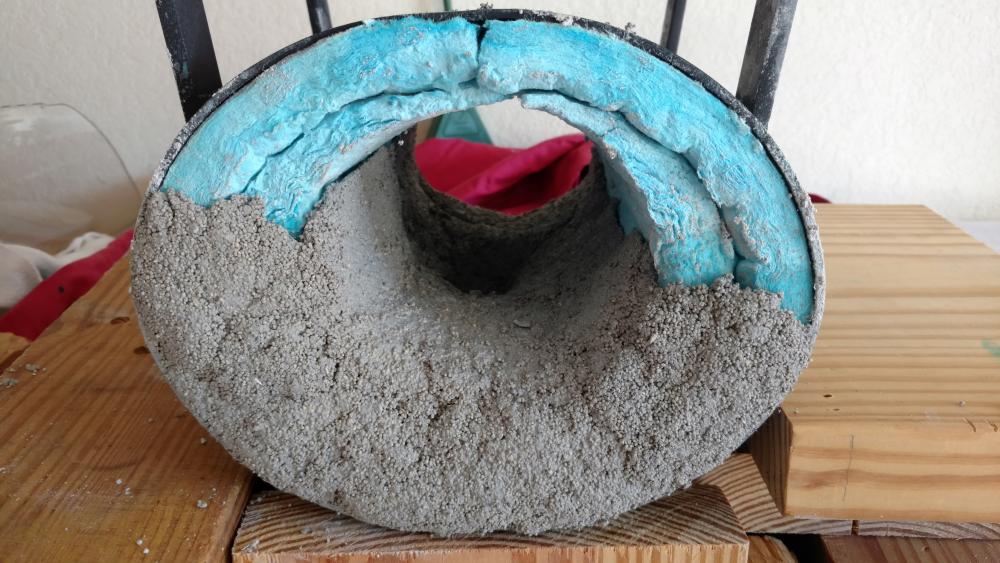
Hi all, next step in my forge setup is to apply Kast-O-Lite 30 on top of my rigidized Kaowool. Question: Is there any concern (outgassing or otherwise) with doing the initial heat treat of the Kast-O-Lite 30 up to 500deg in a kitchen oven? I've seen various methods (kiln, dedicated shop oven, bulb, fire, low flow burner, etc.) that people have published, but I was thinking to do the initial cure very controlled in the kitchen oven and then do it the rest of the way with the propane burner. Am I crazy, because I haven't seen anyone else post about doing this (perhaps there is a good reason)? And yes, it will fit as it is a very small single burner forge. Thanks in advance.
-
Thanks for the advice, JHCC. I'll play it careful for sure.
-
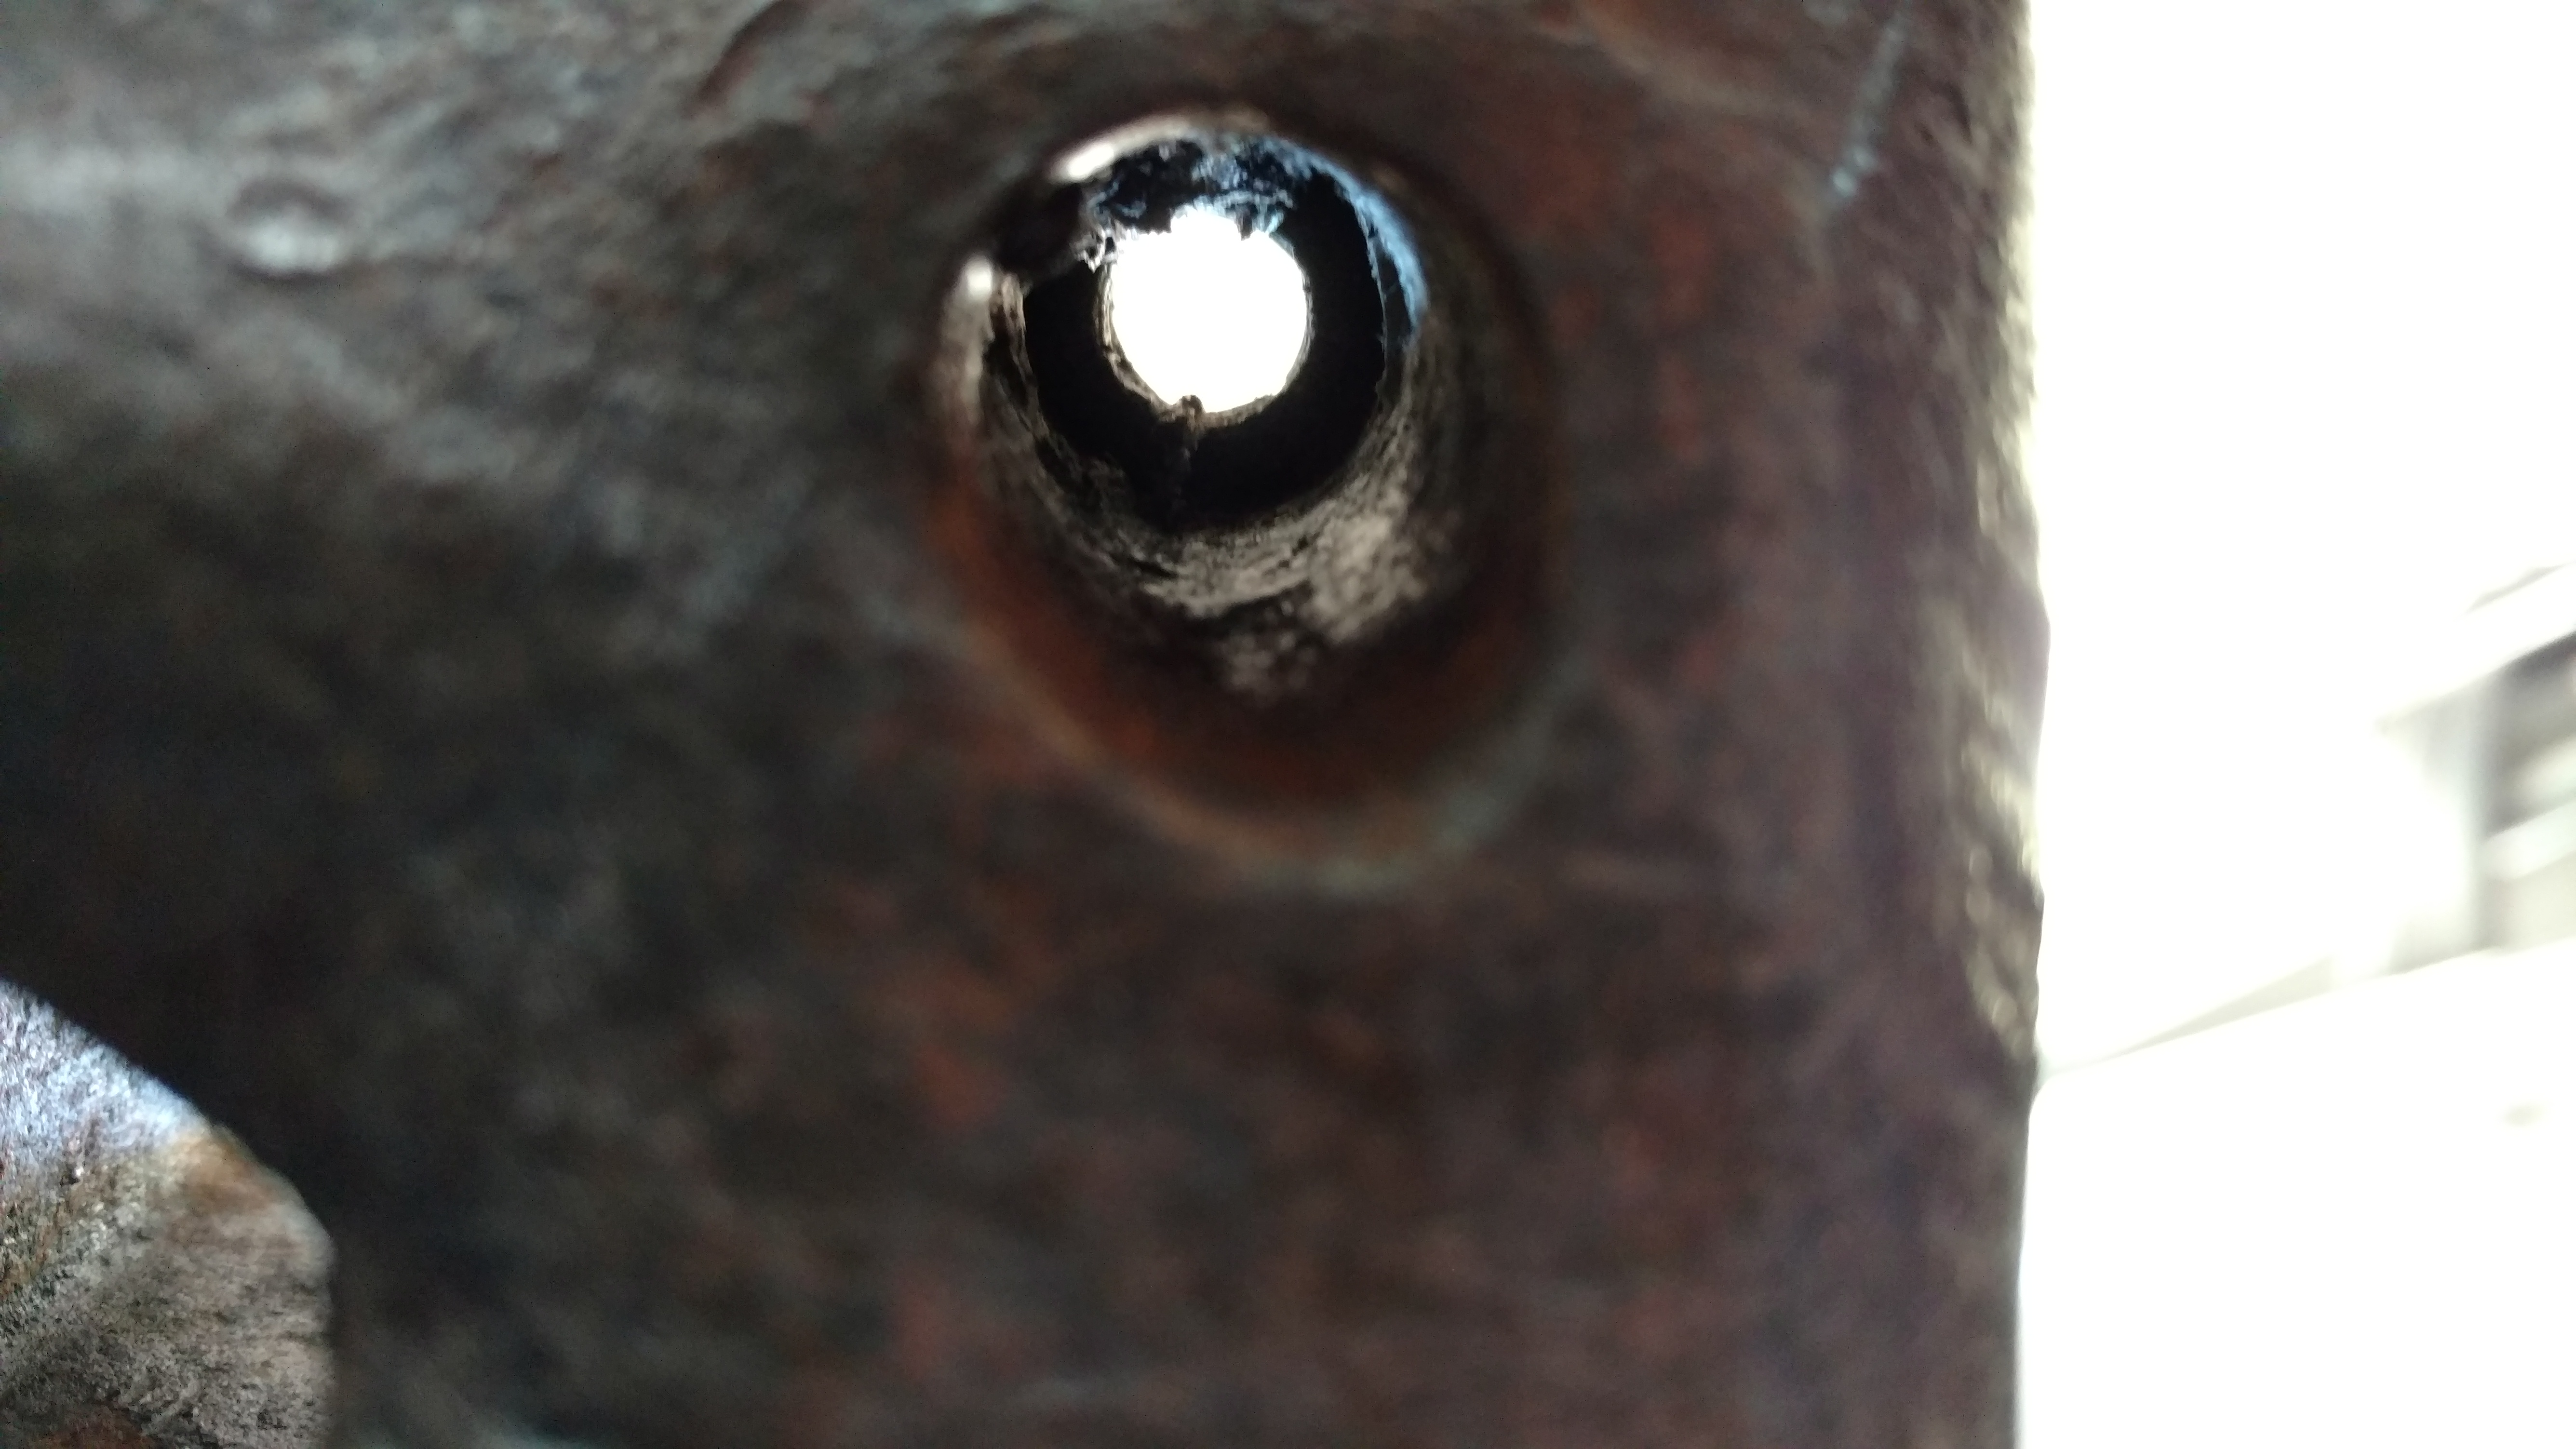
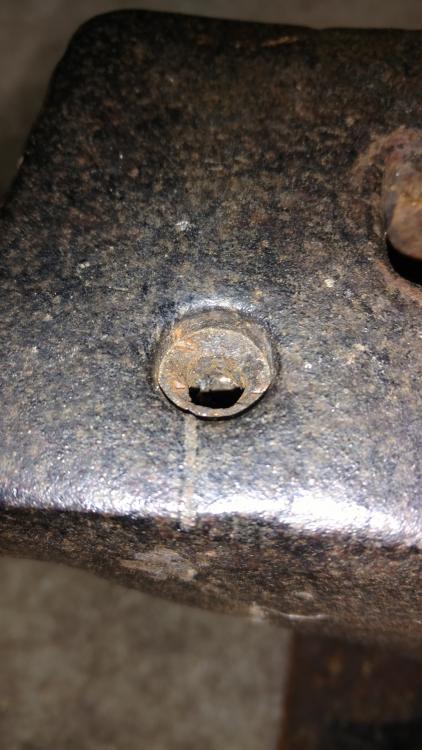
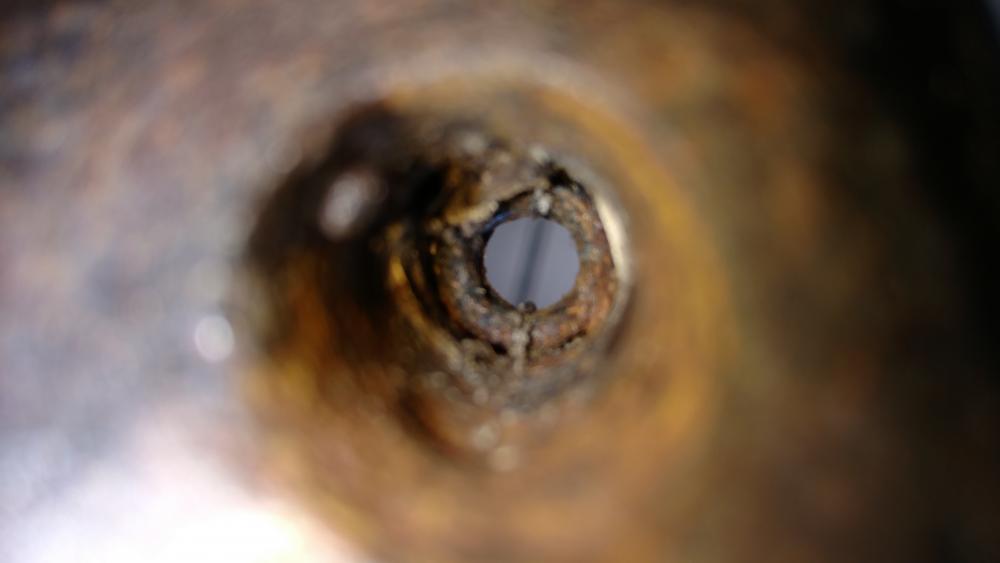
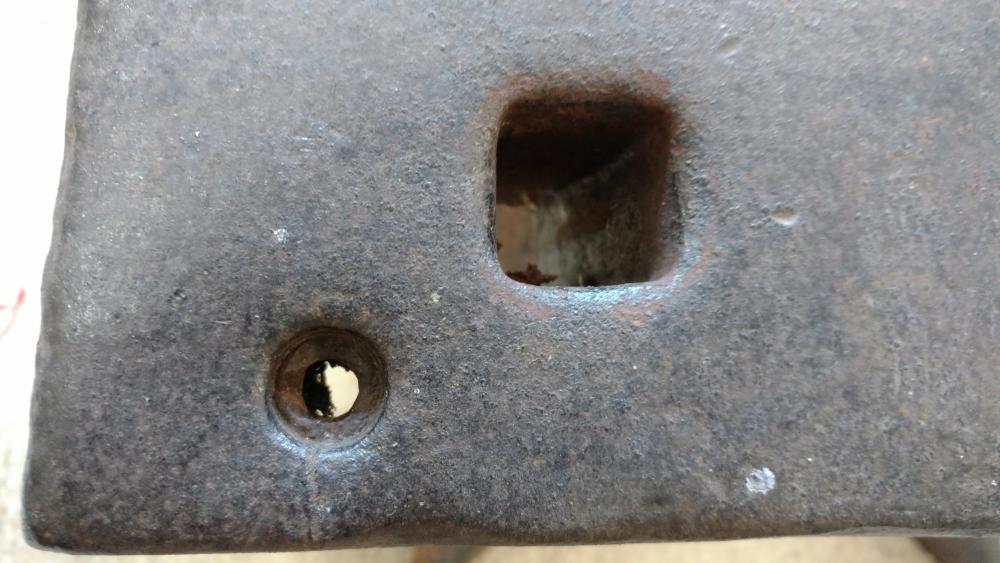
Mystery solved. It was a ~ 3/8" tall insert welded in from the top. I drilled it out and when I got through the weld the rest of the insert fell out, leaving a clean, original hole. I suspect it was put in there as part of the crack repair since the crack runs the entire thickness of the heel into the hole. Let's see if my heel stays together.
-
Mine would be yelling "When are you going to get that flippin' forge finished and use me already, you noob!"
-
Let's forget the last question ... It's moot now. With no negative impact of changing the interior volume, I'll be adding the second layer of wool. So now I will have (in order from the outside):. stock steel shell, stock 1" blanket pre-rigidized (maybe I'll add more as it doesn't seem super hard), additional 1" Kaowool blanket rigidized with Simwool rigidizer, 1/4-1/2" Kast-O-Lite refractory, wash of Plistix, alumina kiln shelf. Sound ok? Any experience with the Simwool rigidizer, should it be ok for this application? Thanks in advance.
-
Thanks, Thomas. So sounds like the burner "setup" will not have to change. Any input on my second question about whether it's advisable to put the 2nd layer of blanket on top of existing refractory and then adding another layer of refractory on top (so a sandwich of wool/refractory/plistix/wool/refractory/plistix), or to just rip it all out and do wool/wool/refractory/plistix? Thanks again.
-
Mikey, no need to talk down to me. I'm not sure that you're curmudgeon status yet. Haha! And it is extra by definition since it is added to the "stock" forge. I stand by my definition, no need to continue this discussion.
-
OK, input received. I also agree it obviously can't hurt, was just trying to save cost/time if not needed. I'll pick some up just in case I decide to add the extra layer. Any input on whether the setup will be changed too much by adding the extra layer. In other words, I assume (maybe a bad assumption) that the burner setup is optimized for the height of the floor (with hard firebrick that I'm replacing with kiln shelf) and volume of inner cavity. Will I need to adjust my burner by changing those two things?
-
Wayne, no worries, I trusted it was coming. Just looking for answers to my questions now if anyone can help. I've got a query in to the manufacturer as well about the change in interior volume.
-
Mikey, the 1" wool that came in the forge is already rigidized. I checked with the manufacturer and confirmed when I received the forge. Regardless, the new 1" layer I would add would not be rigidized as it will be coated immediately in Kast-O-Lite. Wayne Coe advised that no rigidizer is needed in that case. And I have read on here where some people advise to rigidize first anyway, but I'm going on Wayne's advice. Wayne, sorry, but please re-read my post. I already purchased the Kast-O-Lite and Plistix from you (I'm waiting on delivery) so the blanket, whether the 1" it already has or the 2" total after I add another 1", will be coated in both of these. Regards.
-
Wow, nice work and thanks for the heads up on the remaining sale.
-
Was this the Kyle estate sale where they had 4 or 5 anvils? I only learned about it Sat afternoon by the time it was nearly done ... kicking myself. How much did you get it for out of curiosity?
-
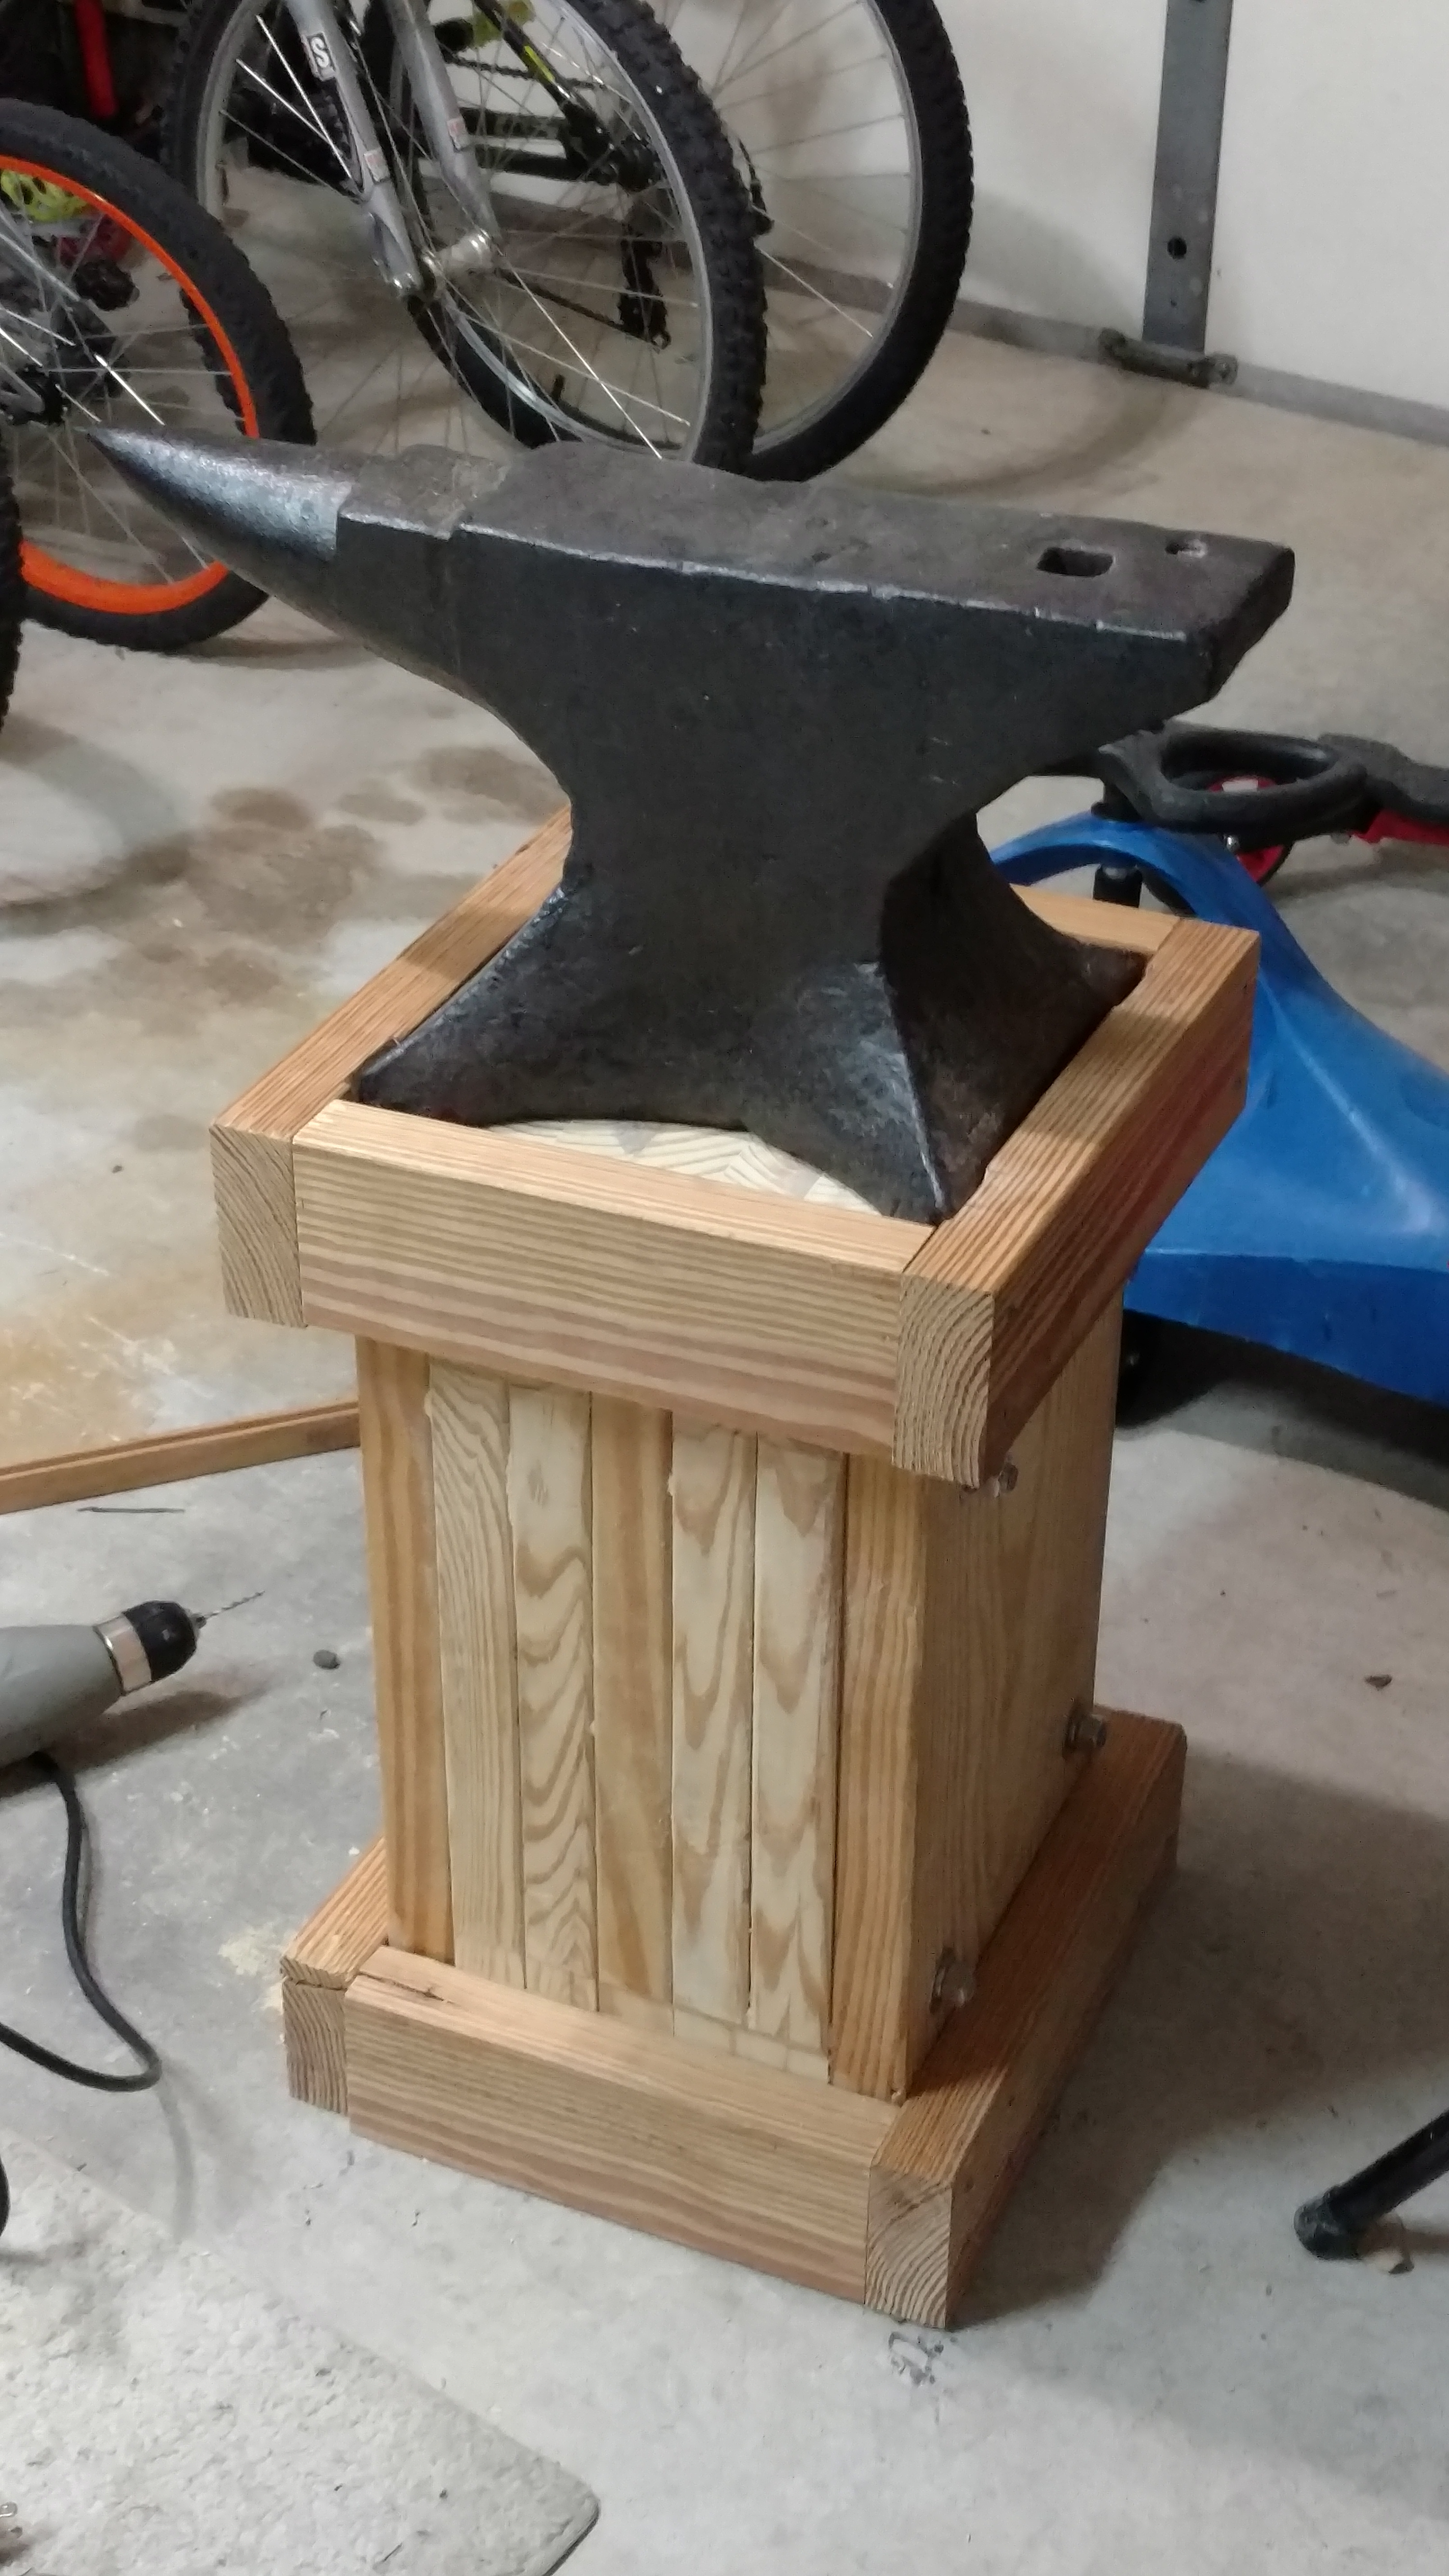
Continued thanks, guys. I'm glad I came here first. Finished my anvil stand and now I just have to prep my forge for use.

-
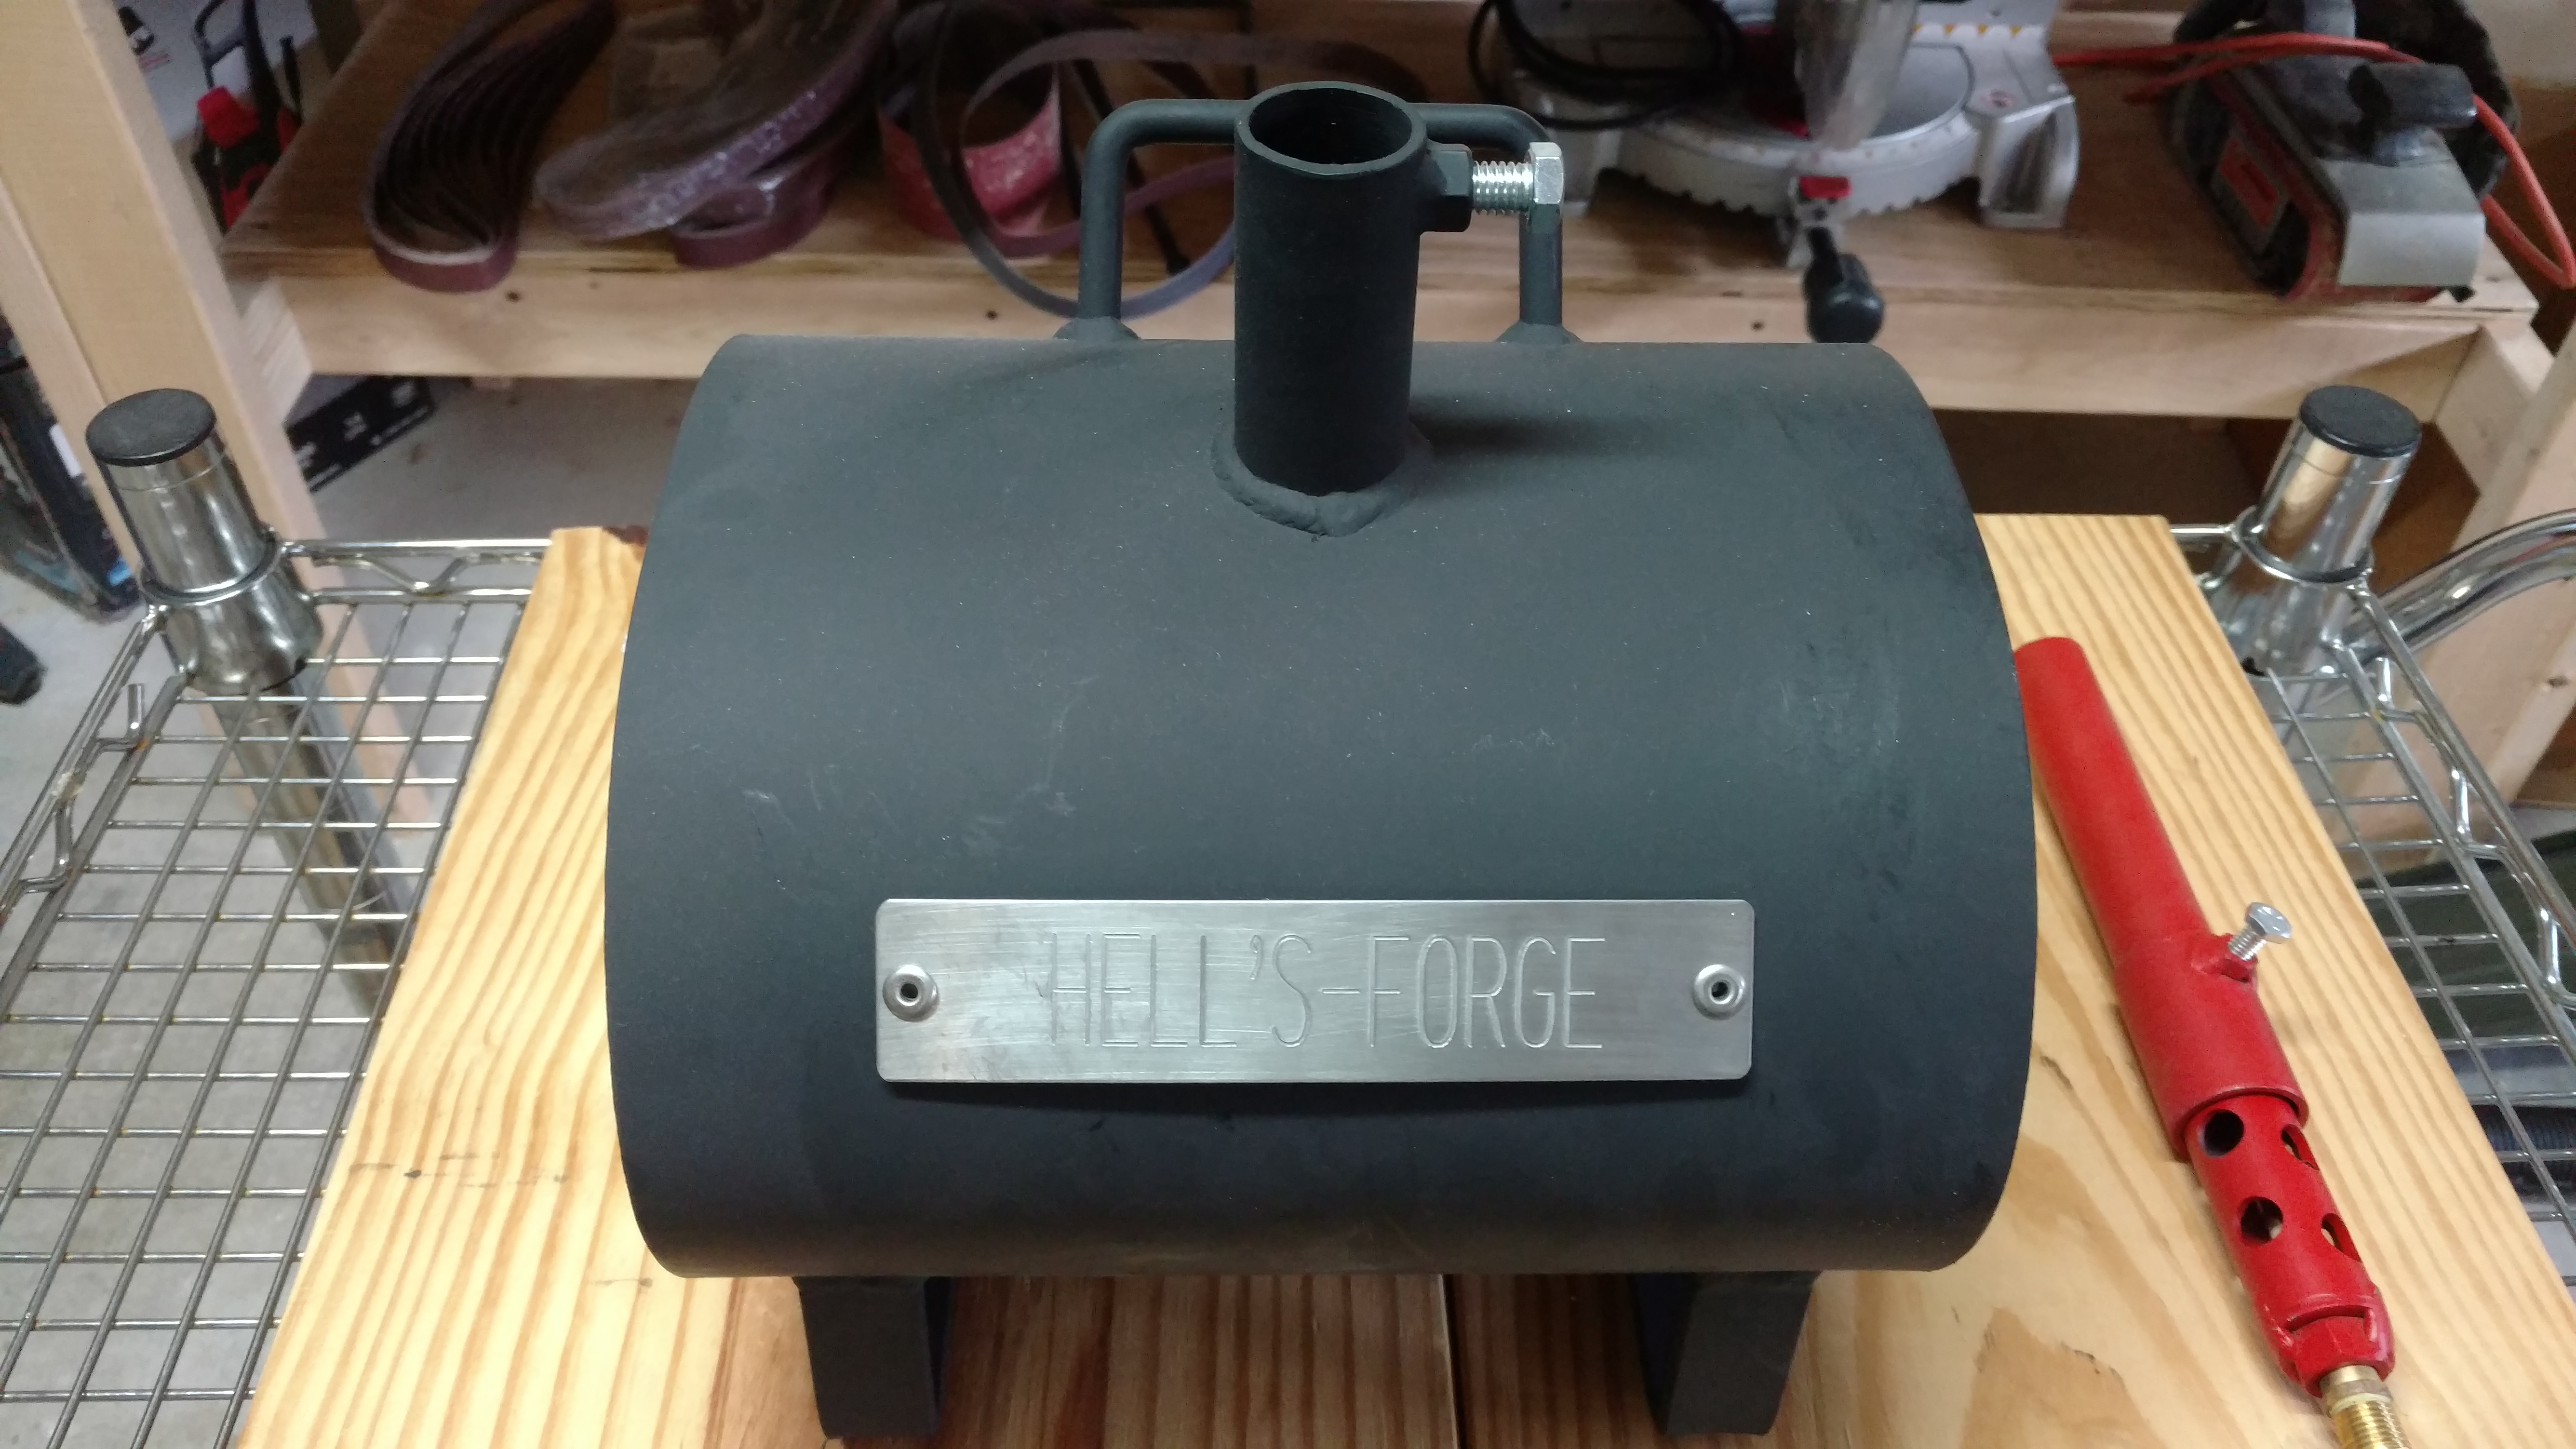
Hi all, I just received my new Hell's Forge 1 burner forge (no time or interest to make my own yet, but I'm sure I will someday). Based on discussions here, I bought my Kast-O-Lite and Plistix from Wayne Coe to improve thermal properties. I was also planning on adding another layer of Kaowool before coating in Kast-O-Lite. And I'm replacing the brick with a kiln shelf. However, now that I have my forge, I'm debating adding the extra blanket as I'm worried about changing the inner dimension too much. Questions: 1) Can I add another layer of blanket on top of the Kast-O-Lite and Plistix coating if I decided later to add more? Or would I need to remove all that first and start over. 2) If I do add the extra liner first, will I have concerns about the burner setup and forge thermal properties? Thanks.


-
For now I just decided to avoid the issues and put the forge on a metal cart with locking wheels. I wheel it outside the garage under a canopy and keep the anvil inside the door but relatively close by.
-
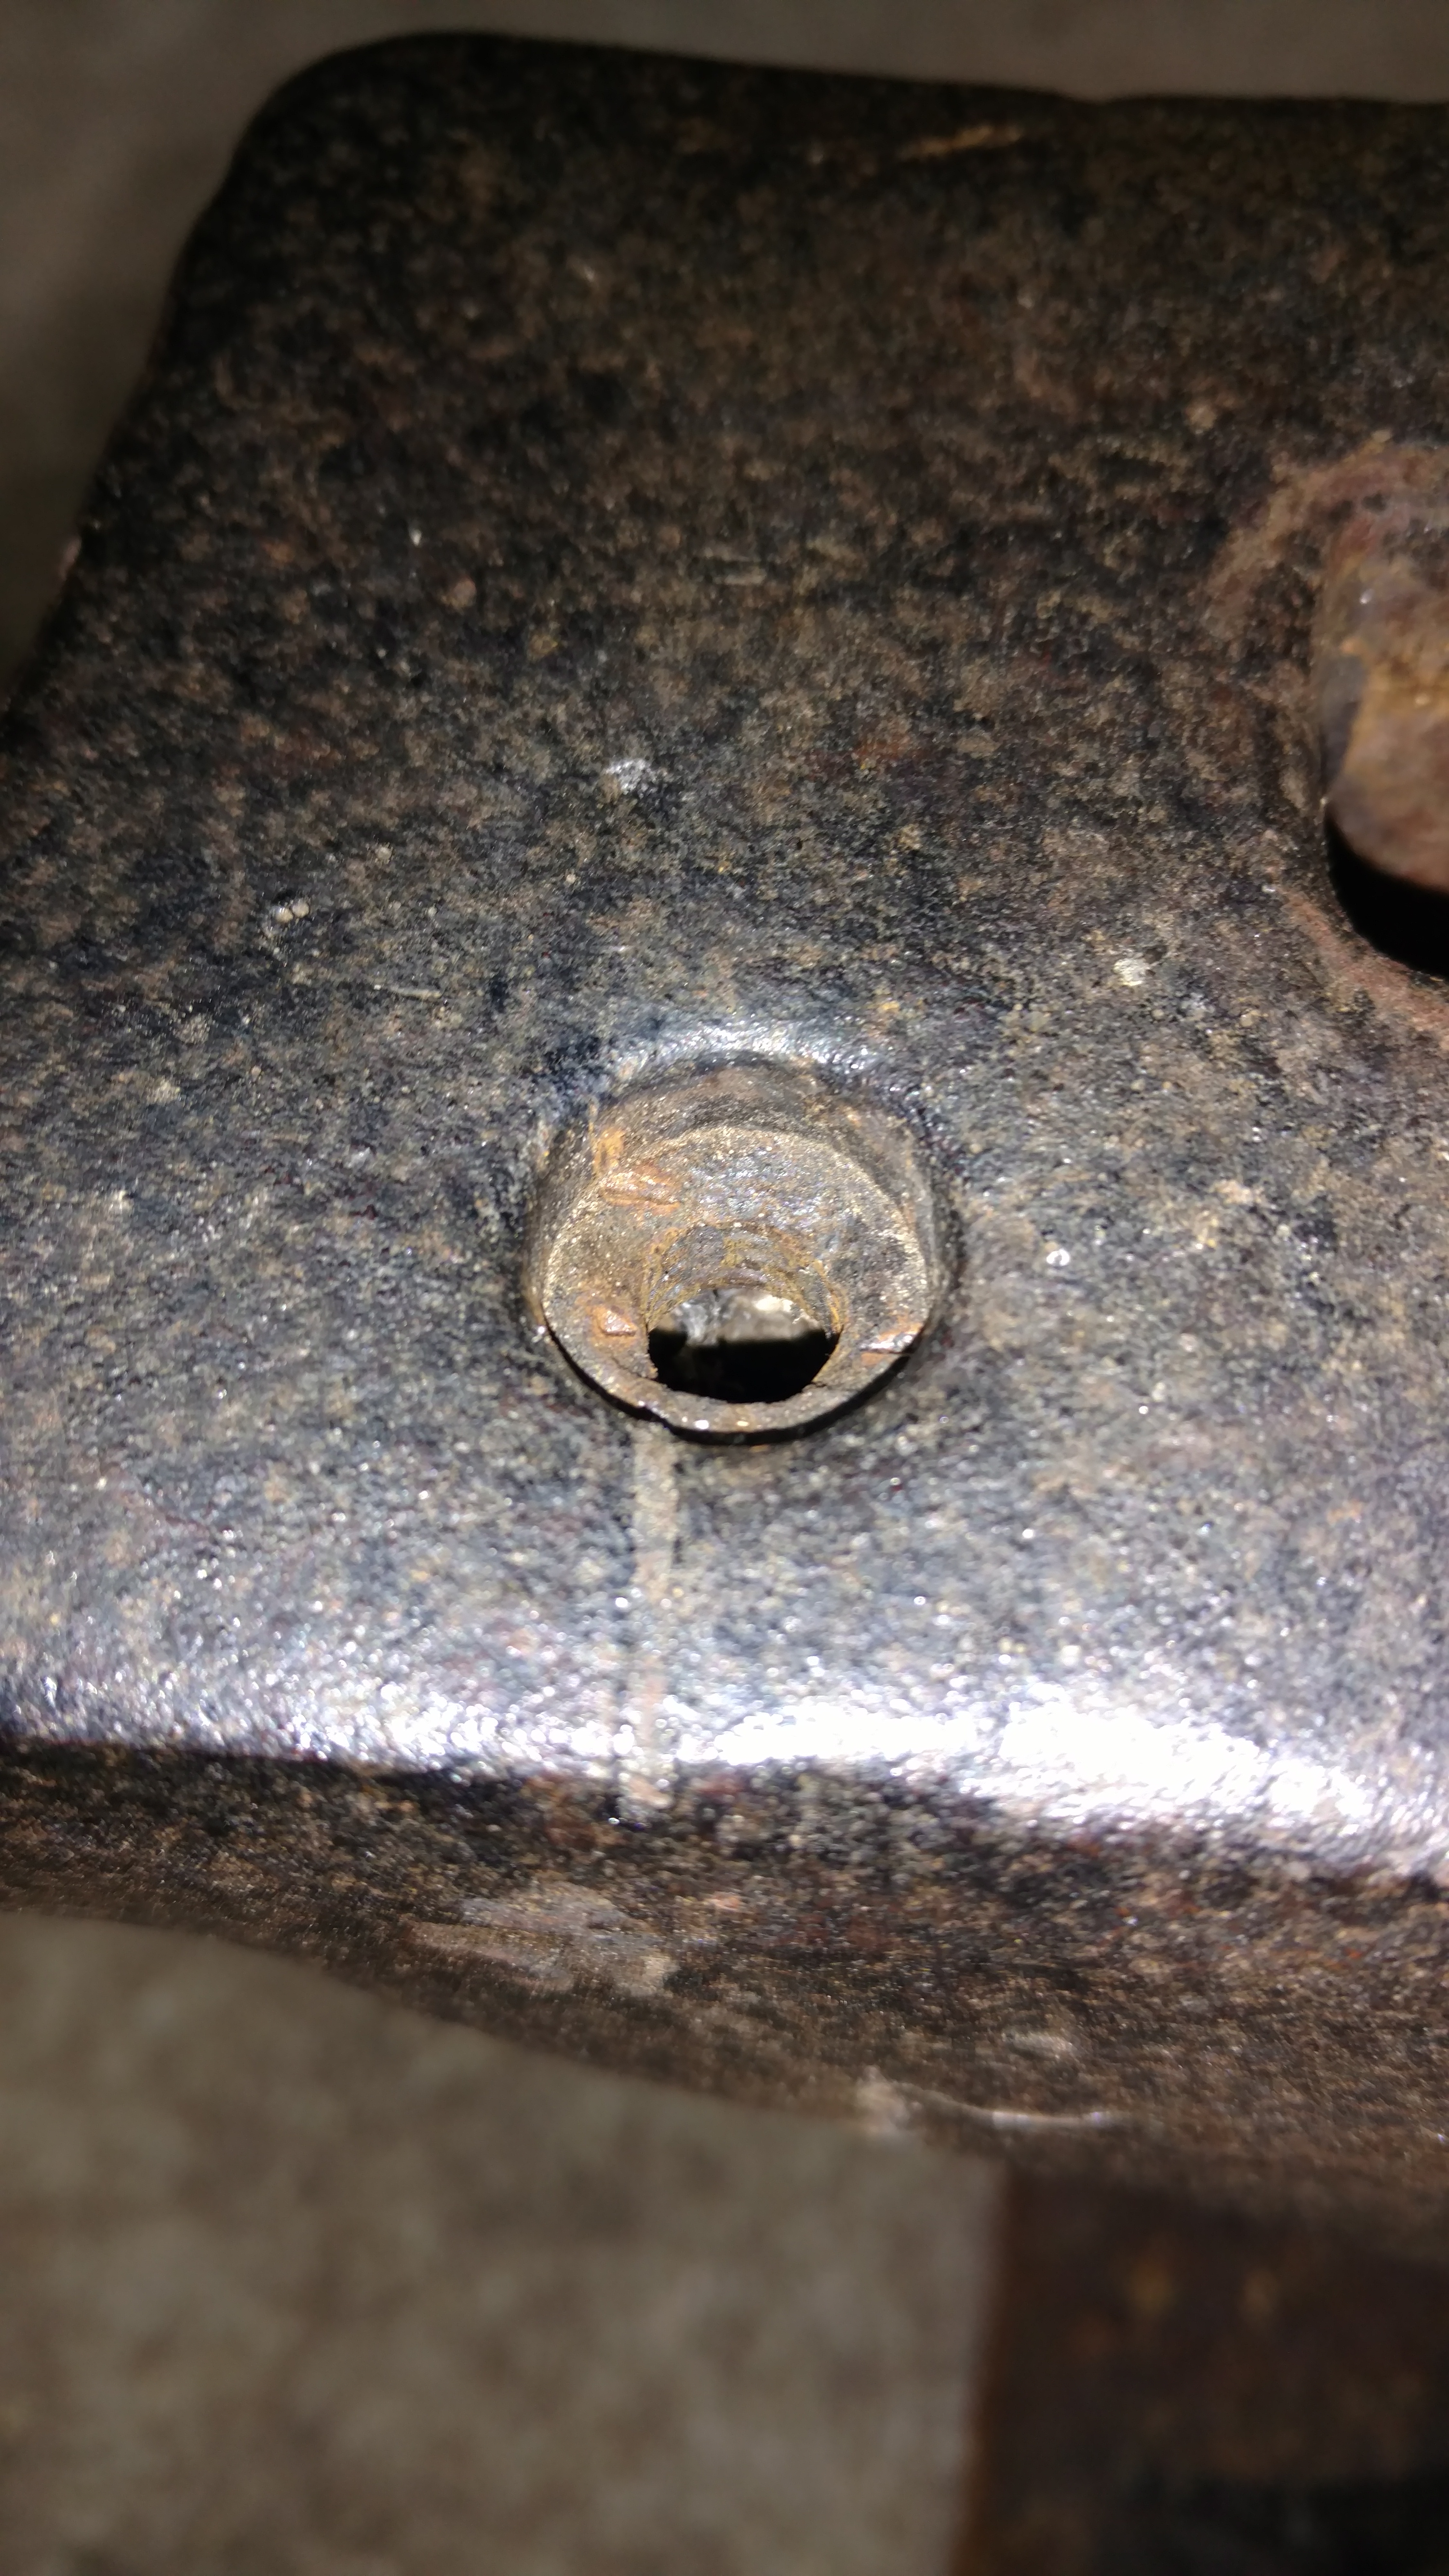
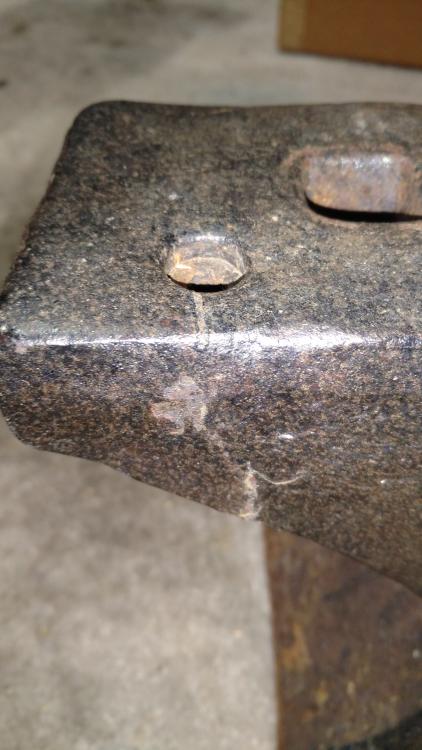
It's definitely part of the anvl, not an insert or something stuck. It won't punch out. You'll just have to trust me, you have to see it in person. Maybe it's welded in? That said, I now see the crack that runs through the entire thickness of the heel and into the pritchel hole and that was repaired. The flash on the camera really highlights it. Unraveling the mystery ...
-
John, no, I've got the anvil, it's definitely a counterbored hole. Tried to get some good pix from the underside. It's so thin that I can easily drill it out if I so desire. But want to learn about the history and purpose before I do that.


-
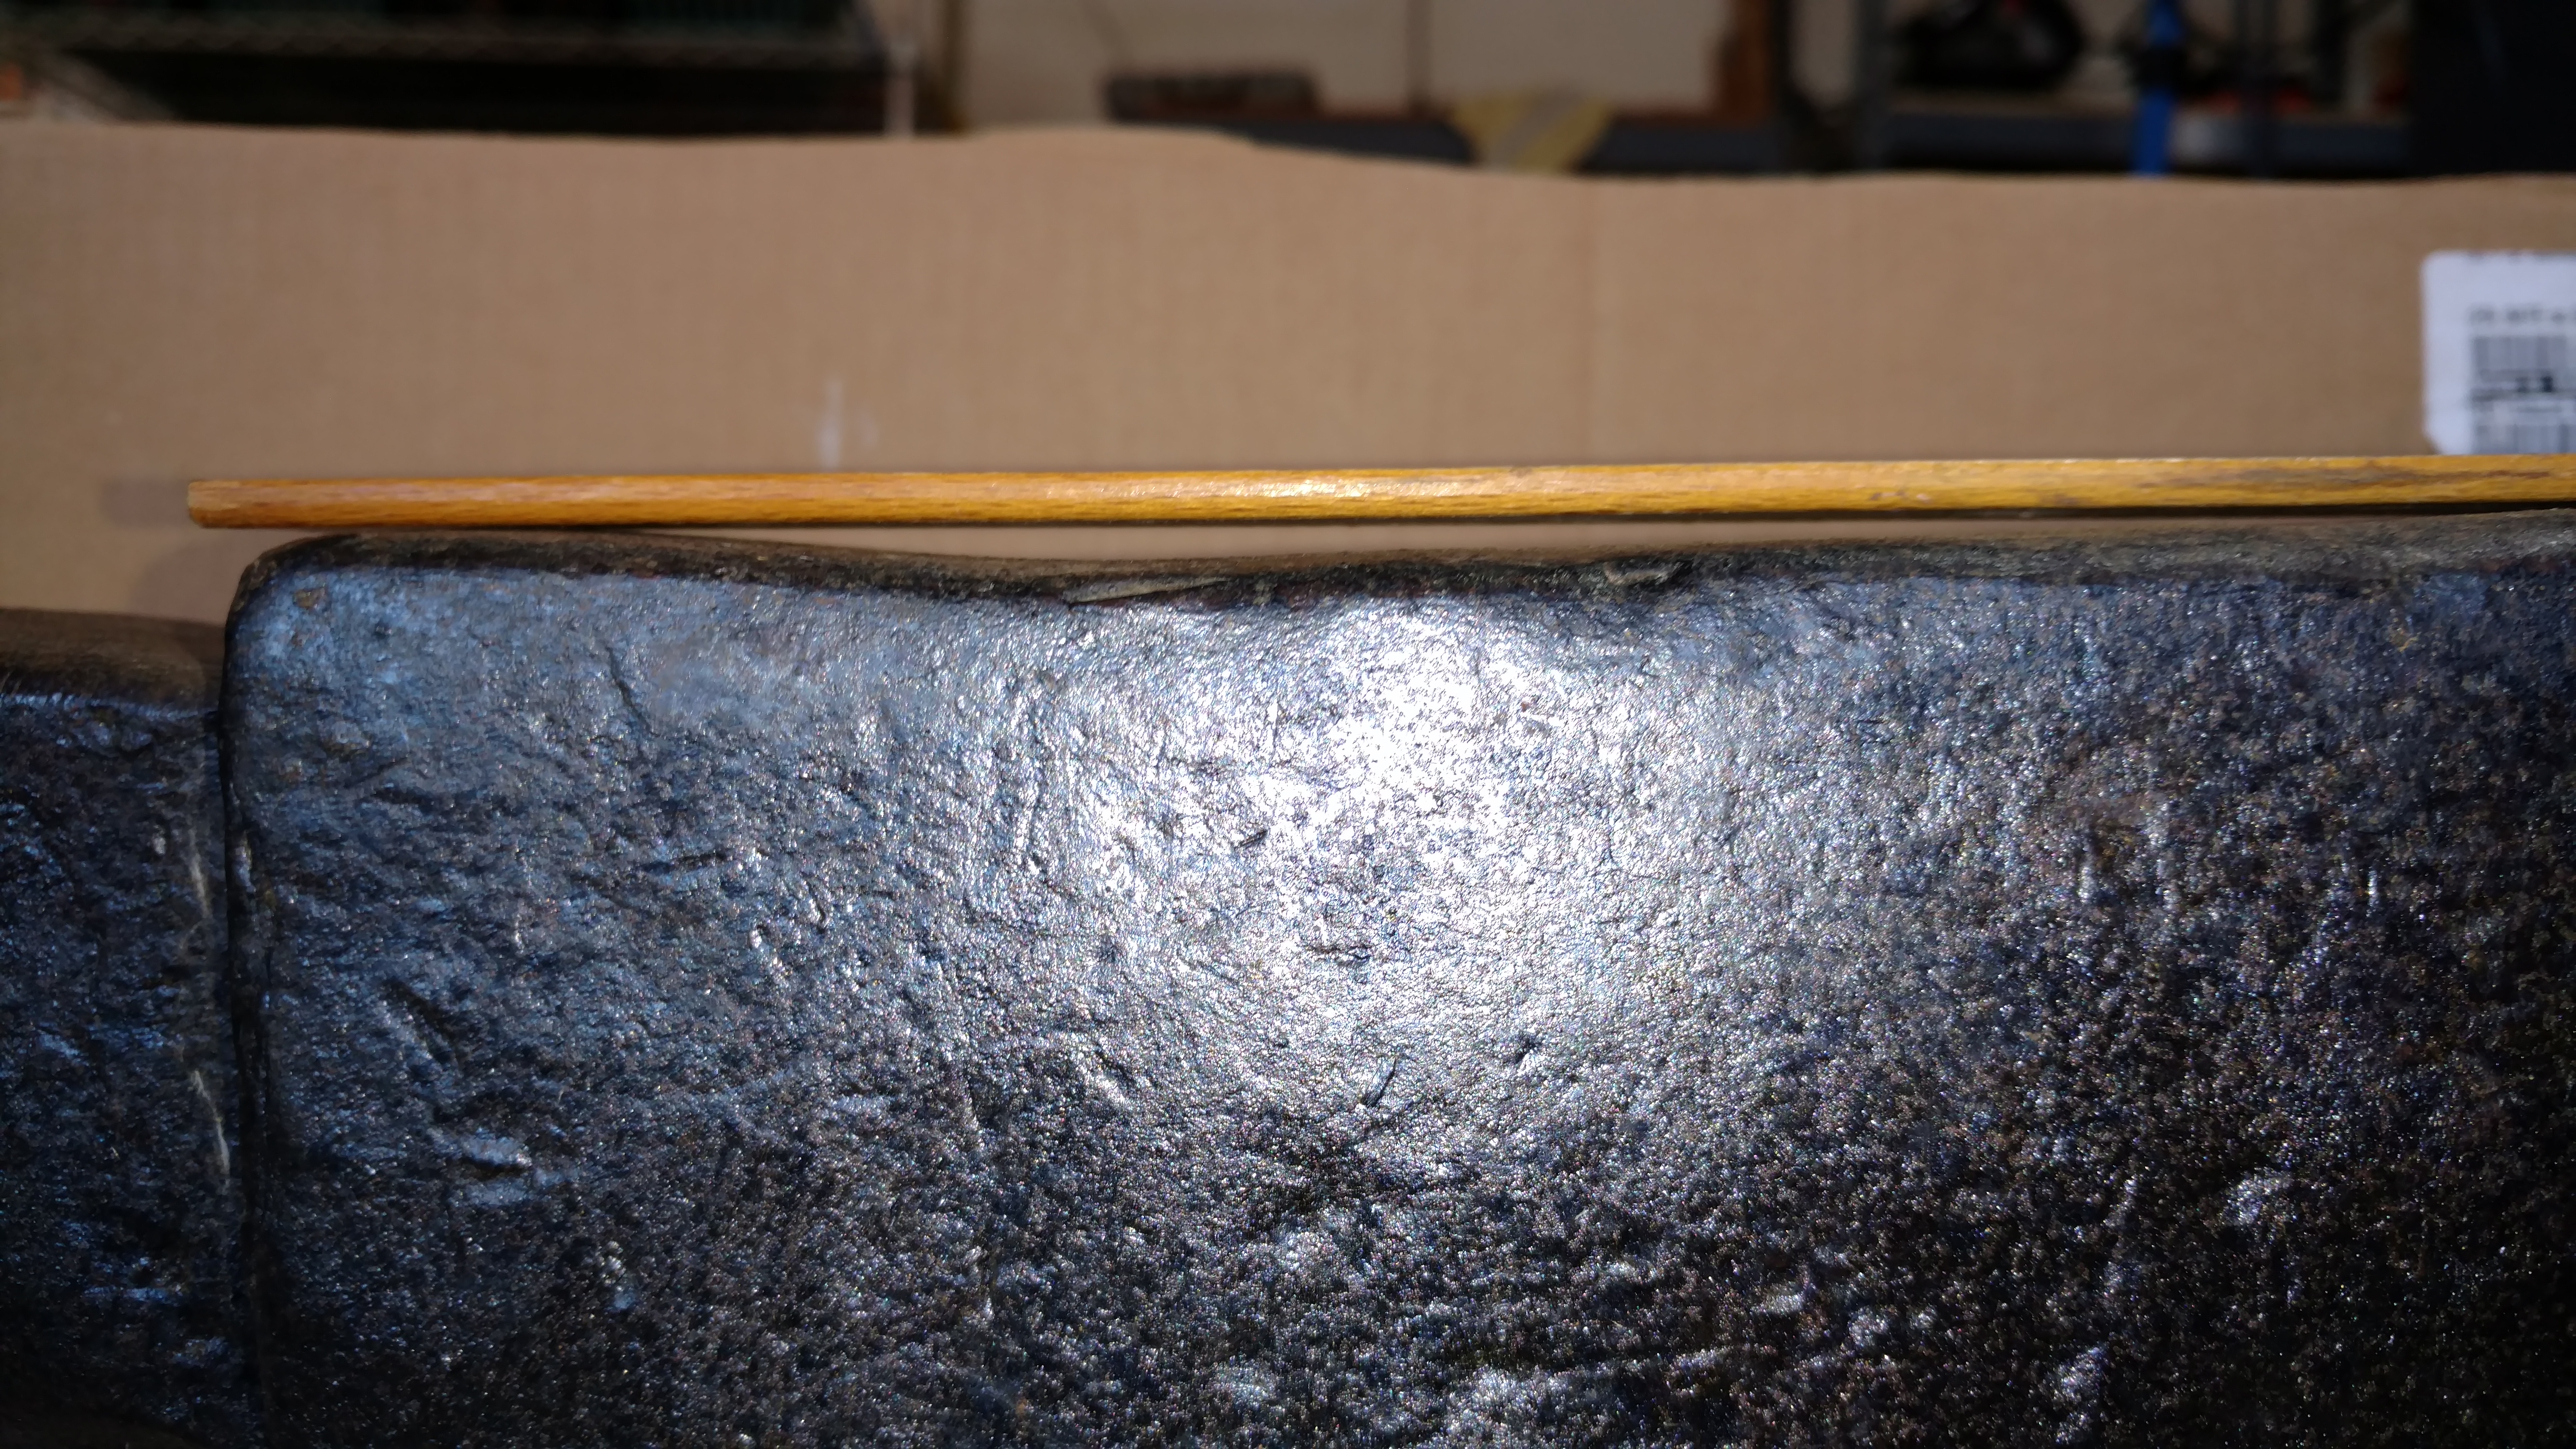
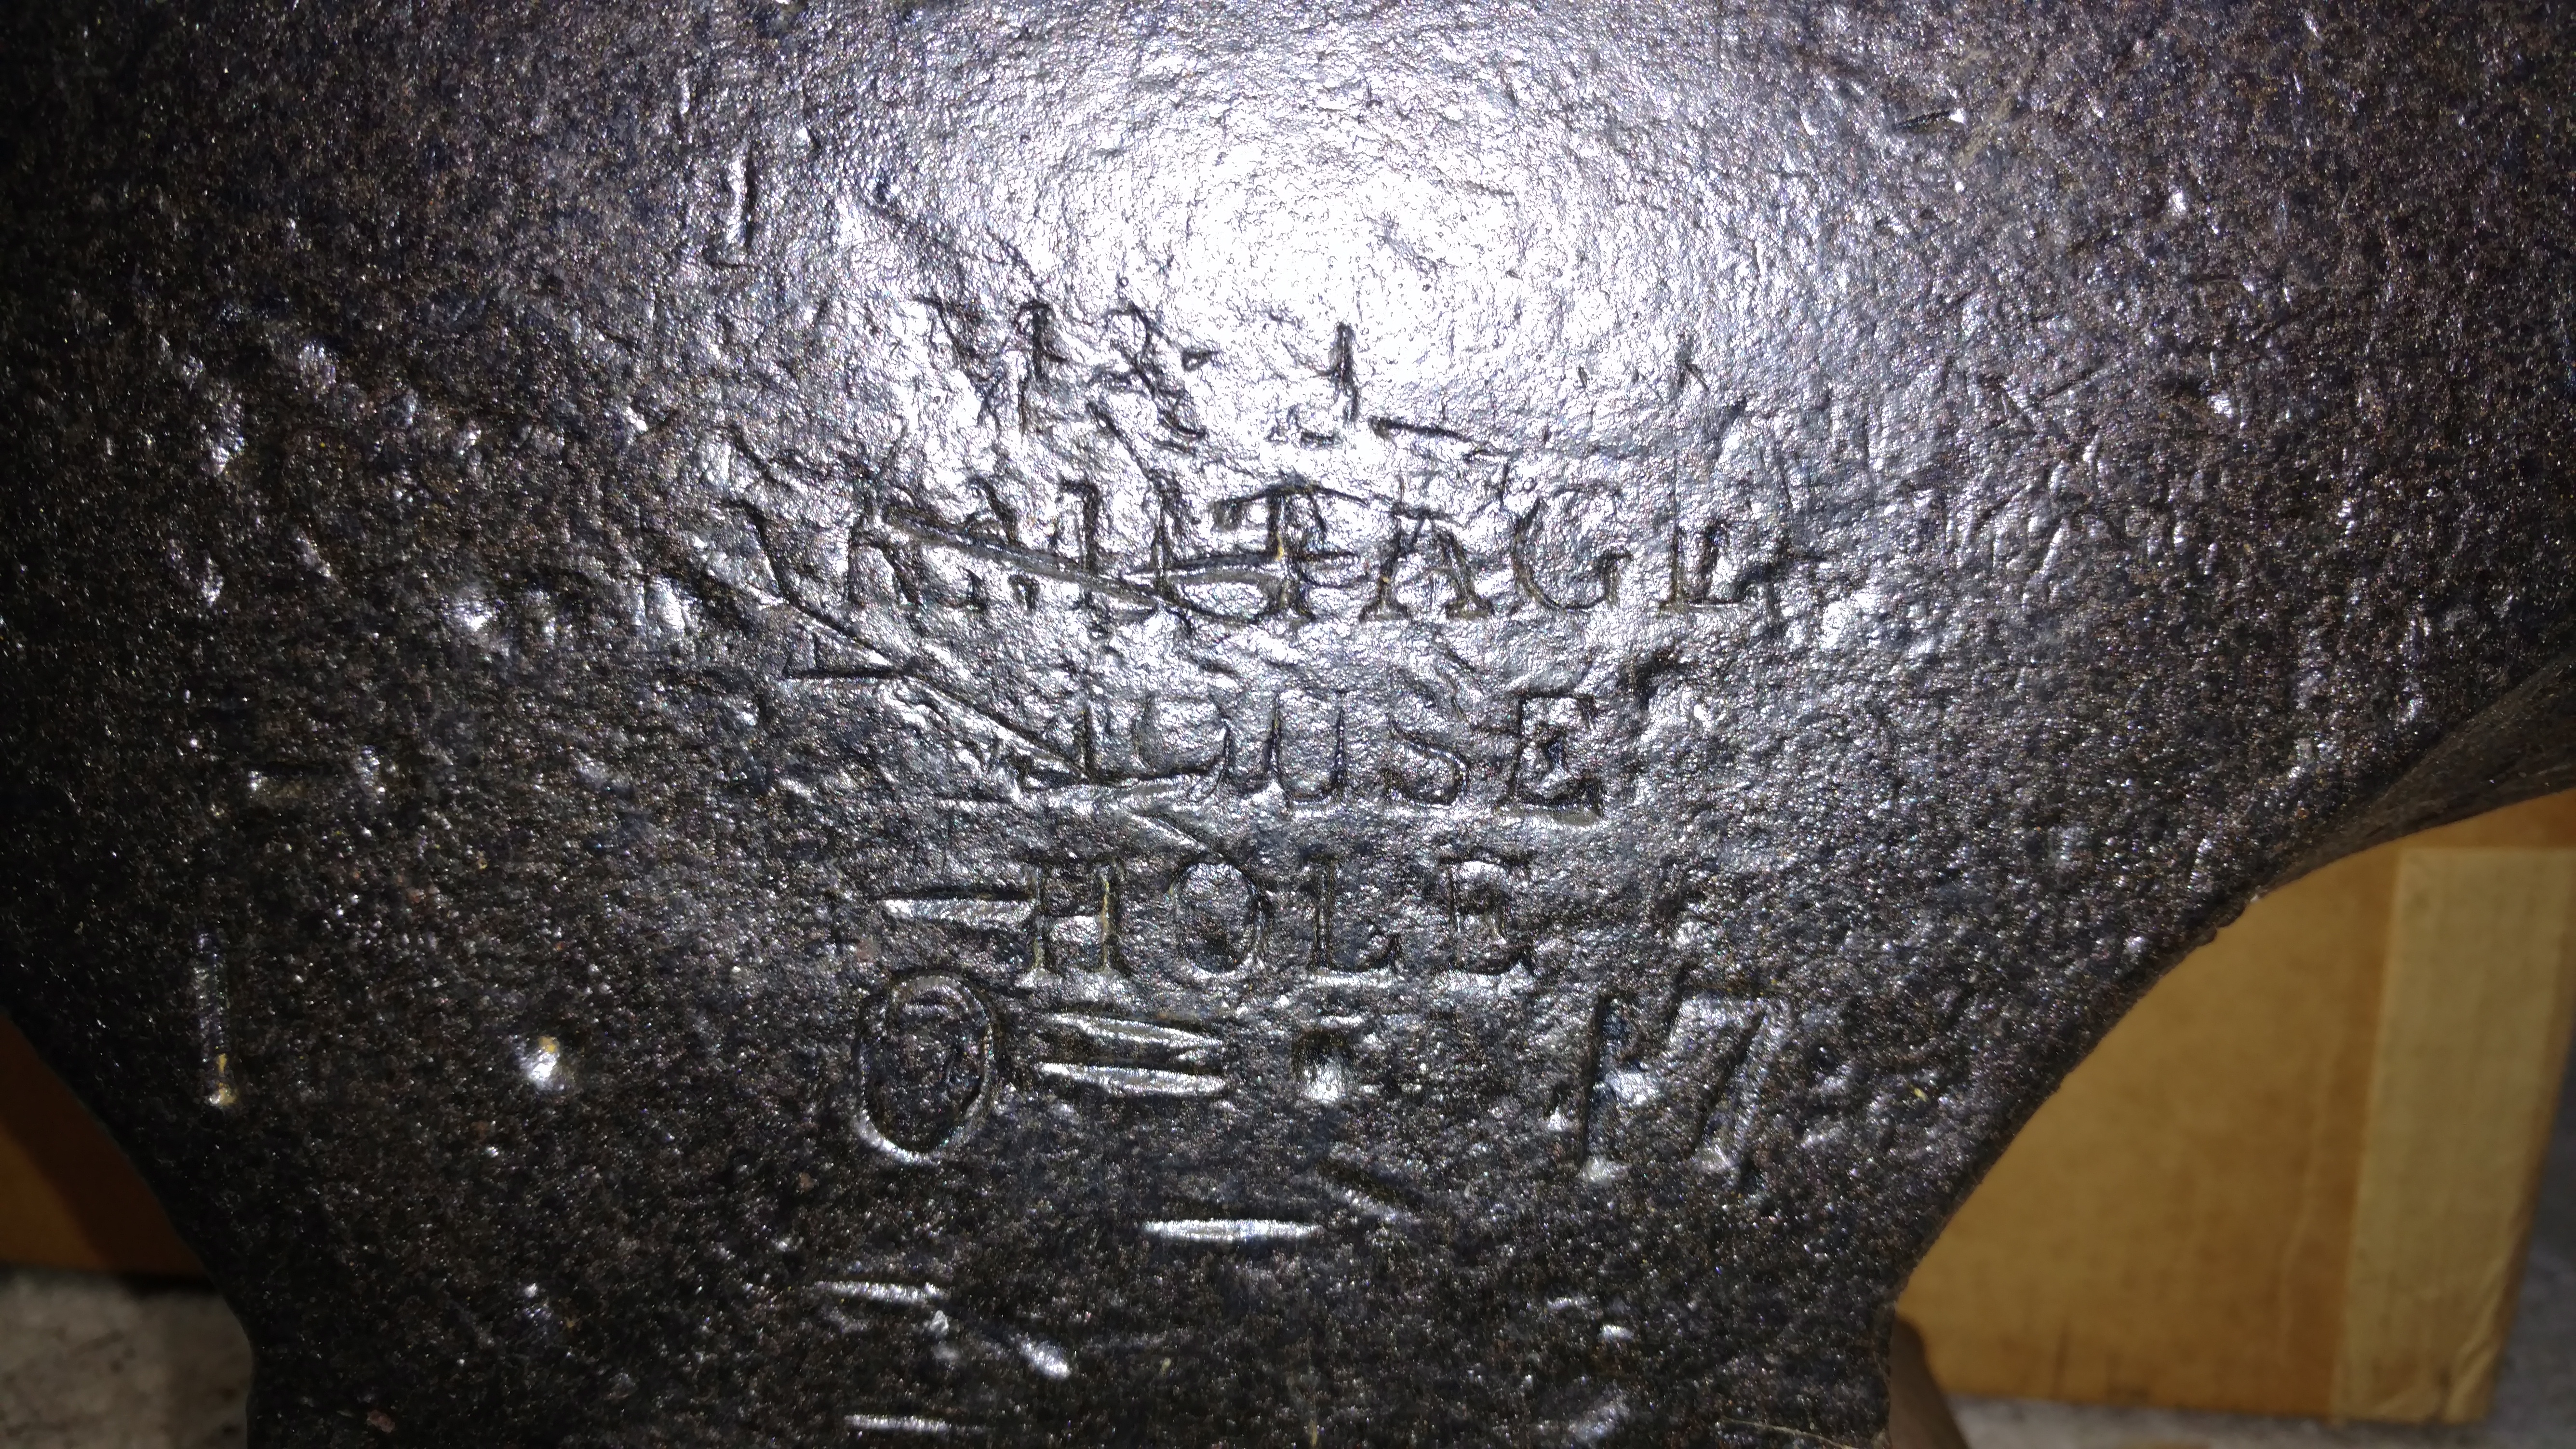
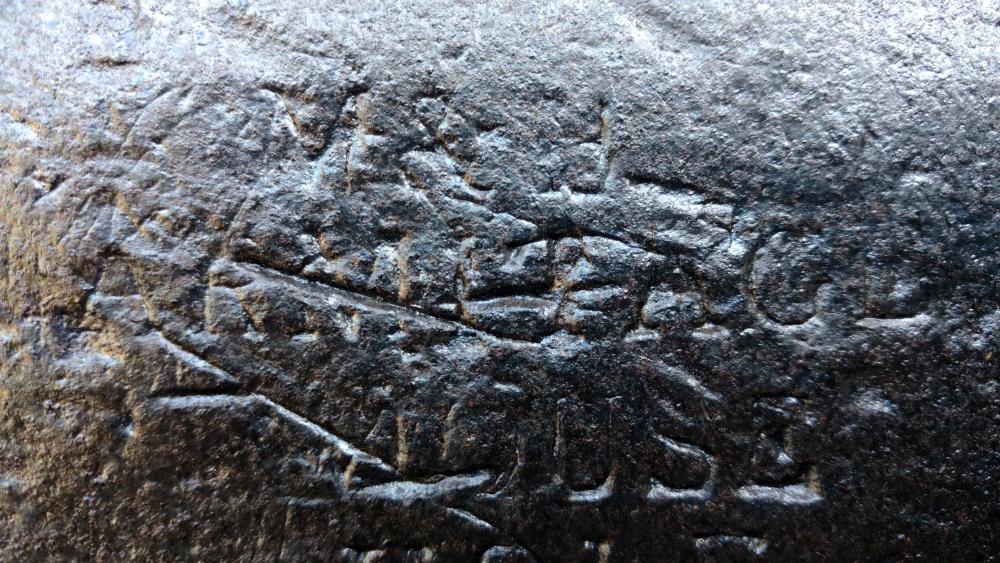
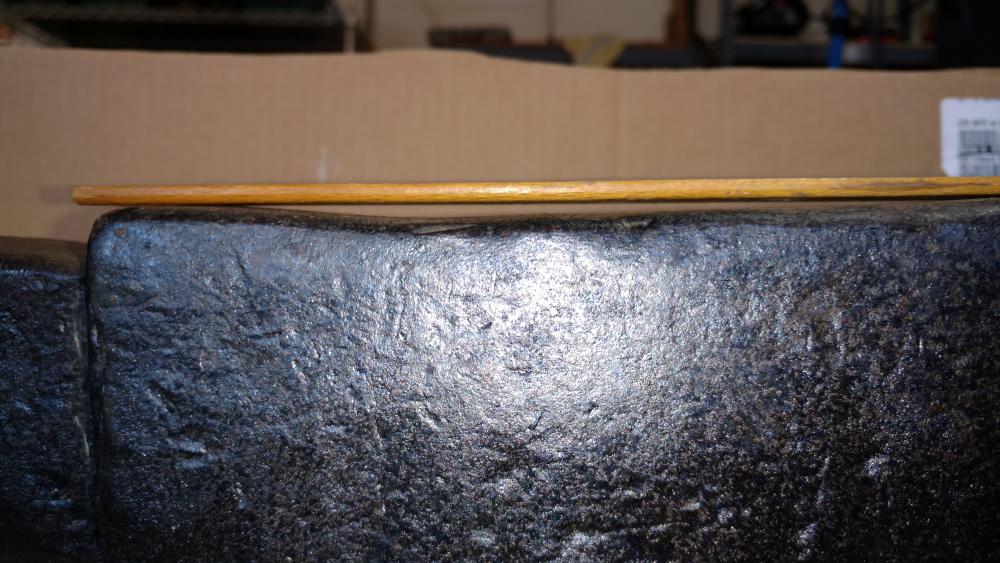
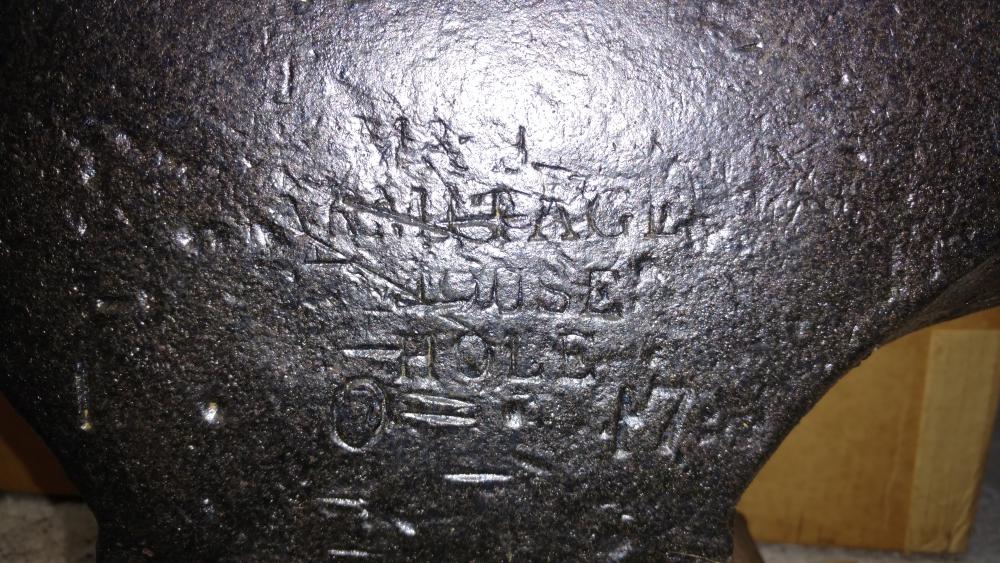
Well, I got it for $460 ($3.57/lb) ... not a steal, but like I said, a decent deal for this area lately. Sway is about 1/8 in. Ring is good and rebound is OK (didn't have a ball, so used a hammer), no delamination. The pritchel hole is interesting. It's counterbored but the inner diameter hole is very thin (i.e., the hole at the bottom is full diameter). Does this mean it was added later to hold a specific object? I see "M&" stamped but I don't really see the "H", but rather something like a lowercase "d" a bit further over.
-
Thanks, Marc, I have been. JHM 120lb is $630, TFS 100lb is $570, NC 112lb is $440. So yes, all in the same size and price range as this Mousehole. The TFS 100lb is my backup as it's available locally for pickup and I've used them before. But as I've been hunting, I've grown fond of the gnarliness and uniqueness of the old, used anvils. I only wish they could tell their stories.
-
Thanks, Daswulf. I hope to test it out this weekend. And yes, I suspect that will happen. If so, I may just end up with several anvils. Ha!