paulgatx
-
Posts
71 -
Joined
-
Last visited
Content Type
Profiles
Forums
Articles
Gallery
Downloads
Events
Everything posted by paulgatx
-
Eventlessbox, the alumina kiln shelf cuts very easily with a masonry blade and it sands very easily as well on your belt sander to shape-to-fit. And to be clear, I still put a thick floor of Kastolite down but then use the shelf to protect the Kastolite so that you don't have to repair it as often.
-
A kiln shelf from your local pottery supply will protect the Kastolite floor, especially if you will be forge welding. I got that bit of advice from someone on here and it really helps protect my forge and provide a very flat floor.
-
Thomas, to be honest, my first anvil does everything I need it to. To be even more honest, I have become addicted to searching for anvils. I can't promise that this will be my last. I do promise to get better at getting good deals ($3.50/lb for my first, $2.50/lb for my second, $1.50/lb for my third?) And I have determined that 200lbs is my upper limit for how reconfiguable my garage shop needs to be.
-
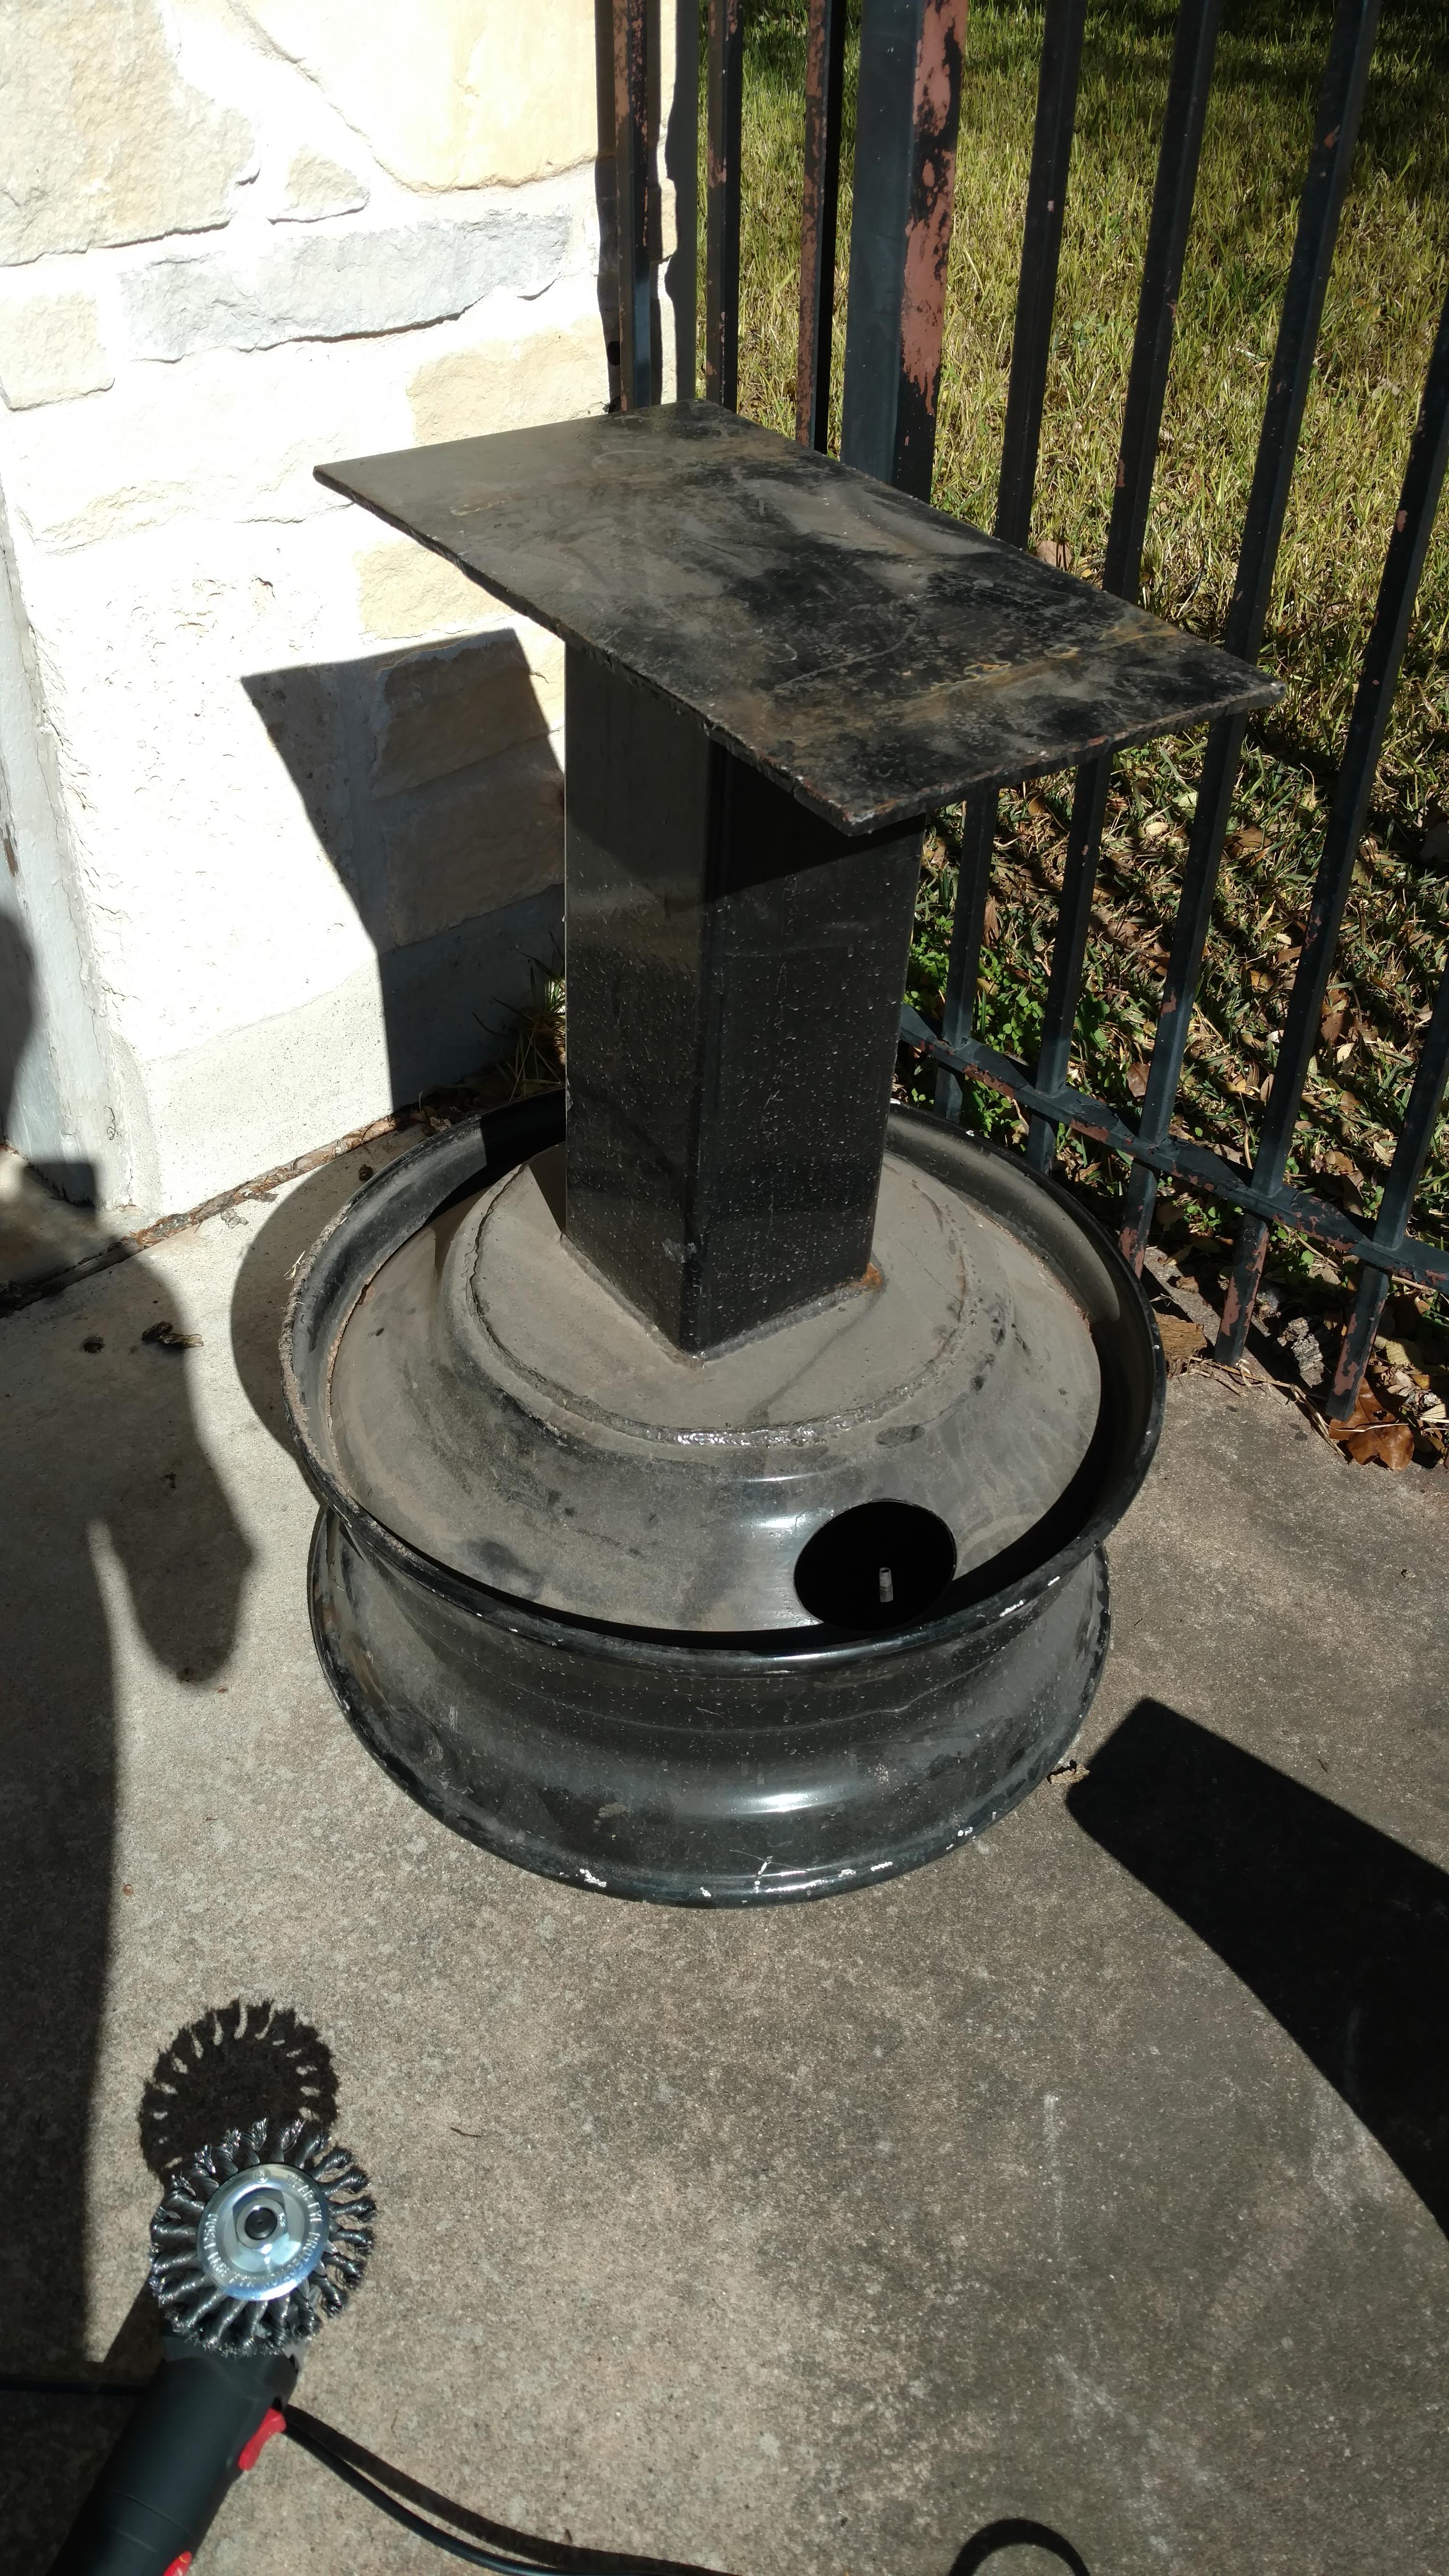
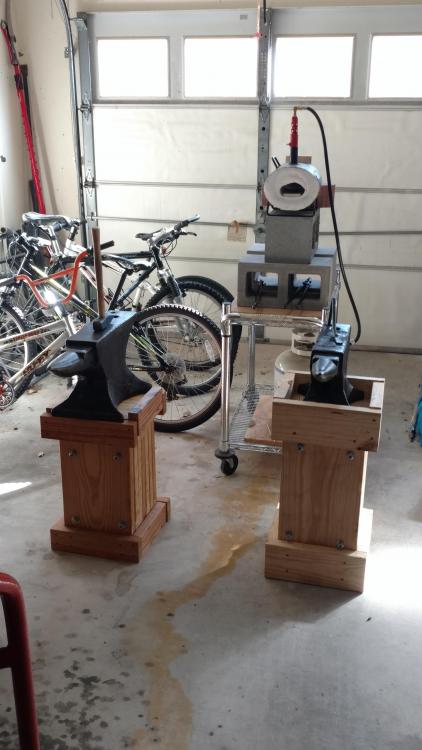
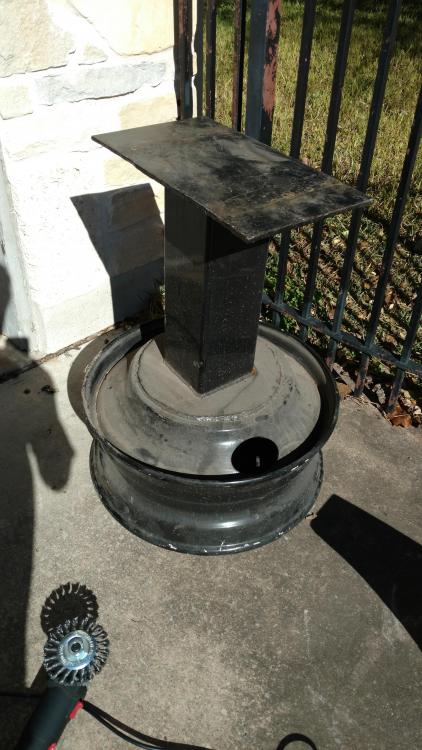
Arkie, my shop (garage) has a concrete floor. But I've already got it repurposed as a tool stand. Big bro and little bro look great next to each other. They are almost identical twins. Now I just need to get my 12 yo son smithing with me.

-
Great point, thanks!
-
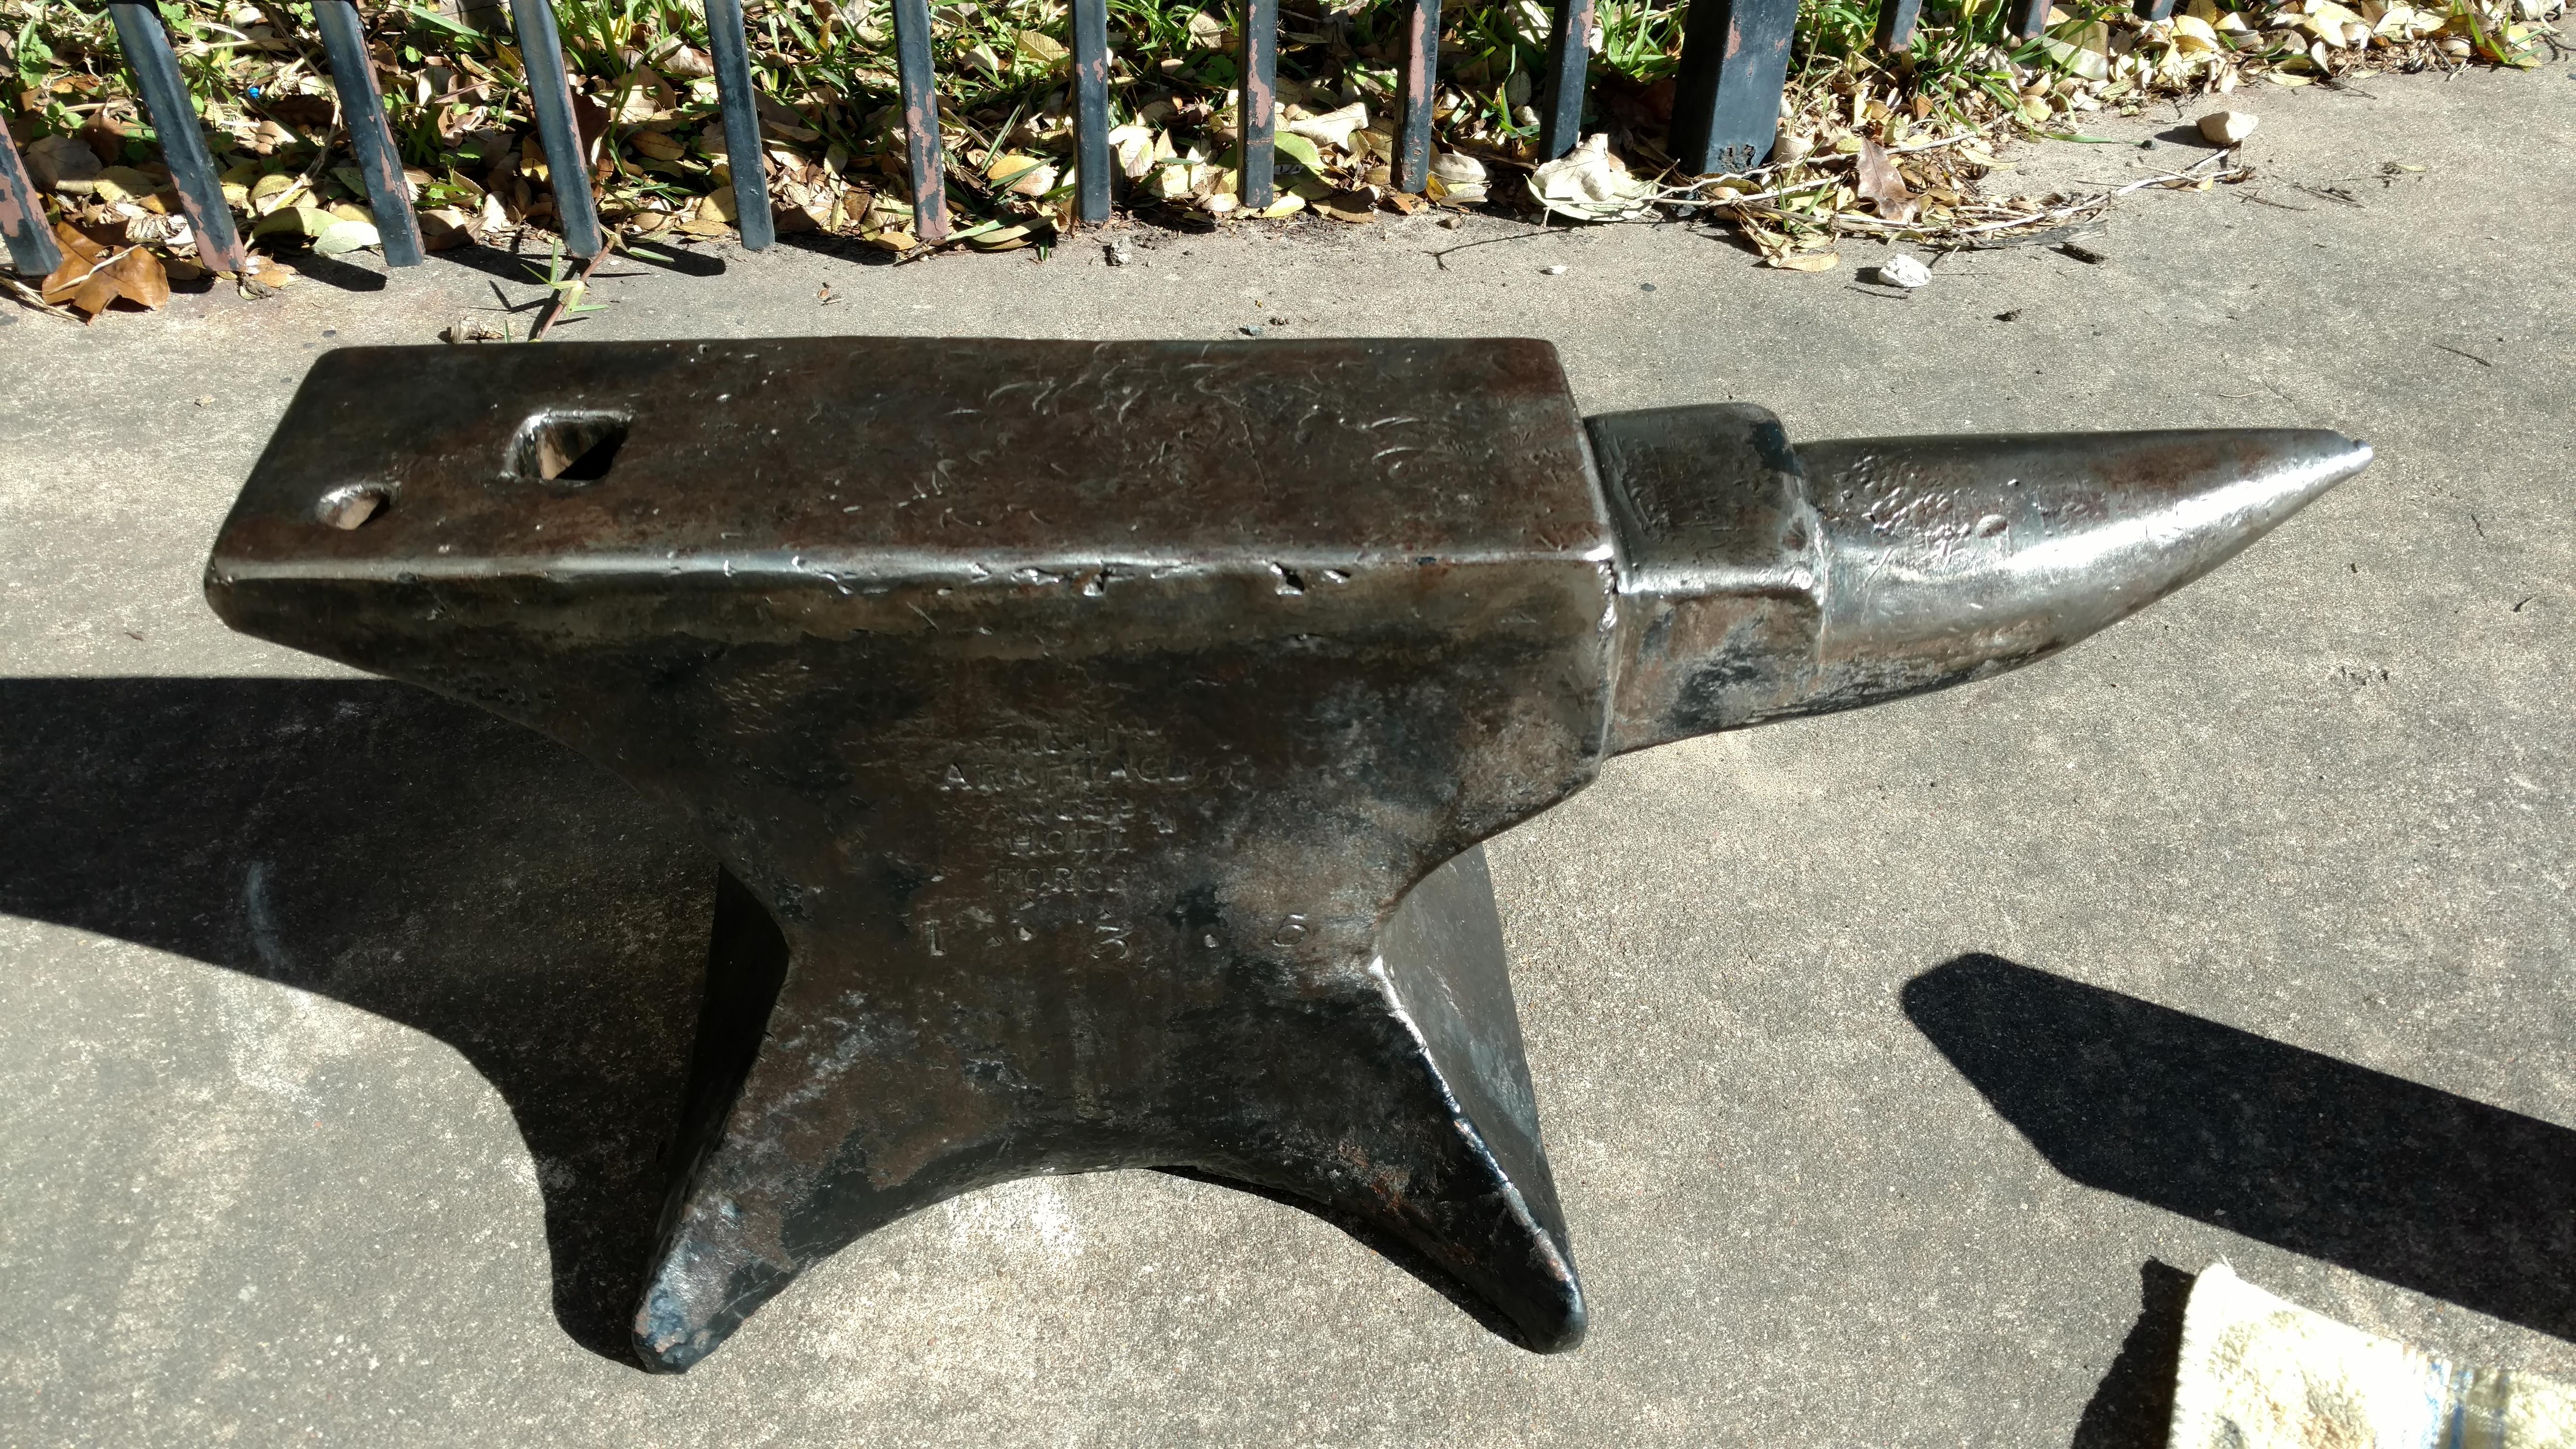
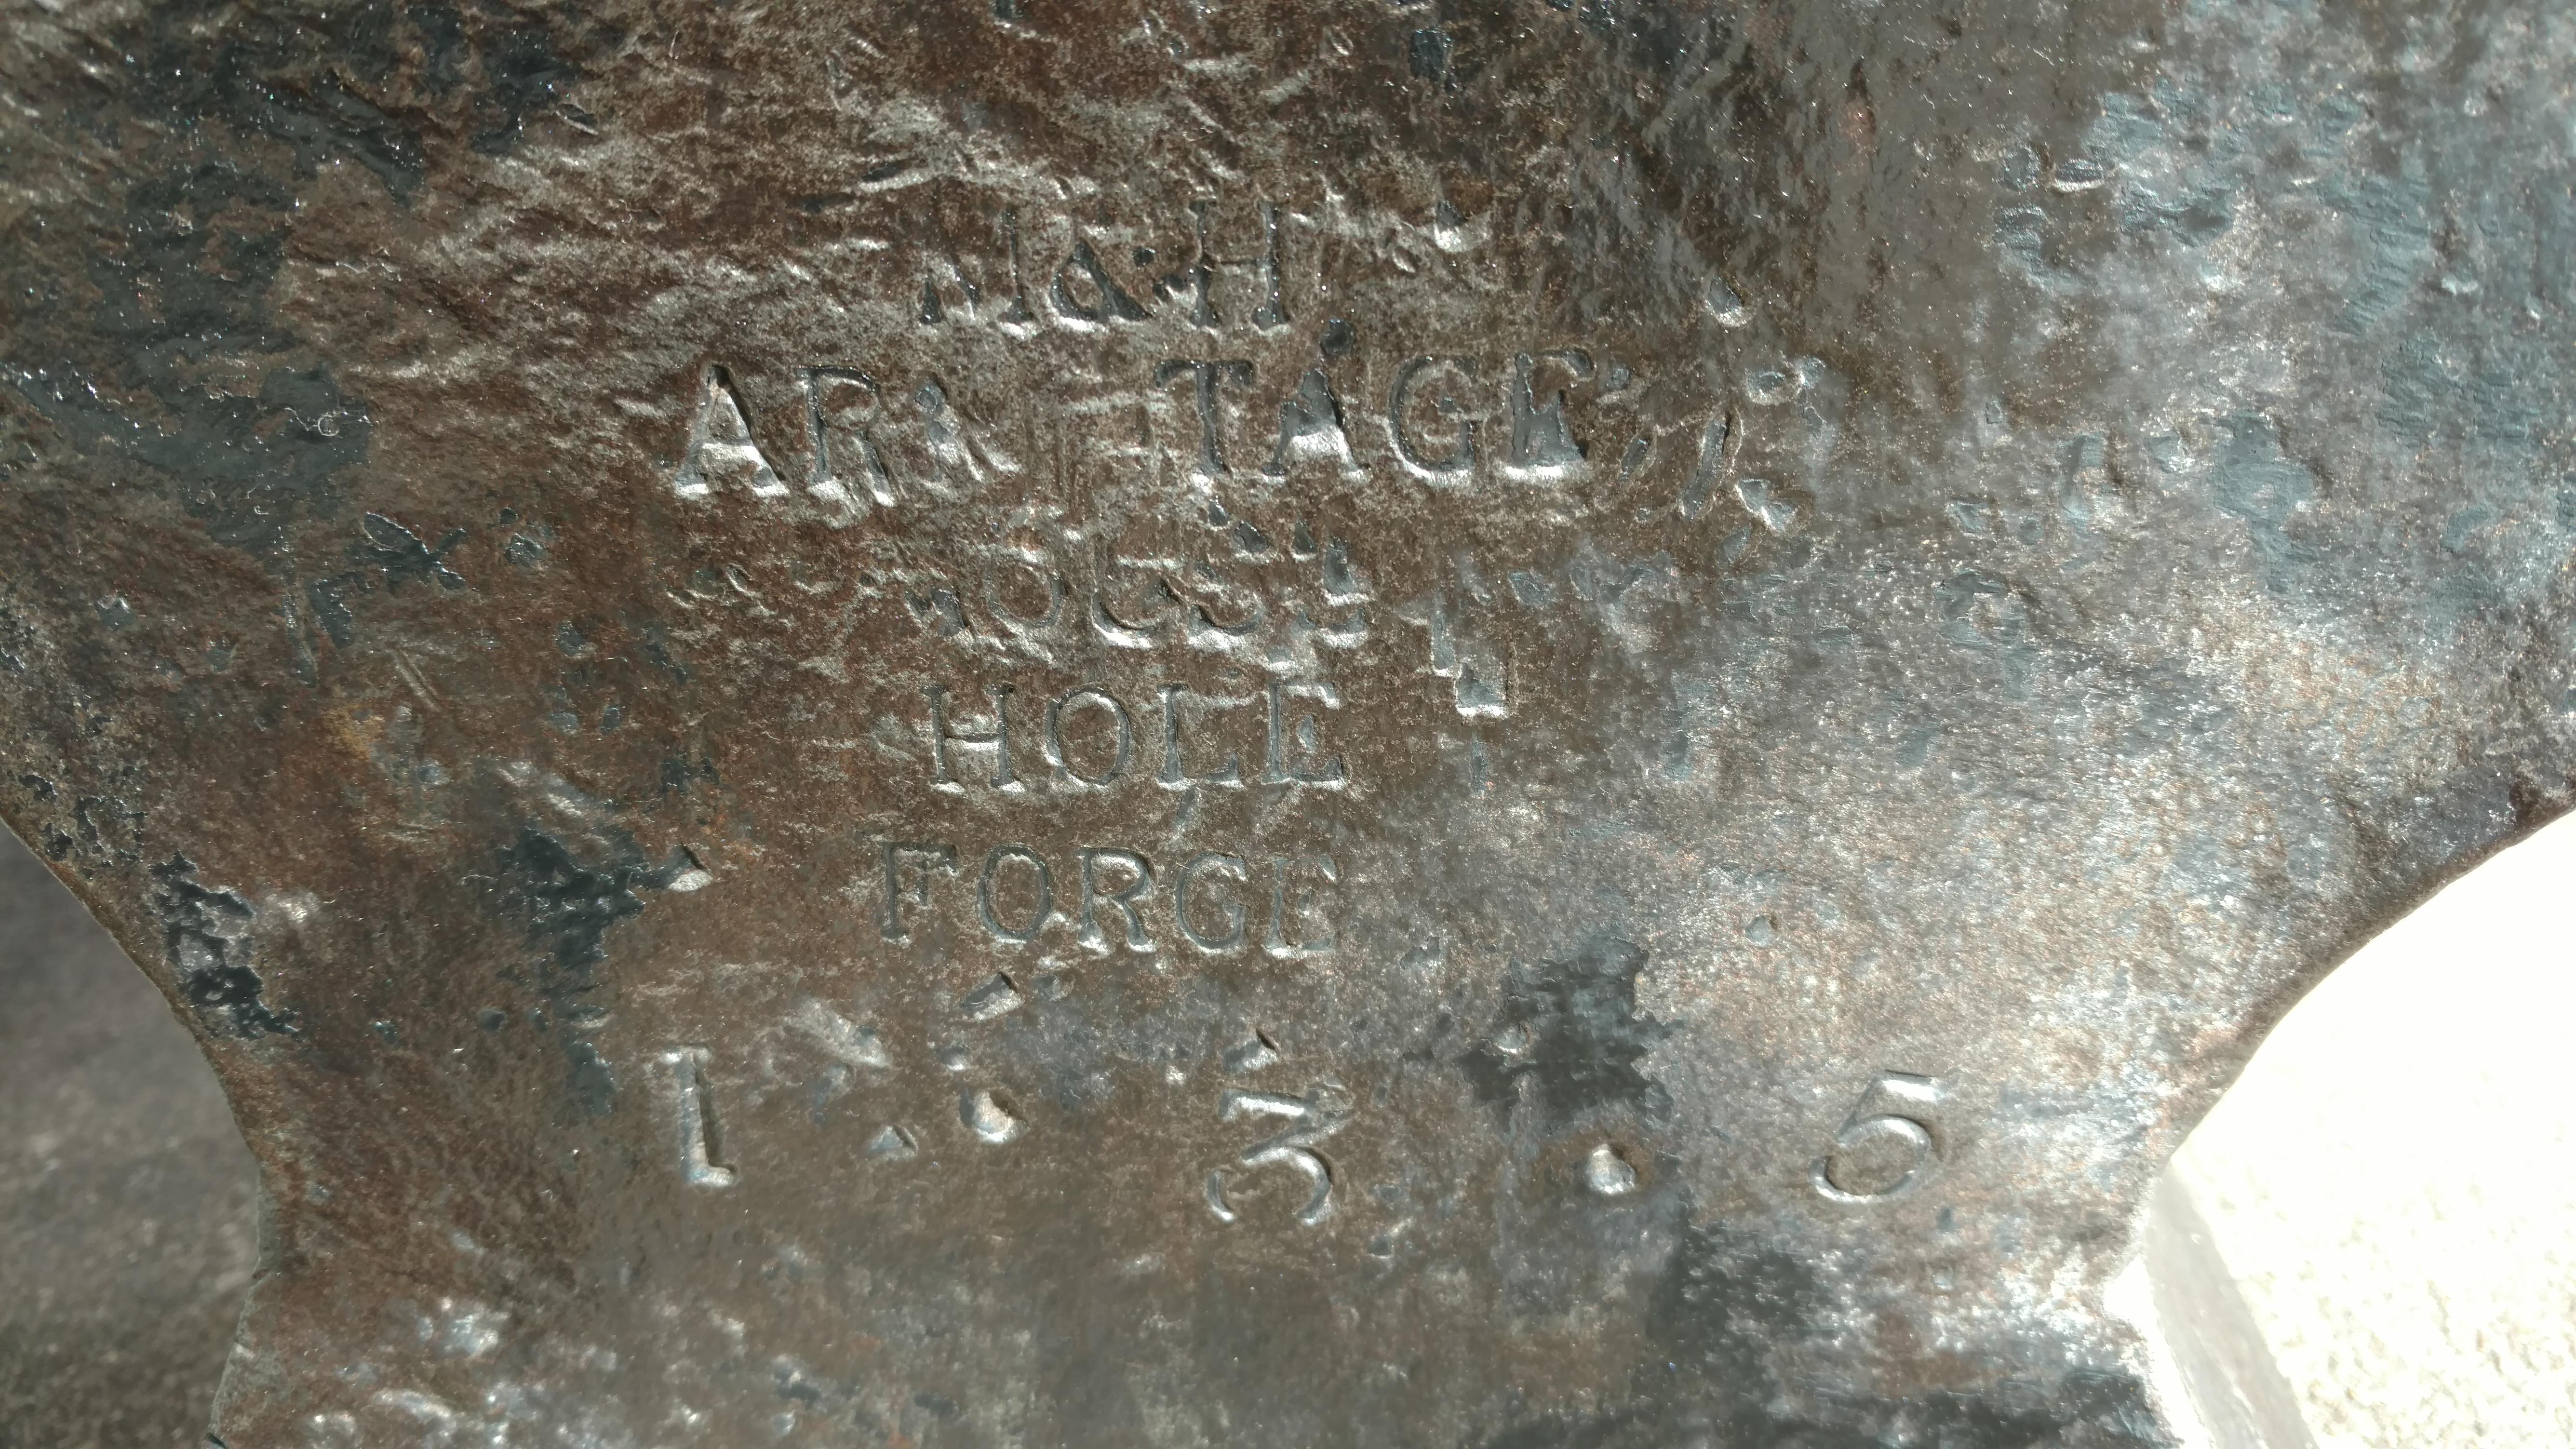
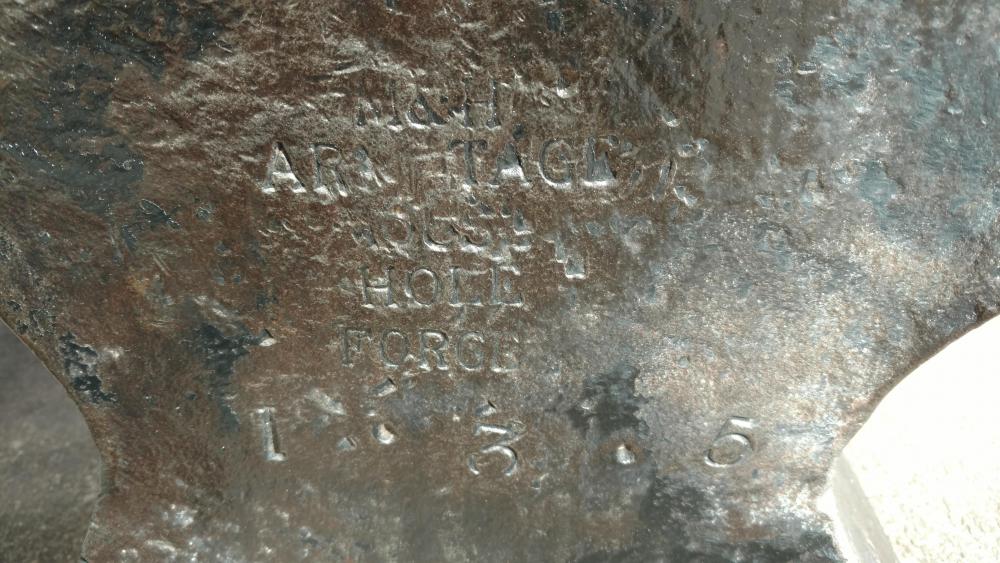
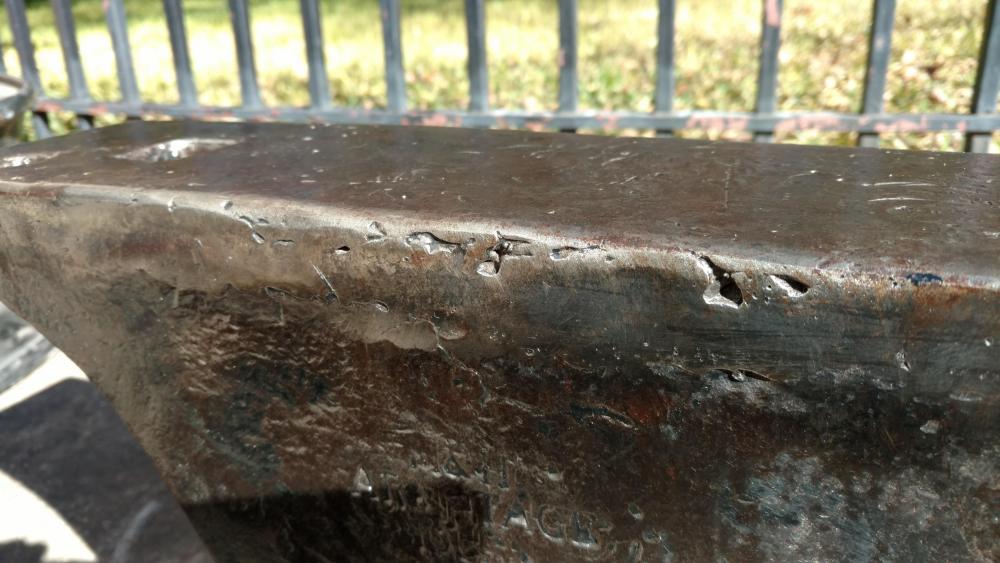
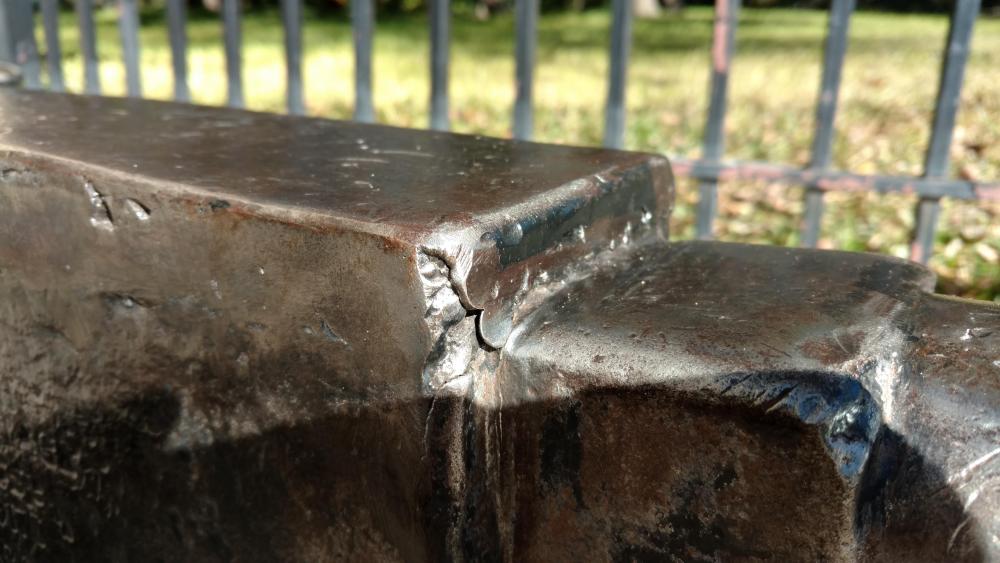
Hi Marc1 and Glenn, thanks for the quick feedback, I do hobbyist weekend black and bladesmithing. My other Mouse Hole is smaller and has some sway in it, so the usable area is pretty small. This one is definitely an upgrade in those terms. I'll post some more pix after I get it situated on its new stand. I'm most curious if you think this is a new welded top. The stand it came with is way too tall for the anvil, by 6 in or so, unless the previous owner was 7' tall as I'm 6' and the anvil comes half way up to my elbow when mounted on it. I have another home made wood stand that I was going to use for this, so my plan was to sell this metal one. And I definitely plan to know it well, and it will know me. :)
-
I picked up my second Mousehole today, so I guess that makes me a Mousehole collector. It's in much better shape than my first one. However, after I cleaned it up (rusted and painted), I find that the rebound is only 50-60%. It felt and sounded decent with my hammer, but I didn't have my ball bearing on me when I checked it out. Upon inspection, it looks like maybe it has a new welded plate on it, but I don't know what this would look like exactly. See the pictures below. At $2.50/lb ($500 total) including a big stand, I figure it's still usable and not a bad deal. Thoughts?

-
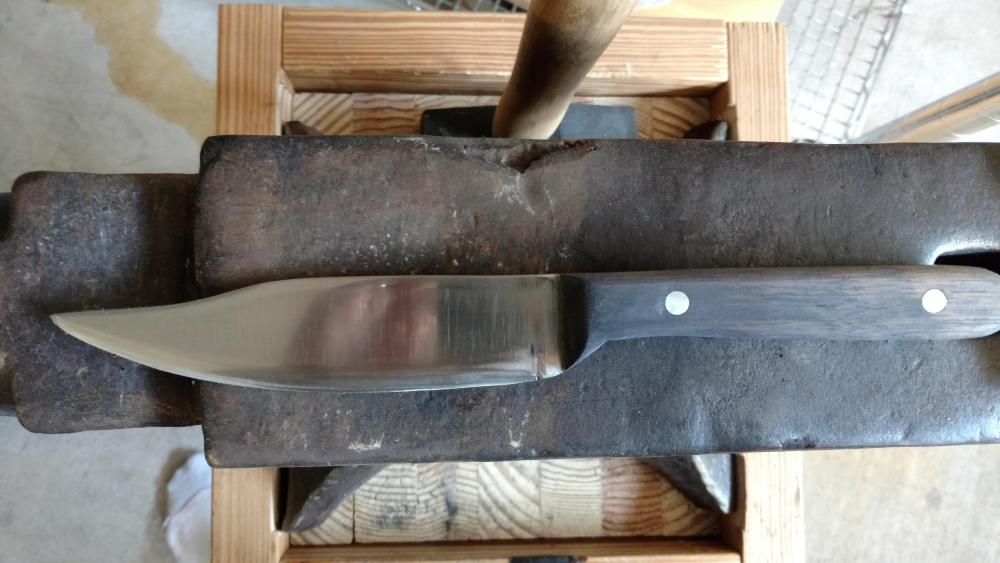
Thanks for the additional tips, guys. I called this one done and finished the handle. I definitely spent more time finished this one than I did forging it, so that's an area for improvement. Also found a nice sheath on eBay that fits it perfectly. I think he'll appreciate it, since he knows I only just started this craft. On to my next knife ... A camp knife for my buddy that supplied me all of the spring steel and handle wood.
-
Had to go back to 600 with a sanding block perpendicular, then back to the 1000 belt grinder to finish. Not perfect, but much better. I need to be more careful when stepping up my grits next time.
-
Thanks everyone, this makes sense now. I've got my plan of attack now, but no, I am not a masochist.
-
Buzzkill, my bad, it's silicon carbide not ceramic. Sounds like I'll go back to the grinder with some 45deg passes to see what I can do. Then maybe I'll take a crack with the wet paper up to 2000 or so. Maybe not go for mirror but at least get the big scatches out. Thanks for the tips. So far I have found finishing to be the most difficult part of knife making, but it's also the area I had no training in previously since my classes used 1800s equipment.
-
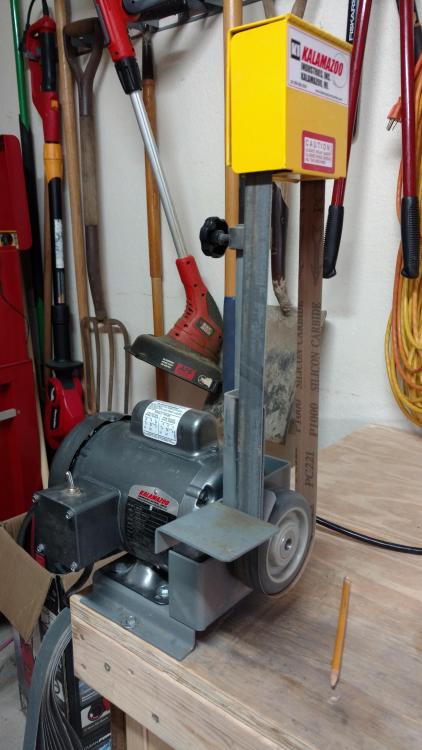
Thomas, I wasn't planning on buffing since I don't have a grinding wheel or sanding/polishing wheel. Just hoping to do it with the belt grinder and hand sanding, unless you guys tell me it won't be possible. In that case I'm willing to add new toys to my shop. DOCTOR, I wish I had taken some pictures as I progressed. I swear I had a finer finish after the 400 grit, which is why I was surprised to see the deep scratches after the 1000 on the platen. But perhaps you are correct in that the 1000 only highlighted the scratches from the previous grits. So would you recommend going back to the grinder? I can't really go perpendicular on my grinder because it doesn't have a usable flat surface wheel, just the platen and slack area as shown in the picture.
-
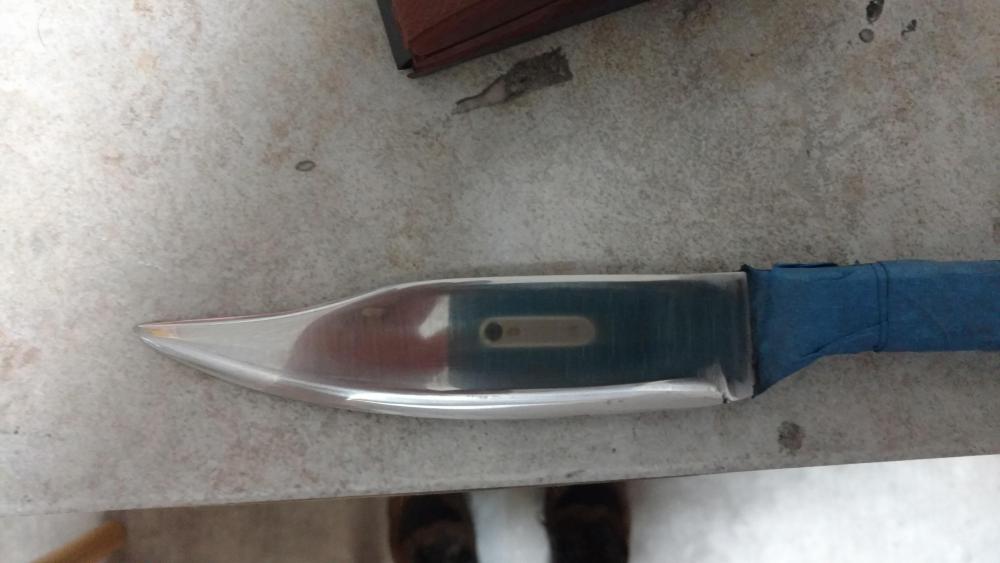
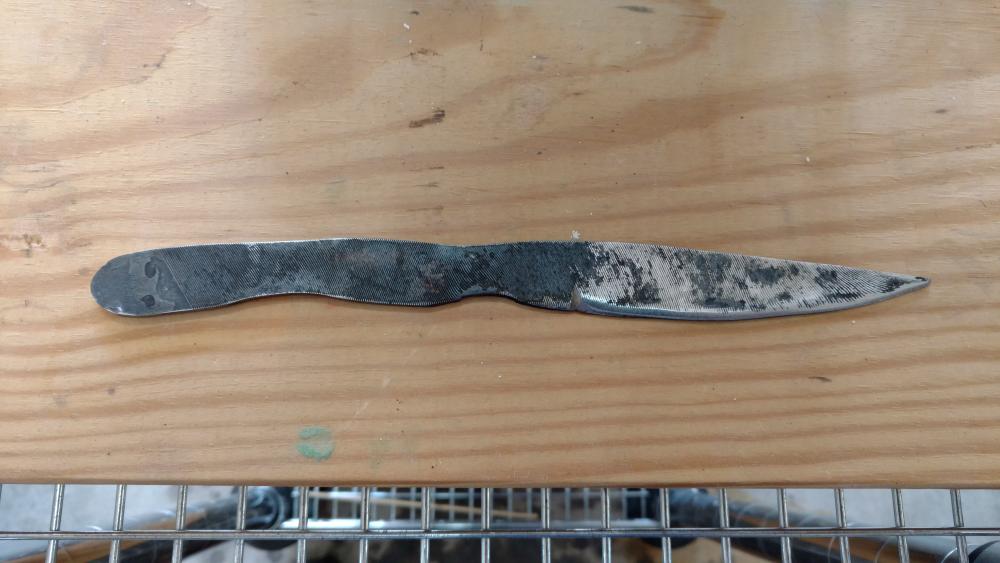
Hello, newbie here working on my second knife. The first was a practice knife made from a file, and I left the finish rougher as I wanted to retain the file lines. This one is a wedding gift for a friend of my mother's, and while it will likely be a heavily used knife, I wanted to deliver it with a nicer finish since it's a gift. It's a Baby Bowie made from 5160 leaf spring steel. It's mostly done (hardened, edged, handle attached and shaped), but I still have to polish the blade and sand and finish the handle. I hoped to get it there on my belt grinder, but I realize now that I hadn't done the proper research yet. Now I'm trying to figure out how shiny I should be able to get it on my grinder and then how to finish it. I have a 1x42 Kalamazoo grinder with cheapy AO belts from 40-400 grit and then nicer ceramic (mod edit Silicon Carbide) 1000 grit belts. The finish in the picture, if you can see it properly, is the best I can get with stepping up from 120-240-400-1000. The scratches in the middle of the blade seem to have been caused by the 1000 belt when I put it against the platten. I can get it shinier around the edges of the flats on the slack part of the belt, but the platen grinding seems to not work as well. I don't know if this is me (pressure, technique), the belt, or the platten. So is that the best I should expect on a grinder? I have automotive wet/dry paper in grits 400-600-800-1000-1500-2000-2500-3000. Is it best to just use those now with a backer and alternating direction polishing? I've also seen videos using a sanding wheel, but I don't have one, and haven't purchased one yet. Thanks for any and all advice.
-
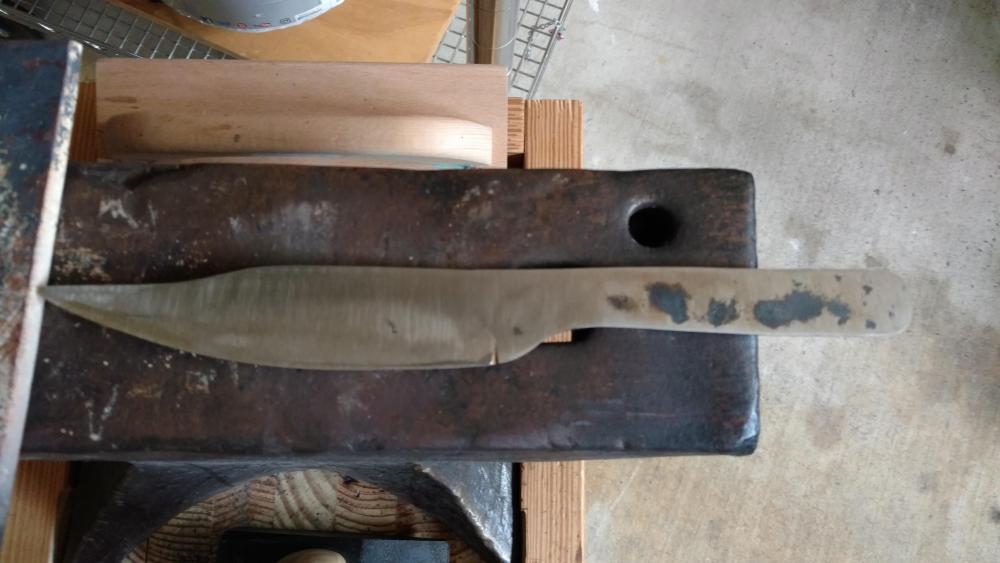
I know this is an old topic, but I thought I'd add my 2 cents. I knew then as I know now that FiF is a reality show that leaves out so much detail. But here's what it did for me. As someone with a long but peripheral interest in blacksmithing having gone to Renaissance Festivals since I was a teenager and being a fan of anything fantasy/medieval, it led me to believe that I, too, could make a knife with my own hands. I'm a 47 yo electrical engineer with 0.0 experience in hands on fabrication of anything beyond semiconductor processes for making computer chips. After 2 years of watching the show, I decided to could do it. So I found a local traditional blacksmithing class last December, and after 40 hours of training, 8 months of buying equipment and setting up shop in my garage and practicing the skills on my own, I'm making my first knives. The third one being this Bowie that is 100% hand forged from a piece of leaf spring and that I'm finishing up now. Not showable or sellable, but a really cool thing that I made with my hands. So as real or fake as the show is, it's the one thing that got me into this in my mid-life crisis phase. And for that I am thankful.
-
I was thinking about this recently as well and was going to start a separate post in the blade section about it. I recently forged my third knife, a 12" Bowie knife (5" tang, 7" blade) out of a 1.5" x 5" x 0.25" piece of leaf spring (I hope it's 5160!). I forged 100% of the knife with no cutting and minimal shaping on the belt grinder. It was a blast. It took about 5 hours of forging time and I did it mainly to work on my forging skills. As I was watching a few YouTube videos on forging a Bowie knife, I came across two popular videos that resulted in beautiful knives. They both started with a bar the exact width, length, and thickness of their final knife. One forged the tang and a bit of the tip, but then finished the tip with an angle grinder. The second angle ground the tang and forged the tip. Then everything else was done on the grinder. My questions are: For sale or show pieces, is there a general rule of thumb for how much forging should be done to consider it a forged blade? Do people and bladesmiths care? Are the details of how much of the blade is forged divulged and does it affect typical sale prices? For now I'm just curious as I'm doing this for fun and skill development, and making gifts for friends and family.
-
Hi Foamhead, I have the exact same forge and I'm using the stock burner, hose, and regulator, but I heavily modified the inside. You can do a quick search and find my post with what I did. I'm about as far from an expert as you can get, but I've had very good initial results with this setup. Only a little but of huffing every once in a while, but gets super hot very quickly with relatively low flow (don't know how low without a gauge). Also, the owner seems very nice and willing to talk. Before I modified mine I talked to him to make sure I wasn't going to screw anything up. He should have included his number on the instruction book. Happy forging!
-
Well, I don't know how to say for sure, but I was pretty careful about the drying procedures I followed. I've run it for a total of about 5 hours so far, the first two being lower flow and the next 3 being higher flow. Is there any way to tell?
-
Looks like we started a new "Tell us about your scars" topic. I'd be surprised if this topic didn't already exist somewhere. I'd post a picture of mine, but I don't want to encourage JHCC to do the same with his "extreme lower back" wound.
-
Thanks, Daswulf, I was lucky as it bounced off very quickly so the scar is somewhat superficial. So it really served as a great lesson. The good news is that my new forge heats that leaf spring to bright orange in about 90 sec, so my forging to waiting ratio is high.
-
As someone who just got hit in the cheek by a bright orange piece of 3/8" leaf spring, I agree to NOT use wolf's jaw for bar stock. I am heading to CentaurForge tomorrow to get some box jaws. I have a nice right angle burn mark on my cheek as a reminder of that stupid move.
-
Thanks, Mikey. I'm getting a bit of intermittent huffing or fluttering (what's the preferred term here?) in my burner at different flows, so that will be my next point of research to figure out if there is anything I need to change in the burner setup. It's not bad enough that it's causing problems with heating the steel, but still something I'm sure can be improved.
-
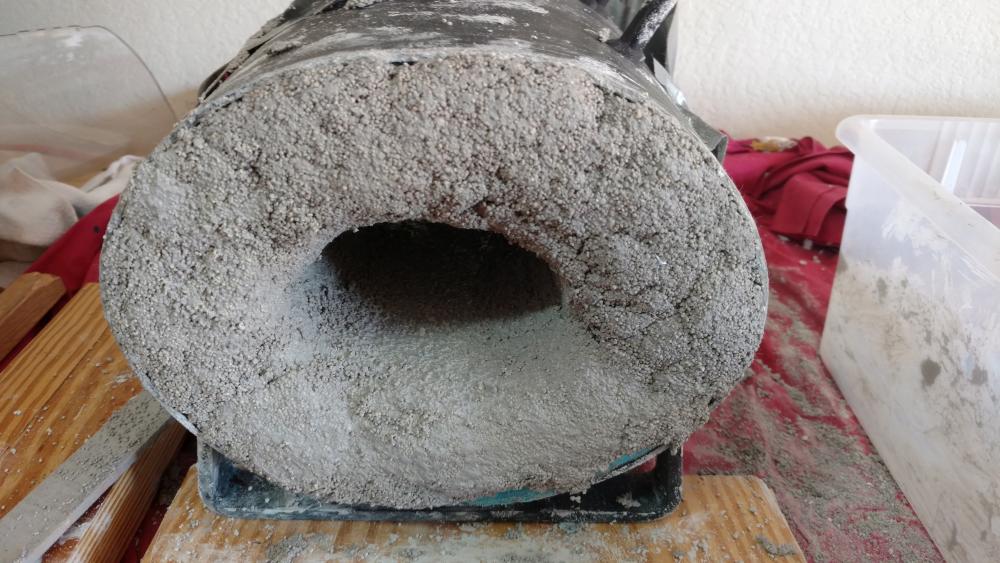
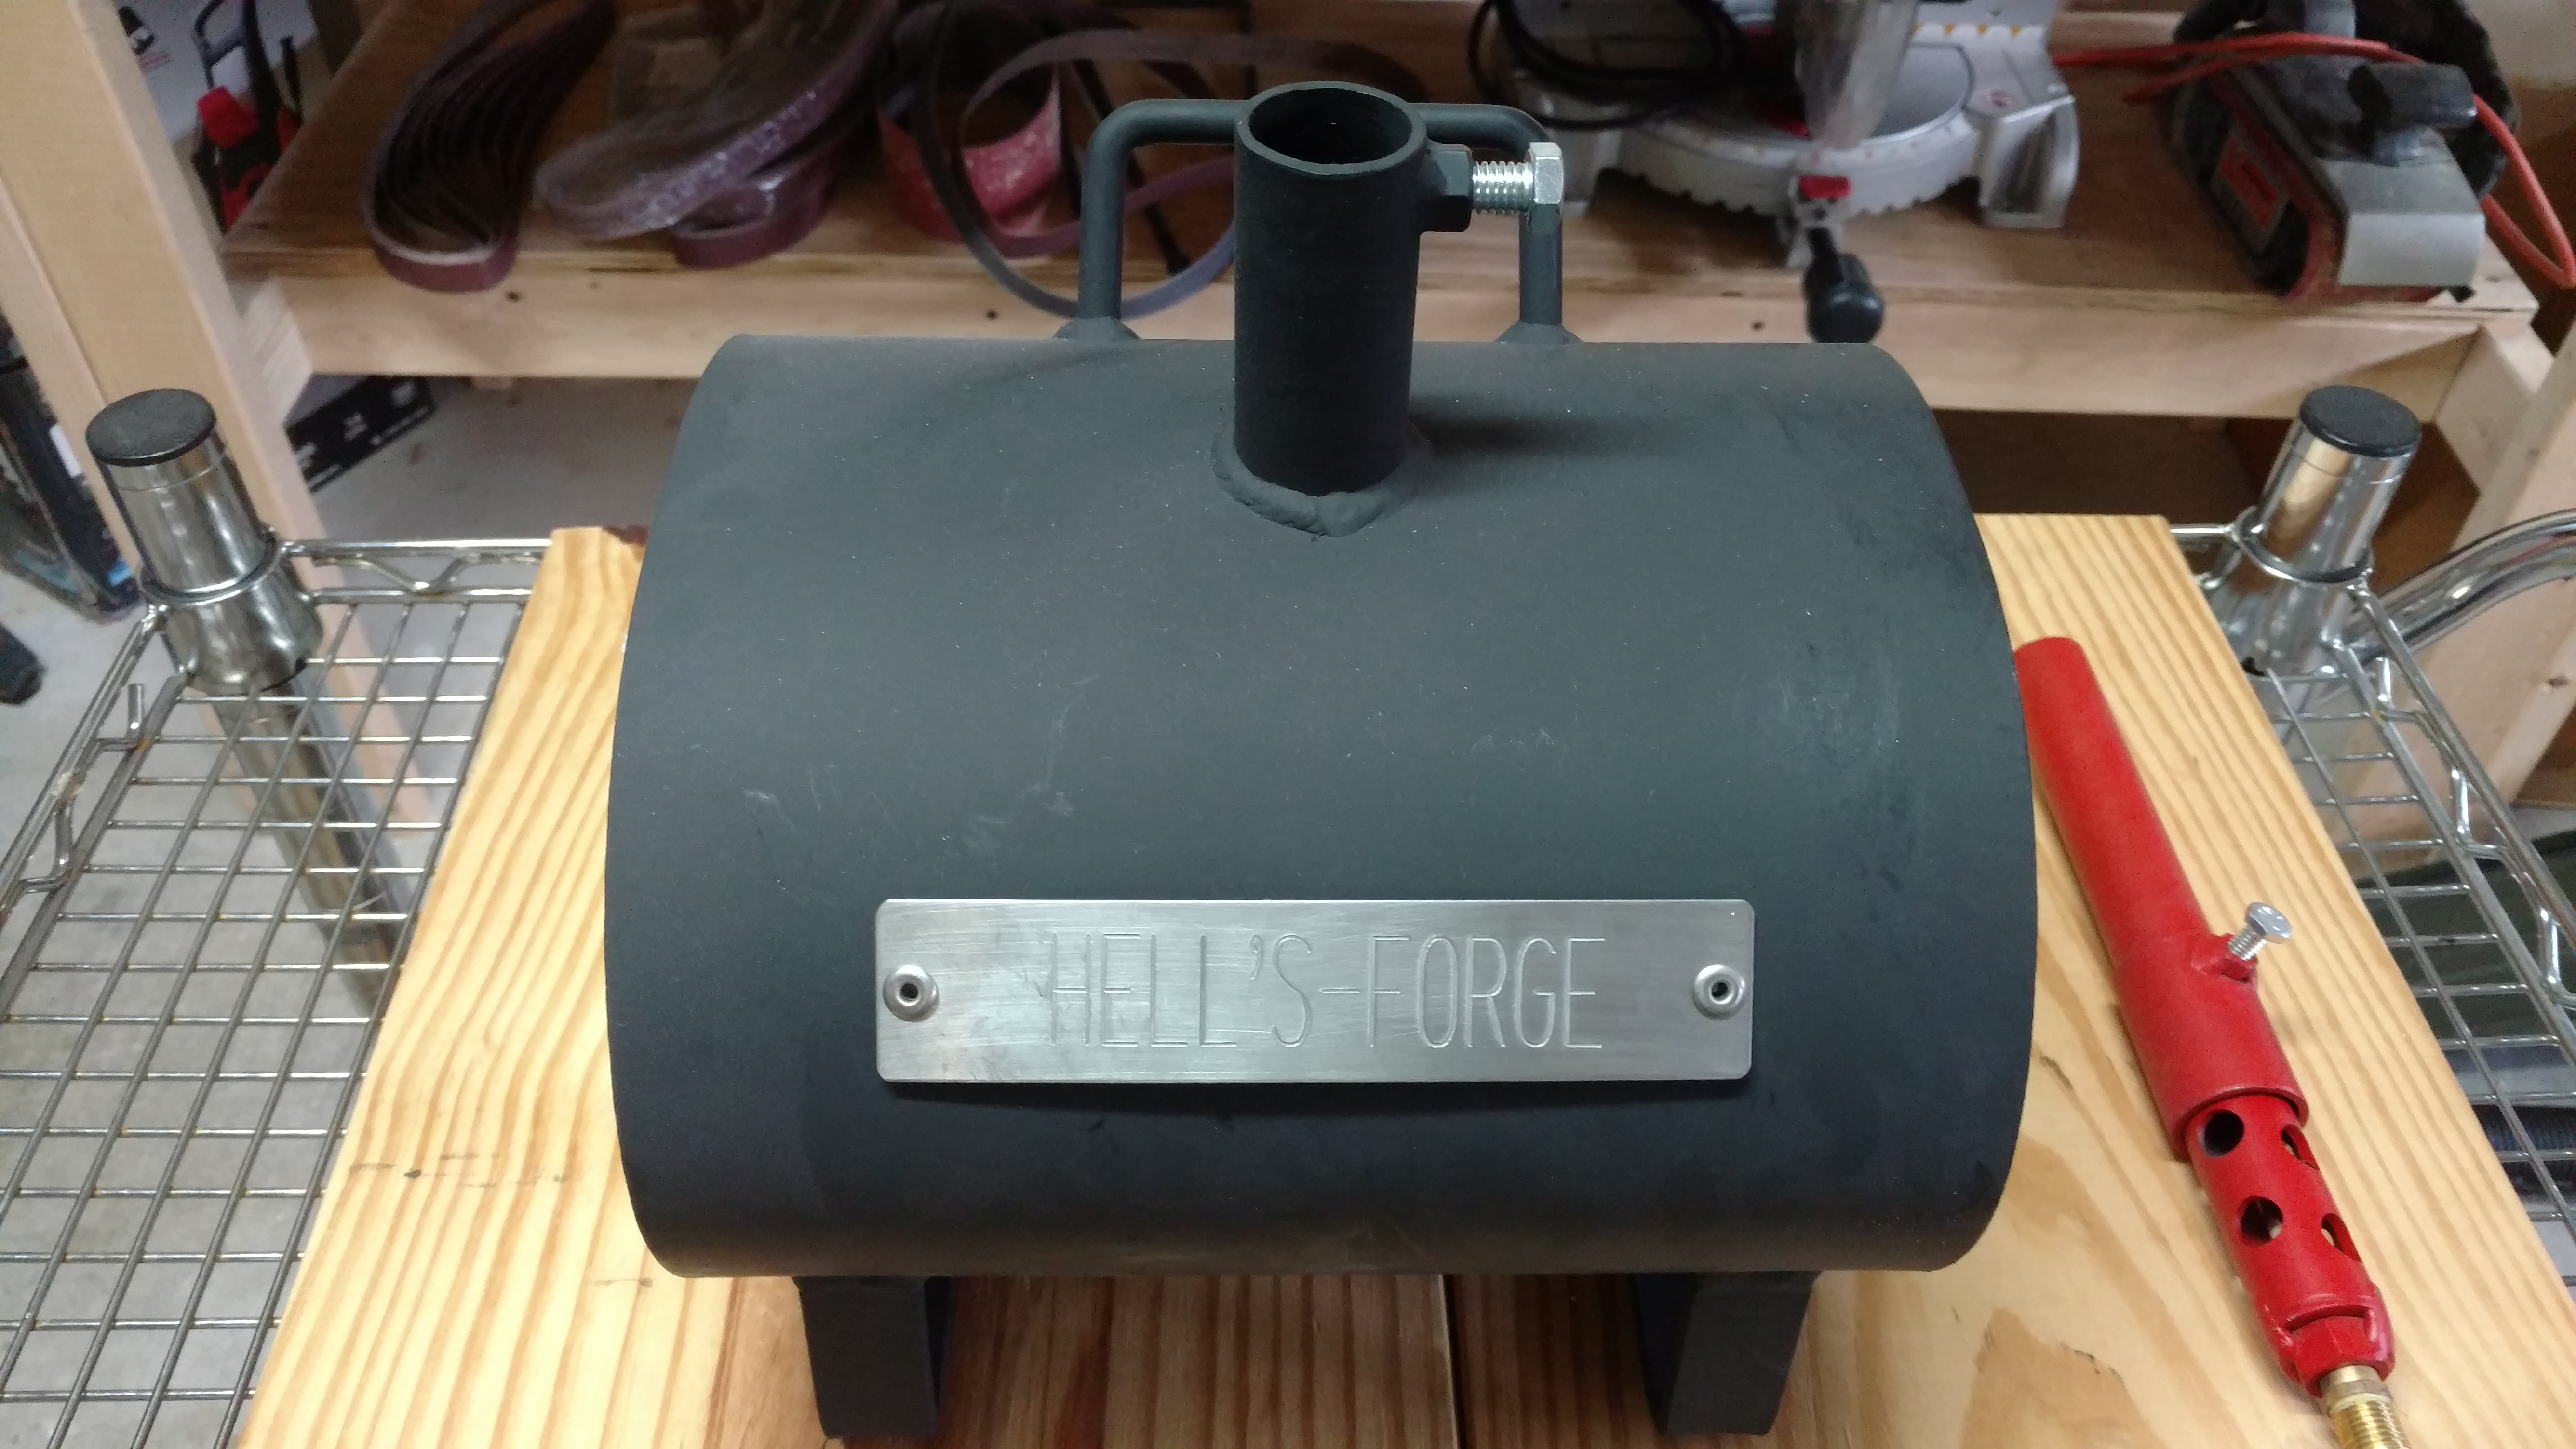
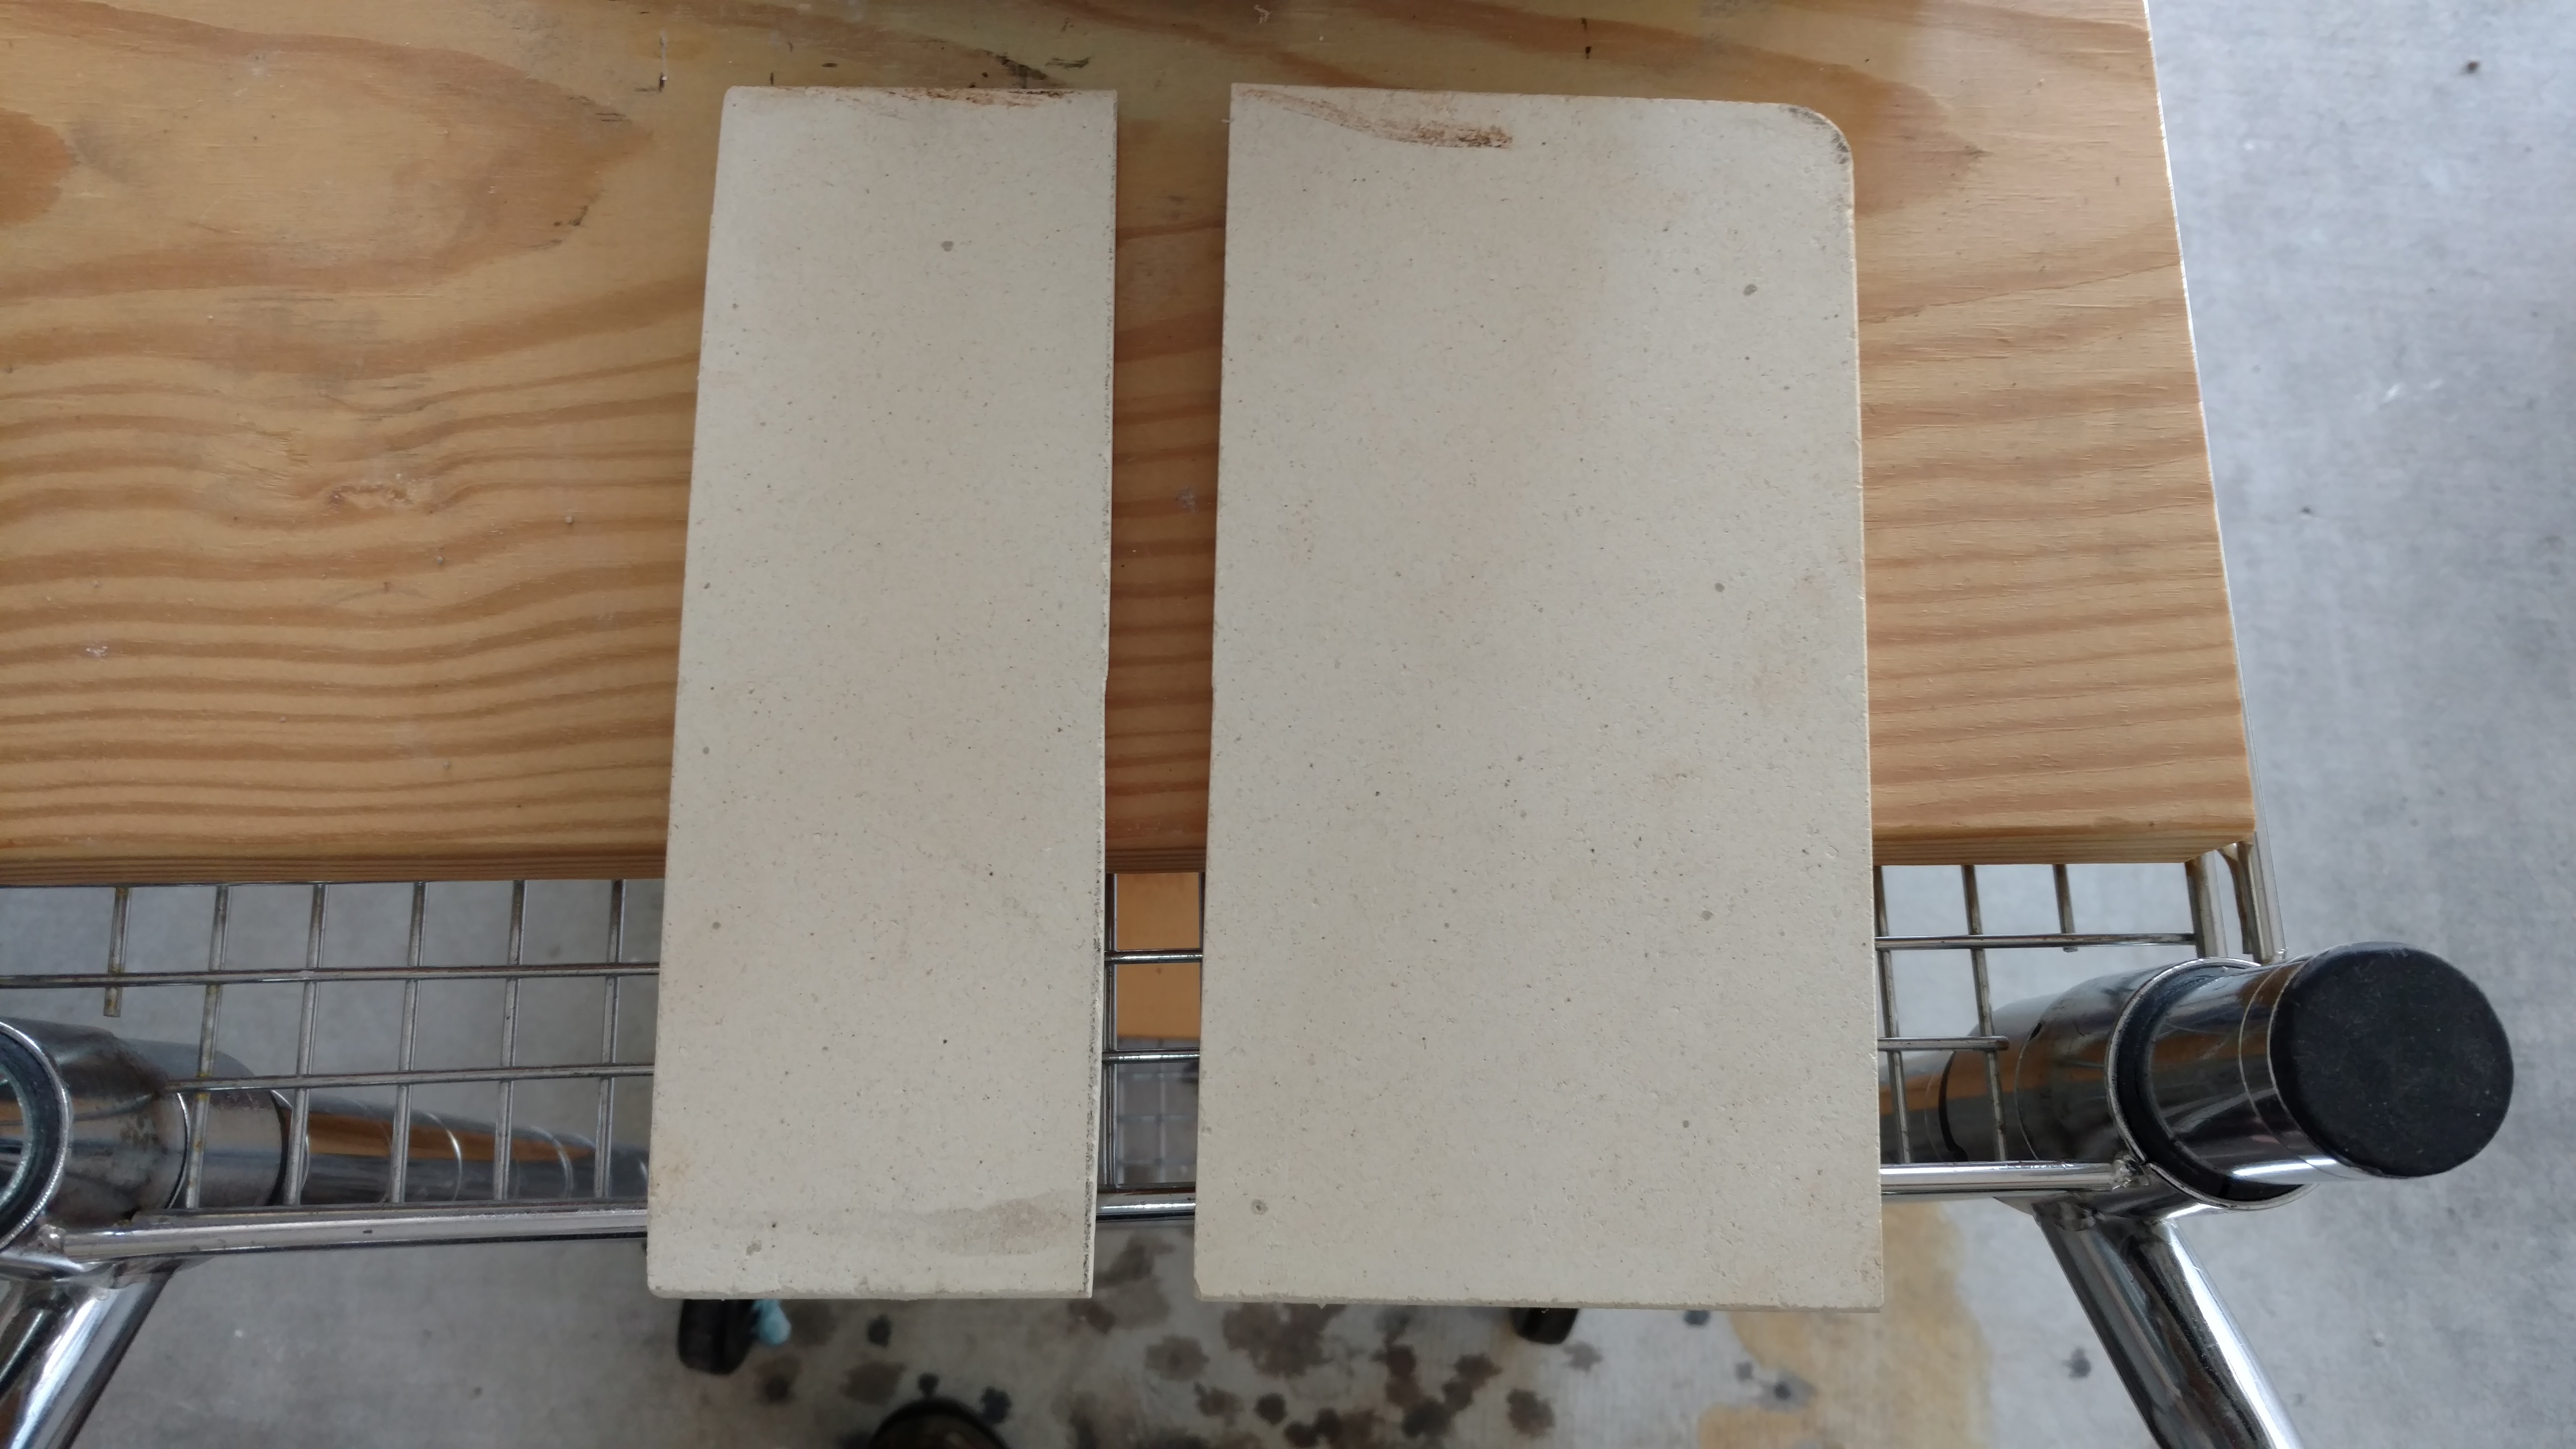
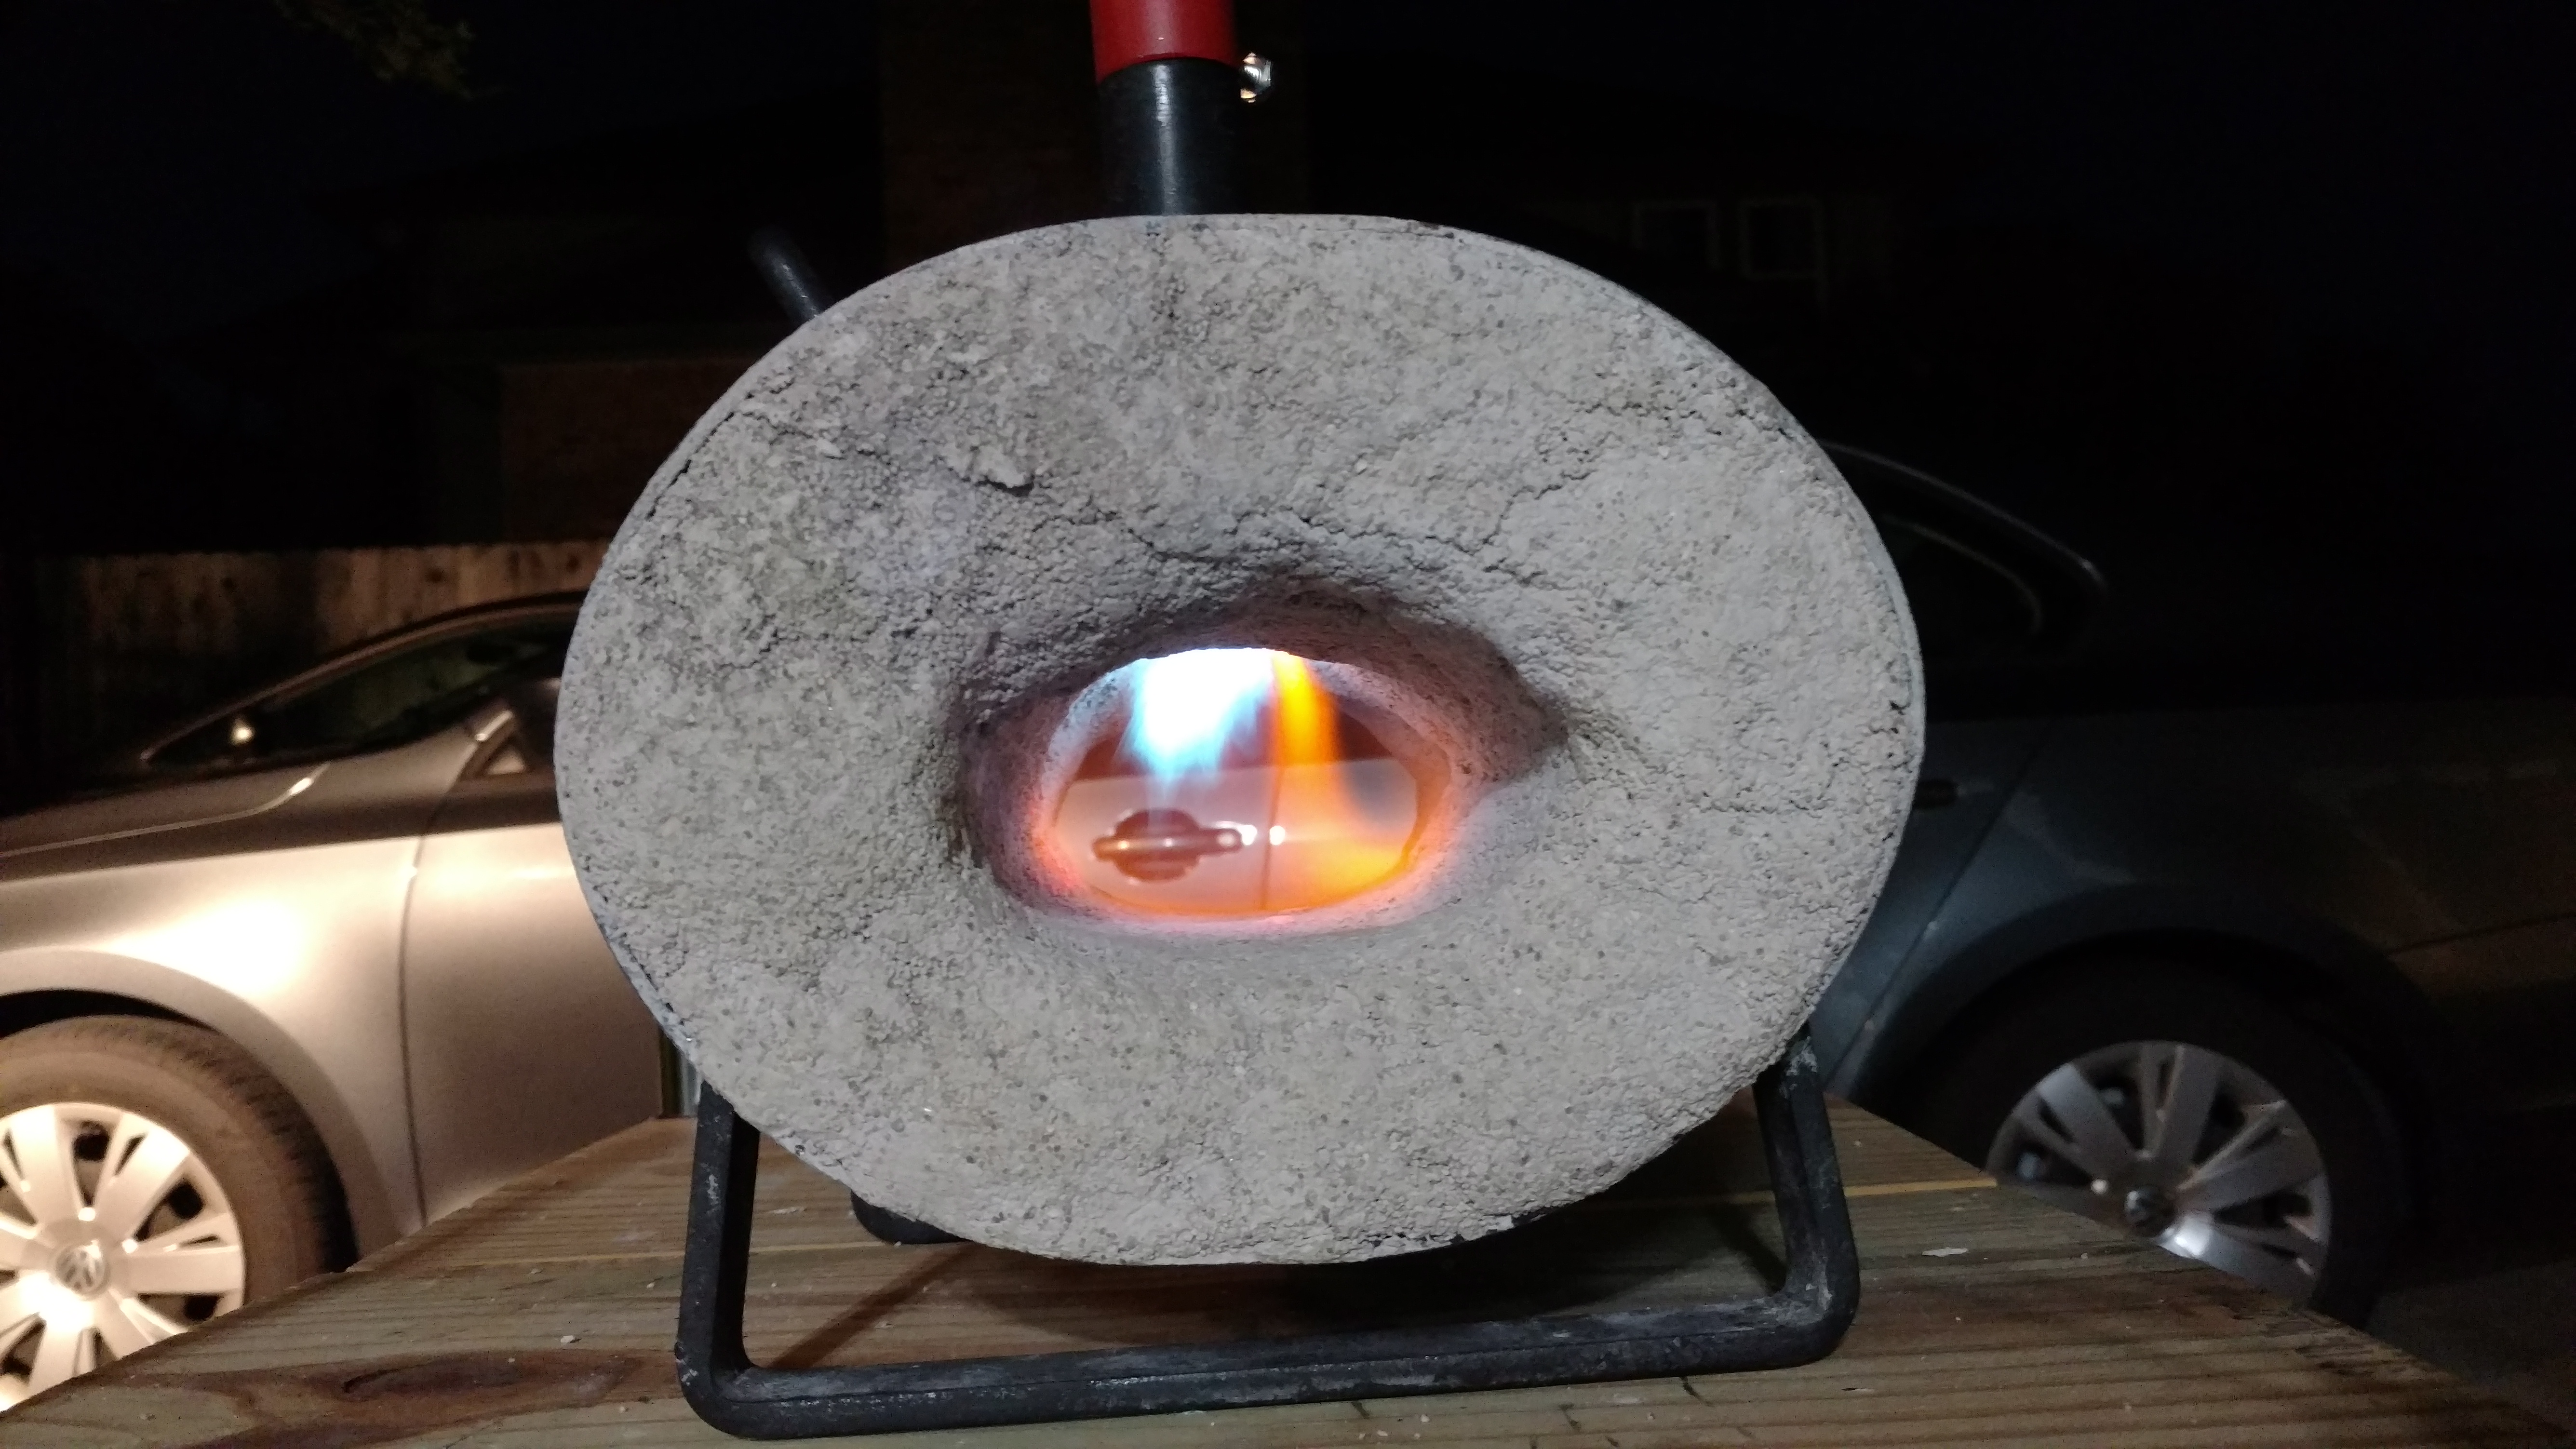
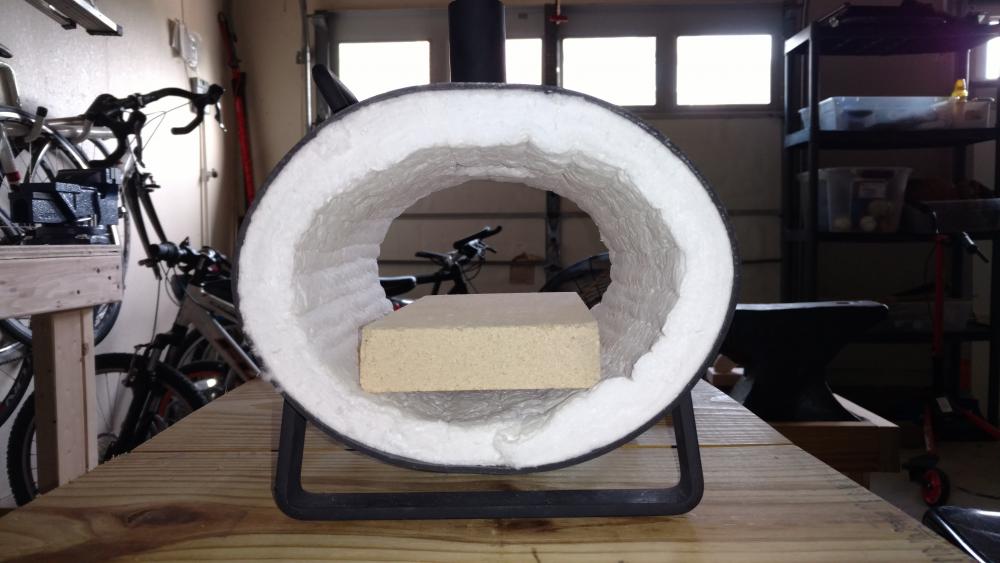
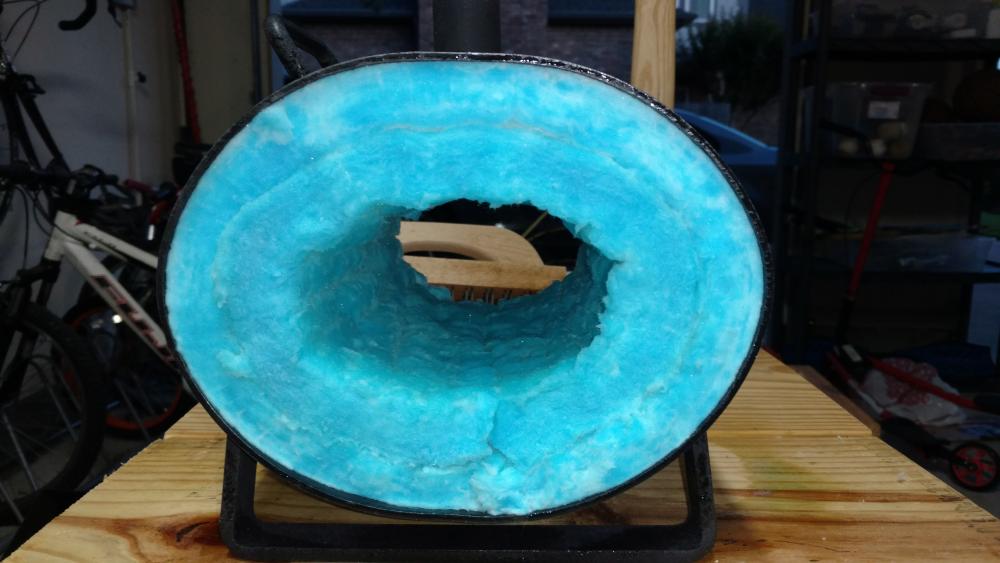
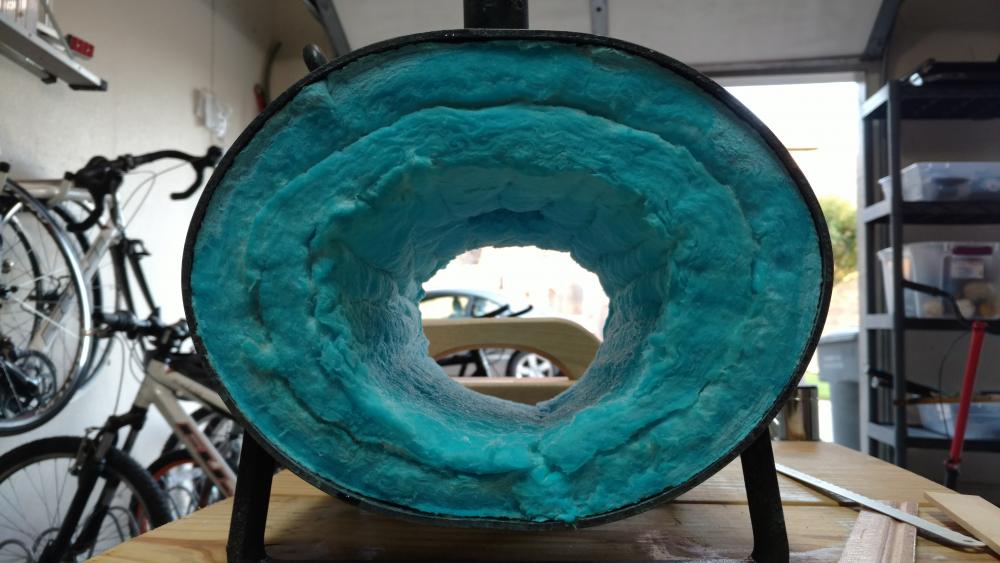
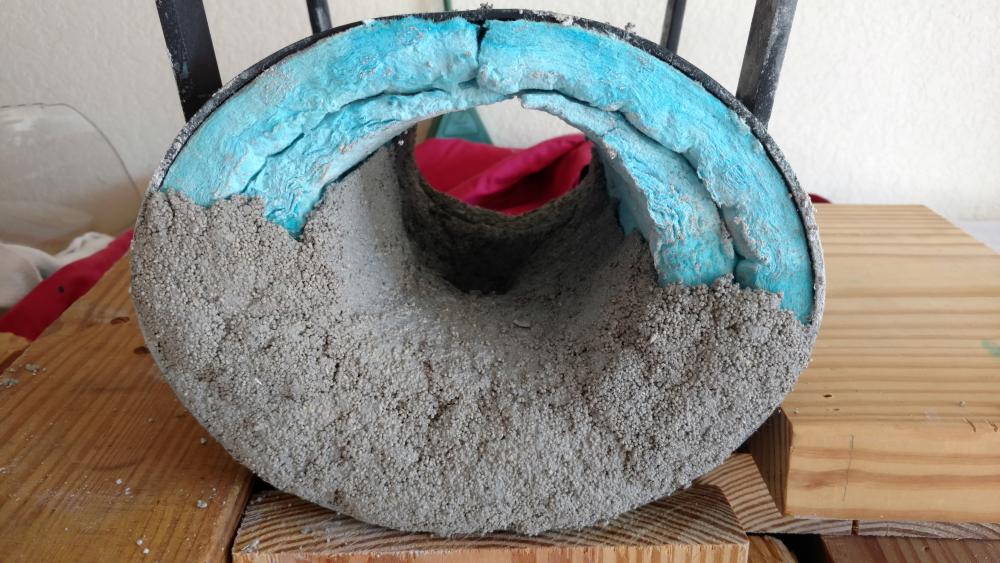
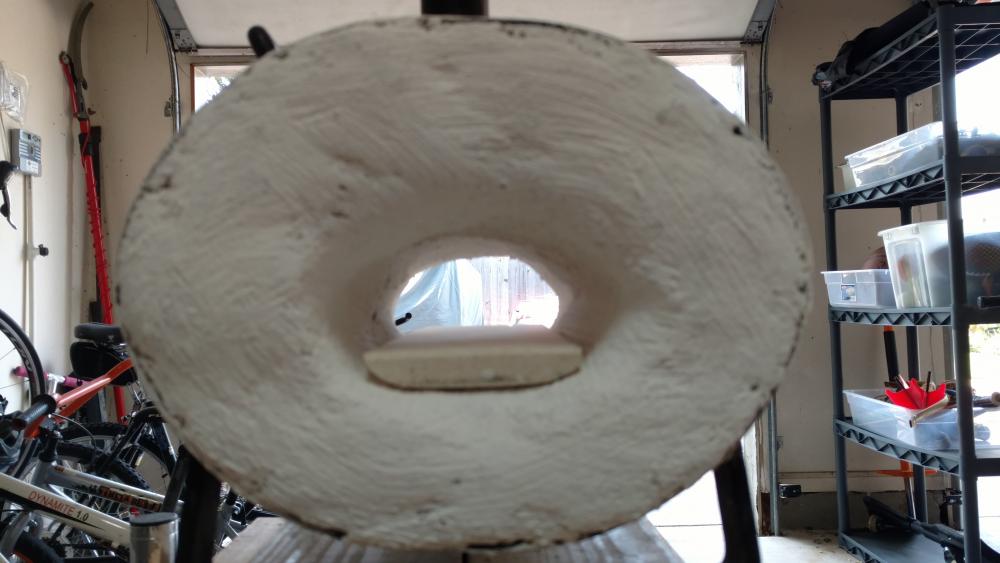
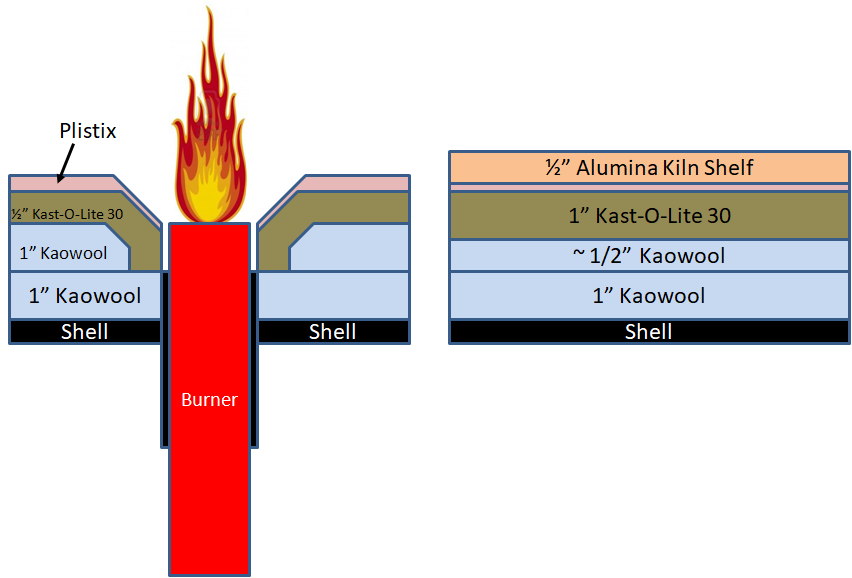
Hi all, I wanted to put a post together for other newbies out there that are trying to figure out how to improve a commercial propane forge. Thanks to everyone here to helped answer my questions over the past couple of months. There is so much useful information in this forum and there are several posts or answers from the experts here that come really close to being the perfect guide for what I wanted to do. However, for a newbie it can be a lot to digest and make sense of, so I tried to summarize what I learned and also include pictures in the step-by-step guide, since some of us are more visual learners the first time. Also, I’m not trying to open a debate about buying vs building a forge. I hope to one day build my own, and I think I probably have the information I need now to build one, but given that I am just getting into this as a weekend hobby since I still have a 60hr/week job and two school-age kids, I felt that buying a cheap eBay forge and modifying it to improve its capability, durability and safety was the better way for me to go at this point. So if you are in the same boat, or came across a forge already built that needs improvement, then maybe this is for you. I bought a single burner oval forge from Hell’s Forge on eBay for $190. It included: 1) 1/8” steel shell (approx 9” wide by 7” tall by 10” long) 2) 1” ceramic wool pre-rigidized blanket 3) hard fire brick floor 4) 180k BTU (@ 20psi) burner 5) 0-20psi regulator, hose, propane tank connector The cost of the other supplies I bought to modify it totaled $110 and included: 1) 1” Kaowool blanket (1”x12”x24”) from eBay - $20 2) Simwool rigidizer from eBay - $30 3) 10 lbs Kast-O-Lite 30 castable refractory from Wayne Coe - $30 4) 1 pint Plistix IR refractory from Wayne Coe - $15 5) 8”x9”x1/2” alumina kiln shelf from local pottery supply - $15 The total build was $300, but the extra $110 I would have needed for a home build anyway, so really I paid $190 for the shell, burner and connections, and the 1” ceramic blanket liner. Though the stock forge comes with a rigidized blanket, it is not really safe or durable to run a forge for a long time with just this setup. Plus the propane consumption would be very high and I’m not even sure if this forge could have gotten to welding temps. I would have liked to have run a set of control runs with the stock forge to see how well it worked, but I had no interest in running it like this after doing all of the research here. Below are pictures of the stock forge, small and simple with questionable burner positioning. My final liner design is shown in the cartoons below. The left picture is a cross-section of the top of the forge and the right picture is the floor. I added a total of 1.5-2” of additional liner to each side, cutting the volume down from 265in3 to 70in3 … so very tiny. I designed the floor so that the distance from the burner to the floor face is identical to the stock forge (whether that was a good distance or not). The first thing I did was add the second layer of Kaowool. I cut it slightly larger than the inner diameter so that it fit in tight. I cut the burner port hold 1” diameter larger than the port so that I could get ½” of the Kast-O-Lite refractory into the hole. I also chamfered the edge to make easier to coat (see cartoons above). The Koawool cuts easily, and I used regular scissors for the edges and an exacto knife for the hole. I then sprayed on the rigidizer with a standard home spray bottle, with a little bit of blue food coloring added so that I could see the coverage. This was allowed to dry for a few days until I got to the next step. It was very hard and crispy at this point. Next I wanted to set the correct height of my floor as mentioned above, so I cut out up to 1/2” of the Kaowool at the very bottom of the forge so that I could fill it with a thicker layer of the Kast-O-Lite and screed a flat(ish) floor. The rigidized wool is much easier to cut and shape than unrigidized wool, which is why I did it in this order. I simply used a metal hack saw blade, which was longer than the forge, to cut out the shape. I then reapplied the rigidizer to the newly exposed wool and let it harden overnight again. If you have sufficient volume in your forge, this step isn't really necessary. Next was the Kast-O-Lite 30 liner. I calculated that I needed 4 lbs to coat the inside of the forge and so I prepared a full 5 lb bag so that I would have enough extra for the thicker floor and the outer edges. I underestimated how much I would use for the outer edges, so I ended up mixing a total of about 6 lbs. I used the exact amount of water as advised by the manufacture (2.8oz per 1 lb, for a total of 14 oz). This created a very dry and “crumbly” consistency that ended up being a bit harder to spread and shape than I had anticipated. The extra pound I mixed up I made with more like 3-4 oz, and it turned out runnier and more spreadable, so if I had it to do over I’d probably use a bit more than 3 oz per pound of mix, but making sure that I dried it out appropriately. I applied the upper half of the forge first, let it dry for 1 hour and then turned it over and applied the lower half. This almost didn’t work as I had some sections fall off after only 1 hour of drying, but I had mixed up the entire 5 lbs and didn’t want to waste it. In hindsight and based on other advice obtained in this forum, I would mix up only half of the mix and then let the top half dry overnight before mixing and applying the bottom half the next day. It dried in my garage for two full days, and it was rock hard at this point. Summer hit early this year in Austin, and we already had 100F days and very hot garages, so I had no qualms with only letting it cure for two days. In colder climates or with more water in the mixture, you could go for up to a week of curing. Next I proceeded to do a controlled drying sequence. According to the manufacturer, you are supposed to bake it at the rate of 100F/hour from 100F to the use temp to dry it out. After some research and determining that there was no safety issue, I decided to do the initial bake in my kitchen oven from 100F to 500F at 100F/hr. There were no noxious fumes or any issues with this method. After that I had no way to control or measure the temperature, so I decided to use the burner to complete the baking. I ran the burner for a total of ~ 2 hours from low flow to high flow with some cool-downs in between and got a good portion of the interior glowing red on the final heatup. The final look was a sandy gray finish. After this final bake and letting it cool down overnight, I sanded the Kast-O-Lite to smooth it out a bit, especially on the flat(ish) floor. I used both 60 grit sandpaper and drywall sanding sheets with equal effectiveness. Next I applied the Plistix refractory as the final coating to create as thermally efficient forge as possible. Because of my very small final interior, I mixed only half of the pint bag that I bought. This will leave leftovers for future repairs. I mixed it to a pretty thin consistency so that I could paint it on with a paint brush and it went on very easily. After drying for 1 day it resulted in a bright white finish. I decided to make the floor out of alumina kiln shelf to protect the refractory from forge welding flux because apparently the flux will degrade even these refractories over time. The smallest I could get at the local pottery supply was 8”x9”x1/2”, but I wanted the thinnest one possible so that the floor was at the right final height. I cut a 3”x9” strip with a concrete carbide saw blade and then shaped the bottom with an 80 grit belt on my belt grinder to fit nicely on the floor. It cut and sanded very easily, so you can create any size and shape you need. Below is the side-by-side of original out-of-the-box to final modified version. I think (hope) the modified one is going to work much better and save a lot of fuel! I fired it up slowly to not thermally shock the new Plistix coating, and then easily heated up an old file in minutes. I banged out a crude knife (that I still need to harden and finish) with ~ 60 sec to get to orange with each heating since the file was only 1/8” thick to start. Next up is a 3/8” thick leaf spring experiment to see how efficient this thing is. Hopefully some people find this useful. It certainly gave me practice with the steps I'll need to make my own forge when I need to upgrade. Experts, feel free to add to or offer improvements or alternatives to this recipe.


-
Tips for Kast-O-Lite 30 application?
paulgatx replied to paulgatx's topic in Insulation and Refractories
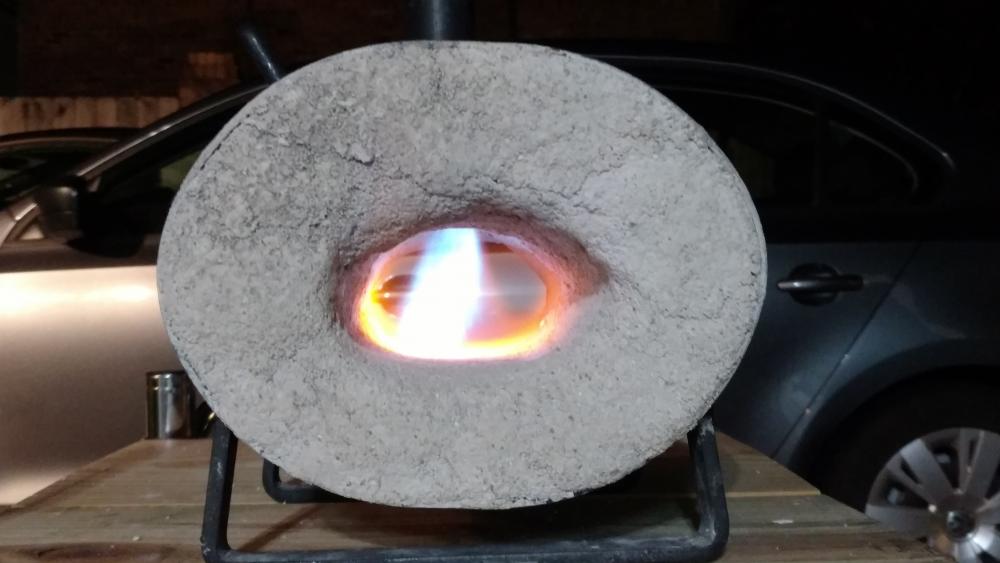
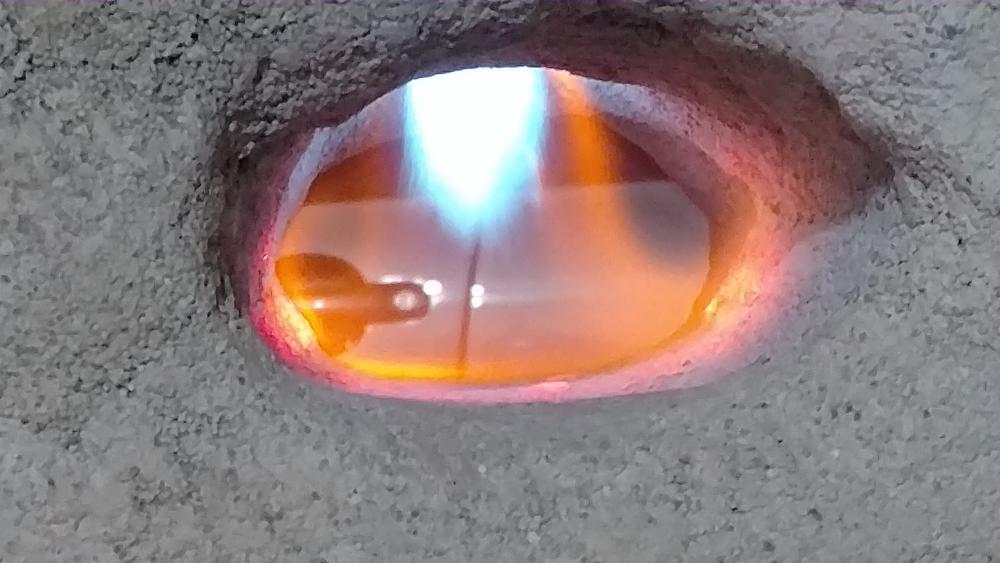
Mikey, I fired it up for the first time to continue the KOL drying (started it in the oven) and it seemed to work decently. It sputtered a bit at low flow, but I didn't crank up the psi yet since I'm still doing the slow dryout of the KOL. Looks like my flared opening in the KOL near the burner port is blocking one side of the flame a bit (left side in the pix).

-
Tips for Kast-O-Lite 30 application?
paulgatx replied to paulgatx's topic in Insulation and Refractories
Nope, burner is built for a volume 3-4 times larger. I'm setting myself up for a fail, but at least I'll learn some lessons. If I have to do it over I'll just use one layer of Kaowool. If it does work, I'll be melting titanium after I put the Plistix on. Haha -
Tips for Kast-O-Lite 30 application?
paulgatx replied to paulgatx's topic in Insulation and Refractories
Thanks, Twisted. My premixed batch was drying, so I went ahead and just took a chance. It worked for the most part, with only some stuff falling off of the ends that I had to repair. But man my tiny little forge just got really tiny!