Trevor84
-
Posts
168 -
Joined
-
Last visited
Content Type
Profiles
Forums
Articles
Gallery
Downloads
Events
Everything posted by Trevor84
-
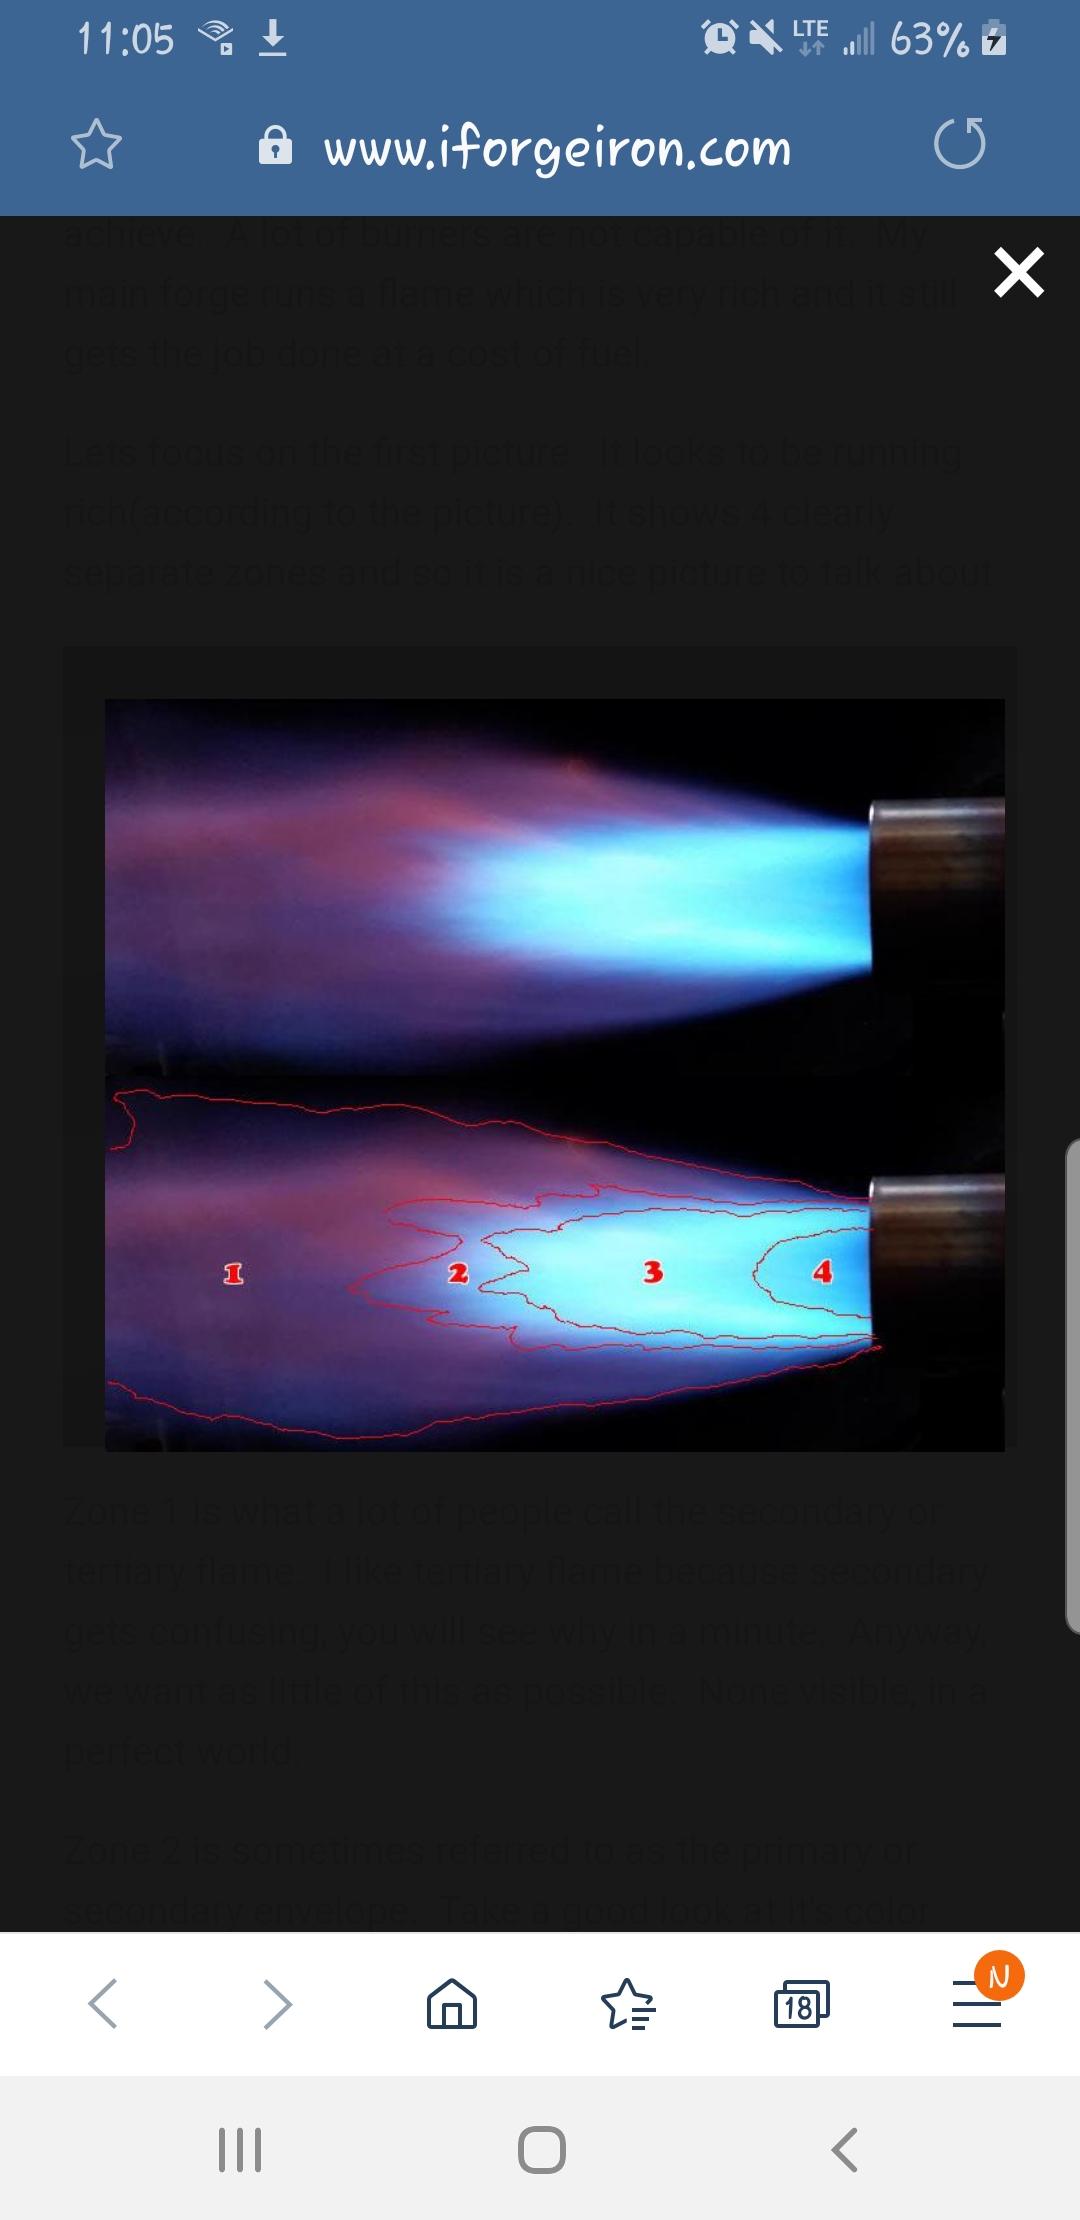
This is the section I grabbed that numbered flame from. I'm not saying anyone's wrong but I was thrown off by this as it seemed backwards. My main goal despite names and numbers while testing was to try and have the primary and secondary area kinda blur together so I didn't have the bright lightblue and less of that tertiary flame without getting purple. Ill take some more pics today with the different mixing tube lengths and lable them better as I'm obviously struggling with reading them. https://www.iforgeiron.com/profile/74859-another-frankenburner/ I'm not a huge tube guy. If I upload a video for private only and share it here will it be visable or do I have to upload it for public? Iron dragon I'm not a huge youtube guy. If I upload a video for private only and share it here will it be visable or do I have to upload it for public?
-
I'm trying to use these pics as guides but I'll see green with my eye and bright blue on my phone, I'll see a ghostly blue with my eye and a darker blue on the phone etc when I dim the light filter to snap a shot. I guess I'm being nit picky but I'm waiting for insulation anyways. As for the choke, I'm hoping to get it to run with out it so I don't have to muck around with it unless I want a reducing flame. Thanks again Frosty, I'll check in tomorrow.


-
Those numbers are my own reference kinda. 8"mixing tube (3/4") with a 1 7/16" or 1 9/16"over hang of the nozzle. Those seemed to be the magic numbers for stability. I couldn't type it that way when I named my album. If you think the 030 is best all around I'll grab a couple pics with the different mixing tube lengths tomorrow. I may not be reading it right, it's really hard looking at a flame with my eye, through my phone and trying to match it to pics from here. I'd post the videos of the flame but I haven't figured out how yet.
-
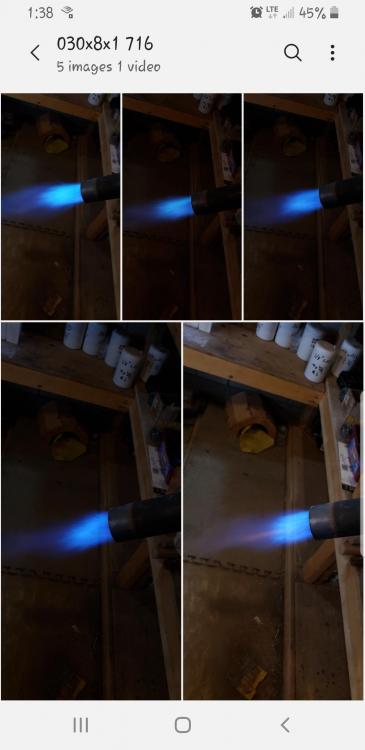
I hyper focused on trying to get those two "zones" to kinda blur as I was tinkering. I wrote notes but didn't lable the pictures while I was testing shorter tubes, doh. I did notice like you say the shorter bushier flames but I had to move the choke quite a bit throughout the psi range to keep the flame looking decent. I have the notes regarding the different length mixing tubes and nozzle over hang. So when I get it in the forge I'll have a starting point. These two sets of pictures are with the 8" the first set is 035 no choke adjustment the second is 030 with choke almost closed at the beginning and finishing wide open.
-
Thank you, I will watch for that as I put things together then I tried 7.5, 7, 6.5, 6 mixing tubes with both 0.030 and 0.035. I either ran rich with the 030 (believe it or not) and lean with 035. It seems my original set up is burning the best thought the range. Without drilling the 030 bigger. 023 wouldn't even light. Time to get the forge finished then adjust it in there too if needed. Thanks for the help so far guys.
-
Ok that's good to know, I'll make sure not to lose the settings I have currently. I'll tinker with it a bit just to see since I have the parts already. I'm thinking my forge will allow room to swirl the flame I have but you got my thinking about a slower fatter flame when we were talking about the mixing tubes. I'm heading to the shop in 10 to go play mad scientist a little more and see what happens. Then it's on to finishing up the forge so I can really test this sucker. (Jynx)
-
When it comes to the orifice, right now I have an 035 in there and was thinking of trying a smaller one then working my way back up just to see. Are you saying that a smaller jet might not work as well? I know I had trouble lighting it with the smaller jets at this mixing tube length. I do have tip drills/files as long as I keep my notes on what made this work so far there's really no harm in trying another combo I guess. Now that I see the flame parts identified I should be able to start understanding how to read a flame.i still have to get it in a forge to know for sure Sorry but is this reffing to air passing between the nozzle and the insulation where the burner enters the forge? I may have missed something as I thought that should be stuffed with some scrap wool. There are so many individual variables, i have kept myself up at night running through these while trying to design this forge. I guess I'll know more once I get this in the forge and see how it reacts. Thanks for the extra help, I'm getting there slowly but surely.
-
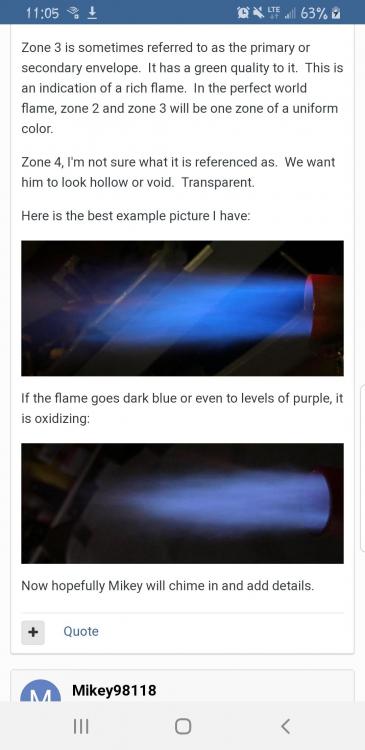
That explanation makes a lot of sense and clears things up Franken. I've struggled to find pics including a description like that. Flames can look so much different in pictures, to get these I had to turn the brightness down on my phone to kinda match what my eye sees. Thank you for starting this thread Mikey. I'm stoked you approve of the flame as well, your explanations were easyish to follow. I'll add this forge on another page when it's done, in couple weeks hopefully. I do want to see if I can get similar results using a 030, I might play with that tomorrow whilst tinkering with the mixing tubes.
-
It really is a lot. But fun. The math that makes these work is pretty cool and I'm thankful it's here. I'll play around a bit tomorrow with it and see what happens, nipples are cheap. Thanks again
-
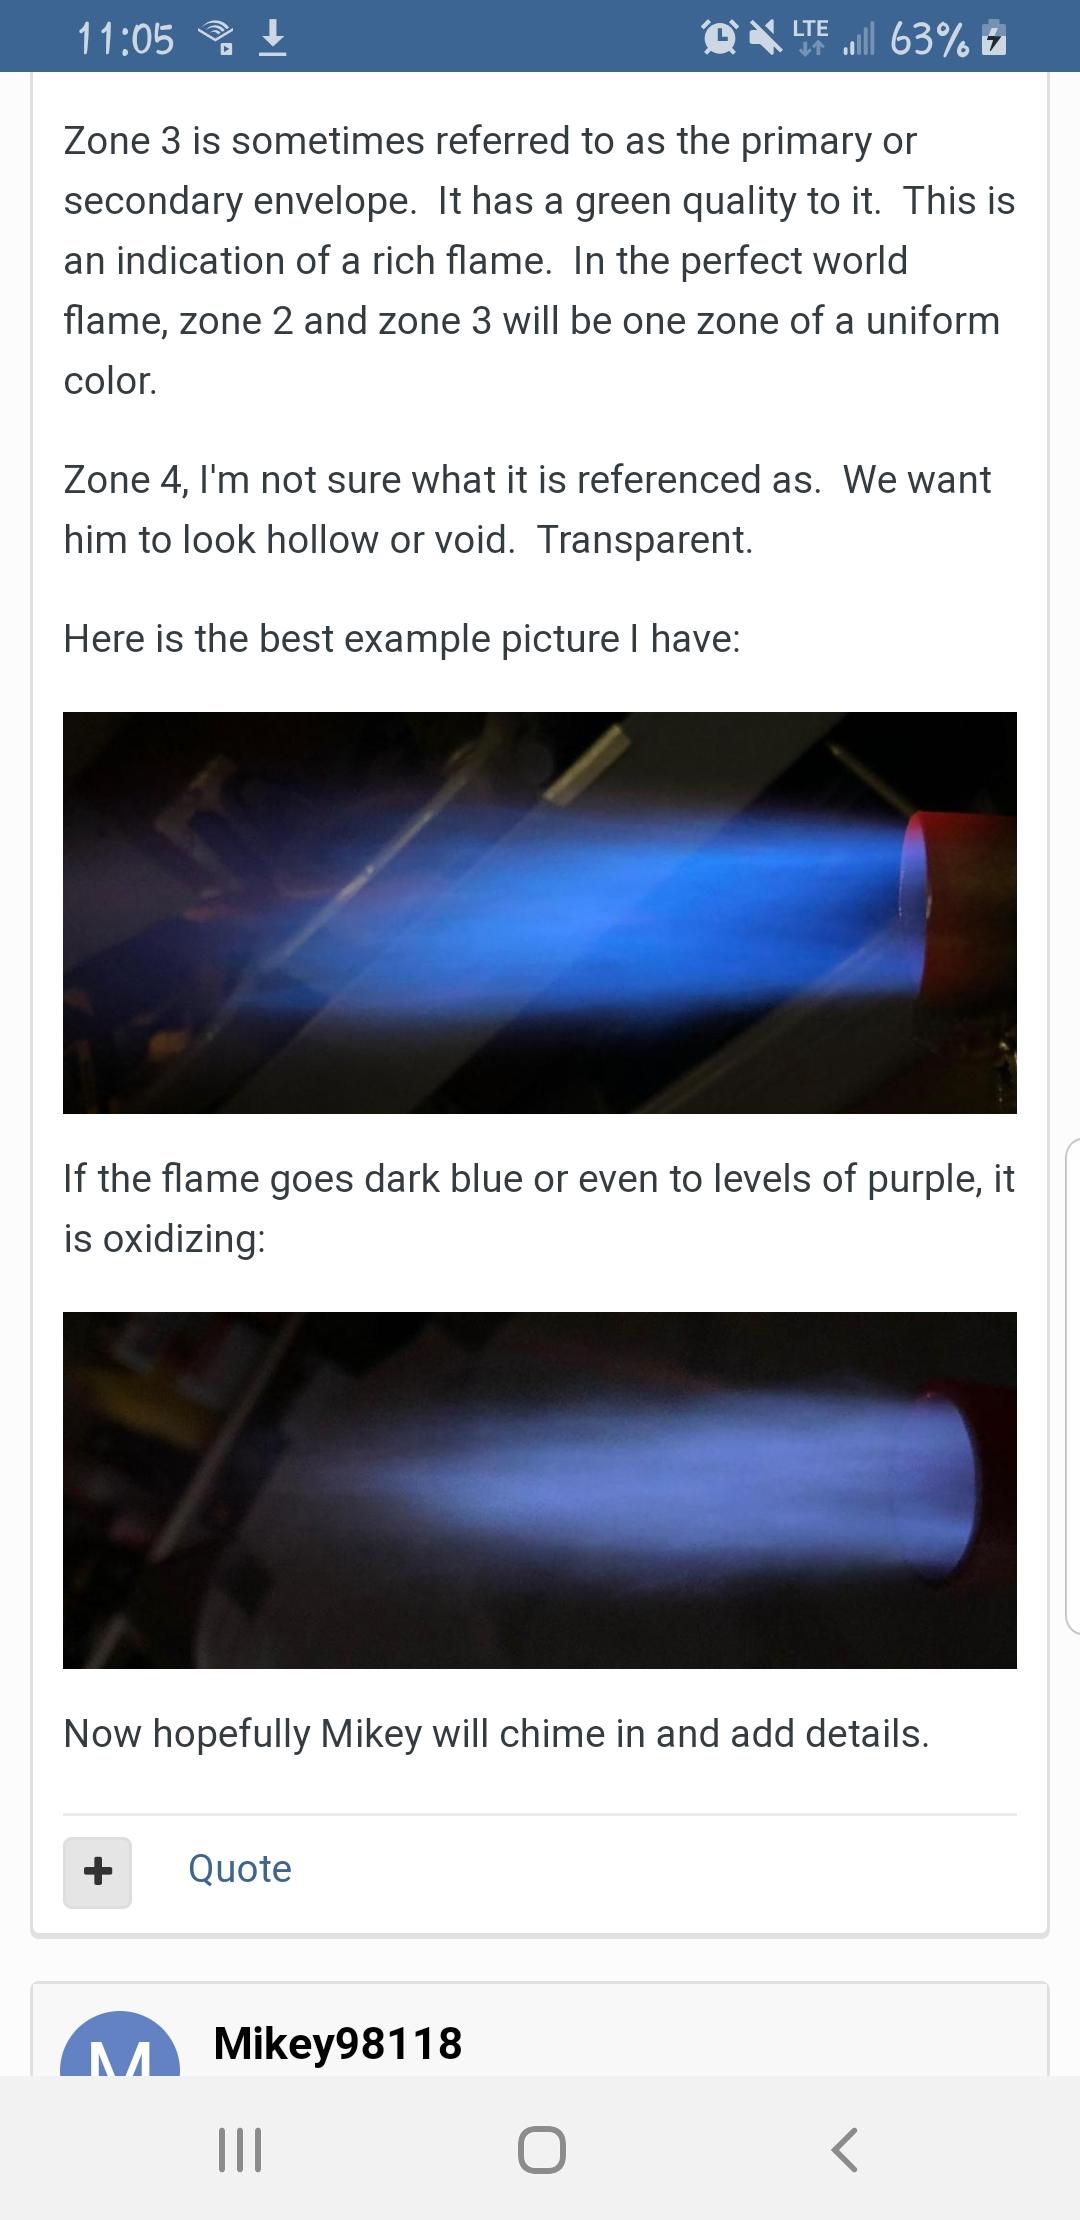
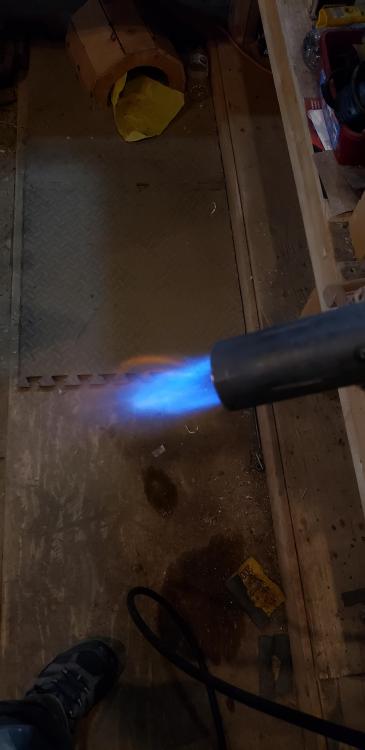
Thank you. No hint of green flame with this set up. I know it's not in the forge but the 1.5 over hang with the nozzle seems to be the sweet spot it is the only position that I found held stable. It literally goes from 1-30psi and stays that clear blue. When I tried a flared 1" alone I got the greeny soft blue colour. I'm going to grab another 3/4" nipple and try a shorter mixing tube. Shorter means faster and longer means smoother flame right? I've been jumping back and forth through the first dozen pages for the last couple days trying and I keep forgetting which page I read what. I get lost on the first second and third flame. Is this the different flames? Or do I have just one and two in this pic?

-
This is where I took the 8"mixing tube from I guess. This is a 3year old comment though so it would be worth it to try a shorter one.
-
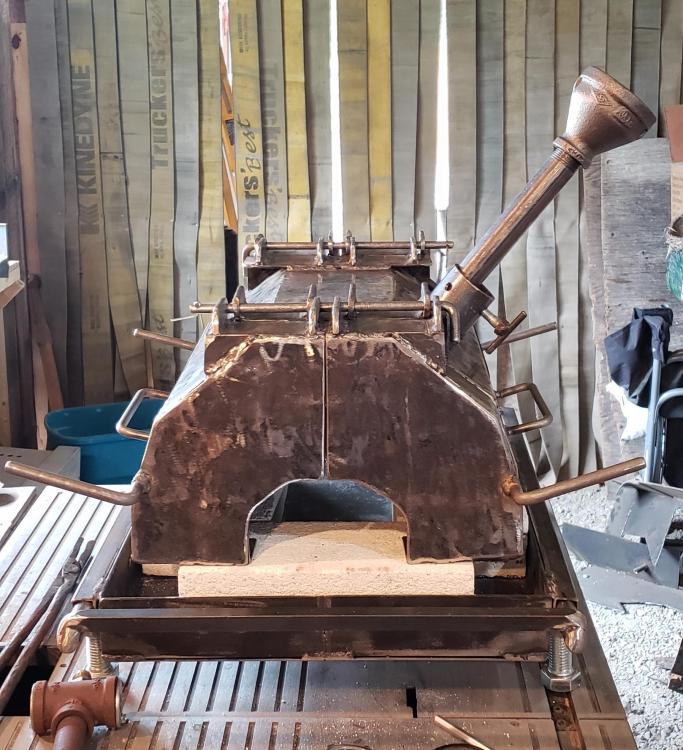
Fixed the location I think. Rule of 8-9 would be 6-6.5" I guess. I thought one section Mikey mentioned using 7/8 to figure the rule due to pipes not being actually 3/4. I'll have to find that page again and see what I missed there. Following you're general rule Frosty I was making only one adjustment at a time (nozzle) after I found this flame I figured there was no need to muk with the mixing tube. I'll start trimming it down tomorrow and see what happens. They're Ifb 2600f for the floor the body will be 2" wool with kastolite. I'm planning on gaining the bricks a coat of kastolite. 330ish ci interior on the rare occasion I'll be able to set the top on a wall of bricks. (will loose welding heat) I may add a jack/crane kinda like your shop forge just cuz.
-
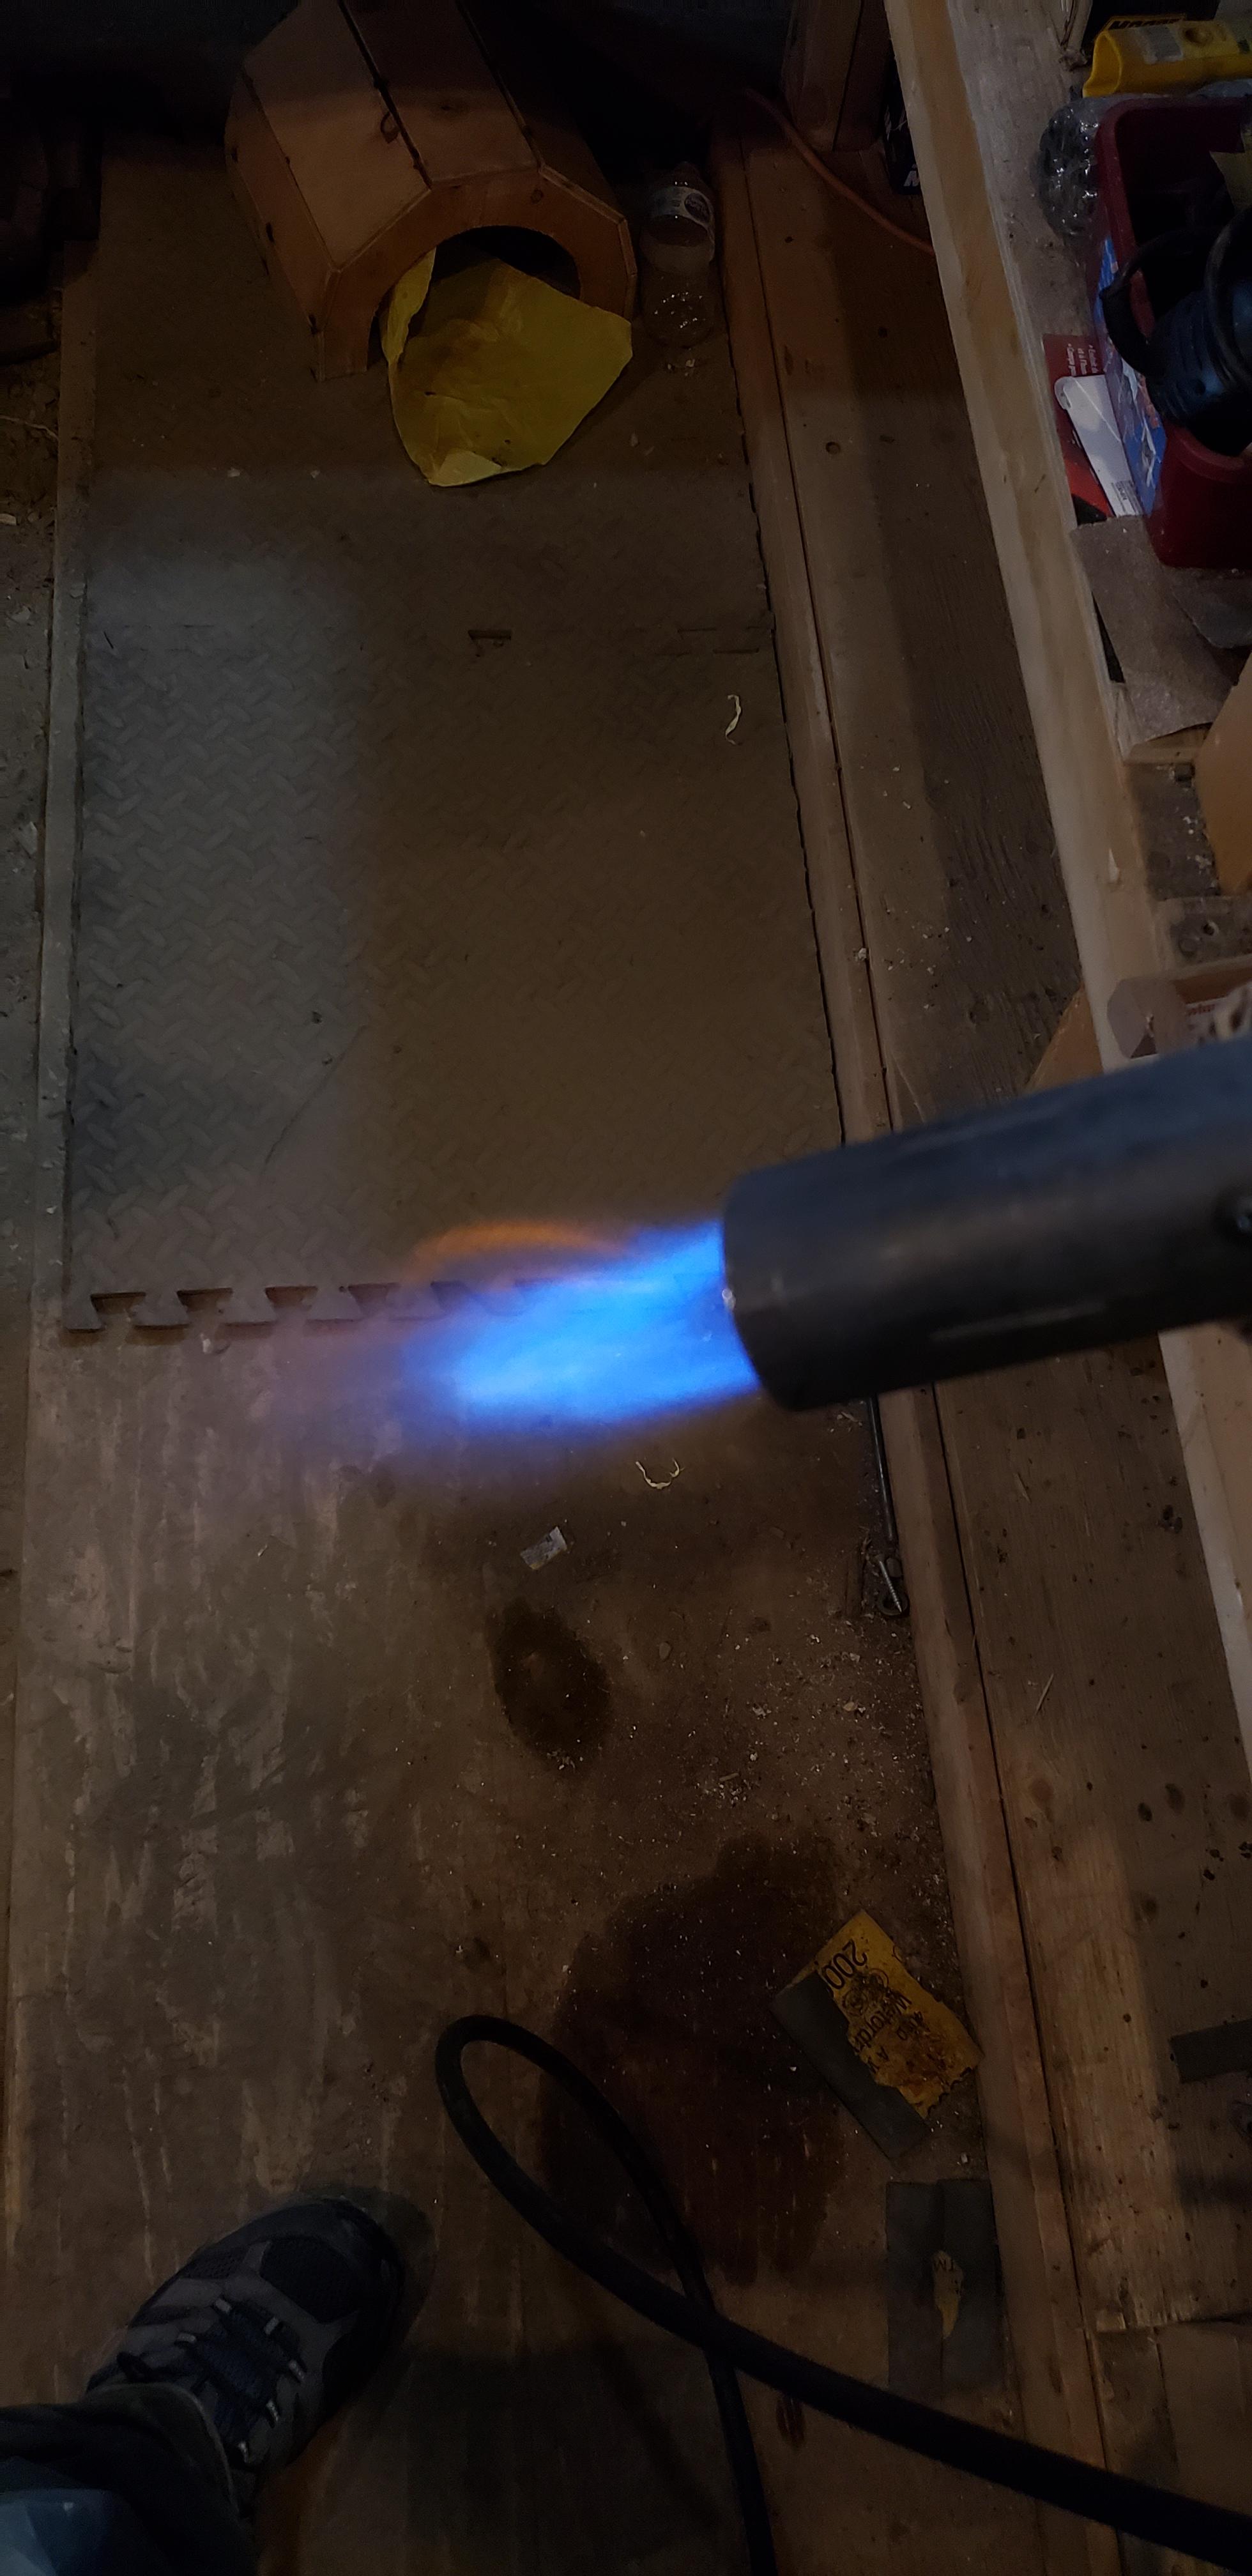
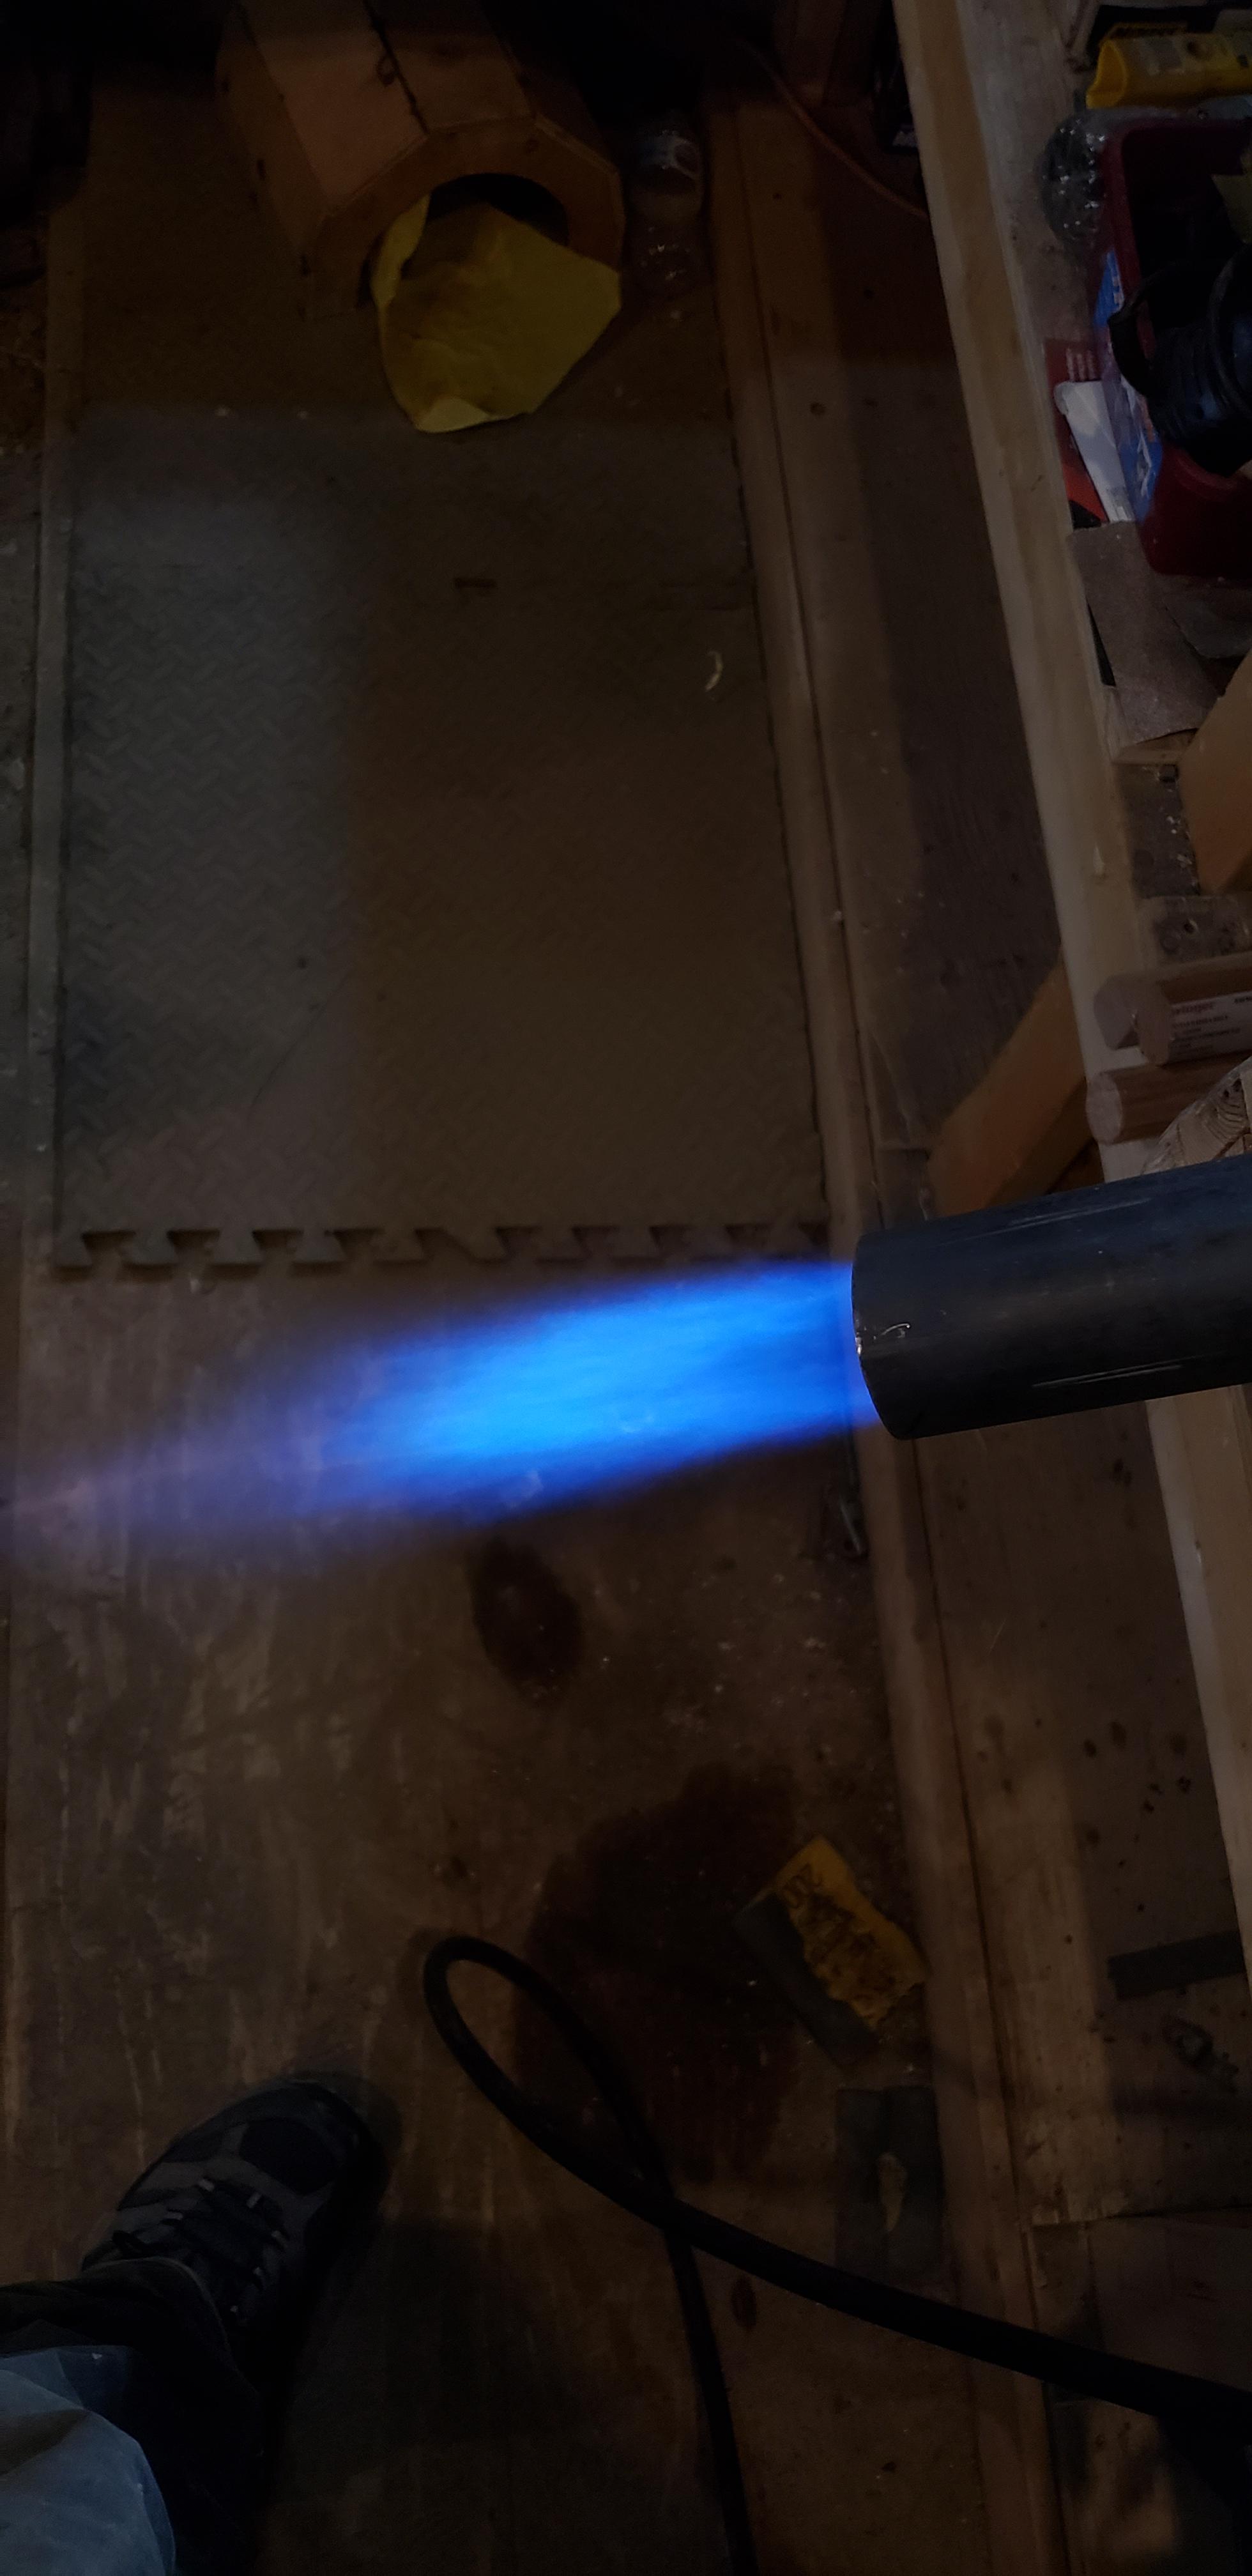
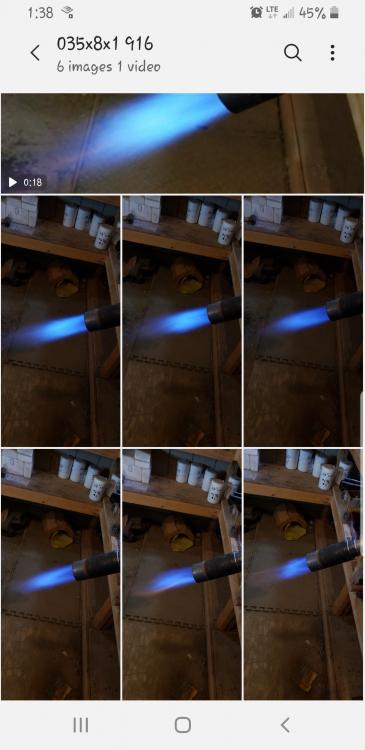
Hello all. My name is Trevor, I'm from east kootenay's BC Canada. I'm kinda jumping in here I hope it's ok. I want to thank all who have contributed to this thread. I haven't read in full past 2016 yet but I have used that info to come up with this and think I've got it diald in pretty good and I'm kinda hoping for confirmation/advice.(Hopefully it may kinda count as contribution too) 2"-3/4" bell, 3/4"/8" mixing tube, 1"spacer, 1 1/4" nozzle (apx 1 3/8" I'd at opening) 1 1/2" overhang, 1/8"brass T, 0.035 tweeco apx3/8" above throat. First pic is around 12psi the next 3 are 1, 15, 30psi it holds steady the whole way through. I think this is a neutral flame , it has a faint hint of propane coming off the flame itself though but I think Mikey mentioned somewhere that's a good burn...? The flame doesn't get much longer through out the range but does get louder and alot hotter. It'll be going in this forge once my insulation arrives. (I'll try and make a thread for the whole build once I'm done.) Anyway thank you all for the info so far, I look forward to catching up on thiswhole thread. span widgepan widget


-
Out of curiosity did you try Frosty's actual design and it did not work? I ask as I am about to build the one he's spec'd out but with the 1/2" dimensions due to my small forge. According to everything I've read, his specific design works pretty darn good with the only mod possibly needed is to trim the mig tip. In burners101 Mike has a really good description of how to judge your flame for air/fuel ratio by the colors and shape. Looks like you have a better flame then before. Congrats