Shabumi
-
Posts
399 -
Joined
-
Last visited
Content Type
Profiles
Forums
Articles
Gallery
Downloads
Events
Everything posted by Shabumi
-
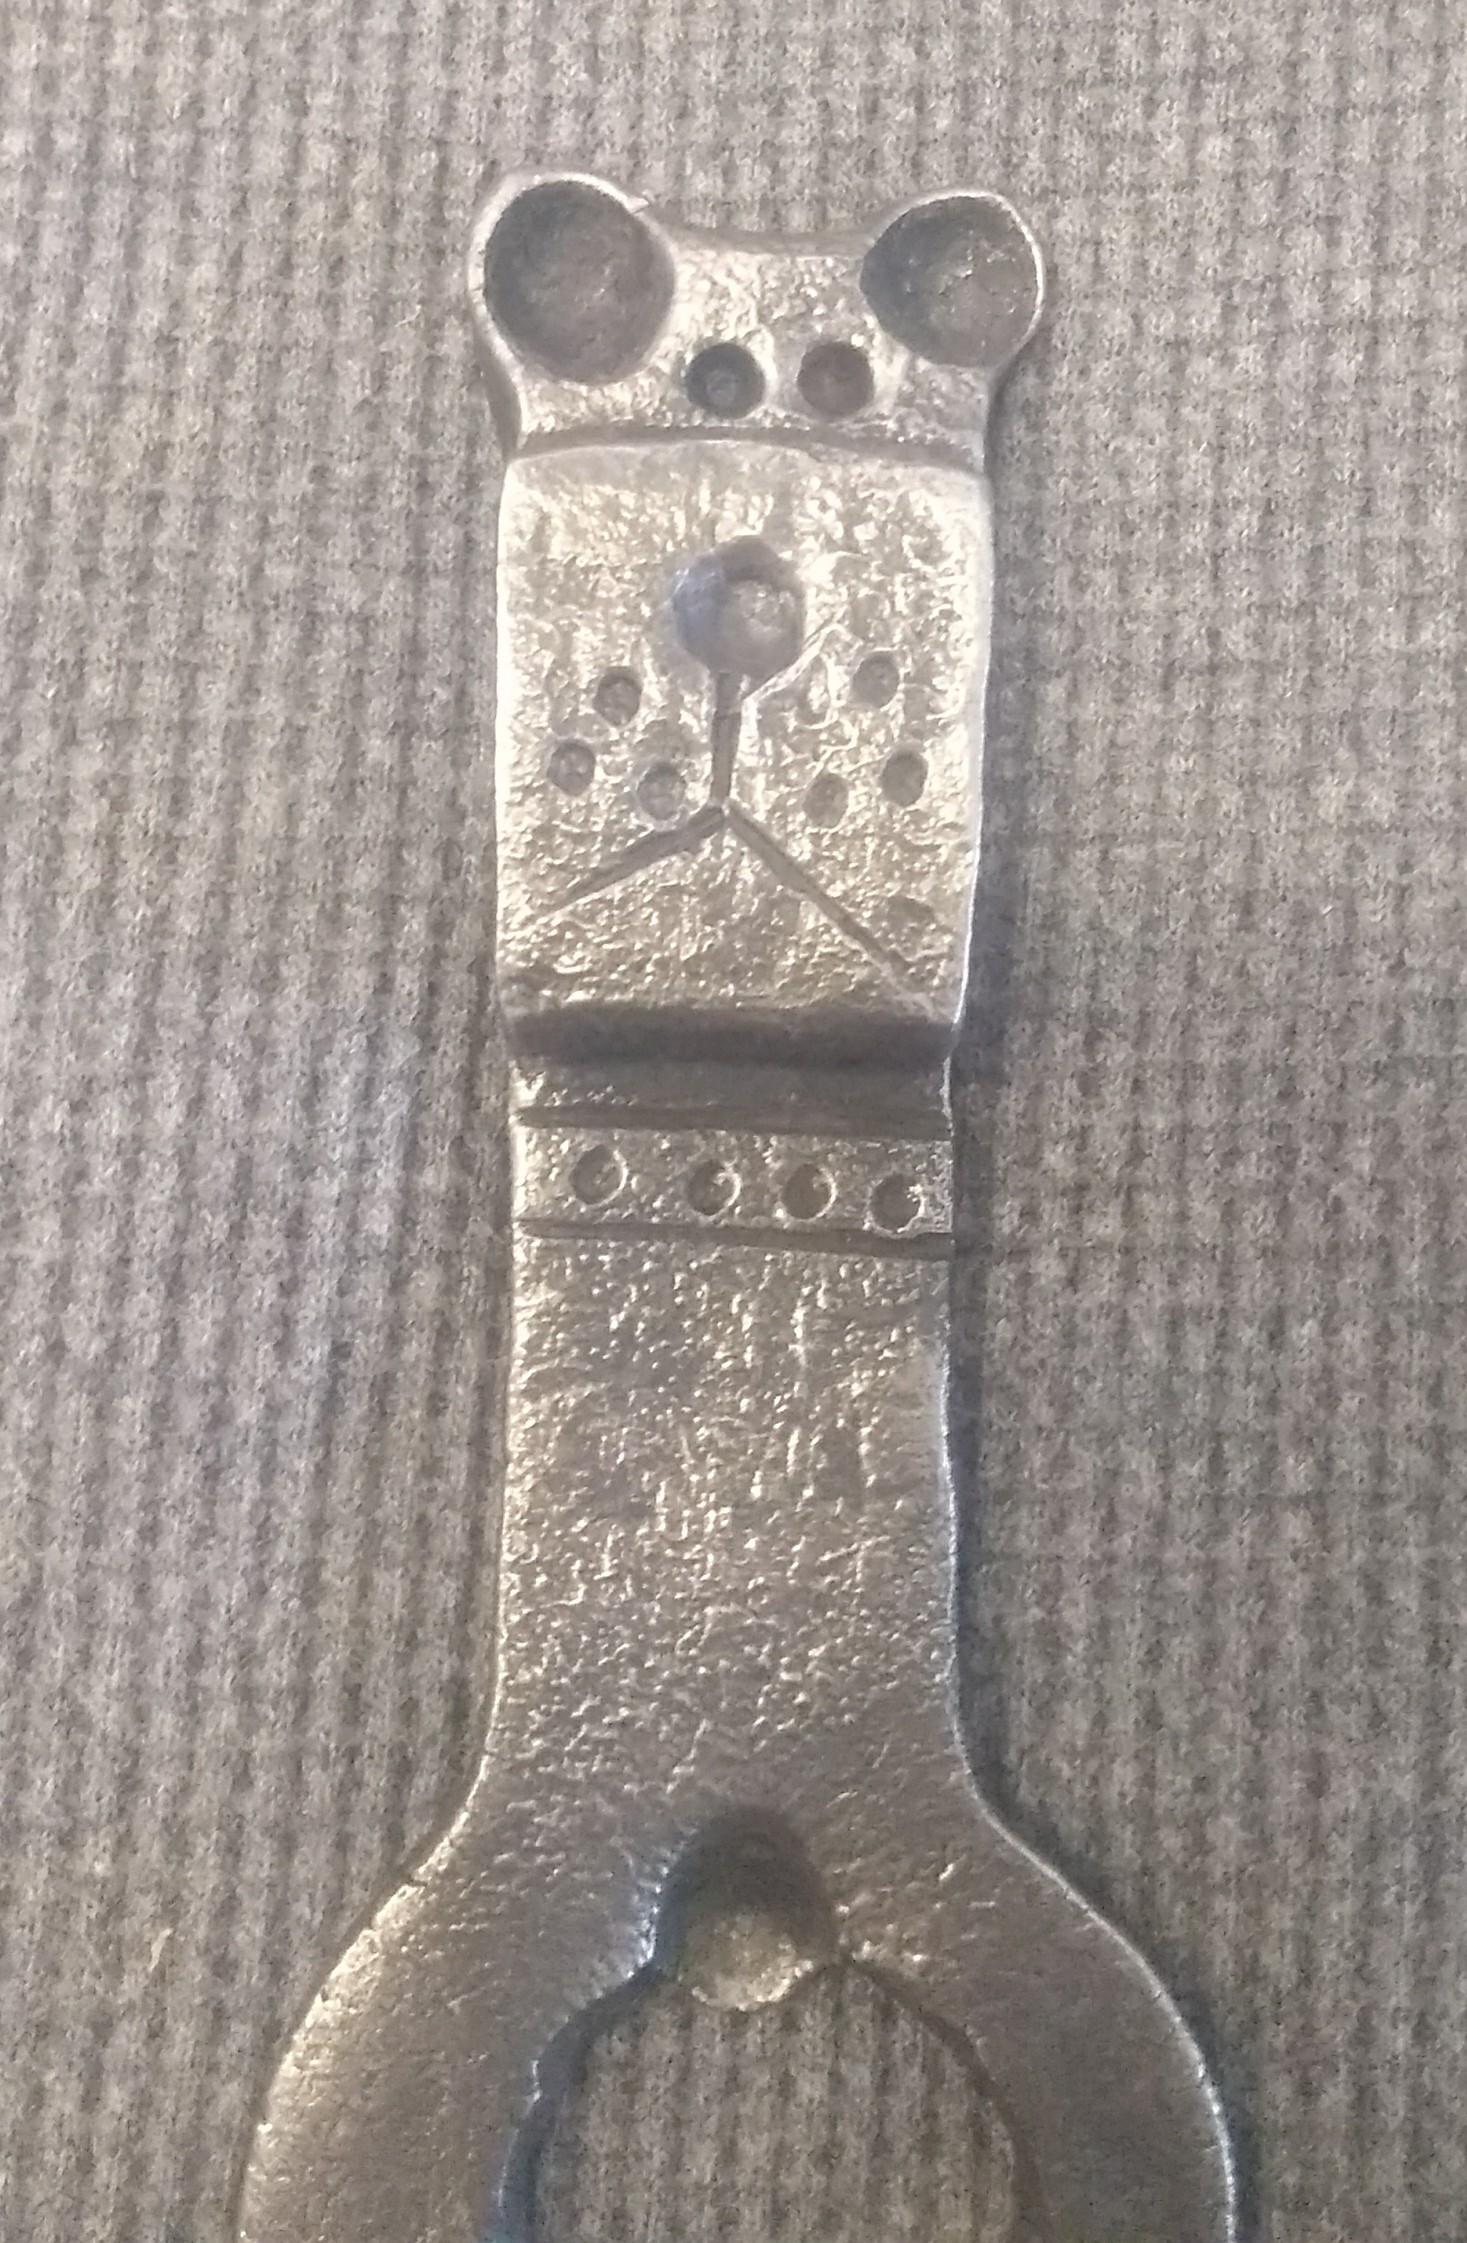
How'd you do the eye punch? Did you punch the pupil then grind the eye to shape?
-
Nice looking horse head, I like how round the cheeks are
-
Your welcome, and thanks for the support.
-
Interesting, when you see muscle memory it means "a memory from the muscles", I see "a memory for the muscles". Though I tend to see an abstract meaning in sayings. I can't help it, it's how I think. For example, whenever a member of my family finds money on the ground and picks it up they say "money on the ground means money to be found" which to them means that money on the ground is fair game to pick up. To me it always meant that by having money on the ground means more money is soon to be found, so I always keep a handful of change scattered about the yard. Maybe it works, maybe not. Worst case scenario, I can always pick it back up and spend it.
-
It's always hit and miss for me at yard sales, mostly miss. Haven't found anything at the 7 sales before this one, but then you find the one that has quite a few things you could use and it makes the effort of the others you went to worth it.
-
I always called this "muscle memory". Unfortunately, my muscles haven't learned enough hammer control to remember anything worthwhile, yet.
-
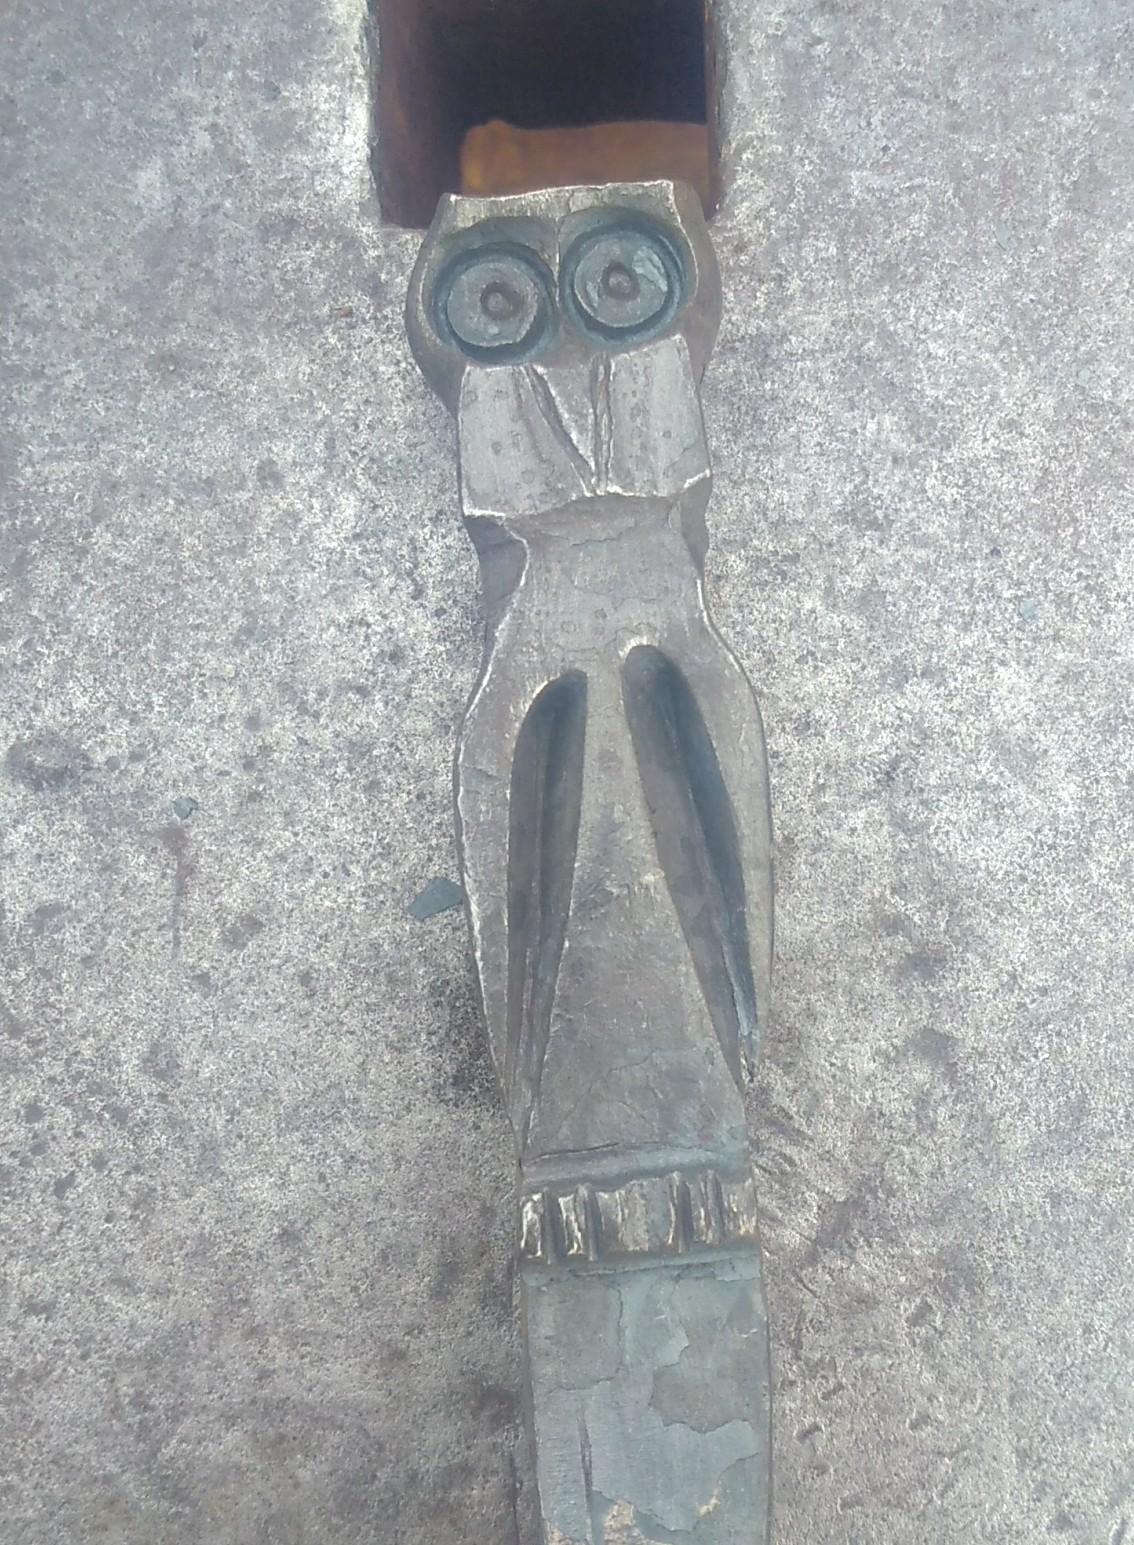
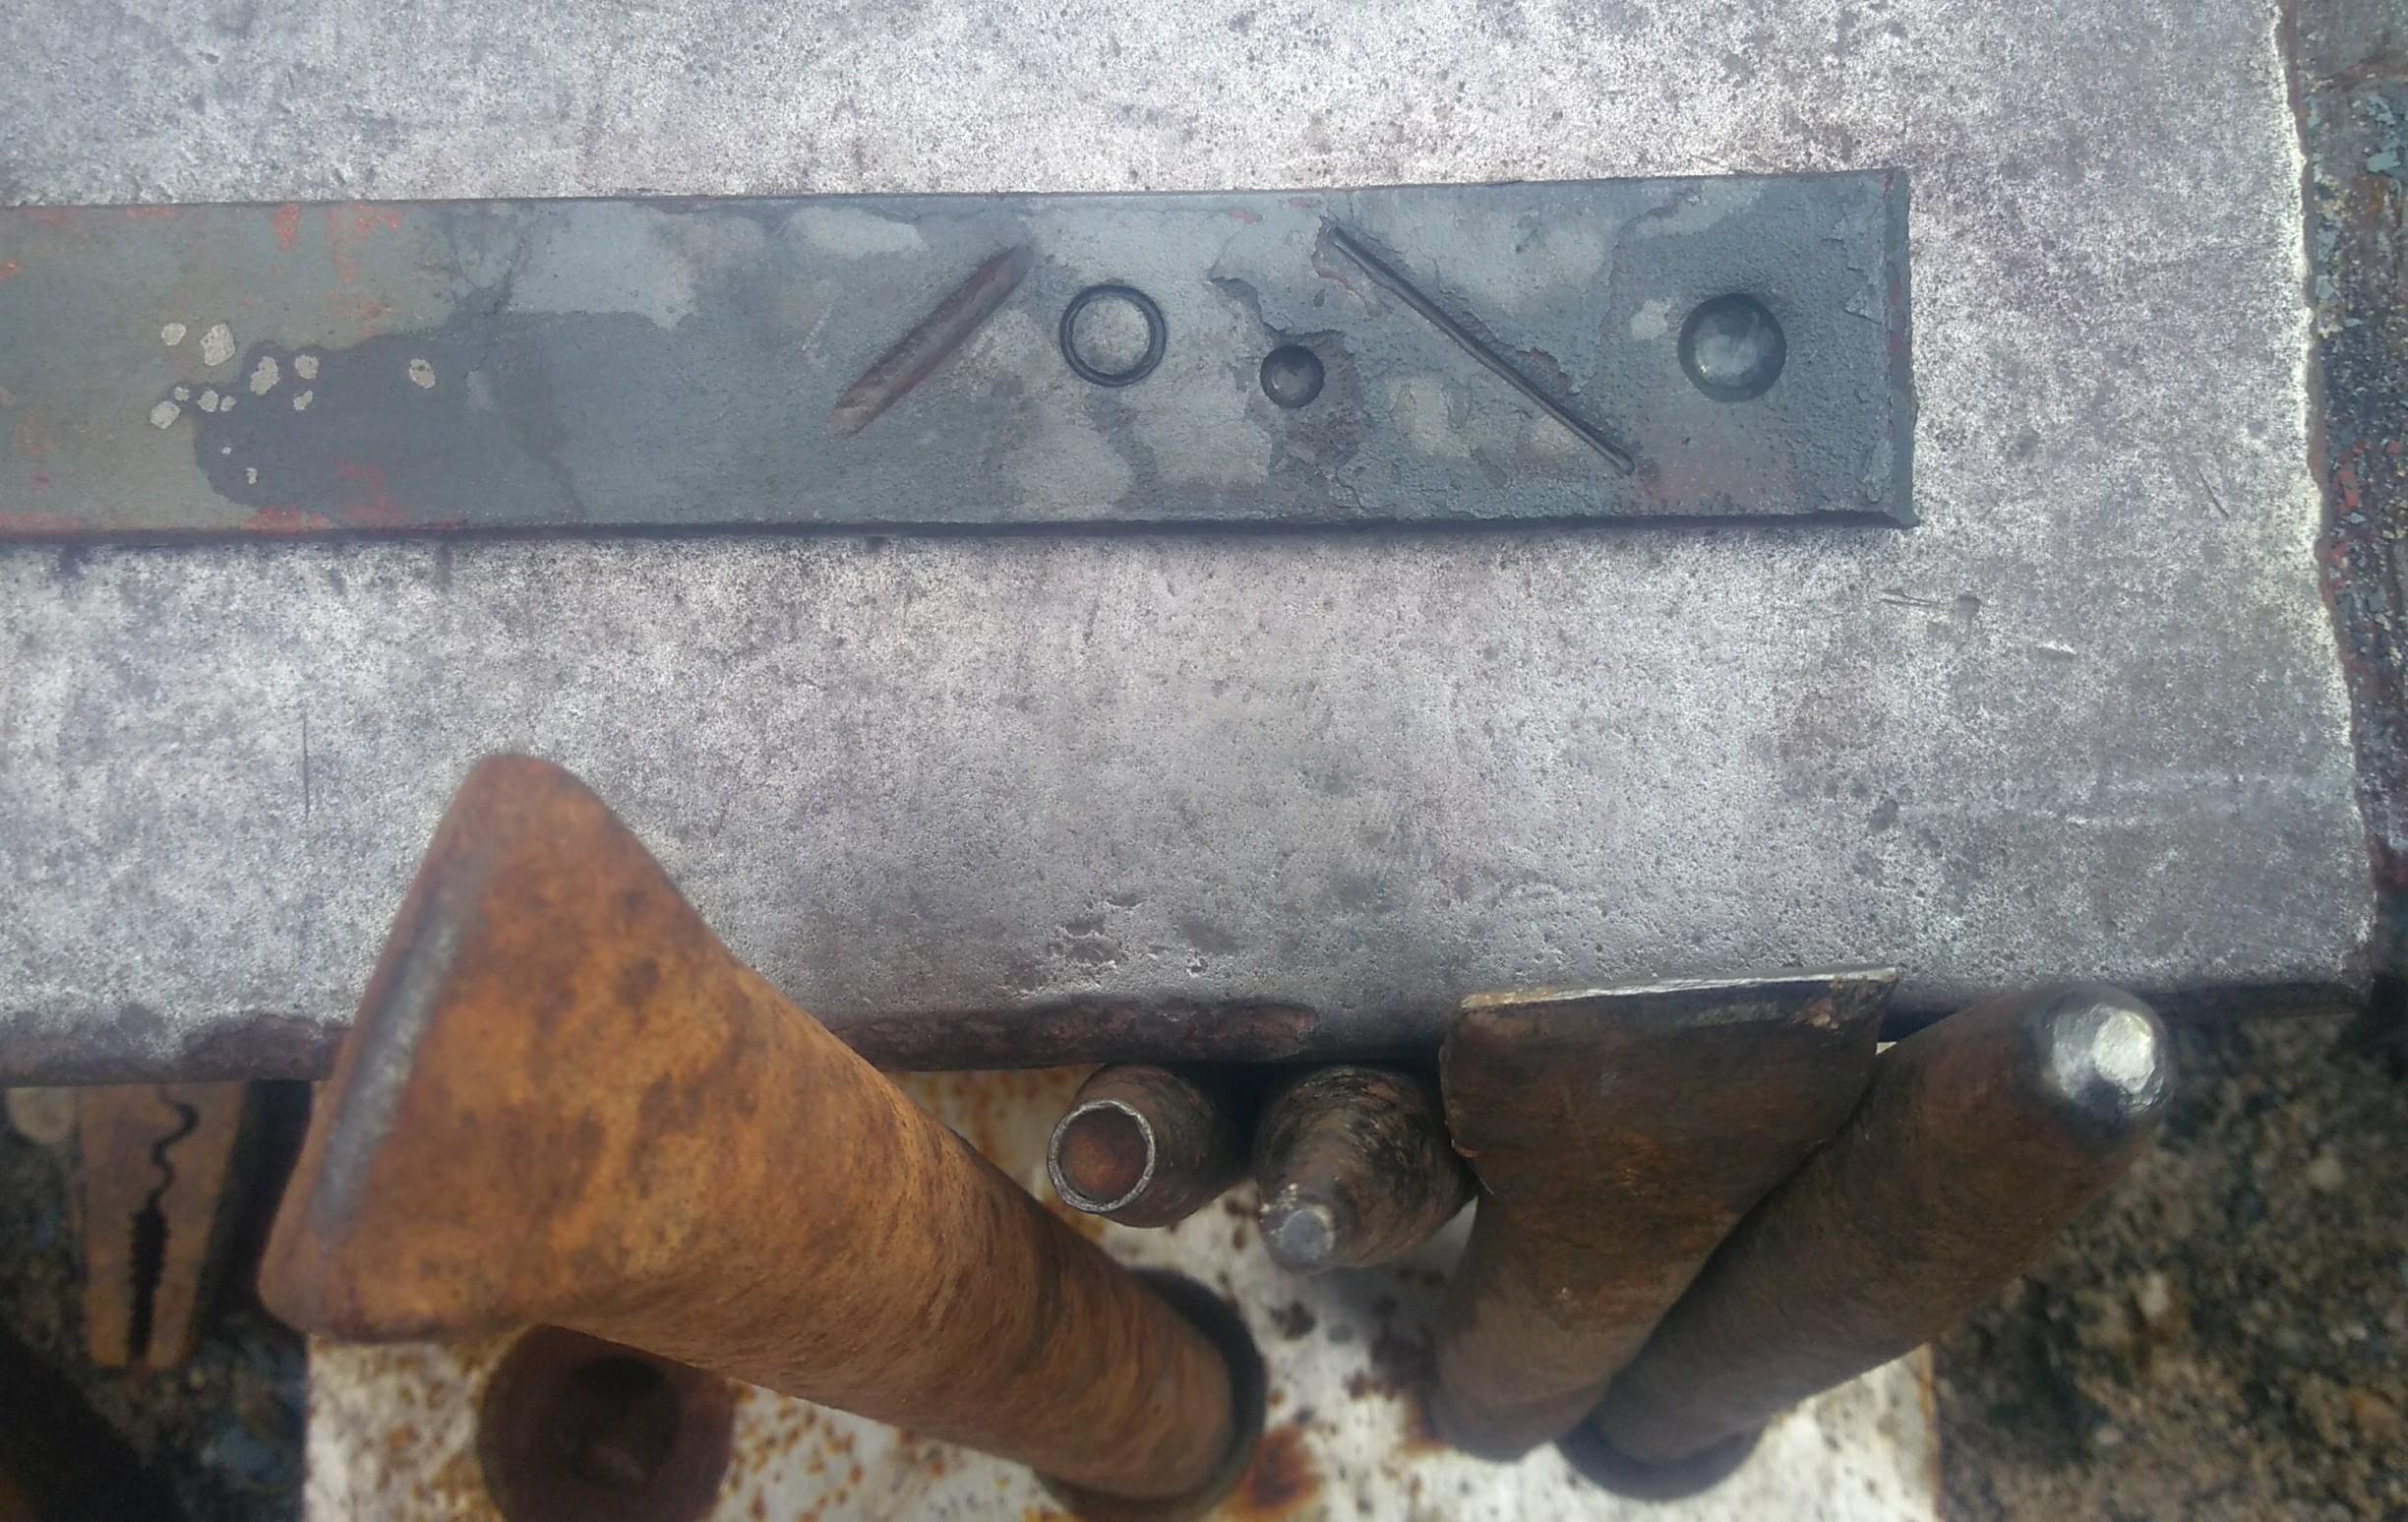
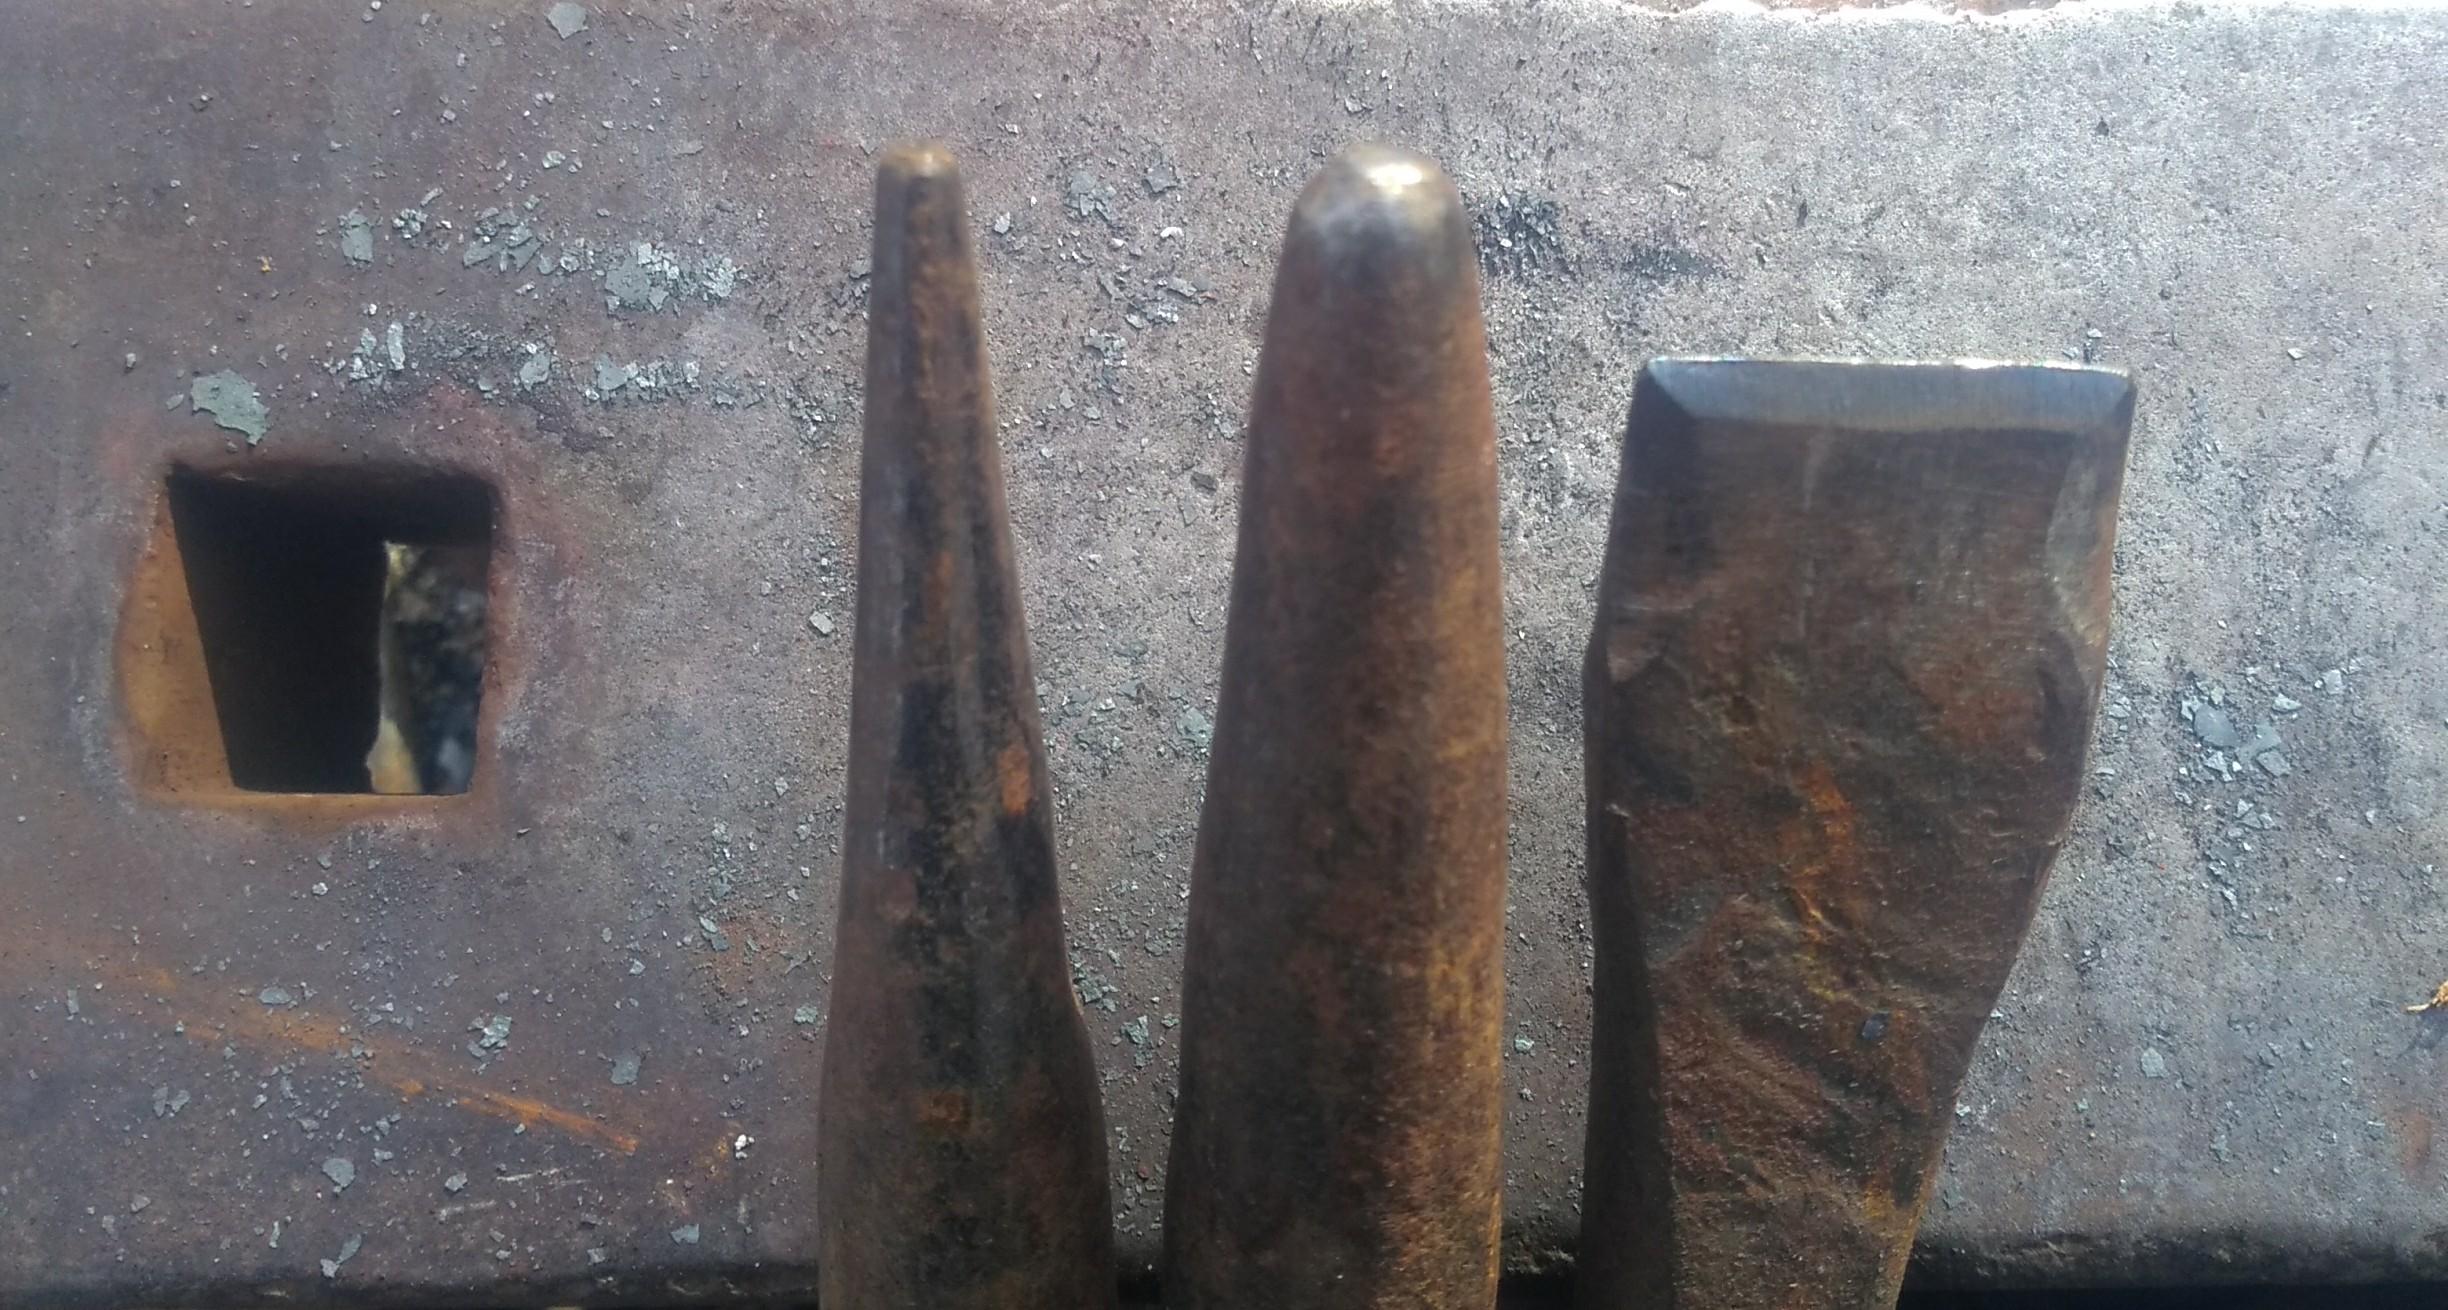
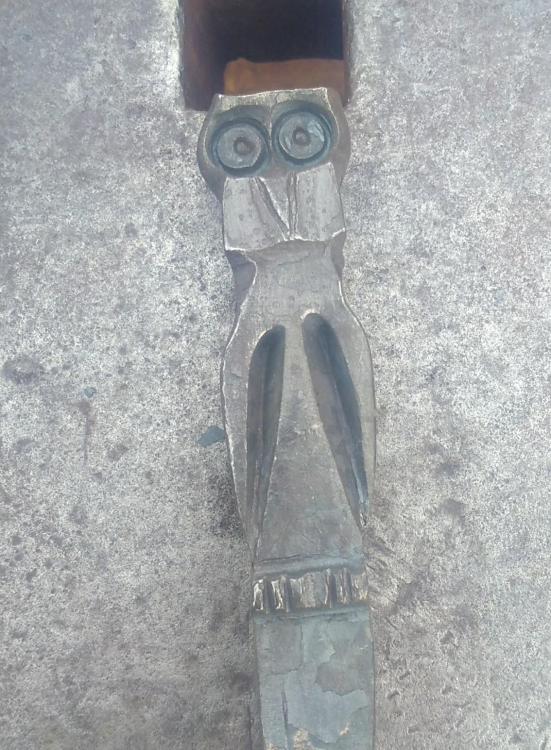
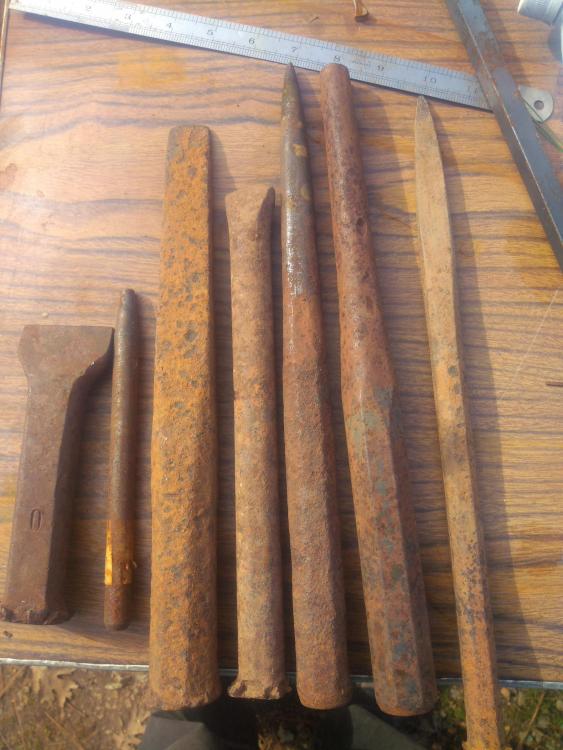
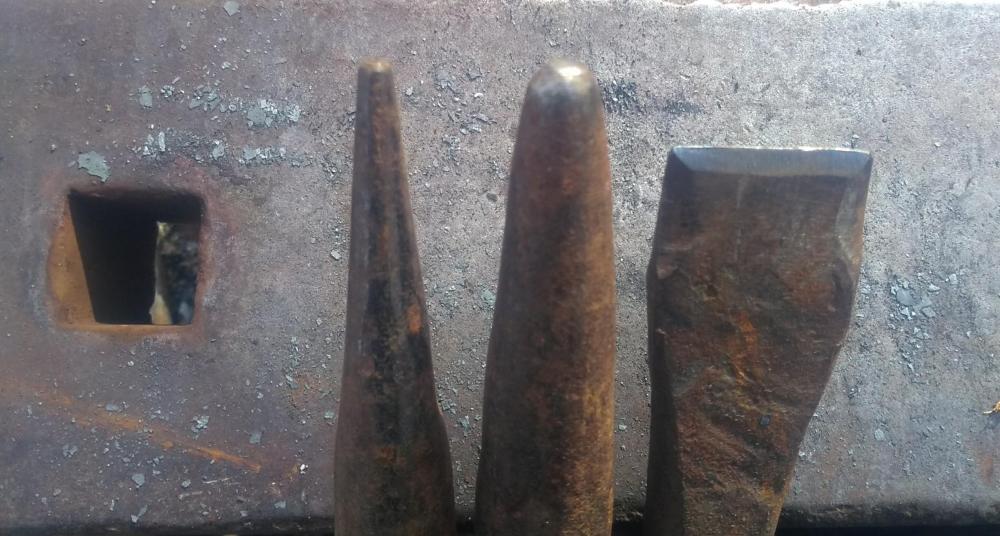
#5 is another owl, tried it with a new eye punch I found at a yard sale with a center punched pupil. The eye punch just so happens to be the same size as my large round punch, so I set in the socket with the round, then the eye punch to define. Also tried defining the neck more, though I think it looks too stretched out for my tastes. I prefer the shallower cut for the wings on the first one too. Somtimes simpler is gooder. And as requested, here is each chisel I have next to it's mark. Haven't used the rock chisel? yet, but I want to use it as is before I decide to alter it.

-
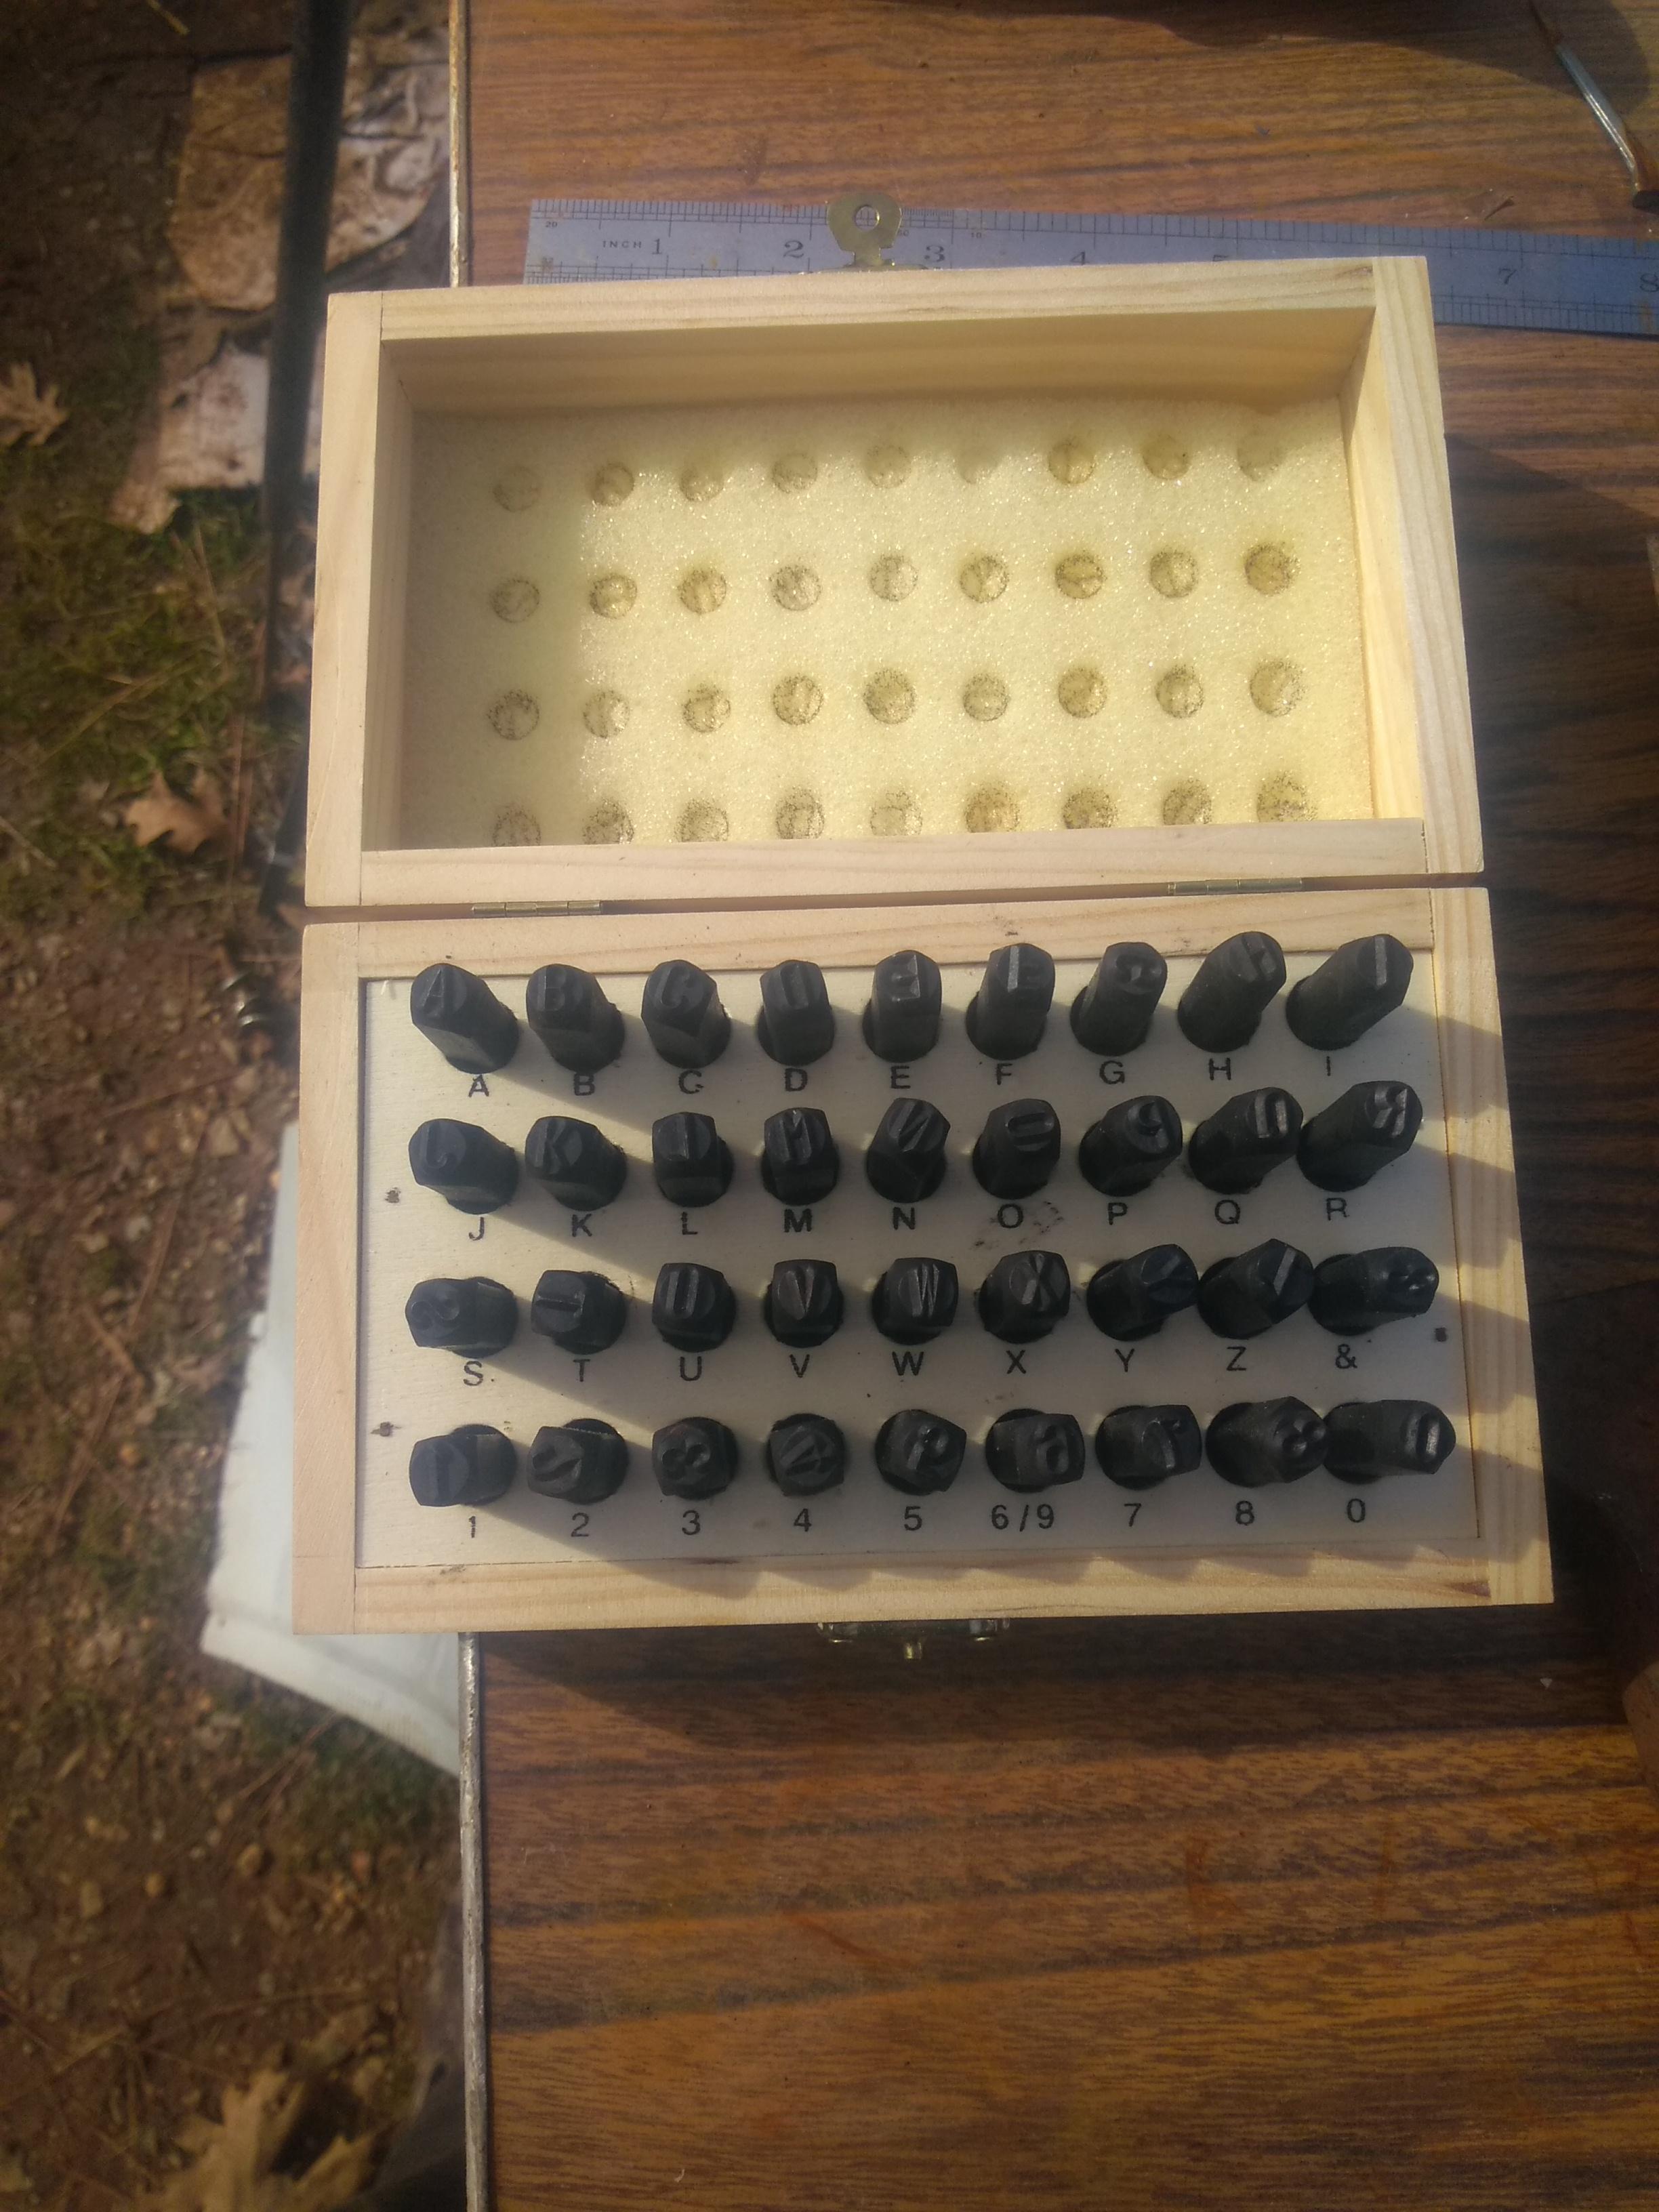
Went to a yard sale and found a few gems in the rough. From left: fuller, eye punch, rectangular drift, rock chisel?, round drift, round punch, drift?... 25¢ each Also a set of letter punches. 7.50 When asked why they were getting rid of it all, they replied that it was in their garage when they moved in, and they were tired of tripping over it. I managed to talk them down to $10 for the lot so we didn't have to mess with change and everyone went home happy

-
 Looks like you went a bit further back than I did. I only had a 30+ year old dictionary (unknown age as the cover and first 10 pages are missing, though it's been in my family since before I was born)to give me the root word, which it states as tradere. I googled tradere and got the definitions and other derived words from there. Now that I delved deeper I see you are correct.
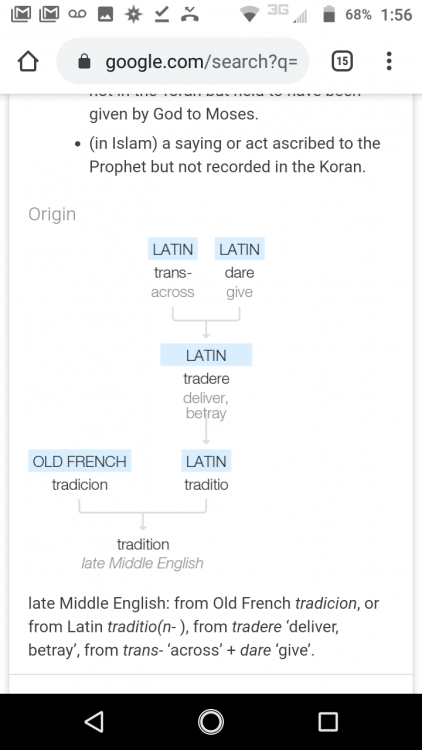
-
While I was reading this I got interested in the definition of tradition. It comes from "tradere": to hand over or betray, which is also the root of traitor and treason. My old Miriam Webster ditionary defines tradition as "the handing down of information, beliefs, and customs by word of mouth or by example from one generation to another". Which tells me that of you do things the way you were taught, then you are a "traditional" Smith. So even if you do work based on specific period, but you weren't taught by someone from that period, or from an unbroken line of Smith's who worked in that tradition, then you wouldn't be a traditional smith. As for the question at hand about liquid phase welding in a blacksmiths shop, I say go for it. As frosty said, they were invented by blacksmiths to make their work easier, so why not use it for it's intended purpose. You wouldn't deny using a fuller simply because it wasn't what they used before they invented them, would you?
-
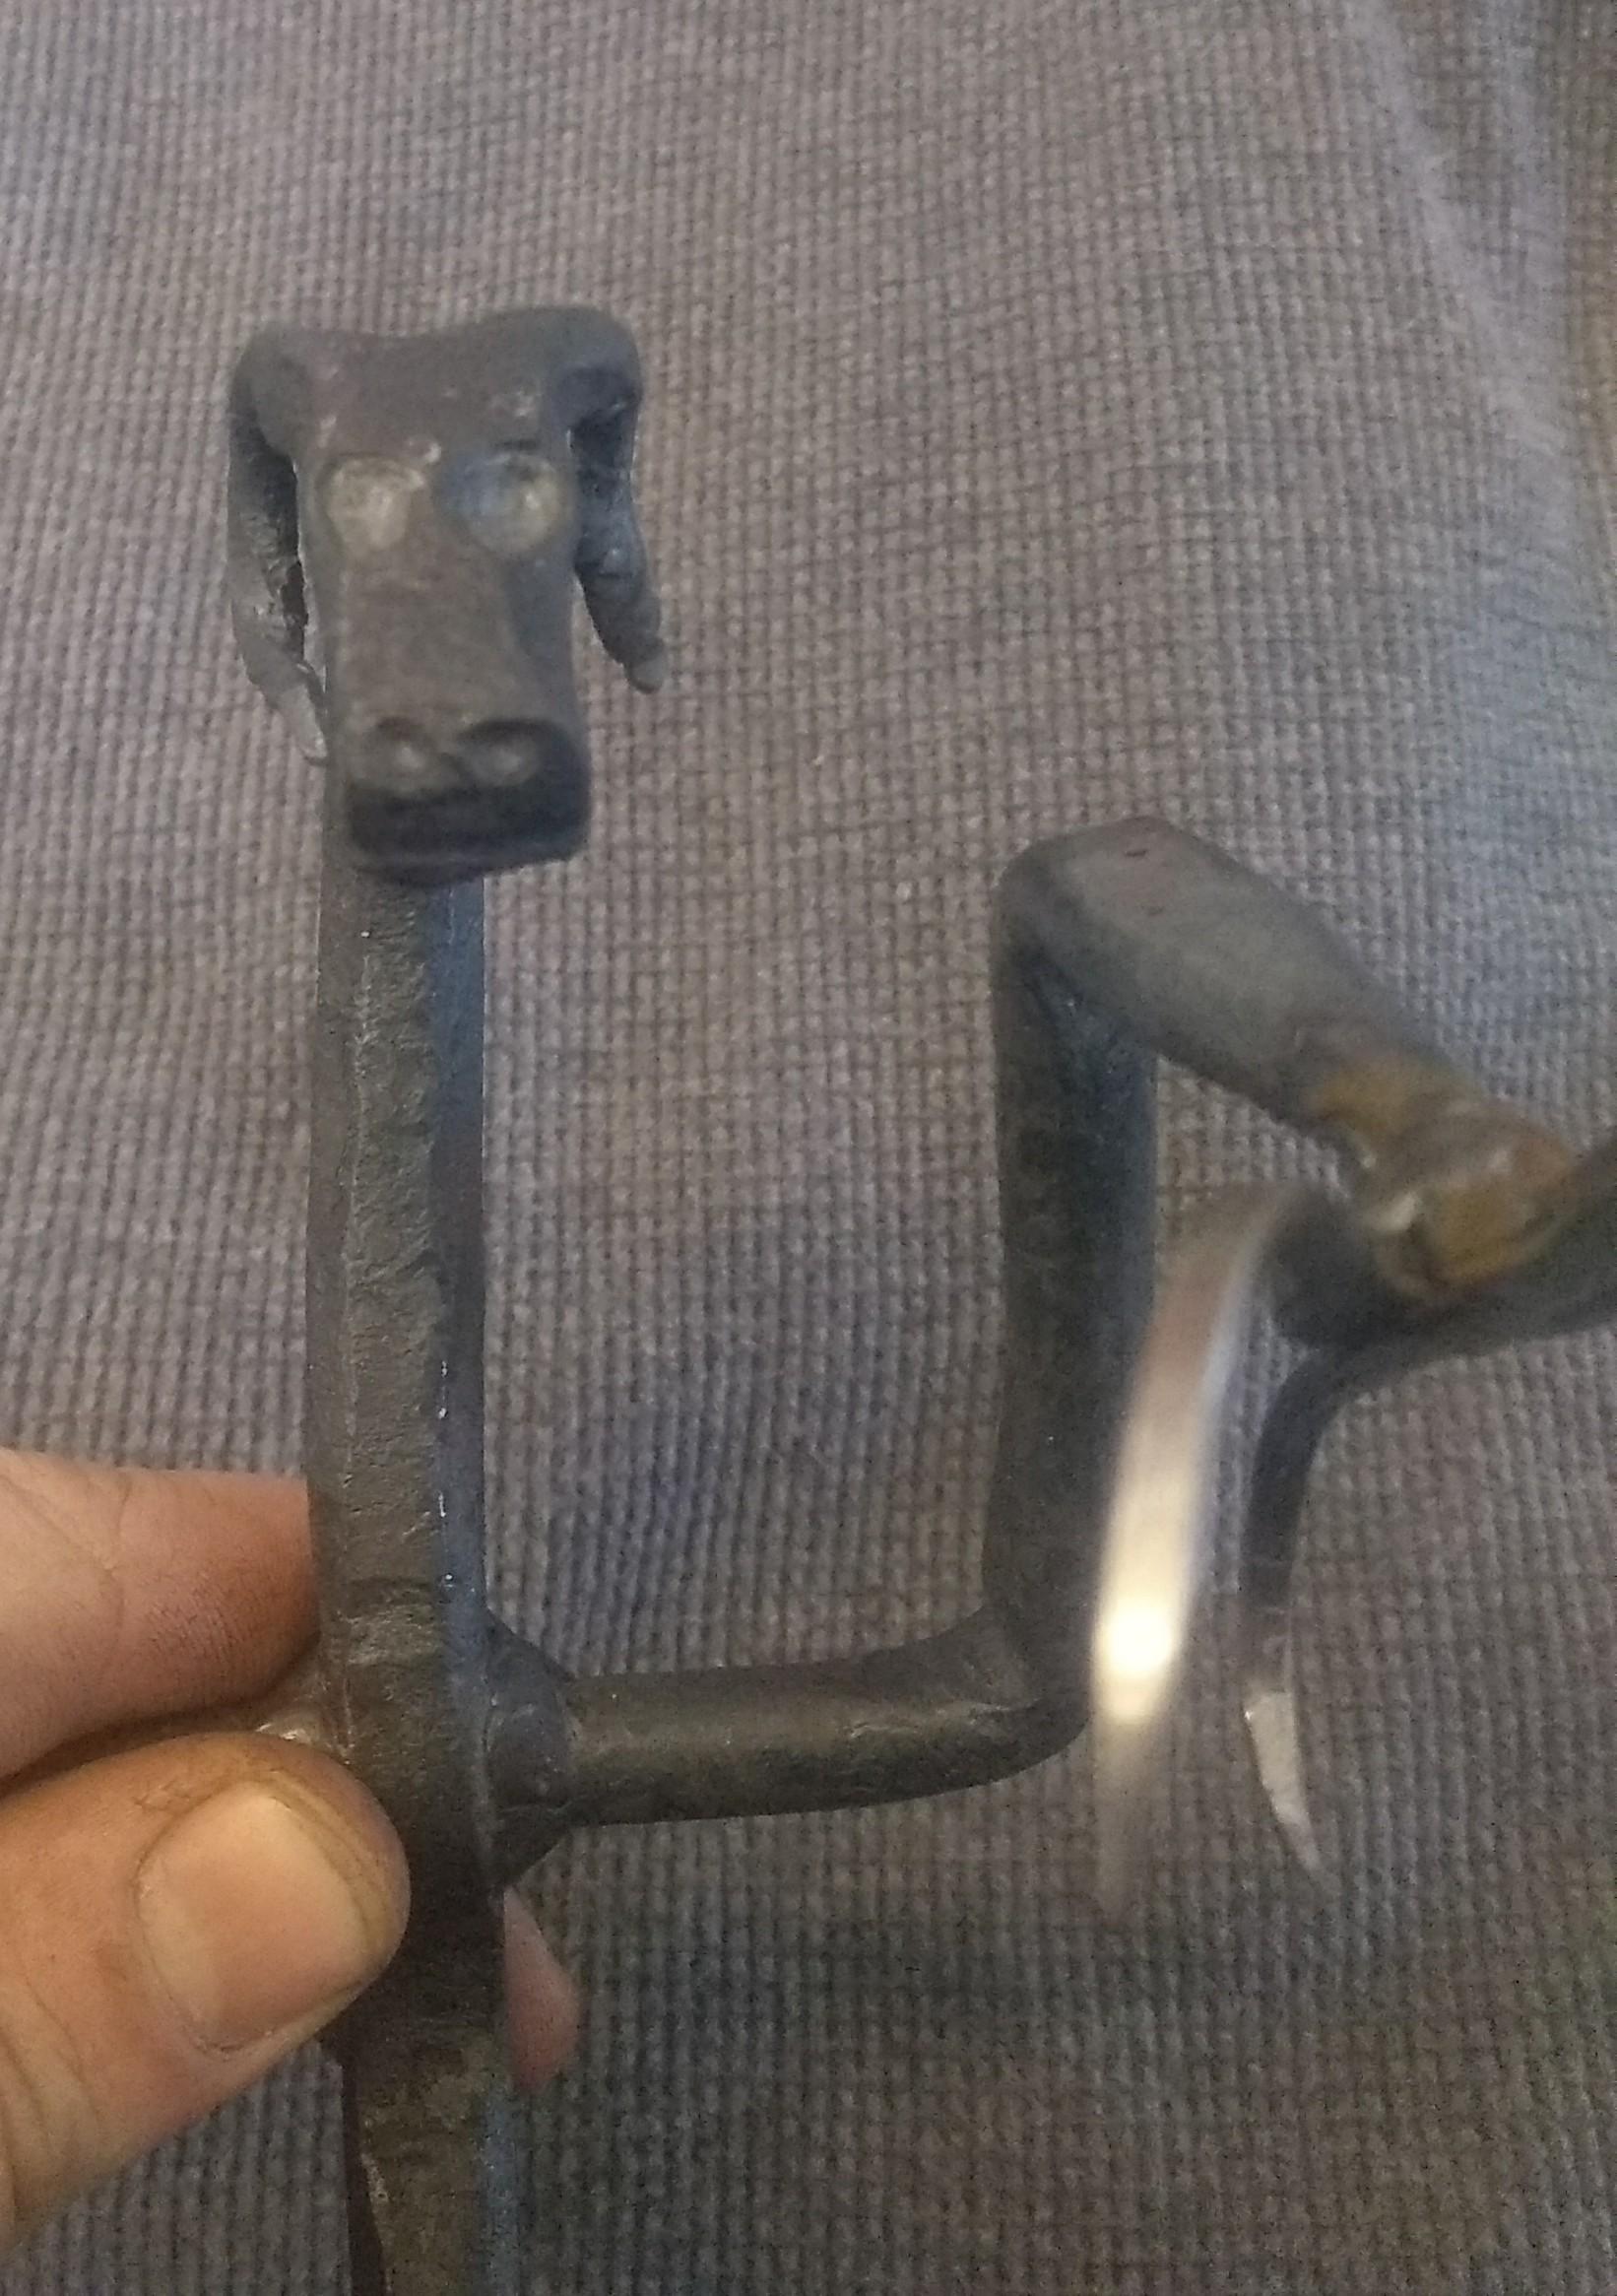
Thanks everyone. The owl started as a Brian Brazeal 3d horse head, but I messed up and made the cheek way too long and I used the wrong edge for some of the half face blows, so I just winged it. The lips of the horse became the brow of the owl, and the cheek became the body.
-
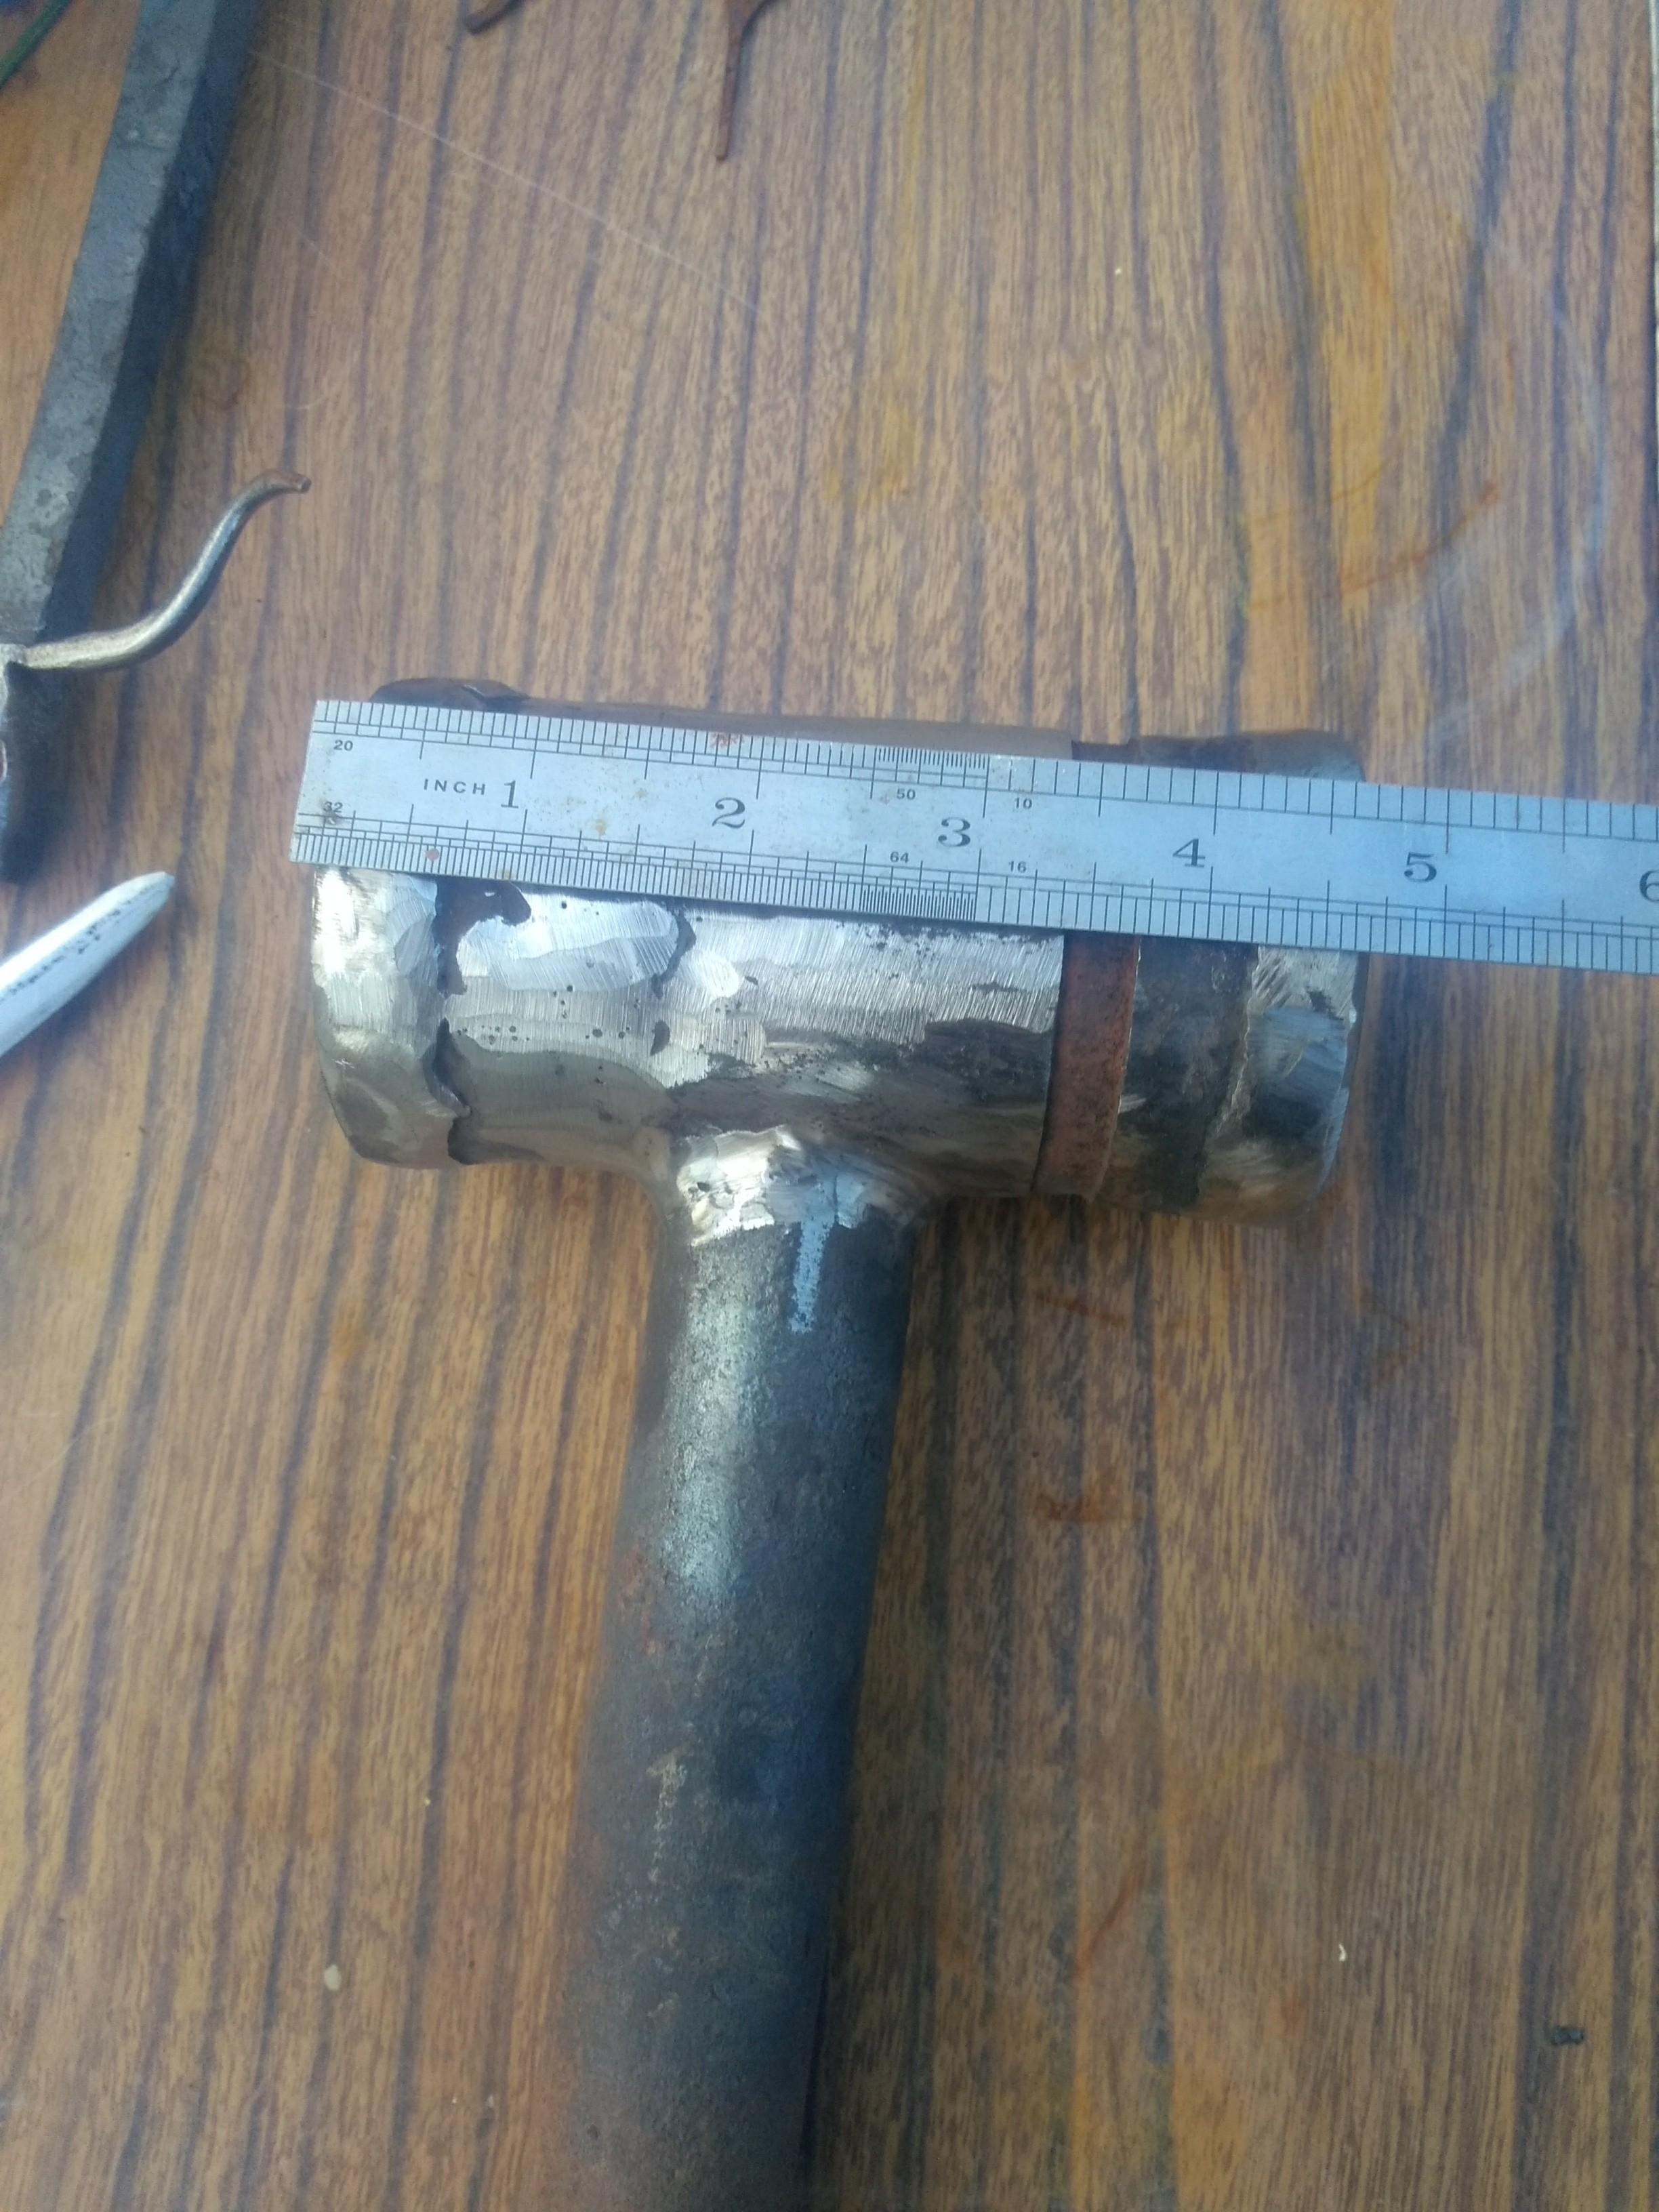
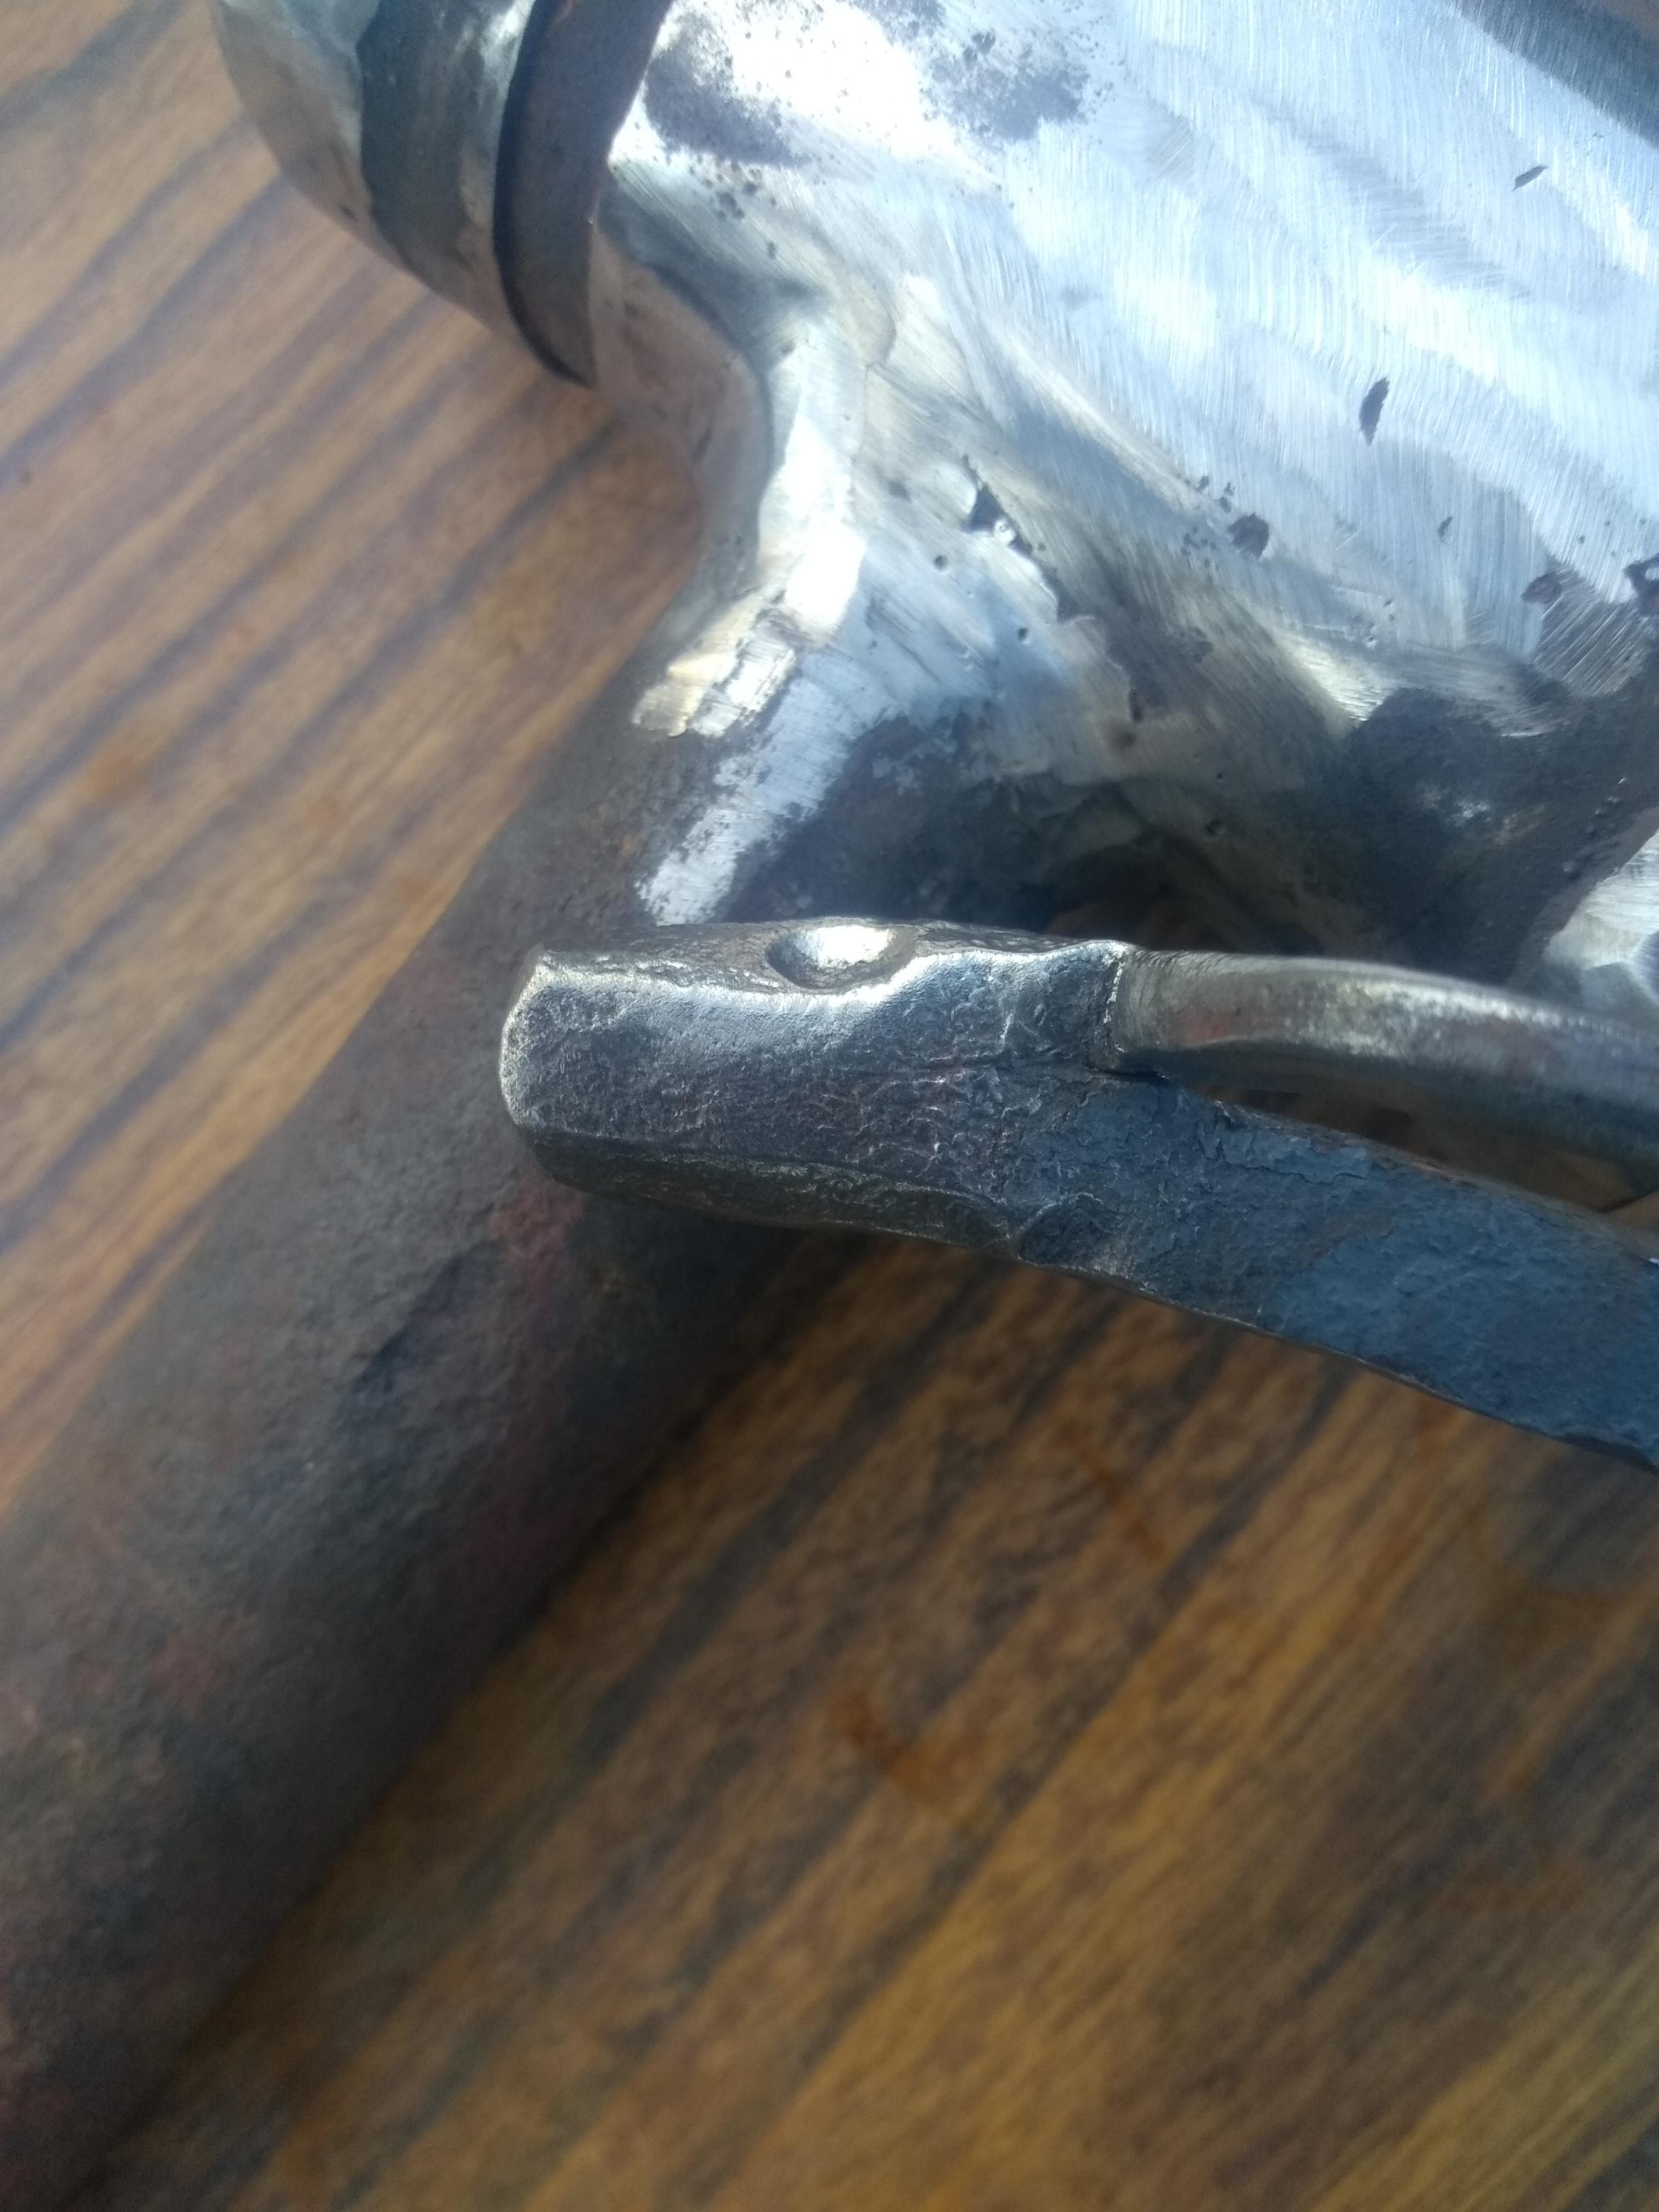
Had a buddy weld a couple of pieces of normalized? (heated to red to straighten then air cooled) 3/8 inch leaf spring onto an old ~2.5 inch od pipe, filled 3/4 full with the finest quartz sand I could find in the hydraulic mining "Diggins" behind my house. I got to try welding on the handle, its not pretty but he said it should hold. He's just a backyard welder, so I'm not sure if his opinion is worth much on this subject. I'm in the process of grinding it down to check for cracks and to make it a little prettier. It's about as heavy as my 3lb hammer, maybe a little more. I did try it on a longhorn I was trying out and I "felt" the weld on the first hit. I hit it again for good measure and it felt solid, so I figured I'd go with it. It was probably a lucky hit more than the hammer, as I've only ever felt the weld once before. More experiments to come.

-
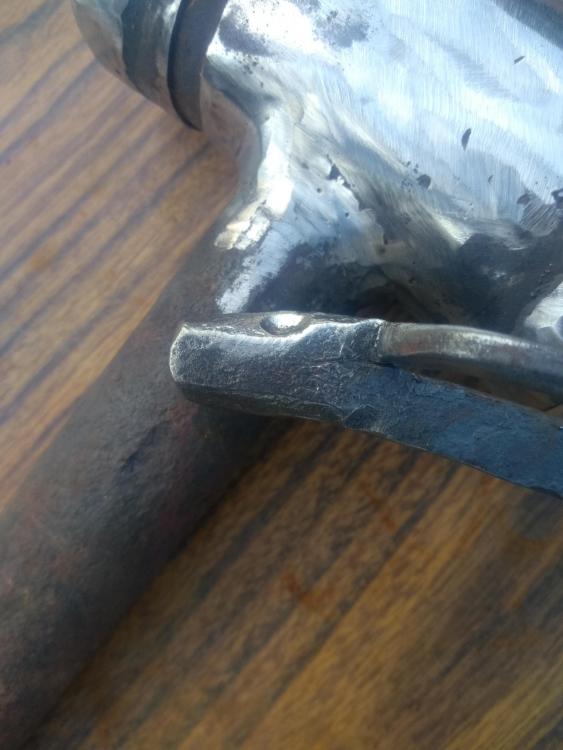
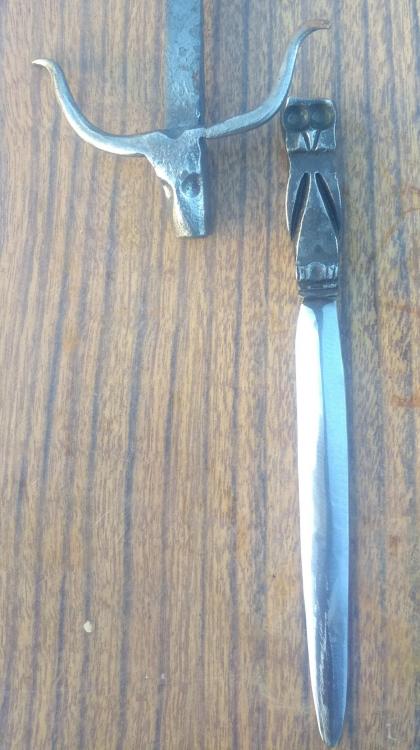
Here's numbers 3 and 4. An owl letter opener and a longhorn. Same punches as before. Both from 1/2 inch square bar.
-
As requested, here are the 3 punches I used for the first 2 heads The chisel is just over an inch wide, not sure of diameter of the punches. I'm guessing 1/16 inch and 1/4 inch.
-
The Ayes have it. Motion to show punch heads with finished head adopted.
-
Motion seconded. All those in favor?
-
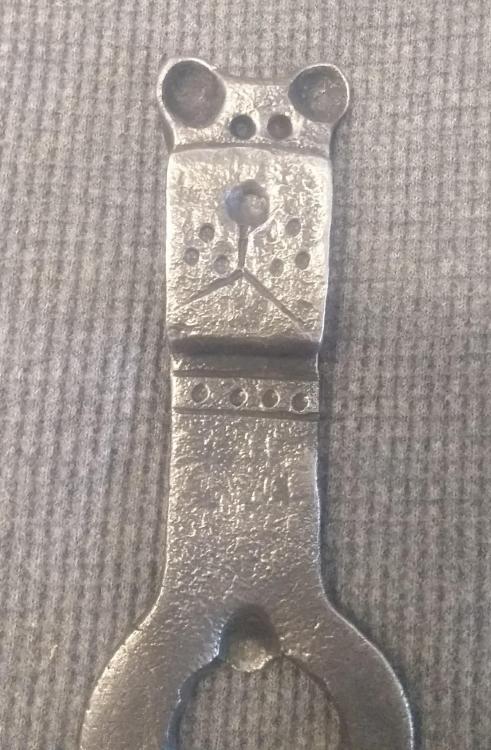
Thanks. I'll keep posting them here as I make them. I can already see that I'm going to need to make some different shaped punches and chisels. I used my whole sculpting arsenal on the bulldog/lioness/circus bear? A large ball punch, a small ball punch and a not as sharp as it could be hot cut. I try to set attainable goals for myself, none of the vague "eat healthier" or "go to the gym more". I figure ~2 a week should be in my grasp as a hobbiest.
-
Well, I've decided to make a new years resolution to make 100 animal heads this year. Mostly to give me practice forge welding, but the sculpting practice it gives me won't hurt. Here is 1 and 2 for this year (4 and 5 of my total animal head count)

-
I found this video of Brian Brazeal talking about the Haberman bend. There is even a iforgeiron mention around 5:15 in the vid. Perhaps I missed something in the video, but he thins the outside of the bend to "exceed" it. Wouldn't that weaken the bend by having less material where bent?
-
Pnut, yup those are the style I was looking at, only bigger. That one looks like they just bent the teeth in, while the one I was looking at had been upset and then bent, which I will try to do to make it stronger. Goose and TP, tie rods or sway bar, hmm, I'll have to look for those when I head down to the local scrap yard, they have a few of my bottle openers already, so I think it will only cost me a 12 pack... Of donuts. I have a pretty good rapor with the guys there, my dad was a backyard mechanic and he frequented it often enough for the workers there to know me by my first name, that and it's a small town and I went to school with most of their kids. That was where I was going to source the 1 inch rebar as well so I'll just shop around while I'm there. Thank you everyone for pointing me in the right direction, I will post progress if/when I remember to. Hopefully soon if the weather cooperates
-
I searched for log tongs, and I like what I see. The one that looks like it would do the trick would be a 24inch jaw. It starts with 1" stock, a simple enough design, just need to work on my 90°+ bends. It is a "drop forged alloy steel, tempered for strength where the force is applied", which tells me that I should harden and temper, though I was hoping mild steel would work *sigh* and isn't force applied along the whole tool? Alas more questions. The max weight of the one I thought would work was 3000lbs at 15°, 3500 at 30°(I'm guessing this is the angle of the jaws when set in the log). This would most likely be the toughest use this tool would get. The logs are about 10-15ft under water, 30ft from shore. We only need to get them to shore, once they're on the ground he has the equipment to deal with them. We could probably just drop a set of the tongs over a smaller section instead of right at the base to make it easier (work smarter, not harder, right?). I think I'll make it more of a log skidder instead if a lifter, that way he can get a bit more use out of it than just this job. He's always pulling logs around with his quad/side by side/truck, this way he won't have to chain up each log when he does. Now I know rebar gets a bad rap, but would the texture be beneficial for a set of log tongs? They are meant to grab things, and wouldn't more texture give more grip? I only ask because I can get to some 1in rebar locally vs a 2.5 hour 1 way trip to the closest, that I've found, steel supplier
-
My buddy asked for a large hook that he can use to catch and pull out a few trees in his pond that are too far out to get with his excavator. My first question is, is there already a product out there that is designed for the task already that I can copy? All I've been able to come up with when searching is small dredging hooks meant to pull weeds at the bottom of the pond, or grappling hooks for climbing trees, neither is quite what I was looking for. Question 2: if the grappling hook is what I'm looking for, how large of a hook would I need to pull out a water logged pine that's ~2.5ft diameter at the base and 20-30ft long? Question 3: is there a certain angle for the pointy part of the hook to be to be able to hook and sink in? The trees are deep enough that it would be tough to manually attach them, so hooking them is the best option I see. Question 4: would such a hook need to be hardened, or would it be ok without? Any info that could get me closer to a working tool would be greatly appreciated. Thank you
-
Hahaha, the guy from Alaska calls it an Oregon Mill, while I've only ever heard it called an Alaskan mill. We had a neighbor who rented his out(with him as operator) to locals who had 1-3 trees to mill up, past that it was more cost effective to rent a mobile mill. Ive helped him when he was at home and what kozzy said is correct. SHARP is key, if he was milling soft wood, he'd sharpen his chain every 7th pass, and hard wood every 5th pass. On certain high dollar jobs he sharpened each pass, but that was usually oak burls. I wouldn't be able to tell you what he charged, but he paid a pretty good wage to a teenager helping him, $20 an hour. Worked for him for 3 summers before he passed. My job was to place wedges, stack boards as they were finished, move logs into place, keep an eye out for dangers while he was engrossed in the milling and to keep the customer a safe distance away. Though the last one was mostly to keep them from bothering him mid cut.
-
What did you do in the shop today?
Shabumi replied to Mark Ling's topic in Blacksmithing, General Discussion
Interesting, I was taught to use a single Y shaped stick. Same principle as your method, hold the arms in your hands with the leg away from you, but instead of crossing sticks, you know where the water is when the leg drops down towards the ground -
Those are great ideas, I'll have to check out what I can find in the thrift shops when I next visit.