DavidF
-
Posts
162 -
Joined
-
Last visited
Content Type
Profiles
Forums
Articles
Gallery
Downloads
Events
Everything posted by DavidF
-
Thanks Robert! I agree with Binesman. If you have the tools or want to pick them up, I would build your own. In my case, I think it was much more expensive to build my own because I picked up a Mig welder, etc. but I really wanted to do the build so I understood the insulation, burners, etc. I take a ton of pride in the forge I have built, even though it is probably more of a “Forgenstein” than the polished things I have seen from the guys on this forum. If you want to start banging the steel quickly and that is your priority, there are the Diamondback forges, etc. In my locale, there is a guy who competed on Forged in Fire, that started building and selling forges in the classifieds (https://www.ksl.com/classifieds/listing/50338772). Looking at his offering, I think I would make sure the blanket is rigidized and then do the Kastolite and Metrikote. But I liked the use of a vehicle wheel and the tube steel for the stand. I just picked up a steel service cart to move mine outside for use (worried about the carbon monoxide since my garage is attached). Since I was excited to get going, I have started doing Knives via stock removal while I was building the forge. I have really enjoyed doing the Knives via this process and think it will help me once I actually start forging the knives. So if you have the passion to get going, but you also want to build your forge, you can do what I am doing and do a stock removal with a lot of detail work for the knife to kill time while you are also building the forge. I will post some pics and video tomorrow that I took this evening of the dragon’s breath from my forge. I definitely have some tuning to do on the burner. I will take some lumps in the feedback on the burner. Lol! But I really enjoy the ribbing and I know I am a novice in this endeavor. But I will be a solid Smith because I learn from trying, enjoy the socializing, and really, really appreciate the feedback from the guys here. It has been amazing to find a group that will provide expert feedback to newcomers. I will repay the value they have provided me when I have knowledge that I can share.
-
Excellent app. Just downloaded and using it. Thank you for sharing
-
1/2”. I will check it later today and see if it can be fired or needs more time.
-
Thanks Binesman. I moved inside to cure. I appreciate the feedback from a similar winter region. Do you know how long it needs to cure? And should I fire before the IR application?
-
Air cure. But the freezing temps in my area are a concern. So I am giving some heat to help the process. May cause issues, but freezing would definitely cause an issue. If it were July, I would just air cure and not have the extra factor to deal with.
-

Amount of fiber blanket for a 20# propane tank
DavidF replied to DavidF's topic in Insulation and Refractories
For conclusion on this thread, I wanted to share that I ended up going with four feet of blanket. It was the perfect amount for a 20# propane tank as the body of the forge. And the three bags of kastolite was also the exact right amount. I haven’t used the merikote yet, but based on Wayne’s precision so far, I am sure it is also the right amount. I wanted to share my experience in case someone else wants to use a similar approach. The one thing I would have changed is to go with the tank body as Wayne recommended on his site. Cutting the end of the tank like I did, made for a more difficult lining. May need to do another forge in a year or so. I have enjoyed the making of the forge more than I expected. -
First two of the three applications of Kastolite are done. I torched a little until I saw steam and then let it cure without help. I heard you don’t want to produce steam due to cracking, but it is frigid here so I gave it a jump start. The liner still has a little play, so I could not get three layers applied, just ran out of time. I think for my next forge or re-line I will have a better process for rigidizing and for the kastolite application. But I learned a lot from this round and I find that I learn better when I make mistakes. I am a much better version two producer. Also, my burner is far from perfect. Once I have the refractory and IR complete, I will share some videos. I have plenty of heat, but I need to run higher PSI to get the flame pushed out and also at lower PSI, I am hearing and seeing some sputters.
-
I have fired it and will move on to the kast o lite
-
Tonight I received my packages from Wayne. I have placed the liner in 2 layers and sprayed with rigidizer I made with the fumed silica and blue food coloring. I am letting it cure and will be moving on to refractory cement next. It is looking pretty good. I a, hoping to forge something in about a week. We will see how long it ends up taking for the rigidizer to set. I was thinking 24 hours, but it may be longer.
-
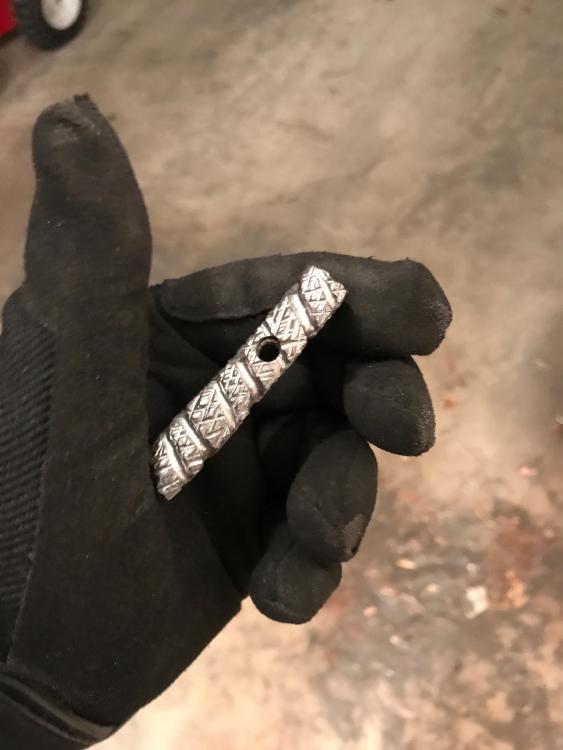
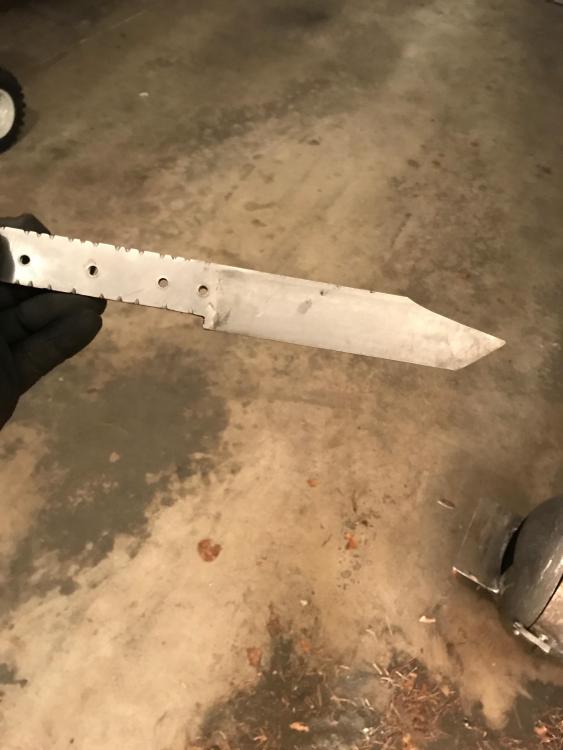
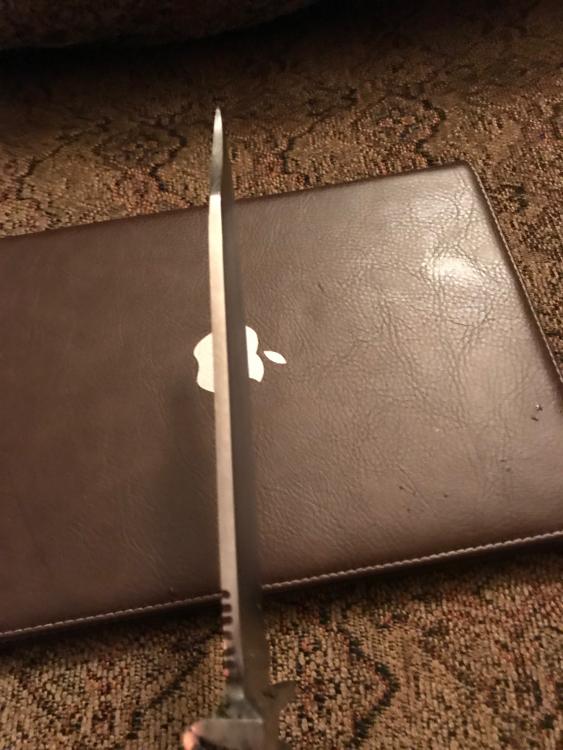
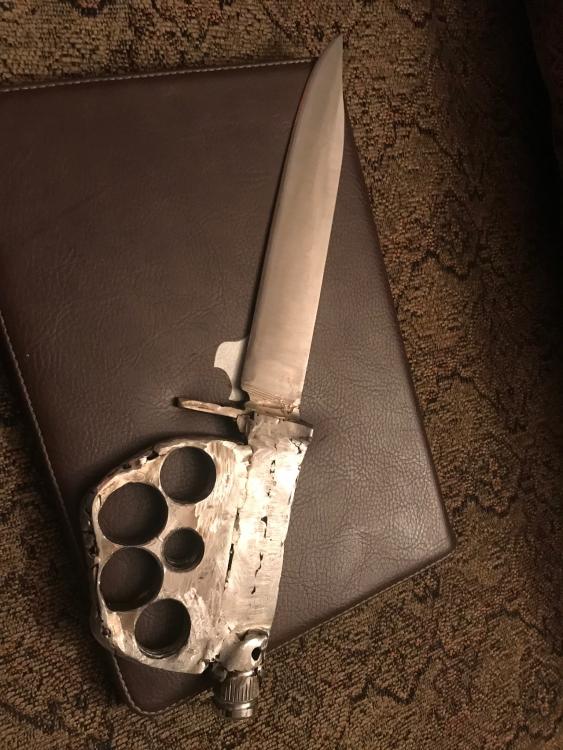
Thanks eseeman. The pommel started out as a socket wrench, which my dad had turned into an improvised file handle. He passed in 2013, so I wanted a “piece” of him in my first blade. I welded it to the end. The handle on the tang is two pieces of 1/2” square tube. And the knuckle piece is five pieces of sheet I welded and then ground to shape. It is “post apocalyptic”. I am now working on a hunter for my nephew in law. He picked up a 1” thick plate of A2 (not tool steel) which is 14” x 14”. I will be using it as my anvil strike face. Here is the work for the hunter. It is 1095, the guard is a piece of the same socket wrench I used for the pommel on the first knife. I spent about 6 hours on the detail of the guard and replicated it around the tang. I tapped where the three pins will go as 1/4” 20 thread which will be SS screws (should be secure with threads and epoxy). I will need to HT this one, but it is more traditional with a full tang. I have antlers, scales, liners, and plan to use some SS to make a sandwich handle. I am doing a lot of detail on it and hope it will be a nice piece. I will post more views as it progresses. The grind and blade are about 80%, still working the plunges and tip, but wanted to share a WIP post. Thanks for taking the time to share your feedback. I have caught a smithing bug and can’t stop fiddling around!
-
Thanks Will! I have some scales and started on a new project. I will post when it is completed
-
Thanks for the feedback Jasent. Any recommendations on the rear door? Hinge it? Just eliminate it? Now that you have called that out, I can see it may not be functional. I still like the idea of being able to close it off, but is there value? I could make it hinged and insulate as one option. Looking for input whether it is worthwhile.
-
Thanks Tubal. I agree with what you said on the handle. I will probably set aside and do a full tang with scales and forget about this one. I may try replacing the handle later, but not sure if it would be worth the effort
-
Good question Frosty (and thank you for asking this because in the wrong locality it could be an issue). I should have mentioned, in Utah, where I live, there are no issues with owning them. Our statutes even allow carrying them for self defense with a concealed permit. Possession in the car is fine because the car is classified as “private property” here. There are “restricted” person laws for felons, domestic violence, etc where those two previous pints are moot. Also, if you ended up using them in a defensive situation, then the circumstances would define if it was a crime (ie who was the aggressor, etc). This will never be an issue for me since I am licensed to carry concealed weapons am I always carry a firearm. The entire design is not for utility. I personally laugh about the knuckles restrictions because it seems really outdated nowadays, but that is my personal opinion. I know these were an issue at one time, but haven’t seen anything in the past 45 or so years. But that is from my limited window of the world. I should include a disclaimer that the laws on these types of designs should be researched for your own applicable state. I know mine inside and out and follow the changes during each legislation period. For example, the carrying in the car law just passed legislation the past year.
-
I agree on the securing bolts. I ended up moving two of mine up 3/8” on one. It was necessary to have clearance because my ports were too close. But it is more secure than the one without the staggering. Definitely a mod for my version 2 as well.
-
I am in the process of building my first forge. I have created a first knife from a hand file. I wanted to share with the group. After my first knife, I have found that I am OK with grinding on the belt sander. Not great, but I was committed on developing my skills with this method. I have some touch up to do, I haven’t hand sanded to a finish yet, but I am feeling ok with the blade profile. I did a tang all the way to the end of the handle and I tapped 1/4” holes and secured the handle with screws that I flushed off. The handle was a cool idea, but the lesson I have learned is to fully finish the blade and handle separately and then assemble with as little touching afterwards as possible. Probably sounds obvious, but it is something I discovered for myself during my first project. I thought to myself, I bet the guys that have done a few knives will get a chuckle about my discovery of something that is probably a “101” level concept. But I learned quick! Anyway, by posting my first project here, I know I will get good feedback and maybe some good “ribbing”. I welcome all of it. I had a fun time getting to this point and I will try to clean up some of the eye sores on the handle with some type of material that goes to the finger holes. I may come back to this a few times because I want to make it better and every time I look at it, I know I can do something more. Also, one side looks more polished right now because I ended up calling it a night. I still have a few days of work on this. Hopefully I can make the handle look a bit more refined. Also, I have not ground the grooves in the spine. Those are sharpie marks. I have some chain saw bits to grind those, but the HF rotary tool gave up the ghost. That is number four HF rotary tool. I am going back to my Dremel that I rebuilt this week

-
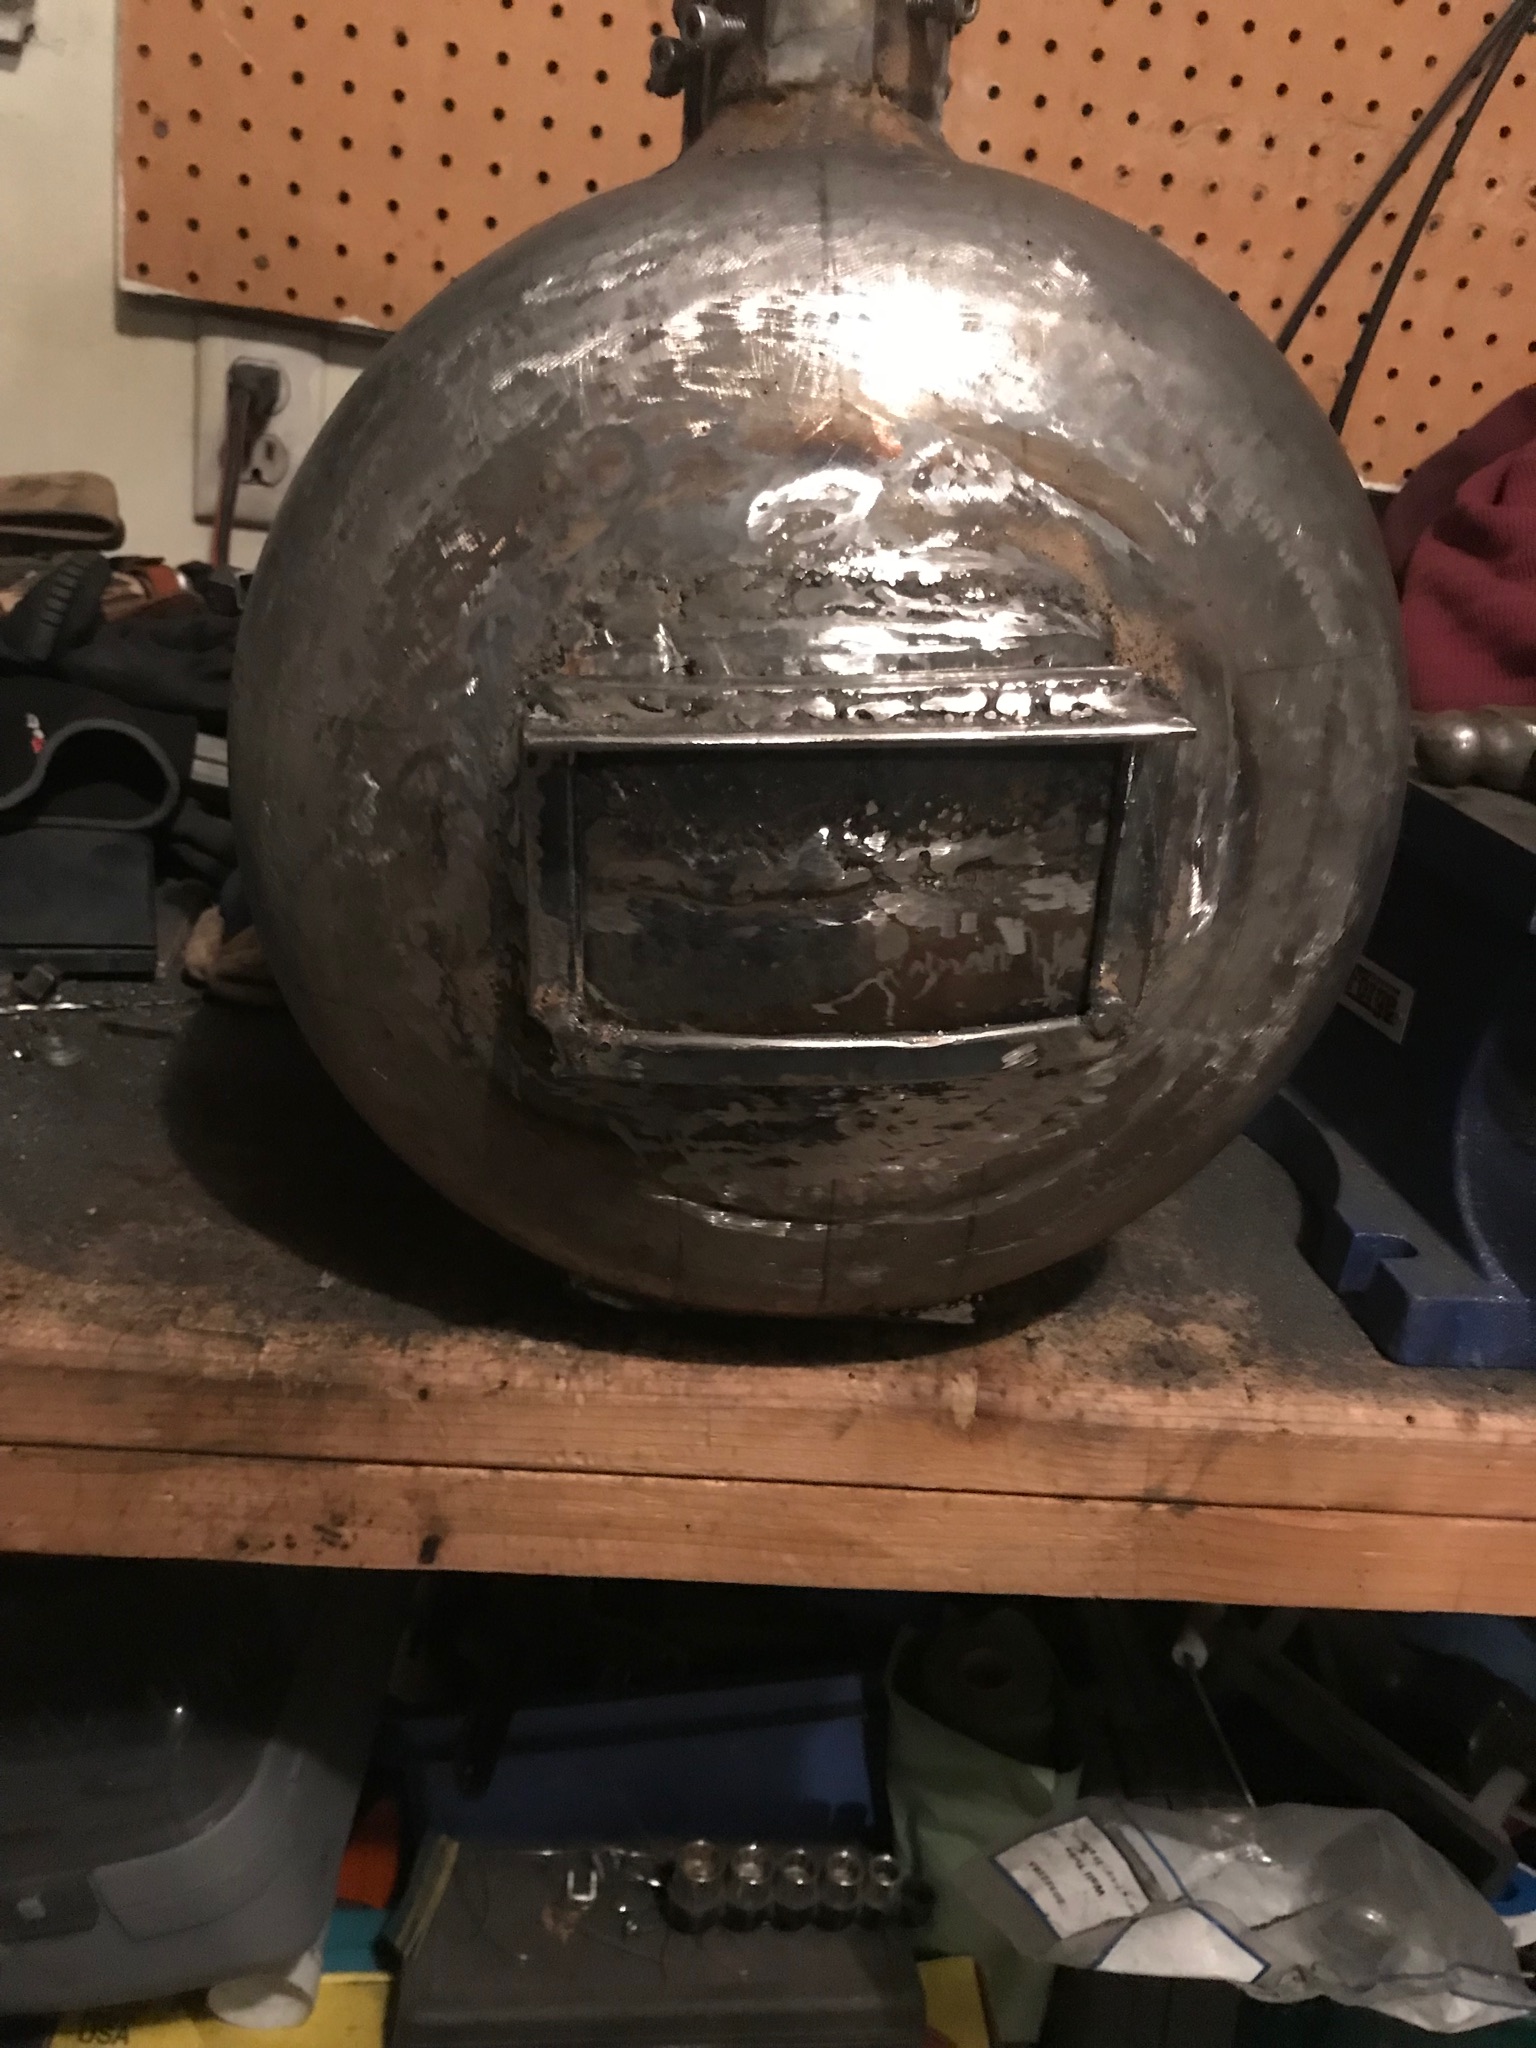
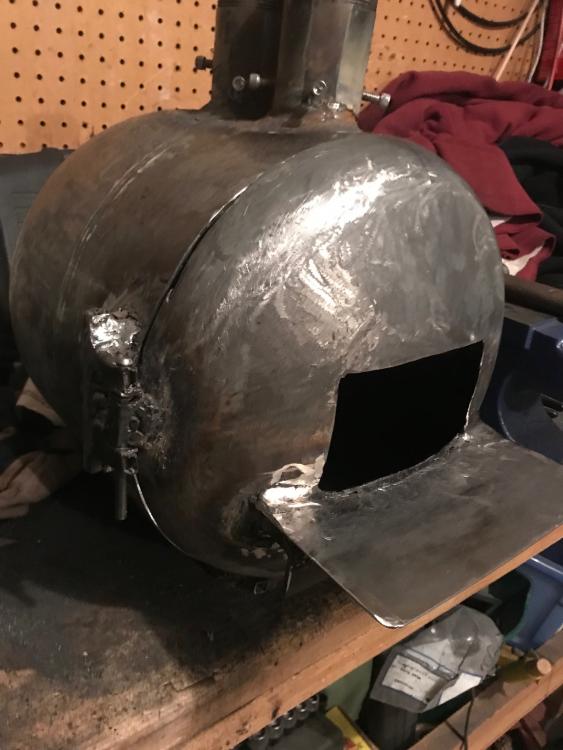
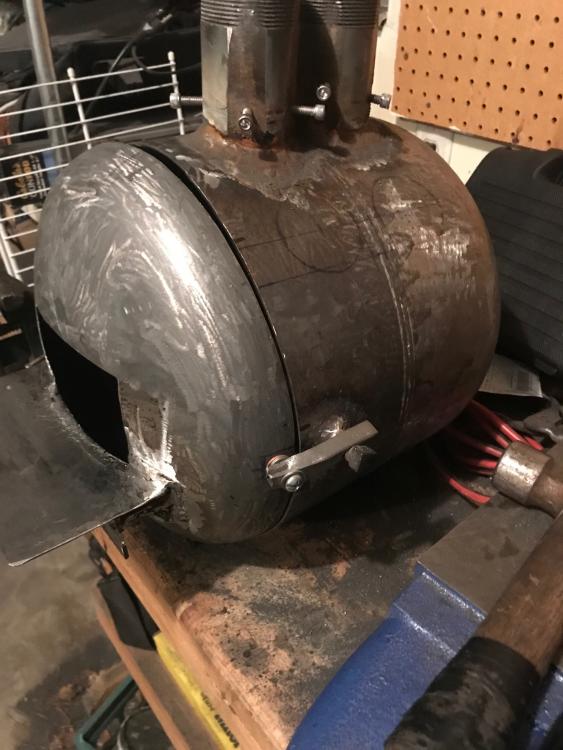
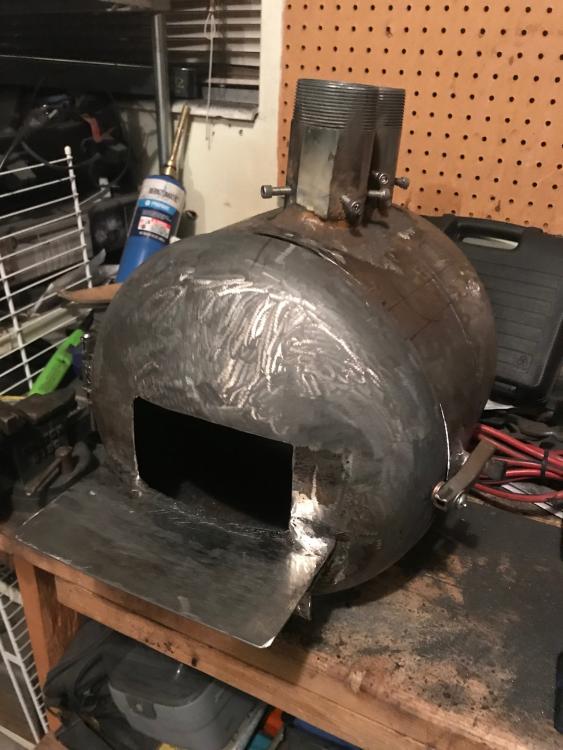
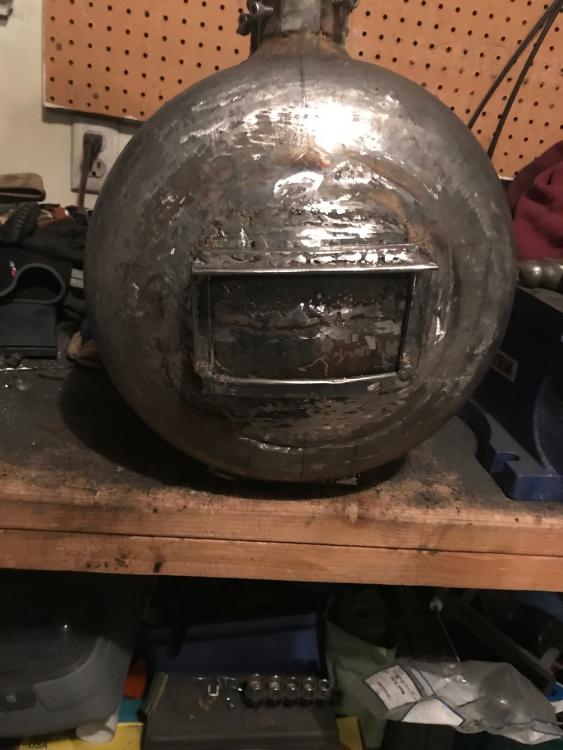
Ok, updated photos. All that remains is to insulate. Insulation will be from Wayne. Then to paint. I have the regulator and fumed silica in hand. I am at the point where I felt it was “good enough” for finishing. I could grind and beautify more, but I have seen pics of forges once they have been fired and I thought, how much more touching should I do when it will be “seasoned” and looking like a workhorse in a week. One thing I did add was a door for the back pass through. I wanted to be able to allow airflow and also passing of larger materials, but I felt like being able to close it would be helpful for containing heat. I am not a good or even mediocre welder, so it looks rough because, well, it is rough. It is my first project with a welder. Anyway, it has been fun and I will enjoy trying it out soon. Any and all feedback is welcome. I think the next time I build a forge, it will be the Wayne method of cutting the tank in half. The biggest issue I have seen with my project is getting the door flush. I will overlap insulation past the seam, so I am OK with it, but I wish I had seen the Wayne plans before I went with the front door design. It is the difference of a rookie versus someone who has built many of these. But the access to plans I have seen here just shows me that I was creating a new wheel. Simple is best. Last thing, the pass through door is not quite level. If it looks a little skewed, it definitely is. But stock does sit flush, so it will work for a first forge.

-
Absolutely amazing. The chain pattern is incredible. And the Trex logo. I had to look at that a few times. Really great work
-
Very nice and clean. I really like the spacer color with that wood. I would be proud if that was my work
-
They are all gorgeous. Love the texture on the Wakizashi handle. The Bowie handle is incredible. I may need to try and replicate that. It really catches my eye
-
(Pic hvy) Sold my first knife! And it wasn't even for sale.
DavidF replied to Jclonts82's topic in Knife Making
Beautiful knife. Love the Damascus. Very well done -
Trav, hit me up when you are ready to start. I made a few tweaks, but I would be happy to help you out.
-
Love the build story IronDragon. Went through the thread and enjoyed the adventure and pics. It turned out great.
-
Amount of fiber blanket for a 20# propane tank
DavidF replied to DavidF's topic in Insulation and Refractories
Here is a link to the thread for my forge build with pics of progress. -
Here are four new pics of progress. Excuse the messy workbench. I haven’t cleaned up after this round. You can see the stock shelf, and two ports for the burners. I took Frosty’s feedback on the length of pipe and changed to a much shorter extension. The regulator is in route. I picked up one that goes all the way to 60 psi and has a flow gauge integrated (although I don’t expect from my research that I will ever go beyond 30 psi if I even need to go beyond 15). When I picked up the reducers, they only had galvanized, so I ended up soaking all parts with zinc for more than three days. The acid bath worked extremely well. One thing I wanted to share is that my Dremel lost power, so I picked up a rotary tool from Harbor Freight. The locking pin button has failed on two of those units, so I have returned them and I am now on my third Chicago Electric rotary tool. I also rebuilt the Dremel, so if I continue to have the failures on the Chicago Electric version, I will switch back permanently to my Dremel which is now about 15 years old. Lots of fun, lots of grinding, and my welding skills are getting better, but I have found that I can’t go through a surge protector with the 110v mig welder. I get ok results going straight through an acceptably rated cord directly. I also found that stripping zinc is a pretty caustic environment. I had as much open air as possible and sealed everything in ziploc bags and placed them in a cubby tray. I don’t have a respirator yet, so I was using the masks you can purchase for cheap. But I definitely got hit with fumes and luckily I am young and healthy enough that I was fine the next morning. My biggest lessons from this build has been to respect the need for personal safety. I will be picking up the best respirator I can find, and opening as much air flow as possible. I have also burned through three pairs of mechanics gloves which have saved my skin from sparks, abrasives, and even drill bits. I still have all ten fully functional digits and I always wear two pairs of gloves when welding or grinding. Outer pair is welding gloves. I also always use eye protection and welding masks. When I was 18, I built golf clubs and ended up with a red hot piece of metal in my eye. I don’t know if anyone has had that experience, but I was at the ER within two hours of the accident and the metal had already rusted. They used an optical drill to remove the rust rings and patched my eye. It was one of the worst pains I have experienced. It felt like someone was hammering my eye and brain for the next 24 hours. I now always wear eye protection, even on the sanding belt. My sight fully recovered, but I am thankful that it didn’t end up any worse than a couple of days in an eye patch. I wanted to share some experience with you guys. And I welcome any and all feedback on the build. I have gained invaluable feedback and knowledge from you guys and I look forward to any ideas and/or criticisms. I know I am doing something new to me, but many of you have done this many, many times. So I appreciate being able to incorporate your feedback! Thanks again guys!