Jonathan Smidt
-
Posts
49 -
Joined
-
Last visited
Content Type
Profiles
Forums
Articles
Gallery
Downloads
Events
Everything posted by Jonathan Smidt
-
Define "good" files, I'm having a real hard time judging what makes a good file, and what types are good (full/half, bastard, etc)....Also...is it possible to start the plunge lines by offsetting the blade with the anvil on both sides?? Will do! Didn't get much free time yesterday, but the next two nights I plan on spending looking deeply into everything ya'll have told me to, so that when I get to the forge this weekend I can try to apply these new techniques. (I currently have a blade that I've already hardened though...so that one will not have these new techniques applied to it )
-
Will, I will definitely try to work on those.... going to need to watch some more videos and do some reading I think to figure those out, the few classes I've taken were a level 1 and 2 blacksmithing course, and a 3 hour long railroad spike knife course....which didn't cover too much in the finer aspects of knife making (I am taking a 3 day tactical knife course towards the end of December, which may help me as well!). So most of this has just been banging on hot metal with a shape in mind, and trying my best to get there! While I have your attention, curious with regards to the point of the blade, I've had some issue when I'm drawing out the point from the stock that it likes to try to fold in or one end tips over the other, leaving a slight crease that I have to work to get rid of... wasn't as bad for the fourth knife (the longer of the two), but had an issue especially with the third, which required some love from the angle grinder to fix. Is that likely a problem from drawing it out unevenly, or is there a trick I am missing? (I've seen some people just cut the tip profile out of the stock...but that would feel like cheating to me haha).
-
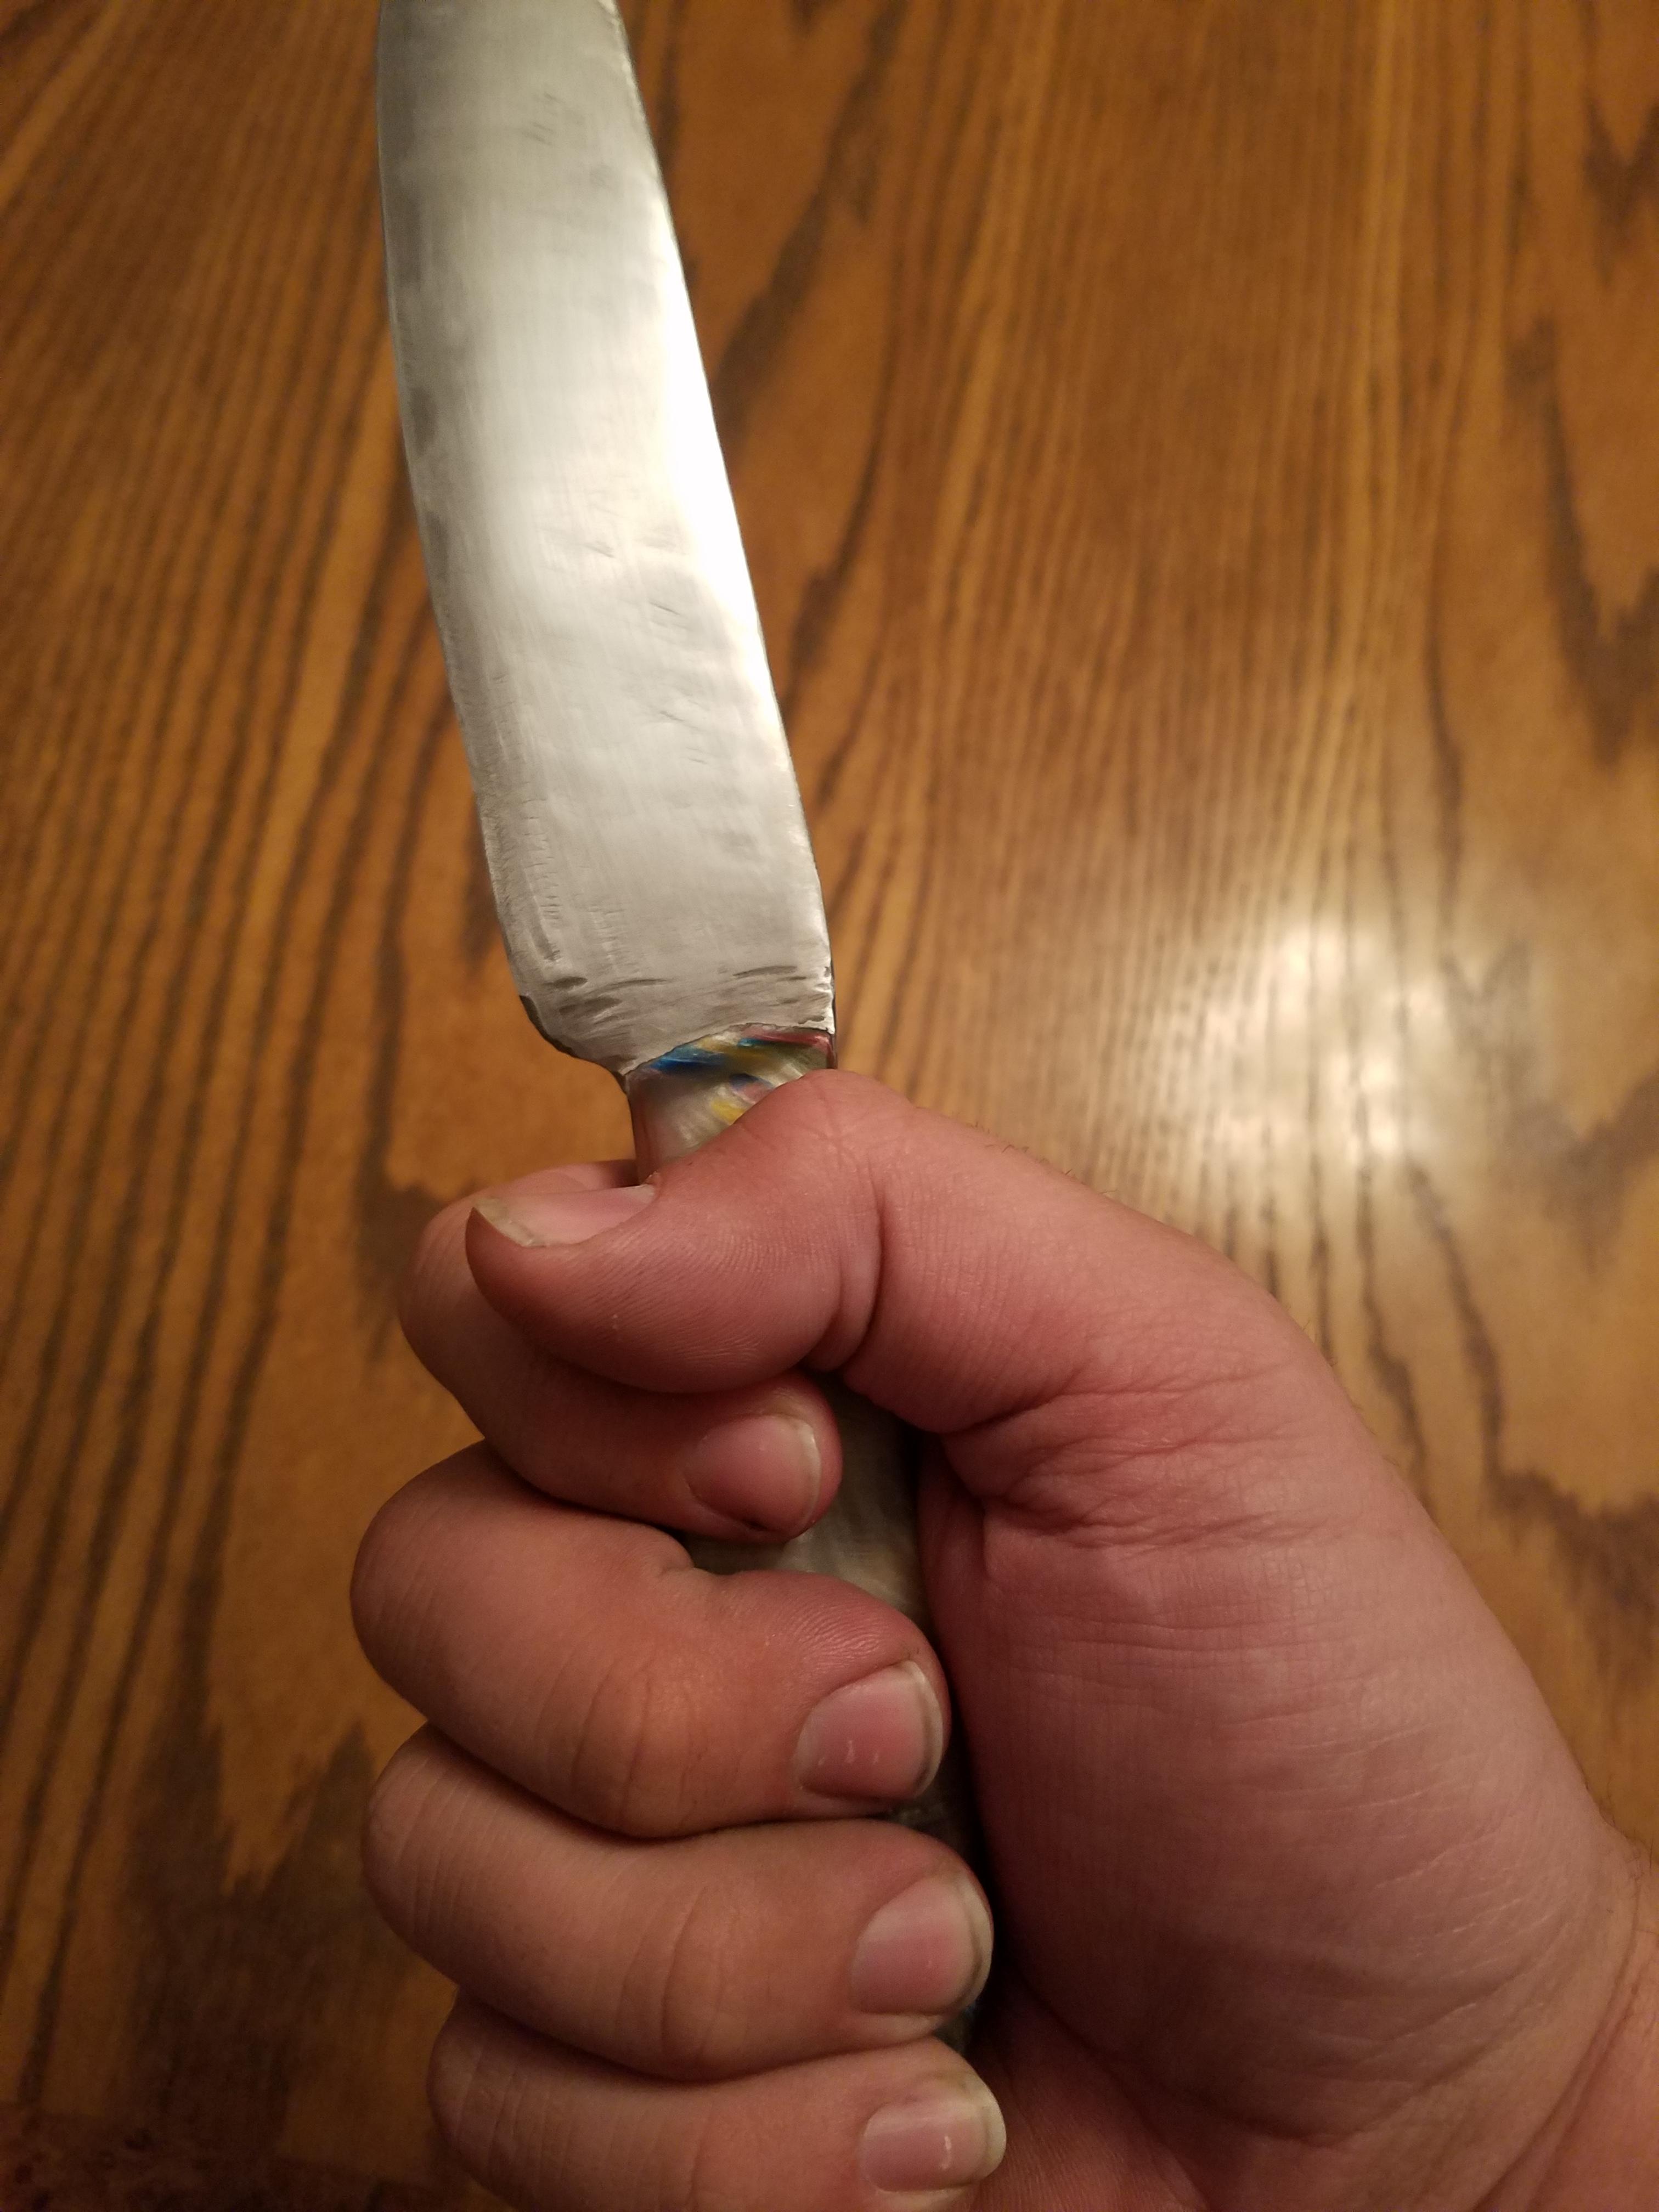
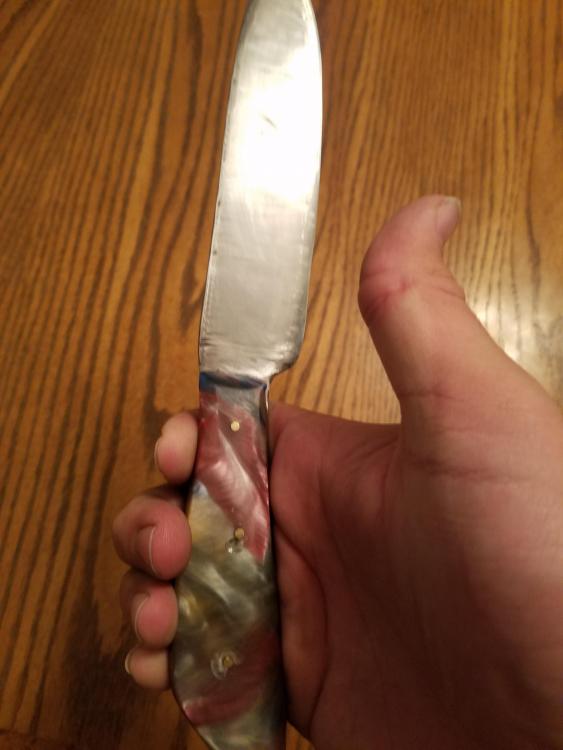
I can definitely see it, but I think it might be exaggerate by lighting and the angle. When I close my hand around loosely I dont feel the edges, but if I grip tighter i can feel them a little, i think the edges fit mainly where my knuckles are. I definitely want to work on making smother rounder handles though, before I move to more complex handle designs with grooves for fingers etc

-
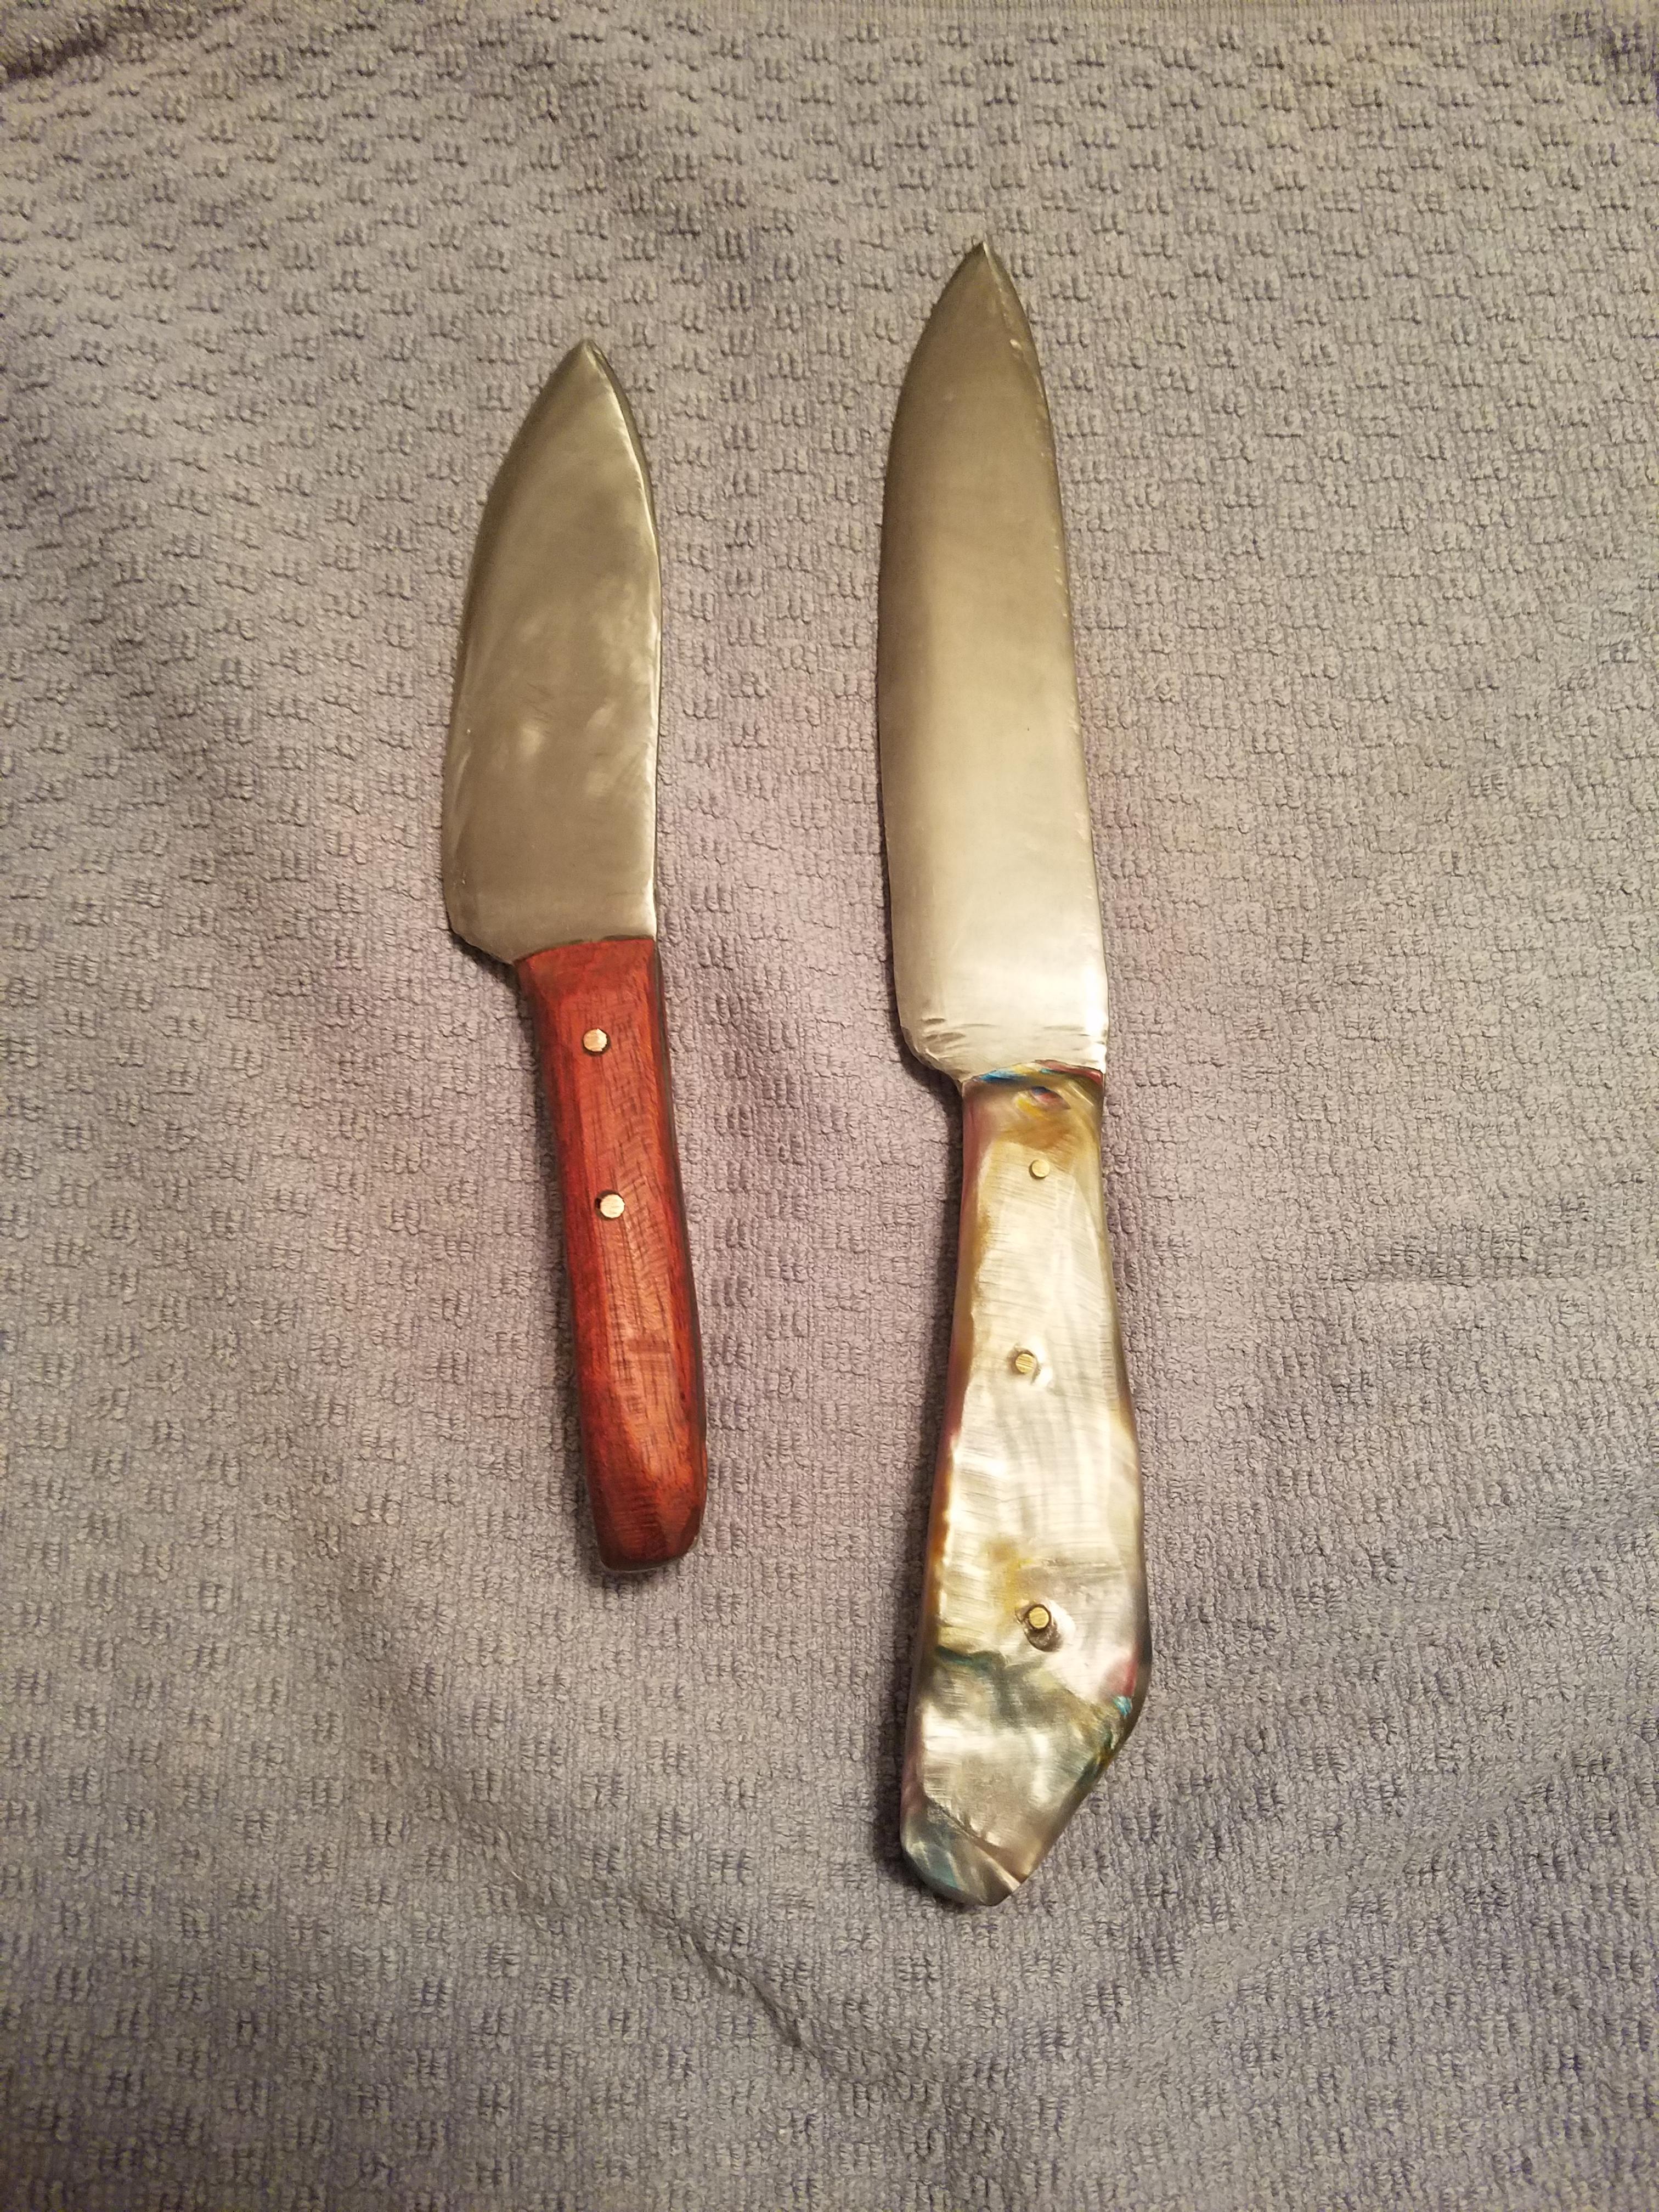
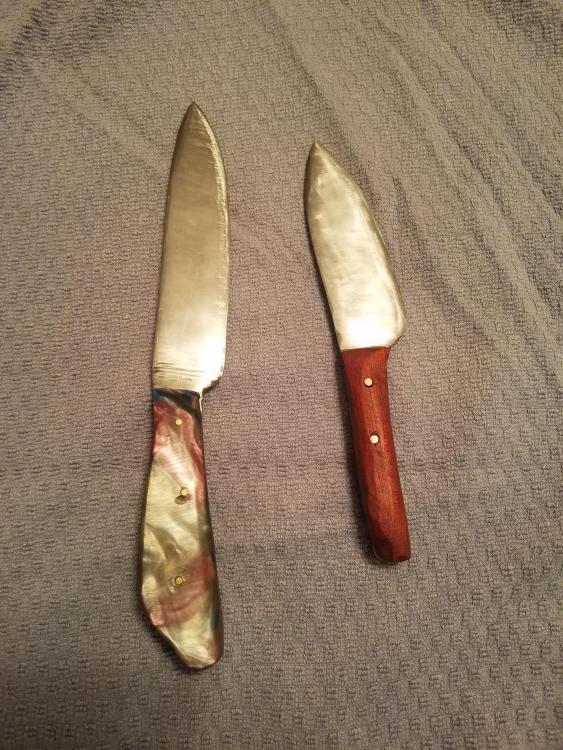
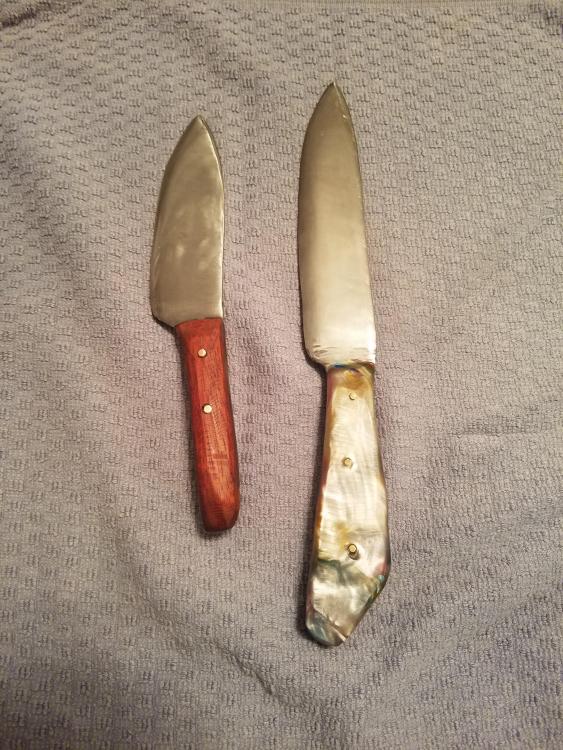
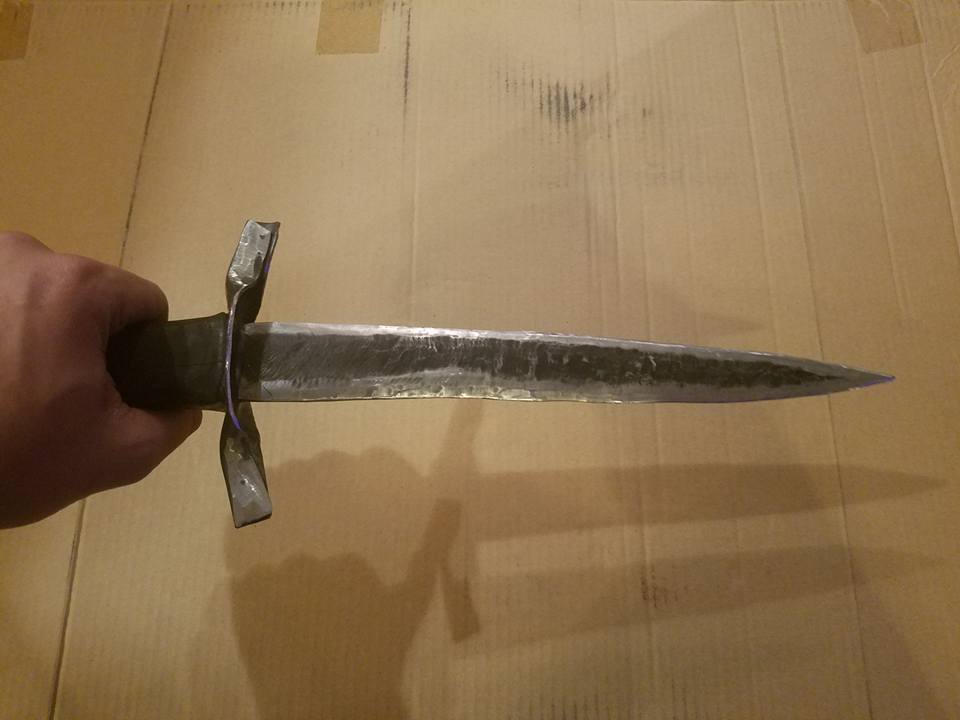
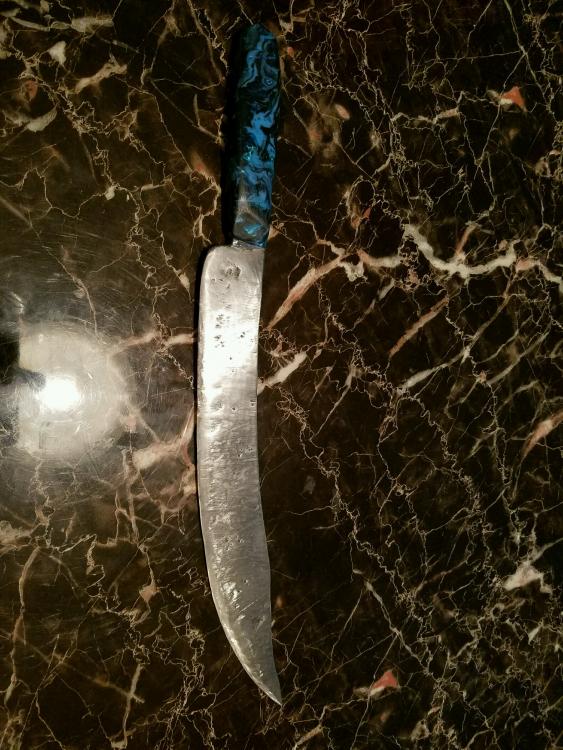
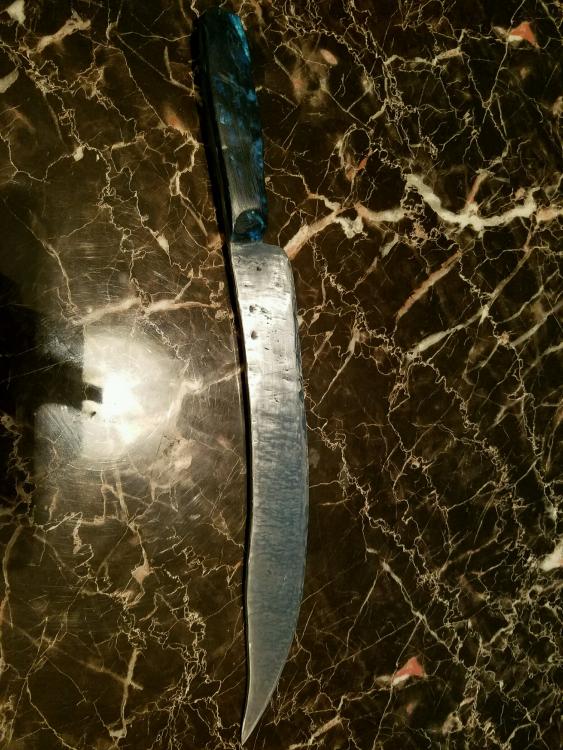
Alright, so I am sure quite a few of those who check this out will have seen my first two knife attempts. Well, I tried to take in all the advice I could, and as a result, without further ado (is that the right word for the saying?), I present to you all, for critiquing and criticisms, my third and fourth knife attempts. Beforw the pictures....blades are 1084 steel, smaller handle is rose wood, larger handle is pearl inlace acrylester. Heat treat all went well (though on the quench on the larger one I developed a slight bend, so I heated it back up, fixed the bend, real quick, and it was good to go)
-
First Crucible Steel Run, and Forging.
Jonathan Smidt replied to DanielC's topic in Smelting, Melting, Foundry, and Casting
Awesome! I just started learning how to forge (took a couple blacksmithing courses over the summer, and a few bladesmithing courses in the past few months), now just spending time out at my forge every weekend, and reading/watching everything I can during the week. I think I'm going to go back and rewatch that Nova special tonight, it's been a few years since I watched it, and I feel I'll have a better appreciation for it now! ....though I am a long long way away from attempting to make crucible steel, but watching the pictures of the process here is fascinating! (any other good documentaries/specials to watch?? I think I've punched through all the ones I could find on Netflix/Hulu/ and Amazon) -
First Crucible Steel Run, and Forging.
Jonathan Smidt replied to DanielC's topic in Smelting, Melting, Foundry, and Casting
Was that the Nova special on the Ulfberht??? -
New to the Forge from Falcon, Colorado
Jonathan Smidt replied to Jonathan Smidt's topic in Introduce Yourself
I've definitely enjoyed the classes I've taken from David, and hoping to take a few more from him in the future to help grow my skills in blacksmithing. He has so much knowledge and skills that I hope to learn/gain from him. As for the open forge, I may try to attend a few of those after the winter months....not gonna lie, I know it would be a good experience, but slightly hesitant to show up and make a fool of myself....I am my greatest critic...and find that keeping me from doing some things in person at times haha. -
Of all the places I expected to see the Grammer Hammer come into play....this was unexpected haha
-
You're entirely right Will. I believe there is that old saying "Haste makes waste", and I definitely feel that is what happened this time around. I could have kept the handle from cracking if I did as you mentioned, and went and got the files I needed, and took my time. I am planning on starting a new project this weekend, so I think I'm going to ensure I have all my materials lined up, everything chosen and set aside before I begin, and also make sure that I have everything I need (perhaps with a backup when it comes to my files etc), before I start. I will also try to do better at my time management, and not try to just keep pushing till darkness or exhaustion, but instead approach the task in steps, taking breaks and making sure I stay focused. (Taking your advice Latticino, gonna make sure if I feel myself wavering in the slightest, to step back from my project so I do not ruin it.) As always, thanks again for all of the help and advice you guys offer me, hopefully I can move forward and start presenting you guys with some nice blades. One last thing @Will..... I can't believe I didn't think of punching the hole into my guard....
-
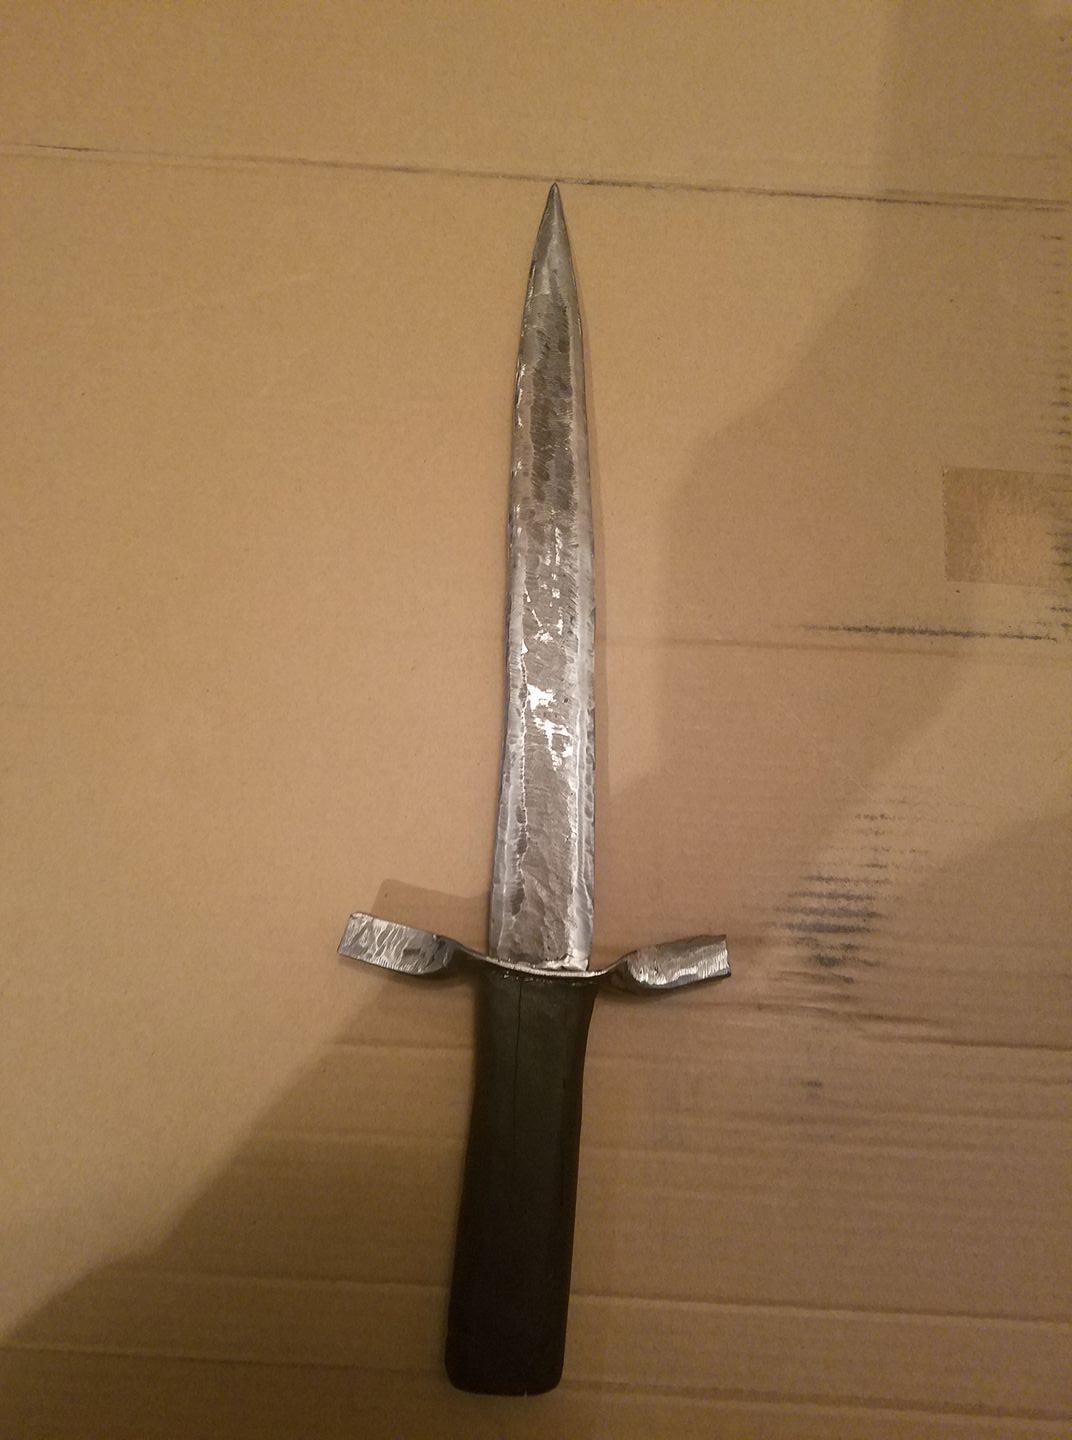
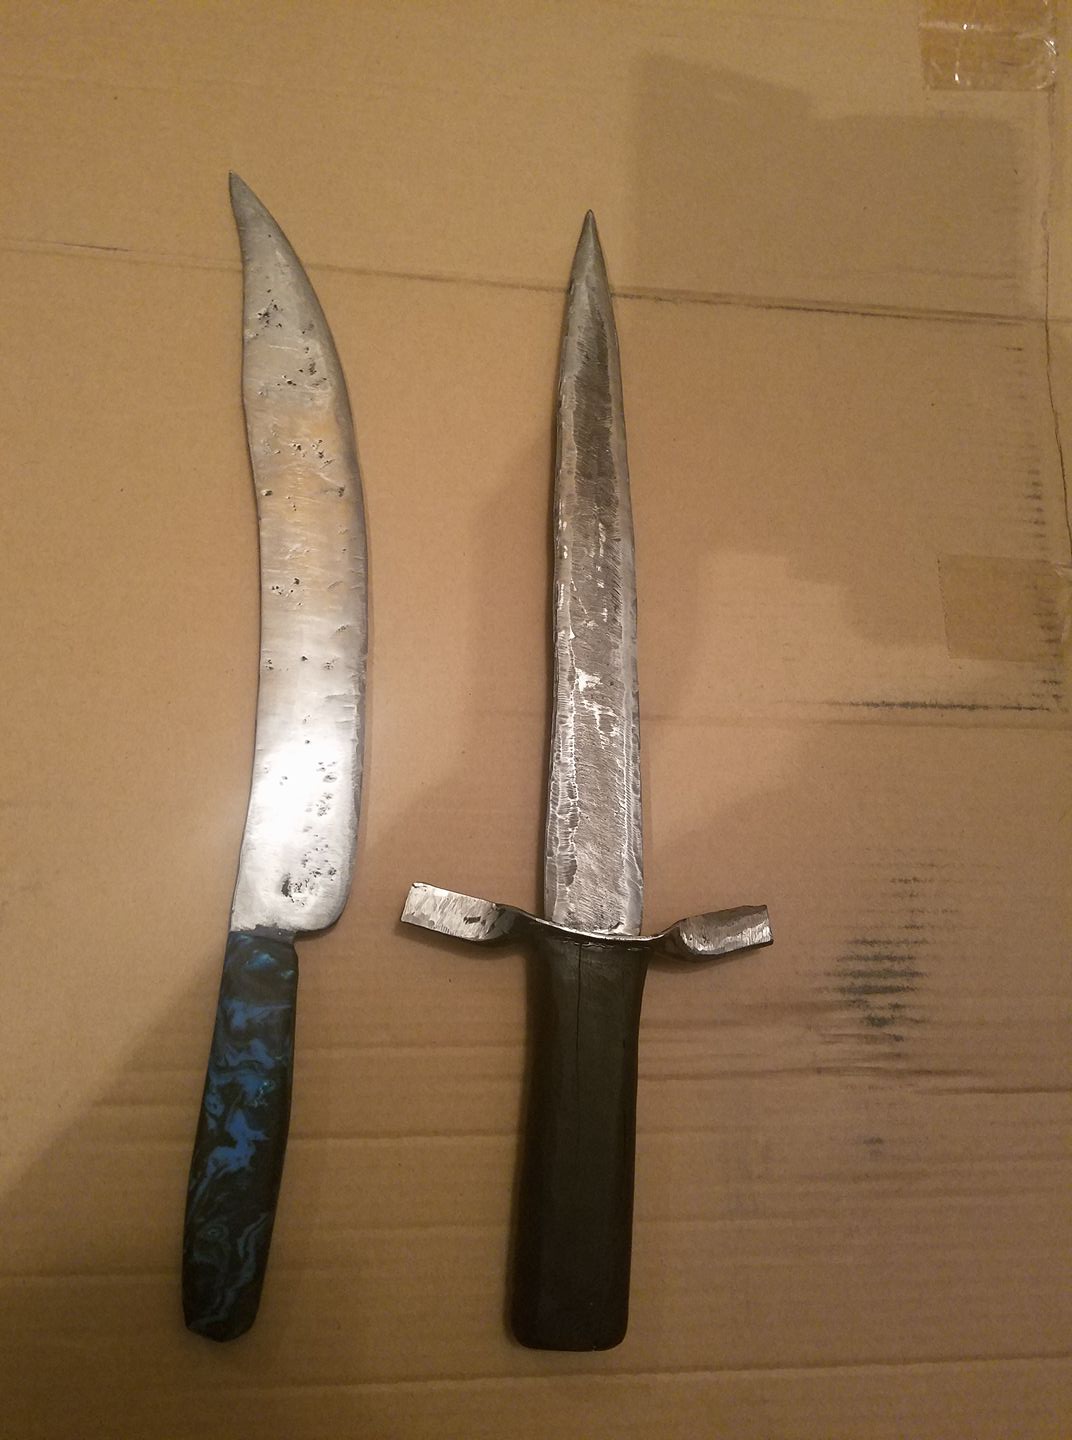
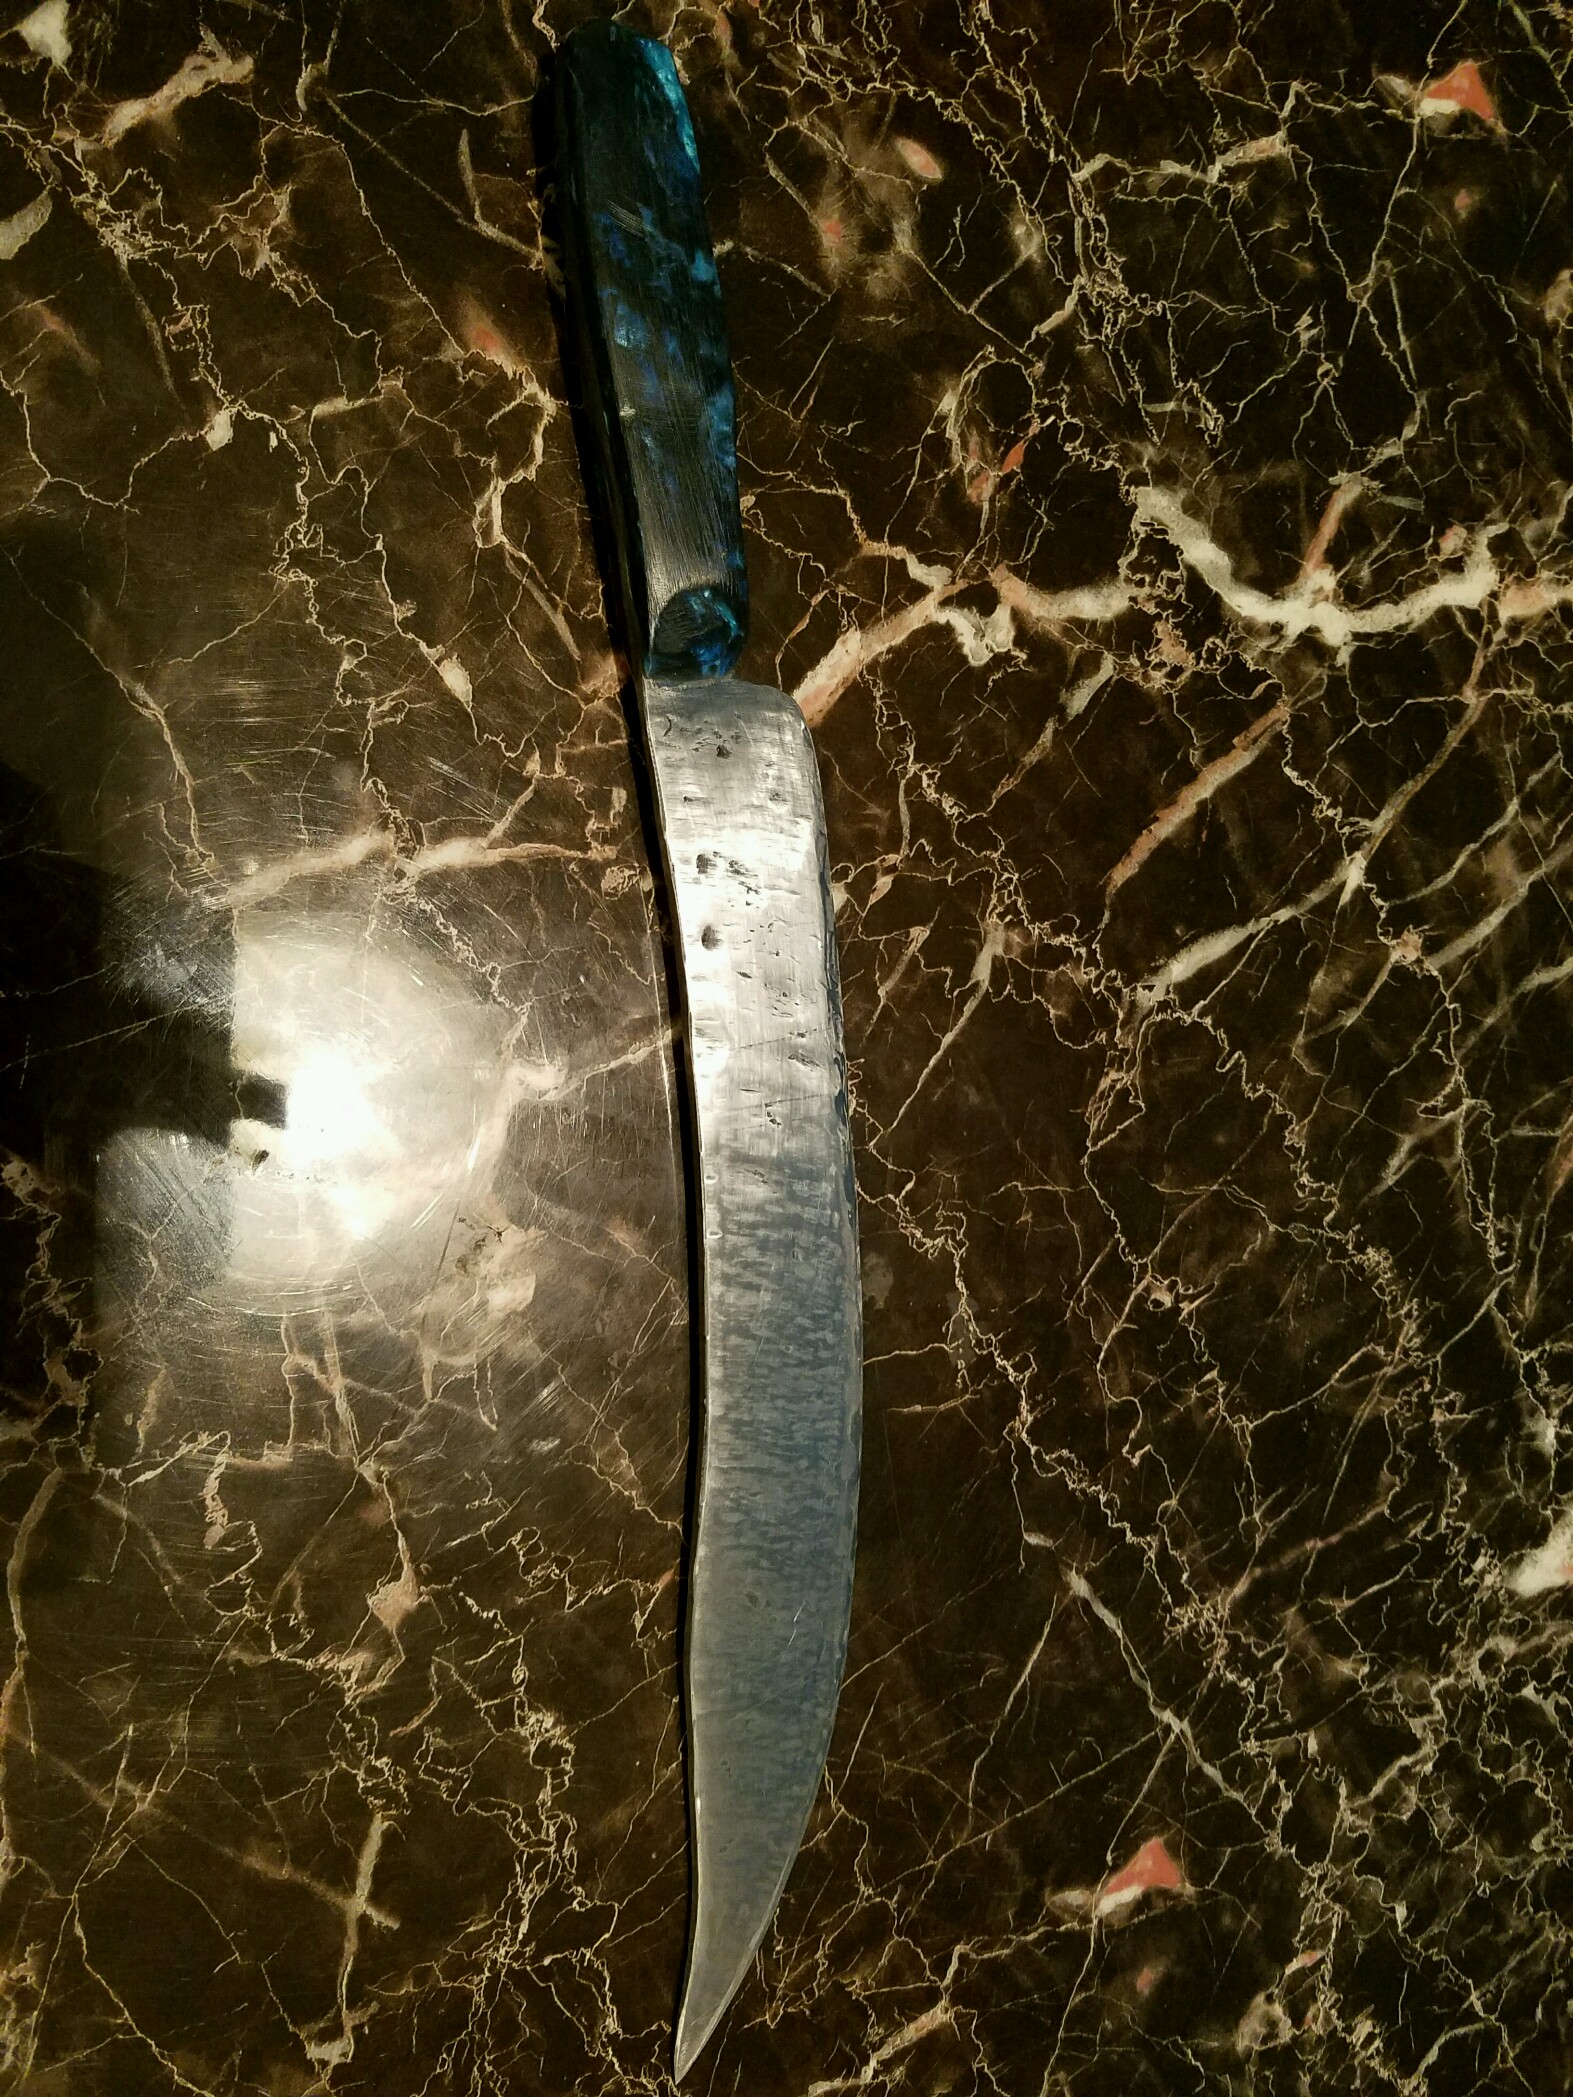
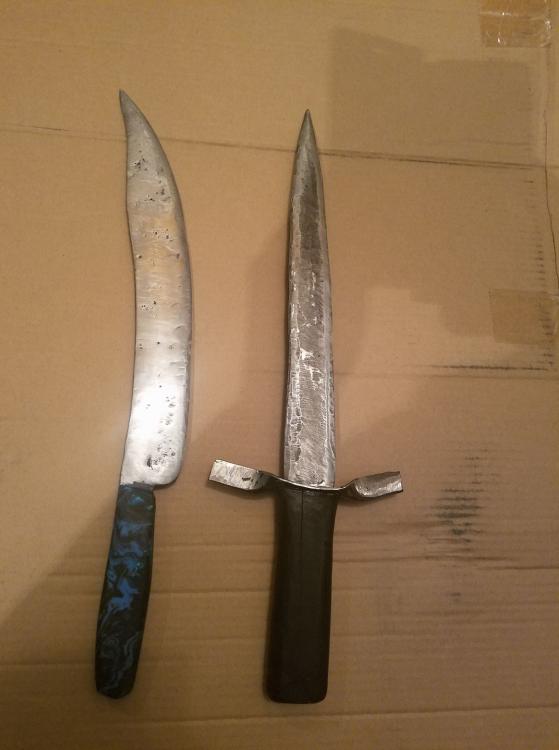
Well, it's been a...journey, but I finished the second blade I mentioned I was working on (knife number 2 done!). This blade caused me a lot of trouble, and I learned a lot as I went, but as always, suggestions/critiques always help! Story time first! I am still working on edge geometry and the bevel...trying to figure out how to improve upon those two with my hammer for the initial shaping, and then my angle grinder (really hoping for a belt sander for Christmas...think that might help just a tad). So, shaping this blade went well in my opinion, I got close to the shape I wanted, though it was a little shakier than I would have preferred. I am going to apply the techniques given to me in a previous post next time, to try to keep the blade straight and flat! I tried to clean it up as much as I could, but in the end, when I went to quench, I developed a slight bend that I just couldn't get rid of :(. The temper went well though, so the blade is definitely nice and hard :). Grinding away after the heat treat was a little difficult...the wife wanted me to try to leave some of the dark coating that appeared after tempering on the middle....and well...I just don't have the angle grinder skills needed to make that look pretty just yet....will keep trying in the future! Onto the part that taught me a whole lot...the guard and handle.... So, my initial idea for the guard was to take this piece of brass I had, and forge it out nice and pretty like, to make a fancy guard.... I learned quickly, brass is not my friend. Now, as I failed at the brass, my light was leaving, and my forge was setup outside because it was a nice day, so I grabbed the closest piece of metal ( a thin piece of 15N20) and tried to forge that into a guard.....it did not cooperate, so I just kind of forced it into a guard shape, and said it would be a forever reminder of my frustration and failure that night.... I then drilled through it (I don't have a drill press...so that was a pain too haha), and then filed away, until it fit my tang. Next was the handle.... I got a nice piece of blackwood for this blade (thought it would like striking with a brass guard....as we know that didn't work out haha). So, without a drill press, I placed my block of wood in my vice, and tried to use my powerdrill to punch through both ends. That became quite the struggle, and after a lot of fighting, switching bits, and changing which angles I was drilling at, I sort of had a path for my tang to go through. However, it wasn't wide enough, and my file broke on me....(cheap files are definitely a lesson learned), so I thought, well, might as well try a burn through...only problem, my forge was off and cool, and all I had for a heat source was a little plumbers torch..... Lets just say my patience lasted to about 3/4ths of the way burned through...and then the hammer came out. Proceeded to accidentally crack my handle material...so out came the epoxy. (I attached everything before I cleaned my guard up....ugh). Today, after I let my epoxy set for 24+ hours, everything was held nice and tight together, so out came the angle grinder again, as I worked the guard the little I could, and the handle material. Then I took it home, polished it up by working my way up to 2500 grit sandpaper on the edge, and am now, finally, sharing my second attempt at making a blade, with all of you! (Will also attach a picture below that has my first and second blades sitting side by side). Thanks for reading, and I hope you all enjoyed my story! Blade is made from 1095 Guard is made from 15N20 Handle is Blackwood

-
Working on my second ever knife
Jonathan Smidt replied to Jonathan Smidt's topic in Heat Treating Knives, Blades etc
Thanks! I'm definitely going to have to look into tempering tongs for the future! -
Working on my second ever knife
Jonathan Smidt replied to Jonathan Smidt's topic in Heat Treating Knives, Blades etc
With regards to that, for future reference, if the blade has edges on both sides (for this instance I was working on a dagger), can you still do an edge quench? or is it best just to do a full quench on any blade that has edges on both sides??? -
Working on my second ever knife
Jonathan Smidt replied to Jonathan Smidt's topic in Heat Treating Knives, Blades etc
Thanks! I bought a piece of D2 when I got my 1095....I will keep that hidden in the back of my metal stash for later down the road haha -
New to the Forge from Falcon, Colorado
Jonathan Smidt replied to Jonathan Smidt's topic in Introduce Yourself
I will check that out, I got a membership to ABANA after Dave mentioned it. -
quench done....omw home to temper, will still finish this blade...but after getting all the tips etc in here, I know there is a lot I could have done differently in the forging process for it
-
So glad I joined this forum, you guys are amazing!! Also, getting ready to head to my forge...had to make a quick stop....

-
I was originally going for a curved camp knife design in my mind....but as I started workint thr bevel and it started to curve more...I just embraced it. As for fixing it, I know it was mentioned above I can put in a countrr bend before hand. that should straighten it out as I work the bevel correct?? And Will, thanks for that, I will definitely give those techniques a try to get more level and cleaner blades!!!
-
Working on my second ever knife
Jonathan Smidt replied to Jonathan Smidt's topic in Heat Treating Knives, Blades etc
Thanks will do!! any steels in particular I should stay away from for now? or materials in general?? -
Working on my second ever knife
Jonathan Smidt replied to Jonathan Smidt's topic in Heat Treating Knives, Blades etc
Thanks will do! I'm definitely going to try to get a lot more practice blades under my belt...ordered a 48" piece of 1084 that should be arriving soon....gonna cut that into smaller pieces to work on more practice knives...that will not reach the 17inch length of this current piece.....haha -
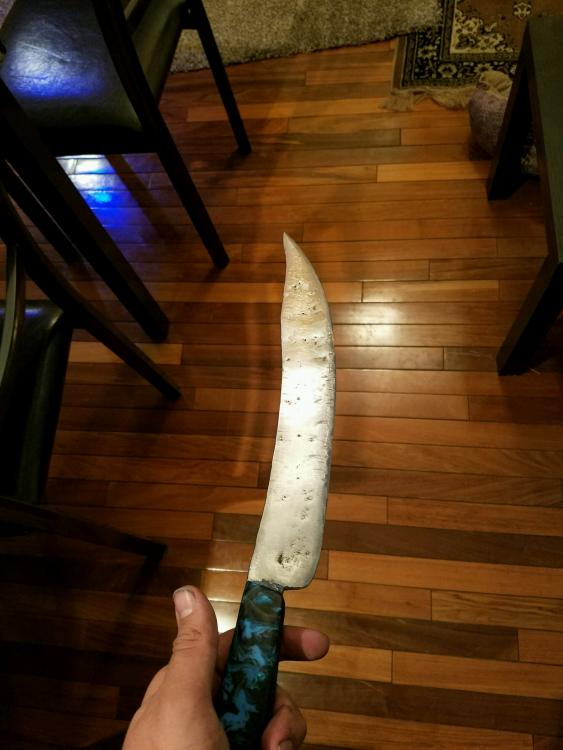
Thanks everyone! I really appreciate your comments and critiques, and will do my best to put them all into being as I move forward! (I'll also start taking pictures on a better background, my apologies on the busy background!). As for the heat treat of the blade, that went really well, I didn't get any warpage or bends, and I tempered it in my oven as I'd read was supposed to happen, so that part at least was a success (though I doubt the wife was happy I was using the oven in the house....) With regards to the sabering...that was not intentional in the beginning...as I was working the blade it started to curve...so I just kind of embraced that and went. That being said, I have been working on a second knife, and just as you mentioned, I have started drawing up the design of the blade (I got a chalkboard in my forge area now, so I can draw up a profile, and look at it as I work!) With regards to mechanical joints, I do not have a drill press yet, but I do have a power drill and bits....would it work if I tried to drill holes through my tang while it was still slightly hot (and before the heat treat), so that I can get through it? I was thinking I could punch some small holes into the tang while forging, then drill through those with my drill bits, for my full tang handles. Also, is there a way to decrease initial hammer blows/pits, is it a matter of improving my hammering techniques? And I will definitely look into draw filing for the bevels! (For this blade I just used the forge, my angle grinder, and a lot of elbow grease with sand paper haha....)
-
Working on my second ever knife
Jonathan Smidt replied to Jonathan Smidt's topic in Heat Treating Knives, Blades etc
Thank you both for your responses! I suppose wanting to do the water quench was more so a matter of ease/a character flaw in thought (thought process being "I already have everything for a water quench, why get the stuff for an oil quench if water will work, just be a little harder). I know now that was not the best idea, so when I head to the forge this morning to do the quench, I will bring with me the galvanized wide metal bucket I got at lowes, and some oil, and do an oil quench. I will also hold off on the clay idea for this blade, as recommended, and probably give that a try on some smaller pieces as practice first in the future. As for heating the water...was just a suggestion I had relieved, did not know the purpose of heating the oil was it's viscosity, not a temperature issue...thanks for setting me straight on that one Thomas! Hopefully everything goes well, and if it does I'll probably have a picture of the finished piece up in a couple days....as long as the quench goes good....I'll be working on the guard and trying a hidden tang handle on this one! -
Hey all, so I'm new to this, I've taken a few blacksmithing courses, and about 6 hours of basic bladesmithing (as well as watching videos/reading books.) I just finished my first ever attempt at a knife, 1084 steel, with inlace acrylester as the handle (bought from texasknife). Any who, I have it now near my forge, as a reminder of my starting point, and while I feel I learned some lessons as I worked on it, I'm curious what noticeable issues there are that I should focus on fixing, and any/all tips on how to go about doing that would be greatly appreciated!
-
Hey everyone...after lurking on this forum as a guest to get some answers to questions, I've finally decided to make an account, and hope to take full advantage of everything available here to help myself grow as a blacksmith/bladesmith, and who knows, maybe some day I'll be able to help pass that on. Anywho, about myself.... I currently live in Falcon, Colorado (so if there are others from Colorado in the Falcon area or the Colorado Springs area, I would be ecstatic, been having a hard time finding local people to chat with/work with....) I served 8 years in the Marine Corps....and that's really about it interesting wise for myself up to this point (I occasionally write, and have some self published novels out...but meh....) Back in June of this year, I took my first blacksmithing course on a whim. It was a 2 1/2 day level one blacksmithing course taught by David Noirre, and needless to say I was hooked. I was able to take his level two course later on in the year, and met a local bladesmith who I've worked with for a few hours to begin learning the process of blade making as well. I just got myself a forge and anvil, and set up my own little area to practice on, and am doing all I can to improve both my skillset/talents when it comes to blacksmithing and bladesmithing. I honestly just love the ability of taking a piece of metal, and being able to turn it into practically whatever my heart desires with the pound of a hammer and a fire in the forge. I am hoping to be able to grow my skills as time passes, and would love to reach a "master" level some day....I think that's about it for now...I aim to share some of my work as I get going (right now all I've done outside of a class is made a knife from 1084 with inlace acrylester for the handle, some practice railroad spike blades, and some rail road spike snakes lol). ...I'm really bad at these introduction things...
-
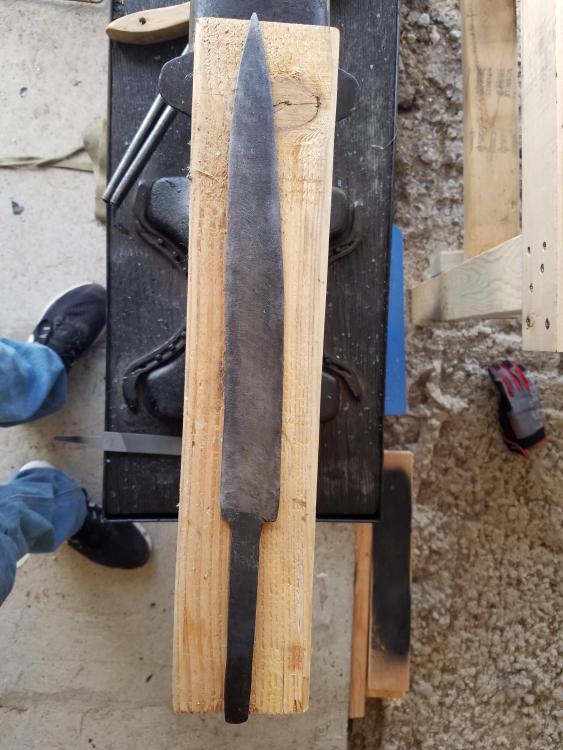
*I realize I accidently posted in the blacksmithing forum instead of the bladesmithing forum...however I am finding it difficult to put this in the appropriate area, my apologies!* So I'm working on my second knife project (posted my first one earlier), and I had some questions with regards to the heat treat (which I am planning to do tomorrow). The piece itself is a dagger I am working on out of 1095 steel. I have the profile and grinding done for it, and am getting ready to heat treat, but a bit nervous about the quench. I am planning on using clay along on the spine of the dagger on both sides, but wasn't certain if there was a certain time to apply the clay, or if you just put it on before you begin heating the blade for the quench? I was thinking this would help keep the spine from getting overly hard and brittle, which would give the dagger more strength and flexibility of movement when thrusting into hard objects (not that this is the intention, just trying to learn and practice things for now.) I also was thinking this might help prevent cracks/breaking of my blade for the quench. The reason for this is because I am going to attempt to quench the blade in water, not oil... I am going to use some hot railroad spikes to heat the water up, which I am hoping will decrease the chance of any serious damage to the blade. My question there is, when I got to quench the dagger, do I plunge it in tip first with the edges perpendicular to the ground, or the flat of the blade? Are there any hints, tricks, or tips that could help me from ruining this piece? (I mean if I did, I would treat it as a lesson learned...but I'd like to avoid a catastrophic damage if possible). Also, any advice on fixes if the blade develops a warp or a crack during the quench? Thank you all for reading this....hope I made sense above haha.