Jclonts82
Members
-
Joined
-
Last visited
Everything posted by Jclonts82
-
Right on. Go ahead and try a few different inner cores if you have the time/resources, post results. I only had 2x12” sections of pipe.
-
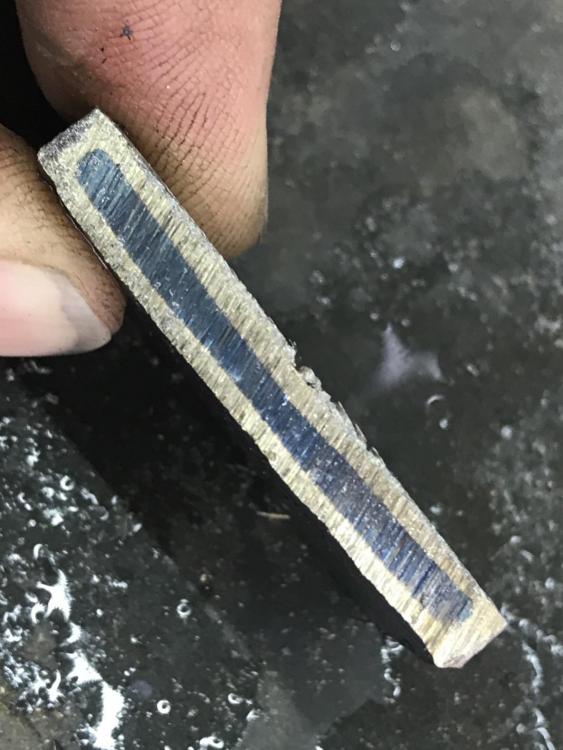
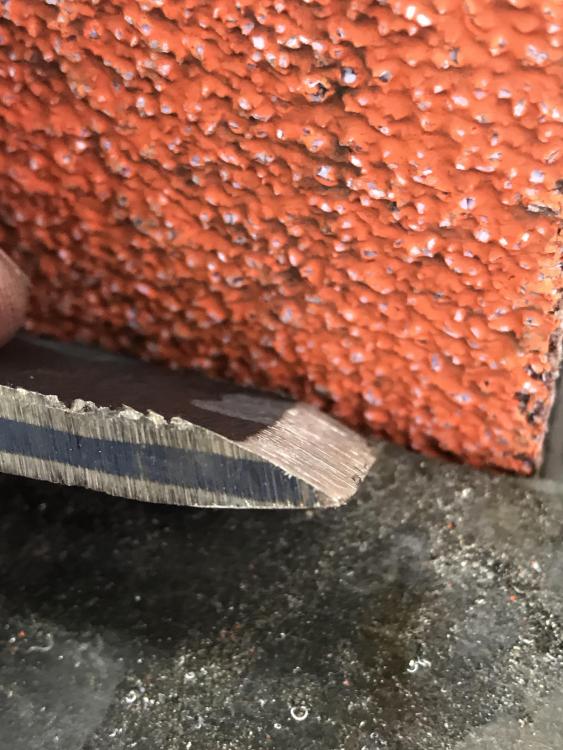
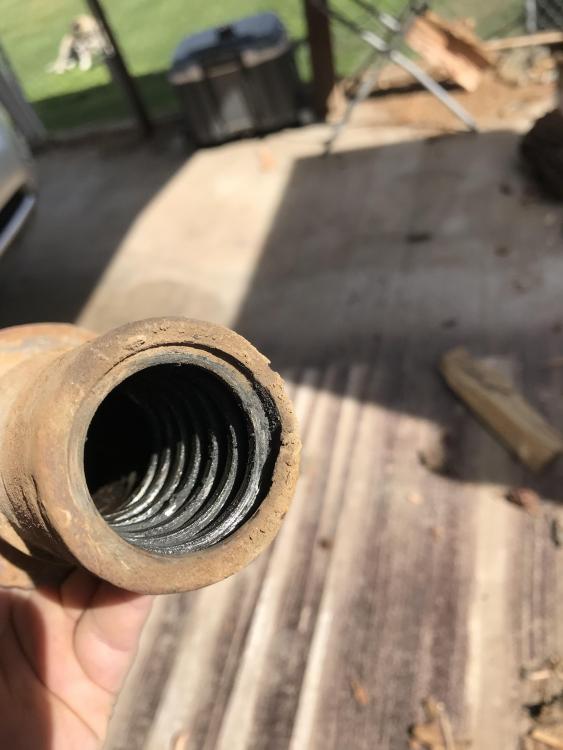
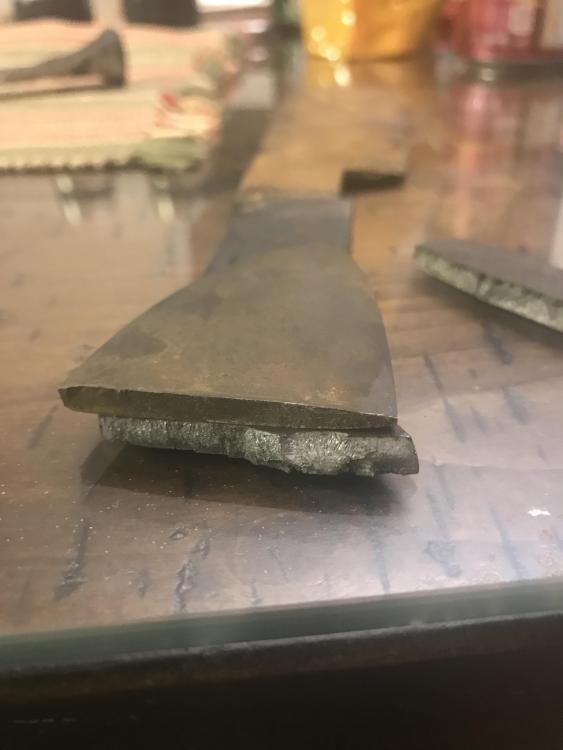
I had success with a heavy walled 316 stainless pipe, 1" outer diameter, 0.74.." inner diameter, and a piece of W1 round stock at 0.75.. I took a 1/4 round mild steel rod, cut a slit on the end, then put a piece of 50 grit sand paper in the slit, chucked it in a drill and bored the inner diameter of the pipe until the W1 round would just barely fit with some 'gentle' persuasion. once the stainless sleeve was on, and flush on both ends, I mig welded it completely around both ends. effectively making a canister, with the 316 on the outside. Heated it to welding temp. I judge it by color, to me its a bright yellow... use whatever you want, you could even slap some borax on the outside to make sure its bubbling vigorously just to use as a temp gauge, not needed for the weld, just a temp indicator. Took it to the power hammer and away I went. hammer to shape, hammer in bevels, grind through the stainless and expose the W1 cutting edge. I had to experiment with the quench. I had to use a slower, room temp canola oil. I cut some test pieces at 1/2: wide, 1.5" long , ground through the stainless to make a bevel exposing the W1. I tested in Water, Mcmaster carr quench oil, heated canola, and room temp canola oil. The room temp canola is the only one that didn't crack the W1... I think the stainless cooled and shrunk quite a bit, and it actually pulled the W1 apart, the welds held, but the w1 ended up with a crack in the middle of it, like it was pulled in 2... lol

-
This is a post of mine, my first foray into cable, not great, but not terrible either... . So... for the NEXT KNIFE you make out of this cable, to get the pattern to show up, no adding up the layers, just get it solid, then shape a knife out of it, standard etching will show it off, plenty of threads explaining how to do the etch.
-
Ray Rybar, MS


-
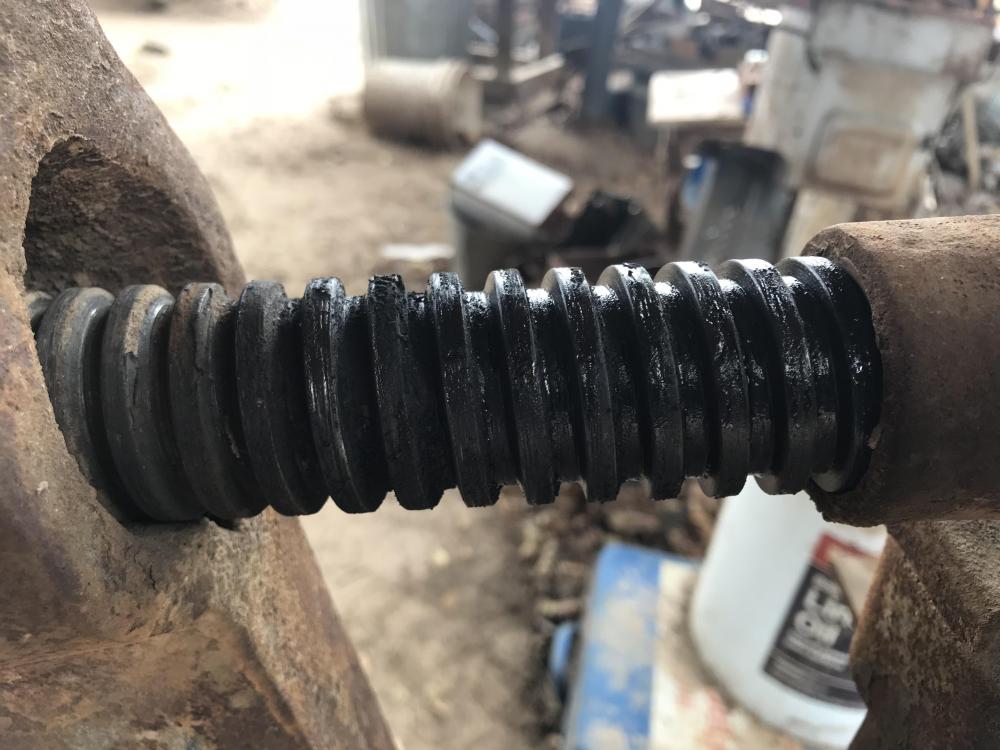
I thought it was in decent shape. I will take a wire wheel to parts of it that have accumulated dirt on it, that can trap moisture and promote rust, plus clean up the screw... other than that, I will just get her back to work!
-
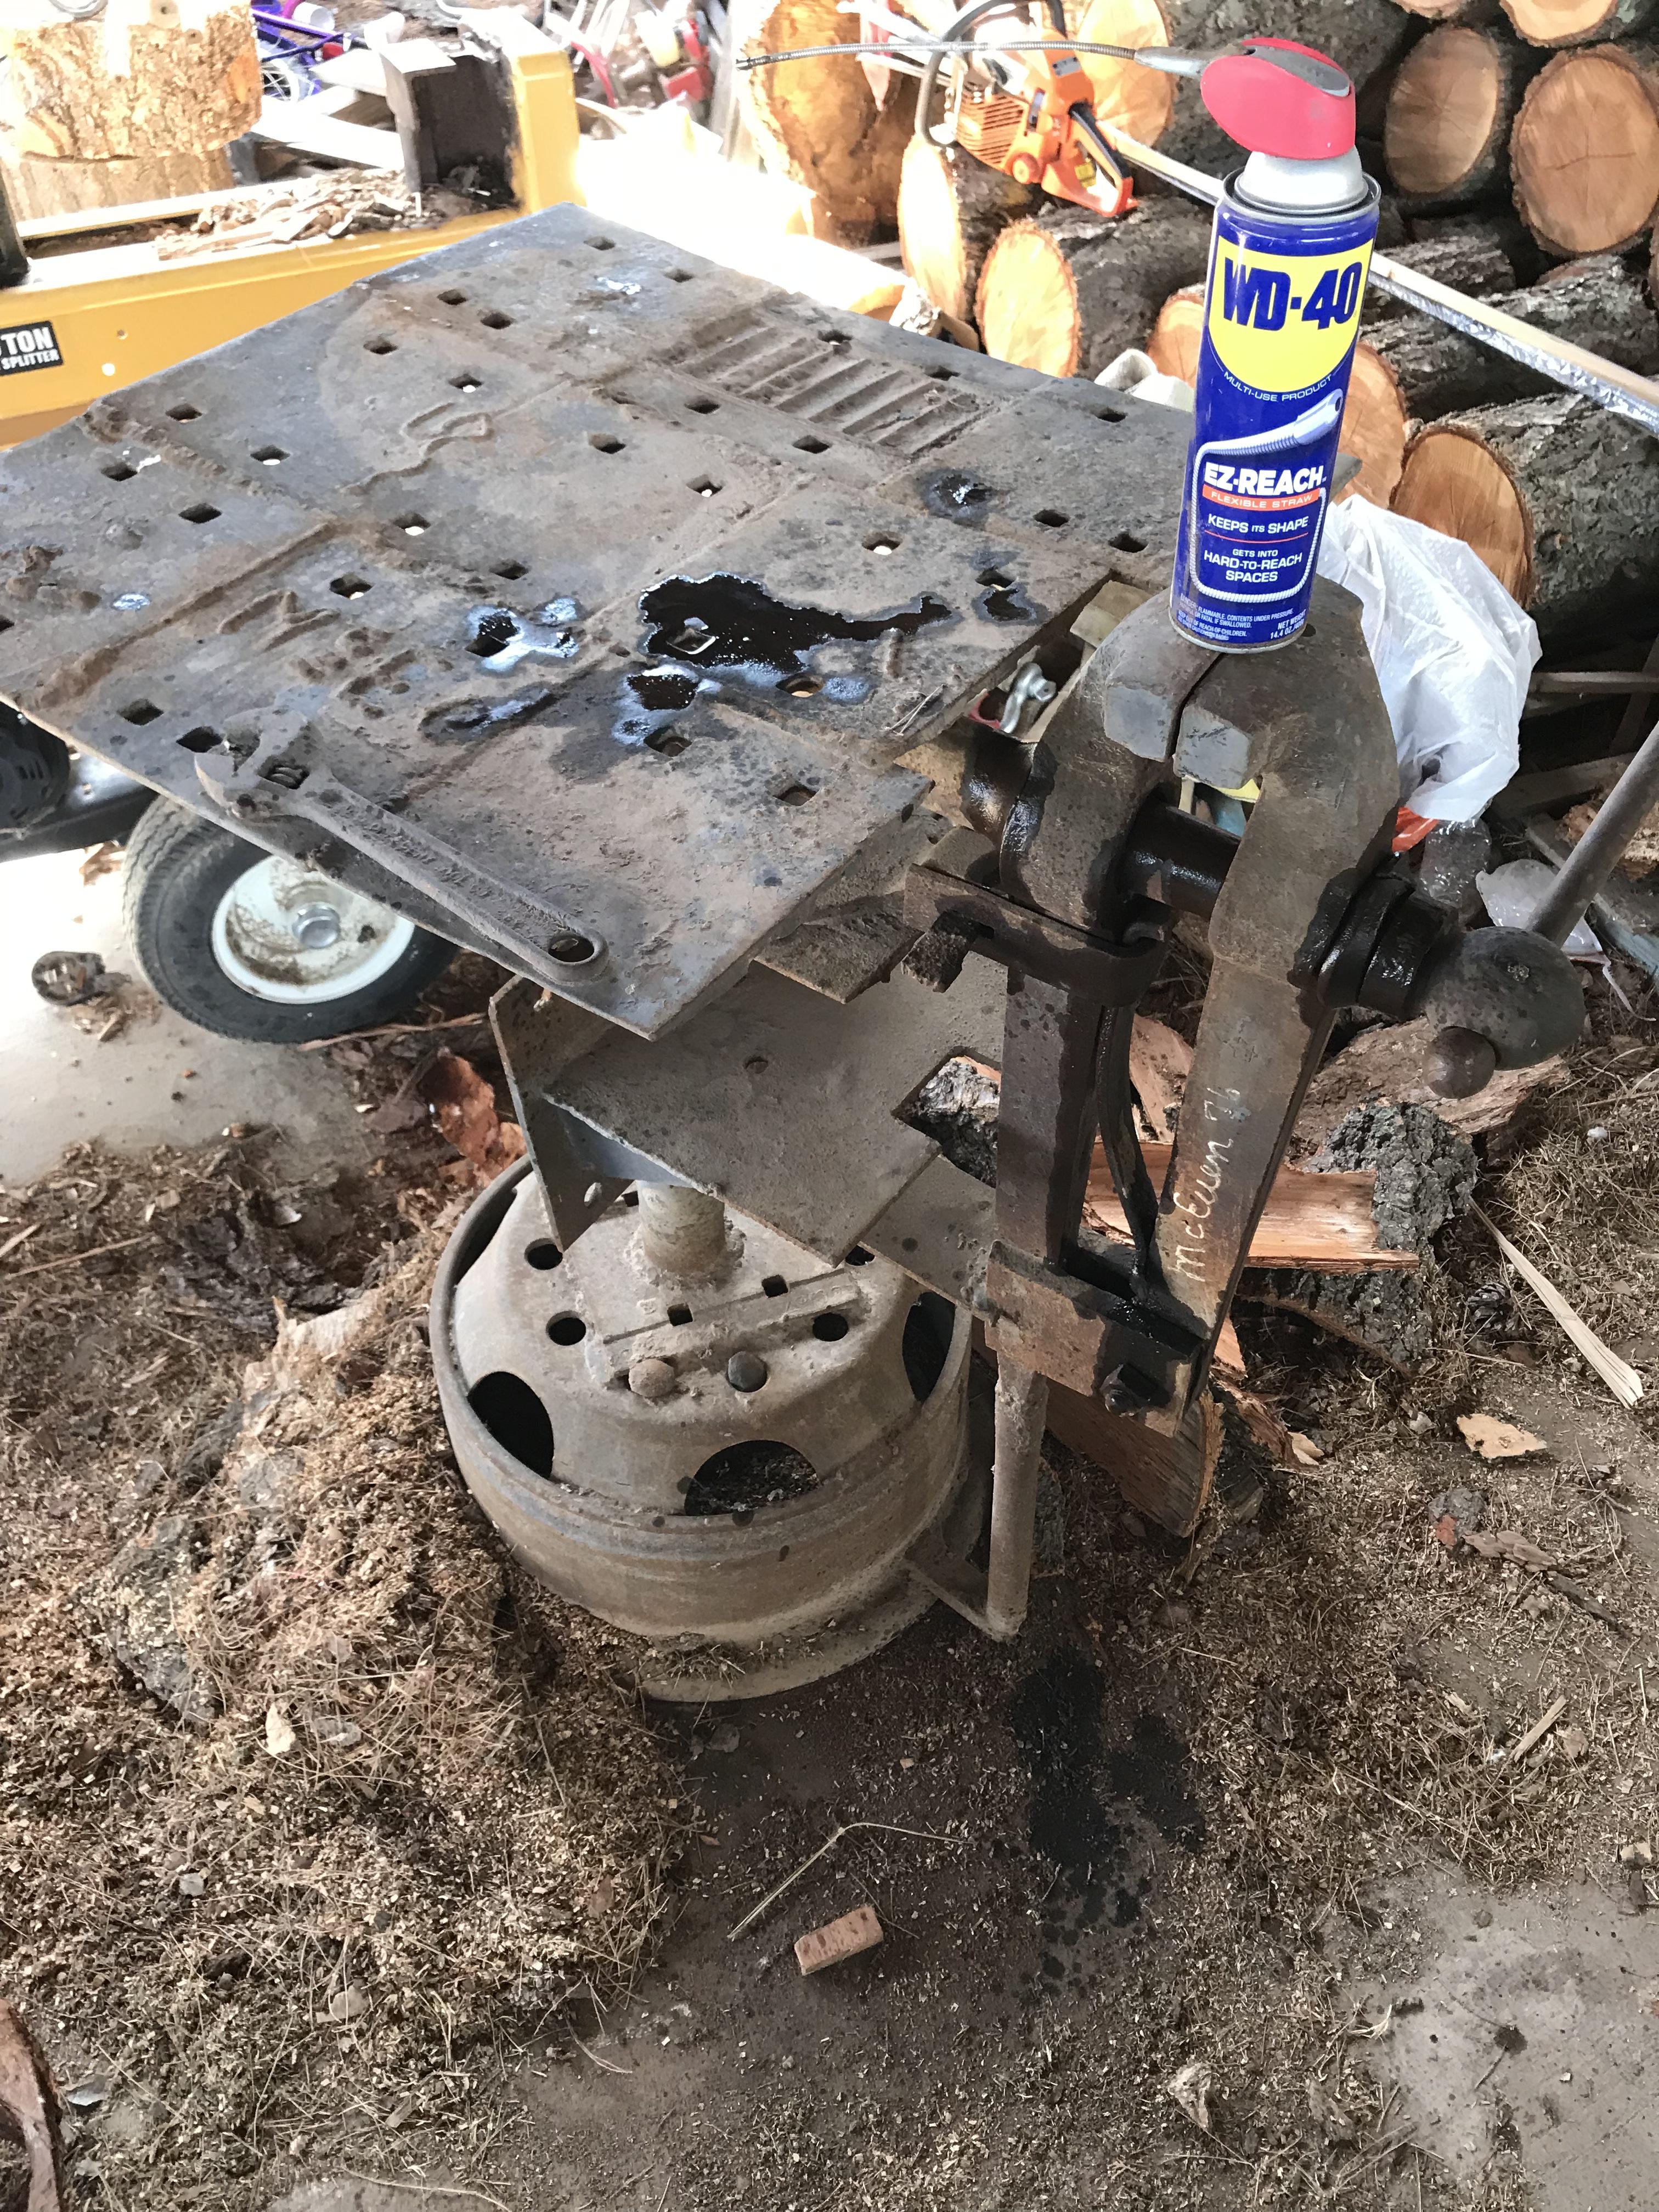
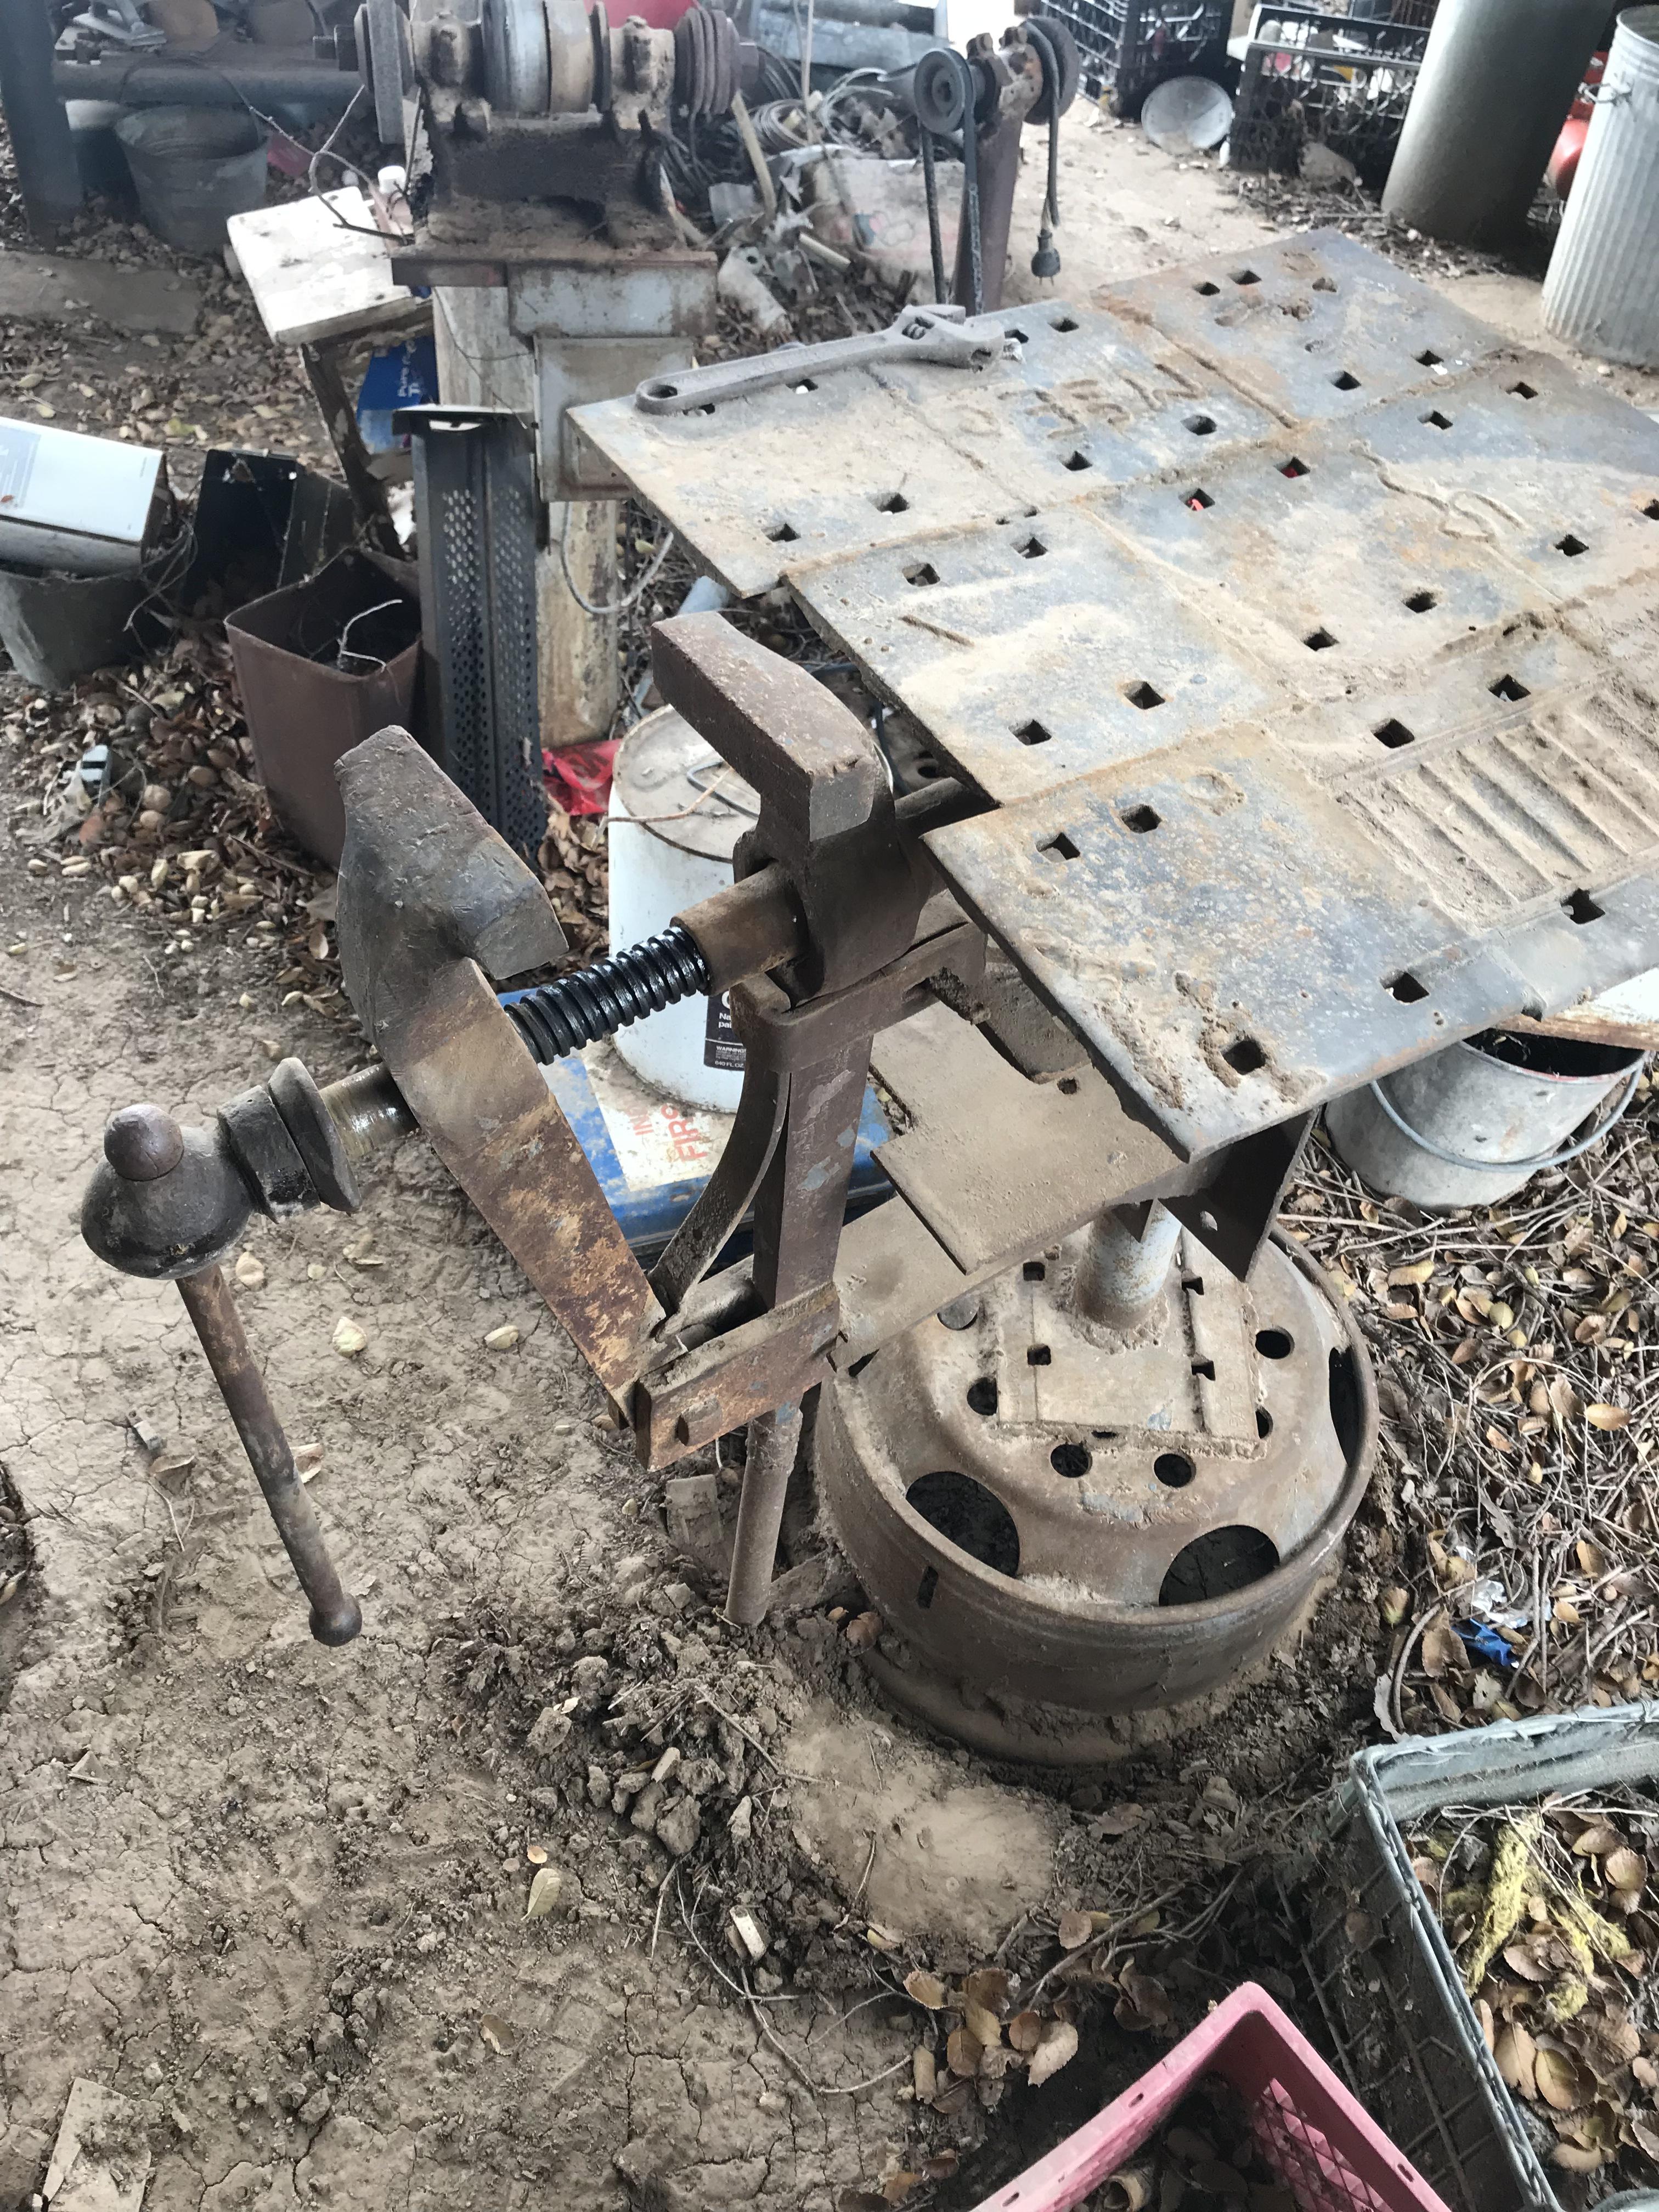
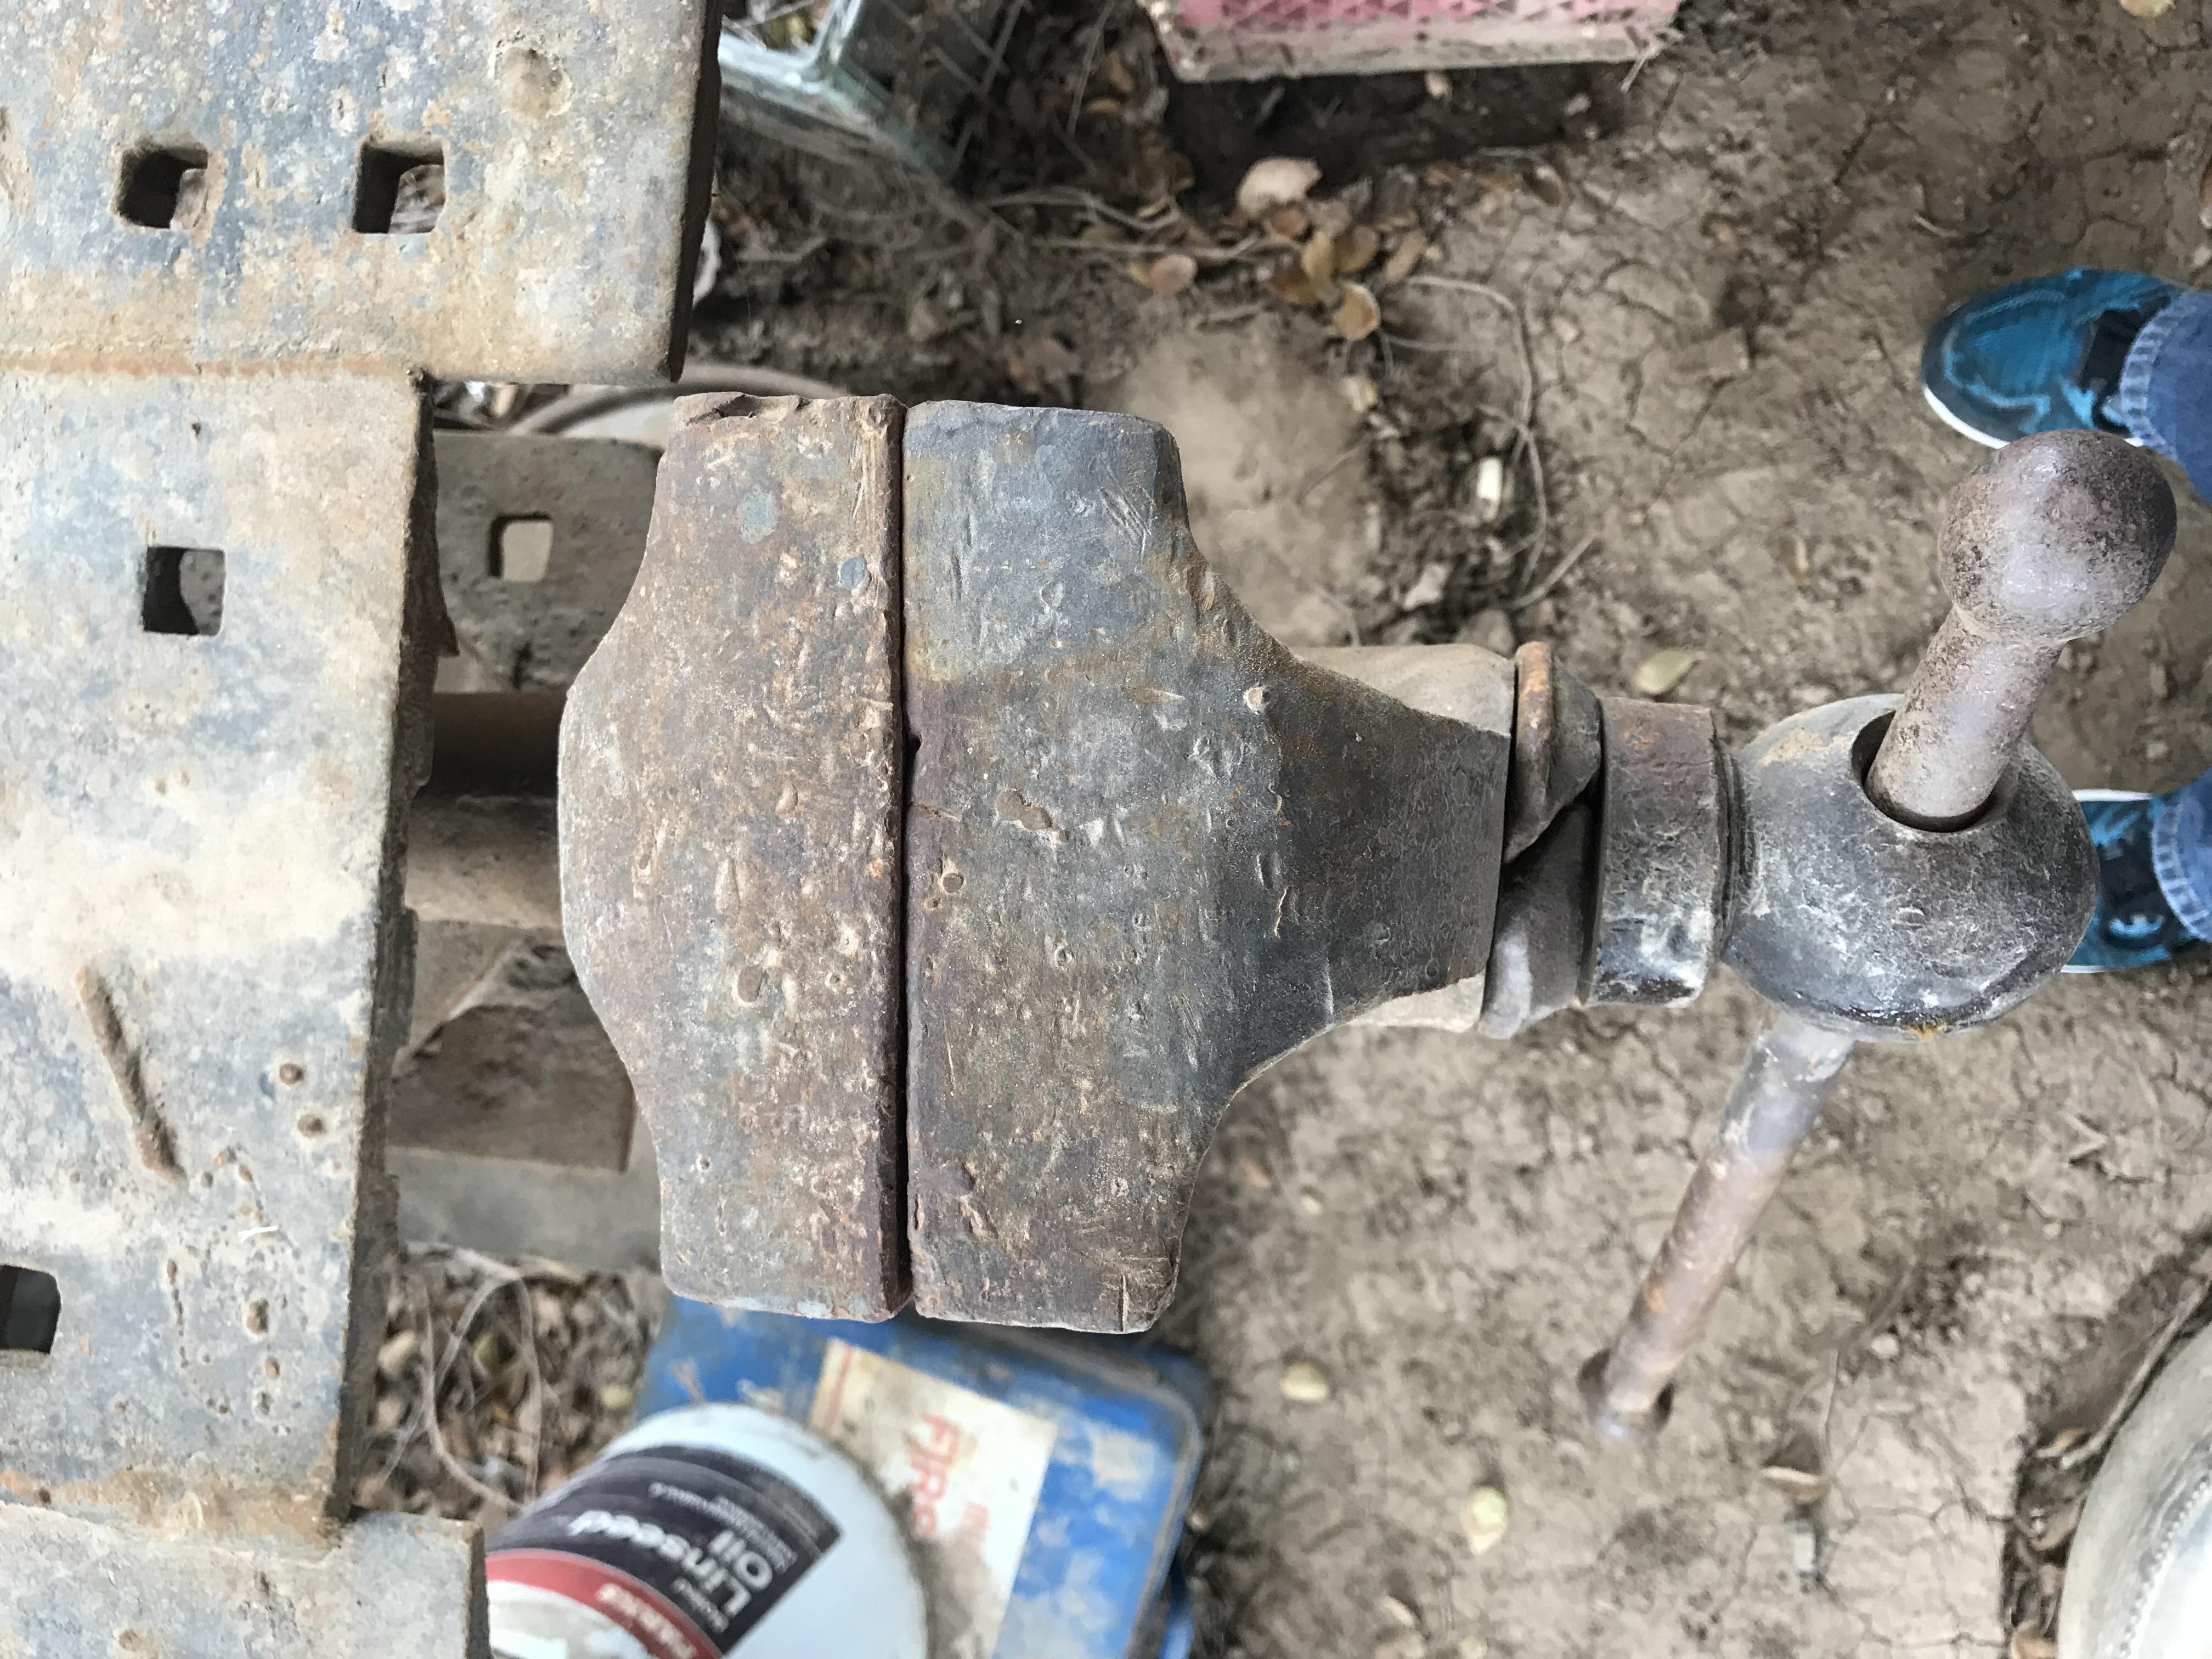
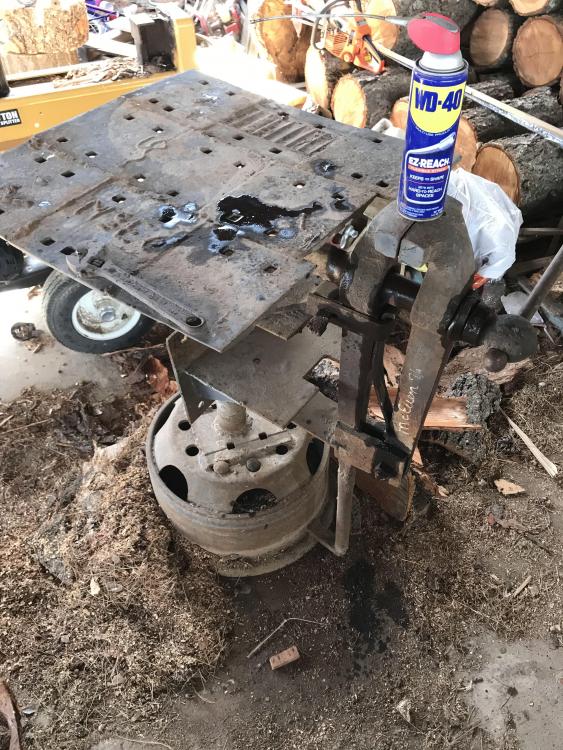
I don’t know my post vise anatomy that well, but I’m assuming this is the screw box? gotta love the stand/table/thing the old man kludged together.


-
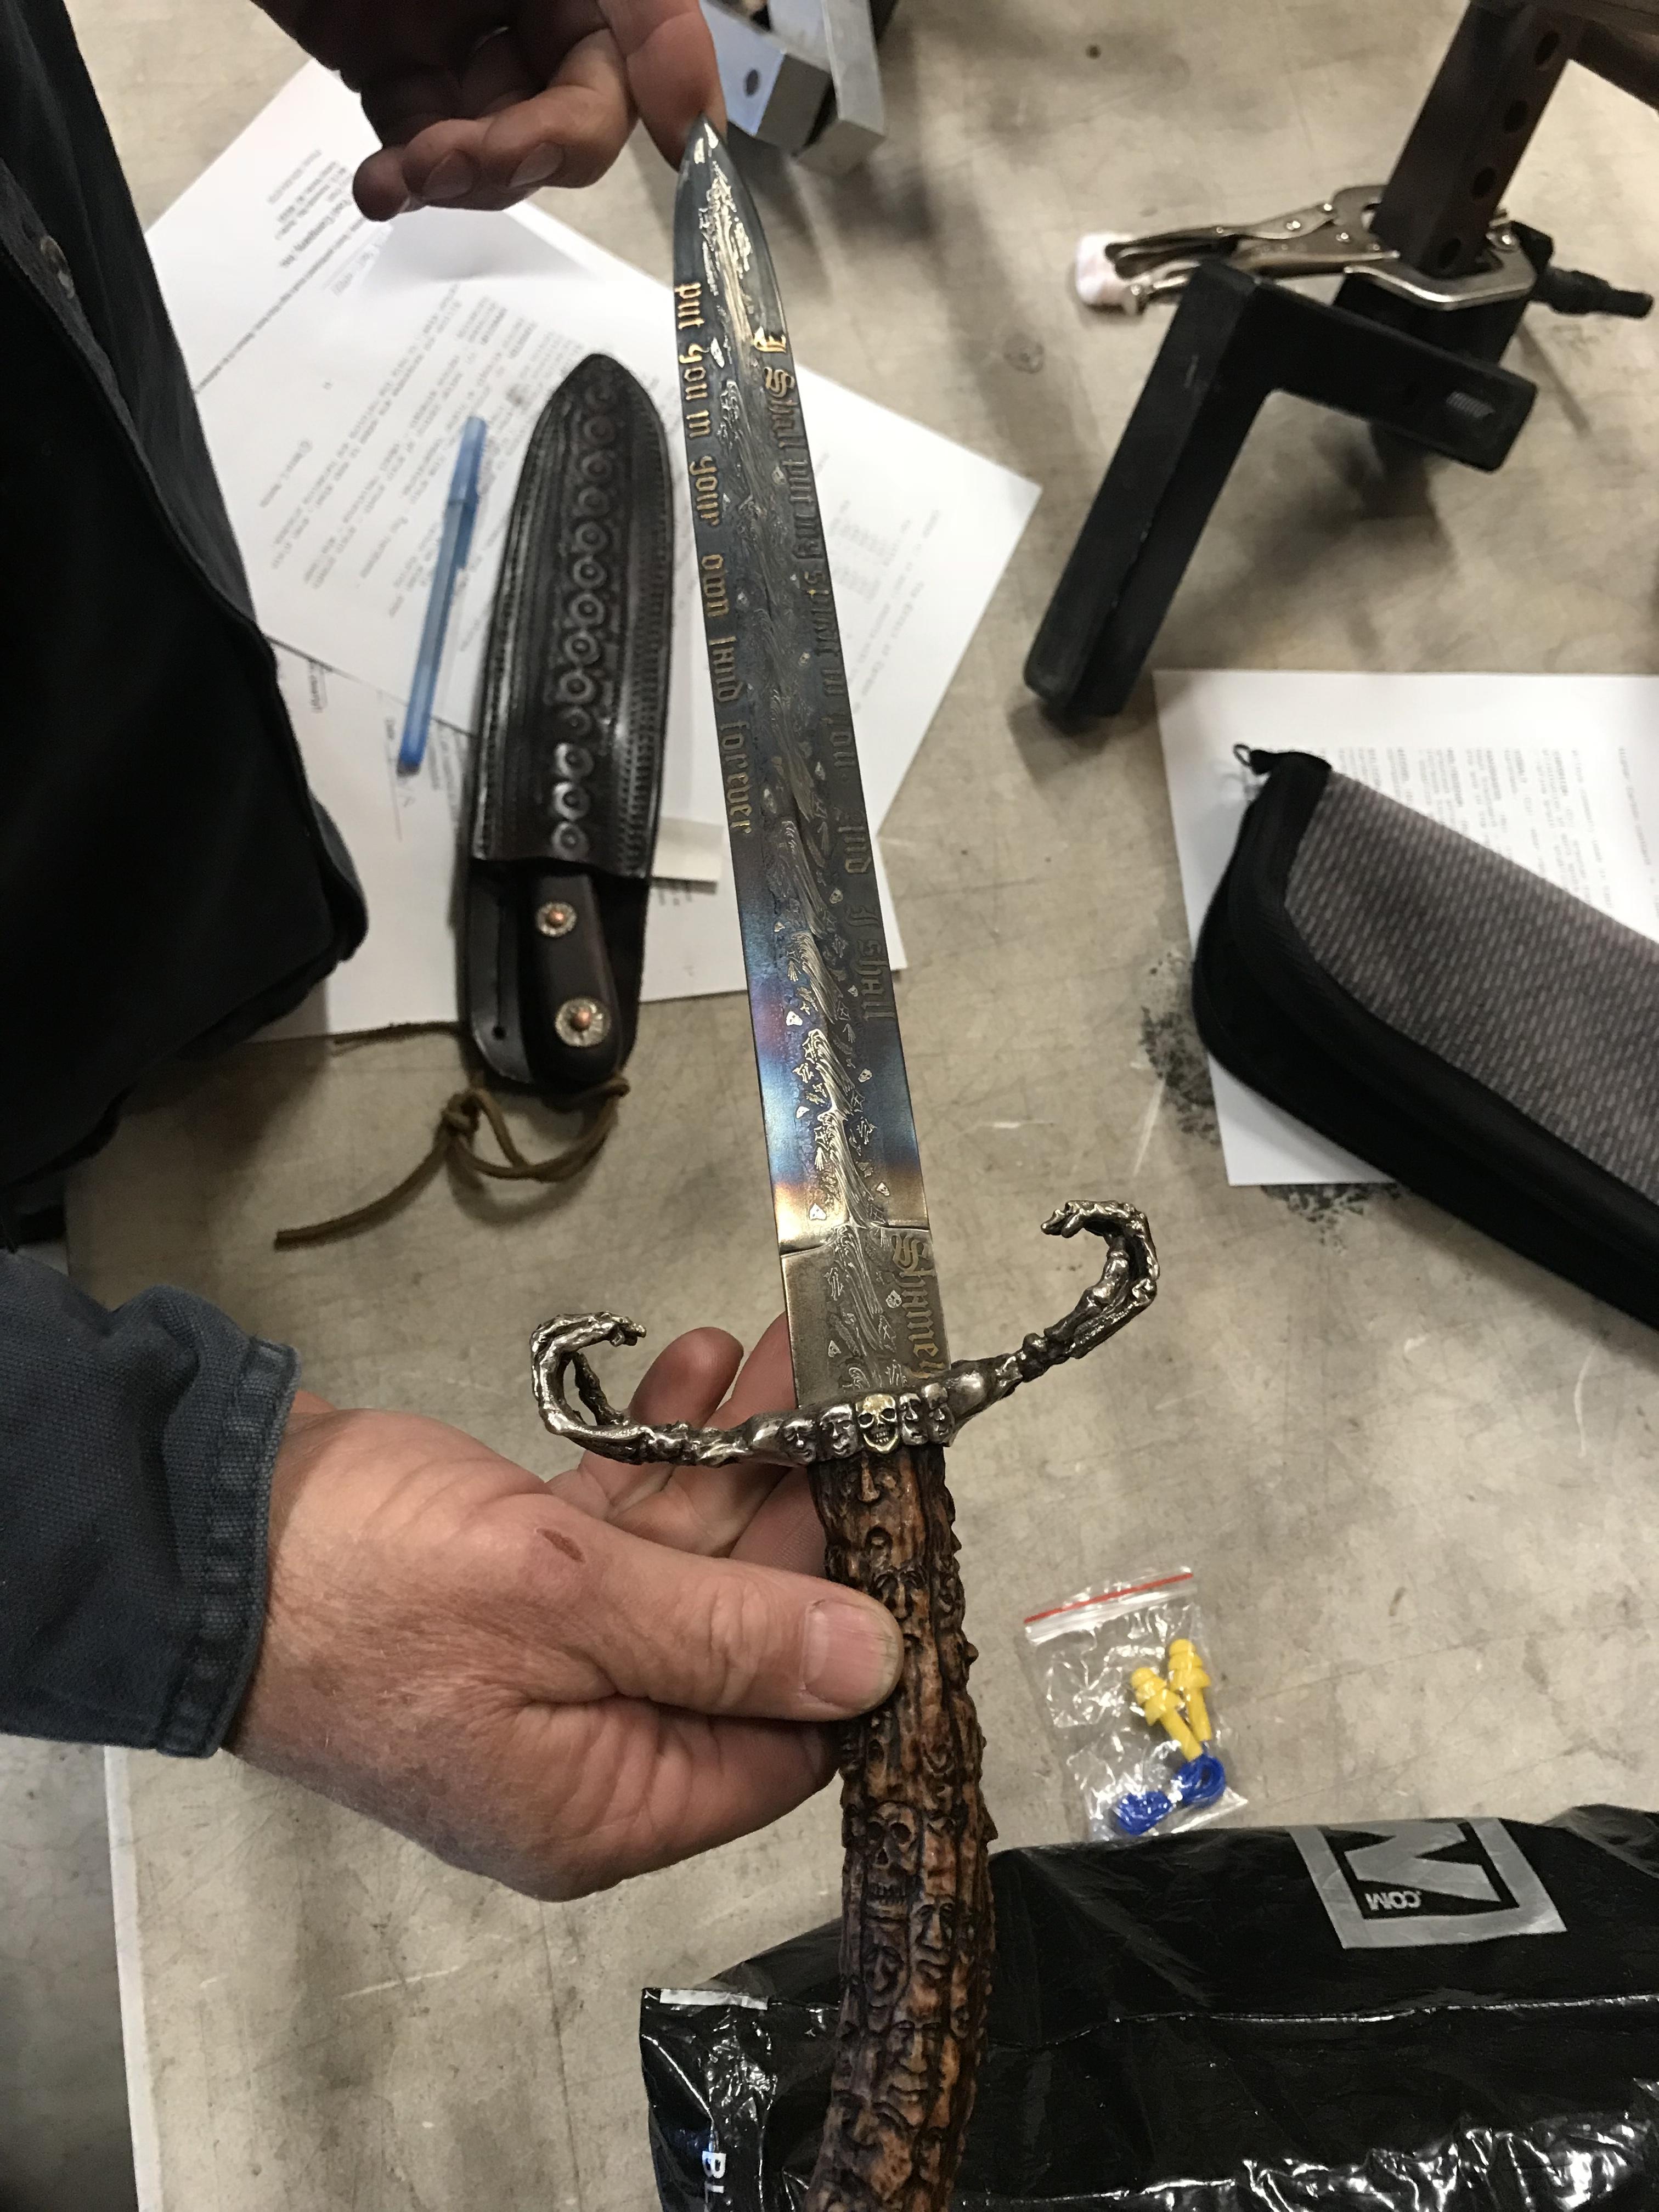
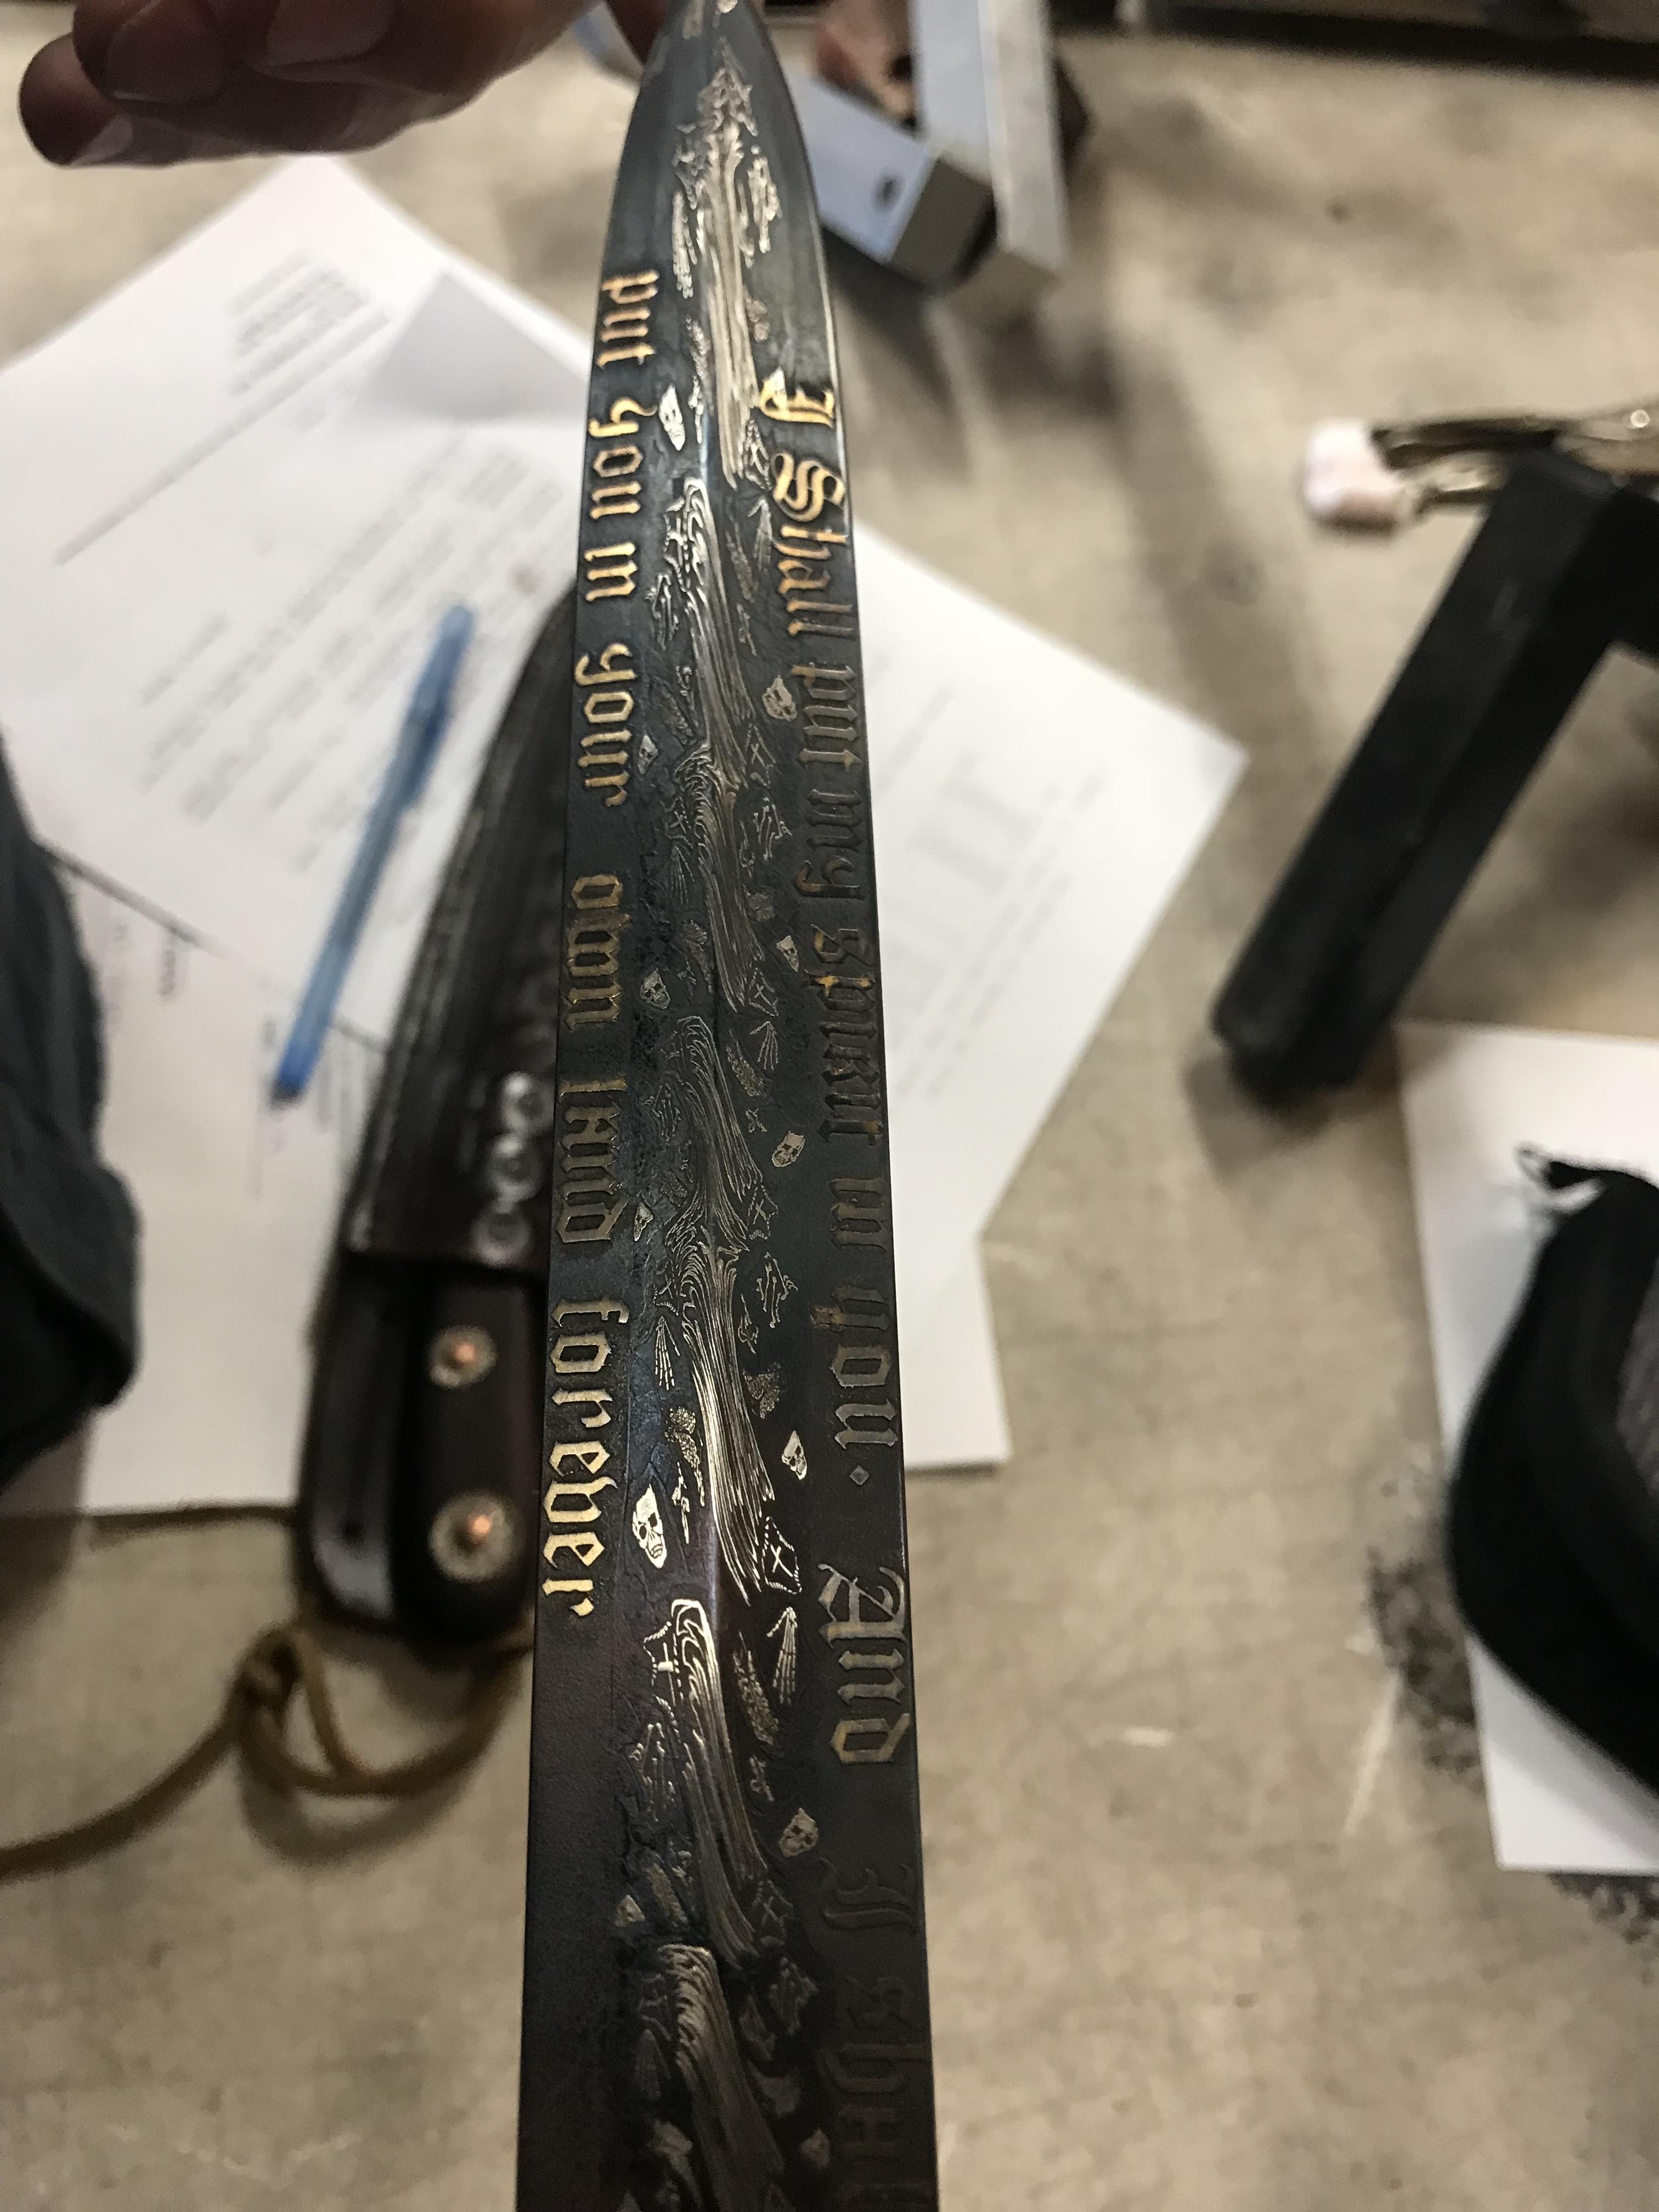
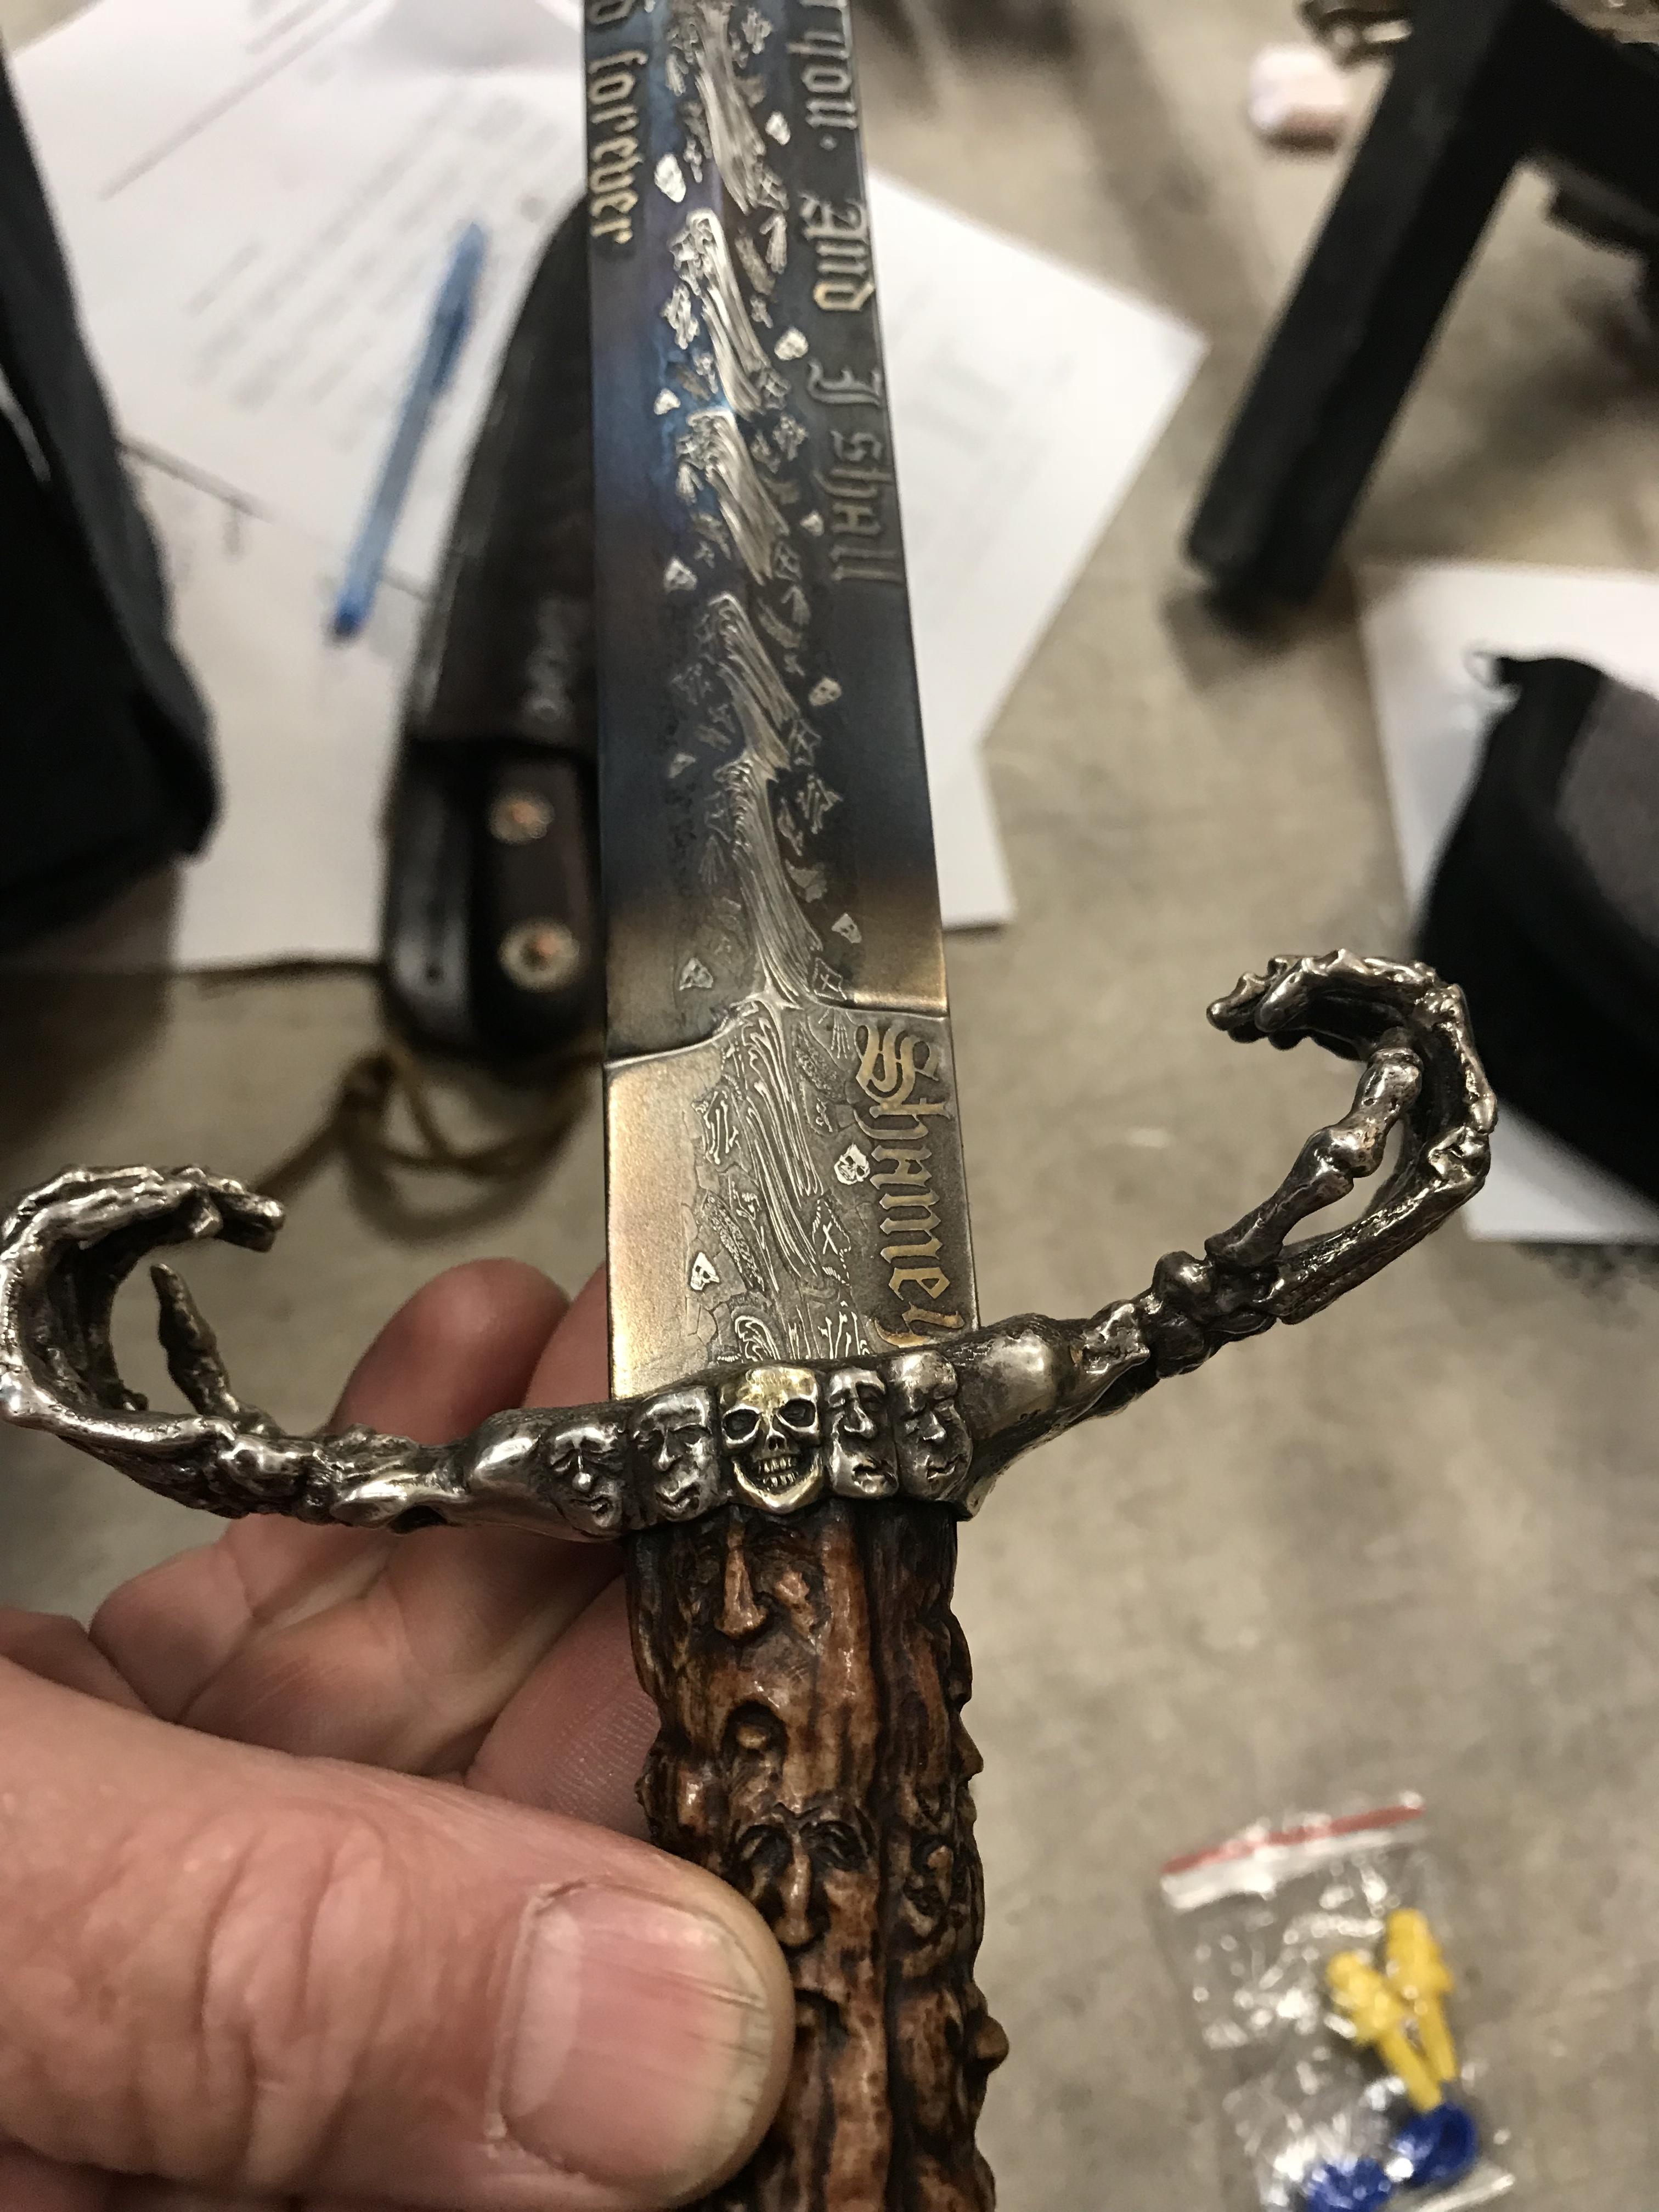
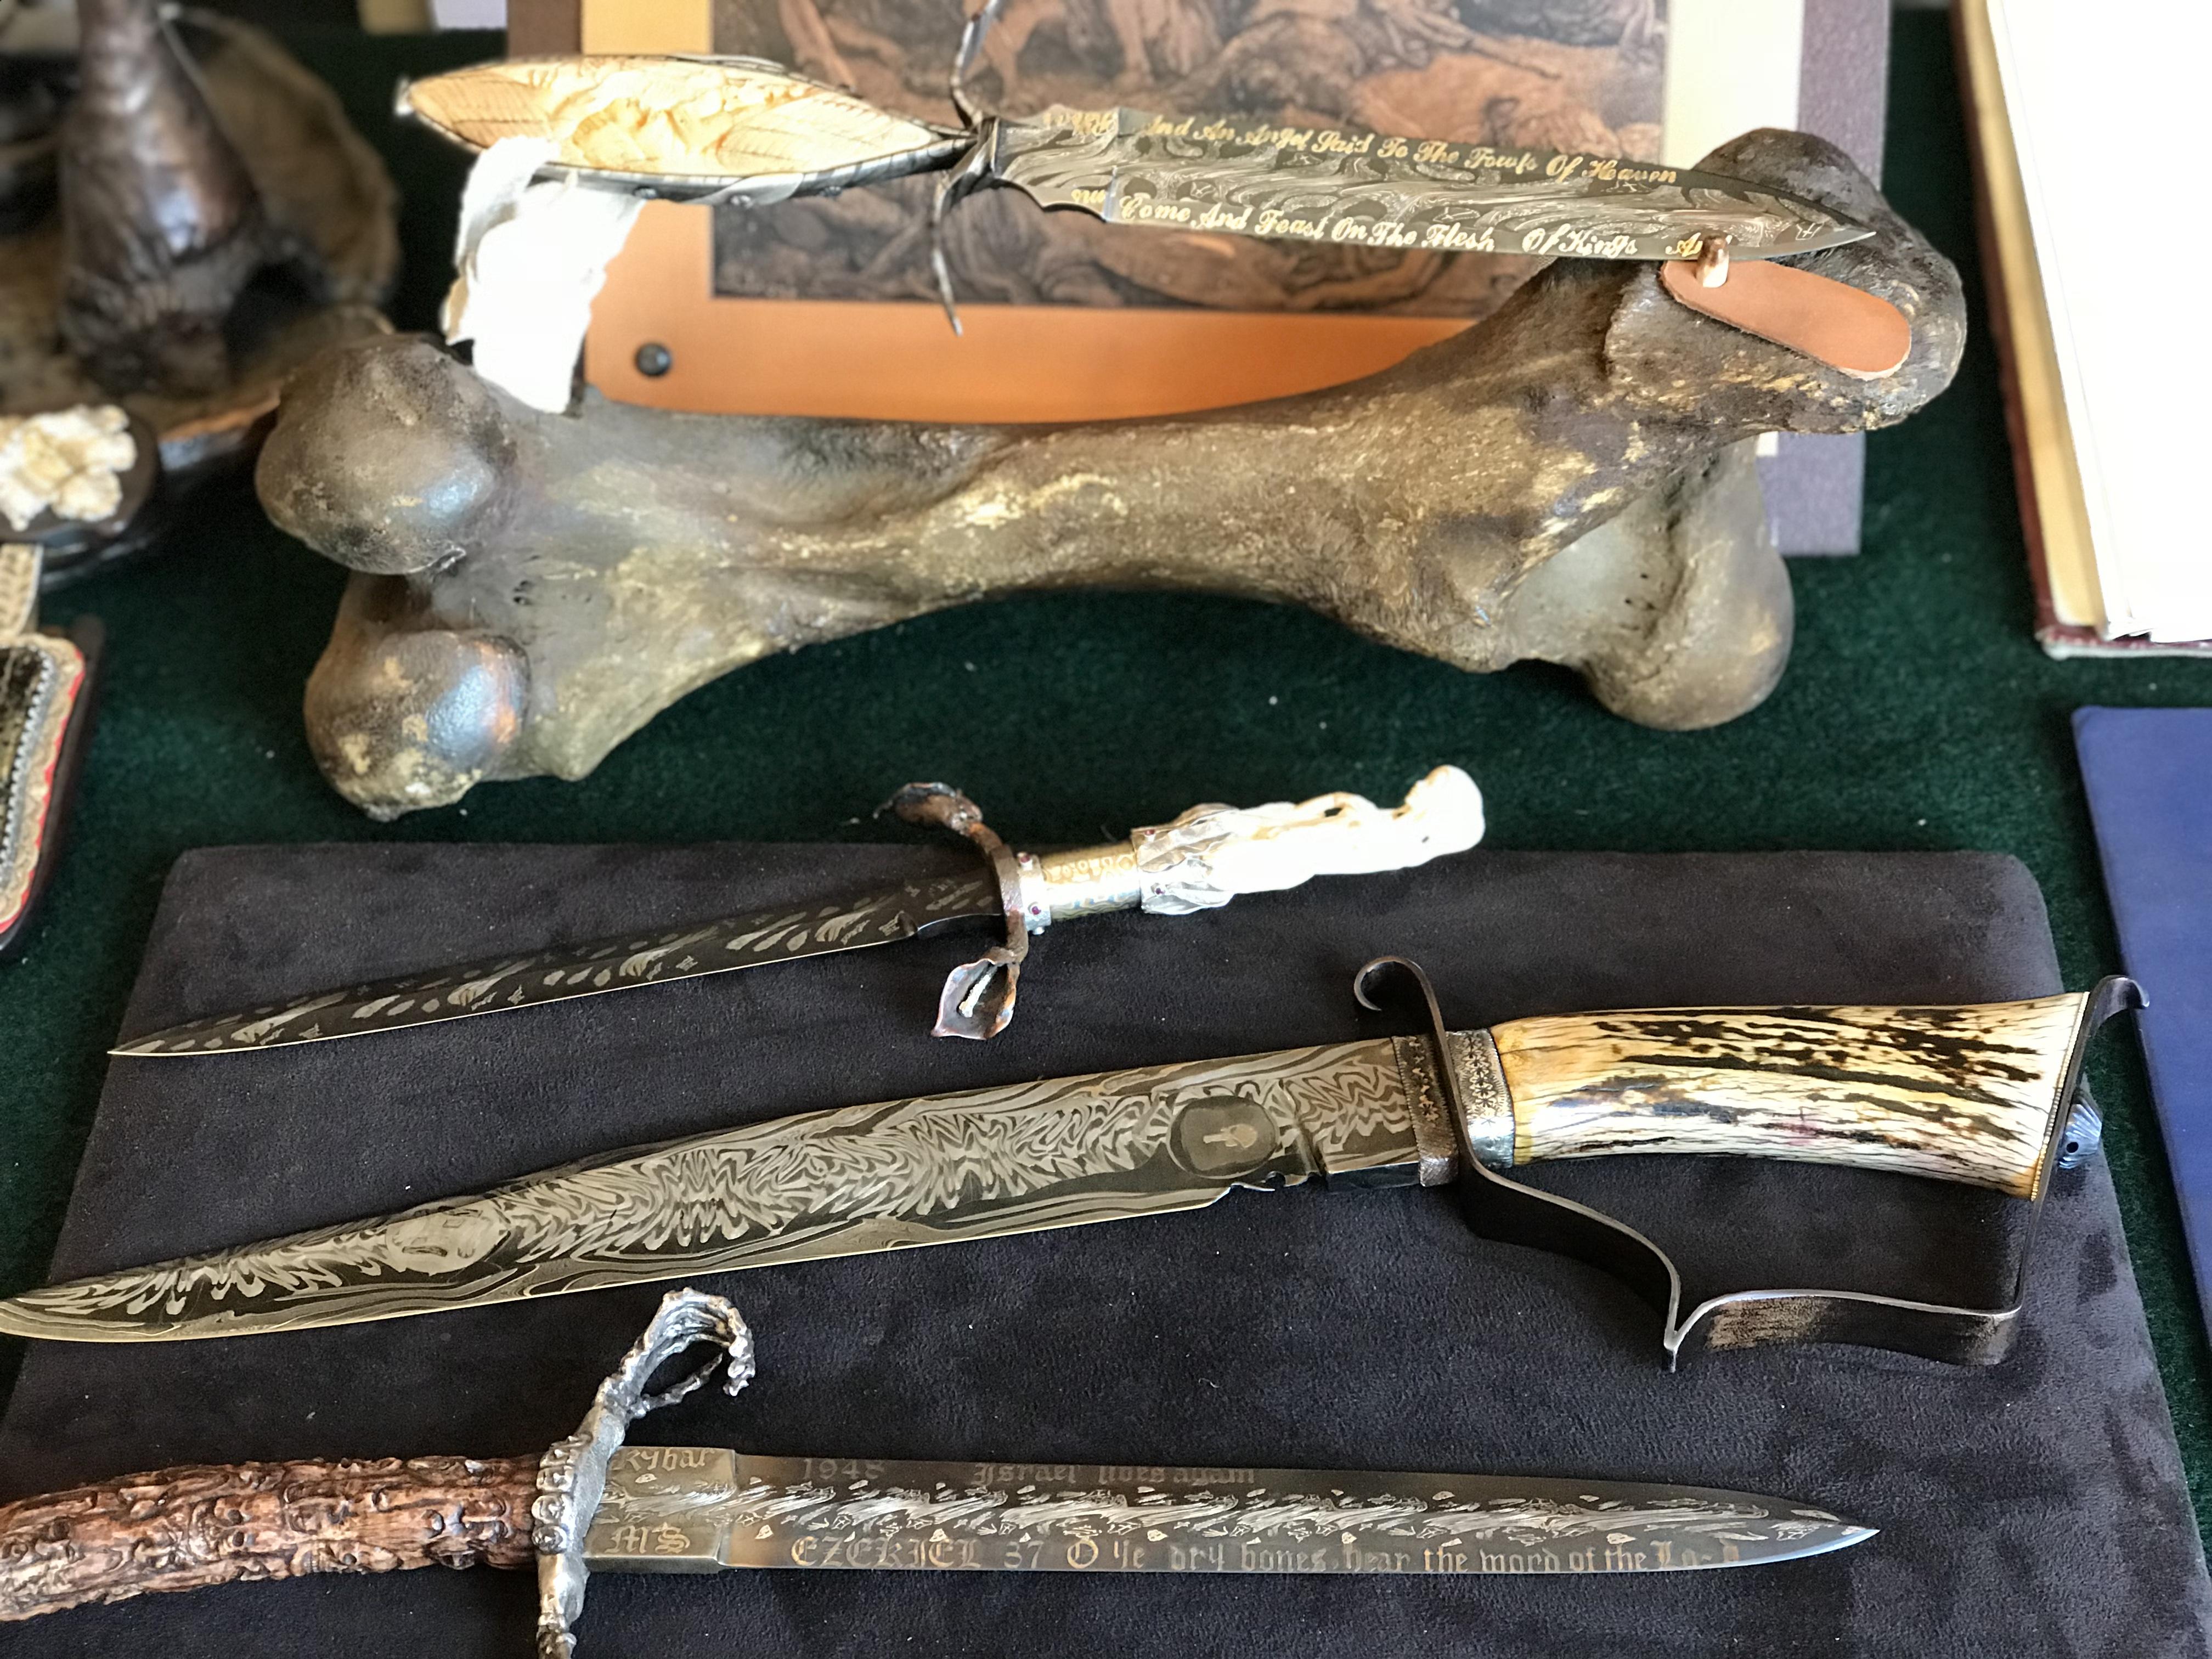
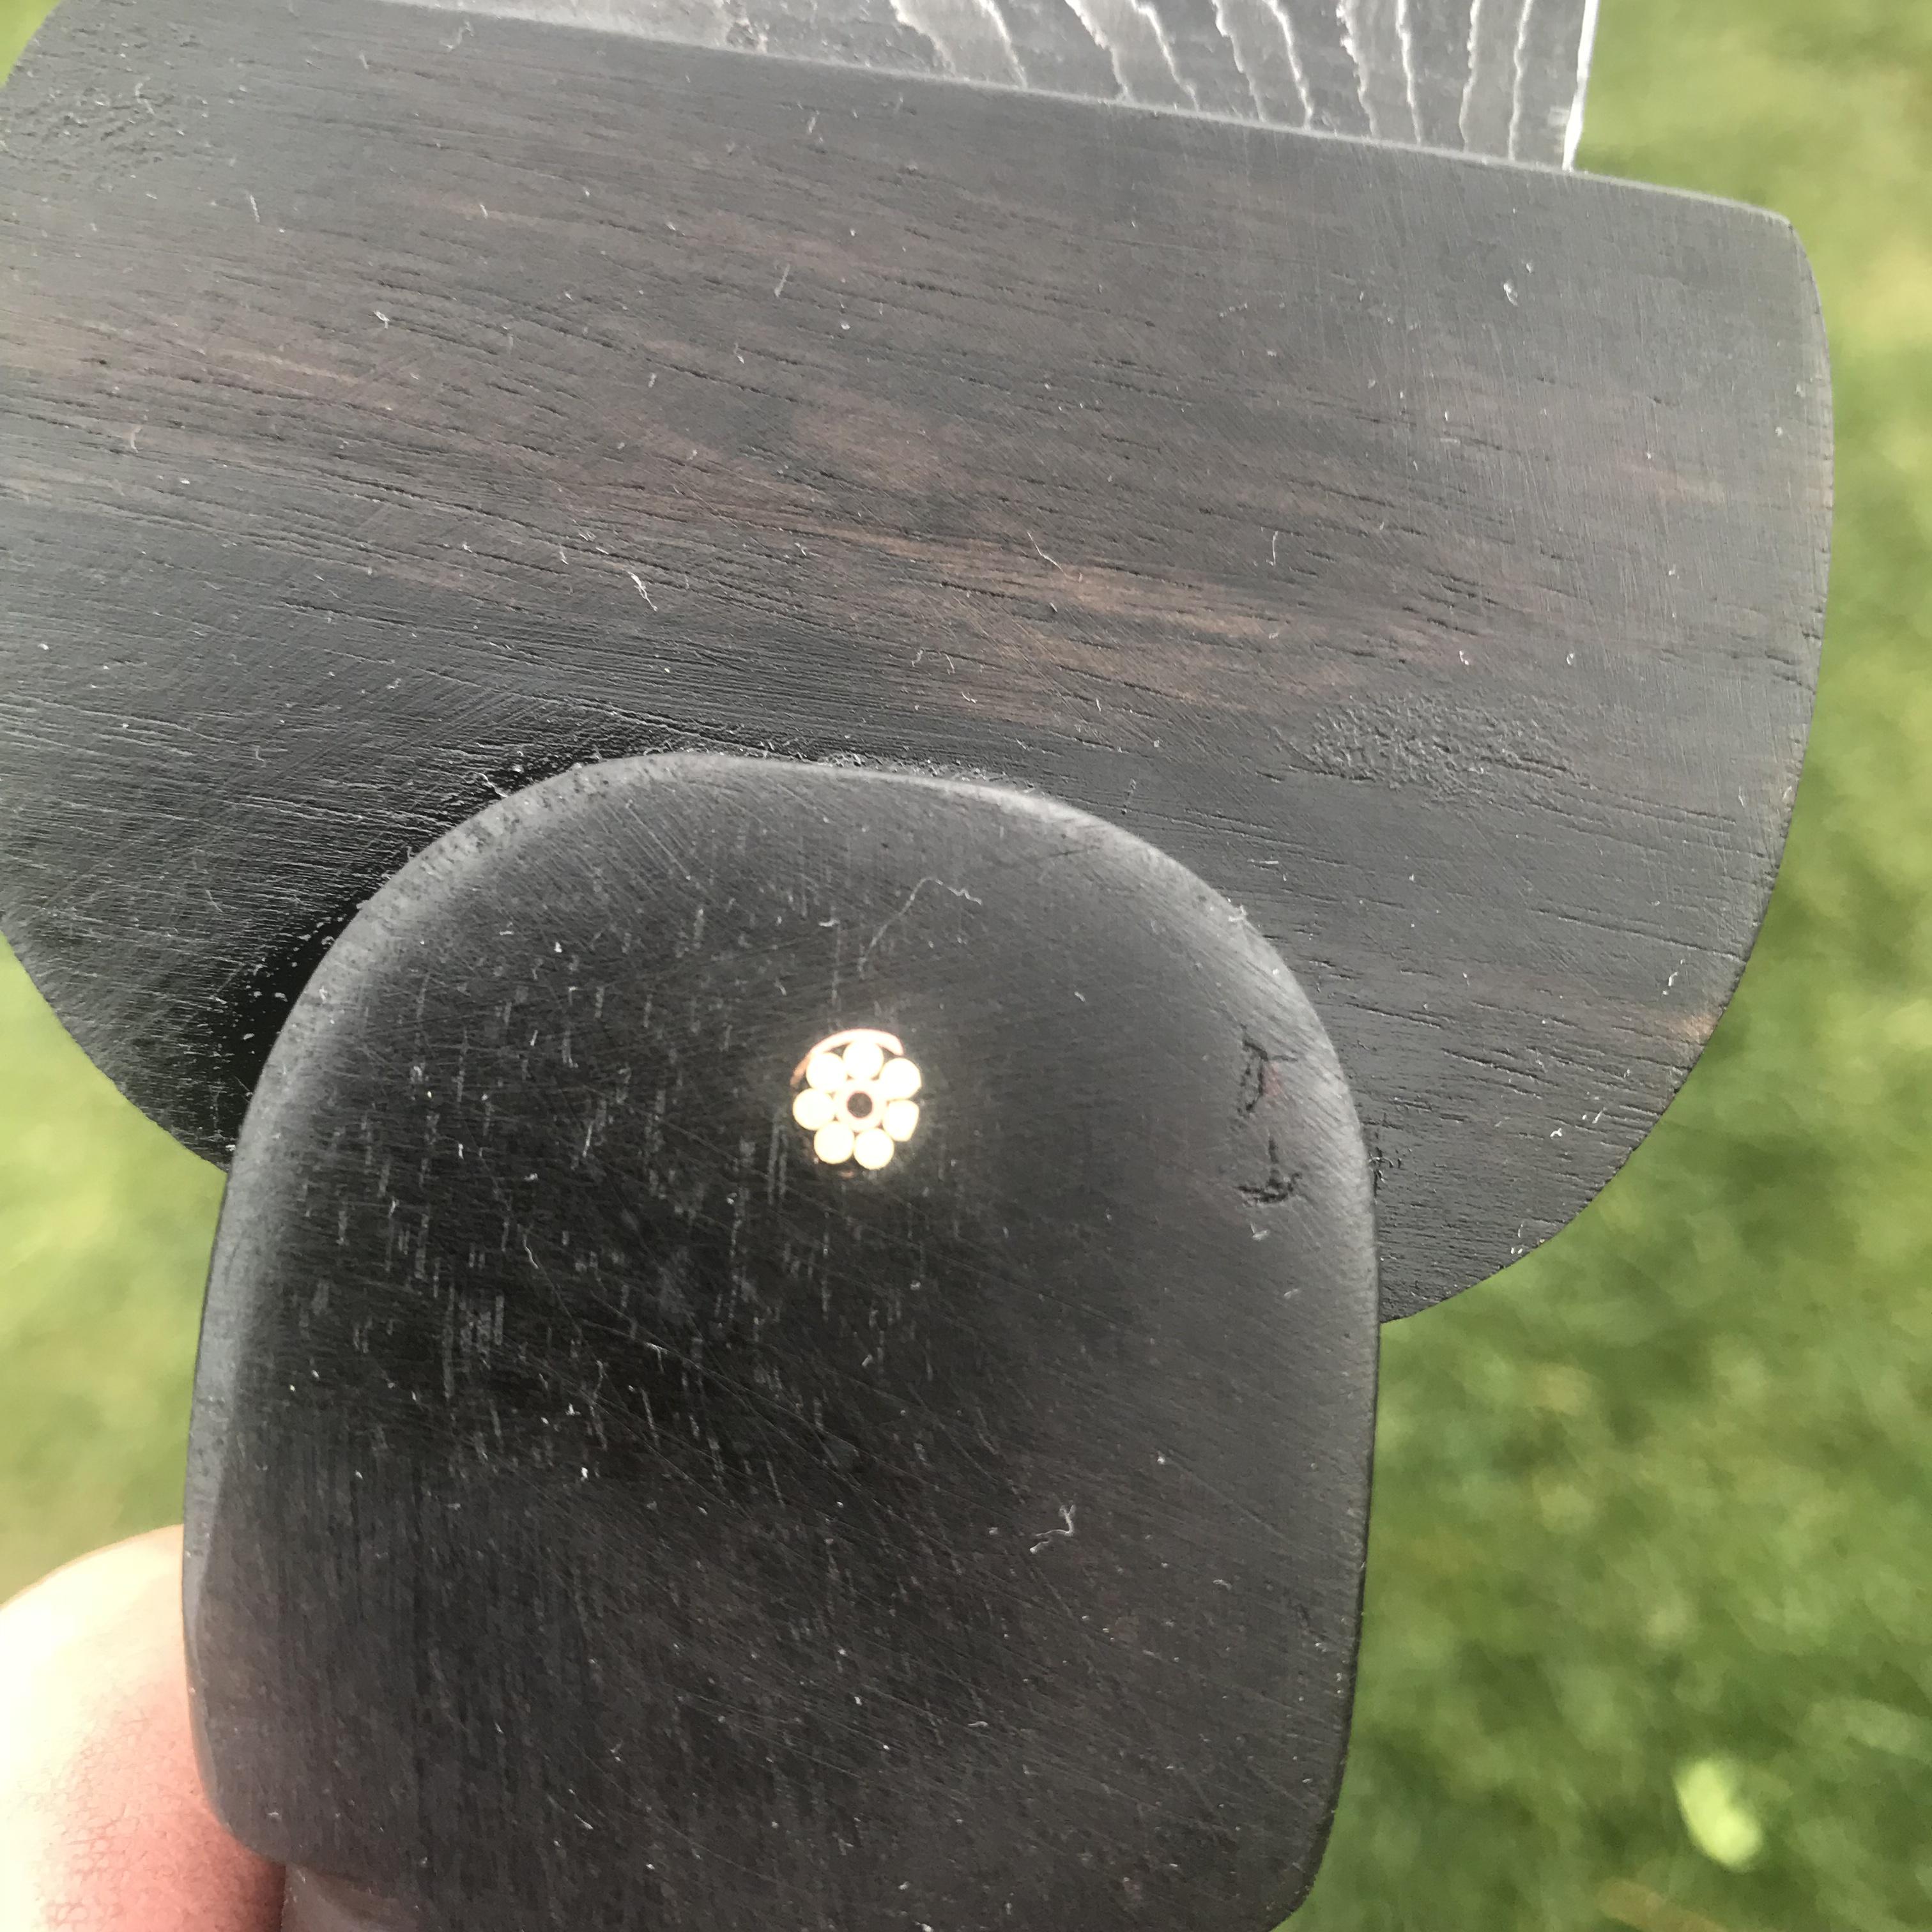
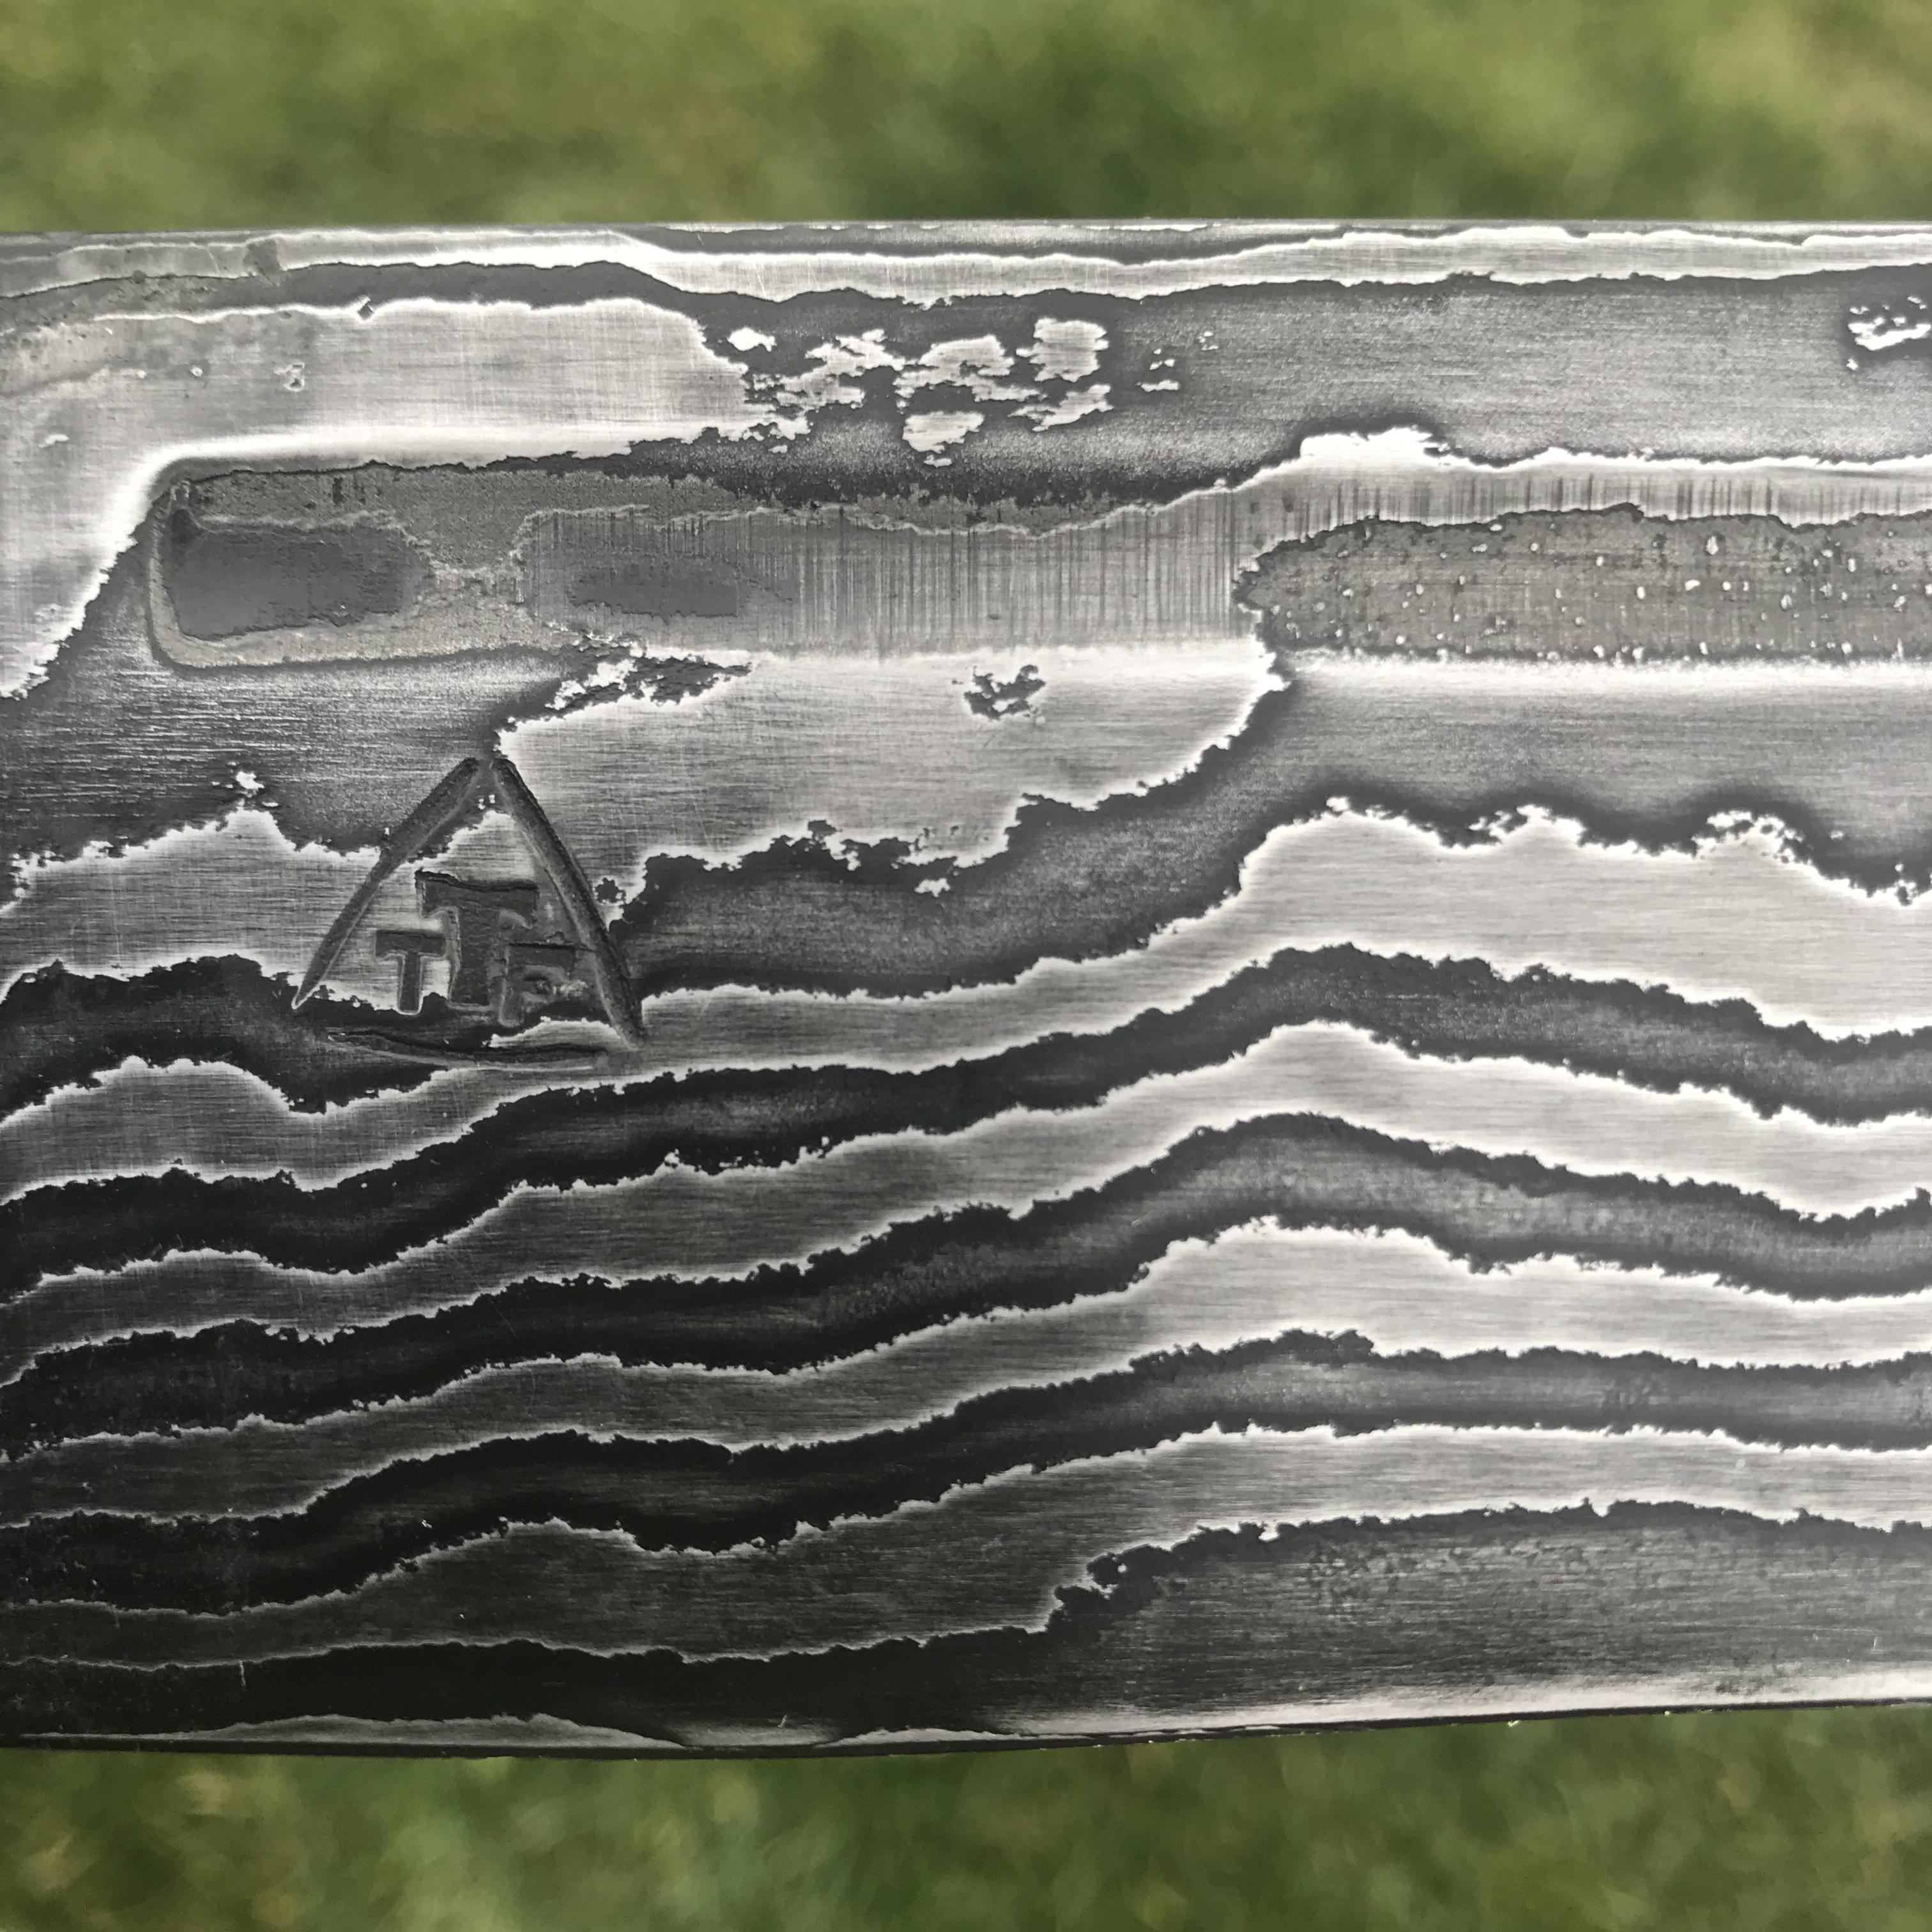
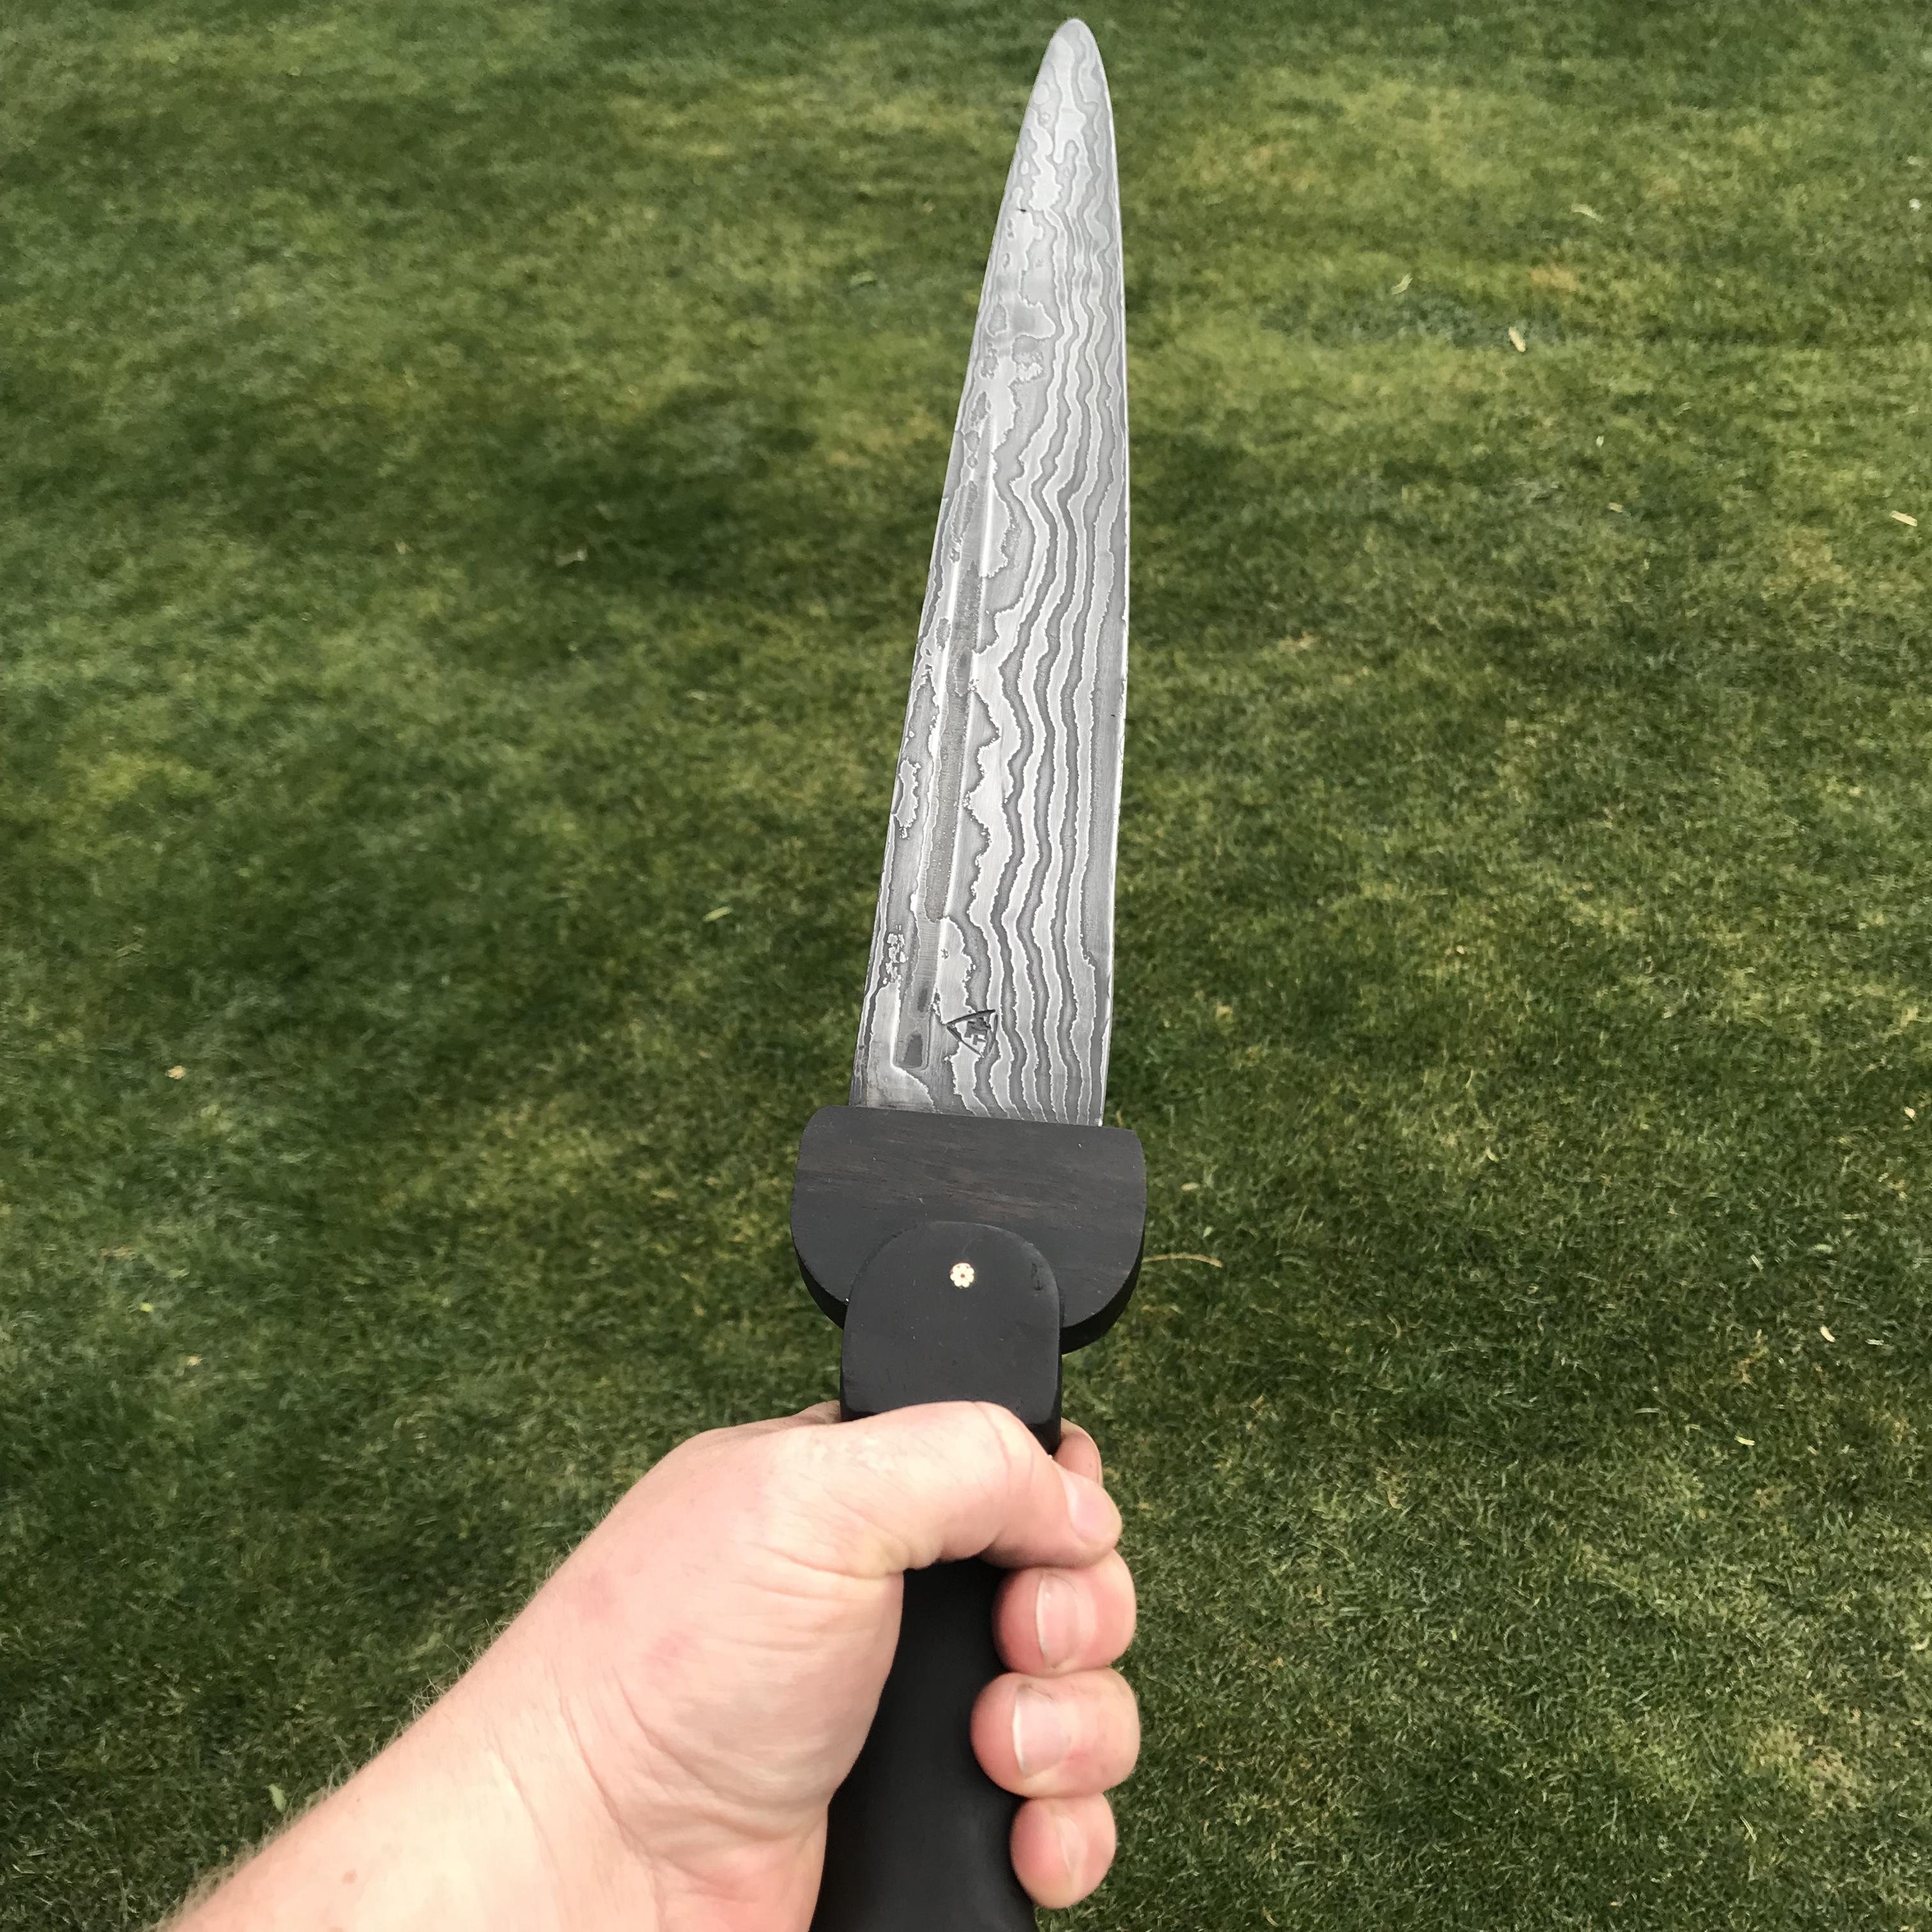
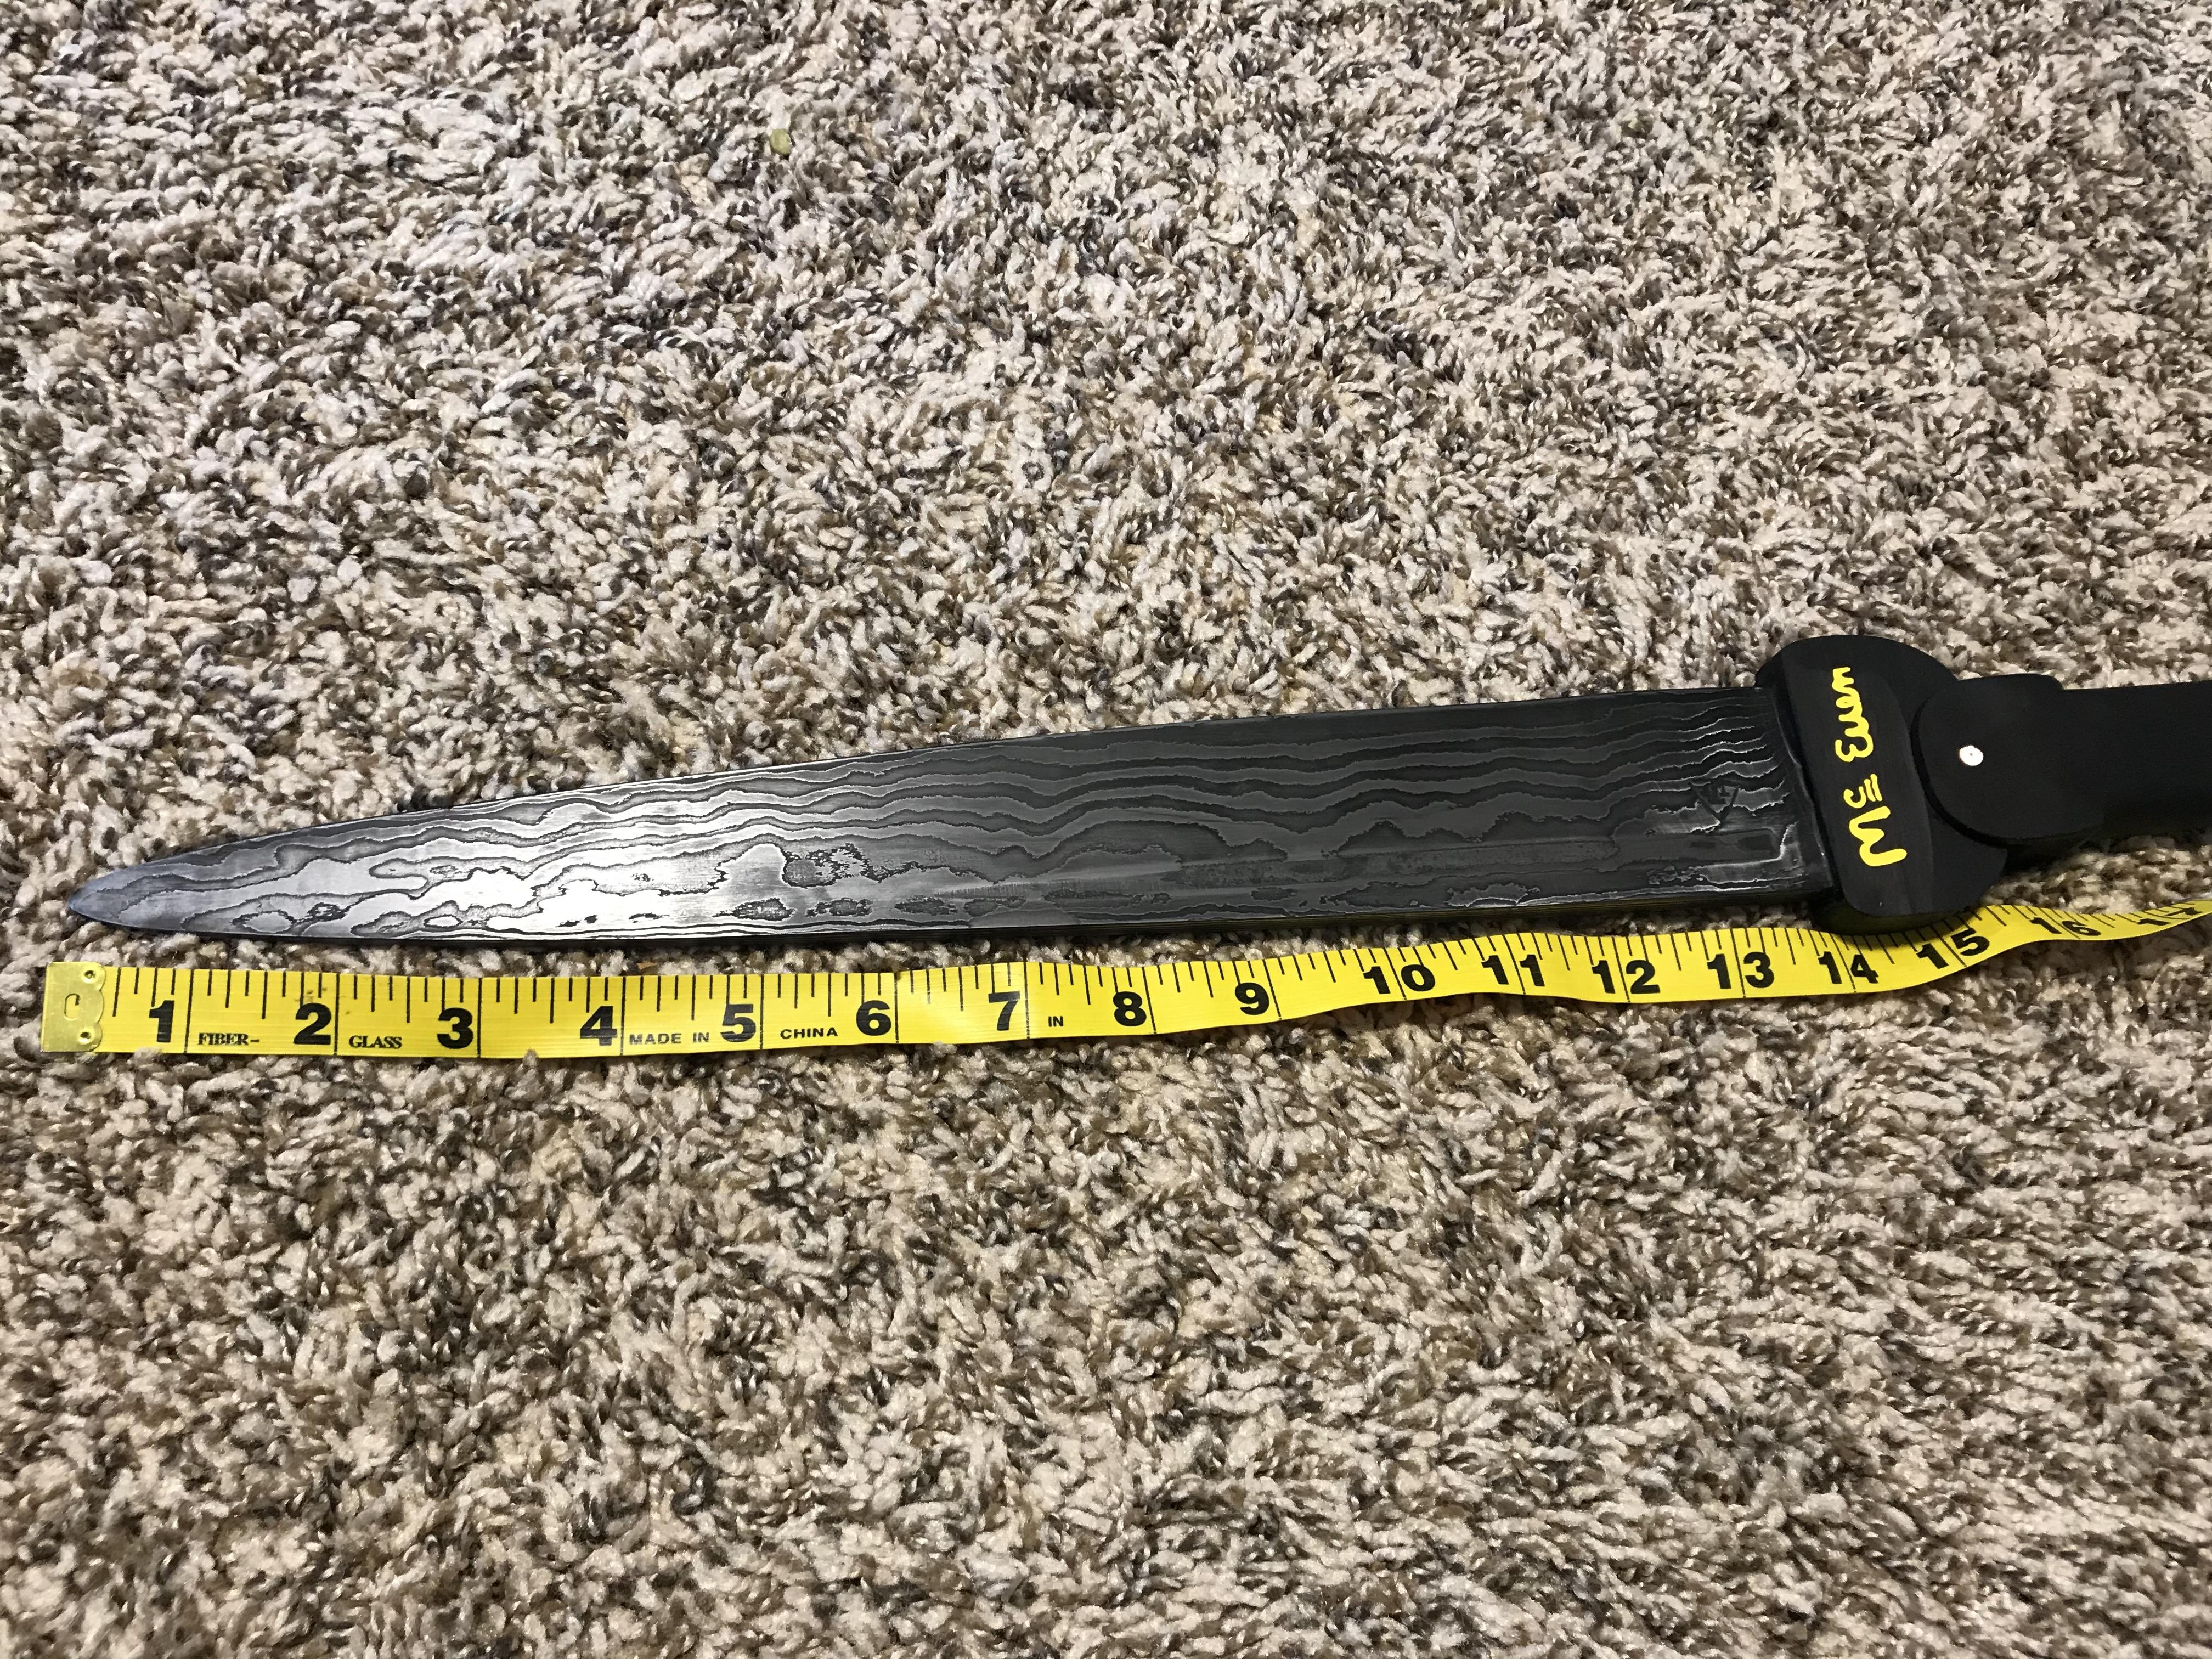
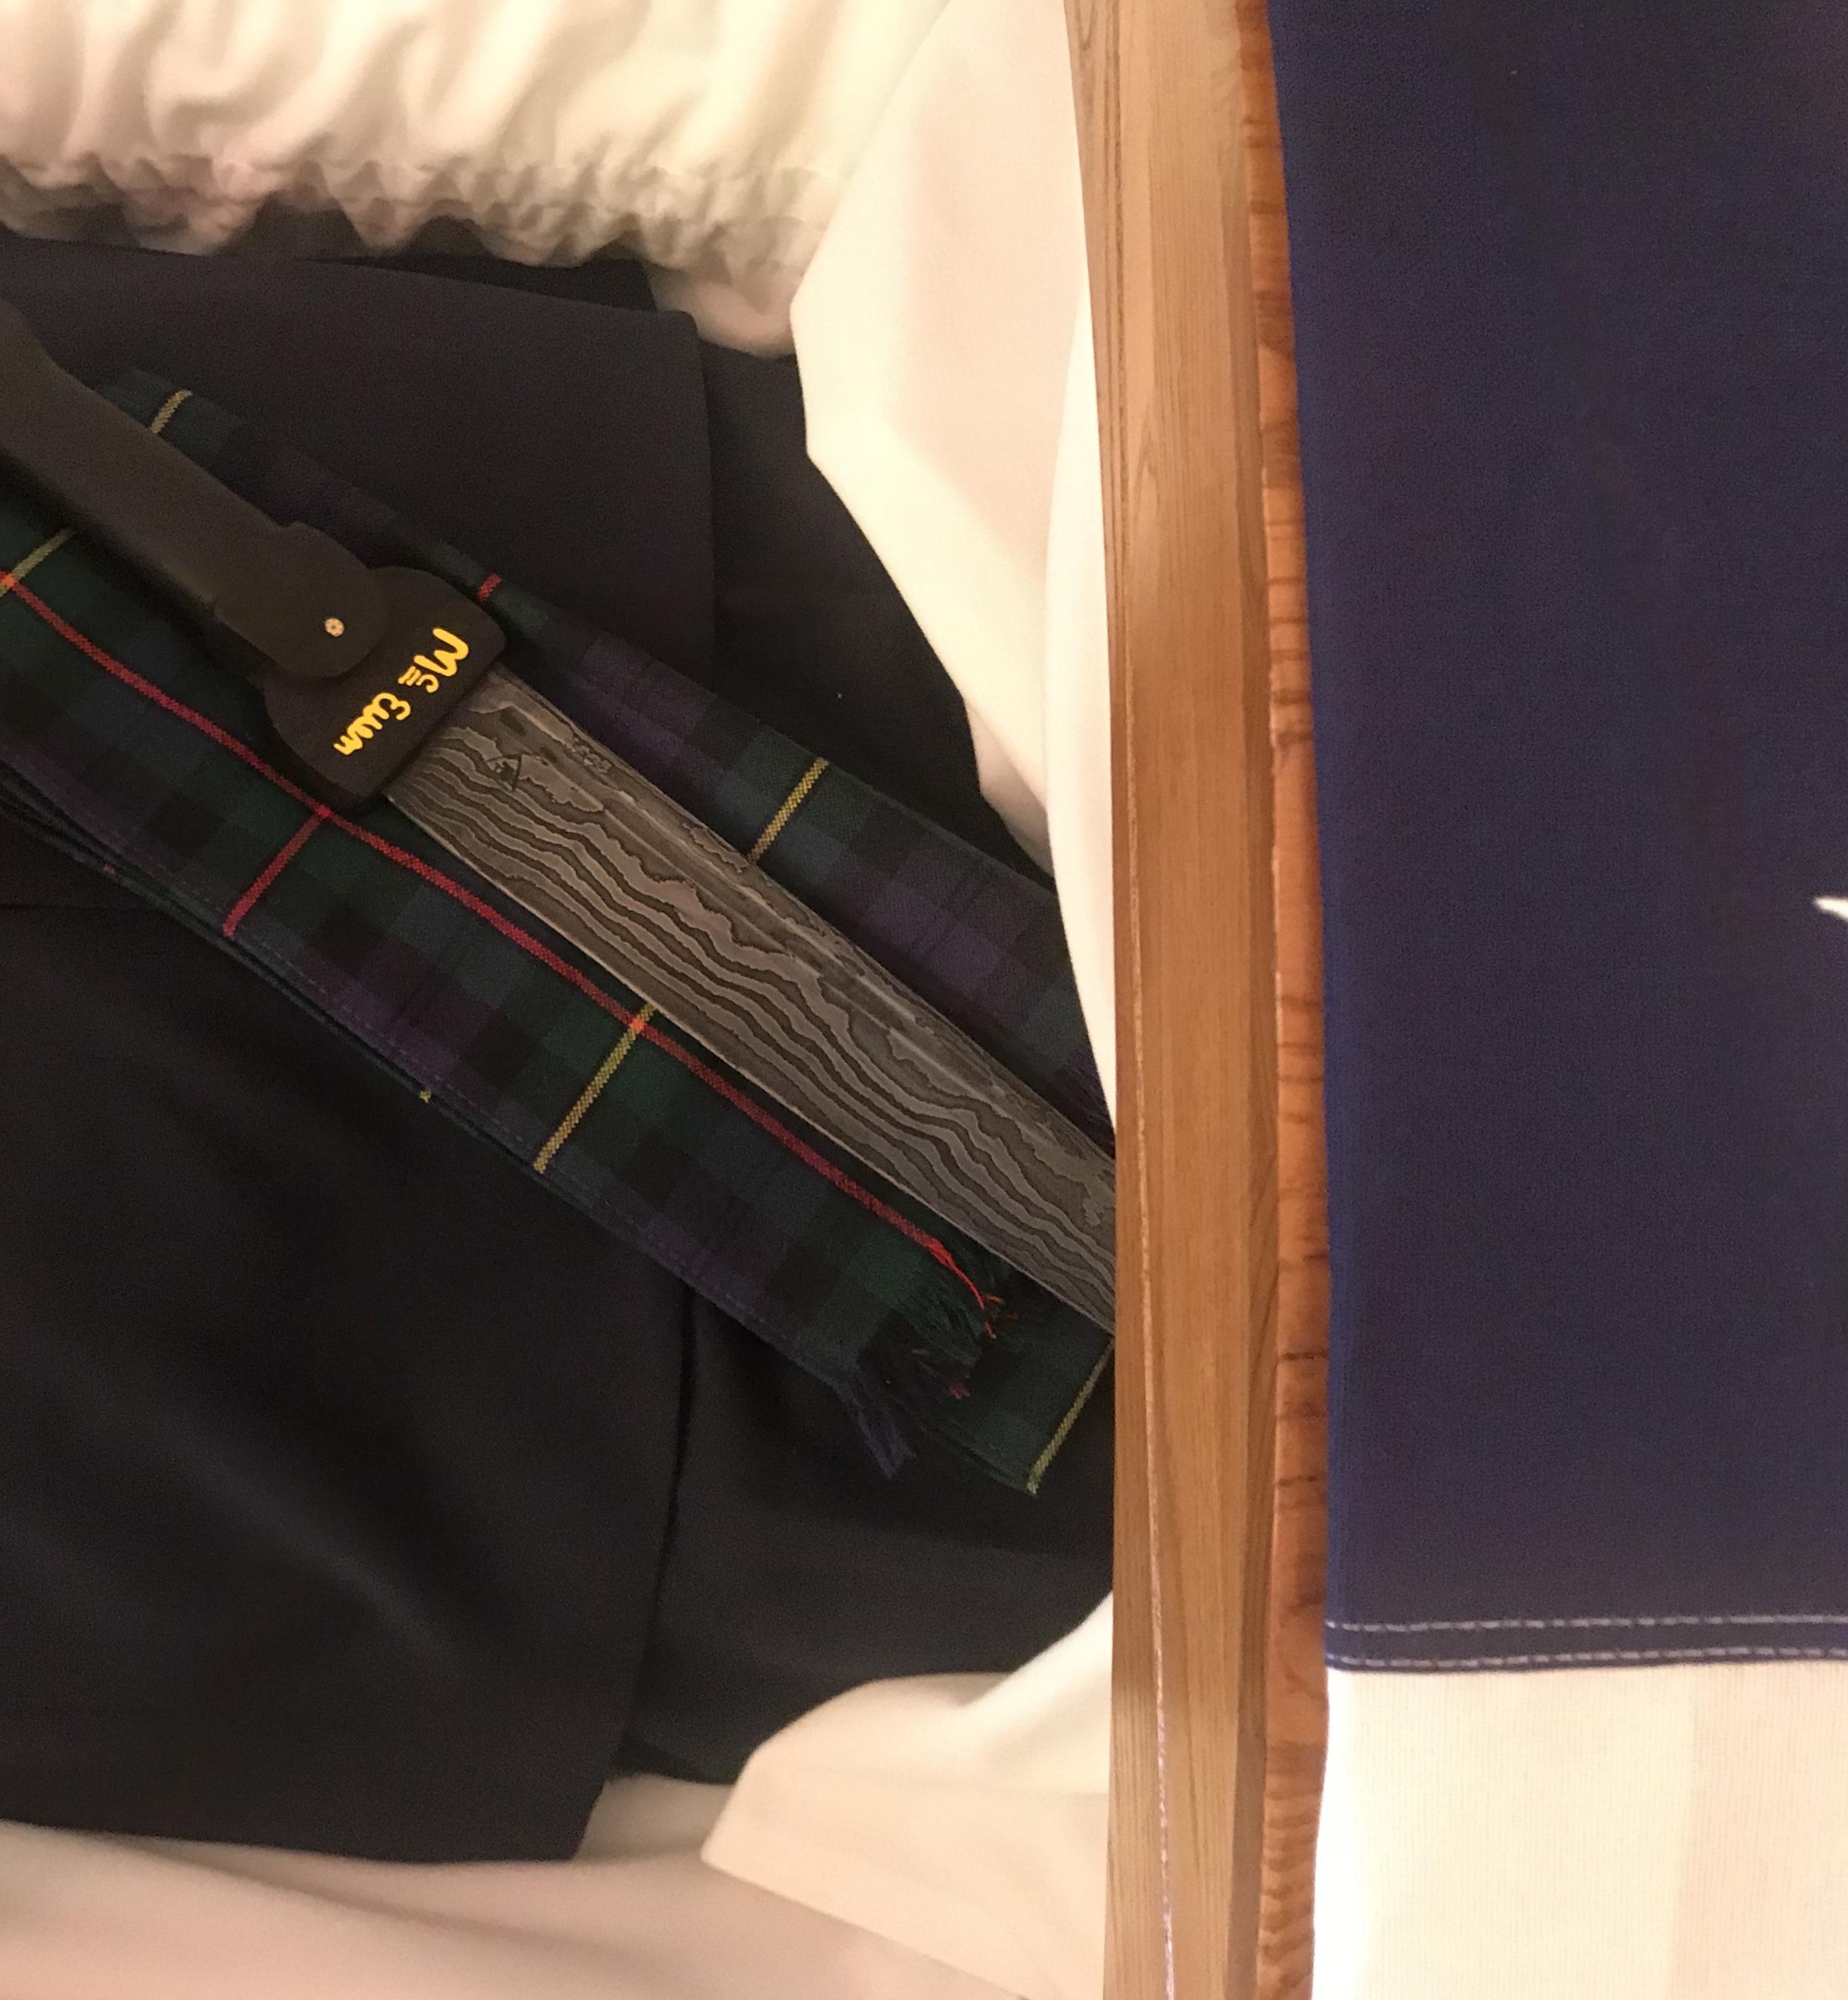
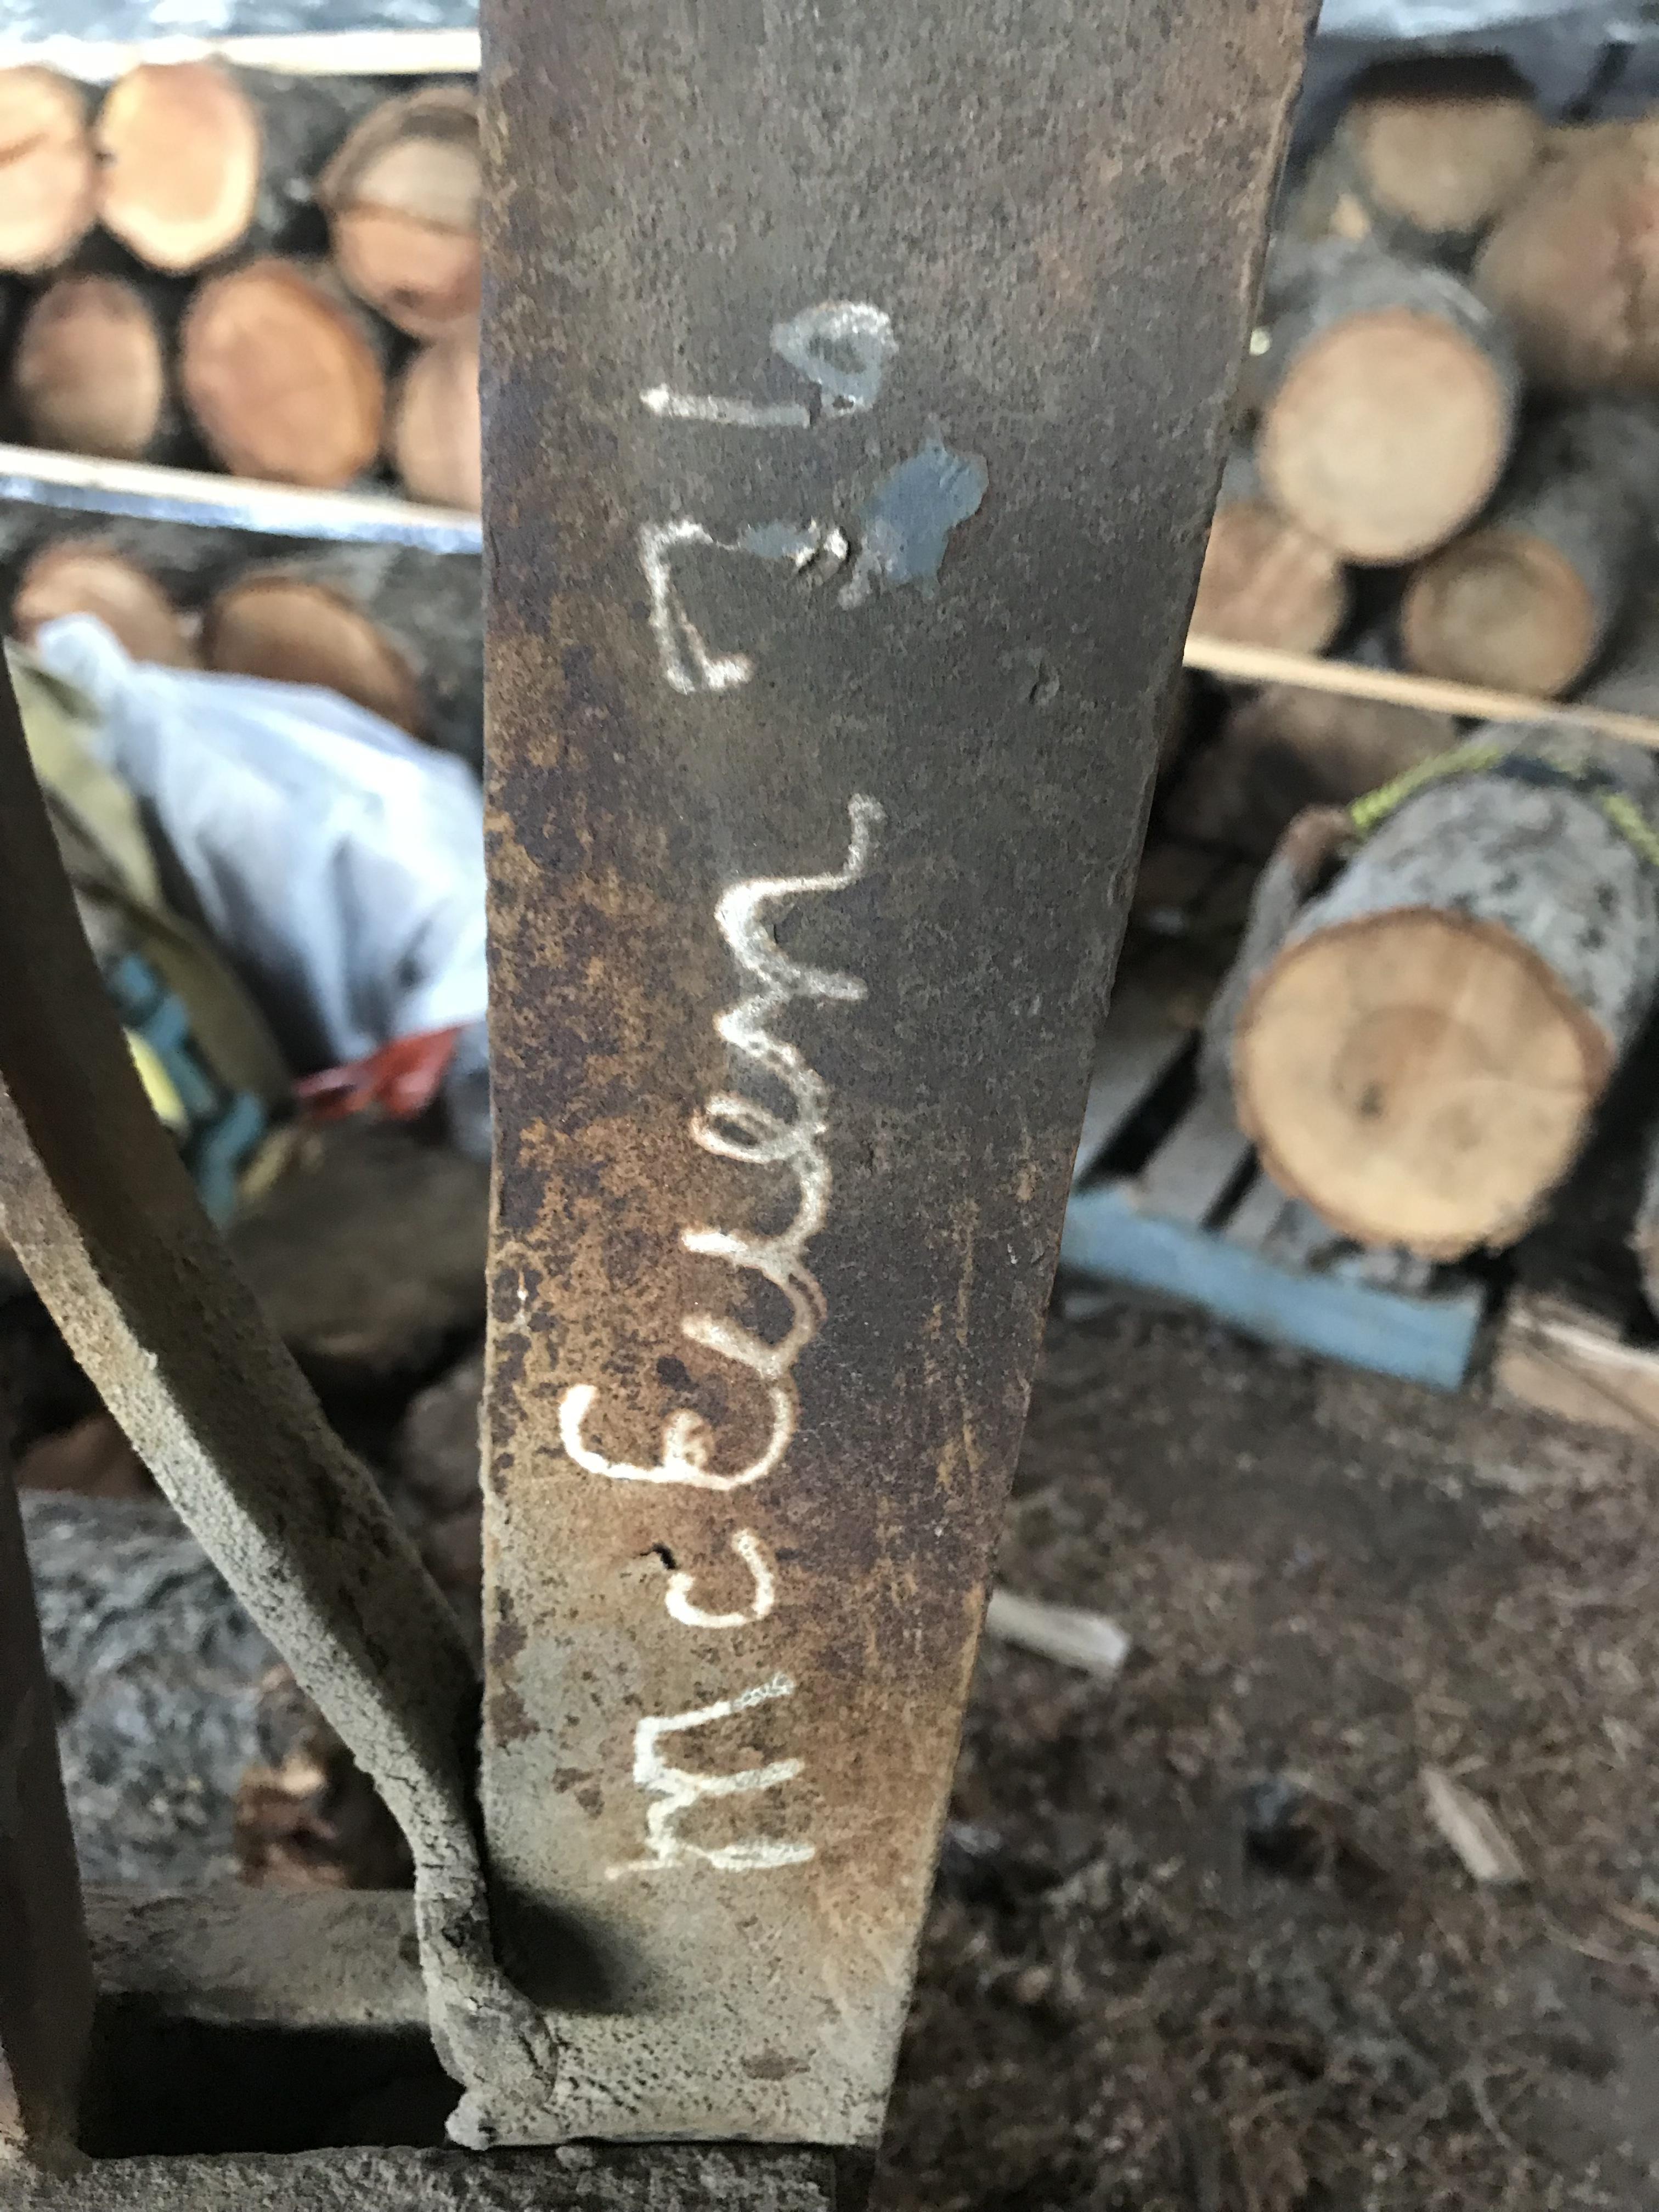
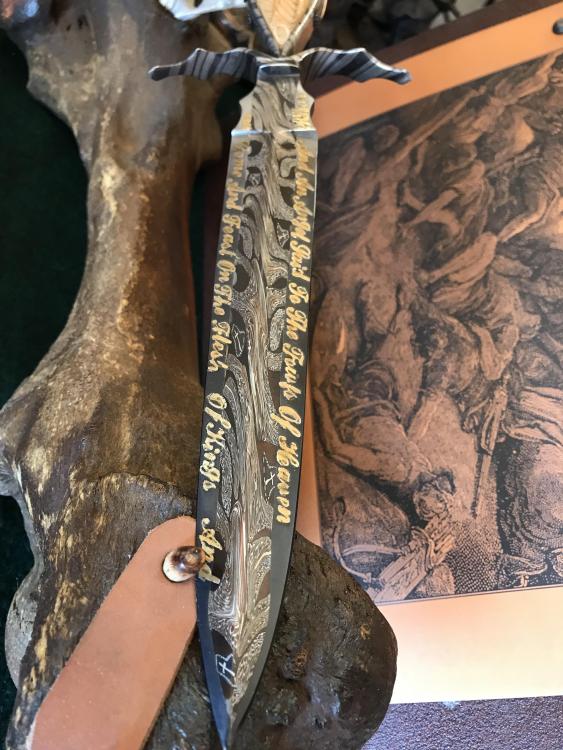
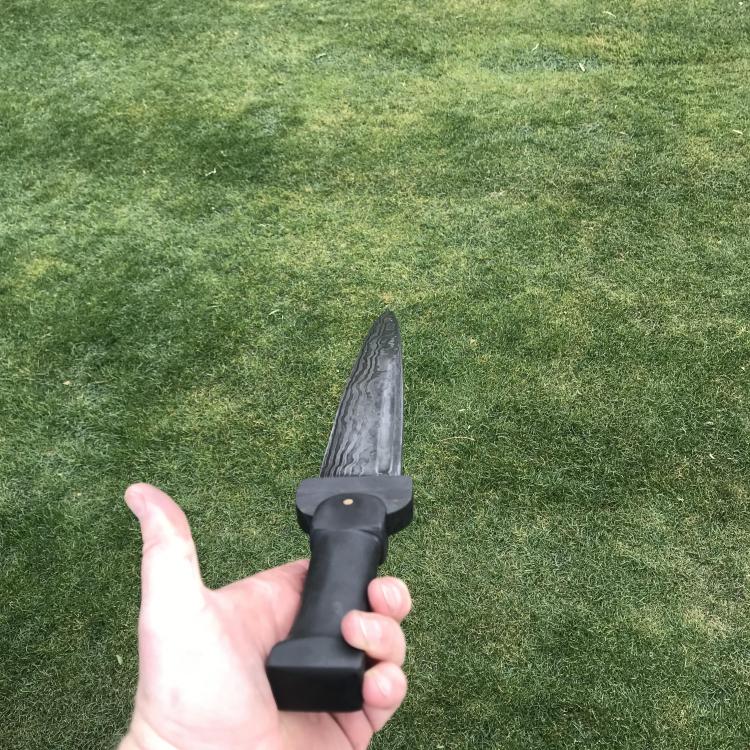
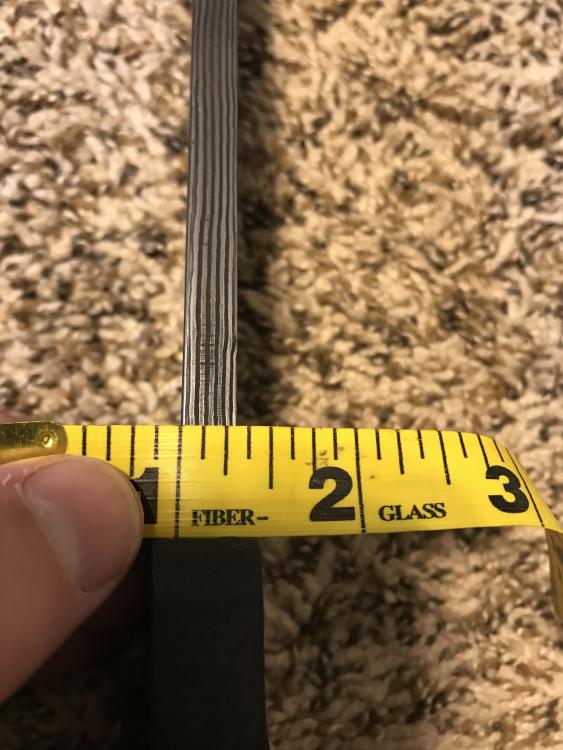
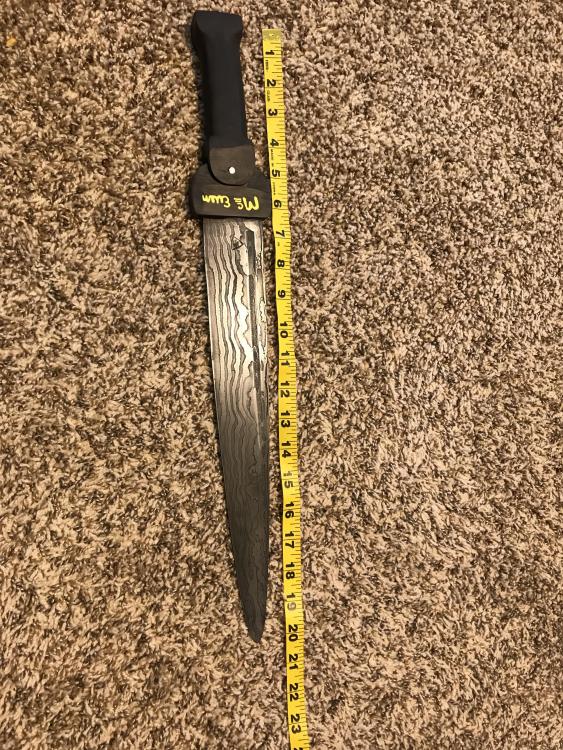
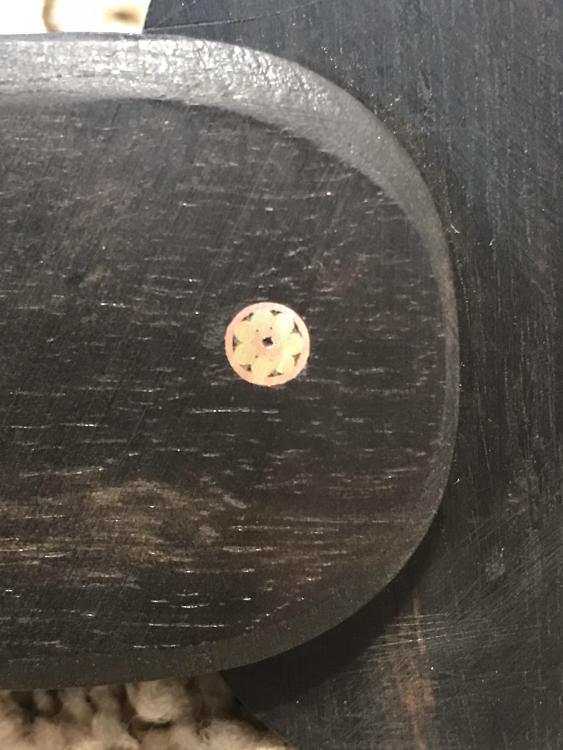
Story time, always makes things more meaningful right?: My grandfather passed away, and many of the family wanted to add something personal with him in the casket. My grandfather was always very proud of his lineage. We can trace the McEuen name to the 1600’s in Scotland. There is even a McEuen castle. So my mom, aunts and uncle got the traditional McEuen Tartan made and laid it with him. I decided, in the 6 hours I had available over 3 days to make him a Dirk. He once told me he liked them because they were usually fairly ‘beefy’. More than that, he loved the interesting history behind them. I made a low, 26 layer billet and instead of forging bevels like I usually do, i did pure stock removal, so to have even-ish layers. I had a piece of 2700 year old bog wood (oak i think) from Scotland that made the handle. I know its not really the traditional handle style, but with what I had and time available it was what I could do. The yellow name is sort of a family/friend inside joke, plus a little endearment. Every piece of equipment, old jeep, welder, vise, swamp cooler, etc ... he would get a yellow or white fabric paint pen and write his last name on it, sometimes a year too. I took a picture of one signature on a mig welder he gave me, and my wife used her craft cutter computer program to trace it exactly and cut it out with vinyl. We thought it was appropriate. He was a great man, and taught me so much. He will be missed.


-
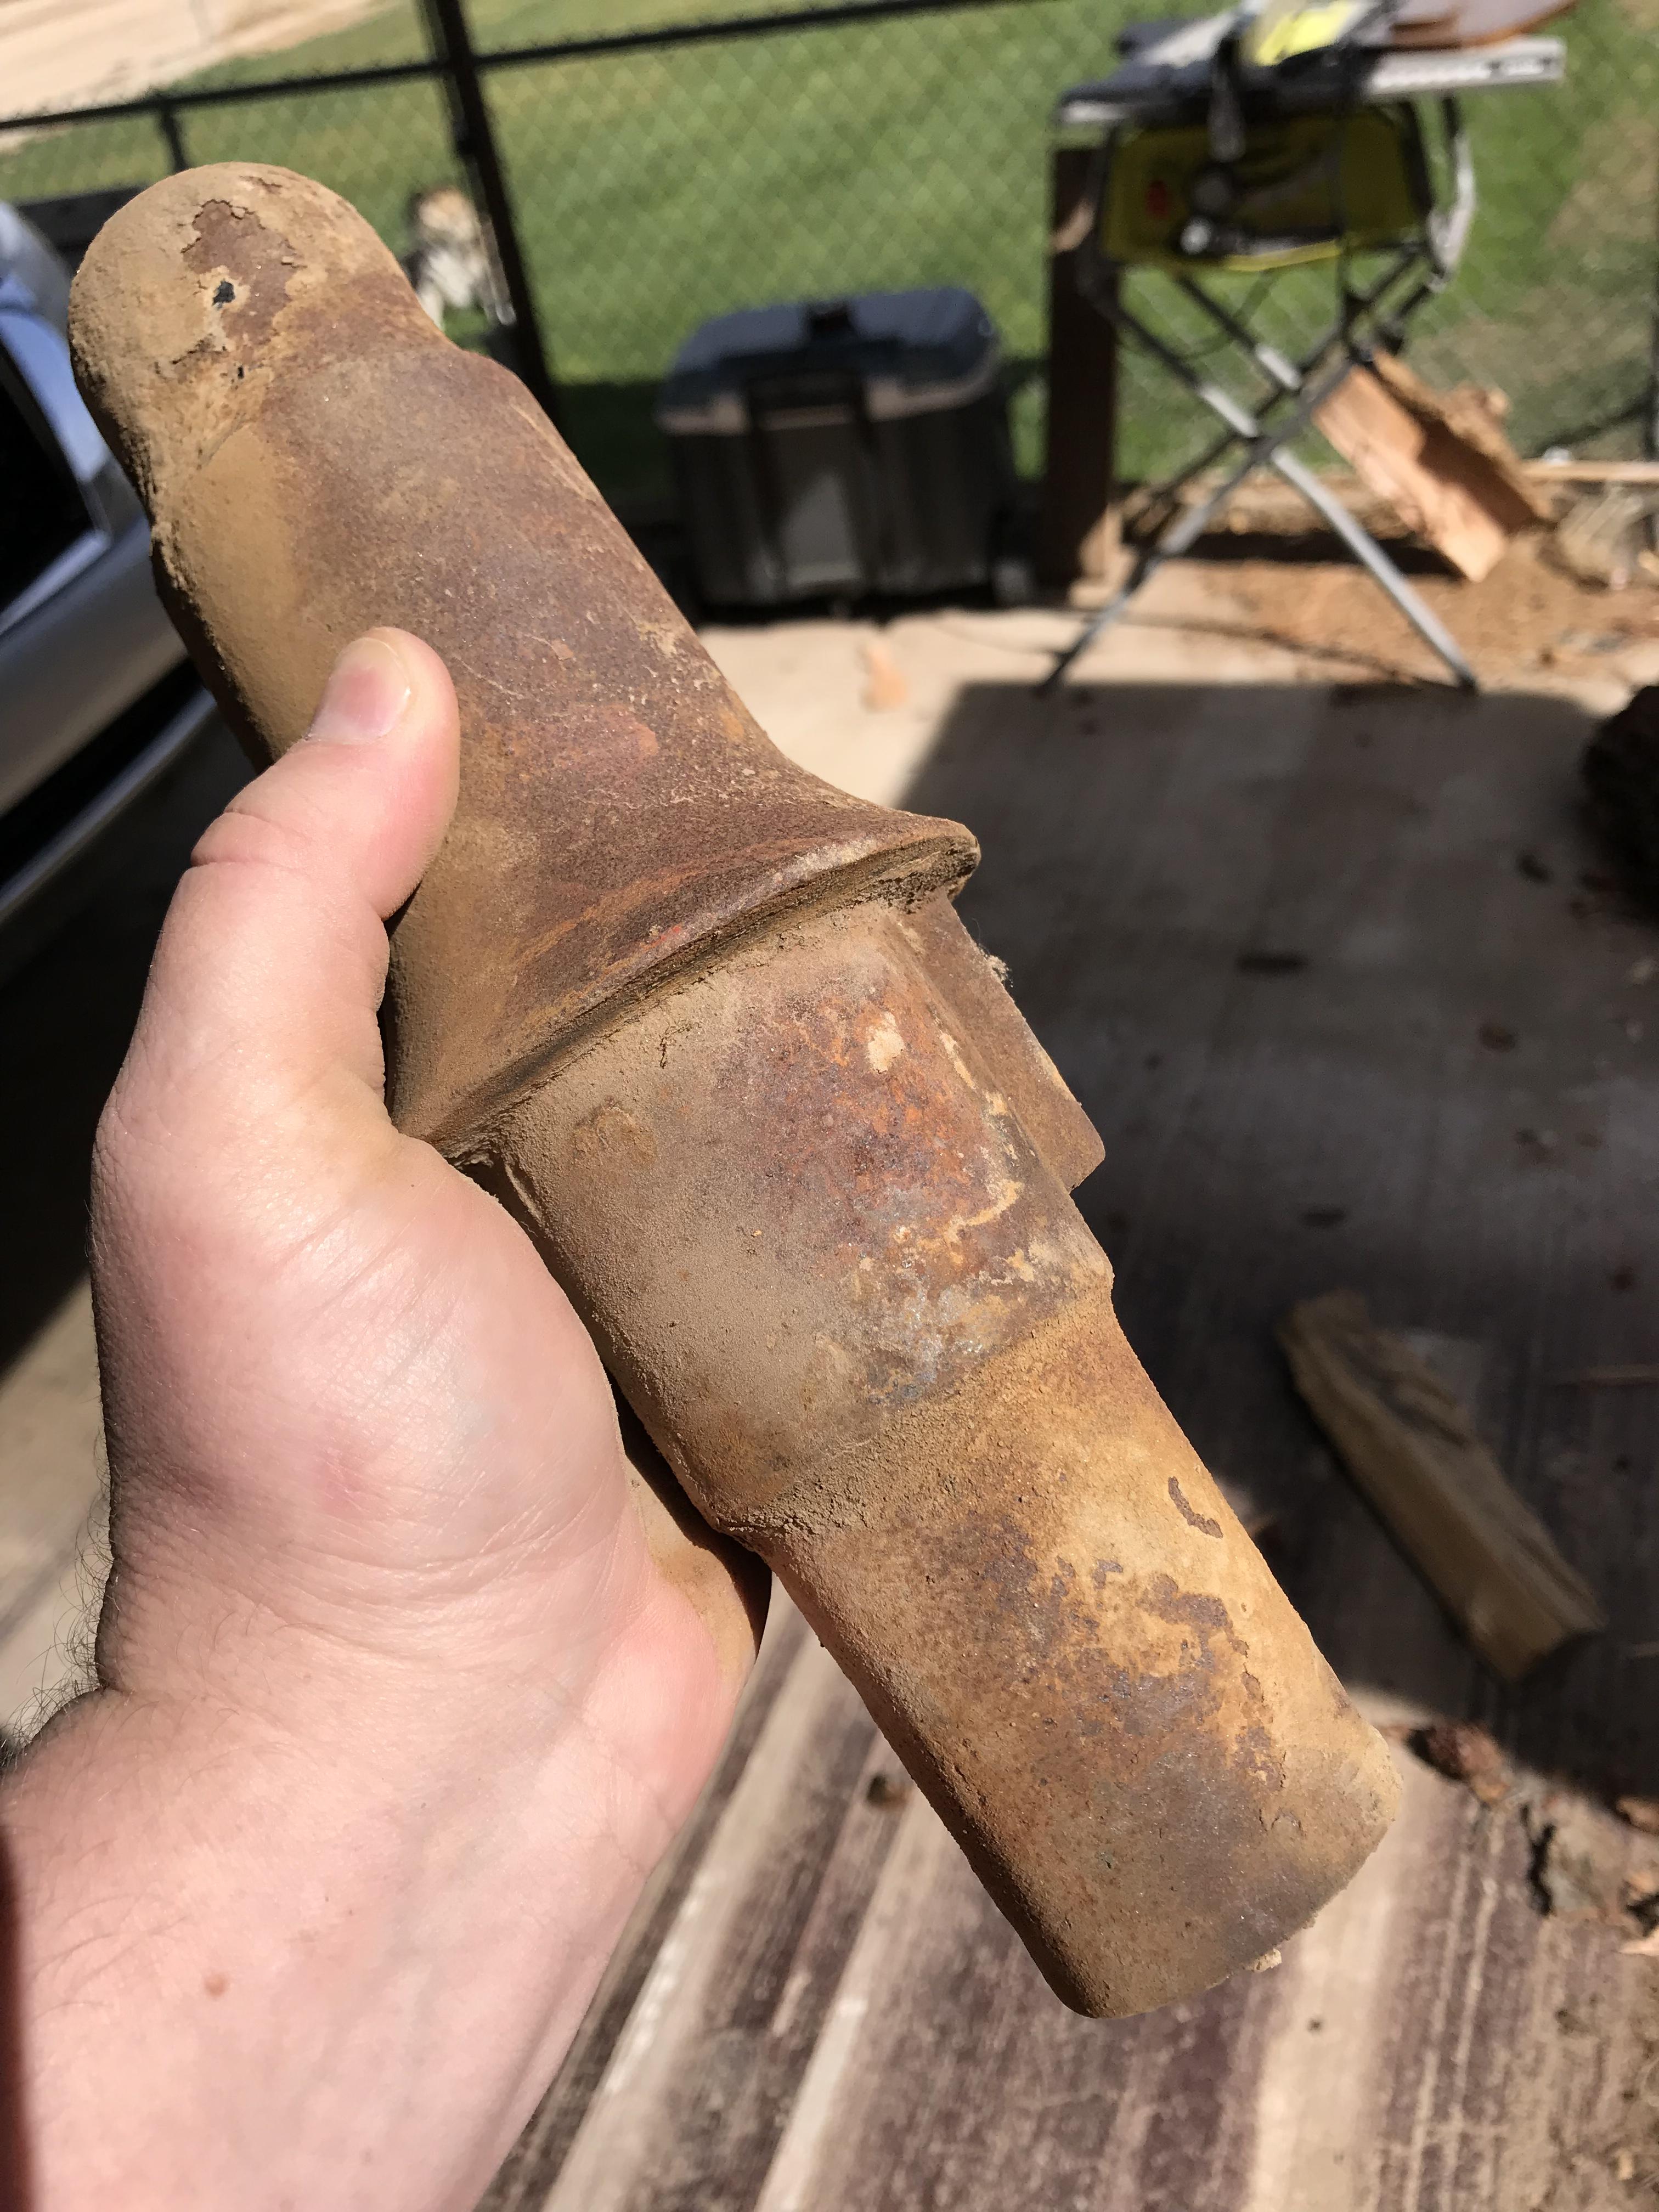
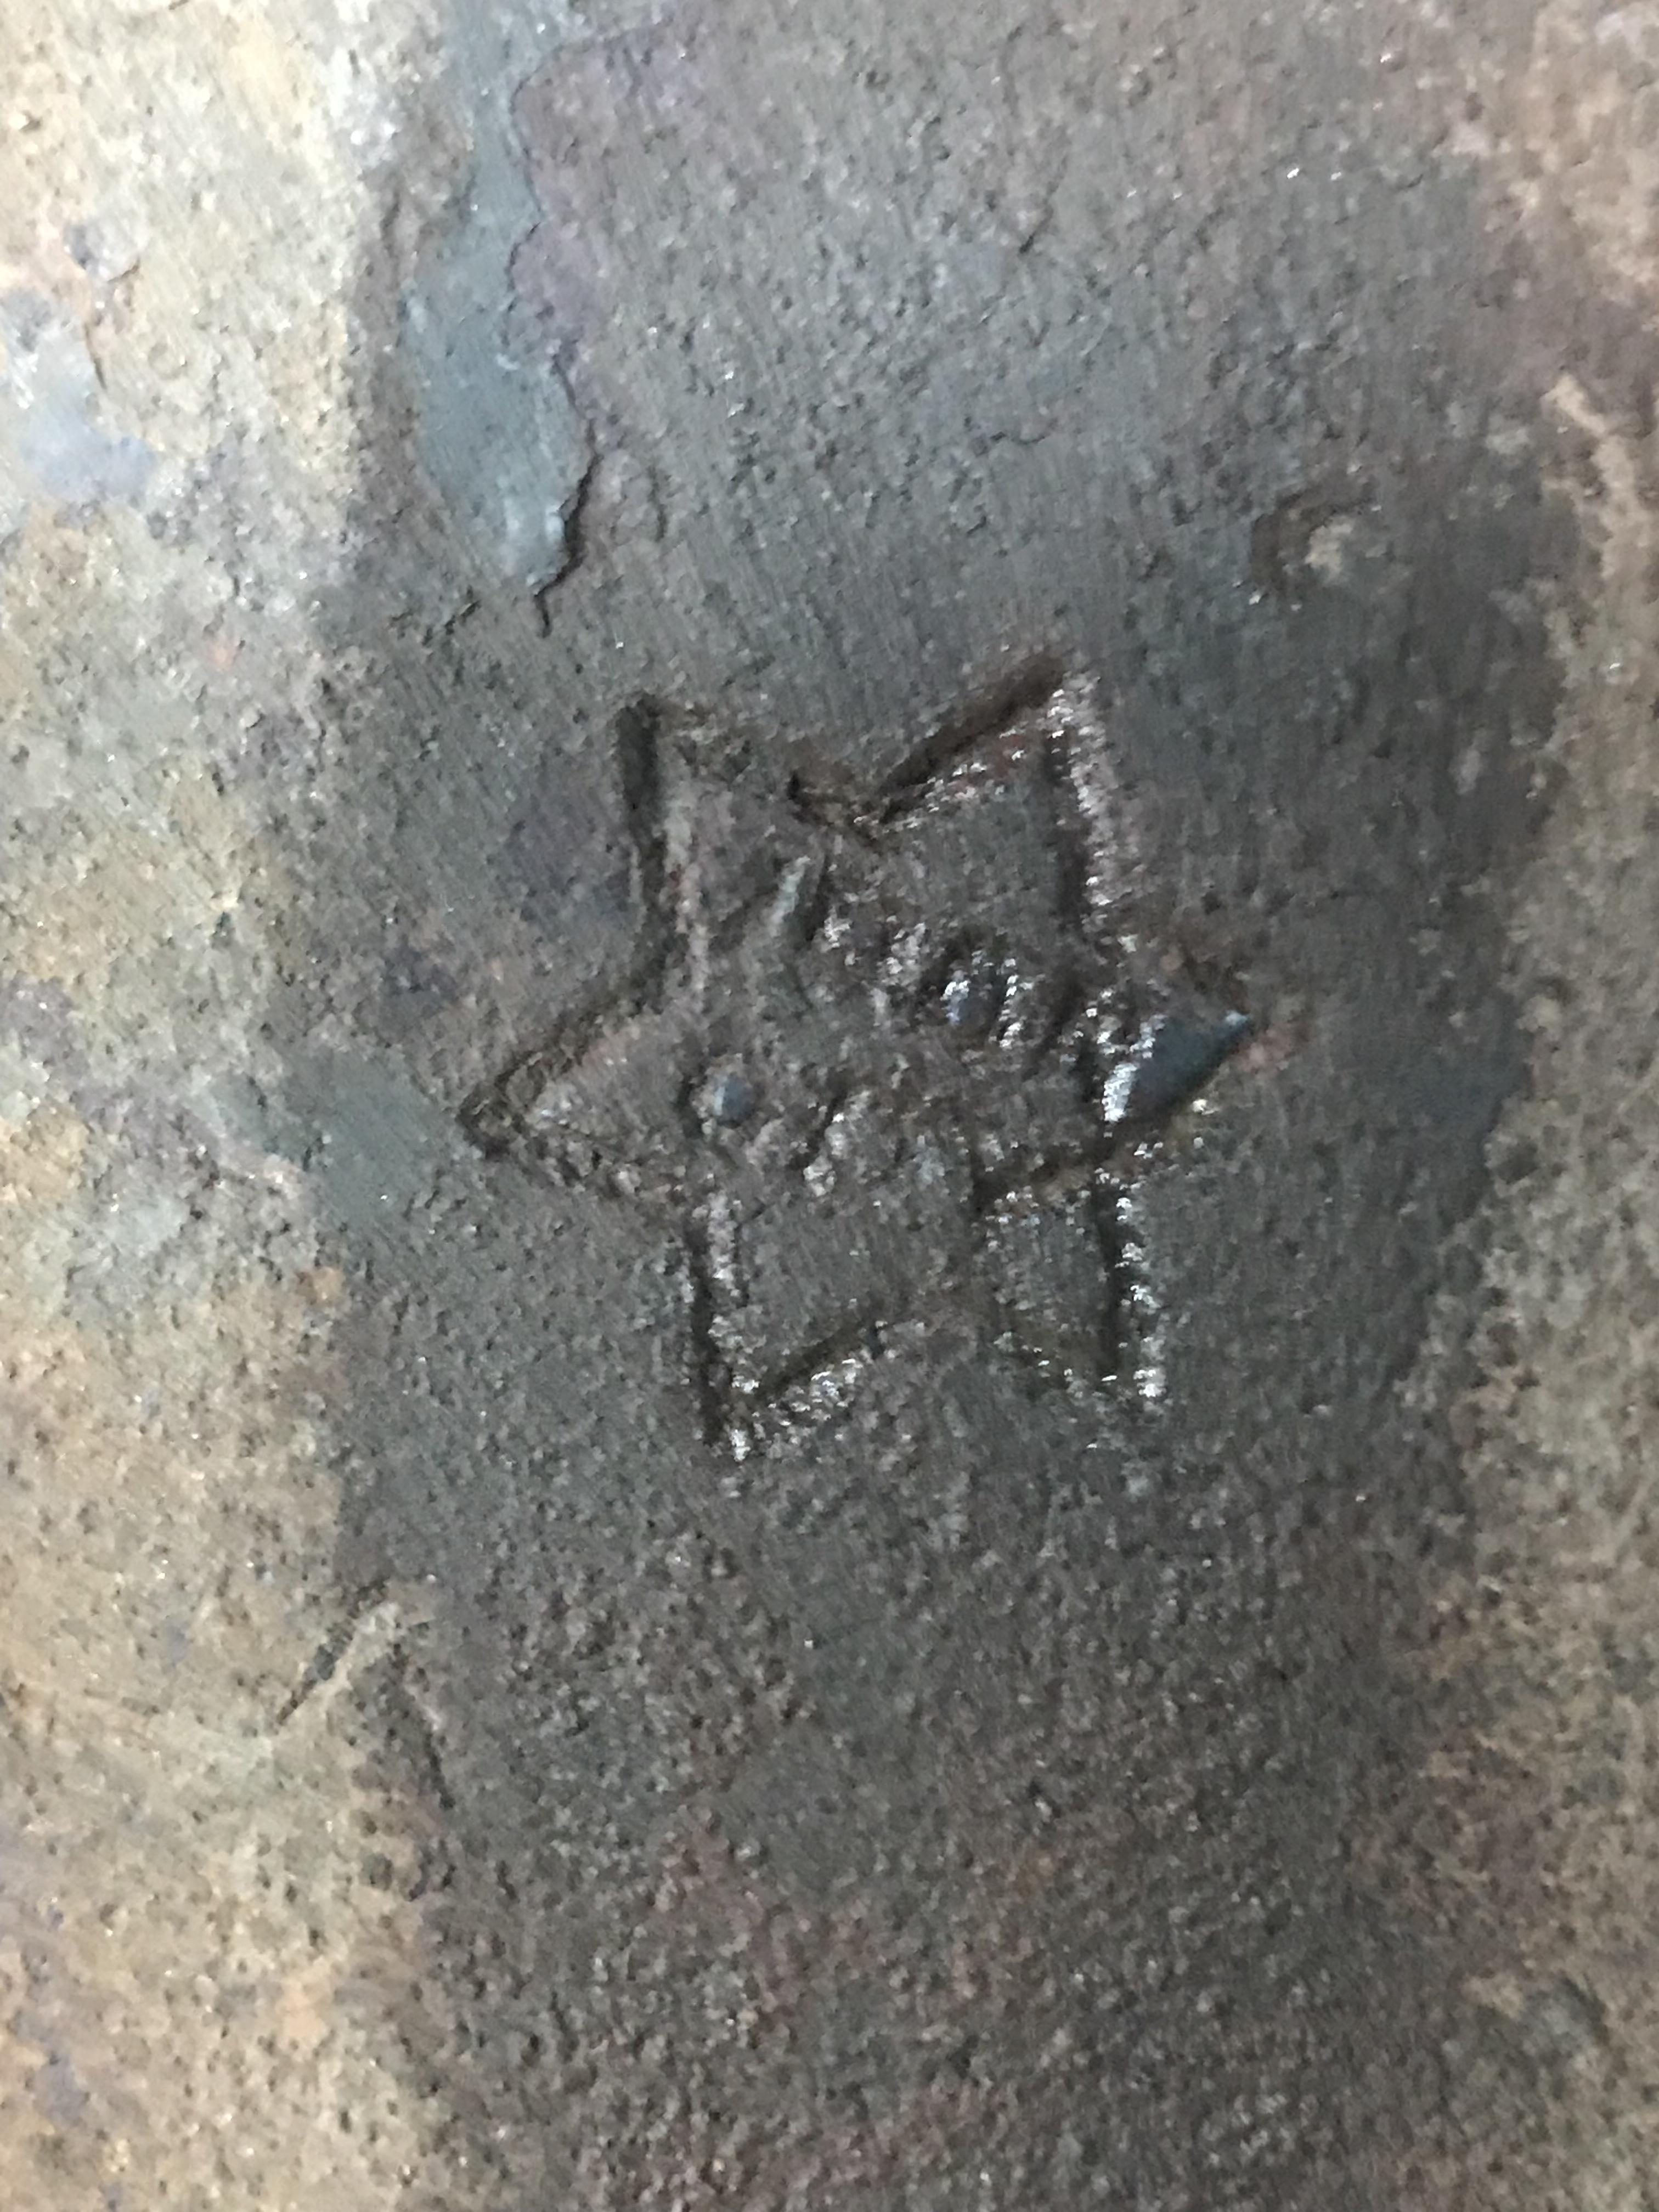
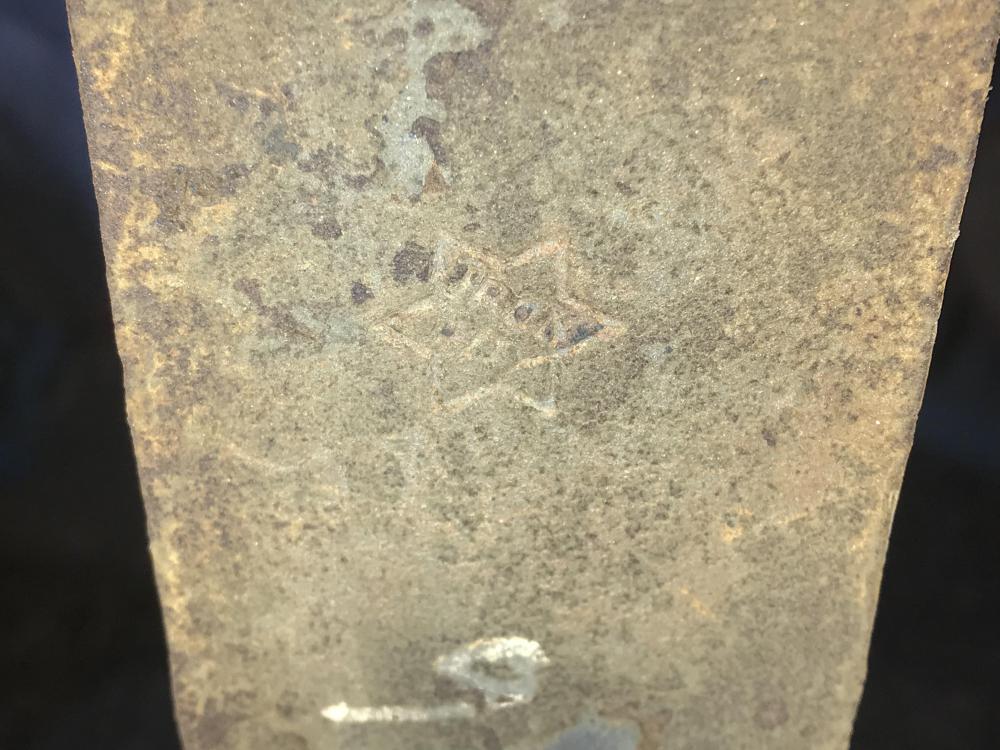
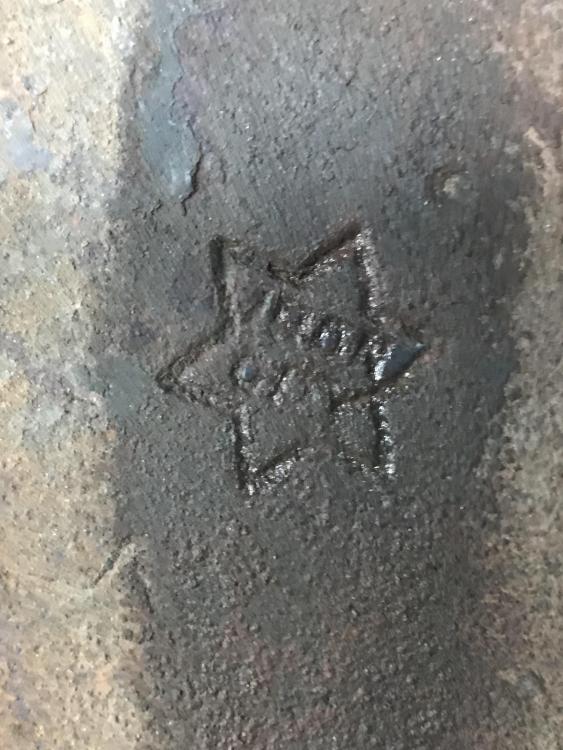
My grandfather passed away Valentines day, the Saturday before he told me to go ahead and take the vise. I was able to haul it to its new home today. It openes and closes just fine. The screw seems in good shape, but when I get time I will take the whole thing apart, clean it up, and put it back together and back to use. The one thing I wont be cleaning is his fabric paint writing. He put that on everything he acquired. Wrote his name, and usually the year Any idea what the makers mark is here?


-
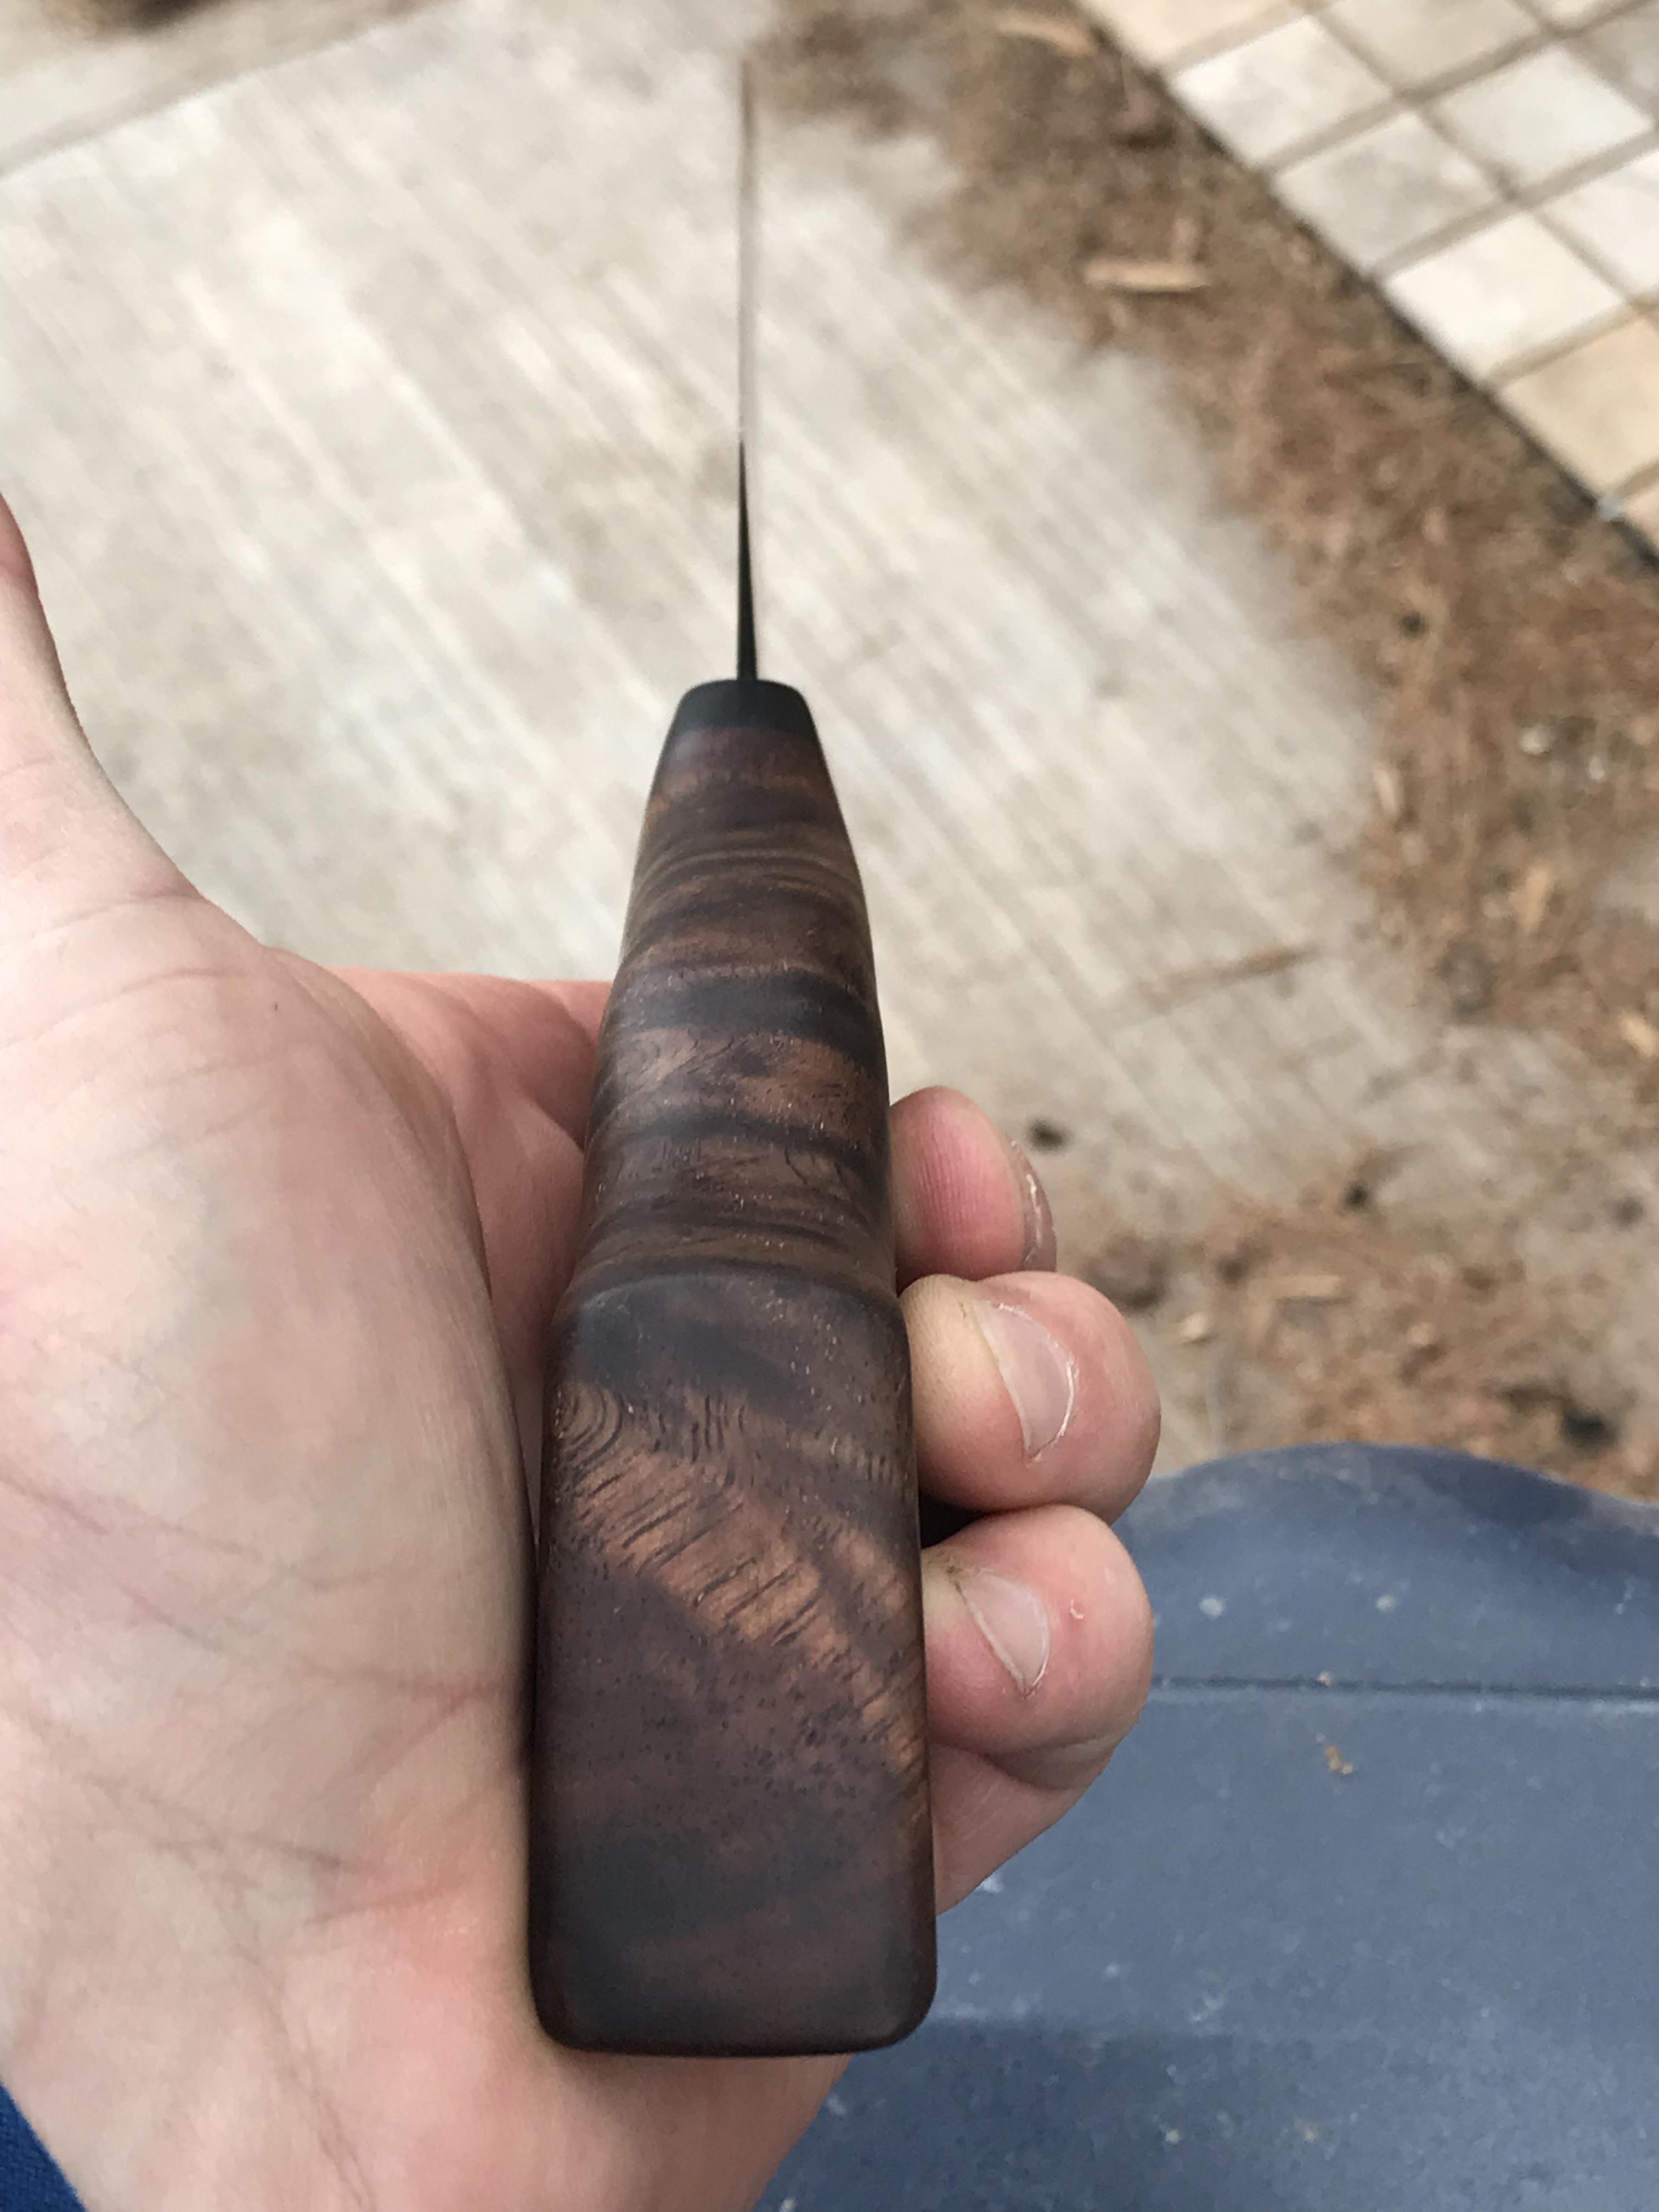
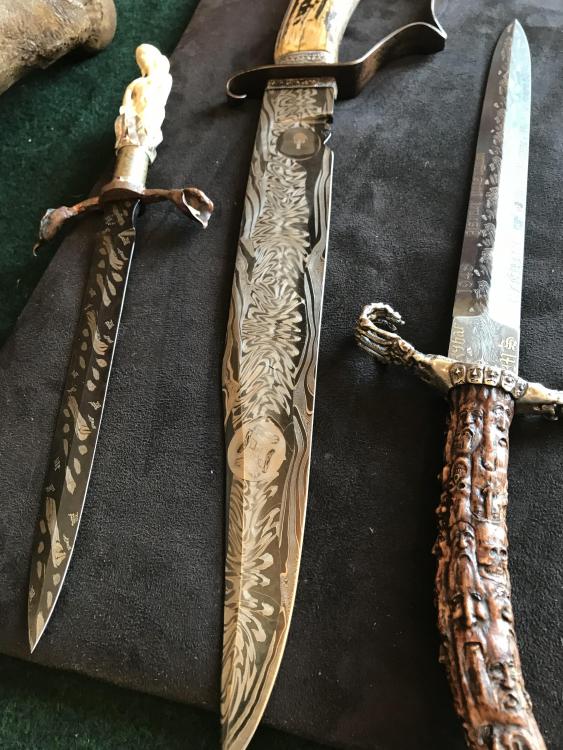
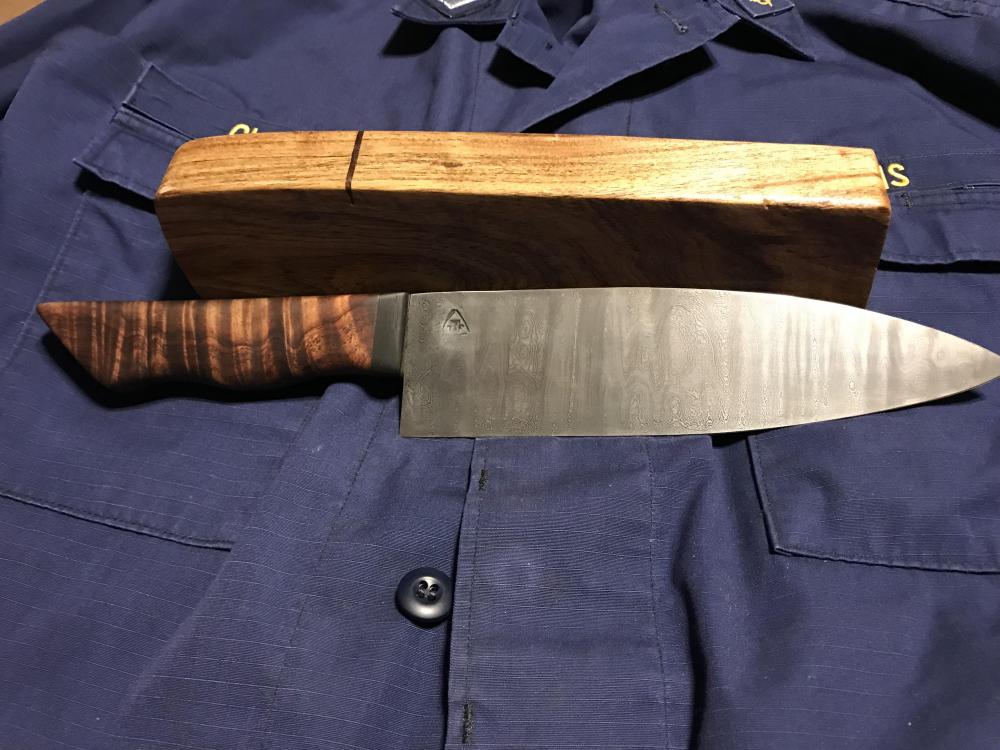
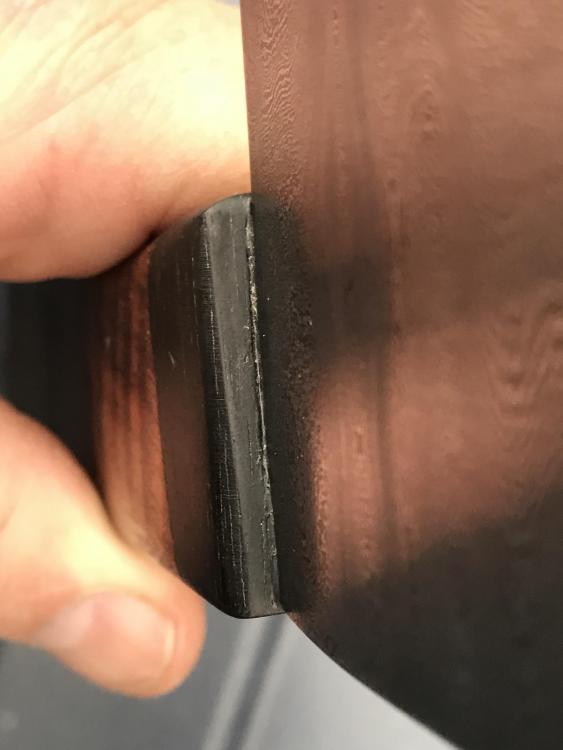
Thank you. It was a blast to make! The steel work was fairly straightforward. However, I feel most accomplished in getting the angles of the wood (where koa meets ebony) and the front of the ebony into matching the roughly 15 degree angle I put on the heel of the knife... hard to explain what Im talking about. The angle where the ebony part of the handle meets the spine on the steel is not 90 degrees, its more of a 75/105 degree, and I wanted the wood lines to match and be parallel to that angle. For me, that was the hardest part of the whole build... LOL
-
Someone from Flint Michigan?... i'd understand you being weary of water. LOL There are enough small lakes and streams, hidden gems, if you know where to look. They all live in AZ, with 3 being in the southeast part of the state
-
glad to hear I'm not the only one! just recently found a knife I had been working on, 4 months earlier, because I set it down somewhere and 'lost' it
-
the main difference is that CO has a higher binding affinity to hemoglobin and myoglobin in the blood and muscles. Neither gas has a color, or odor. CO2 is heavier than air and sinks and fills low pits, settles, CO tends to be lighter than air and accumulates in the top of structures... you know, where your breathing hole is. However it is more close to the average weight of 'air' and will mix more readily rather than have a separate layer. To answer your question about which, I have worked with both, I am also fairly inexperienced. With that label on myself I prefer propane. I don't have to babysit the flame, stack and rake the coals, worry about clinkers, ash, less likely to overheat or burn steel, though a hotspot in solid fuel forges can be advantageous. Maybe add your own experience level into the equation and ask yourself do you want to spend more time tending a fire, or swinging a hammer. For me, with my lesser experience, it was the latter.
-
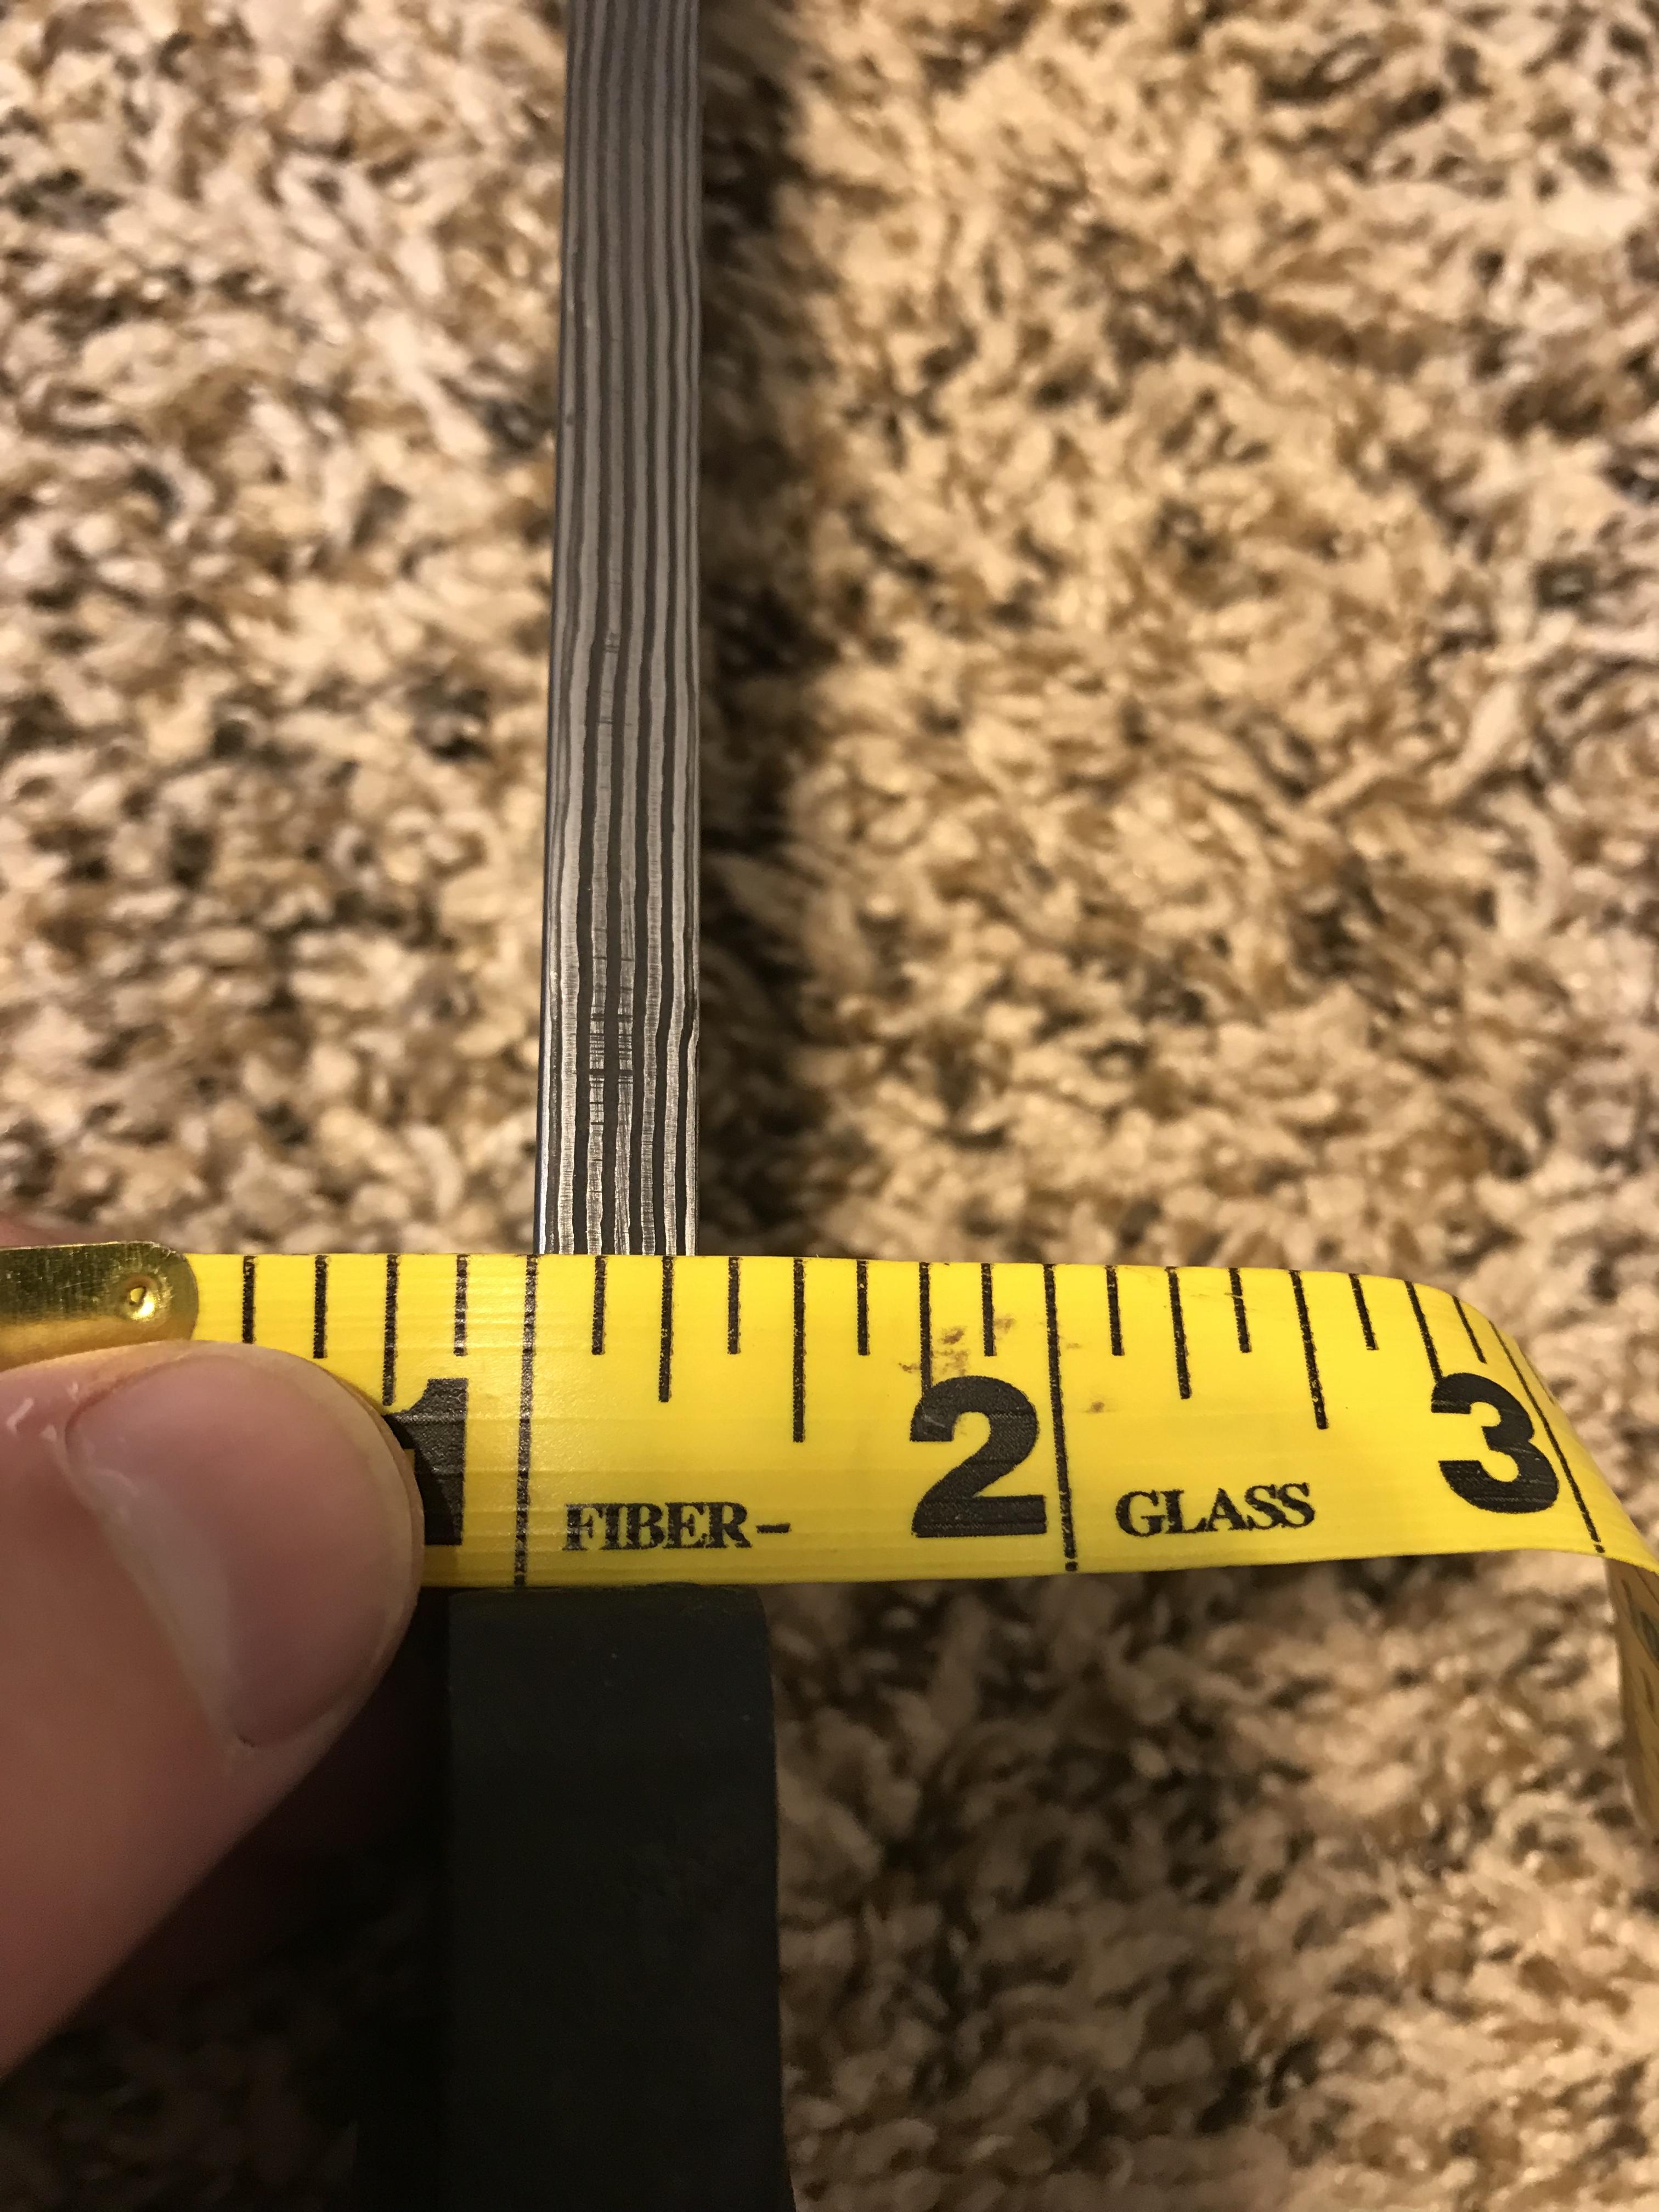
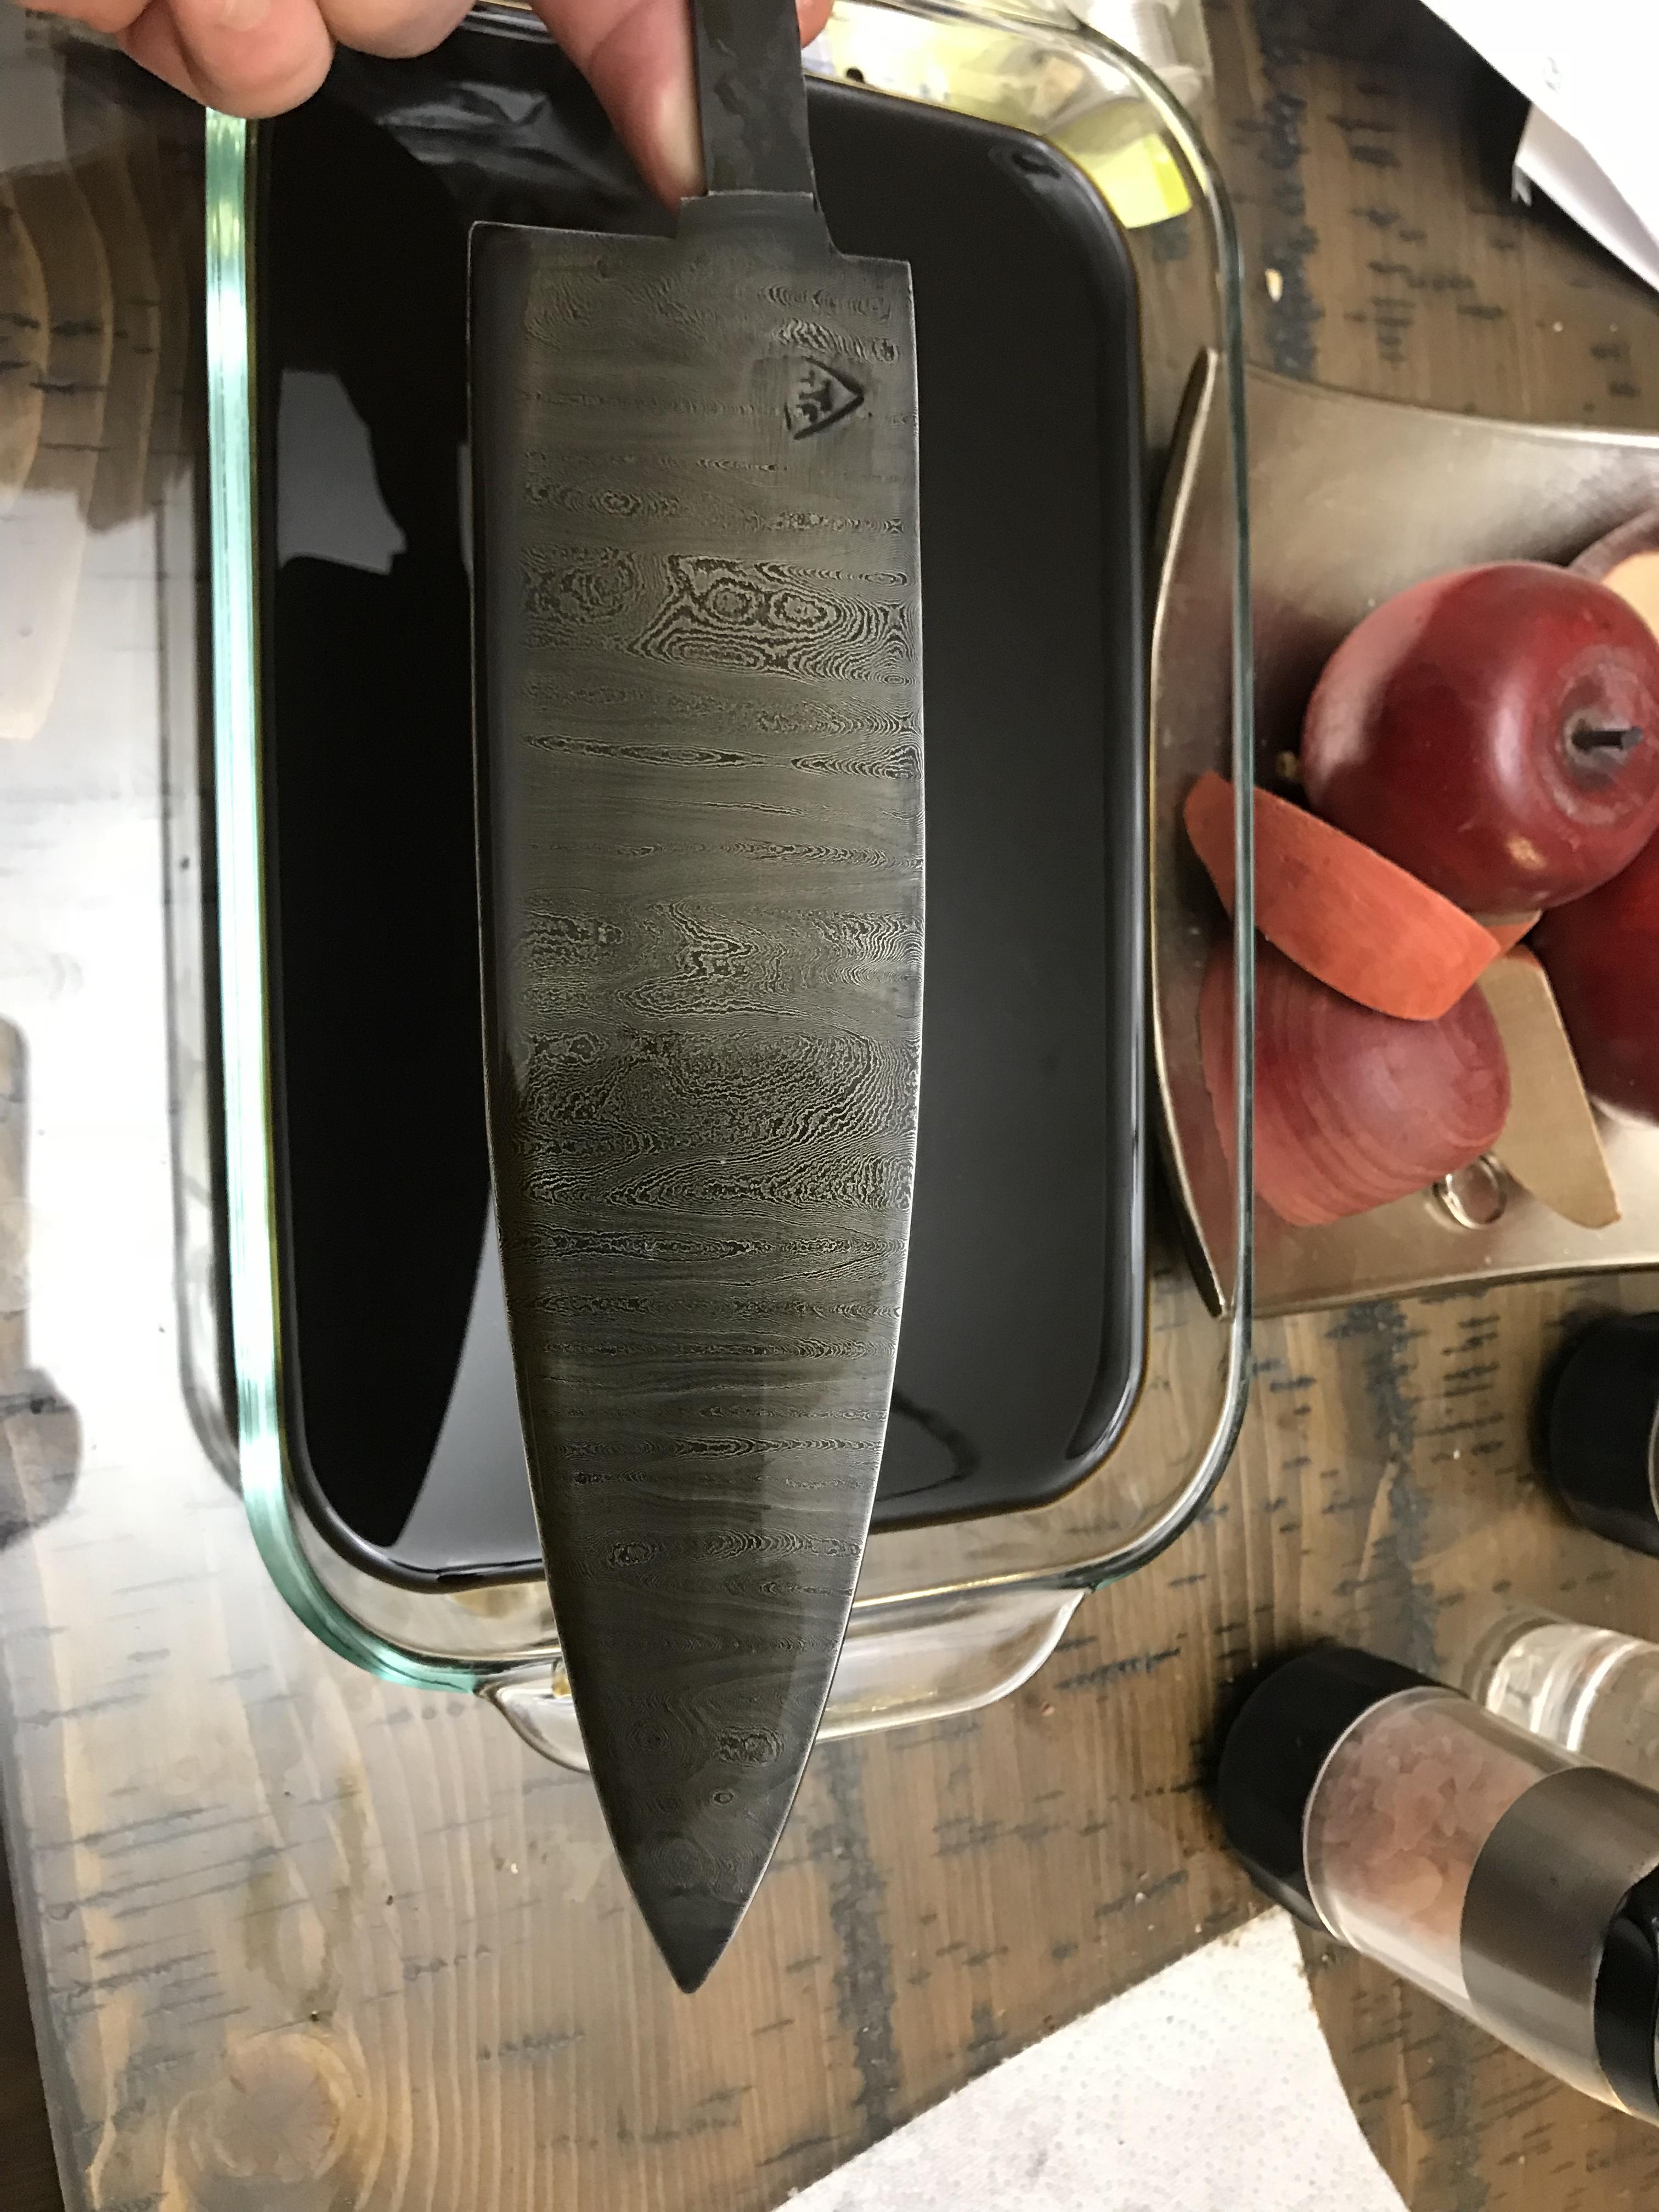
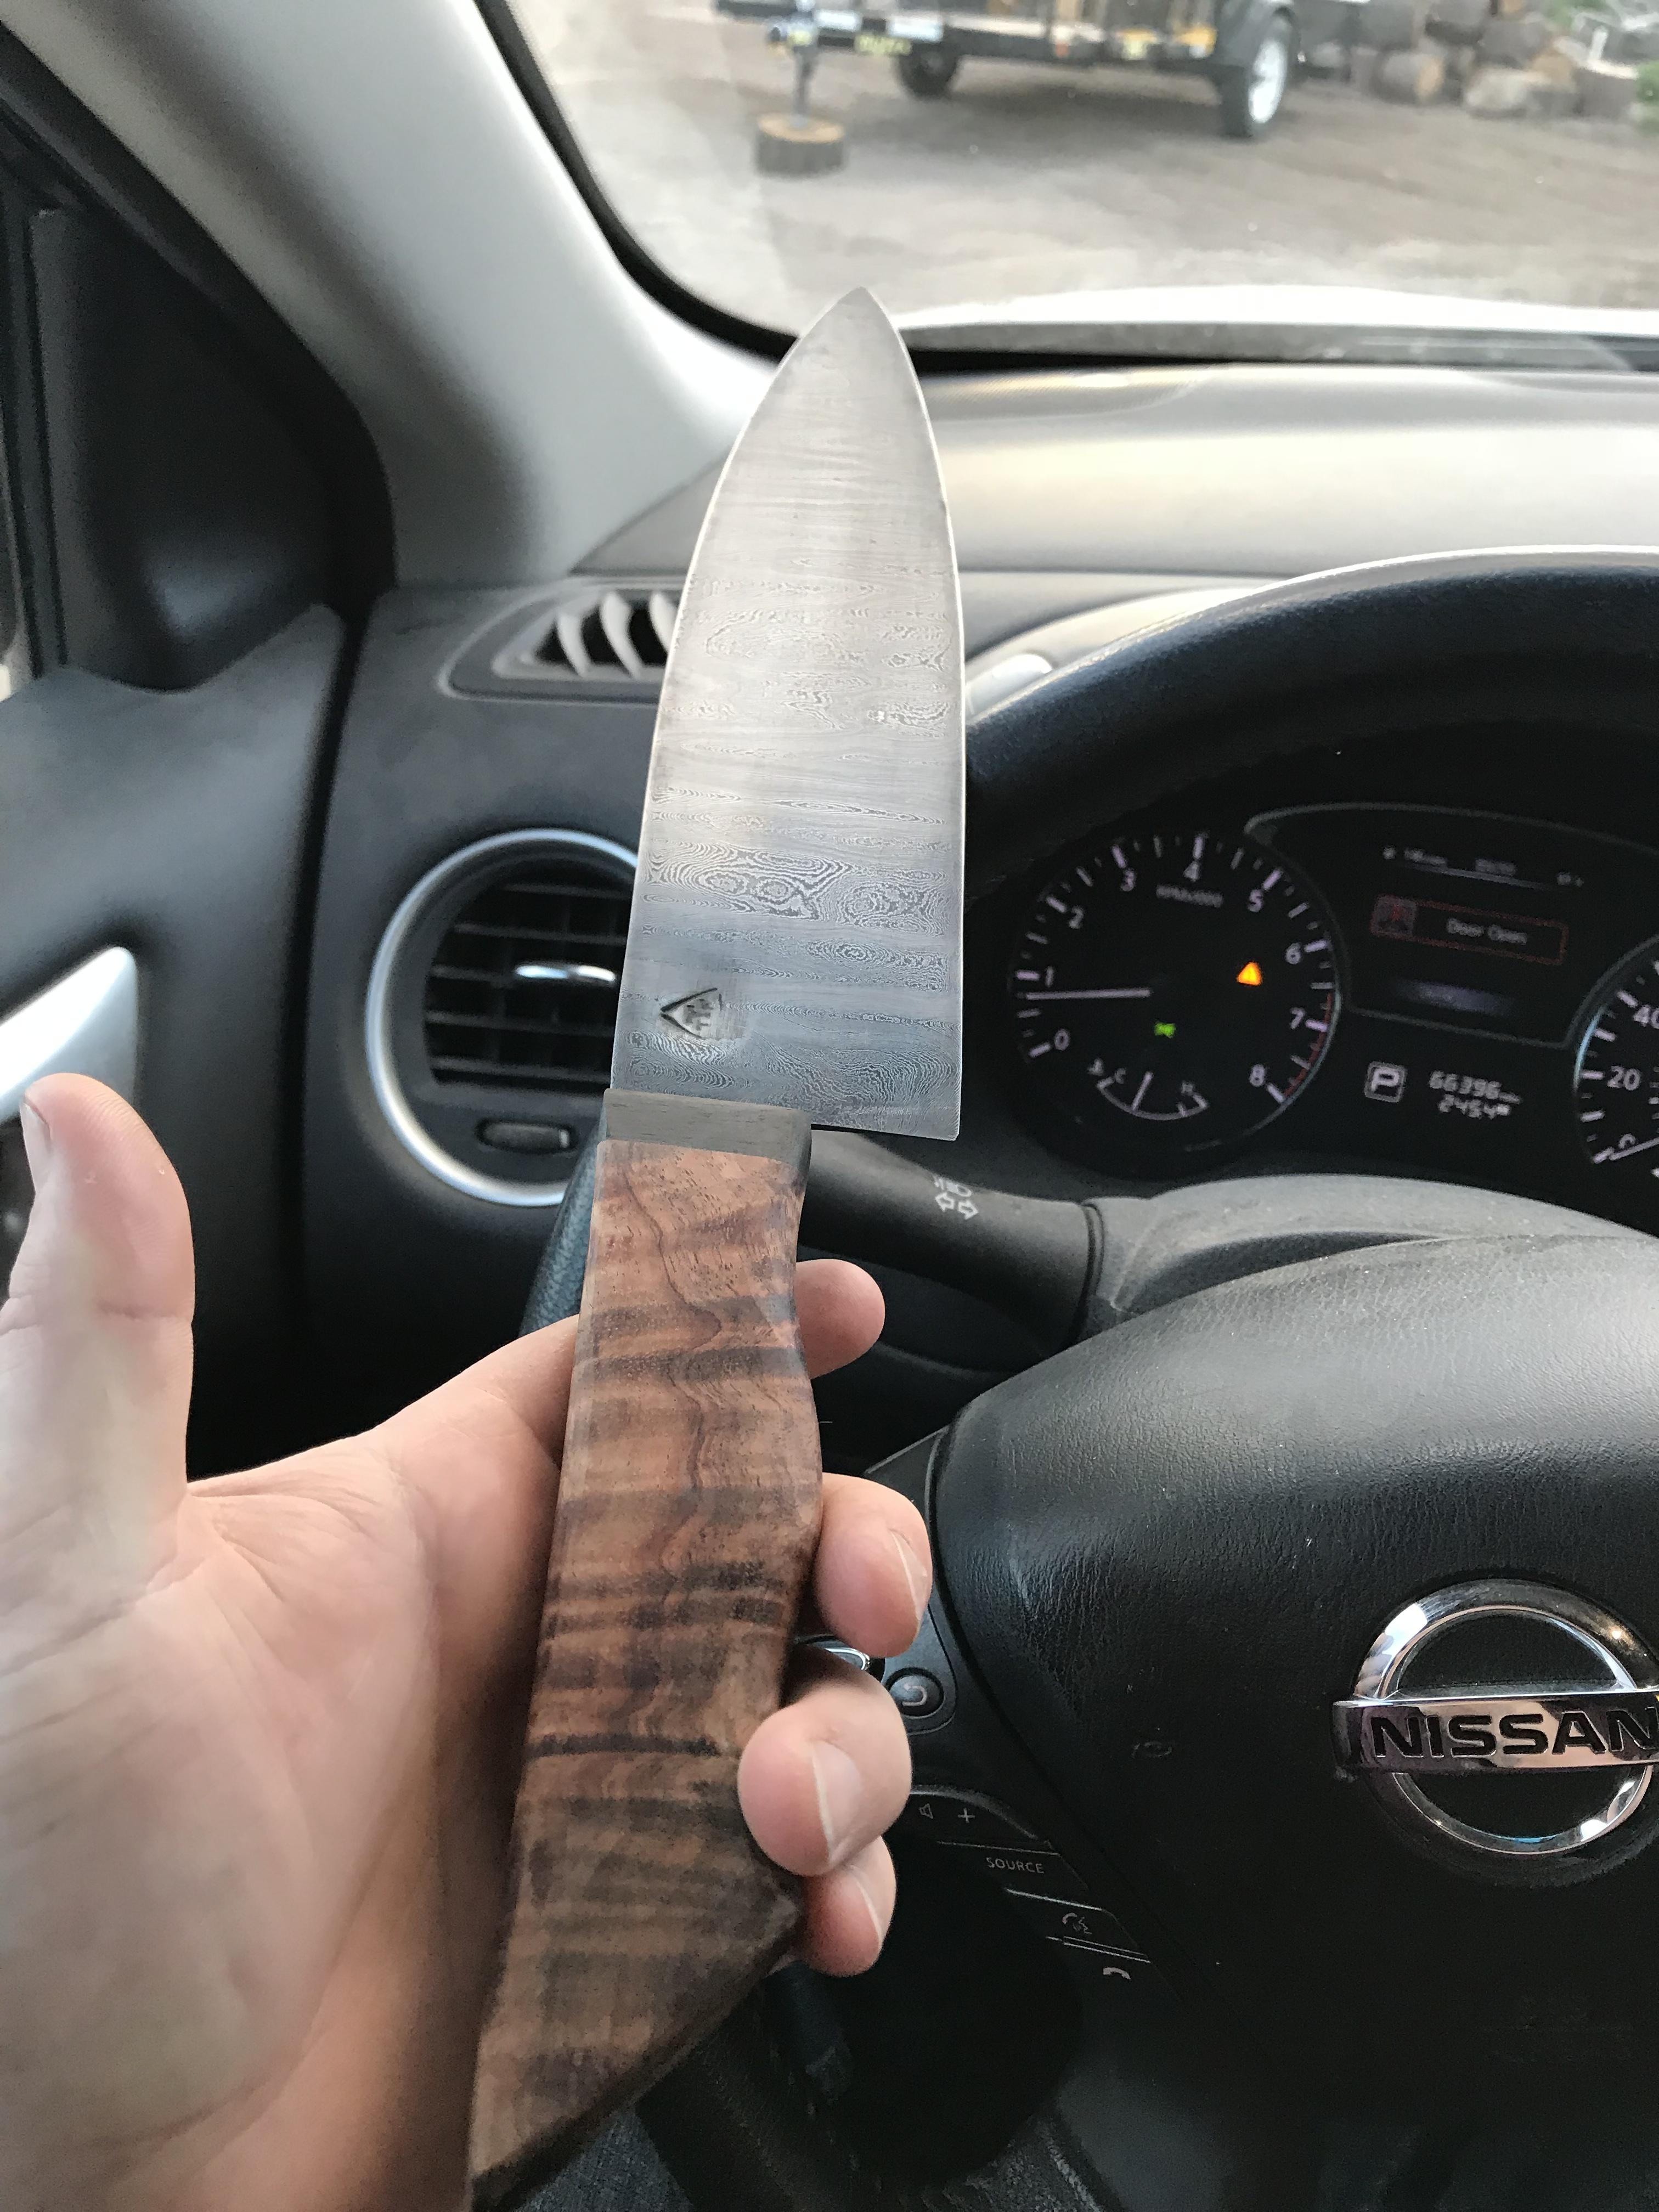
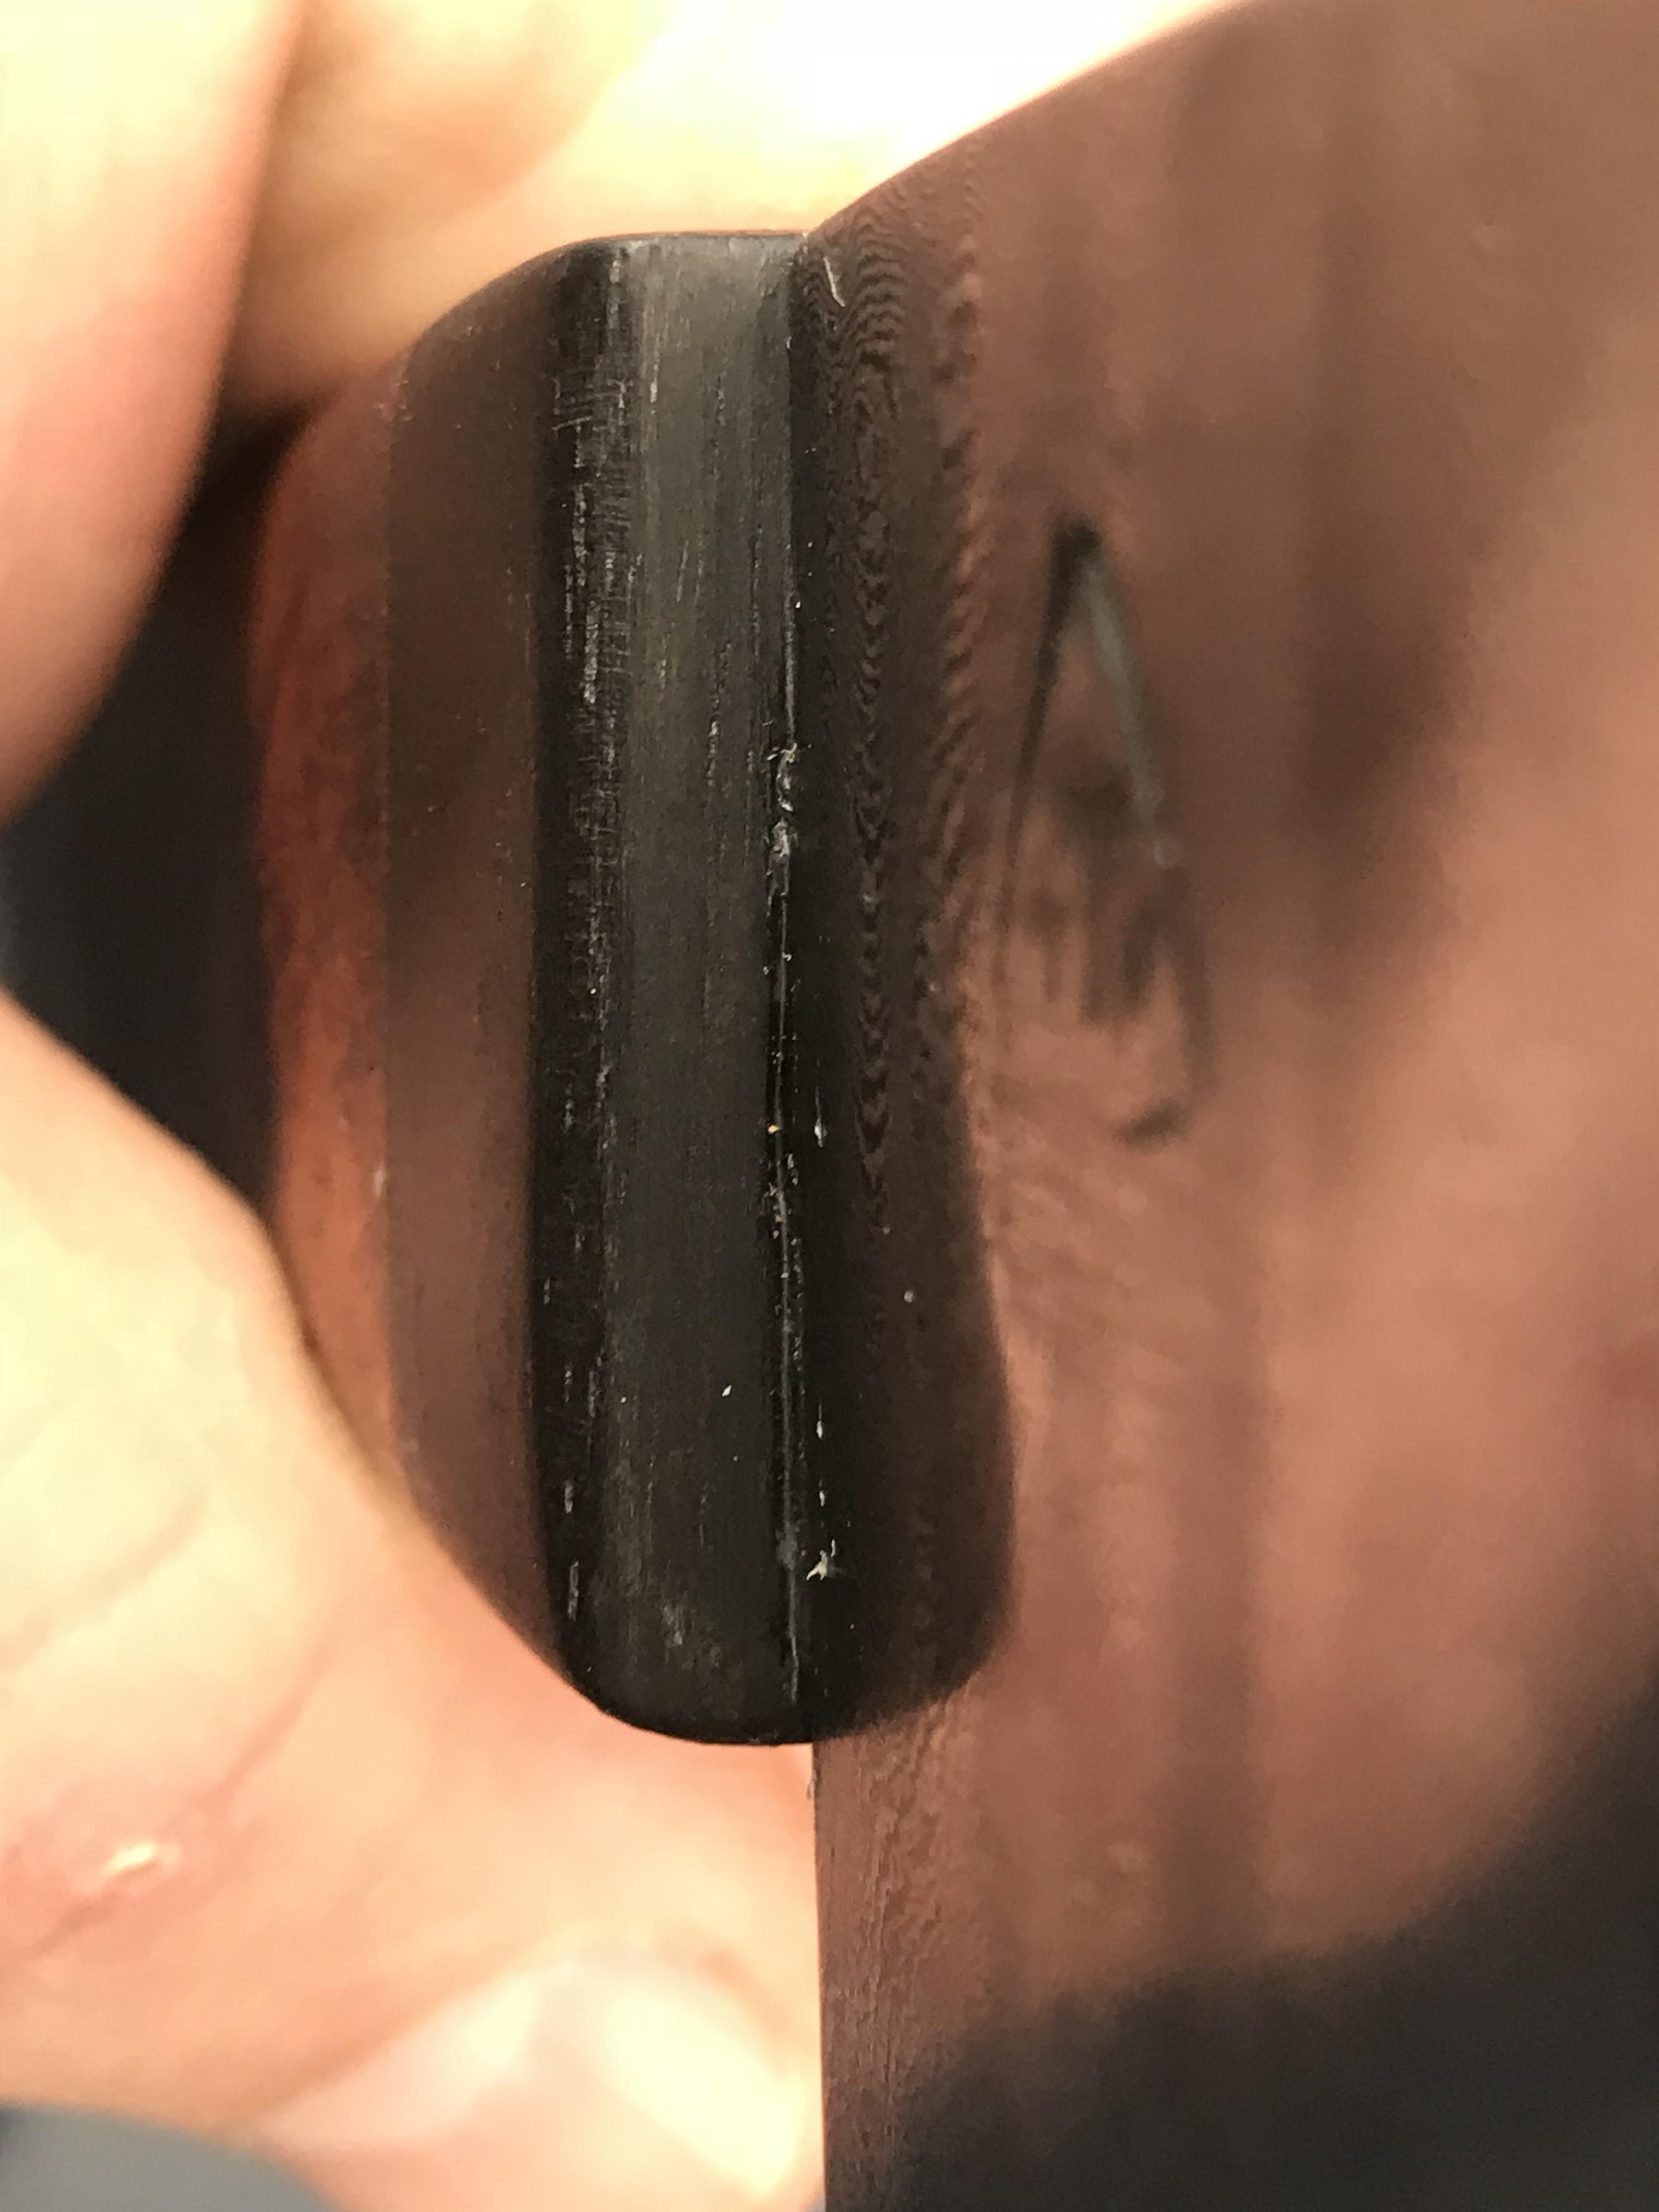
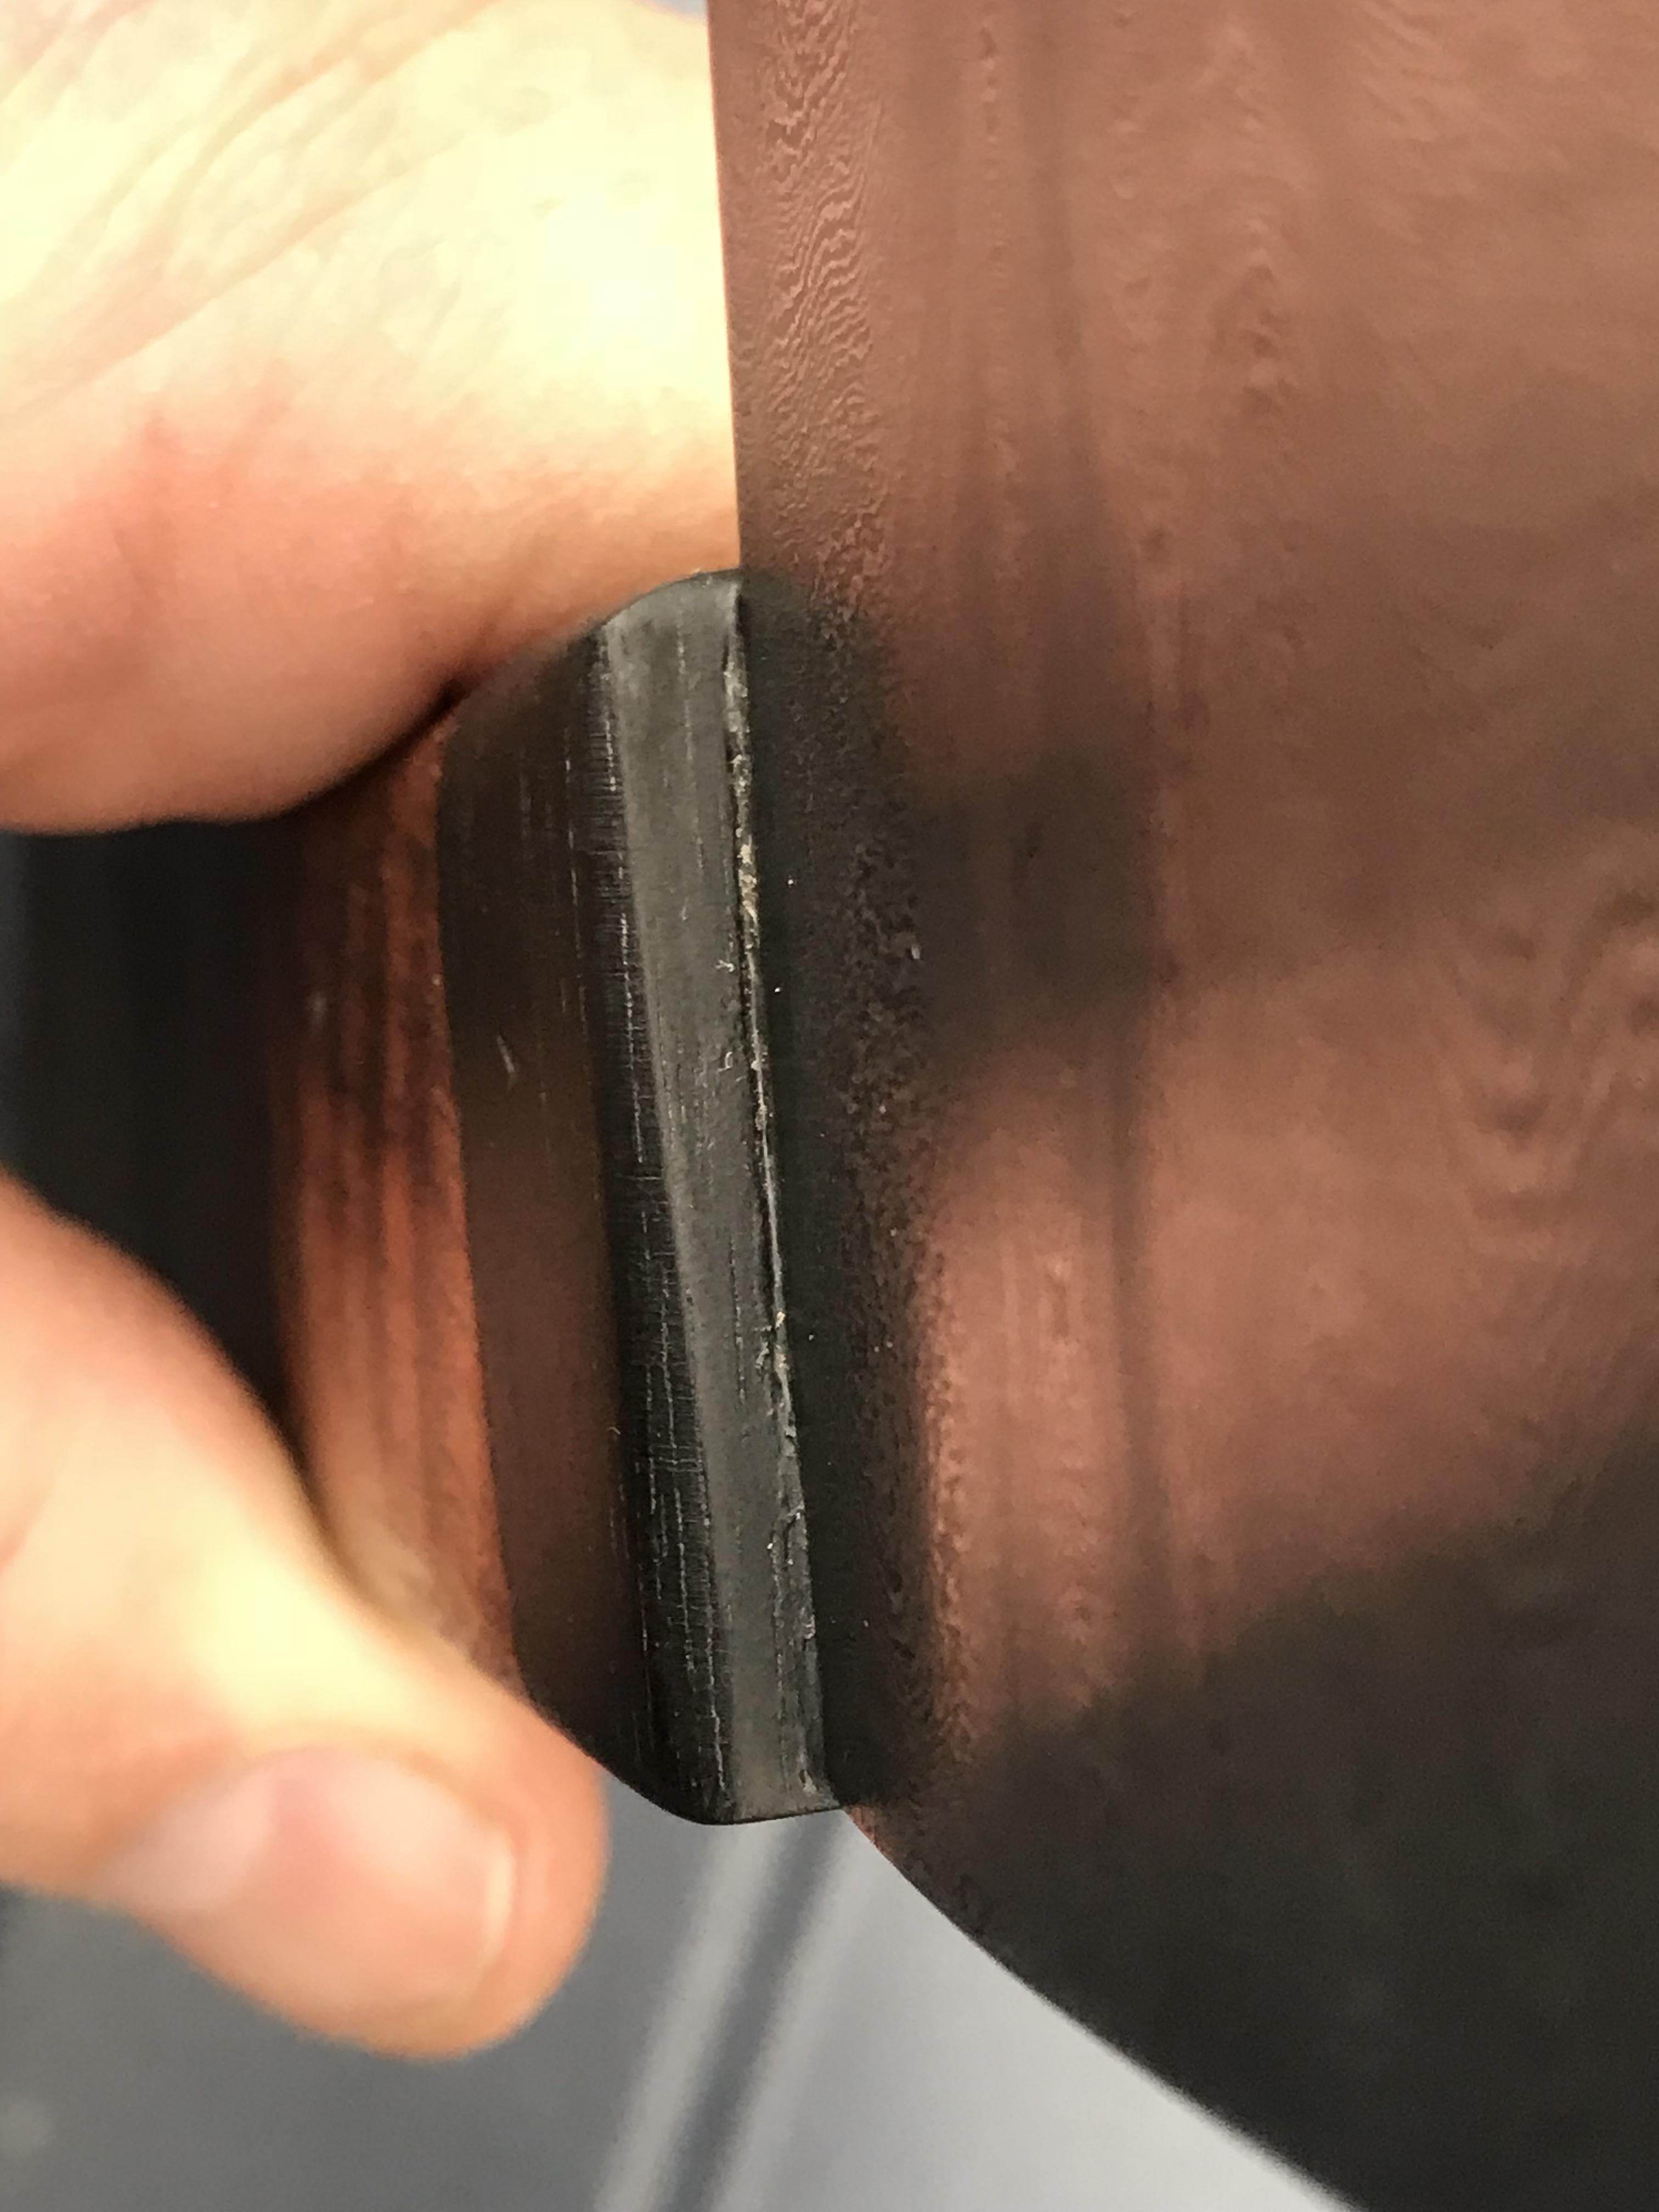
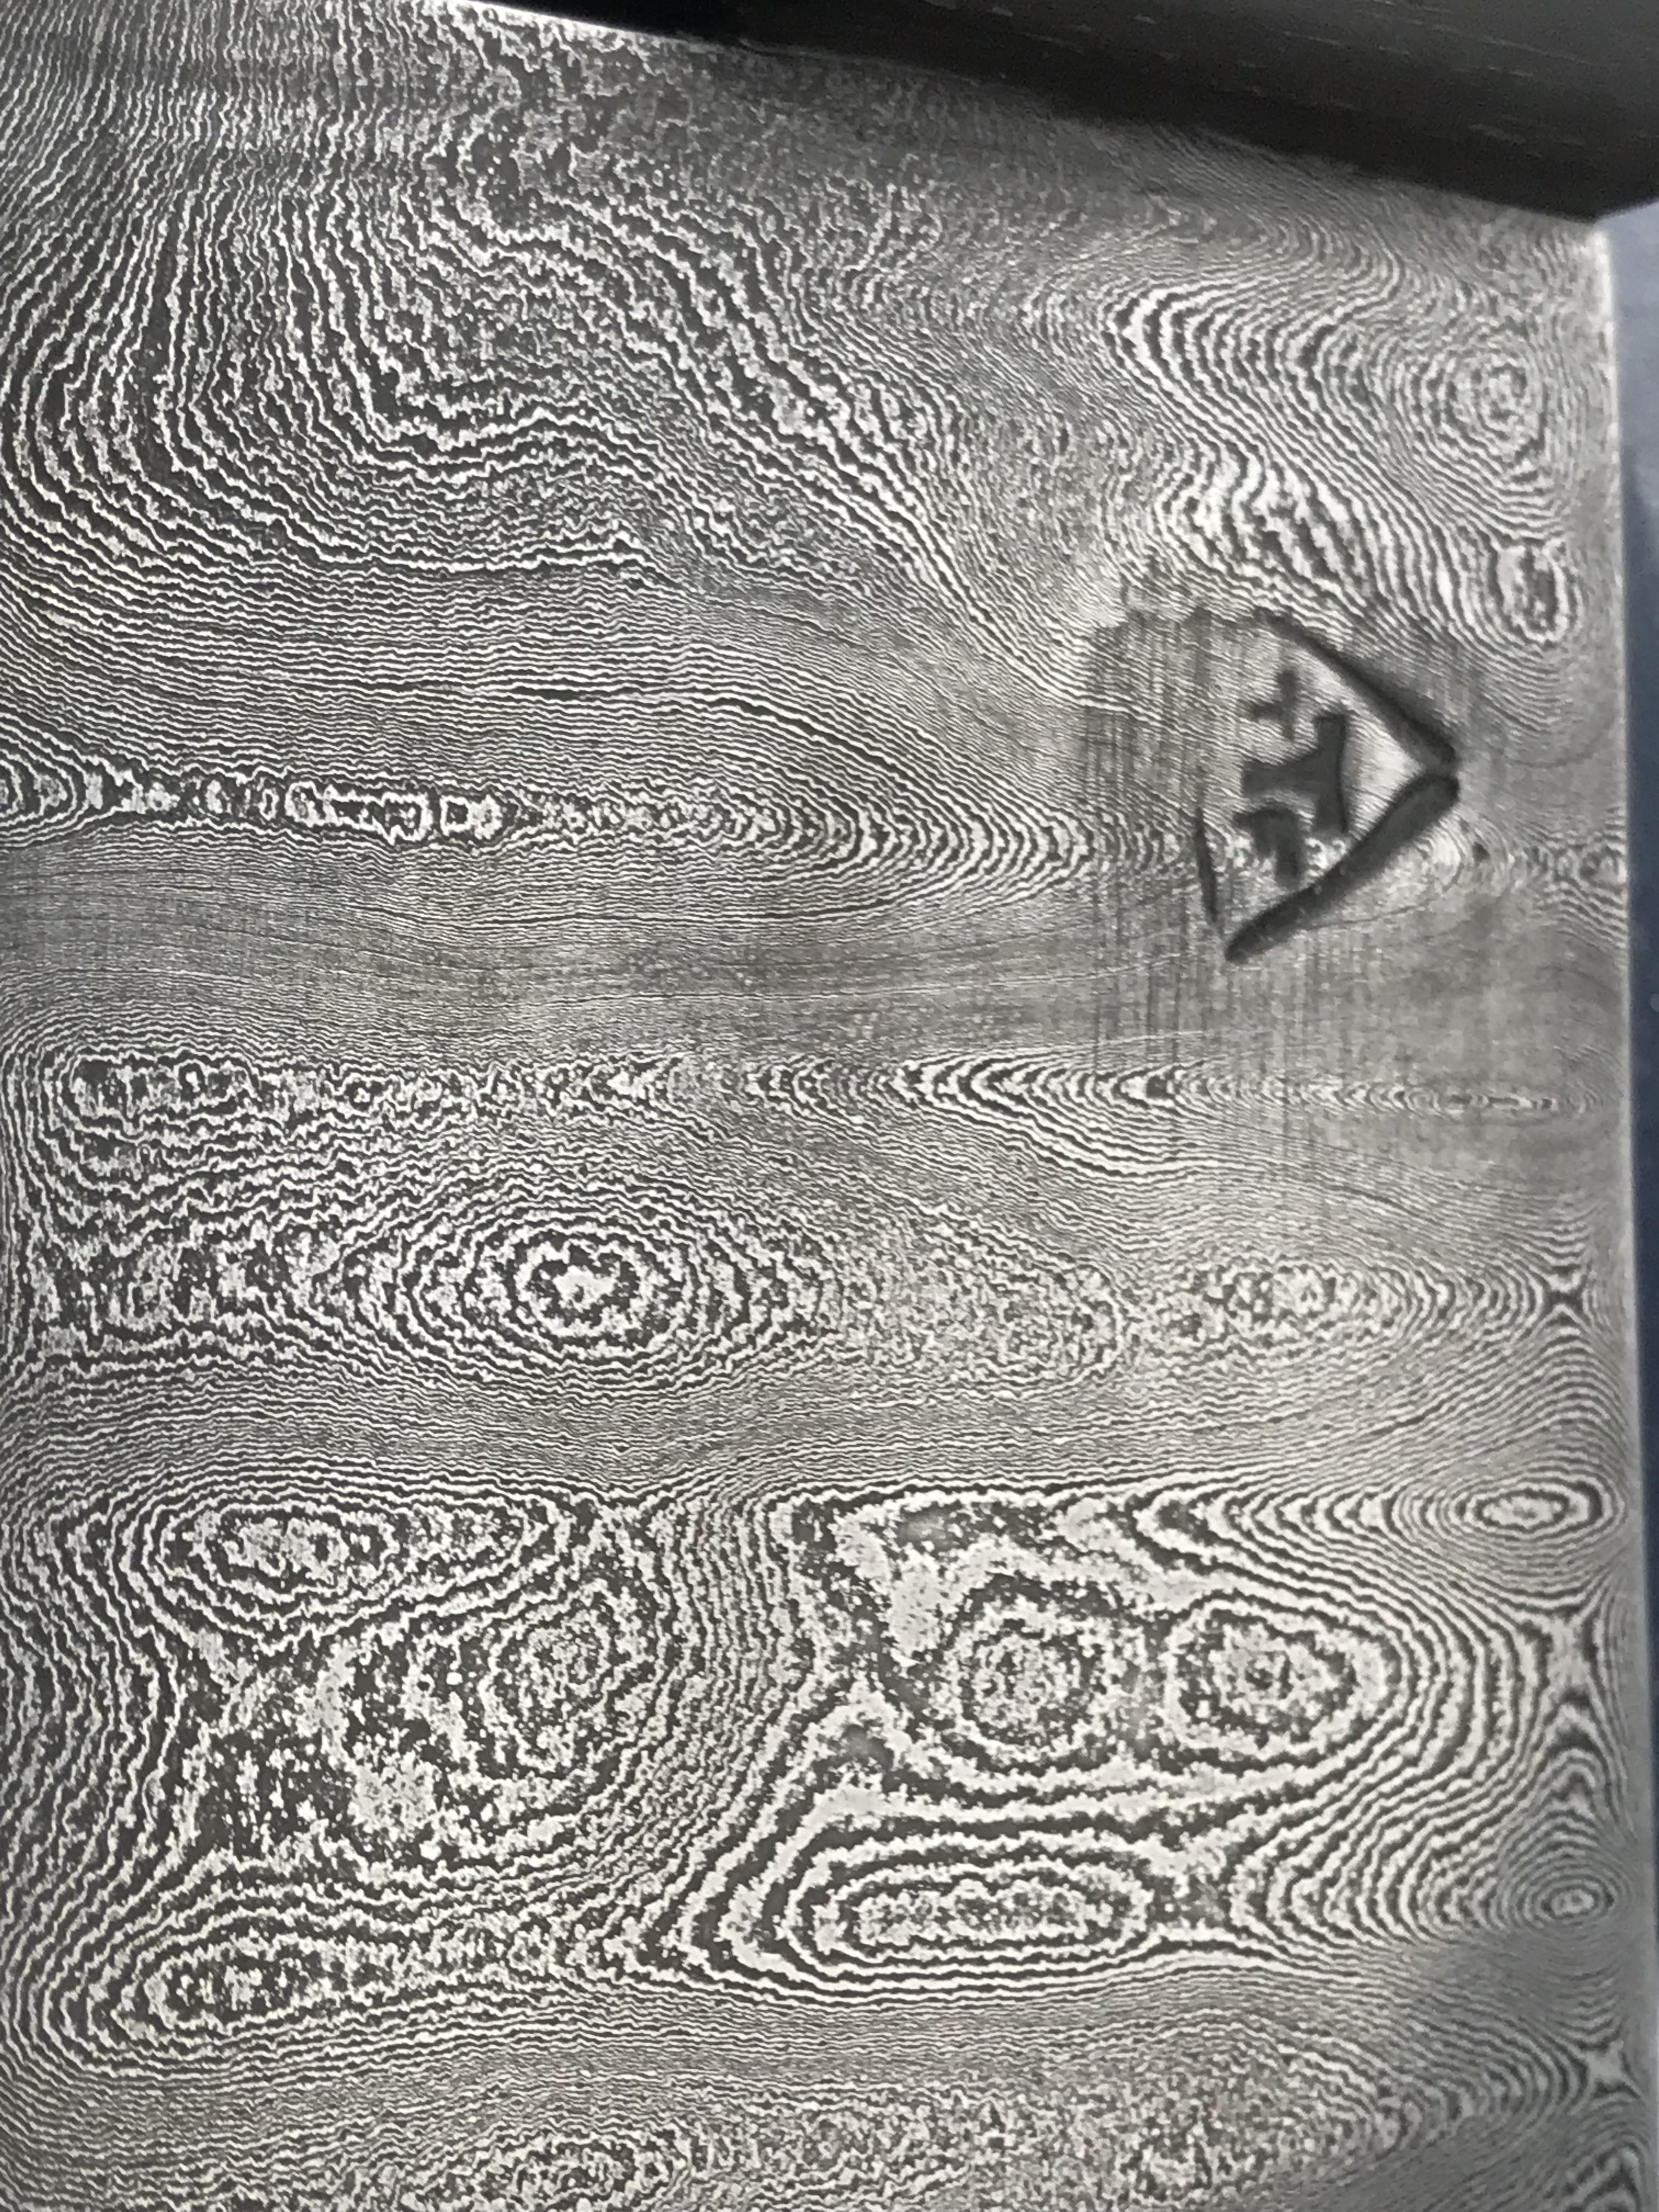
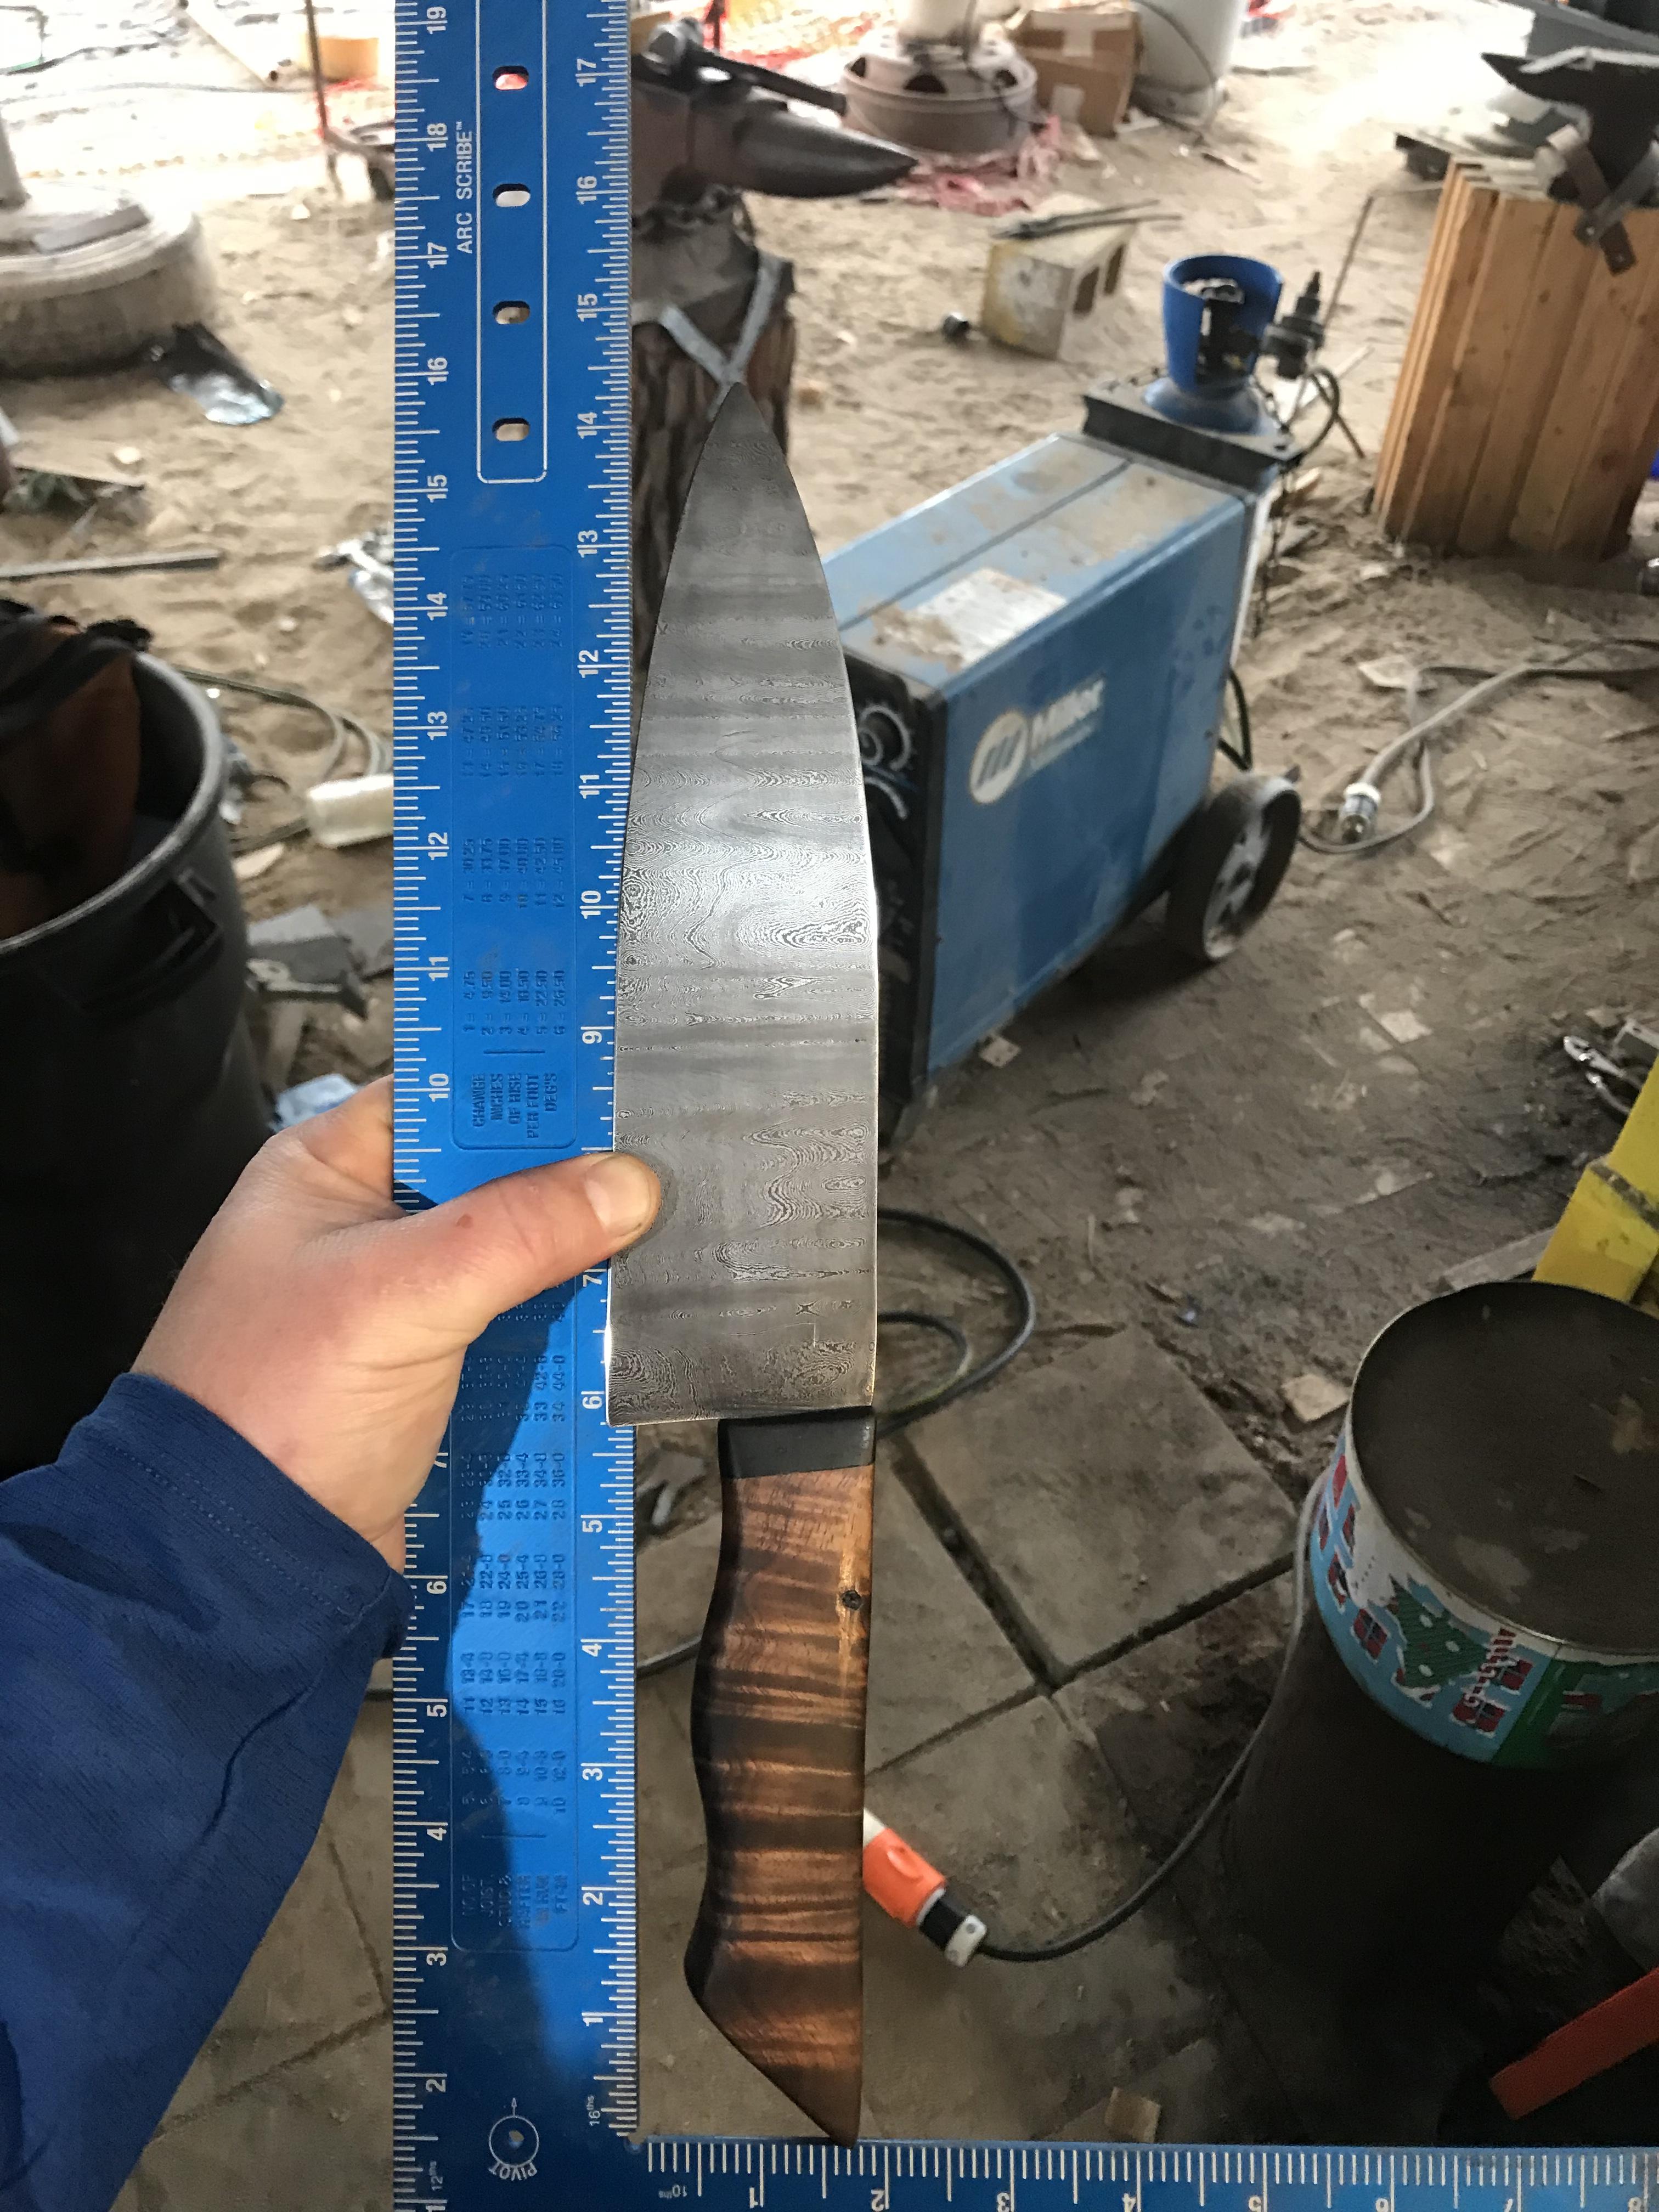
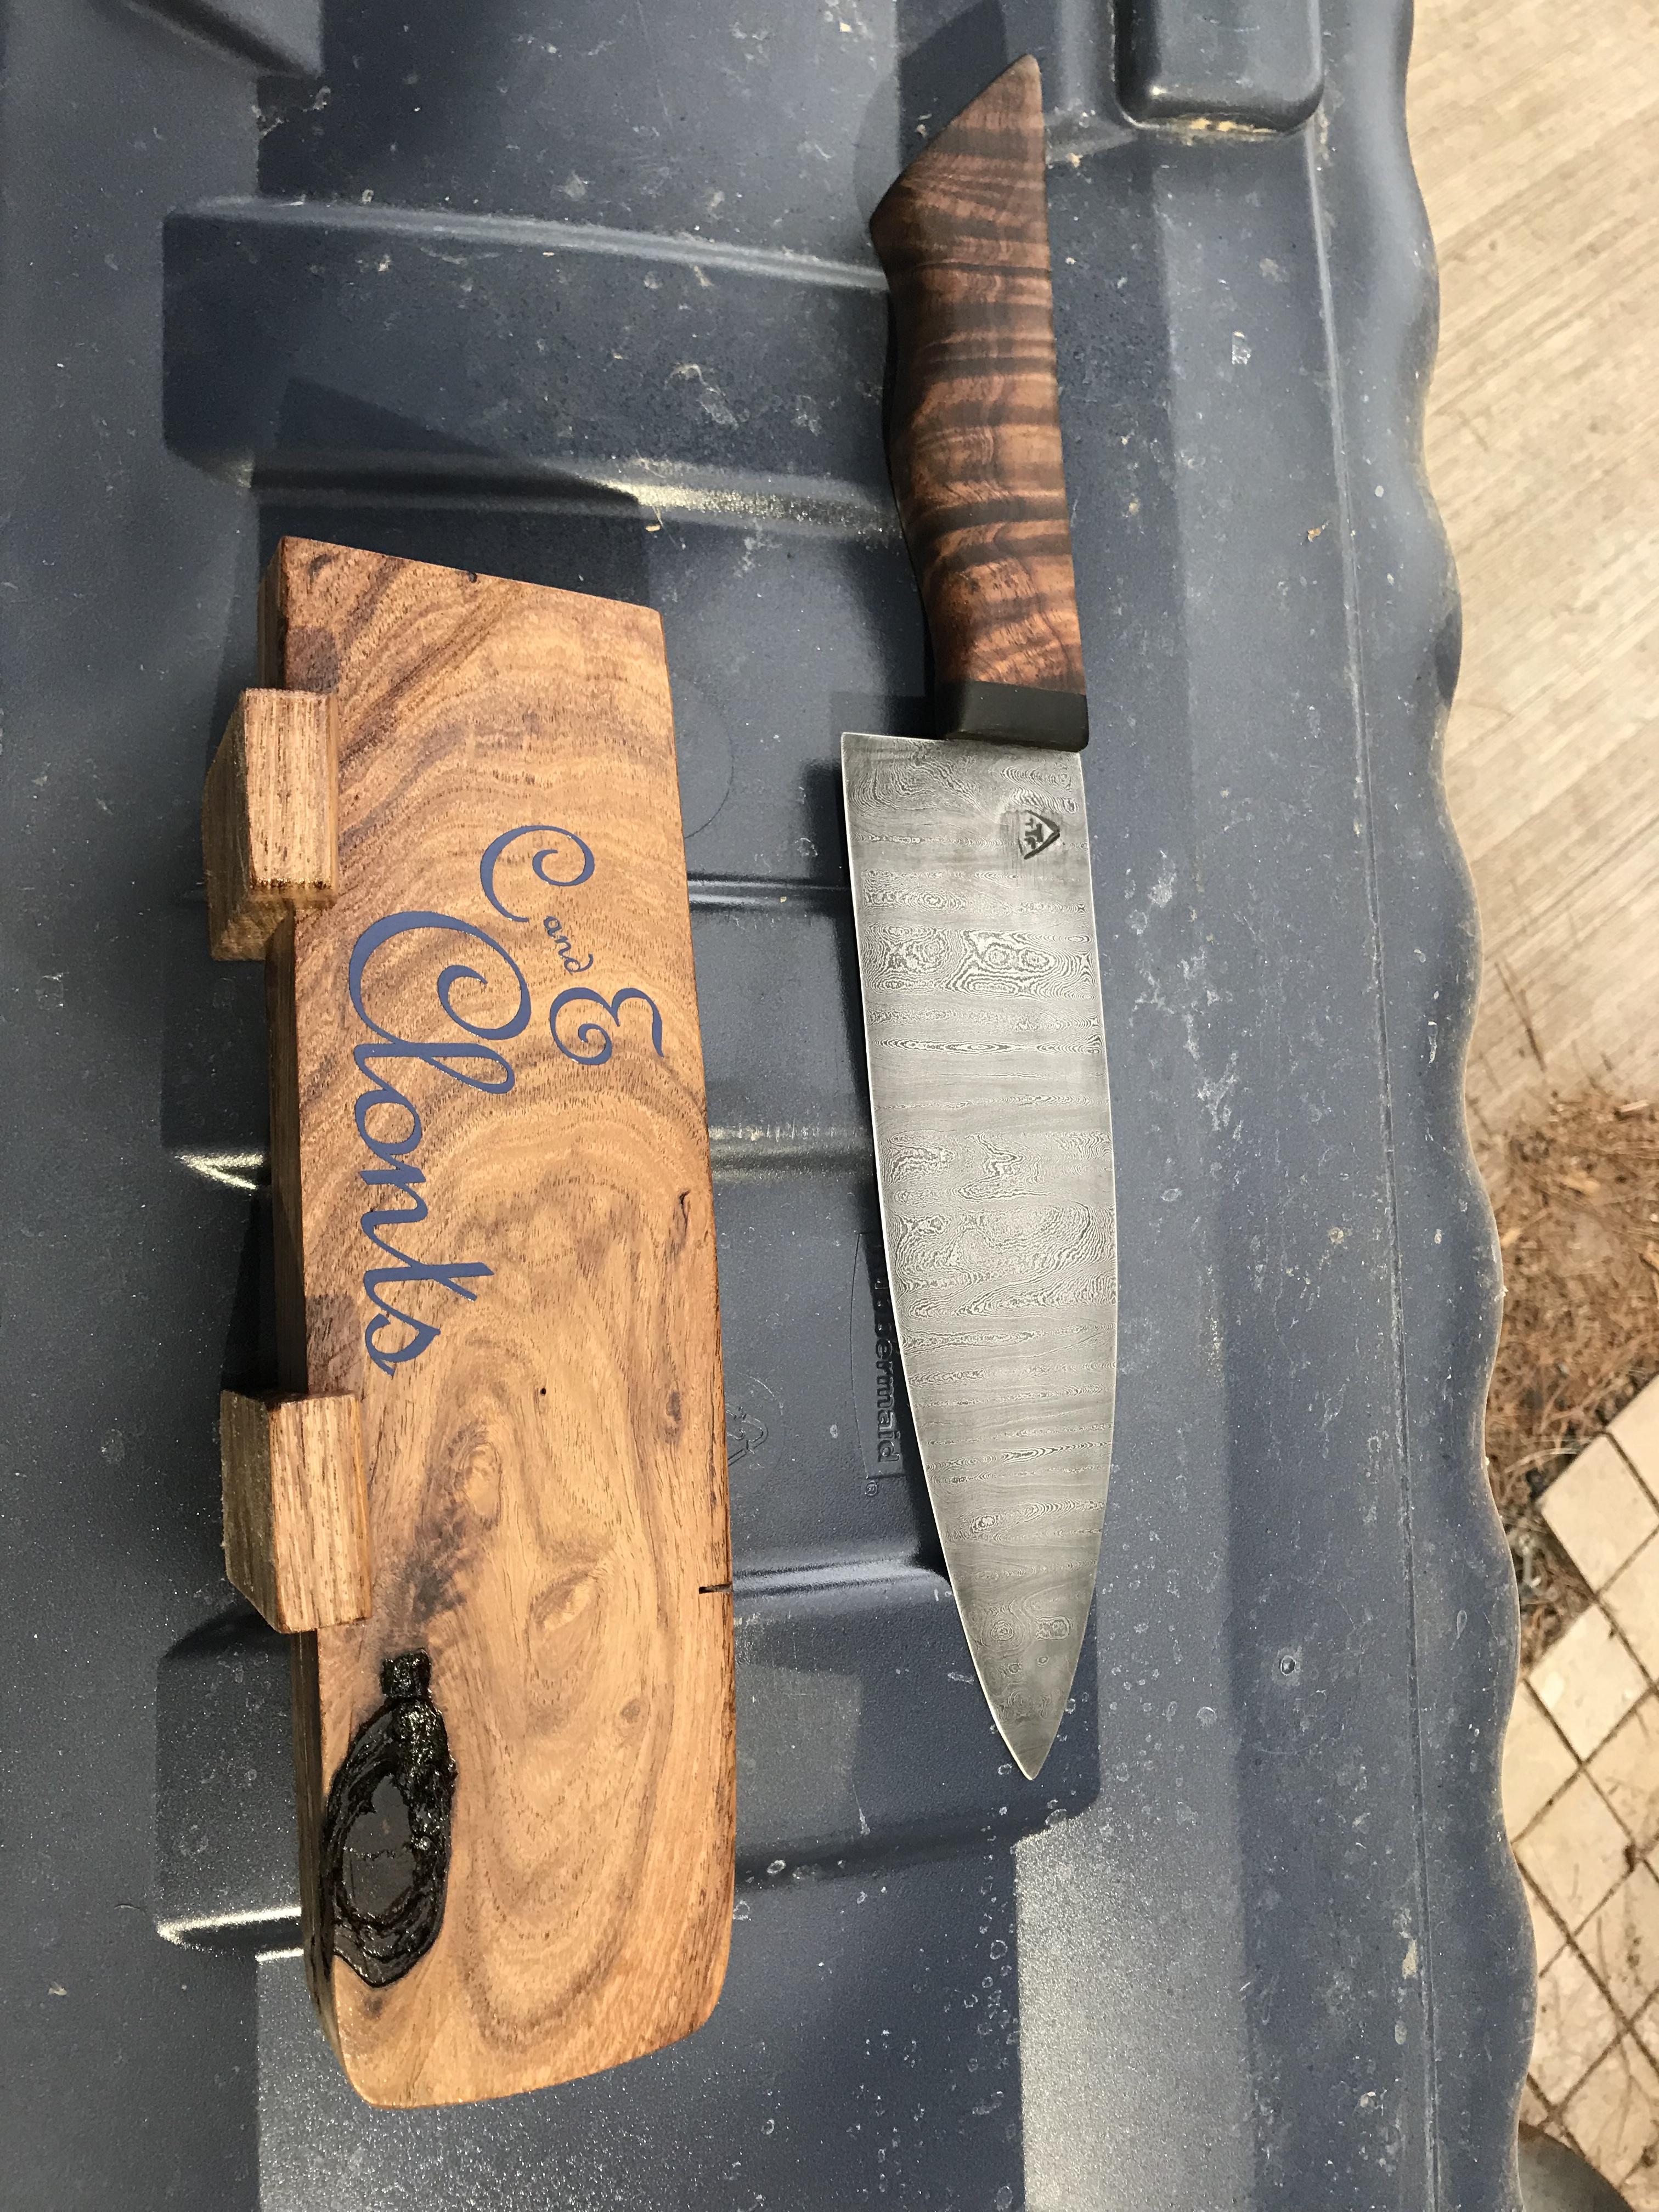
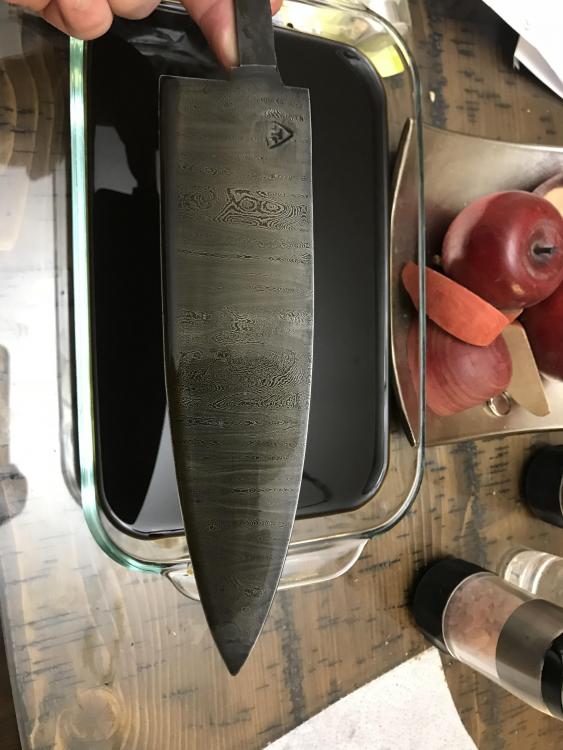
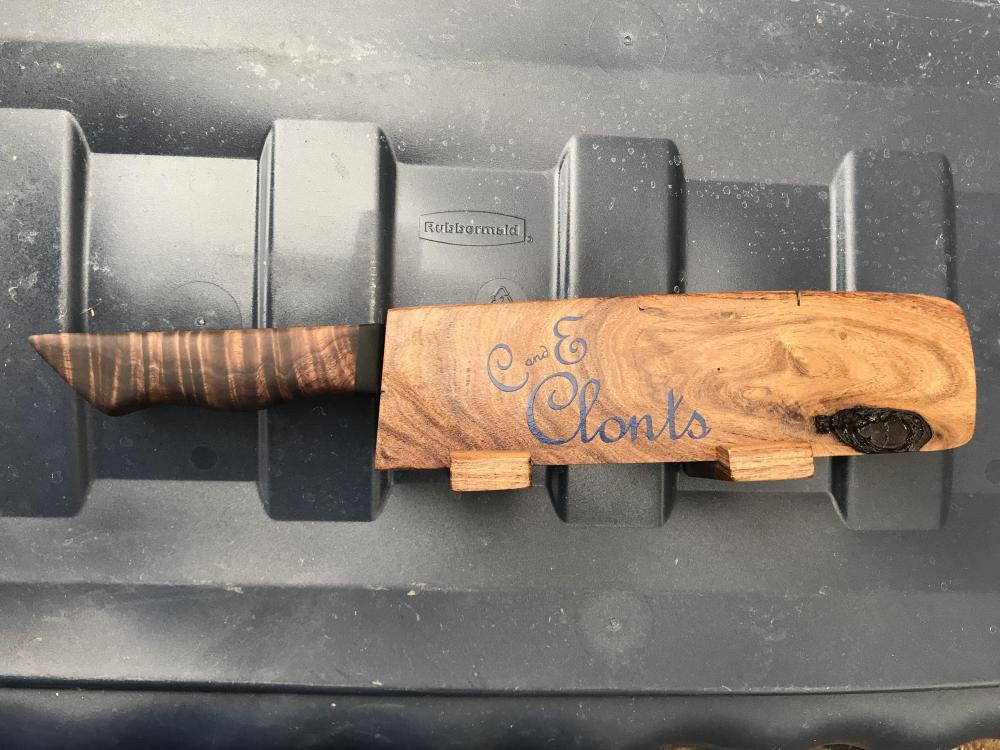
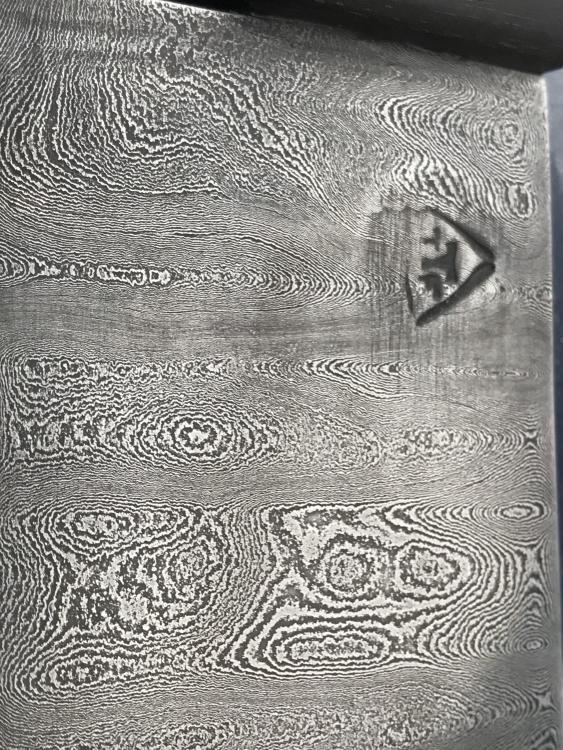
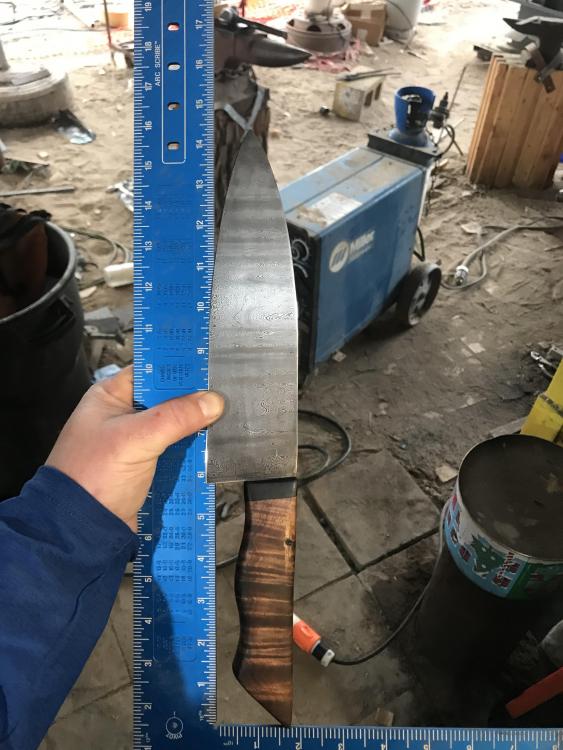
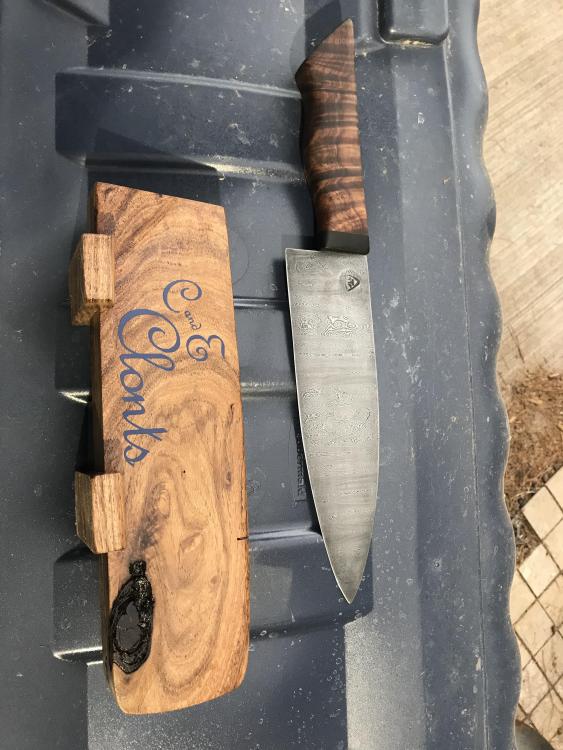
Also the 30th knife I have made. I have a spreadsheet and keep track. Steels: 1084, 15n20. 600 layers ‘organic’ ladder. Handle: curly, or fugured I've seen it called, Koa wood with gaboon ebony front. No end grain towards cutting edge. Overall length 14.5” blade length ~8.5” weight feels quite light at 8oz. Etched with ~20% ferric chloride, darkened after sanding with Walmart brand instant coffee. A few months ago my Aunt and Uncle went to Hawaii and he brought me back a block of curly Koa wood figuring I could make a pretty knife handle with it. Well, tonight I’m giving him that wood back, with a blade stuck in it. Originally I wanted a high layer perfectly even ladder pattern. And have it match the ‘chatoyance’ of the wood. I made dies for my 88# Anyang, but had too many bars on it and the steel bounced too much to get nice even rows. Then I thought what if the pattern is more ‘organic’ and flows like the wood itself does? So I risked the 640 layer biller and gave her a go on the bouncy dies. I really like how it turned out. Ends of the billet from 20 -> 80 -> 320. Then a hotcut and single fold to 640. Call it 600. Made a block from a slab of mesquite, had a clever idea. Just after the dark line on the top of the block, i have a strong hidden magnet about 1/8” from the carved channel the blade goes in that holds the edge off the wood when the blade is inserted. My lovely wife made some vinyl to put on the block. Now for my own critique: the ebony front ofthe handle should have been filed more carefully to leave less gap. I filled the gap with epoxy mixed w/black printer toner. Where I put the touchmark, it dished the steel and I couldn’t grind that deep on the whole thing to get it flat... still figuring when to stamp in the process... need to electro-etch... also the scratches in there I couldn’t get out without eating too much of the stamp. Self critique over.


-
*Update: This knife has skinned and boned one 6x6 elk, and this weekend a mule deer and he reported to me today that it still shaves! Its nice to have feedback on something you make. Positive feedback is nice, but negative lets you improve
-
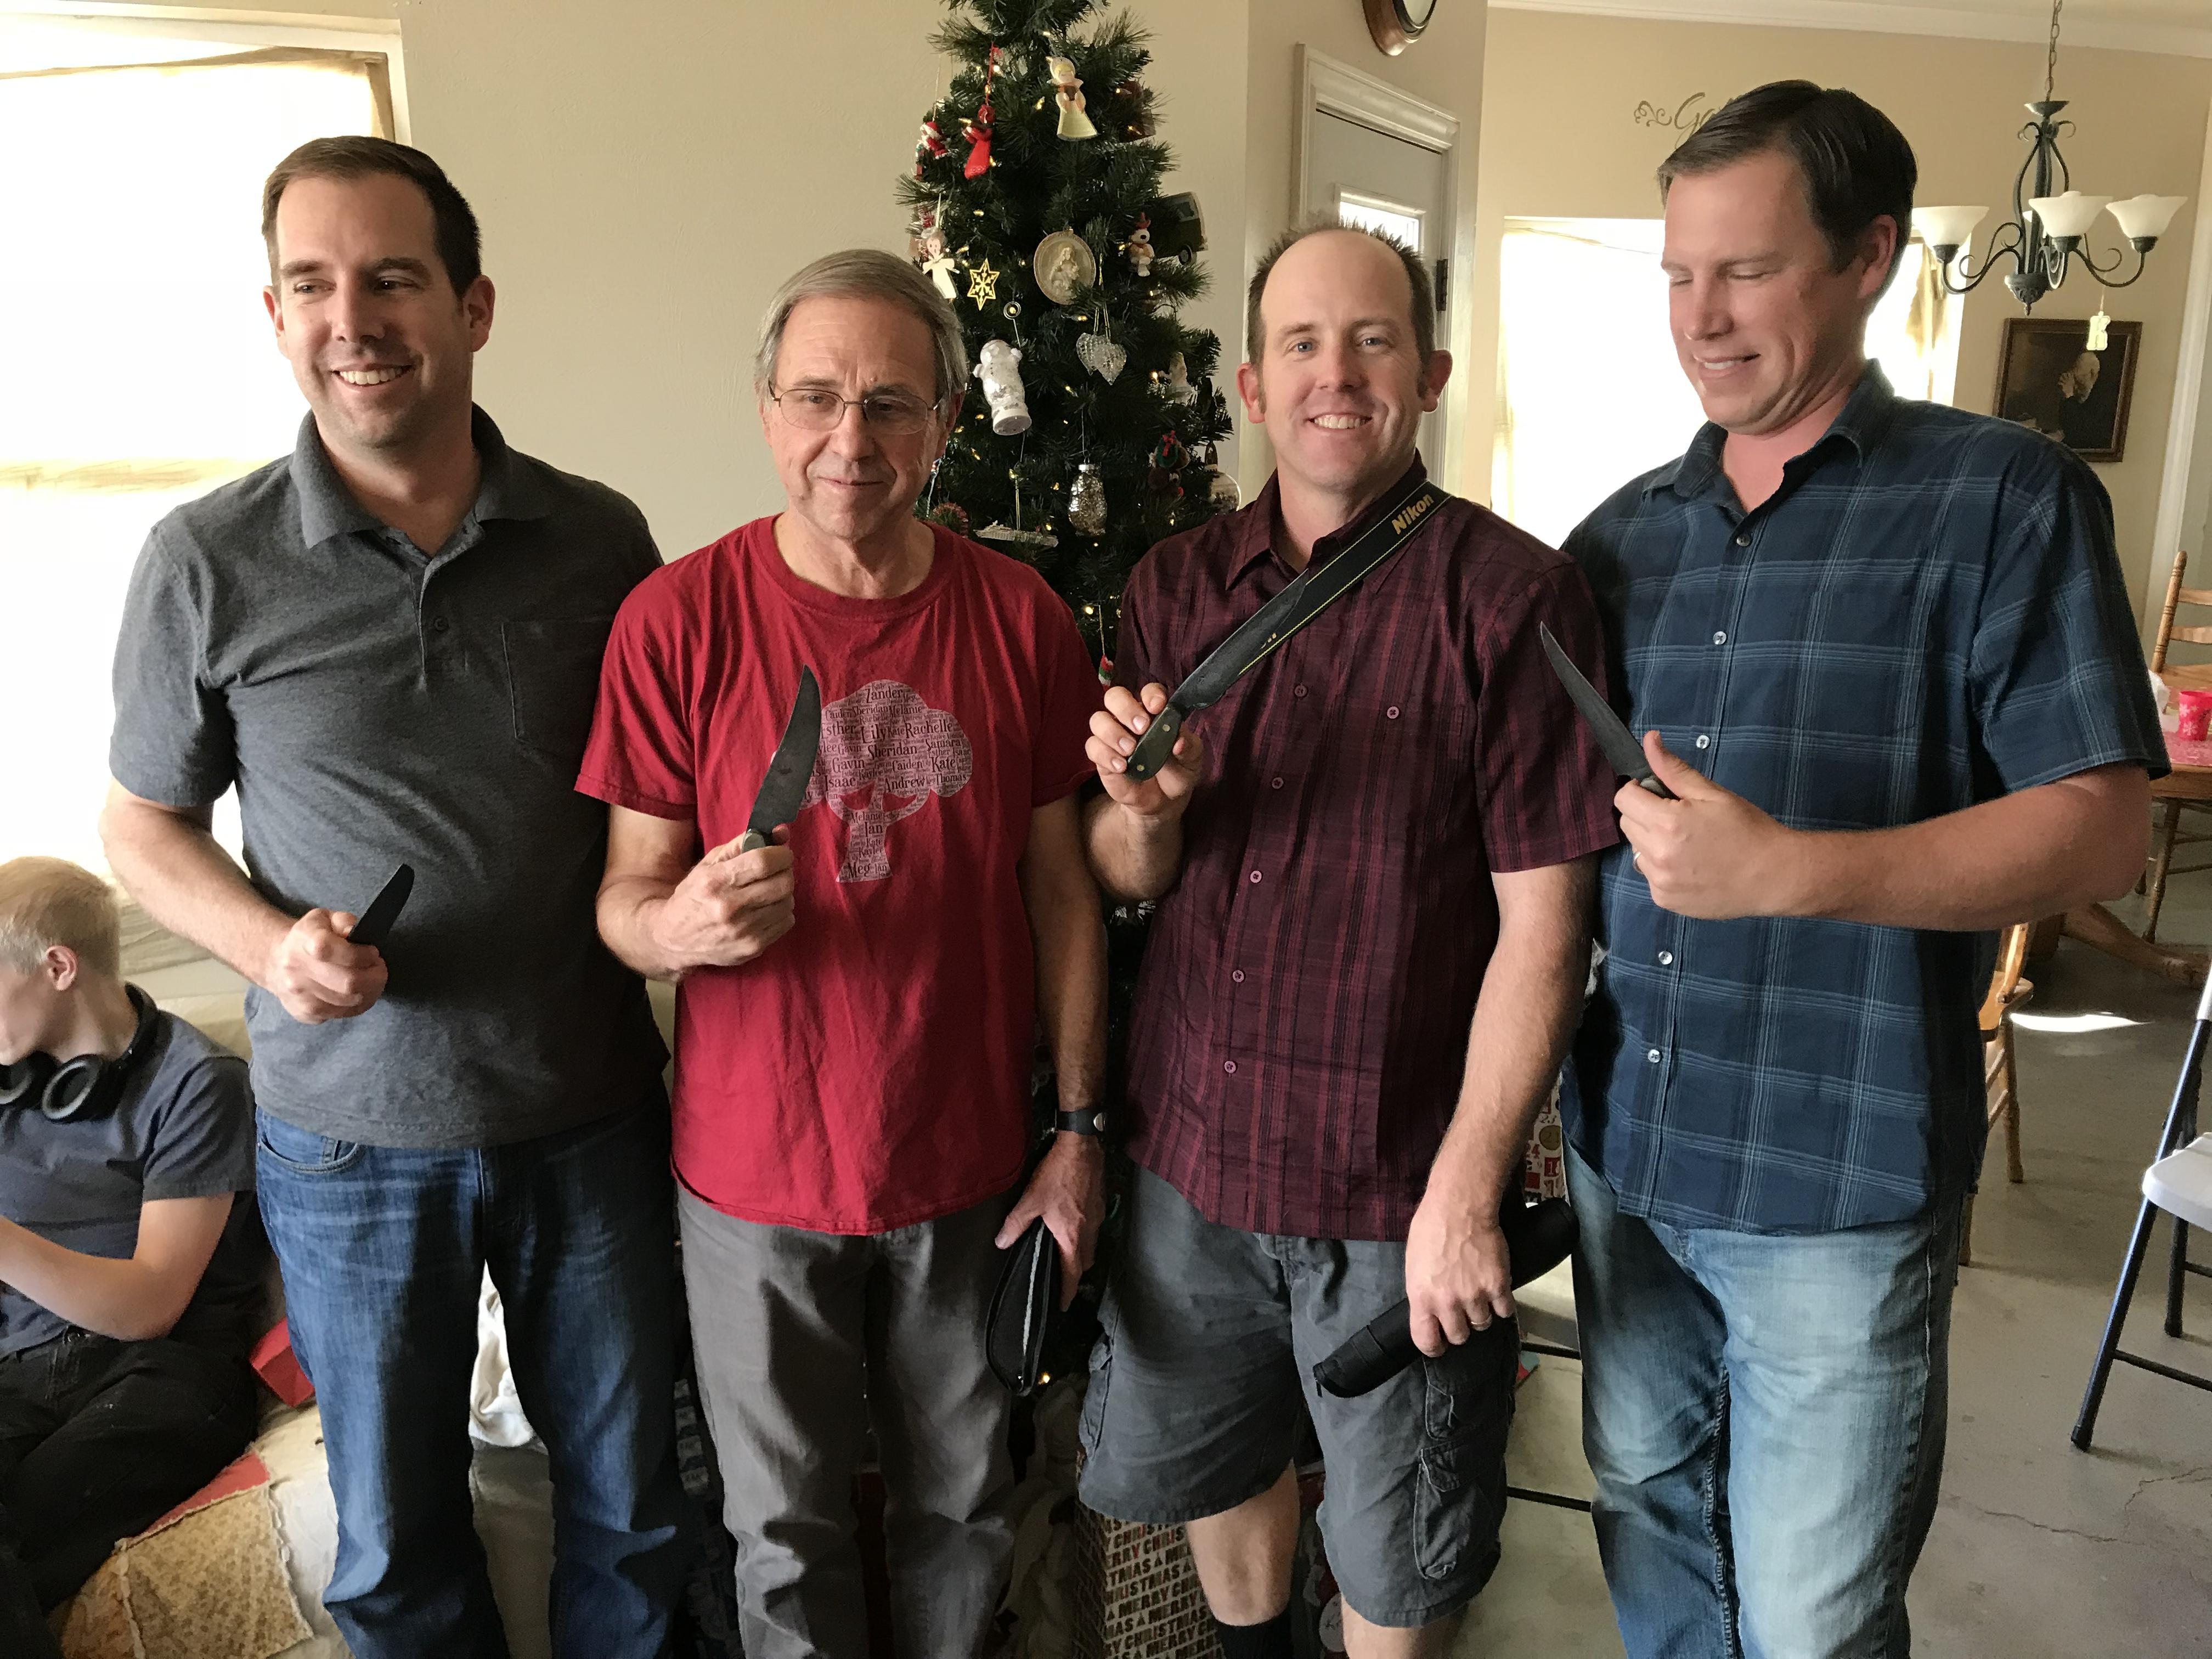
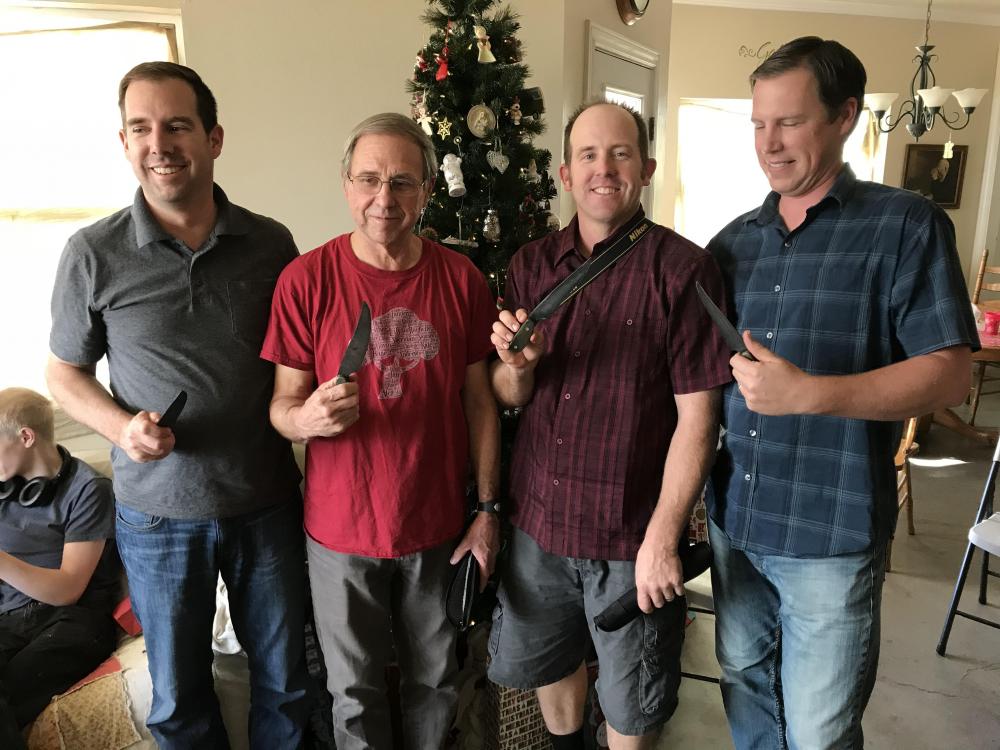
Gave em out today (late Christmas due to scheduling people from 4 different cities) Everyone was extatic
-
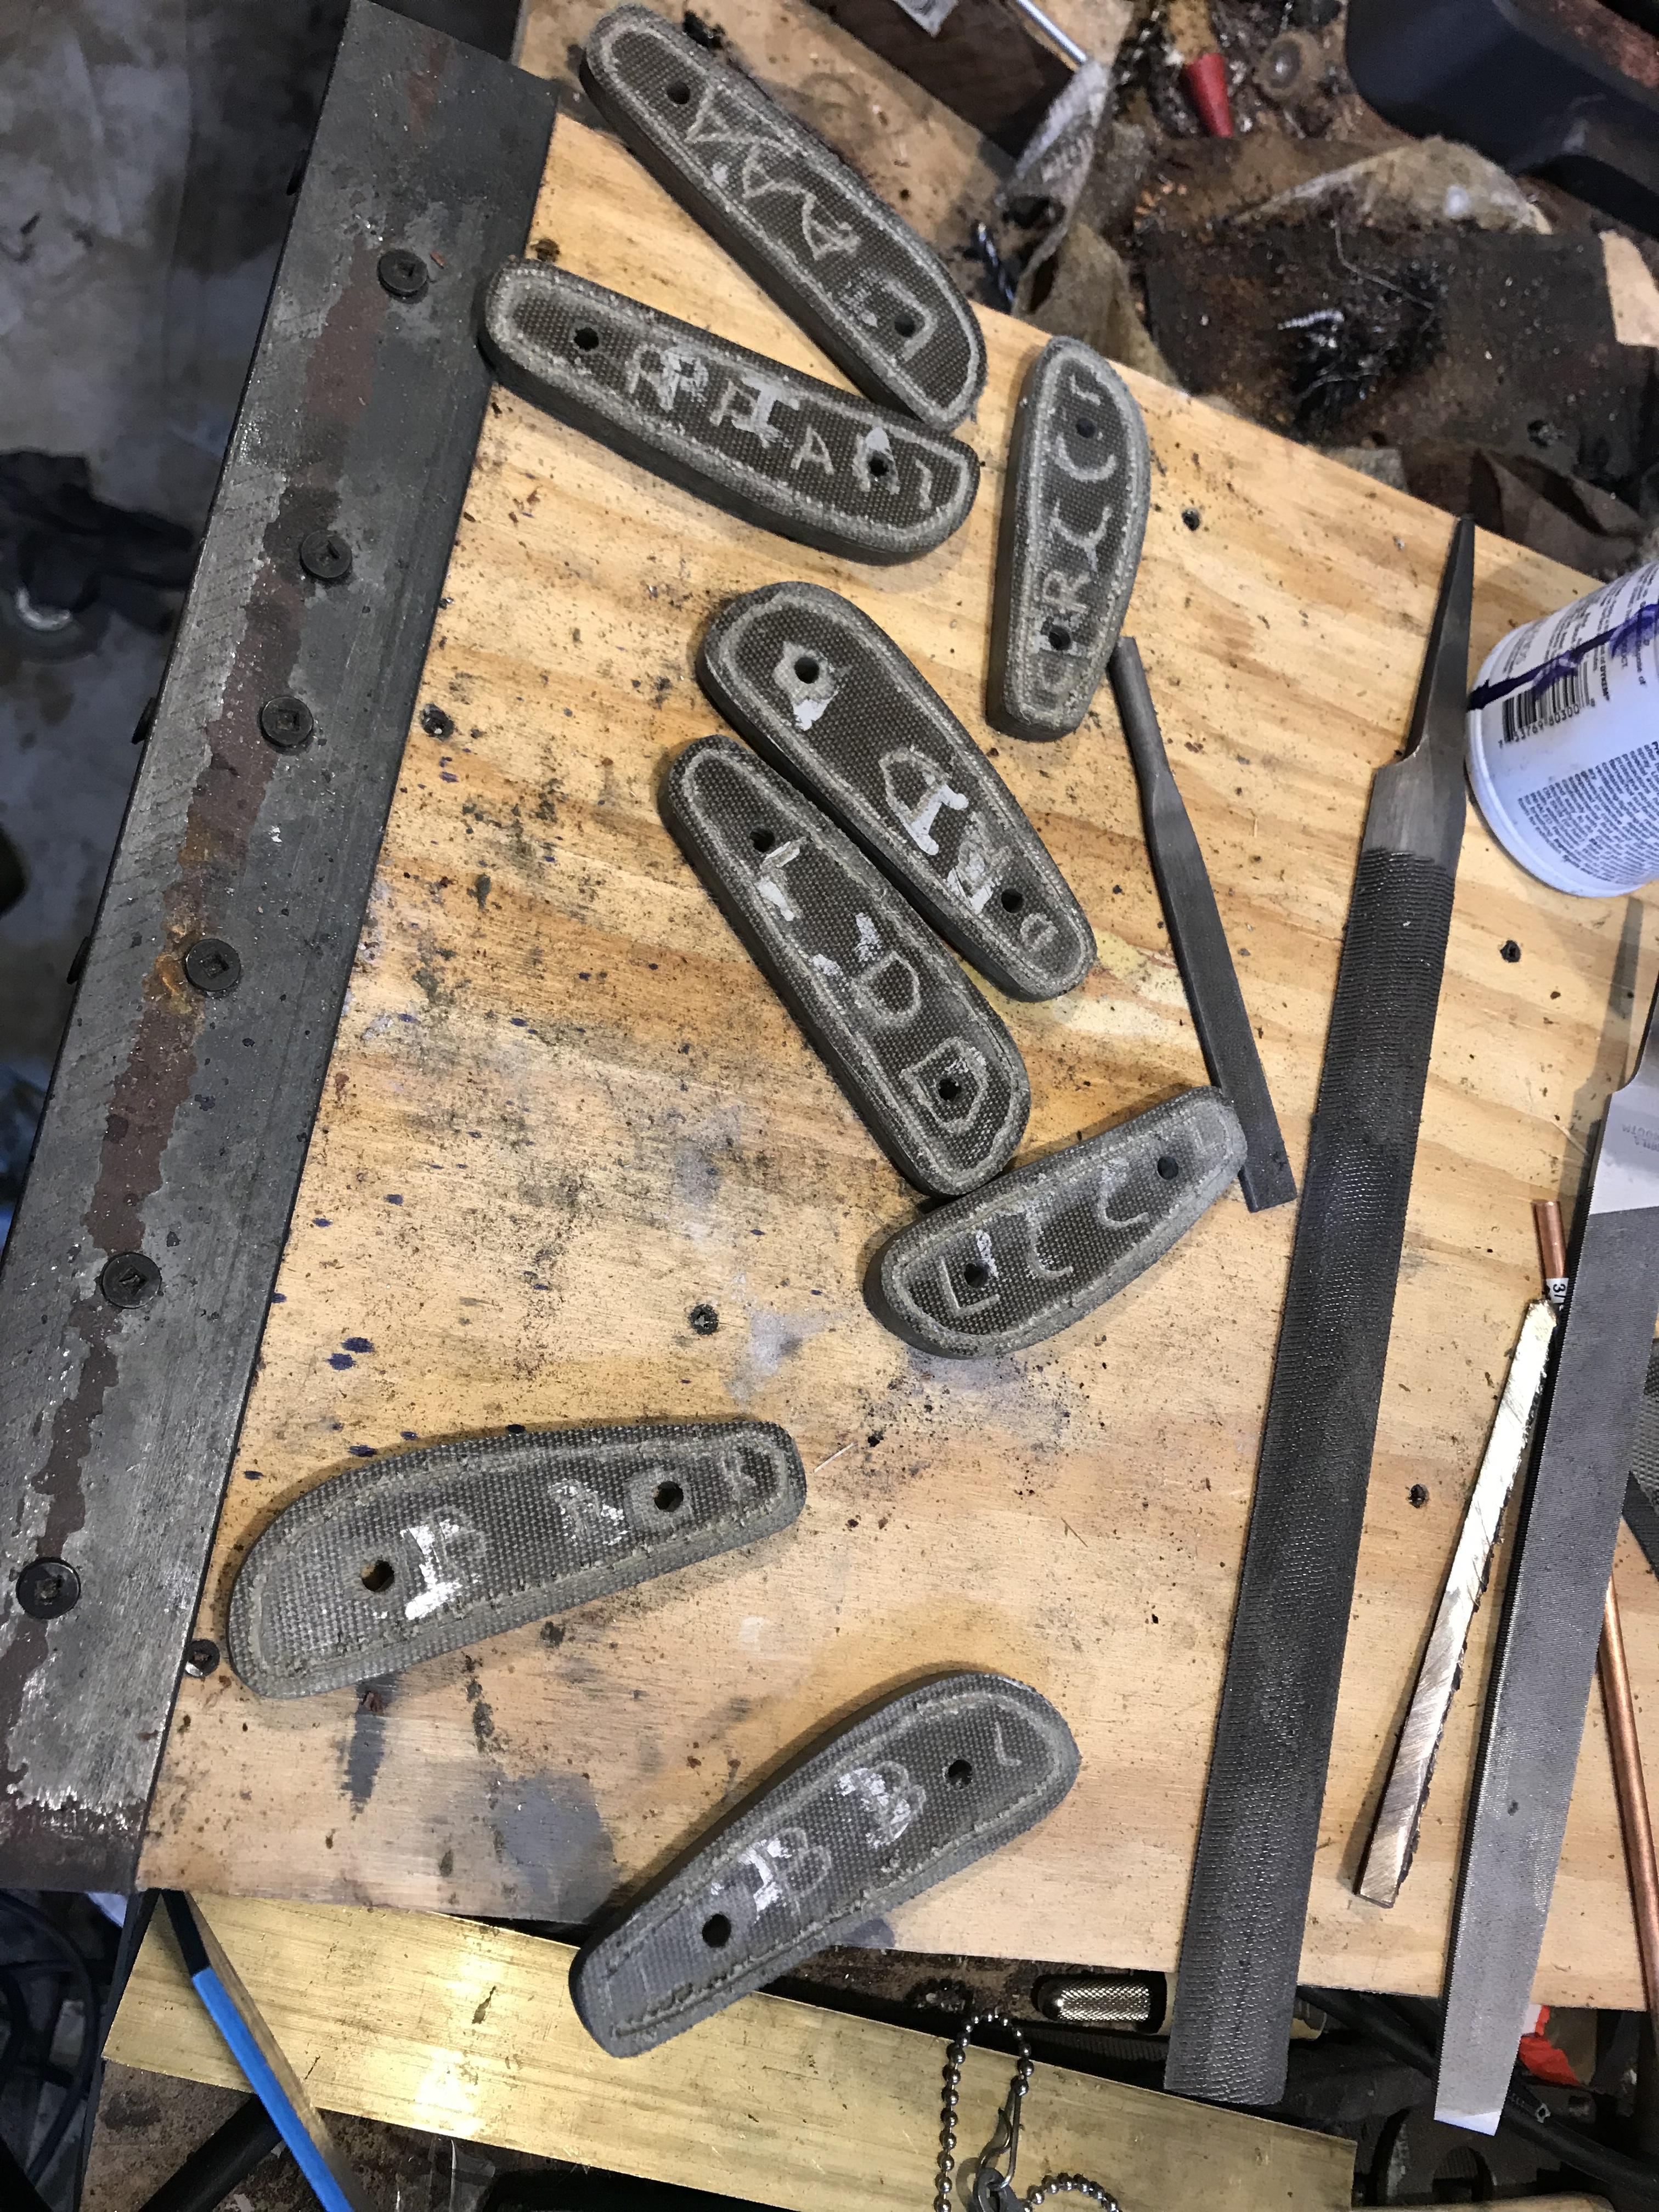
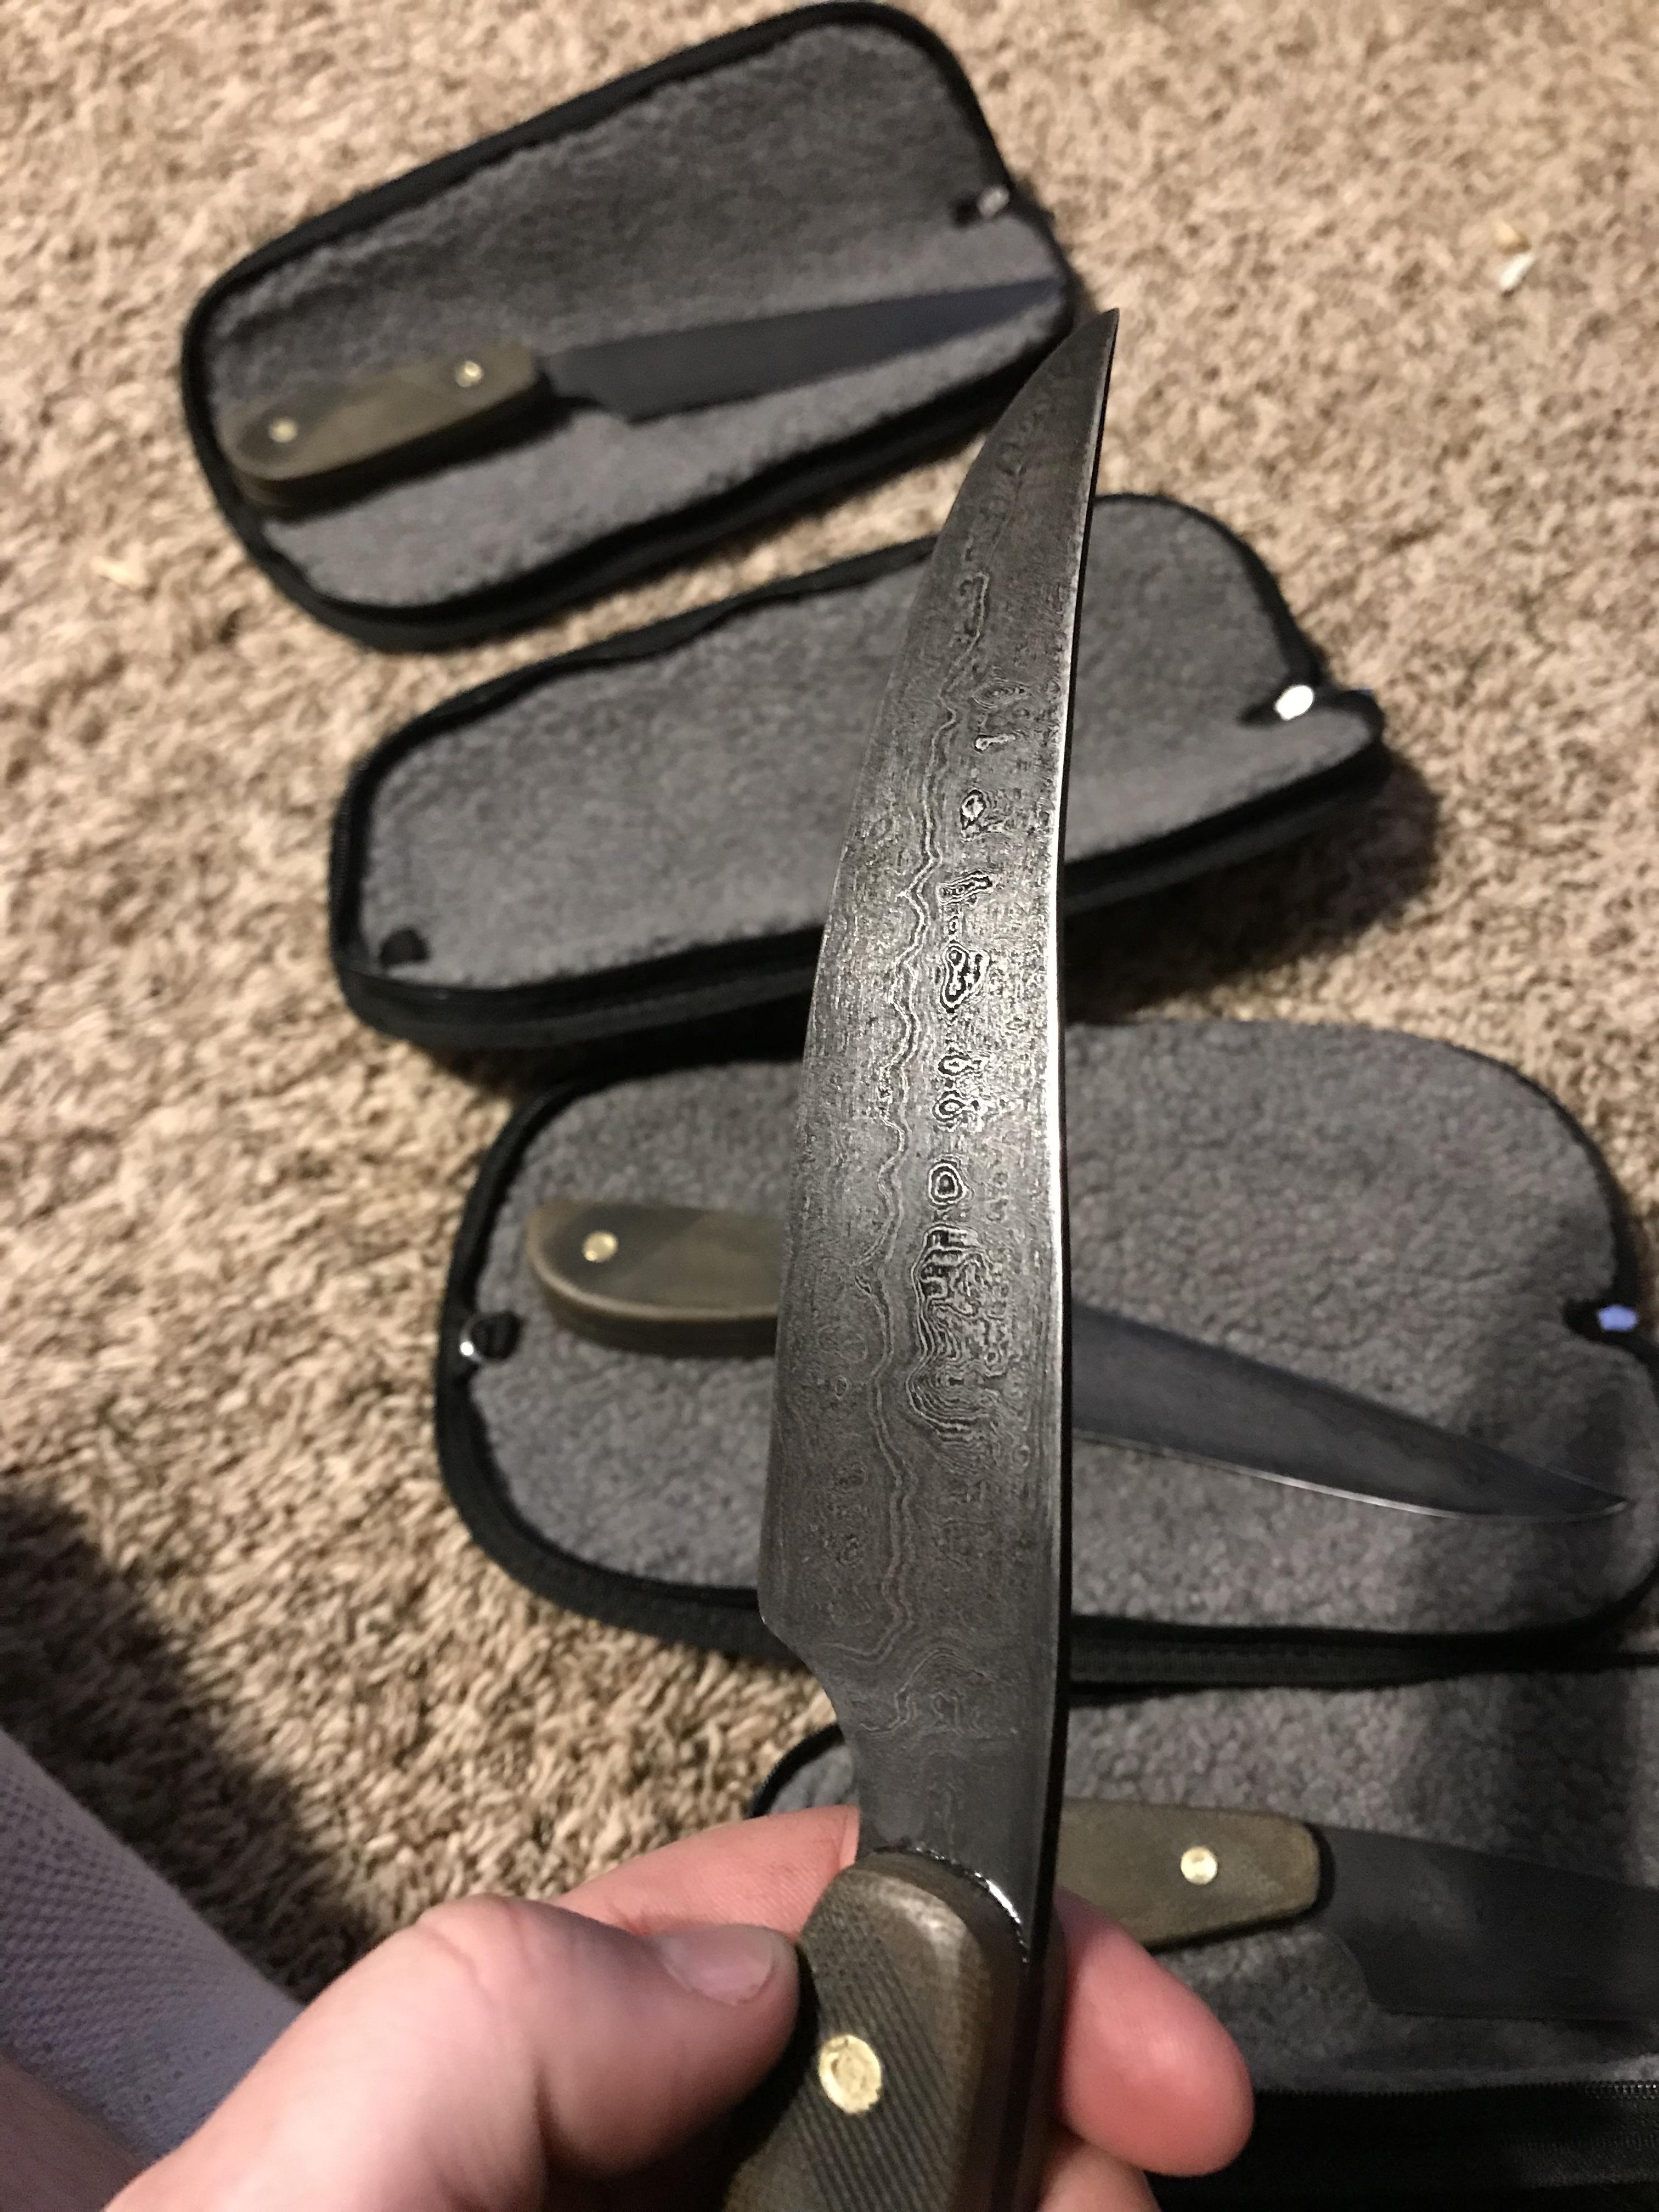
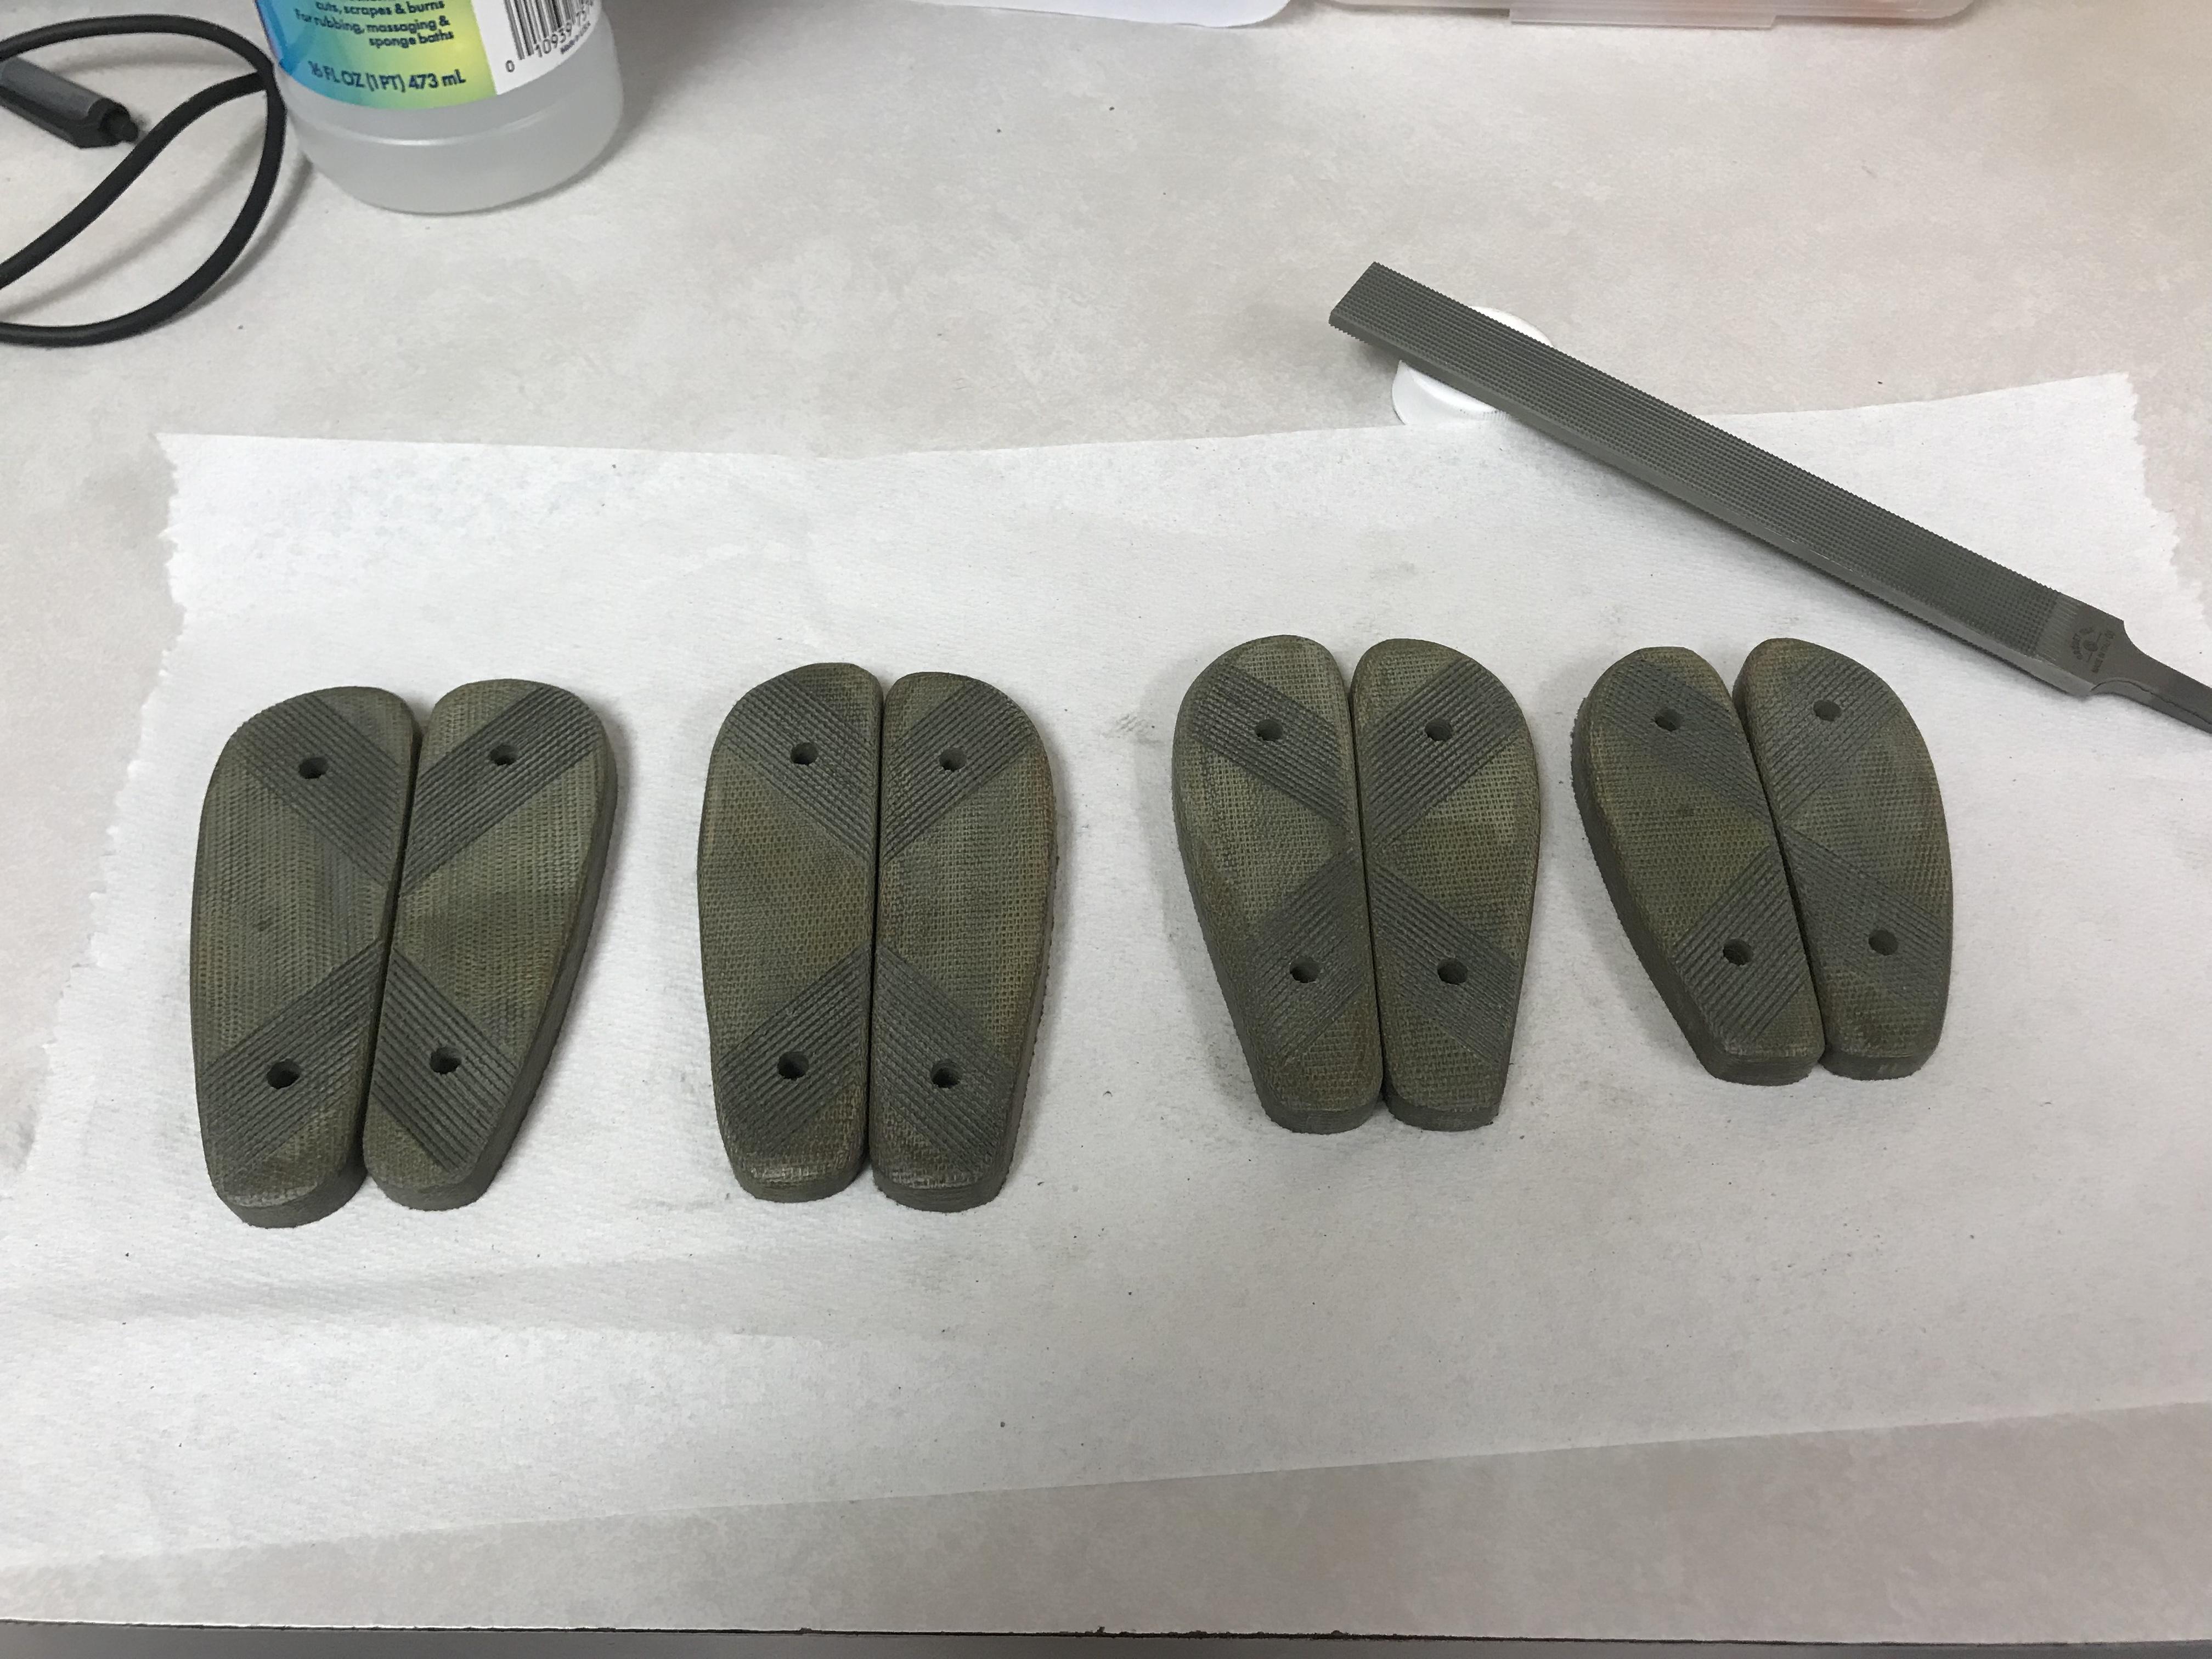
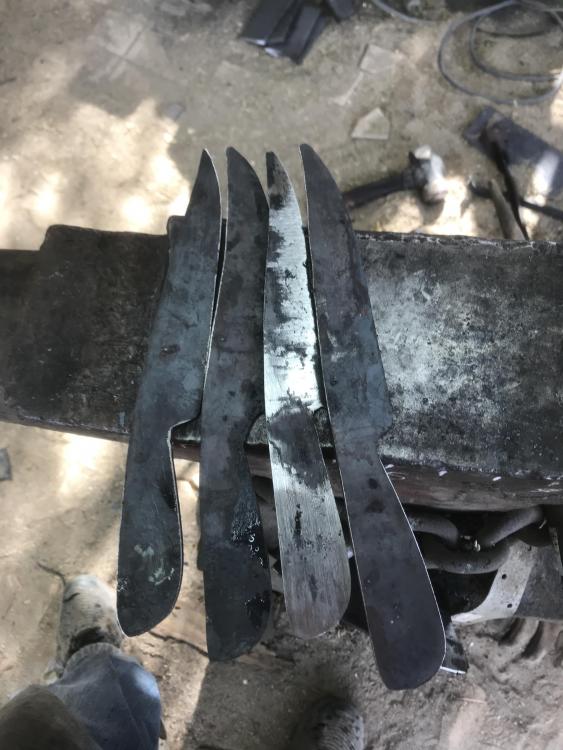
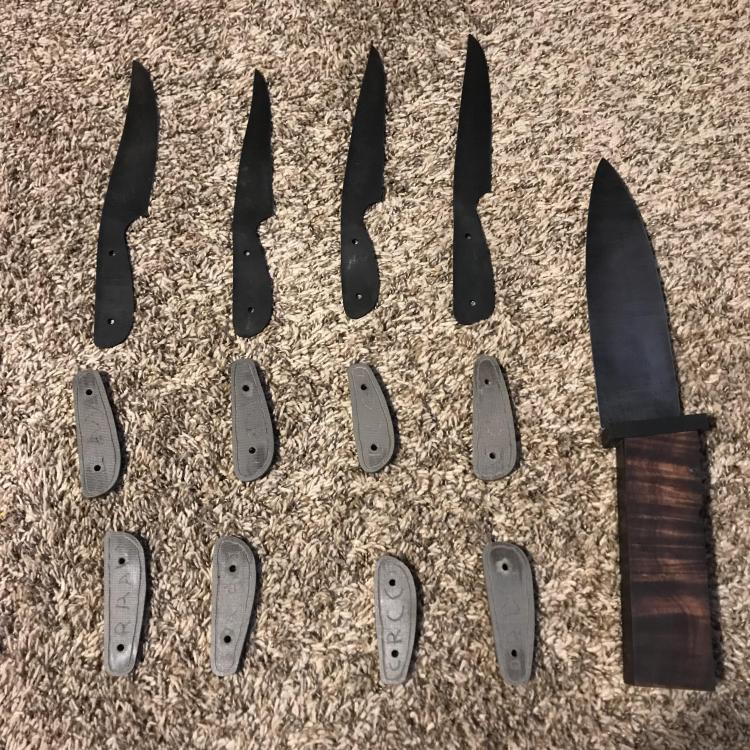
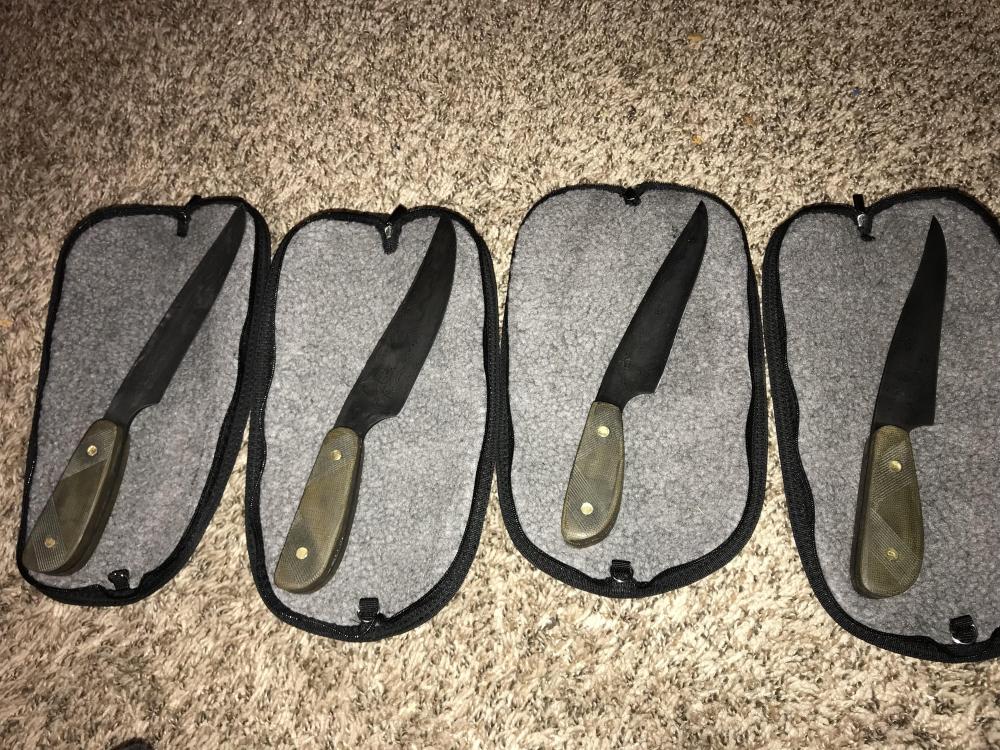
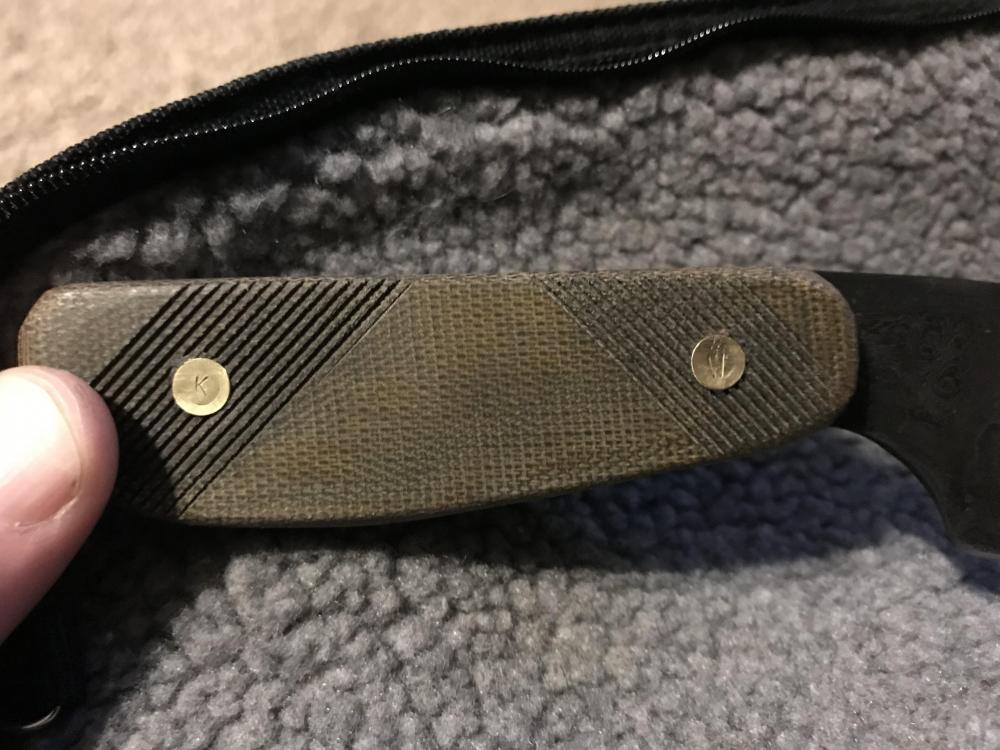
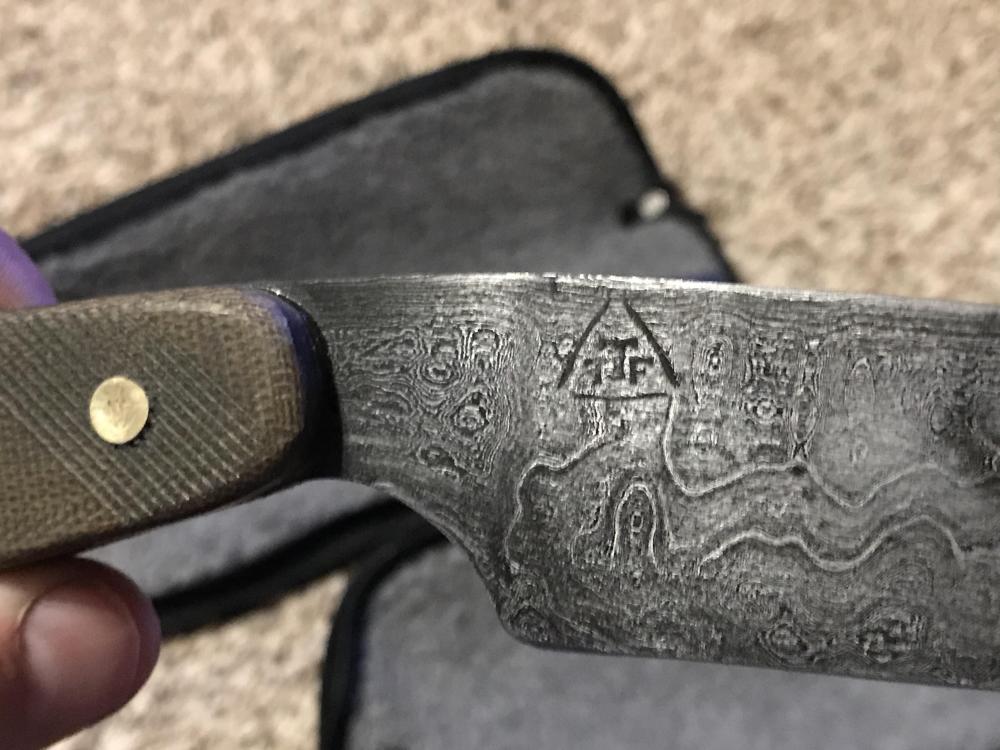
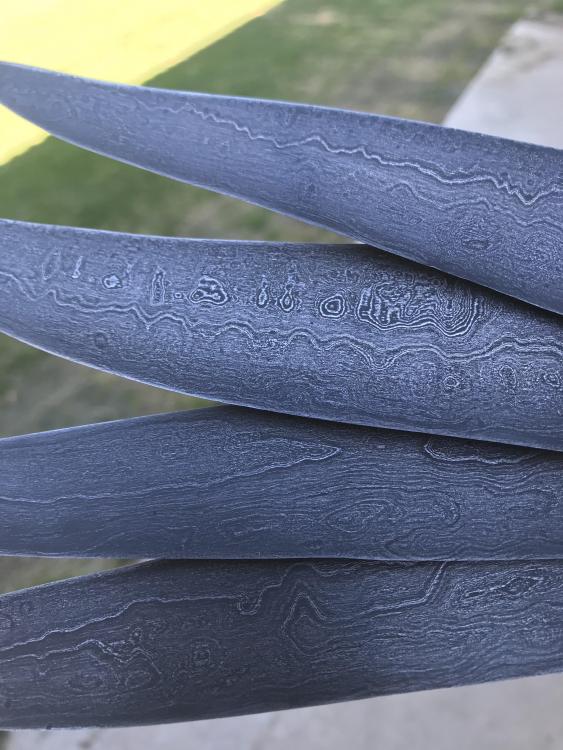
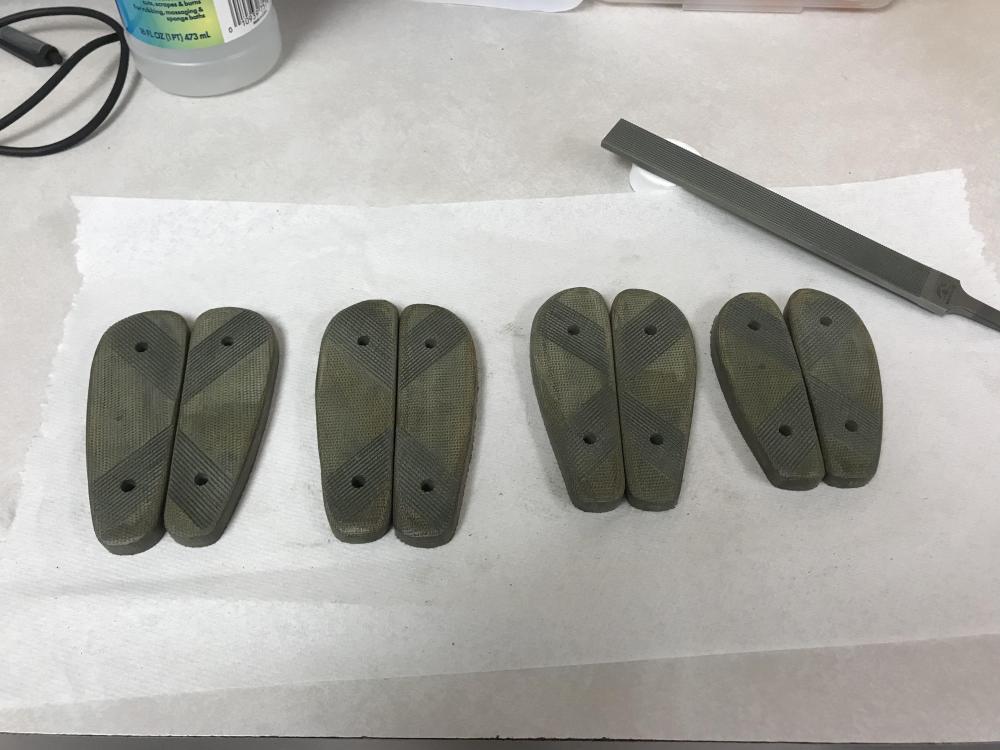
I made a 600-ish layer billet for a kitchen knife (wip in one of the pics), had a chunk left over. 4” x 2” x ~3/8”. My lovely wife suggested I make her dad a fishing knife for Christmas. Her dad, and all 3 brothers are avid fishers. I decided I’d challenge myself, and stretched that billet to 4 knives. One for each. Because I forged nearly to completion of shape, and the high layer count, the pattern is REALLY squished in there. Handles are canvas micarta, beded fully with epoxy. I cut a small channel in the inside perimeter of the scales and filled it with epoxy. Idea being kinda like an o-ring to ensure I get a good seal. Sanded up to 400 grit, added single direction checkering lines for grip. Cutlery pins, heads ground a lot thinner so they stand up less. Then each persons initials stamped on the head of the pin.


-
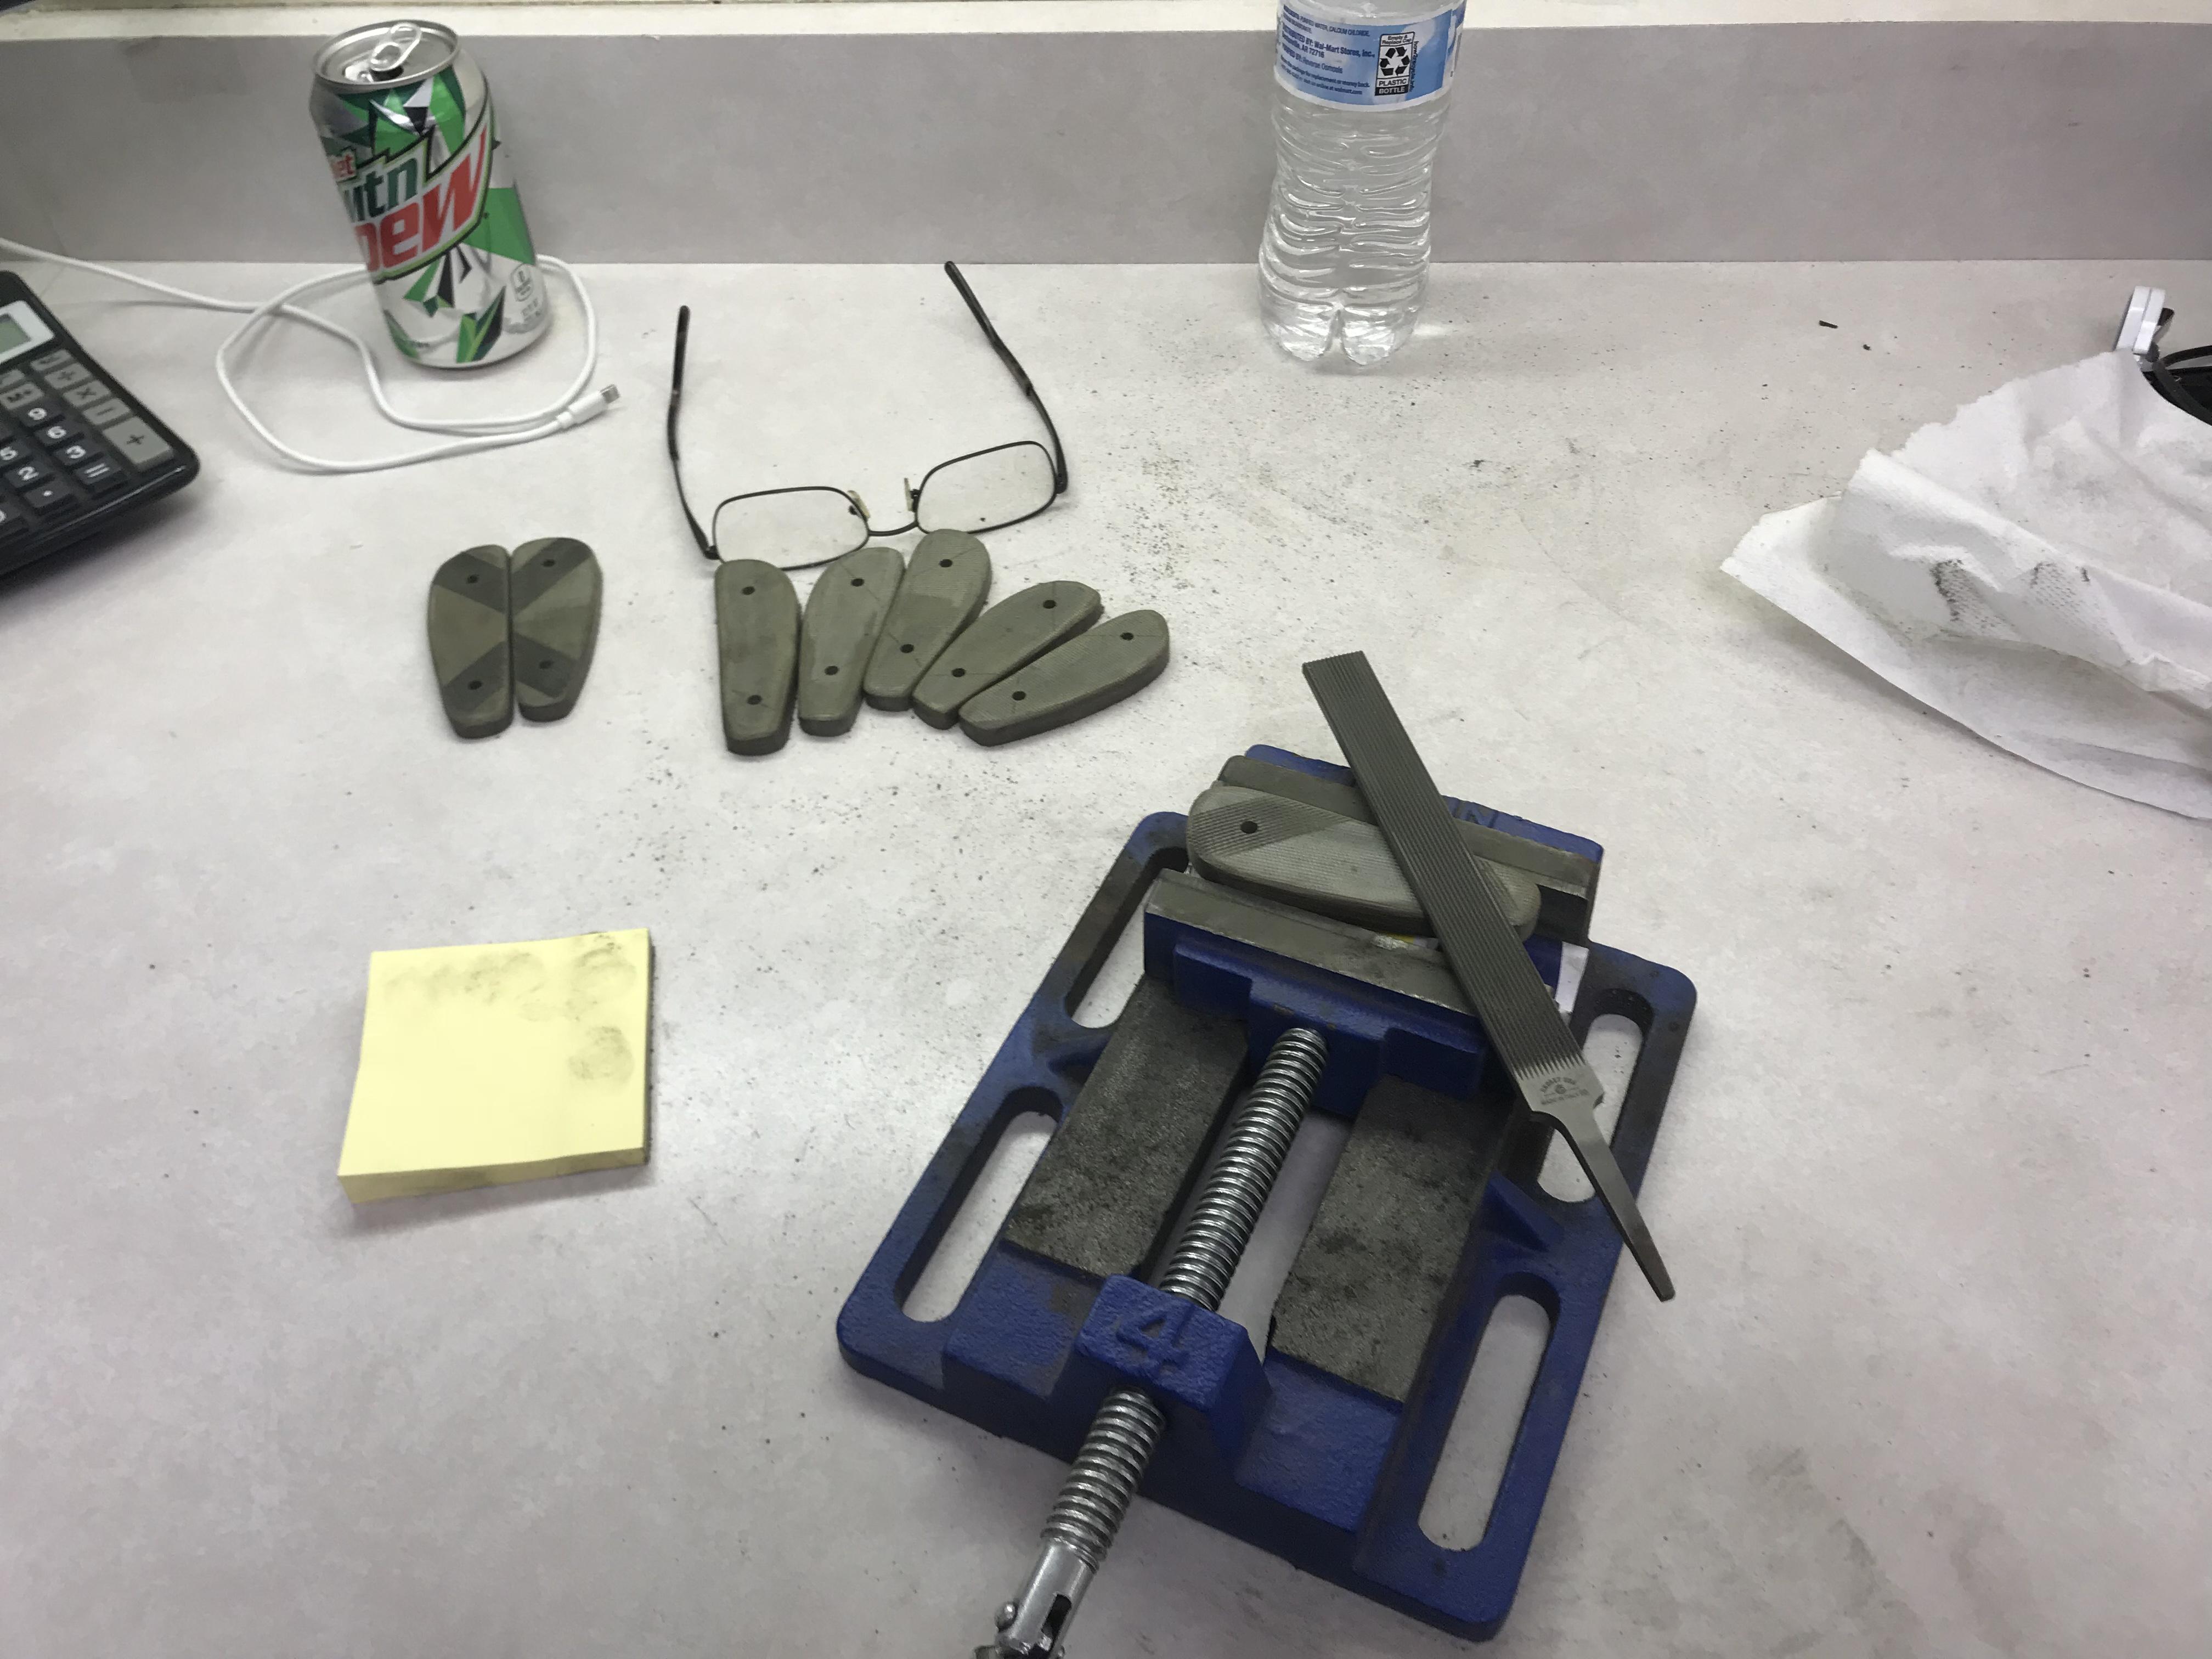
I knew it was gonna be a slow day at work today, so I brought some scales and a checkering file. Never used one before, thought Id give it a try. Handles are for a set of 4 pattern welded fishing knives going to my Wife’s dad and 3 brothers. Micarta, sanded up to ~ 300 grit (A45 micron). Since they are for wet-work, you want some grip. I tried going in 2 directions on a test piece, I’m not talented (read patient) enough... yet... so single direction it is! Lol I will assemble then sharpen tonight I hope.


-
I do about 90% of hand work on my 252# Hay Budden. I also have a 51# small Hay Budden, that is PERFECT (for me) for hand forging an integral bolster at the front of a knife, while also forging the butt. its right at 3" wide, forge both across the face, leaves little grind/clean up work. Plus the smaller horn has come in handy too. I also have a 125?-ish# Columbian that has a hardy hole that fits a few of the tools I have... too lazy to make the adapter for the larger anvil I guess...
-
So any recommendations on on a good quality brand to look for. I tried researching reviews and whatnot, seems like just a bunch of lay persons saying yeah it worked once, or it did great in aluminum or plastic... I initially bought a set of harbor freight stuff YEARS ago... made out of chineseium... and this was the first time I used them, broke 2 of the 1/4X20 taps making this: went to Ace and got a single Irwin brand tap and it barely made it through. Pipe tap turned into a spiral tap by the time I was done... all BEFORE I had hardened the steel, I suppose I should have fully annealed it, but was just lazy I guess. Anyways, this project was a blast, and I would like to do more like it in the future, but would need a real quality set.

-
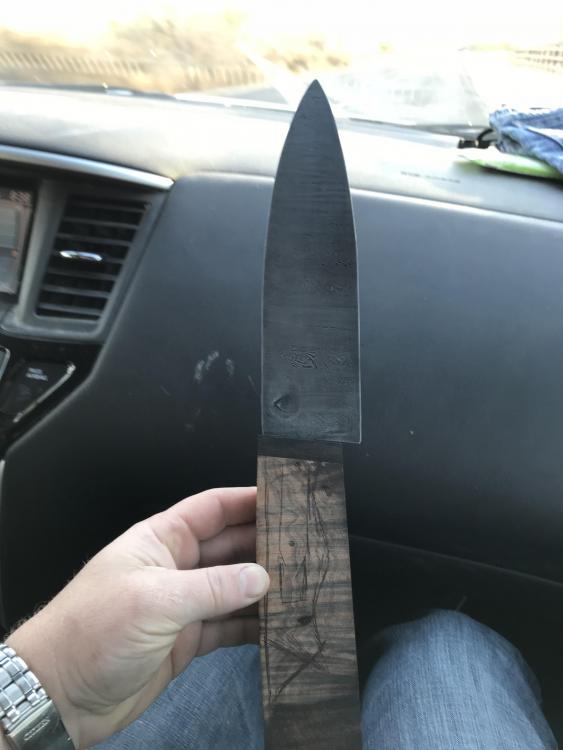
Well, it worked... kind of. I think there was too much surface area to try and get a good even impression with 4" of steel at a time. I'm going to try cutting down to 4 bottom bars and 3 top meaning just under 2" of steel worked at a time. The steel just bounced too much, and with the fairly high cycle rate on the Anyang, it was not very controllable to get a perfect even pattern. Of course... could have been the old IT joke: PEBKAC... problem exists between keyboard and chair... The goal with this pattern project was to have the ladder pattern match the curly wood for a handle. My uncle visited Hawaii a few months back and brought back a block of curly Koa wood figuring I could use it for a knife. Beautiful 3D pattern on it, I decided to make HIM a kitchen knife and give the wood back with a blade stuck into it. With the goal of having the steel match the wood, and the dies being a little less than controllable, I decided to still use it, with the goal of ending up with a slightly irregular, more organic, pattern in the steel. I still have a fair bit of grind work to do, but I had to check the pattern so I did a quick etch. Blade: https://www.youtube.com/watch?v=di8aytGj7YI Wood: https://www.youtube.com/watch?v=CbiXcsRHRHY Once I remove some of the bars, and have another billet to test, I will update this thread with results.
-
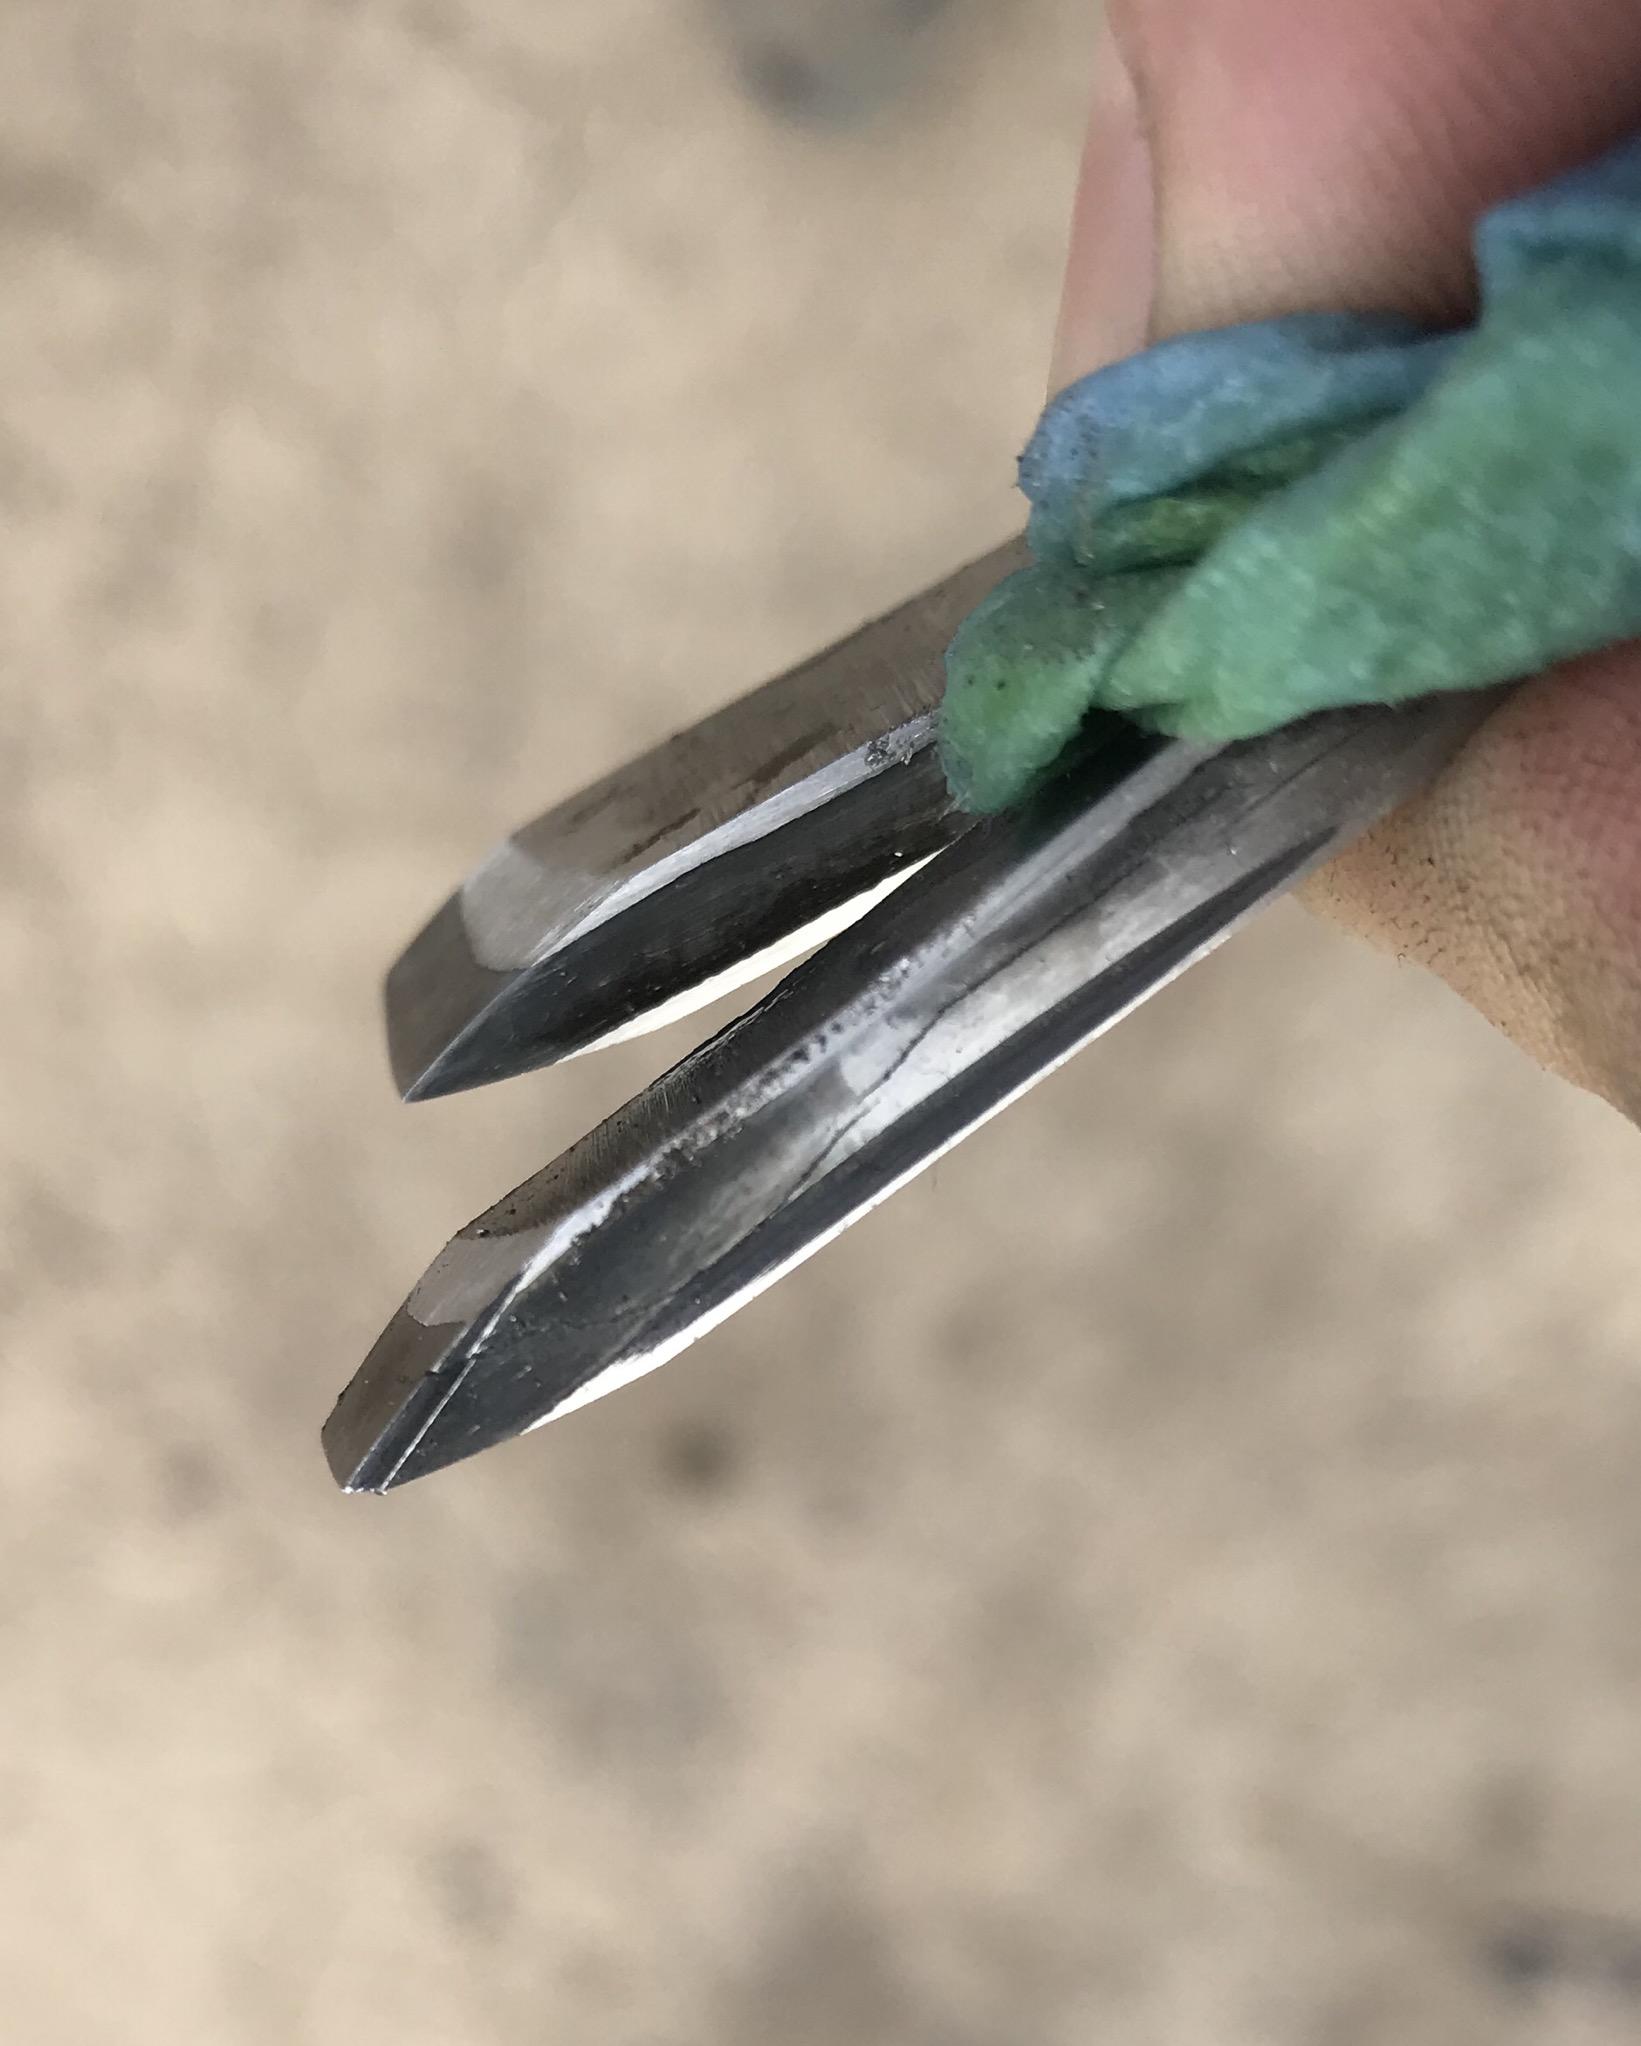
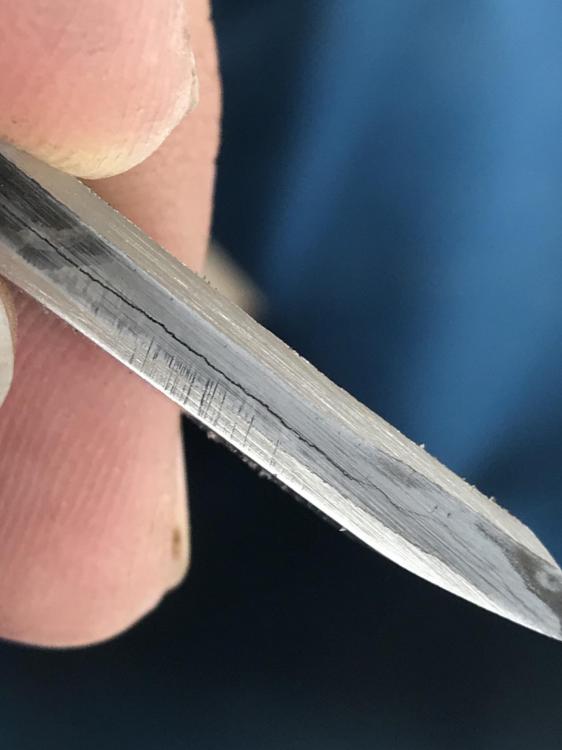
Here is a knife i had with a crack a while back that I broke is a few places just to check it out. Steel is 52100. This picture shows 2 grain sizes. The top, blade section near the tip is pretty good, smaller texture. The bottom is from near the end of the tang. Everytime I heated it for normalizing, and for the quench, I heated up the tang first. The idea being to let heat travel to blade so I didnt overheat the blade. It ended up getting the tang way too hot, and the grain totally shows it. Looks like compressed gravel.
-
no 'sprechen sie deutsch' here unfortunately.
-
The Anyang is not really a single hit hammer, if you time a heavier pedal stomp just right it can have a single hard hit, but if you hit it too soon I have seen the ram top out and actually kiss the key on the dies Not a good thing I imagine. However, practicing with the leaf spring should tell me what is gonna be the best way to go about it... I hope.. I will try to look for that book, right now on amazon its running about $100, I'm sure I can find used for less somewhere.
-
Yeah, I welded the rods across the die, so the hammer will only hit about 4" of steel at the same time. I'm probably going to do this near, but not quite, 'welding heat'. say 1700-2000. I ran some quick tests last night on some mild steel 1/2" square stock that was just in the red, seemed to do just fine. Next I'm going to practice on some leaf springs that are about the thickness and width of my pattern welded billet to get a feel for higher carbon stuff under the dies. I've got a ~600 layer kitchen knife in the works, and desperately do not want to screw that up! Slow and repeated blows will be the key here. Sometimes steel tends to bounce off the Anyang 88 on the flat dies, cant have it do that and get out of alignment..., we will see if careful baby taps will get me there. *fingers crossed*
-
Oh yeah, your books are on my wish list this year for sure! And if they dont show up as gifts... I will gift to myself. Lol. I was just curious as to the layer count on that particular blade because of the nice chatoyance the picture seems to show. Namely the 4th picture in the original post. Also the method of stock removal then forge, or vice versa because the pattern is very even across the lengts of the blade. The one time ive personally made ladder damascus was cut, then forge. And the ‘steps’ werent as close as id like, so next time I’m forging groves, then grinding flat. I love your shared work. Always nice to have examples to aspire to!