Quench.
-
Posts
52 -
Joined
-
Last visited
Content Type
Profiles
Forums
Articles
Gallery
Downloads
Events
Everything posted by Quench.
-
Show me your anvil stands
Quench. replied to pkrankow's topic in Stands for Anvils, Swage Blocks, etc
Well, I cannot reply...disappearing post, repeatedly. Can't reply with more than about a 1 liner. Very, very frustrating. No adhesive. Wood needs to dry and shrink and still be able to be tightened. Had a lot more detail, but the forum won't save the post. -
Show me your anvil stands
Quench. replied to pkrankow's topic in Stands for Anvils, Swage Blocks, etc
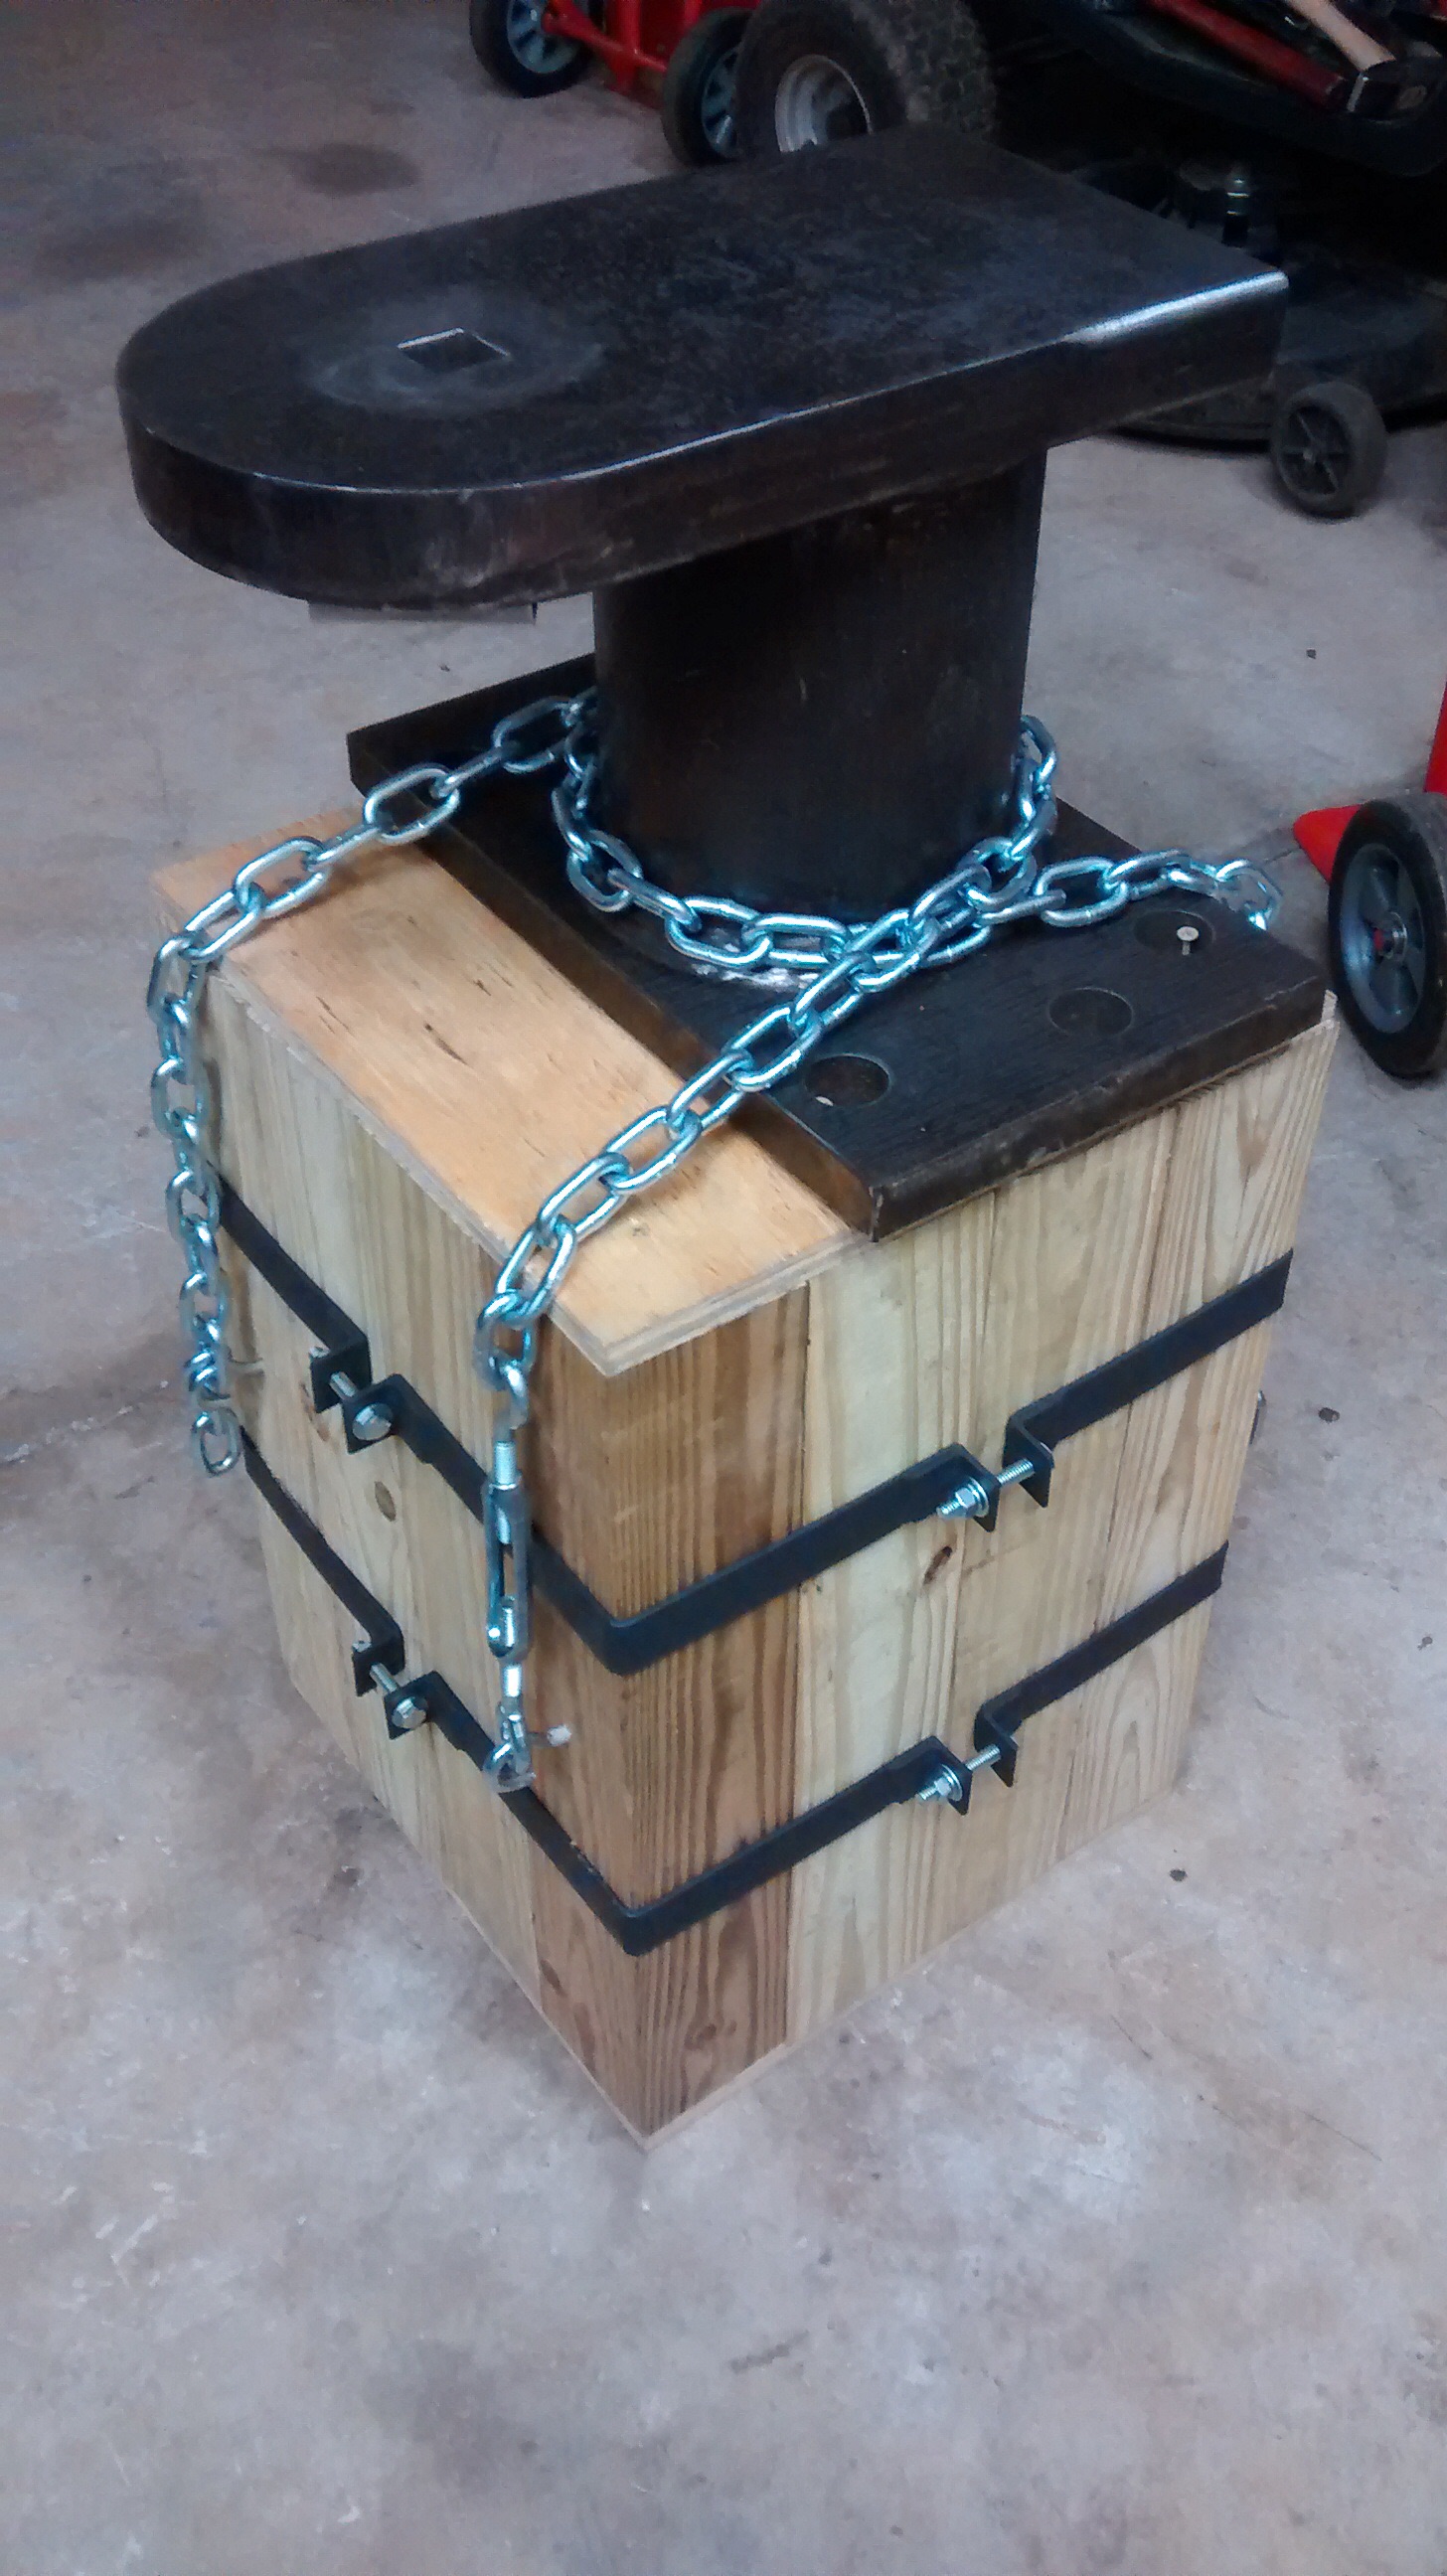
JHCC, I expect there will be issues with twisting, but I figure I can screw some lag bolts in the holes of the base. I put a few screws in there just to line up the chain. -
Show me your anvil stands
Quench. replied to pkrankow's topic in Stands for Anvils, Swage Blocks, etc
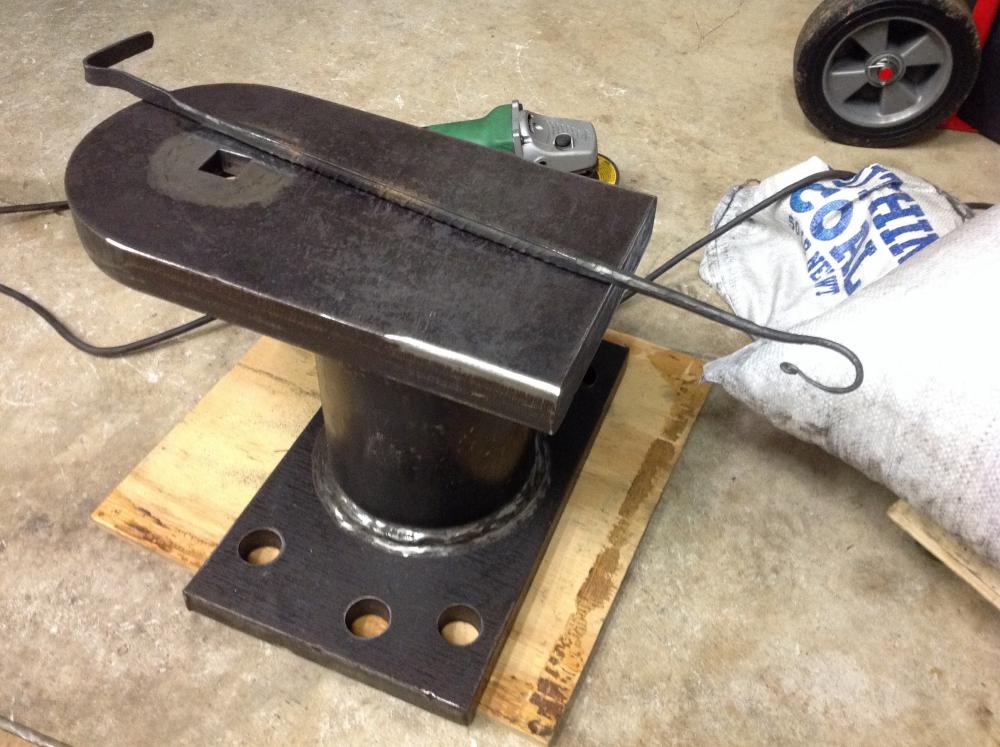
Nothing special, but better than the stack of bricks... 1 1/4" x 1/8" bar, with pieces of 1" angle welded on for reinforcing the bolt. 4x4, 5/16" chain, 3/8" turnbuckles. The anvil is 120lbs. Moves well with a hand cart.
-
Good start to a power hammer...
-
Ok, thanks, kind of what I thought. Can't tell one rusty chunk of metal from another without cutting or breaking it.
-
Daghrim, mine came from a metal recycle yard. 120 lbs; I added the hardy hole. Keep your eyes open. A real anvil is nice, but sure not necessary when you're just checking it out.
-
Is there any way to identify wrought from others by looking at a rusted chunk of metal? I mean, without cutting or bending it? -Q
-
VaughnT, I run 7014 DC+ and set the amps low as I can for the metal and still push the slag back to see the puddle. If the rod said 120-170, I'd start with 130 because I'd stick the rod on 120 and make a mess on 170. My understanding of arc force is that is only matters if your arc gets too short and the voltage starts to drop too much like it's going to short out and stick. Then the arc force kicks in to stabilize the arc. WeldingWeb is also really good for questions like these. Very helpful to me. Disclaimer: I'm not a welder. I have a welder.
-
Fantastic...
-
Nick do you have any experience sand casting? If so, anything hotter than aluminum? Forgive me if this is below your level; I'm assuming no casting experience. If no casting experience (or even if only lead bullets), I suggest you begin with aluminum. Brass and bronze are a fairly big step up from aluminum because the heat is much greater, and the equipment is more critical (for safety and quality of castings). Since you already have the material, it probably doesn't matter, but silicon bronze is going to be more forgiving for a beginner in casting. Unknown brasses such as what you have, when heated uncontrolled (which is what you would likely have at home unless you are a professional), can release vaporized lead and zinc (for example). They can also be unforgiving in casting. Not all alloys are suitable for casting. You have a LOT of brass. It is going to take a long time to cut it all down to a size which you can melt down safely. You can't realistically build a cupola furnace (like for iron), and expect to get usable brass castings from that. You need fairly expensive silicon carbide crucibles, custom-fitted crucible tongs (you're a blacksmith, no problem), and a temperature-controlled furnace that can reach 1800F in a reasonable time (compare that to 1400F for pouring Al.) When you pull out the crucible filled with molten brass, it is blazing hot, glowing like you pulled it from a forge, only now if you drop that thing, you are in a world of hurt. If you've made your own cope and drag from wood, they will scorch when you get too close with the crucible, and they can even scorch from the heat passing from the casting, through the sand. Larger crucibles are heavy; not a one-man job. Physically, hammer heads would be relatively simple to cast, other than dealing with the issues above, because the pattern is uniform and has a nice parting line. But the quality of the casting is important, too, and the alloy and process is going to influence that. I have a little experience in aluminum and bronze sand casting. Not much. Built my own electric furnaces. I don't recommend an electric furnace for anything hotter than aluminum--it is just too stressful on the element. (My bronze furnace finally did a little Chernobyl number on me, and it used a Kanthal A1 element.) Good luck! -Q
-
Thanks FC. I might give that a try after finishing the stand and get the anvil locked down so I'm not wasting energy in bumping it around. I got very lucky, finding that chunk of metal. Cost me $55. At the time, I didn't have a forge and didn't want to spend that much for a substitute, but glad I did.
-
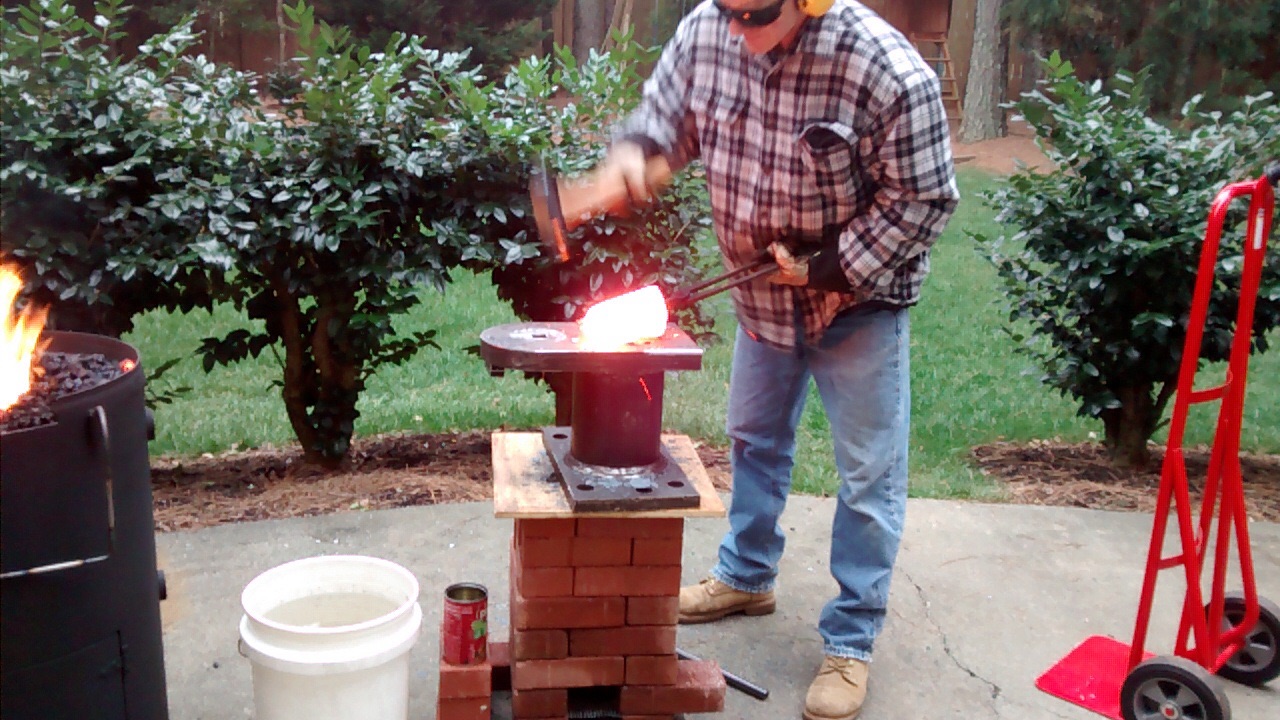
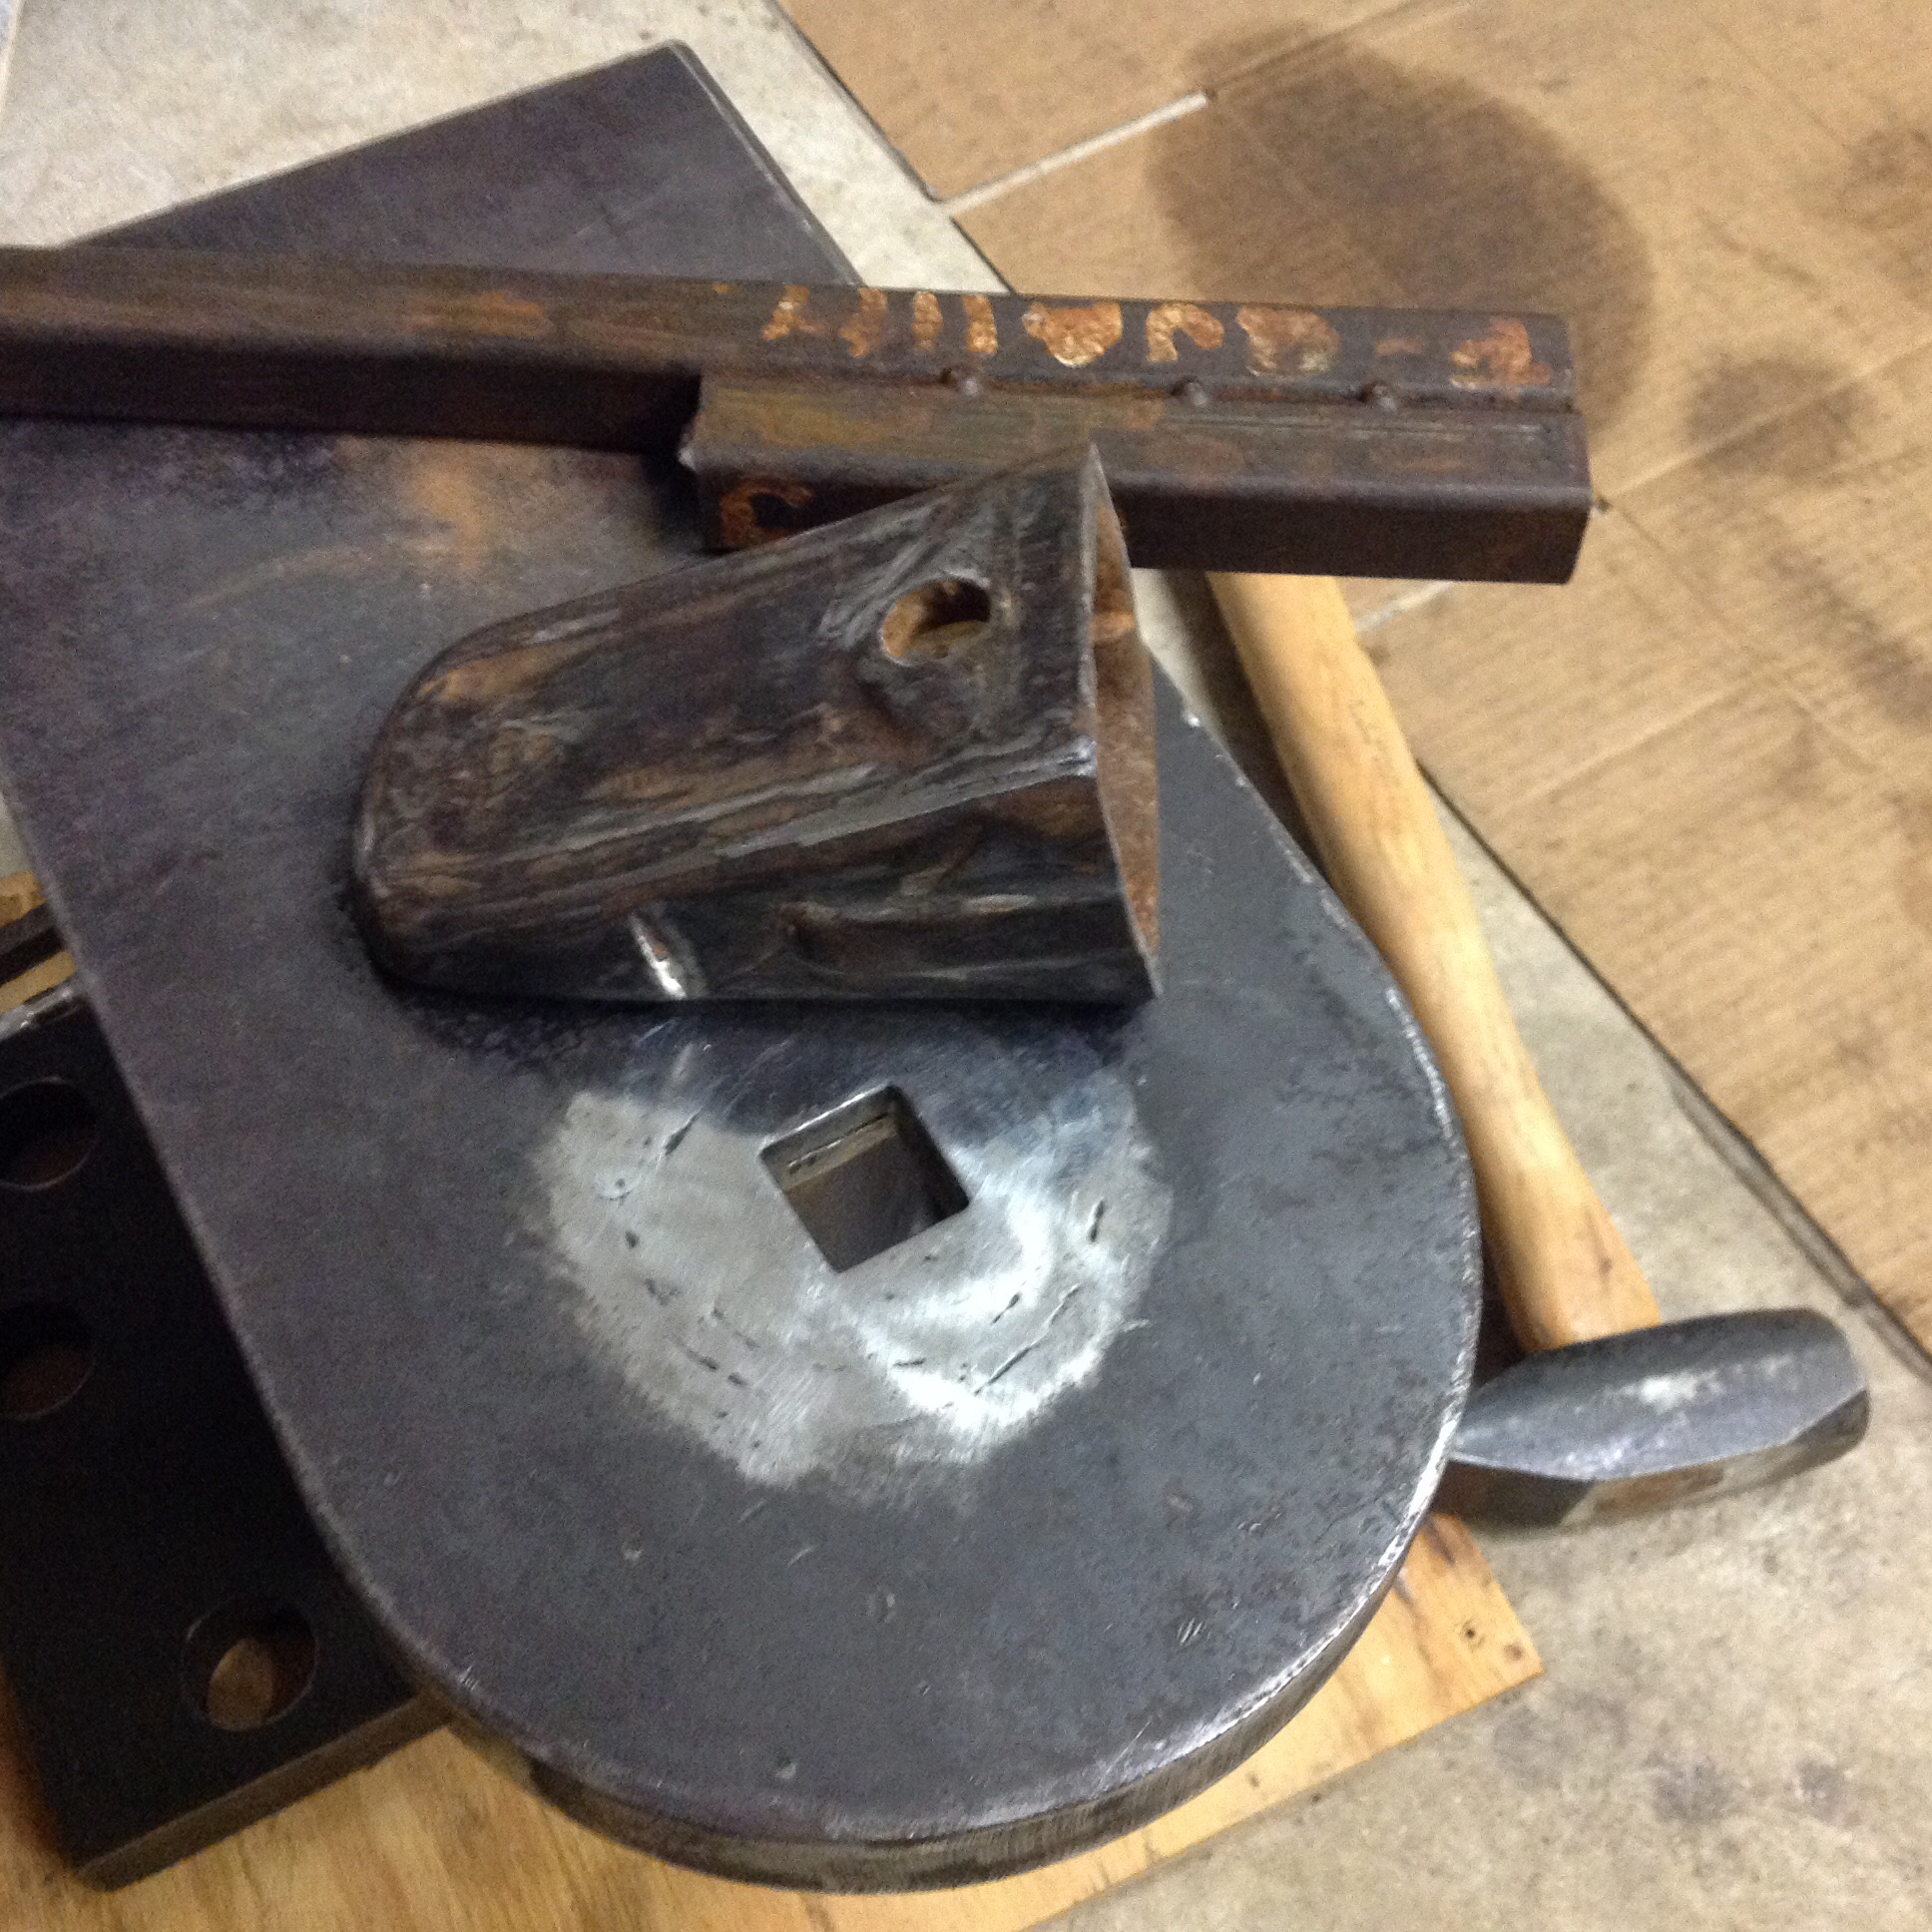
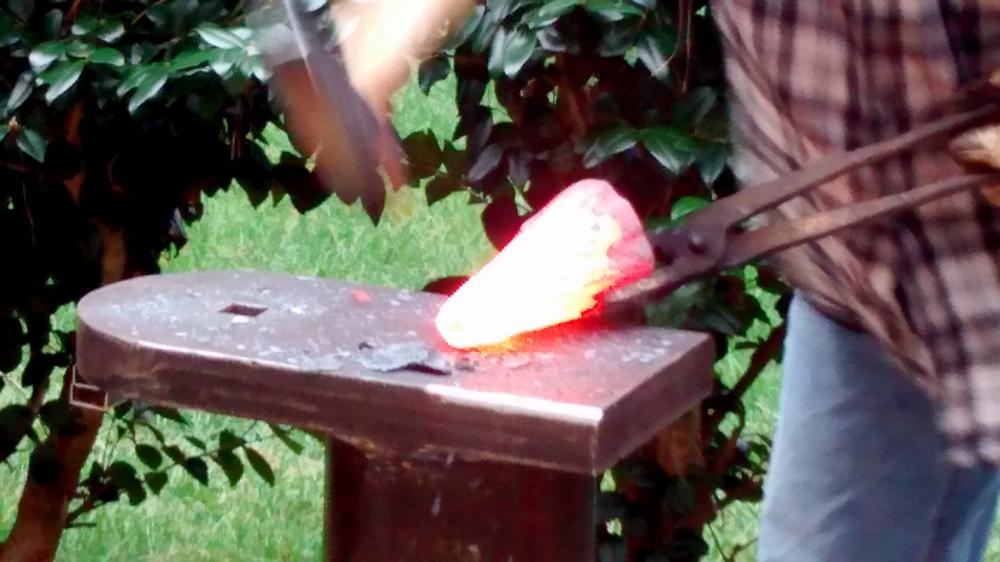
^^^ THAT'S funny. I looked up the tooth. Couldn't make out the markings well, except an H in a triangle and a couple of 2's. Turns out it's a very worn-out Hensley X220 Dirt Tooth. I looked for a data sheet and couldn't find what the alloy is but pretty sure it is cast. So "some type of pretty tough cast stuff" is my evaluation Someone else could probably shape that tooth. Here's why I can't: 1. I'm not that big, like under 150lbs soaking wet. 2. My hammer isn't that big--about 2-pounder. 3. My anvil is a chunk of steel that doesn't hit back. 4. The anvil was not secured properly, although I'll admit it is 120lbs and doesn't move that much. I'm making a proper stand now. I definitely had this thing HOT. I had it at welding heat at least twice (just beginning to spark). I was able to start getting the rear, rectangular section to start to round, but that solid tip was not moving much. Waste of coal. I could spend a few hours with an angle grinder, but I can also get a useful 19lb horn on a stake, in cast ductile iron, for about $70 shipped. IMO, worth the money, for as much time as I could spend, trying to make a chunk of something "work out." At least until I find a decent anvil at a price that doesn't cost more than a welder Anyway, I have my answer, and I had some fun with it. -Q
-
Guess I'll put up a picture even though it didn't work for me. Even at forge-welding heat, the thing just laughed at me with my 2 1/2lb hammer. I gave it up after about a half hour, with it looking not much different from where I started. This is a job for a power hammer, but even then not worth the effort; shaping would take a long time. I need a proper anvil stand. The brick stove is convenient height, but the bricks are just stacked. I kept checking to make sure the whole thing wasn't going to collapse while I was beating on it. Anyway, that has to be the next project. I picked up some shade 3 safety glasses from Amazon. $16. Uvex, model S3306. Little hard to get used to the colors (orange and yellow look similar), but I figure better than burning up my retinas, and easy enough to take a peek to verify a color. They fit well. Lot of coverage. Comfortable, even under the muffs. -Q

-
Forging Carver, if you used raw linseed oil it might takes weeks to dry. Boiled linseed oil (BLO) will dry faster. BLO is a misnomer in that it is not "boiled." It contains metallic driers to speed the curing (remember lead paint? the lead was a drier). Even so, I have found that BLO can take several days to dry, especially if applied in thicker coatings. There is little reason to build up a pure oil finish. It does not dry hard, and never will (you can verify this for yourself by taking a jar lid and putting a drop of BLO on it and letting it sit for however long you want.) It does not provide good protection against moisture, or heat, or stains (if that is your intent), nor physical protection (scratch) for the wood. There is lots of information on the web about this, but if you finish wood, I highly recommend a book by Bob Flexner: Understanding Wood Finishing. It dispels the myths, gives clear explanations, and puts the science behind it all into language that most can understand. I'm a newbie to blacksmithing, but not to wood finishing. Though not an expert in the wood finished by any stretch, I've refinished a number of new and antique wood projects, and experimented with various finishes and application techniques. I've been watching this thread with interest. At one suggestion, I immediately went to the garage, and grabbed a cabinet scraper and went to work on the hammer handles, which had a varnish coating (varnishes DO dry hard, I'll get back to that.) I like the feel better. I think I will see what the handles look and feel like after use, before thinking about adding a finish again. For something that gets used (vs. looked at), I wouldn't use an oil finish. That said, oil finishes look really nice, and I have BLO in the garage for when I want that kind of finish. But not when I need any protection at all. Even shellac, which is not good for liquid water, provides more protection than oil, in that water vapor (think: humidity) will not pass through shellac, but it will go through linseed oil like it wasn't there. So the linseed oil won't help with wood swelling and shrinking with the weather (if you care about that). If you want some water and water vapor and stain protection (but still not much scratch protection), and you want it to dry hard and fast, you can use a "wiping varnish." That is nothing more than straight varnish, thinned with mineral spirits. I suggest wiping varnish because it can be applied very thin. That will help keep the natural look to the wood, but still give it moisture protection. A few coats would probably be fine, but even one is better than oil. The sheen won't be as flat as what you initially get from oil. A cross between the oil and the varnish is an oil-varnish blend. It takes longer to dry. It's not as hard as varnish, not as soft as oil. And there are resins...there are other types of finishes and no way I can go through them. The manufacturers do their best to confuse everyone. Examples, Formby's Tung Oil Finish (which I happen to like) contains very little Tung oil and no oil at all in its raw state; it's effectively a wiping varnish (thinned varnish--78% mineral spirits). Minwax's Wipe on Poly is a thinned polyurethane, which is also similar, but at least it isn't disguised. I've said enough. Just don't want too many people to have sticky hammer handles, or even think they can oil the handles and use them the next day. -Q
-
CAE, if you find your holes plugging, you can easily open them up a lot more. Below is a link to my drum forge example. Also gives another example of the plates that MrDarkNebulah showed, to reduce the size of the pot. If they are removable, you have your choice to use them or not... Brake drum forge with trough plates and larger grate holes. Still a work in progress. I've cut back the rim to make it easier to rake coal and now my plates don't fit, but that will be fixed this weekend. My air control is on the inlet of the blower. I read somewhere that controlling on the inlet sometimes works better than controlling on the outlet. Maybe not as hard on the blower? But definitely harder to fabricate, and I'm not sure the motor likes it any better. I might try the tube slot as well, but I'm also considering a diverter so I don't have to switch off the fan to completely idle the air (air still gets in through the inlet cover). - Q
-
Even if you guys say I can't, I'm going to try it. Only cost me $2. I just need some dry weather. Worst case, it ends up being cast and shatters when I heat it up and hit it. Next worst is I heat it up but can't move the metal enough before my arm wears out. I was just wondering if anyone here has done it. I'll bet someone has. I saw a short youtube video of these things being forged. Kind of cool...only 24 second vid. Forging bucket tooth video
-
I found a few posts where folks use excavator bucket teeth as hardy tools or makeshift horns. Can these be forged? I found a small one today, that I was thinking might be small enough to be able to get orange in my forge. I would temporarily weld it to a piece of pipe for handling while forging. Would try to get it more into a cone shape, then weld on a hardy post. I read that some teeth are cast steel and some are forged. I'm hoping this one is forged. -Q

-
Will this side sucker hood work for a barrel forge?
Quench. replied to Quench.'s topic in Chimneys, Hoods, and Stacks
Ok, I have twice replied, and twice the post went into the ether. Thank you, I get the idea now. -Q -
Will this side sucker hood work for a barrel forge?
Quench. replied to Quench.'s topic in Chimneys, Hoods, and Stacks
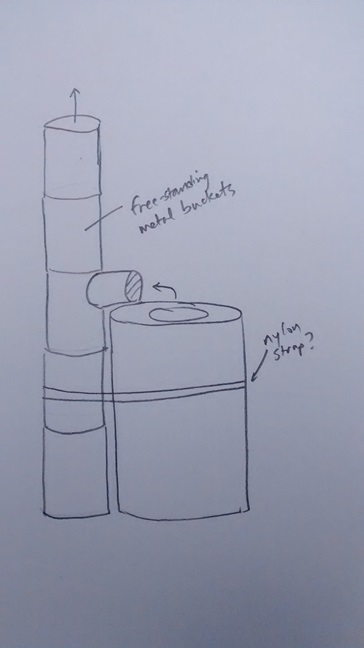
Glenn posted his "Forge Hoods Explained" post at the same time I posted this one. His explanation would mean this wouldn't work, but then how can a side sucking work? Or that is not a hood? My drawing is not very good. The horizontal section would be a section of a bucket, opened in some kind of contour. Not covering the coal area, but next to it. But not a thin pipe like it looks. I need to find the buckets, anyway. It's easier to find 55 gal metal drums than 5 gal metal buckets... -
How to add a horn to this ASO
Quench. replied to Quench.'s topic in Repairing and Modification to Anvils
I found something which might work as a "horn tool" (maybe go in the hardy hole) and sent an email off for more information from the maker. The reply came back that the tool is cast in ductile iron, has a Rockwell hardness of 52 and can work harden to 55. And it is not otherwise hardened. And it will need some dressing, which I figure should be no biggie. I did some reading and searching, since I don't have any good feel for what 52 is. I know that my mild steel chunk will dent easily with a hammer. But it doesn't seem to dent when I hammer on hot metal (even dull red). And I think the hardness of my mild steel chunk is lower than 52. I also read some about "ductile iron," and I see that some decent anvils are even made of this stuff. And their hardness is roughly in this range. So the questions: -- I will have to do some filing or grinding-maybe a lot of it--to make this fit into my hardy hole. Is 52 very hard to file or grind or should not be a concern? -- If this is good enough material to use for some anvils, can I assume it would at least be a good material to use as a horn? -- What is required to make something work harden? Does it need to deform (dent)? Would the light hammering one might do on an anvil horn cause it to work harden or would it realistically take a lifetime for that to happen? Should I even care about this? I would post a link to the object, but I think it might not be allowed since it is a company. thanks! -Q -
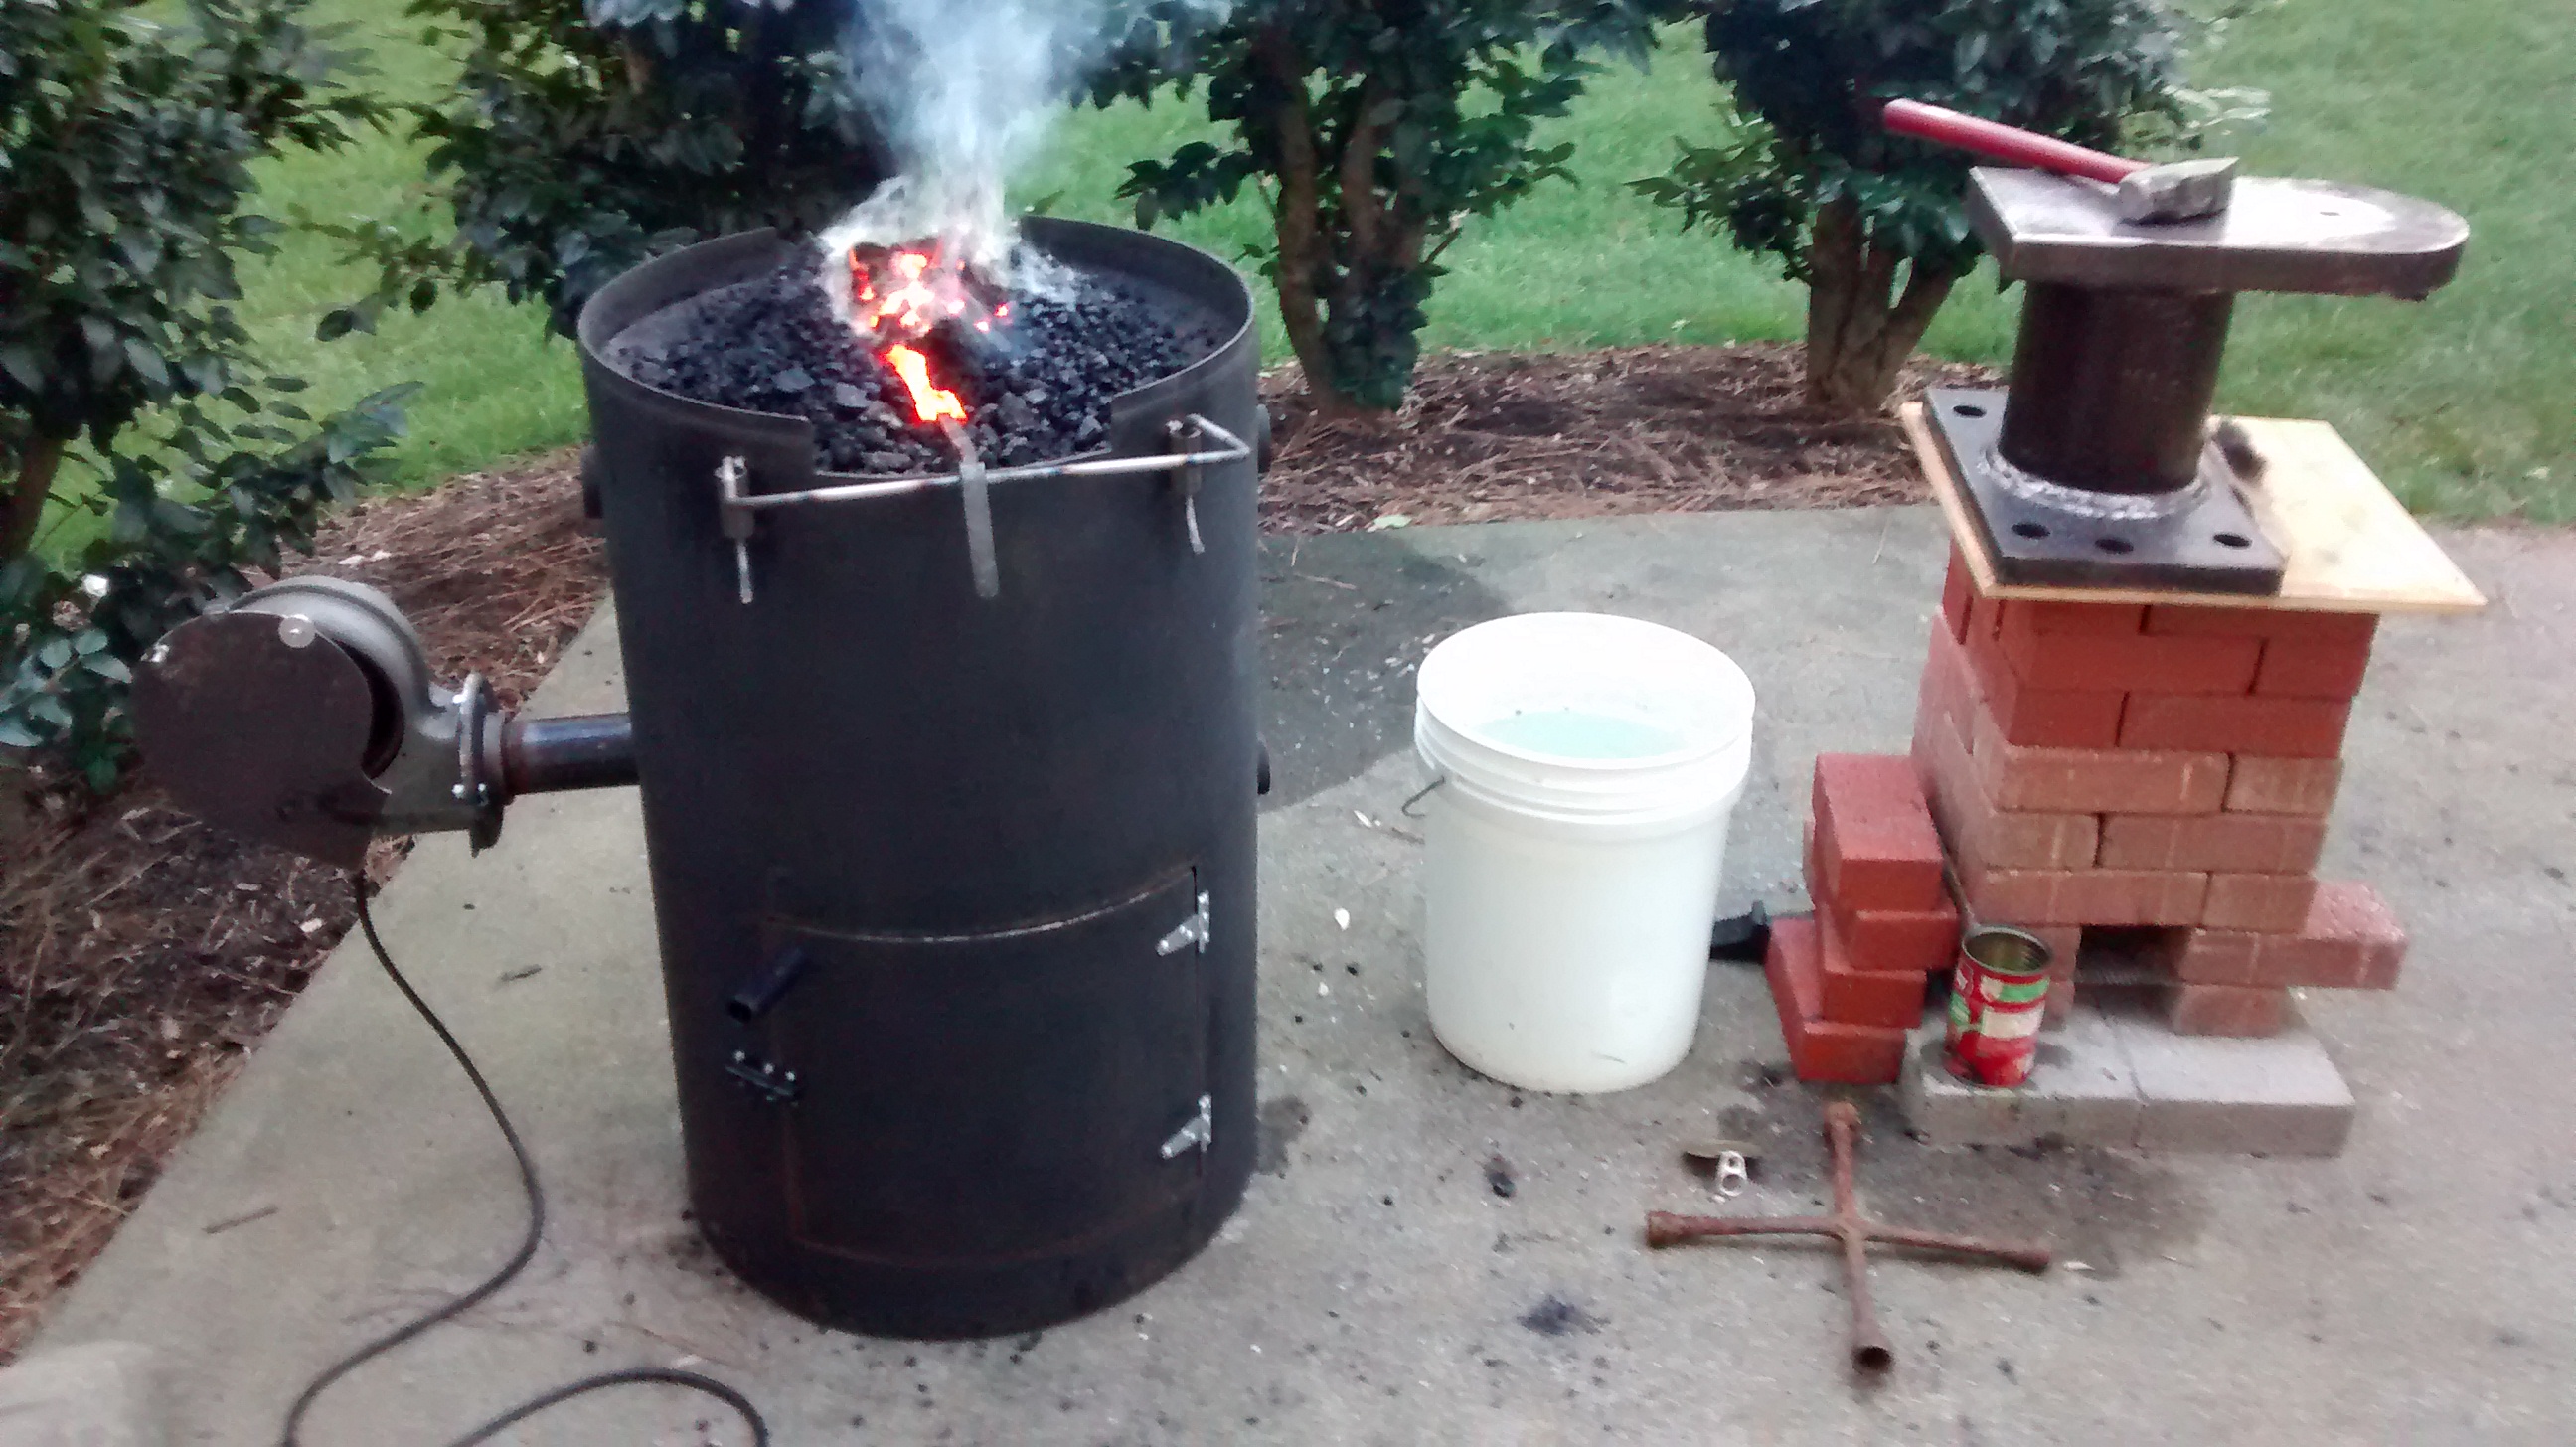
I have this forge. Wish I'd made it from a normal 55gal barrel but didn't. It's a little smaller diameter. I would like to add a portable hood to it. So the whole thing would be portable, and the hood would be optional, say, for when I need the room and the hood gets in the way, I just pull it away. I found several good designs with stacked barrels, but mine isn't 55-gallon size and they look really large. Here's my idea. Will this draw, do you think? Or will breeze outside just laugh at it? I'm not sure if the 5 gallon buckets could be stacked very well if they are tapered. Maybe bottom to top to bottom to top... Even better if the bottom of it could have collapsible legs instead of more buckets... But I just thought of something. If I put a door in the bottom bucket, I could prime the airflow from there until it got drawing good from the center. (?) - Q
-
Need ventilation advice- lungs hurt
Quench. replied to Cardinal Knife's topic in Blacksmithing, General Discussion
I read the whole thread. What a nice selection of buildings you have... If it was me, would want to know if it is a physical reaction to what was in the building before, or if you have some weird air stagnation/circulation problem causing CO or CO2 buildup around your working area. Even if you move your forge to another building, you will no doubt want to use that building for something else. You can be fit and still allergic to something you never knew about. You can be fit and still get knocked down by the nasty microorganisms that stick around for years, waiting to pounce. Could be from chickens or chicken feces or anything else coming in with the chickens. Could be from mold. Could be from bats or bat feces. If it is medical-related, lungs hurting within minutes seems like an allergic reaction. The microorganisms would be a delayed reaction (days to years). Someone mentioned lungs hurting from asthma. Someone mentioned lungs hurting from CO2. Which is it? You can't guess. You need to know what the problem is before you can attack it. Maybe, when you cleaned/hosed out the building, you uncovered some nasty stuff that just needed to dry out to become airborne. That seems like the easier theory to try first. Electrical cords are cheap. Get a long one from the house. Put a small electrical heater in the building. Put a fan in there to circulate the heated air. Get a book or your favorite i-device, and sit in there for 30-60 minutes and see if you have any symptoms. If not, it's maybe the forge. But if you have symptoms without the forge running, you have your answer, because the electrical heater is producing zero CO or CO2. If its something nasty in there, I can't say what to do. But your health is much more important than anything, even a building. Some of those microorganisms are really bad. Scrambler said what I was thinking, which is bleach. But while bleach kills pretty much everything, that can include you, if you use it without enough ventilation. I don't know if you can spray down the whole inside with some kind of respirator which can deal with bleach fumes. I doubt it. And then your eyes would need to be covered too. Spray though the windows, maybe. Good luck. -
How to add a horn to this ASO
Quench. replied to Quench.'s topic in Repairing and Modification to Anvils
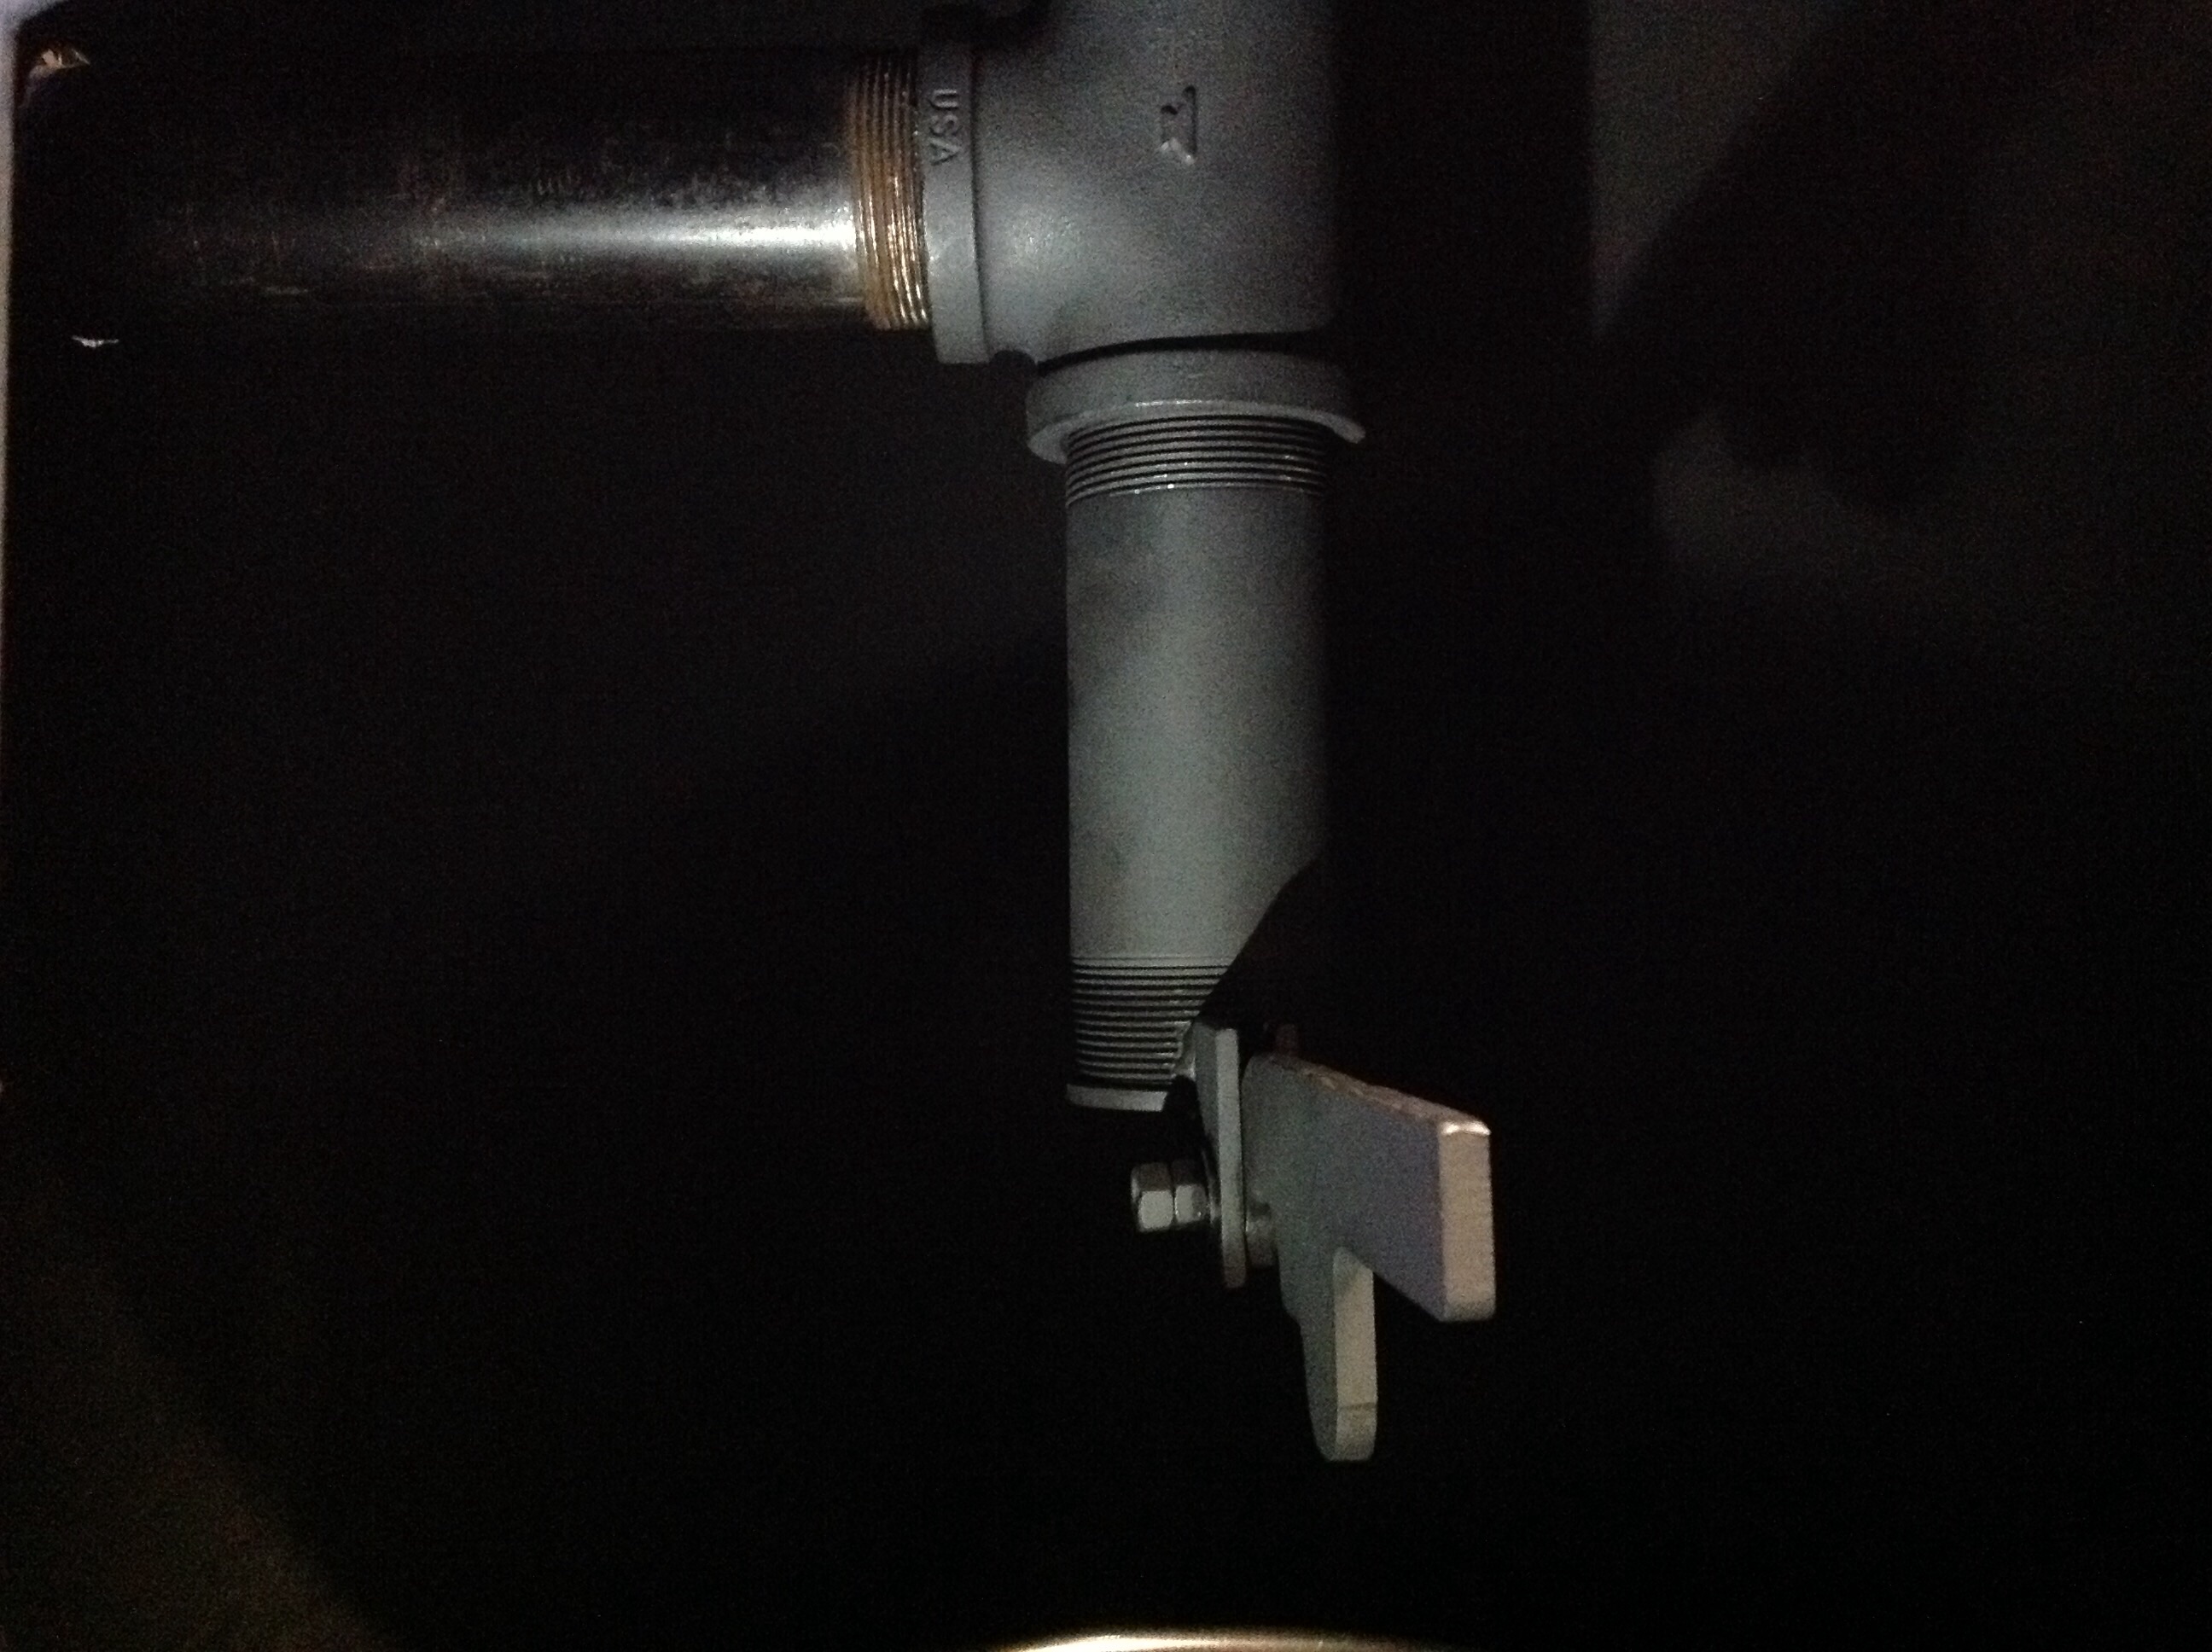
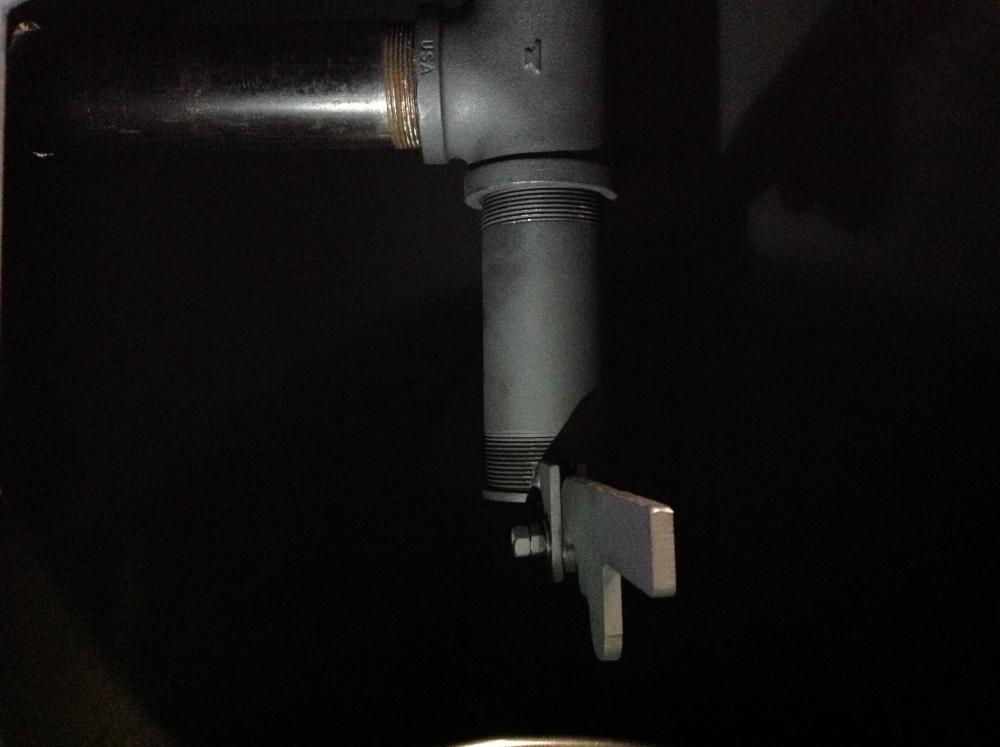
It was a rusted out water pressure tank. Terrific find at the metal scrap yard. I was actually looking for 1/4" plate to make a square/flat forge. Couldn't find any, but this was sitting there, looking lonely. It had a concave bottom (which is now the top) and a convex top (which I cut off). I'm trying to find a good use for the cutoff. Rain lid, maybe. The door? Over-design? But really, I wanted the forge to be portable. I don't have a dedicated place for it. Plus, I am not a very big human, and no longer very young. The brake drum plus 2" iron piping weighs up. I wanted to be able to take it apart easily. When I remove the blower side air inlet pipe, and try to reattach it, getting the threads lined up with the T inside the tank is a pain without a way to see what I'm doing. So that's part of the reason for the door, and the whole reason why the hinges are on the right. The other reason for the door was to get access to the ash dump lever, and to make it easy to remove the ash tray. I thought about bringing the lever to the outside of the tank, but it would be used only some of the time, and in the way most of the time. I got the ash tray at the recycle place, too. It was a perfect fit. I bought two of three piping pieces, the two floor flanges, and the T joint online at the big A. Anvil brand, cheaper than local big box, and Made in USA, baby! The rest came from scrap. While I'm at it... Don't look too hard at the slanted plates in the fire pot. They used to fit well, when the fire pot had a taller lip. But the taller lip made the coal a real pain to rake in. So yesterday I cut off the rest of the lip. But now of course I will need to redo my plates, which is kind of a bummer since I cut and welded them to fit the drum contour. This question is coming next, so I'll answer it now: the plates are removable so I can have a larger fire if I need one. I read posts from you guys on refractory linings and I just decided that was too much trouble and would just make it that much heavier. Also didn't seem to be any agreement about whether refractory linings were good or bad. When in doubt, leave it out. Sorry the second photo is so dark. I used a flashlight but the tank is all painted black, hopefully to stop the rusting. I wonder if these photos are too large and will use up all my allowed space? Scrambler, I don't know what that anvil used to be. When I found it, the guy told me he originally had 12 of them and I got the last one. He said the blacksmithing guys use them as anvils (makes sense). It's 120lbs, and has beautiful, multi-pass welds. Rings like crazy. Magnet on the end helps a LOT. Doesn't rebound much. I only had one smithing class, but I sure can tell the difference between a nice anvil and this one. But I'm not a blacksmith. This is fine for now. Thank you again for all the good advice (even before I posted). Tons of great info. -Q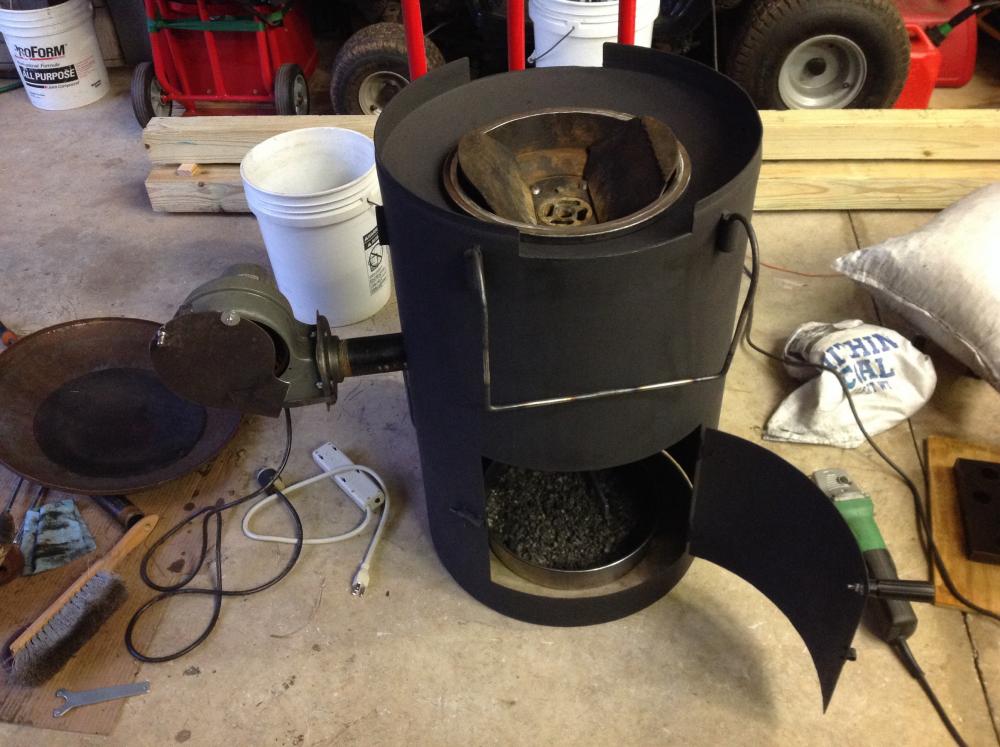
-
How to add a horn to this ASO
Quench. replied to Quench.'s topic in Repairing and Modification to Anvils
No access to anything power yet. Maybe sometime this spring though. I will join the local ABANA and meet a few more folks. I doubt my forge could heat up something as large as a 3" round. I know where to find one of those; just no way to form it. But I have some good ideas now, and Jim's idea for anchoring hardy hole tools opens up that direction. Versa Jig looks great, as does G2. But this is only a hobby and a new one at that for me. I might make guillotine tool just for grins and welding practice, but its kind of hard to justify buying tools right now. (Even an anvil, unless I get a good buy so it can hold its value.) From a water pressure tank. The anvil is just sitting on my brick rocket stove while I make the wood stand for it. Maybe I will post a thread with forge construction pics, but this isn't much different from other barrel-type forges.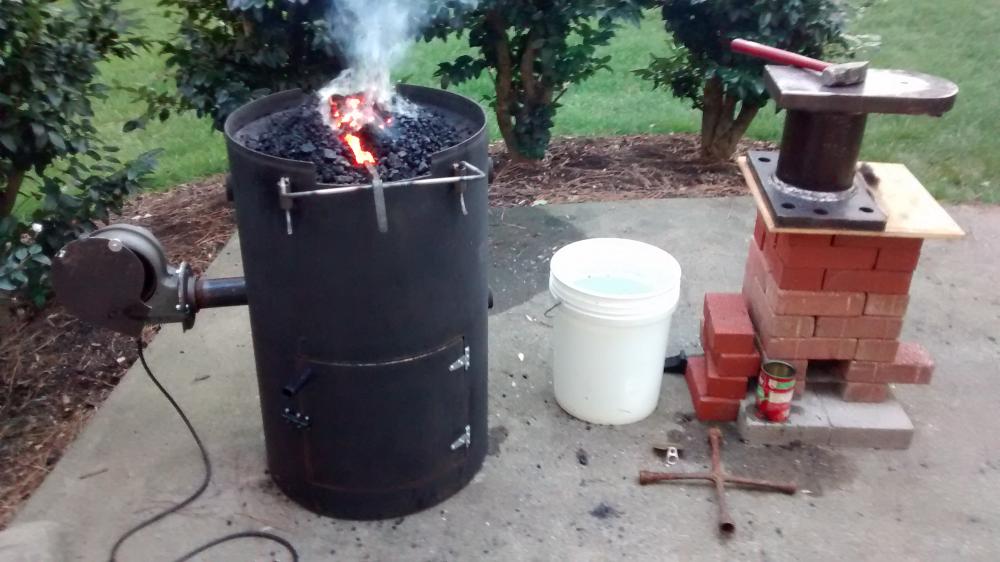
-
How to add a horn to this ASO
Quench. replied to Quench.'s topic in Repairing and Modification to Anvils
I think I see. U-shaped post from the top, then tap a wedge inside the U, under the anvil, to spread the U and lock it into the hole. And my welding and the U-shaped post don't have to be perfect (and they won't be). Oh that is a really, really good idea. Now the hardy tools like a bick can be more useful because they are well-fixed in place. Awesome. Thank you! -Q