
JHCC
-
Posts
19,317 -
Joined
-
Last visited
Content Type
Profiles
Forums
Articles
Gallery
Downloads
Events
Everything posted by JHCC
-
You could make the whole staircase! Ooh, now I'm imagining this as the stringer of a spiral staircase. That would be quite something!
-
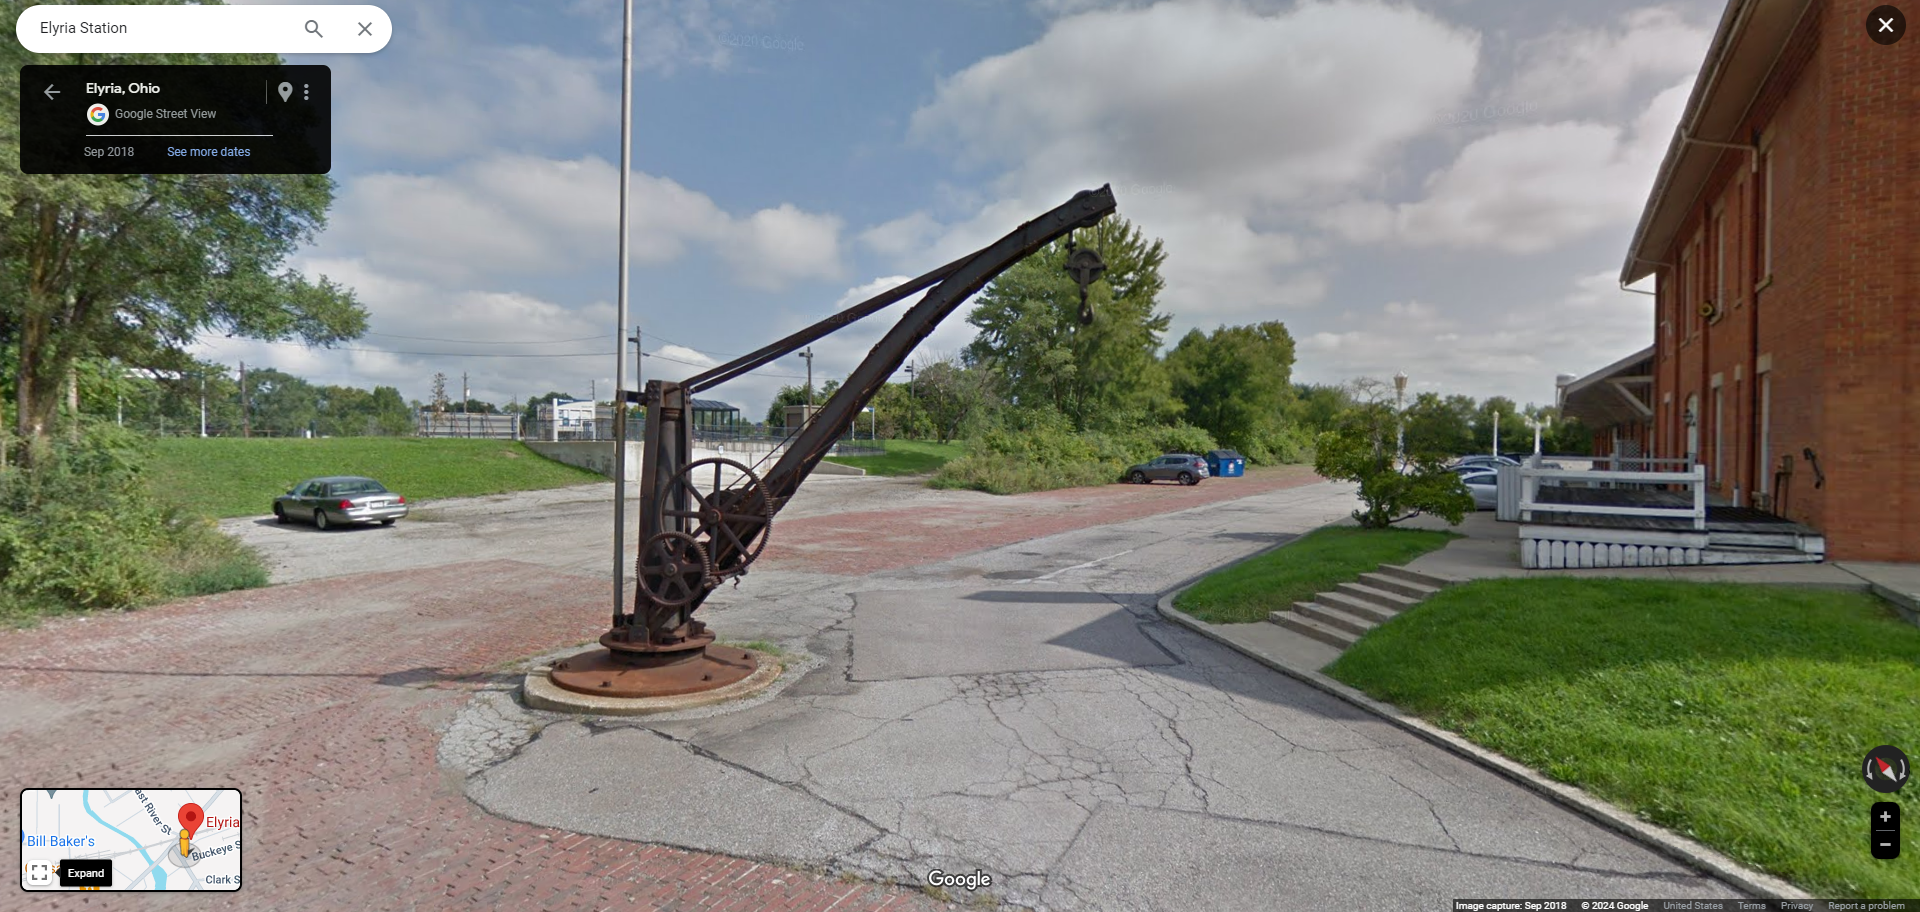
 There's a train station near me with a rather cool old crane; here's a screenshot from Google Maps street view:
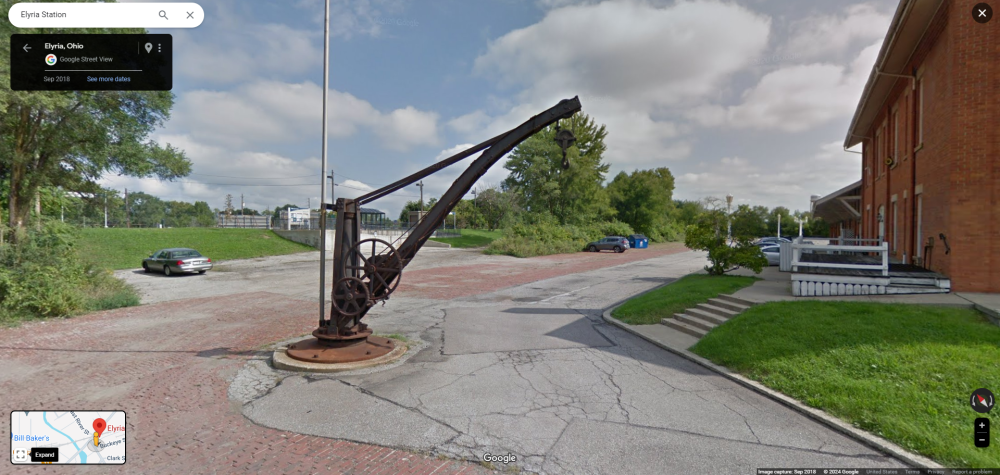
-
Or a post-industrial mailbox.
-
This image is from a listing in my local industrial surplus place. I was thinking that this chain might be good for making cannister damascus, until I noticed how big the links are. For scale, that's a standard 40" x 48" pallet it's sitting on. Caveat emptor!
-
This is NOT my area of expertise, so please take everything that follows with a HUGE grain of salt. From what I can tell, CARC (Chemical Agent Resistant Coating) presents two hazards: the chemicals (isocyanyte, toluene, etc) present in the paint before it is mixed, applied, and cured, and the pigments (e.g., cobalt chromite and chromium oxide to make OD) that remain after the aforementioned chemicals have reacted/evaporated to create the inert plastic layer. The former aren't going to be a problem when removing cured paint, but the latter can pose an environmental risk, either as fumes created by welding or torch cutting, or as airborne dust from grinding or sanding. A little Googling led me to an interesting military vehicle forum called "Steel Soldiers", which has a number of threads about CARC removal (for example, this one and this one). This might be a good place to find others with more experience and better knowledge.
-
What did you do in the shop today?
JHCC replied to Mark Ling's topic in Blacksmithing, General Discussion
I agree in general, but I'd recommend raising the bowl rather than sinking it, especially if you're starting with thinner material. Sinking stretches out the material at the bottom of the bowl, possibly leaving too little thickness for working in the features. -
What did you do in the shop today?
JHCC replied to Mark Ling's topic in Blacksmithing, General Discussion
I remember seeing a photo in an old National Geographic many long years ago (maybe in the early '80s?) showing some foundry workers in either Korea or Vietnam using an old M1 steel pot as a pouring ladle for molten aluminum. -
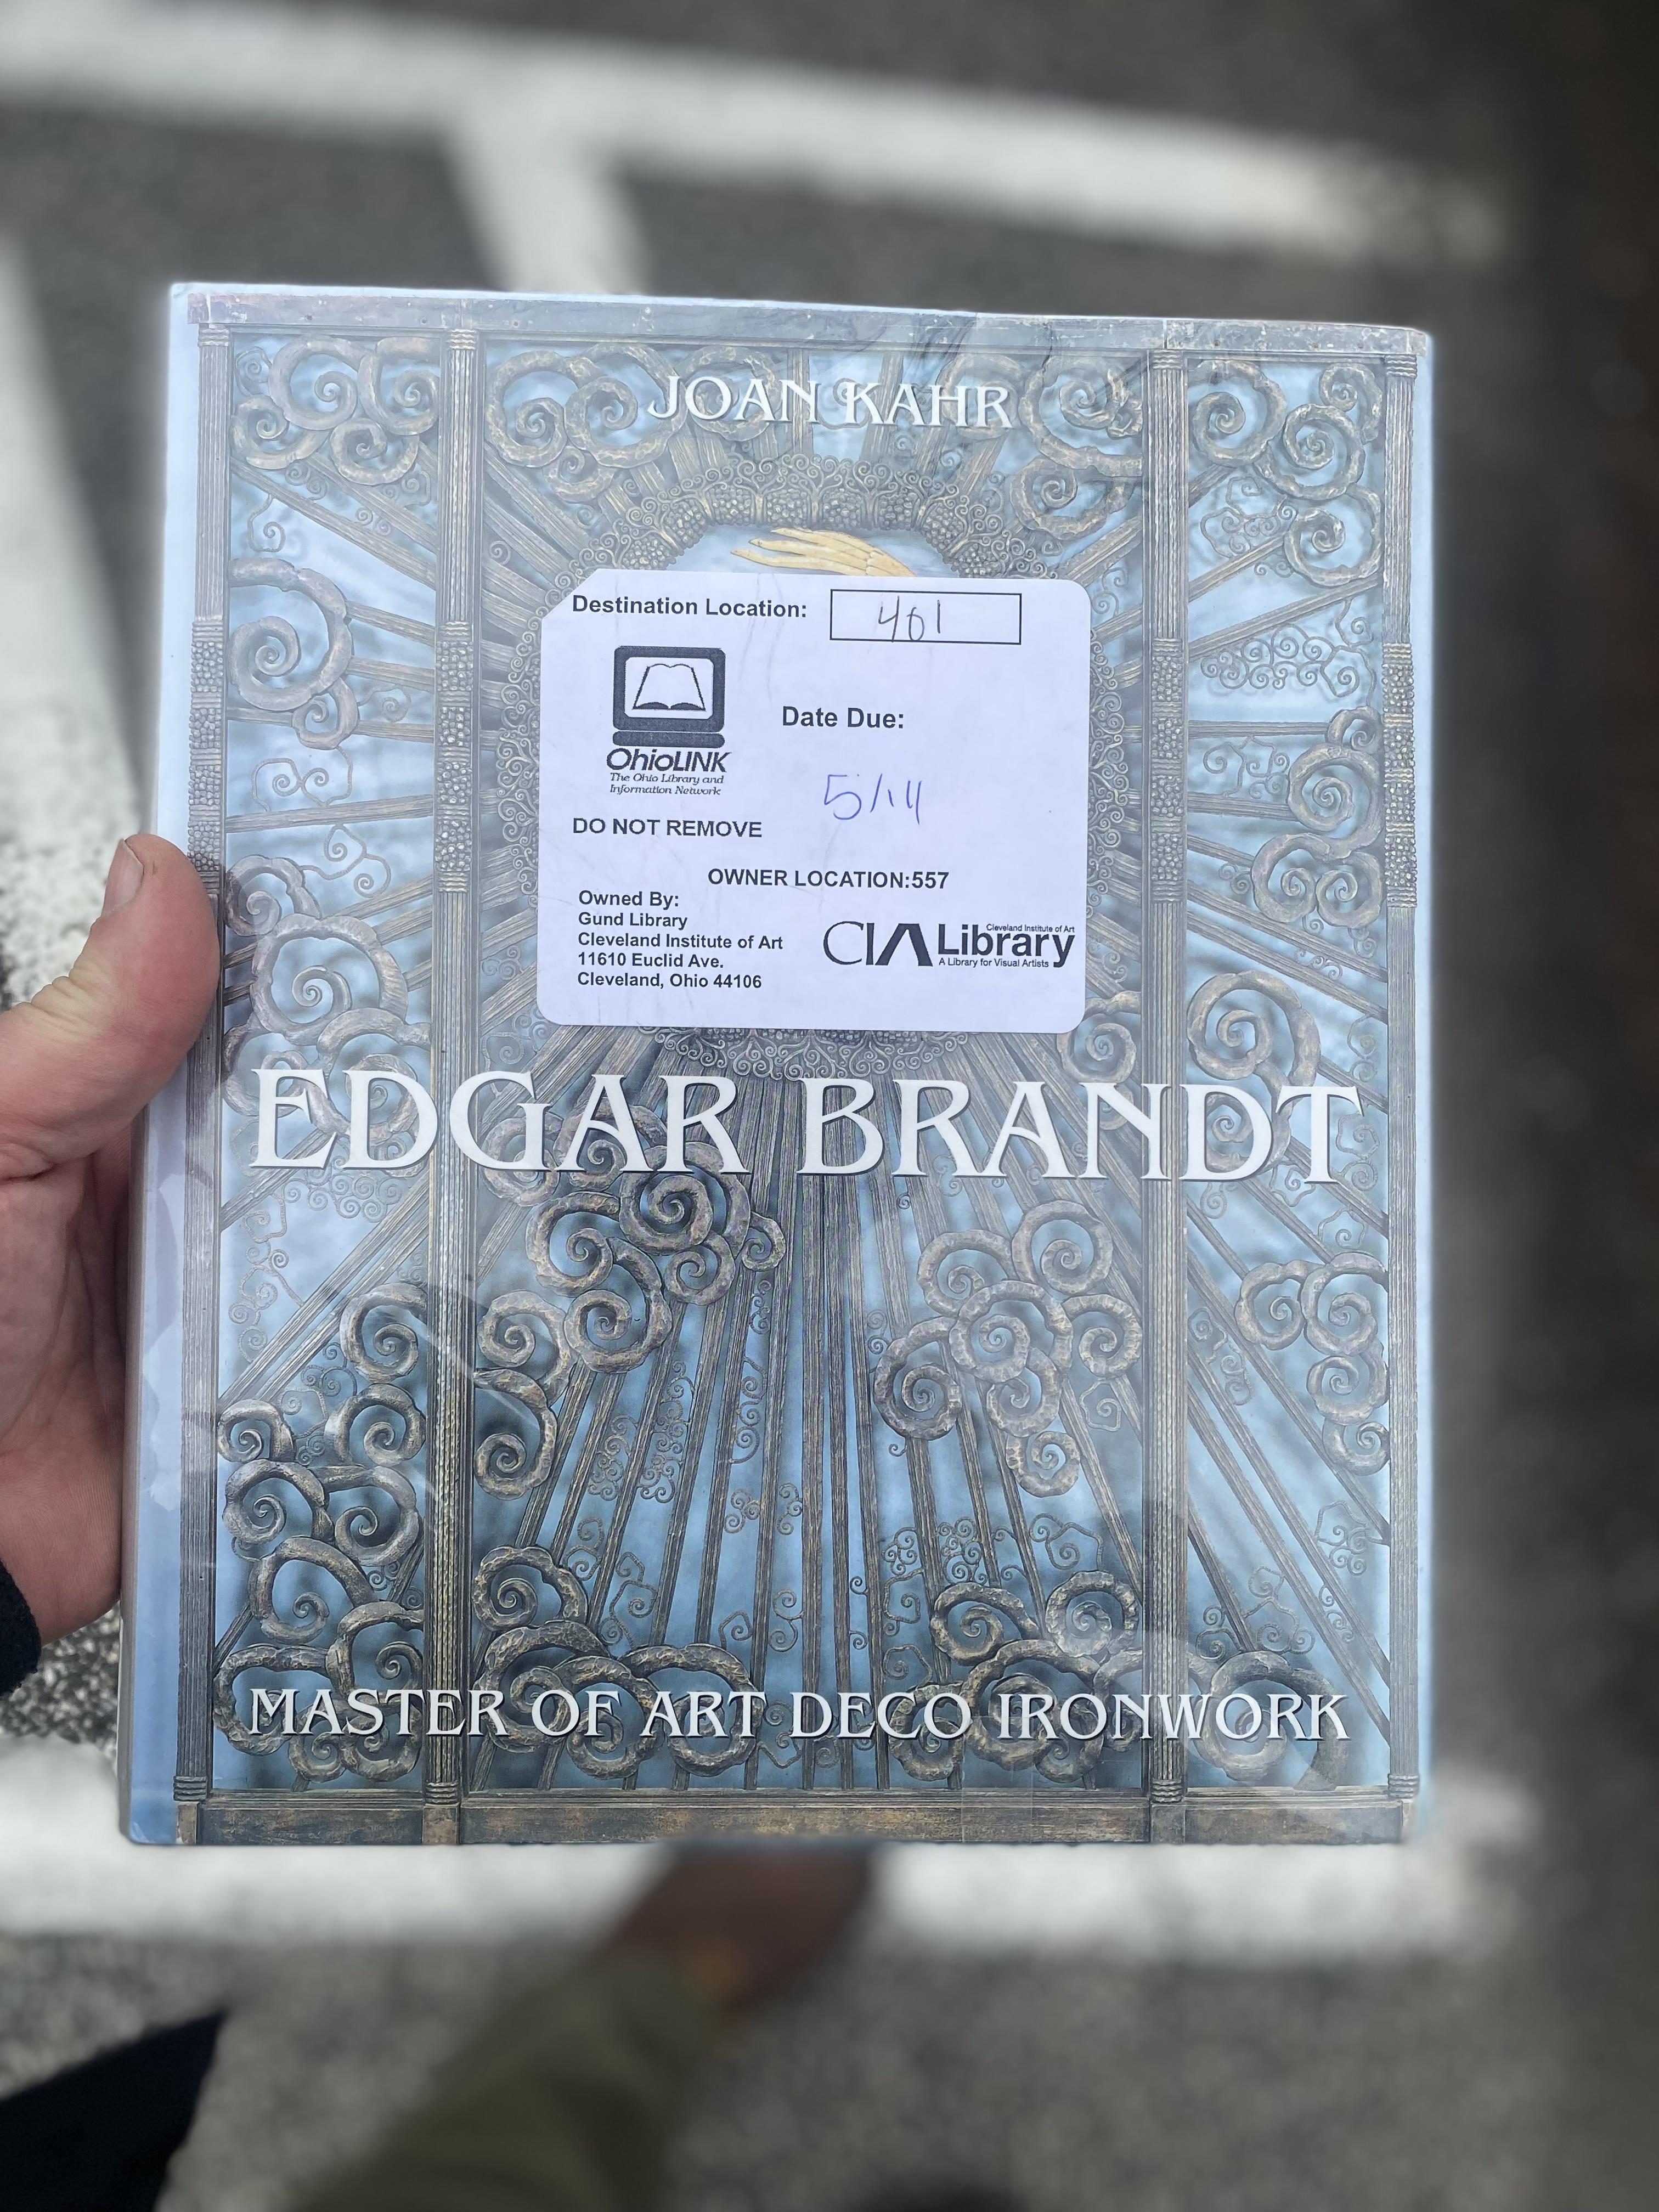
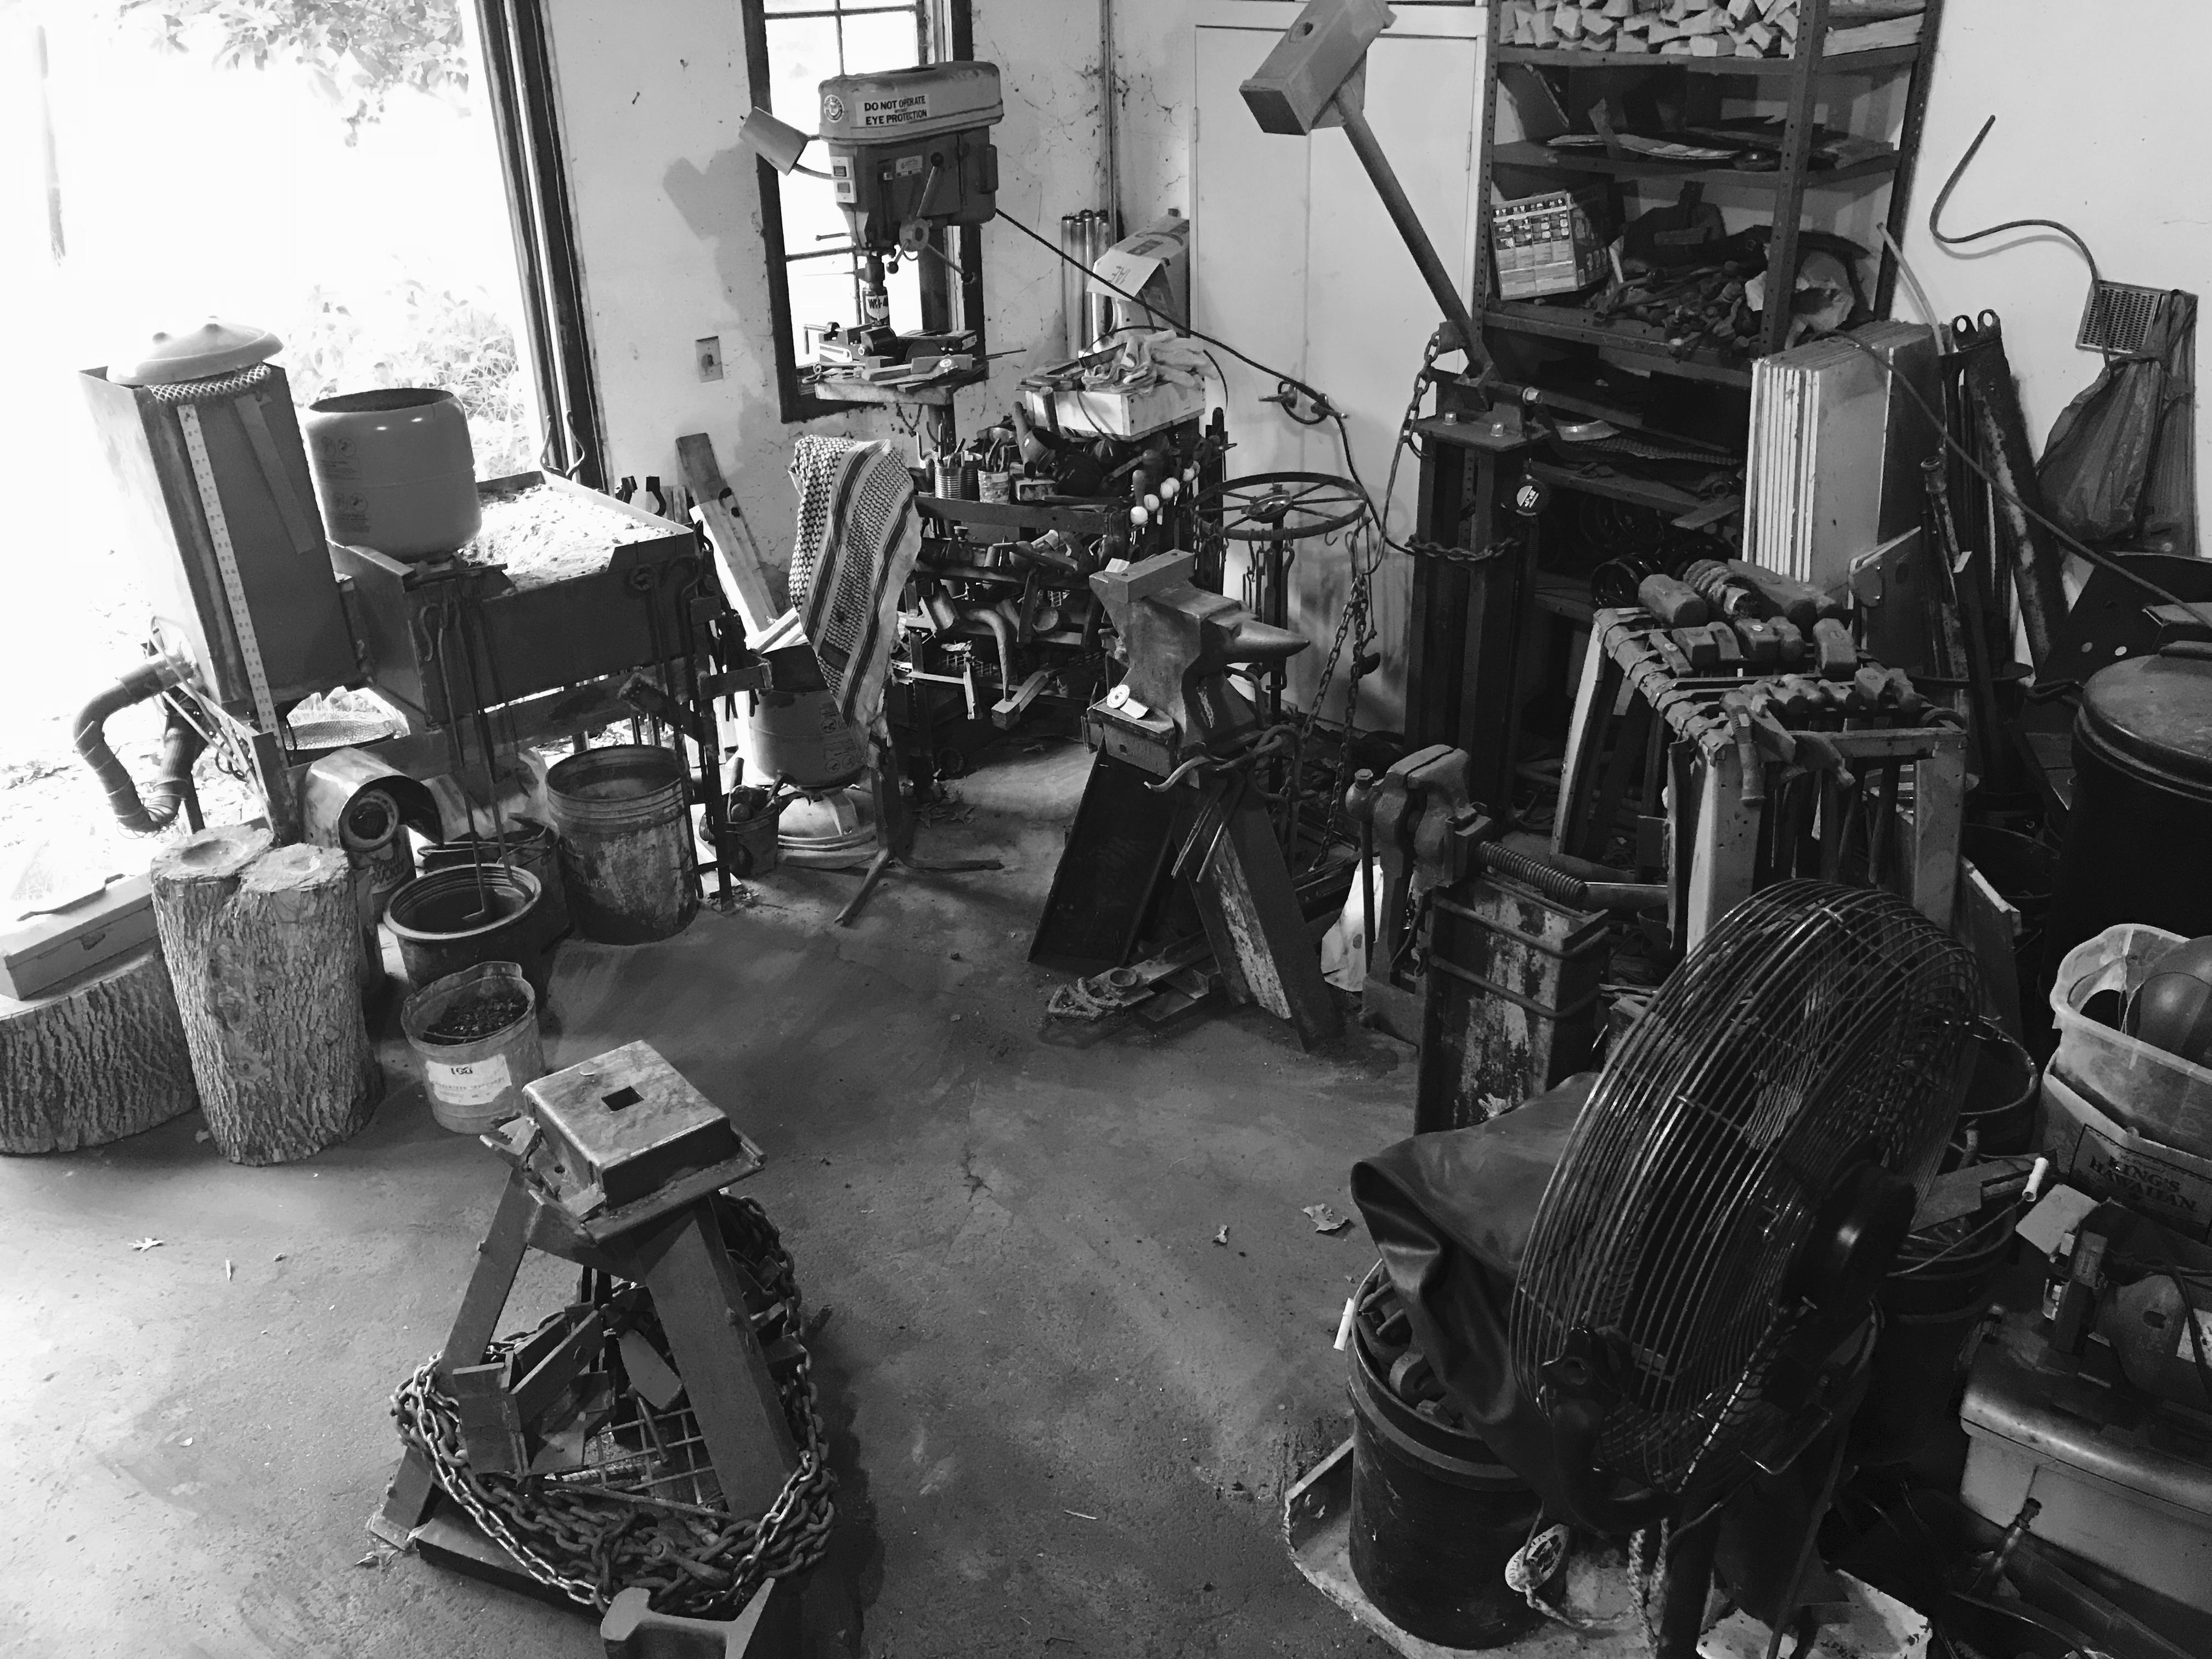
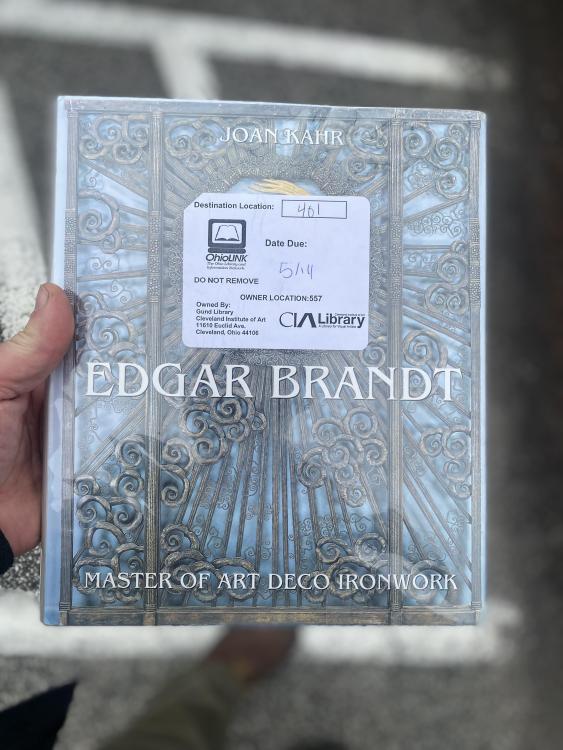
Another Interlibrary Loan:
-
If your drifting goes off-course, try heating only one side of the hole with an oxyfuel torch.
-
What did you do in the shop today?
JHCC replied to Mark Ling's topic in Blacksmithing, General Discussion
I think that was ThomasPowers of blessed memory. Interestingly, twisted wire forks date back to the Romans: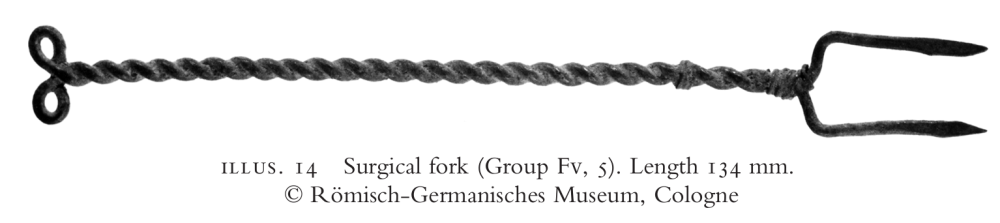
-
What did you do in the shop today?
JHCC replied to Mark Ling's topic in Blacksmithing, General Discussion
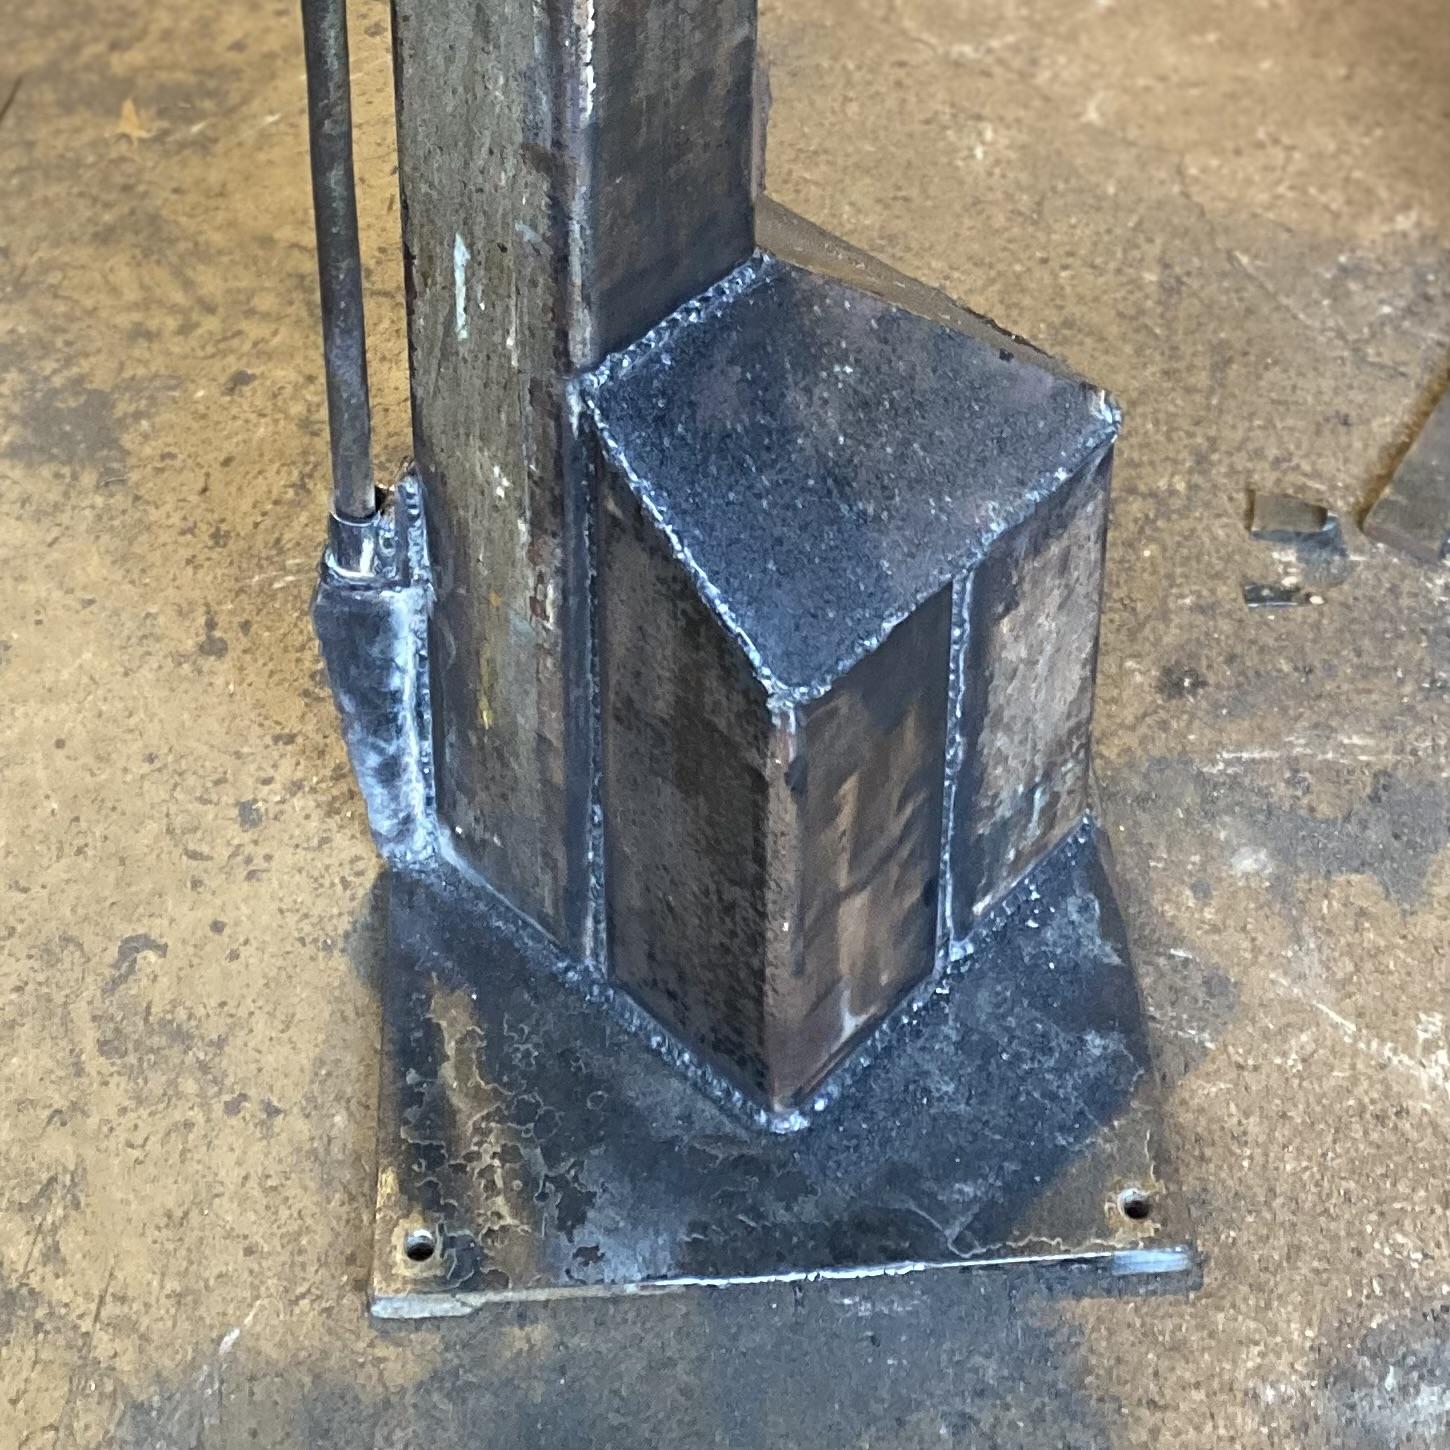
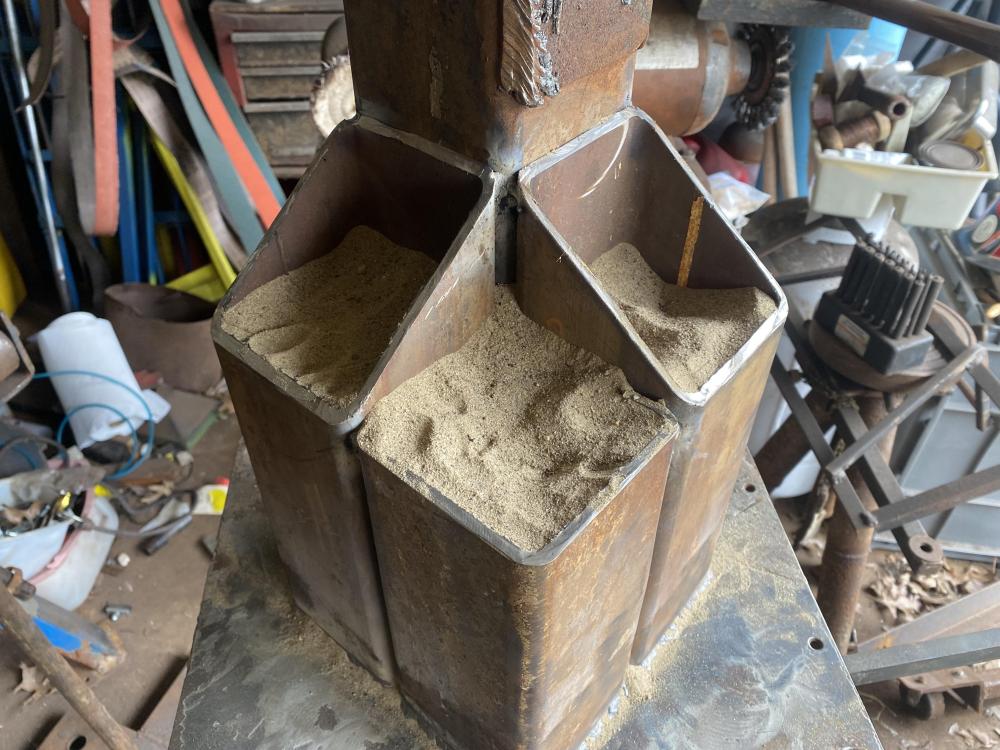
The mounting holes are left over from its previous life as the base plate for my belt grinder (now mounted elsewhere). I don't have plans to bolt it to the floor, as I like to have everything as moveable as possible. I am thinking about pouring the last of the bucket of sand into the column, though. -
What did you do in the shop today?
JHCC replied to Mark Ling's topic in Blacksmithing, General Discussion
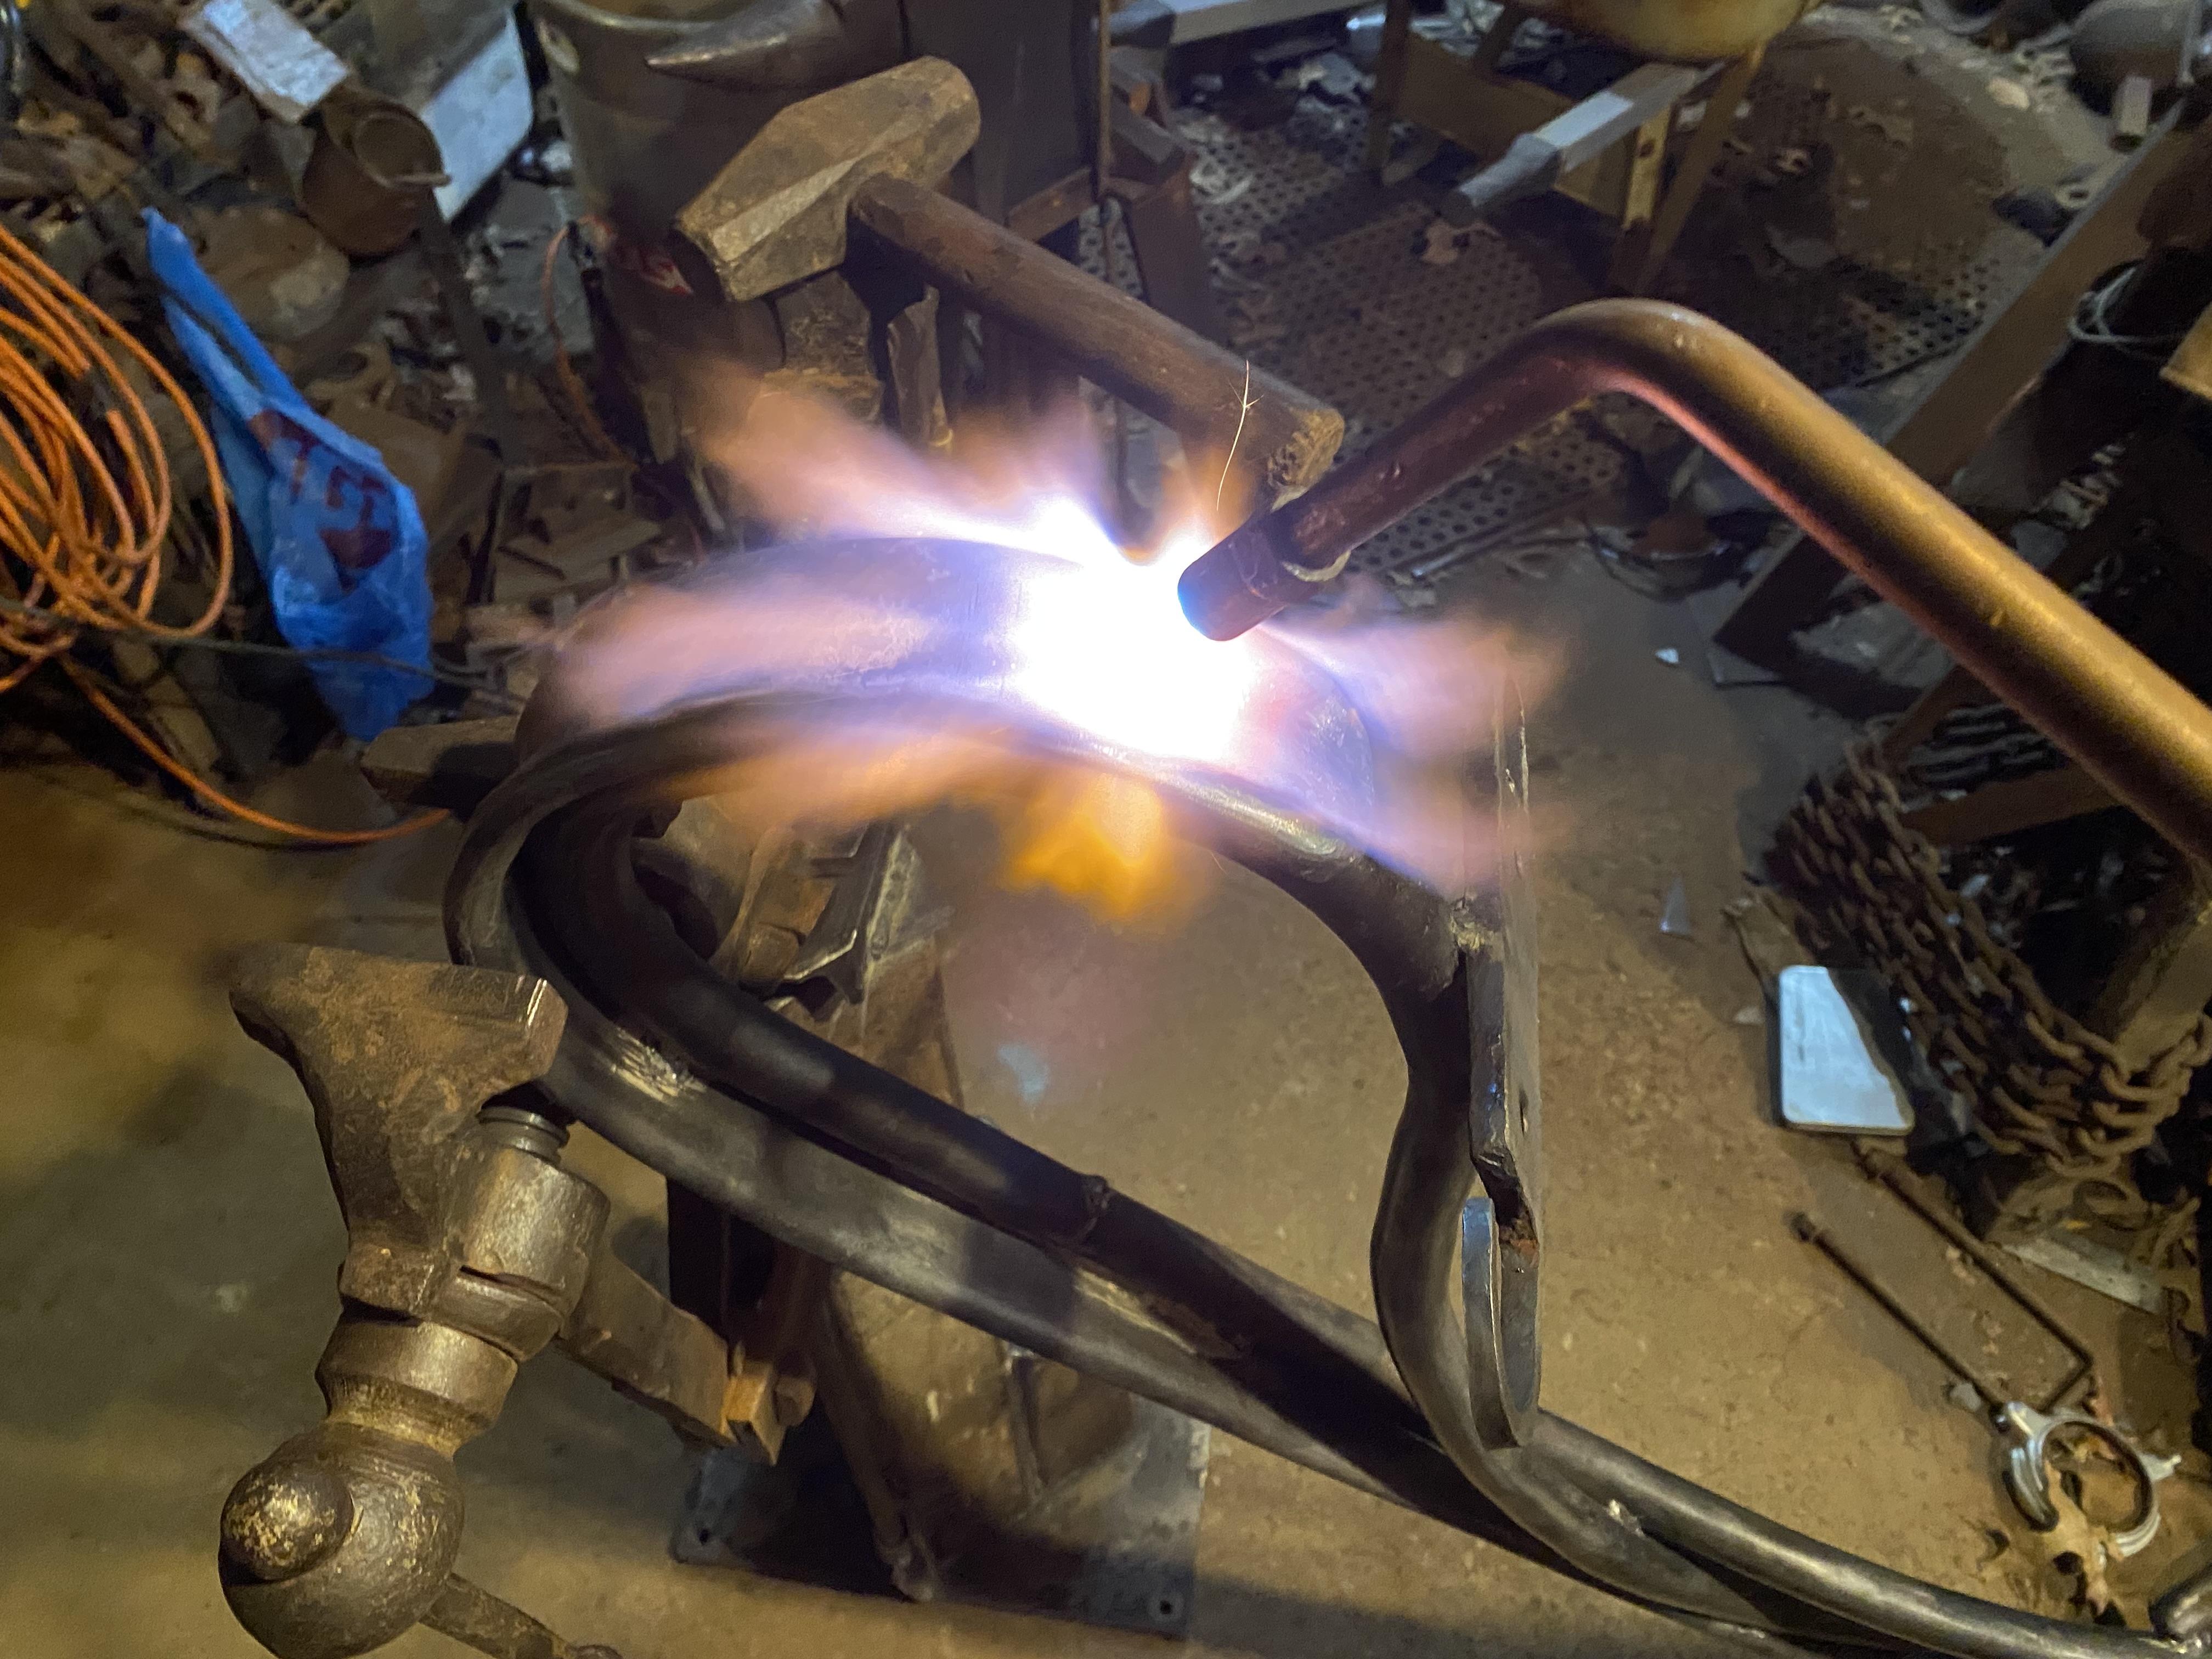
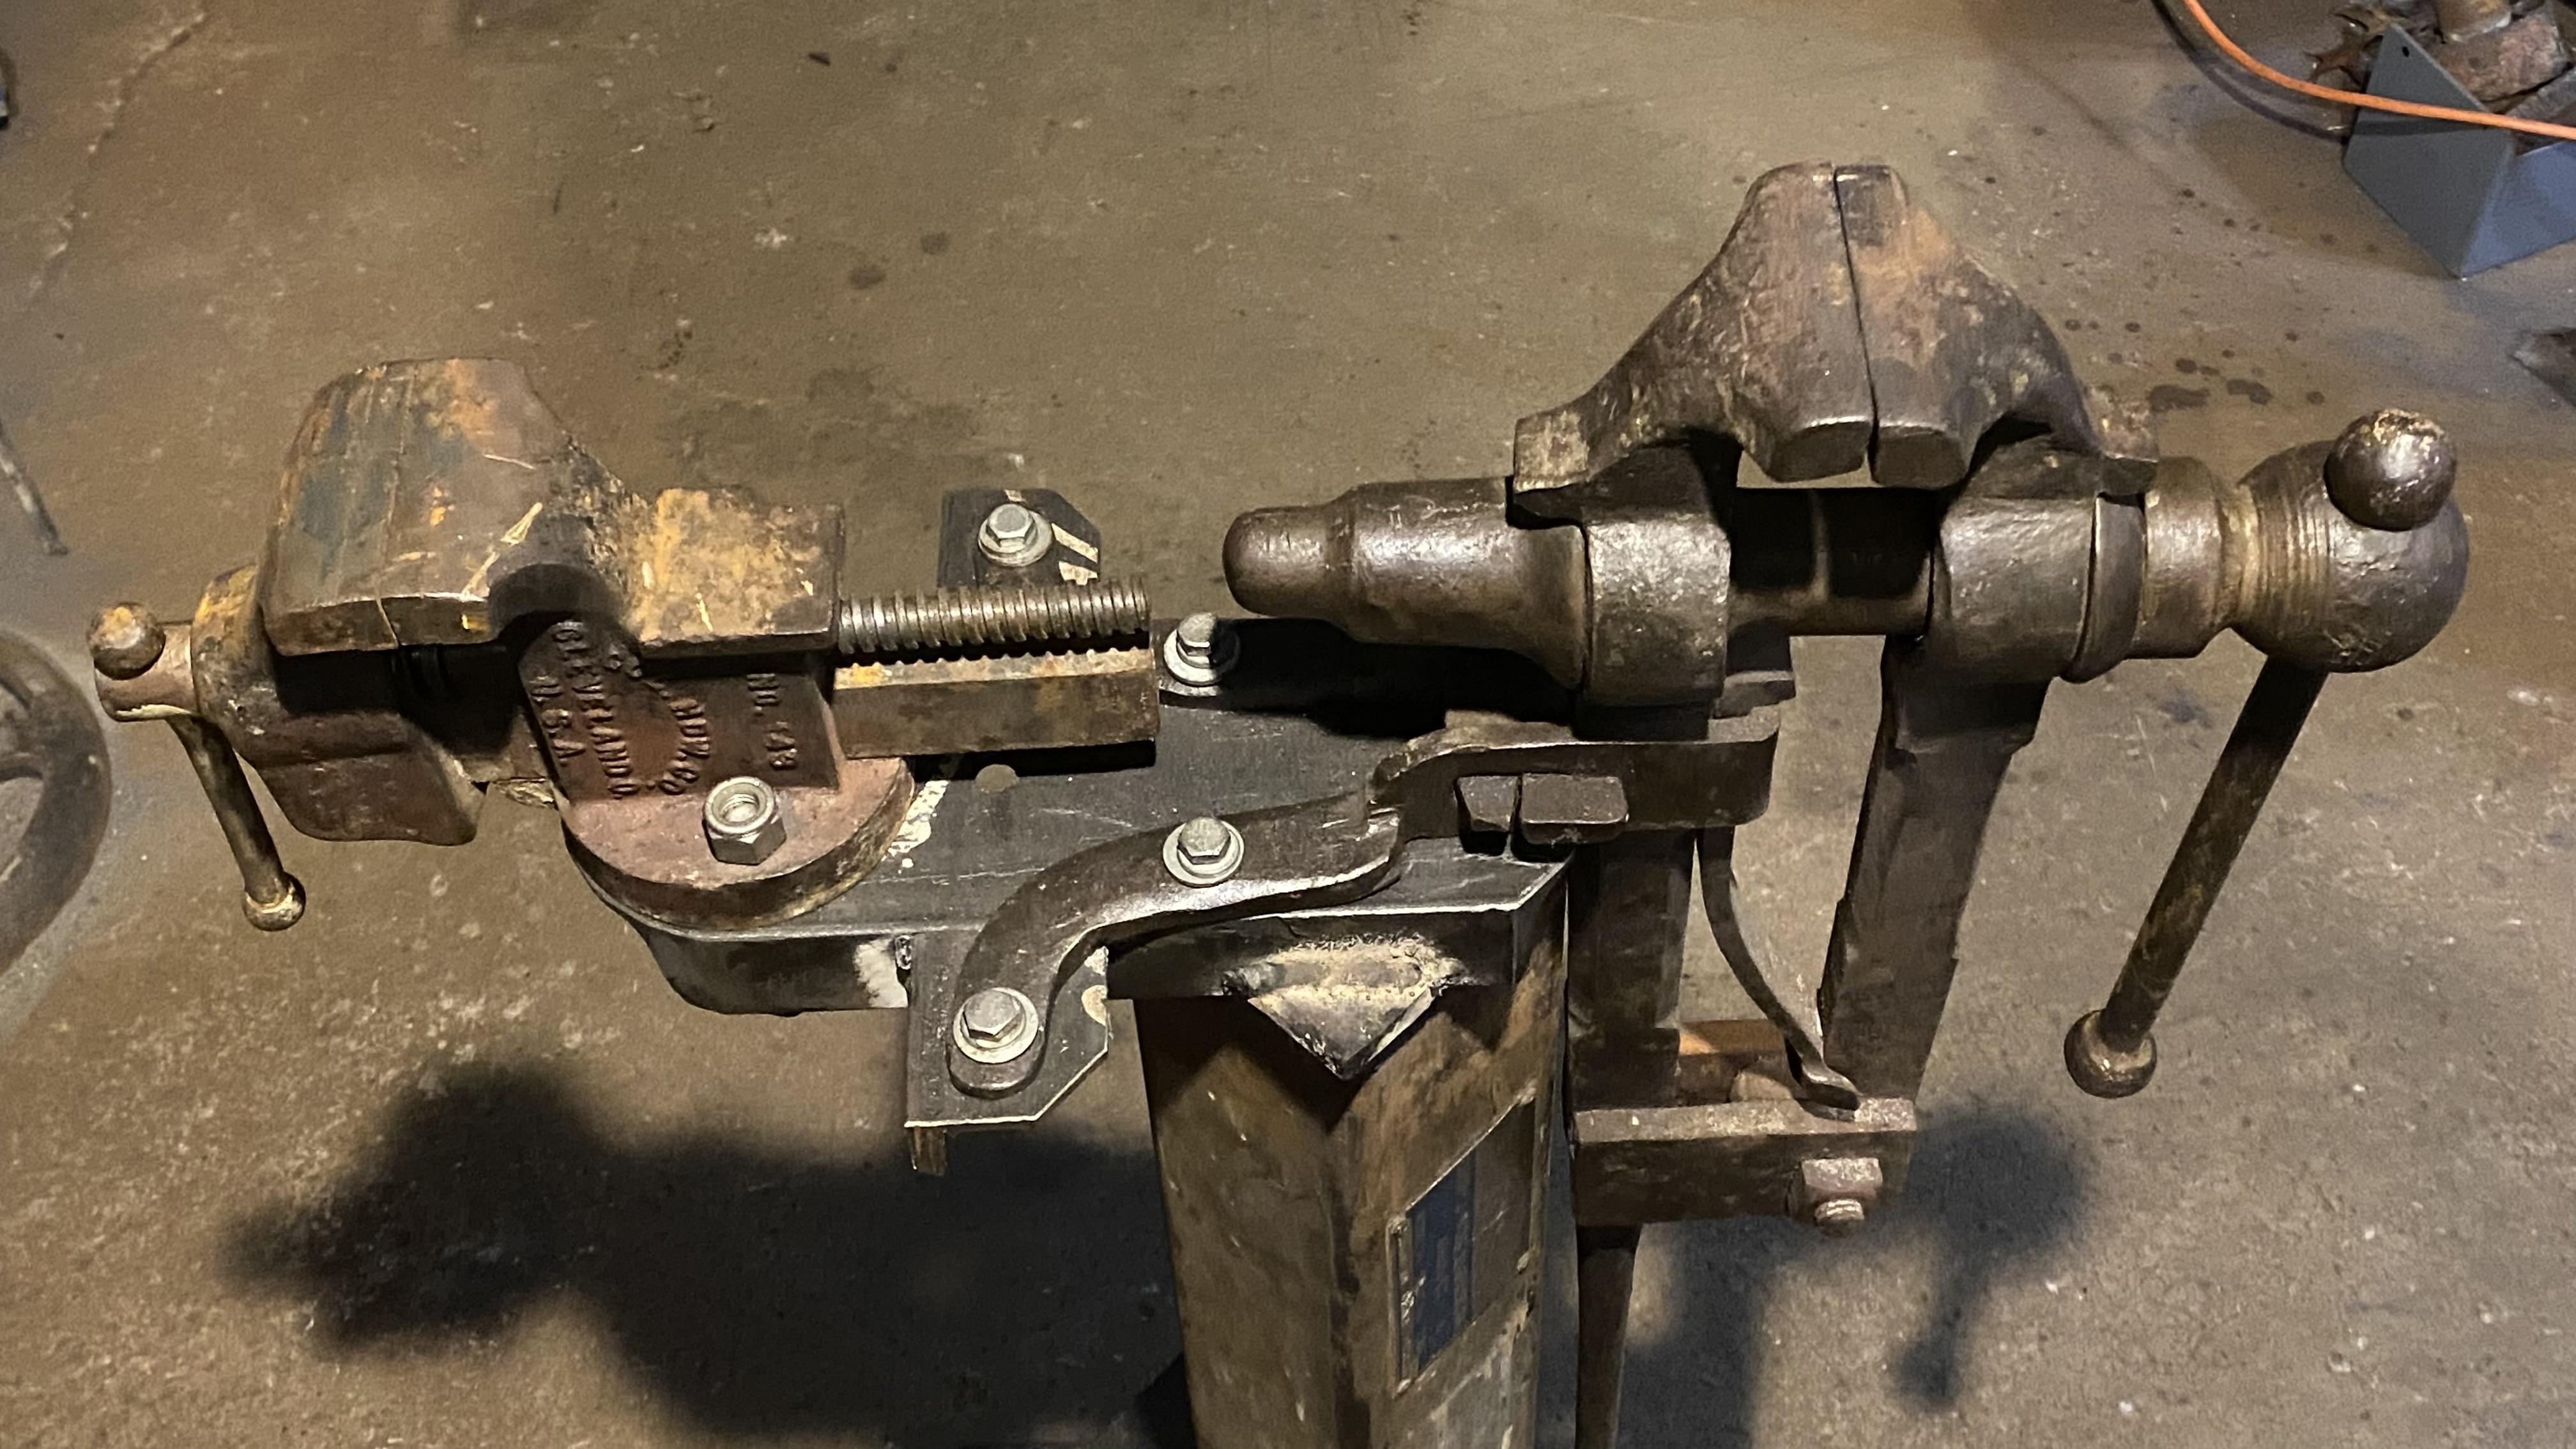
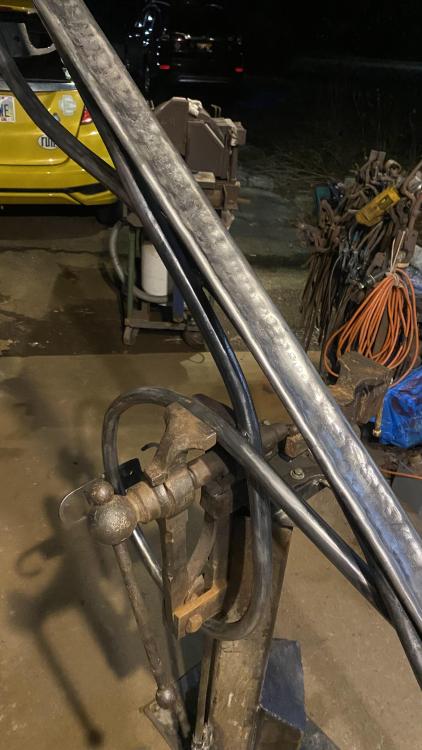
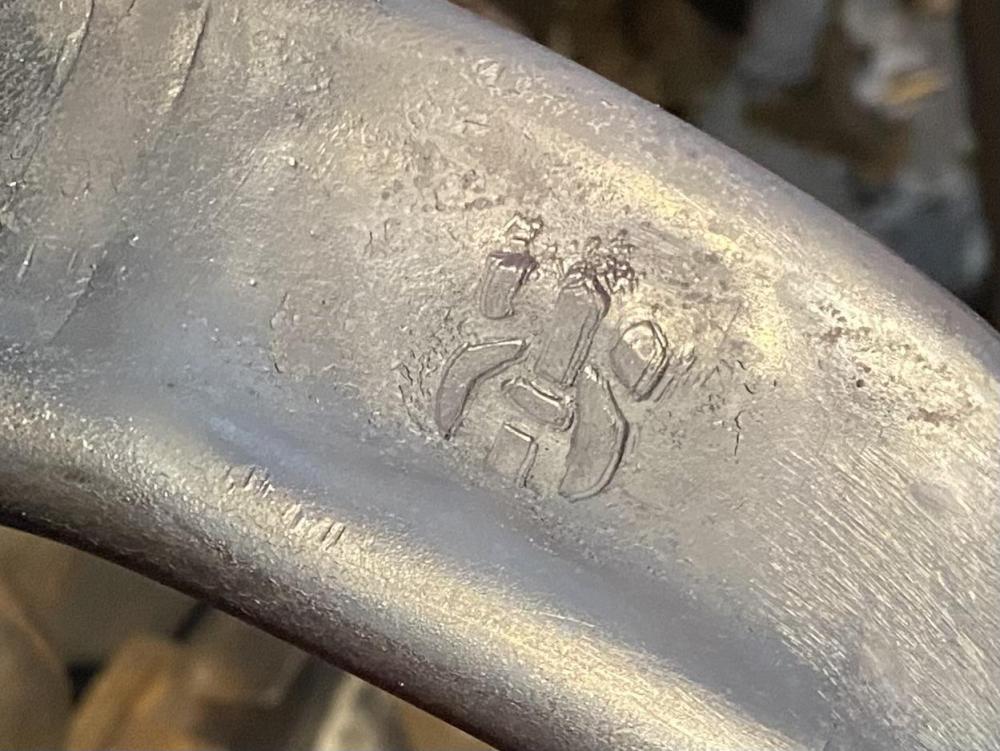
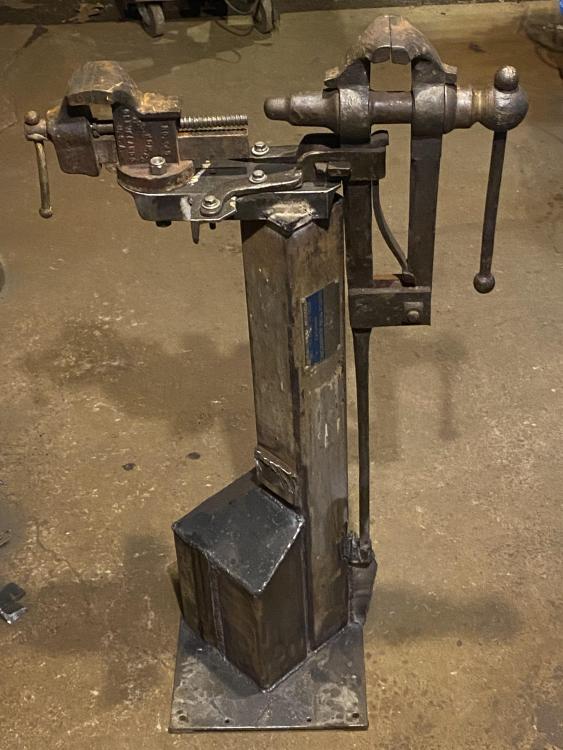
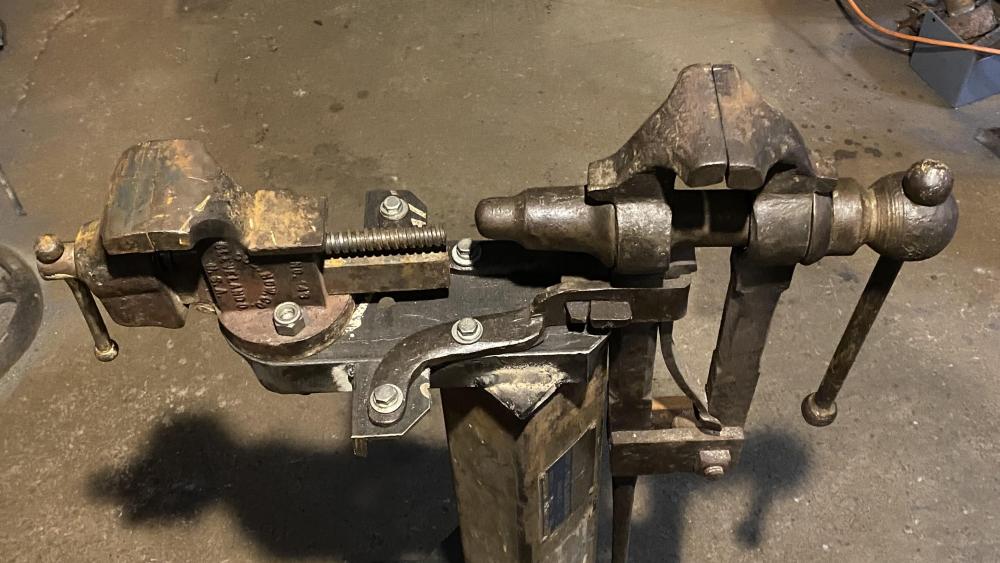
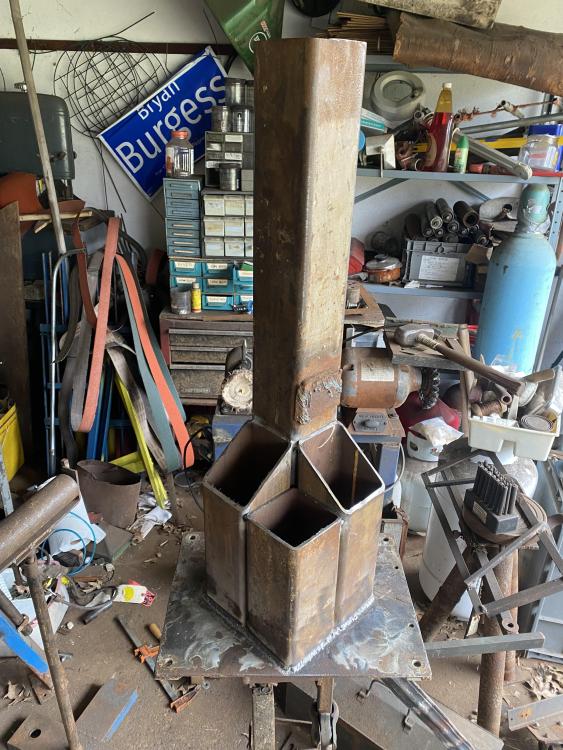
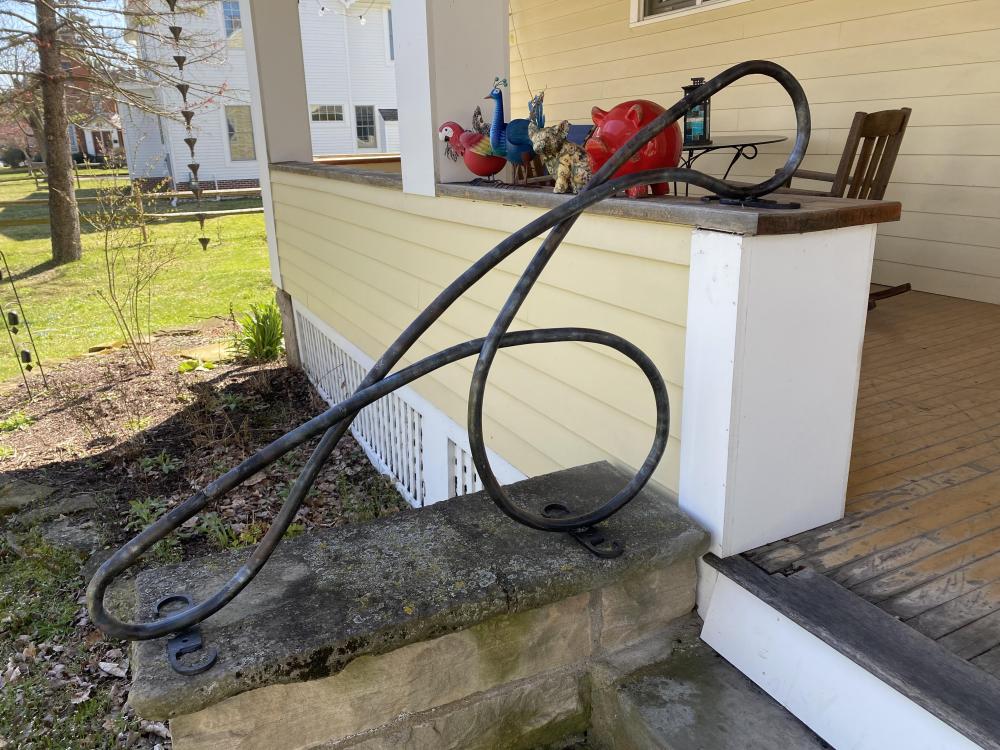
One of my old friends had one mounted on a broomstick. He used it for spitting rats in the barn. So, I welded the handrail onto the railing and did a lot of wire brushing. Also spot heated the railing and added my touchmark. Observant readers will have noticed the new vise stand: Which mounts both my smaller post vise and the little bench vise I got from the scrapyard: This is welded up from some 4” square tube, with shorter pieces at the base: Which are filled up with sand for weight and stability Which is held in with a cover of 16 ga. sheet: I’ve been playing with this idea in my head for a while, and I’m quite pleased with how it’s worked out.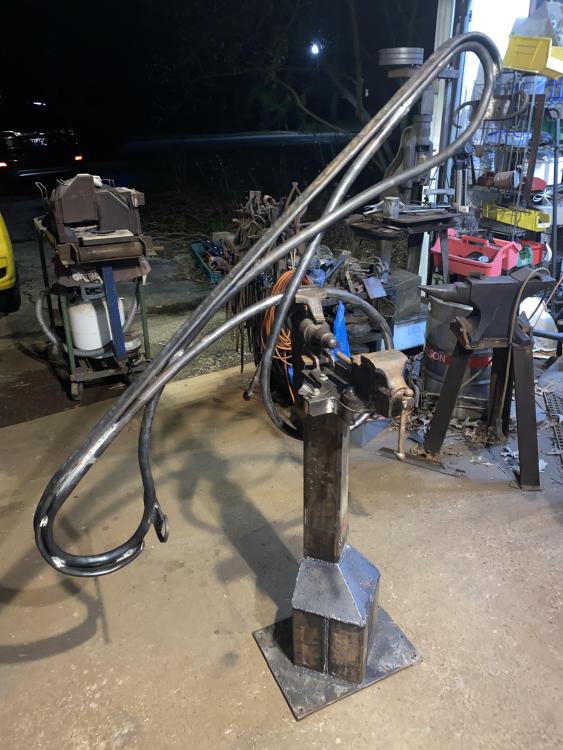


-
One thing to keep in mind is that most tie plates taper in thickness from one end to the other. If you want your working surface to be horizontal, you’ll need to take this into account.
-
What did you do in the shop today?
JHCC replied to Mark Ling's topic in Blacksmithing, General Discussion
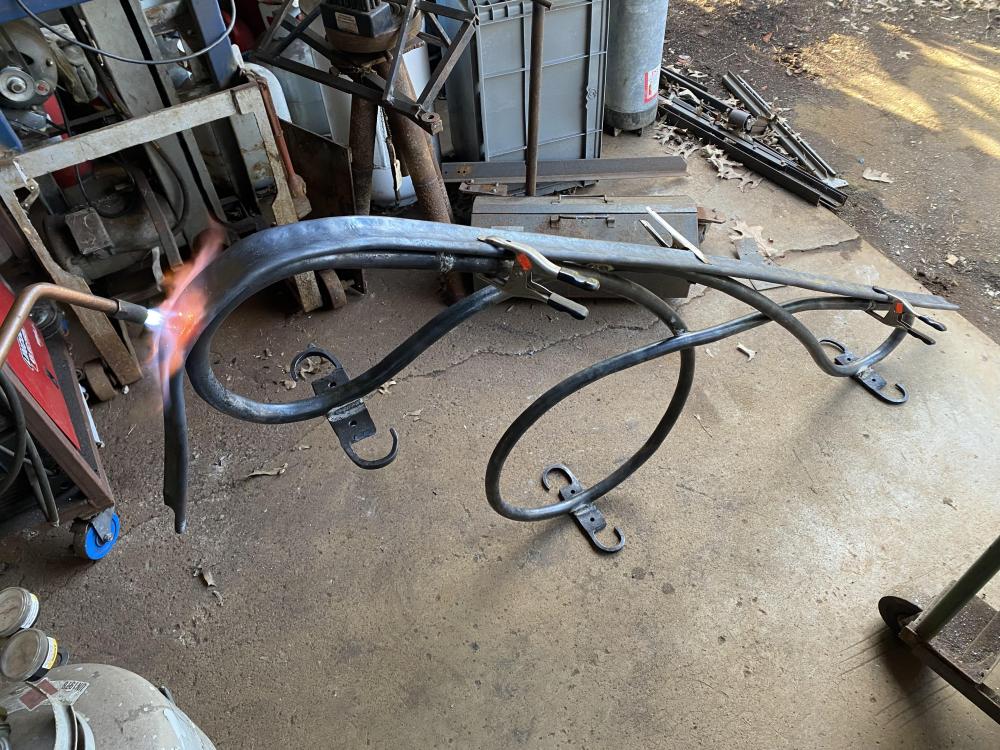
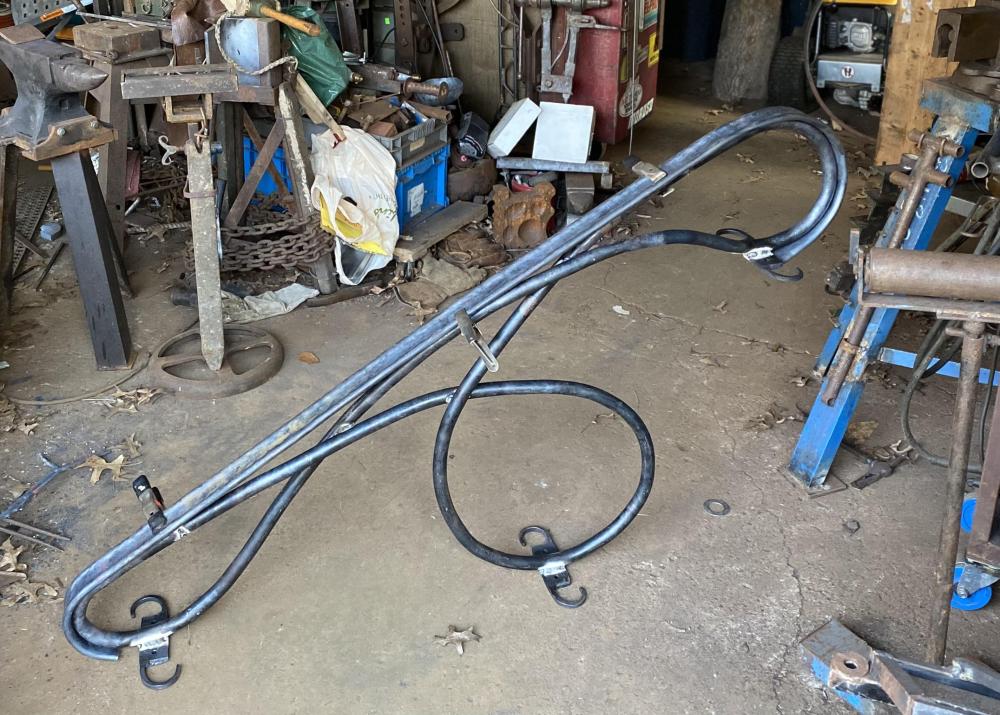
Progress on the latest railing project: The railing still needs to get welded on, there’s some cleanup to do, and then we’ll be ready for paint.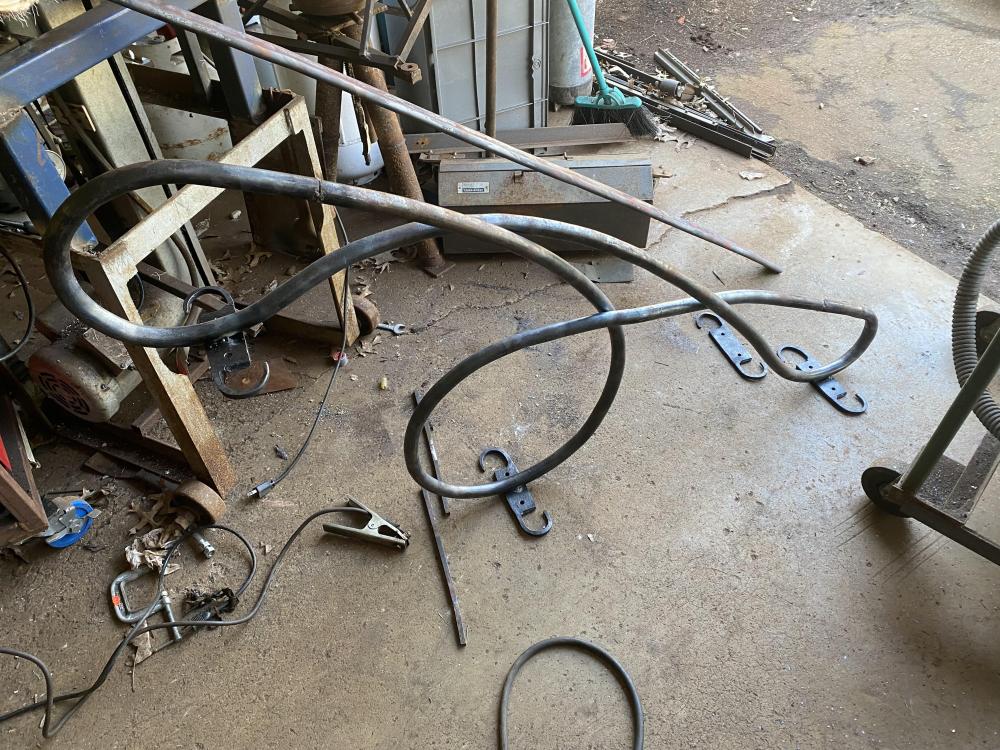
-
What did you do in the shop today?
JHCC replied to Mark Ling's topic in Blacksmithing, General Discussion
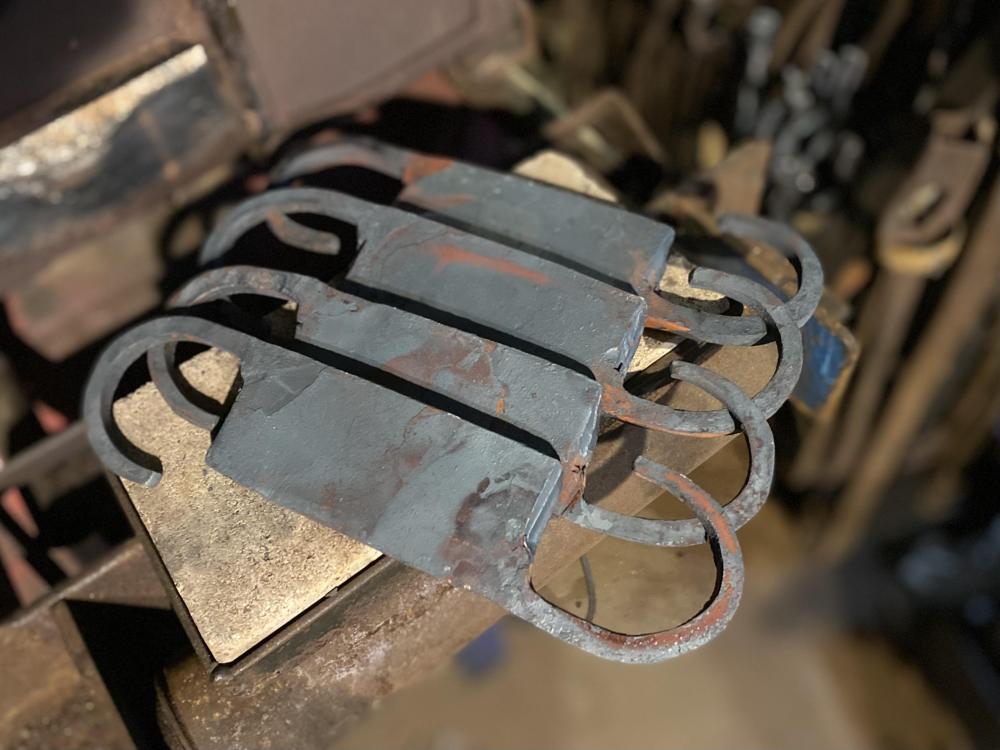
Two significant steps forward. First, I finished forging the mounting brackets for a stair rail project: Second, I added a buffing wheel arbor and motor to my grinder stand: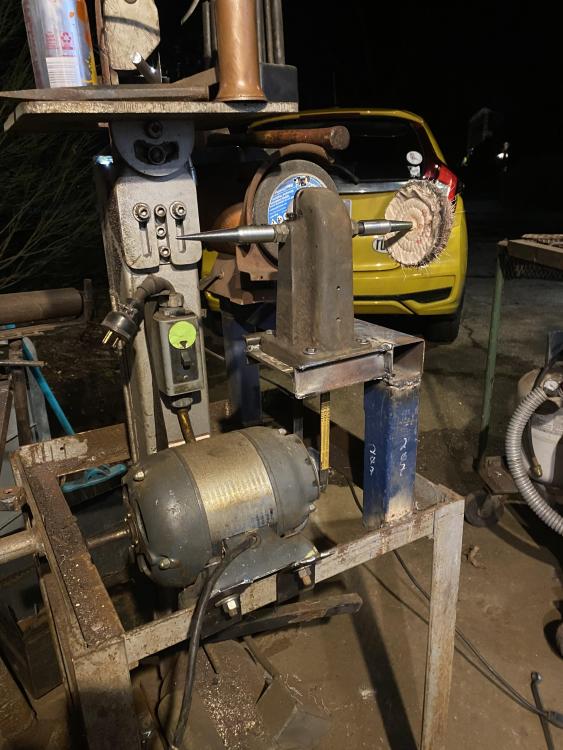
-
Mixing castable refractory and fire clay?
JHCC replied to Treywa's topic in Insulation and Refractories
Gotta pay your dues if you wanna sing the blues. -
Mixing castable refractory and fire clay?
JHCC replied to Treywa's topic in Insulation and Refractories
I'm more concerned that you said "hard fame" when you meant "hard flame". -
Mixing castable refractory and fire clay?
JHCC replied to Treywa's topic in Insulation and Refractories
FMM, refractory cement is generally for lower-temperature applications, such as the firebox for a wood-burning stove. -
Power hammer, hammer eye punch die?
JHCC replied to mnidoone's topic in Slitters, Punches, Drifts, etc
When you're in the learning stage, it's worthwhile to try out what others have done before reinventing the wheel. Torbjörn and Brent Bailey both use round punches and then drift to shape for a reason: it's much easier to align the drift in an already-punched hole than it is to get the alignment perfect the first time (especially under the power hammer). Also, it's easier to release a round with a quick tap-and-twist if it gets stuck. -
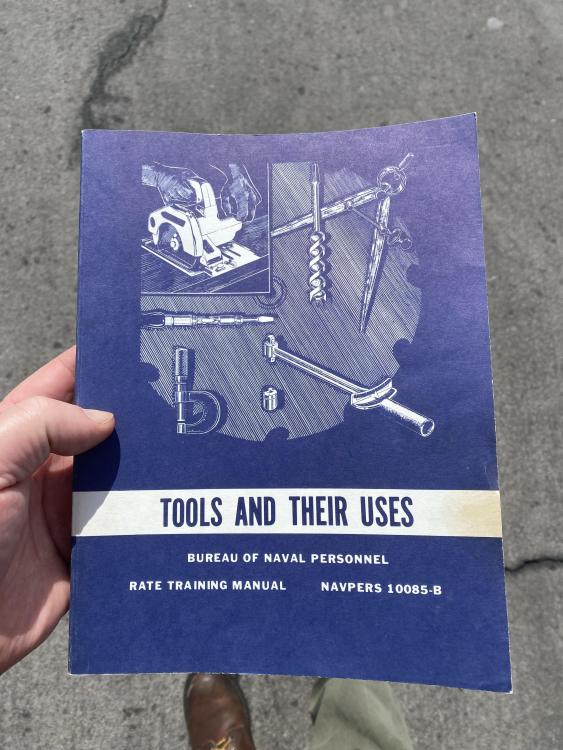
A $1 library book sale find:
-
Nat, you can certainly use multiple small stacks, but you're going to need more than two. The draw of the flue is directly proportional to its cross sectional area, and the general recommendation for this size forge is a flue with a 10"/25cm diameter. Because the area of that circle is about 79 square inches/490 square cm and because a 4"/10cm flue has a cross sectional area of about 13 square inches/79 square cm, you're going to need at least six of them.
-
I actually tried something very much like that, utterly without success. I suppose a lot depends on the belt itself; I had no luck with the heavy grit and tough adhesive of a 36 grit cubitron belt. However, I can report that the blue tape is working pretty well. I did have one belt let go in use, but that was one that had previously been reglued, and I don’t think the adhesive bonded properly to the fabric.
-
Worth a try.
-
I think your flue pipe is a bit too small.
-
What did you do in the shop today?
JHCC replied to Mark Ling's topic in Blacksmithing, General Discussion
He’s a wonderful human being, and I was glad to have him over.