
JHCC
-
Posts
19,292 -
Joined
-
Last visited
Content Type
Profiles
Forums
Articles
Gallery
Downloads
Events
Everything posted by JHCC
-
Speaking of Antiques Roadshow, here’s a friend of mine on AR sharing an incredible story about her father: https://youtu.be/z4NGYaYaCYo?t=1233
-
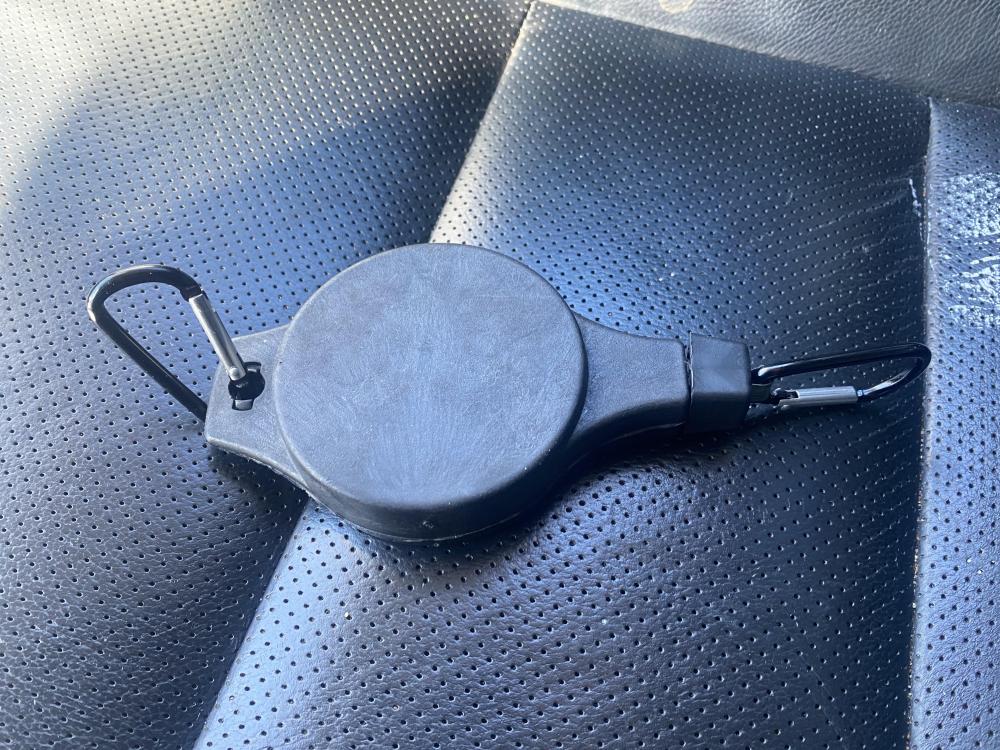
Actually, looking into it a bit more, I find that I’ve inadvertently been guilty of a bit of terminological inexactitude. According to a commercial website that I will not link to here: ”Tool balancers and tool retractors are both specialized pieces of equipment designed to maximize workspace efficiency. Tool balancers utilize load capacity as well as spring tension along a cable to suspend tools in predetermined locations. “Conversely, tool retractors draw back tools to a predetermined position once they're done being used, often away from the workspace. The instrument is usually connected to a cable that's wound in on a spring-loaded coil for maximum retraction power.” So, tool retractor. I lounge about corrected.
-
Another raiding expedition into the dumpster behind the college theater yielded a light duty tool balancer that extends about 30”. I think I’ll mount it to the outside of my portable power tool storage cabinet, to keep the angle grinder wrench handy.
-
A lot of the time, it’s not necessarily about whether or not a piece is “good”, but about how well it works with the other pieces in the collection. At our museum, we’re having to turn down a LOT of offered donations for the simple reason that we don’t have enough storage space. There is a signature, but it’s not entirely legible. Certainly not enough to be able to put a name to the artist.
-
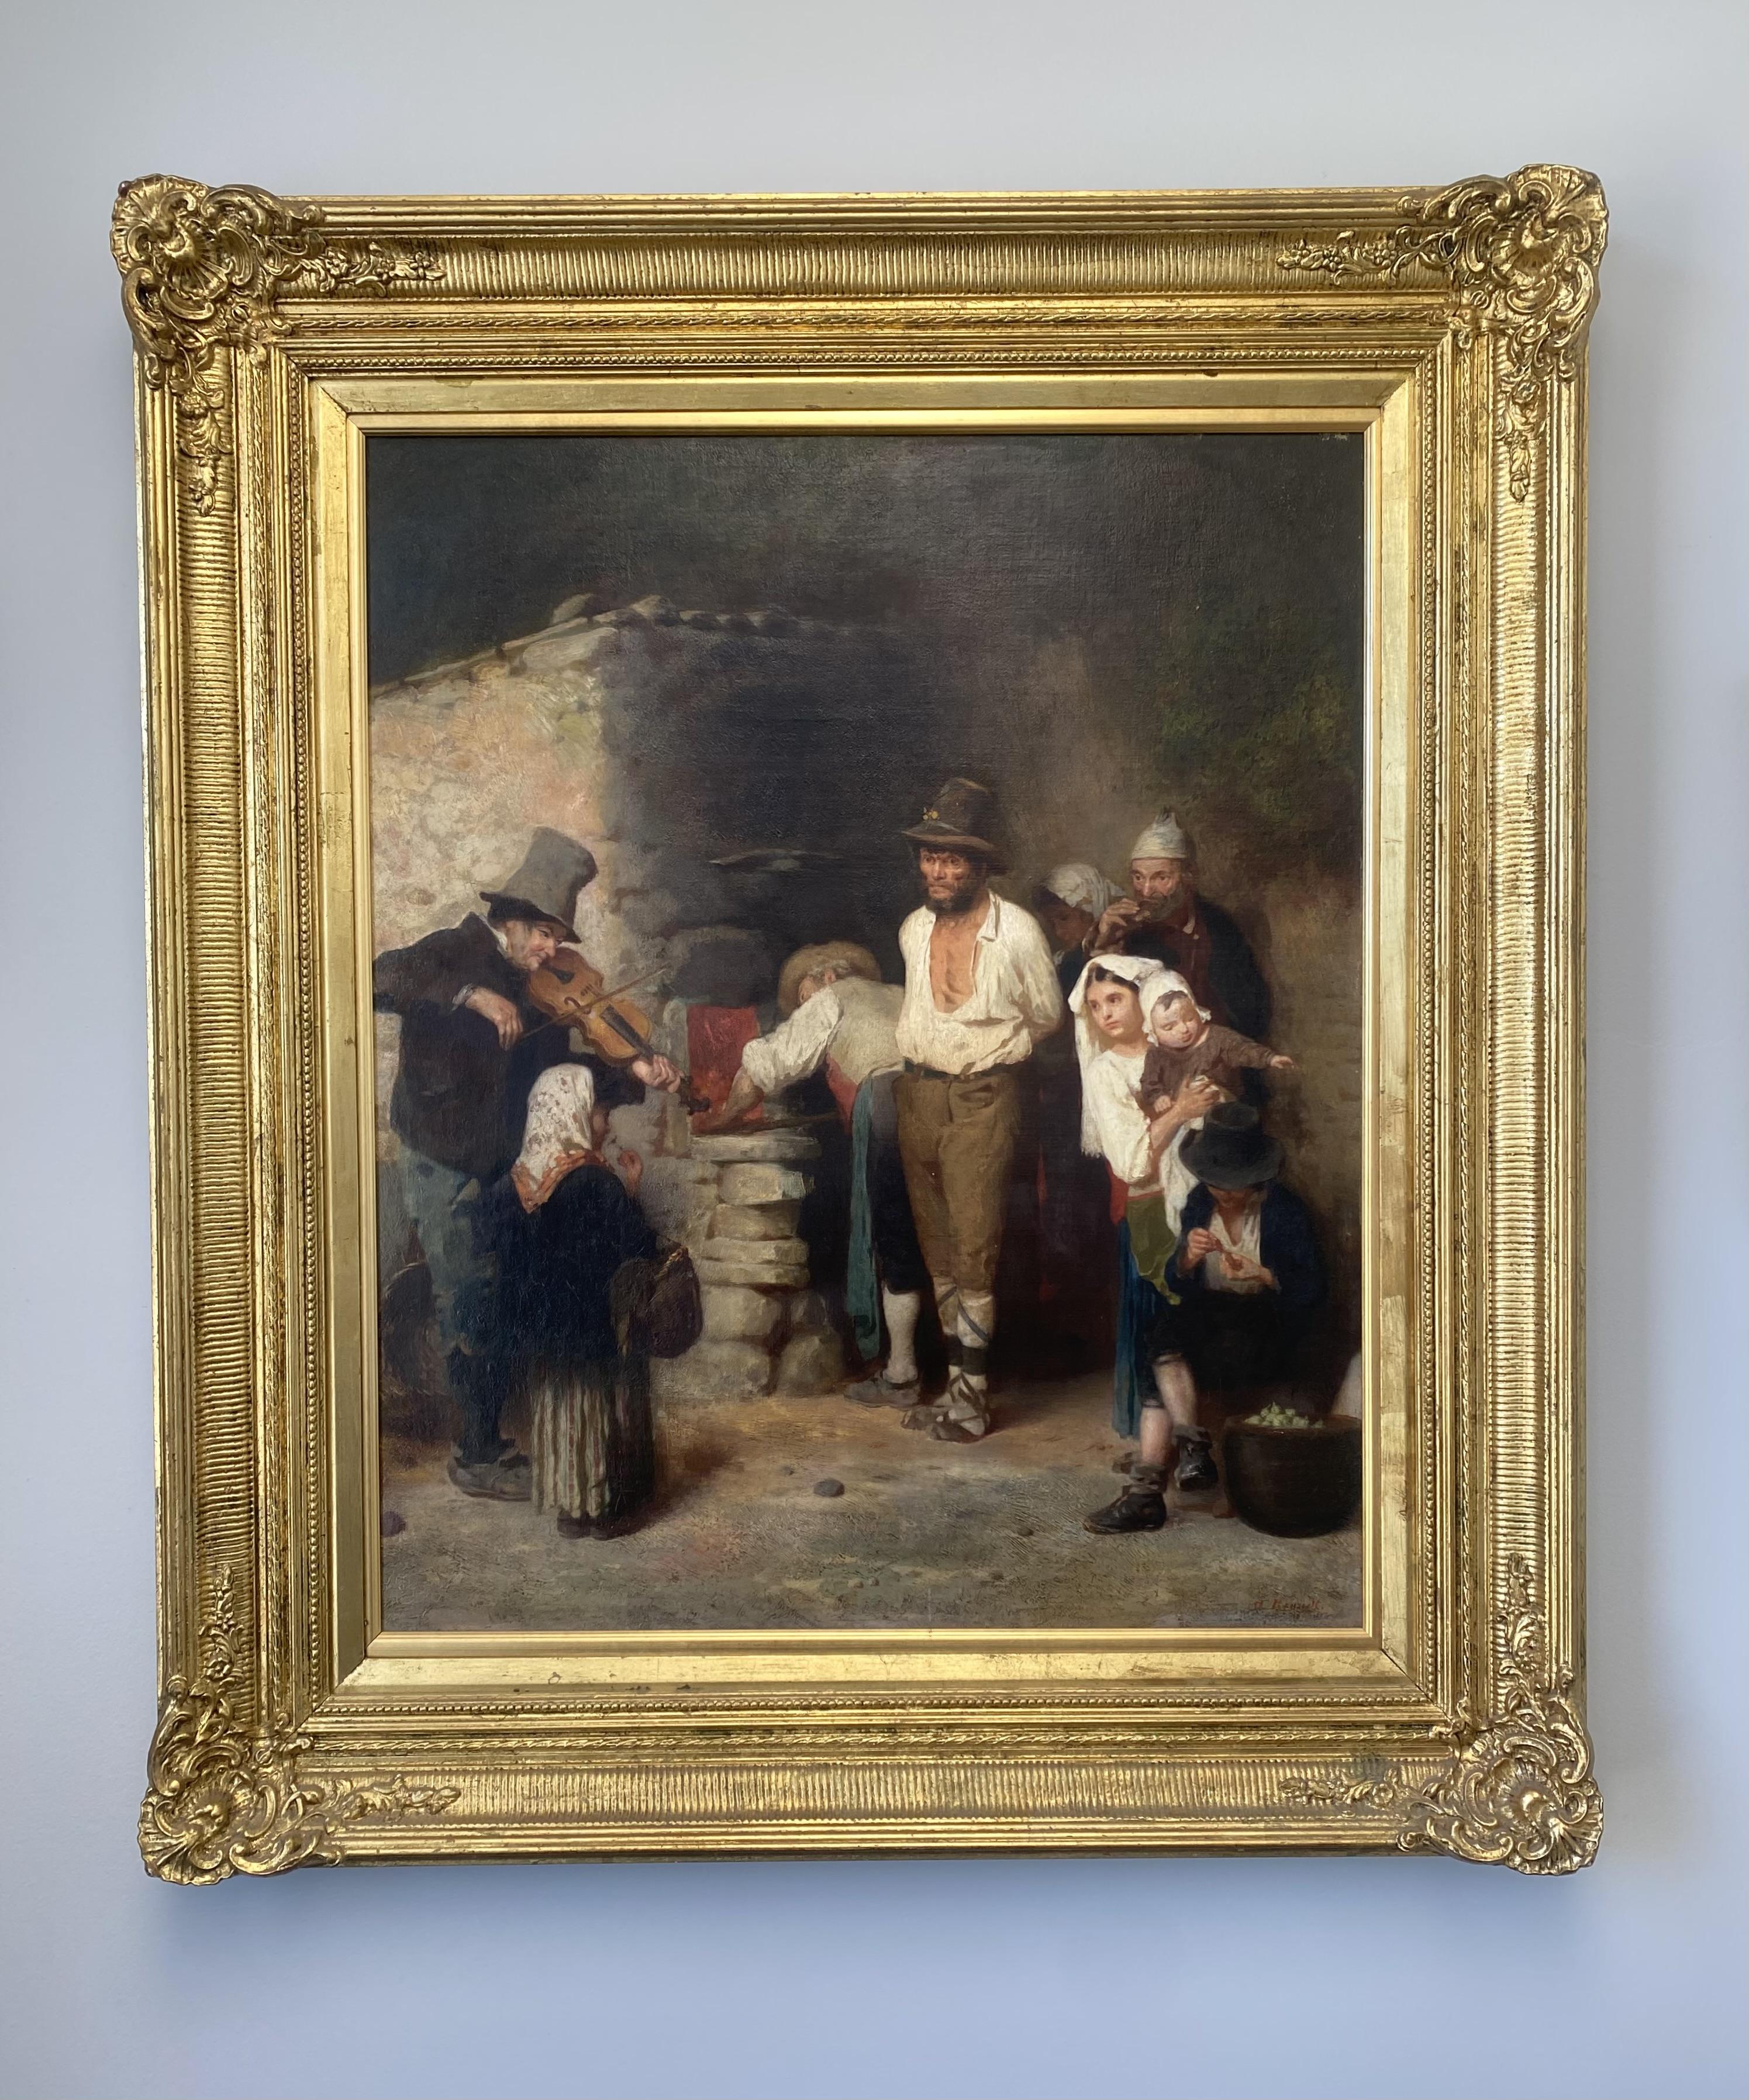
It suddenly occurred to me that I’ve never posted here a photo of the painting that hangs on the wall of my office. This was donated to our art museum a long time ago, but the curators didn’t want it. It spent many years languishing in the basement of our building along with a number of other rejected artwork donations until some planned construction necessitated clearing out the storage space, and we were given our pick of what was there. I grabbed this, and it’s been hanging in my office ever since. I haven’t been able to identify the artist, but it’s most likely 19th century European, possibly German. I do like that it combines two of my favorite things: blacksmithing and fiddle music!

-
It’s yours for a mere $299.99!
-
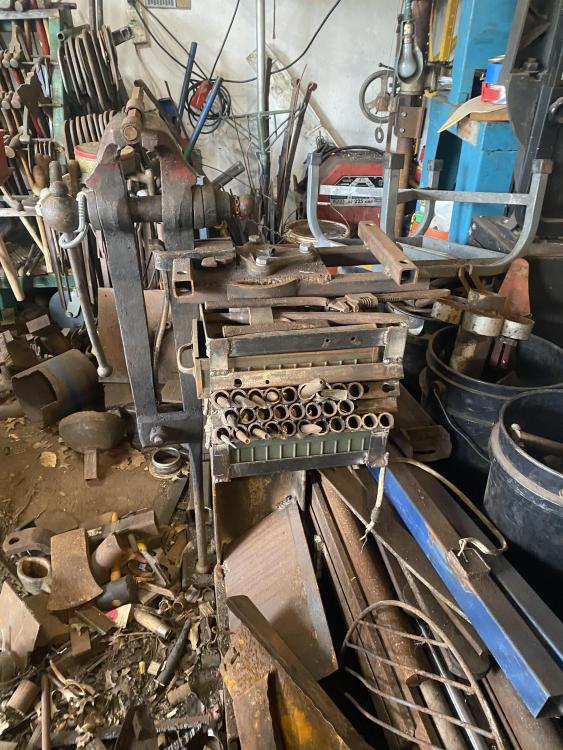
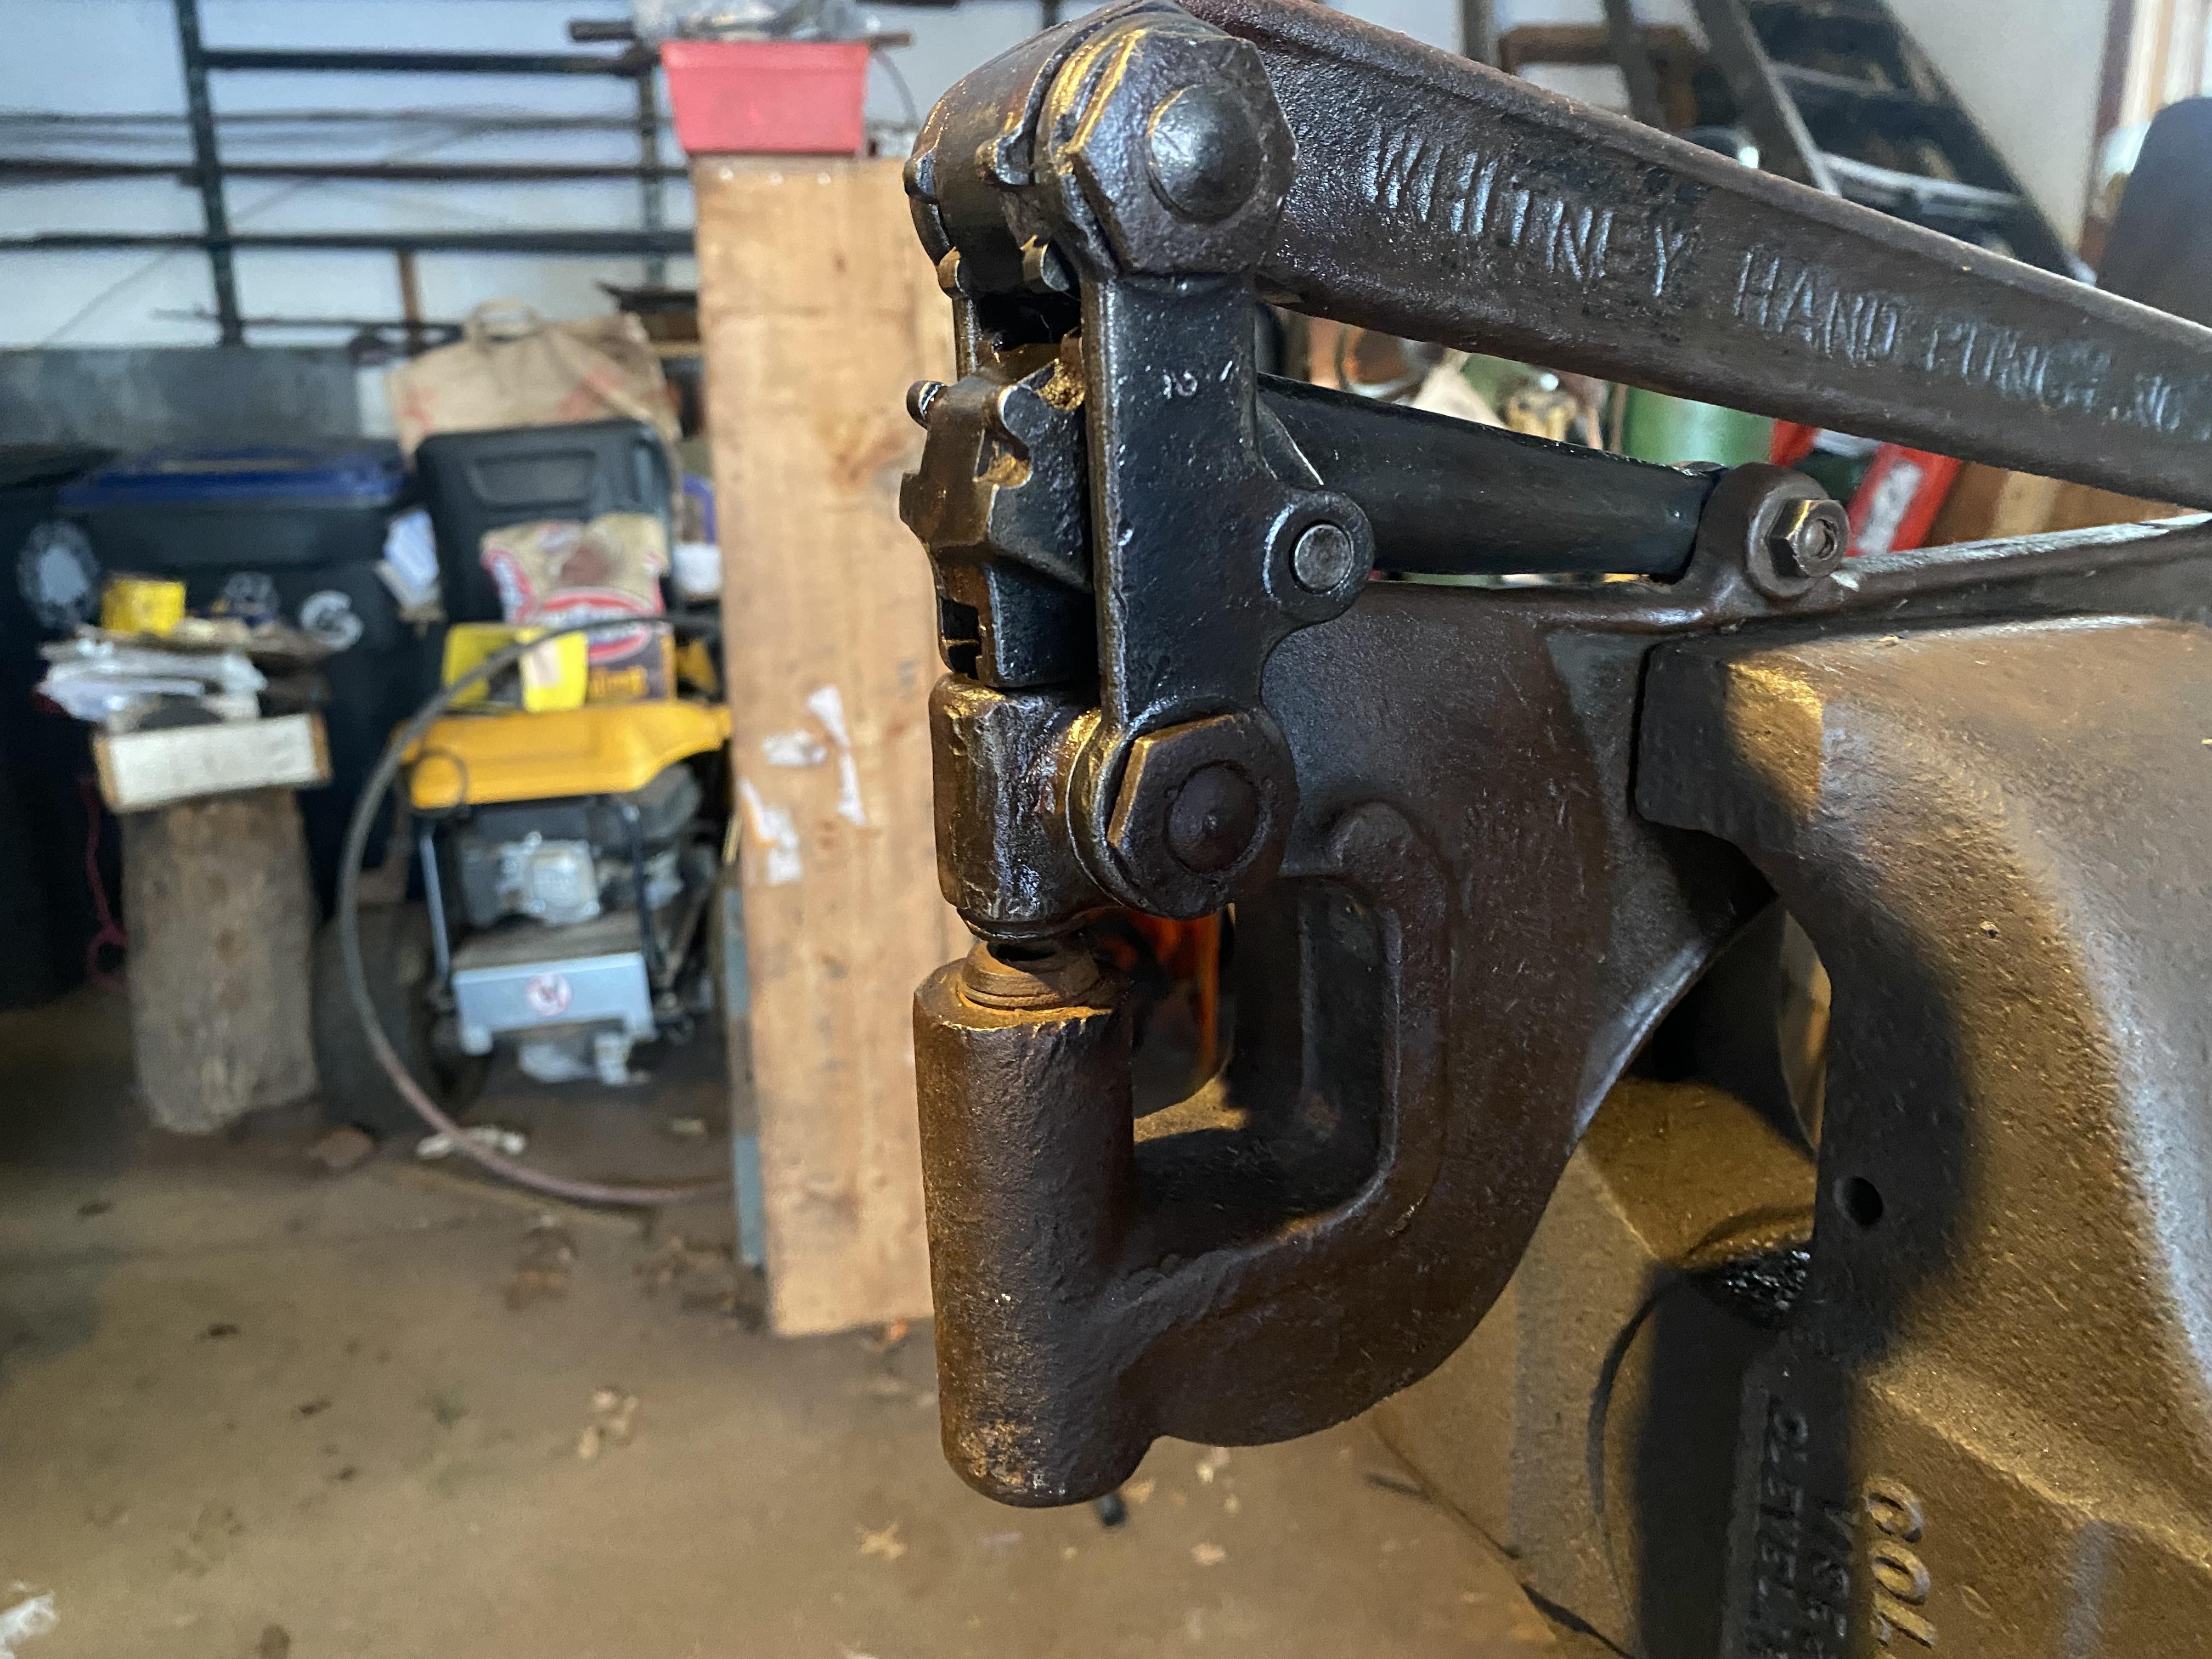
I’ve seen that kind of geared mechanism on shears and punches. For example, here’s the analogous part on my W. A. Whitney #2:

-
mnidoone is correct. The plate that fastens rails together end-to-end is called a “fish plate”; these have become less common since the development of thermite welding.
-

What did you do in the shop today?
JHCC replied to Mark Ling's topic in Blacksmithing, General Discussion
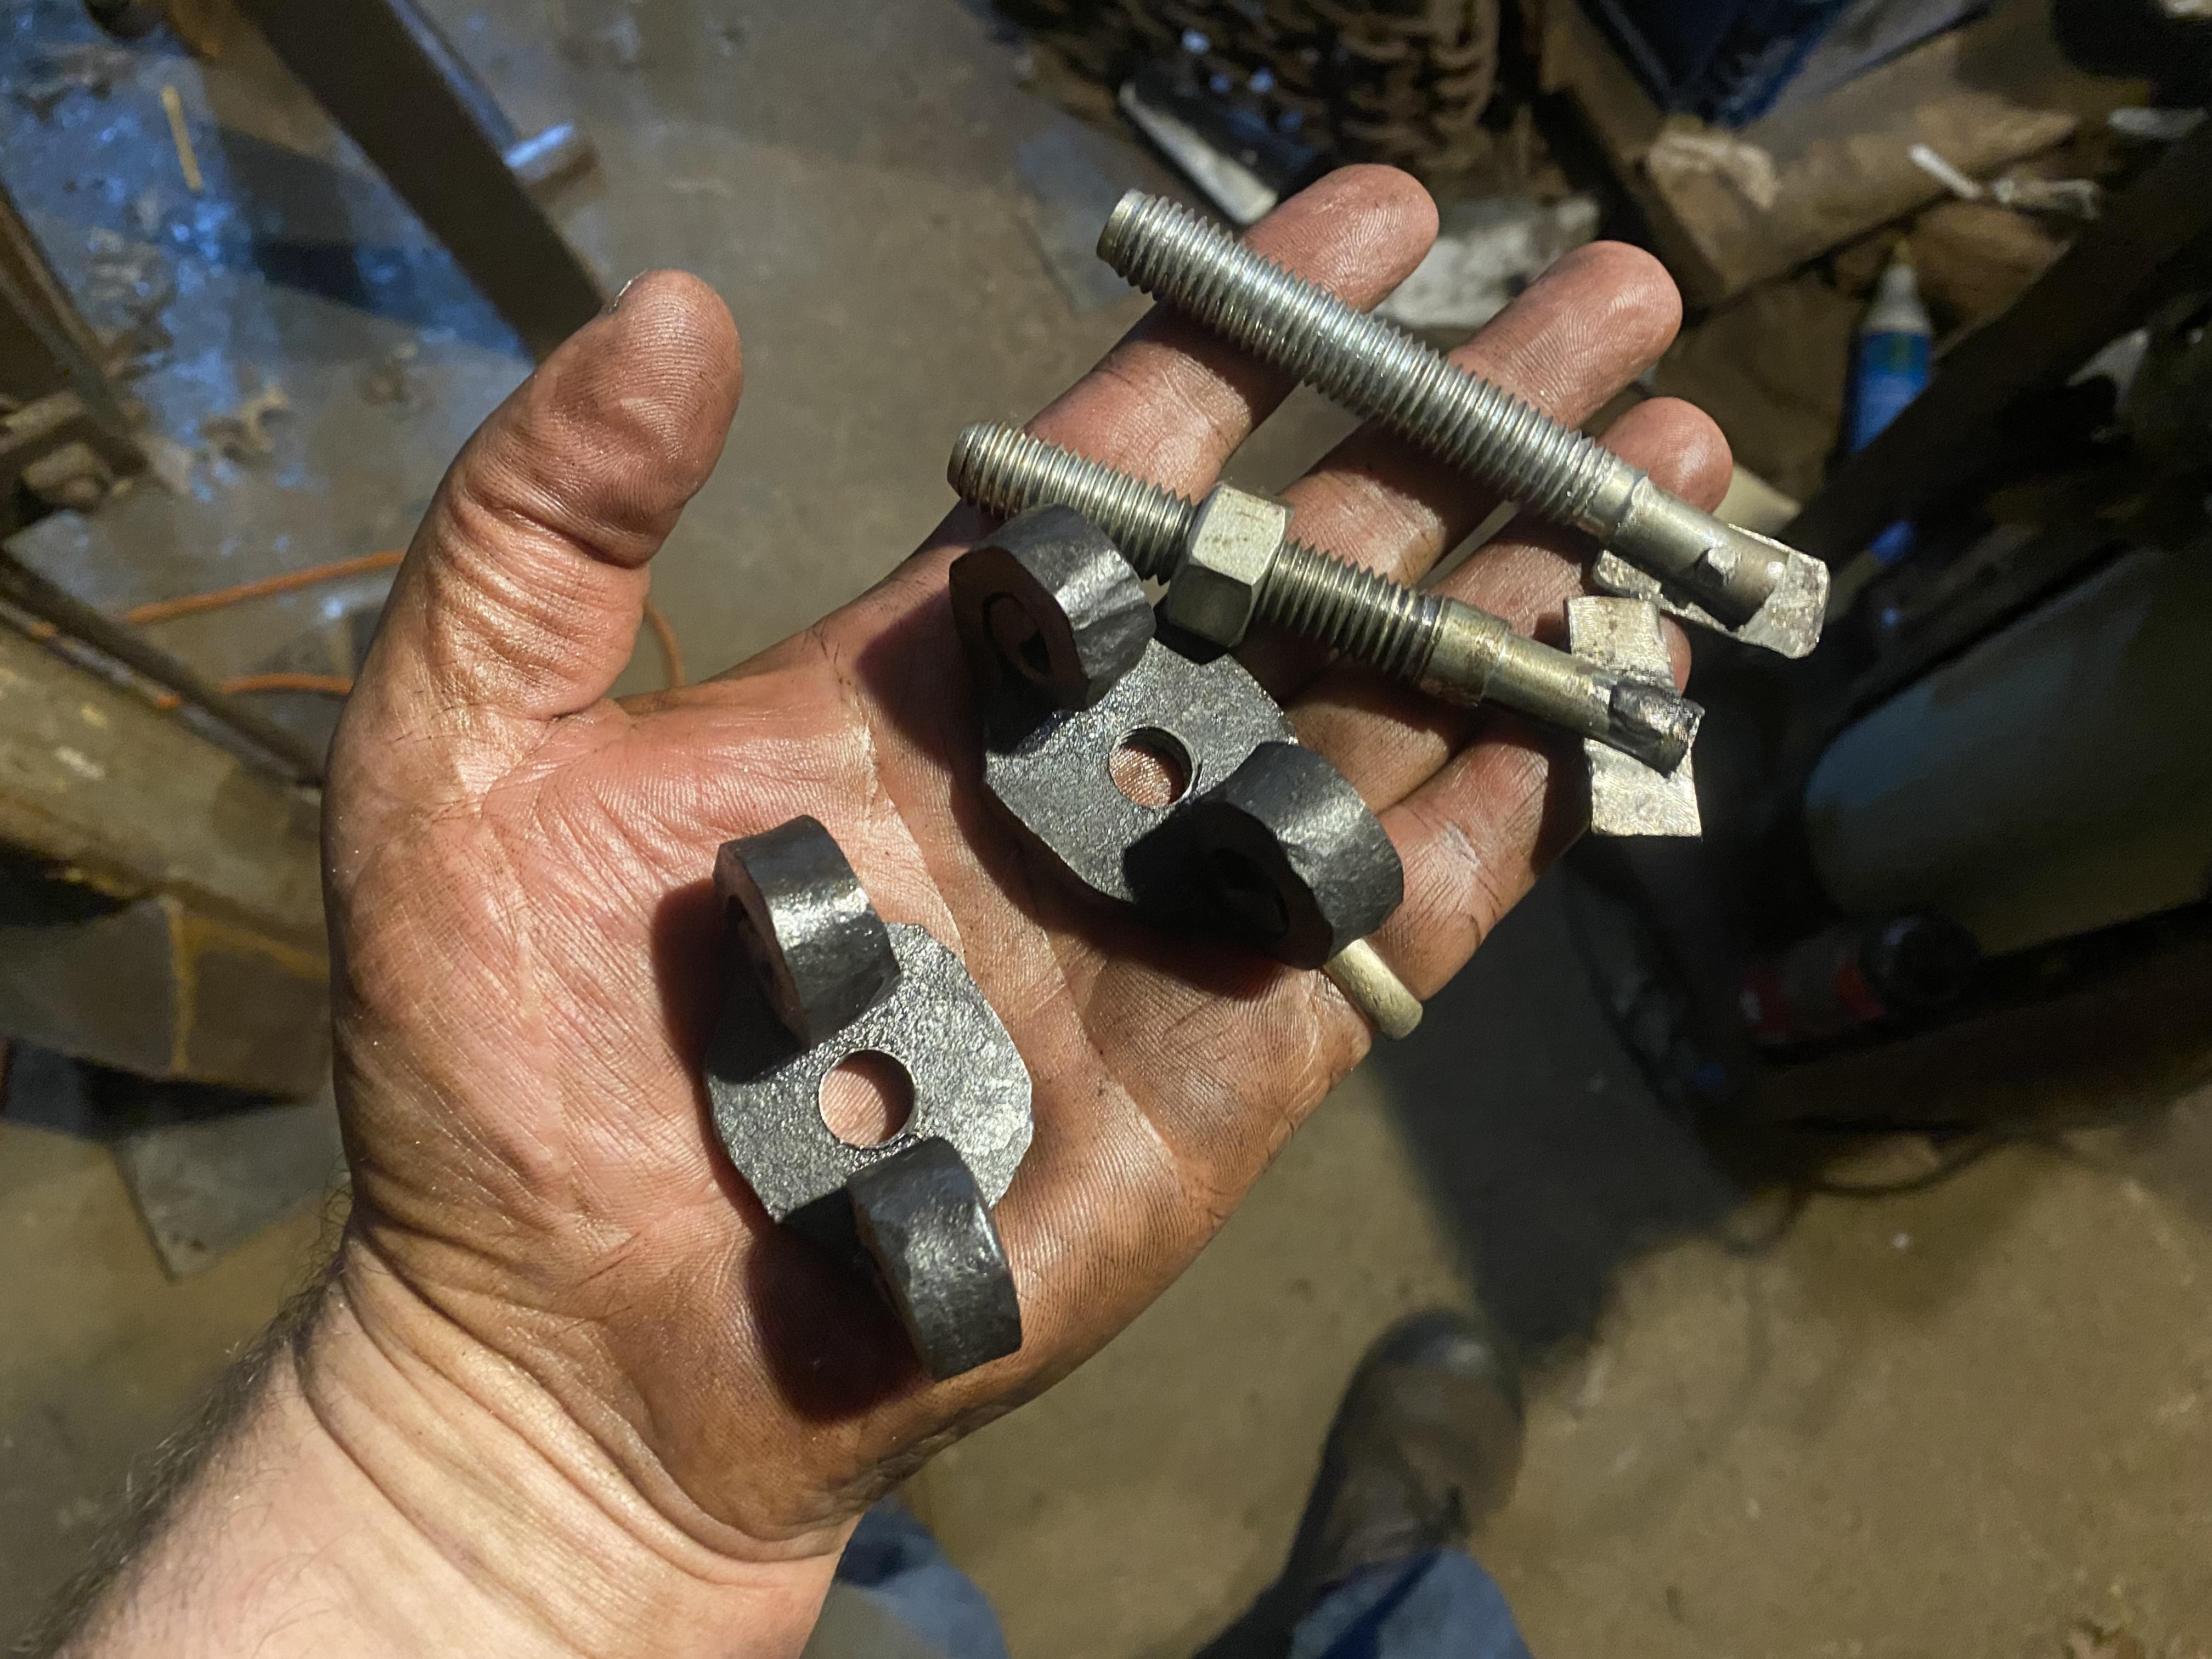
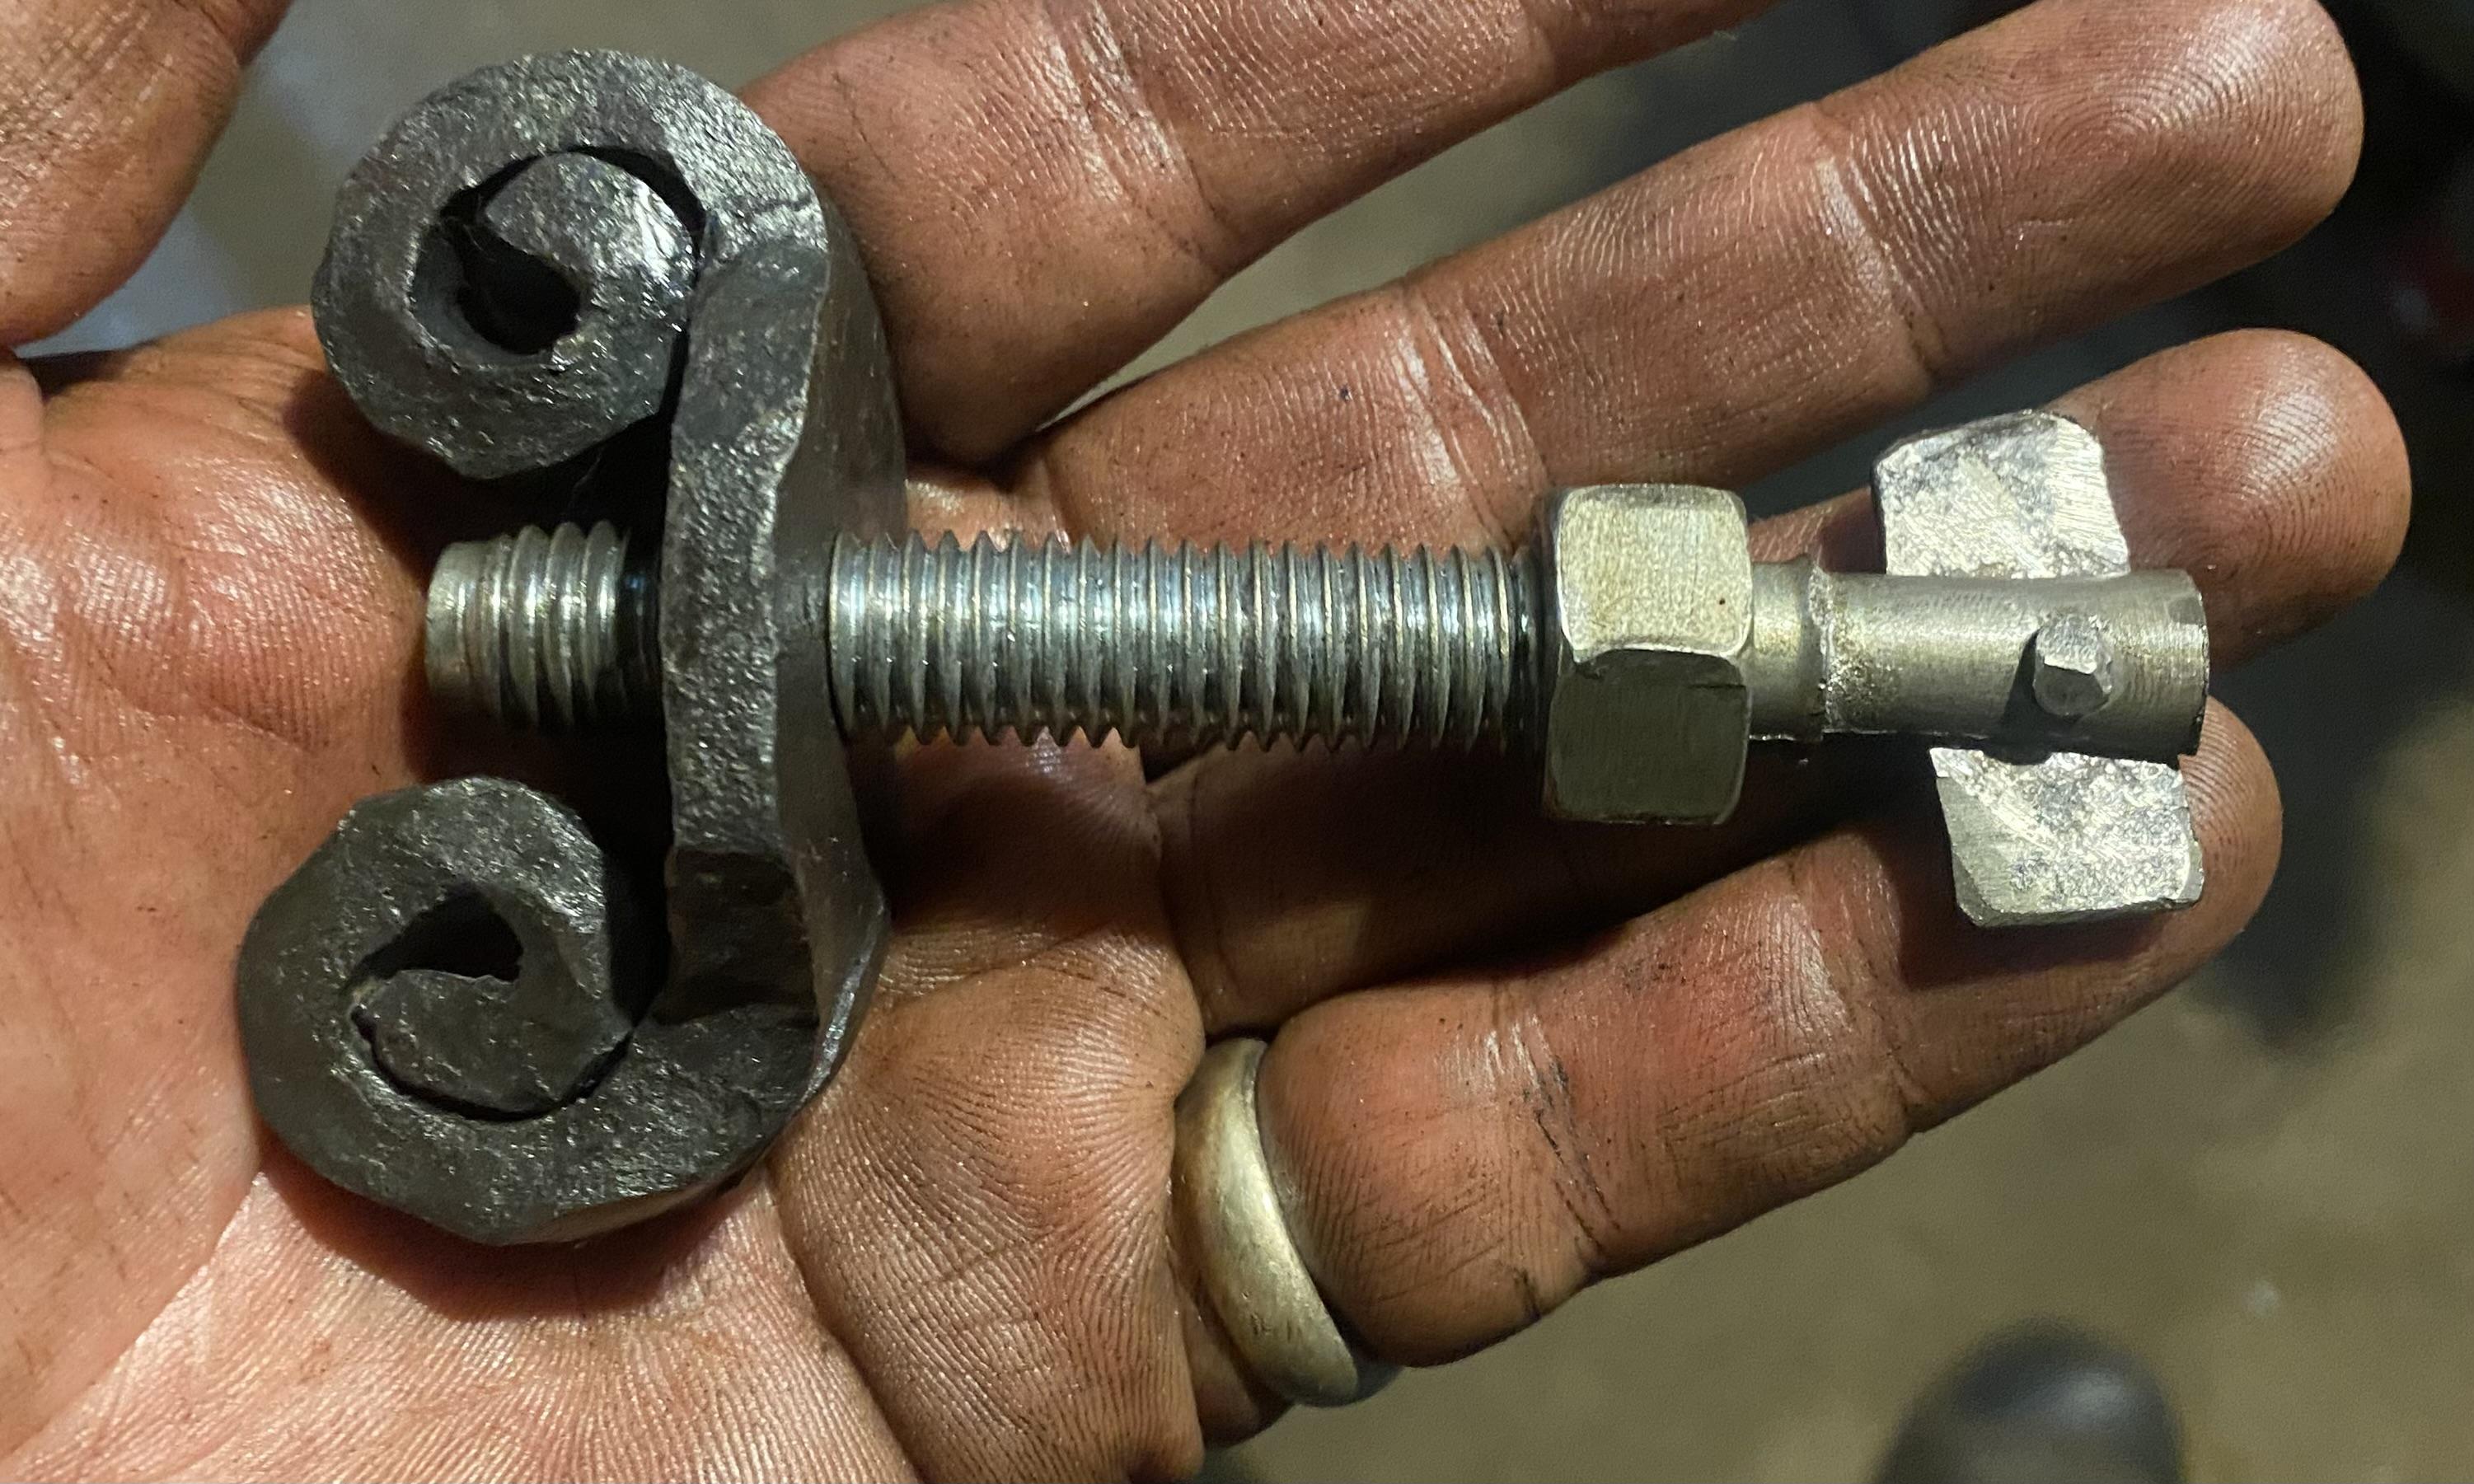
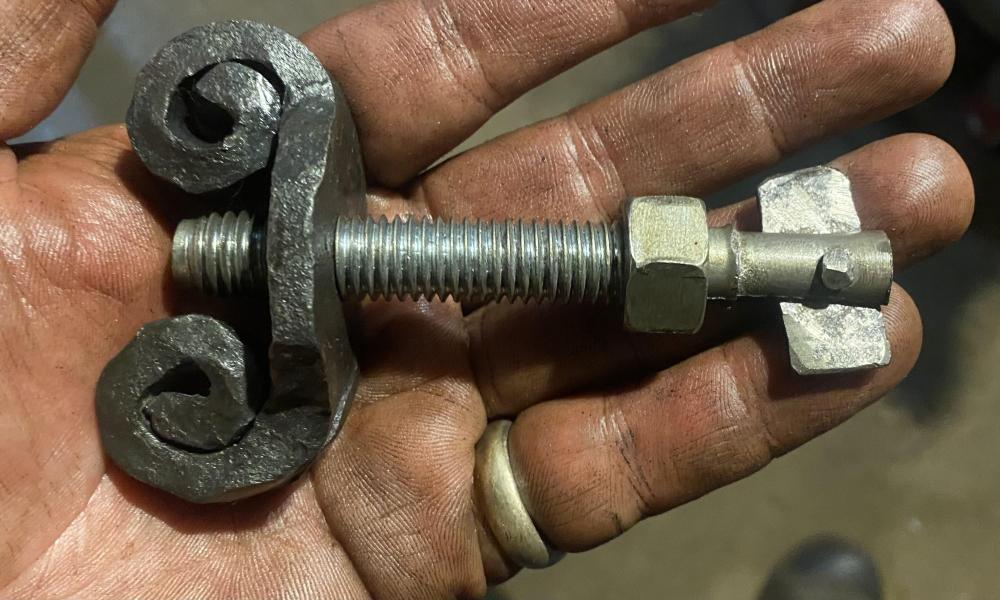
Ooh, pretty. As detailed in THIS COMMENT, I made a pair of shopmade T-anchors and forged wingnuts for quick mounting and unmounting of my Hossfeld bender on its stand.
-
JHCC's consolidated Hossfeld Universal Bender #2 thread
JHCC replied to JHCC's topic in Cold Worked Iron and Steel
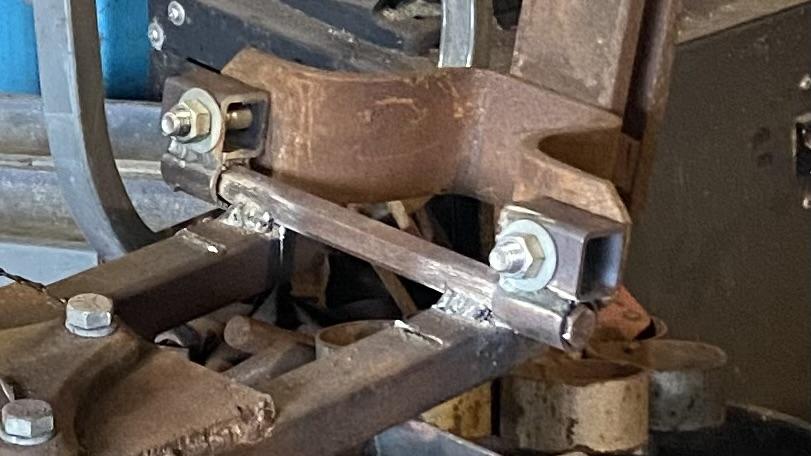
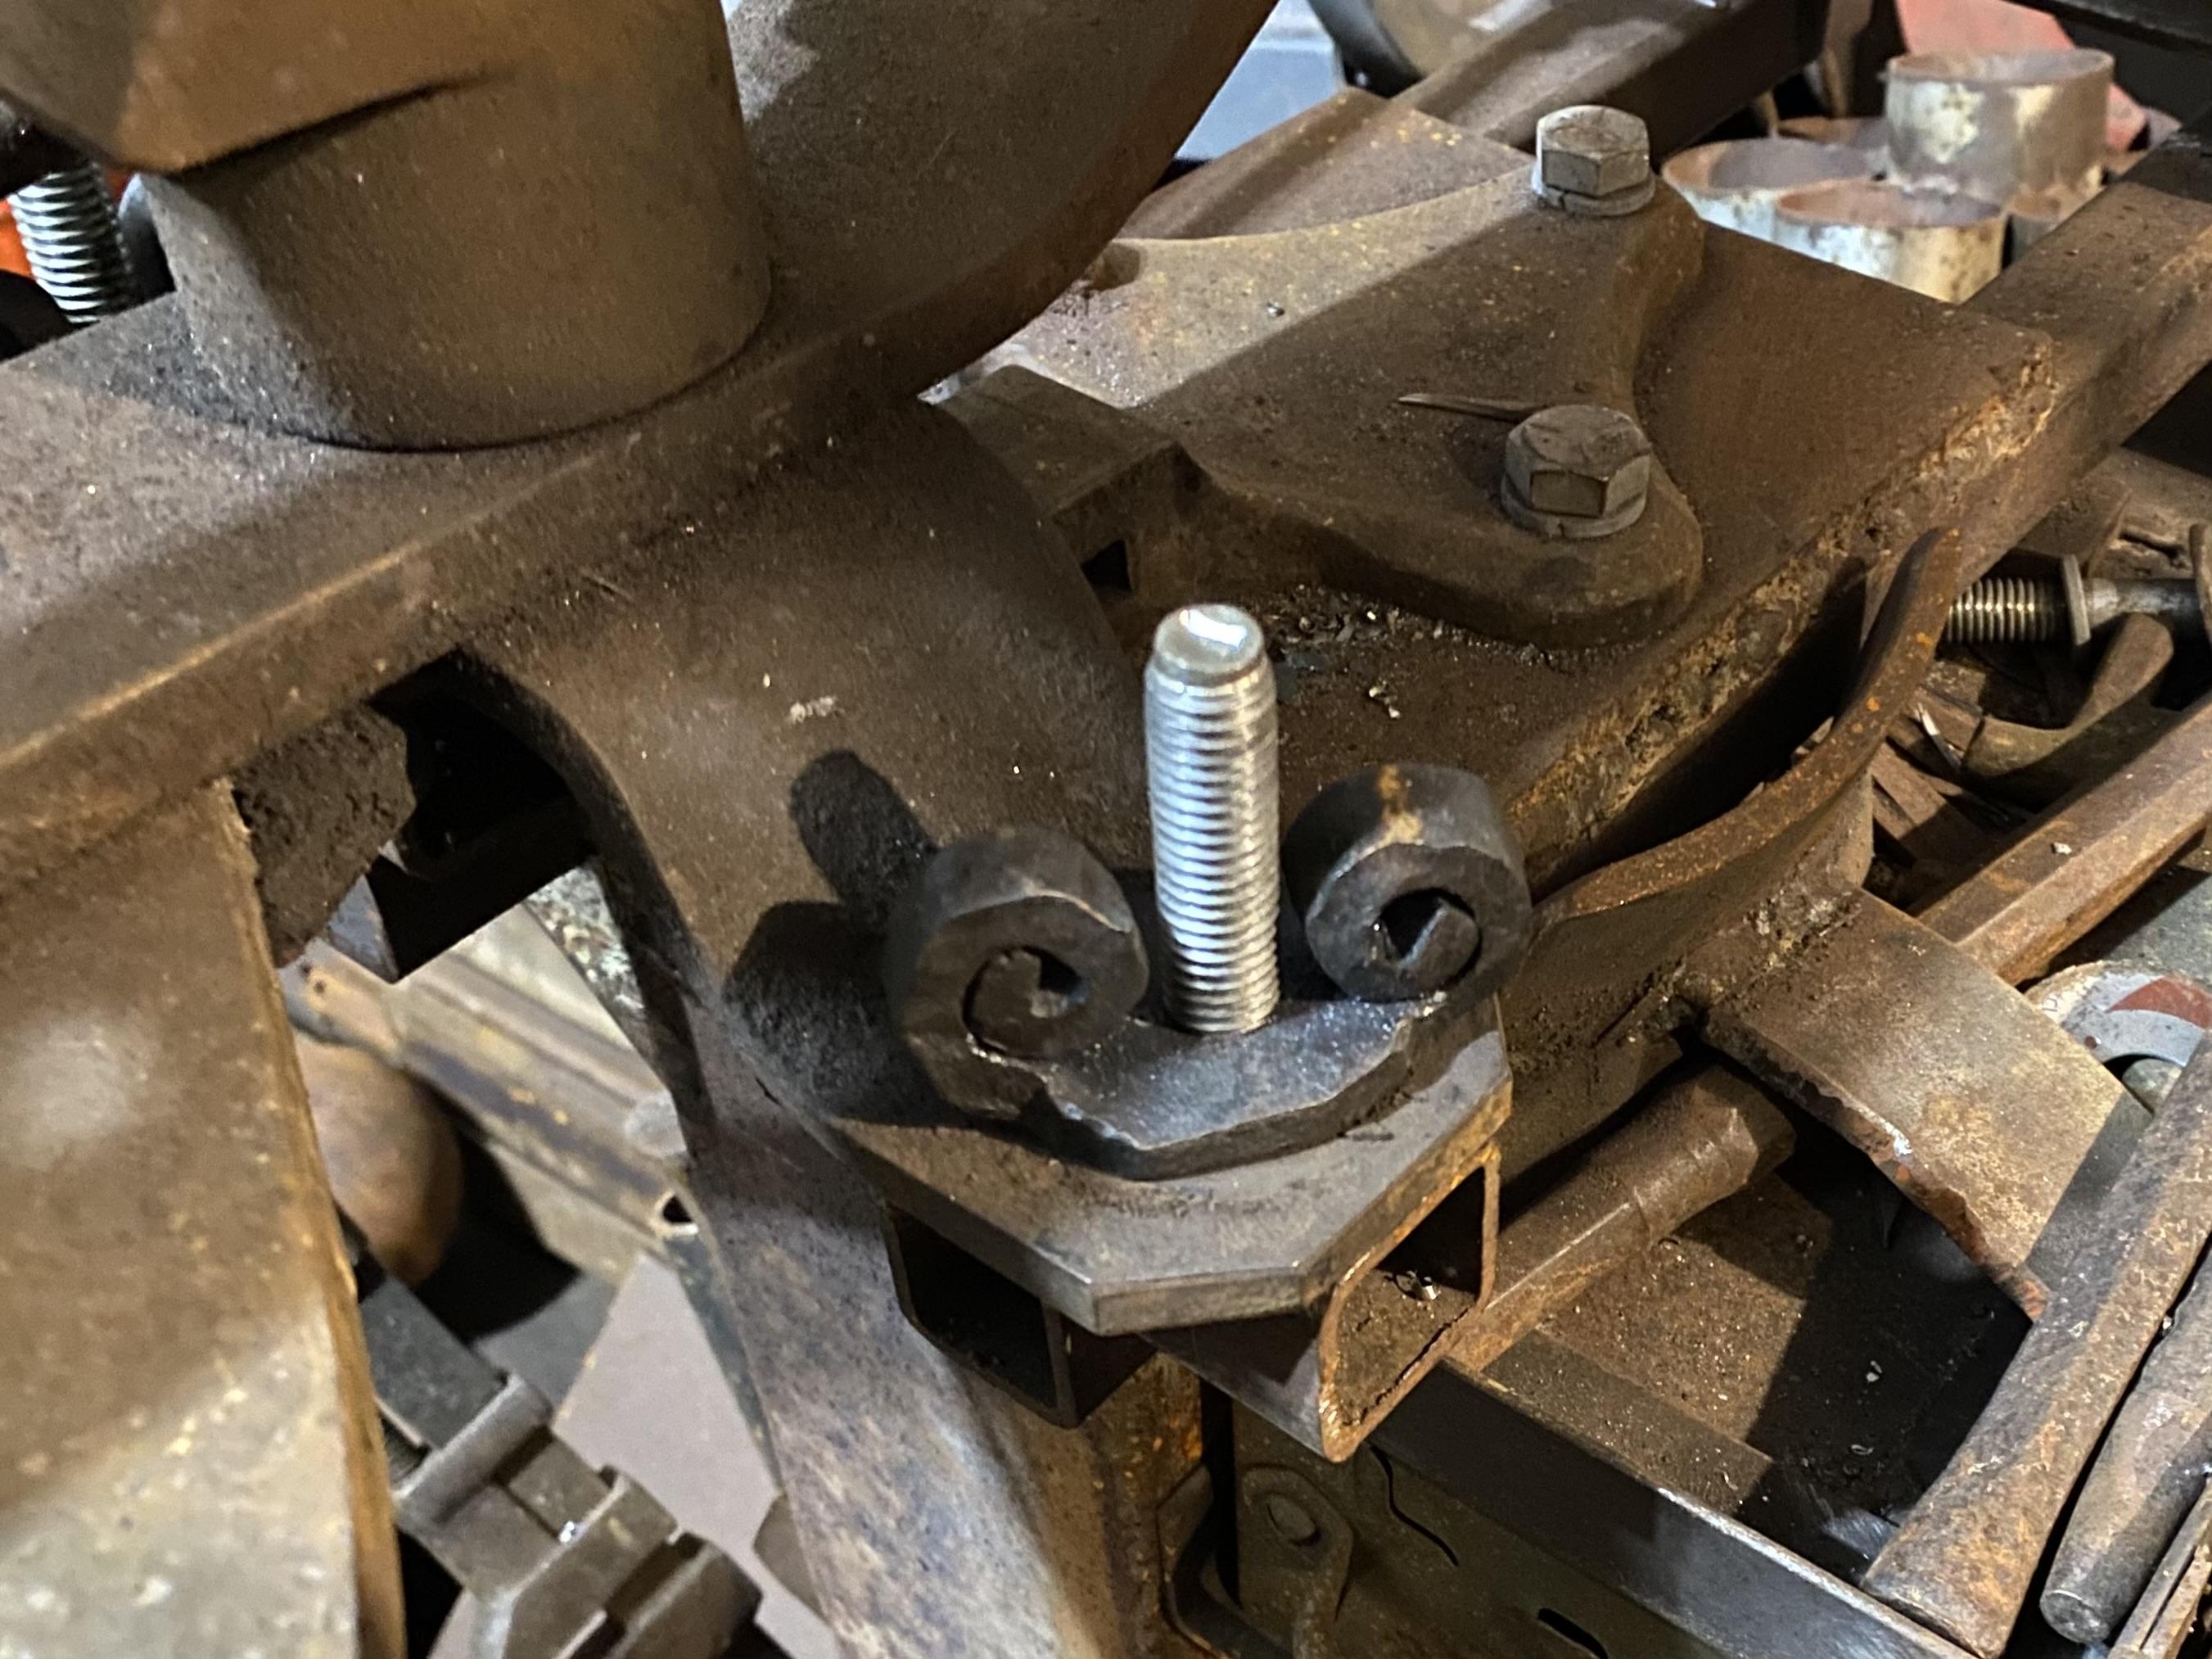
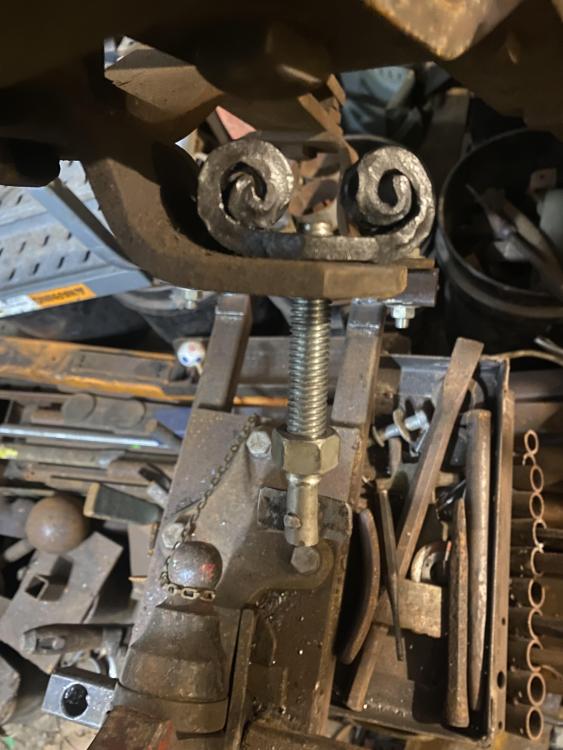
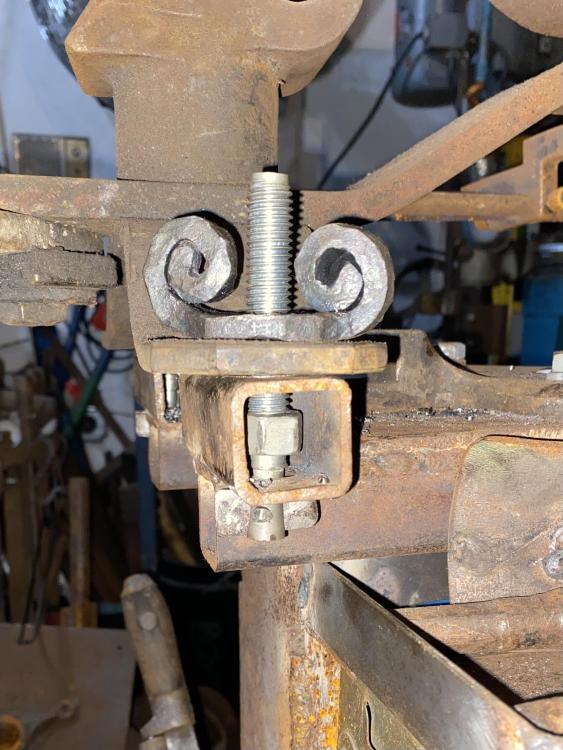
Returning to the mounting system, I added a final detail: a pair of shopmade 1/2” x 5” T-anchors with forged wingnuts. These are permanently mounted on the front feet of the bender (with the help of capture nuts at the bottoms of the threaded sections) and drop down into the bolt holes in the mounting bracket when the bender is lowered into place. The toggles are moved into perpendicular, and the wingnuts screw down to hold the bender in place. No hunting for missing parts or the right size wrench. I love it when a plan comes together.

-
That's a good point, and it highlights the need to do a good cost/benefit analysis. I have a lot of salvaged steel that used to be part of various industrial fixtures and carts, and almost all of it ends up in fabrication projects where I only need to clean off the areas to be welded. Forged projects made from steel of the same dimensions always start with new, clean stock from which I don't have to spend a ton of time and energy removing the paint.
-
What did you do in the shop today?
JHCC replied to Mark Ling's topic in Blacksmithing, General Discussion
Keep us updated! Post photographs! (Also, an observation: attention to this kind of detail is what separates the kind of individual work we do from shops in the developing world that crank pieces out by their hundreds for the mass market. There's obviously a point of diminishing returns where wasting time on imperceptible details really isn't worth the effort, but at the other end of the spectrum, a minimum investment of care and attention really elevates the quality of the finished piece. Achieving mastery lies in learning not just how to do things, but also what things to do.) -
Clarksville is about half an hour from Fort Campbell, right? Maybe there's someone in their maintenance department who can help you out.
-
What did you do in the shop today?
JHCC replied to Mark Ling's topic in Blacksmithing, General Discussion
At a minimum, I'd suggest using a flap disc in an angle grinder to clean up the welds on the top surface: After that, the next priority would be to smooth the welds in the obtuse angles on the outside: If you can reach the welds in the inside corners with a die grinder or a file, that would be great but not critical. The top and outside corners are most obvious to the eye, so cleaning them up will give you maximum return on effort. (You'll also minimize the risk of scratching the underside of a pot or dish.)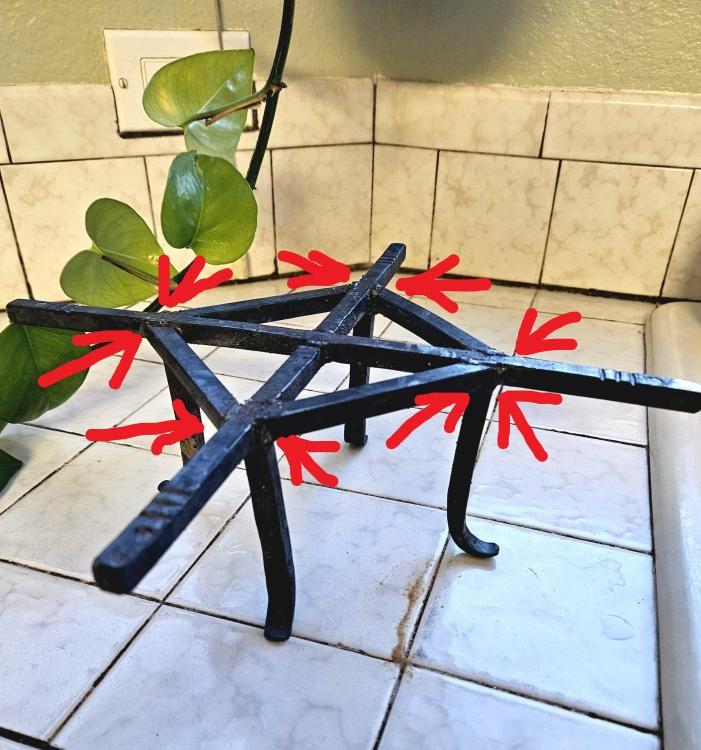

-
What did you do in the shop today?
JHCC replied to Mark Ling's topic in Blacksmithing, General Discussion
I like the design, but it would look a lot better if you cleaned up the welds. Ten minutes with an angle grinder will make a world of difference! -
JHCC's consolidated Hossfeld Universal Bender #2 thread
JHCC replied to JHCC's topic in Cold Worked Iron and Steel
Maybe theoretically, but not enough to make any real difference. The number of times that I've had to go all the way out to the end for maximum leverage is basically zero. Now, I have an idea for a setup to increase leverage without having to invest in the hydraulic conversion kit. More to come.... -
JHCC's consolidated Hossfeld Universal Bender #2 thread
JHCC replied to JHCC's topic in Cold Worked Iron and Steel
I did too, but then I realized why the angle exists in the first place: it gives you a LOT more flexibility in the range of motion and where you stand relative to the bender. -
JHCC's consolidated Hossfeld Universal Bender #2 thread
JHCC replied to JHCC's topic in Cold Worked Iron and Steel
Allow me to remind you how much you sidetracked this very thread with a discussion of black holes. Looking back, I realize that I forgot to mention here that in early January, I modified the handle extension with a bend to match Hossfeld's original:
-
JHCC's consolidated Hossfeld Universal Bender #2 thread
JHCC replied to JHCC's topic in Cold Worked Iron and Steel
As documented in THIS COMMENT on the "What did you do in the shop today?" thread. -
The older I get, the better I was.
-
Designing a bamboo Forge
JHCC replied to DarkMamba's topic in Solid Fuels: Coal, Coke, Charcoal, Wood, etc
Bamboo is going to behave basically the same as wood, although its thin cross section is going to mean you're going to be burning through quite a lot of it. Because both wood and bamboo only get hot enough to forge metal once they've burned down to coals, you have two basic options. One would be a very deep V-shaped forge, where you add the fuel on top, and it settles into a concentrated hot spot at the bottom as it burns down (Google "Whitlock forge" for a commercially made example). The other would be to make a regular JABOD forge (Just A Box Of Dirt) and fuel it with the coals from a separate fire pit, where you do the initial burn-down of the bamboo. There's a good discussion of both these options on this thread: My understanding is that Japanese bladesmiths generally use softwood charcoal. However, bamboo-based charcoal is often used by metalworkers who need their fire to be as impurity-free as possible, such as silversmiths. (This is one reason that willow-based charcoal was the preferred fuel for European and early American silversmiths, in addition to how readily willow adapts to coppicing and thus ensuring a constant supply of raw material.) Bamboo-based charcoal is also used for burning incense, as it imparts no additional odors of its own. -
JHCC's consolidated Hossfeld Universal Bender #2 thread
JHCC replied to JHCC's topic in Cold Worked Iron and Steel
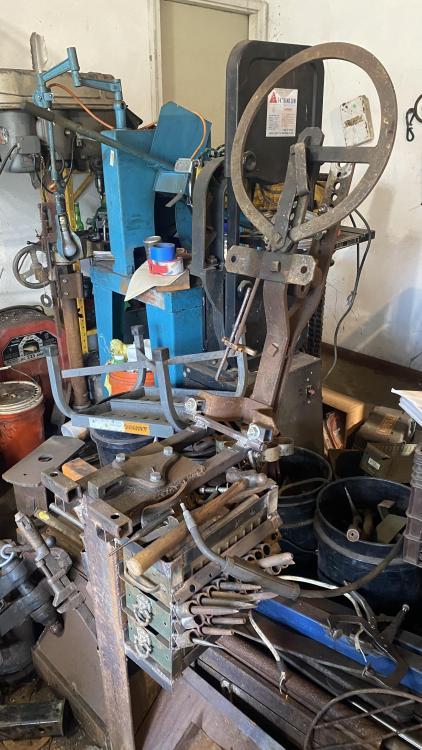
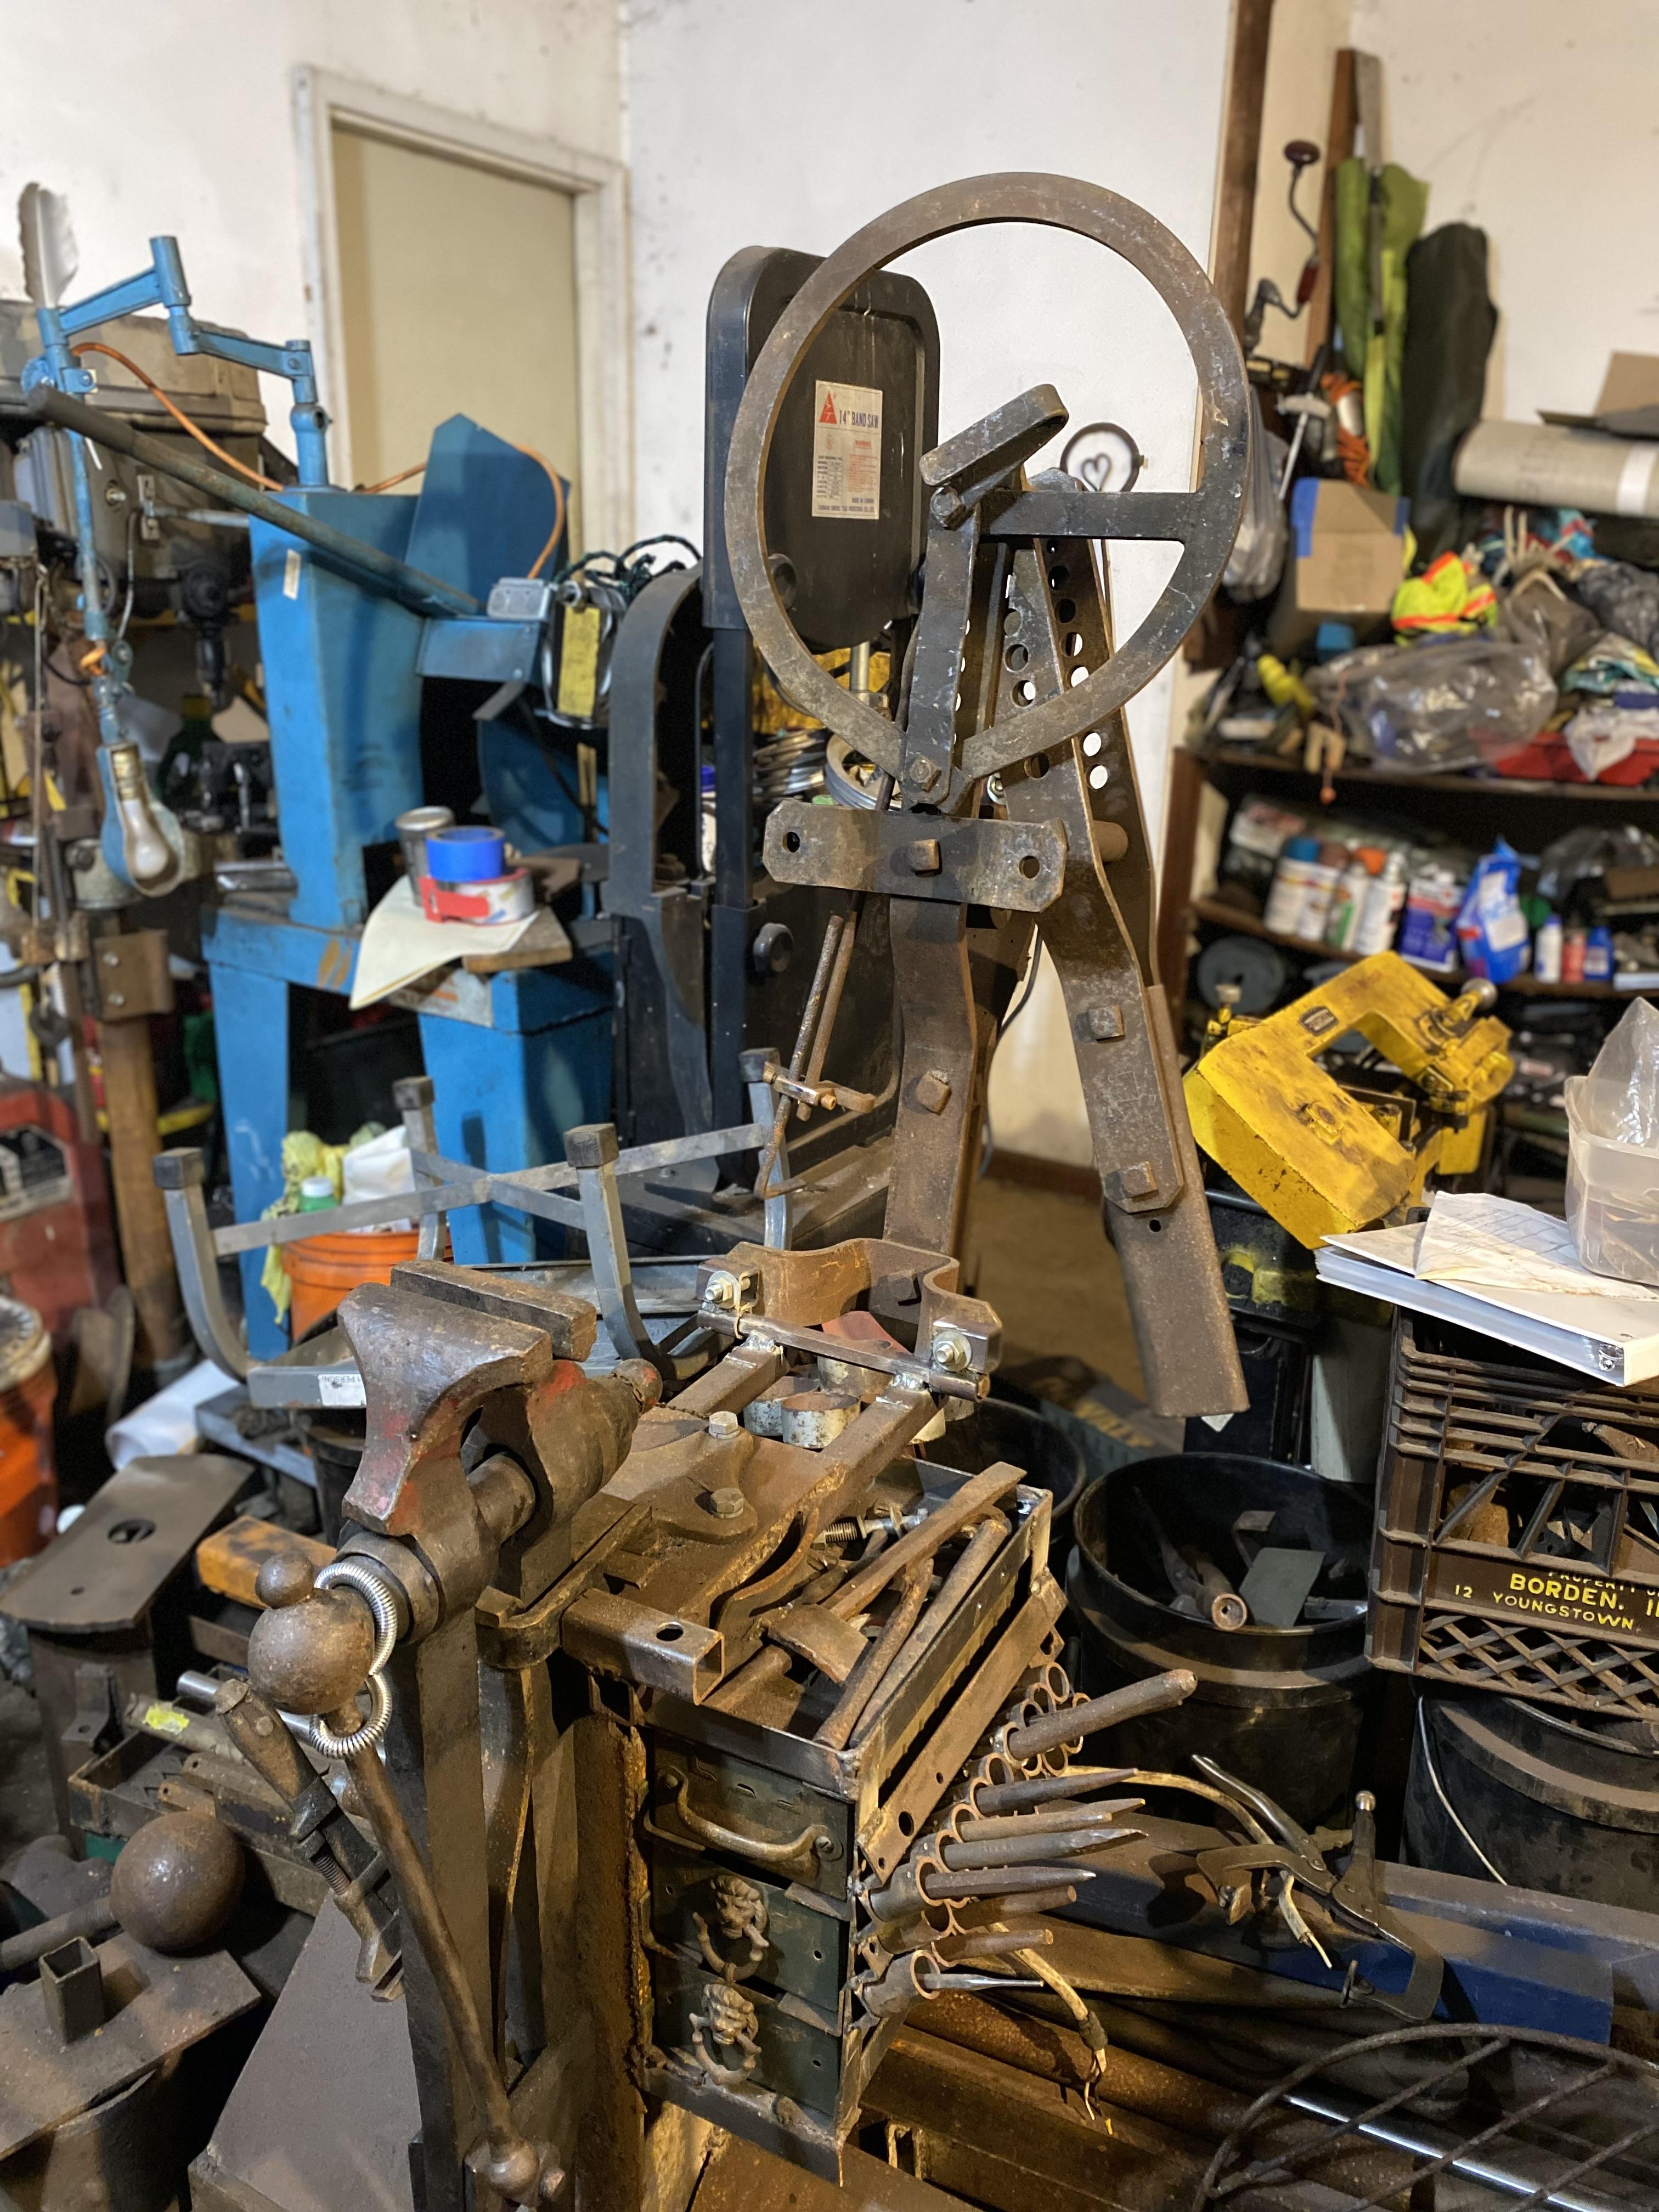
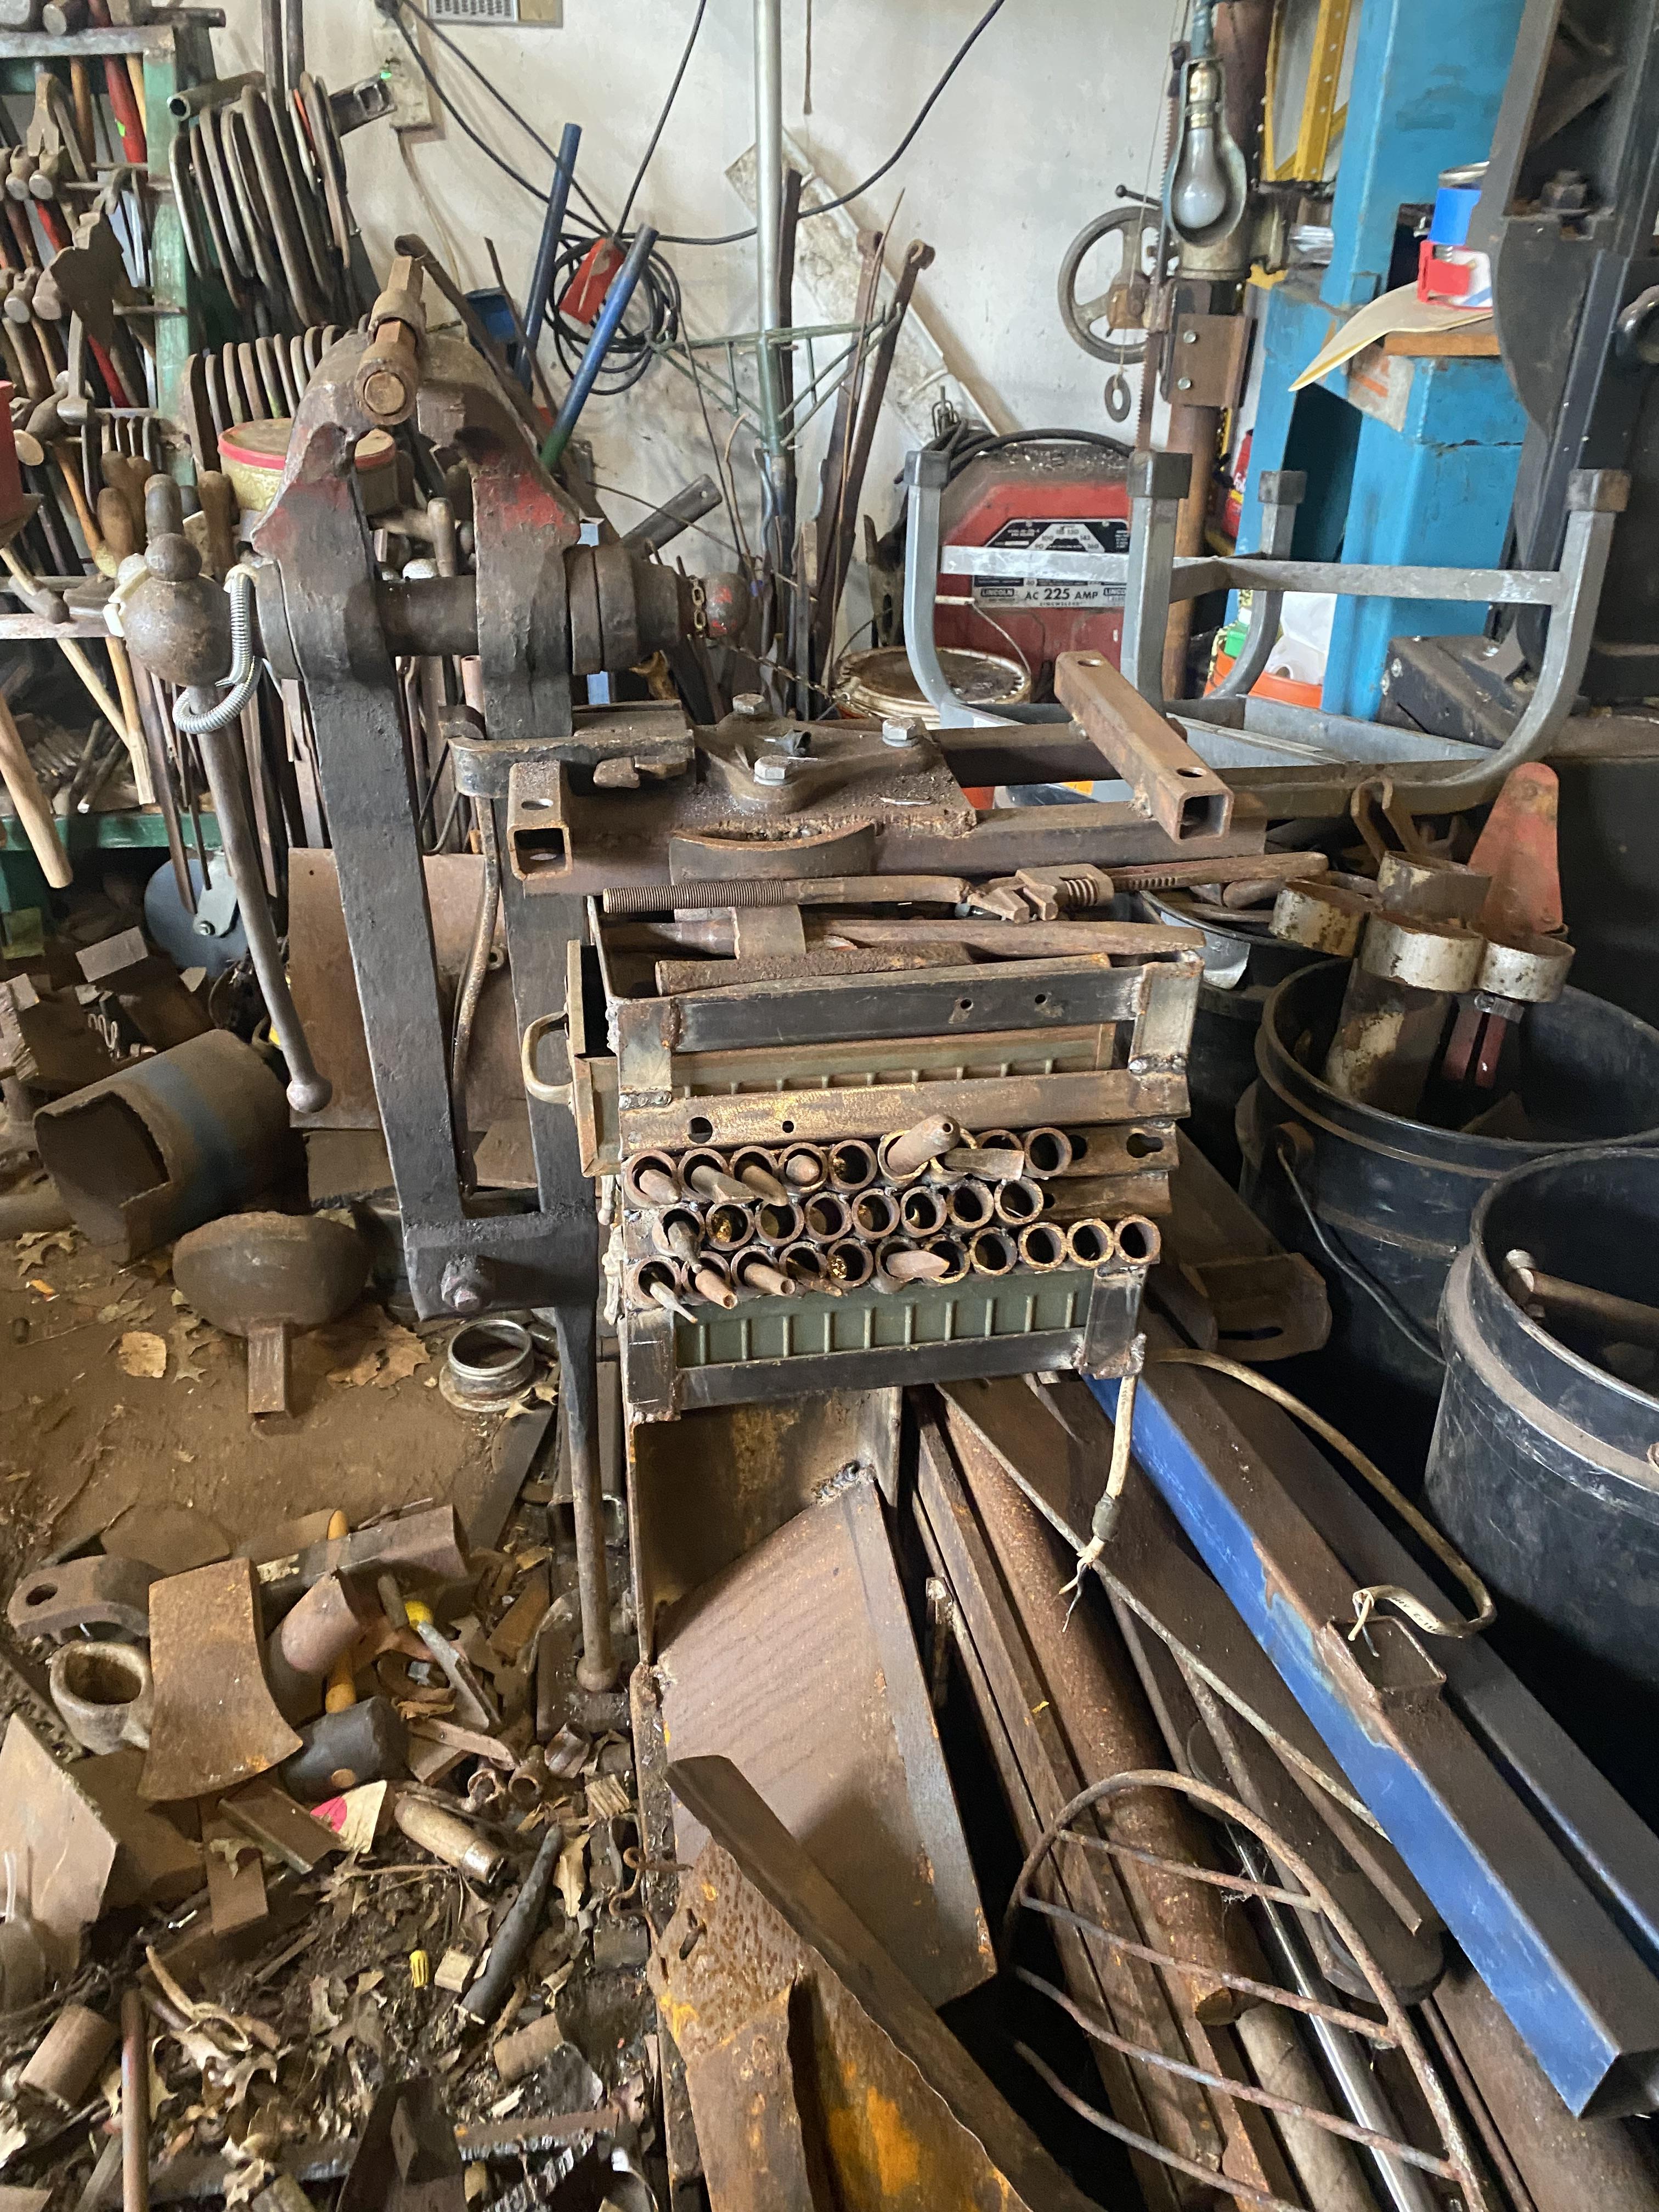
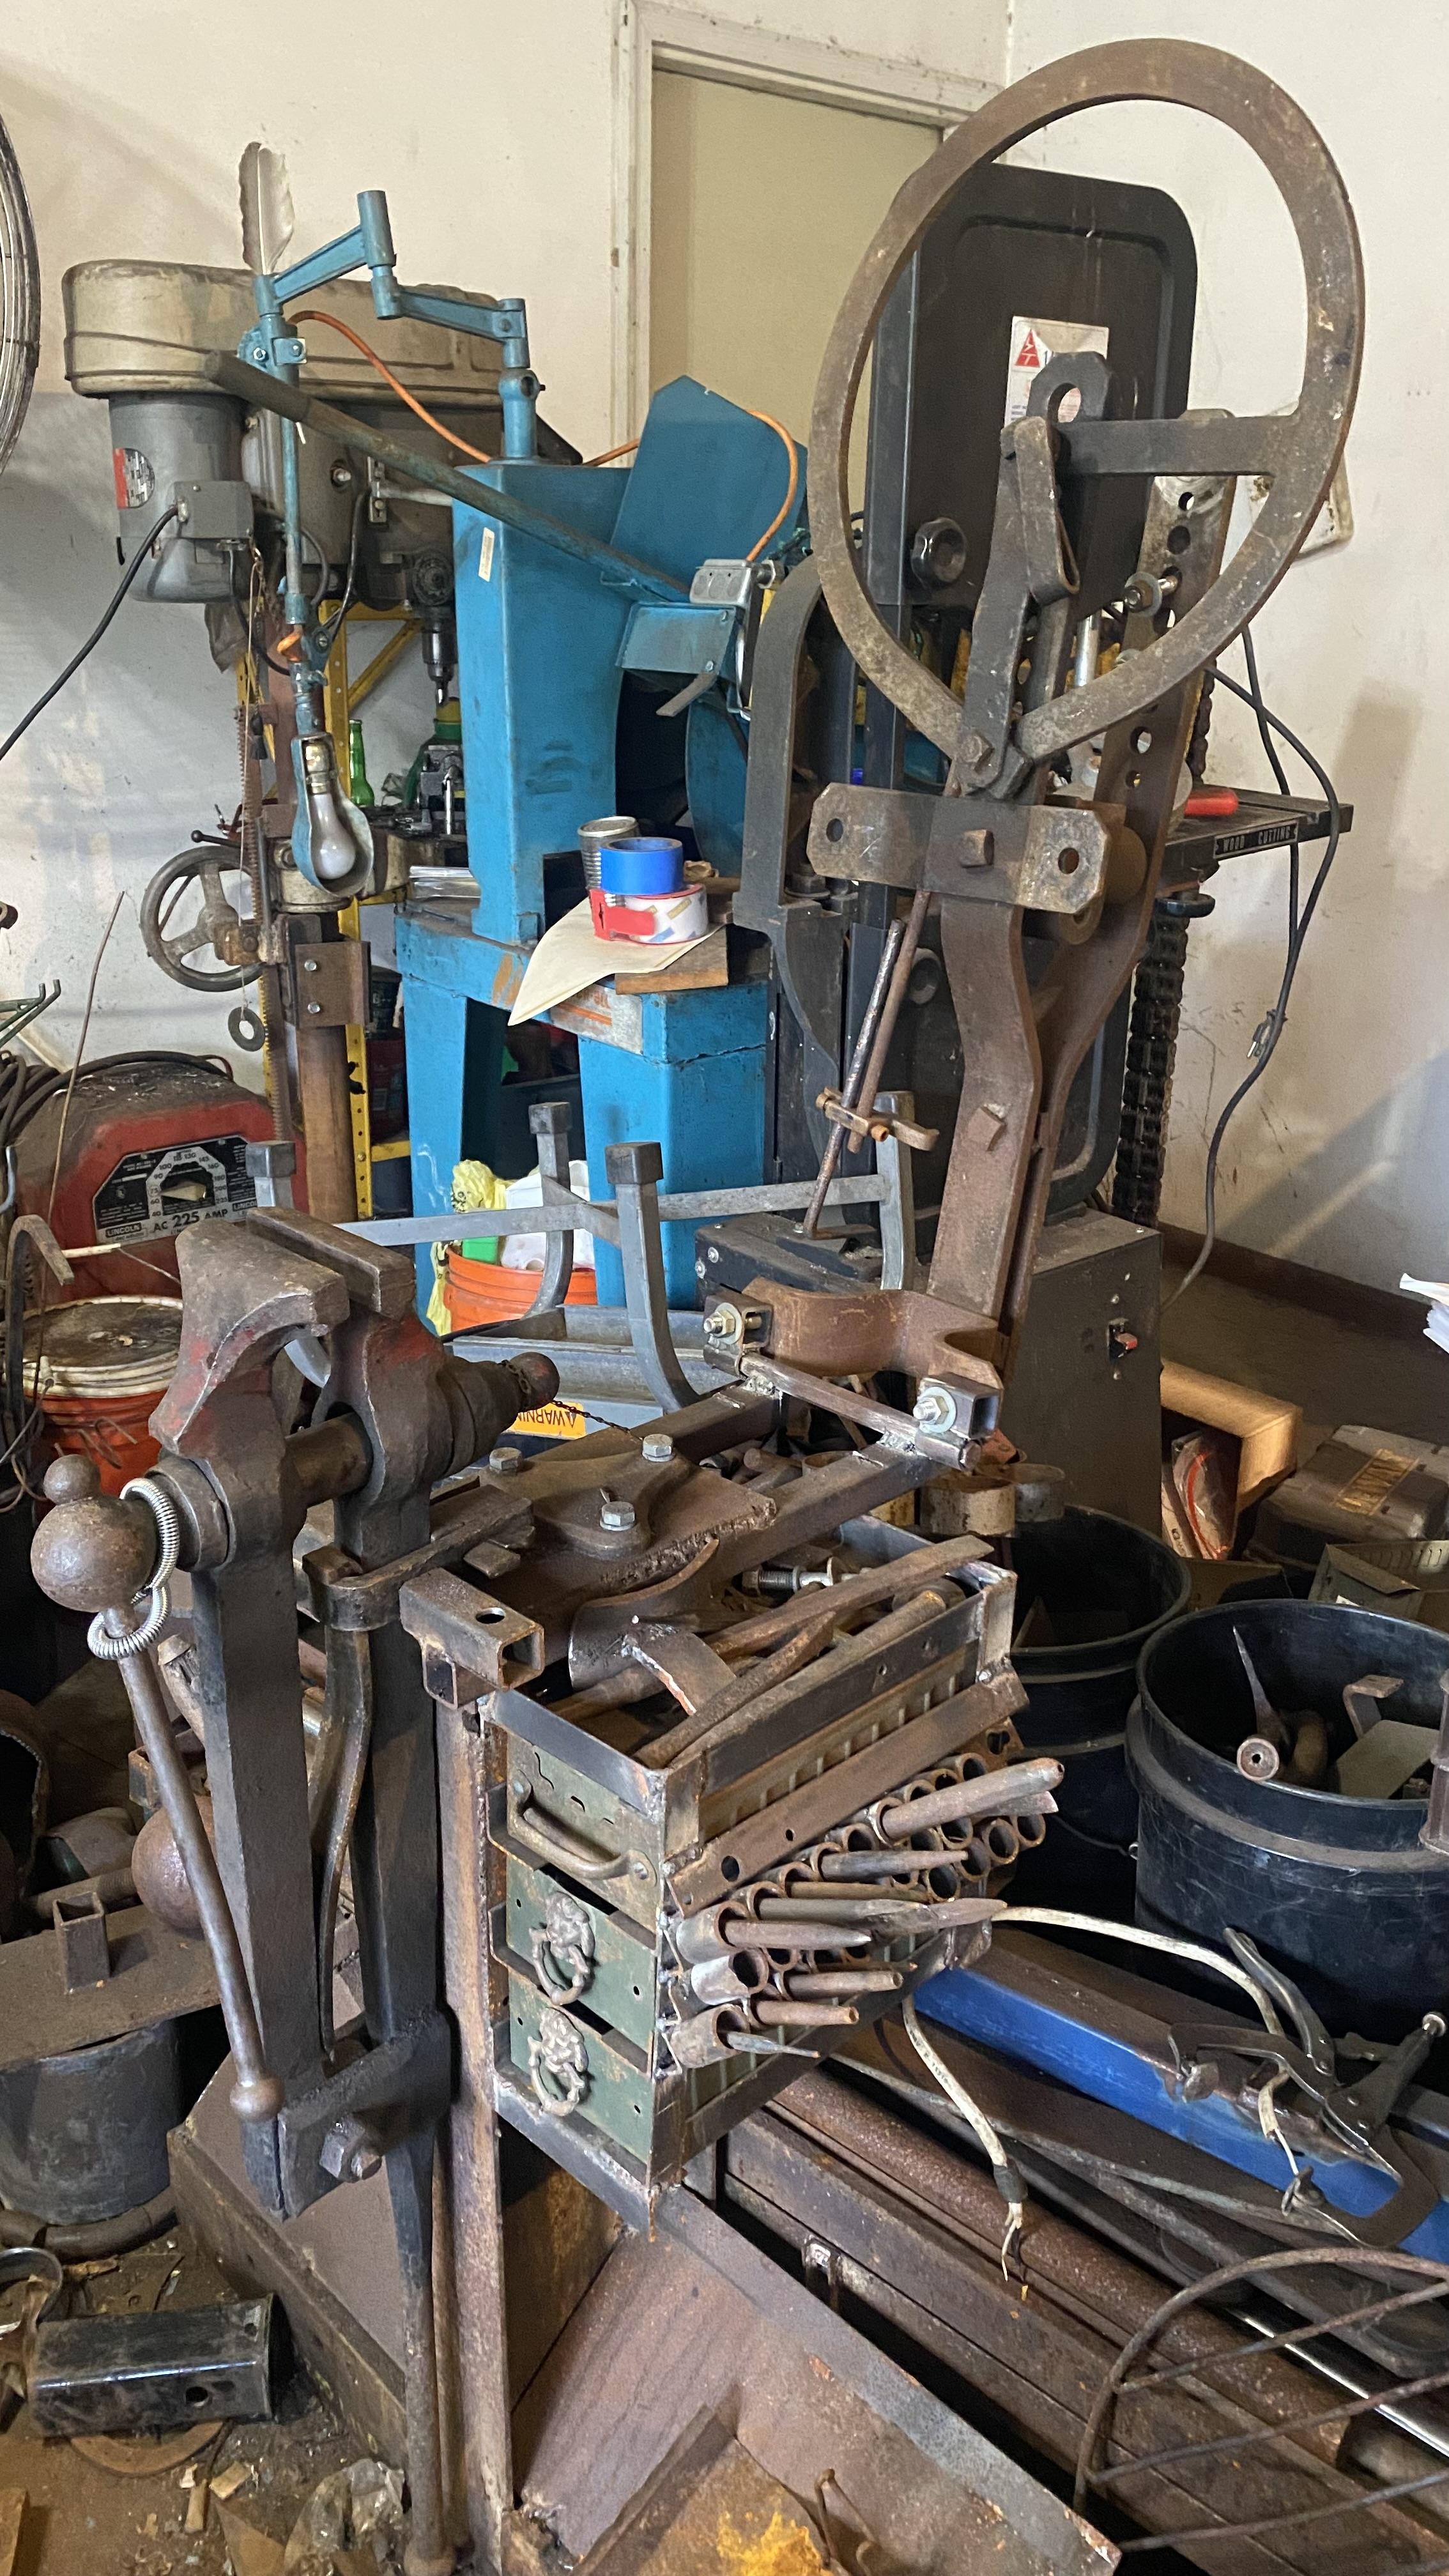
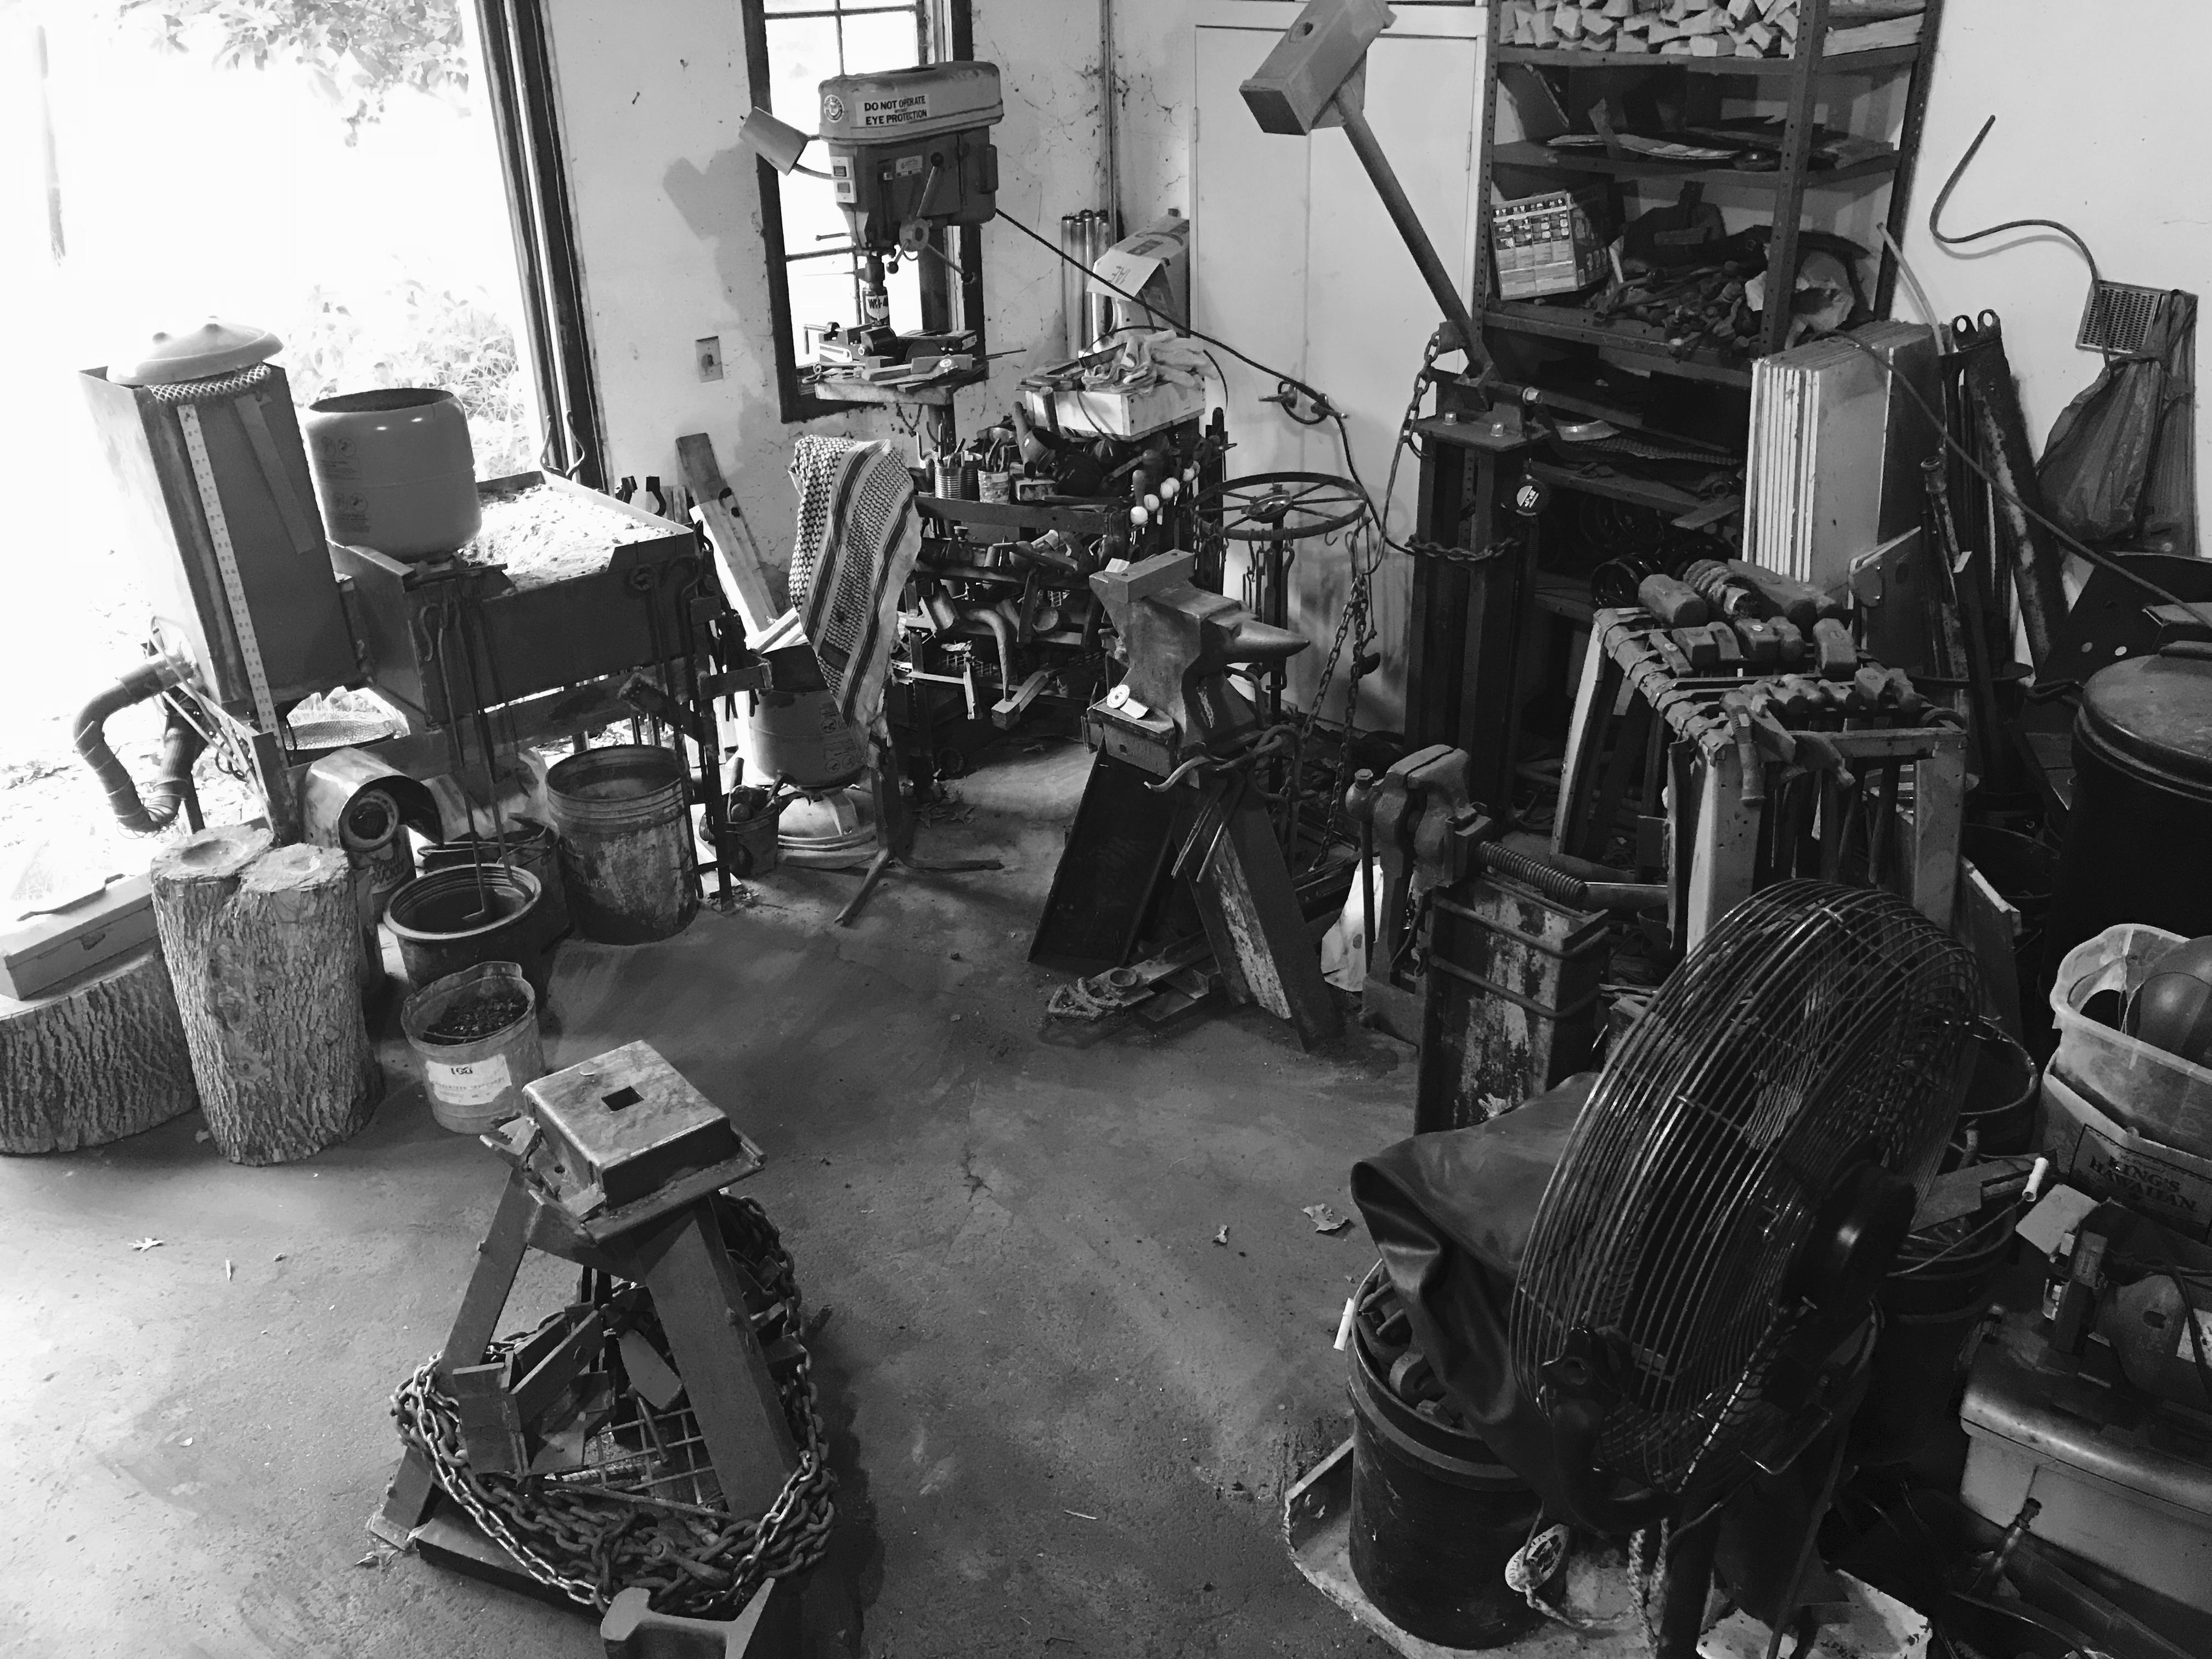
This is the combination vise stand/scrap steel storage that probably weighs somewhere between a quarter and half a ton. So, yeah. -
What did you do in the shop today?
JHCC replied to Mark Ling's topic in Blacksmithing, General Discussion
As detailed in THIS POST, I mounted my Hossfeld #2 bender on a hinged bracket, to facilitate switching it out with my bigger post vise.
-
JHCC's consolidated Hossfeld Universal Bender #2 thread
JHCC replied to JHCC's topic in Cold Worked Iron and Steel
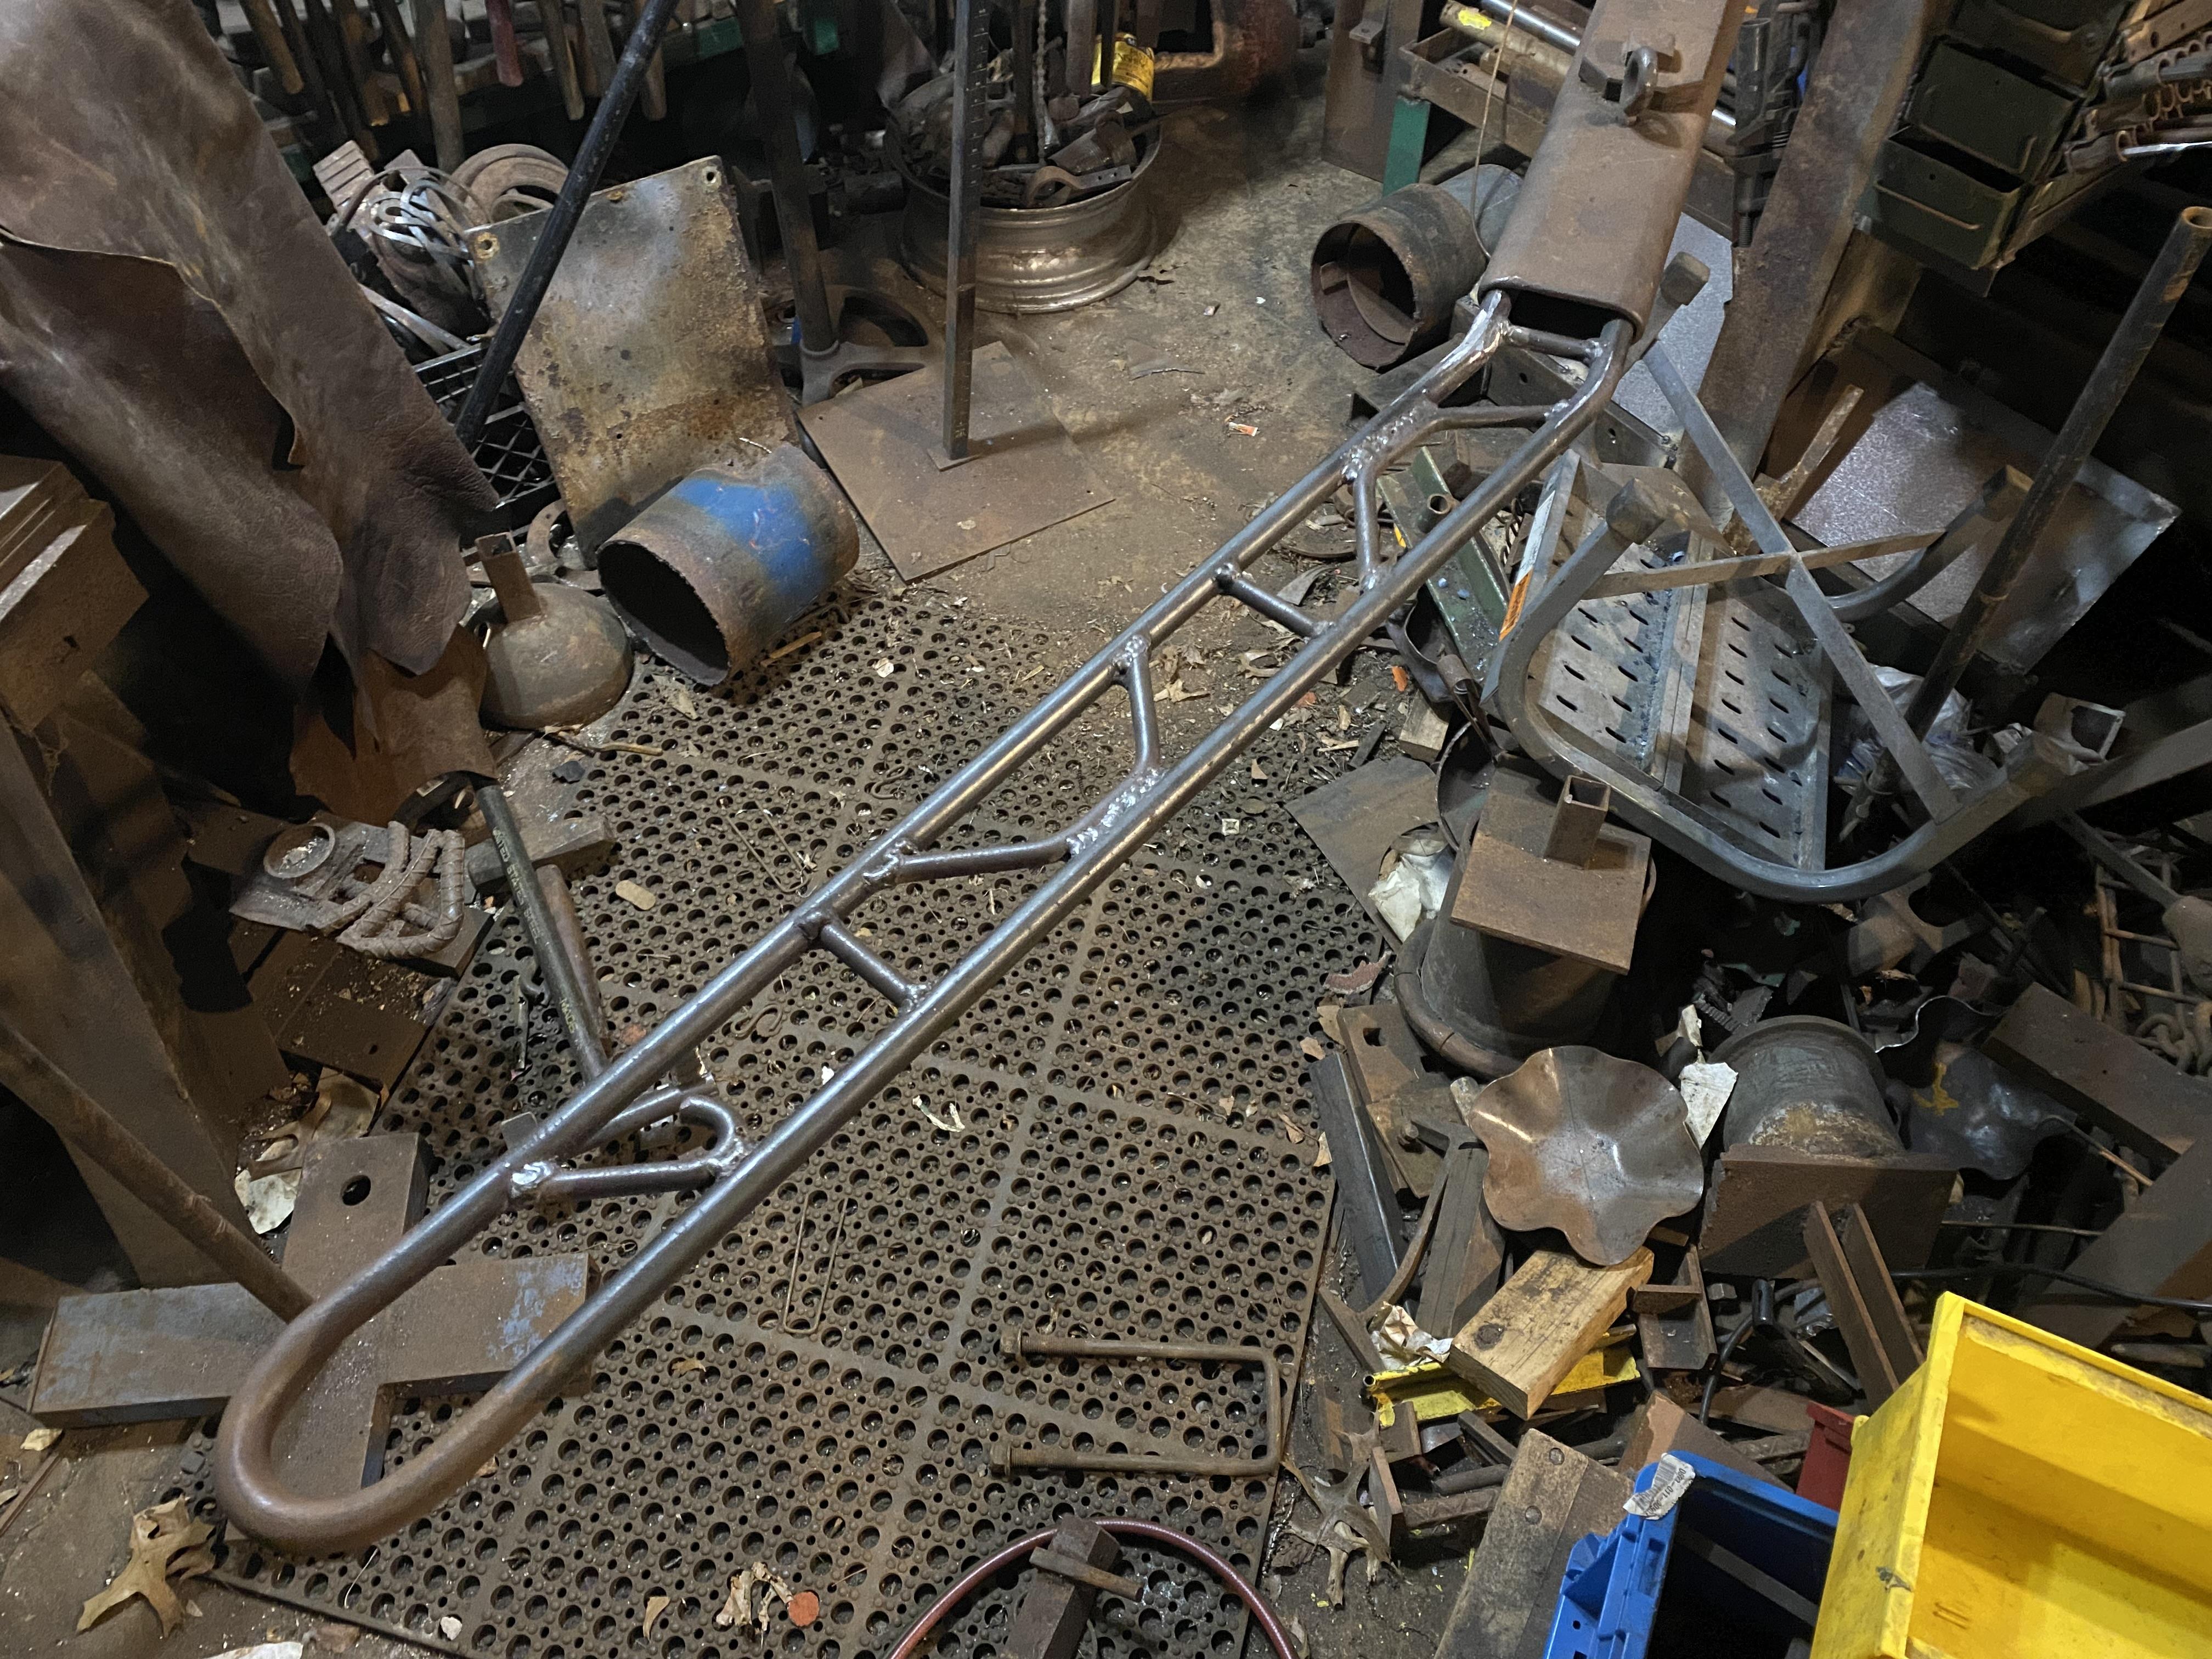
Addendum: here it is with the swing arm in place. Reverse angle:

-
JHCC's consolidated Hossfeld Universal Bender #2 thread
JHCC replied to JHCC's topic in Cold Worked Iron and Steel
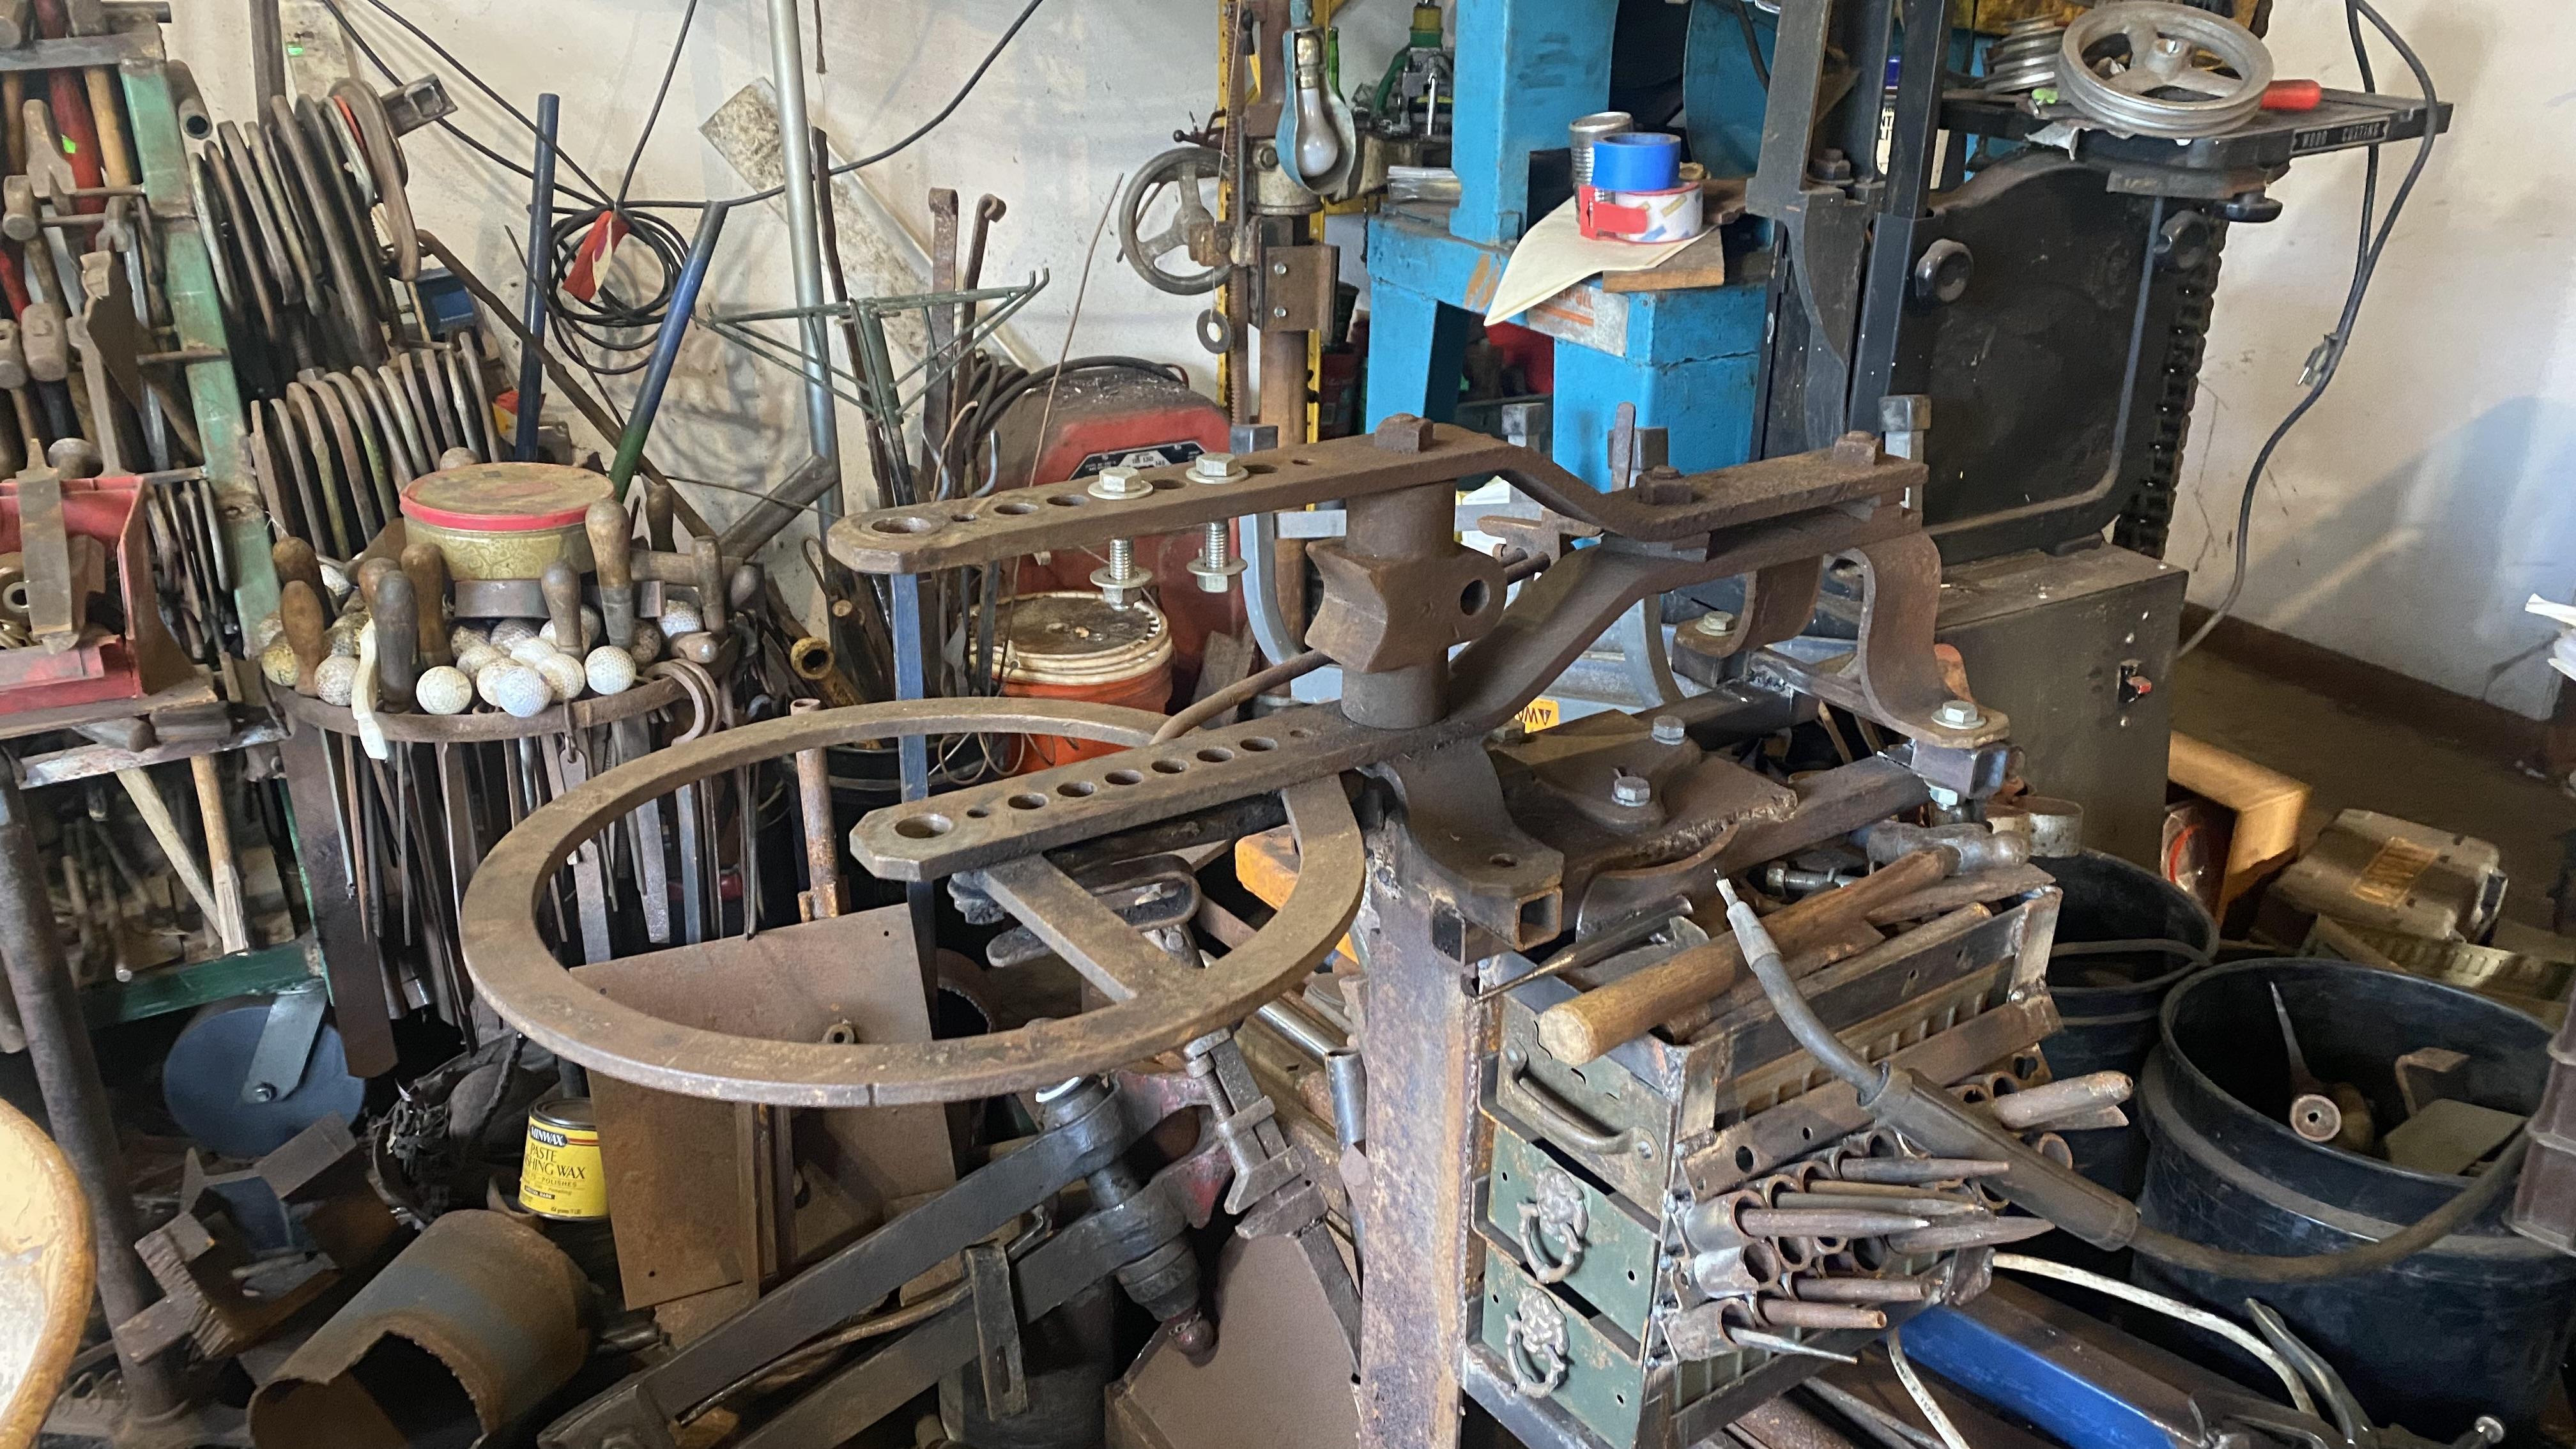
Made a simple-yet-significant change to how the Hossfeld is mounted. Because it shares a stand with my bigger post vise, switching back and forth from one to the other can be a bit of a pain, and I’ve tended to leave one or the other set up longer than I should. I realized that by hinging the bender’s mounting bracket at the back, all I need to do is undo the front mounting bolts, and the whole thing tips up and out the way. A minimum of cutting and welding, and here we are. Closeup of the hinge: And here’s the stand with the vise in place. I’m probably going to make or buy some big wingnuts to facilitate bolting and unbolting the bender in its lowered position, but that’s for another day.