Havoc91
Members
-
Joined
-
Last visited
-
Havoc91 changed their profile photo
-
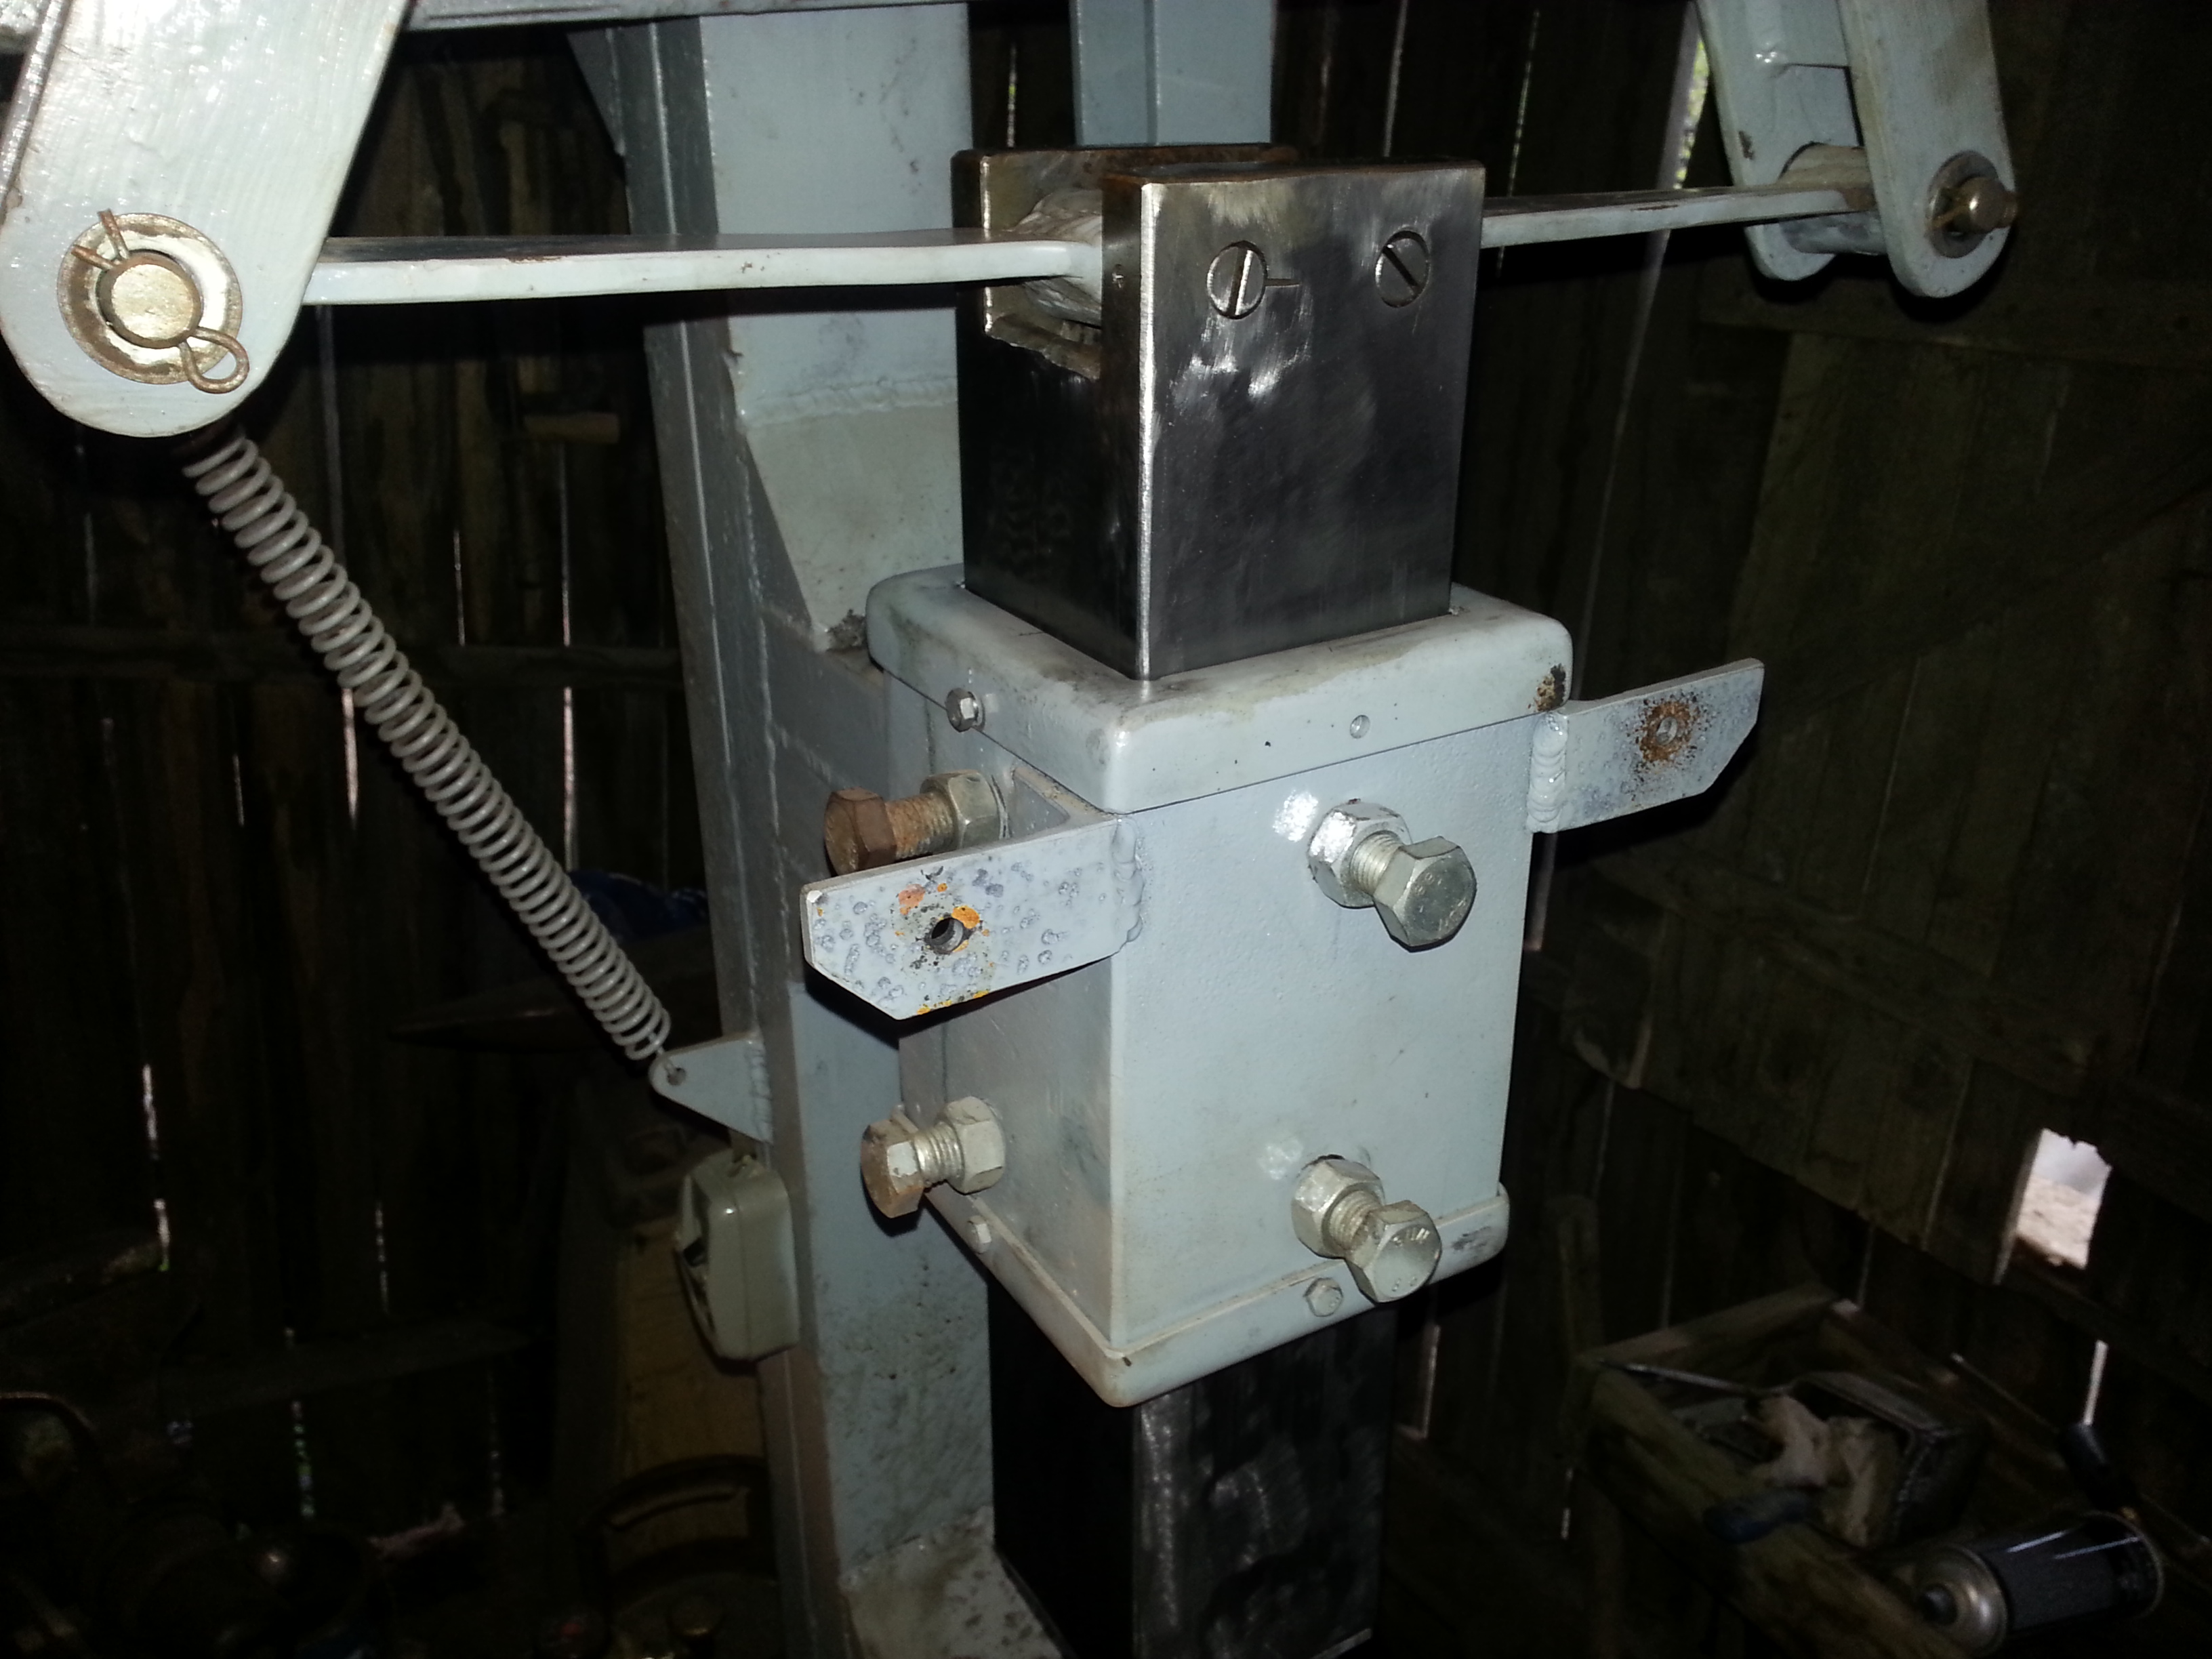
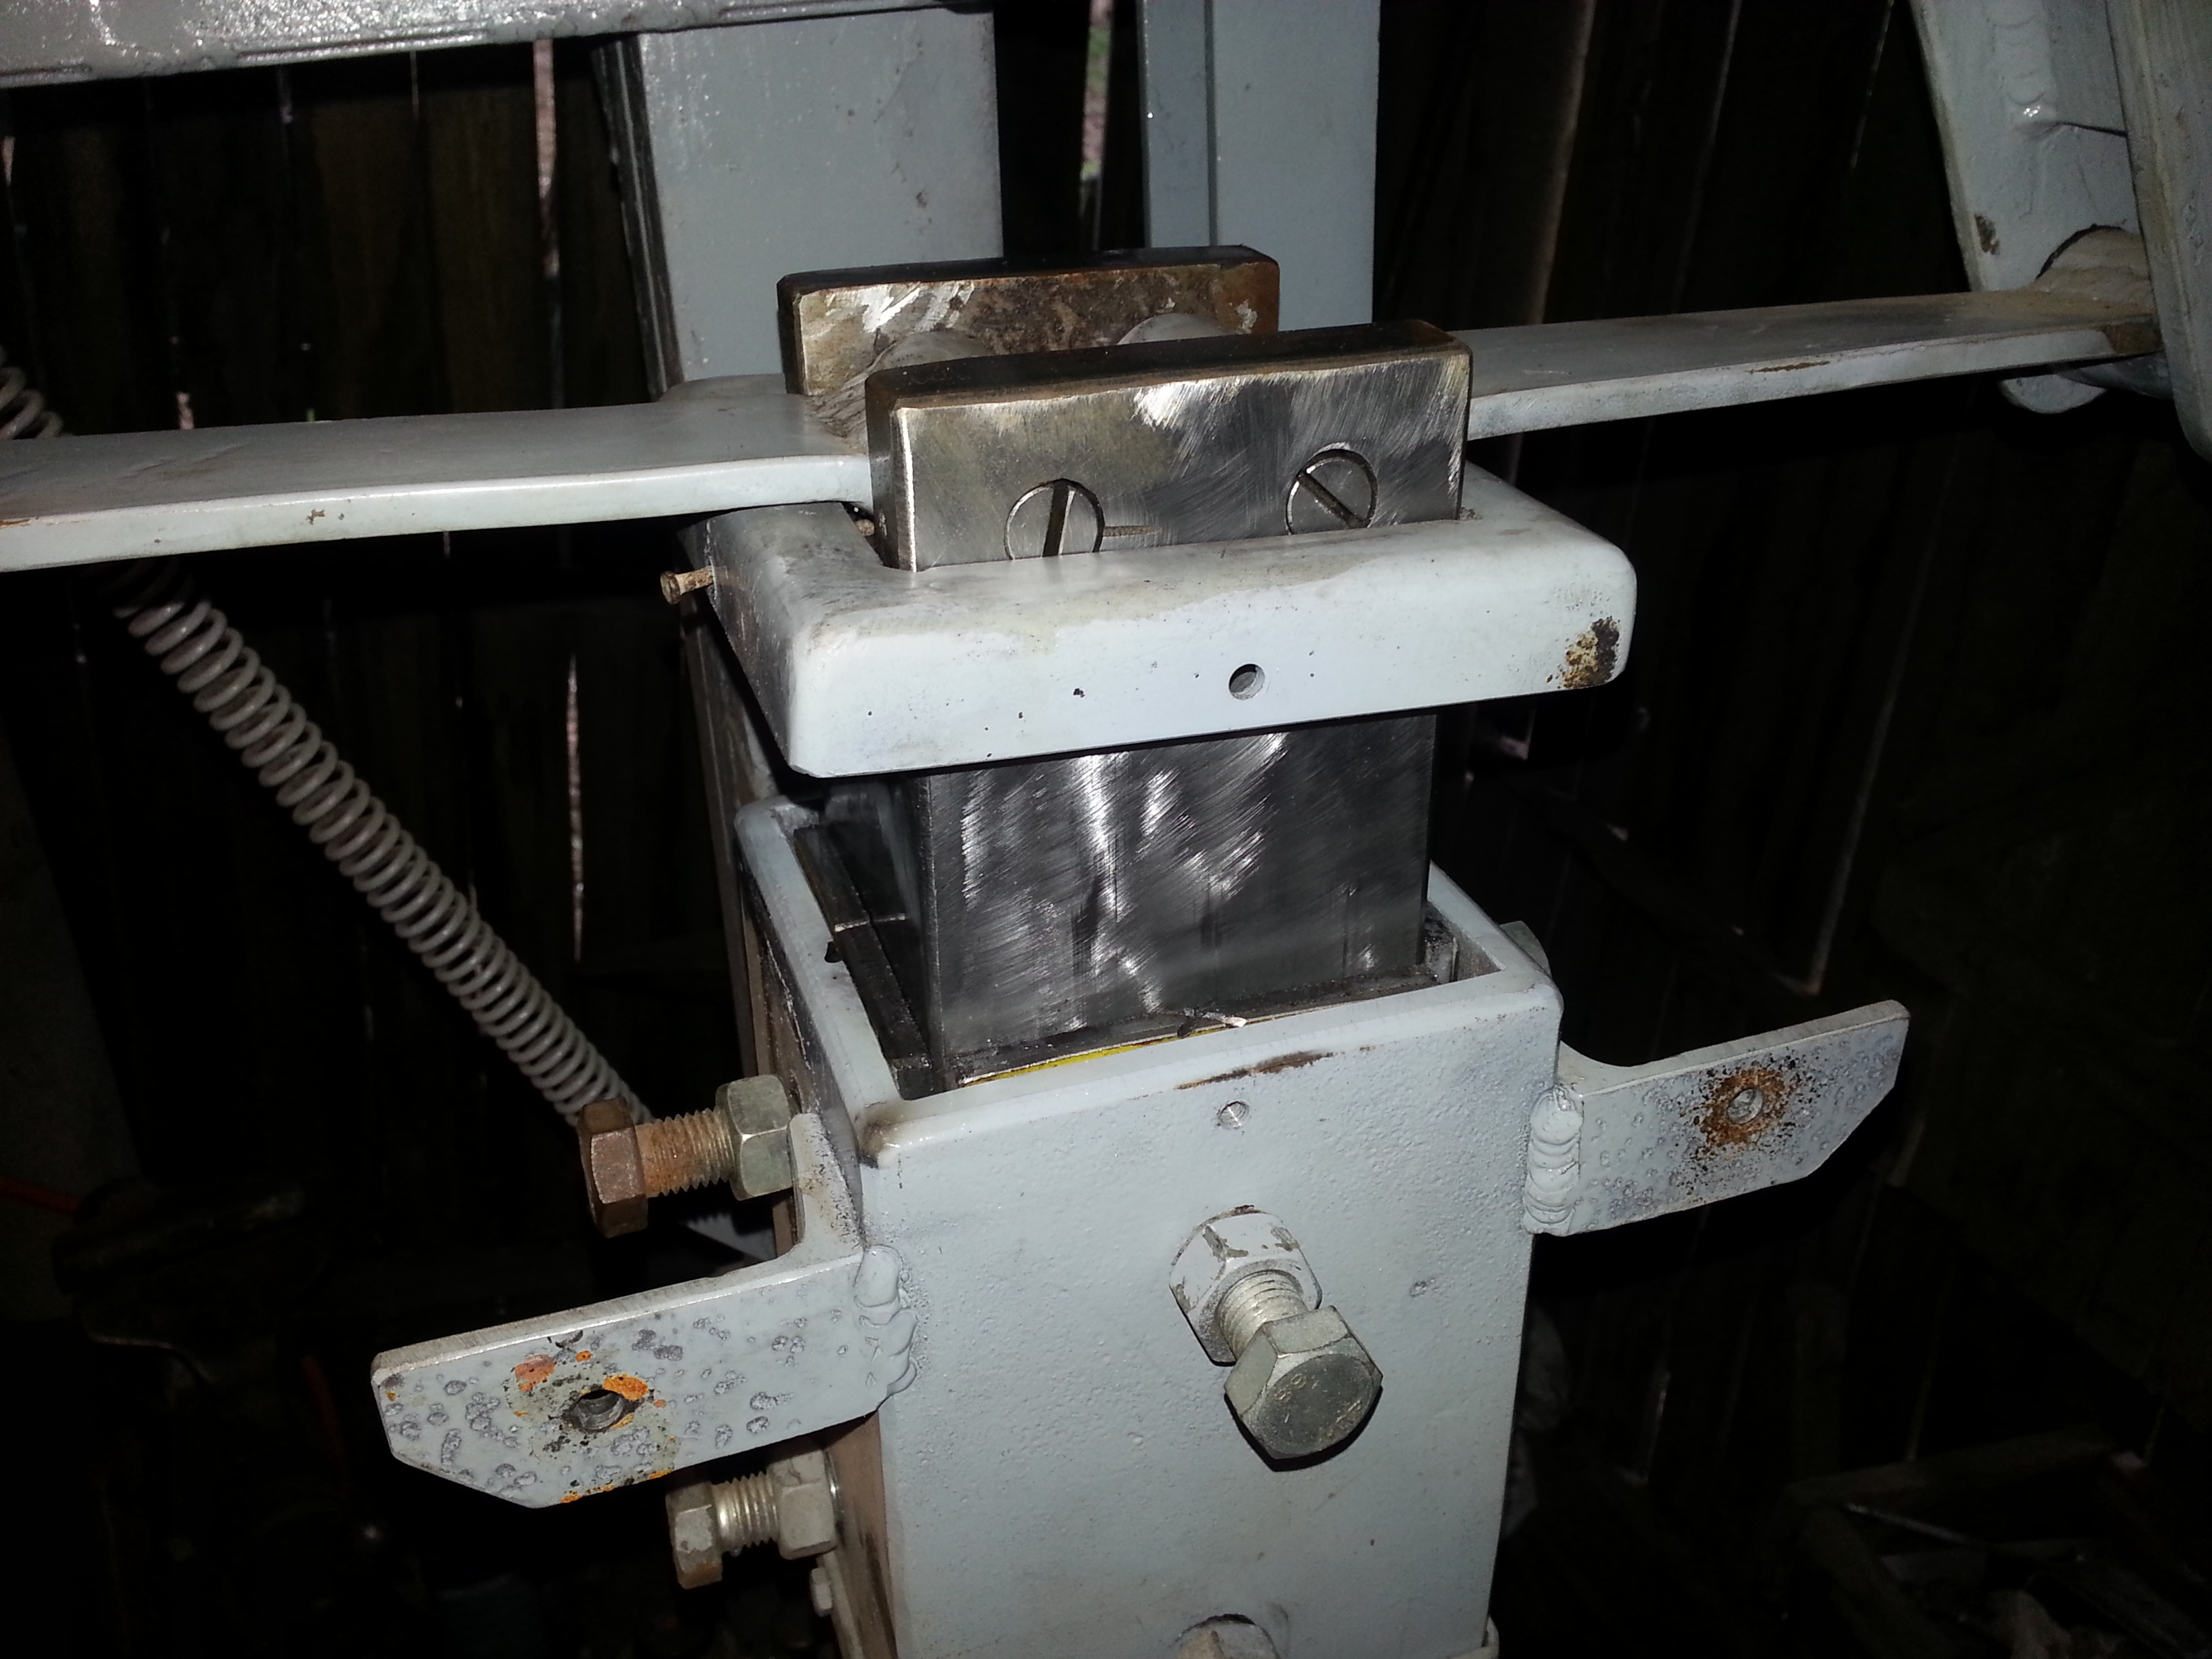
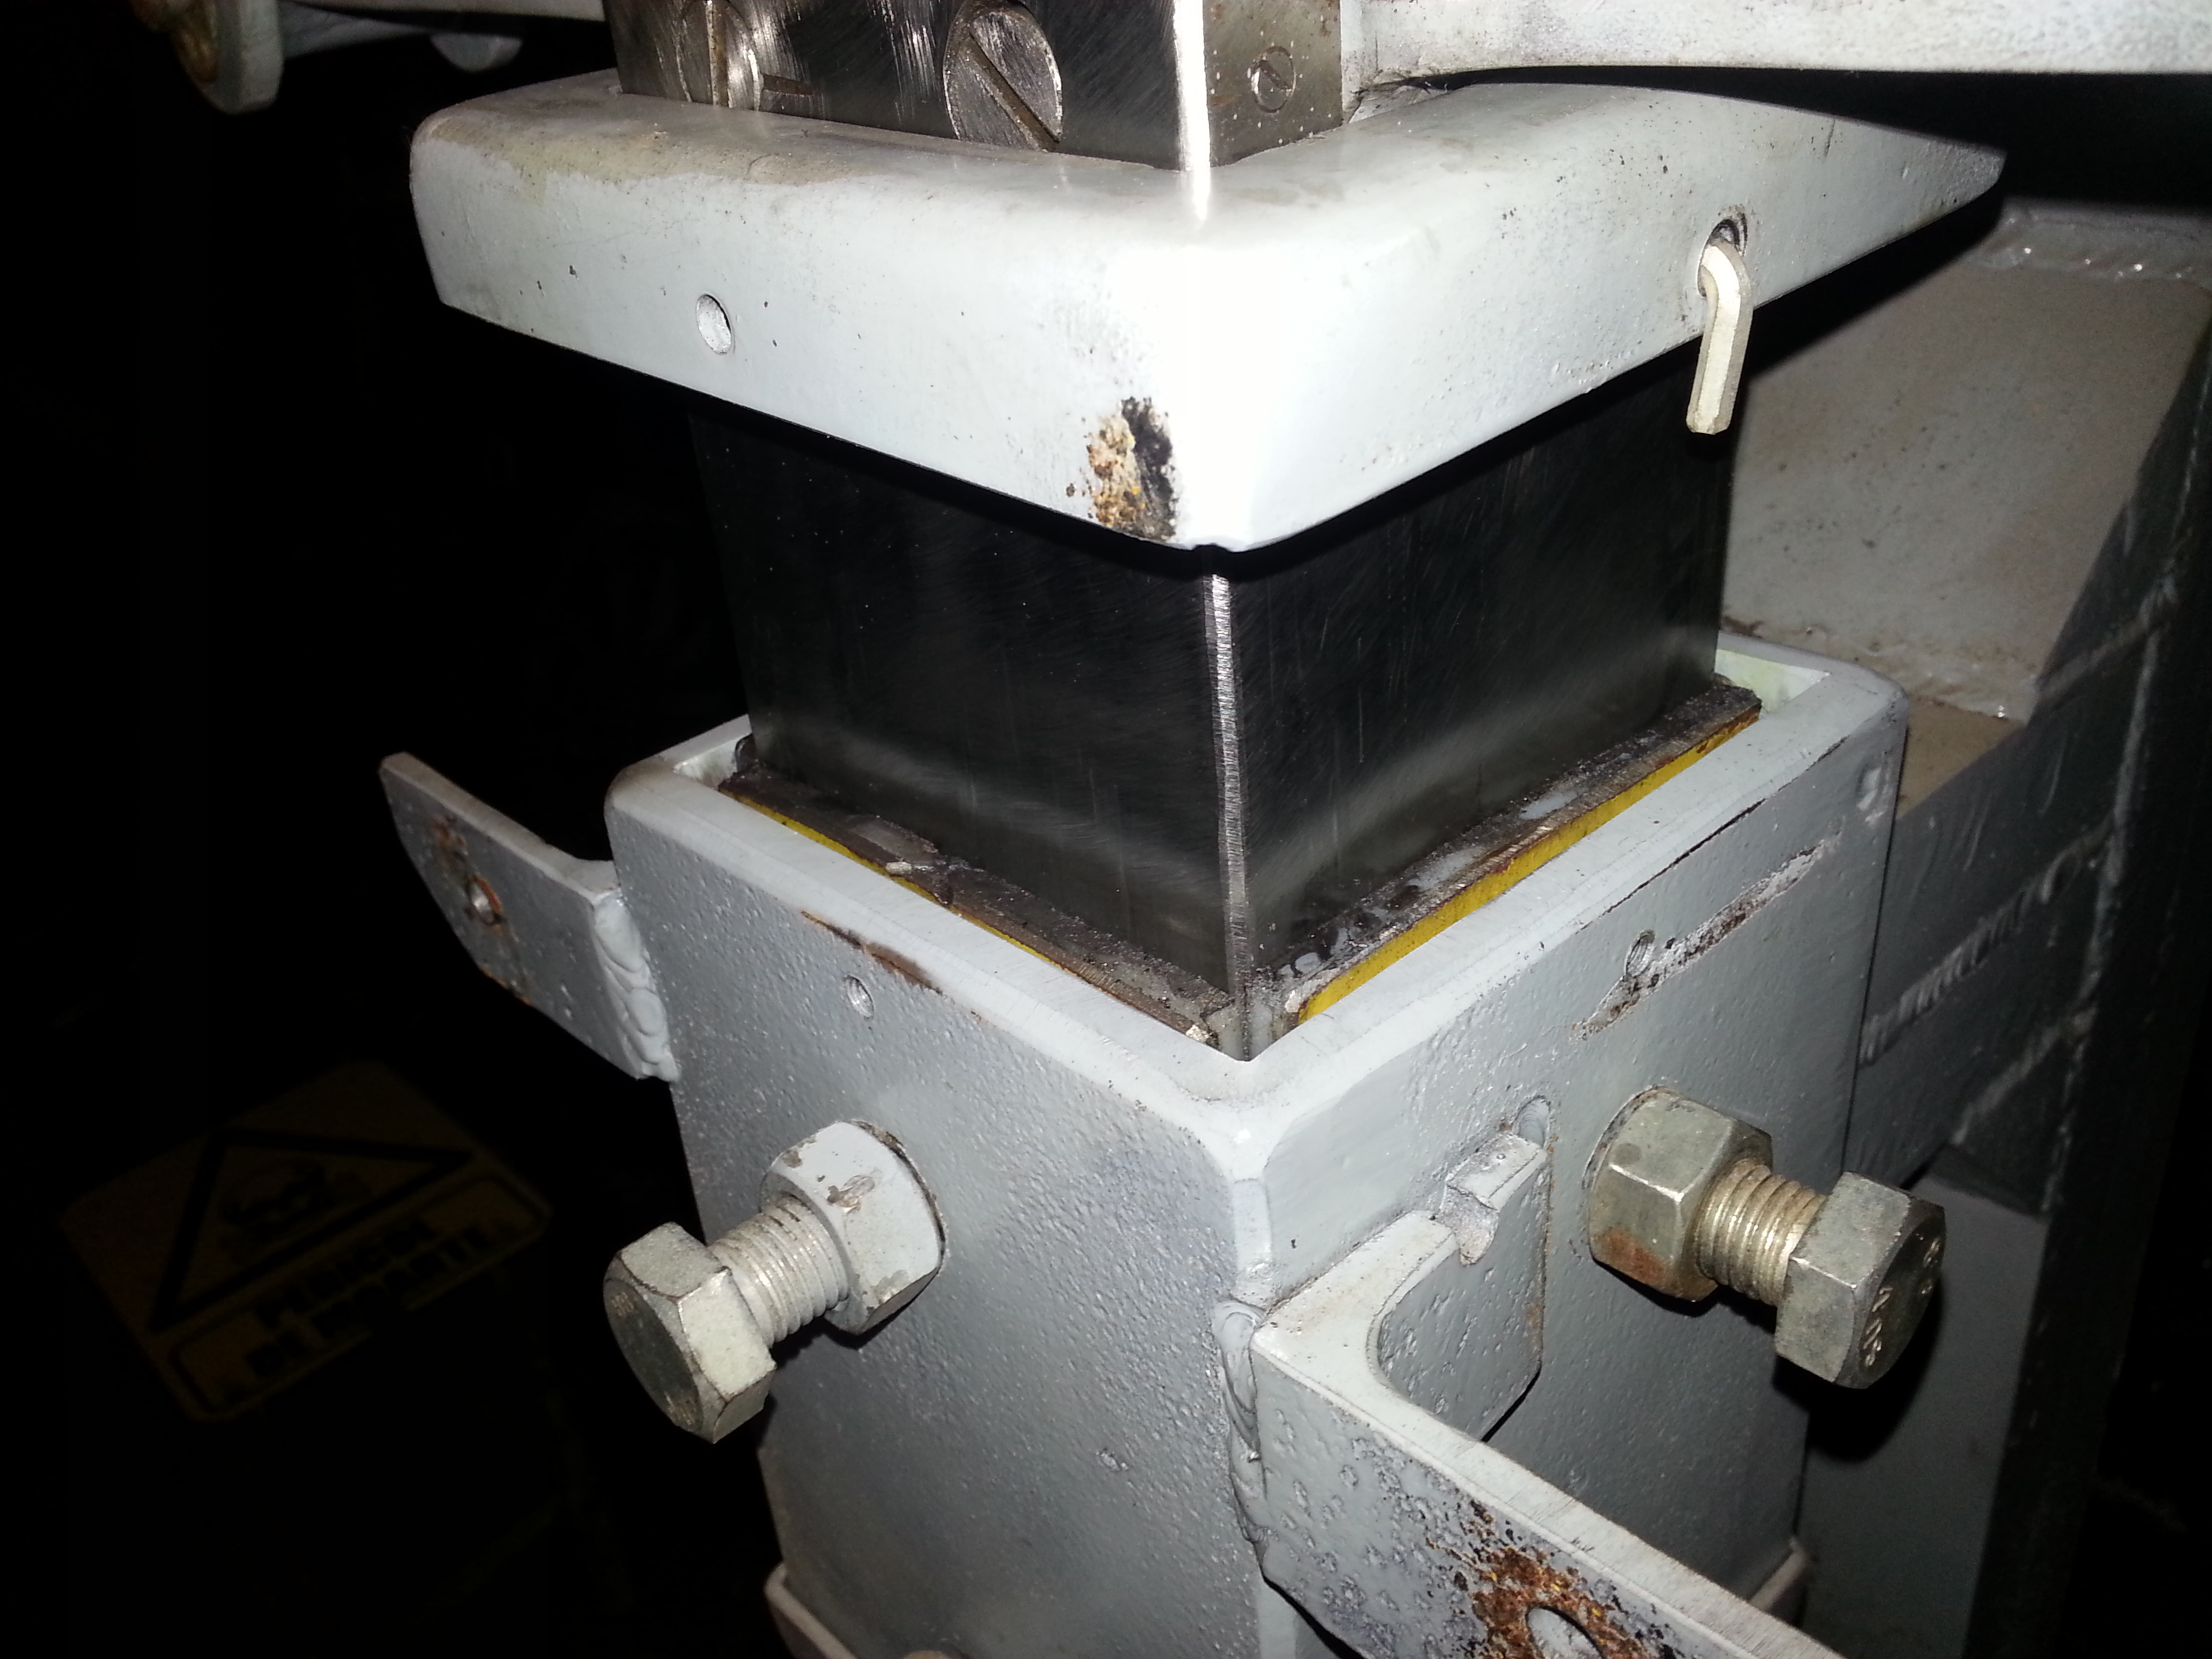
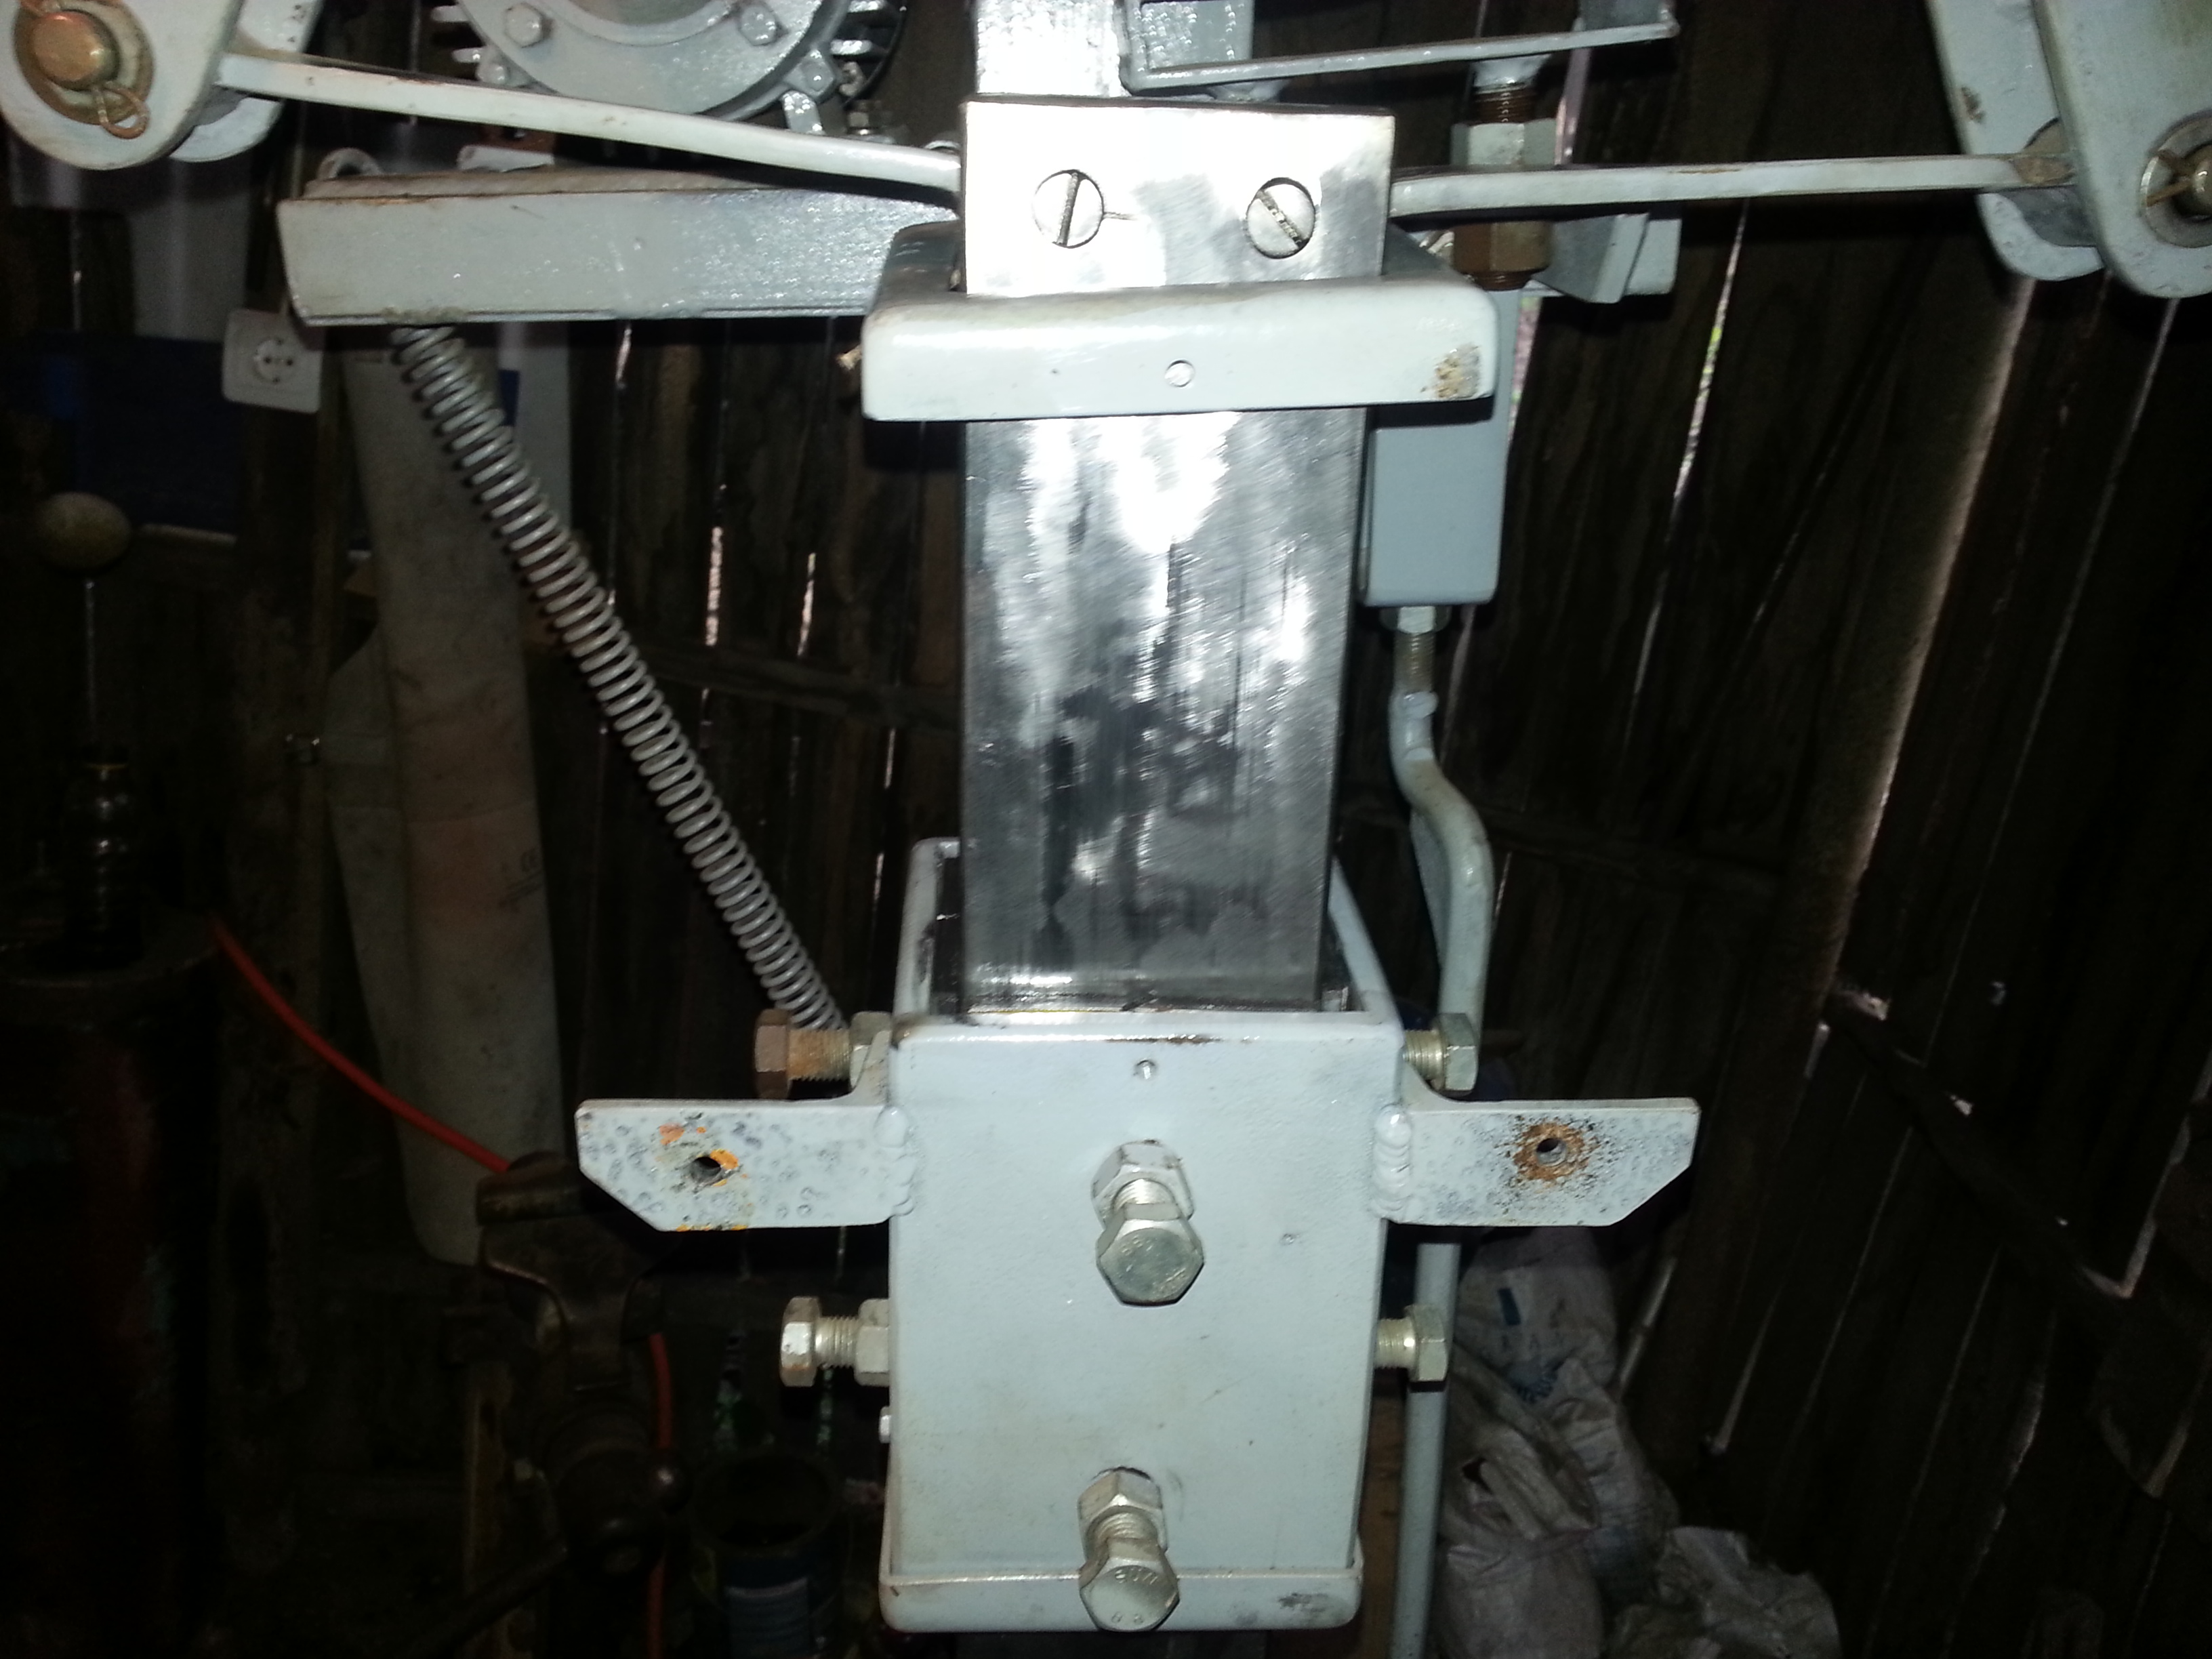
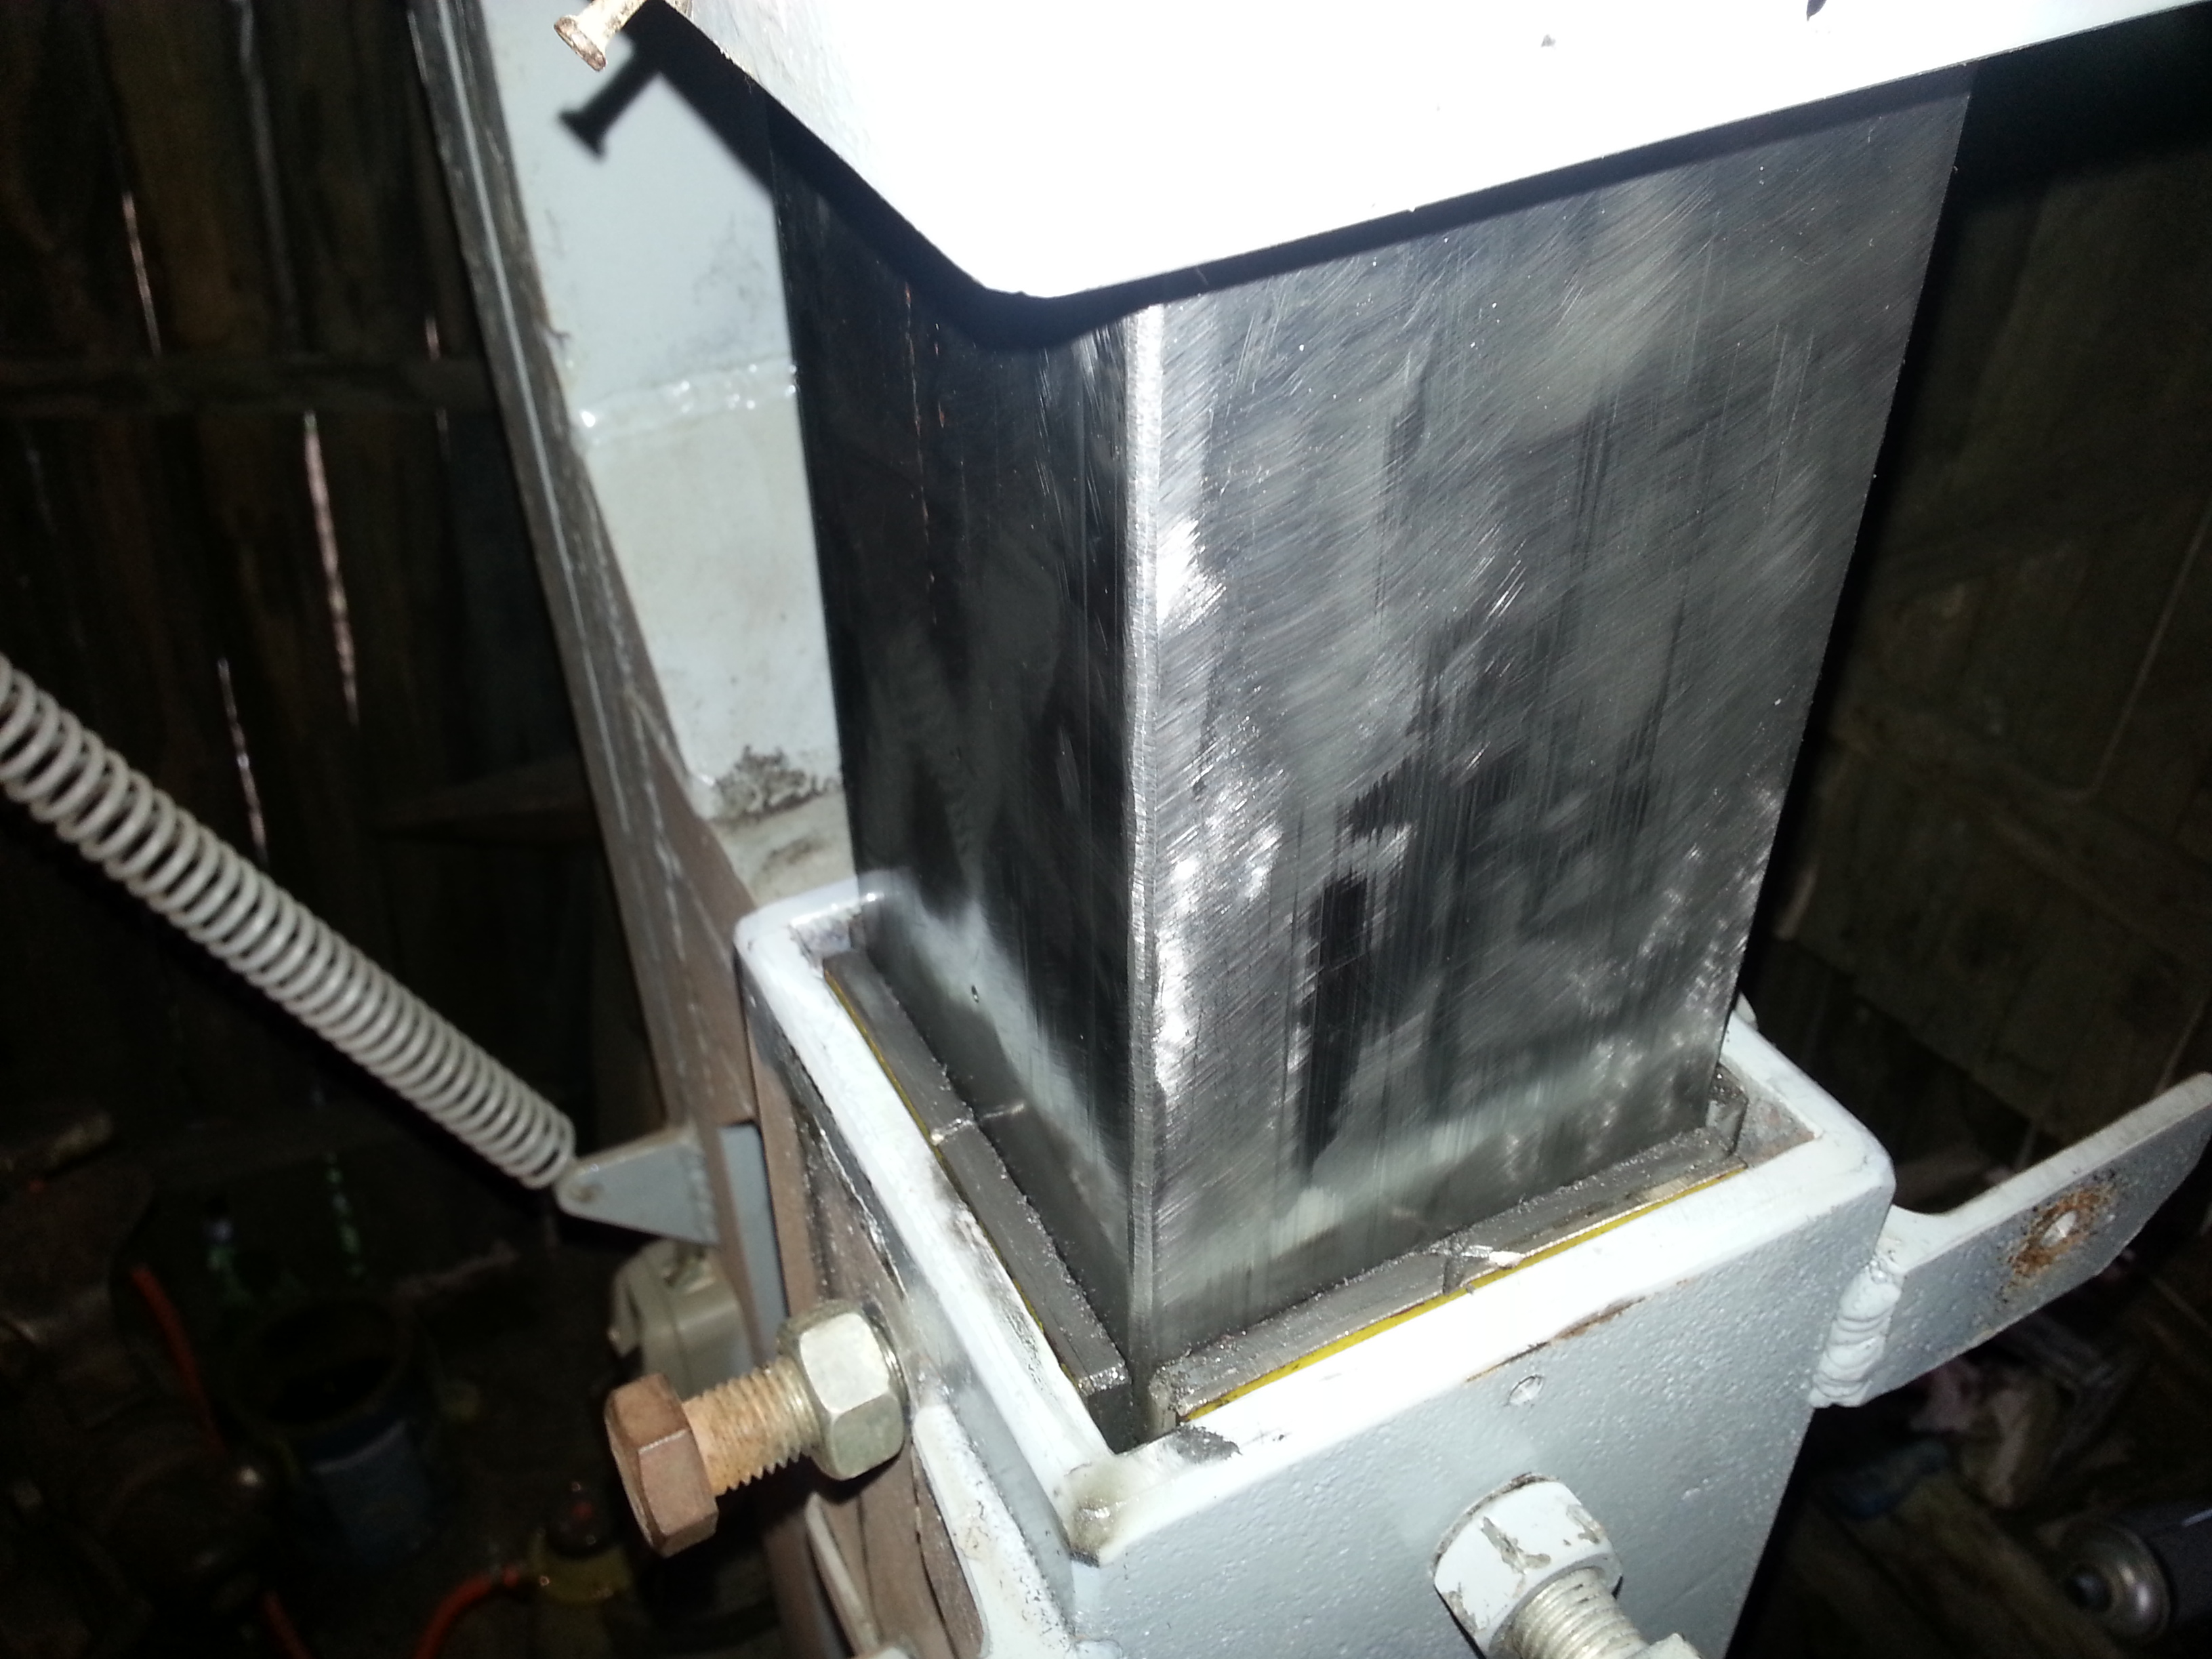
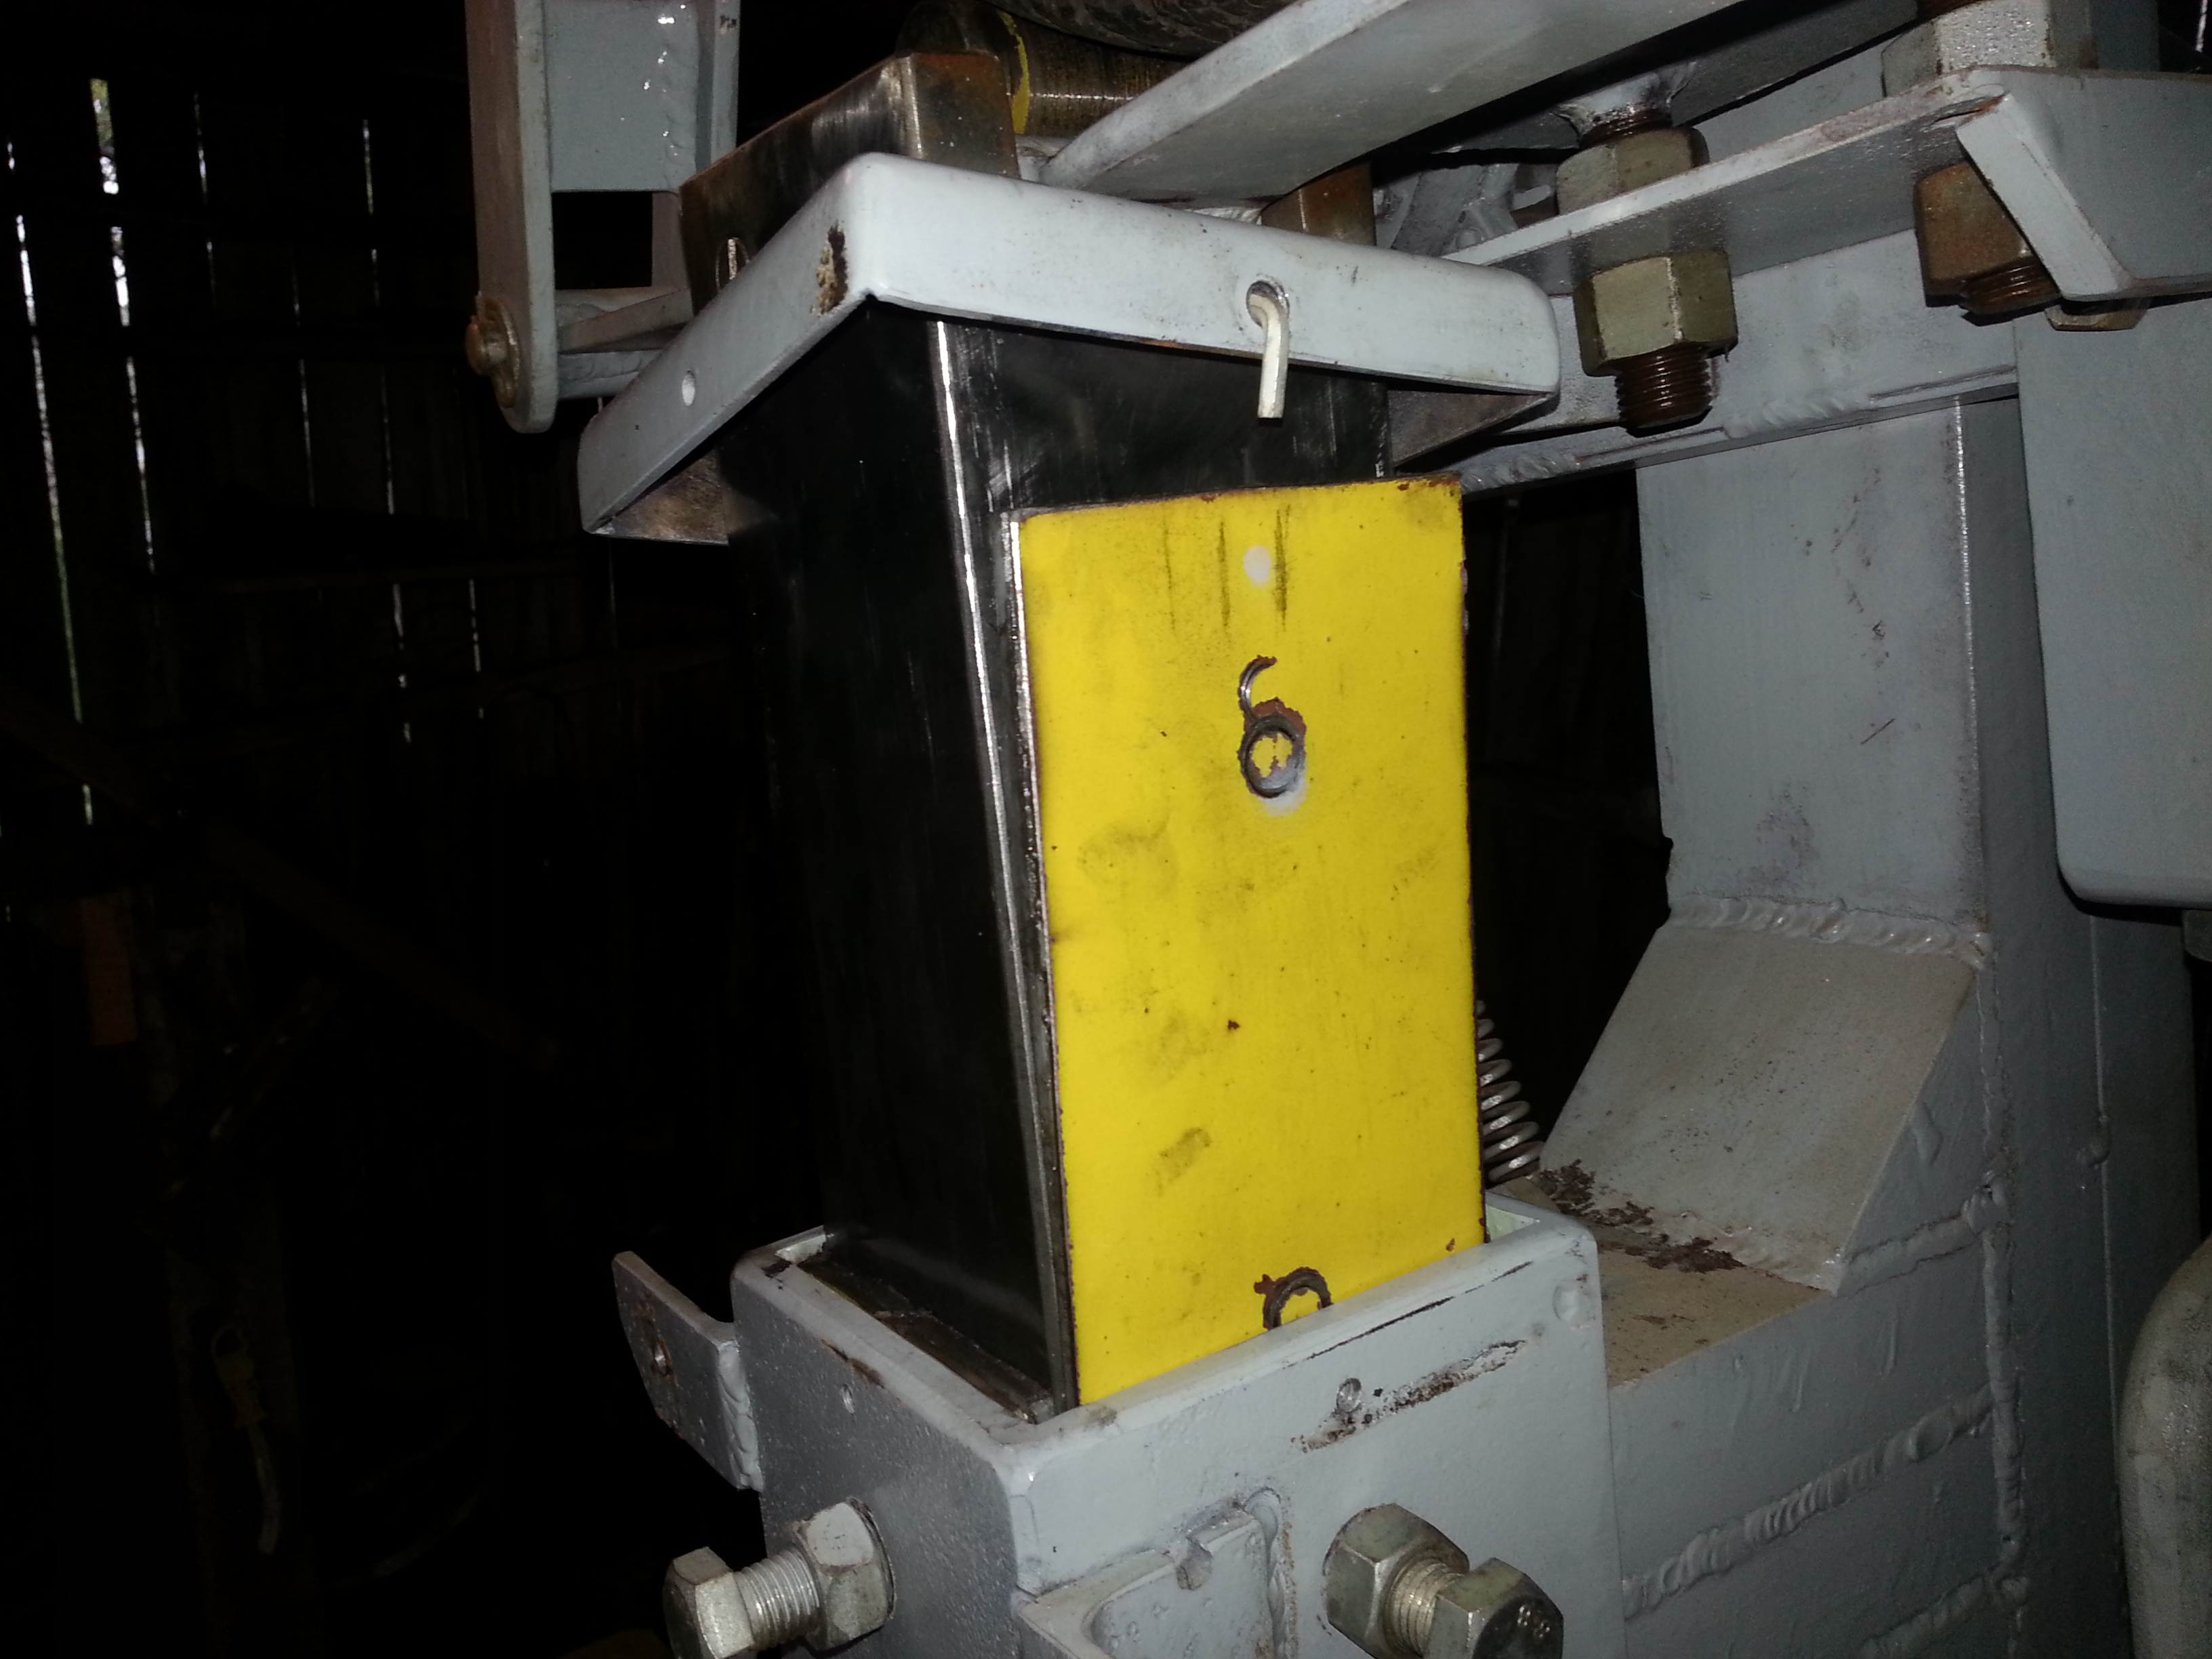
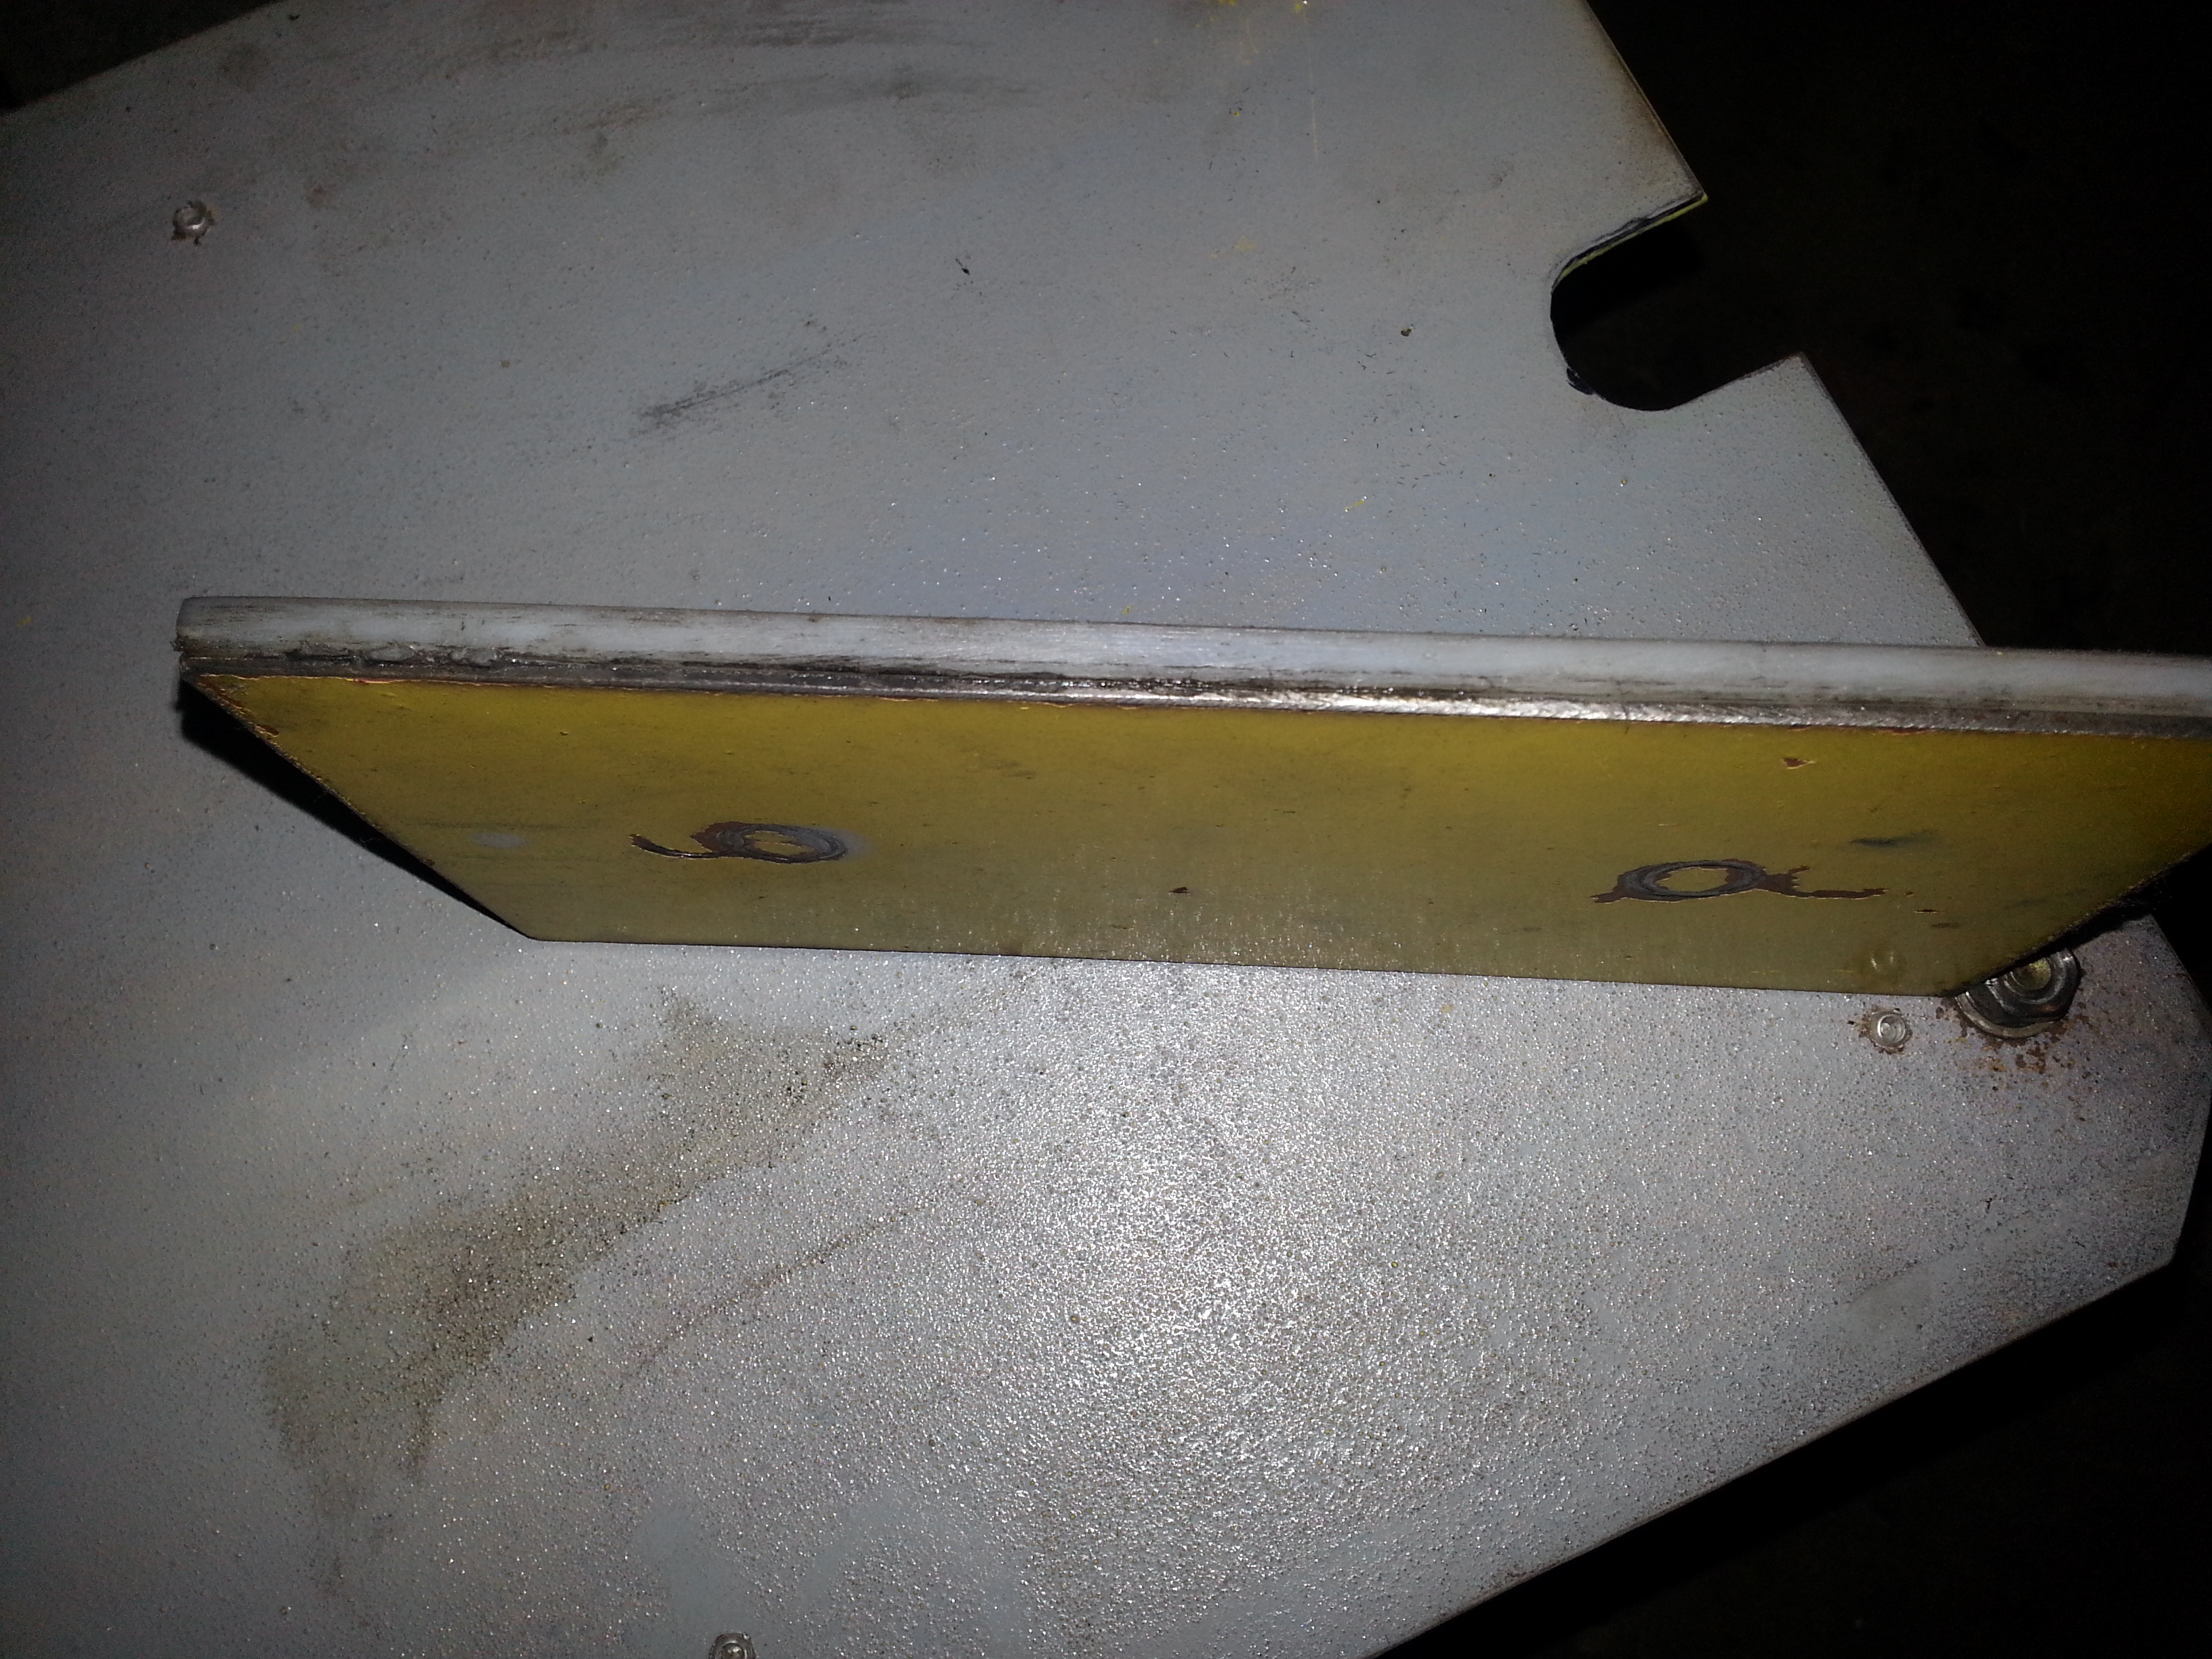
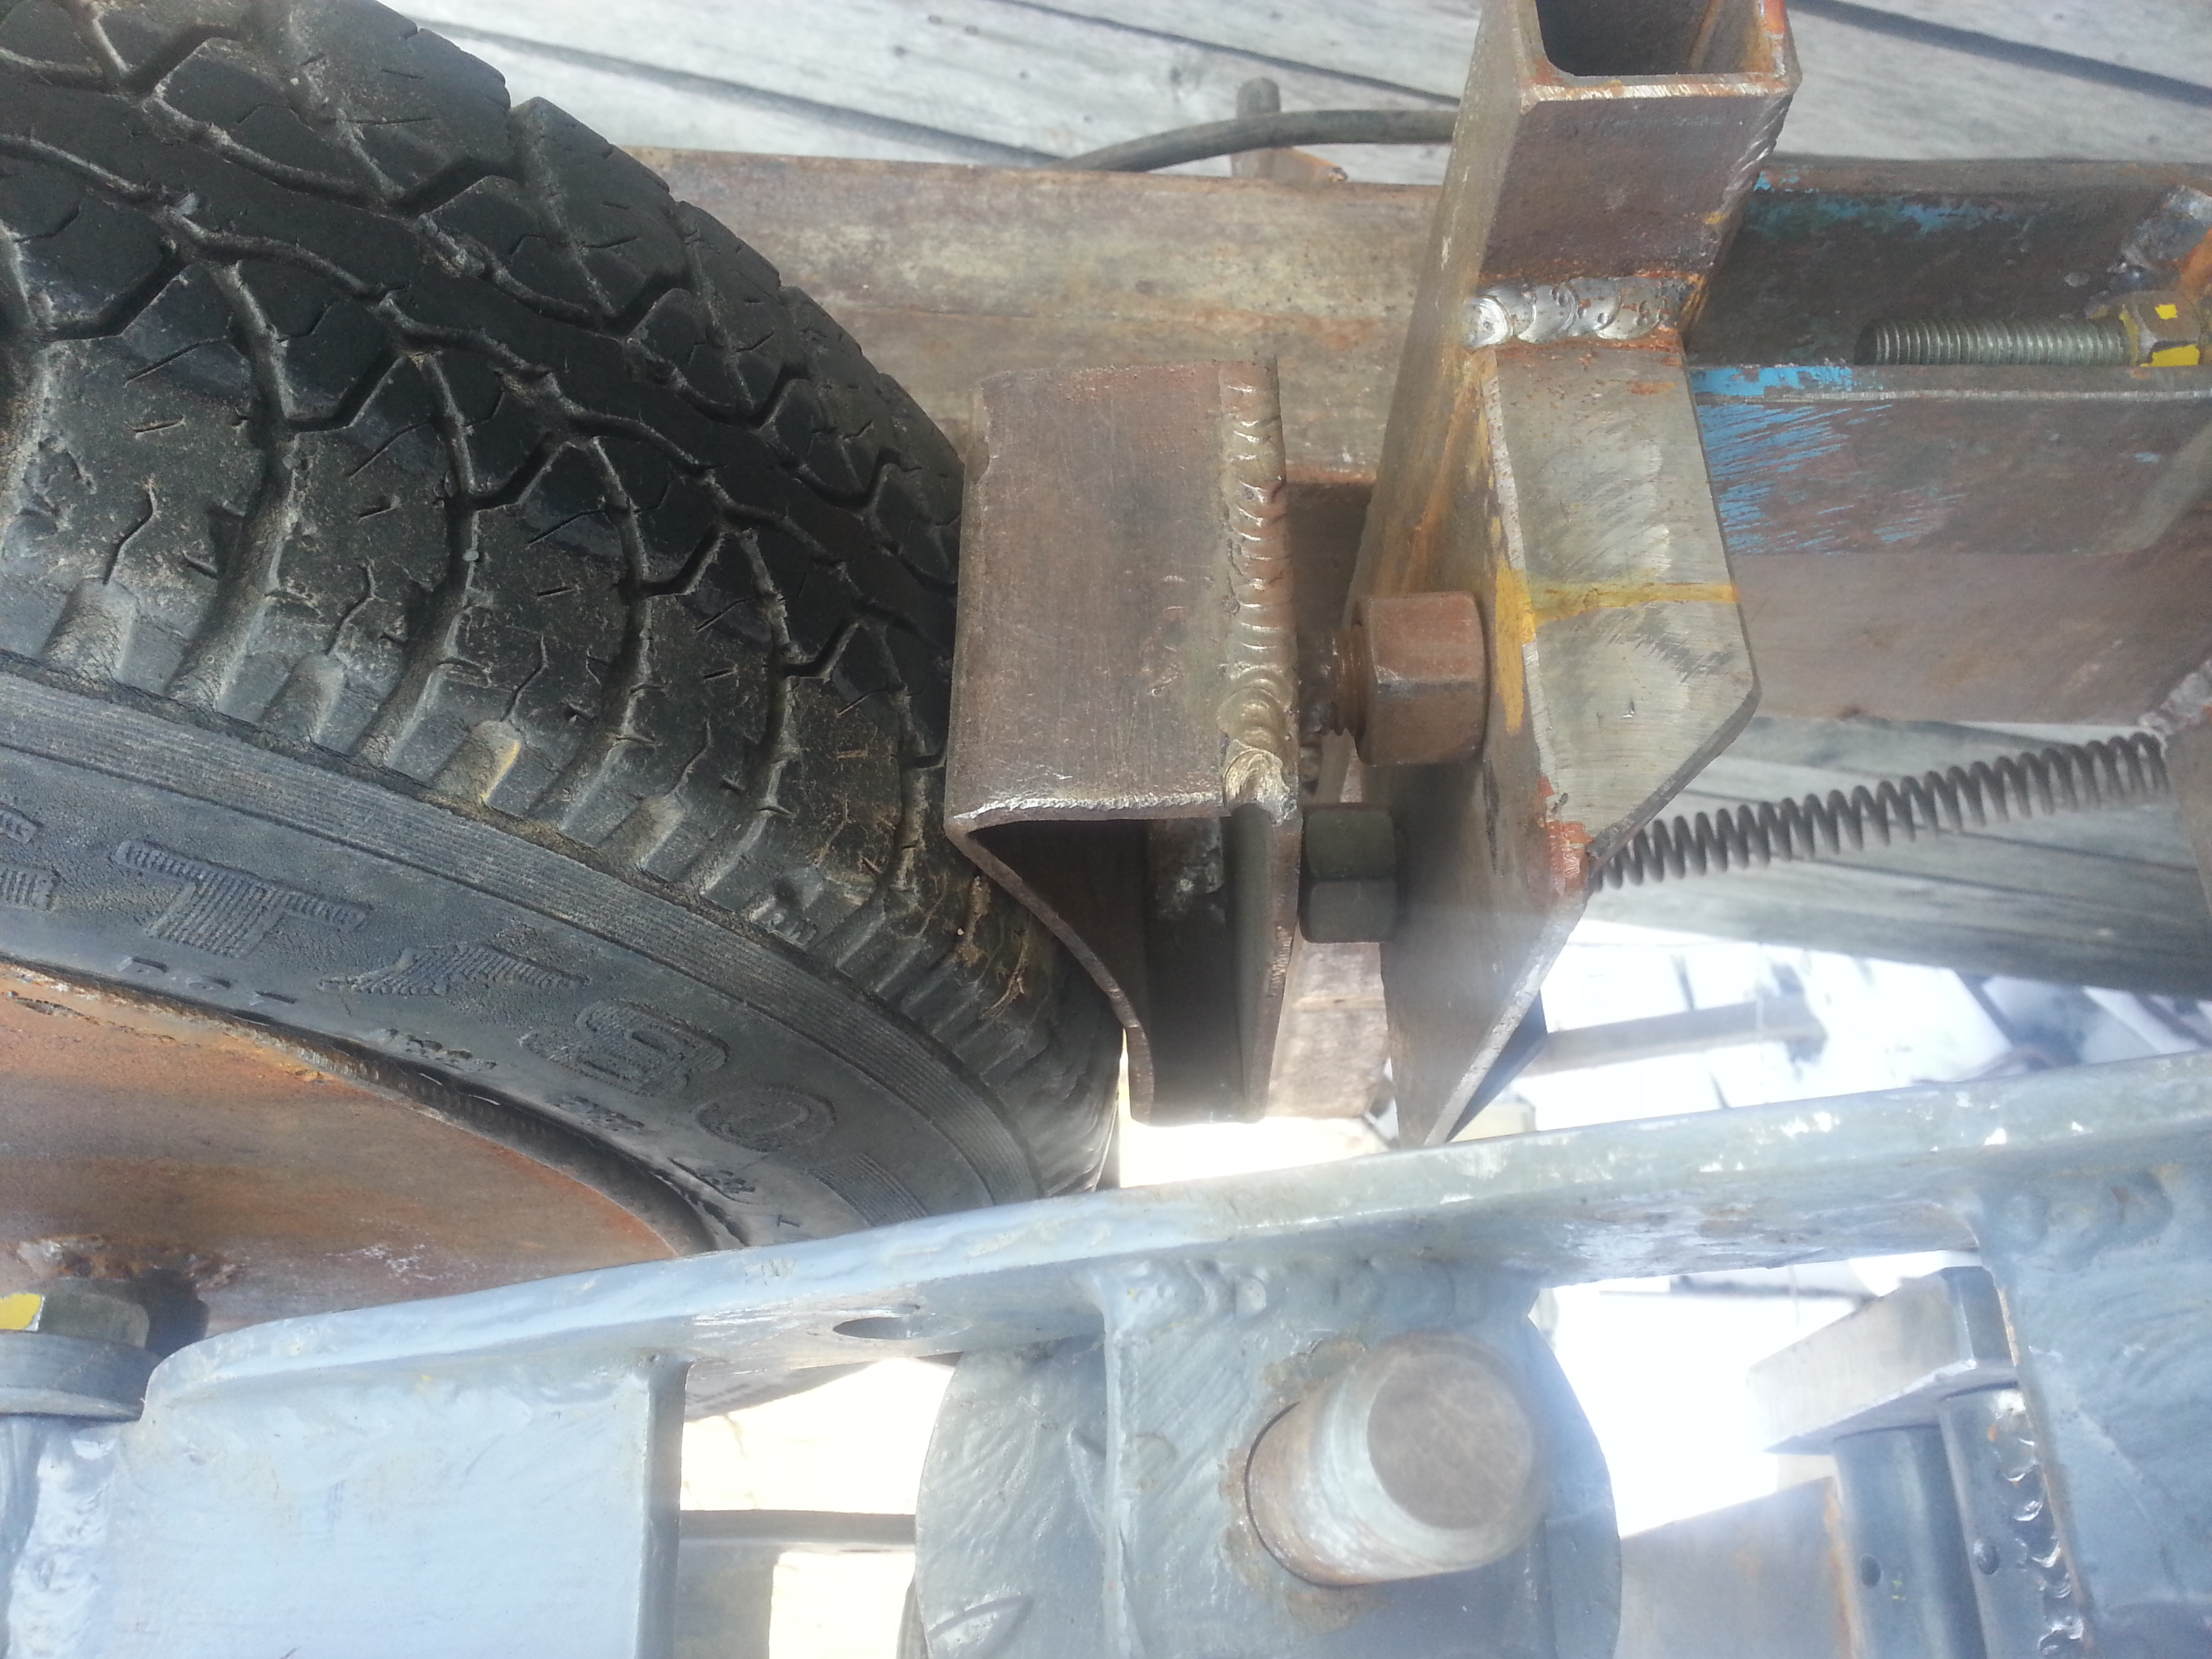
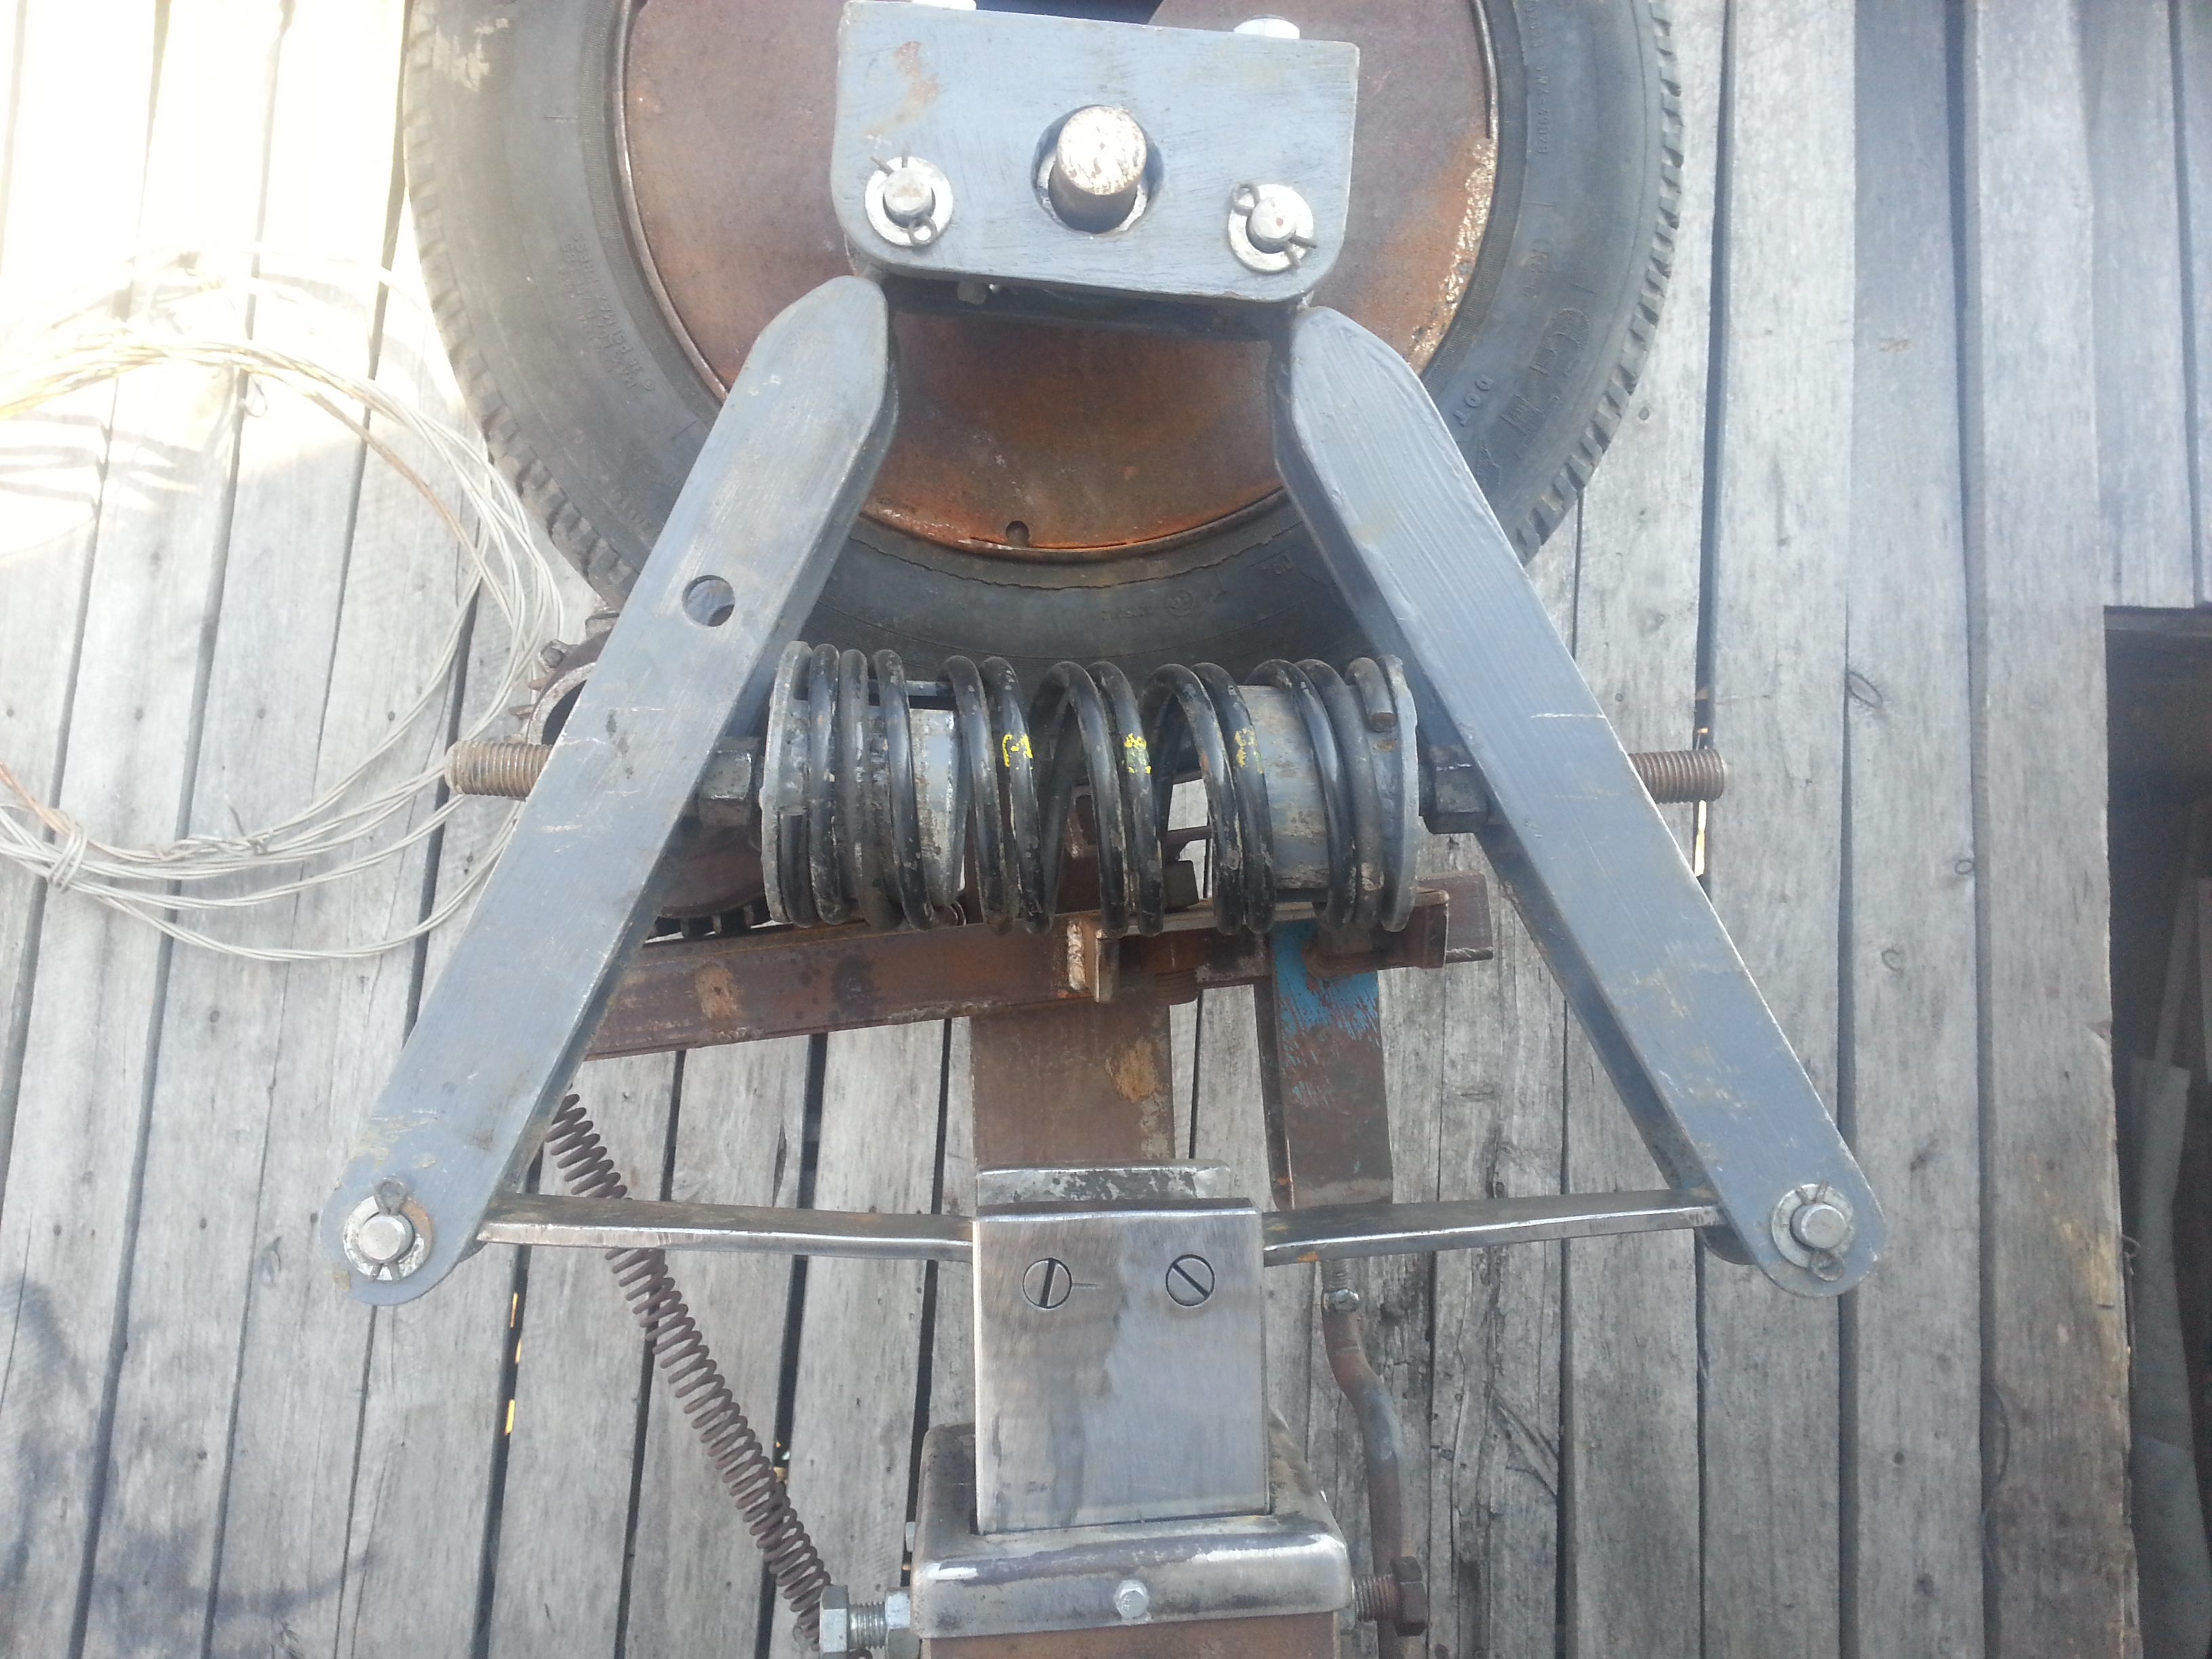
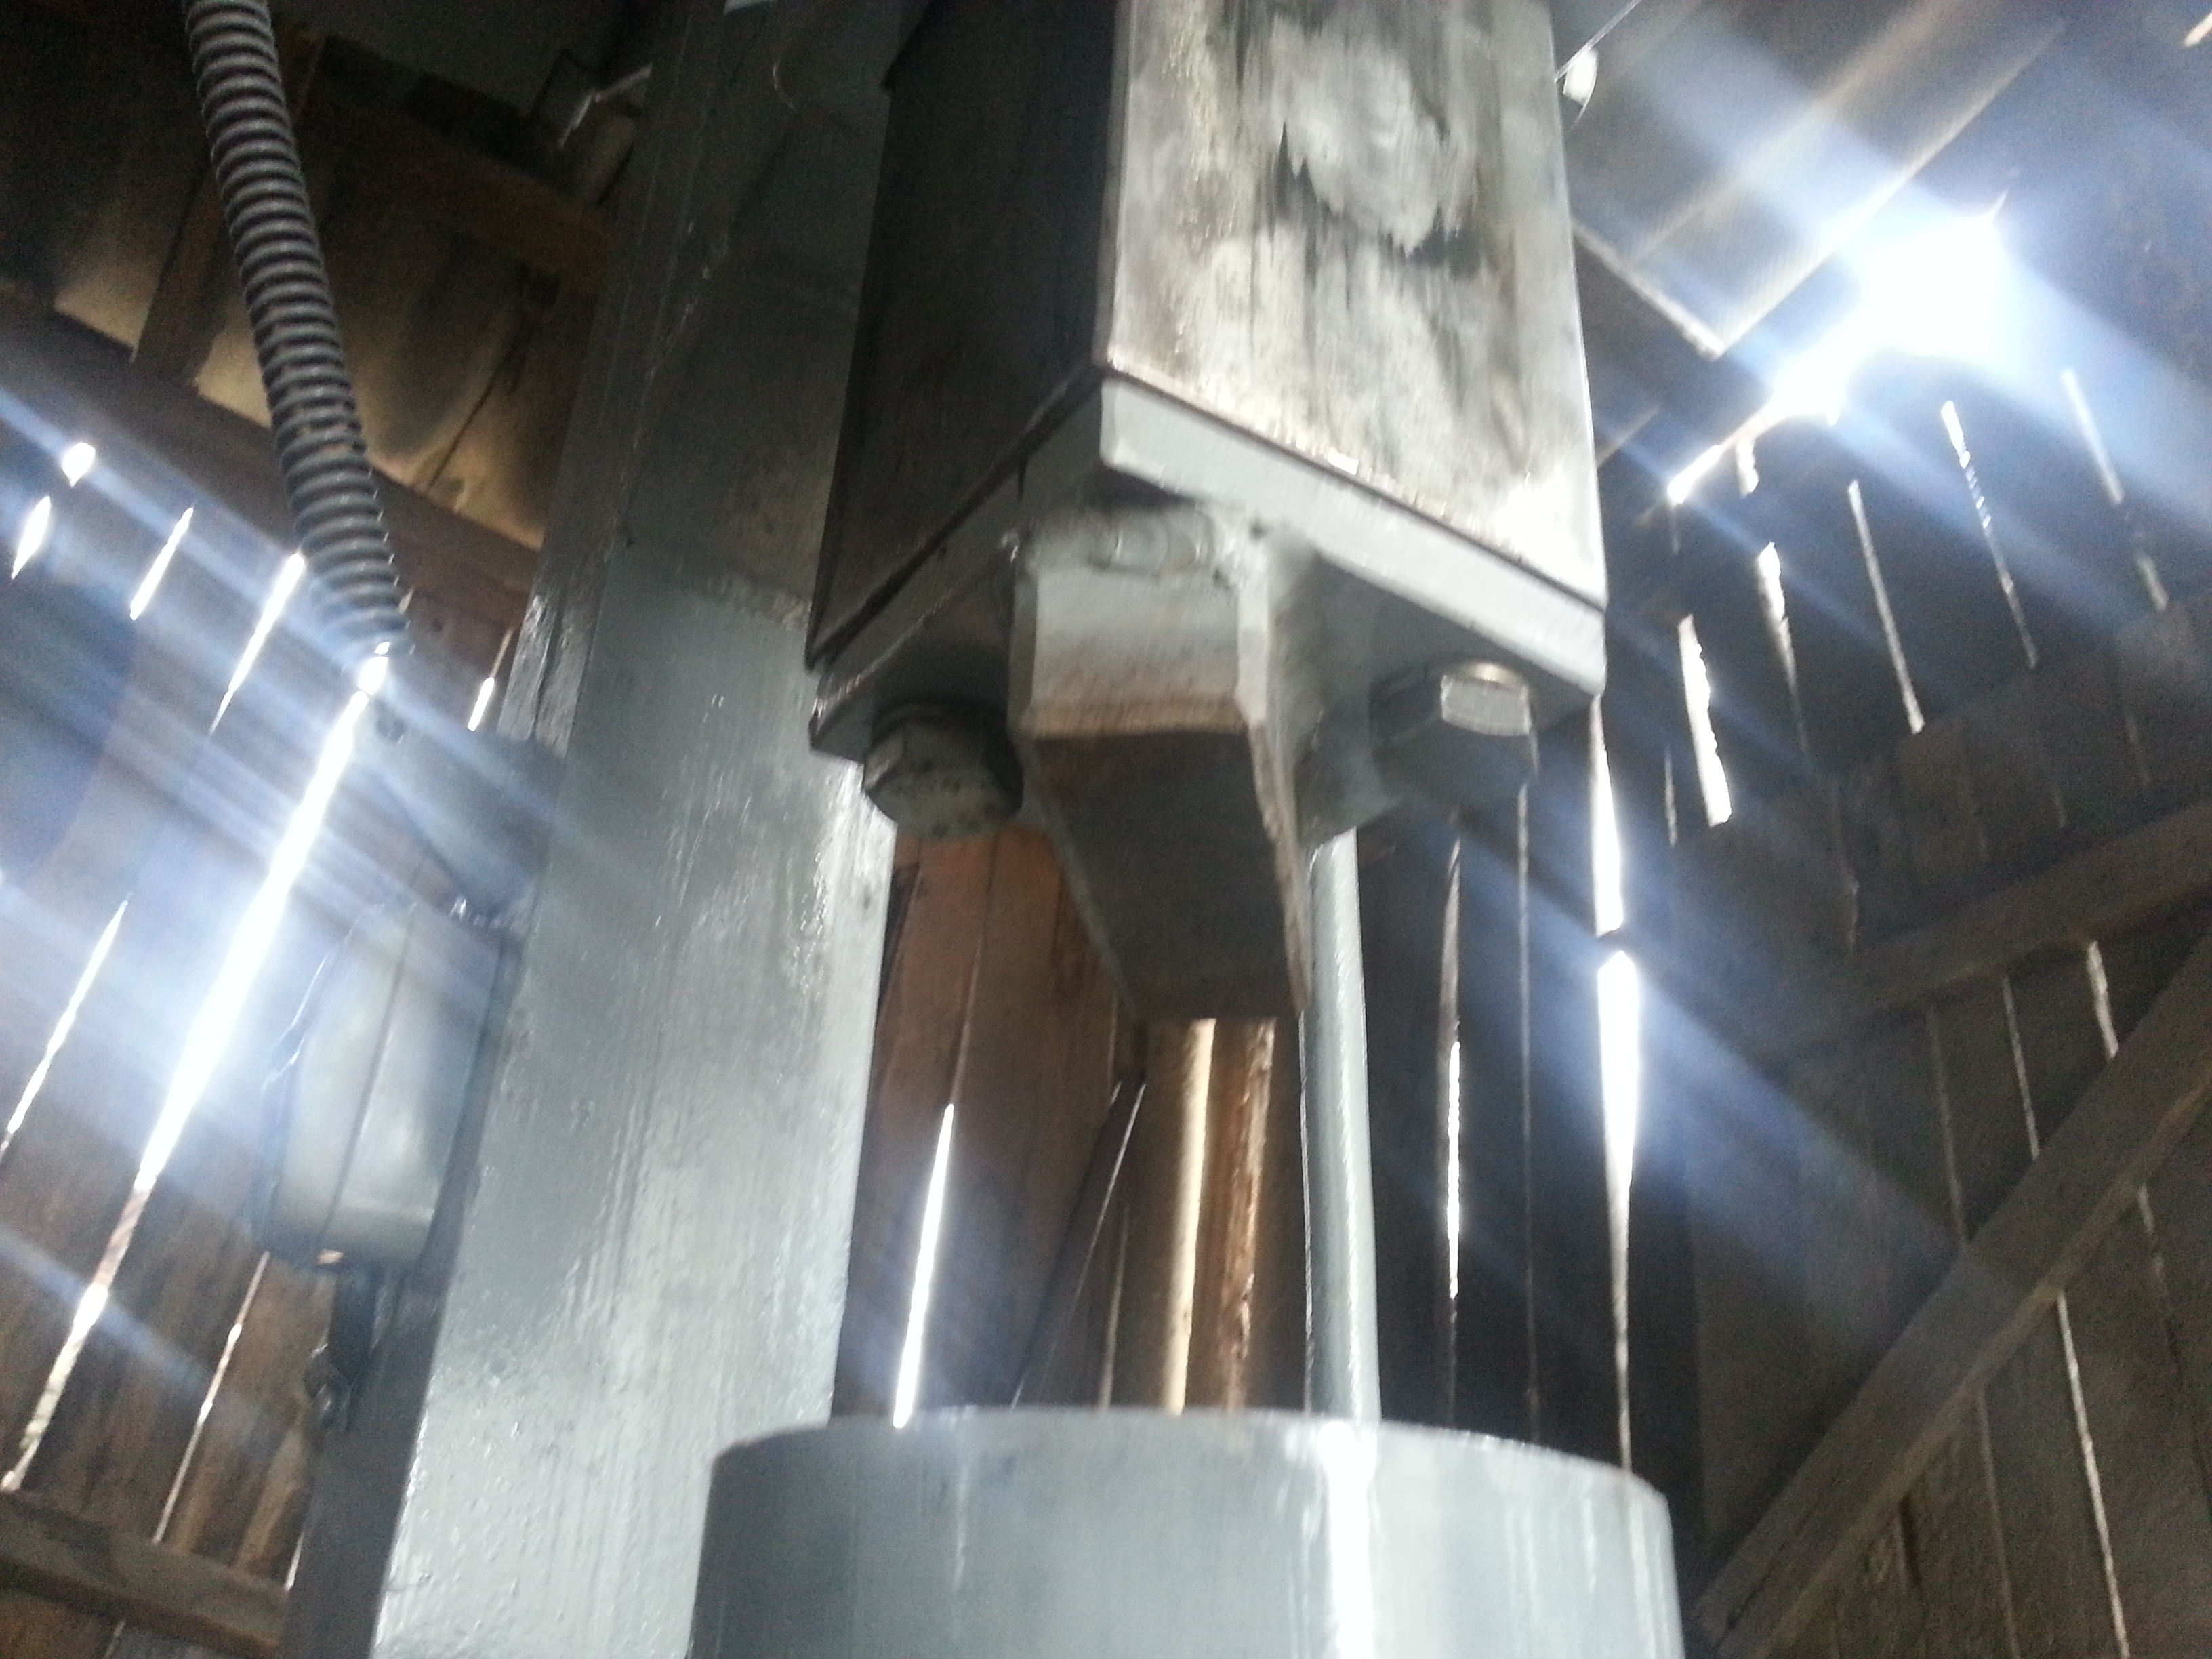
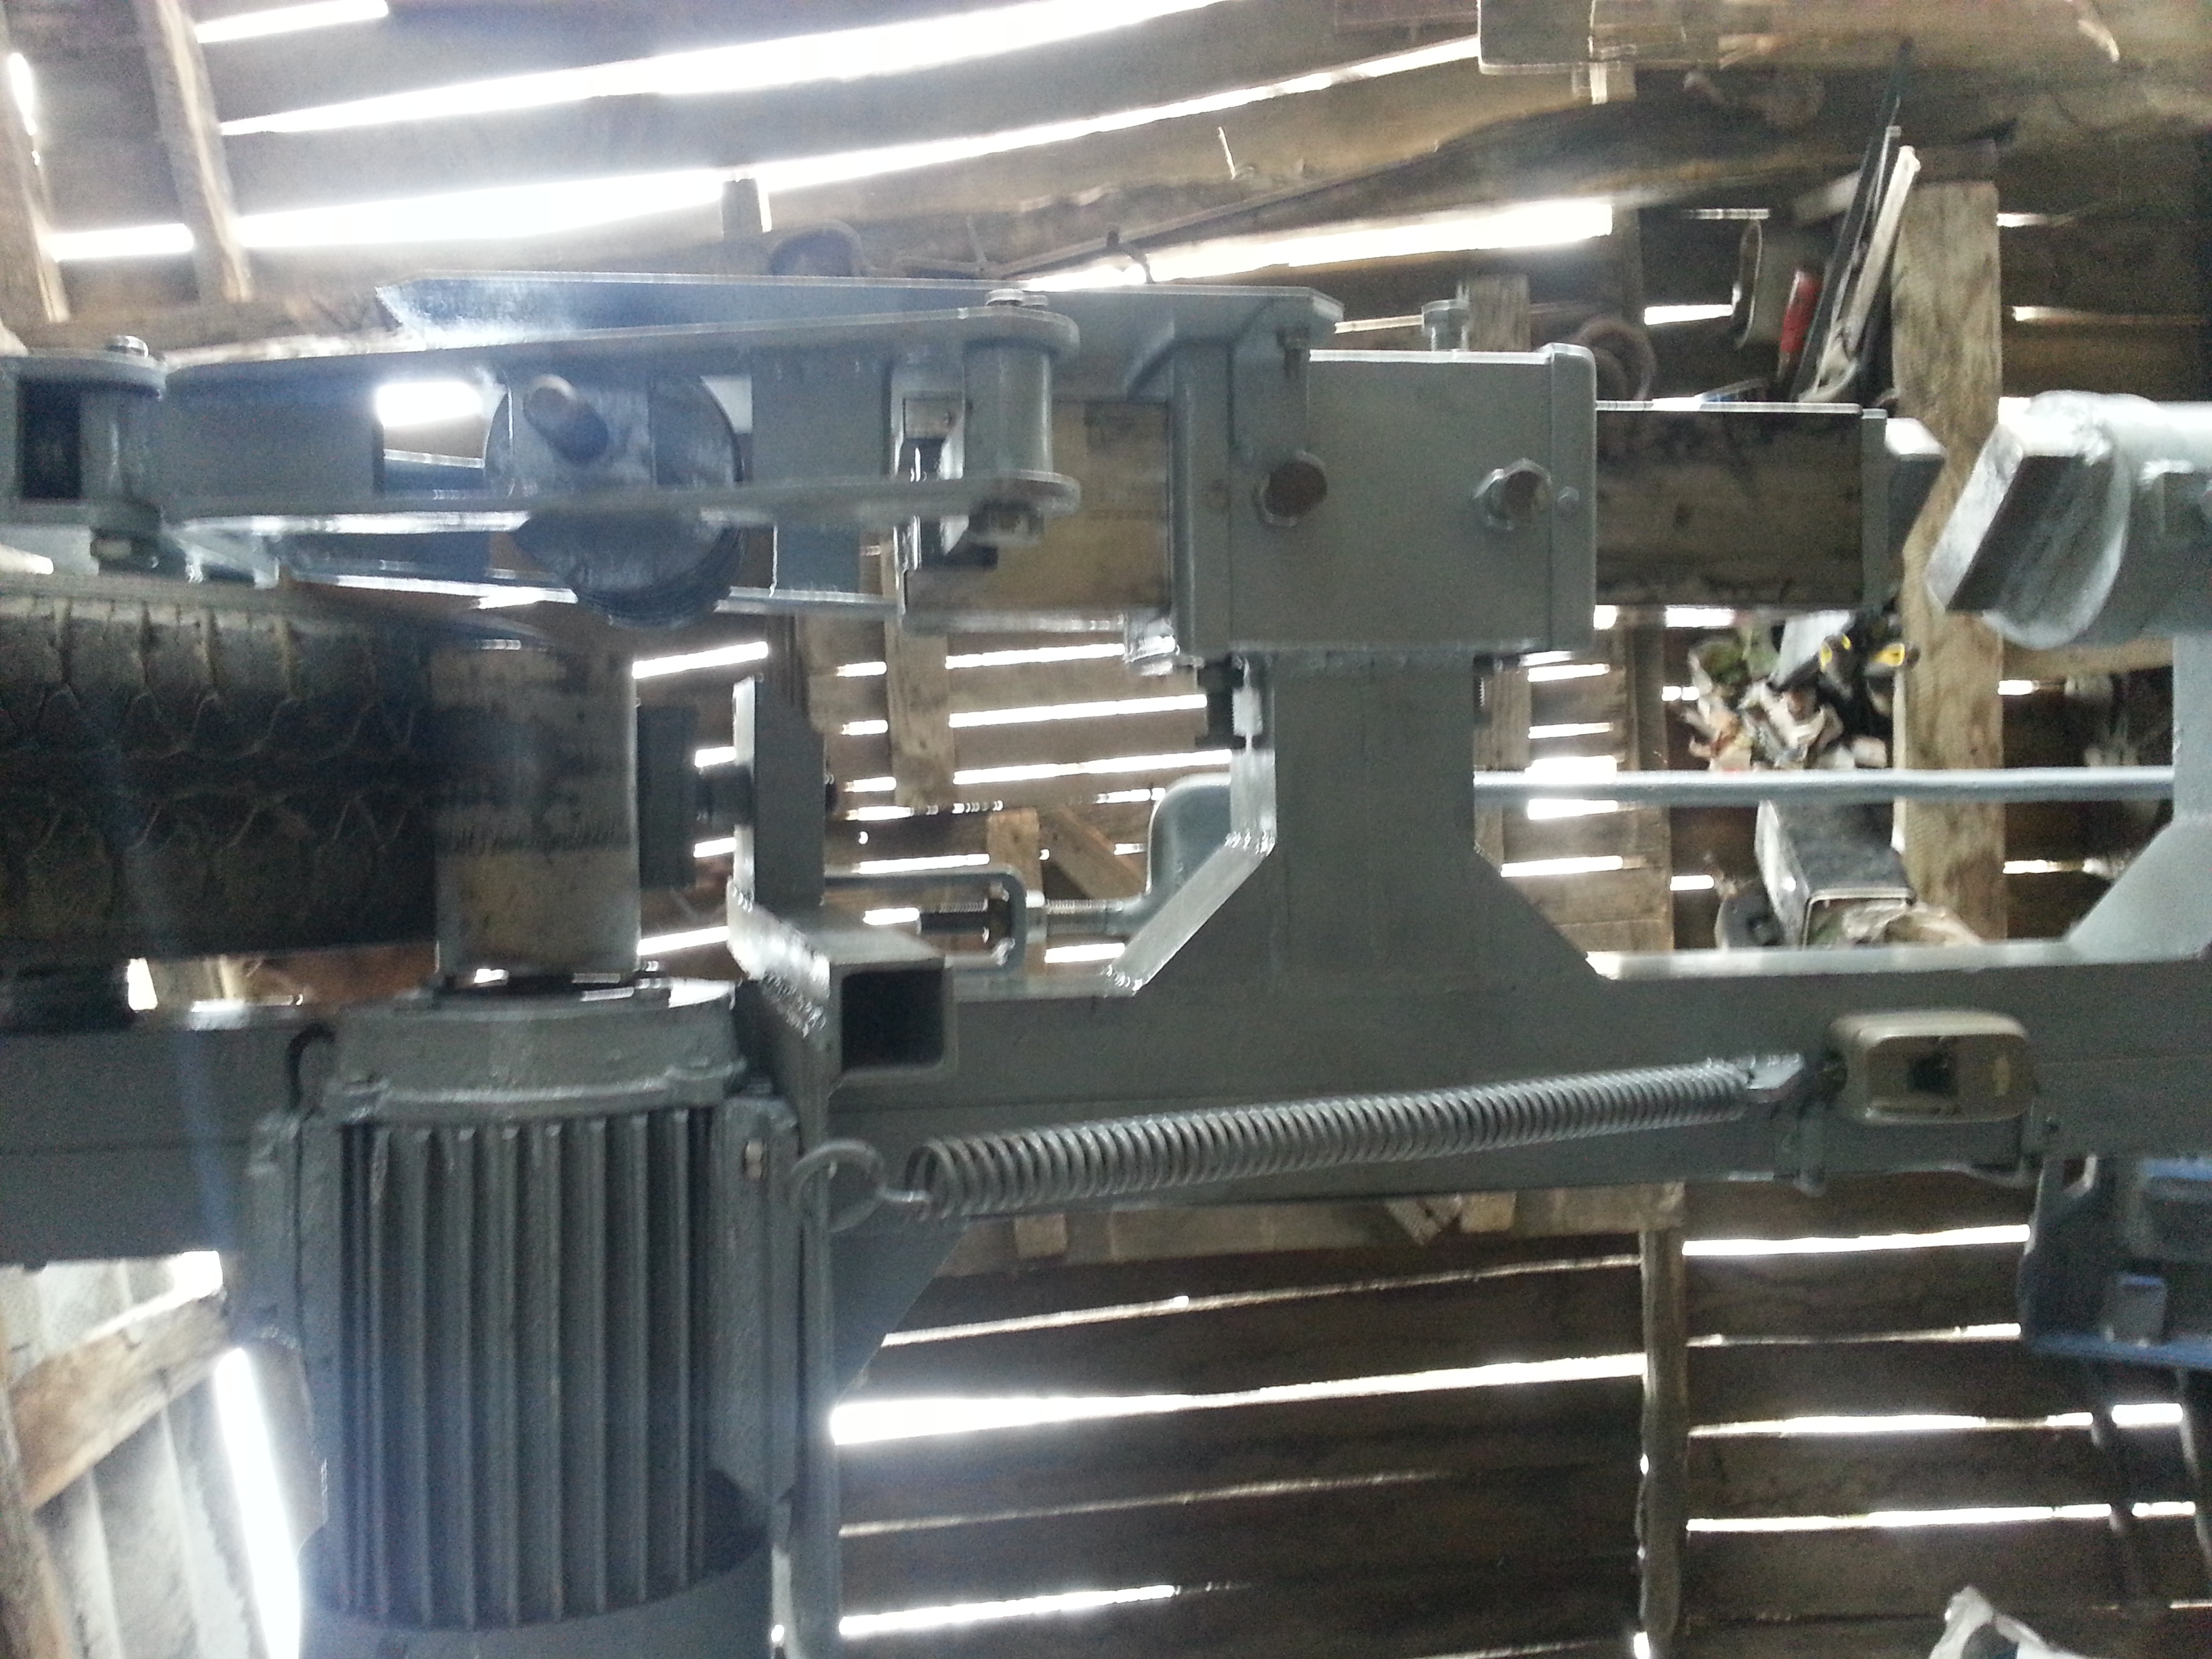
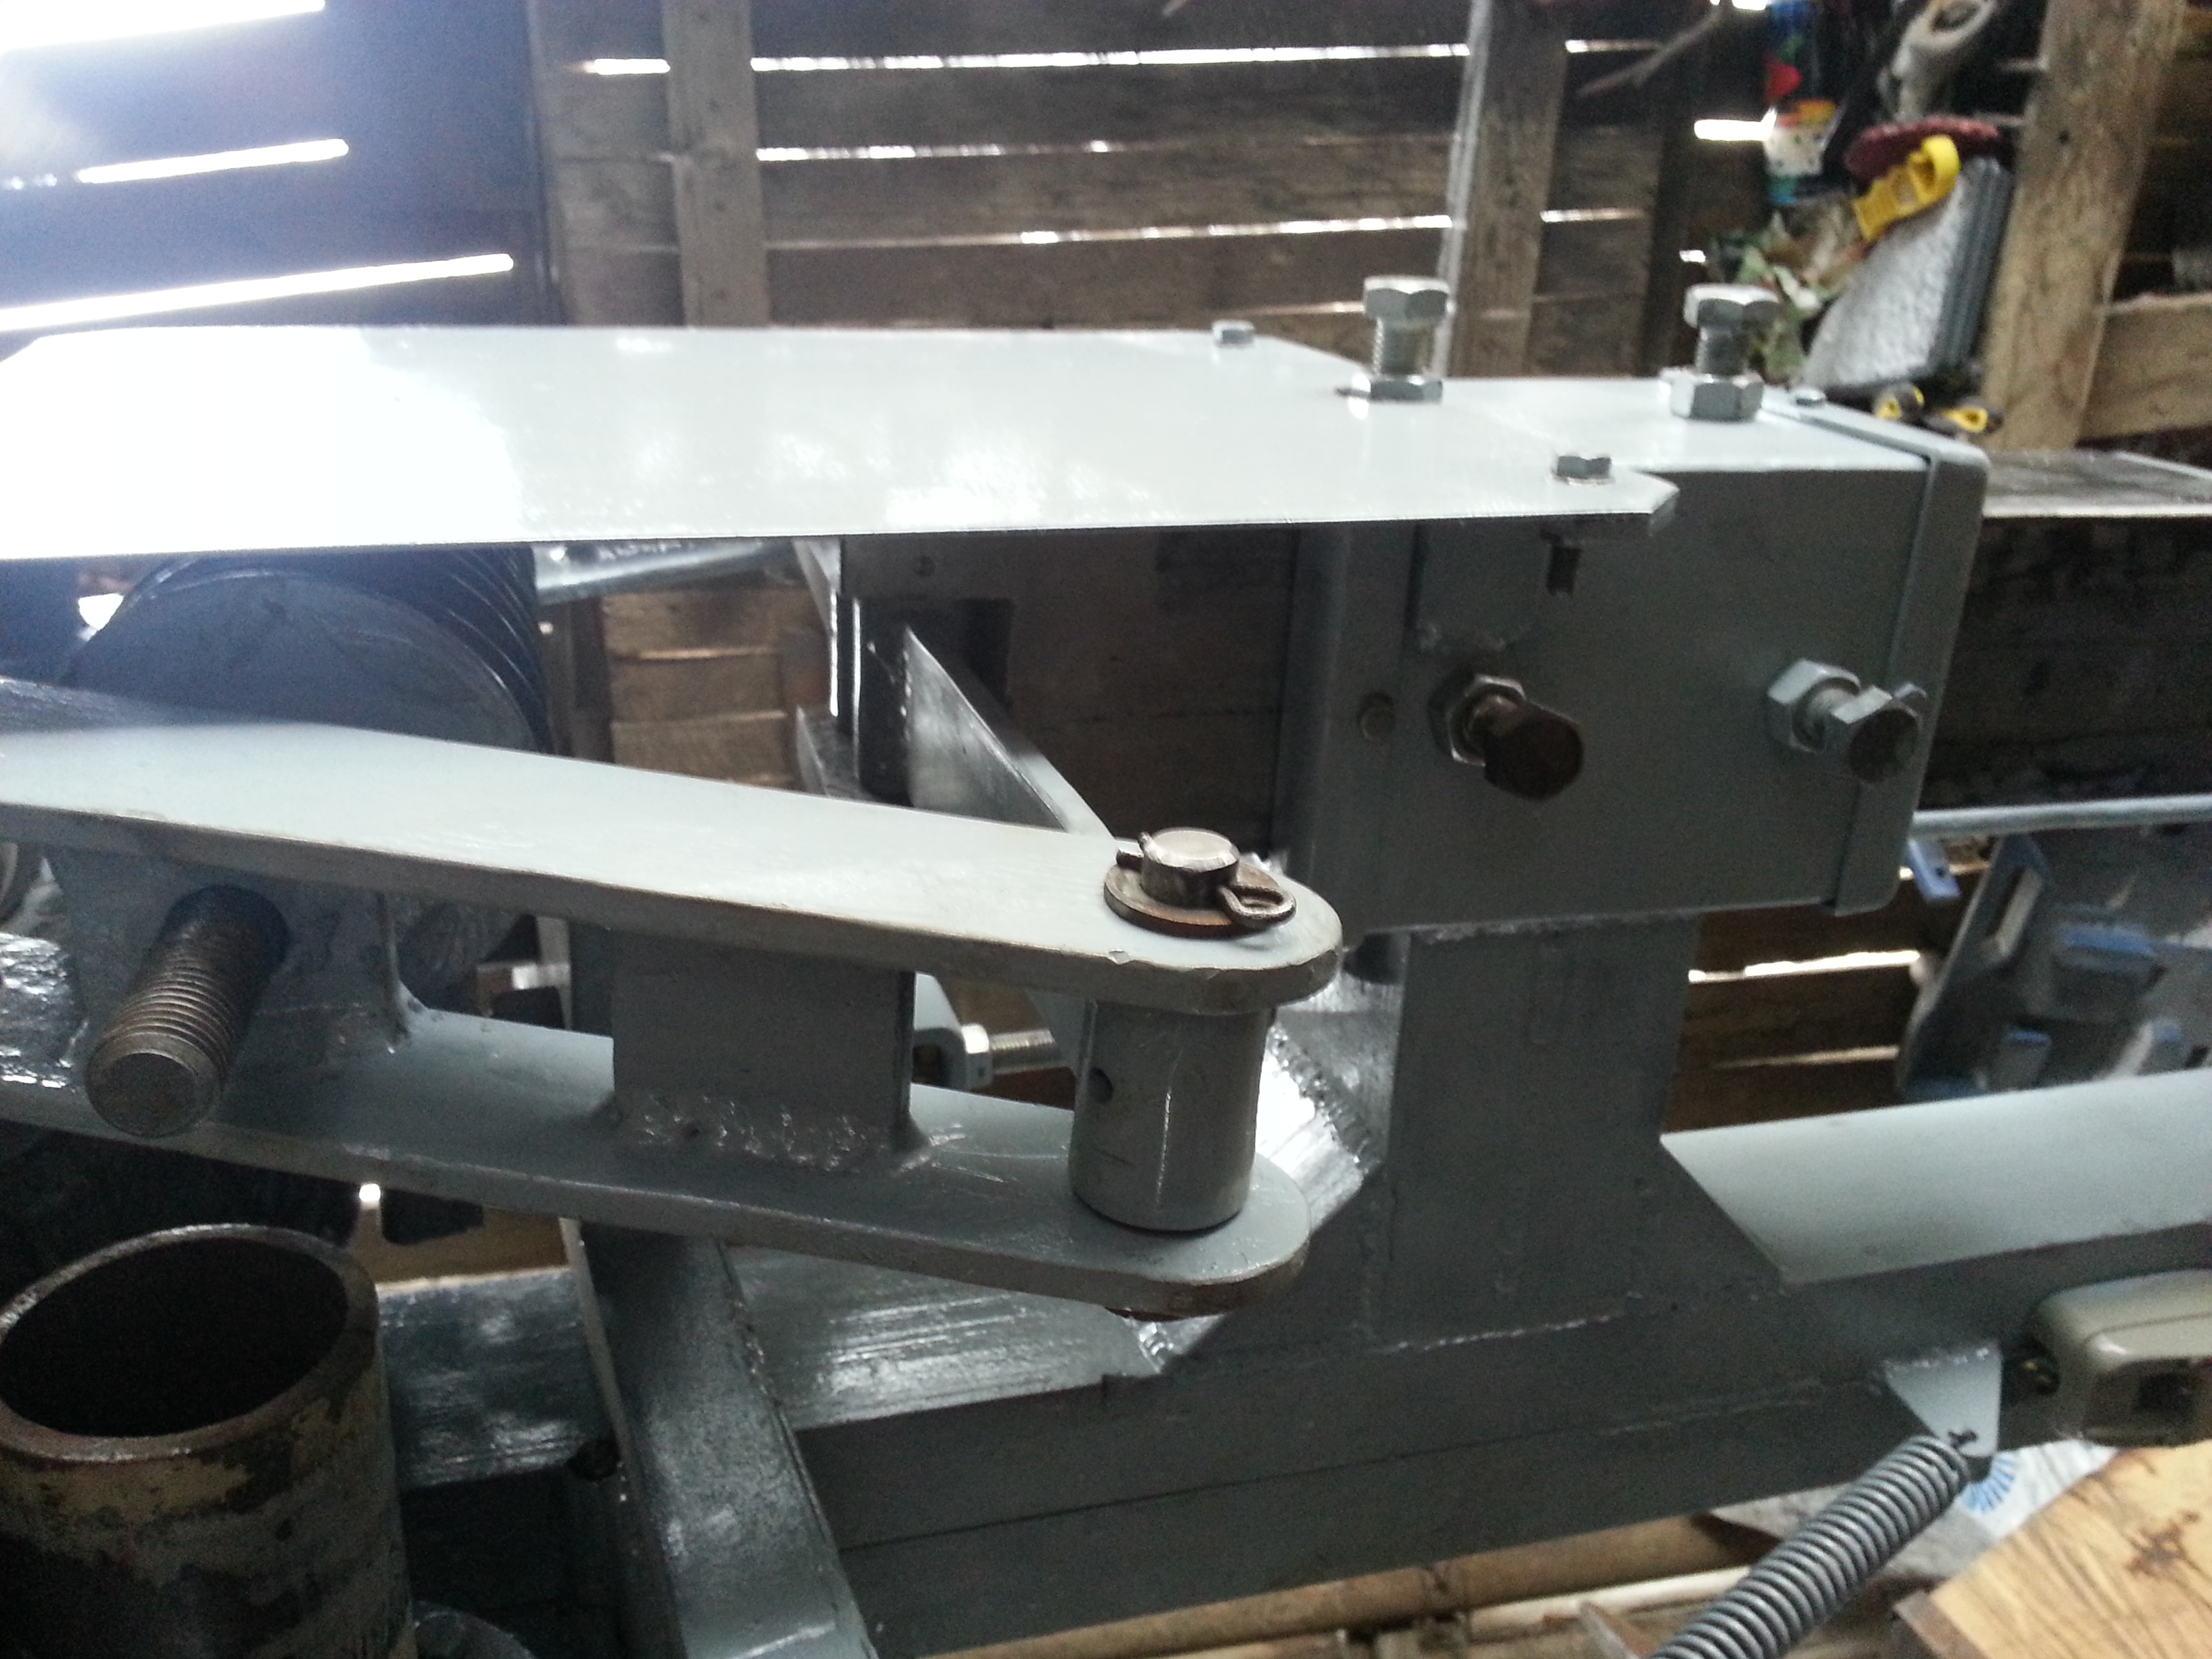
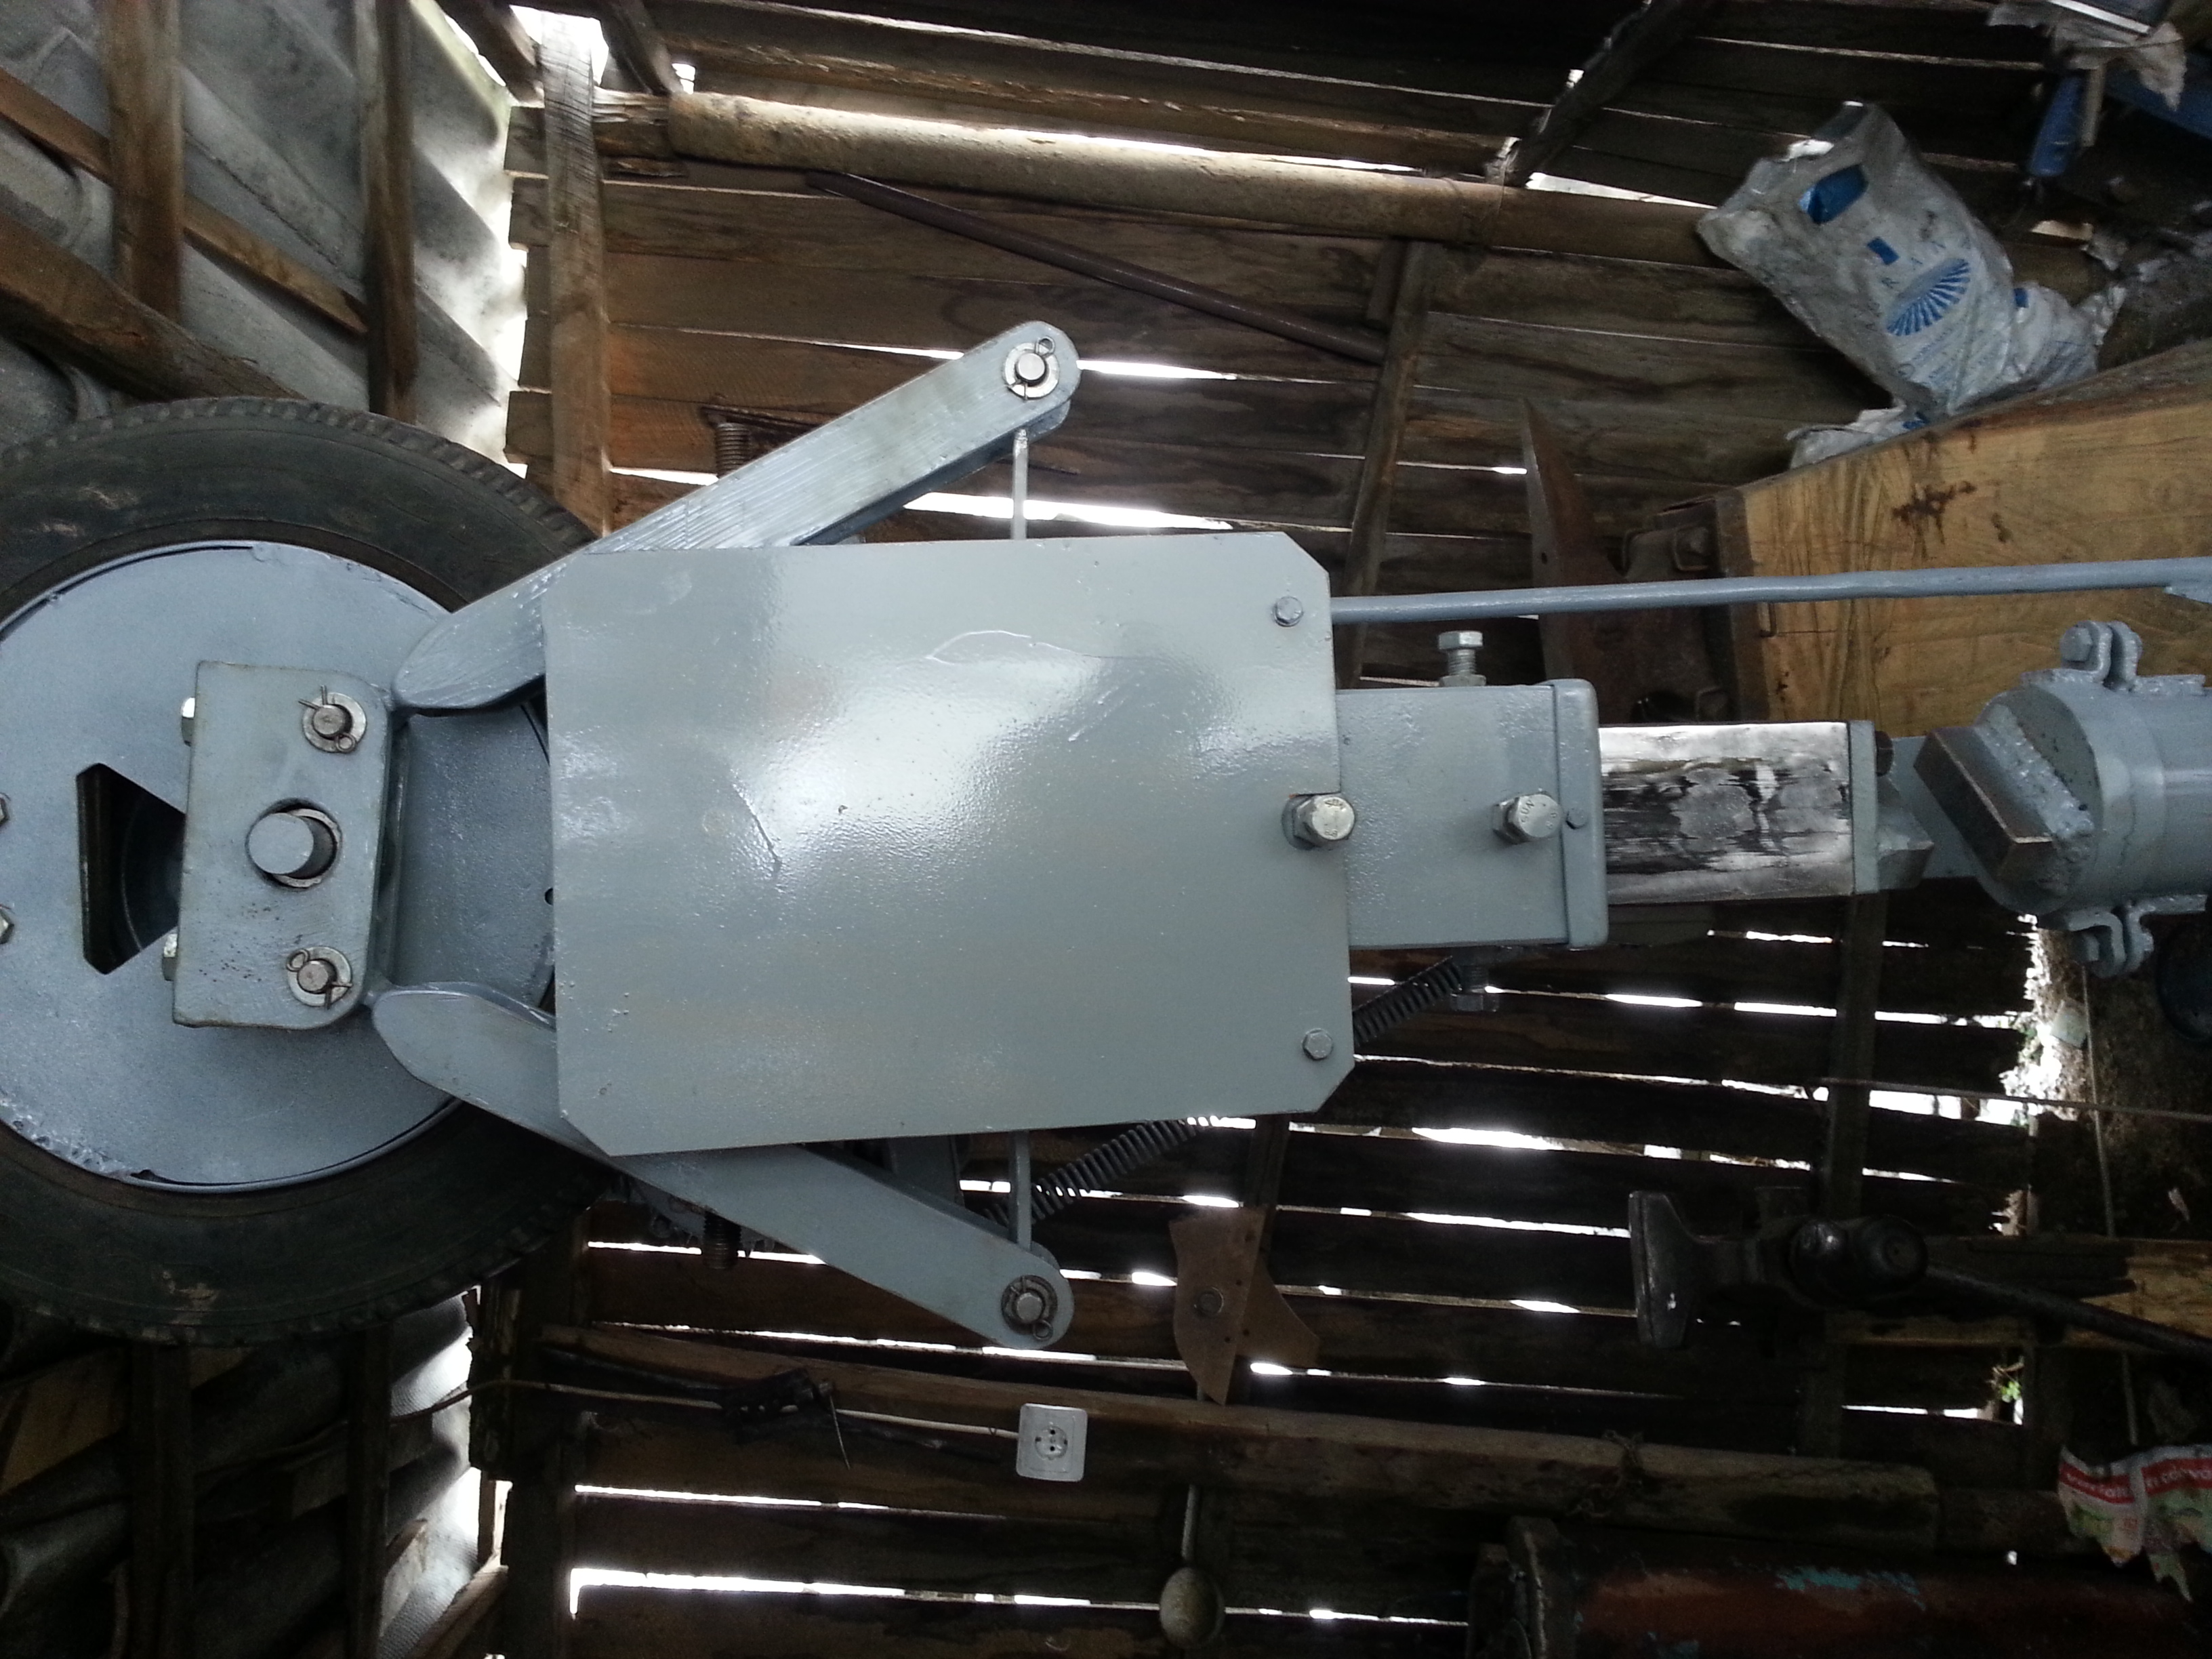
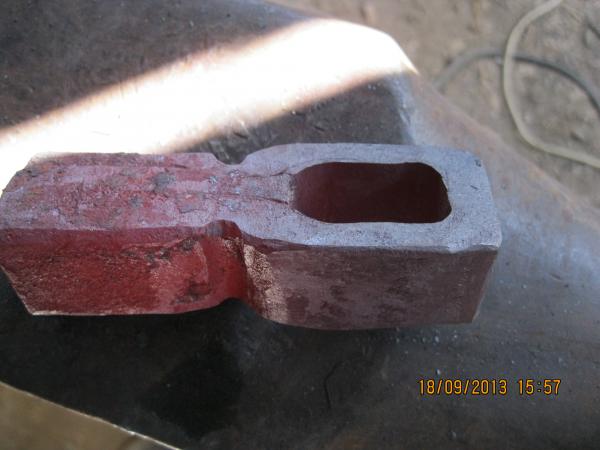
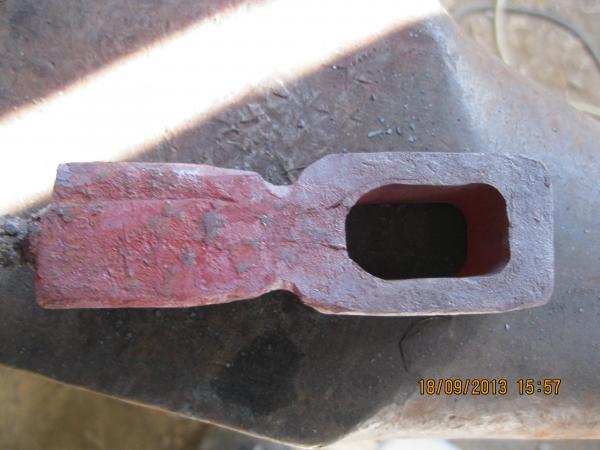
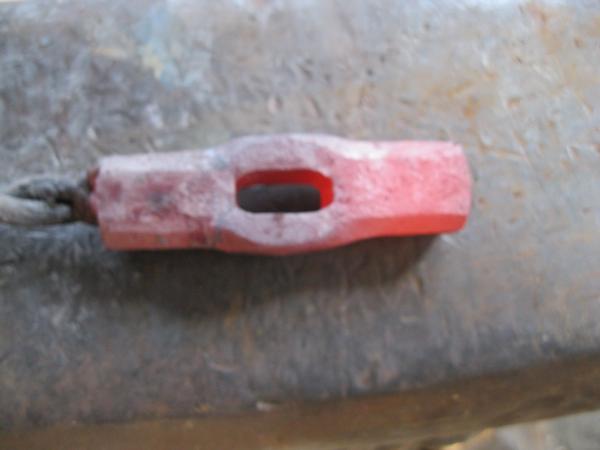
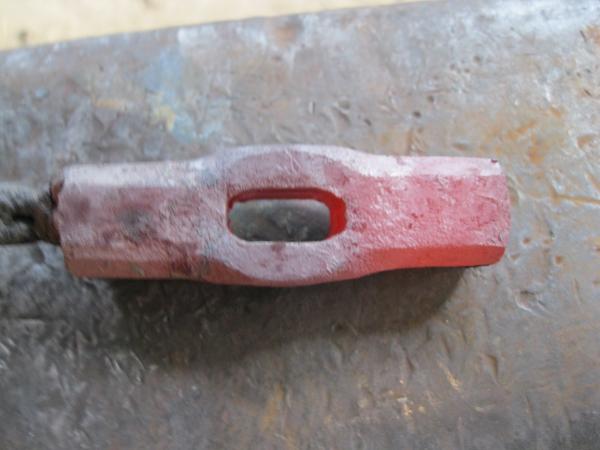
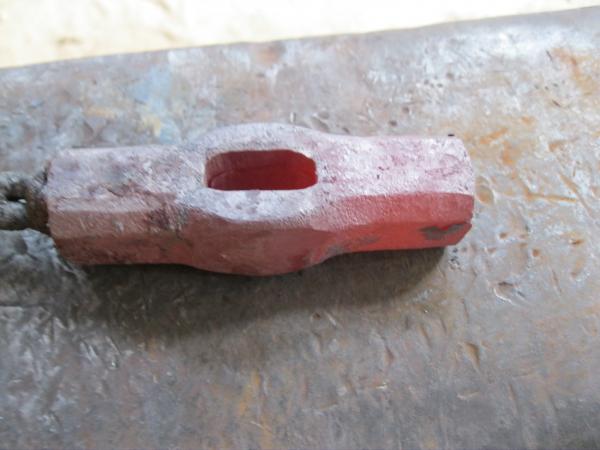
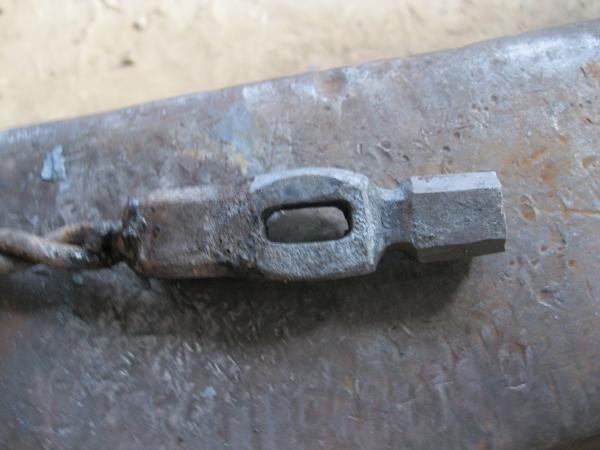
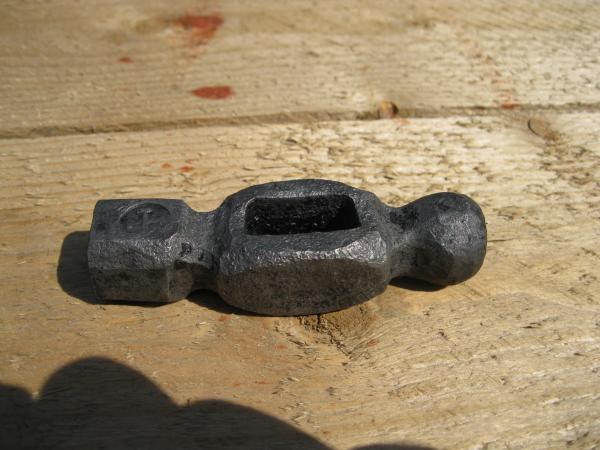
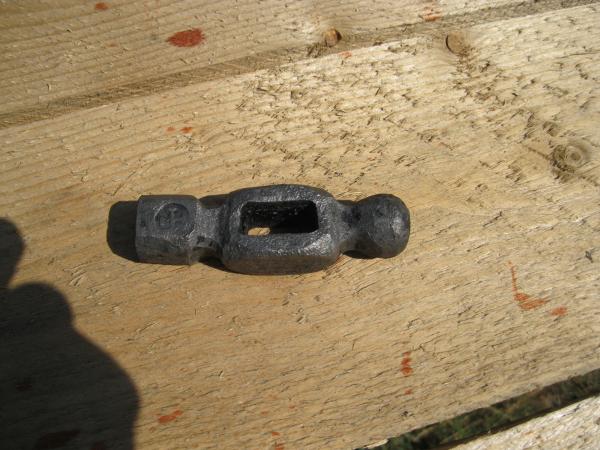
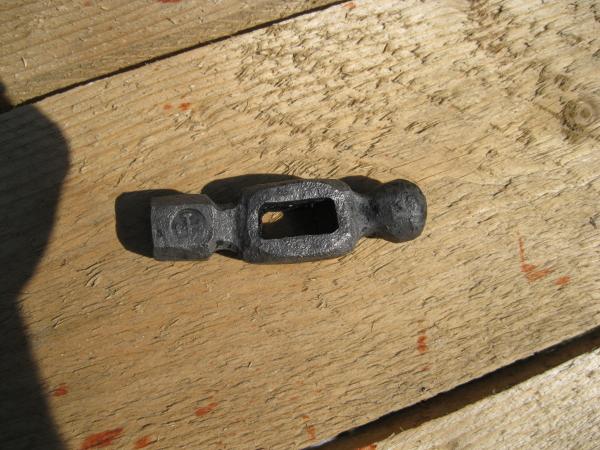
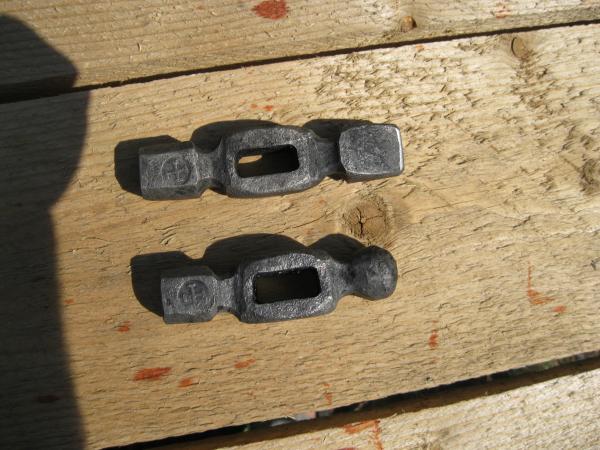
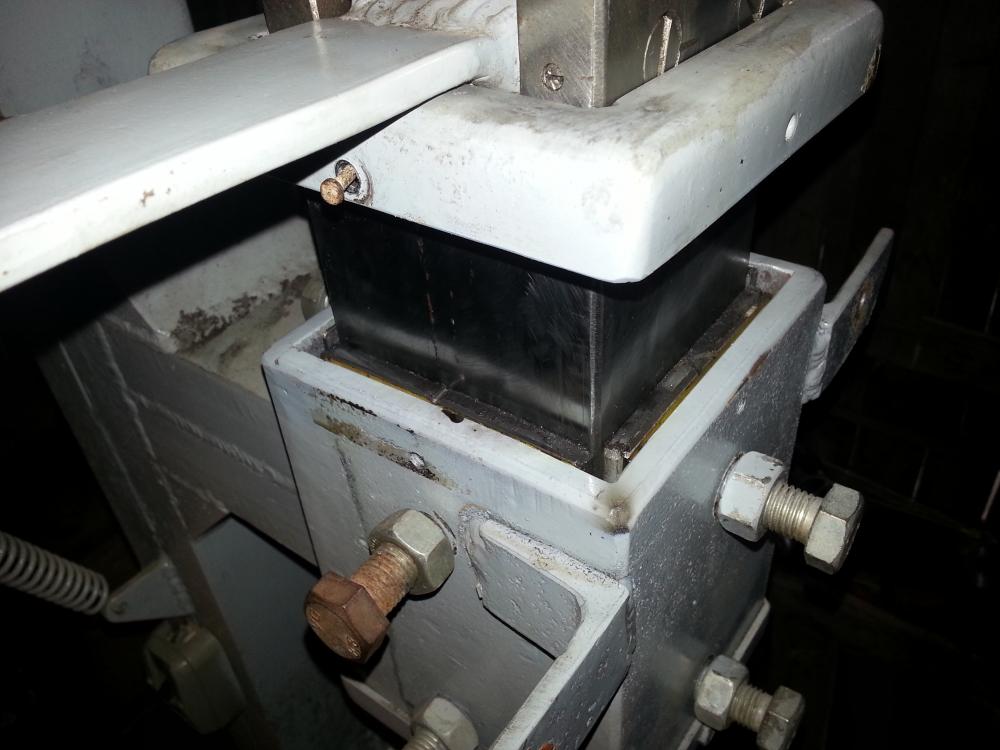
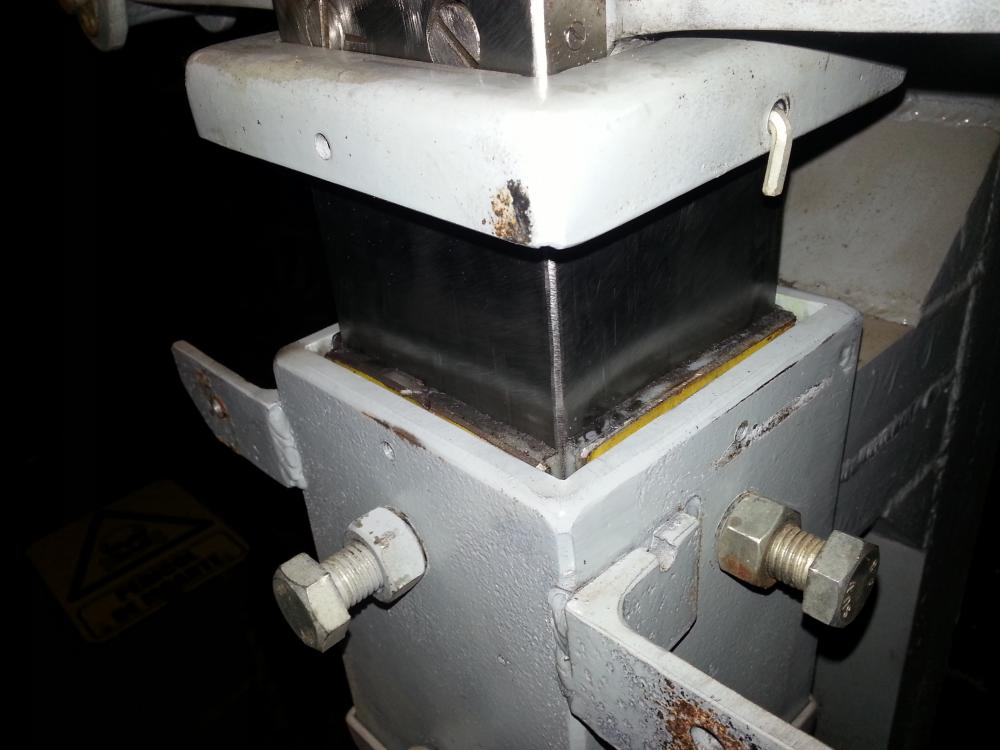
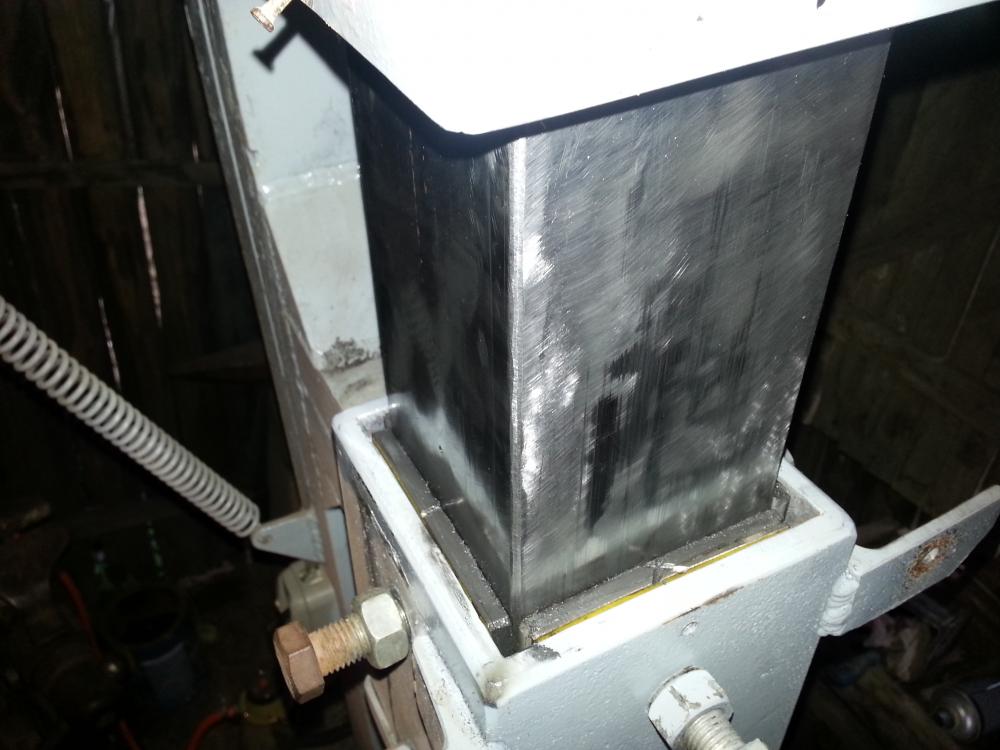
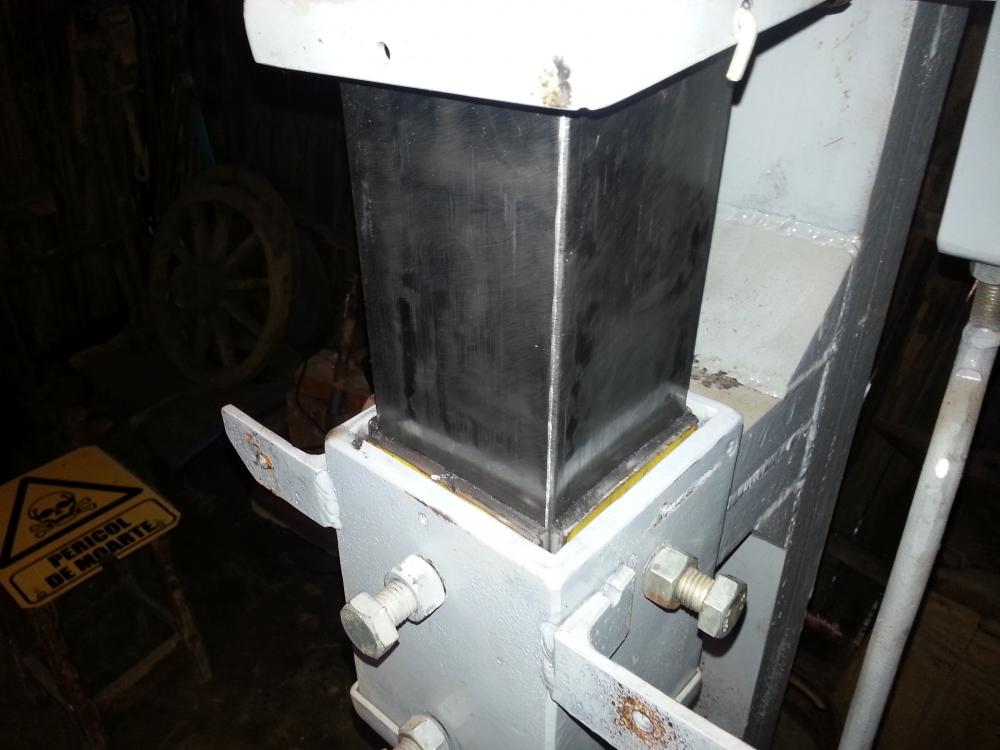
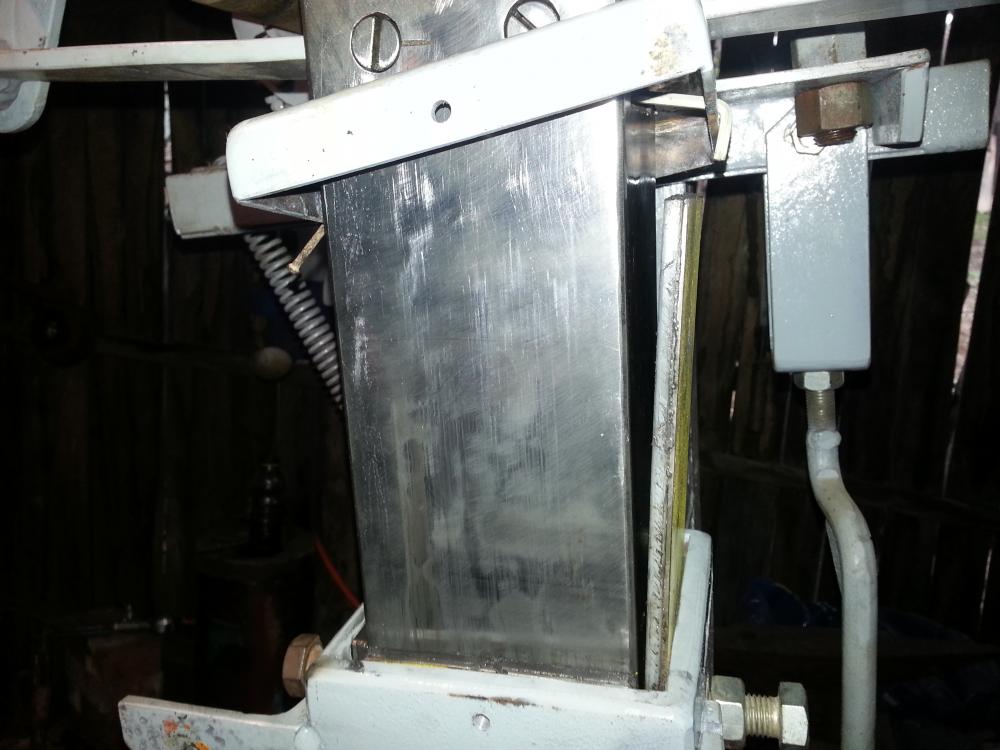
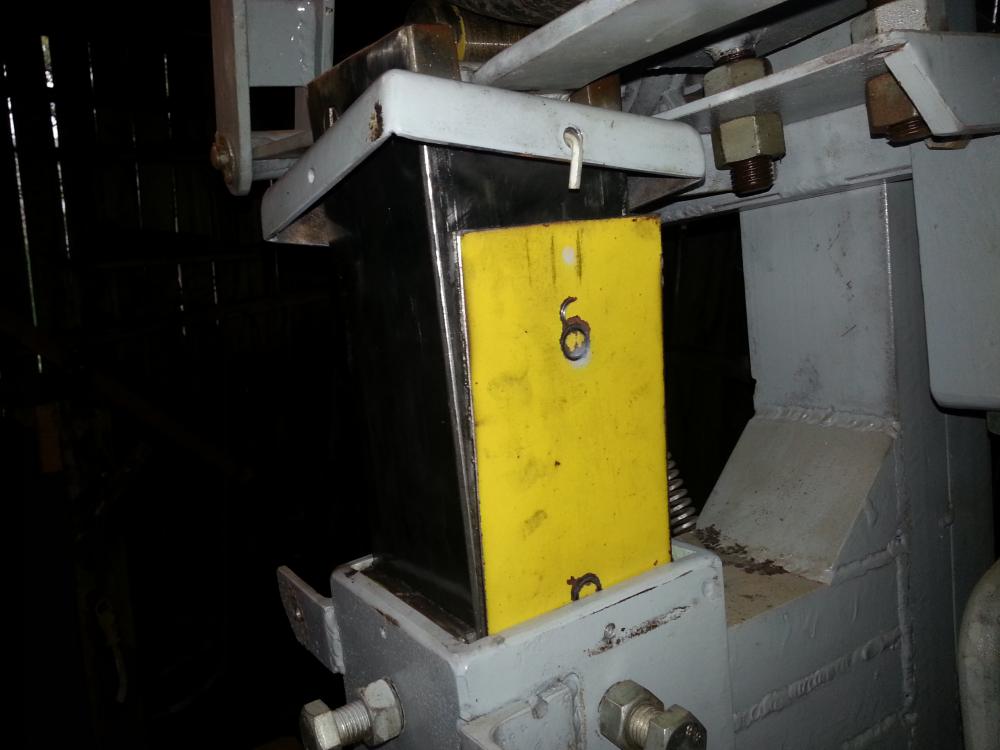
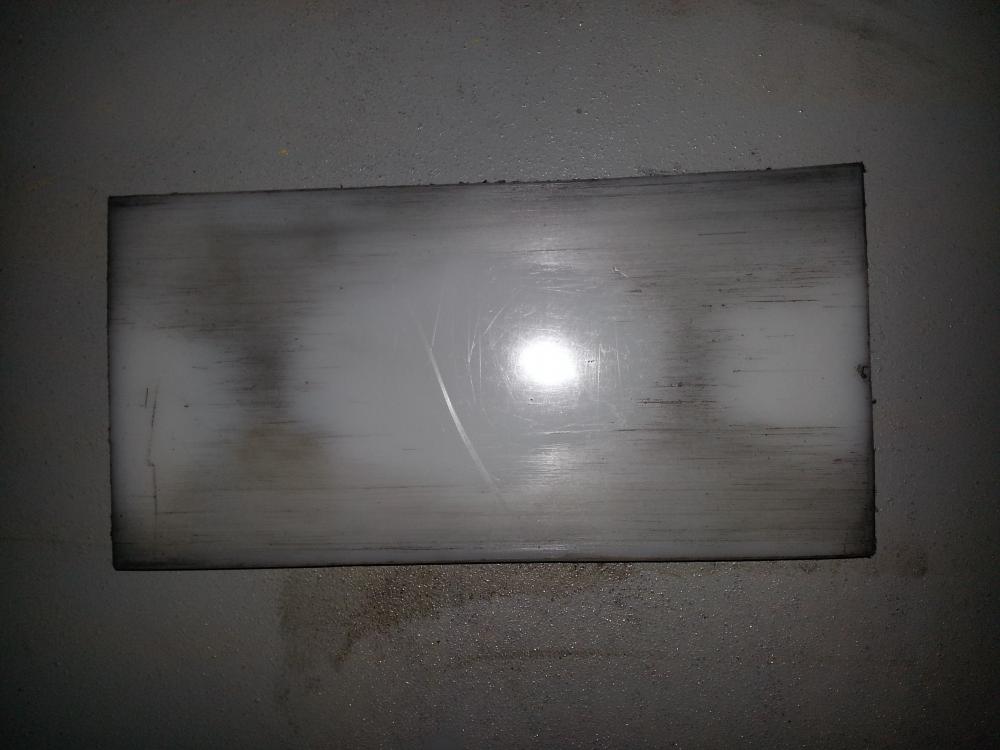
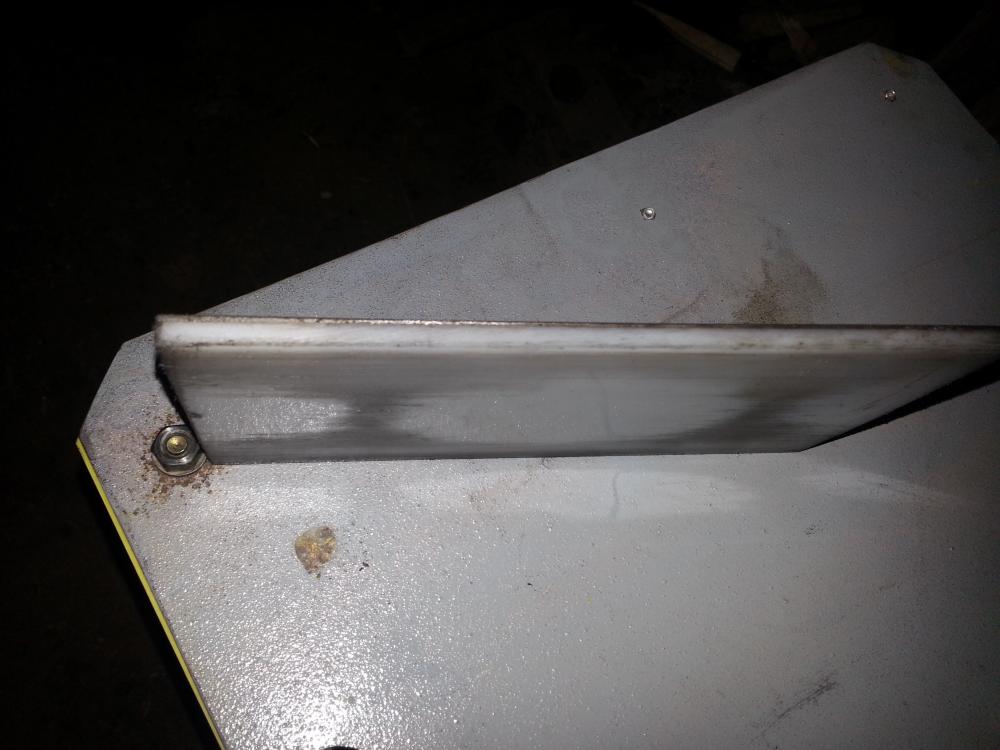
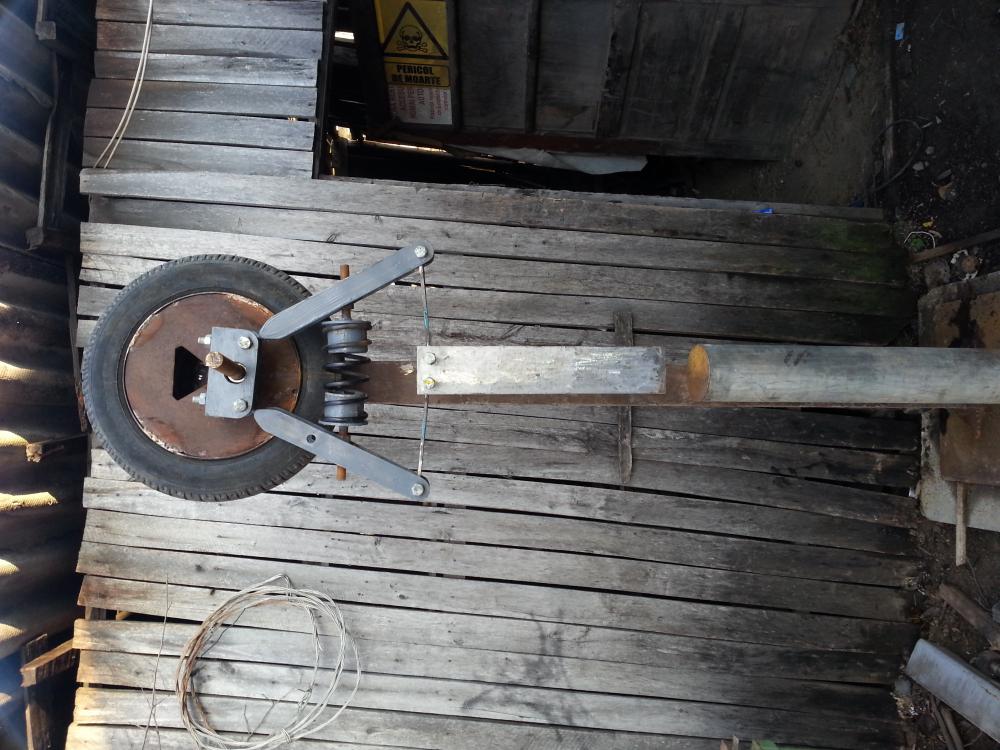
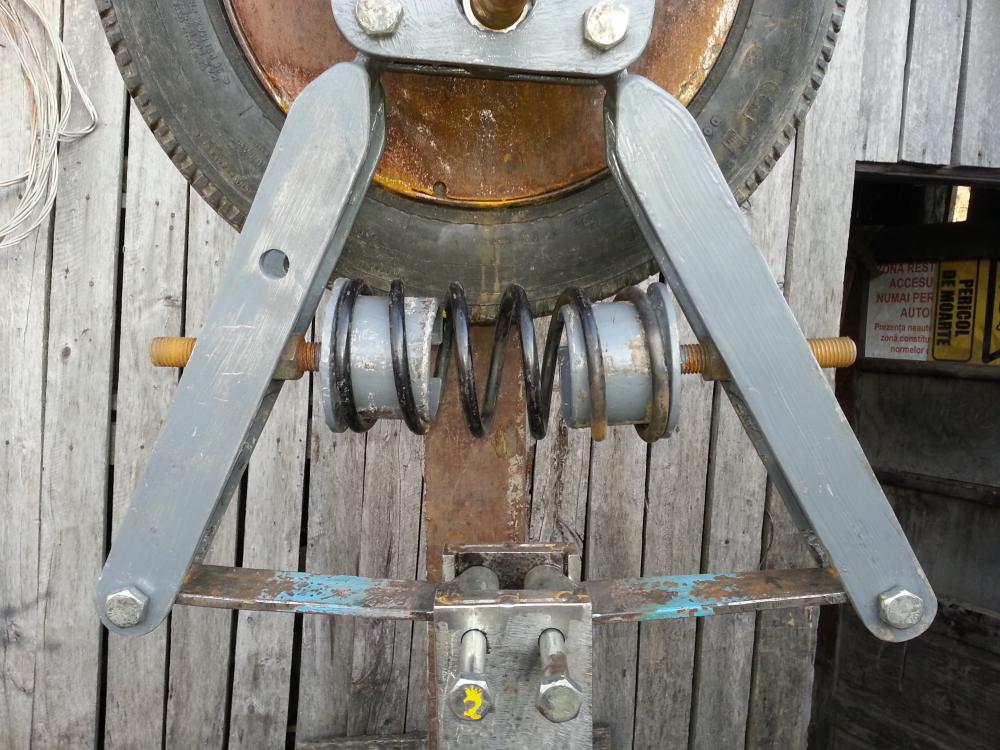
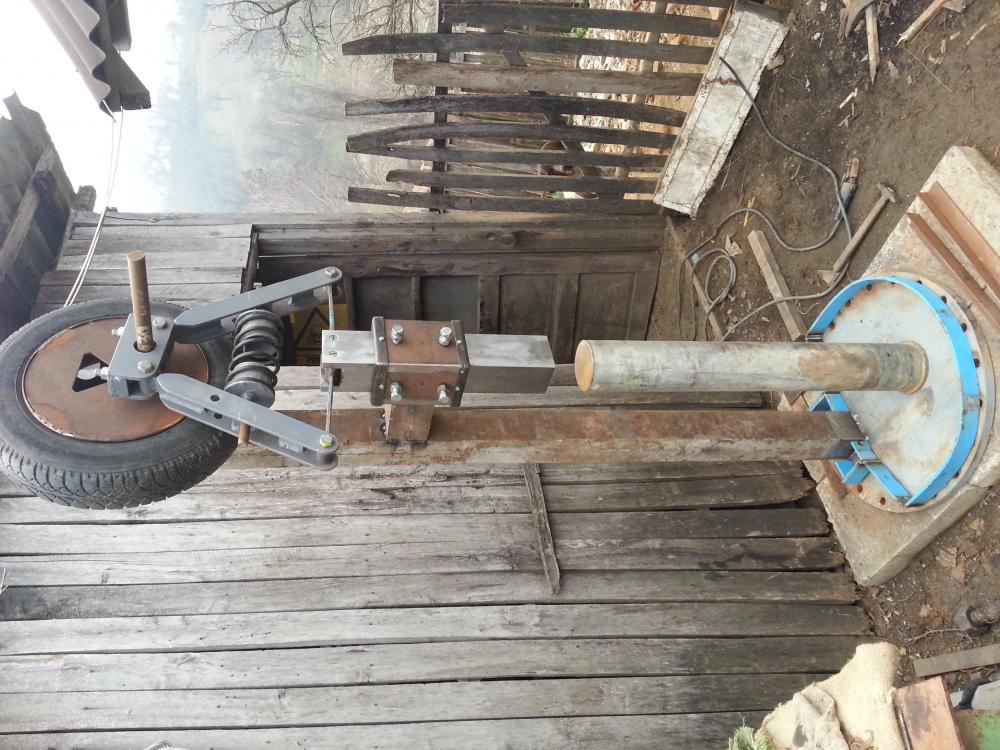
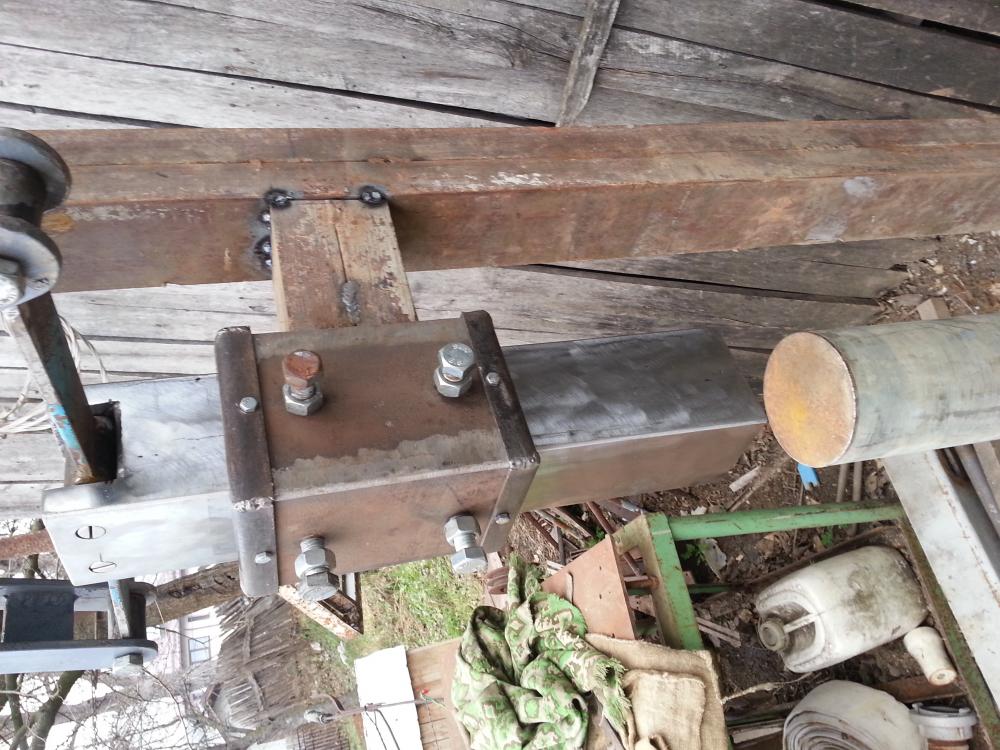
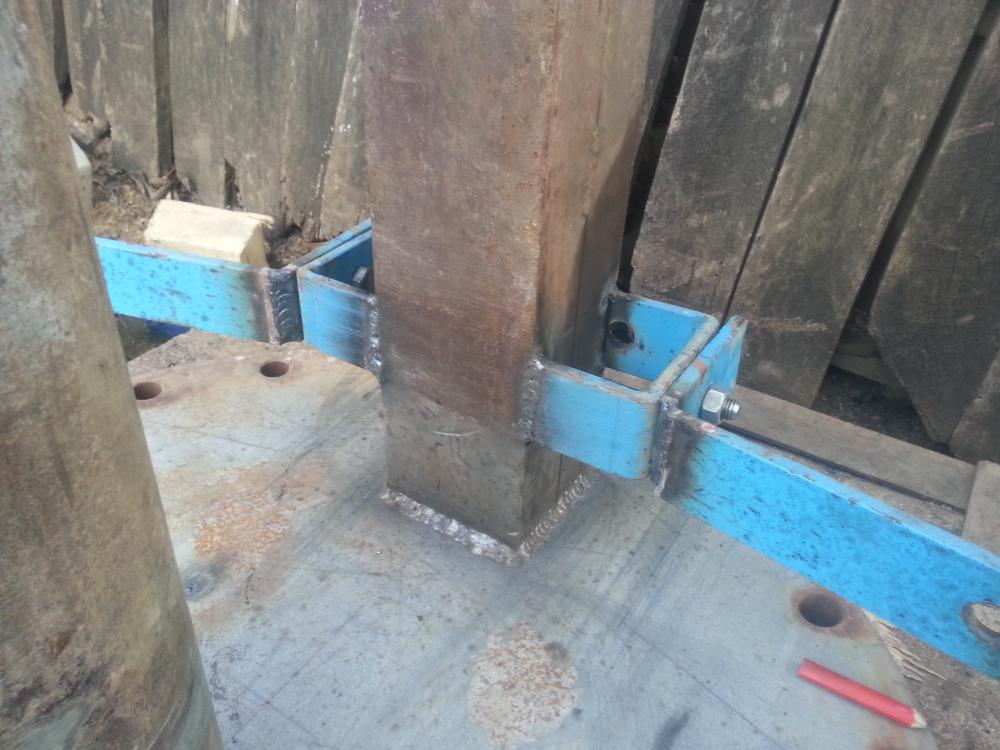
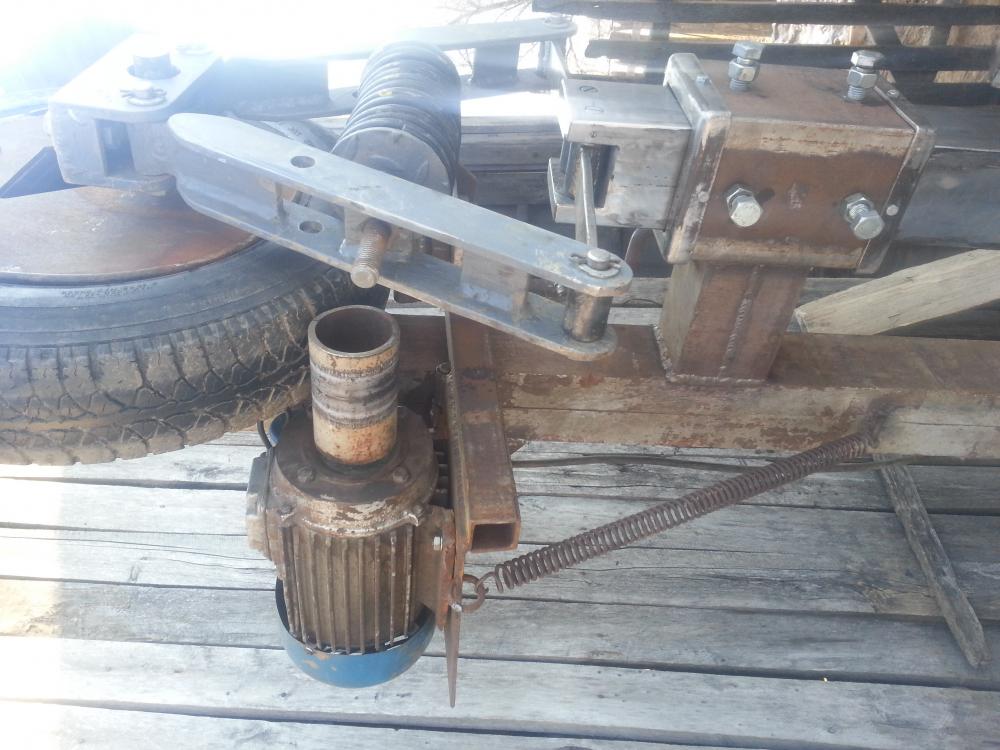
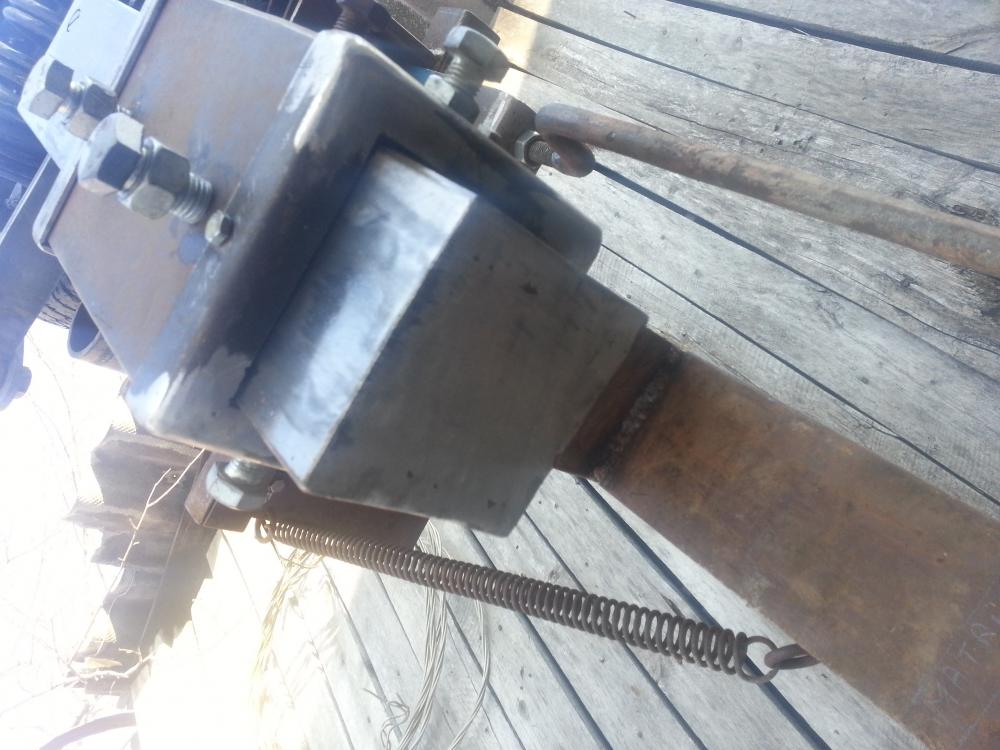
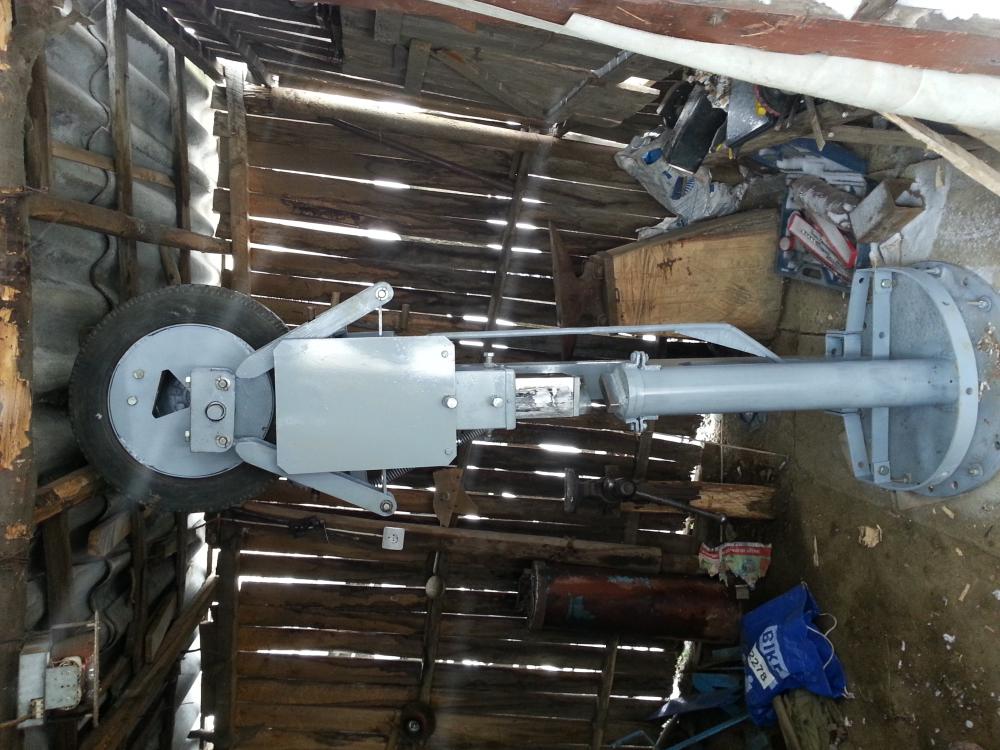
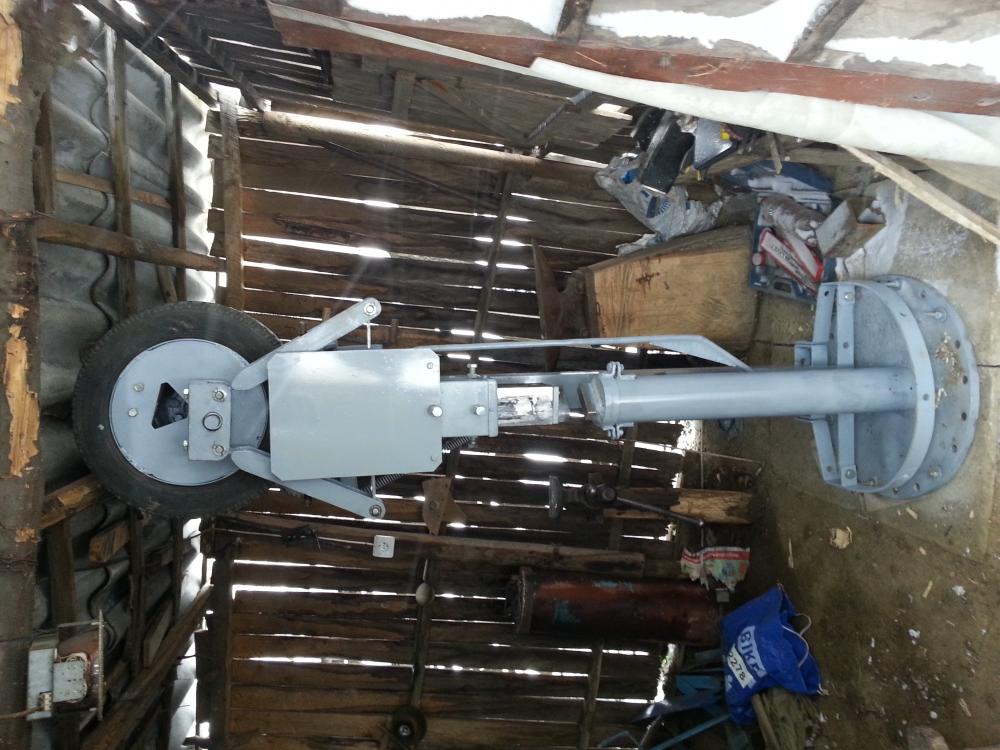
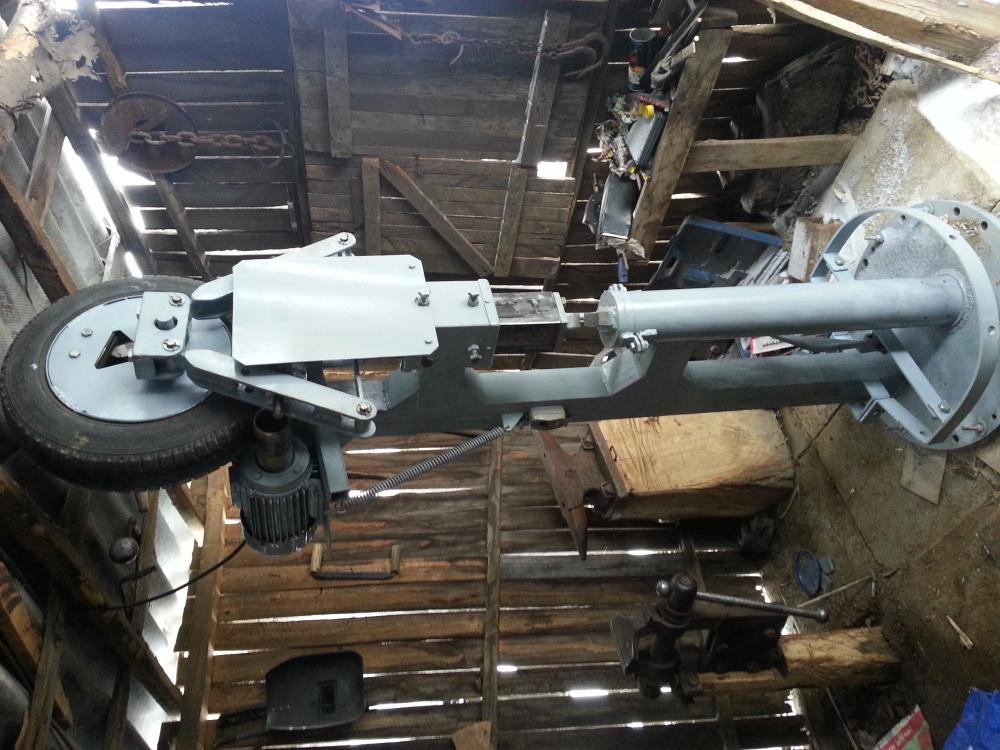
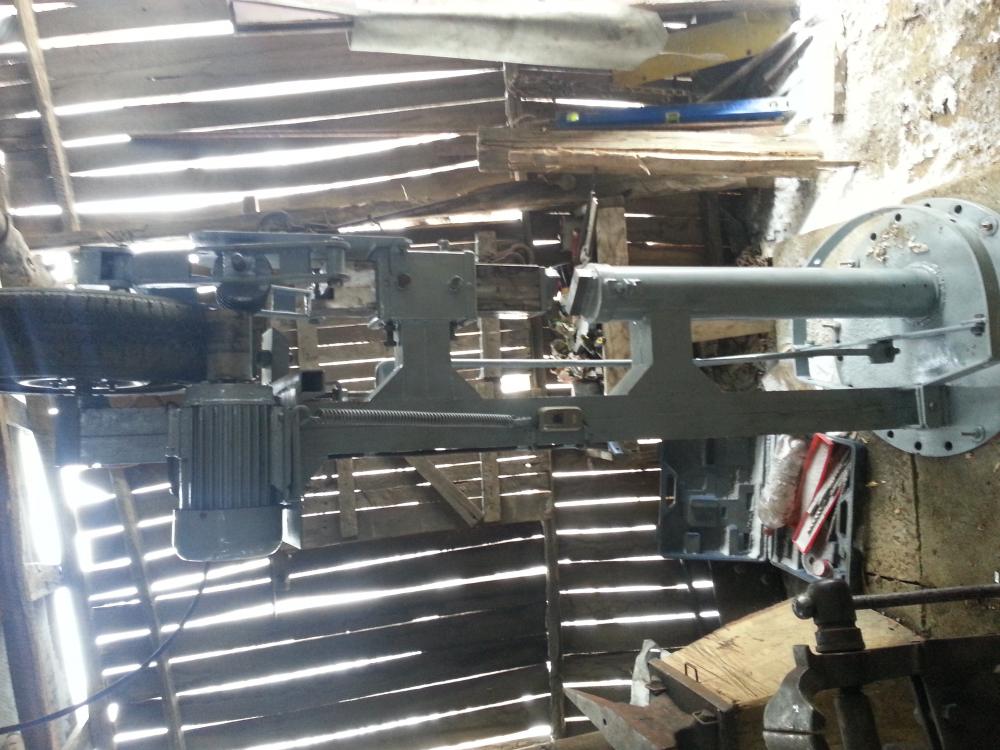
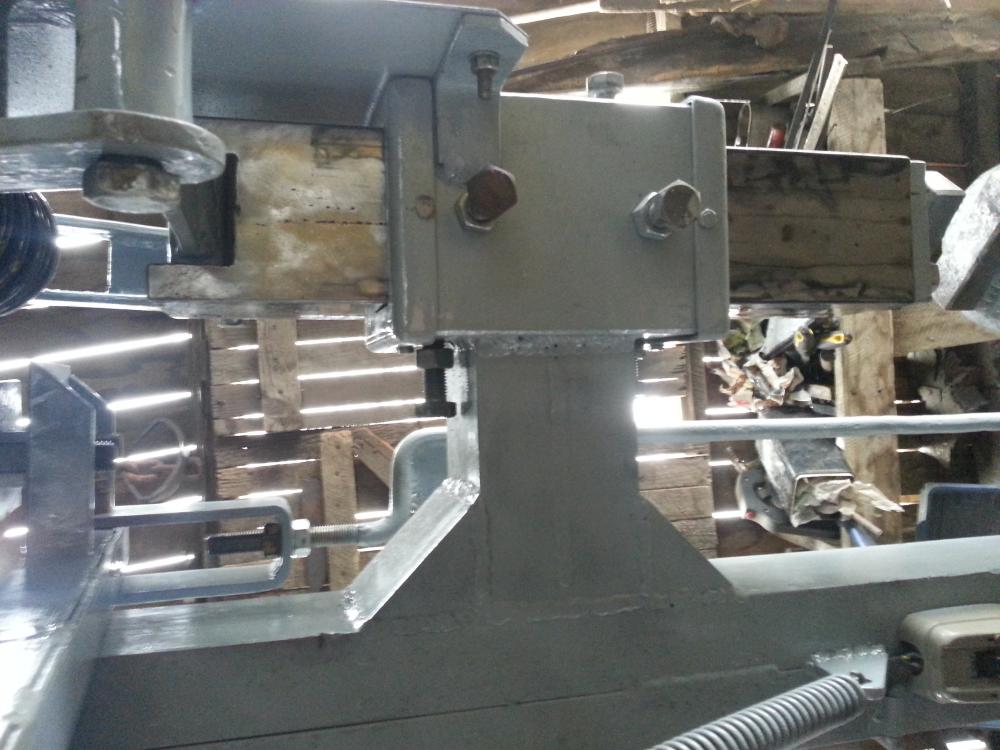
In my case the plates are 4 inches wide,8 inches tall and 5 mm thick poliamide plus 2 mm thick steel plate epoxied on the back,the ram is 4 by 20 inches square tubing but to give it its final weight I forged a piece of steel to fit snugly inside the ram.Than drilled some 1/2 inch holes on all 4 sides of the ram,fitted the piece of steel inside and filled the holes by welding them and also welded all around the lower edge where the two pieces meet but the beauty of building a tire hammer is that if you understand the basic principle of how it works you can adjust the build to the materials you have available.Here is how the wear plates are fitted.Good luck with your build!!!


-
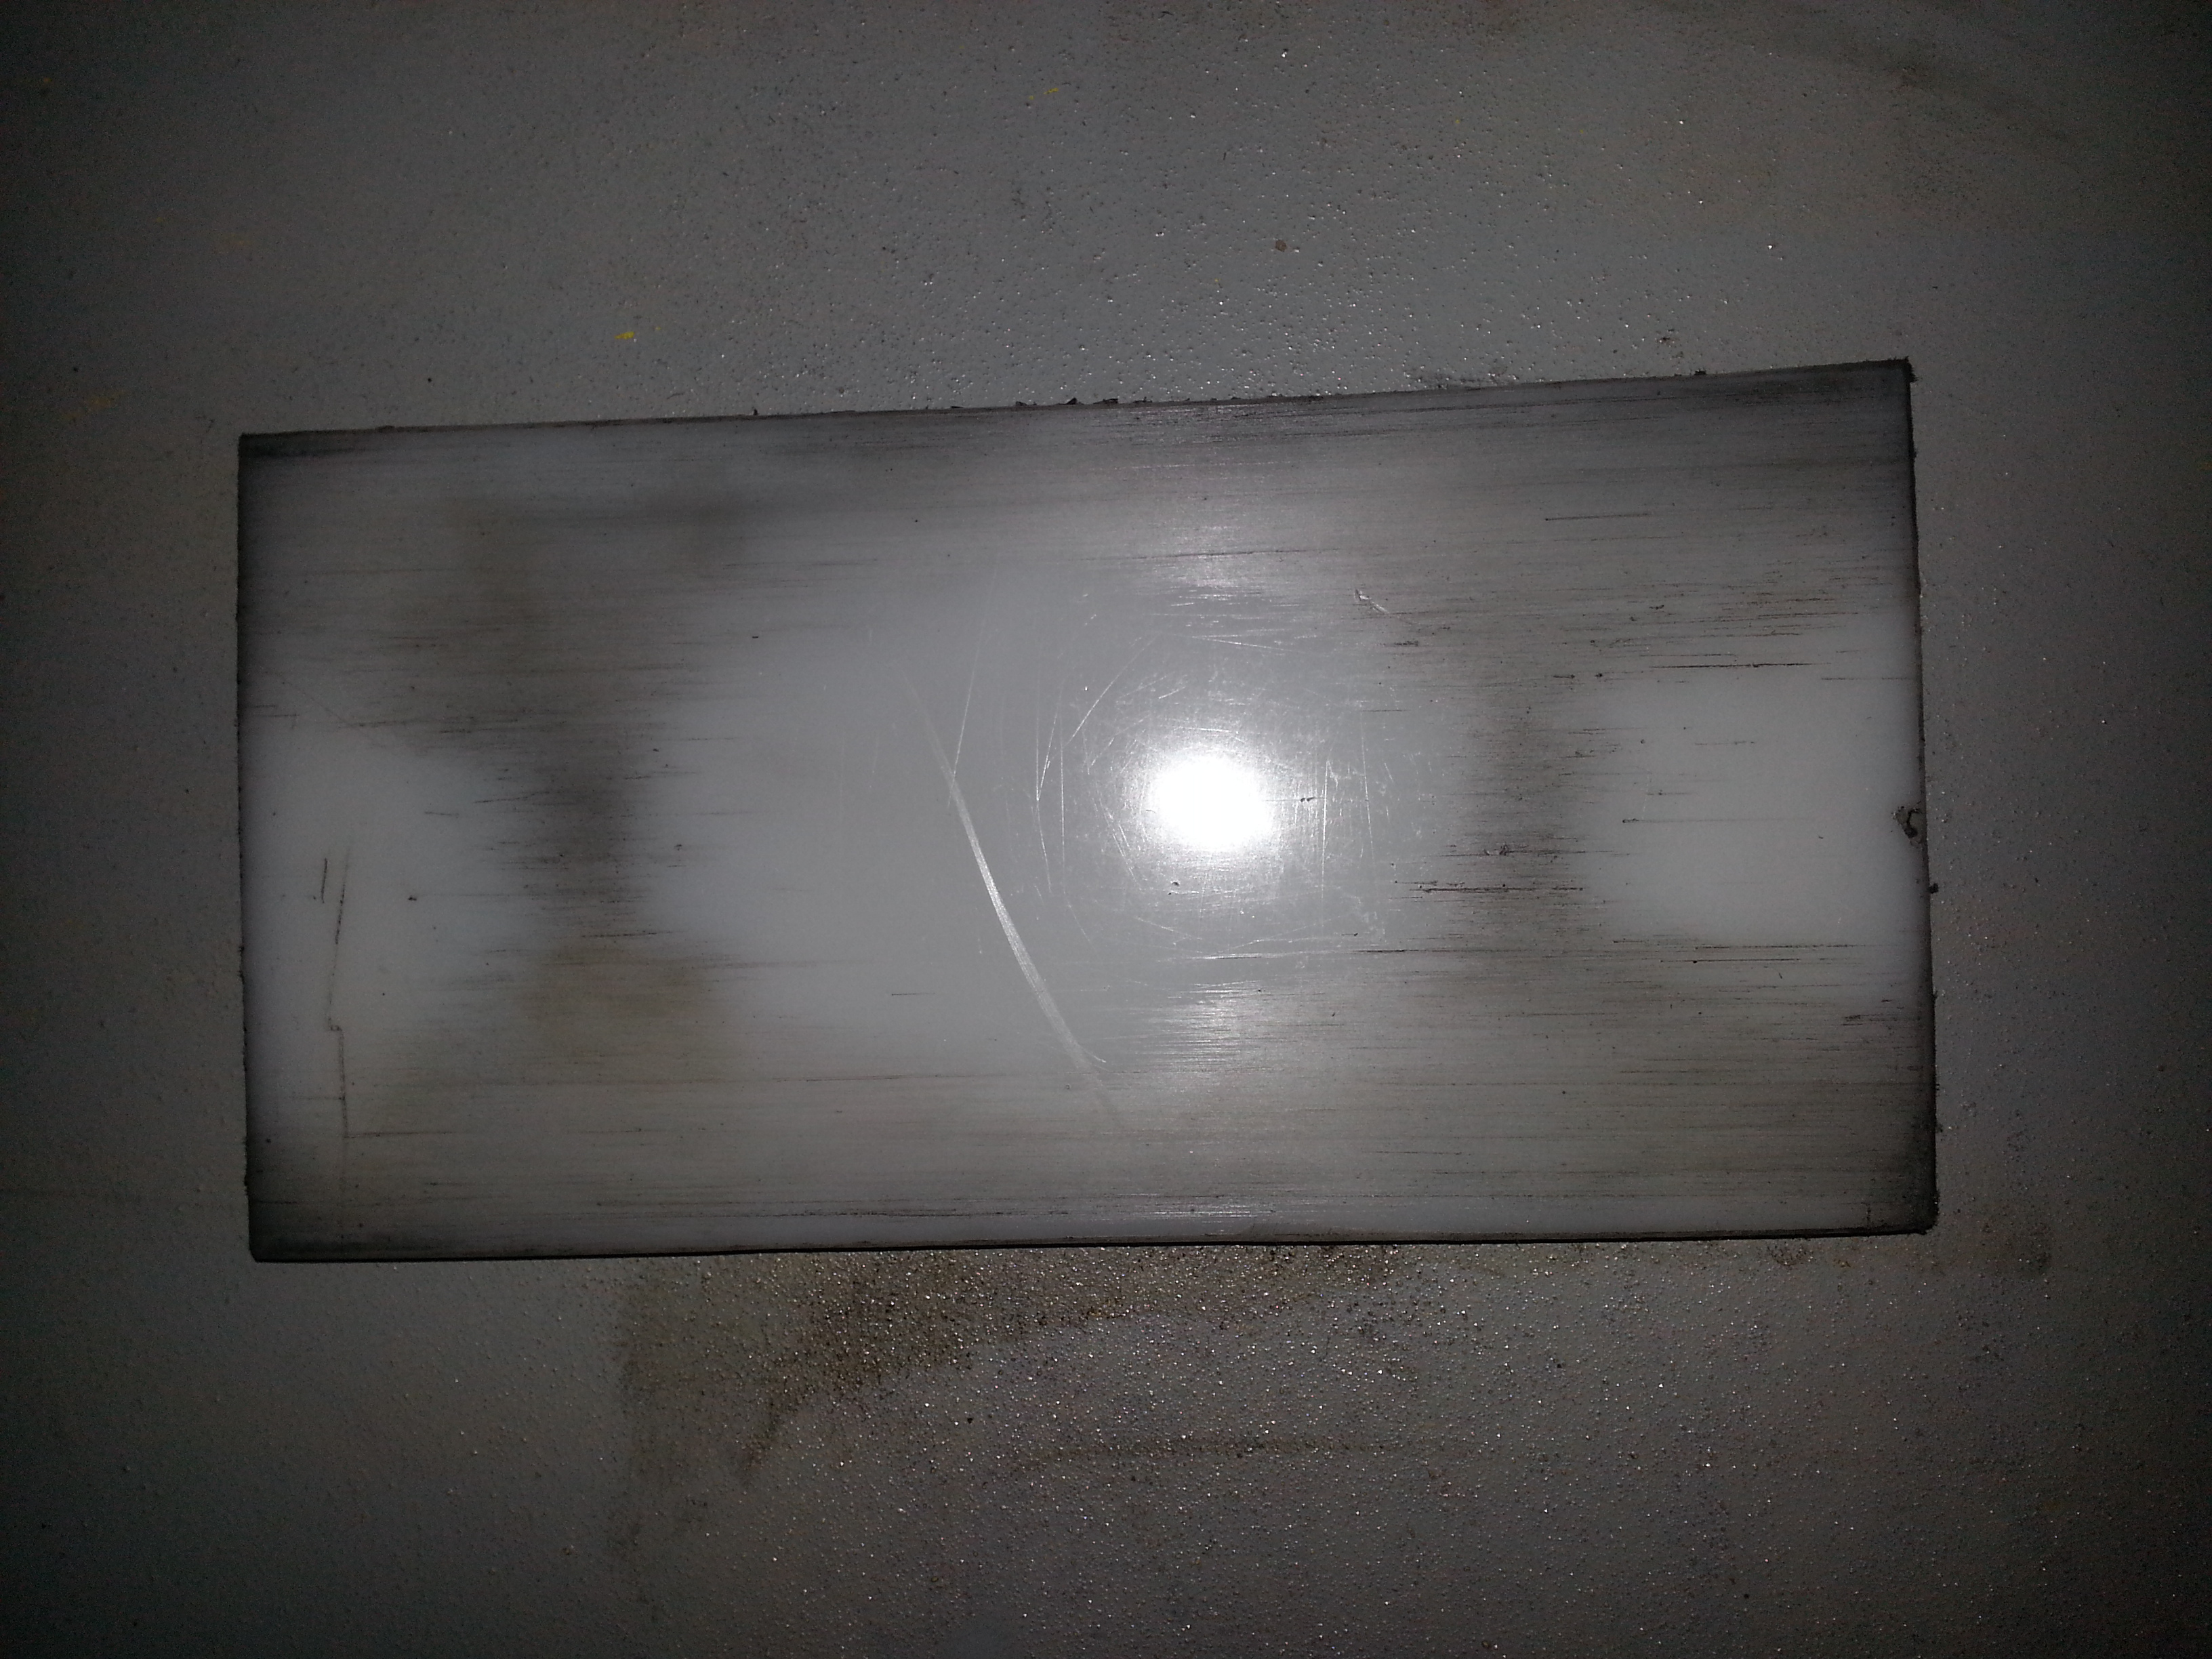
Thanks Johan,I made the plates myself,I only bought large enough piece of 5 mm thick poliamide so i can cut 4 wear plates out of it,if it helps i can take some closeup pictures on the wear plates and the way they are mounted.
-
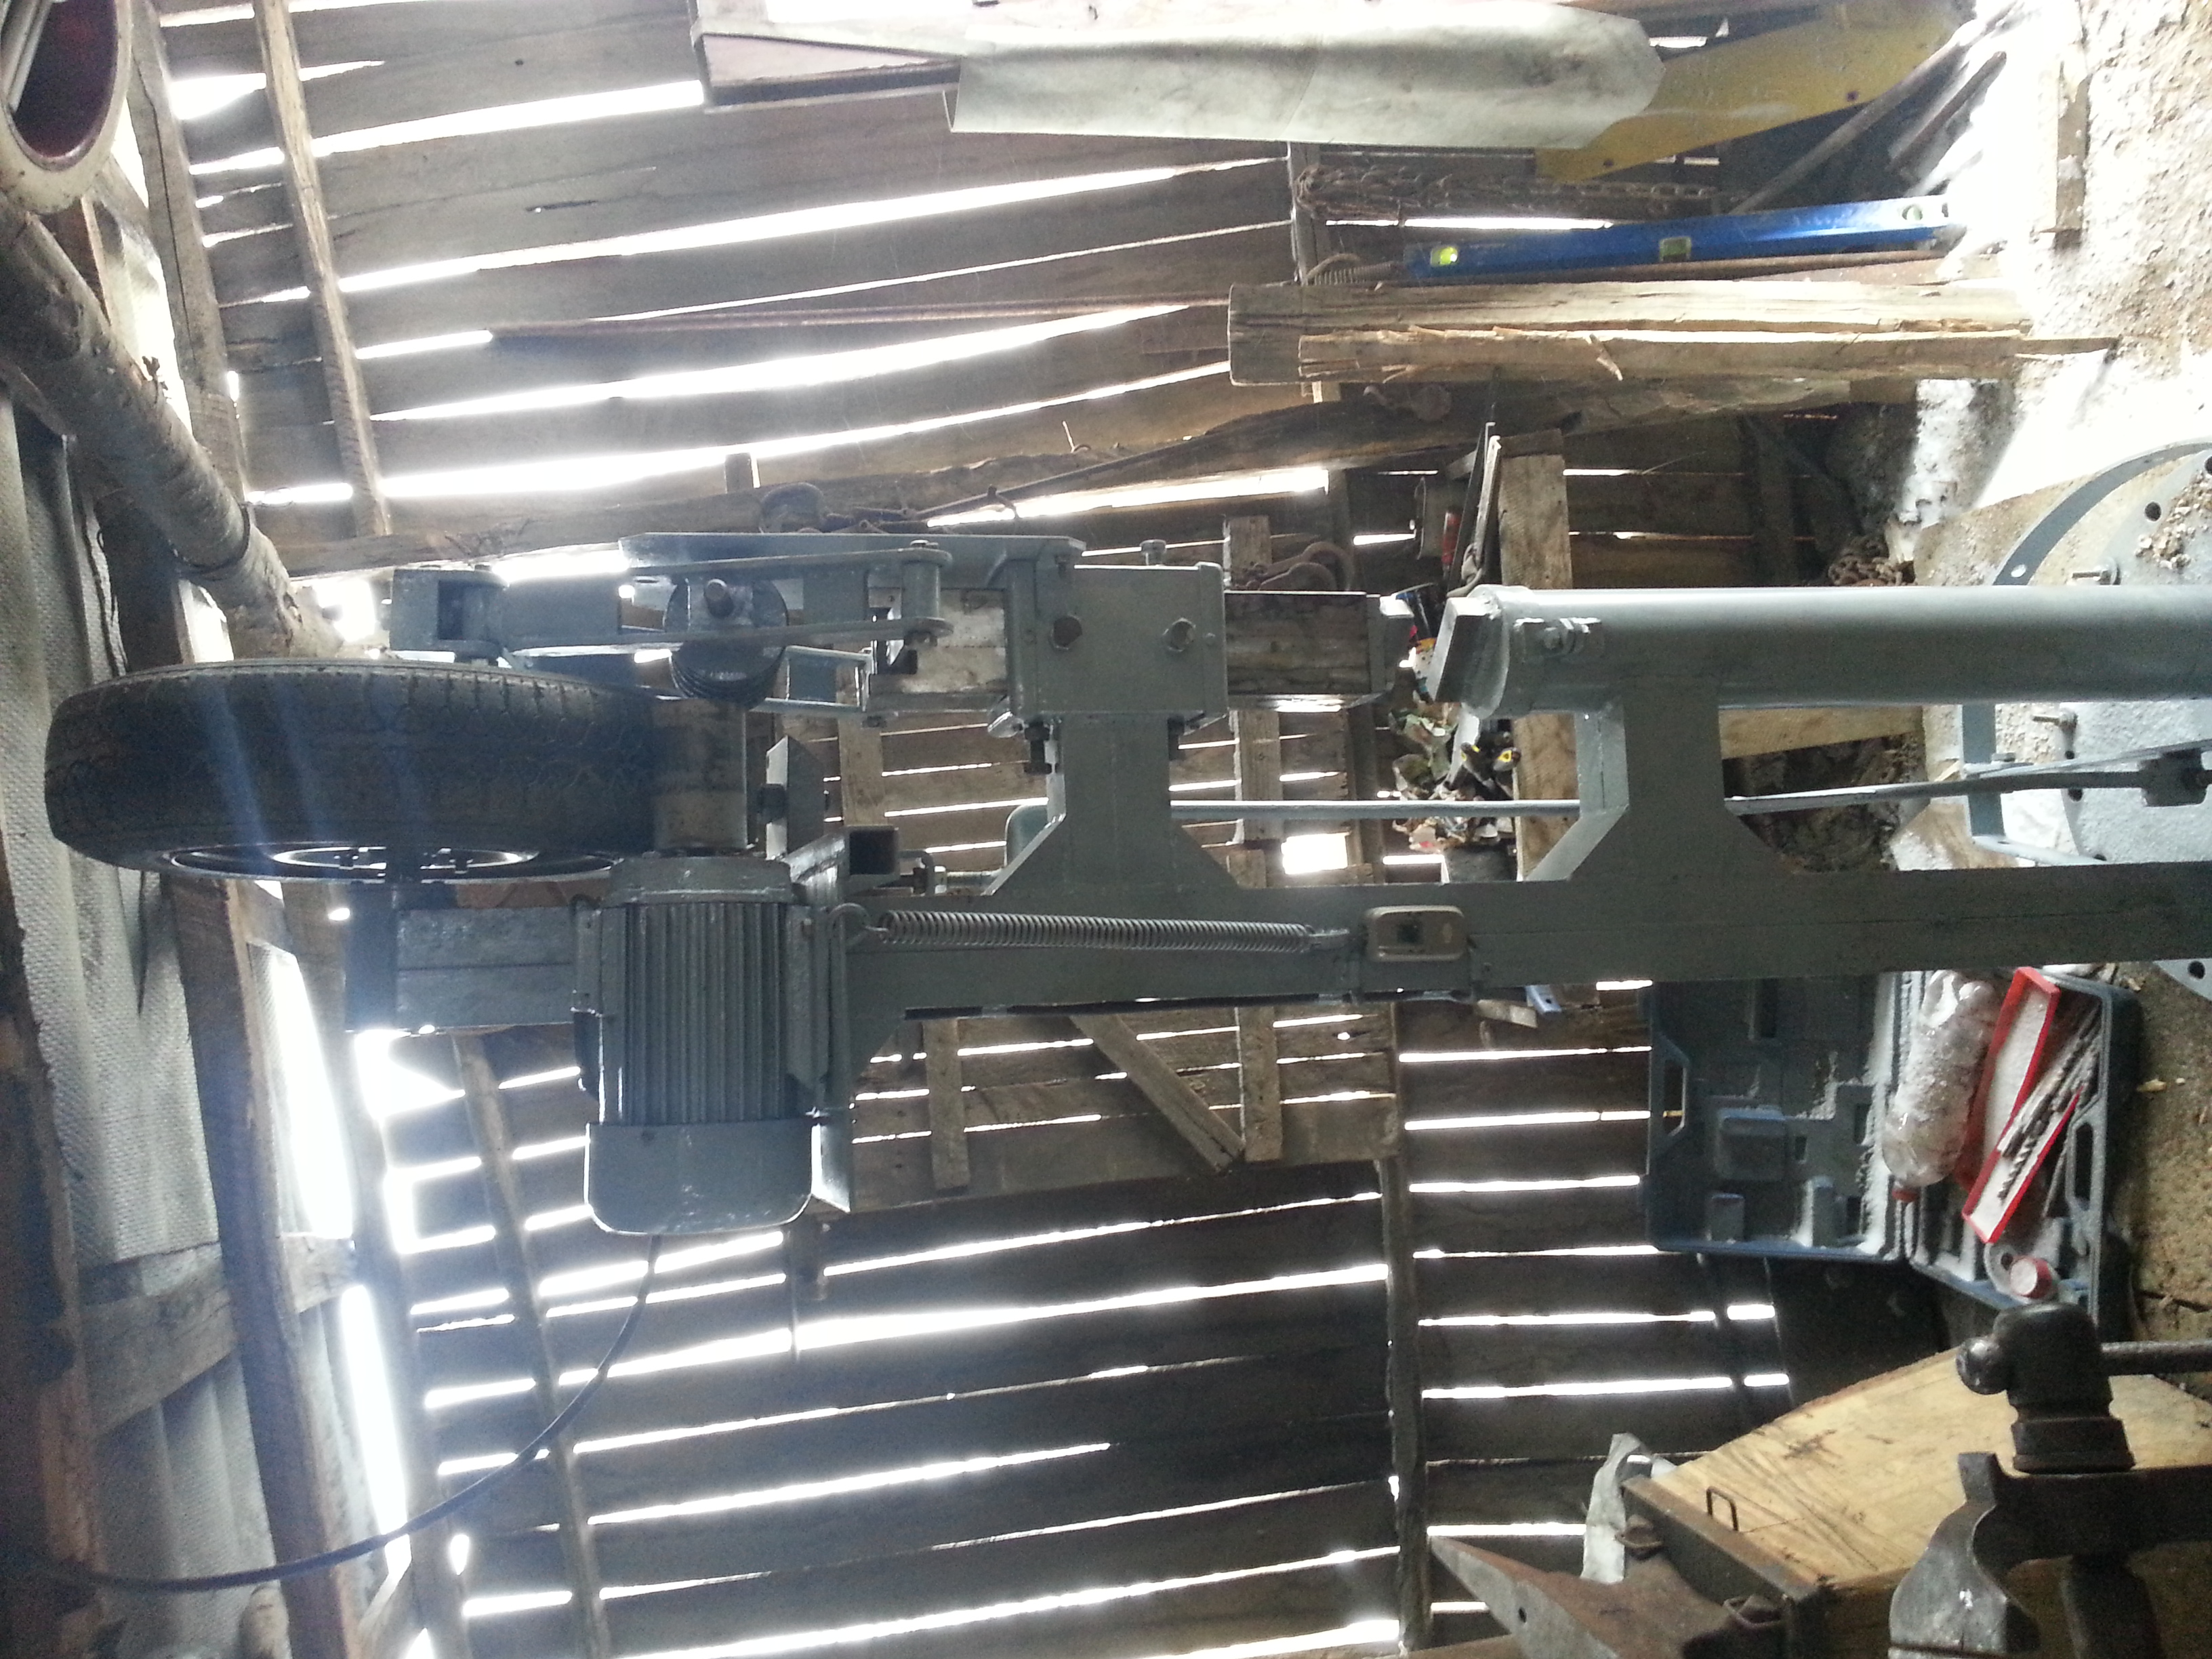
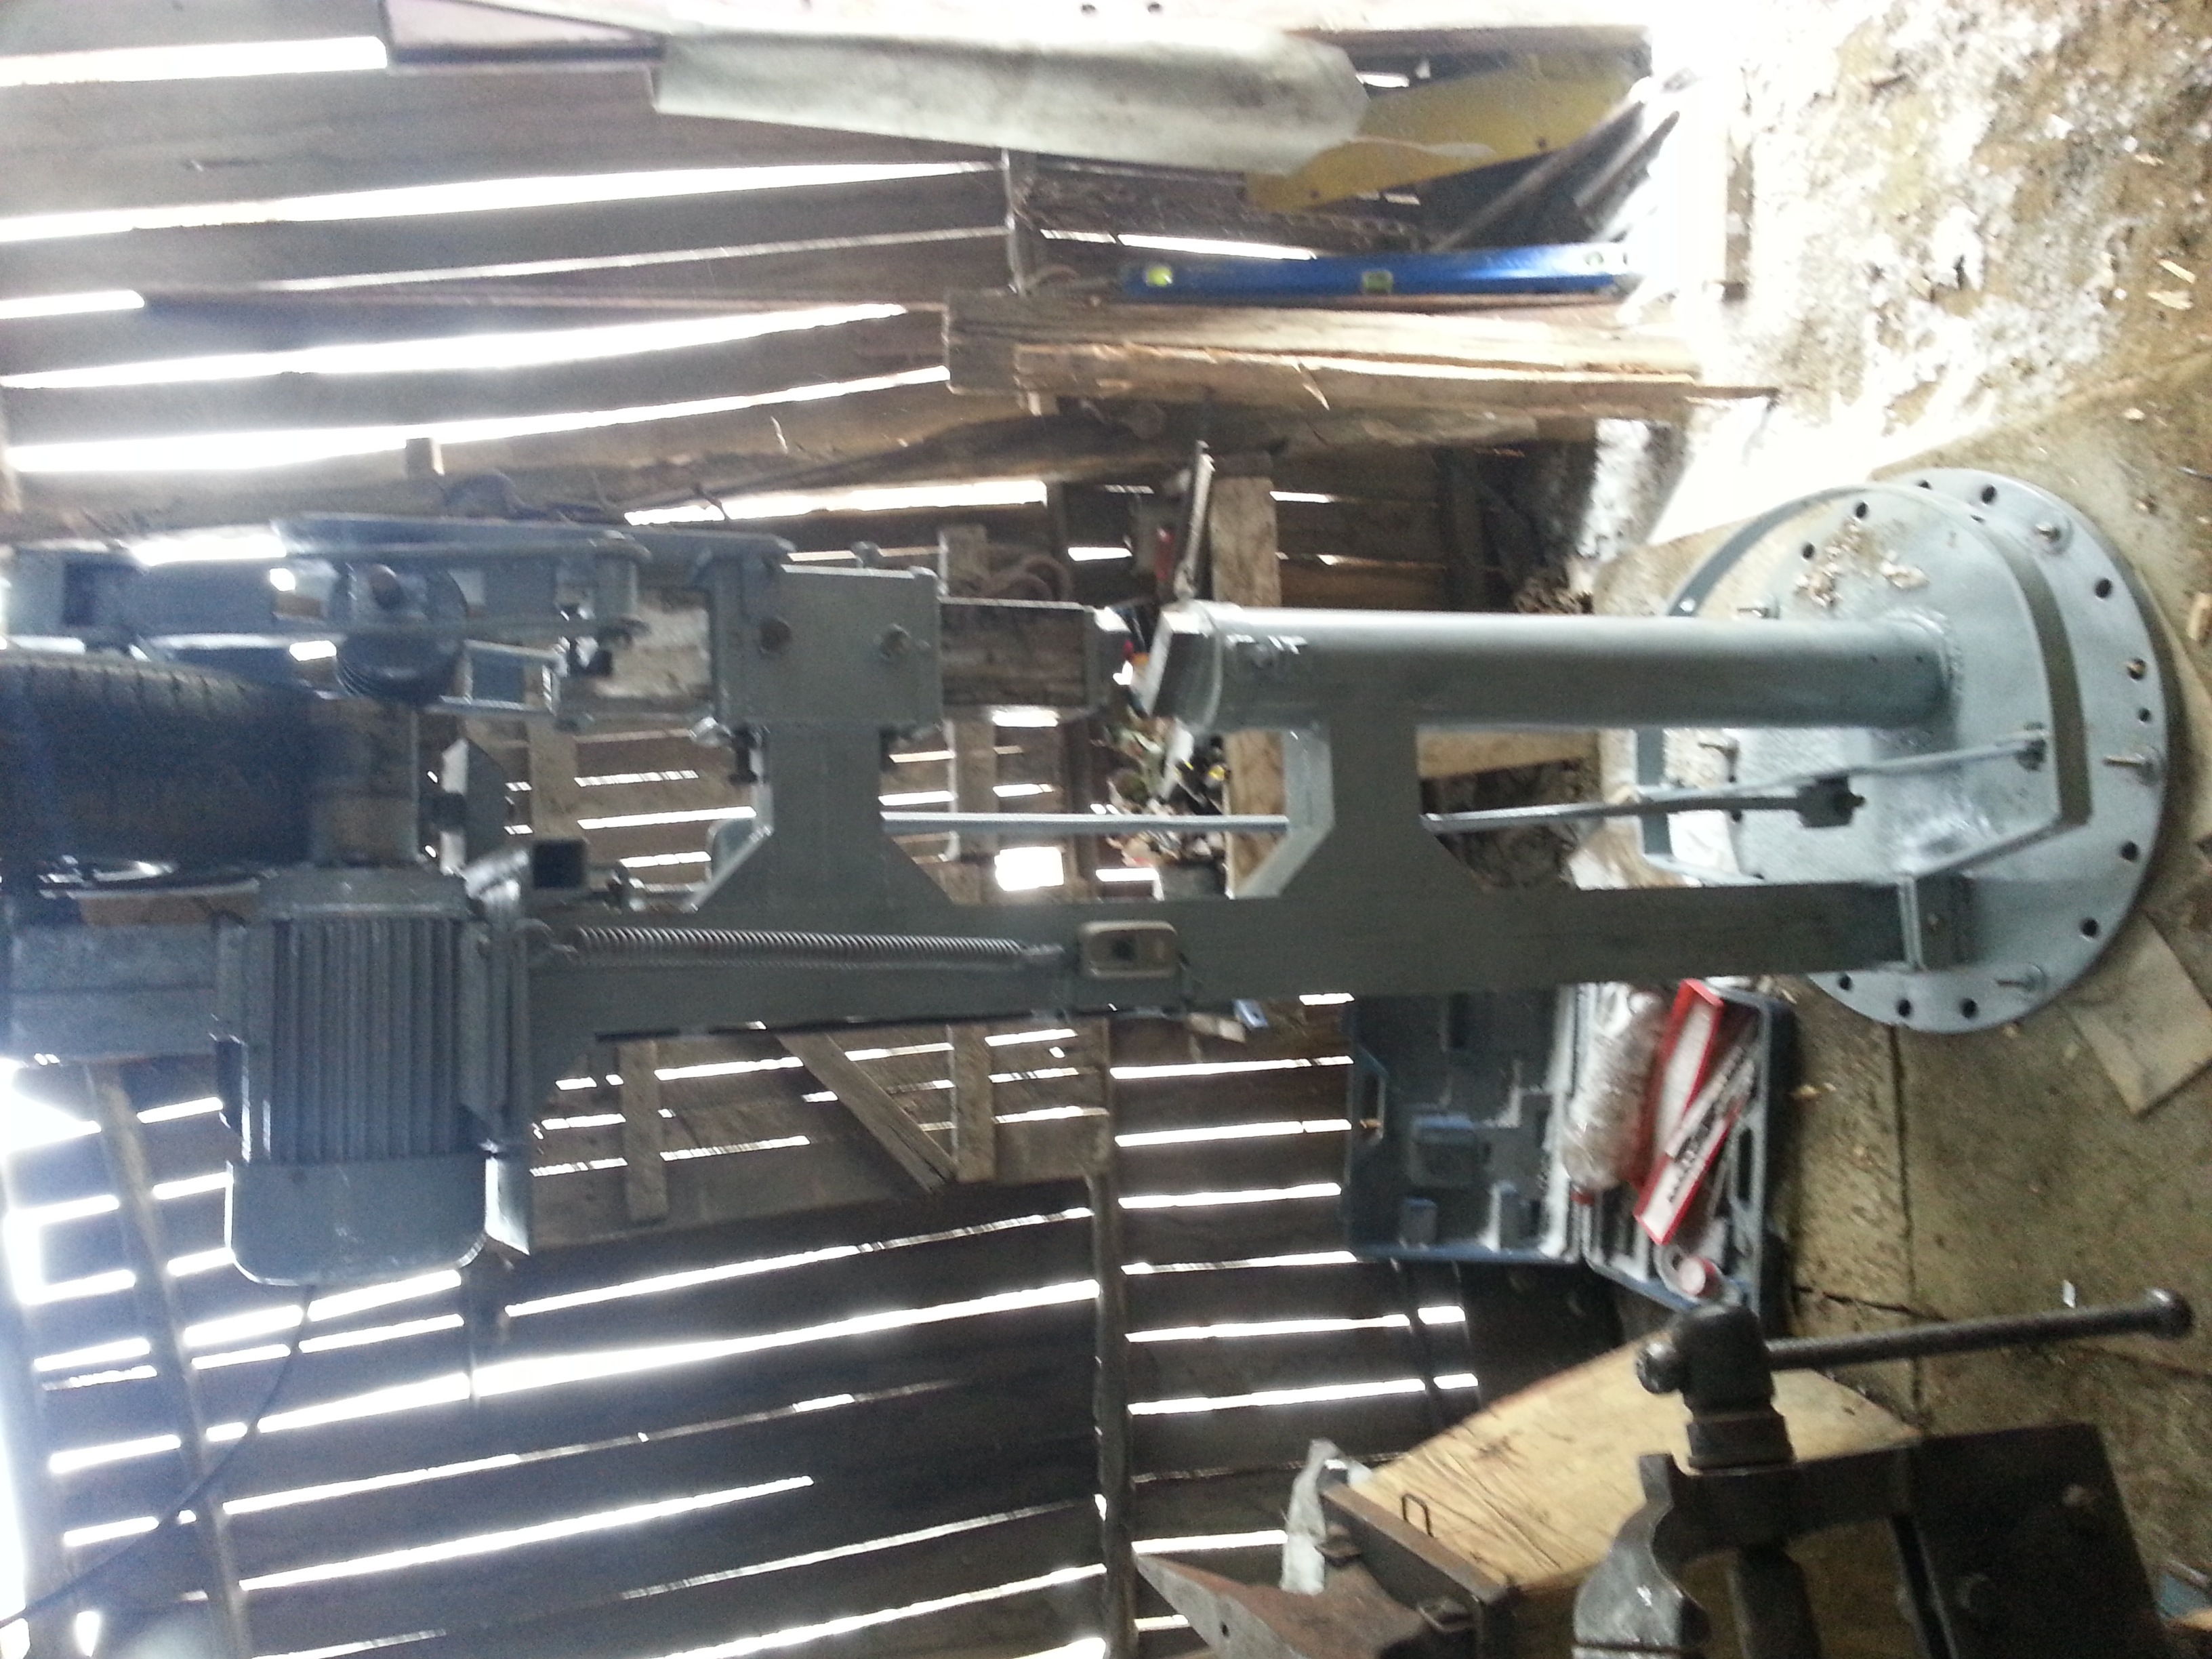
Thanks guys!!! It took me about three months but I was only working on my spare time,that would be about two or three days a week and besides the actual building process it took me some time to figure out the system and size ratios as I did not have any plans to work from.
-
Thanks Alan that is really helpful information.I definetly need to improve my power hammer technique, when I took the video was the third or fourth time I used one. It really helps to hear from a more experienced smith,I am thinking about modifying the dies into some combination dies.
-
www.youtube.com/watch?v=KzmreOgNkdU Sorry for the delay but I could not reply anymore from my laptop and today I had the idea of tryng from my phone. The quality of the video is not too great but you get the basic idea of how it runs, the bar that I forge is 3,5 cm thick tool steel.
-
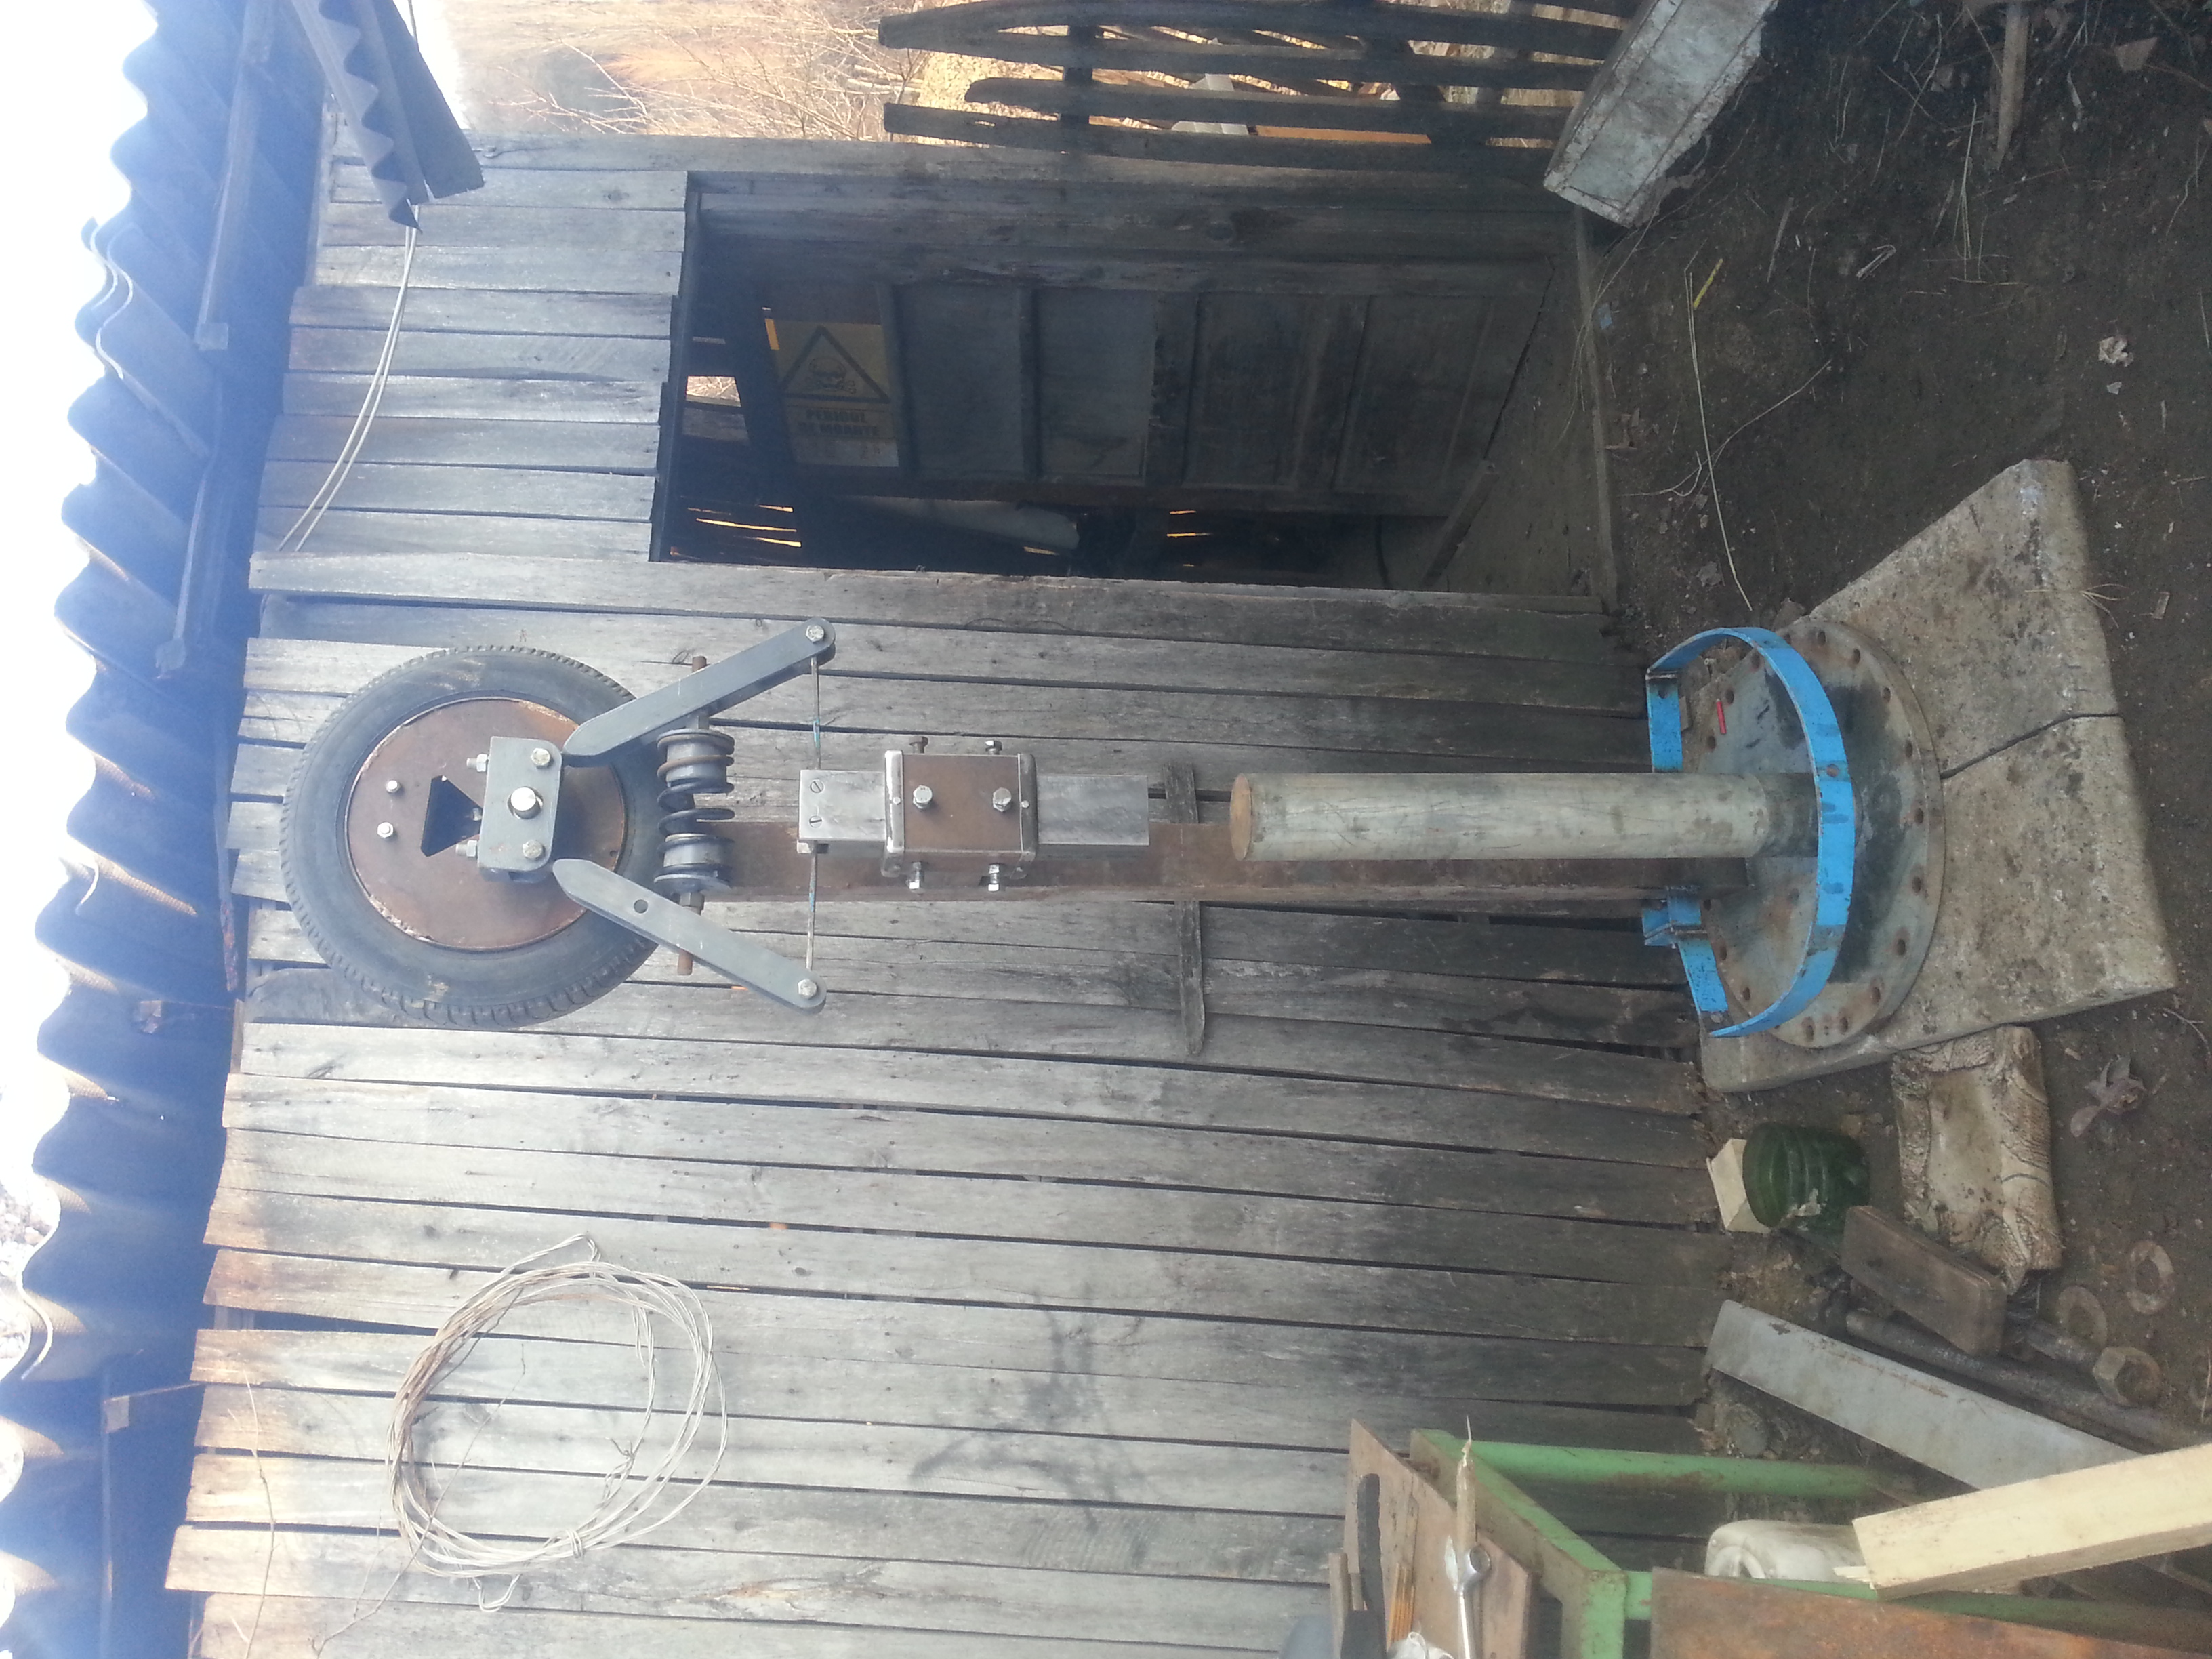
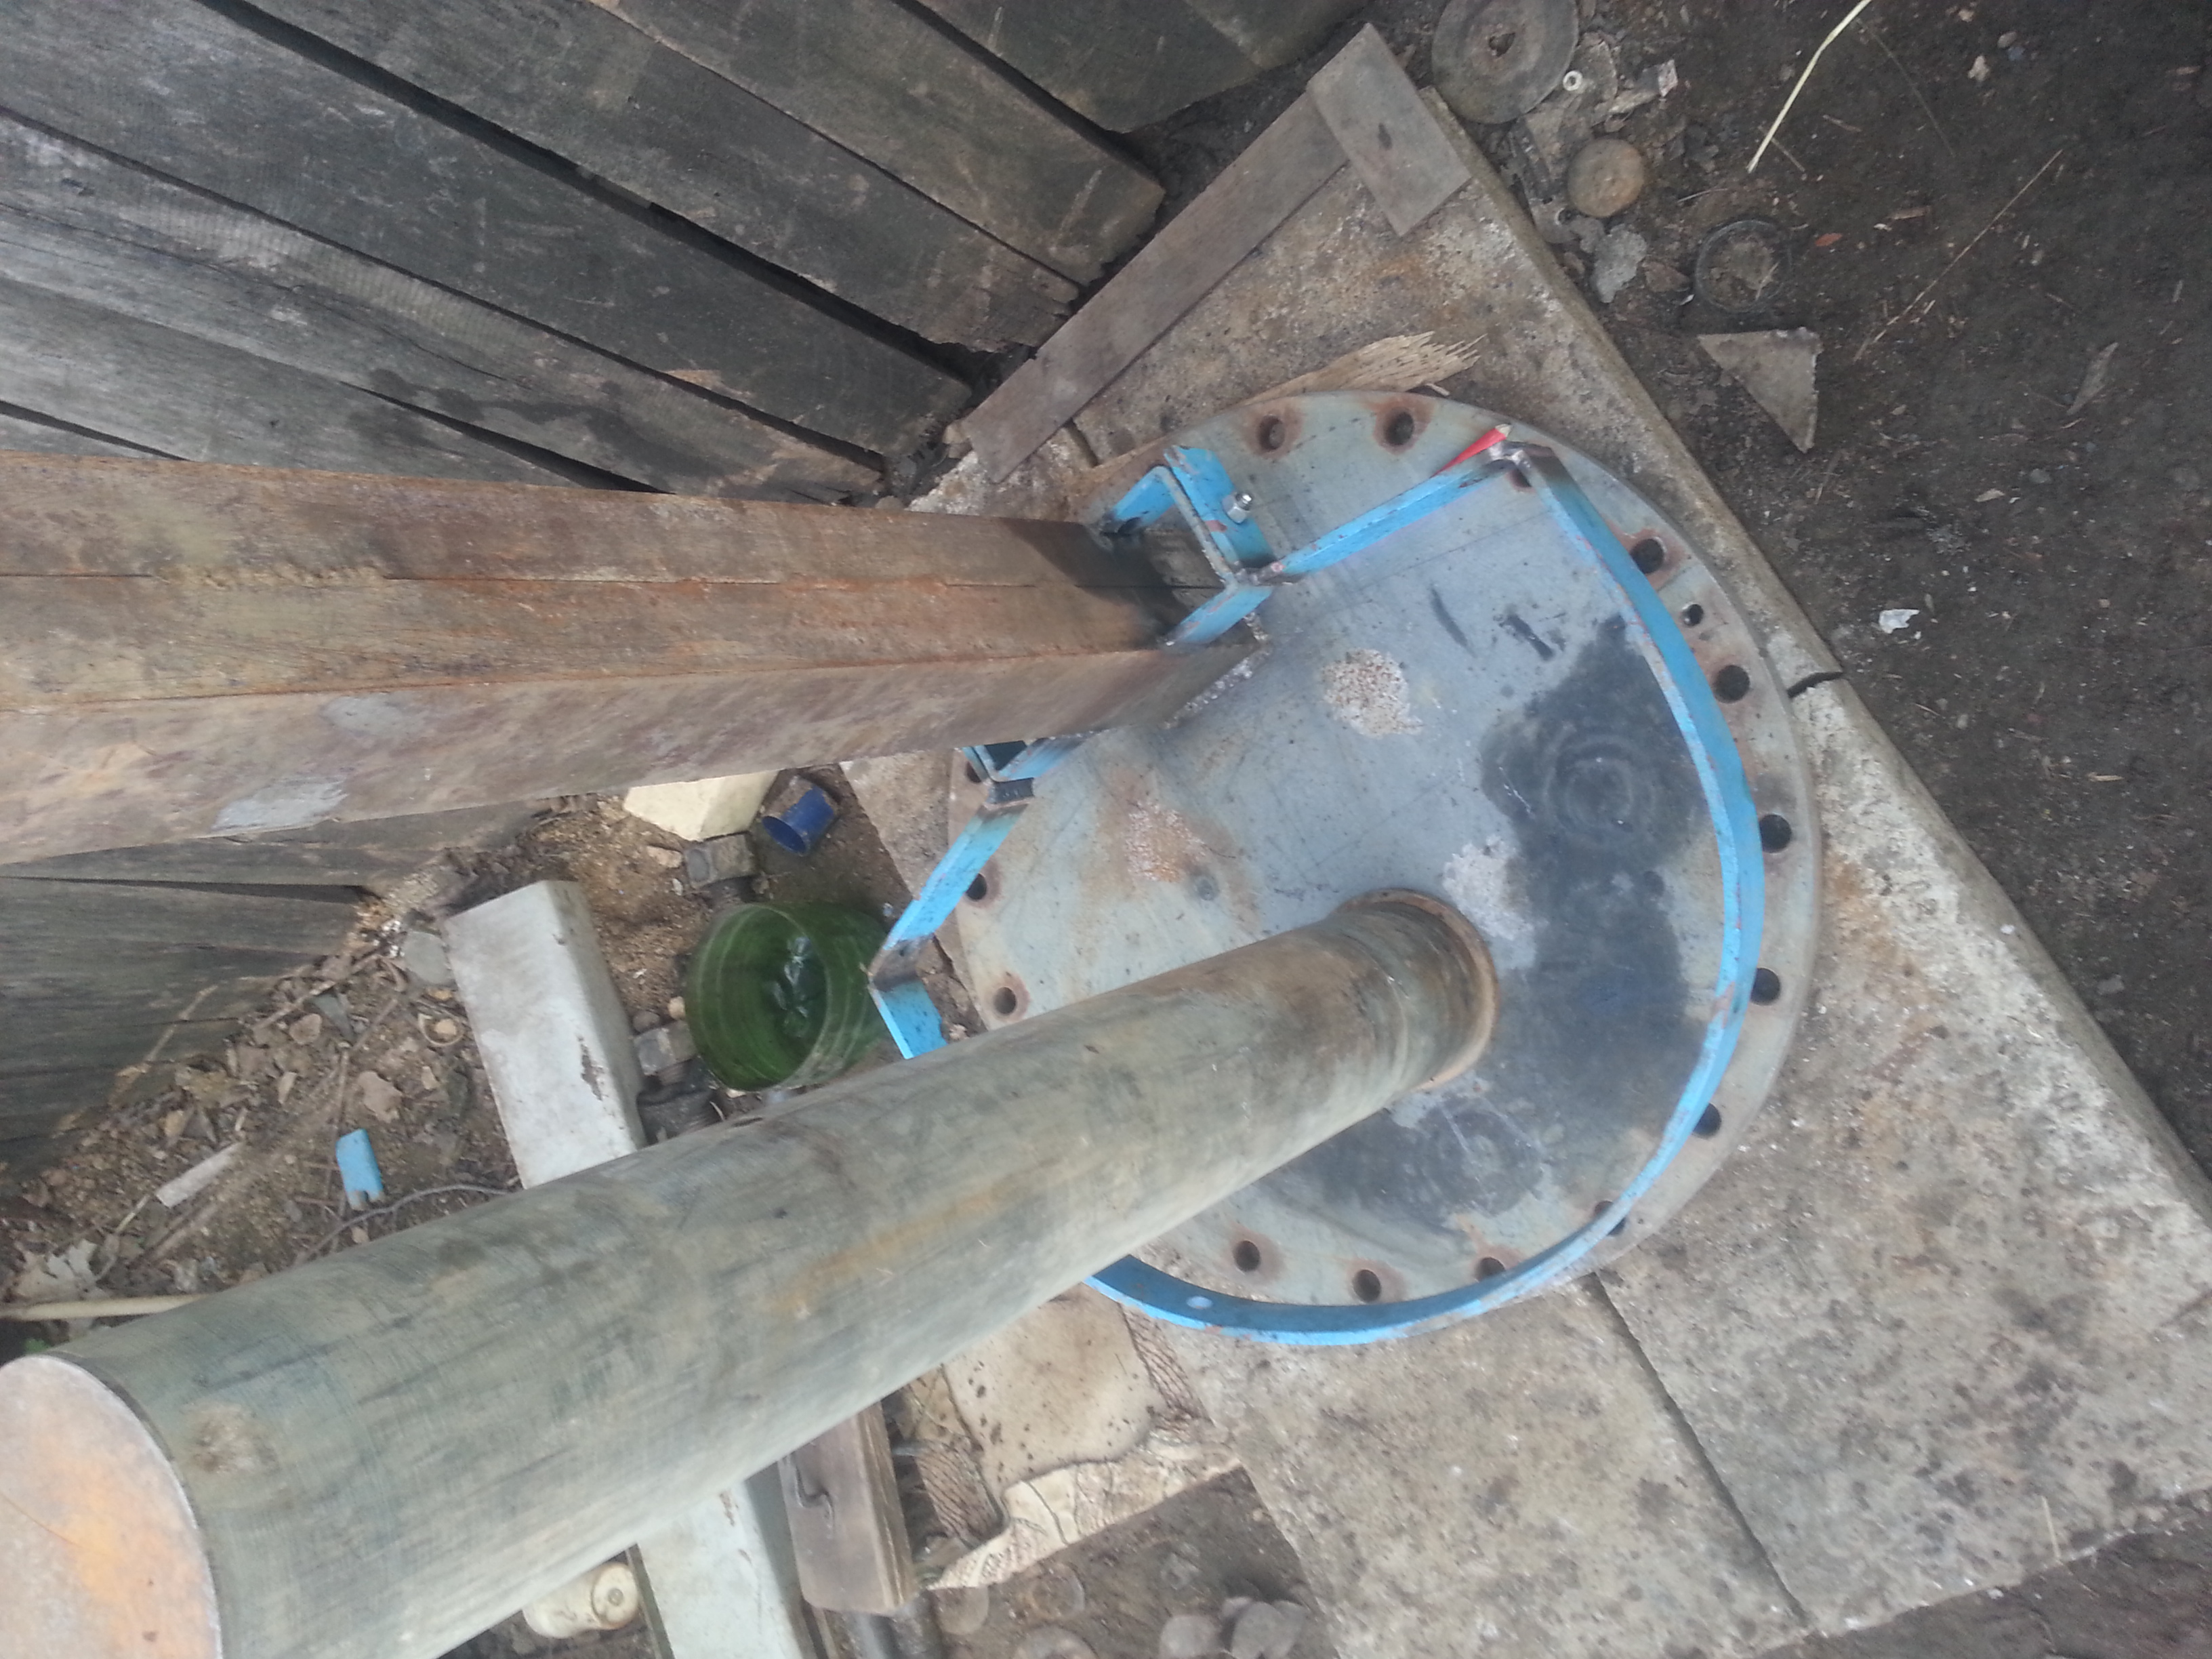
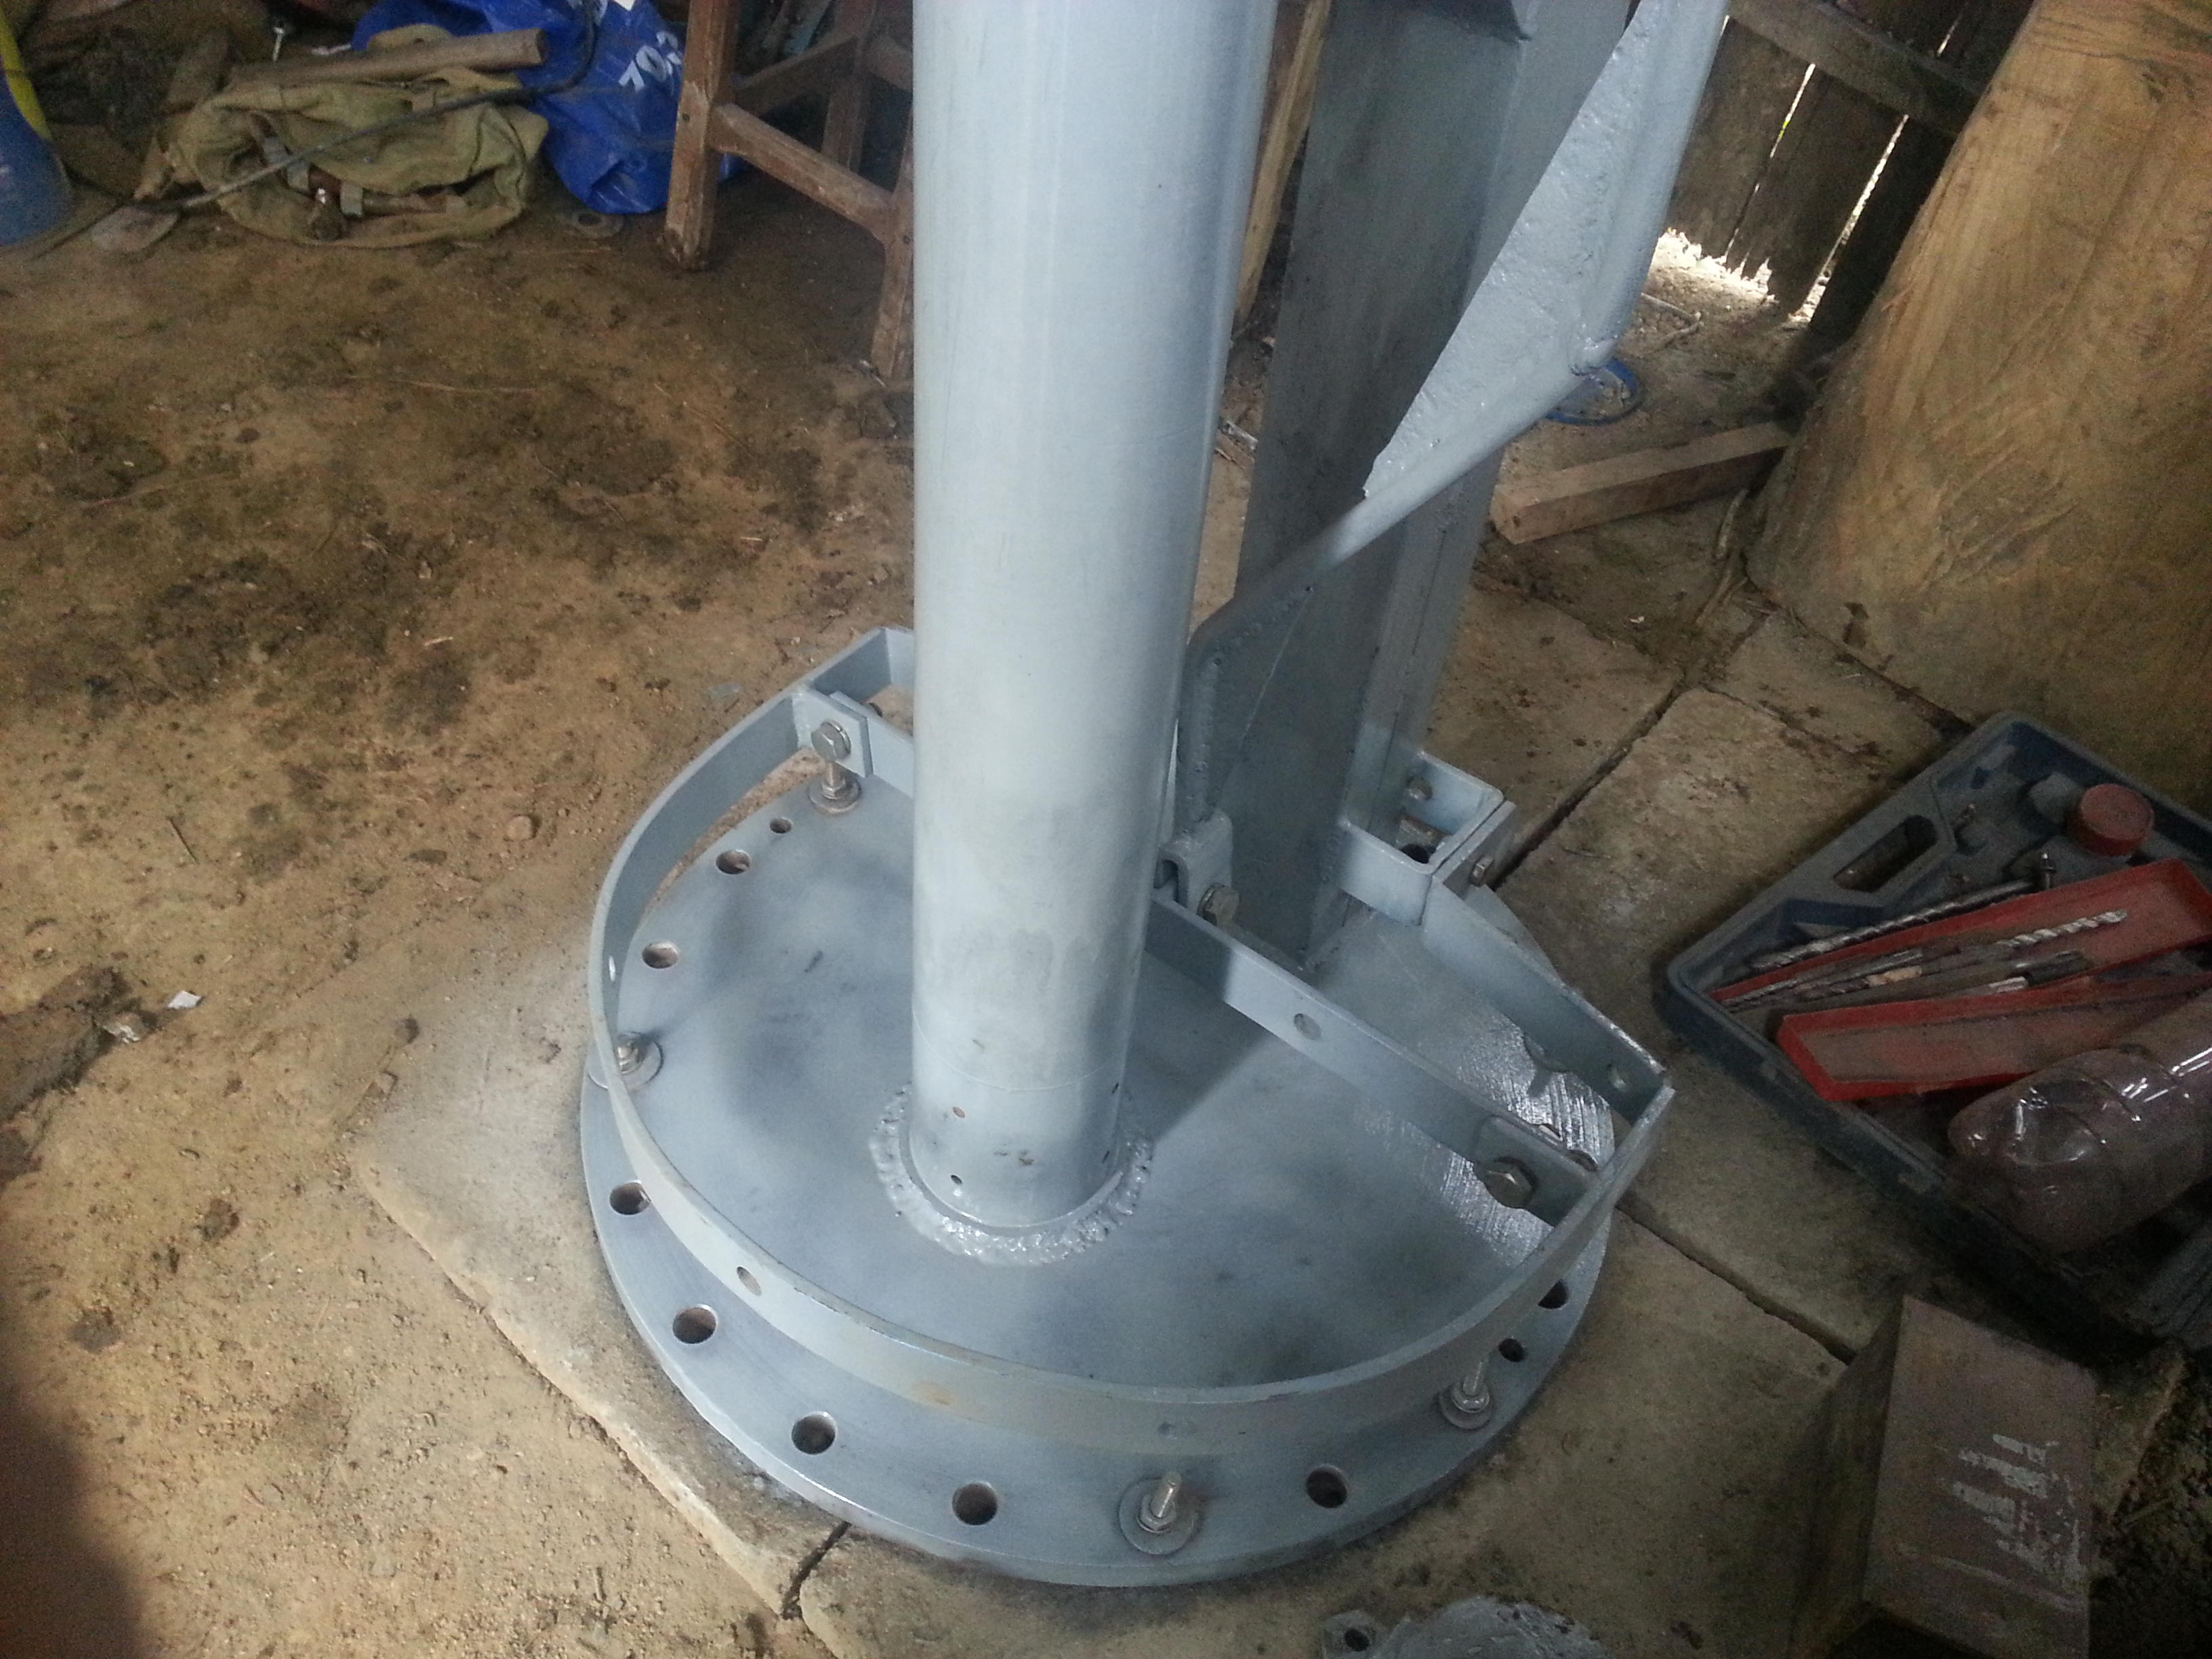
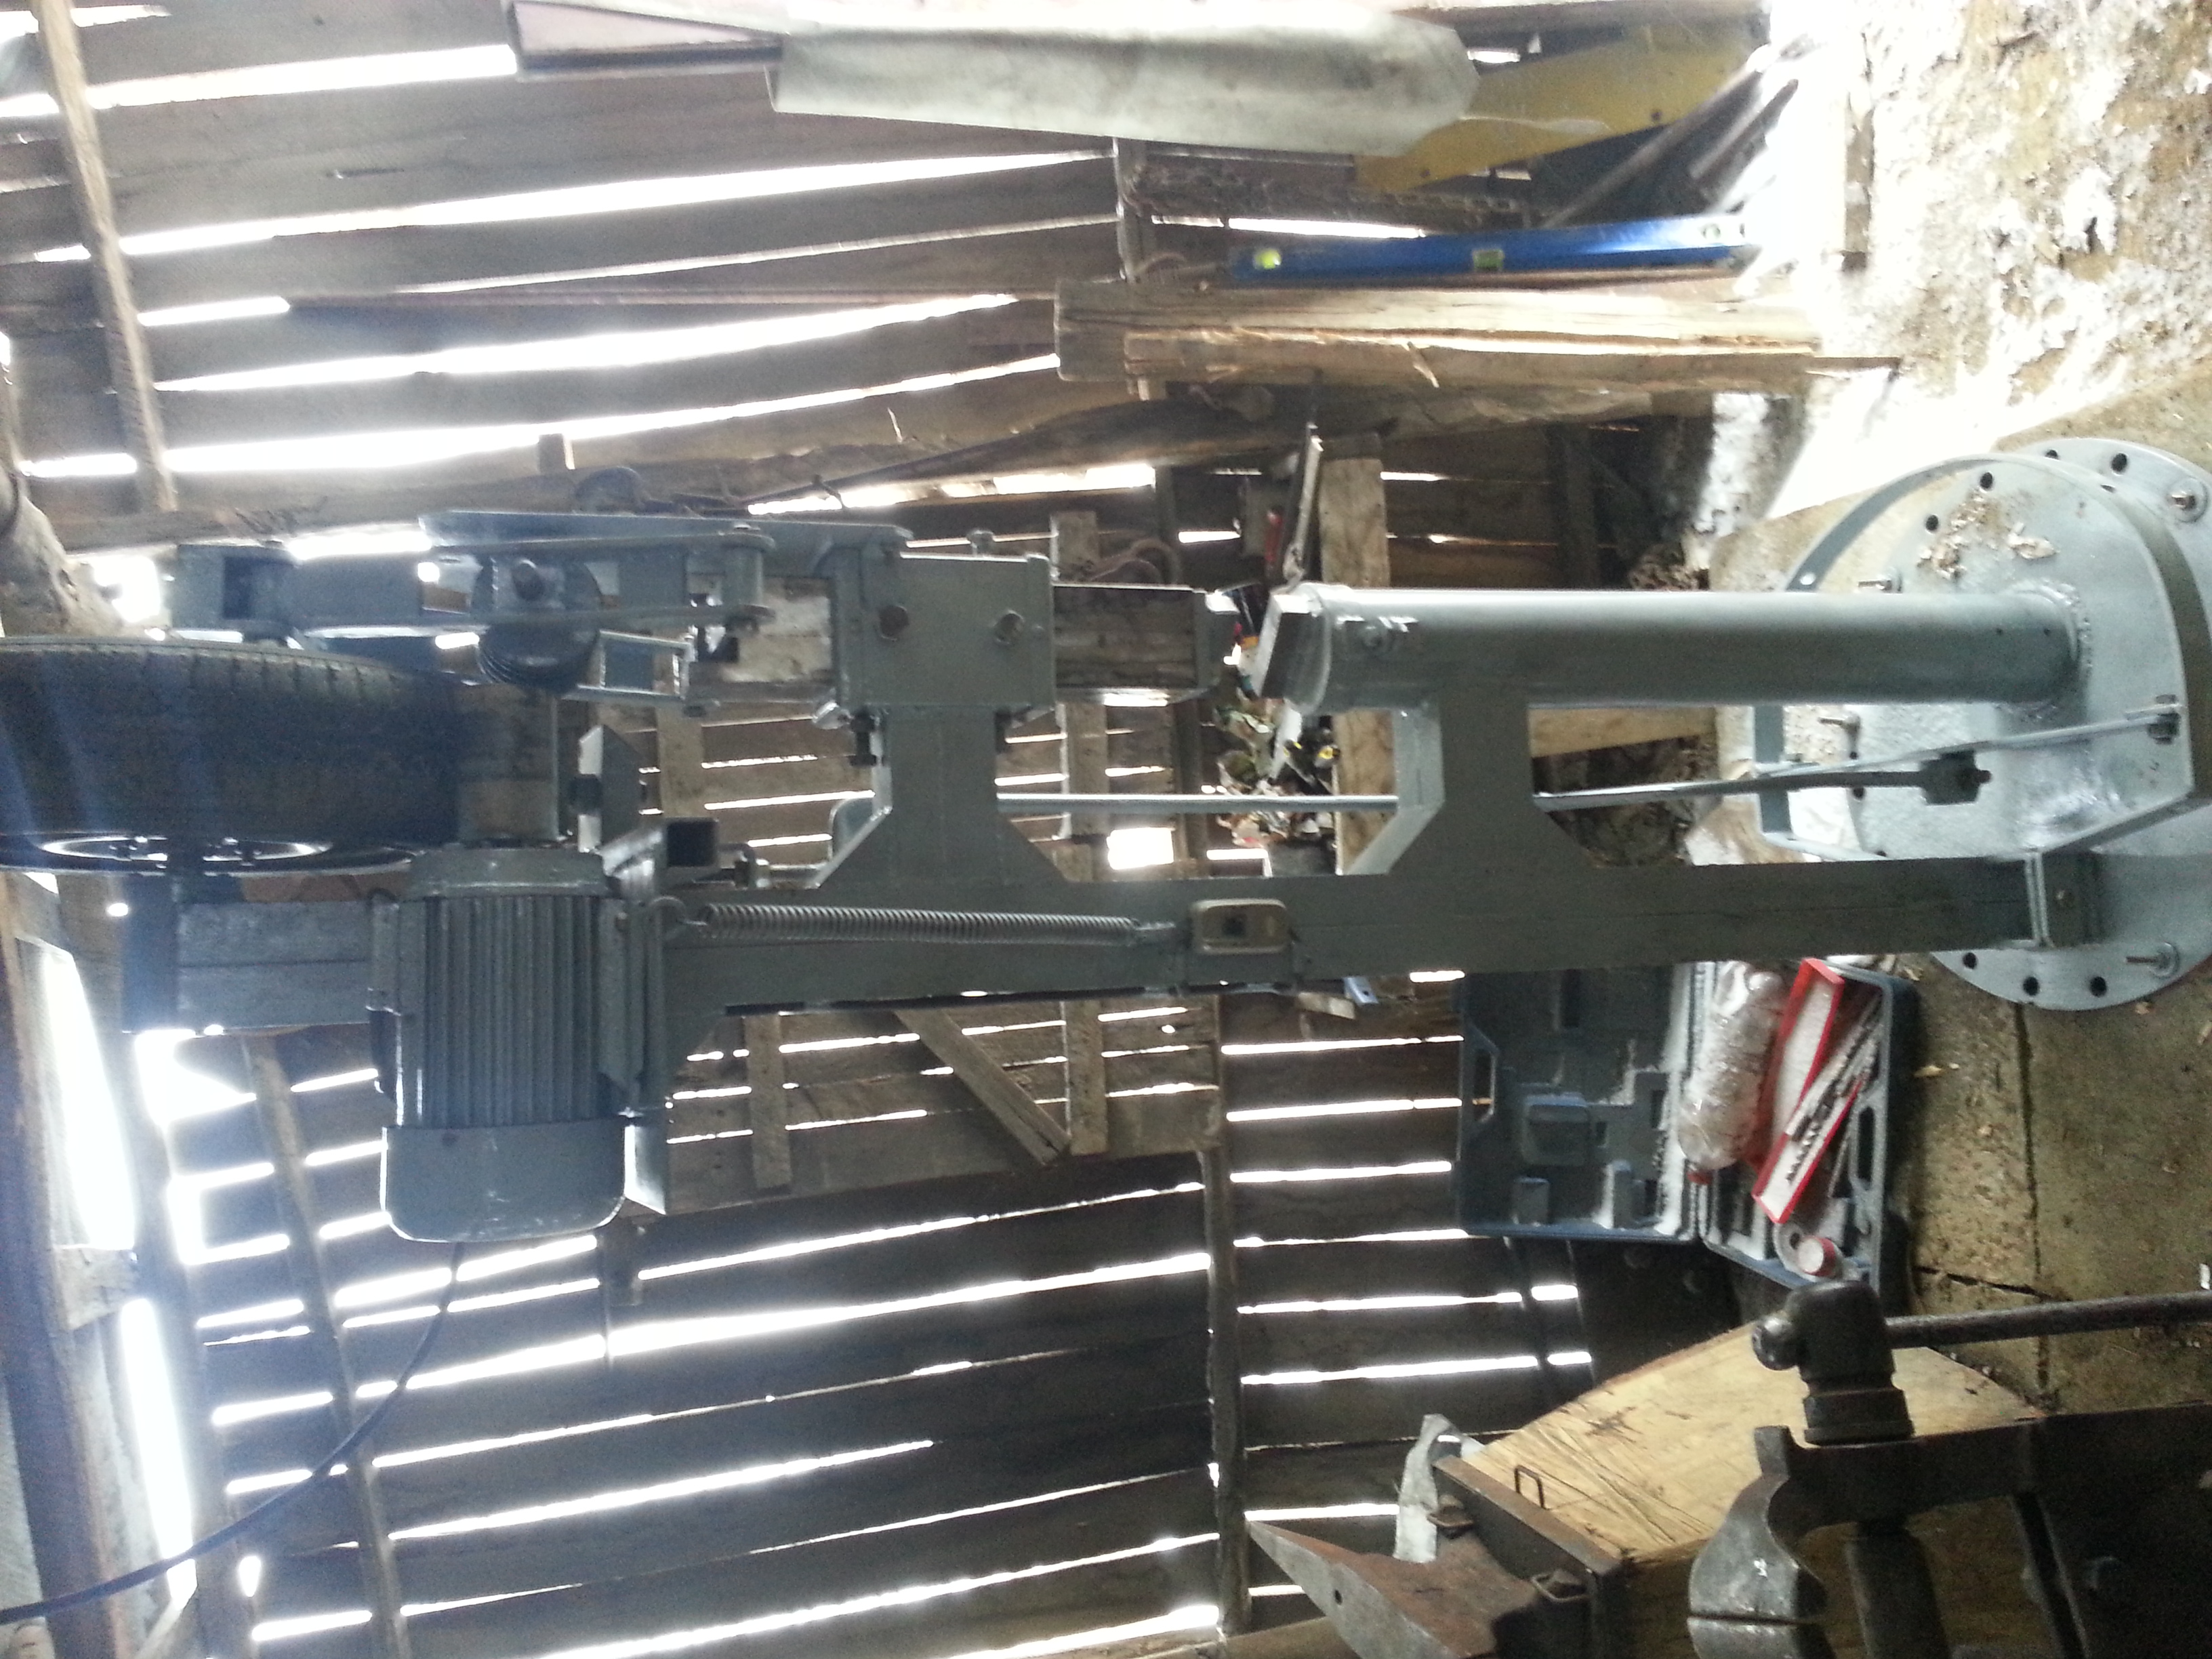
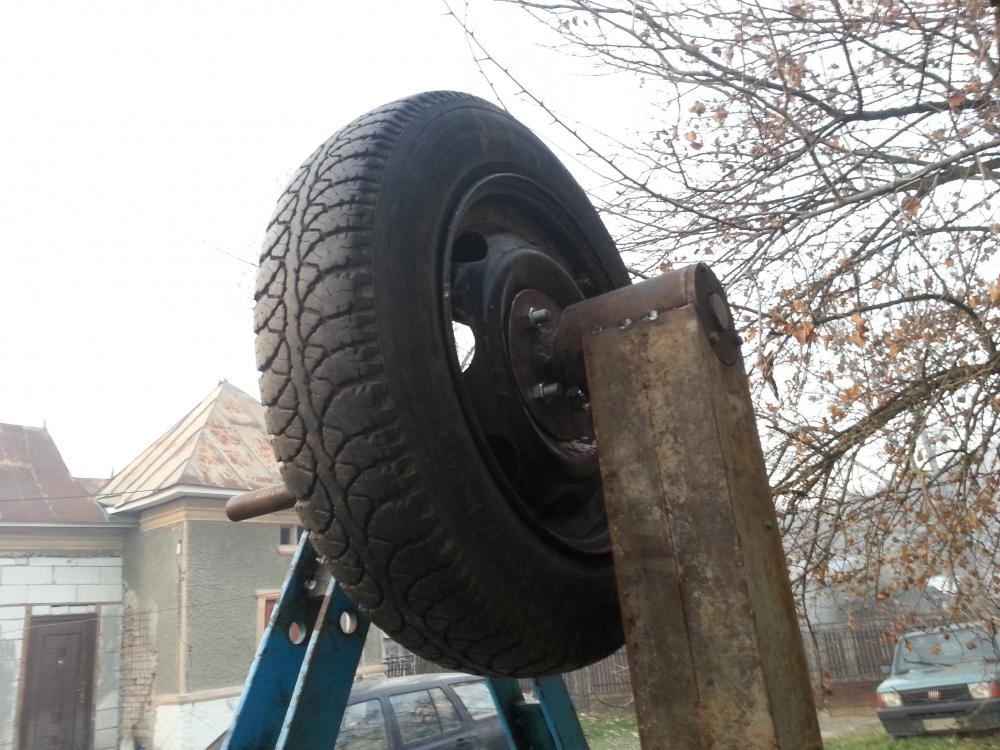
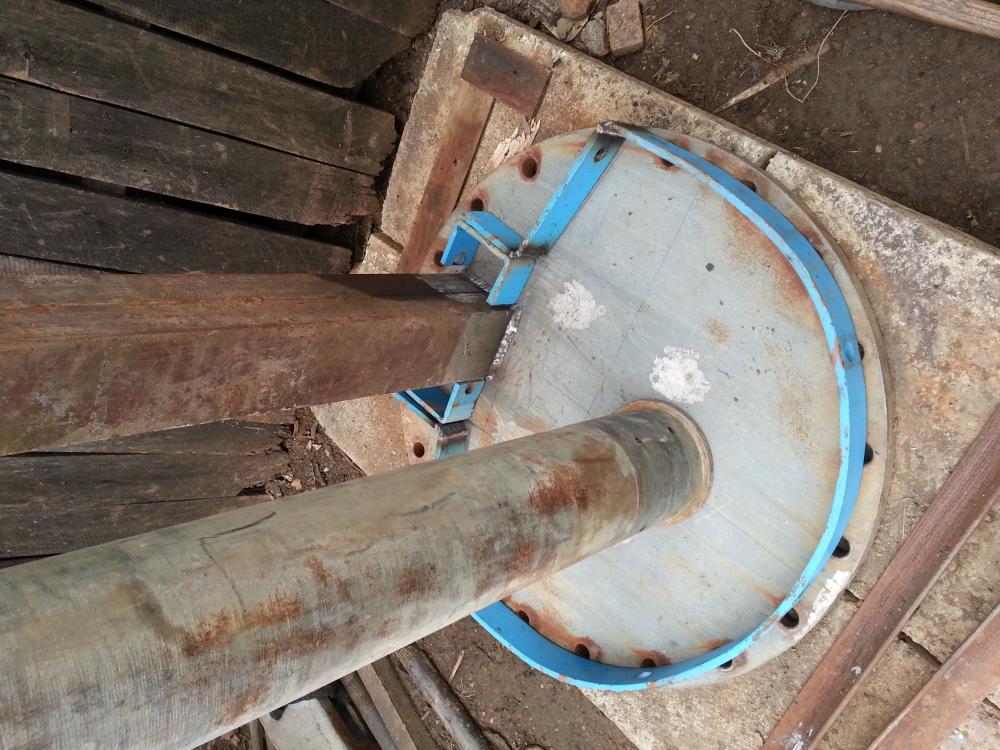
I am really pleased with how she works, the hammer weight is 17 kg without the dies,in the future I will have to pour a concrete foundation and bolt it down better because now it is only bolted do some 10 cm thick concrete slabs and has a lite bit of play in it.
-
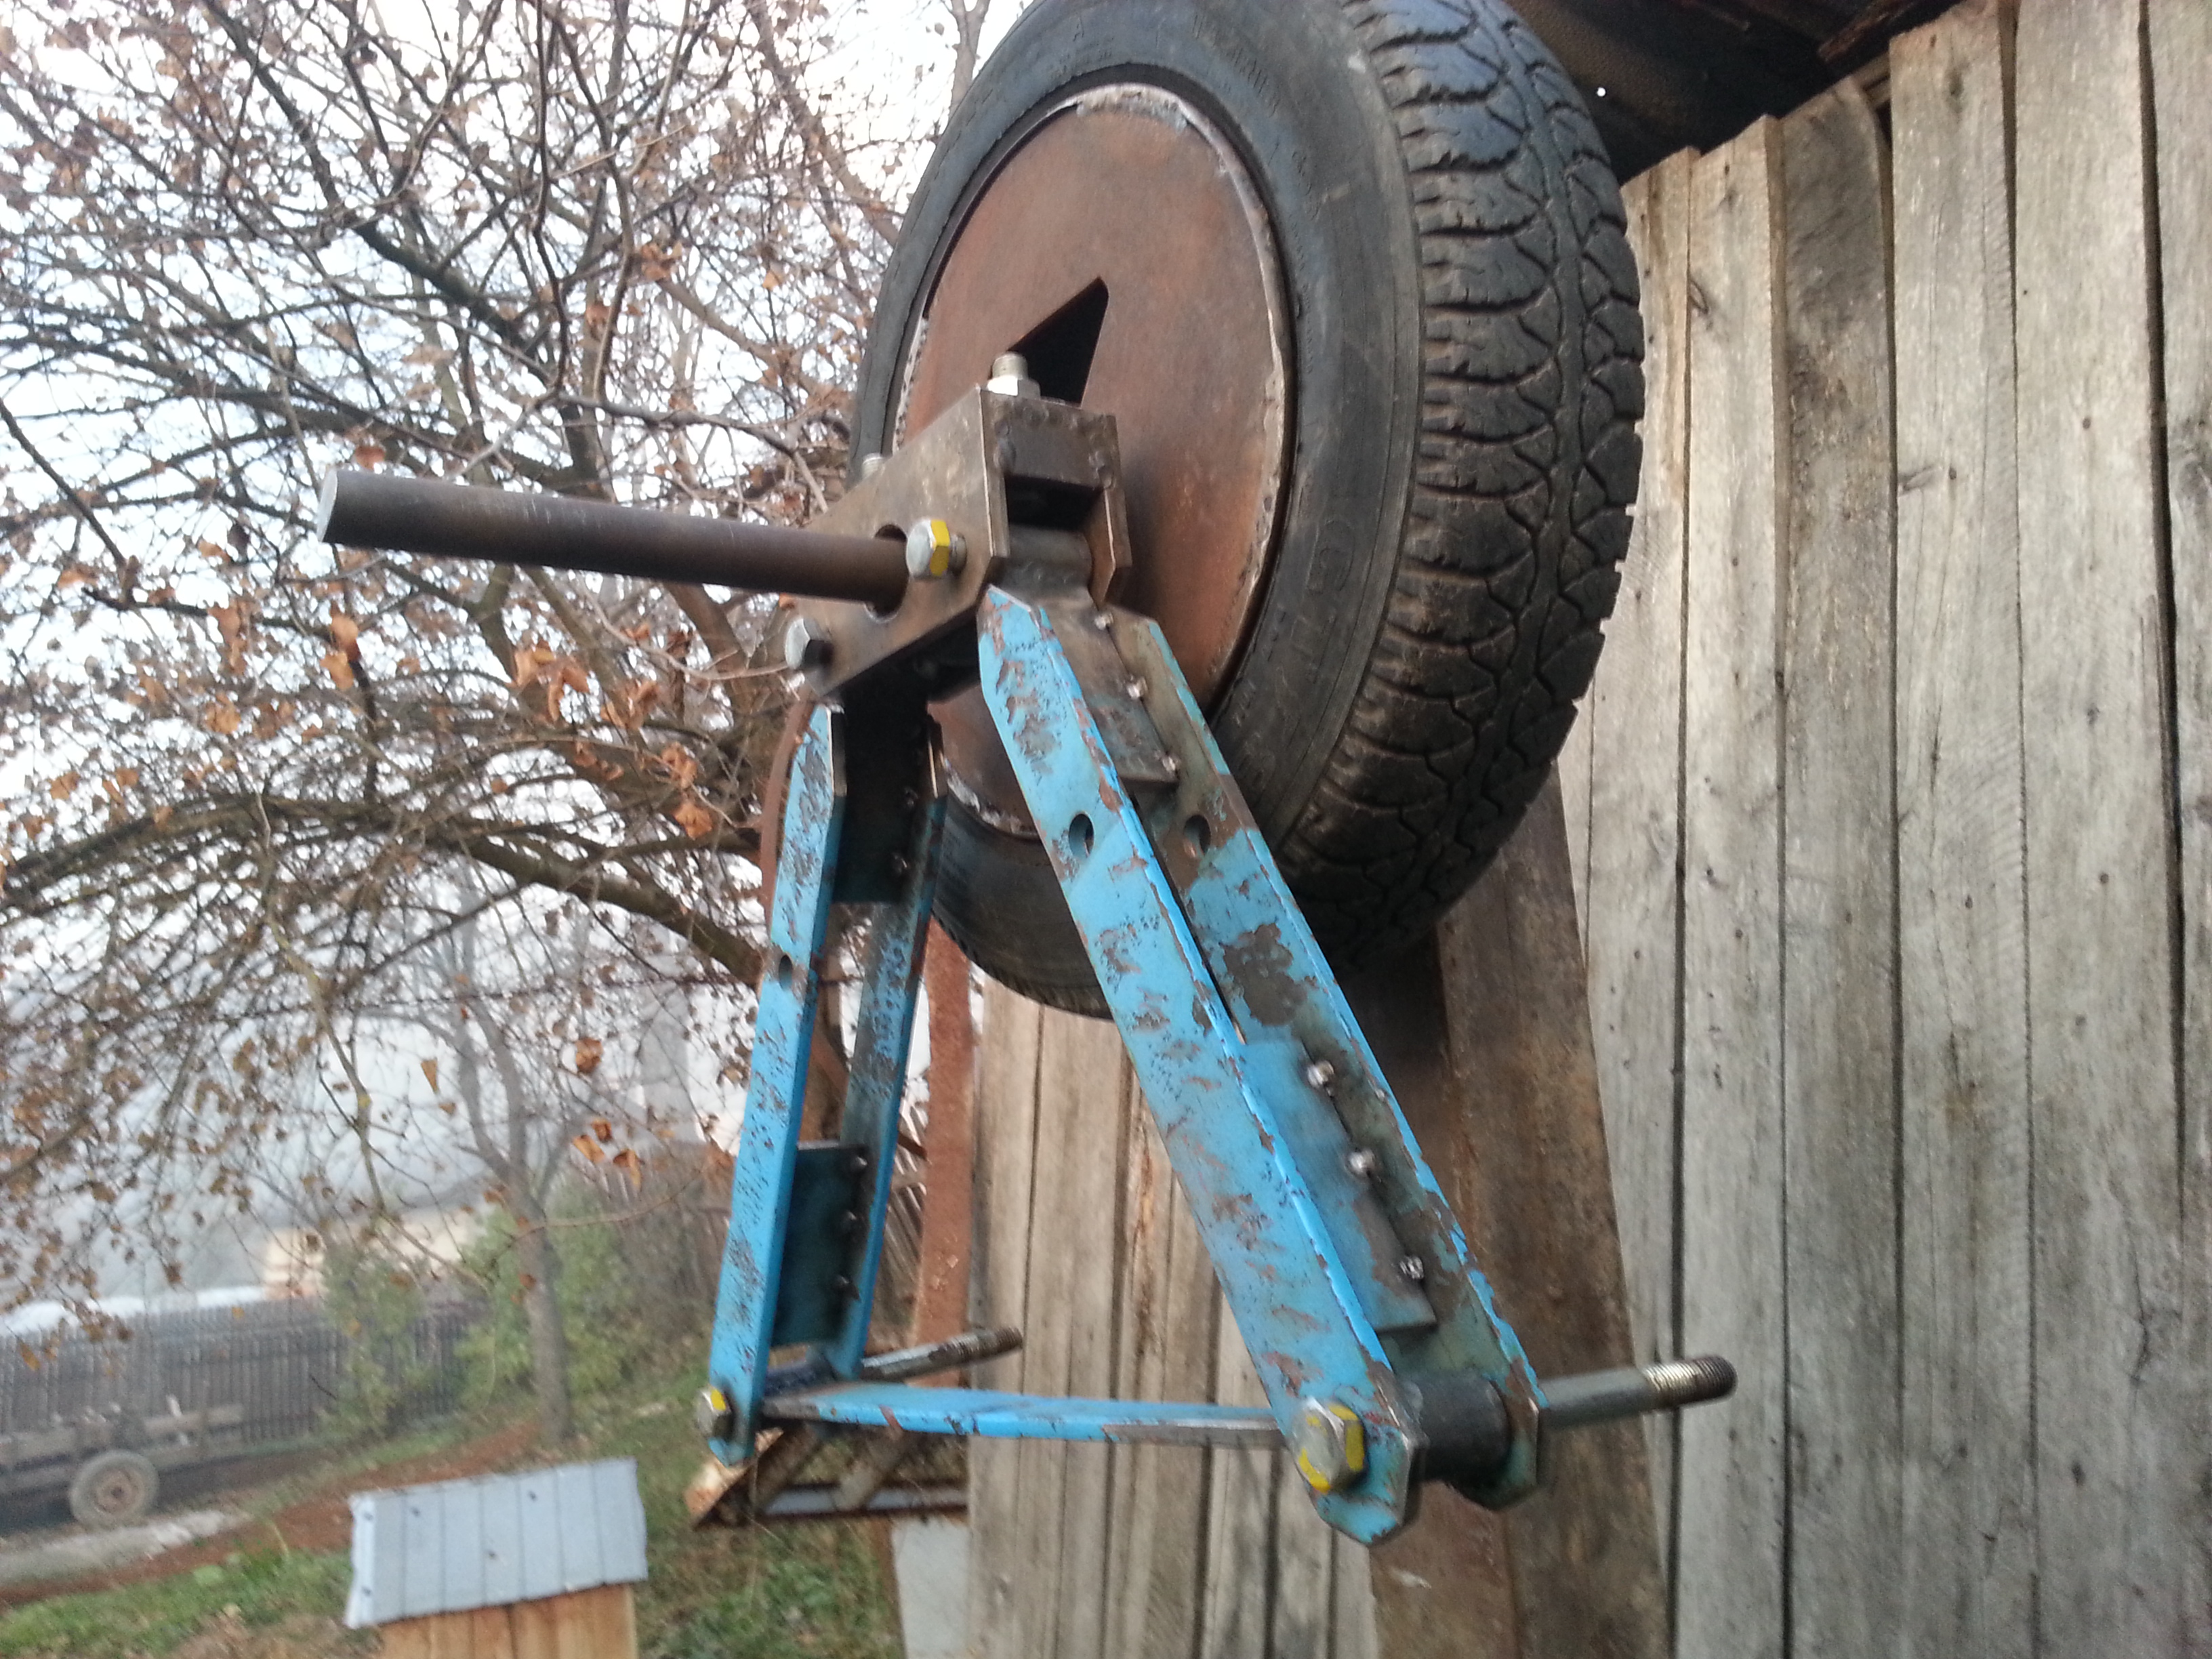
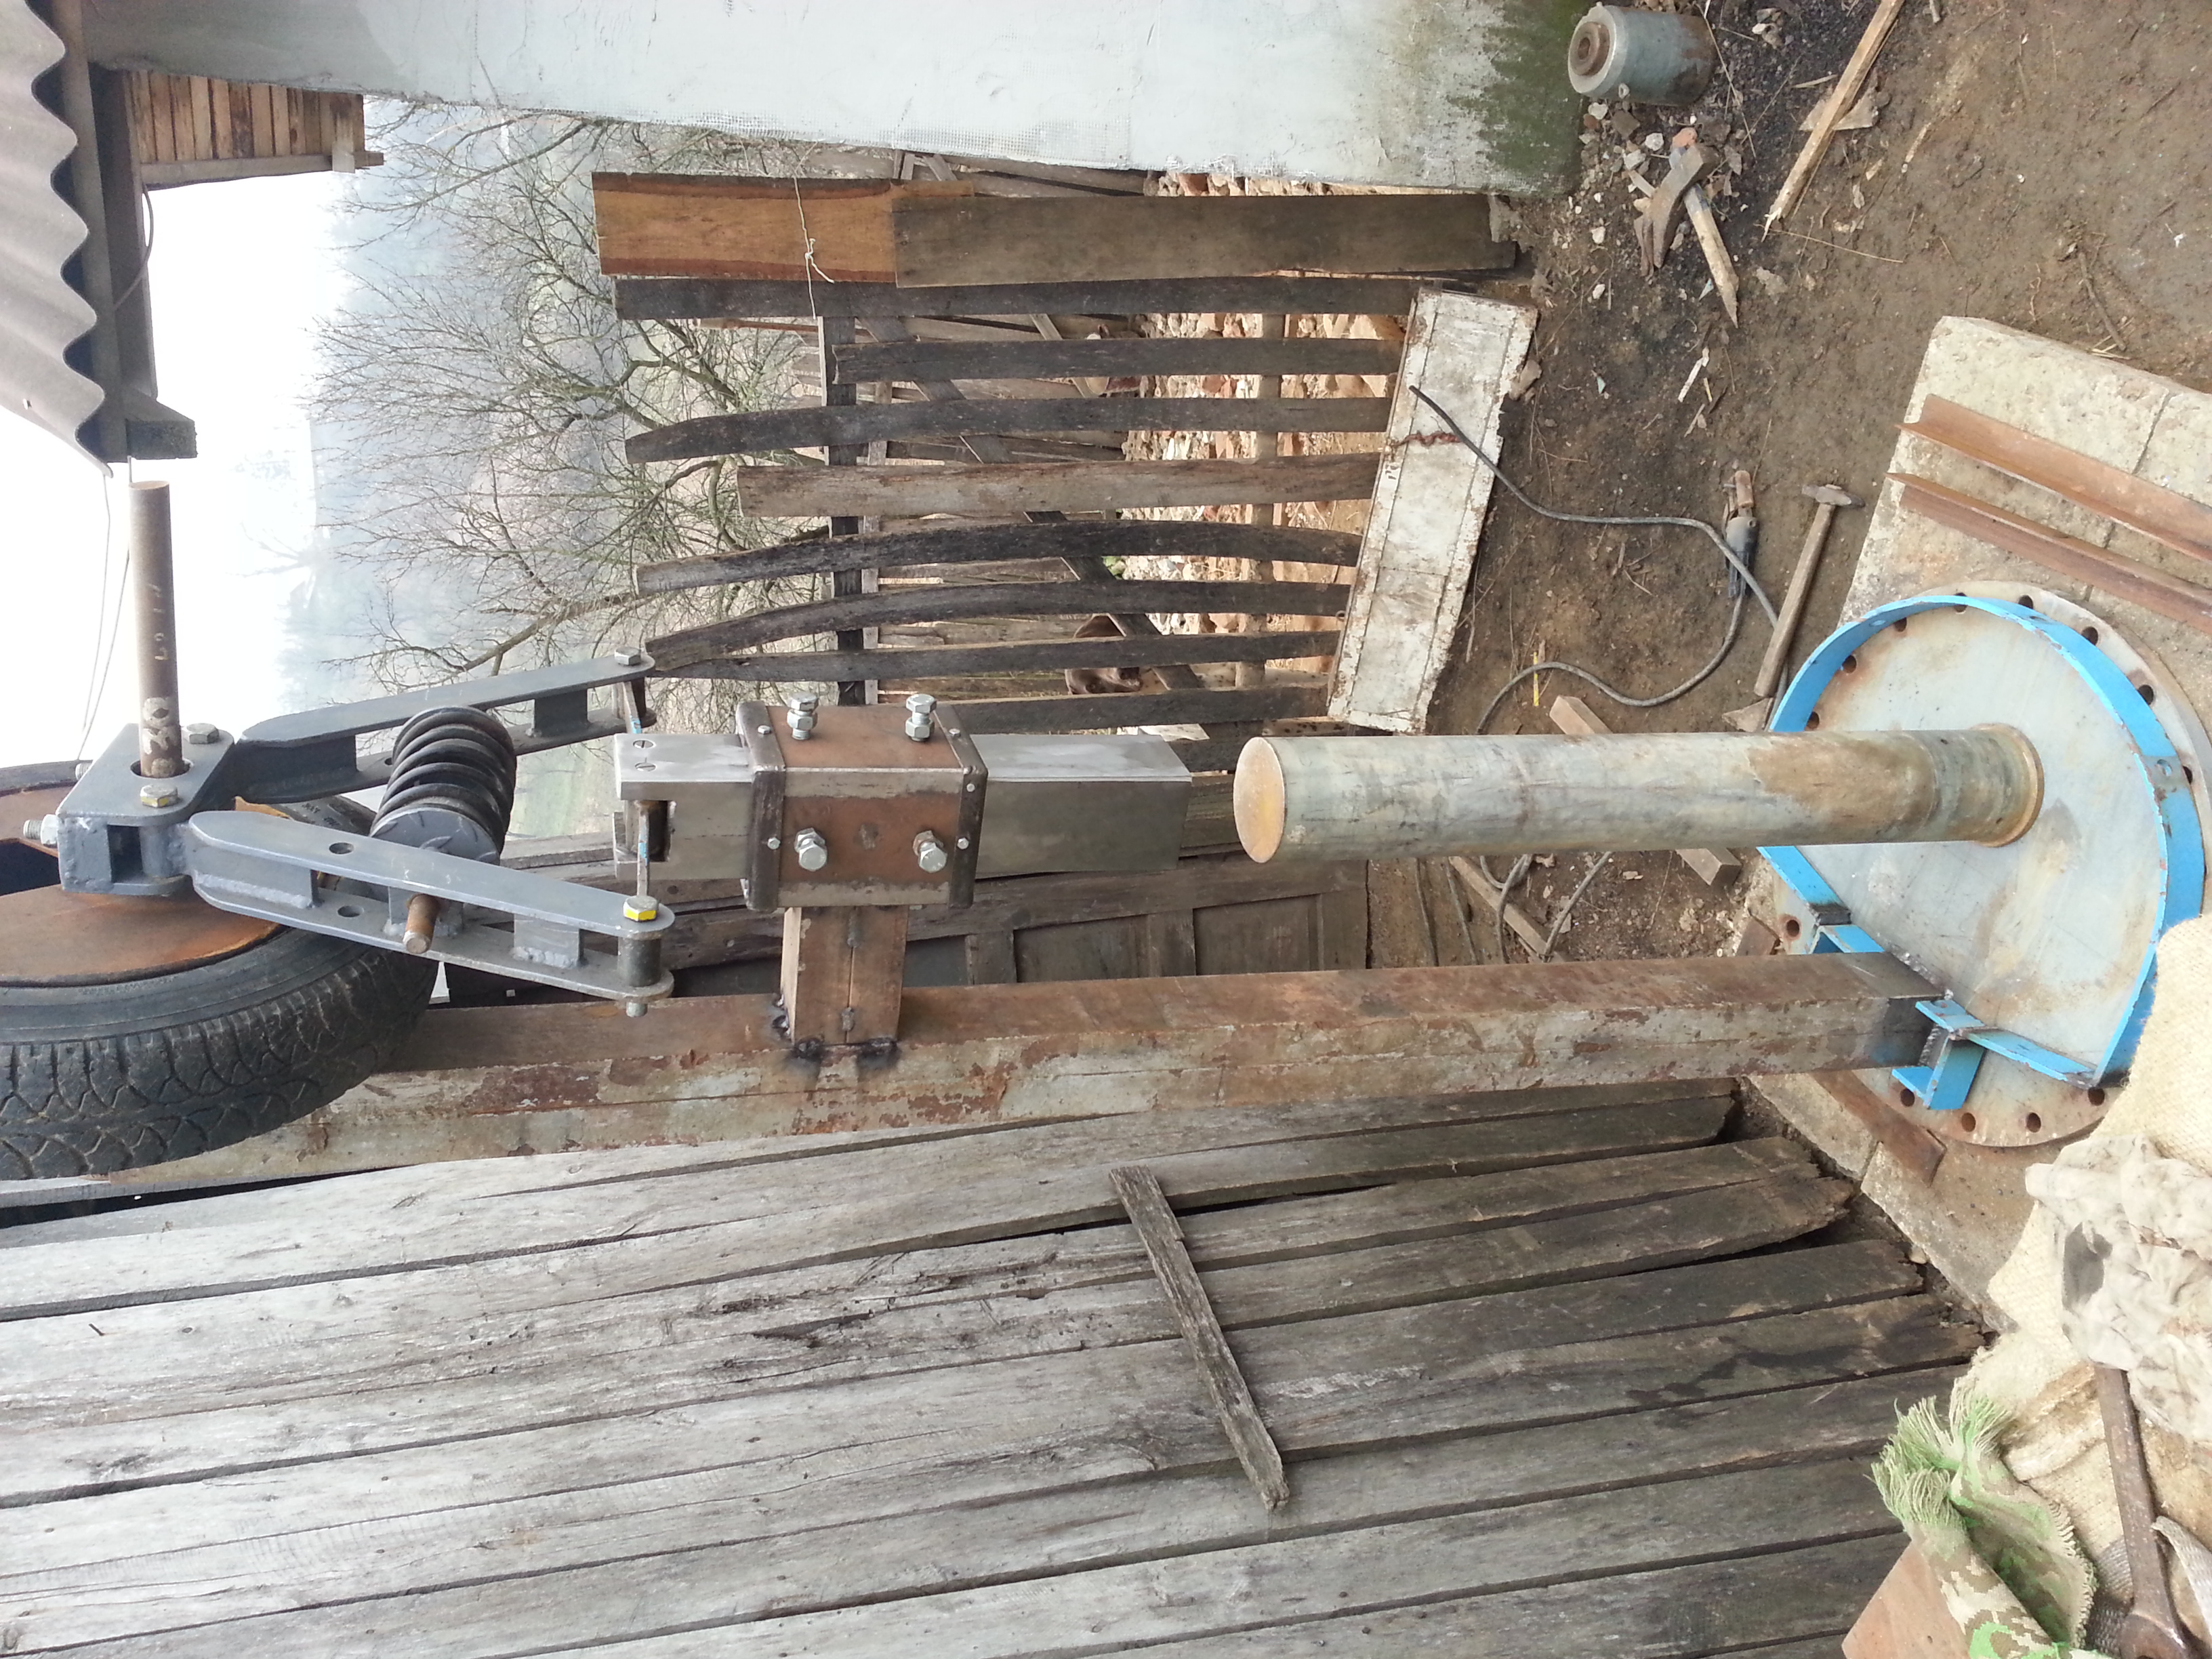
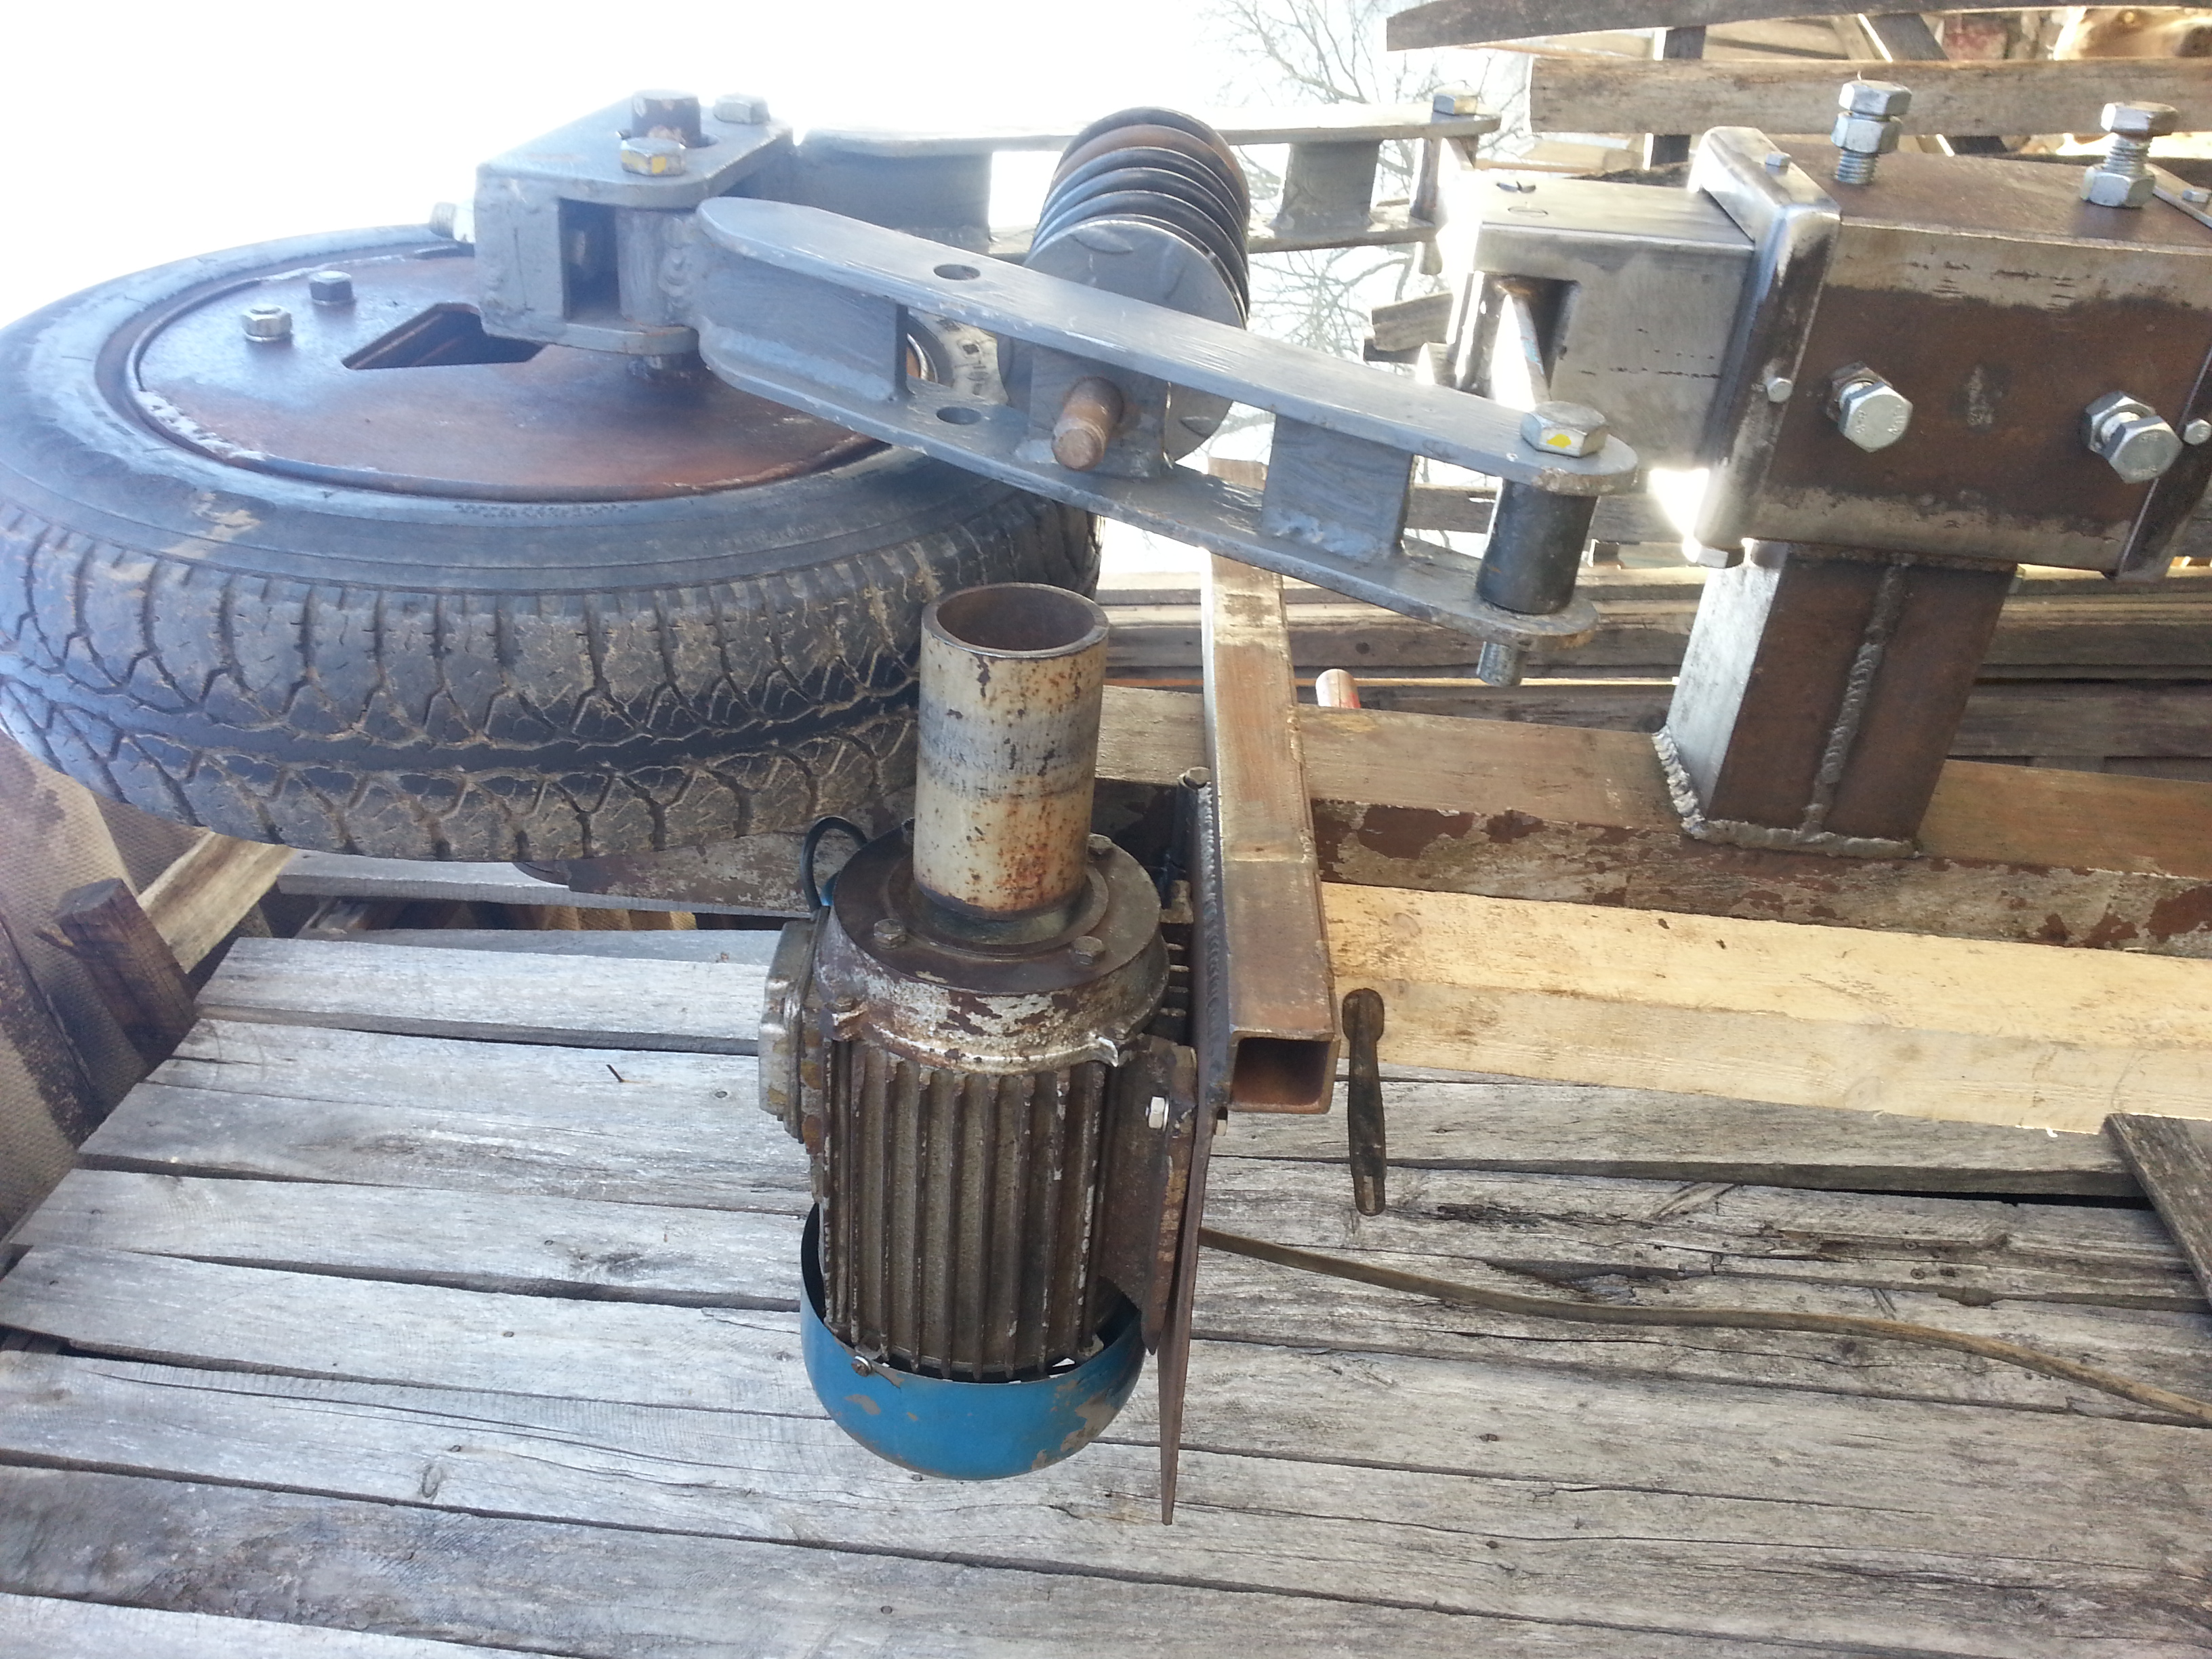
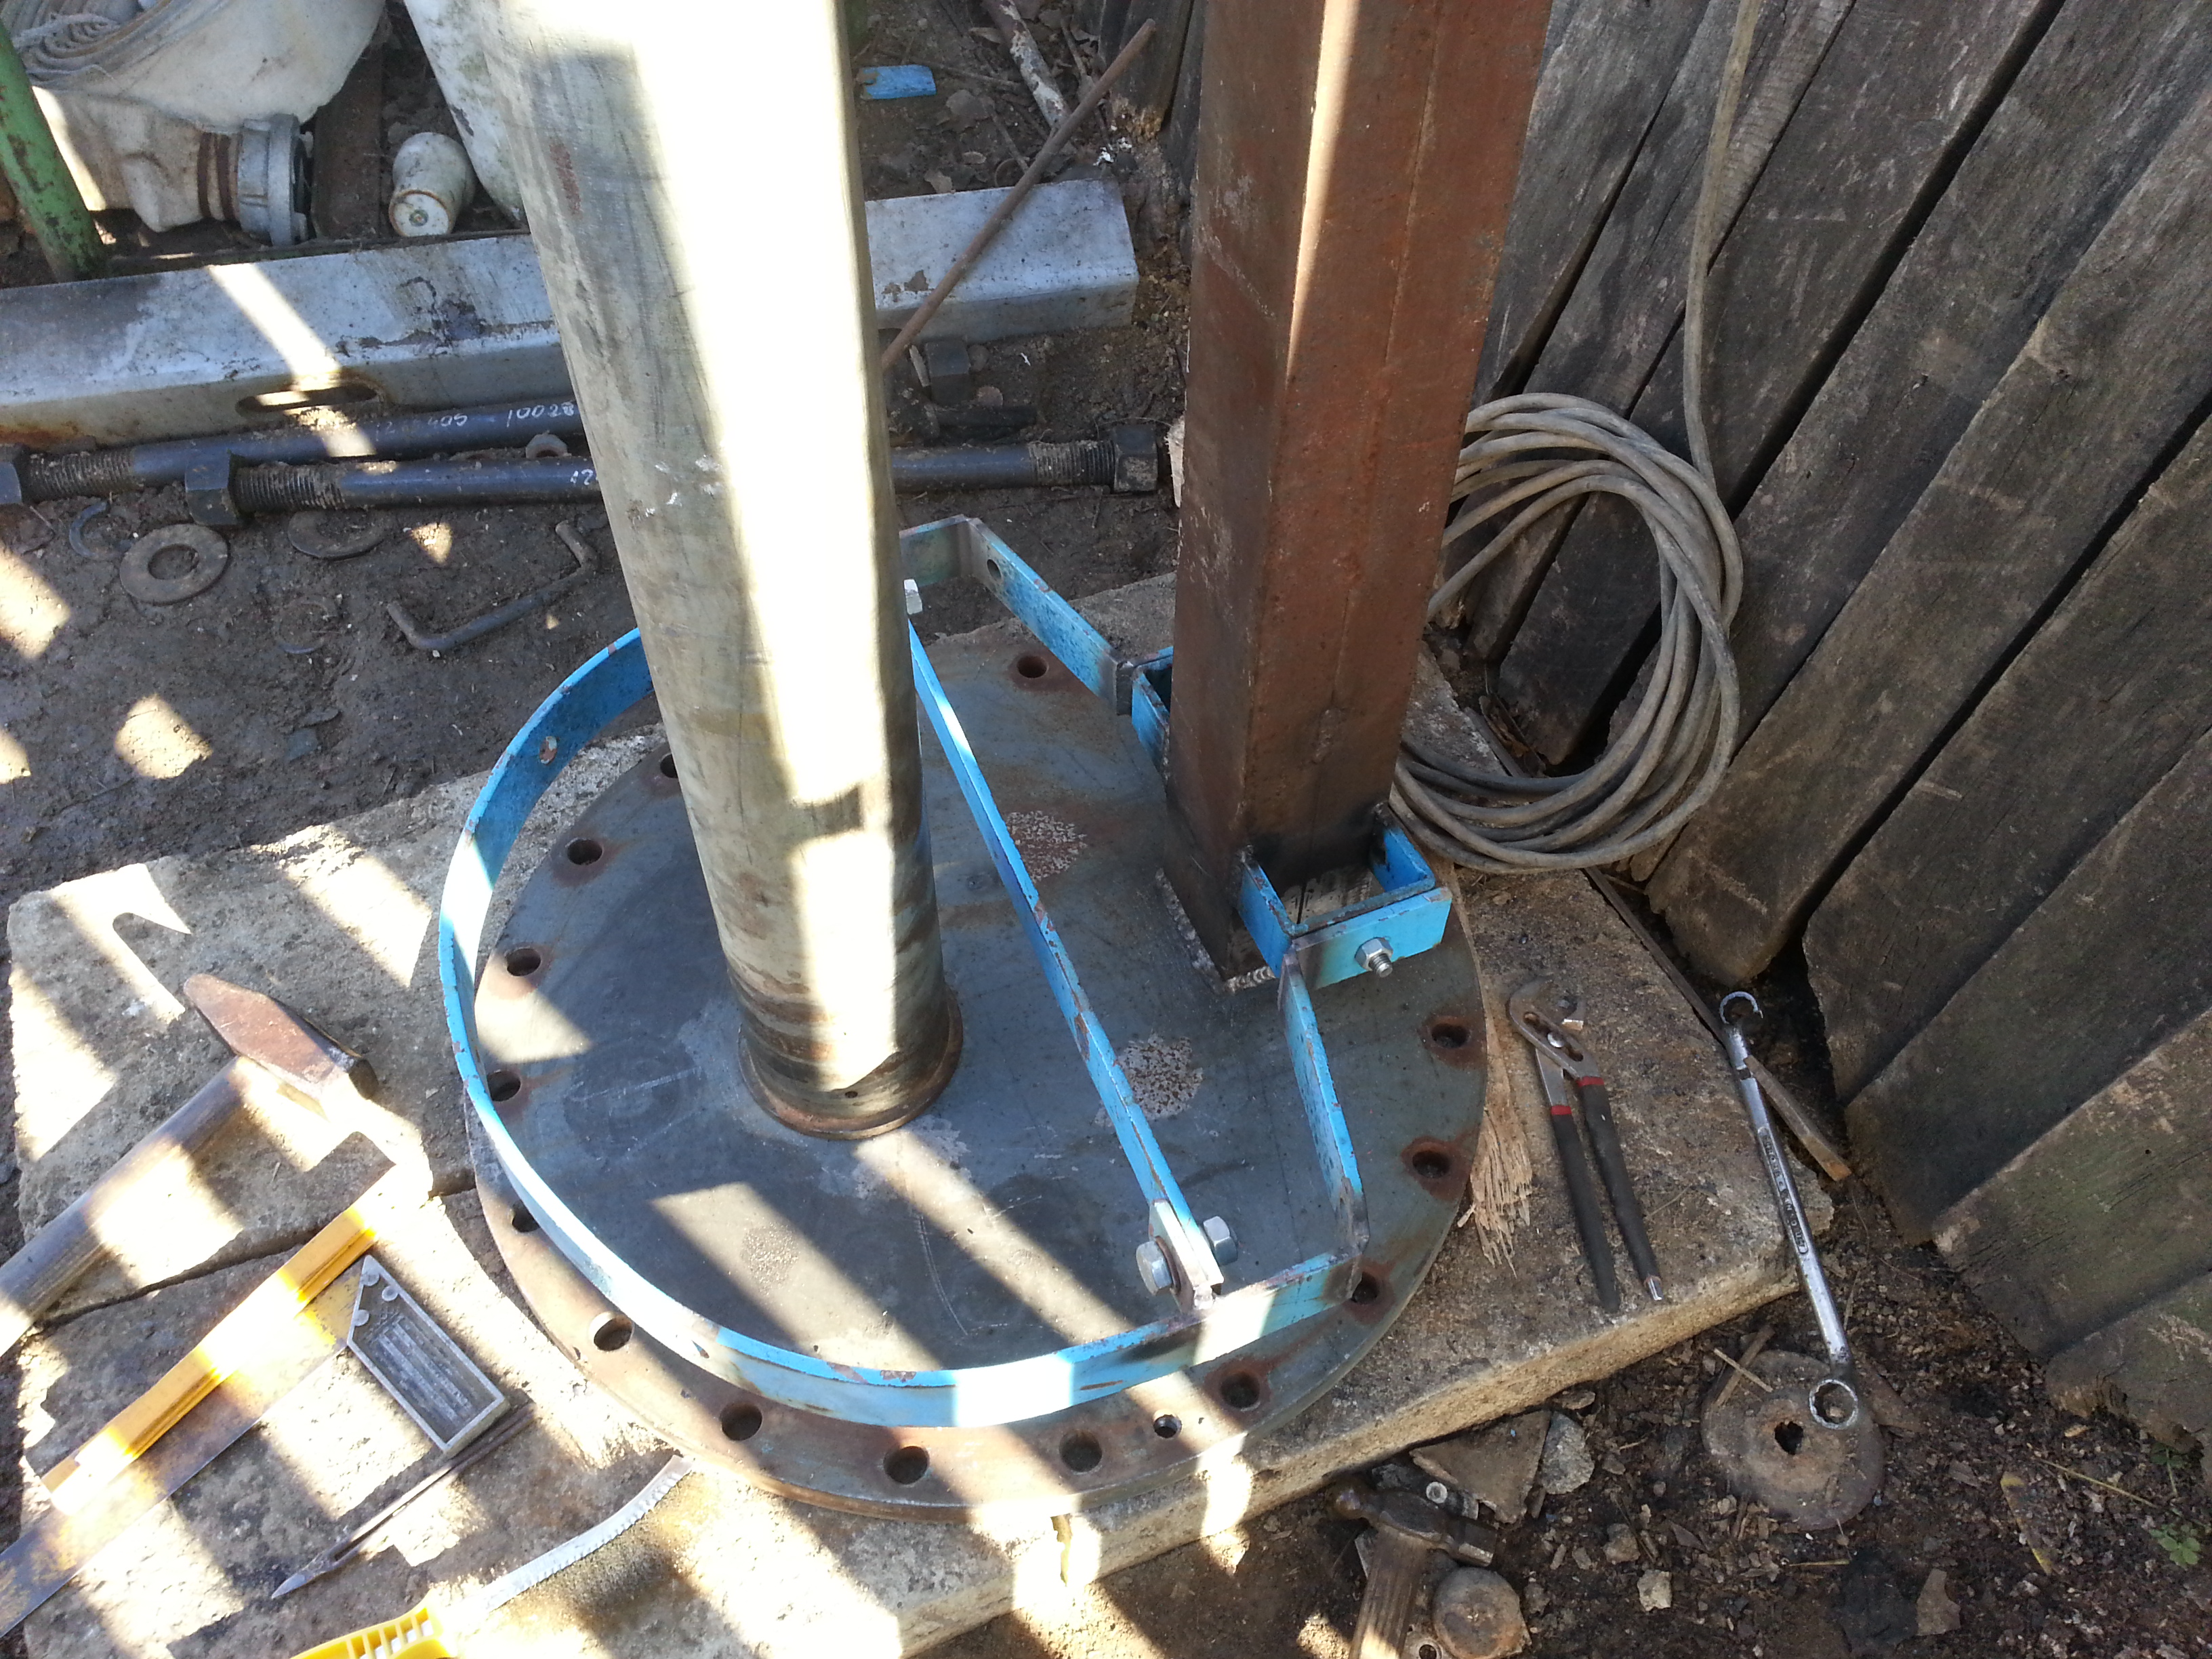
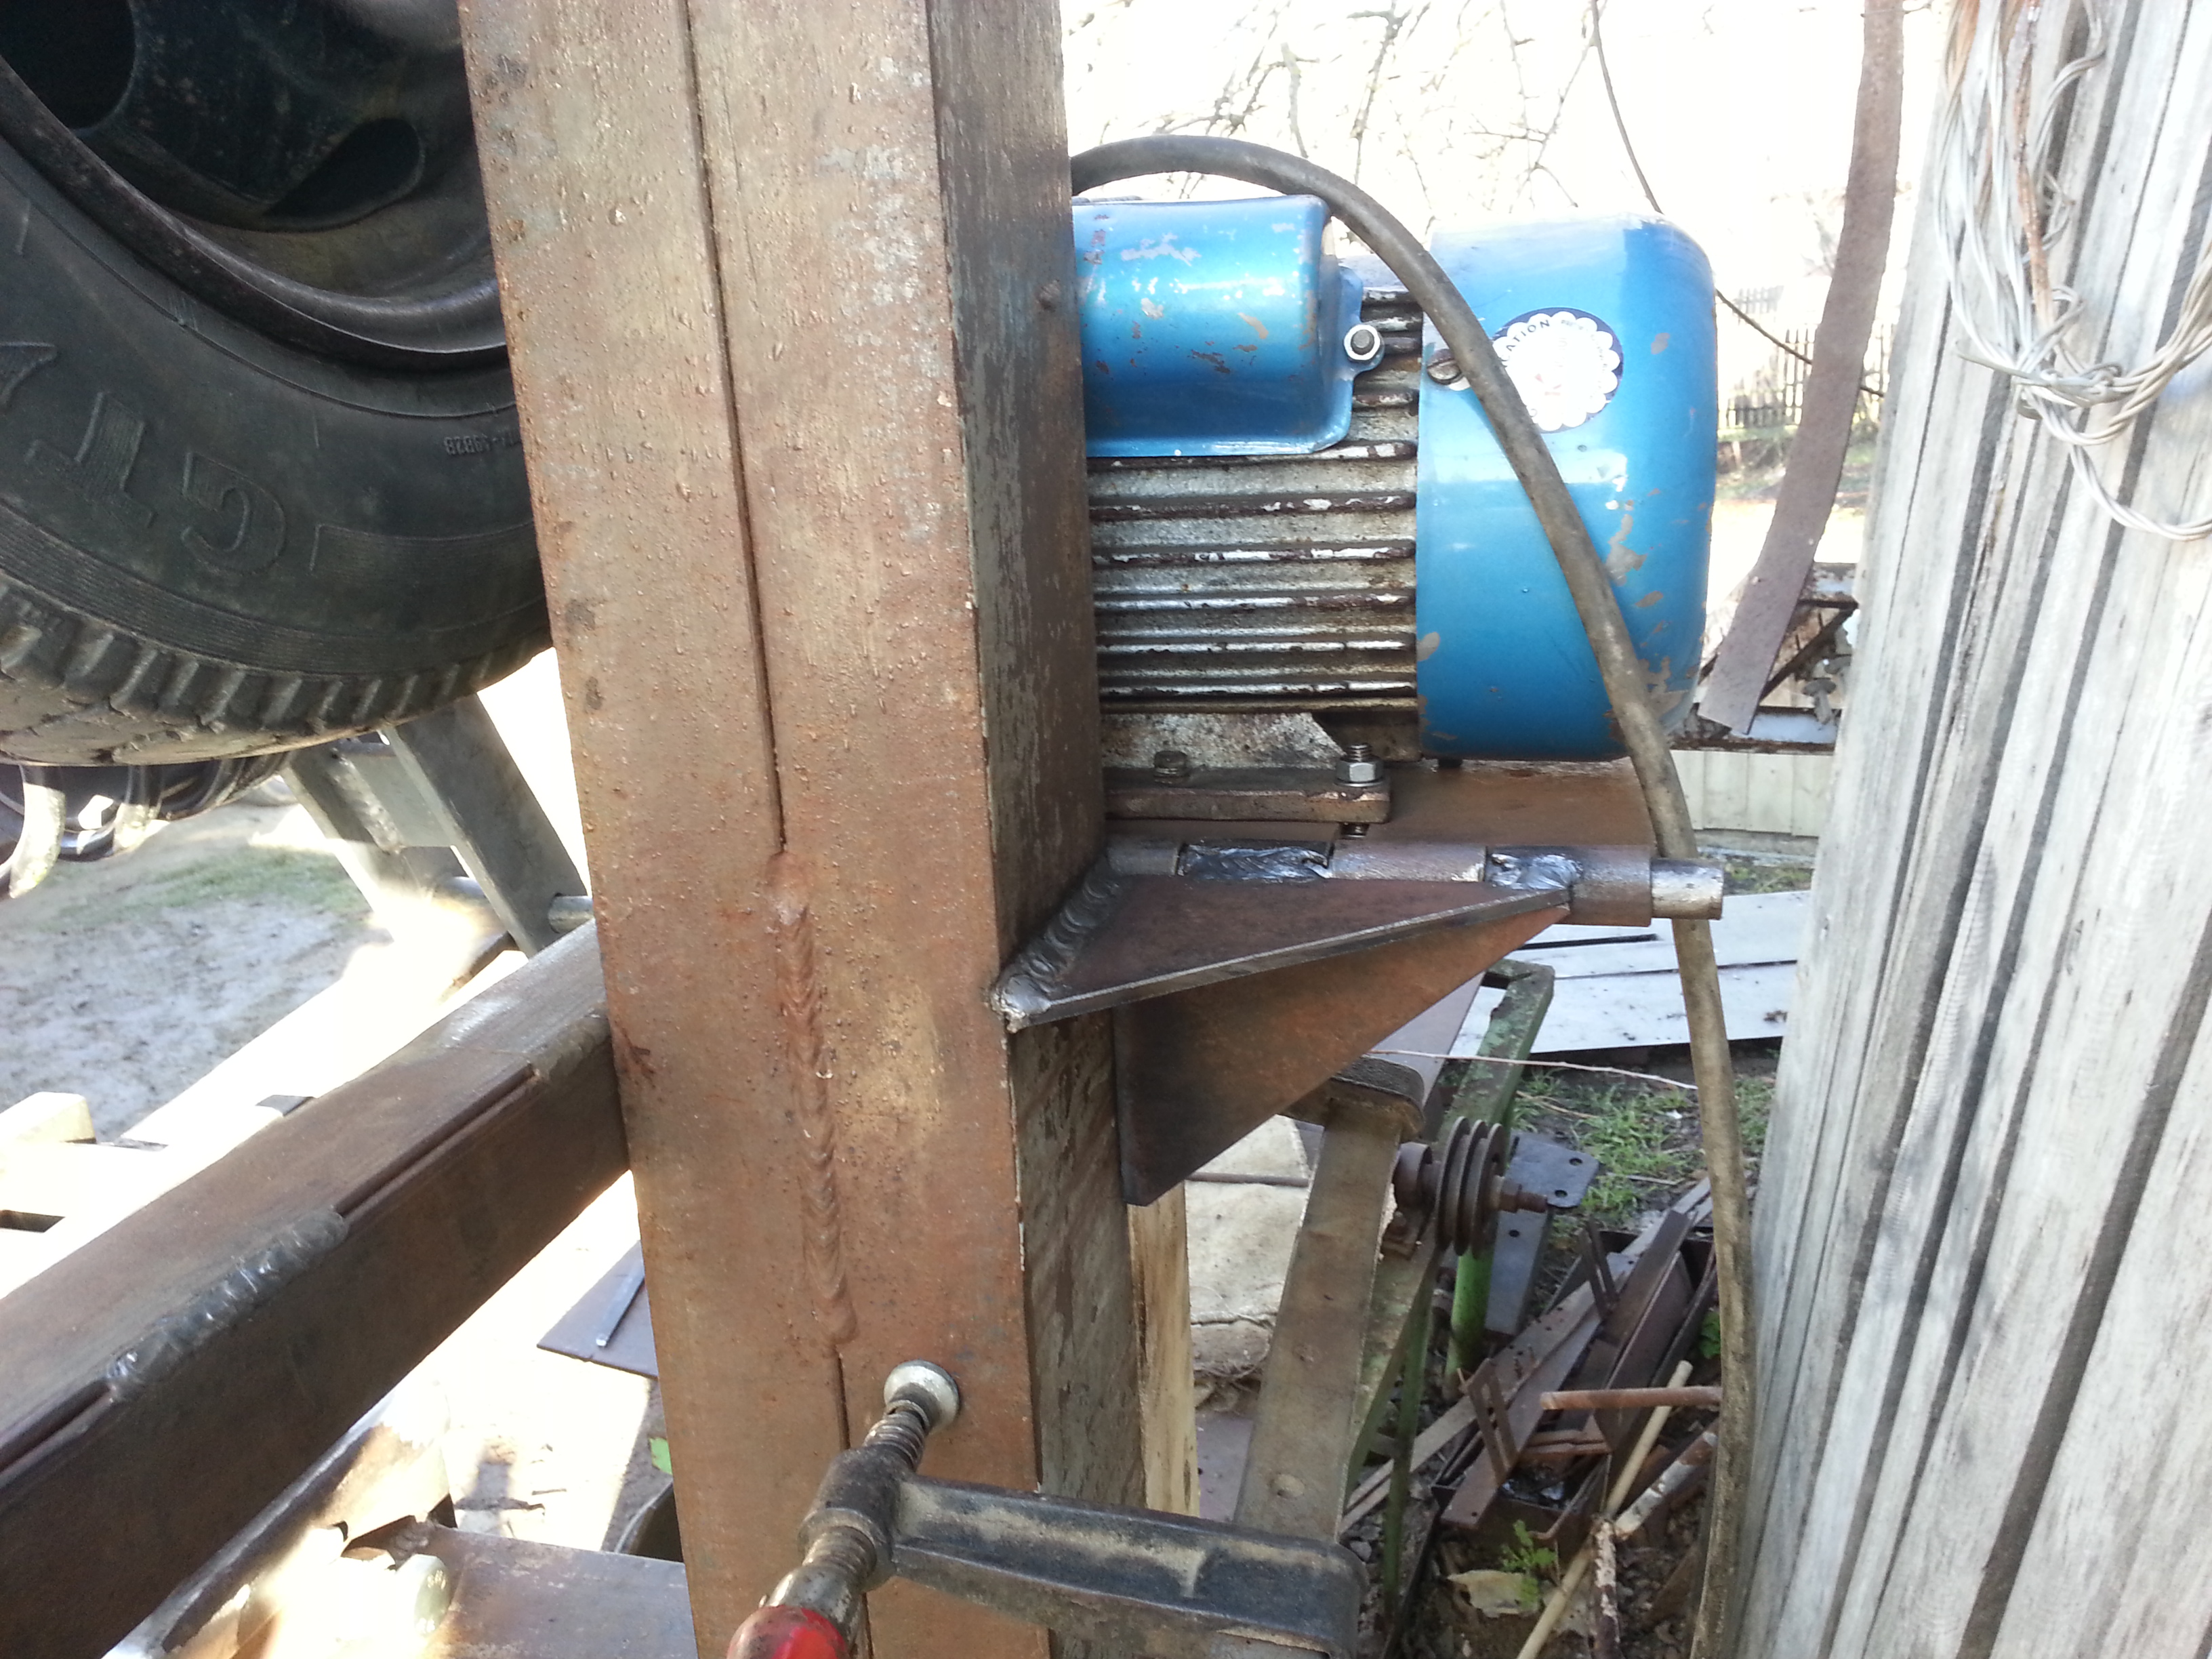
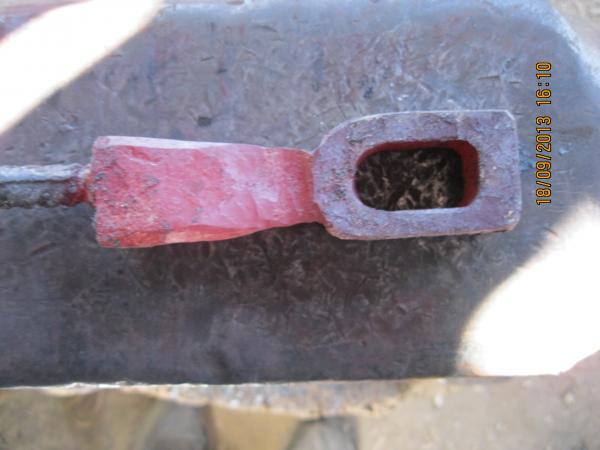
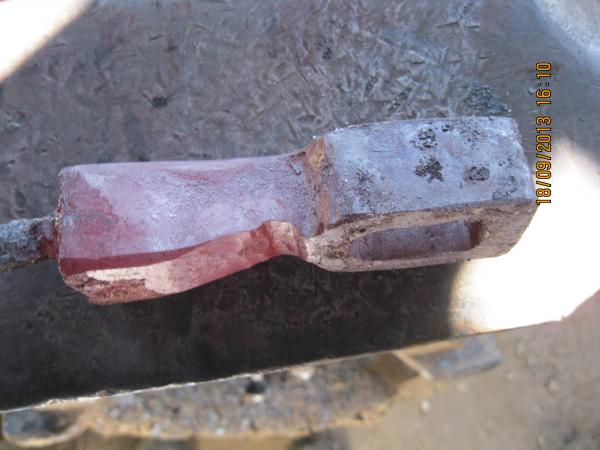
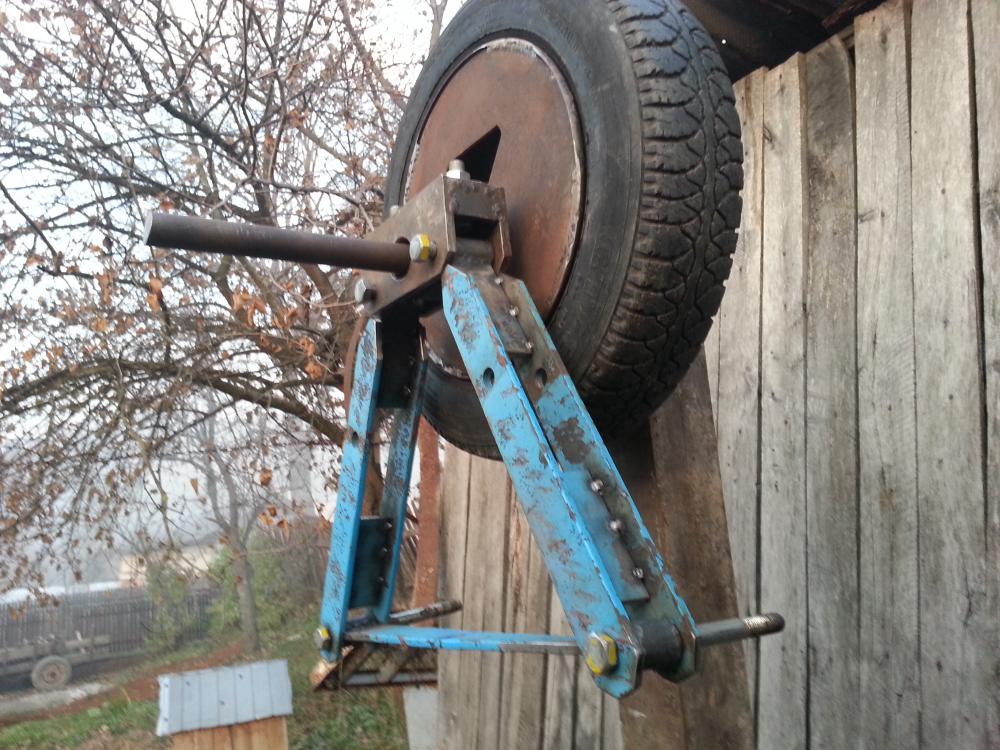
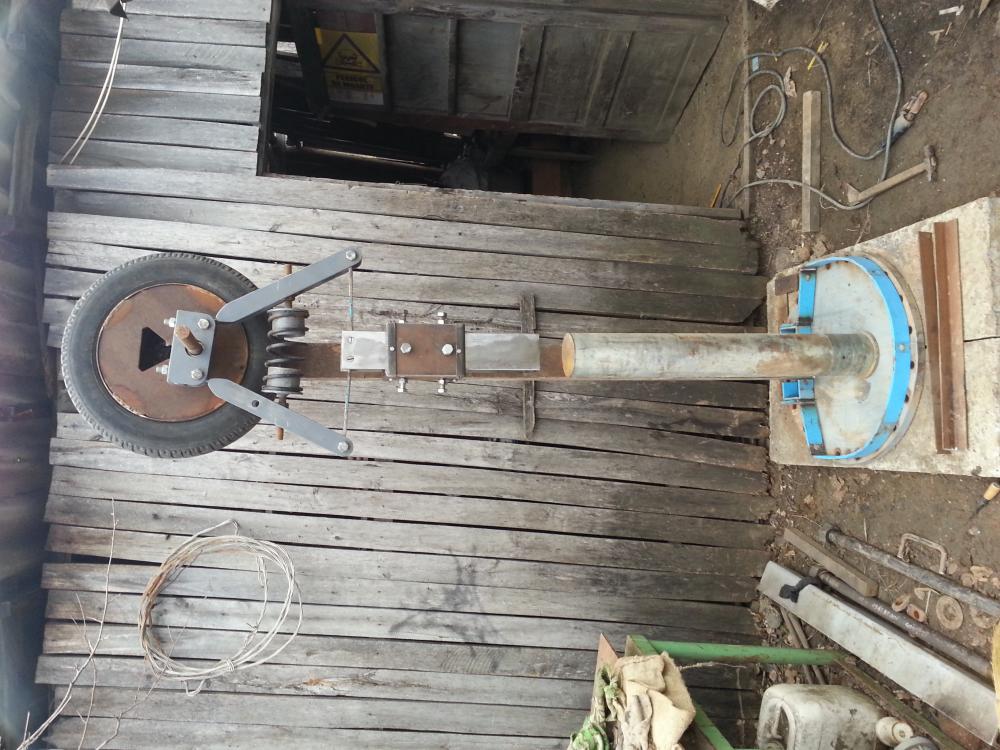
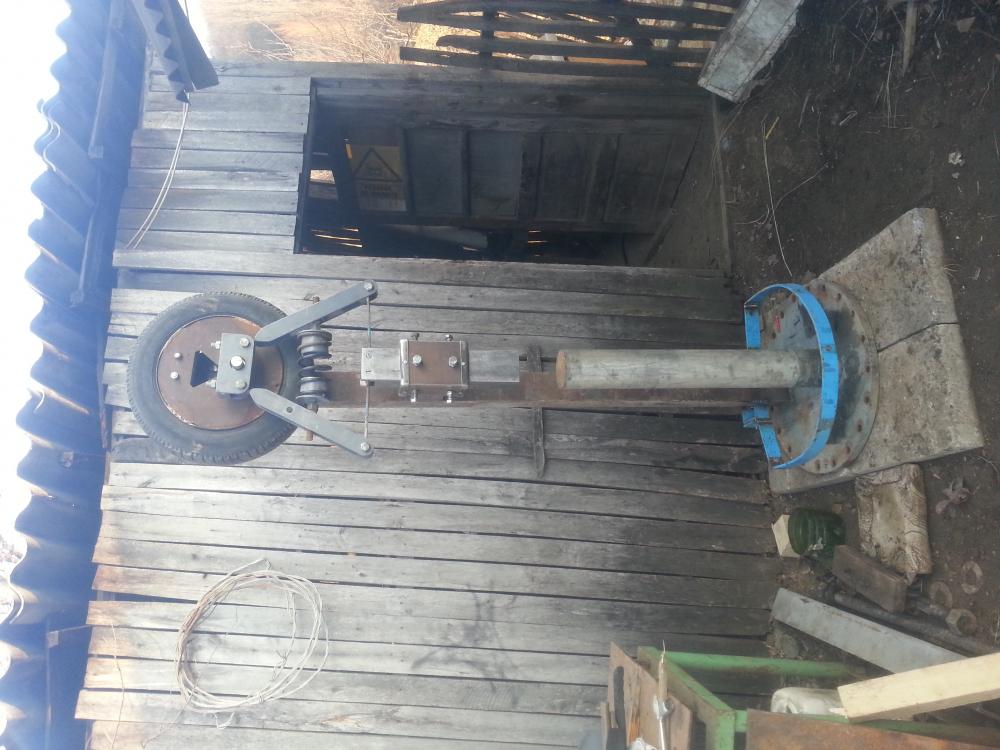
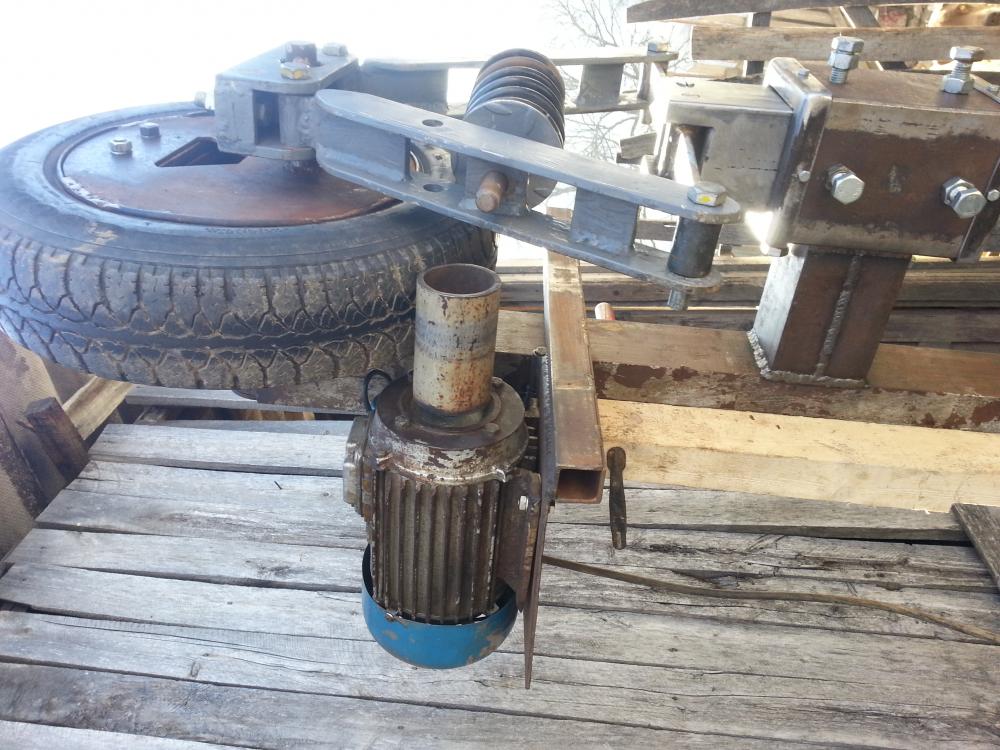
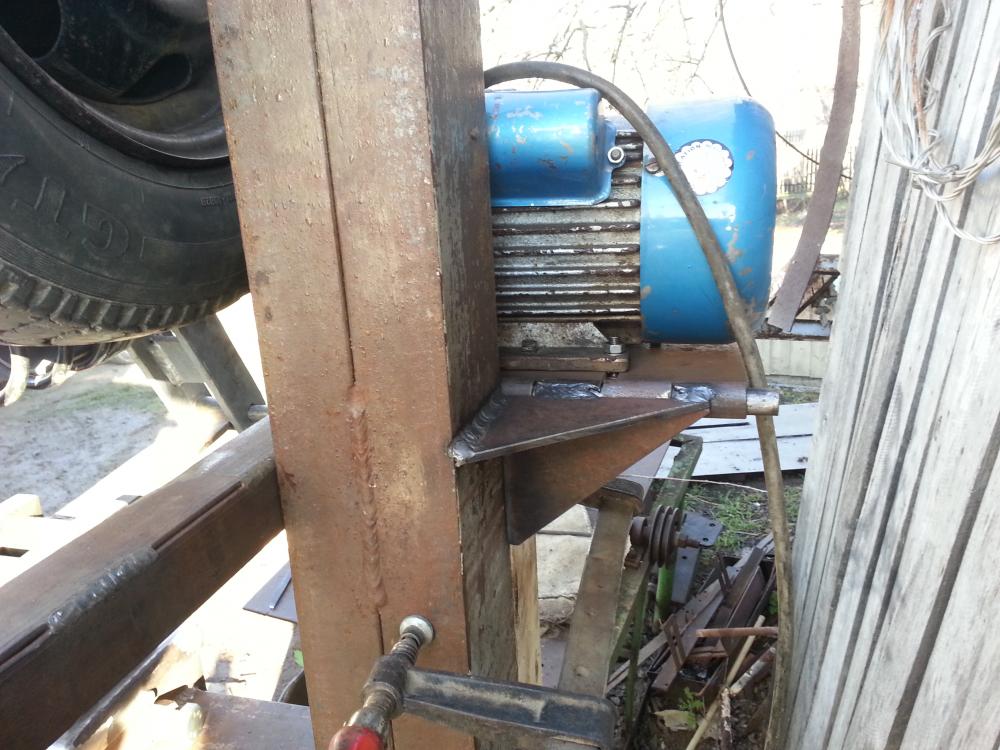
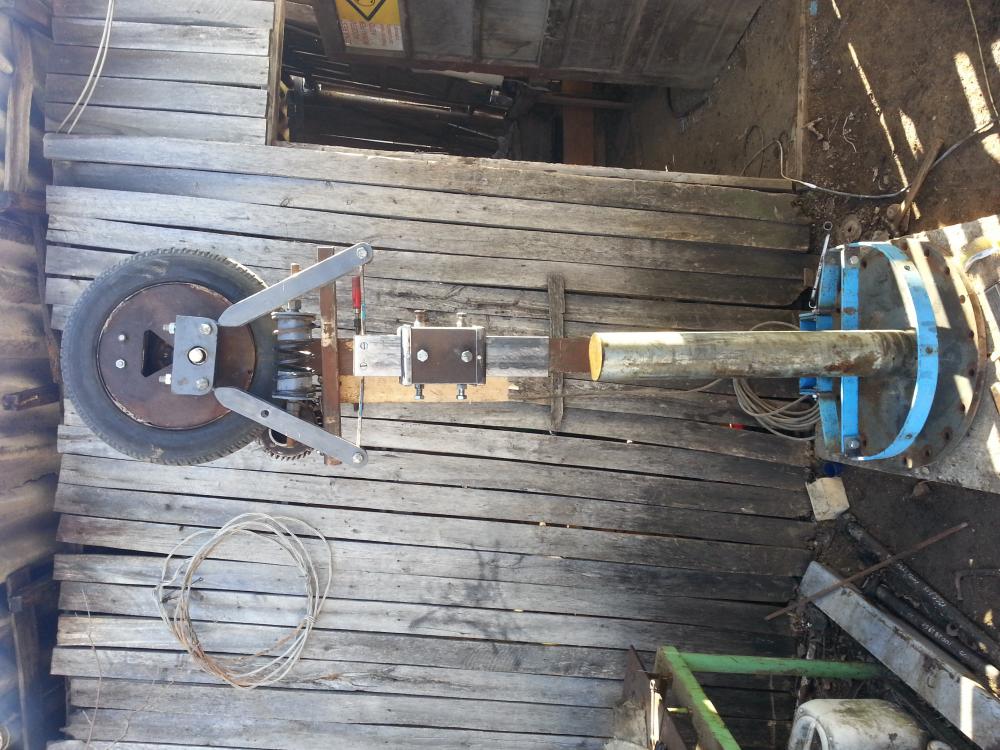
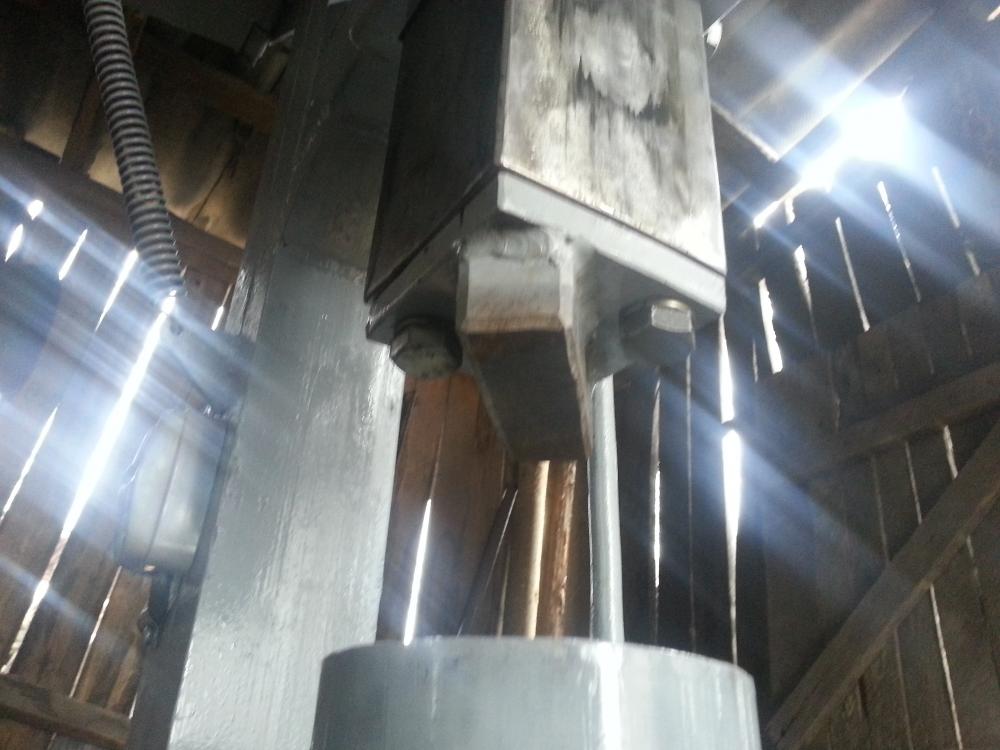
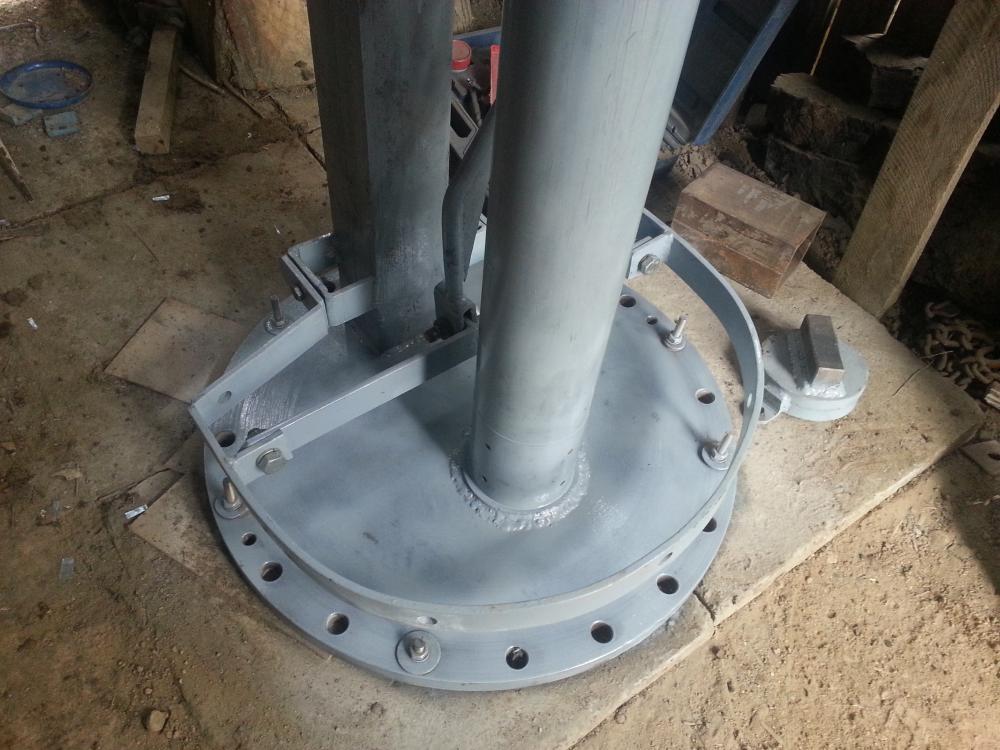
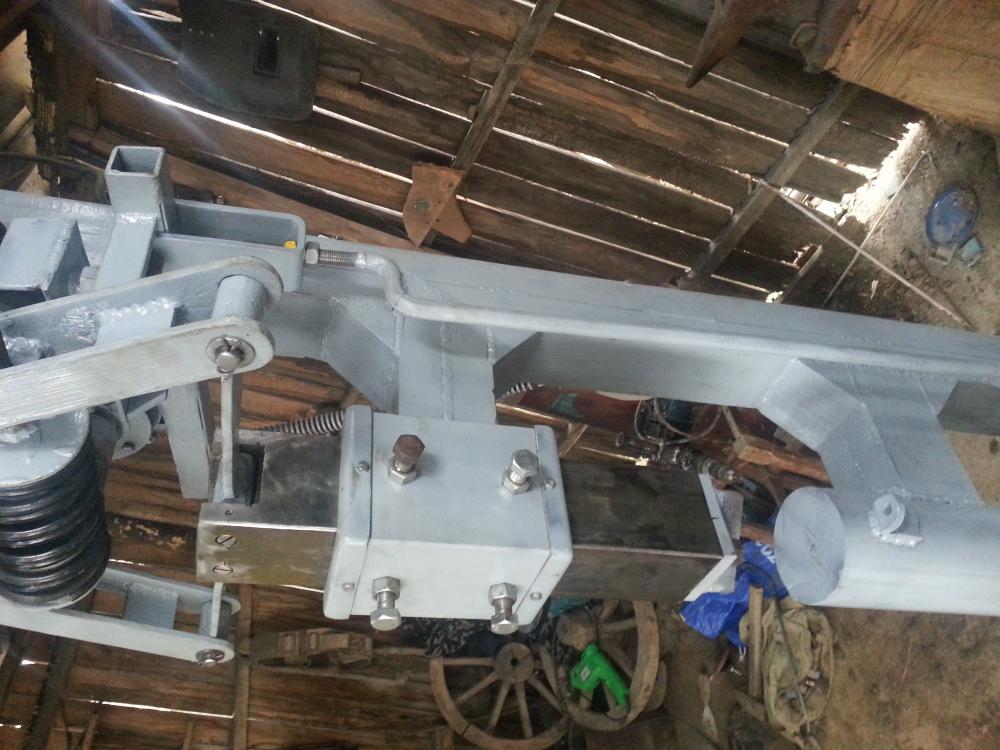
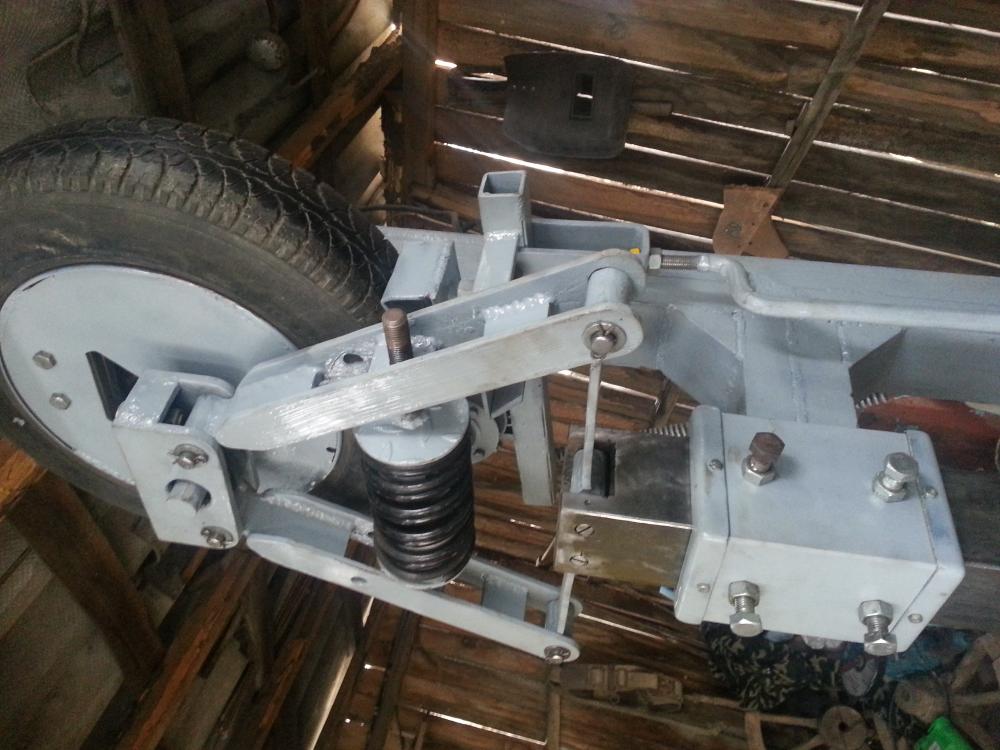
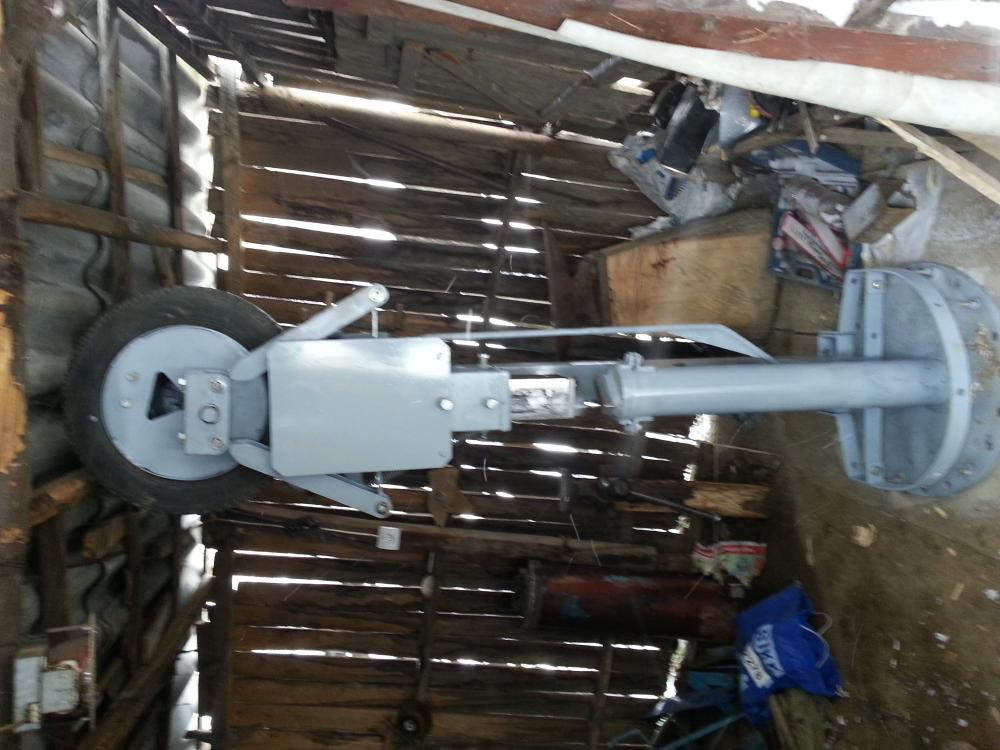
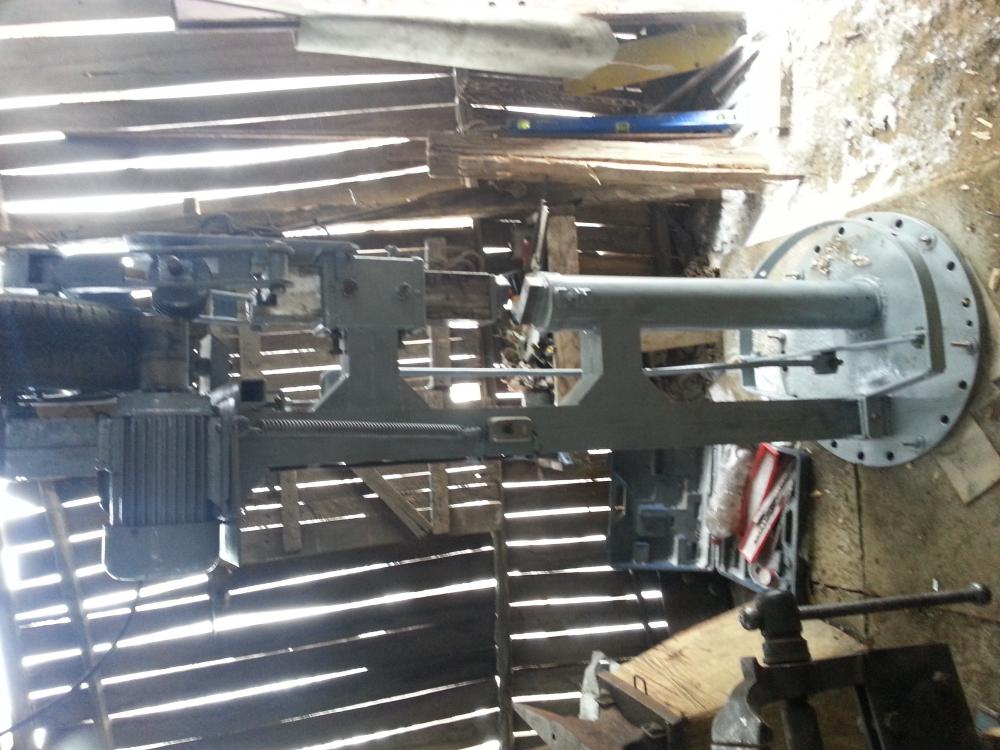
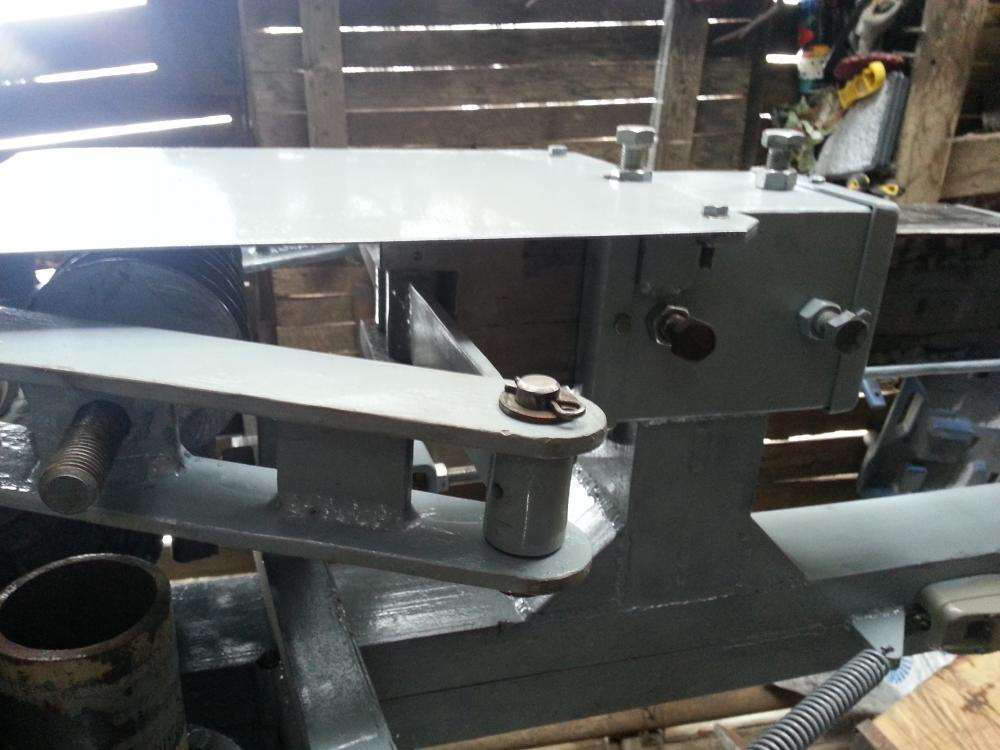
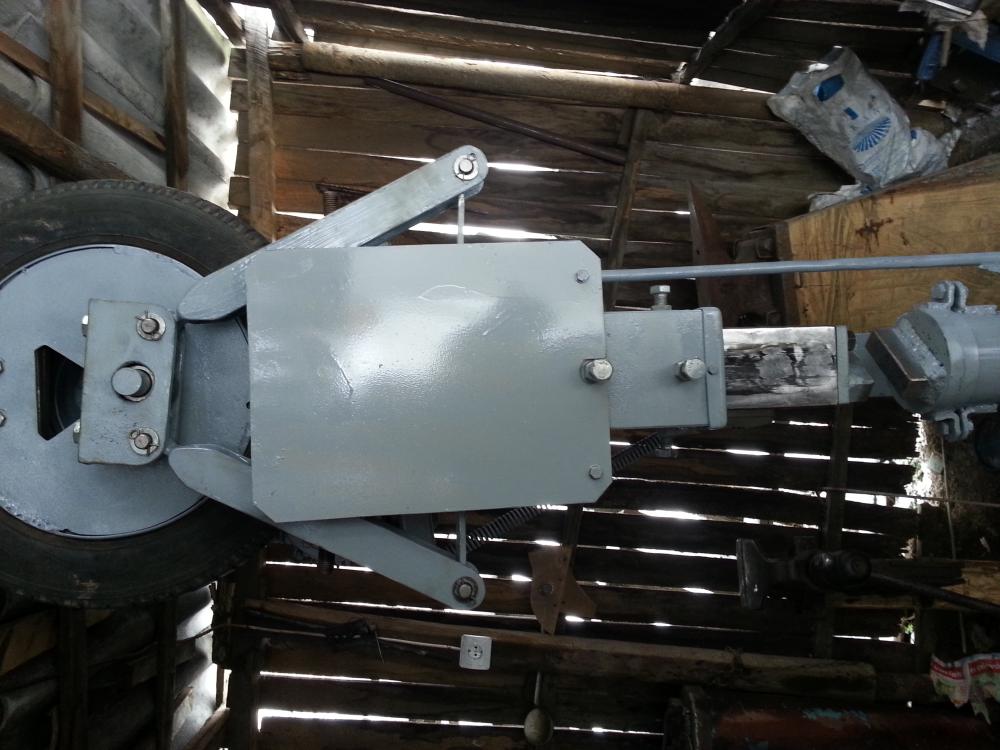
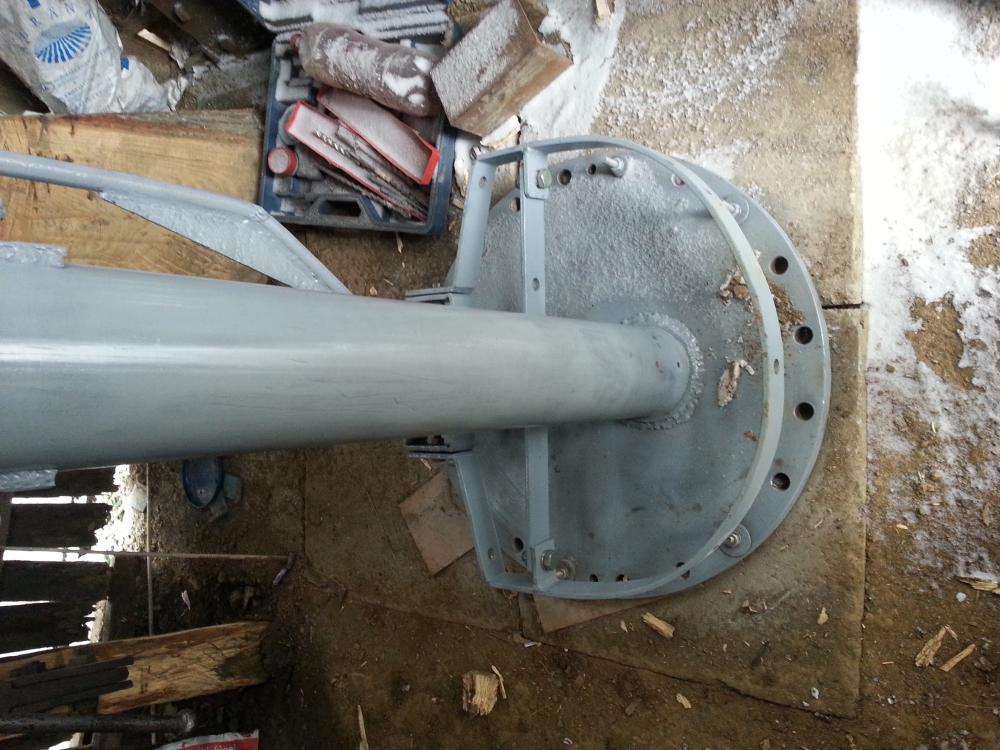
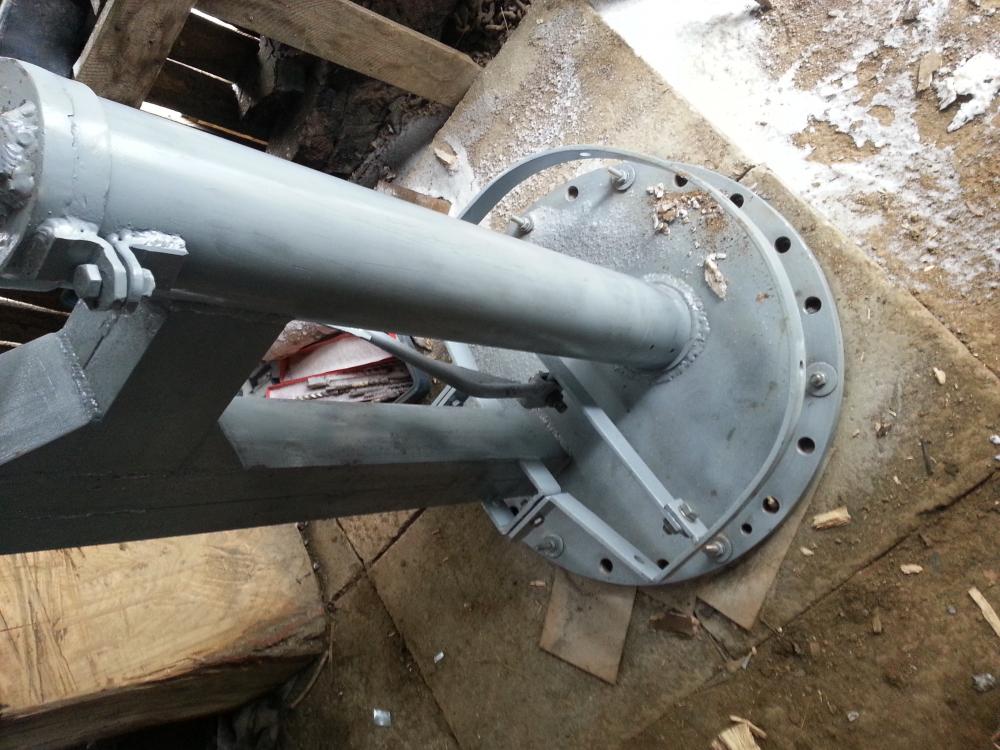
This is my take on the tire hammer! I built it without any plans or precise specifications,I just downloded every picture of a tire hammer that I could find and did a lot if reading on the tire hammer topics.The rest I figured out by myself.I built it only from scrap iron that I had collected for this project in about two years time,the only parts that I had to buy is a bearing and the polyamide wear plates.I also have to go to a machine shop and make a new motor pulley,the one that I have is not machined and has some play in it. This summer I will have to build a new bigger shop, I had to put the hammer inside the old temporay shop to cover it from snow and rain. Here are a few pictures, not very good quality but will give you a idea.


-
-
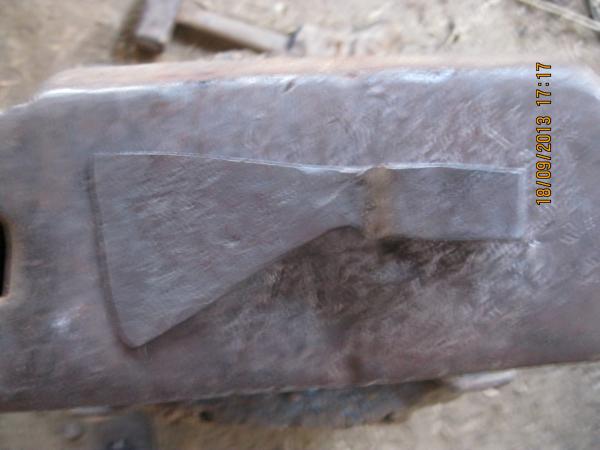
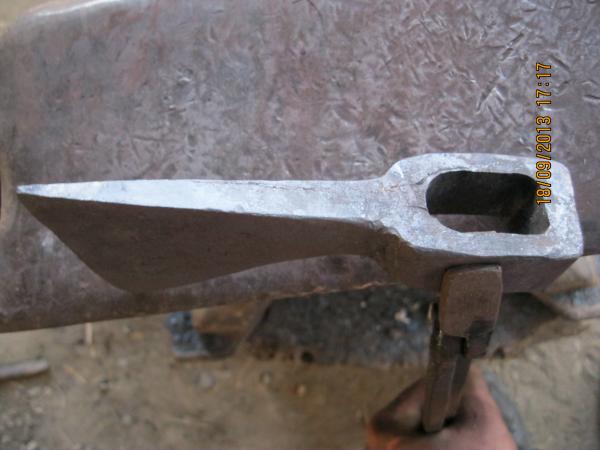
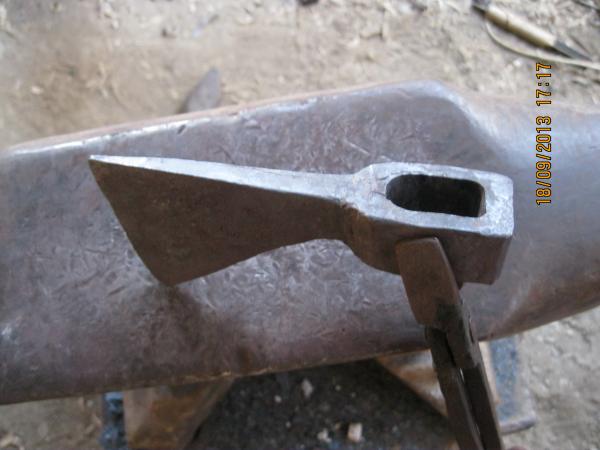
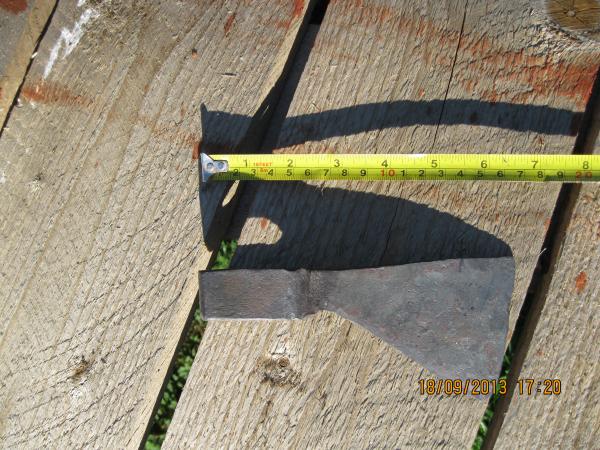
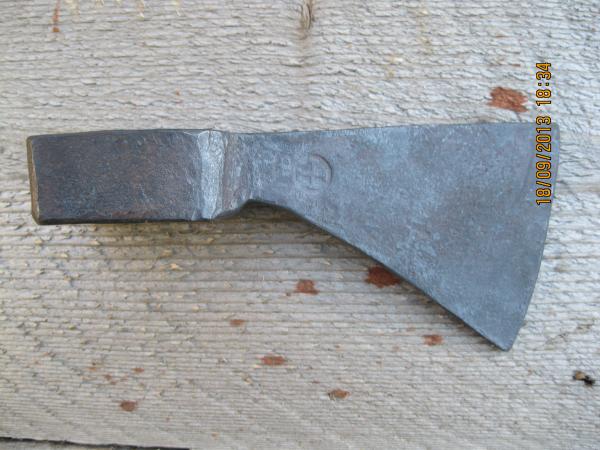
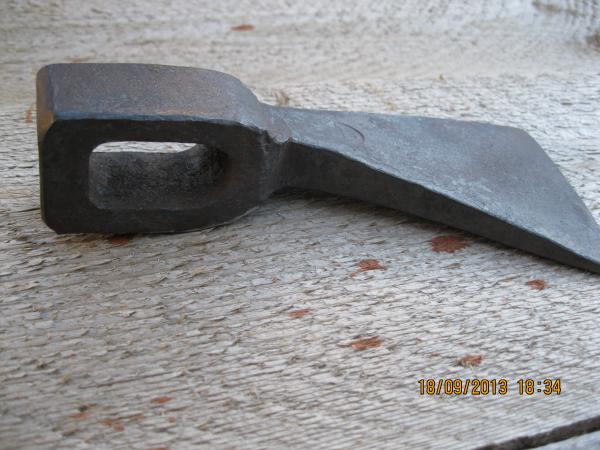
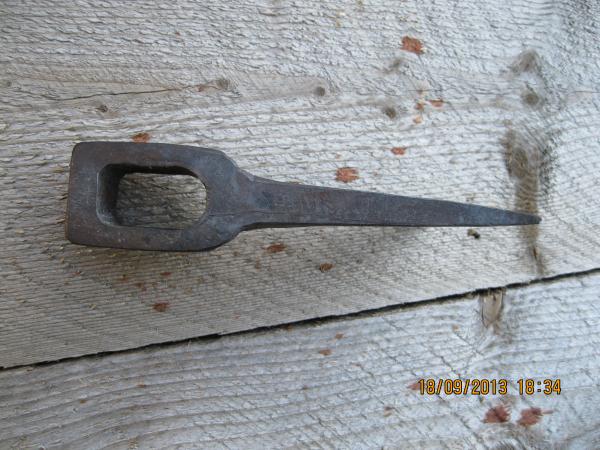
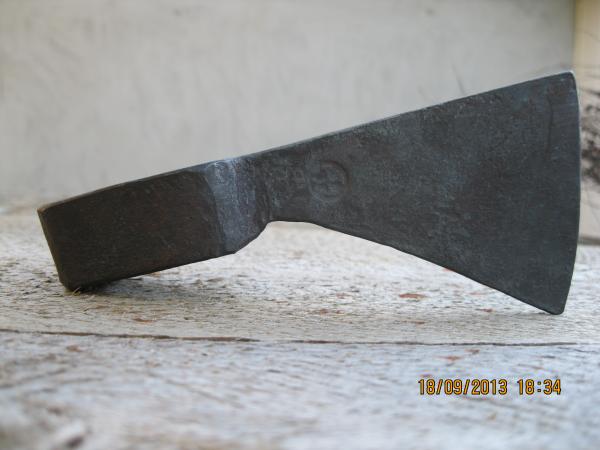
Last summer my uncle came to visit me from the US and saw that I was working on an axe,so he asked me if I cam make him an axe and a knife.Today I managed to finish them and before shipping them I took a few pictures. The knife is 52100 ball bearing steel,the handle is walnut and stacked leather. The hawk is W1 tool steel and the handle is oak wood. Hope he'd like them :D .
-
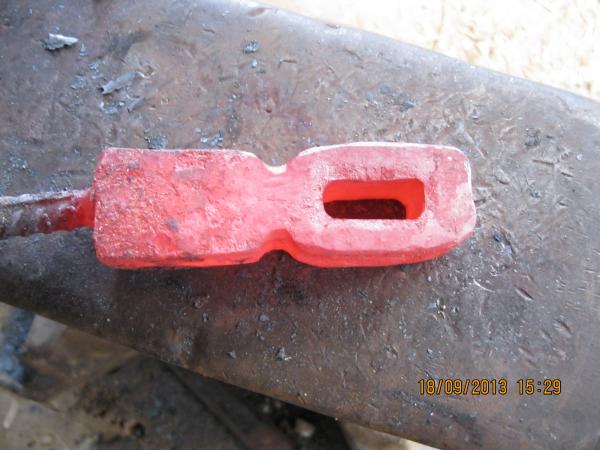
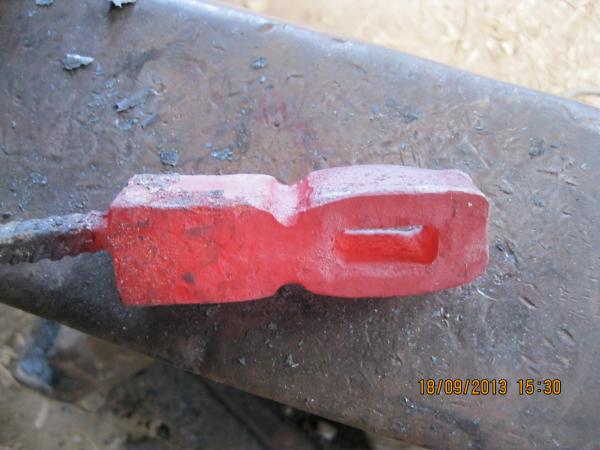
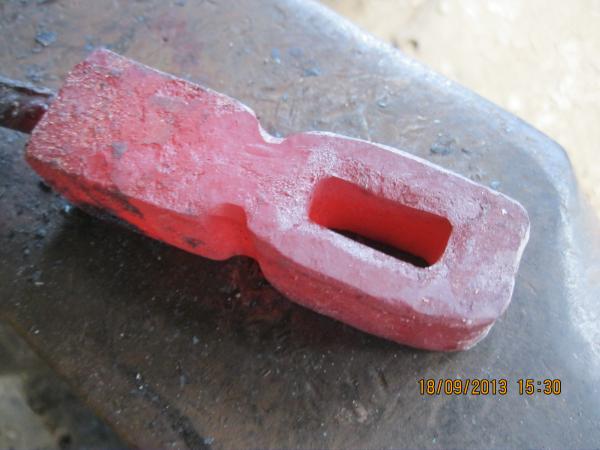
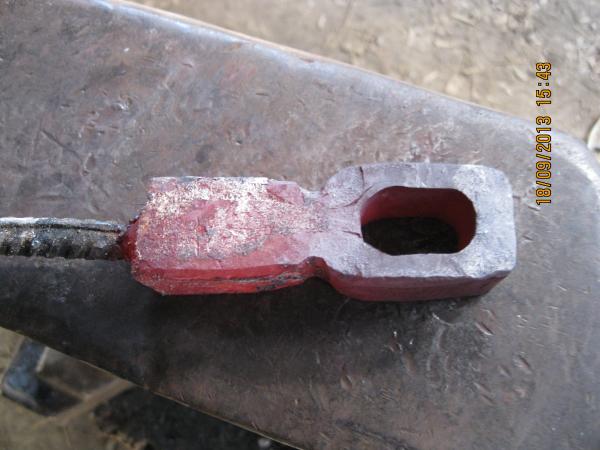
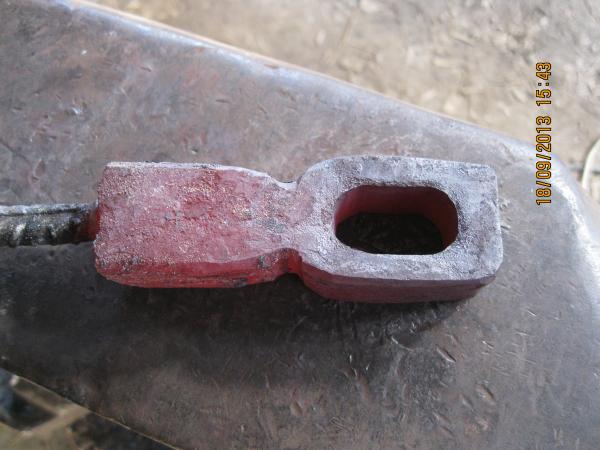
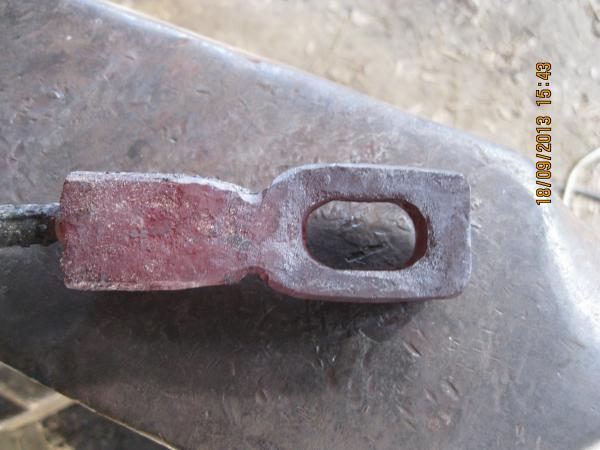
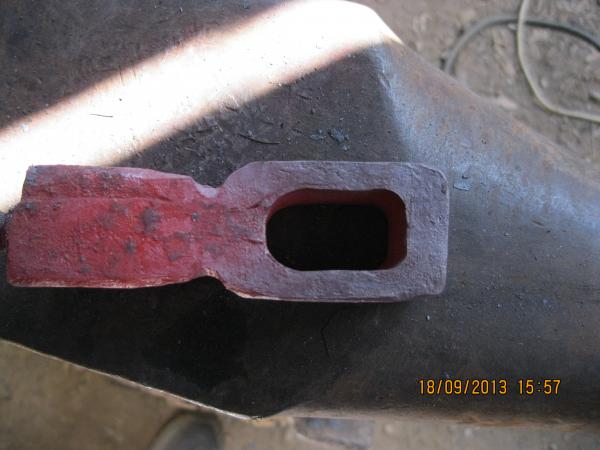
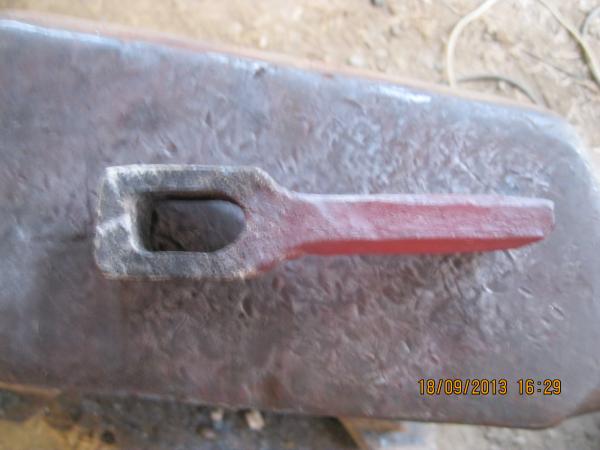
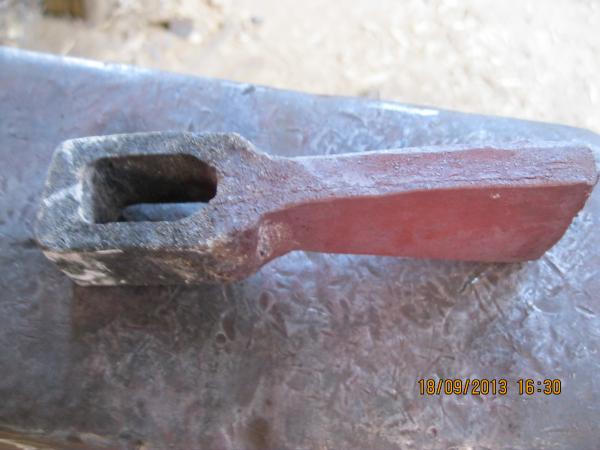
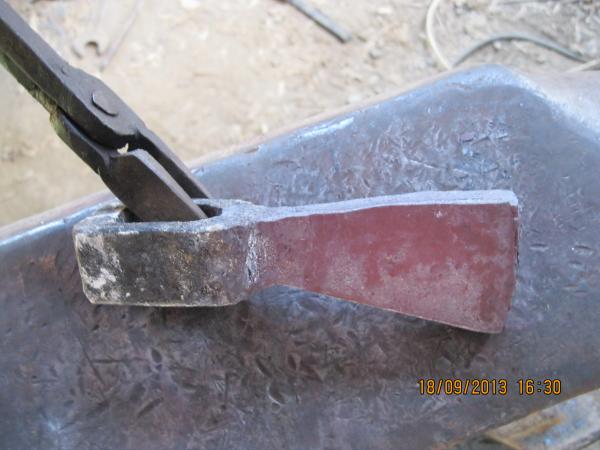
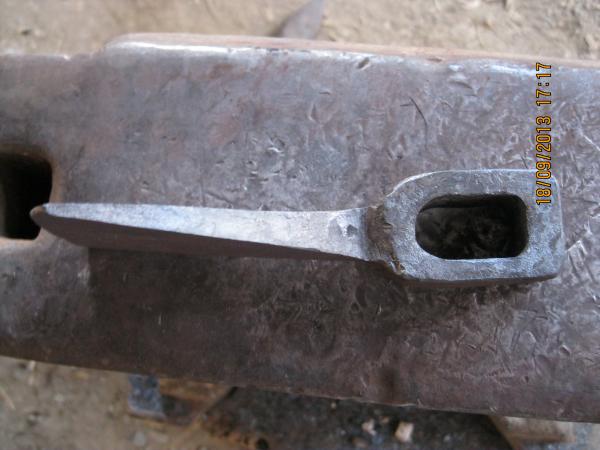
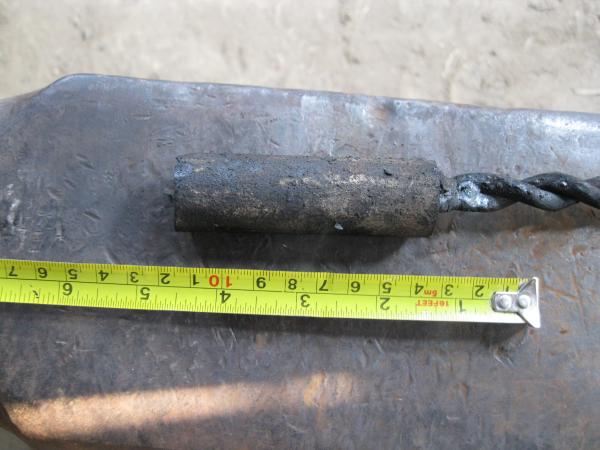
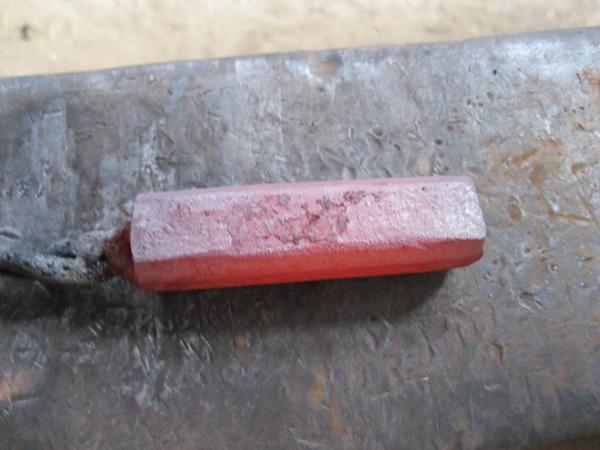
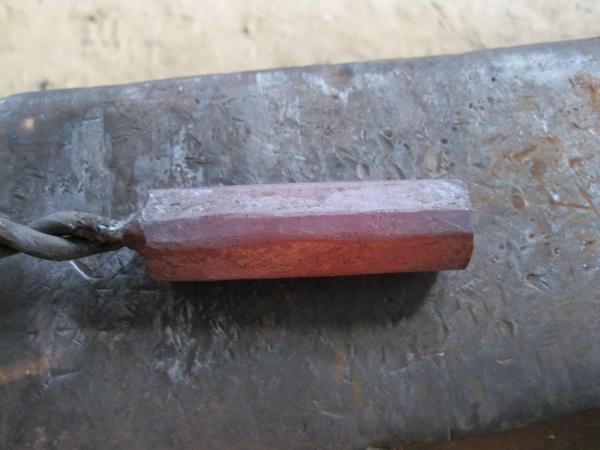
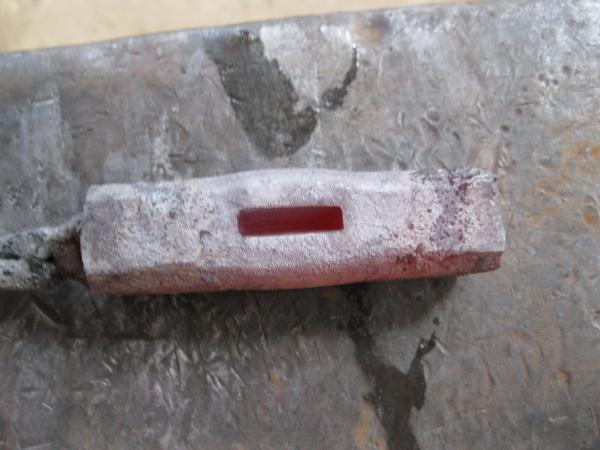
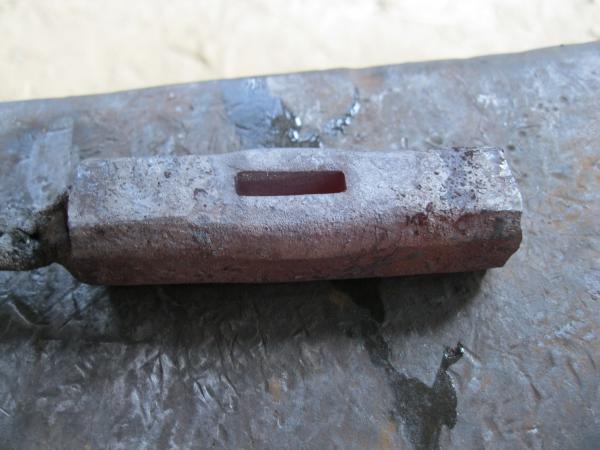
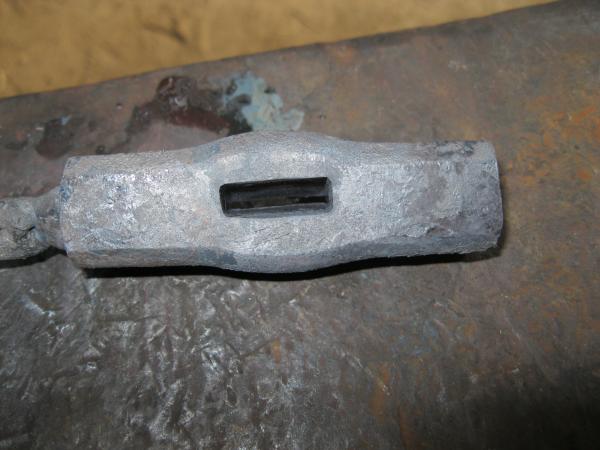
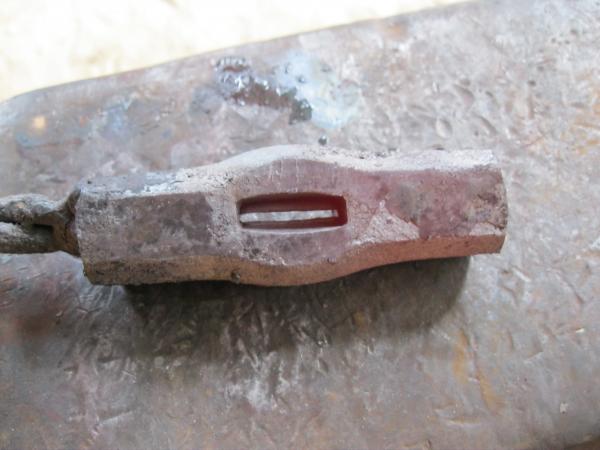
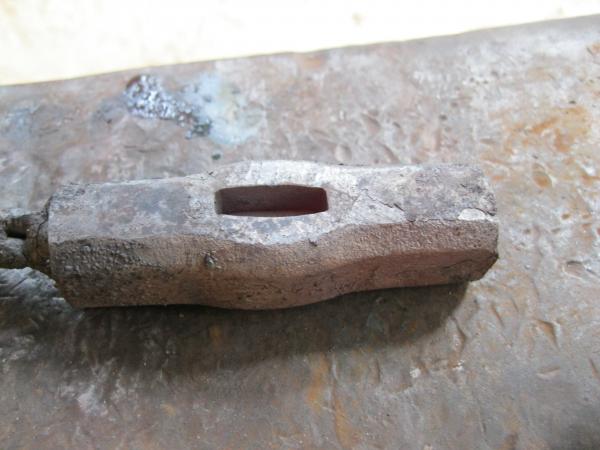
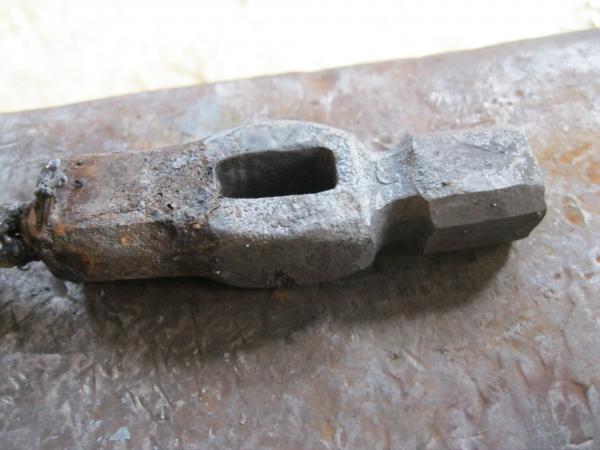
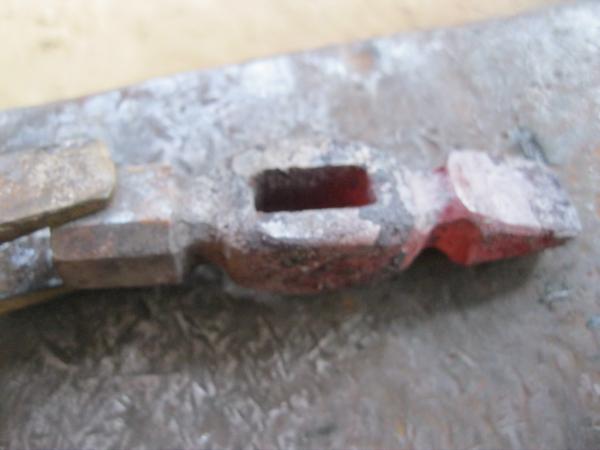
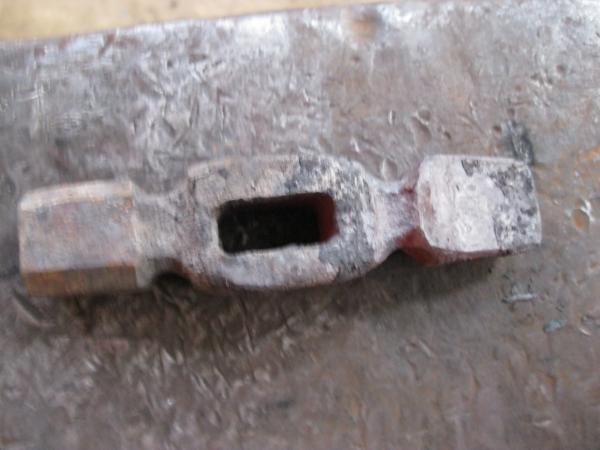
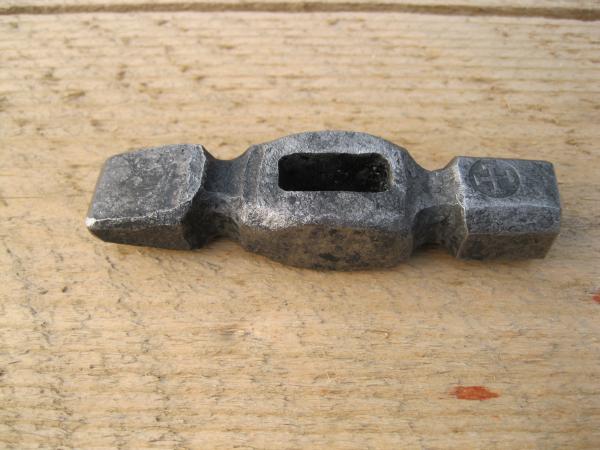
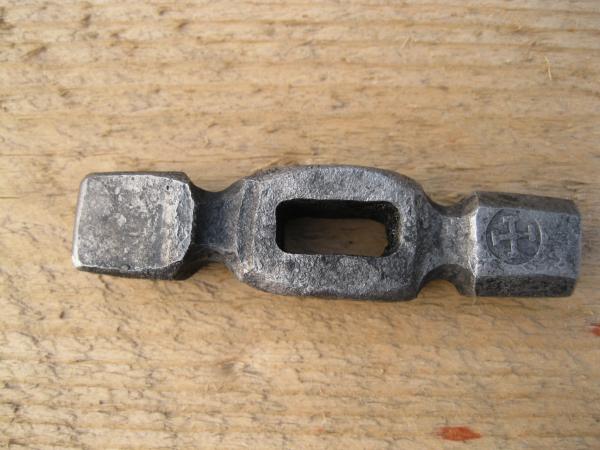
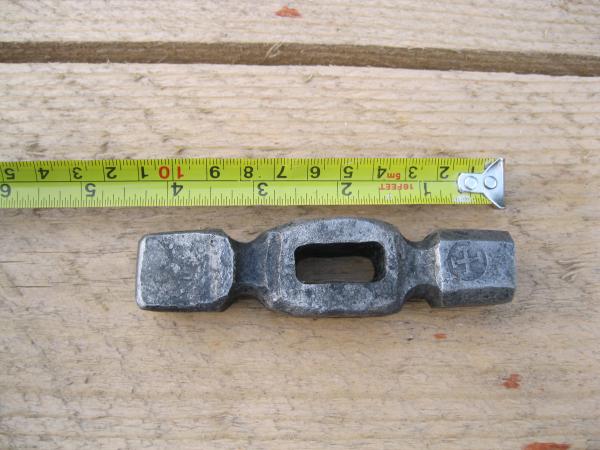
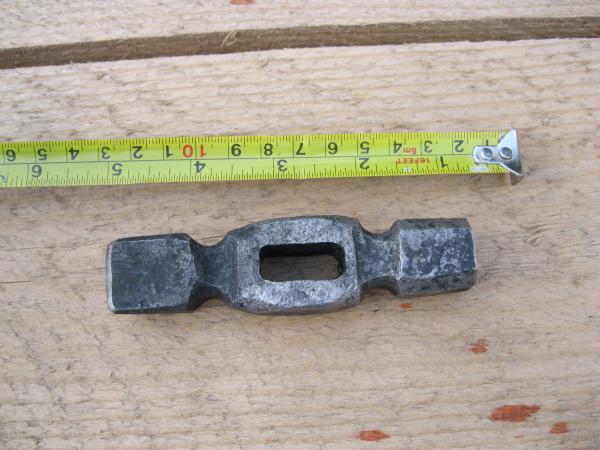
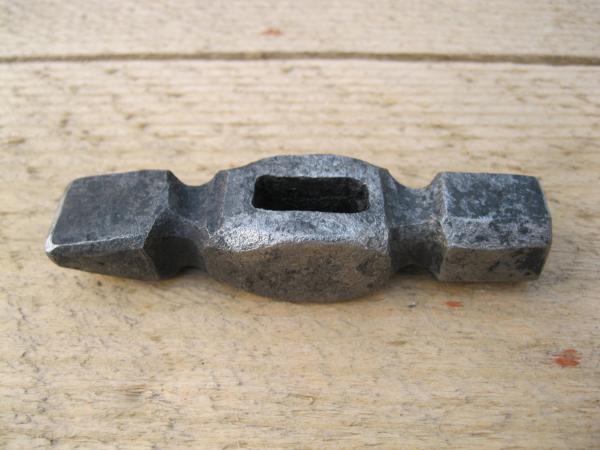
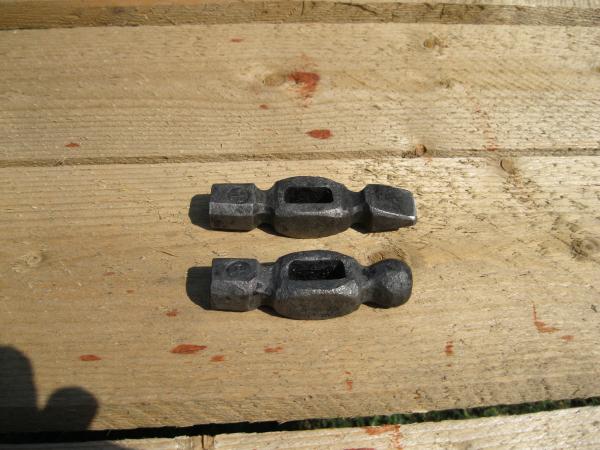
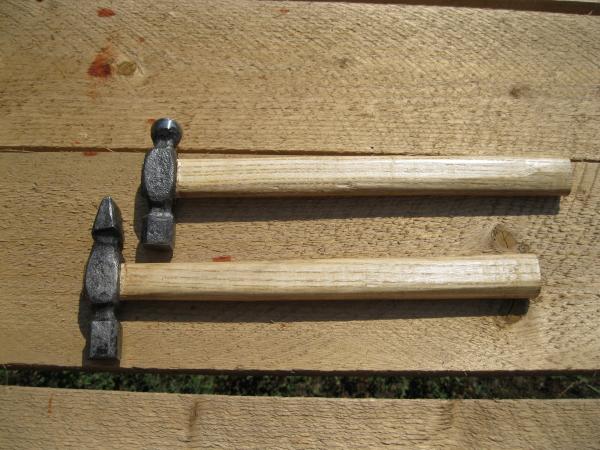
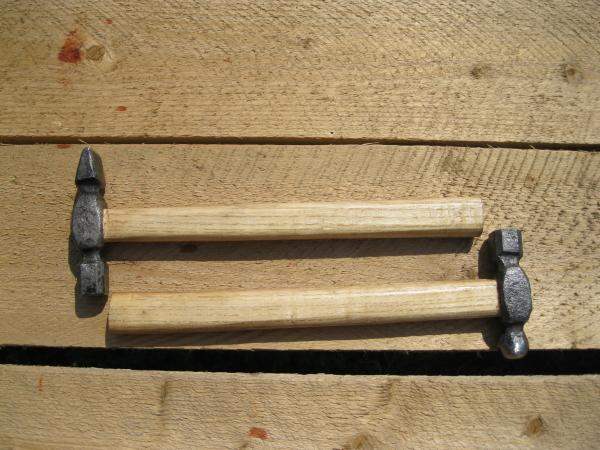
I started with a 8 cm long and 2 cm thick round piece of W-1 tool steel ,the weight of the heads is aprox 200 grams a piece and for the slitting I used the hot set from the other post ,here are a few pics of the tools I used.Nice,it's very close to the original,keep up the good work!Here are some pics with the handle on it.It is forged out of spring steel,no power tools used in the forging process.I started on a round bar,forged on an octogonal shape then i used the slit and drift method for the handle socket and after that I drawn out the chisel point.