

FieryFurnace
-
Posts
2,106 -
Joined
-
Last visited
Content Type
Profiles
Forums
Articles
Gallery
Downloads
Events
Posts posted by FieryFurnace
-
-
Heat rises so even though the metal is in contact with the coals, the main heat goes upward. Also note the fact that you've got fresh air constantly coming in right around the bottom which helps keep things cool. 1/4- inch is not ideal for firepot material. 1/2-inch or thicker s good. However, 1/4-inch plate WILL work!!!!! I built and used a small 1/4-inch plate firepot for several years, and although it is in rough shape now, it can still be used. It has been kept outside for it's entire life of four years.
-
I had one of mine break quite some time ago being mild steel plate welded to s7 dies! It was not a dangerous event, even though it came off while running the hammer at full RPM. I rewelded after grinding a substantial weld groove, with plain mig wire. No preheat and no tempering afterwards. The die still holds up to texturing large square stock cold on the diamond, and it is holding up fine. I fixed it about a year ago.
-
Is this a self contained hammer? I ask because of the double cylinders and I don't see any obvious feed lines running up the wall.
If it is, would you be up for a tutorial on how the air system of a self contained hammer works? I've thought about building one to replace my compressor powered hammer, but I know nothing about the linkage, valves, cylinders etc, and how they work.
-
Ohh yeah! Totally missed that! Thanks for clearing up! That was smart. I hope it holds up well and I certainly like the whole thing overall. Very clean!
-
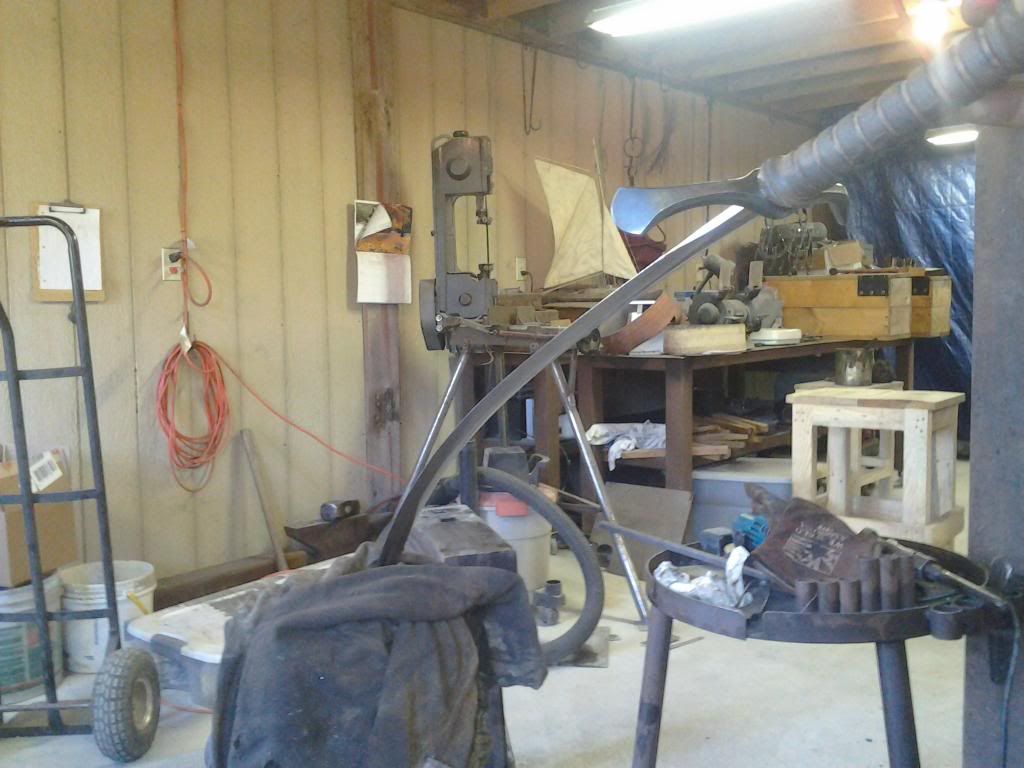
Nice job! I agree with smooth bore. Check back with your customer at the 1-year mark and at the 2 year mark and see if it still holds up. I'd say 5/8 square was a minimum stock size especially for a span that long.
However, it depends on the stove / fireplace and the types of fires the client runs. If your client likes a nice low burning fire in his decorative fireplace just for the "look" it gives, you should be fine. If he's running a serious fire in a good fireplace or stove, you may have issues with bowing in the 32 inch span.
I did a great sometime ago for a guy with a wood stove. He burned through grates about once a year. I made one smaller than the above, out of 3/4 square bar. I've seen him several times over the last couple of years and it's still going strong. The grate is about 4 years old.
-
Impressive job. I use a 7/8-inch outside diameter pipe to wrap my coils around for candle holders. I use an O/A torch which makes things a lot simpler.
You might be surprised at how easy it is to free form a coil like that on the anvil. This will help develop your eye as you estimate diameter. Do the coil while everything is still straight and then do all of the bending last.
Do you have an instructor?
-
Some of the cost is also that you can't go just anywhere and buy a high quality rounding hammer, or diagonal, or straight peen. You are limited to a clunky 3 pound sledge from TSC, a 3.6 pound fiberglass handled poorly ground cross peen from Lowes, and the common-place ball peen. There is nothing wrong with any of these hammers, but they simply do not offer the variety of selection, and are nowhere near the quality of the more pricey hammer.
You CAN go cheap, regrind the faces of the hammers you buy, and have some service-able tool. If you are just starting out, I would recommend that!
If you've got a couple of years of experience under your belt and you are making more than s-hooks and leaves, you might want to invest in a more expensive, high quality hammer that is going to feel much better in your hand.
And there is always the possibility that you just happen to have $130 to spend on something, and in that case, sure! Buy the hammer.
Where are you looking at getting a rounding hammer for $130?
-
At 5:27 you brush the flux off the face of the anvil, palm down using your finger prints. May I suggest that you use the back side of your hand or as Bruce Wilcock of the Shetland Isle UK does use the corner of your apron.
Palm down if you run a splinter or metal shard into your hand you are done hammering for the day as it hurts to even hold the hammer. Palm up you can still grip the hammer and finish a days work. The apron is best as no hands are put into harms way.
And oh yes, I like the shirt (grin) Thanks for wearing it for the video.
Hey Glenn! I think that IFI shirt is actually mine that I outgrew during Young Smiths 2012 and passed on to Alec. :D
-
Interesting idea!
-
Interesting design.
I like a good swing arm treadle hammer. There isn't anything really wrong with an inline, but they seem generally more stiff.
Here are a couple things I would point out. Your springs are not 90-degrees to your treadle. I would think that a 90-degree line of pull from your treadle, would give you maximum efficiency in your spring energy. (I could be wrong, I'm not engineer.)
The second thing is, the more your stretch a spring the more the resistance increases. If your spring motion is kept very little, the amount of resistance it produces is more consistent. (I.E. The treadle is not harder to push the farther down it goes.) This one is from personal experience. The inline treadle hammers and a lot of swing arms have the springs attached to the treadle just behind the anvil. On my treadle hammer the spring is attached just in front of the hammer's backbone really close to the pivot point of the treadle. In this way, the spring only flexes a very little bit. This requires a much heavier spring. I used a 16-inch snow plow spring made from about about 3/8-inch diameter steel. You can operate the treadle with your small finger. Mine is lighter as it is build for reppousse work, but you could use two or even three springs if needed.
http://www.iforgeiron.com/topic/26380-my-new-home-built-treadle-hammer/?hl=%2Btreadle+%2Bhammer
-
Lets see how the cherry holds up on the sledge.
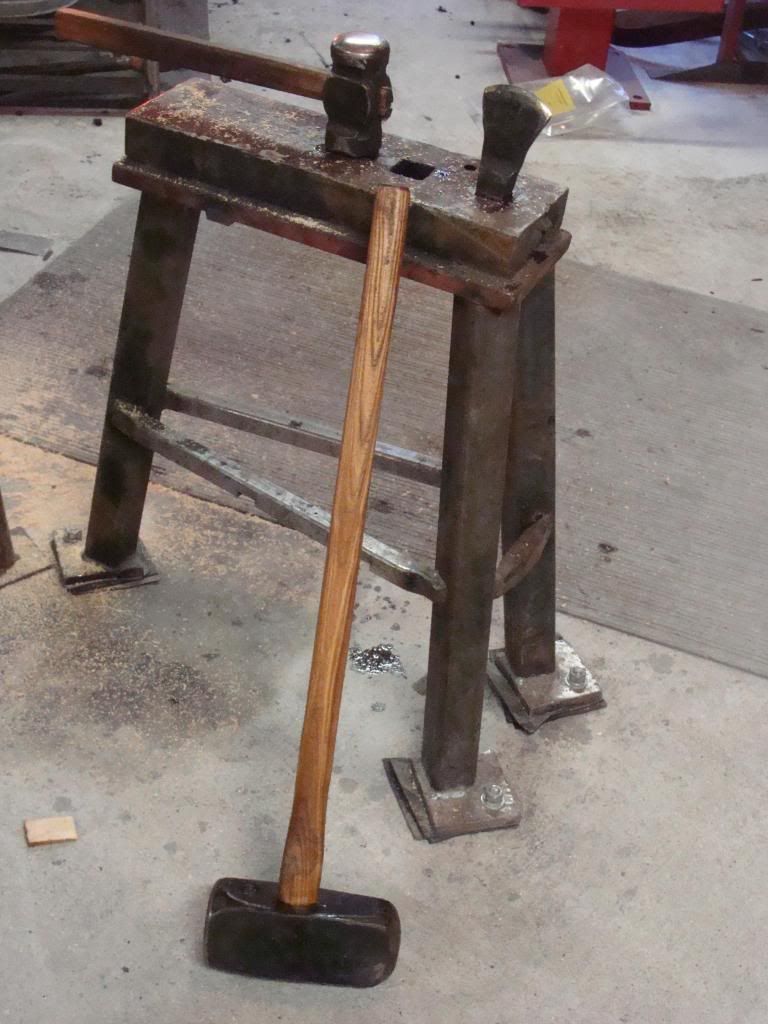
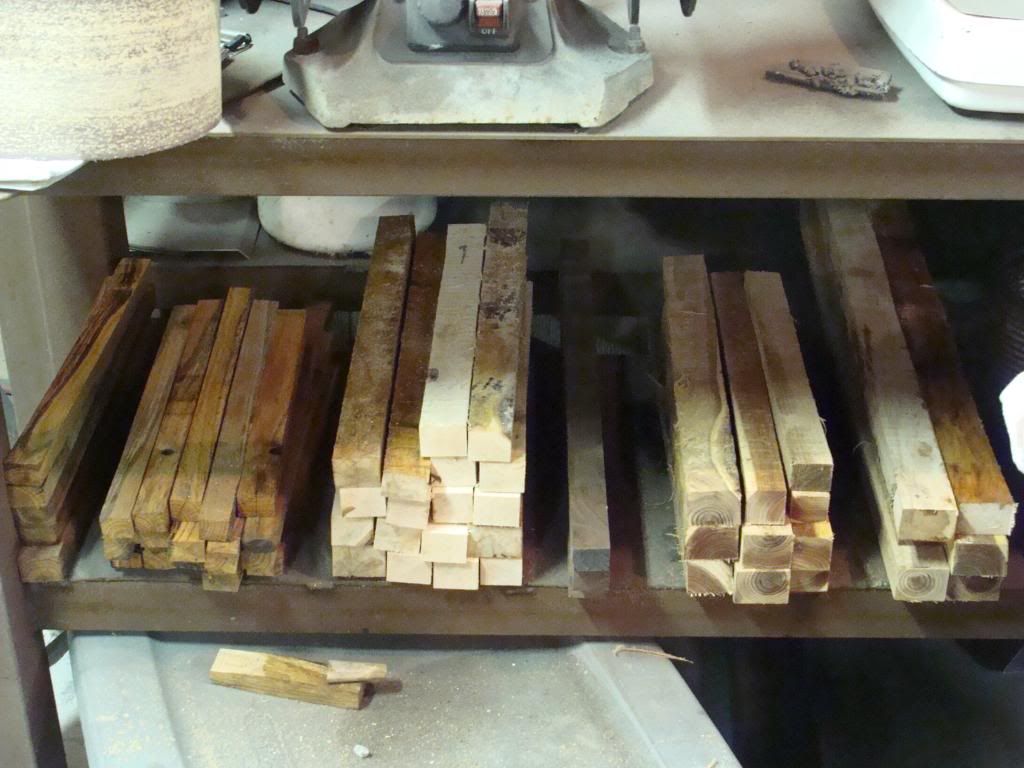
My current handle supply.
-
I have maple in my Brazeal rounding hammer that I forge everything with. It's still going strong and it's been in there since last march. That's on a 4.5 pound hammer. The handle on my 3.5 pound Brazeal hammer just broke about a week and a half ago, and it was the same wood cut at the same time.
I'm not sure what is a "good life" out of a forging hammer handle really though. Maybe a year is good, maybe it's not. I'll let experience speak here.
-
So today I spent a few hours working on punching and drifting.
I seem to have a problem after I get the hole punch, and try to drift something through it (Using a pointed 1" peice of round stock) It seems like the metal starts to get "pulled" down while I'm drifiting. On the videos it shows you get a nice "punch" in the metal - then drive the drift through the pritchel hole. It goes from my stock getting "Stuck" in the hole, or all the metal tears on the way through... Watching videos it doesn't seem very difficult, I am assuming I dont have my metal hot enough, but its "yellow" when I start, and it cools off very quickly as im driving.
can anyone offer some tips?
ThanksCheck out the "slitter geometry" thread that Wesley Chambers posted.
What size slitter are you using, and what size drift? Are you using an opener before drifting?
Ideally you want a clearance hole as close to the same size as your drift as you can stand. I.E. It will not work so well if you try to drift a 1/4-inch hole over a 1/2-inch prichel hole. It does not offer enough support.
-
Thanks guys! I'm really happy with it although, there are some parts that aren't so hot....like the handle attachment and stuff.
-
Frosty! I'll get back with you when they break! :D
-
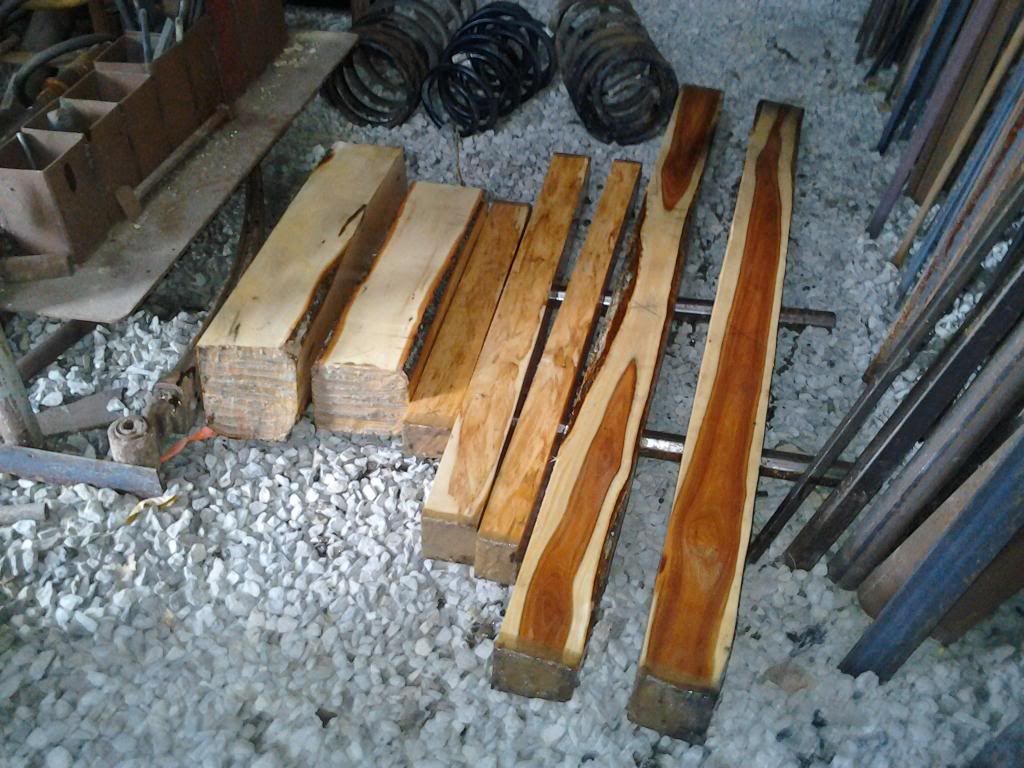
I've just been cutting some handle stock!
I needed some handle material for my sledge hammer, and I had a couple pieces set aside for hand hammers as well. I've got the logs blocked out, but the tracking tire on the band saw busted, and will take a couple hours to replace. So I just waxed the ends and oiled the faces and will finish cutting later.
The stuff on the left is all maple and the last two pieces on the right are cherry.
-
This is a sort of mini-sword I made out of a drop piece of leaf spring. It's got an 18-inch blade and is 24-inches overall. It has a very comfortable feel to it. There are some issues with the blade, but generally it has a nice taper to it for the length of the blade. The handle isn't anything fancy. It is just turned walnut, attached via, epoxy. The tang is notched for better grip on the epoxy. The transition from the blade to tang is rounded instead of sharp. The hand guard is spring steel, annealed, and is pinned on. The balance is about 2 inches in front of the guard.
It weighs a tiny tiny bit less than 1-pound
(The blade returned true after each of the stress bends in the vise.)
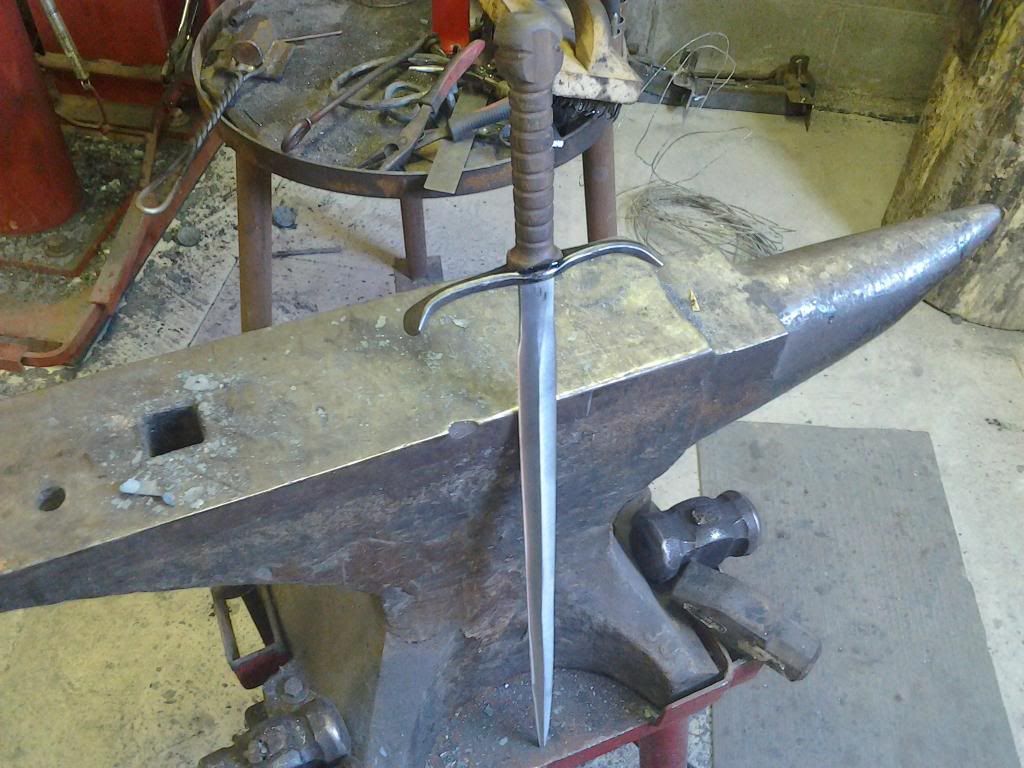
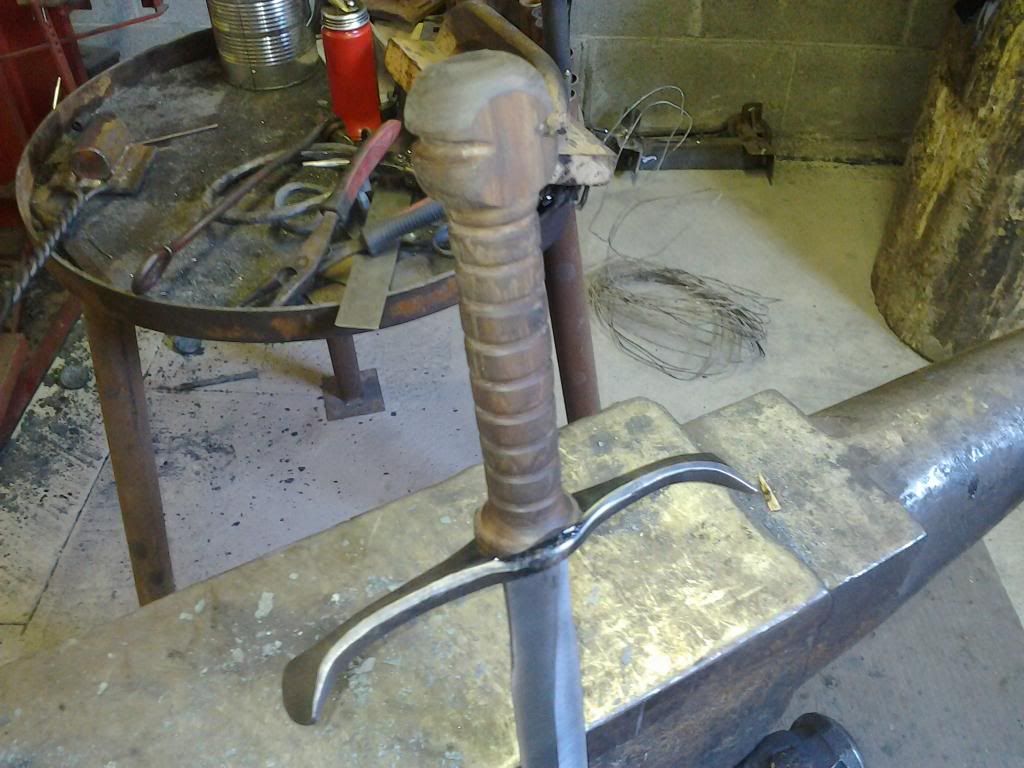
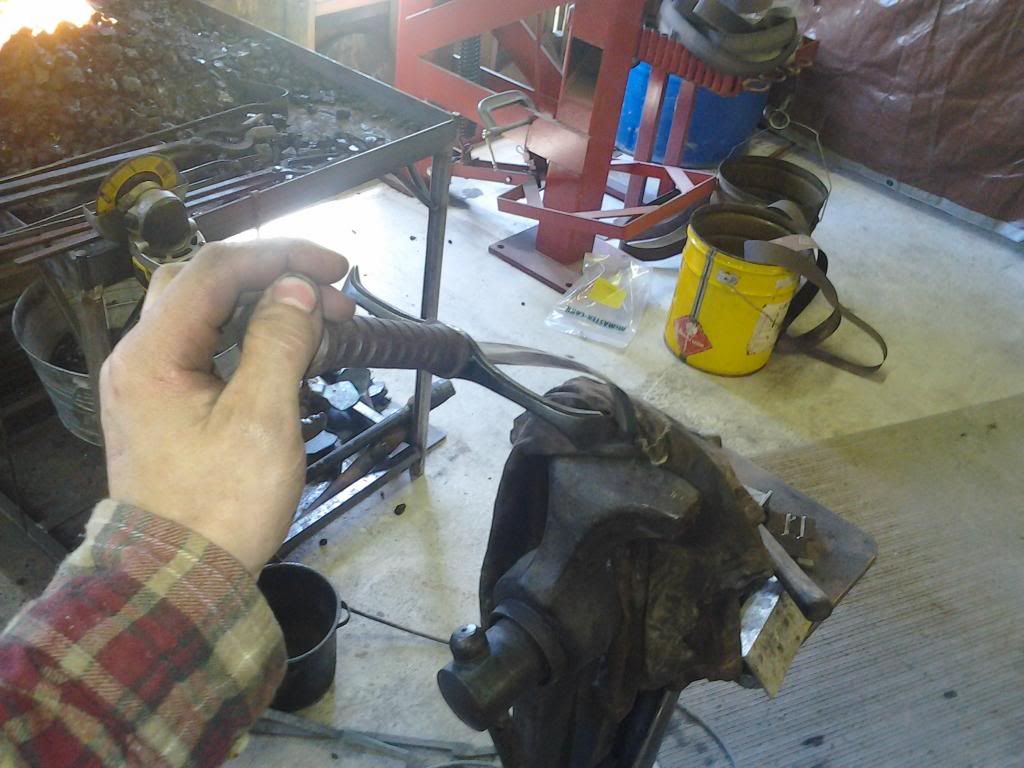
I'm no bladesmith but I'm happy! I just need to cut out a wooden scabbard now!
-
-
Wish I could make it but I'm sick! Keep us posted and put me on whatever notification list you have. My email is blacksmithdave@gmail.com
-
I always wear safety glasses in the shop and require anyone in the shop to do so as well. If I"m grinding something with excess slag, or with the likelyhood of ricochet, I grab a pair of full goggles.
Good points about the dust. I may go ahead and add a shop-vac dust port on the bottom just bellow the belt. It's kind of an ordeal to get stuff in/out of the shop, because my shop is behind the wood shop. I am wanting to add some shop-built, air filtration systems sometime this year to help things stay cleaner in general.
The motor being open is something I wondered about. I may see about building a cover. I've got some thin sheet metal that I could bend to shape in 30 minutes or so.
I'm hoping to use this one for a year or so, sell it, and build a much larger one.
-
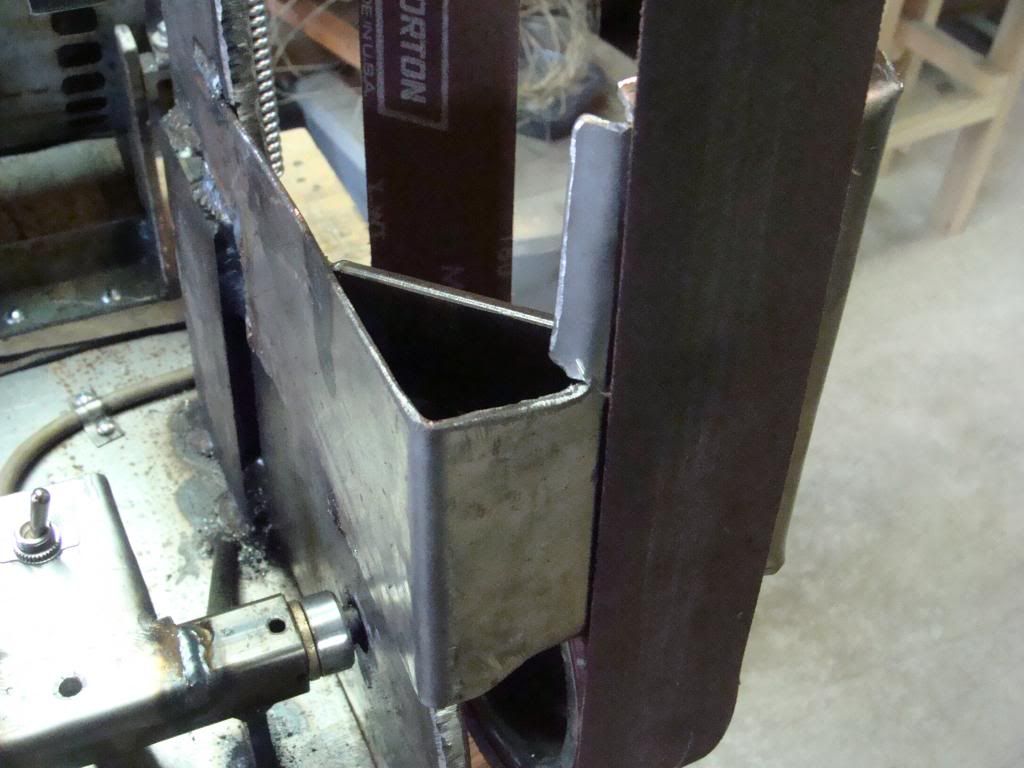
Oh here are a couple more pics I forgot about!
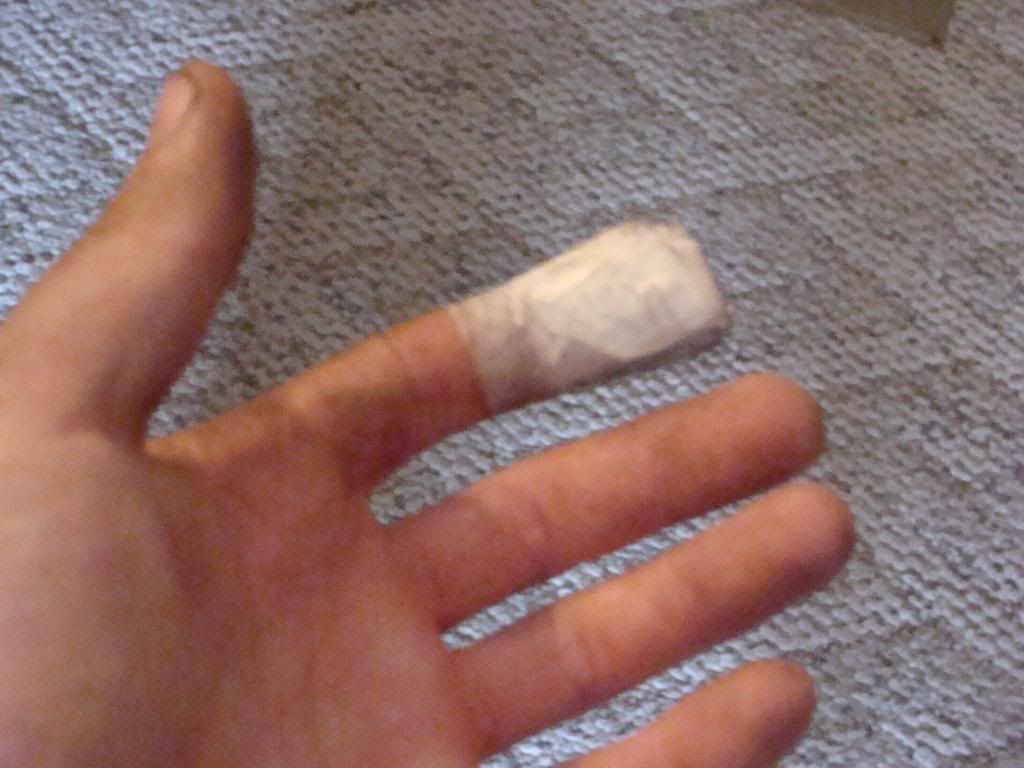
I used self tapping screws to attach the small home-made electric wire brackets that hold the motor feed wire in place. One of the screws grabbed the bracket and spun it around (I was using an electric screw gun,) and it slit the end of my finger open for the entire finger width.
-
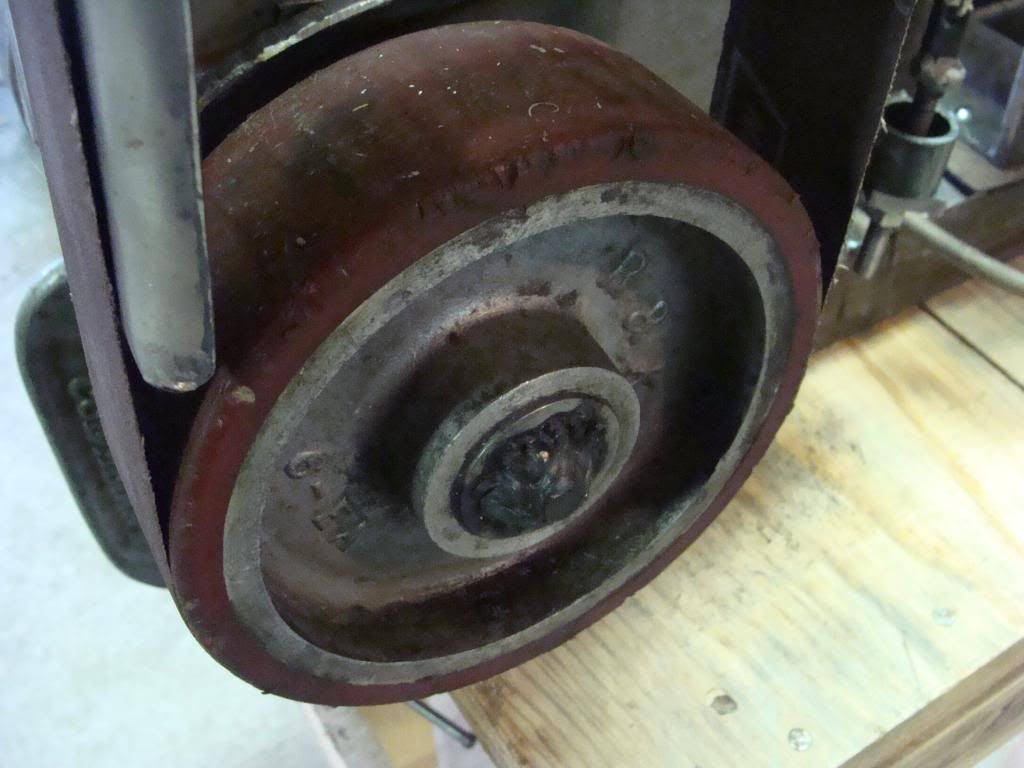
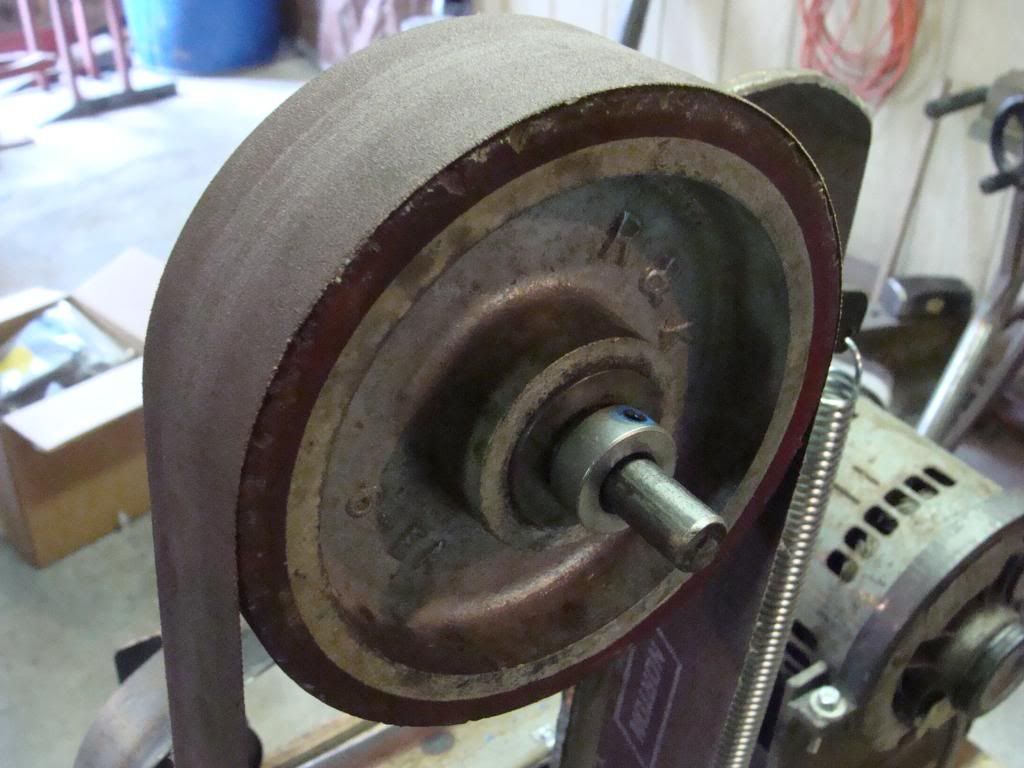
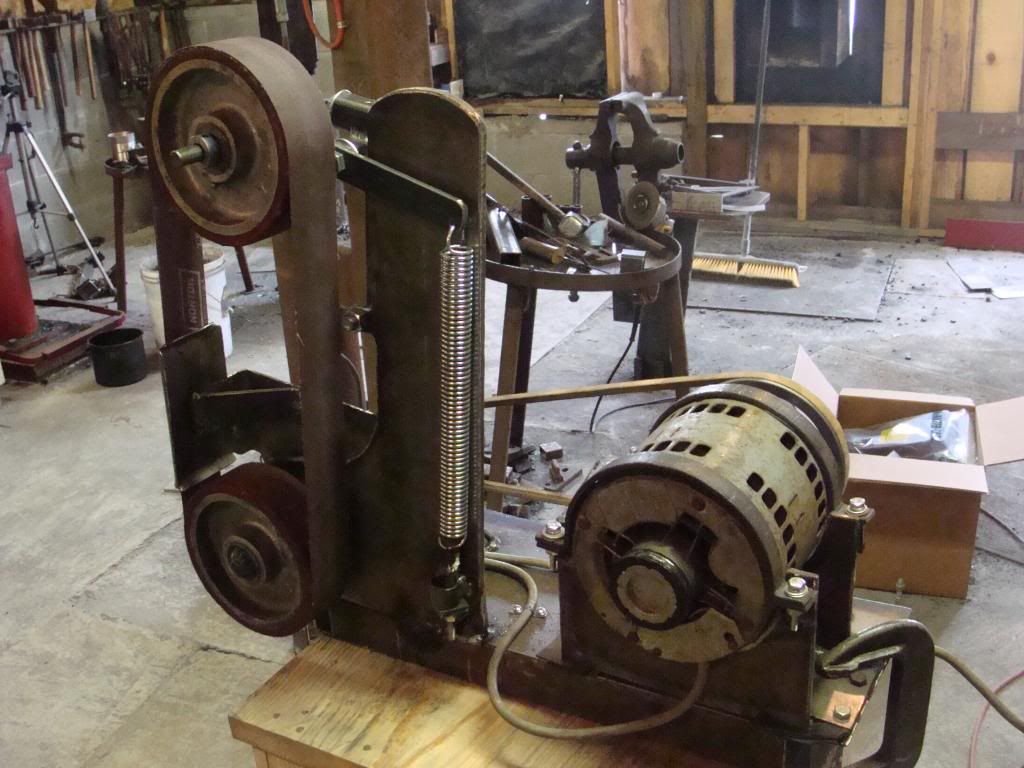
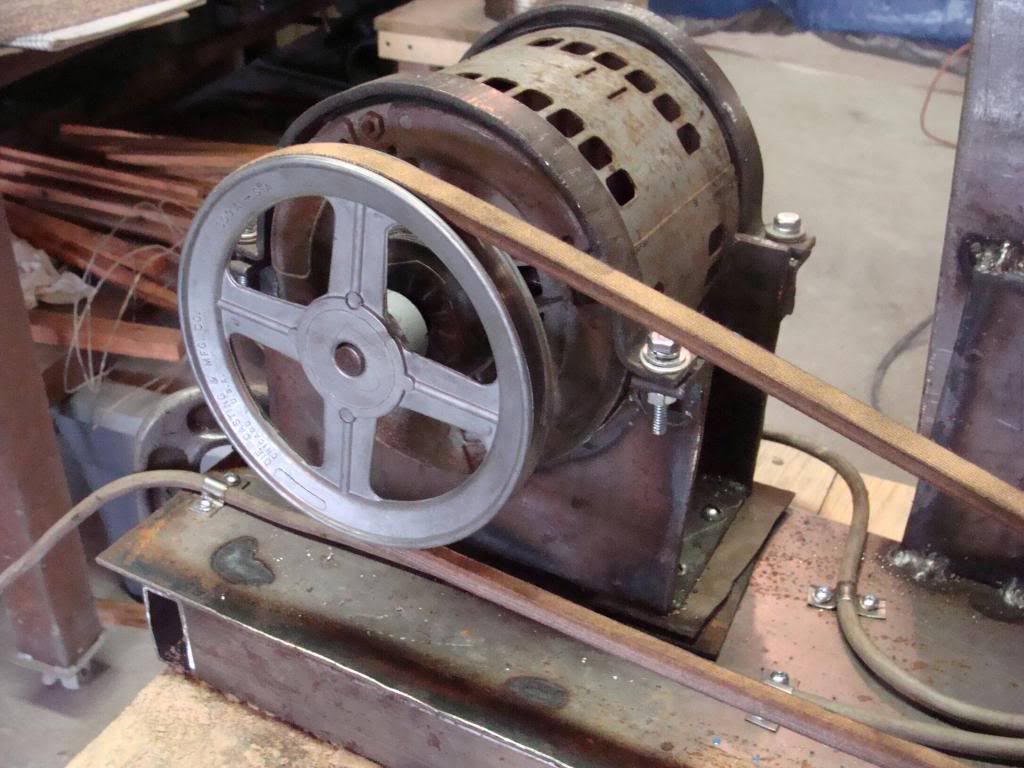
I built myself a 2x48-inch belt grinder. It is run off of a 3/4-horse power, 1725 RPM motor, using an indirect drive system. I used a larger pulley on the motor, and smaller on the drive shaft to increase the belt RPM to 3500. That seems to be the common RPM used on metal-working belt grinders.
I used mostly scrap steel in the shop.
I purchased various bronze and plastic bushings, springs, bolts, toggle switch, and the drive belt new.
My contact wheels are caster wheels purchased for $7 each at my steel yard. They are used 5.5-inch casters. They work a charm.
Total expense is estimated at $70-$80 including the steel. I had the motor already.
It seems to run great. I haven't really used it yet as it still needs mounting feet, and a designated work table. It's loud! That's its down-side.
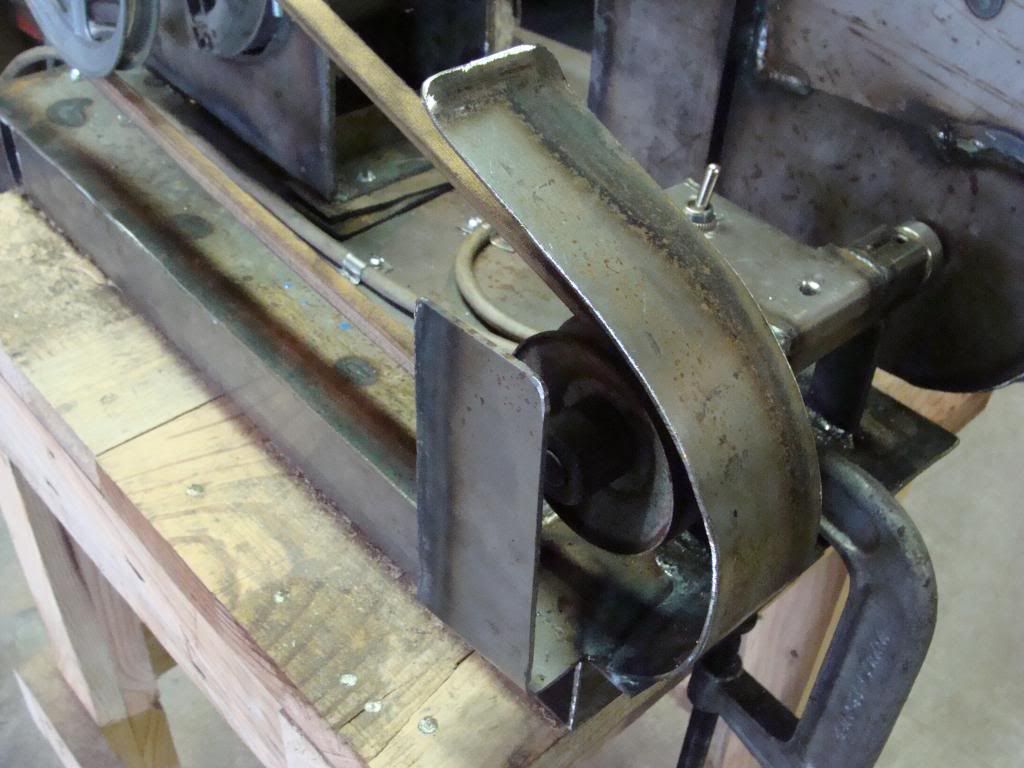
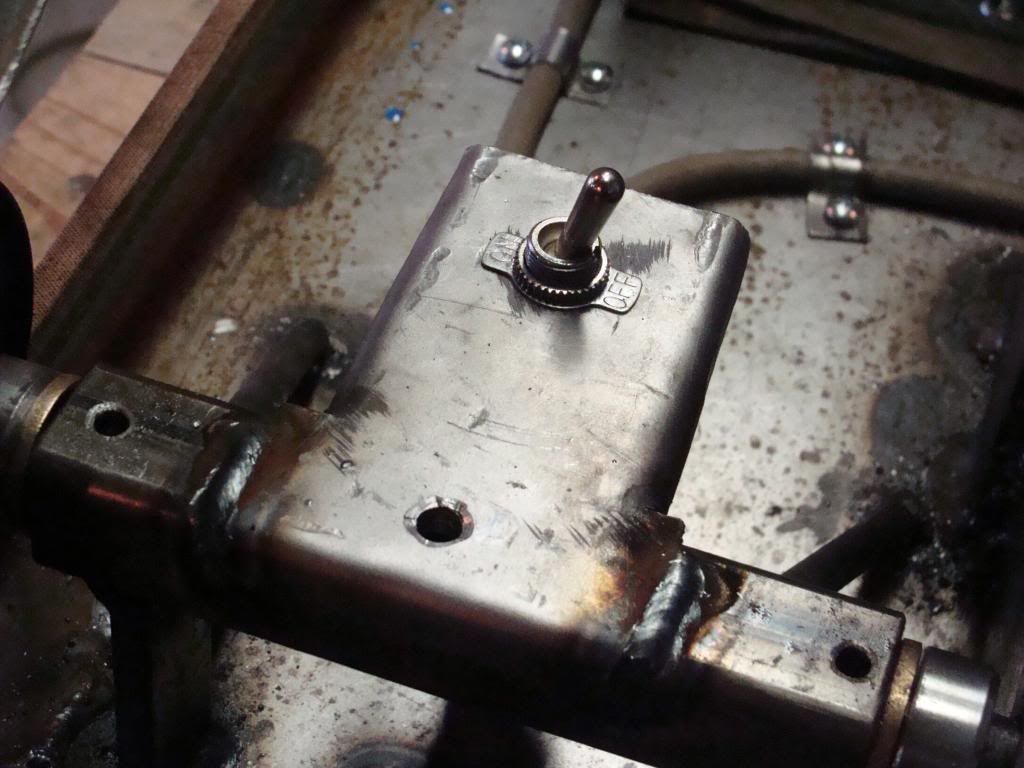
It's complete with tracking and belt tension control. There is also a backing plate behind part of the belt so that I can use a hard or slack belt. I also rewired the motor to an on/off toggle switch.
Enough said! Here are the pictures.
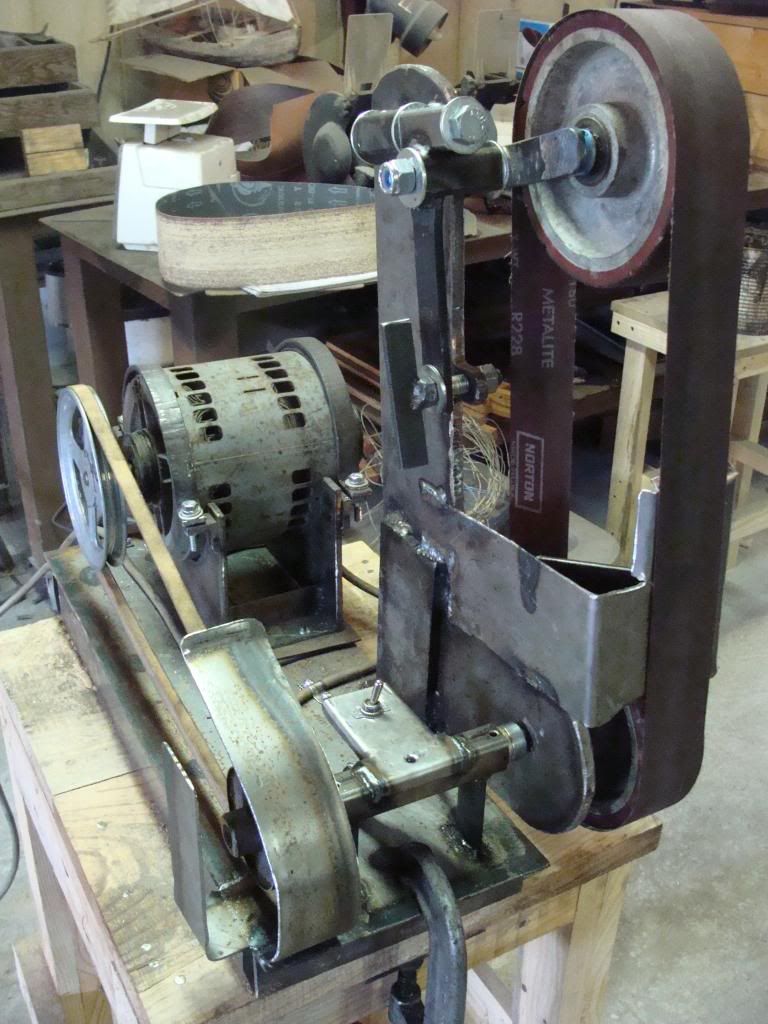
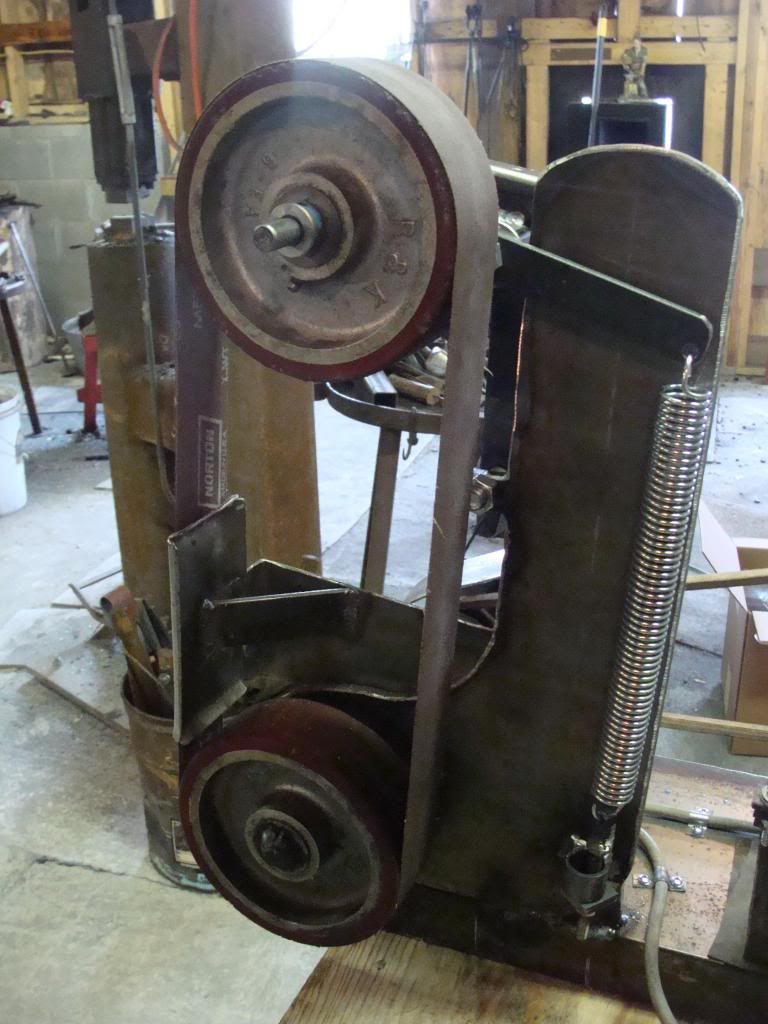
I figured it'd be smart to put a belt guard upfront to keep a shirt sleeve or finger from getting sucked in. I can still remove the pulley and belt without trouble. The shaft comes out the other direction so that's not an issue.
Switch!
The backing plate!
It took about two days to make, quite a bit of head scratching, and some re-cut parts. I got the idea from doing a google image search for homemade belt grinders.
-
Thanks Harold! *Pulls the to-do list out, turns to page 239 and scribbles notes.* :D
-
I make mine out of 3/8-inch with 12-inch sides and 1/2-inch with 14-inch sides. Women like the smaller one as it has more chime. Men like the big 'un because it has more ring.
Good job!
Trunnion swage block
in Swage Blocks
Posted
These can currently be purchased new but I'm not sure where right offhand. John c Campbell folk school has a new one in their shop and I've seen a couple of other ones. I think someone had them for sale at ABANA in 2012. They are handy blocks, but I do wonder how much heavy work they would take.