

FieryFurnace
-
Posts
2,106 -
Joined
-
Last visited
Content Type
Profiles
Forums
Articles
Gallery
Downloads
Events
Posts posted by FieryFurnace
-
-
Sounds like they'd make neat vines on forge welded trees!
-
This will be one fiery furnace... warming up lovely dutch hearts.
LOL That's funny! I've had a bit of experience with a couple young ladies (or rather young lady's dad's) and I wouldn't count on it any time soon! LOL
Phil! Nope I didn't! Just going for the head first dive approach this time. :D
-
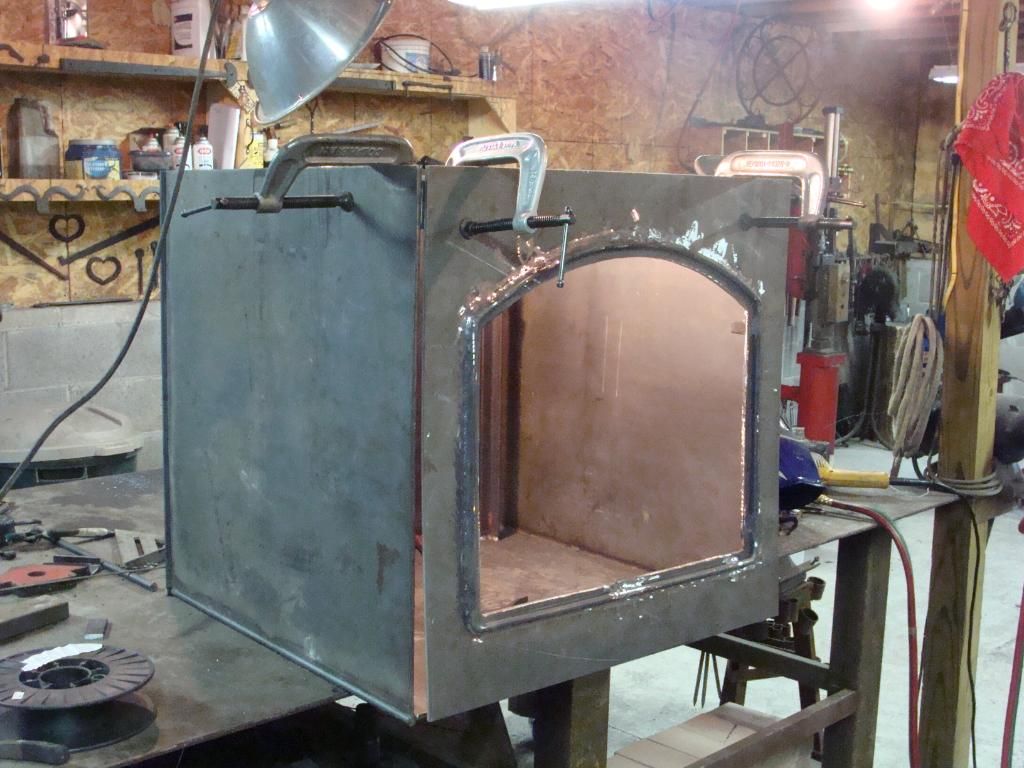
Last picture, lower right hand corner......50, 2-inch firebrick! Yes the bottom and sides will be bricked.
-
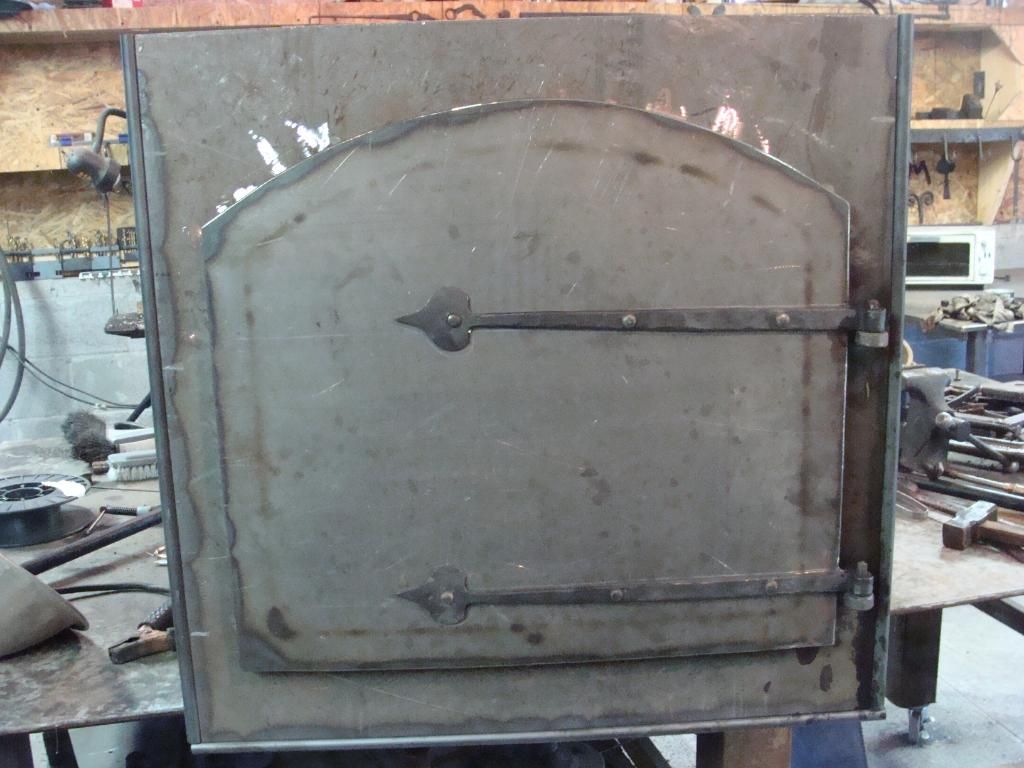
I'm building a new wood stove for our house. It a 24-inch box made from 1/4-inch plate material. I forged some hinges for the door.

Here is an overview of the stove before the front door plate was welded on.
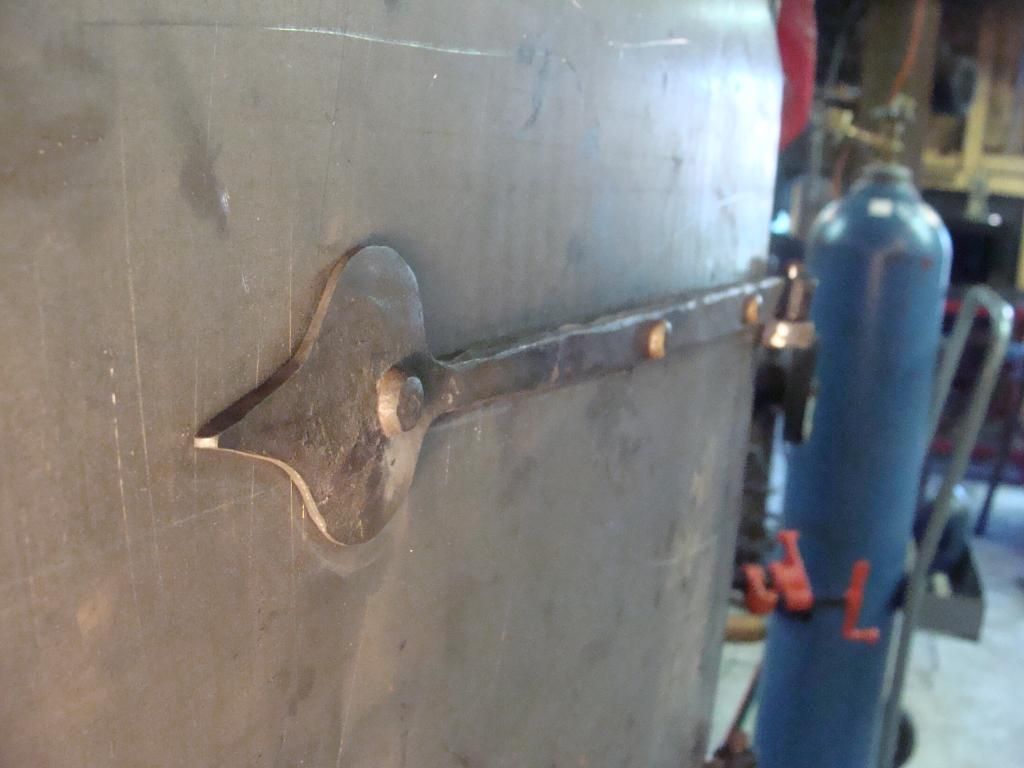
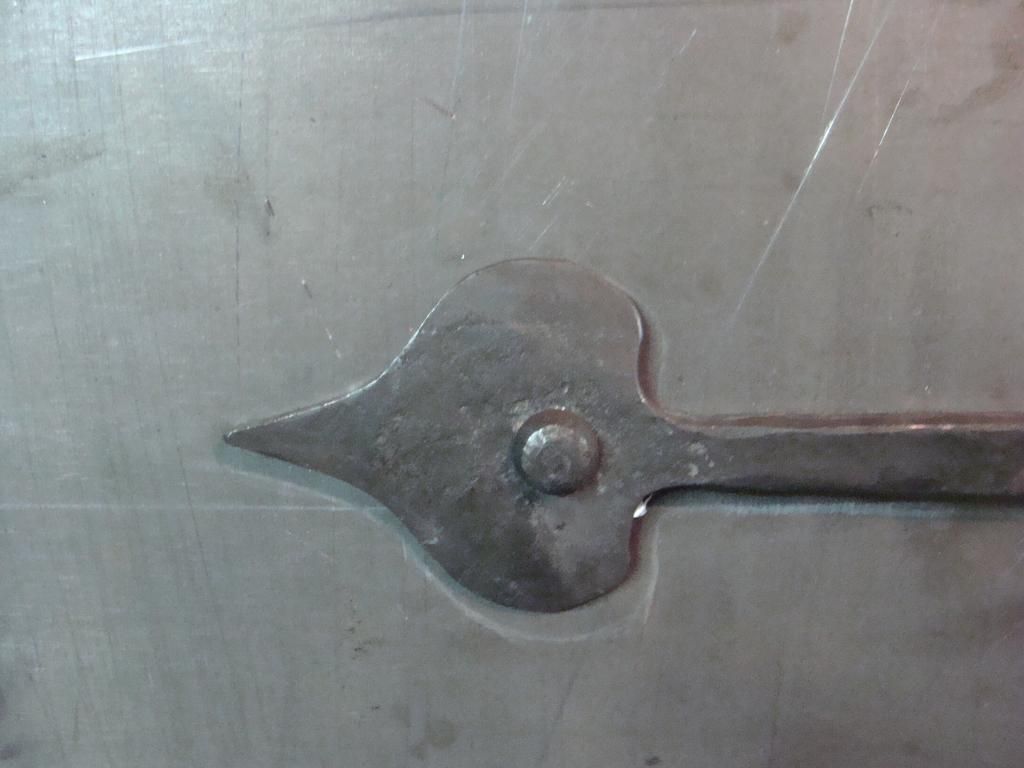
The hinges were made from 1/4x3/4 flat bar. Their primary fastening is rivets, although their is a tack weld that was more a temporary holder. The pintels are welded on. The entire thing is primarily cut-n-fab work so I wasn't concerned with traditional fastening. I just wanted to forge the hinges. They were forged entirely by hand and they took about an hour for both of the straps.
I made 14 pintels before I got two that I was happy with. I forged a couple of the dutch hearts as practice pieces first as well. Those are the 4th and 5th dutch hearts I've ever forged.
-
Doggone it.....I think that someday I would have figured out on my own the glove trick,,and then could have kept it from everyone........
SSSSHHHHHHH!!!!! :ph34r: Don't tell anyone!
LOL Yeah that's one of those "duh" type "trade secrets" where the first thought after hearing about it is "that was a great idea," and the second thought is "ok beat my head against a wall because I should have thought of that!"
Try it out sometime....it works great. I just need to weld up a handle out of 1/4-inch round. Maybe I'll put five fingers on it and make it look like a hand! LOL
-
Pst!
Use an old heat resistant kevlar glove for your oil application. It's heat resistant, and holds together GREAT as an oil applicator.
Don't tell anyone! It's a secret!
-
Heating and air supply company will have heating and air duct work, not culvert pipe. Heating and air duct pipe does work but succumbs to heat and rot rather quickly in a humid inviroment. Mine lasted about 9-months with a rain cap on it, and with the pipe itself 3-feet away from the firepot, via a hofi style side draught hood. 15-eett of the stuff cost me like $65 though, so it's cheap.
Try a hardware store or a building supply warehouse for culvert pipe.
Culvert pipe is technically called "road tile." It is much, MUCH heavier than heating and air duct. I am currently using culvert pipe and it is showing no signs of wear at all after over a year of use. I paid nearly $200, delivered for a 20 foot section so in order for it to be the same price as the heating and air duct it needs to last me about 3.5 years. I think it probably will last that and probably more than that.
-
How big are the chunks in the scrap yard? Square or round?
2.1875-inch (3/16) round about 2 feet long. It's not a scrap yard. It's a wholesale steel yard that gets shipments from who knows where, of what is considered "scrap." Mostly scrap just means that they don't know the grade of steel. I've bought 8-foot pieces of 2x4 channel, and 12-foot pieces of square and round stock, in perfectly good shape from their "scrap" section. What they classify as scrap currently runs 25 cents per pound.
They have a very small section of known steel that they still classify as scrap, because it is in small pieces. It usually runs 40 cents per pound. They may have as much as 10 feet of 4150, 2.1875-inch round stock right now. I've also bought 5-foot bars of 2-inch square 4140 for $25.00 a stick. The carbon steel supply there is very limited, and very splotchy, but you can get a good deal if you keep an eye out.
-
njanvilman:
All tools are certainly an investment! Agreed! I'd even consider the price of the anvil as a tool being worth more than as a collector's piece. It would certainly be very high to have one custom made.
I definately believe it's worth more than your average PW, because of it's condition. However, I still contend that you can only charge what the market will pay. Are there any PW collectors out there that have the cash to pay for something like this, plus shipping or travel expenses to get it to wherever they are?
LOL Yes Wayne! Feeling much better. My voice is still not 100% back but it is getting stronger ever day. I've been active and in the shop. Sorry I missed you the other day.
-
That is about the right price for a NOS PW of that size. If you adjust for infation and if it one the last anvils out of the PW factory.Gold was 17.00 an OZ. This morning Gold was 1700+ an oz. I'm 63 years old and have never seen the US dollar is worth less than the Canada dollar, think about what that means.
HH
CH
By inflation perhaps, but you can't charge double what the current market brings for a tool.
Same here Timothy! If I was crazy rich and stupid with money, I might buy it just for bragging rights. :D
I wouldn't have any problem paying $4-5 a pound for that anvil in that condition. If I had the spare change!
-
This beats all I've seen!
Granted, this is a VERY VERY VERY nice anvil! There isn't a smith in the entire country who wouldn't be proud to own an anvil in this condition, but almost $10.00 on the pound is a little pricey, even for an antique anvil in this condition.
By comparison, a 400 pound TFS single horn, is currently running almost $2000. Brand new!
This guy wants $5000 for a 500-pound Peter Wright. Like I said, it's in great condition, but c'mon! It's just not worth that.
http://knoxville.craigslist.org/atq/3460539451.html
-
I run a DIY air hammer, that I bought off of someone else. It's a 60 pound Kinyon style and is similar to yours. Mine runs off of a 2-inch by 13-inch cylinder at an average of 120 PSI. I am running a 7.5 HP, single phase compressor, with an 80 gallon tank. It pumps around 19 CFM. Downsizing you cylinder will help.
I would also recommend increasing the weight of your anvil post by quite a bit. Go for about 5-or 6-inches solid. You can sandwhich material onto what you already have in position. Increased mass equals more resistance to the hammer blows.
Making sure your hammer is mounted solidly is important too. If you have concrete, bolt that sucker down really good.
-
I applaud your fabrication abilities. You did a good job.
I would point out that everything looks a little light-built. If parts begin to bend/break use, simply scale up the size of those parts. I would also recommend getting a larger steel plate to put under the base. You don't want it pounding itself into the dirt or putting a lot of pressure on such a small foot-print of concrete. Get a larger plate and bolt the whole unit down.
Once again, nice job overall, just some things to keep in mind!
-
OK clue me in on it. What is it...
OK
Surface Area Contact: This is the amount of area on your forging dies, that contacts the metal being forged!
Your dies are whatever surface on your anvil that you are using, and whatever surface on your hammer that you are using.
Here is a simple example of how surface area contact affects things.
Take a knife and drop it on the floor, handle first! Does it stick? Of course not!
Take the same knife, drop it on the same floor, from the same height, point first. Does it stick, or make some sort of mark? Why does it do so this time? What was different!
The asnswer is surface area contact. There is less surface on the point than on the handle. Therefore all the force from the knife falling is directed into that tiny area, causing it to stick or dent the floor.
Same with steel. Take a 5-pound hammer and smack a piece of metal with it flat on, with the metal sitting flat on the anvil. VERY LITTLE gets accomplished.
Take the same metal, same hammer, same anvil! This time angle the metal so that it is only touching the corner of the anvil. Hit it at a corresponding angle with the very corner of the hammer face. You've just crammed all the forge from the entire hammer, into a little tiny area, instead of spreading it out over the entire hammer face.
As an added bonus side affect to reducing surface area contact, the metal cools off faster. If only a tiny portion of the anvil and hammer come in contact with the steel, then there is less surface area to suck the heat out of the bar. If you lay the bar flat on the anvil, it cools off much faster!
You'll hear and see all of that in March! You'll have a good time!
-
Hey usually it takes me a cut or two to get one of these tapered shank hardies to really seat itself into the particular hole I'm using it in. After that, one tap and it's in firm. It just needs to get "introduced" to the new hole, and get aquainted before it sits quietly.
I use these curved blade hardies every day. I used mine today to make a couple cuts in 1.25-inch solid round car axle. Cuts like a charm.
I directed during a cut we did at the ABANA conference. I was using a striker (Kainon Baumer,) and a top cut, along with the hardy. First off, I marked the location of the cut all the way around with a hand hammer. Then I used the top cut and striker to complete the cut. The material was 1.25-inch or 1.5 inch solid round axle material (4140 or so.) The cut was done in one heat, but the killer is, the top cut head came off twice because I did not seat it on the handle. I had to stop, pick up the top tool, replace it onto the handle, seat it back on the handle, and then go back to cutting TWICE, and still made the cut in a single heat.......with heat to spare!
These things cut great and I'm looking forward to your video! -
Those tongs look good!
If you're scrolling small material, does it try to slide into the wider opening in the scroll tongs?
I haven't had that problem with mine, and I don't see why it would. -
Very nice tongs.
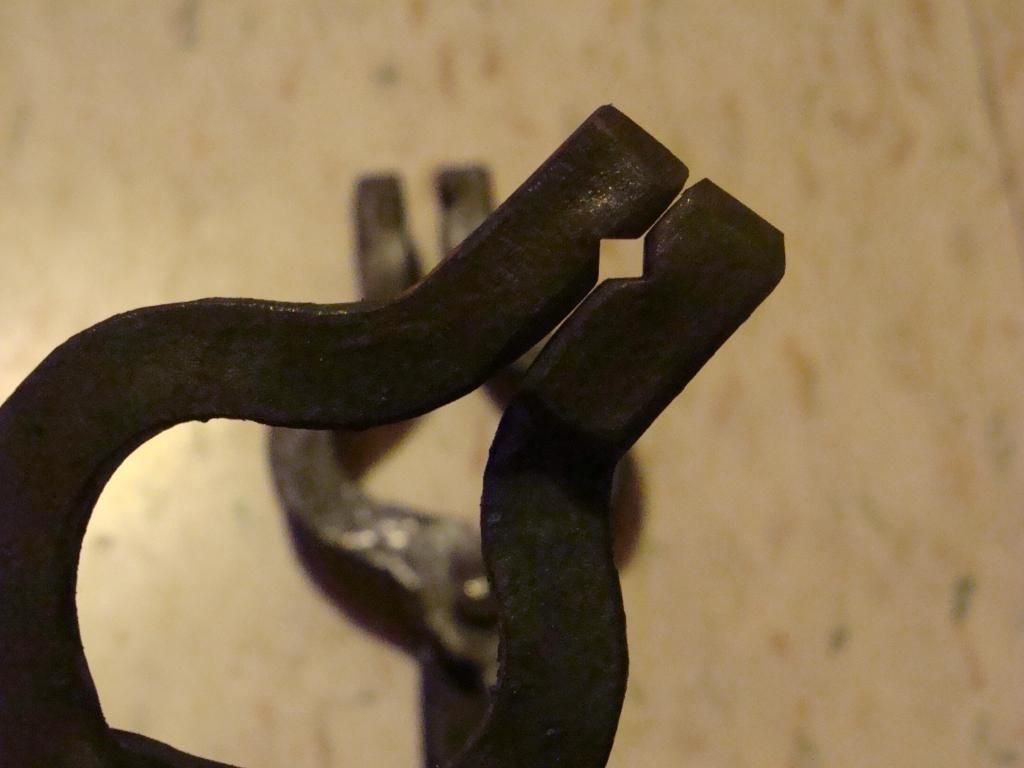
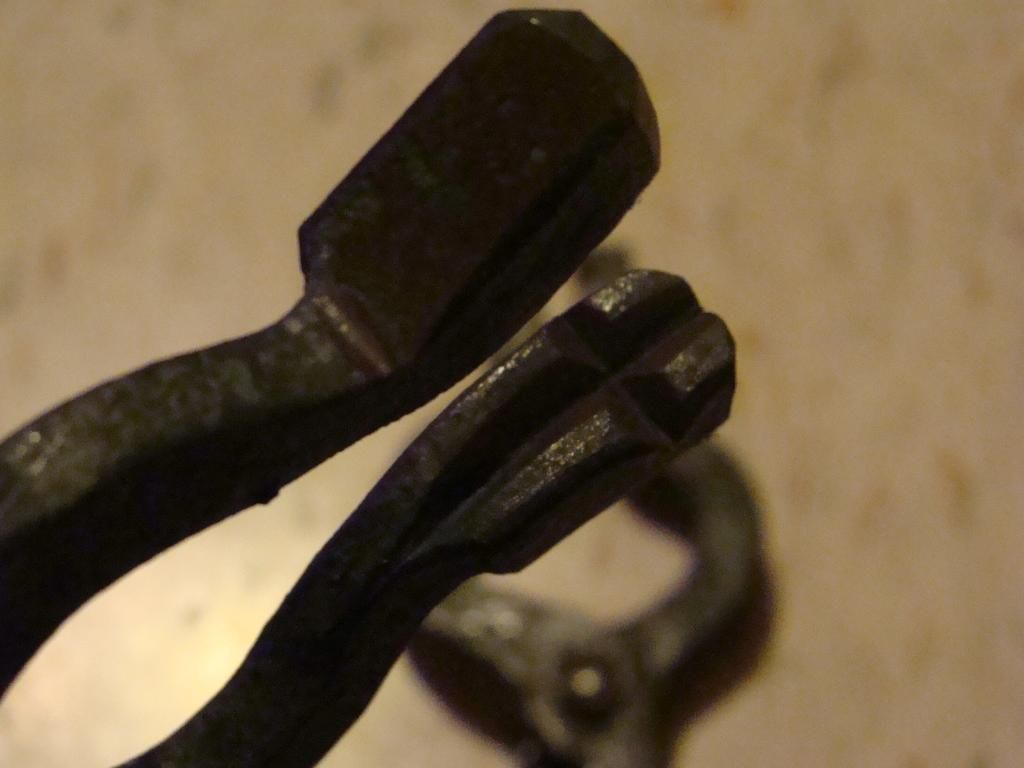
You might find your scroll tongs work better if the bits were flat.
Hey thanks for the complement, and the critique.
The reason I do my scroll tongs with the curved bits instead of the flat, is you can work with a wider range of stock thicknesses while still remaining in the "comfy" range of the tong handles. Flat bit, scroll tongs do not allow for this. To each his own though. (I have used both styles!)
Thanks Brian! As always, it means alot coming from you! -
From what I have experanced Tempature plays a critical role in the shearing off of the slug to hot and it will not come off cleanly.
True! Thanks for pointing that out! -
I made the bolt tongs for a guy that wanted them. They hold 1/4-inch and 3/8-inch square and round stock, inline or perpendicular.
Entirely forged to finish with the exception of rounding off the ends of the reigns and jaws with a grinder.
The scroll tongs were not on the "to-do" list, but I burned the end off of one of my tong blanks, so I had a short piece. I torched a matching short piece off the coil spring, and made the scroll tongs. I did not use the power hammer at all on these. They were forged entirely on the anvil. The ends of the reigns were hot rasped instead of ground. They still need to be wire wheeled. I use a similar pair on a daily basis.
I use spring steel on my tongs.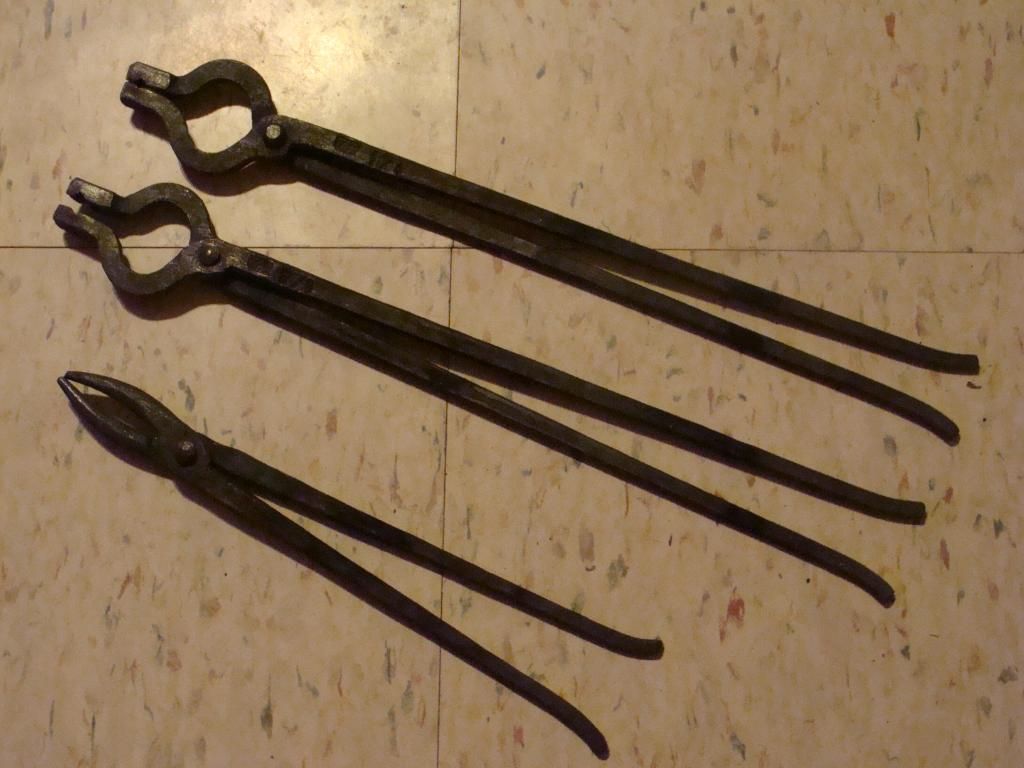


-
Can I ask the purpose of drilling the hole in the center as apposed to offset towards the edge?
-
I just checked the ASM heat treaters guide for you, the carbon content is the only chemical difference. Quenching temp is 1555 vs 1570 for 4140 and hardness is slightly harder for the same tempering temperature.
So basically, if I'm making something out of 4140 and I go to a light straw temper, then when using 4150 I should use a heavy straw temper. Thanks for checking the specs! I don't have any charts here.
Are there good charts online somewhere? -
My steel yard has volumes of 4150 tool steel in a usable size.
I typically use spring steel or 4140 for making top & bottom tools, tongs, and hammers.
My question is, can I exchange 4140 for 4150? If so, what is the difference in the two metals. I'm guessing 4150 has more carbon and would require a higher temp range for tempering. Am I right? Can it be cooled the same?
Thanks! -
Thank you, Brian. I will try it out and see what works best for me.
(just for curiosity's sake, would an inwardly concaved punch be of any use? Thinking of all the different shapes made me consider that one. I believe it would act like drilling it out, removing a lot of material, mixed with a cicular chisel, leaving behind a rag.)
A concave punch would drive easily until it seated fully. Then the metal trapped beneath the punch would have no where to go.
With a pointed punch, the material that doesn't get punched out, gets pushed to the side. A flat punch just plows through, and it's shape does not naturaly move the material out of the way. A concave punch would actually trap material. A chisel, moves all of the material creating the stretched area and the resulting cold shuts. -
There are a lot of opions here, some good and some not so good. The basic idea with hammer techniques, anvil height, and forging, is do what works for you and what doesn't hurt you.
Having said that, here are a few rules of thumb that are law when forging.
A bigger hammer does more work, faster, using less energy......WHEN USED CORRECTLY! If you are hurting your arm with a 2-pound hammer, grab a 4 pounder, choke up on it, and swing slowly, lifting your hand high above your head as you forge. Choking up on the hammer allows the handle to act as a counter-weight, giving you the effect of a 4 pound hammer without the feel of a 4 pound hammer. (Study sword history and design....counterweight is key!)
Swing slowly until you get comfy using the tool. Speed will come naturally with time.
Get the hammer up high. If you are using short tiny blows, you will be trying to speed up the hammer with your arm, instead of letting the hammer gain speed as it falls onto the metal. Get the hammer high, and let it's own weight bring it down. Your arm should guide the hammer, not slam the hammer. When holding the hammer loosely, the hammer handle should pivot in your hand on your middle finger. Using a larger hammer, choked up on the handle, will teach your proper handle grip.
If your anvil is too high, you will not be getting the full range of motion in your arm, therefore cutting down on the distance the hammer will fall before contacting the metal. Your arm will be bent too much, and you will not be utilizing gravitational pull on your hammer to it's fullest advantage.
If your anvil is too short, you will do one of two things. You'll always be bent over it, putting excess strain on your back., or you will be over-extending your arm with a sort of "snapping" motion, as your arm extends fully and then has to "stretch" in order to reach the anvil. Neither of these are good!
Where is the perfect height for your anvil? Experiement! Everyone is different, and where knuckle height is comfy for one person, it may not be for the next. I use a tripod steel anvil stand and bolt various thicknessess of wood to the feet, until I find a height I like. You can do the same with a plain anvil stump. Experiement until you are comfortable and can forge all day without pain. (Once you find your ideal height, bolt or stake the anvil stand and anvil down, VERY VERY firmly. ANY vibration is lost energy.)
Knuckle height is a generaly used reference for proper height. The reason why is, when the anvil face is at knuckle height and you grab a hammer, when you lay the hammer face flat on the anvil, it adds length to your arm. This causes your arm to bend very slightly. However, once again, knuckle height is not a rule, it is a reference.
Do not grip your hammer tightly. The anvil has natural bounce, or rebound that helps to pick the hammer back up. If you are overgripping your hammer, the shock of this bounce will go into your arm instead of the hammer. This will cause you to have to use more arm strength to pick the hammer up, as well as putting more strain on your arm.
Hold a very VERY loose grip on the hammer. You are guiding the hammer to where you want to hit, not forcing it there.
hinges for the wood stove
in Member Projects
Posted
Well no shotguns yet.
Current track record with the ladies is:
Had a lady friend, she seemed to like me, said she did in many letters, then found out she had a boyfriend! "Now that ain't gonna fly!"
Second lady, got a definate "no go" from the dad! Never made it past him! :D