

FieryFurnace
-
Posts
2,106 -
Joined
-
Last visited
Content Type
Profiles
Forums
Articles
Gallery
Downloads
Events
Posts posted by FieryFurnace
-
-
Not quite sure whether to say it looks so hot, or so cool
I was once working in a class setting. There was a woman in the class, a couple forges down from me. We were working on different projects but using the same power hammer, and so we had to watch out for one another. Obviously we couldn't both come out of the forge at the same time with a hot piece of metal.
How do you ask someone if they are about to swing a hot piece out of the forge?
In the rush of the moment I ALMOST yelled across the blacksmith shop to a woman, "ARE YOU HOT?" I got about half of the word "are" out of my mouth and decided to rephrase! :D
-
Well to conclude this saga!
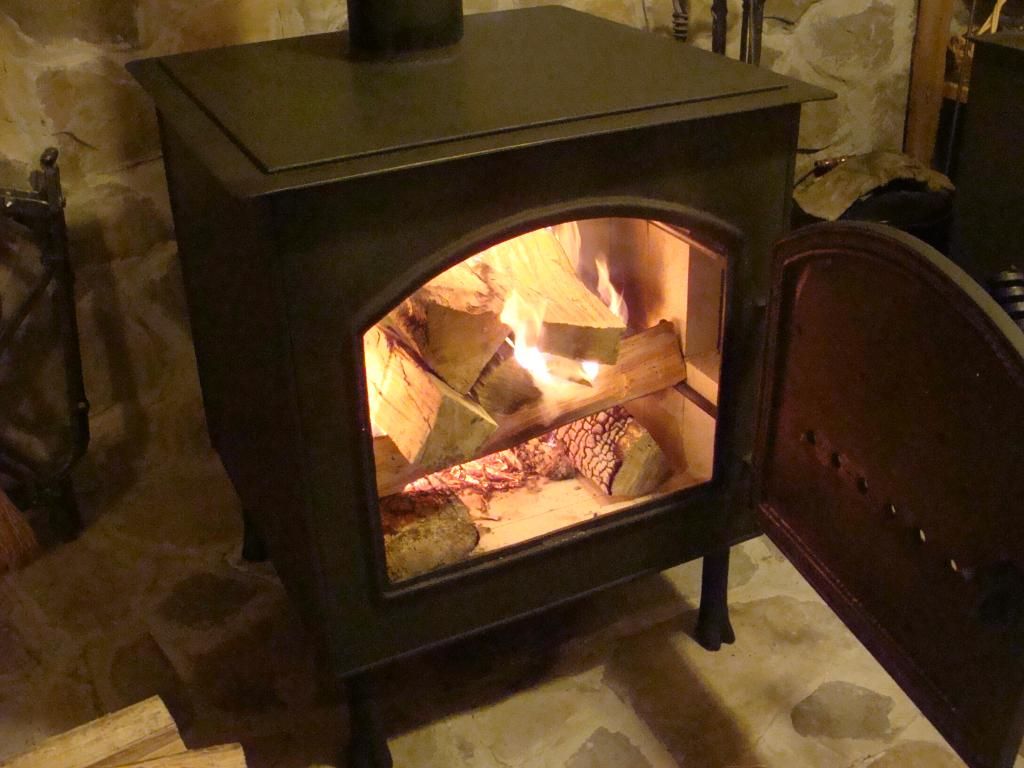
We installed the stove today. It got 6 coats of high heat black paint before installation. It was a pain to move, but we made it.
It really goes well on the hearth. (we built the hearth more for a stove this size. The other stove looked out of place and we planned for it to be temporary.)
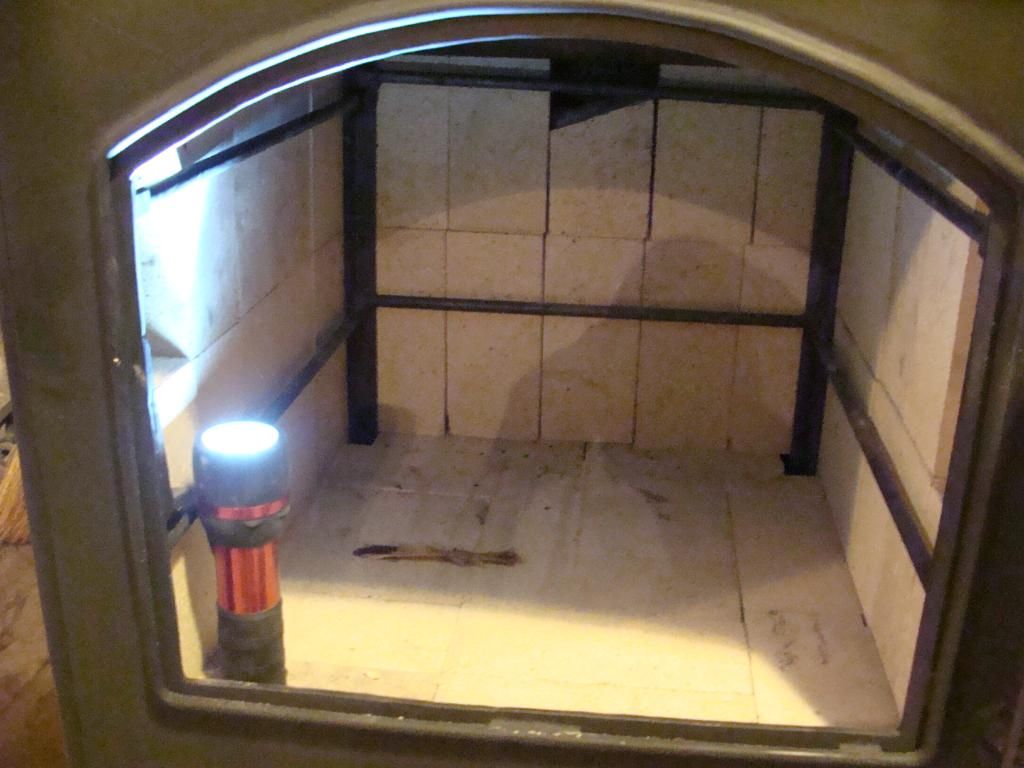
I put all of the firebrick in. That pretty much went according to plan, although I did not account for spacing when I added the smoke shelf. This made it to where I couldn't really get a full firebrick in the back middle. You'll see a shorter broken brick in the back middle there. I had to cut several brick with a masonry chisel and that worked well.
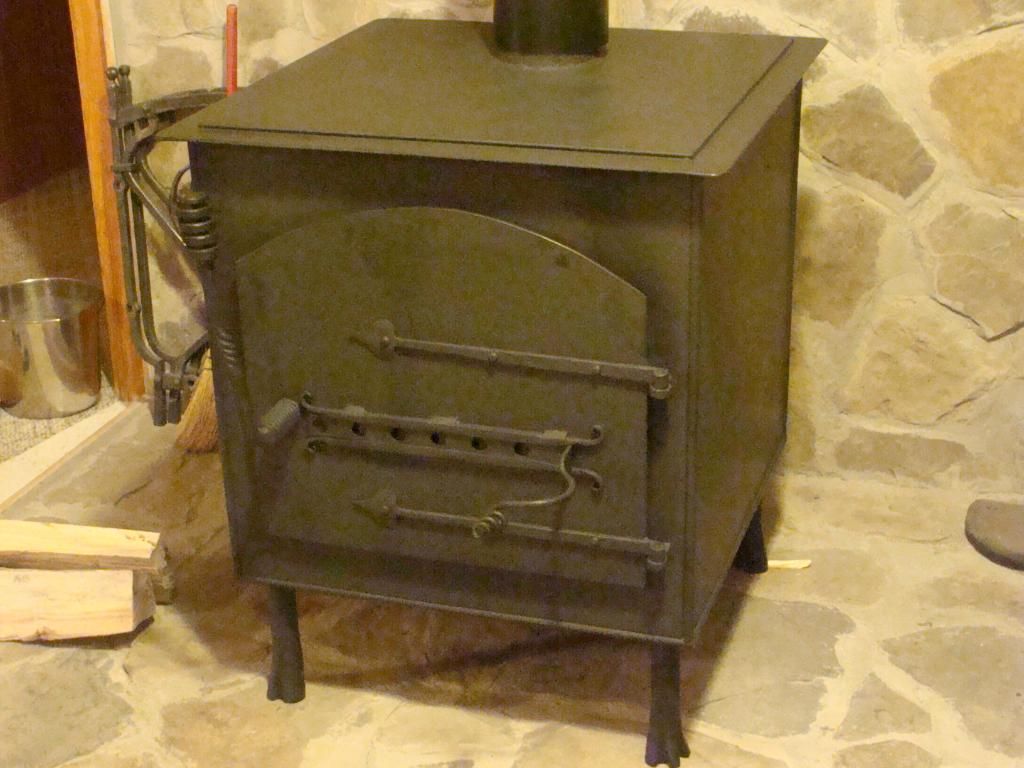
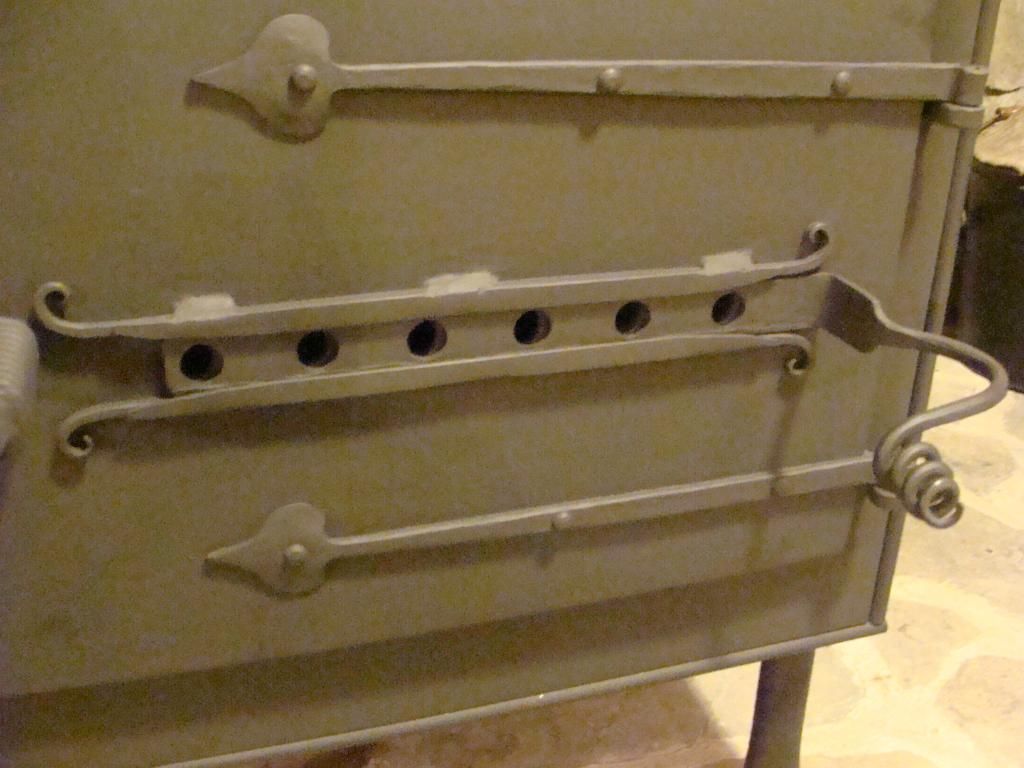
Here you can see the smoke shelf! It seems like it's doing it's job well!

It will take a while to learn all of the quirks and figure out how to run the stove properly. It's going now and is doing well! I want to raise the chimney another three feet to increase draw. (Get it above the ridge line!) The draw has never been awesome but it hasn't been a problem with the old stove as it had two doors. When the load door was open the ash door got closed, and the other way around. That way, it always had draw. However, with a single larger door, the smoke wants to come out as much as go up. Increasing draw by getting the pipe above the ridgeline would be a plus!
Thanks to all for following this thread!
-
Self contained hammers are noisy, but for what they lack in silence, it is made up for in control.
I've never used an Anyang 33, but I have used a similar 100+ pound hammer, a similar 50 pound, and a self contained 400 pounder. They all were great with precision hitting. If you see yourself doing a lot of tooling work I'd recomend the self contained hammer.
If you want to put metal between the dies and beat the crap out of it in a hurry, you can't do better than the tire hammer. It puts out a lot of wam in a little amount of time. I've forged 2-inch solid square 4140 on mine.
Clay uses tooling under his tire hammers and you can get tooling plans from him or through him as well. However, I dislike using tooling under a tire hammer because the single hit controlability is just not there. I've had mine for over a year and use it nearly every time I'm in the shop. I also use a 60 pound compressor run air hammer on a daily basis. I do all my hand-held tooling under the air hammer and my forging under the tire hammer. It just depends on what you'll be doing more of.
If it's going to cost you $1500 to $2000 to build a tire hammer, and you decide a mechanical hammer is what you need, I would strongly suggest shopping for a 25 pound Little Giant. If you shop around, you should be able to get an OK one for that price, and they are hard working forging machines. It will save you a lot of head scratching and a lot of time.
I would also strongly consider looking into getting a stronger power service to your work space.
-
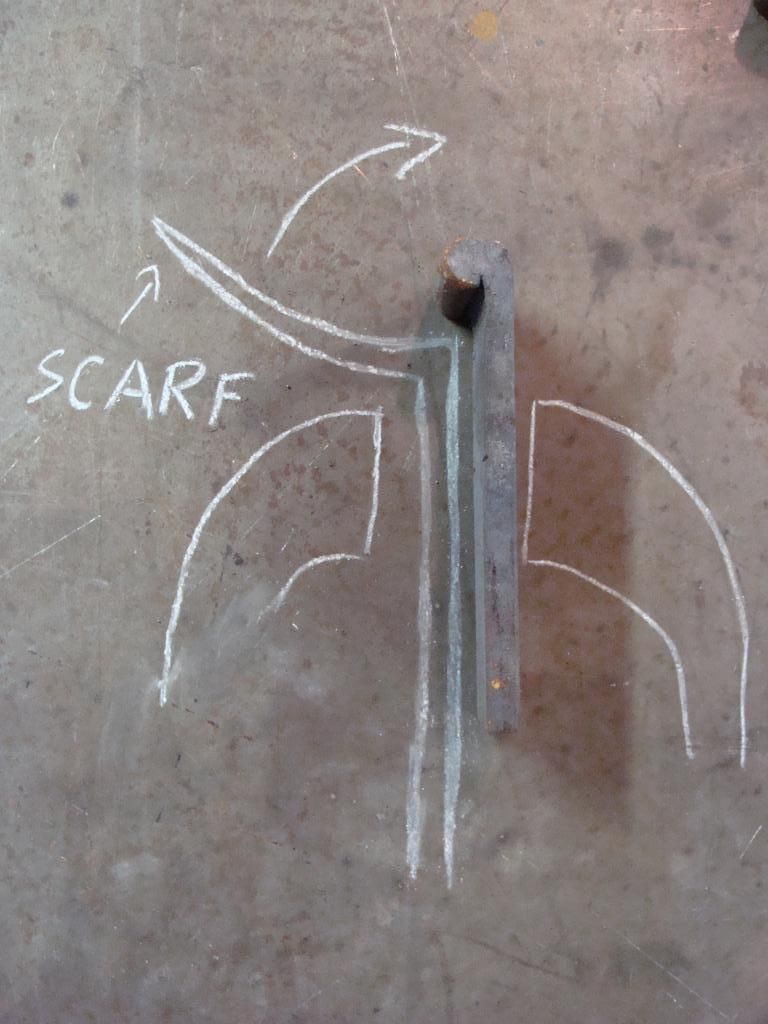
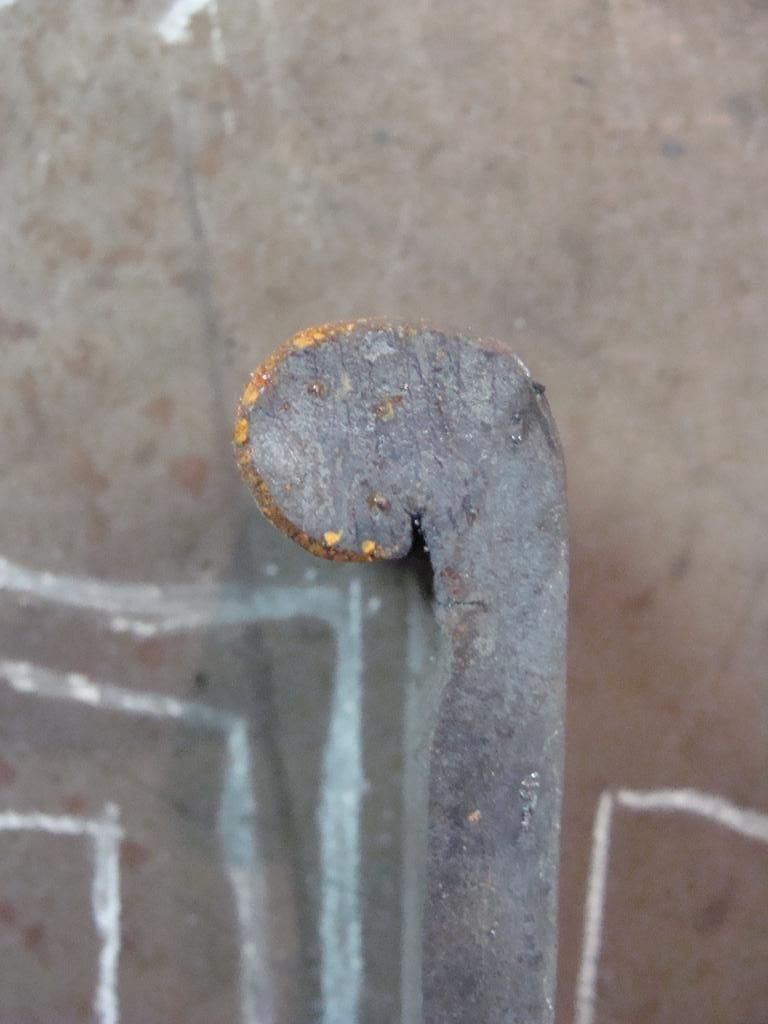
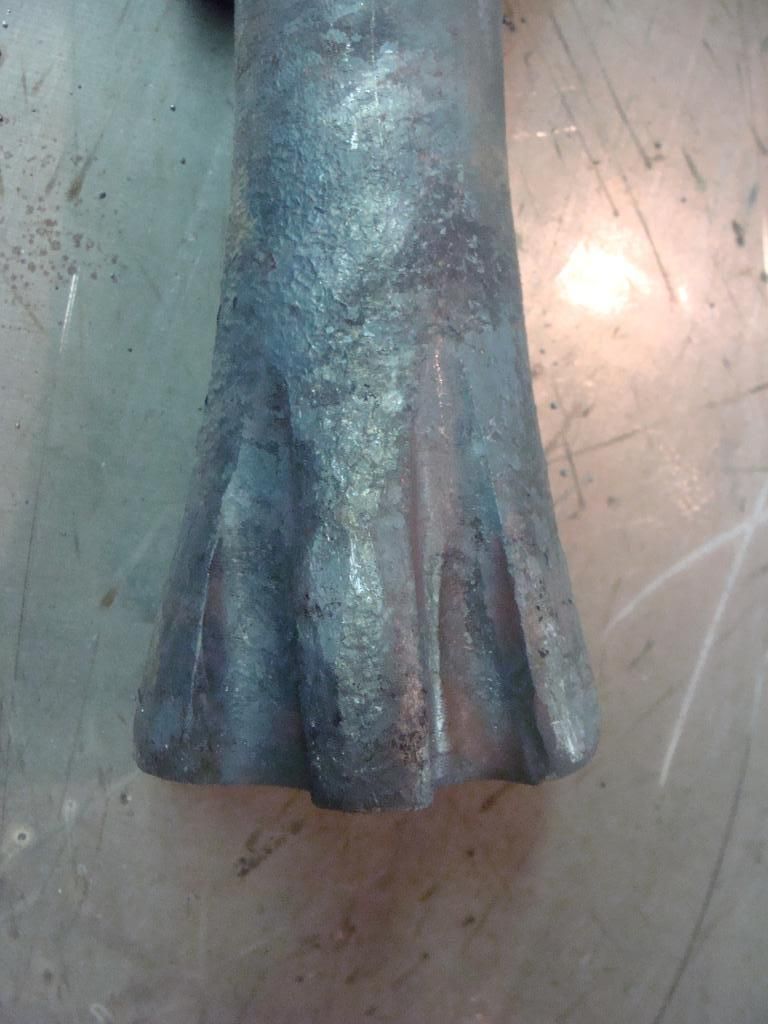
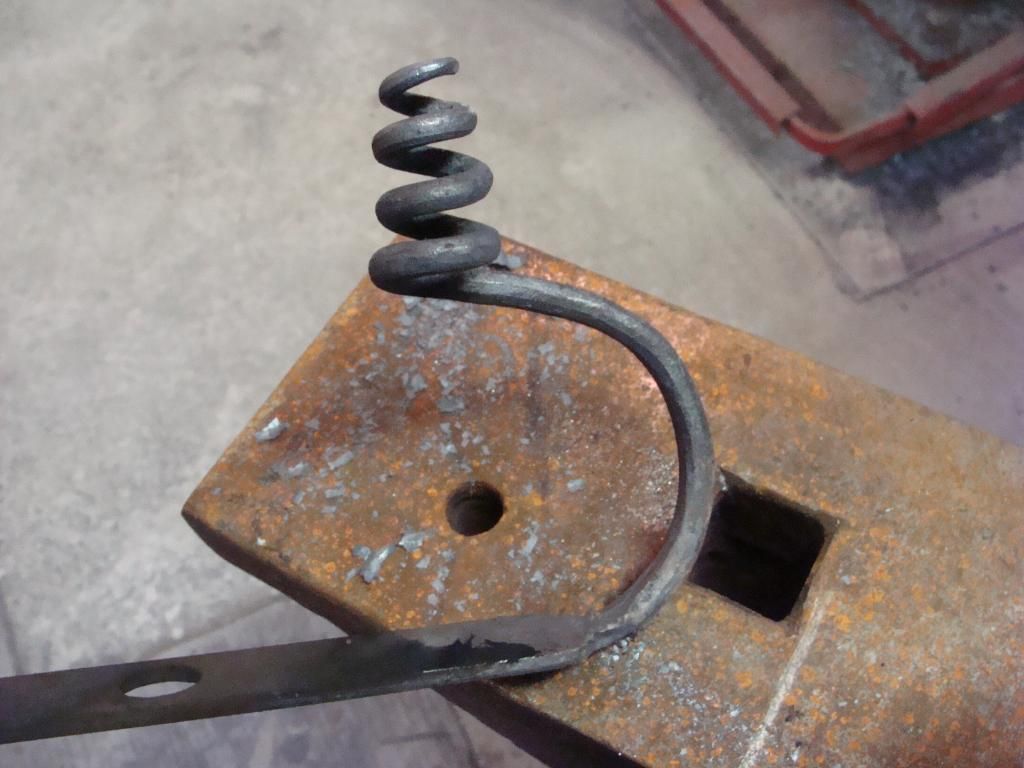
The spade ends are called dutch hearts! The 1/2-inch top and bottom fullers are used to endent the metal. However the curvature that leads into the tip and the hollow area in the spade, by the "stem" are forged with a hammer and mandrel or sharp horn. (That hollow area is called the cusp.) After you've begun spreading the material you alternate between spreading, and placing the back of the "spade" on the sharp horn and hitting the area by the point with the hammer!
It's a REAL pain in the neck until you get used to it.
If you want to, you can come up sometime and and I'll walk you through the hinge making process and help you make the tools too. There are other finials as well like the bean finial (looks like a kidney bean,) and a round finial. Just let me know ahead of time so I can make sure I have the stock on hand!
-
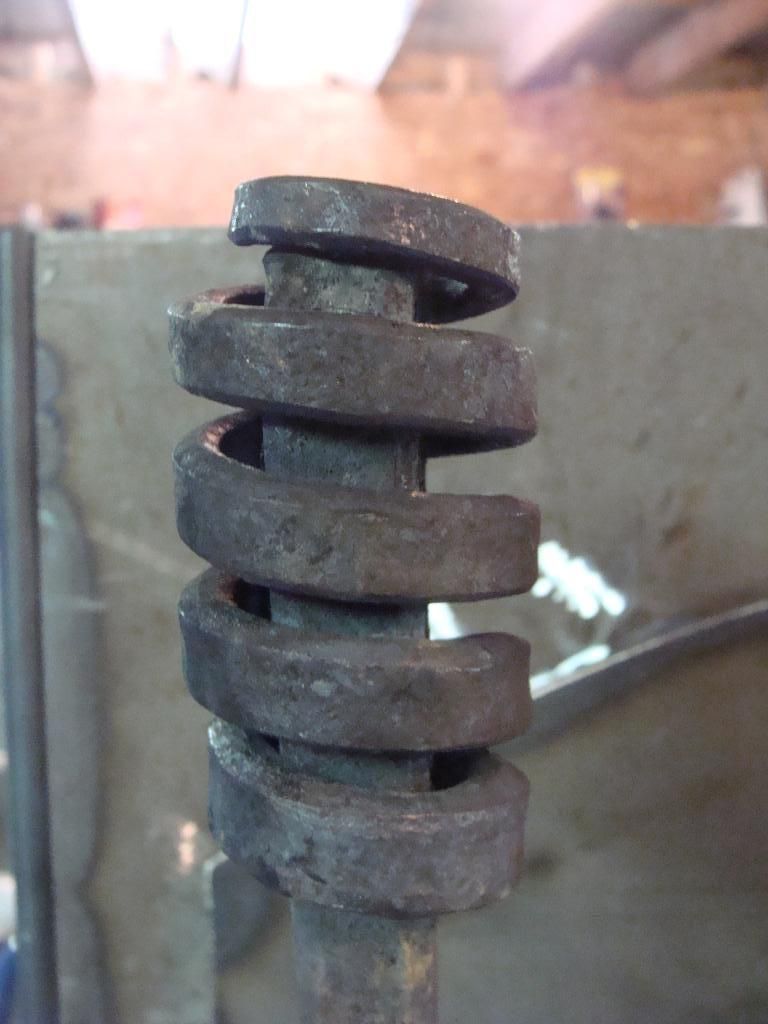
Here are the pictures of the hinge barrel tool! I finally got my picture uploader working.
This one shows the positioning of the tool and the hinge piece in the vise. The hinge stock is scarfed on the end and then bent at a sharp 90 with enough material past the bend to allow material for the hinge barrel and about an inch or so for welding.
Here is a close up of the hinge barrel tool. The blob is a rough forging of the approximate size of the hinge barrel. It's just something to form the barrel around.
The way it works is, you clamp it all in the vise and bend the hinge stock around until it hits the vise. Then take it out and nock out the hinge barrel tool. Place a piece of stock in the hinge barrel that is the size of the hinge barrel. (3/8-inch barrel = 3/8-inch stock) Then close the barrel up around this piece of stock, tightly making sure everything is alligned. Open the scarf slightly to allow the piece of stock to fall out and allow flux between the area to be welded. Flux and then weld. I like my first welding blow to be kind of a pulling hammer blow, pulling the hinge barrel slighly tighter than it was. This allows a drill bit to clean out and true up the barrel.
Hopefully that all makes sense. It's a simple process only involving a few heats in decent stock sizes.
1 heat to scarf and bend
1 heat in the vise with the barrel tool
1 heat to close the barrel, knock out the sizing pin, and flux
1 heat to weld
-
YVES: We used a wood stove for several years to heat our mobile home in Georgia. It was a store-bought fisher, and was 3/16-inch or 1/4-inch plate. We ran that thing pretty darn hot sometimes, and we weren't the first owners. It got used frequently but never warped or changed in any way.
The current stove that is in our house was given to us! It was in pitiful shape. It was made from something like 16 gauge sheet metal. It was half rusted out half burnt out, and warped like crazy. The door still shut, but did not seal well. We encased the entire old stove with 3/16-inch plate. I fill the entire box up with wood in the evenings. It has never warped or changed.
The current stove I'm building is 1/4-inch plate steel. I do not foresee any problems with warpage.
Plate and sheet metal are a pain when heated and cooled. They do not retain their flatness in the least. Even when clamped down, you can still have a piece warp when it has been heated and cooled. However, thicker stove (3/16-inch and 1/4-inch in my experience,) does not seem to be affected.
I assume it has something to do with the fact that it has support on all four sides. There is just too much resistance from too many angles to allow the steel to warp.
It probably would Martin! Good sugestion. I used a favorite of mine which is put the corners together with a little gap in them. Then put a piece of 1/2-inch round in the corner and weld it all from the backside. It finished the corners out nicely, and does not require any grinding or slag removal as the weld is all interior.
That last run of rivets inside the box would be a pain to get at though! LOL
I got your picture this evening Jonathan and now my uploader won't work! I'll try tomorrow afternoon!
-
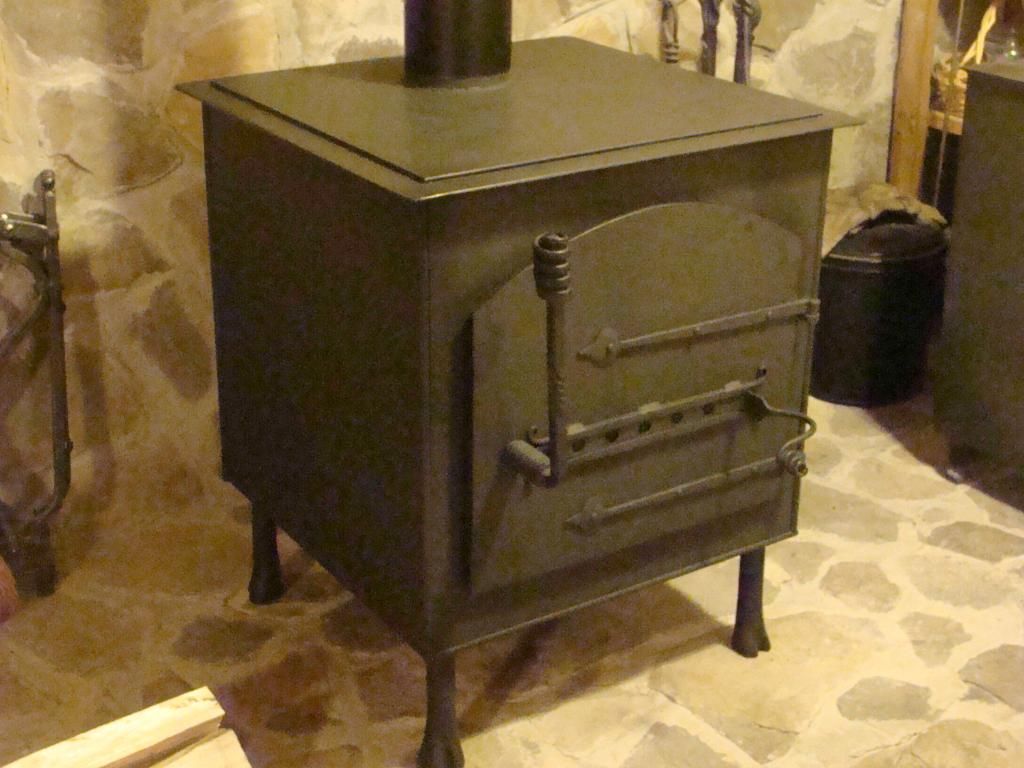
Got the legs welded on yesterday! We've started the buffing!
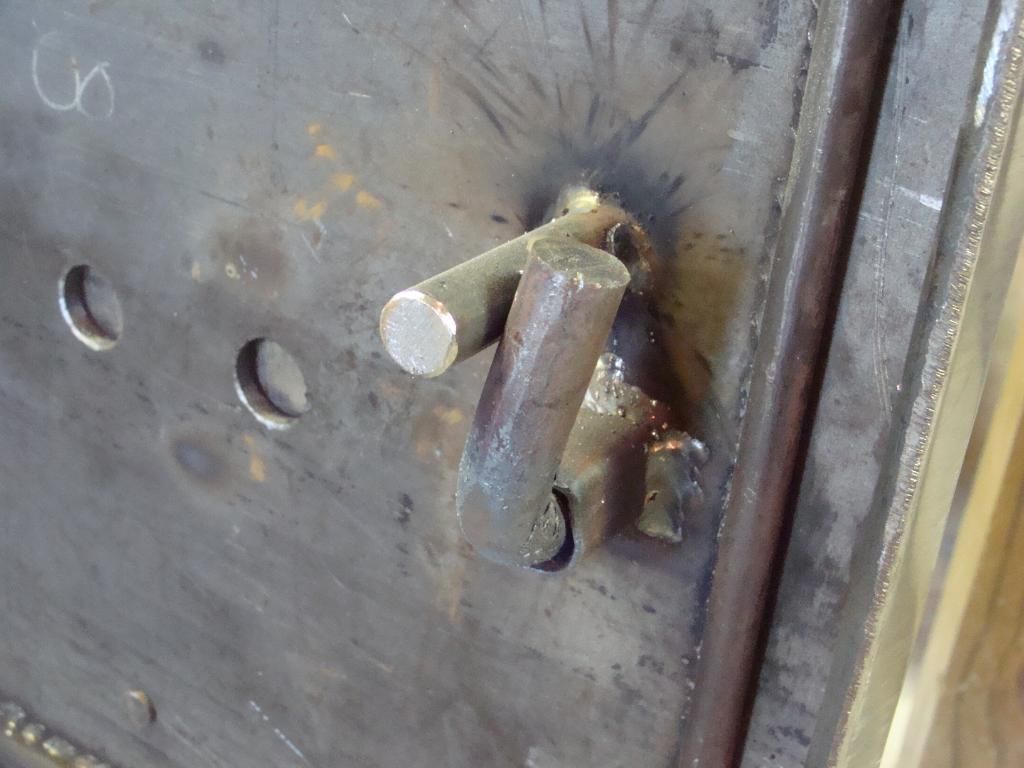
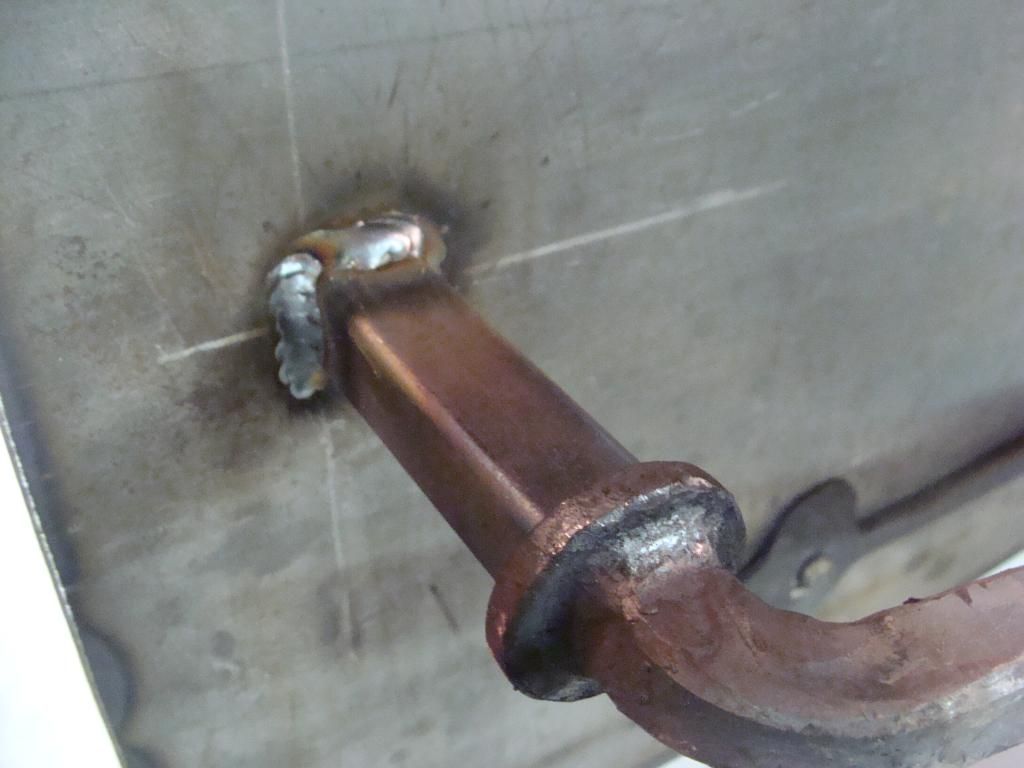
Here is the stop for the door handle.
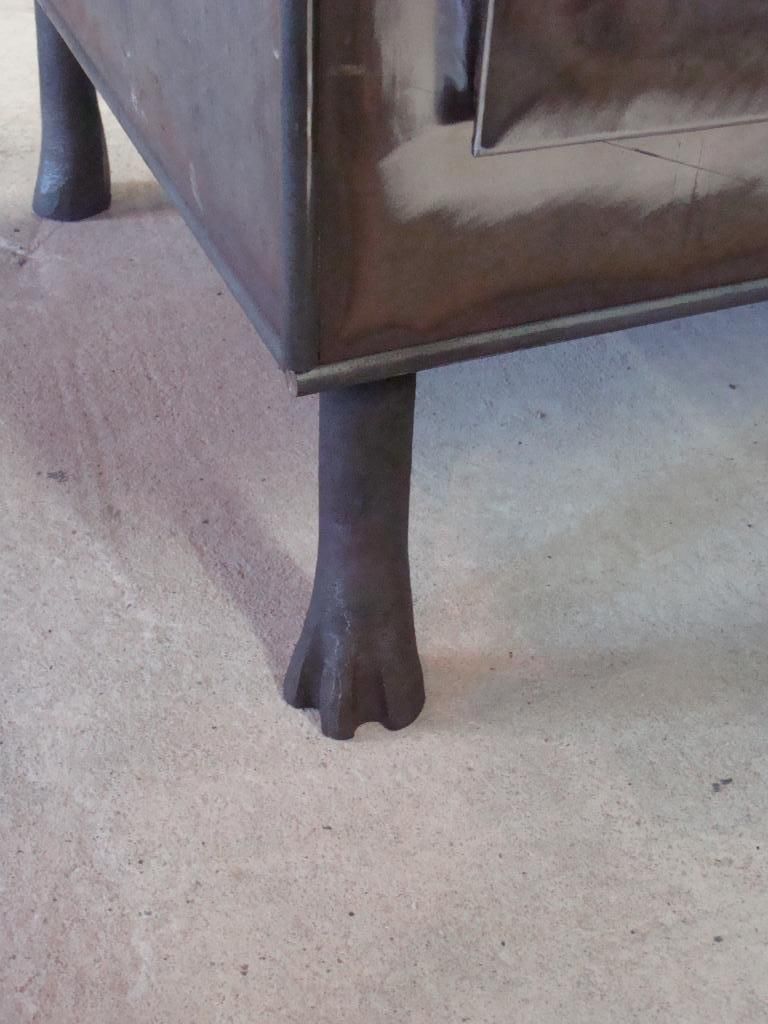
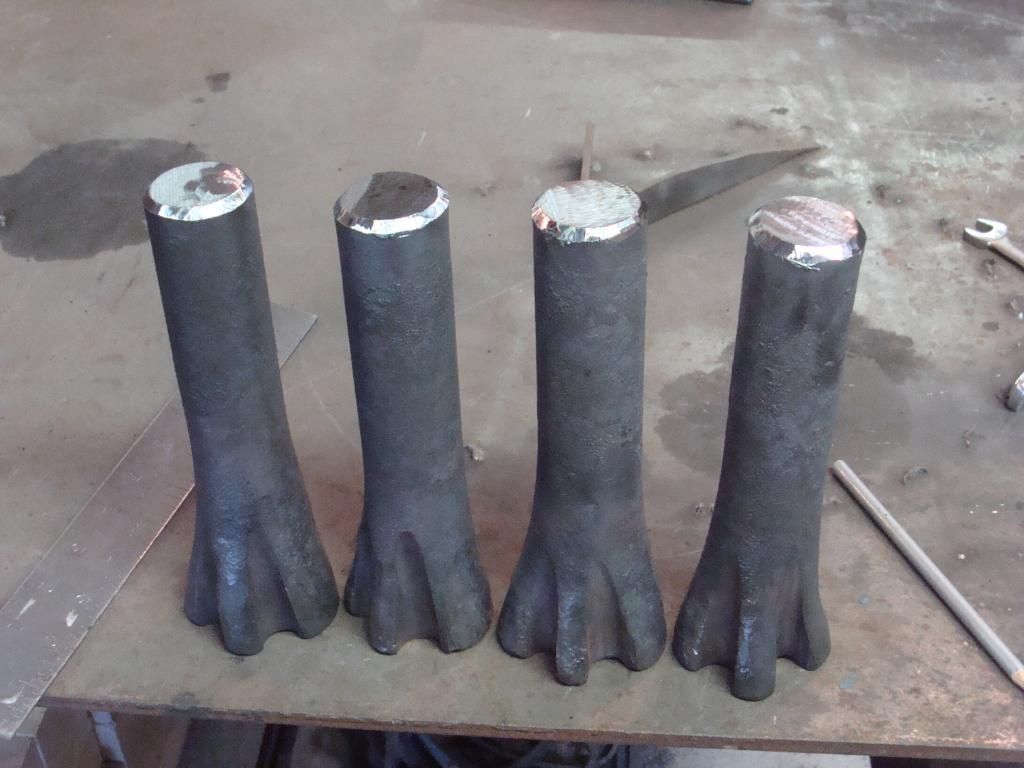
Here is a close-up of the feet. They were made to resemble a "claw-foot." The material used was 1.5-inch solid mild steel. The first two took 6 heats and the last two took 5. 3-heats to upset, 1 or 2 heats to fuller in the claws and check back the upset, and 1 heat to cut.
Here are the four of them before they were attached.
It's warmer today so I'll be working on painting it.
P.S. I still forgot to get that picture Jonathan, but I will remember today!
-
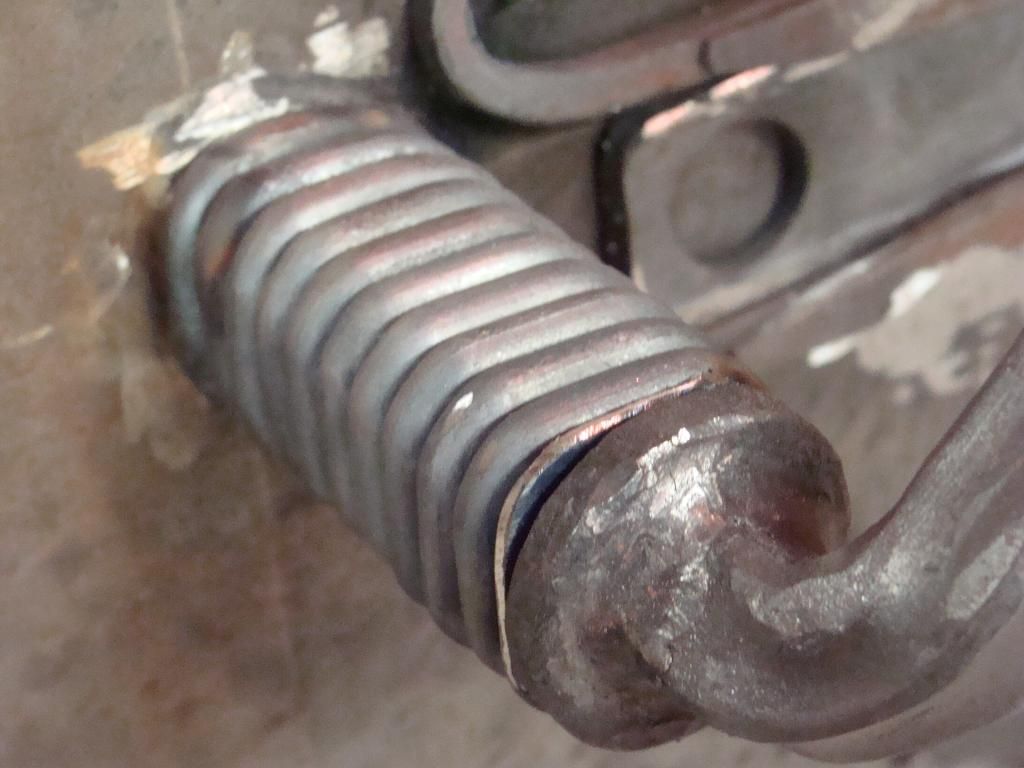
3/4-inch diameter!
-
Jonathan, I forgot to get the picture of the tool tonight. I'll try to remember to get it tomorrow!
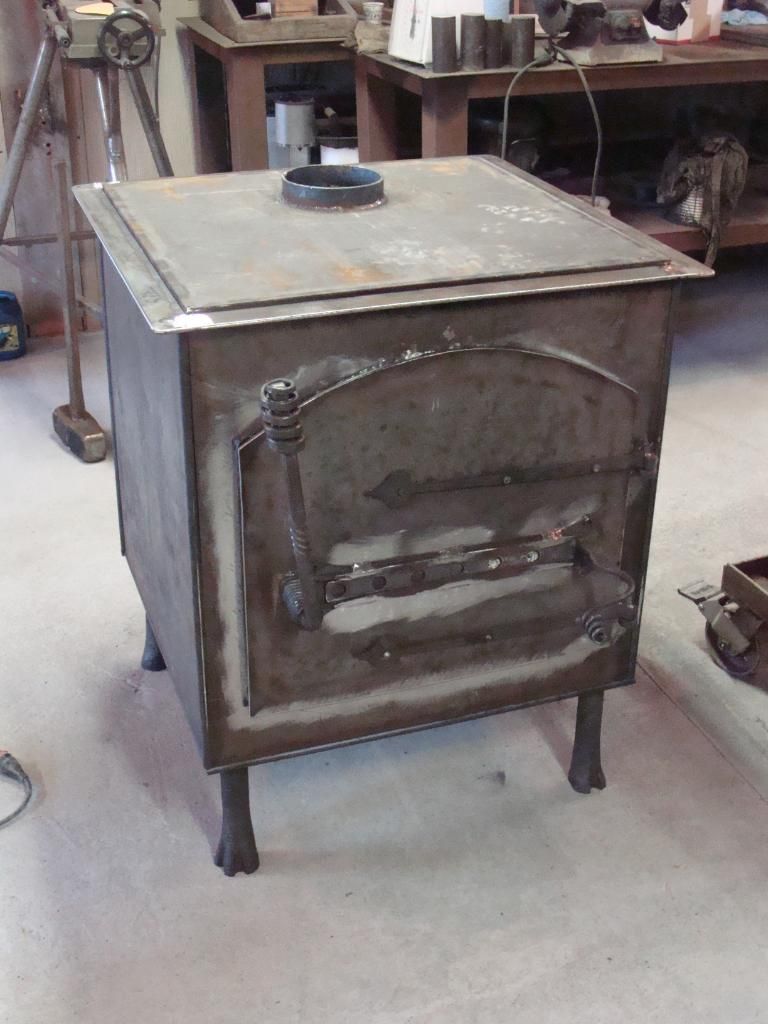
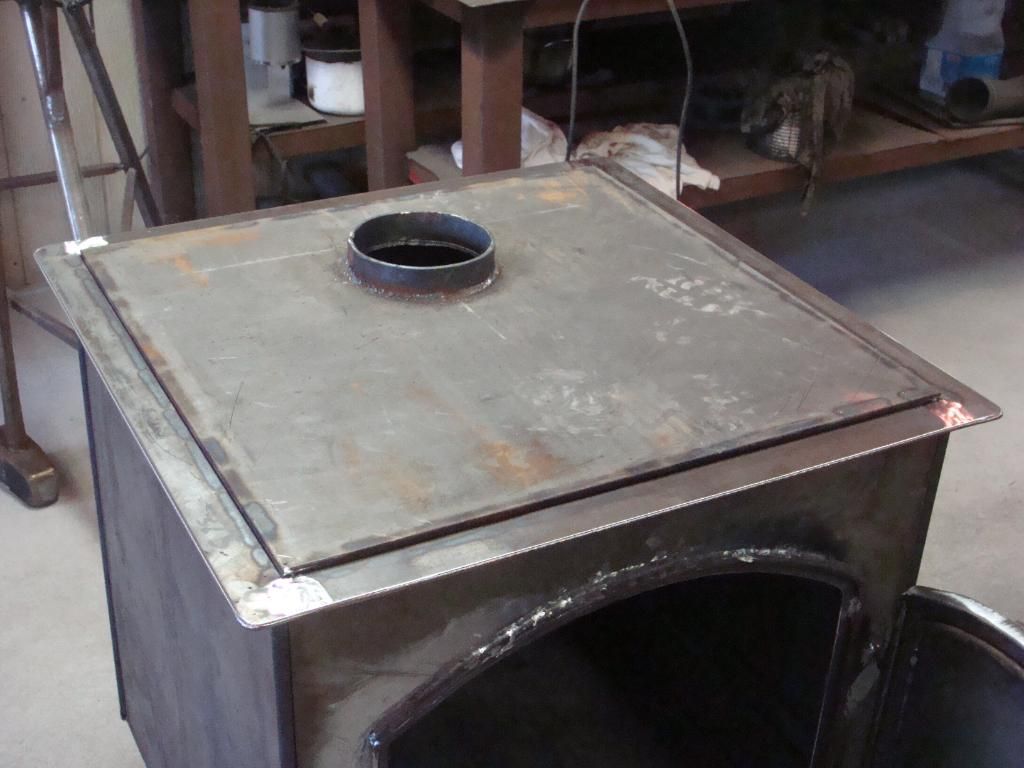
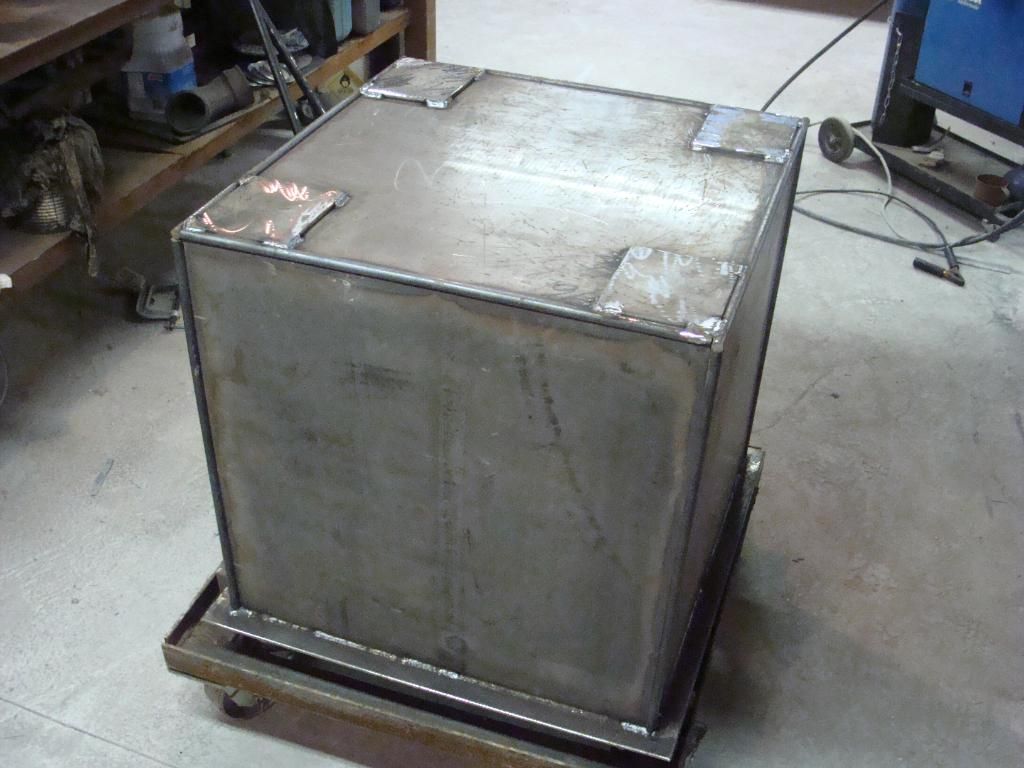
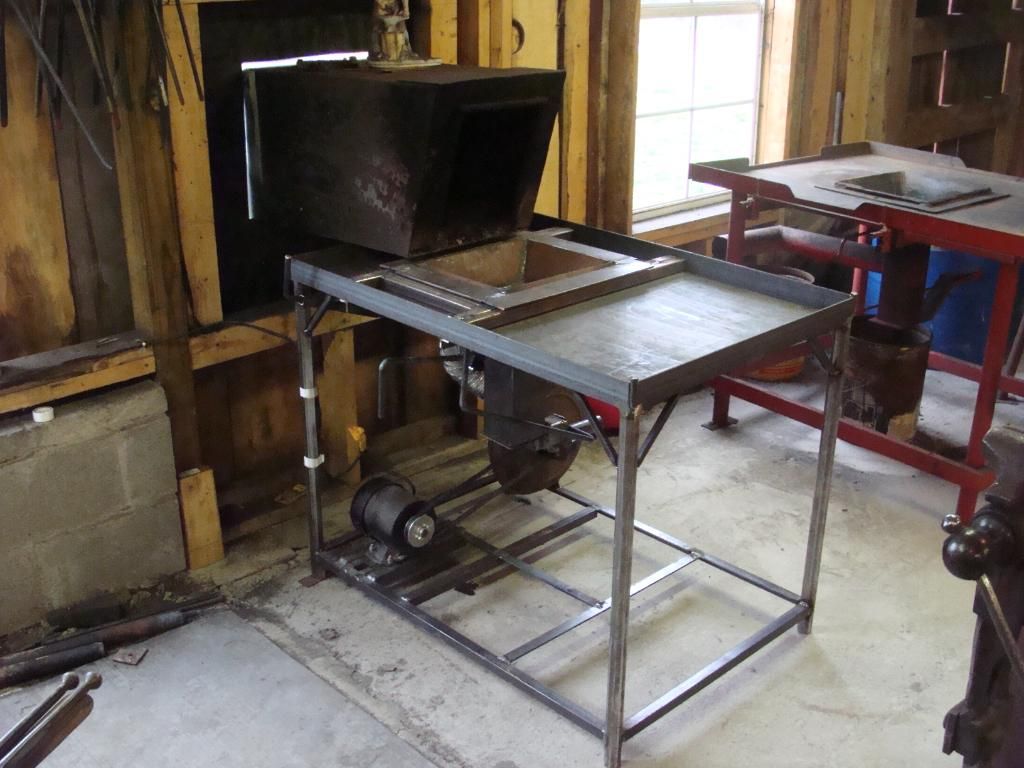
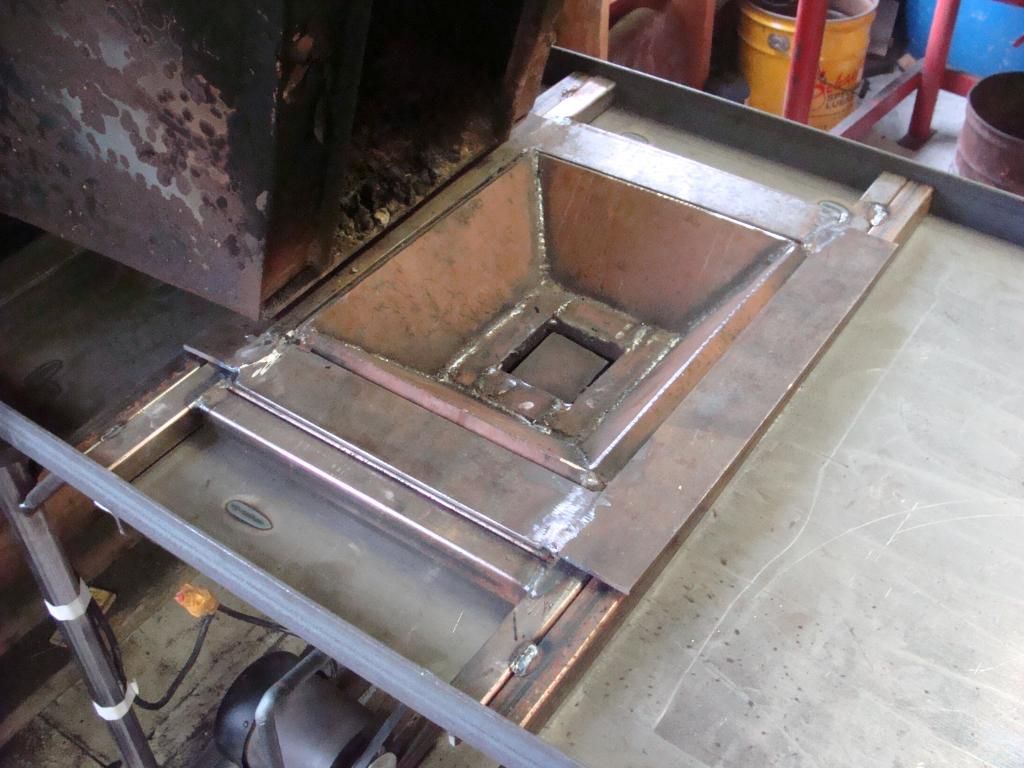
Here are some updates on the stove. I welded a smoke shelf / spark arrestor on the inside. Then I made the chimney pipe collar, welded it to the top plate, cut the chimney hole, and ground it all down.
Next I welded 2-inch flat bar all the way around the lid to create a stepped-down lip. I got the lid welded on today.
After the lid was welded on, my dad and I flipped the stove and put it on a roller cart, so that I can get to the stove bottom to attach the legs. I welded some plates to the stove bottom where the legs will go to help distribute the stove weight in a wider area than just the leg stock diameter.
The legs are made from 1.5-inch solid round. I am forging a sort of simple "claw-foot" design for the legs. This is done by creating a justified upset on the ends, and then using a small diameter fuller to creat the claw-foot look. I've got two feet done, and will finish them up tomorrow.
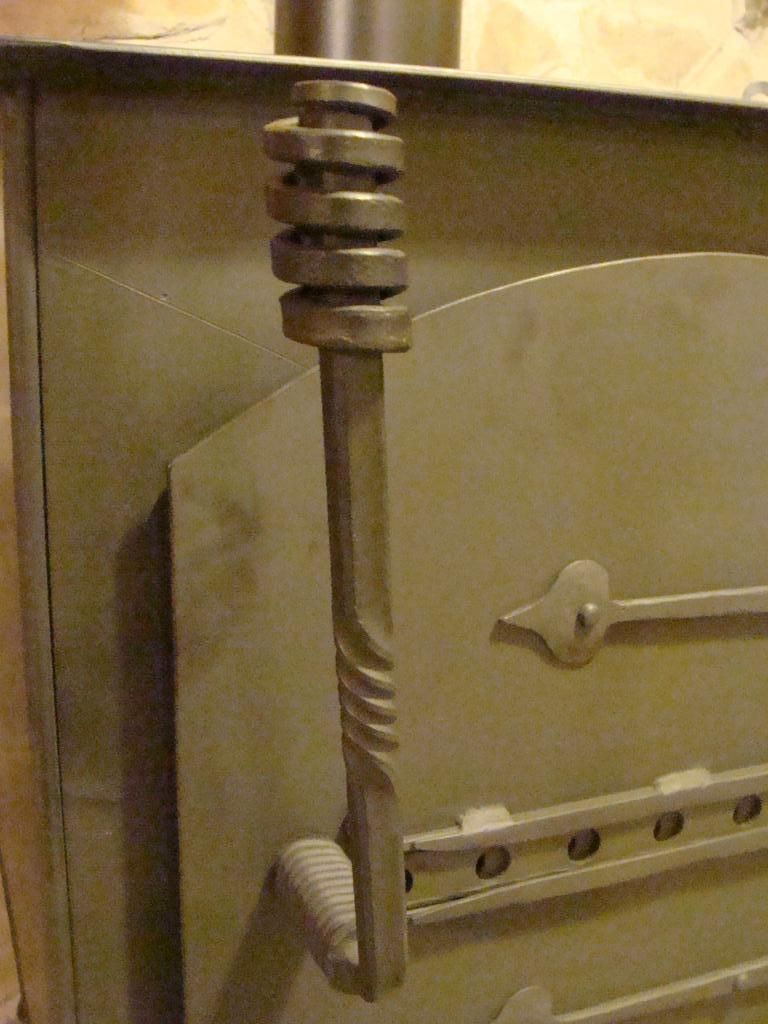
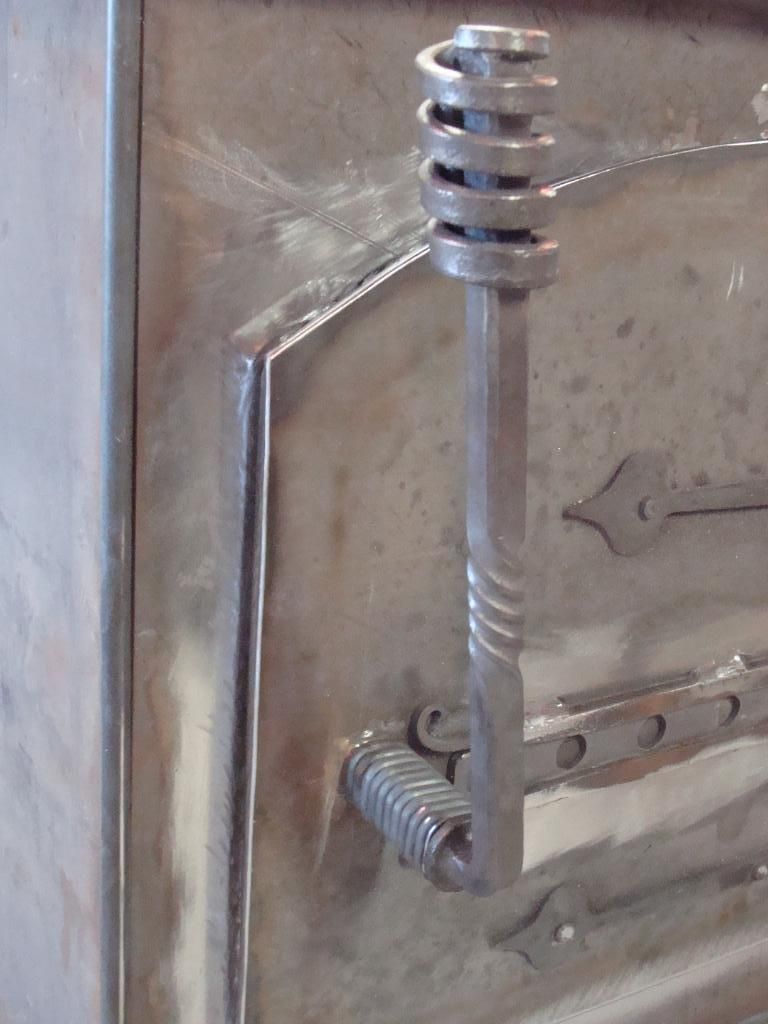
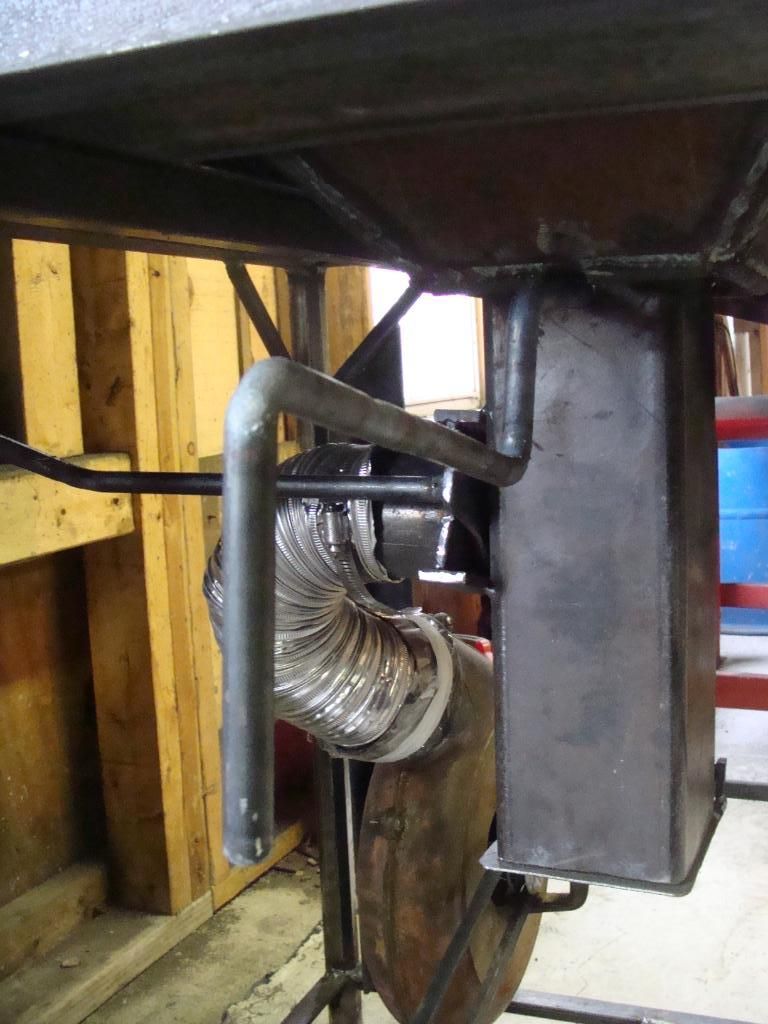
I finished the damper-slide assembly and it all works well.
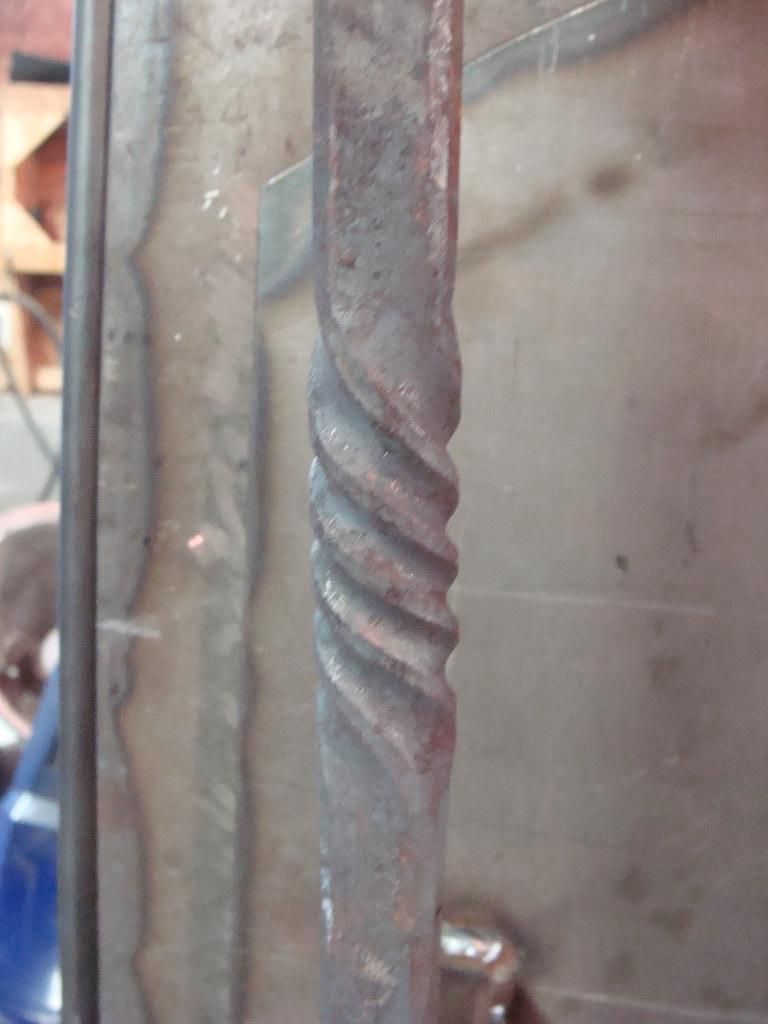
I also wrapped 1/4-inch round bar around the square pipe that is the handle guide. Thanks for the suggestions and ideas John B!
Finally I bent the backside of the handle around so that it latches properly, and I also welded a stop so that when the handle is in the open position it catches at a good angle.
Picture time!
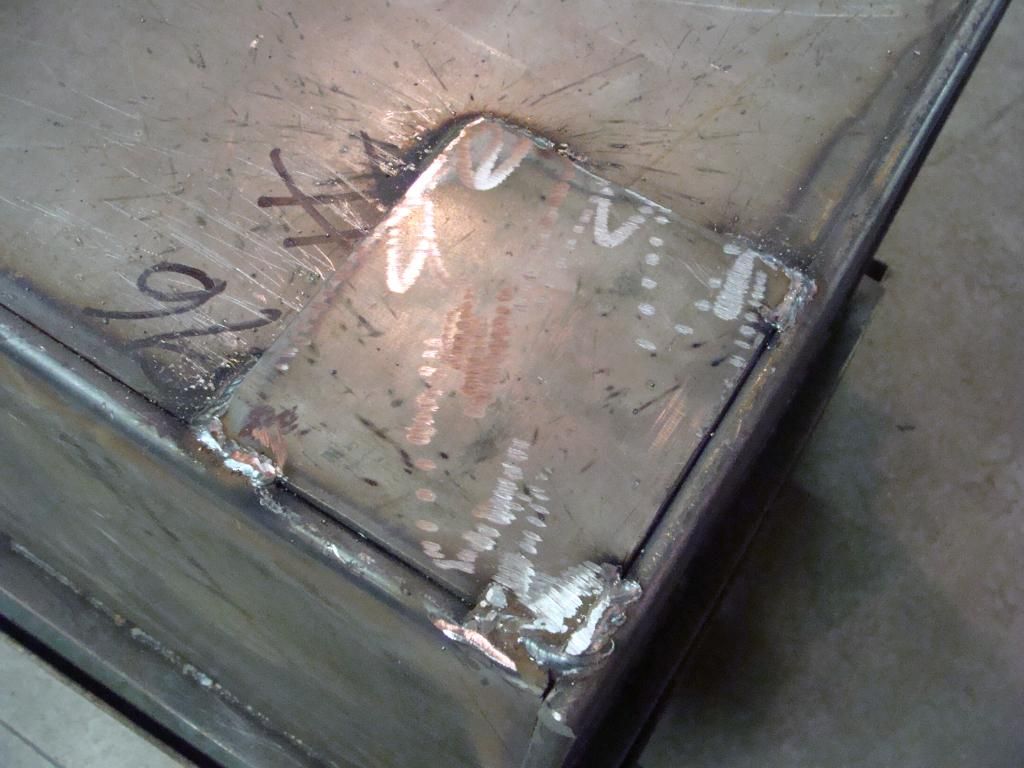
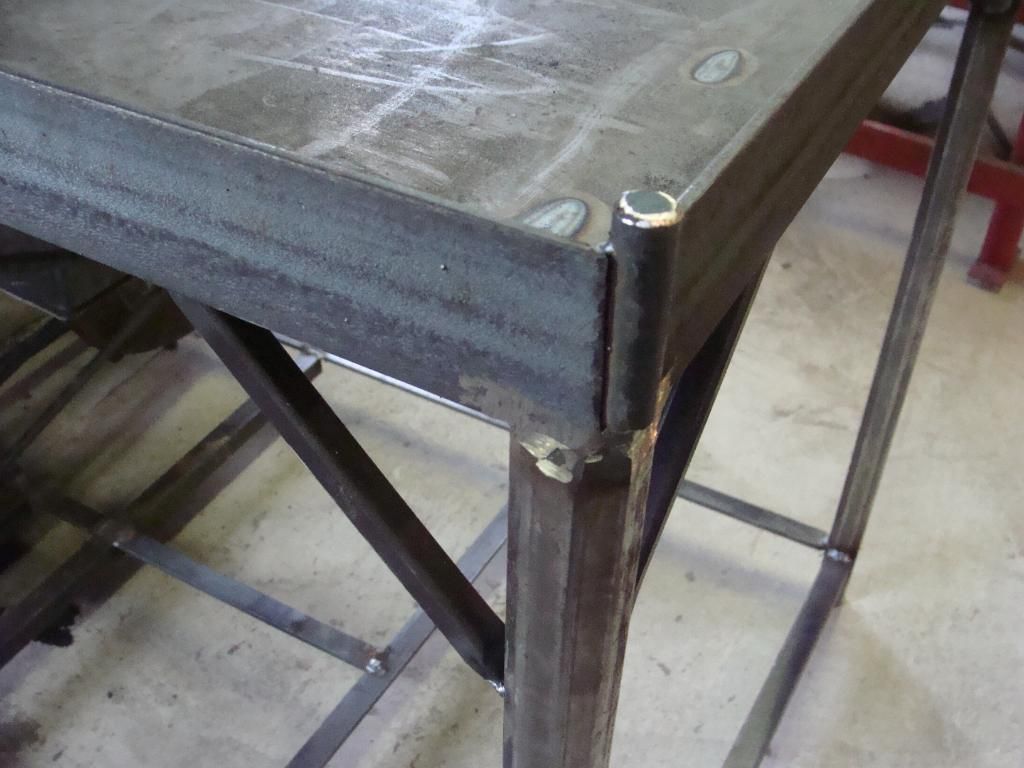
Here is a picture of the bottom with the leg support plates welded on. You can also see the lip around the top (which is currently on the bottom.)
Here is one of the feet! Nothing fancy, but I am pleased with the way they are turning out. They are taking six heats with a striker to help with the fullering!
Ok now! Back to the door!
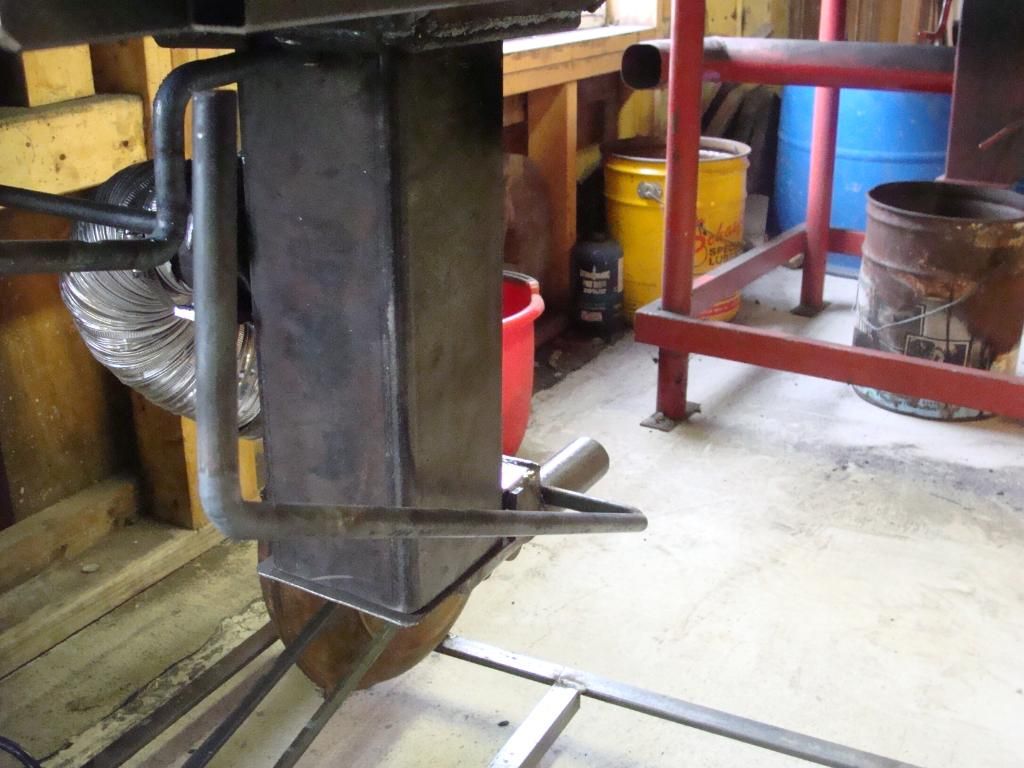
Here is the damper slide!
Here it is in the open position!
And finally here is a close up of the wrapped handle guide!
-
People use water all the time to control fire and put out their fires. If that's your cup of tea, have at it.
However, water is not needed to put the fire out if you do it correctly. That prevents the ash sludge and mess caused by extenguishing your forge fire with water.
As far as fire control, I have no problem controlling my fire without water. Is that saying you are a bad blacksmith if you can't do that? No, not at all! However, once again, it isn't a good idea to mix water and coal if rust prevention is in your agenda. When I build a forge, I want it to last a long long time. I've been using the forge I just sold for the last two years, and there is no rust on the forge pan. Different story if you are using water.
I've worked on both sides of the spectrum here. It doesn't matter what you do as regards using water or not. Whatever floats your boat. However, from my personal experience and from observed experience, I prefer not using water to control and put out my forge fires, having found satisfactory means of doing both without the use of water. -
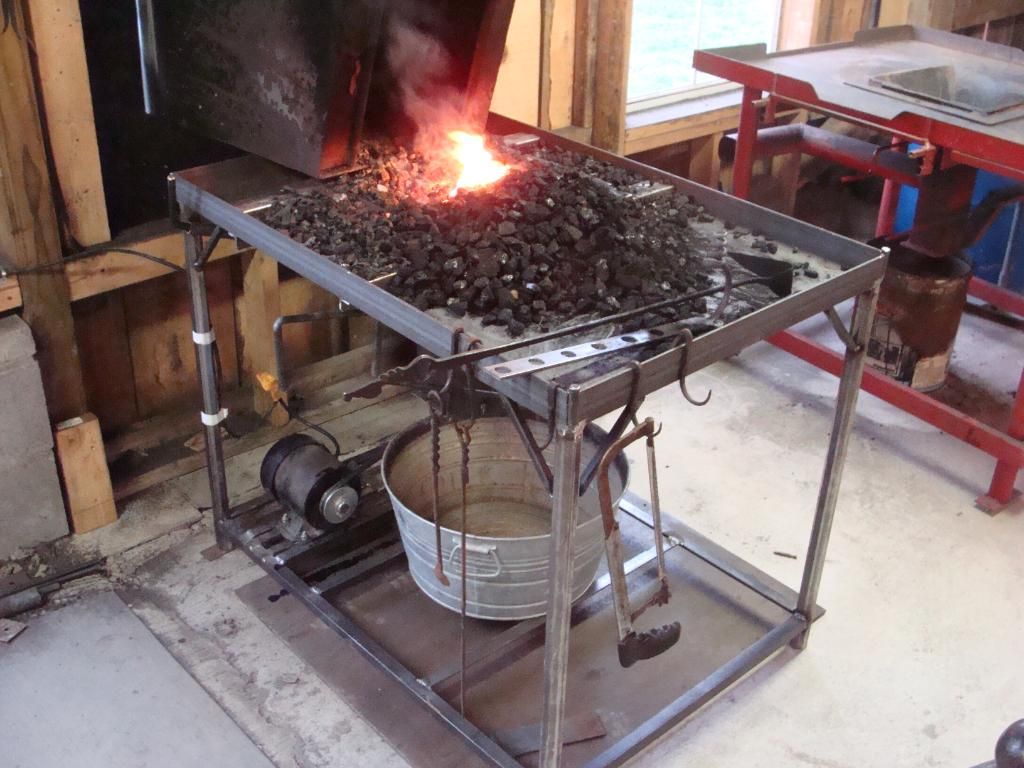
Rake the green, non-burning coal to the sides of the firepot away from the heat. Green coal can ignite and spread flames around quite quickly.
Rake everything else towards and away from you, level with the firepot. DO NOT dig down into the firepot. After a day or forging, all that's down there is ash and clinker for the most part. LEAVE IT ALONE! Spread all of the burning material out a little (just don't leave thick clumps piled up.) Your forge will be out in 30 minutes.
If you insist on excavating your entire firepot to put your forge out, you will just break up your clinkers into tiny pieces and mix the ash junk in with your good coke. Leave that stuff alone and in the bottom of the firepot.
In the morning, you can sift out the good coak that's left in the firepot, and then run your ash and clinker through the clinker breaker into the ash dump.
Stay away from pouring water onto your forge. Water, mixed with green coal, equals a rusted out forge in no time at all.
-
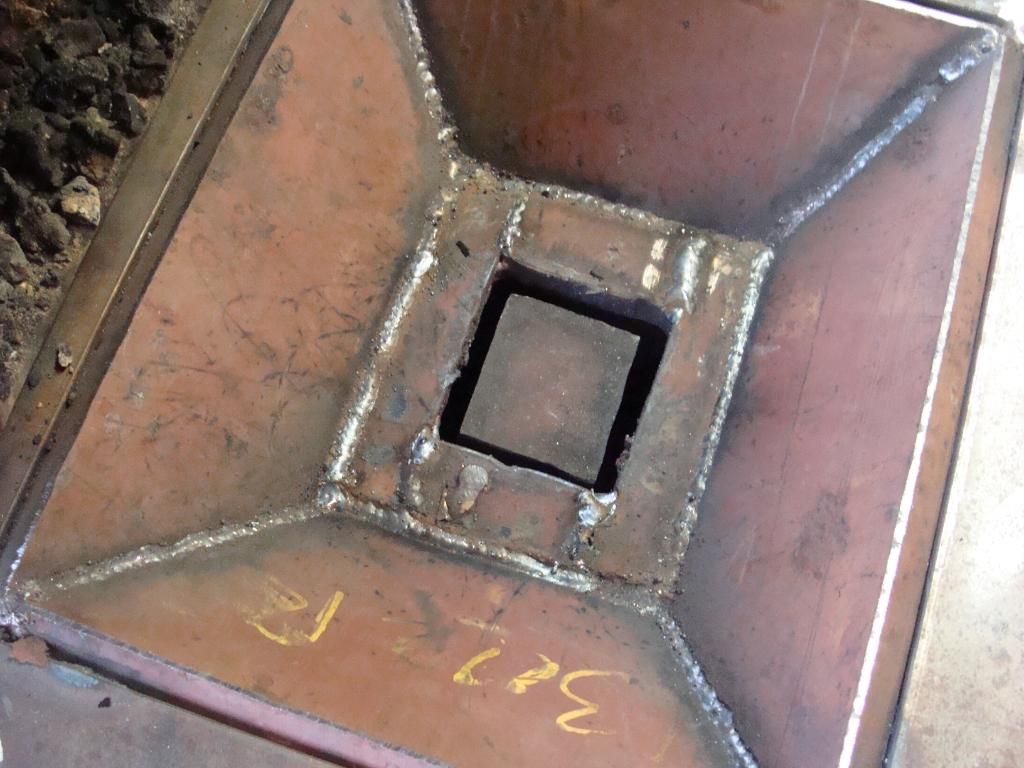
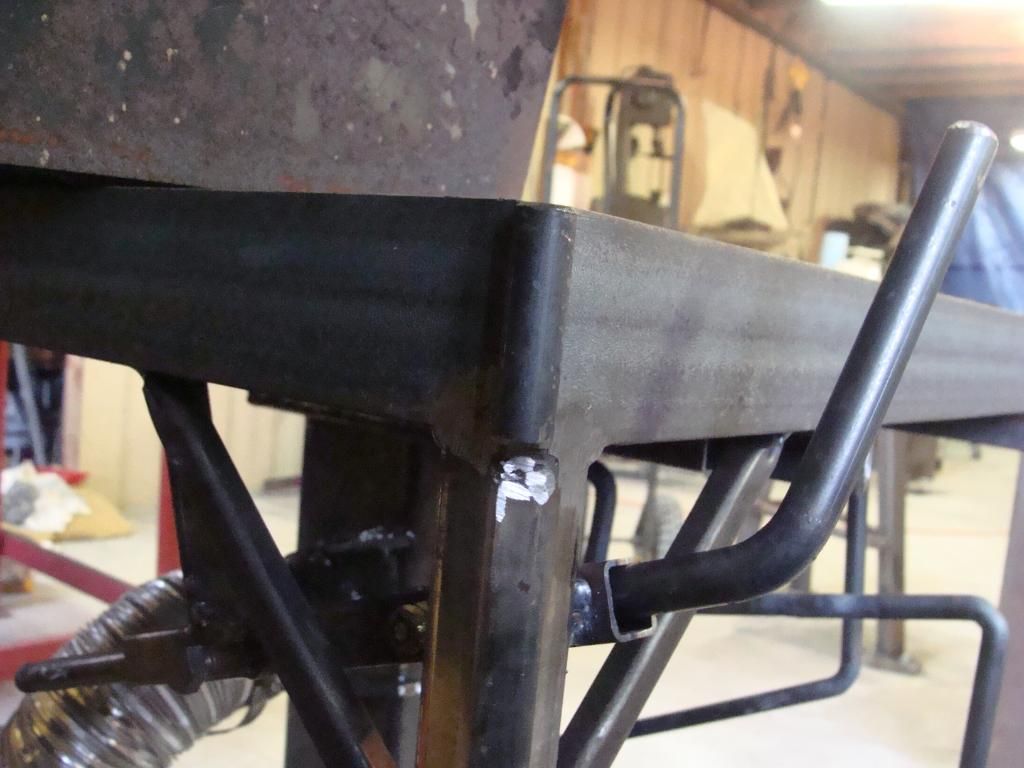
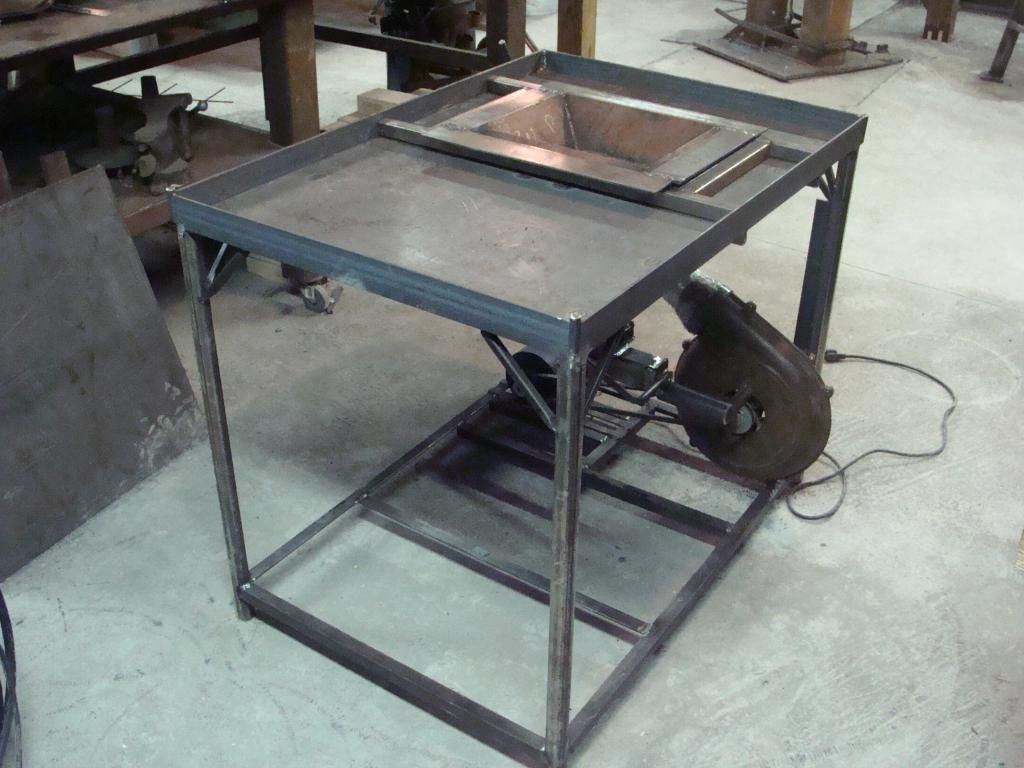
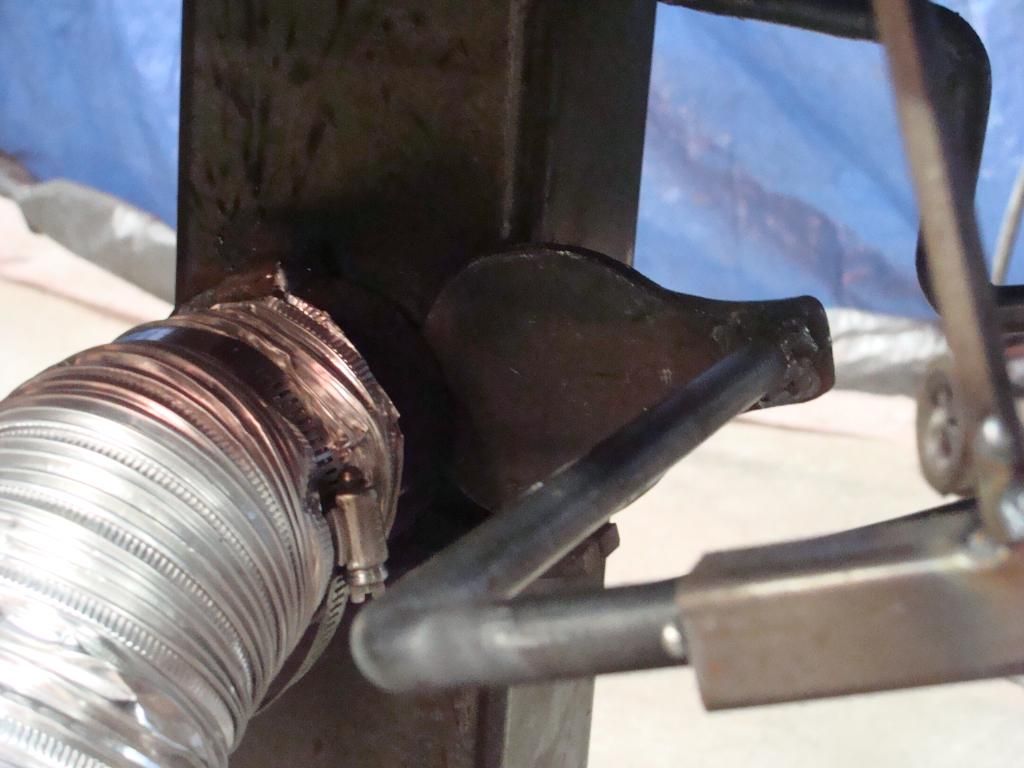
I put in a smoke shelf today.
Jonathan: I make a hinge-barrel tool. The one I made for these was 1x1/4-inch flat bar. Will try to get a picture of the tooling. The hinge barrel is made a tad small and true bored with a drill bit.
-
The hood rests on the chimney so it takes two people to move it. Once it's out from under the chimney, a set of handtrucks grabs the lower angle-iron leg brace and acts like that set of wheels.
-
This stove is going to weigh about 500 pounds.....once it's in the house, it's there to stay for a LONG LONG time! I'm not fond of moving heavy objects frequently. What's done with the stove, must be done now. I've got an idea.....we'll see what it turns out. I'm working on the stove all day tomorrow!
-
Mr. Gaddis,
My blower routing takes the wire clear from any falling steel! I don't think I'll have any trouble there. The blower is plugged into a switch-controlled receptical that I wired specifically for this purpose. However, the air gate that I built is 100% air proof! When the handle is shut, it's shut.
Mr. John,
The air control handle is at an angle. I did this so that the control handle would be at a convenient height. There is a pipe guide that guides the pull handle so that the gate does not jam.
There is a tension bolt that controls the amount of stiffness in the handle. Right now, the air gate and it's housing are stiff enough to keep it from vibrating shut. As time goes on, it will wear and become more loose, so I installed the tension bolt so that more tension can be applied as needed. It is easily accessable just to the left of the handle. (On the back of the forge.)
Here is the clinker breaker handle. Don't ask about the zig-zag. I just kind of went with the flow, and that's what I got! LOL
Weighted ash dump handle and the ash dump.
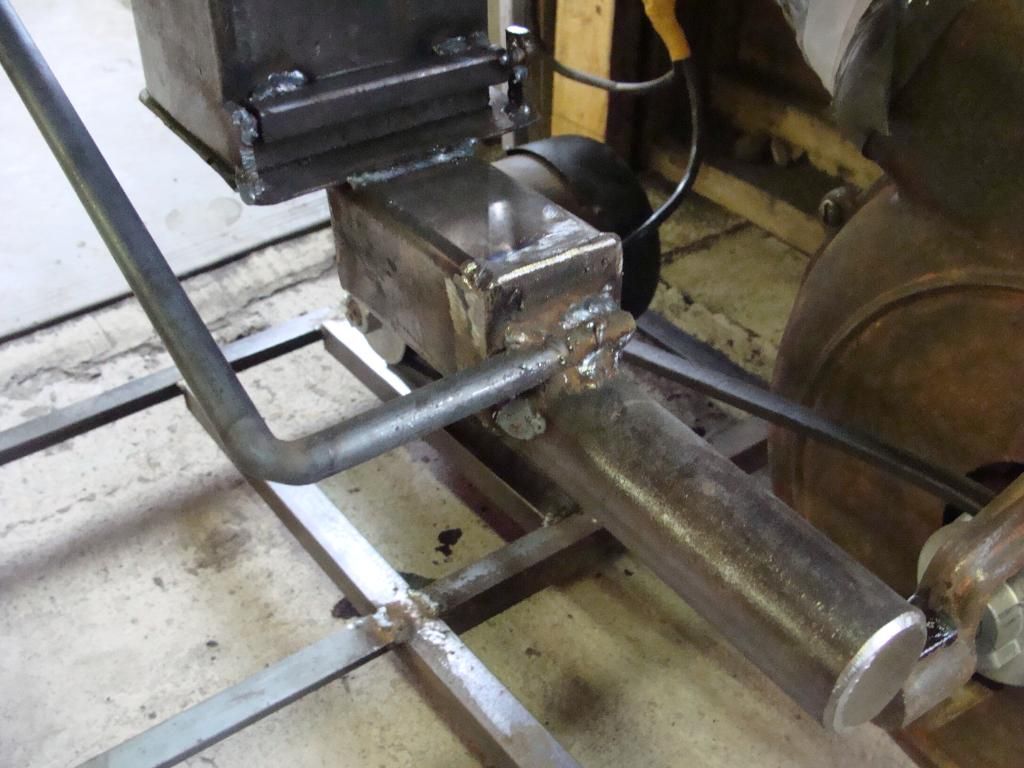
Here is a bad picture of the air gate handle and tension bolt.
This is the air gate!


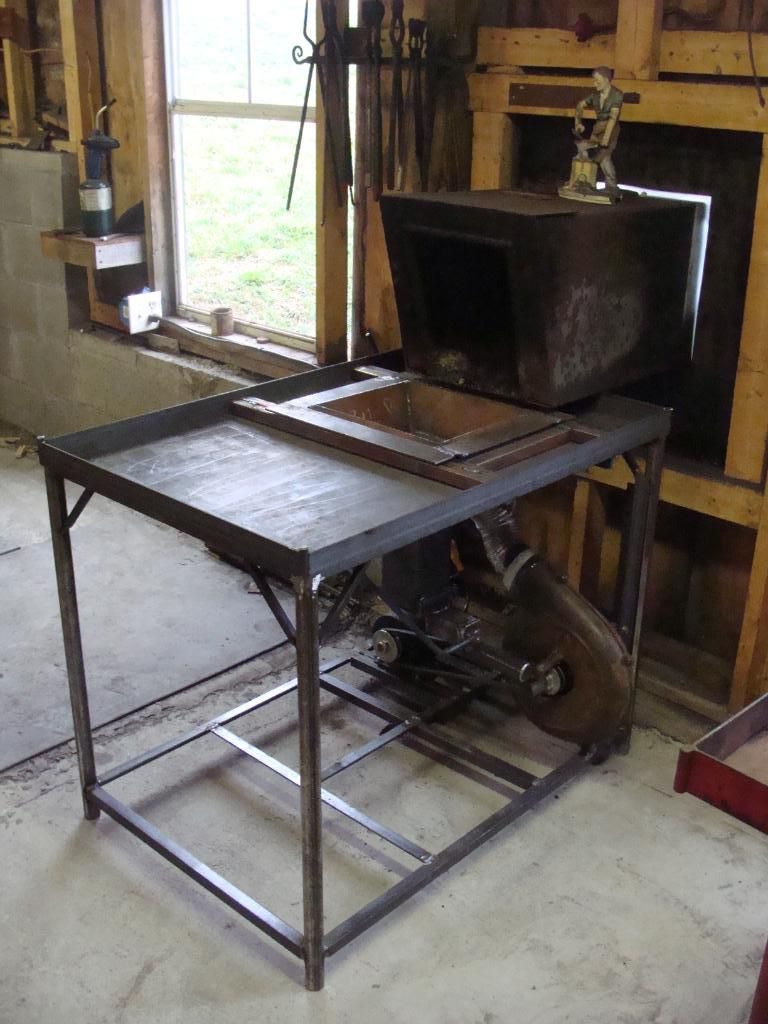
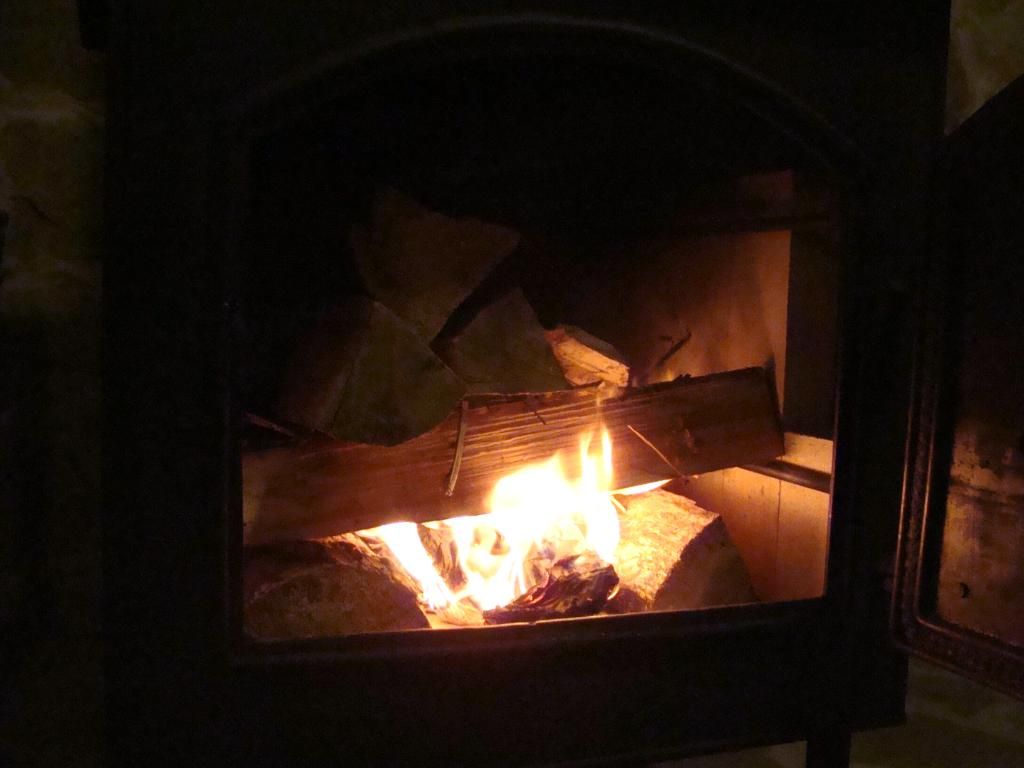
And here is a picture of the first fire as well as a picture of a piece of the damper for the stove, that I made in the forge. (See "hinges for the wood stove" thread in "Member's Projects.") There is plenty of air and the firepot is nice. It'll take a couple of weeks to find all of the downsides, but I am pleased with it overal!
-
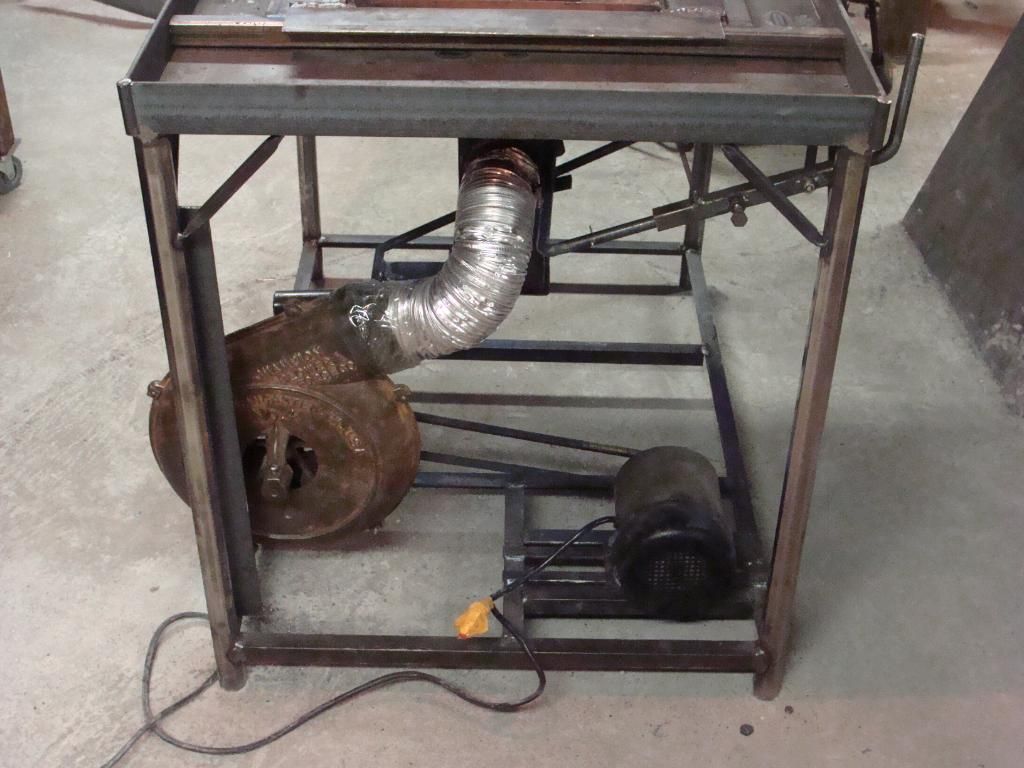
I am selling my big shop forge. The reason is I did a trade for an electric blower and I wanted to build a new forge from the ground up that fit the blower. (Instead of trying to modify the current forge to fit the blower.)
This new one is 26-inches x 37 inches, with a 3-inch deep, 10-inch x 12-inch firepot. It's got all the normal stuff! Clinker breaker, weighted ashe dump, forge plate, braces around the firepot, braces for the legs including triangulation and a 2-inch lip around the edge.
Some modifications to the standard forged designes is that I used 1-inch square pipe around the firepot to raise the firepot level up to the level of the lip. This allows me to put steel in flat across the firepot from any angle around the forge. The pipe also serves to insulate the firepot heat from the steel forge plate, decreasing the chance of warpage and slowing the spread of heat to the edge of the forge. This was Brian Brazeal's idea and it works quite well.
I traded for a Champion Forge Blower number 4. (There is also the number "2" cast into the blower housing.) I got a 1/2 HP motor in a trade. I built an airgate into the air/ash-dump system.
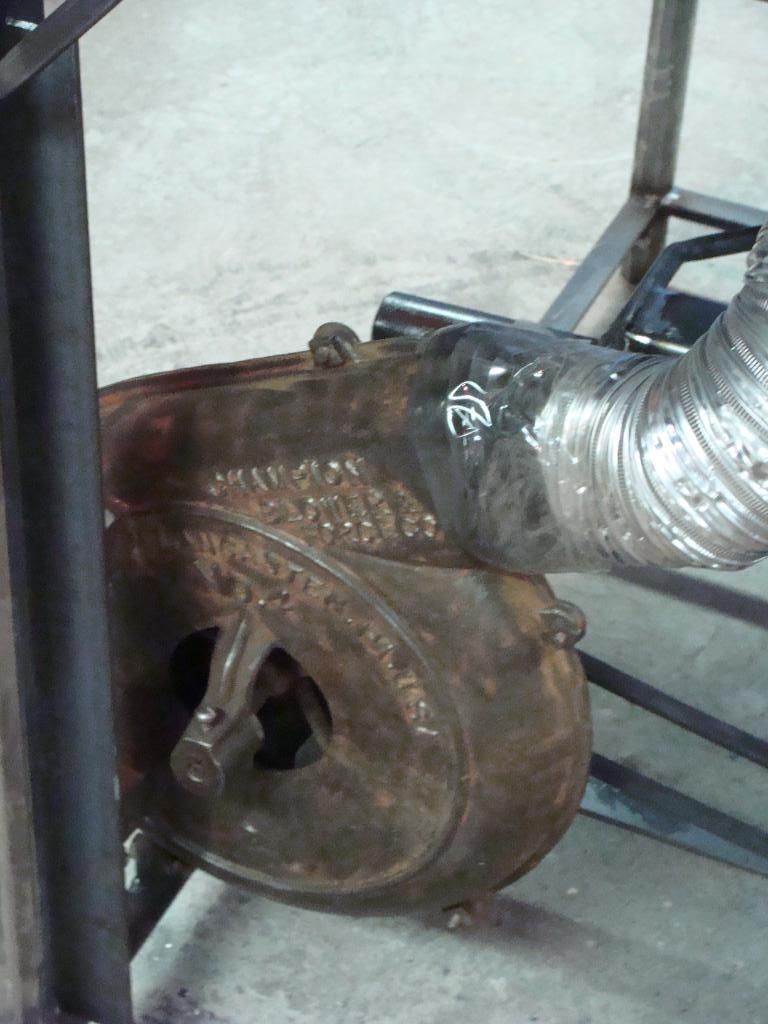
I still need to do some touch-up work with the grinder and put some rubber pads between the motor and the motor mount. It will get painted in the spring when it warms/dries up!
It will get moved in position and fired up later today. Will post pics!
-
hi Dave, looking good as usual, but I am puzzled as to the choice of the square tube for the handle holder, it does not seem to look in keeping with the overall appearance, maybe its just me being picky?
I was also curious as to why you hinged the door from the right hand side, are your family left handed?
The reason I ask is that if feeding the fire when you are right handed, I tend to open the door wth my left hand, and then when I slide in the logs I use my right hand, less chance of burning my self on the door then.
Well as far as the tube goes: I am not aiming for a traditional appearence overal. I forged the hinges, simply because I wanted the experience of forging a set of hinges. I needed some sort of guide to keep the handle stiff and in position with a minimal amount of wobble. The square tube seemed like the logical solution and works like a charm.
There isn't much I can do to change it now, but what would you have suggested here? I always value your opinion highly, so even if I can't follow your suggestions this time, I can file them away for future reference in simlar situations.
The place that the stove is going is on an existing hearth. This stove will replace our smaller stove that we currently use. The wood is generally stacked on the left hand side of the stove. There is a wall about 4 to 5-feet away from the right hand side of the stove. Therefore it is natural for the door to swing on the right hand side of the stove, towards the wall and away from the wood stack. The door can swing a full 180 degrees so it will be completely out of the way while wood is being loaded.
Well, compared to Vermont Judson, it isn't too awful cold, but we've experience as much as two weeks of well bellow freezing temperature, at a time. Plus, we are originally from 50 miles south of Atlanta Georgia. This weather here is arctic compared to there! :D
-
oops! Thanks for the heads-up!
There it is!
No progress going on right now. I'm selling my shop forge and build a new one so I'm working on both at the same time. Updates soon!
-
Make sure you have a heavy solidly built stand, bolt or stake the stand down very firmly. (If staked in a semi perminant shop situation, use at least 4-foot 1/2-inch rebar stakes.) The fasten the anvil to the stand securely. Don't weld it to the stand but use some sort of bolted or wedged bracket.
Then forge on it!
Brian Brazeal (a well noted member and an excellent smithing teacher,) uses around an 80-90 pound Henry Wright anvil, and frequently forges 1.25-inch material with a 5-pound hand hammer and occasionally a 12-pound sledge with a striker.
The key is to make sure your anvil can't go anywhere. That little 80 pounder of Brian's was more solid than my 290 pound shop anvil on a 50 pound stand, before I staked/bolted the anvil down.
You have a very clean anvil nice little anvil, now do it justice with a good sturdy stand, and some good bolts.
-
Very nice!
-
The anvil is hard steel as well as the punch. A punch plate is soft steel. If you contact the anvil with your hole punch you will probably damage either the hole punch or the prichel hole. If you contact the punch plate with the hole punch, you might ding the plate but not the punch. The plate is sacrificial mild steel and saves your holes.
I would revise the video to have a steep ground pointed end, instead of flat. The steep ground point, punches much better.
-
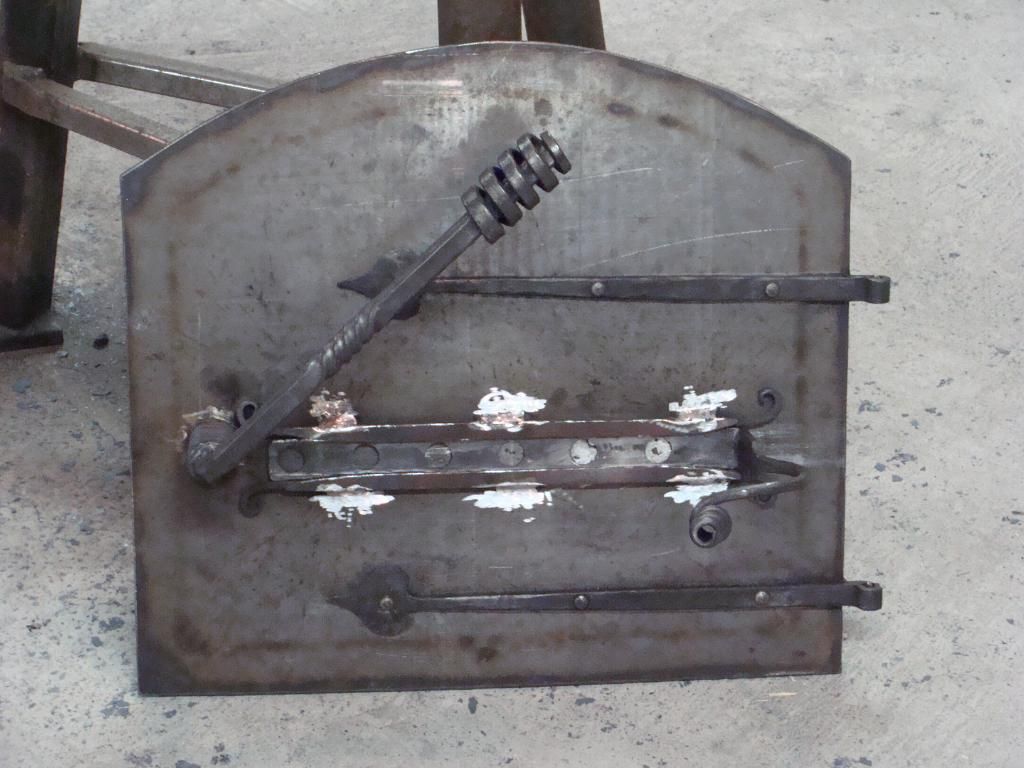
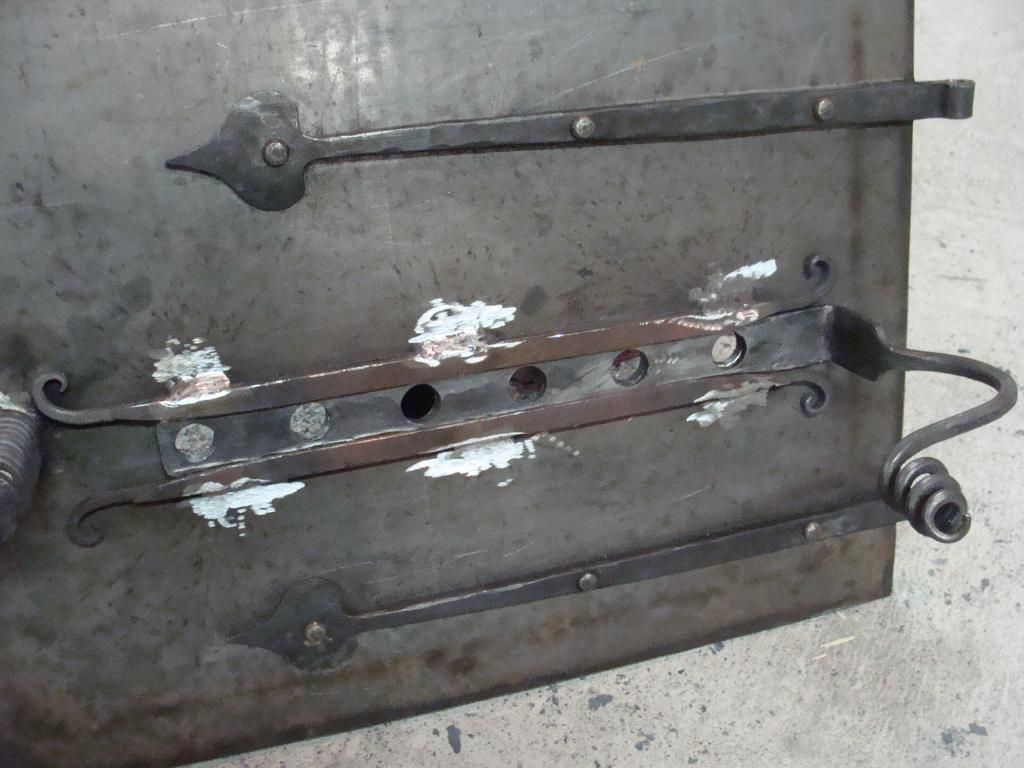
Well here are some stove updates. I'd originally planned on this just being some pics of the hinges, but due to the response, I figured I'd see it through to the end. I'm taking the pictures anyway, might was well post 'em!
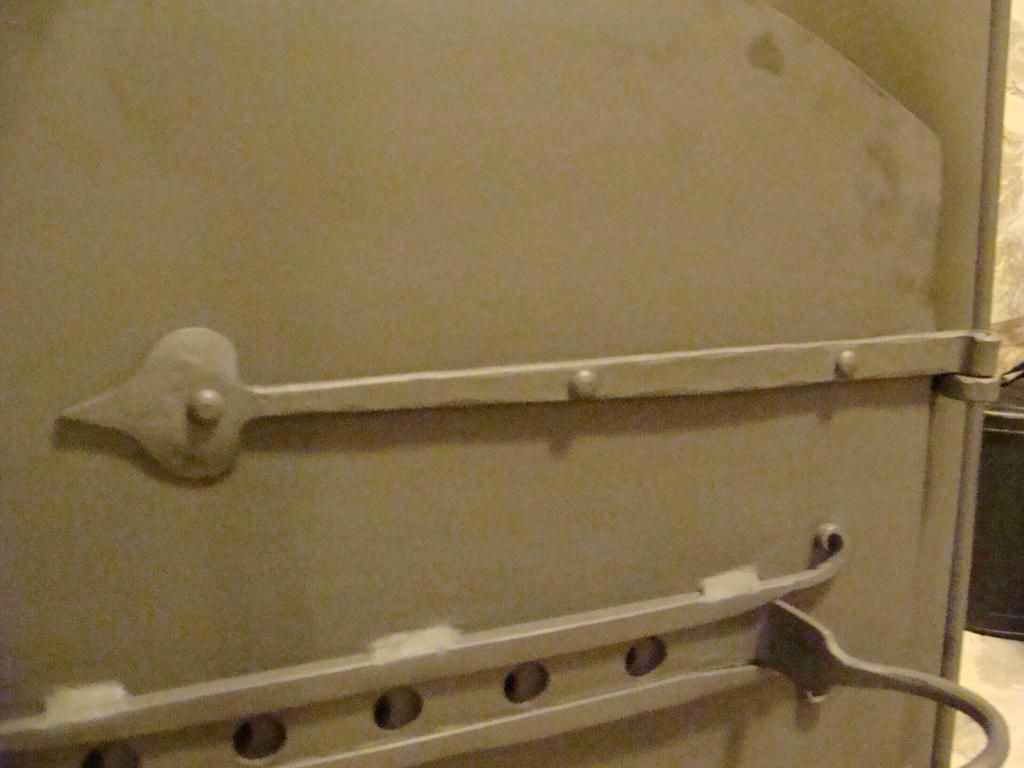
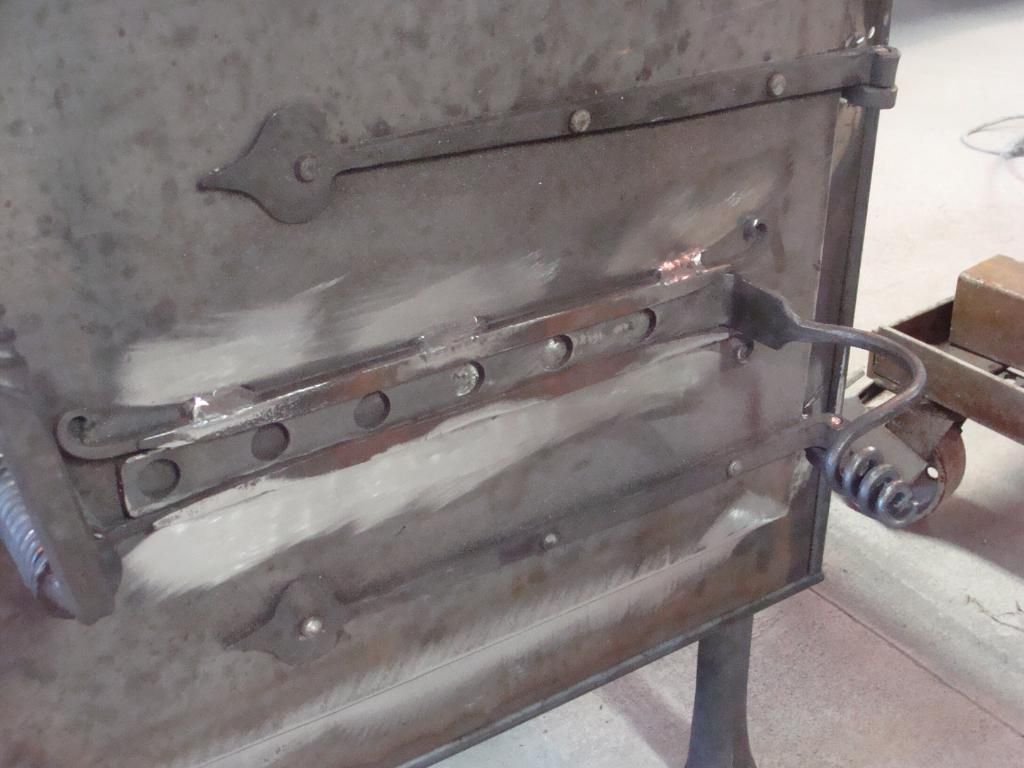
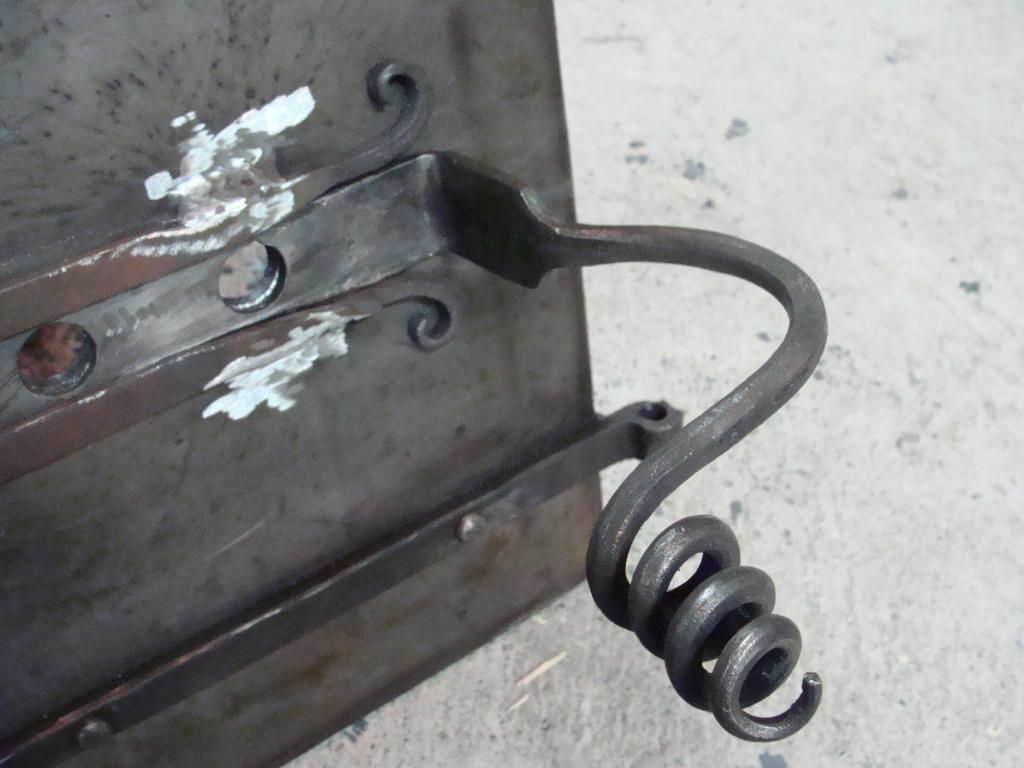
Here is the handle/door latch.
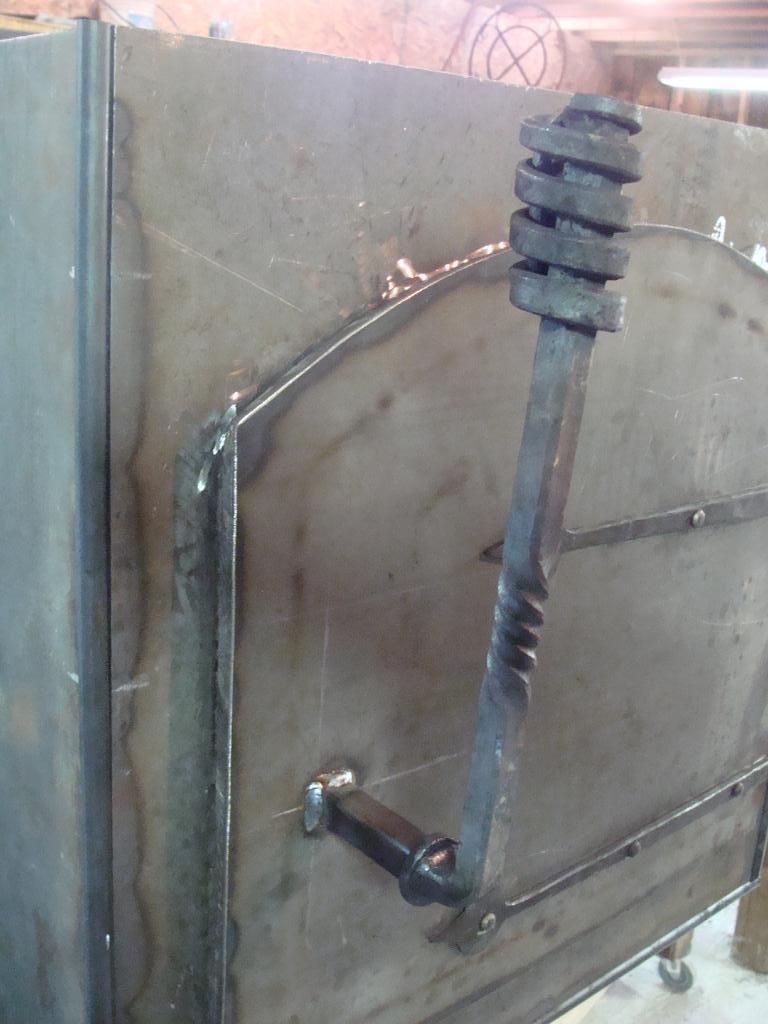
It will get cleaned up before painting.
I used this piece of pipe as the guide for the handle, and then forged the 5/8-inch square material down to round to where it just fit inside the pipe.
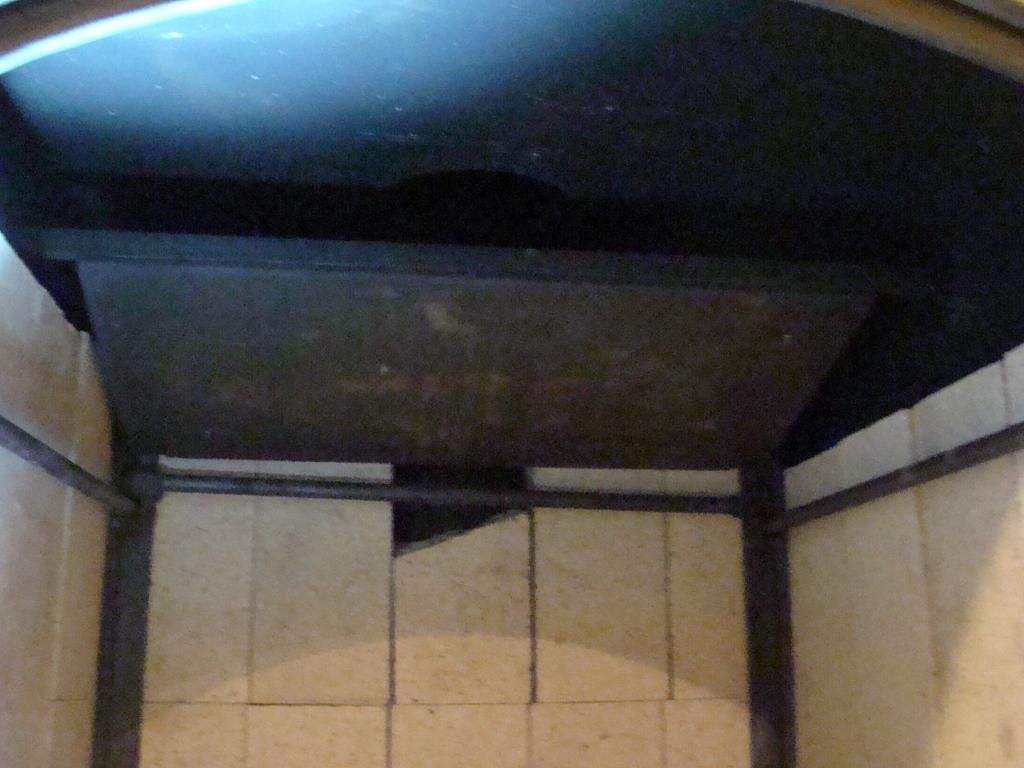
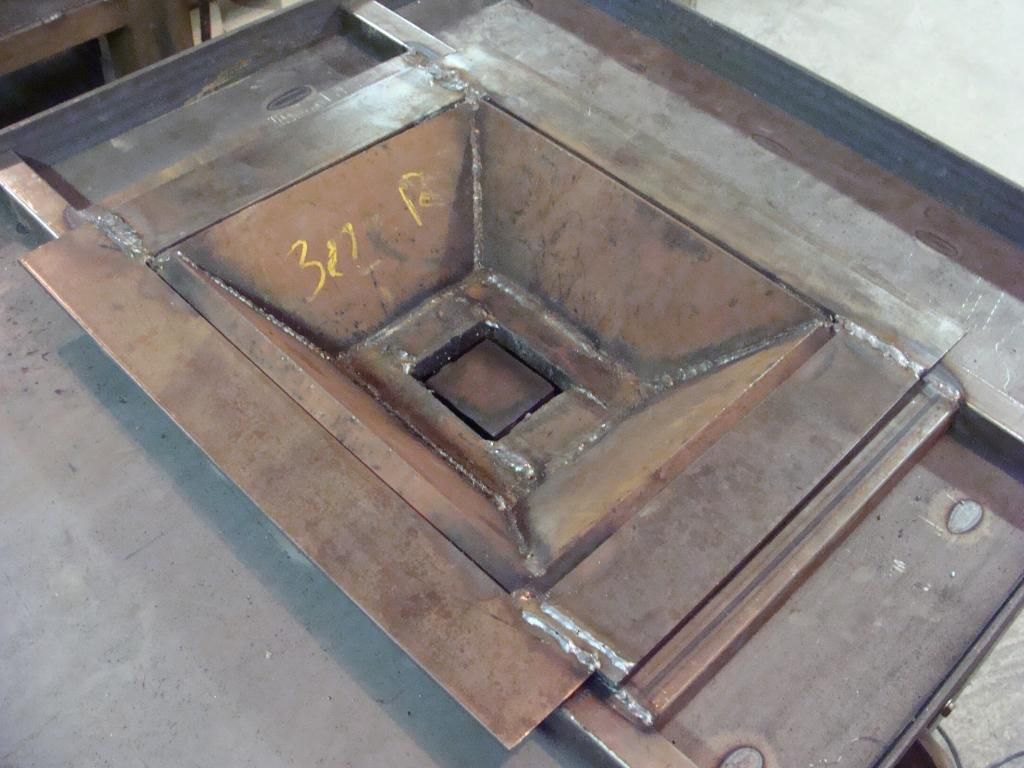
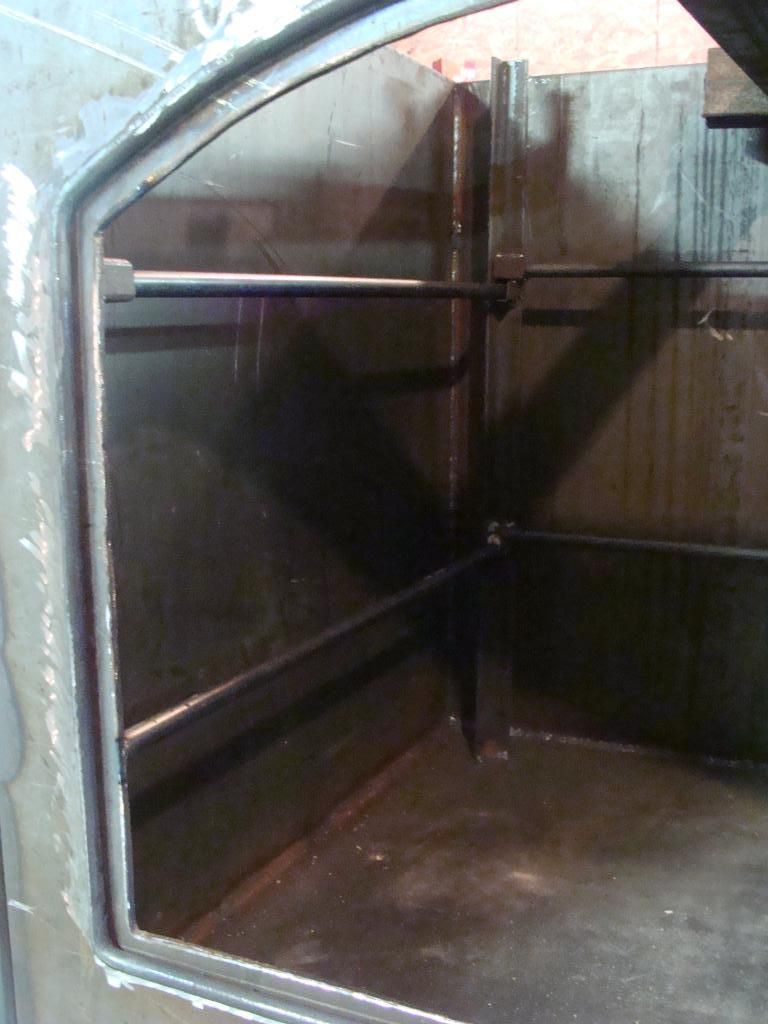
Here is the interior frame that will hold the firebrick in place. The lower line of frames are welded in, while the upper line are removable so that broken fire-brick can be removed if/when needed.
That's all for now. I buggered up the damper on the door yesterday, pretty badly. I've got to try to fix that today, but more on that later!
-
This online metal calculator is fantastic! Thanks for linking this, I probably could have avoided posting this question had I known about this because I would have found that a 3" diameter 5" length hammer would be almost 10 lbs!
Ohhh let's make one! :D Now THAT would take some striking!~
I have not run across any hollow car axles at the JY.
-
Hi there!
Making a Brian Brazeal rounding hammer for forging would be a wise choice! However, there are a number of tools you need to do so.
Hammer eye punch for punching out the hole
Two drifts for drifting the eye
Top and bottom fuller sized appropriately
cupping tool
There are a number of tools required to make those tools. Taking a class from Brian or spending some time with one of his students is definately the way to go. Post your location....you could be 15 minutes down the road from one of Brian's apprentices, who has the tools and is able/willing to help.
Having said that, there is nothing like getting it "from the horses mouth," and eventually I would HIGHLY reccomend taking a class directly from Brian, but one of his students might be able to help you get started.
For a four pound hammer you need about 5-inches of 2-inch 4140.
Here is an online metals calculator. http://www.onlinemetals.com/calculator.cfm
If you need a piece of stock, hit me up in the PM box. I just bought a 41-inch piece of 4140, and can sell pieces. I have easy access to the material at a good price in sizes from 1-inch to 2-inch round. I'll be happy to cut you a couple exact size pieces so that way you aren't paying for extra.
A good source of steel for the tools you need, is junk yard car axles. I buy axles from my junk yard for $5.00 each and they yield a half dozen tools each. Sometime you have to bug the hound out of your junk-yard guy, but once you get them to start setting the stuff asside it will always be available when you need it.
the smithy plan
in Building, Designing a Shop
Posted
I work with a wall-side forge using a side draught hofi-style hood. It works good, no complaints! If I had the floorplan to do it though, I would put a center-mounted forge. With a wall mount the stock needs to go into the forge parallel to the wall that the forge is against. That way you can get long stock in. The problem with this is, you only have a 90 degree working range around the forge. Draw a ling out parallel with the working side of the forge, and parallel with the wall that the forge is against. That's your 90-degree work-space.
With a center mounted forge, you have a 180 degree work space. Draw that same line parallel with the working side of the forge. There's your working area.
So with a center mounted forge you have twice the work space, before you have to start walking around the forge to get to the power hammer.
Right now, I've got to walk around my post vise to get to my striking anvil.
I've got to walk around the left side of my anvil to get to my air hammer. I've got to walk around the right side of my anvil to get to my tools.
It works, yes! But, the opportunities for work space are increased with a center mounted forge. The only advantage I see to a wall mount forge is you don't have to cut a hole in the roof, because you can do a hofi-style hood straight out the wall.