

FieryFurnace
-
Posts
2,106 -
Joined
-
Last visited
Content Type
Profiles
Forums
Articles
Gallery
Downloads
Events
Posts posted by FieryFurnace
-
-
Make a jig that fits over the power hammer bottom die to hold the hammer blank in place, then it will be easier to get the punch set right....or you could make a jig the holds the blank and the punch in line together
I would like an upper H13 die that is the punch. Bolt it on! The bottom would need some form of alignment tooling as well as stops to keep the billet from sticking in the punch. The problem with the alignment tooling and the stop, is the expansion caused by punching the eye. You have to be able to get the billet in and out, easily, to conserve time and heat. You would also need the alignment die to be adjustable in all directions and on all sides to allow for different sized billets.
Sounds like a job for some heavy all-thread.
-
There will always be a need for customized forged iron-work, in some form.
-
Hi there! I've take 9 weeks of classes from John C Campbell folk school and I've spent five weeks working with Brian Brazeal (a notable teacher who is a member here.)
I'm west of you about 2 hours, and I offer classes. PM me and let me know what you are wanting to learn. I'm trying to put together a group class with some locals right now, which would keep cost down per person.
-
Perhaps a hatchet or claw hammer like you said, but in these forging hammers where you typically choke up, I think it would probably fell a little awkward.
-
I'm using an 80 pound air hammer, single hit method. It's hard to line up and move around, which is most of what slows it down. But it is just down-right big stock for the hammer too.
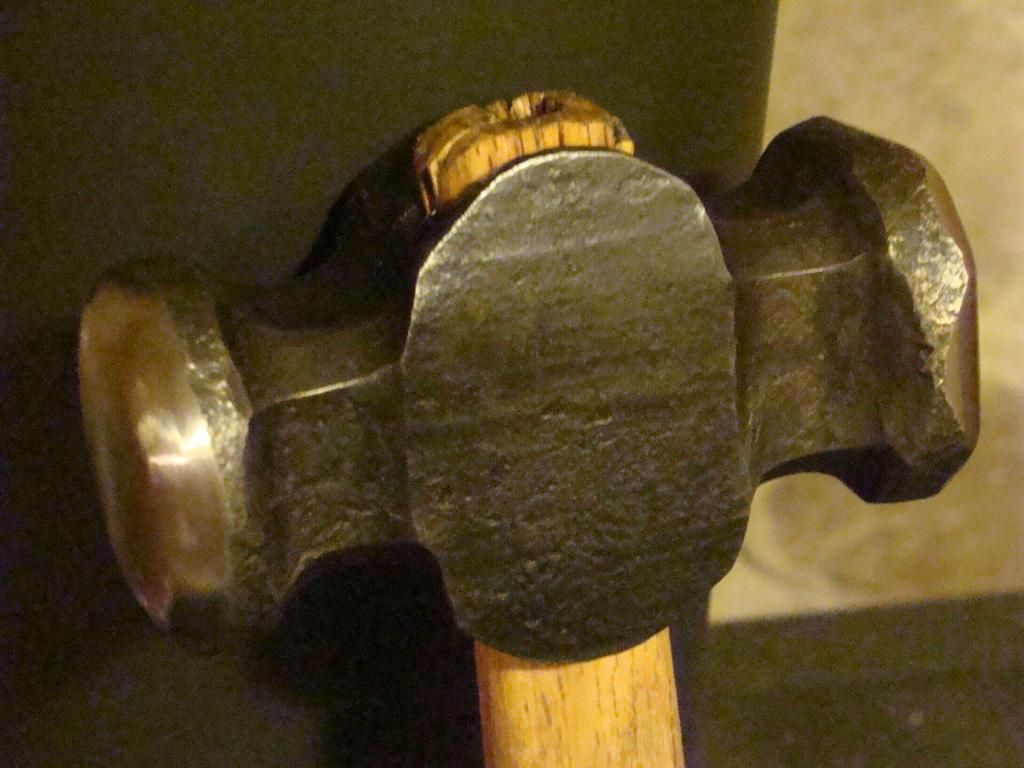
I took out the oak handle today and did a wavy-grain walnut handle with two crossed white oak wedges. I'm staining it now and will post pics when done.
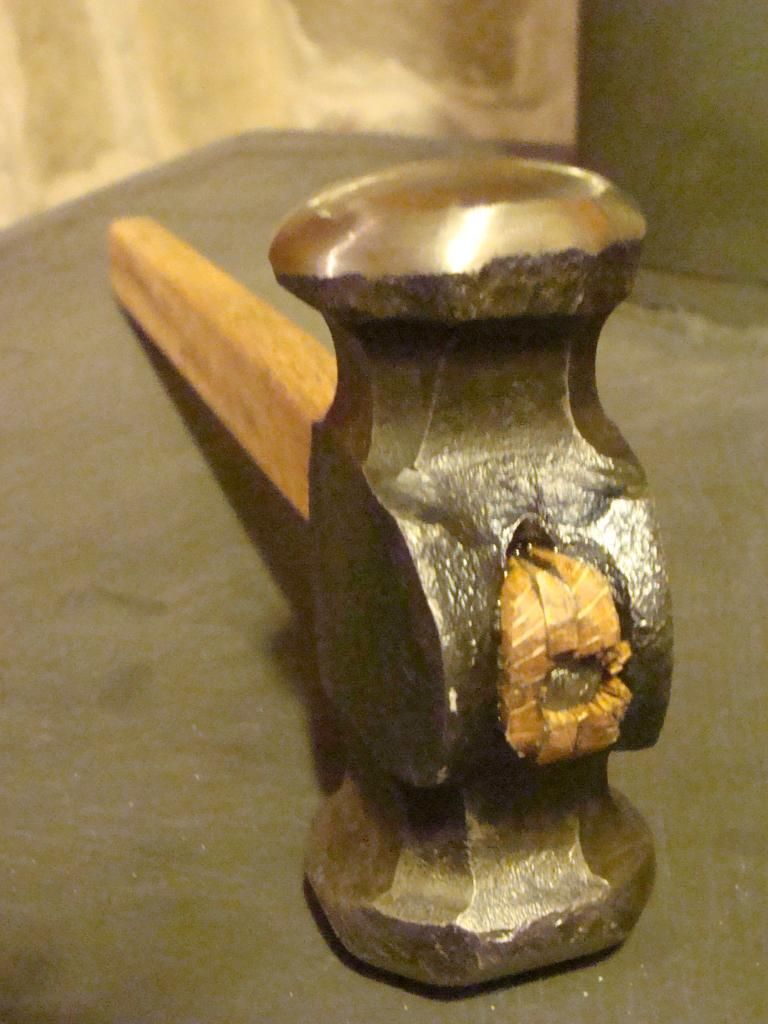
I also polished the face with 220, 340, 400, and then scotch bright. It's mirror finished now.
Brent Bailey's work is quite nice. I got to see a lot of his stuff out at ABANA and I've used one of his sledges at Brian Brazeal's place.
-
Interesting info....especially see that I'm supposed to be on the mailing list for KBA if they ever got together. I've got some interested locals, so I'll contact the Maynards and see if I can't get my email lists transfered to them.
-
Dave,
I'm in, let me know what you need and I'll see what I can do to help.
Mark
Thanks! I gave your email address to the guy that is handling emails for me. Once we've established a date for the meeting, I'll be rounding up some folks who are willing to bring extra equipment so that everyone has a chance to bang on metal. I can set up three forging stations, and 10x10 shade tent. I could use more forges, tents, anvils, tongs, hammers, vises.
Once we establish a date, I'll put my phone number in the general email, so that anyone with portable equipment, who wants to bring it, can arrange it with me before hand.
-
Isn't that when you crack open the air gate to heat up a piece your about 3/4-the way done with, and you forget about it and you hear it sparkling across the shop over the noise of the blower and band saw running?
Just sayin'!
-
I certainly do take Brian's post as a complement!!!
I hope that my reply was not misunderstood to be negative! Anyway, I just wanted to make sure the mods are aware that I will follow the forum rules under any conditions.
As a student, it's an awesome feeling that one of my instructors would want to buy a piece that I made (with Chase's help,) that he taught me how to make.
Hmmm Alec! I kind of liked the flare! Especially in those 2-inch x 3.5-inch billets. You need to try one of those sometime! They are neat.
Speaking of grinding, I need to get a good belt grinder. I used my dad's belt sander but it is designed for wood, not steel.
-
The handle absolutely DOES NOT need a steel wedge to be a working hammer. Whoever told you that was just being silly. I have plenty of hammers and axes that do not have any steel wedges in them, and not a single one has ever come loose. The key is properly wedging with a wooden wedge that's wide enough at the top to really spread the handle.
Also, I've seen a lot of axe hangers re-use an old handle that's rather chewed up by cross-wedging by using a wooden wedge like you used the steel wedge. The cruciform created by the opposed wedges was very sexy, imo, and is something that's different enough to catch the eye without looking untoward. Using odd woods that take a stain differently than the handle does will really make the wedges pop out at you, and this is a good thing.
Agreed! I'm working on some other stuff today, but sometime this week I'm going to rehandle it using black walnut with two perpendicular wooden wedges made from white oak.
-
I see there has been semi recent activity on this thread. I've had a lot of semi-locals express interest as well. Things took off last year, and I had a job-opportunity out of state that came up shortly after I started the thread. Then the Young Smith's 2012 trip to ABANA, and then fall craft shows. You folks that do this for a living as well, know the drill.
Anyway, I've got a friend who is going to start working on compiling an email list of interested people.
-
-
I appreciate all the comments and critique. There are some interesting thoughts on the handle.
One of the things on the guild's checklist is functionality of pieces that are supposed to be functional.
In order for the hammer to be functional it needs the steel wedge. So what to do? I'm thinking about knocking out the oak handle, replacing it with walnut like McPherson suggested, and pre-cutting a slot for the steel wedge like I do on the wooden wedge. This would allow more control of wood displacement when the steel wedge is driven through. I'll also clean up the wedge and make it nice a shiny.
The faces will also be polished. As far as pattern-welded billets and silver inlay, I neither have the skill or materials for that as of yet.
-
I did it on the power hammers. The only thing that really goes slow, is the punching. Even with the extra 20-pound weight on my 60-pound air hammer it took like 6 heats, which is CRAZY!
No touch-mark, the reason being it's a blind jury.....any and all marks must be removed or covered. I center-punched the side of the eye that the handle goes in, and left it at that.
Not sure about the polish. It's got an extremely worn 80-grit polish on it right now, and is perfectly ready for any and all forge work. I might brighten it up a wee-bit for show though. But like I said, it's ready for work as-is.
I'd about agree with that sentiment Frank Turley!
-
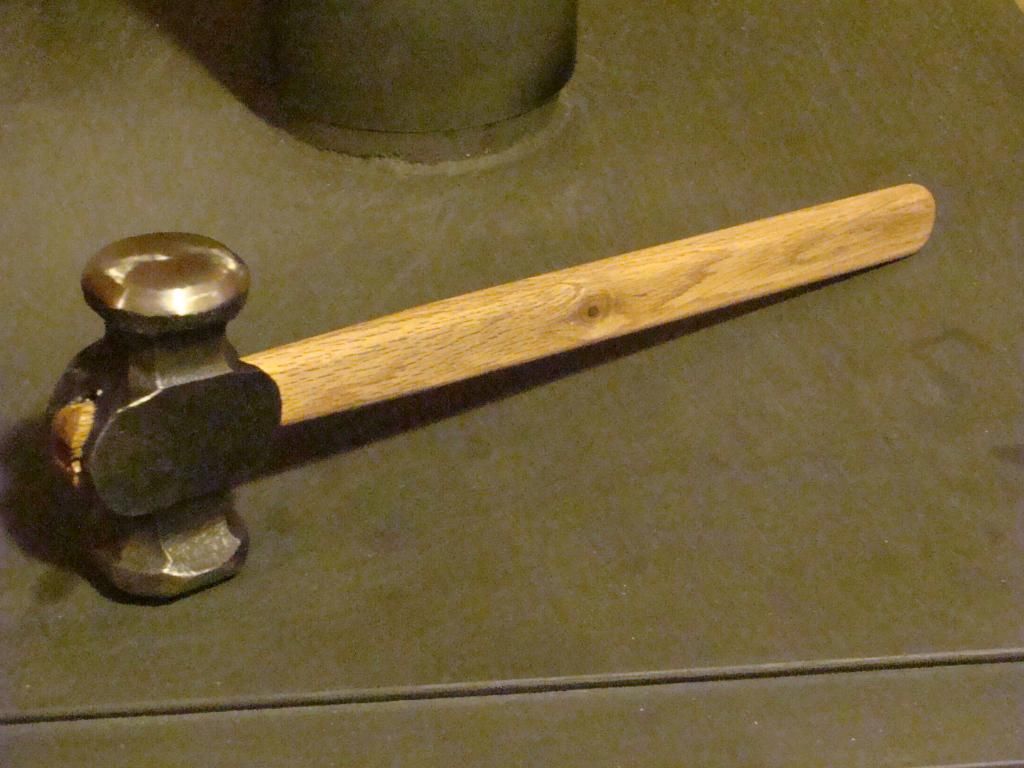
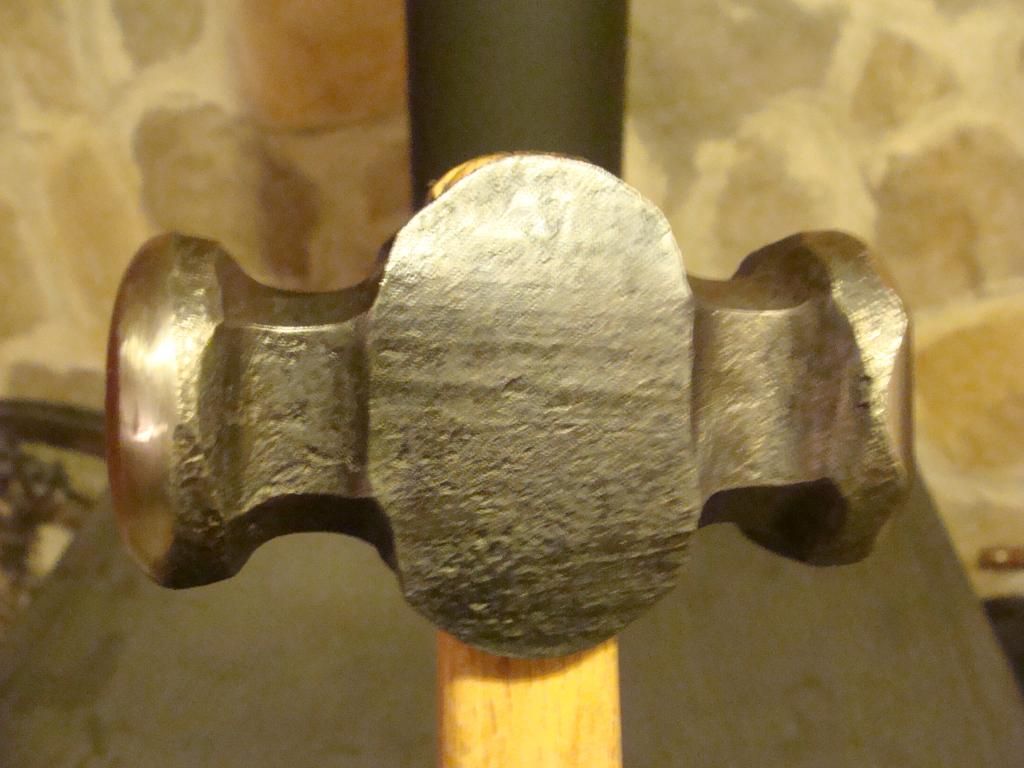
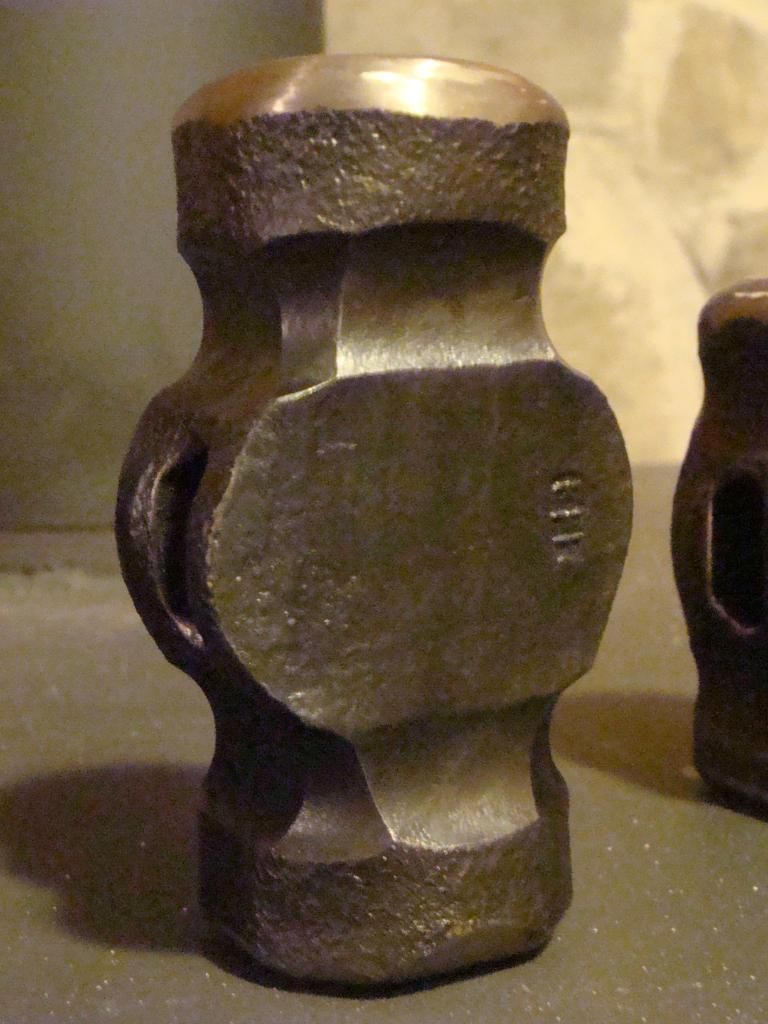
"Trip" AKA Chase, left yesterday after staying here for four days. Since I had all the hammer making tools out anyway, I decided to make a hammer today. This hammer is going to be one of five pieces I submit to the Kentucky Guild of Artists and Craftsmen for review by jury, to try to get allowed into the organization.
I figured that, part of what defines the blacksmith as the king of craftsmen is his ability to make his own tools. So, hopefully the jury will think so too.
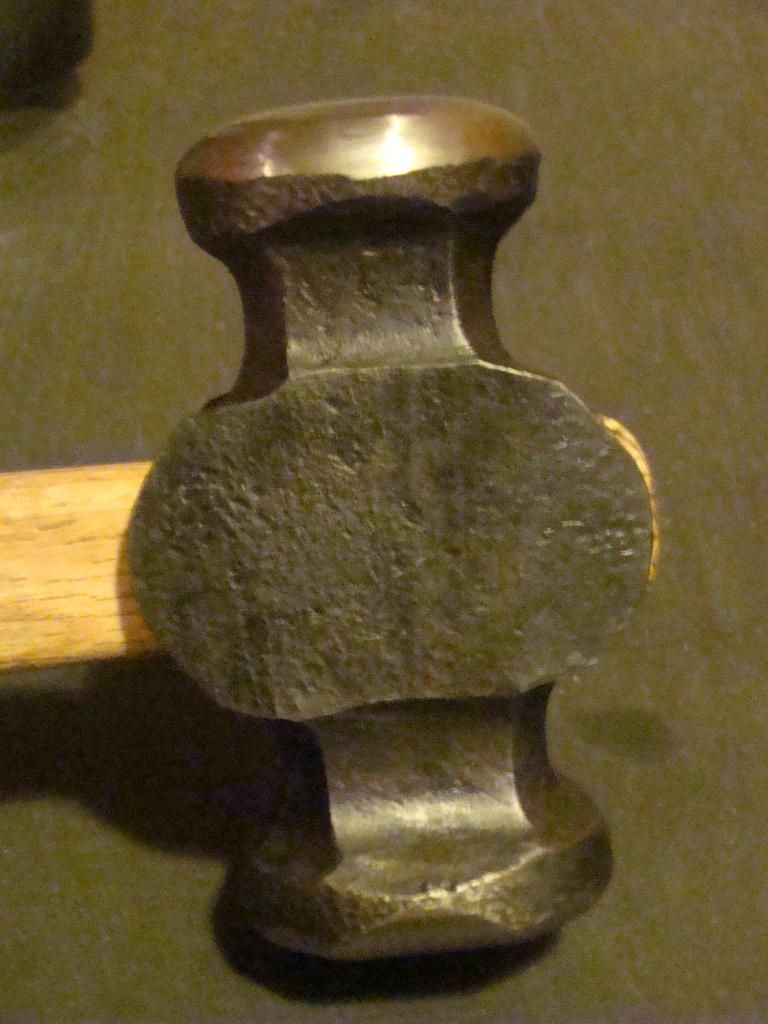
The hammer is made from 2-inch solid 4140, cut into a 4-inch billet. It has the most pronounced cheeks of any hammer I've made.
It is of course the Brian Brazeal inspired blacksmith's rounding hammer!
-
"Trip" will be in touch Brian!
-
Hey thanks for all of the complements! We sure did enjoy making all of these little toys, and I am pleased with the results and time. Chase's striking habits GREATLY increased as he swung the 13.25-pound sledge for the entirety of the operation.
This thread is not for, and IFI does not allow advertising of items for sale. This thread is simply to show the progress of two young smiths working as a director striker team, making hammers for four days. Chase is currently working on video editing the footage he took, and will post a video of our work when he's finished.
-
Post number 1,501 for me! LOL
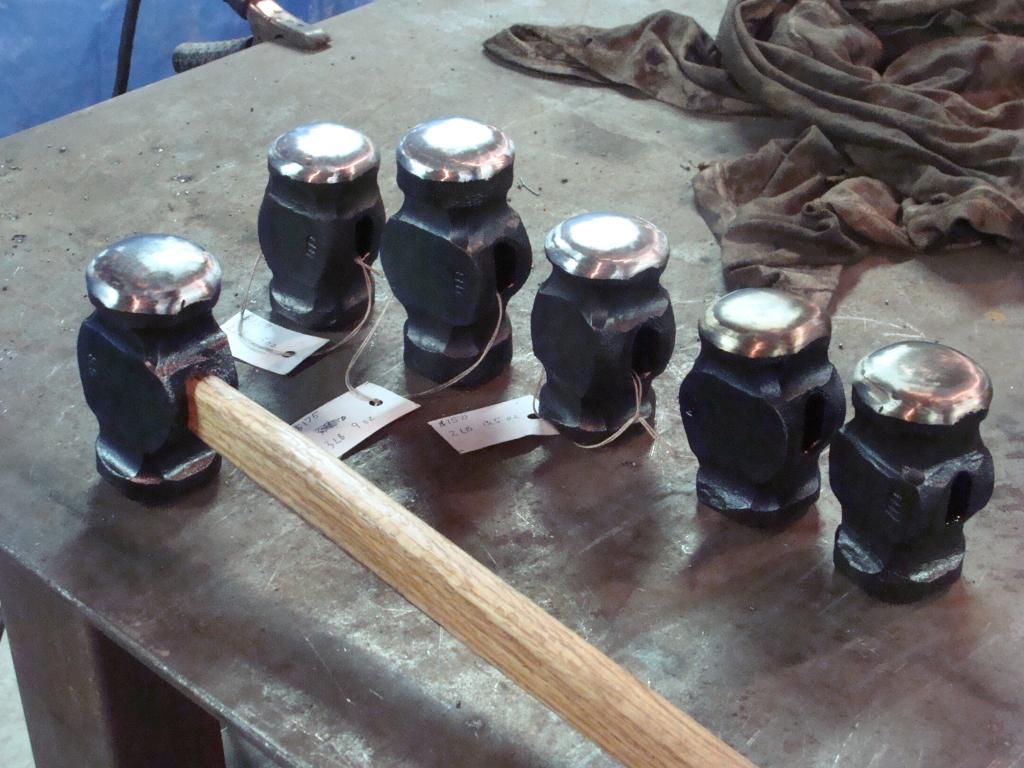
We finished two more hammers today before Chase left. Not too bad seeing that out of four days, we only spent about two and half of it forging. We spent a half a day at the steel yard and a day hauling coal!
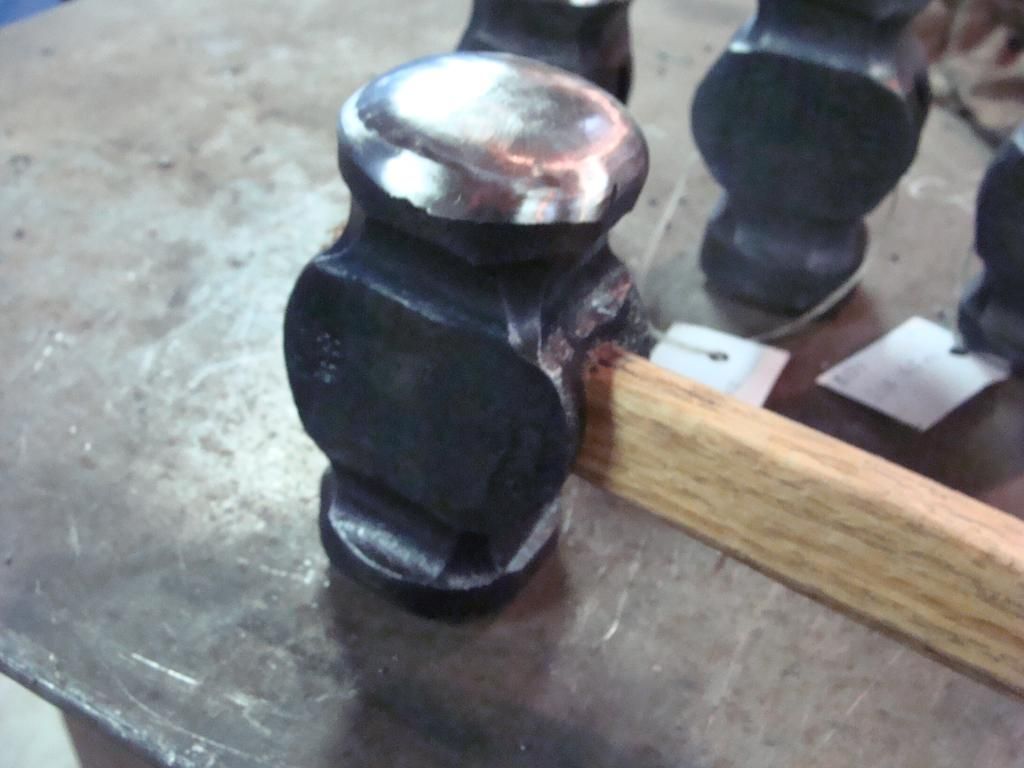
I handled one to show Chase how to, then sent him home with the box of handles, hammers, and wedges. He will finish polish and handle the rest. The tags give the finished weight of the hammer prior to handling!
-
I'll second this post!
-
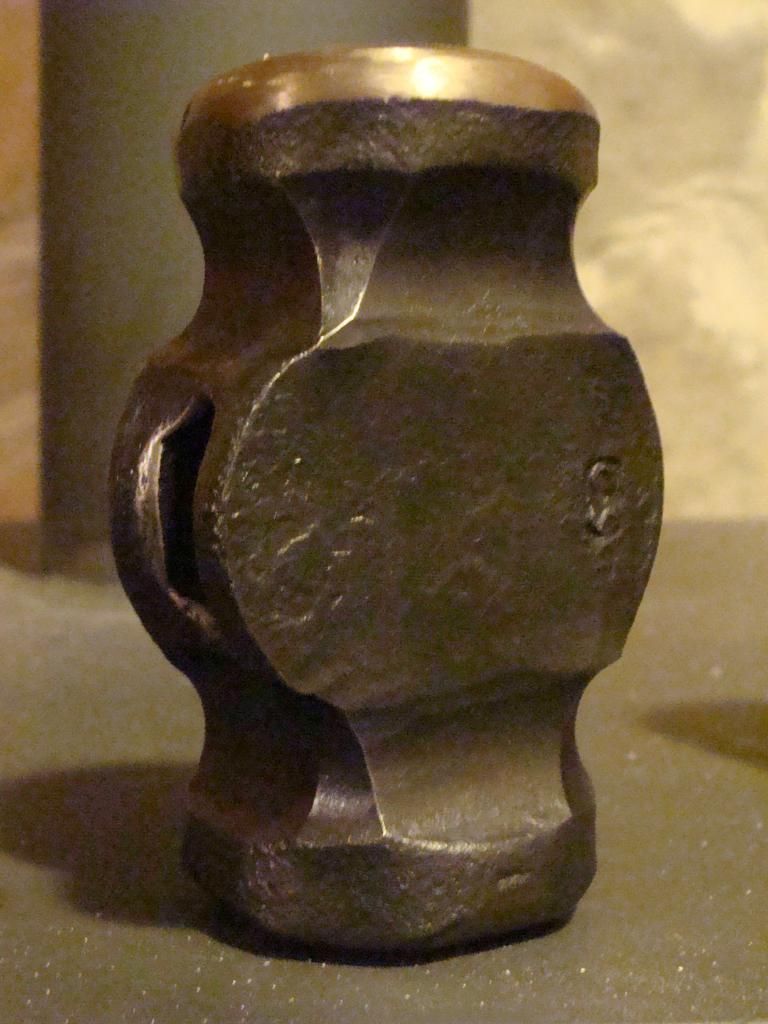
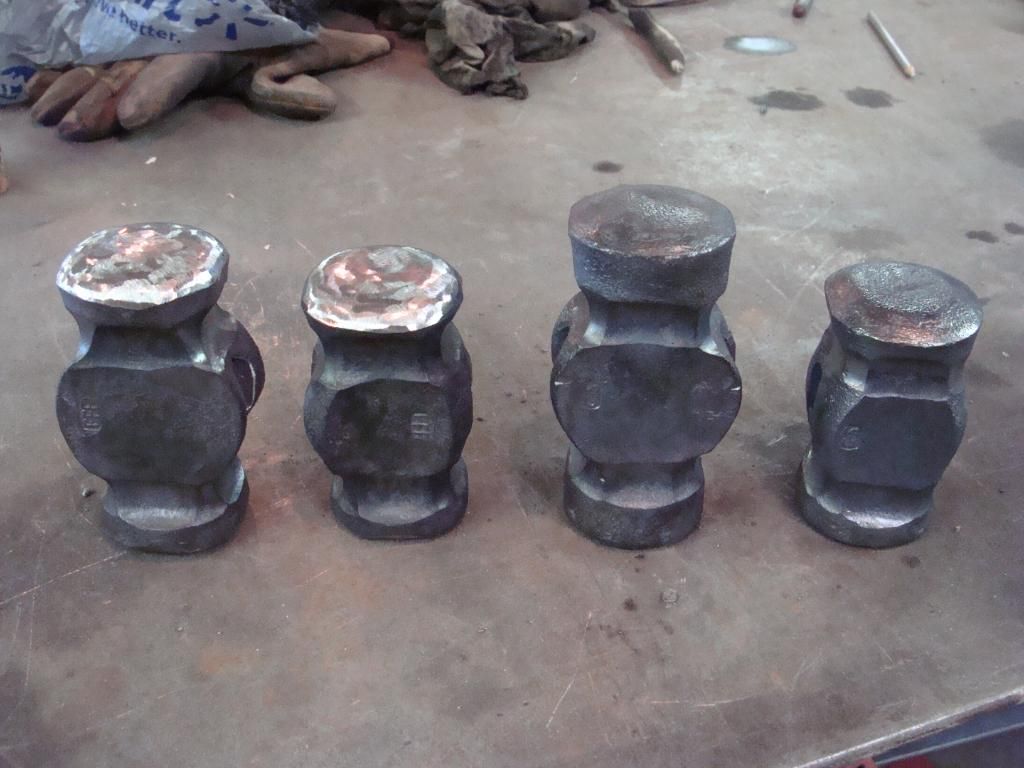
Here are the weights finally.
2-inch solid round 4140 stock, cut in billet lengths of 3.5-inches, 4-inches, and 4.5-inches.
3.5-inch billet yielded a 2-pound 13-ounce hammer. (45-ounce)
4-inch billet yielded a 3-pound 4 ounce hammer. (52 ounce)
4.5-inch billet yielded a 3-pound 9-ounce hammer. 57-ounce)
I have not compared finish weights with the starting weights but my data showed that from the starting billet size to the finished hammer, prior to rough grinding, hardening, tempering, and polishing, the weight loss per-hammer was .25-pounds. This number stayed consistent regardless of the starting billet size.
-
Here are the four hammers we have done so far.
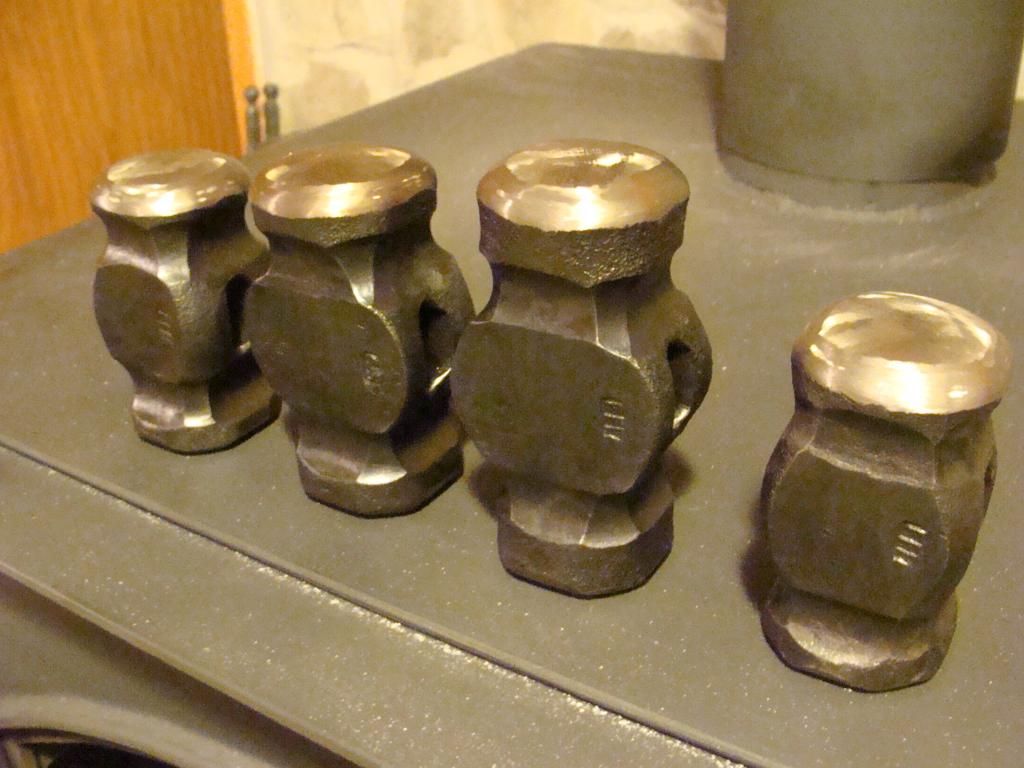
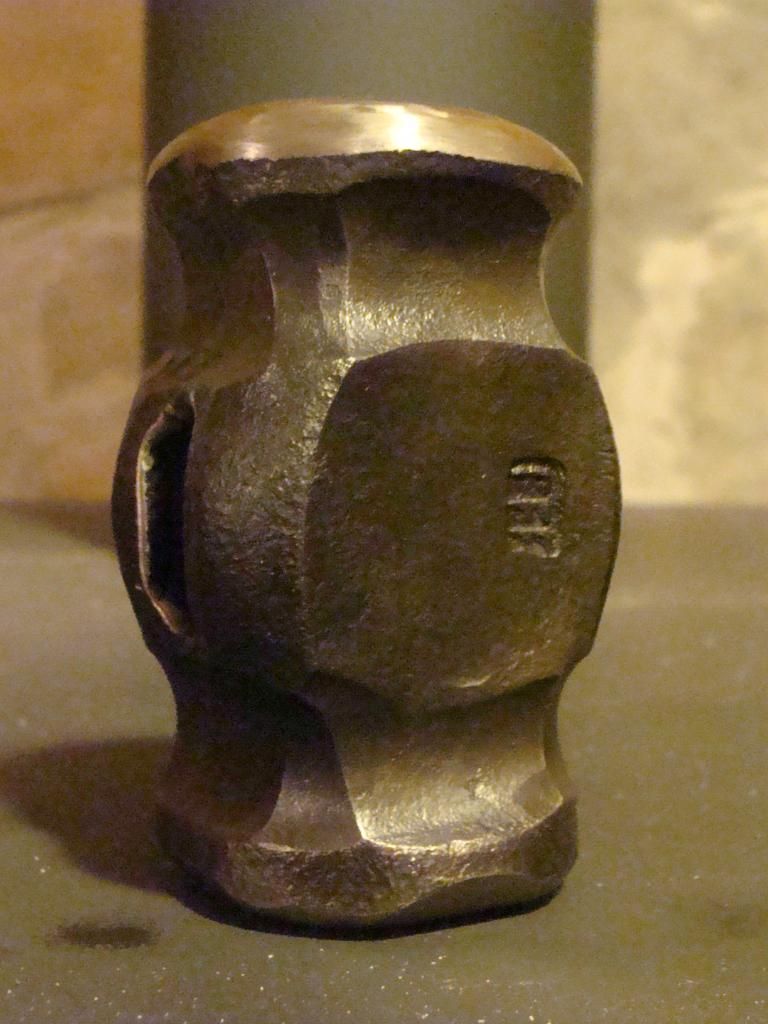
We did not make any hammers today as we spent the entire morning loading and unloading around 3000-pounds of coal. We hardened and tempered the four hammers shown in the pictures above, this evening. I also cut out some additional knot-free handle stock for the hammers.
Tomorrow we are hoping to do another two hammers before Chase has to head back home.
Chase will be posting photos of the grinding and tempering a little later.
-
I've often watched smiths turn their work on the anvil and the power hammer (sometimes at mind boggling speed) 90 deg each time they strike the bar they're forging. I rarely do this prefering to work down one side and then the other.....What if any is the advantage of this?
It really keeps the stock hotter, longer, hands down. If and when done correctly you can actually take and increase the heat in the bar. It would probably be difficult to show on video, but it can be seen in person.
-
Hi Alec! Never really understood what the larger beveled edge does for you. Maybe you could elaborate?
The one from the pictures is a smaller billet, that we used. We used a smaller rounded edge on that size, but I did make sure the larger billets got bevelled more, however, I suppose billet size would not affect whatever positives come from the rounded edge. I must have forgotten, so like I said, please elaborate!
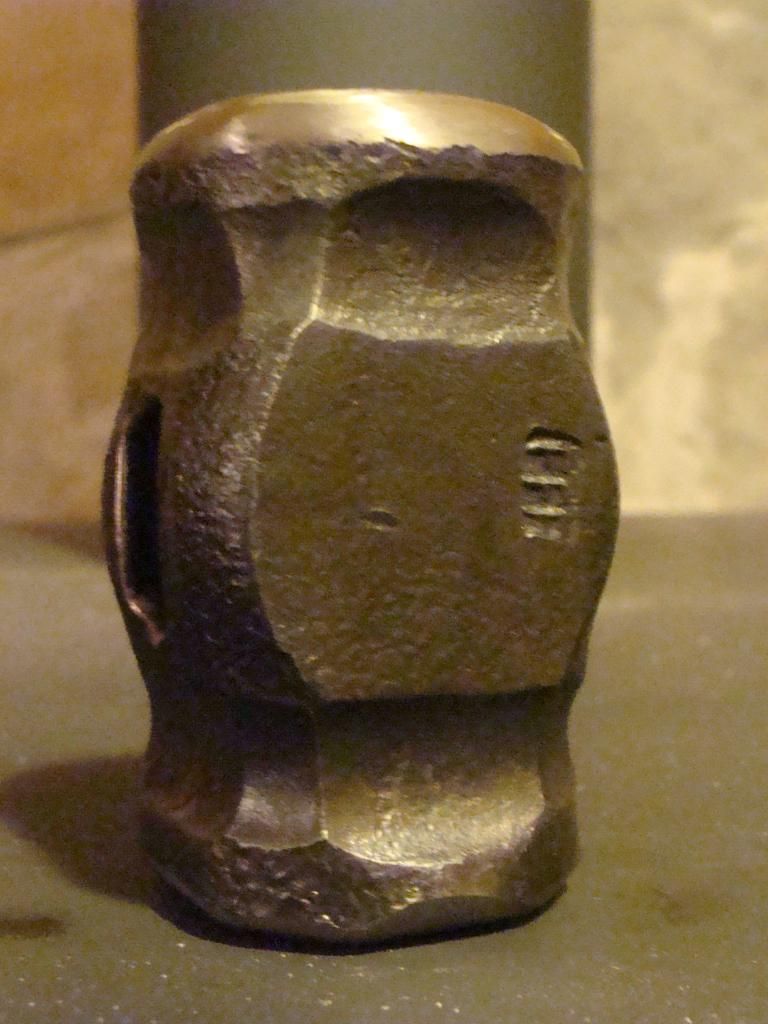
We worked from 8:30 A.M to 12:30 P.M. and made two hammers.
Here are the hammers so far!
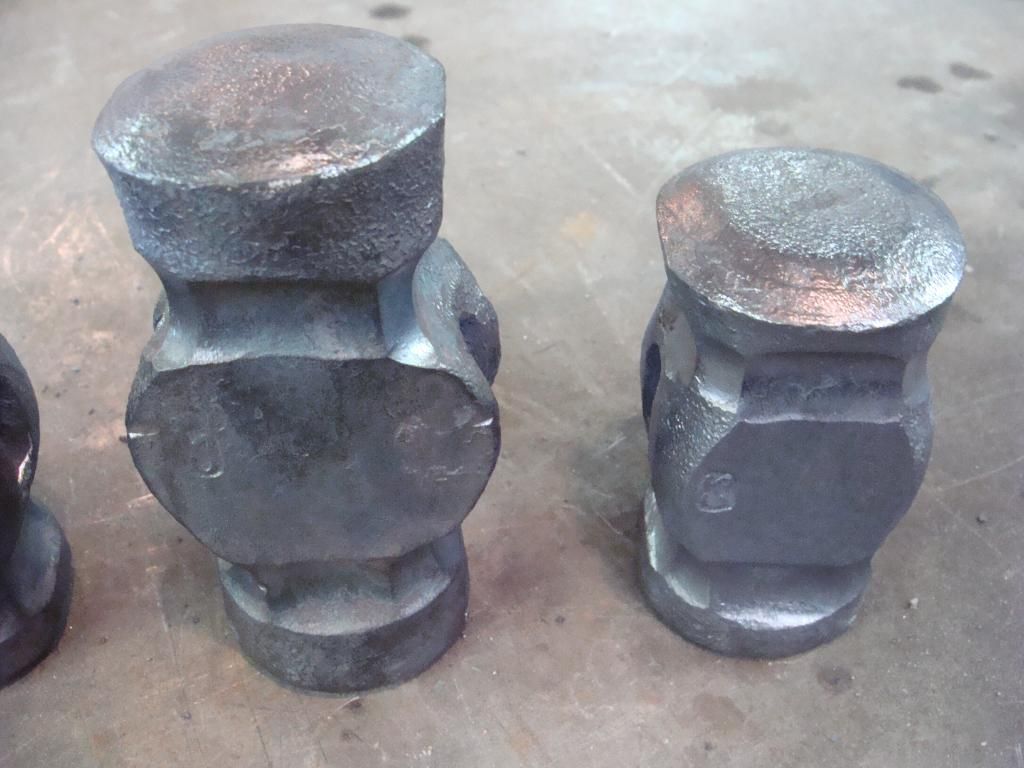
Here are the two we made this morning.
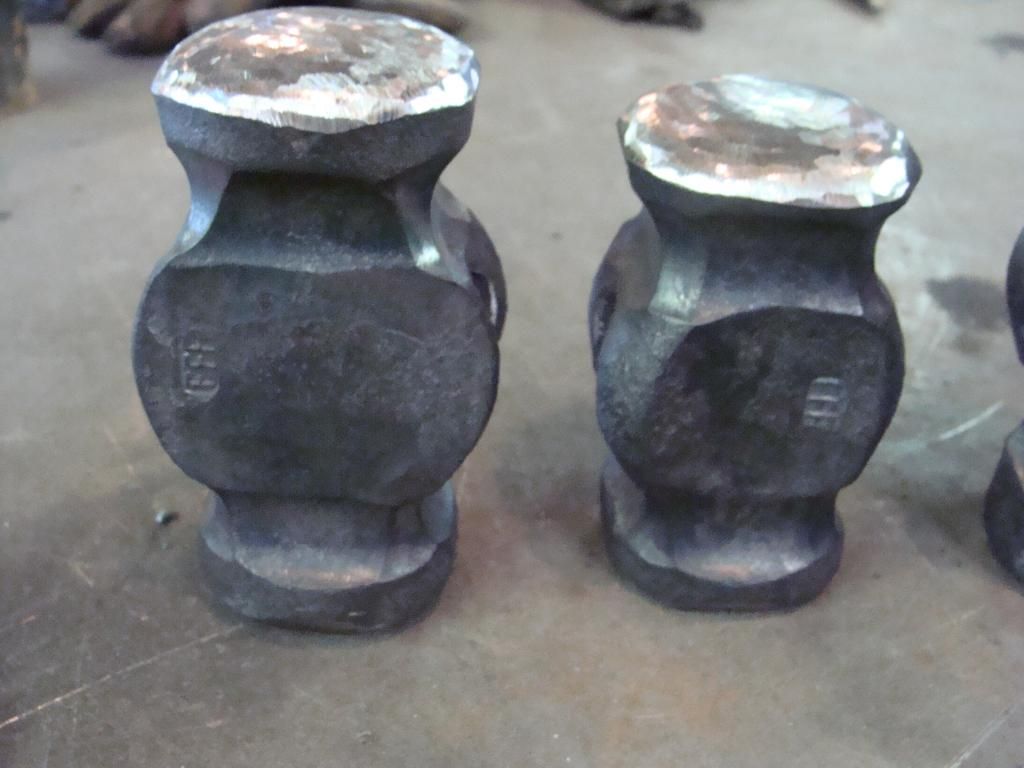
Here are the two from yesterday!
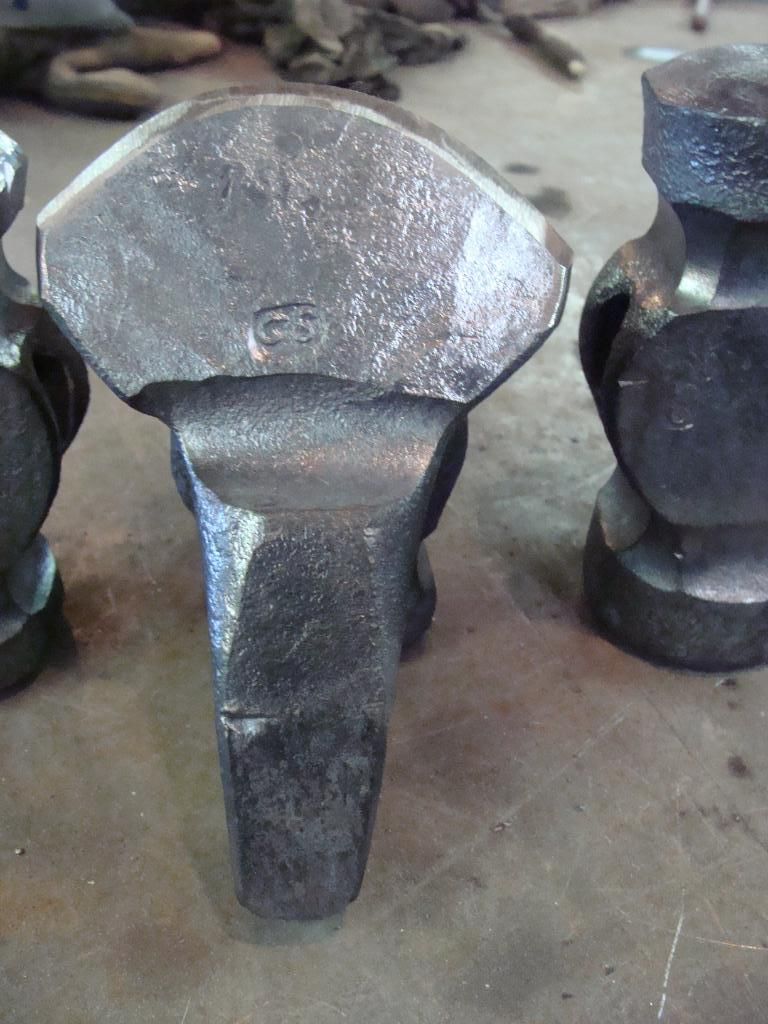
And here is the hardy that Chase directed yesterday evening. I was very pleased with the results especially seeing that was his first time on the director's side of the anvil.
I'm keeping data on billet size, starting weight, weight after rough grinding, and weight after finish grinding. I will post said data when we are done making hammers!
-
The volume on the smoke of entrance to the smoke shelf if plenty....I made sure of that.
The flue pipe is 6-inch. I would have preferred 8-inch but the entire system, including the triple wall stuff through the roof and the insulation box through the ceiling are all 6-inch. I could always put a decreasing plate just inside the door to decrease the door opening. I do not believe this would affect loading, and it would be handy for ash build-up. I allowed a lip for the ash, but it is on the small side. I have noticed that in just burning a fire last night!
the stove is really tight! I put an oak chunk in last night at 10 A.M. and it was still in one piece at 5 A.M.
hinges for the wood stove
in Member Projects
Posted
I did wrap the handle up in 1/4-inch round after JohnB's critiques there. My pipe currently is even with the ridge on the roof, and the prevailing winds usually come from over the roof. That's why I mentioned trying to up the height of the pipe.