
jeremy k
-
Posts
2,405 -
Joined
Content Type
Profiles
Forums
Articles
Gallery
Downloads
Events
Everything posted by jeremy k
-
Paul - Welcome to the site - - Are the shafts on the end with the gears keyed for rollers that you would roll a bead on the edge of sheetmetal? Possibly??? - JK
-
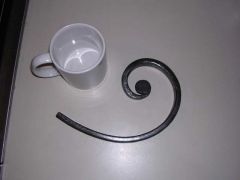 This is just a simple scroll I made for a sample, I started w/ a 3/8inch x 3/4inch bar stock 18inch long. Forging was done freehand - no form blocks at all.
 -
I would steer away from using scotch brite ( not because it doesn't clean) but because it is abrasive and can leave particles on the wire as it goes into the liner - thus adding to the clogging problem, I would stay with a felt type wiper that doesn't abrade but still wipes. The cost of the felt wipers at the welding supply store is very minimal compared to lost time at crunch time when your triing to get a job done and things stop working. Been there, done that! Just my pennies worth. -JK
-
Last night I forged a Pear from 1-9/16" round solid. My Kinyon style air hammer helped out. 10/14/06
-
 This is a new forged pear meeting a pair of forged friends. they were lonely so I forged the pear on friday the 13th to show that good things can happen on this day, even If it's just little things. The pear is approx. 3-1/4" tall. 10/13/06
 -
 I started w/ a piece of 1-9/16' Round Solid to make the pear. My Kinyon style air hammer did most of the work. It is approx. 3-1/4" tall. Forging on friday the 13th is "OK", good things "can" happen.
 -
Bjorn - There are some poor grades of stainless steel the "are" magnetic, but it's hard to say exactly what you have there. Restraunt countertops are a good example of that - most claim they are 16 ga. S/S - and yes they are but on the cheaper countertops you can toss a refigerator magnet on them and it will stop as soon as it hits - "Magnetic". The more spendy ones "lots better quality stainless" will not affect a magnet and it will slide across the whole countertop without stopping from a magnetic pull. All I can say about your mystery steel. JK
-
Glenn is very right on this! I've had the same thing happen after I was done grinding and the grinder was bumped off the table by mistake and landed on the ground disc first, the next time I used it - apart it came looking very similar to the one in the above picture. If I'm the only one that has either dropped or bumped a grinder to the floor, then I'm one in a million. I'm sure it's happend to most of us, for your own safety and others that may be around you, inspect a dropped grinder for a cracked or broken disc - you'll be glad you did.
-
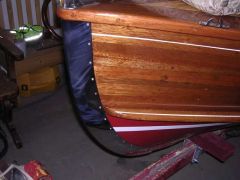 16 ga Stainless Steel cutwater made for an antique wood boat and polished to a mirror finish
 -
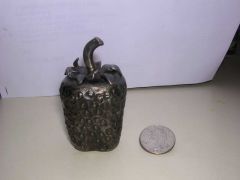
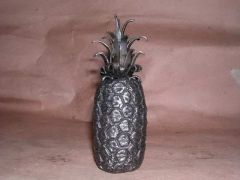 Here is the finished pineapple. Due to the size of the base, the leaves couldn't be any taller or fuller and yet have some strength, so I made due with the size it ended up being --- 4" tall including the leaves.
 -
Here is some pictures as I was making and putting the leaves on the pineapple. Pieces were cut from 16 ga sheetmetal and as the layers were put on they were tig welded in the center hole of the "star type shapes". After being done with it, I can see now that the leaves are put on they could have been just a bit taller to be more proportional with the base - Although I would make changes if I was to do another one. As the first one - I'm happy with it. The total hight is 4" tall and 1-11/16" wide. -JK 9/22/06
-
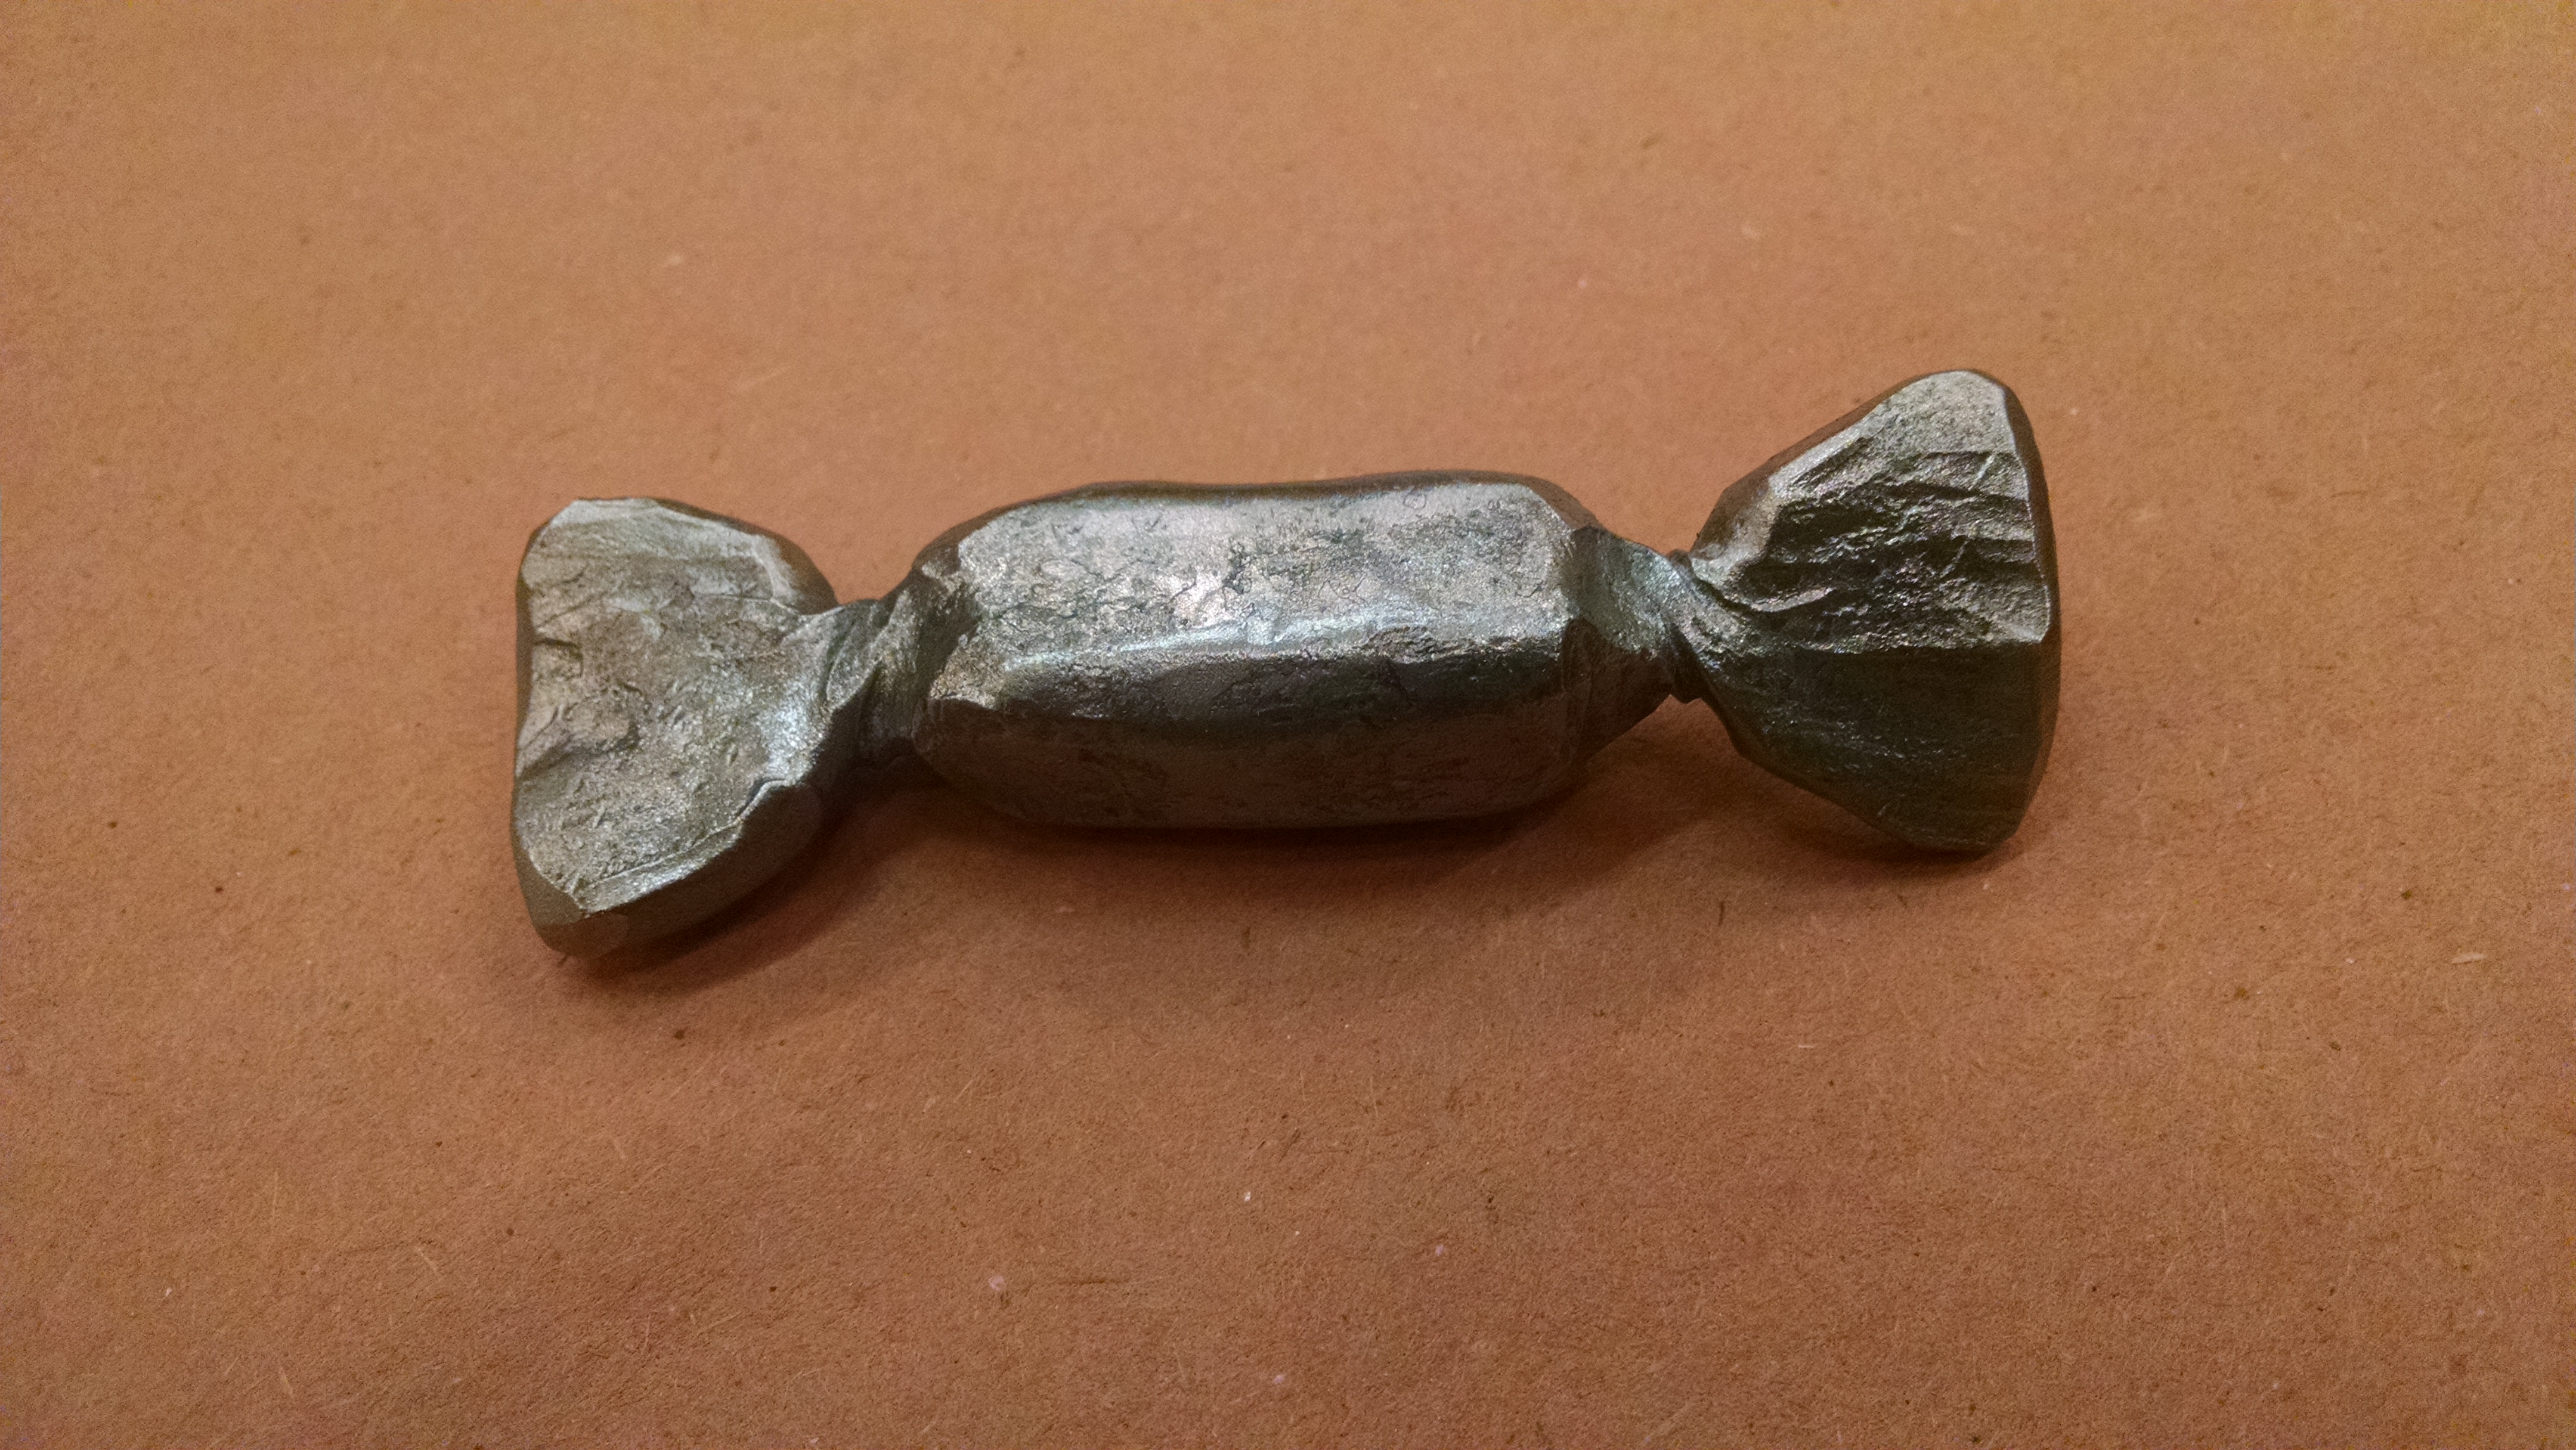
This was just a sample piece that I can put on my desk for people to see the kinds of things I can do. I just used some solid round stock that was laying on the floor. As for a life size - I don't think I would want to tackle that due to the amount of heat, time and weight that would be involved. Not that I couldn't do it, It's just that without getting payed, I don't need to spend that kind of time and money on it. I have plenty of other projects going that will take time and money. So I just did this for the heck of it and a sample. During the texturing I used aluminum plates in the vise to keep from damaging the areas that were already stamped. The heat from stamping softened the aluminum so it would form fit the depressions of the stampings, and that helped hold better in the vise. Speaking from experience - while doing something like this wear gloves! As the vise will get very hot from the residual heat - enough so I couldn't open or close the vise with bare hands. JK
-
Here is a picture of the tool I made to stamp the texture into the pineapple. The pineapple shape is forged from a piece of 1-11/16" cold rolled shaft. I will make the leaves from 16 ga. sheetmetal.
-
This is a pineapple base I forged tonight - for relaxation purpouses. The top leaves will be made soon and a picture of the finished pineapple will follow as soon as I get it done. The total hight of the base is 3" and 1-11/16" wide. I started with a 1-11/16" shaft. There is approximately 125 individual stampings to make up the texture on the base. I'm not getting payed on this one either LOL - this is just for grins and giggles. - JK
-
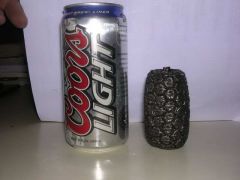 This is the base of a pineapple, - I started with a piece of 1-11/16" round stock. The base is 3" tall and 1-11/16" wide. There is approximately 125 individual stampings to for the texture. Total forging and stamping time including making the stamp for the texture was 5-1/2 hours. I will make the top leaves asap and post a picture when finished.
 -
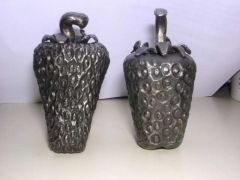
The one on the left is a picture of another strawberry I made today that is an improvement over the one on the right I made a couple days ago. Better shape, more realisctic seed stampings.
-
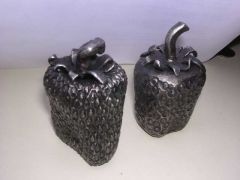
 another view of the strawberries
 -
 This is a picture of 2 strawberries I made recently - the one on the left is the better one. I re-made the seed punch to be more life-like and shaped it better so it has a wedge shape w/ a slight depression in the lower middle to look like some strawberries although none are the same. I spent about 2 hours more on the left one - but I think it looks a lot better.- JK
 -
This is a picture of the latest sample forging I made. The strawberry is made from one piece of 1-9/16" rod and a small piece of 16ga. sheetmetal for the leaves. The stem was forged on the end of the rod first, then rough shaped with the air hammer, finish hammered w/ hand hammer, seeds hot stamped in, then the leaves were made from sheetmetal and slide over the stem and swaged down against the berry, and then I bent the leaves randomly. Hot wax finish. Total time: 3 hours, including lighting the forge and hotwaxing. http://www.iforgeiron.com/gallery/showphoto.php/photo/1060/cat/500
-
 This strawberry was forged from a piece of 1-9/16" round stock. The main berry is 2" tall and 1-1/2" wide, total hight is 3". The finish is hot waxed. Total weight is 3/4's of a pound.
 -
IForgeIron Blueprints Copyright 2002 - 2011 IFORGEIRON, All rights reserved BP0303 Swivel Link Universal Tongs by Jeremy Knippel These tongs were seen in the "British Artists Blacksmith Association" magazine winter 2005 #115. They are similar to a pair that belonged to Hector Cole in the article by Graham Robinson. Giving credit where it is due. I had never seen anything like these so I tried to make a set just for giggles. This way my first set of tongs that I made and with the exception of burning one half of the tongs a bit (not to bad) all pieces were only made once. Grip range for these tongs are 3/8" to 5/8" round but tapers and squares can be held also. List of materials: 2 pieces 3/16" x 1" x 17" 2 pieces 1/4" x 1/2" stock 1 piece 5/16" round 16" - 20" in length. Long enough so you don't have to use tongs to hold it. All rivets use a 3/16" hole Forge top of the tongs with one of the 3/16" x 1" flats to shape and punch 3/16" holes for the rivets on 3" centers and draw reins out to the desired length. Forge lower part of the tongs. Upset the end of the 3/16" x 1" to 3/8"tall x 5/16" wide for approximately 1-1/2 - 2". Form the rivet area, chisel and upset on the 5/16" area length wise for the length of the upset area to form a "V" to hold the stock. Draw out the reins to the desired length. Forge the ring loop. Upset the 5/16" rod on end for approximately 1/2" - 3/4" to a finished size of 3/8" to 7/16" for the rivet tab. Cool with water to localize the heat. Measure from the end 4-3/4" and hot cut. Repeat upsetting on this end also. Total finished length should be approximately 4-5/8". Heat the ends and flatten for 1/2" on edge of the anvil. These will be the rivet tabs. Flatten to approximately 1/8" thick. Heat and bend in the middle and form the ends. Drill holes for the rivets. Take a piece of stock that is 1/4" x 1/2" and mash it to approximately 3/16 x 5/8". Hot cut them to 1-1/2" long and punch the rivet holes Rivet loop on to the top half of the tongs. The loop must swivel loosely. Rivet the side pieces to the bottom side of the tongs. This rivet is to be tight with no movement. Assemble both tong halves. Make sure the bottom is through the loop before riveting. If not you may have to grind the bottom end off to get the loop in place. Mine had plenty of clearance to swing around the end. The top rivet is the active connection. Adjust the reins as usual to your liking and make any other slight adjustments. The total length for my tongs was 19" Adjust to your personal preference. View full article
-
most of the parts less the side braces, brake and dies
jeremy k posted a gallery image in Member Galleries
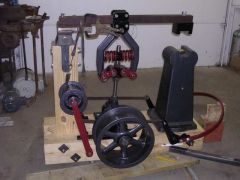 I figured the placements of the bearings and mounting of the idler assembly. these are just setting there now but will be attached very soon. I'm getting closer to getting it running :-)
 -
The Goblet Project (wivs pikkies)
jeremy k replied to Archie Zietman's topic in Blacksmithing, General Discussion
Archie - nice use of glass and Iron. I've always been fasinated by glass blowing - I wish I knew more about it. Nice Job!!! -
 CMB monthly meeting held at Ken Zitur's shop. The final hook and link installed on the other end of the chain and comparing to the original.
 -
 CMB monthly meeting held at Ken Zitur's shop. Checking the shape to the original