Laertius
Members
-
Joined
-
Last visited
Everything posted by Laertius
-
great work -- Would you mind showing the drift you use post punch? Ideal with a rule behind it to show dimensions. Thanks.
-
The coal I use is pretty much powder when I get it, not sure exact specs, but suspect it is anthracite as it is what some power plants use up here. The only difference I find welding with this stuff vs. bituminous, is that it is more 'work' to keep the fire clean, and if you like a cave style fire. For the cave, I mix the powder with water and do the usual 2x4 chunk routine, but once it is solid --and I am welding, I toss handfuls of wood charcoal in the heart as it burns down - otherwise if I feed it more coal, it tends to get klinkery before a couple of heats and I end up ruining the cave by cleaning. That said, no issues with heat in your normal open fire assuming adequate air supply!
-
-
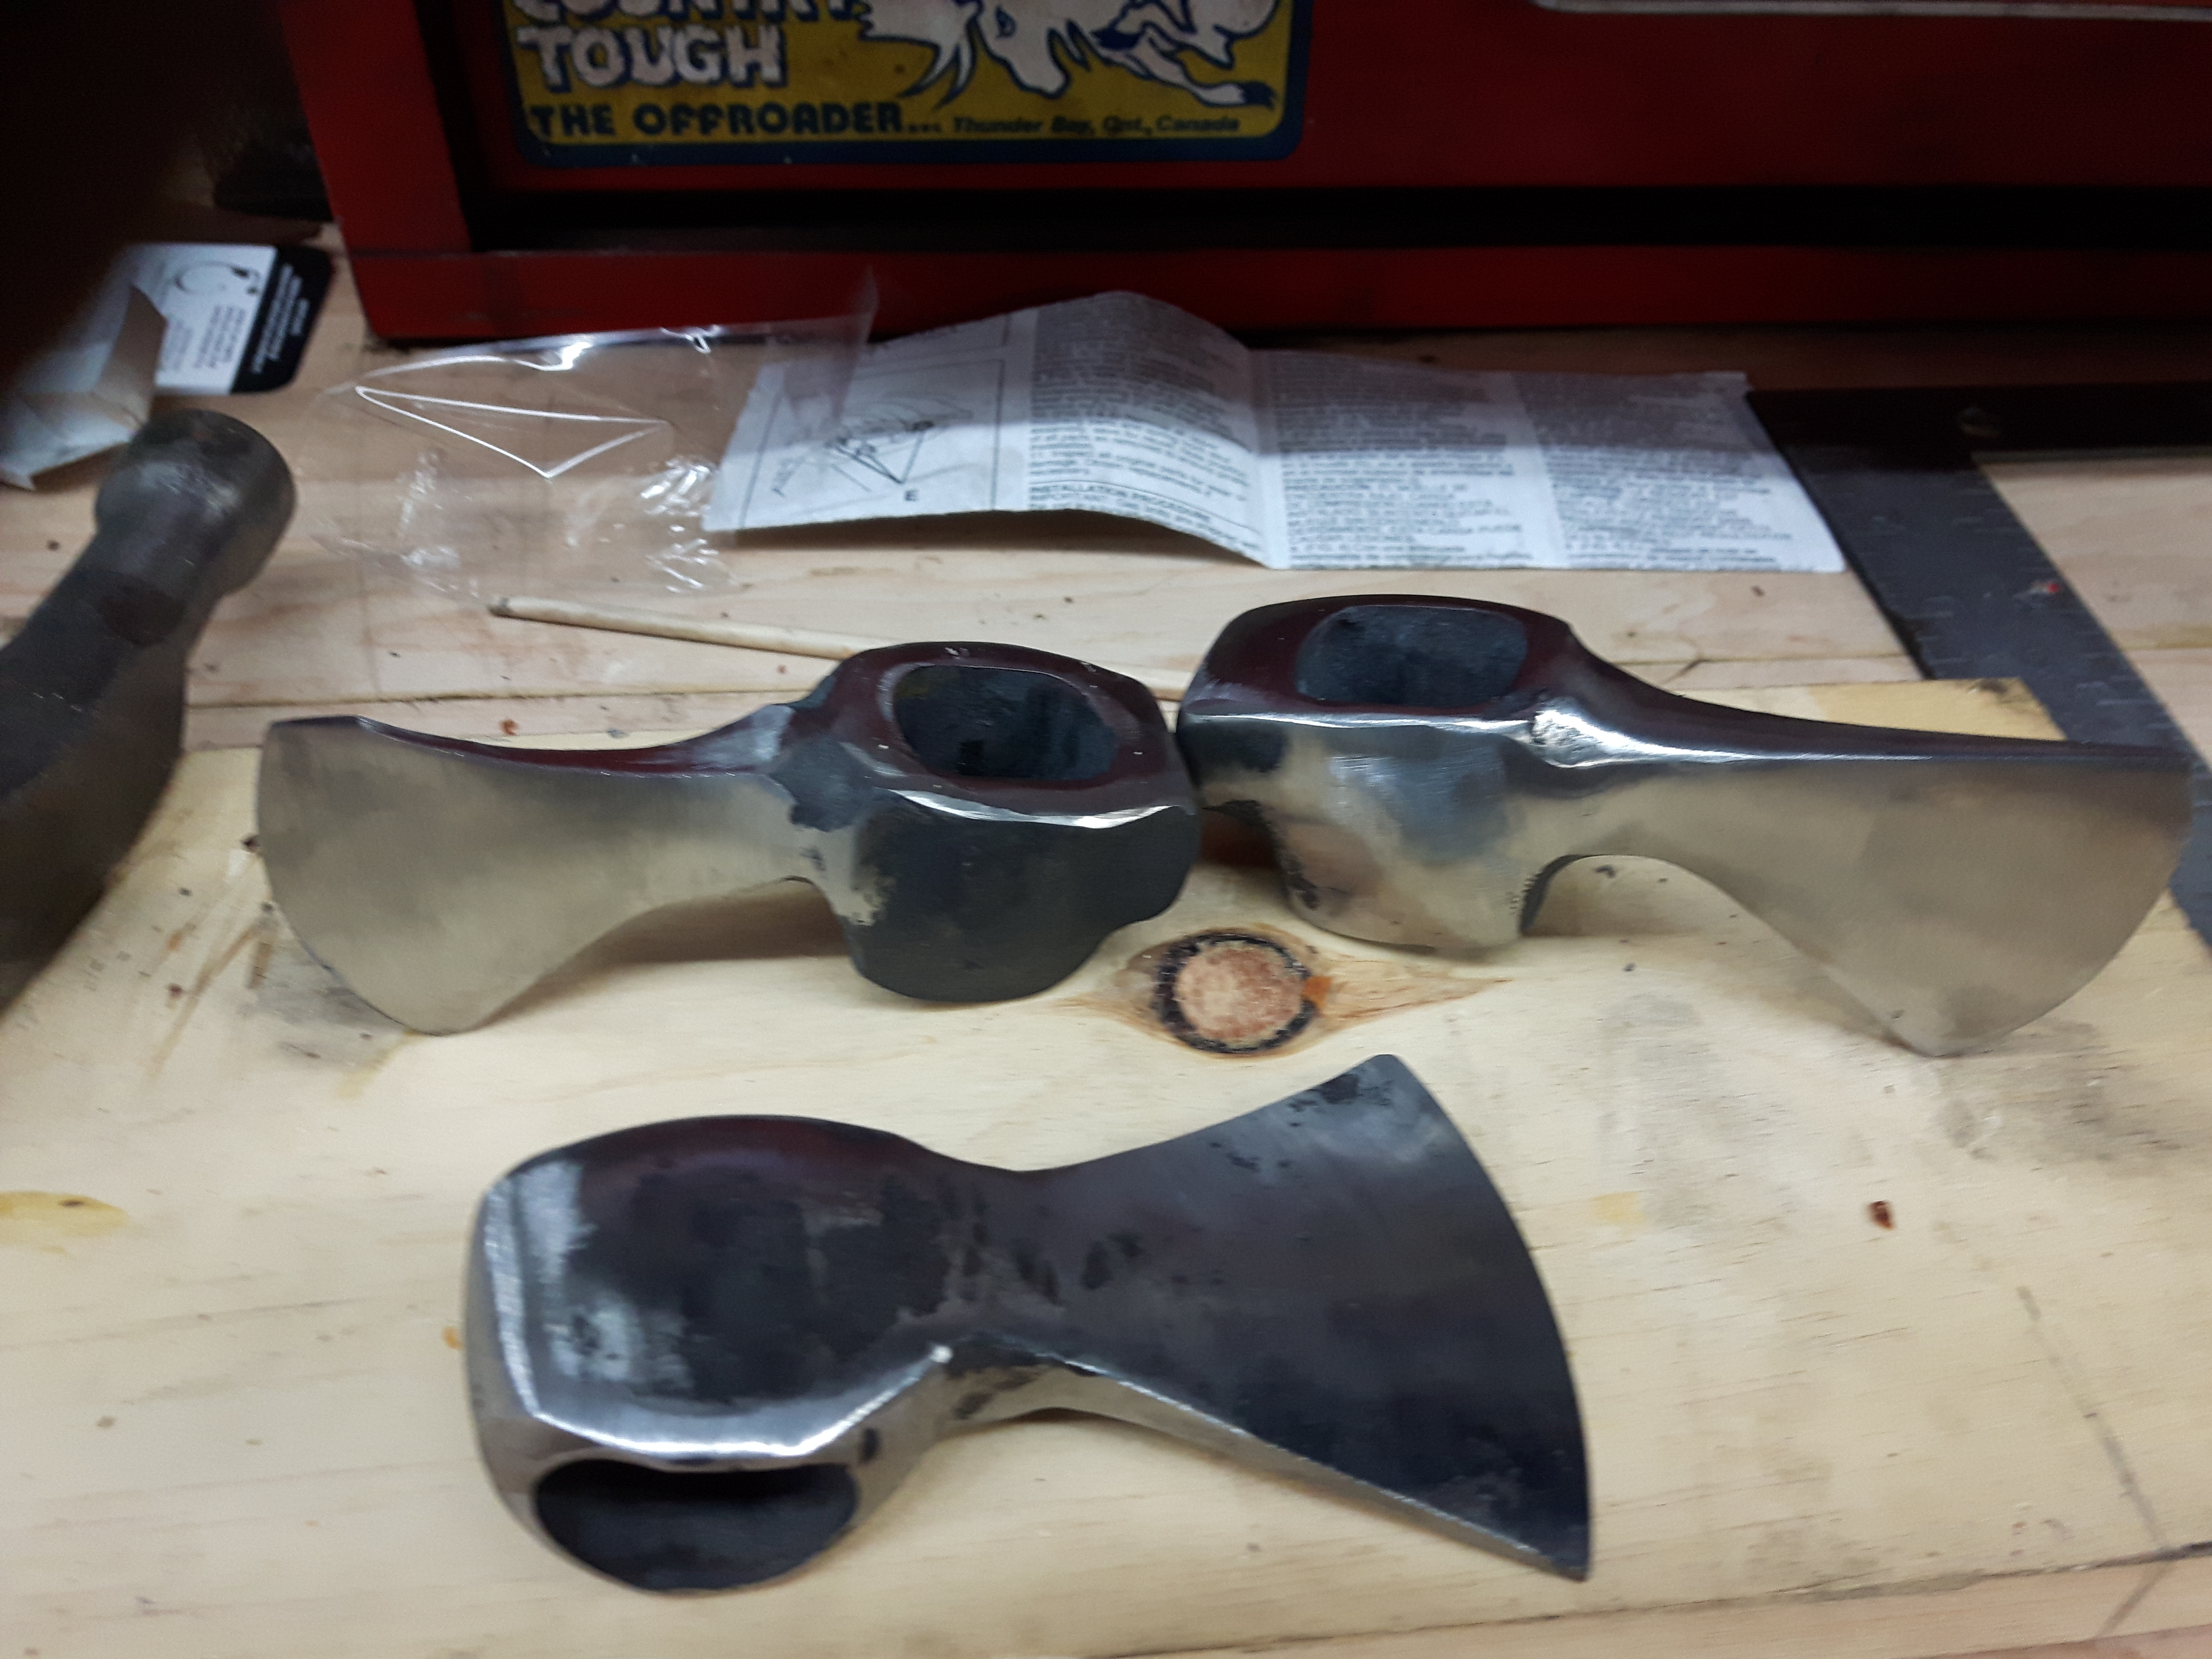
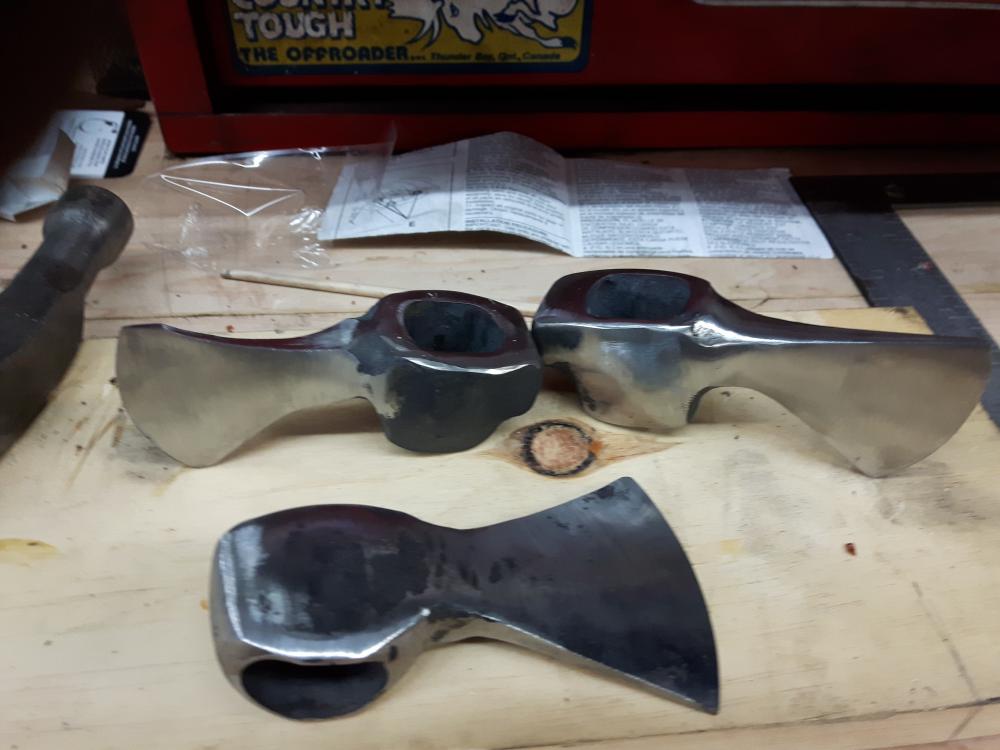
Some throwers made out of old carpenters hammers. Each is different, as experimenting with shape- the one closest is my sons fav- he's 17 and was the striker and helper. Eyes were drifted bigger, trad hammer wedge - next set i make will be tapered eyes like a pick axe/ regular hawk. Rudimentary heat treat in oil from critical, tempered by heating eye till the edge was brown- not very hard a file will bite but still hard enough to resist a bit of misuse. The short handle is from old hammer and the other 2 were the bar from a closet. Rasped, hand sand, fire and oil finish Great fun so far- not my nicest work, but we just wanted to play!
-
File card, then an Overnight vinegar bath, followed by baking soda, rinse in water then blow dry with a super light spray of wd (or whatever is on bench) has done the job well for me -- takes all the rust and crud out and brings a bit of new life to old files -
-
Late Reply -- but thanks for the suggestions... Will have some time off from school in March, so will let you all know how it goes when I get back in the shop!
-
Hello Guys and Gals, Long Time no post for me, but I still check out all the awesome advice and posts! So, Life has changed for me recently, in that I am now a medical student at the Northern Ontario School Of Medicine, and as such, my hands need to look and stay healthier than in the past: patients don't want a doctor with blacksmith hands, and open sores are a no-no for surgery scrub in etc. So, I am asking for advice on gloves: I have always been a no glove for smithing guy unless hot punching etc to protect the tool hand from burn. And before I went back to school I was able to keep my hand calluses up to a point where it took quite a lot to make a real mark -- Last time I went in the shop, I seemed to cut and scrape on everything as I have not done 'real' work in a few months -- white collar problems, sigh, I know ; ) I have Tig gloves and standard welding gloves - and they do those jobs well, but lack the dexterity needed for fine work and filling etc. will obviously not wear anything flammable, so looking for options that are similar to golf or baseball gloves (would these be my best options?). Looking for something that I can put on when I enter the shop and not take off till I leave. Amazon.ca is my main shopping centre, so any advice would be welcome. The main role of the gloves would be to protect from the 'light' abrasions. burns, cuts and scrapes we all get when we come back to the shop after a hiatus. thanks for any and all advice : ) Jon
-
well done!
-
Lol ... agreed on all fronts.. if i had the time I'd do another - just for direct comparison
-
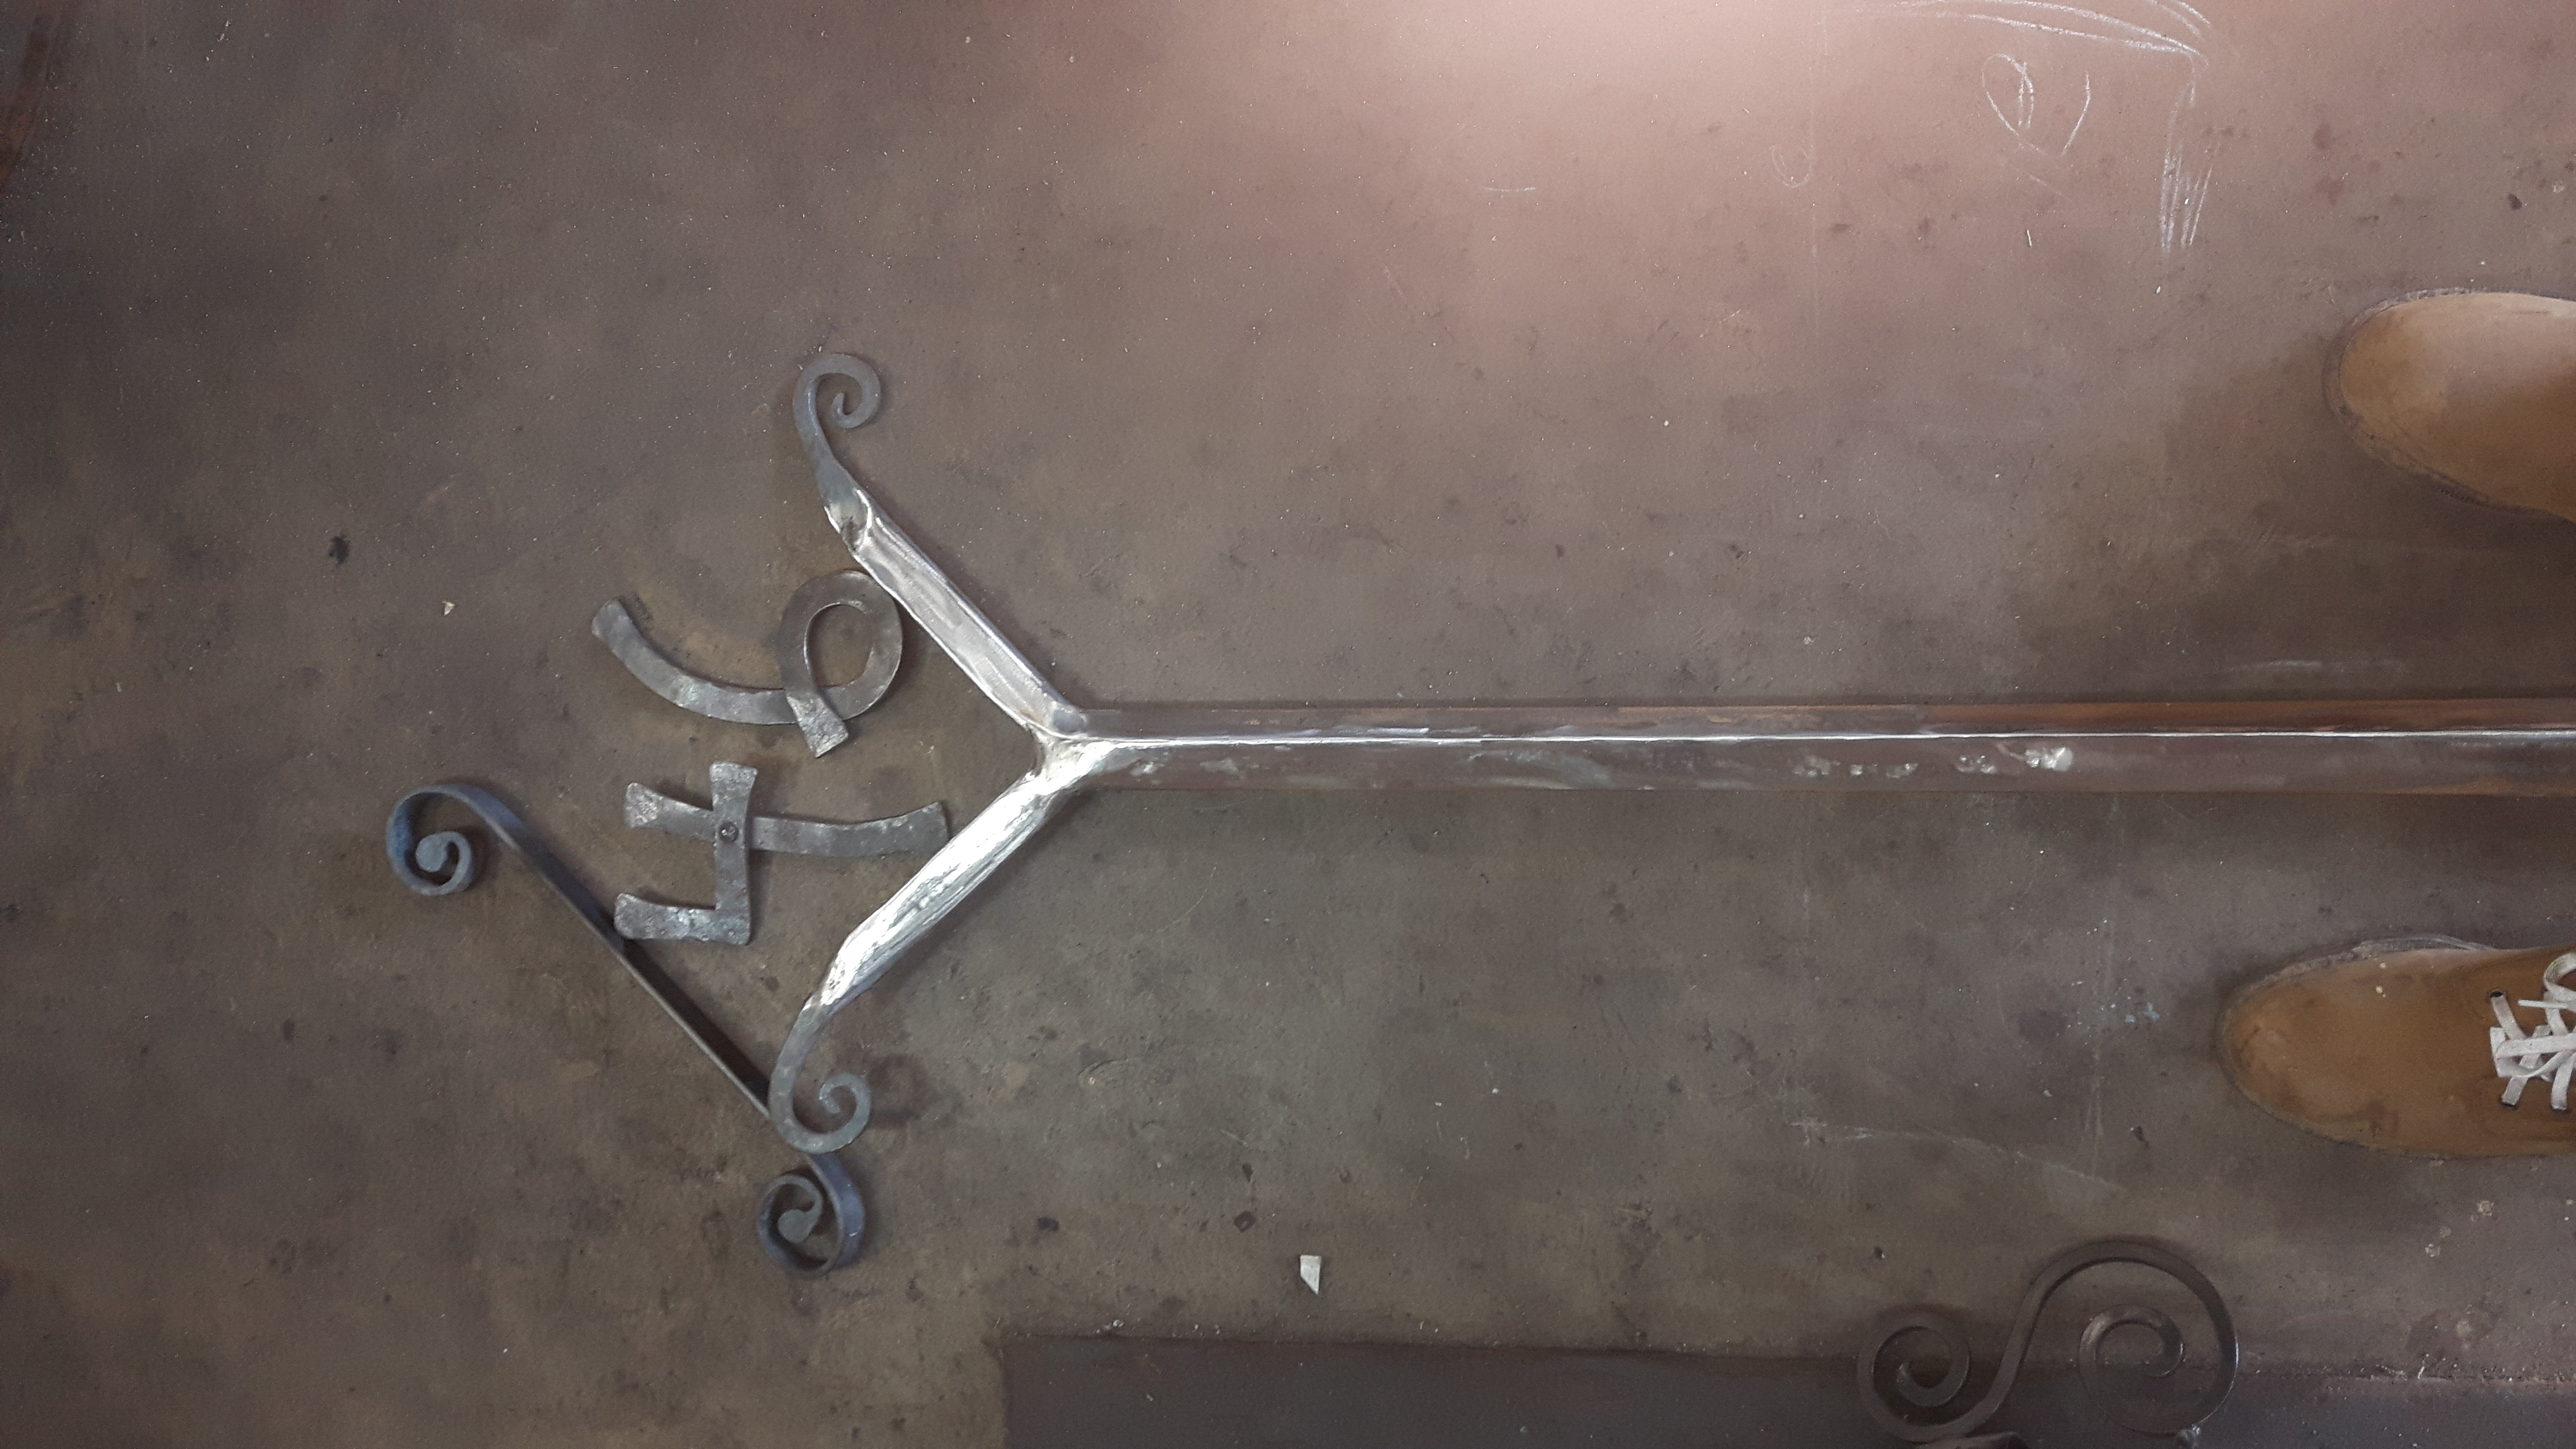
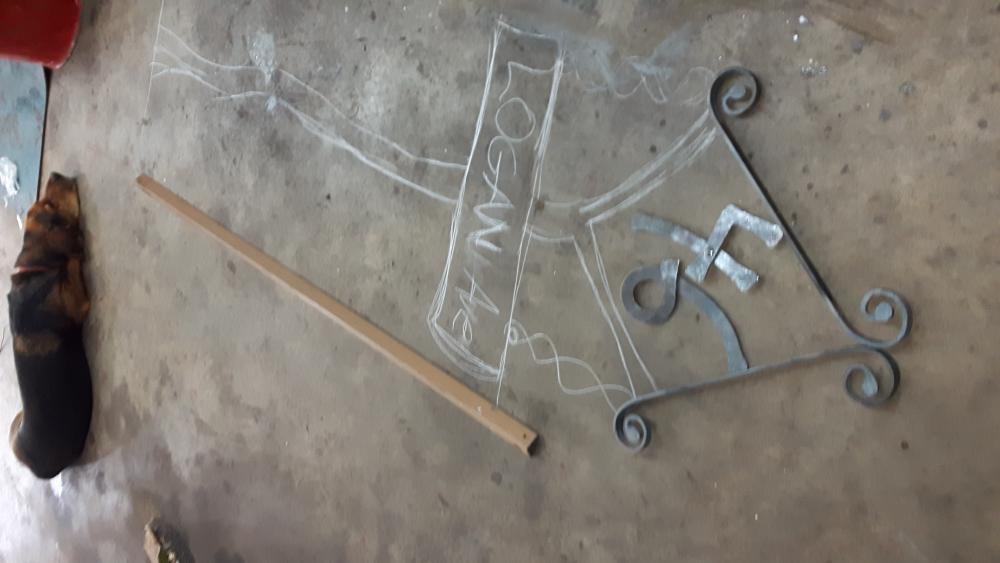
And i was reminded how much i want a bottle for the mig... flux core splatter is a pain lol Thanks for reply frosty! I had several scetches with and without the upper and lower 'spirals' I have done a lot of succesful spirals, but for sone reason the penney messes with my eye! The uneveness was intentional as the numbers and spirals are also not spot on.... was hoping to distort the post as well but as it is 2 pieces of angle welded together I am worried about busting the ground down welds... We shall see tomorrow!
-
Thank you... and i had read thatand as you know from your writing style, there is ahuge diff between THEORY and PRACTICE so.... going to prime and paint tomorrow it is not perfect in my eyes... but good enough for now! Will update with final pic once up! And i was reminded how much i want a bottle for the mig... flux core splatter is a pain lol

-
-
Thanks! I was looki g foryour feedback so no worries. I am thinking i will print one to scale to get the ratio right
-
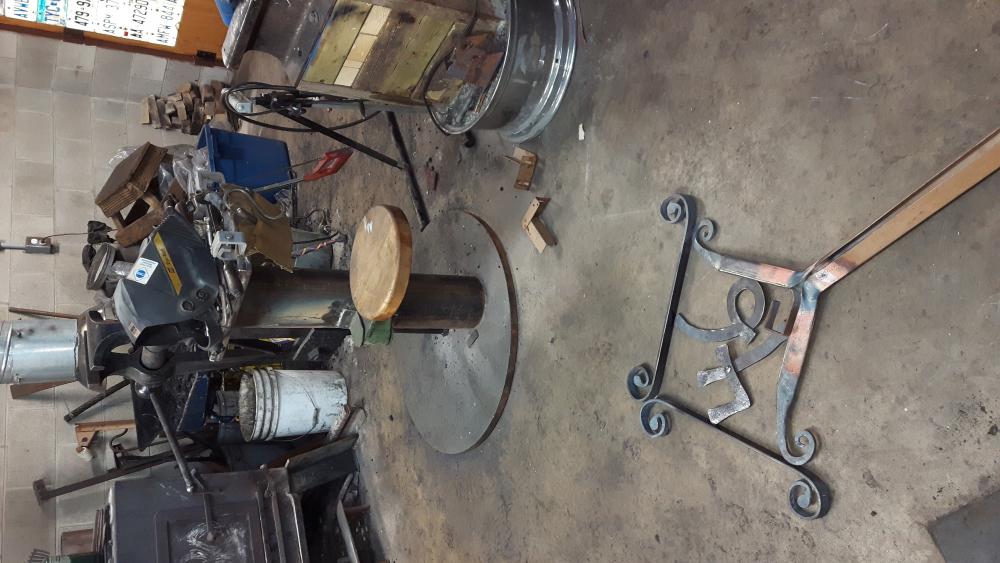
Hmmmmm.... I am not quite sure i understand your comment on the scrolls? Do you mean the ends are not done correctly or that the scroll ratio is off? Or both? I can sharpen the ends with a round or half round file.... but if i have to coil them out again as well i could just re-forge. As this is an outdoor piece with mild and bed spring steel, I was thinking white painted numbers and black everything else... As to the copper - would it work and look alright if done After paint? Thanks for feed back. One win today was that folding and forge welding the lower pointed scrolls on the bed frame pieces went very well and i now have it all boxed to look like a large bar split and then scrolled. Will show pic after clean up tomorrow. And the background will be my house...grey siding
-
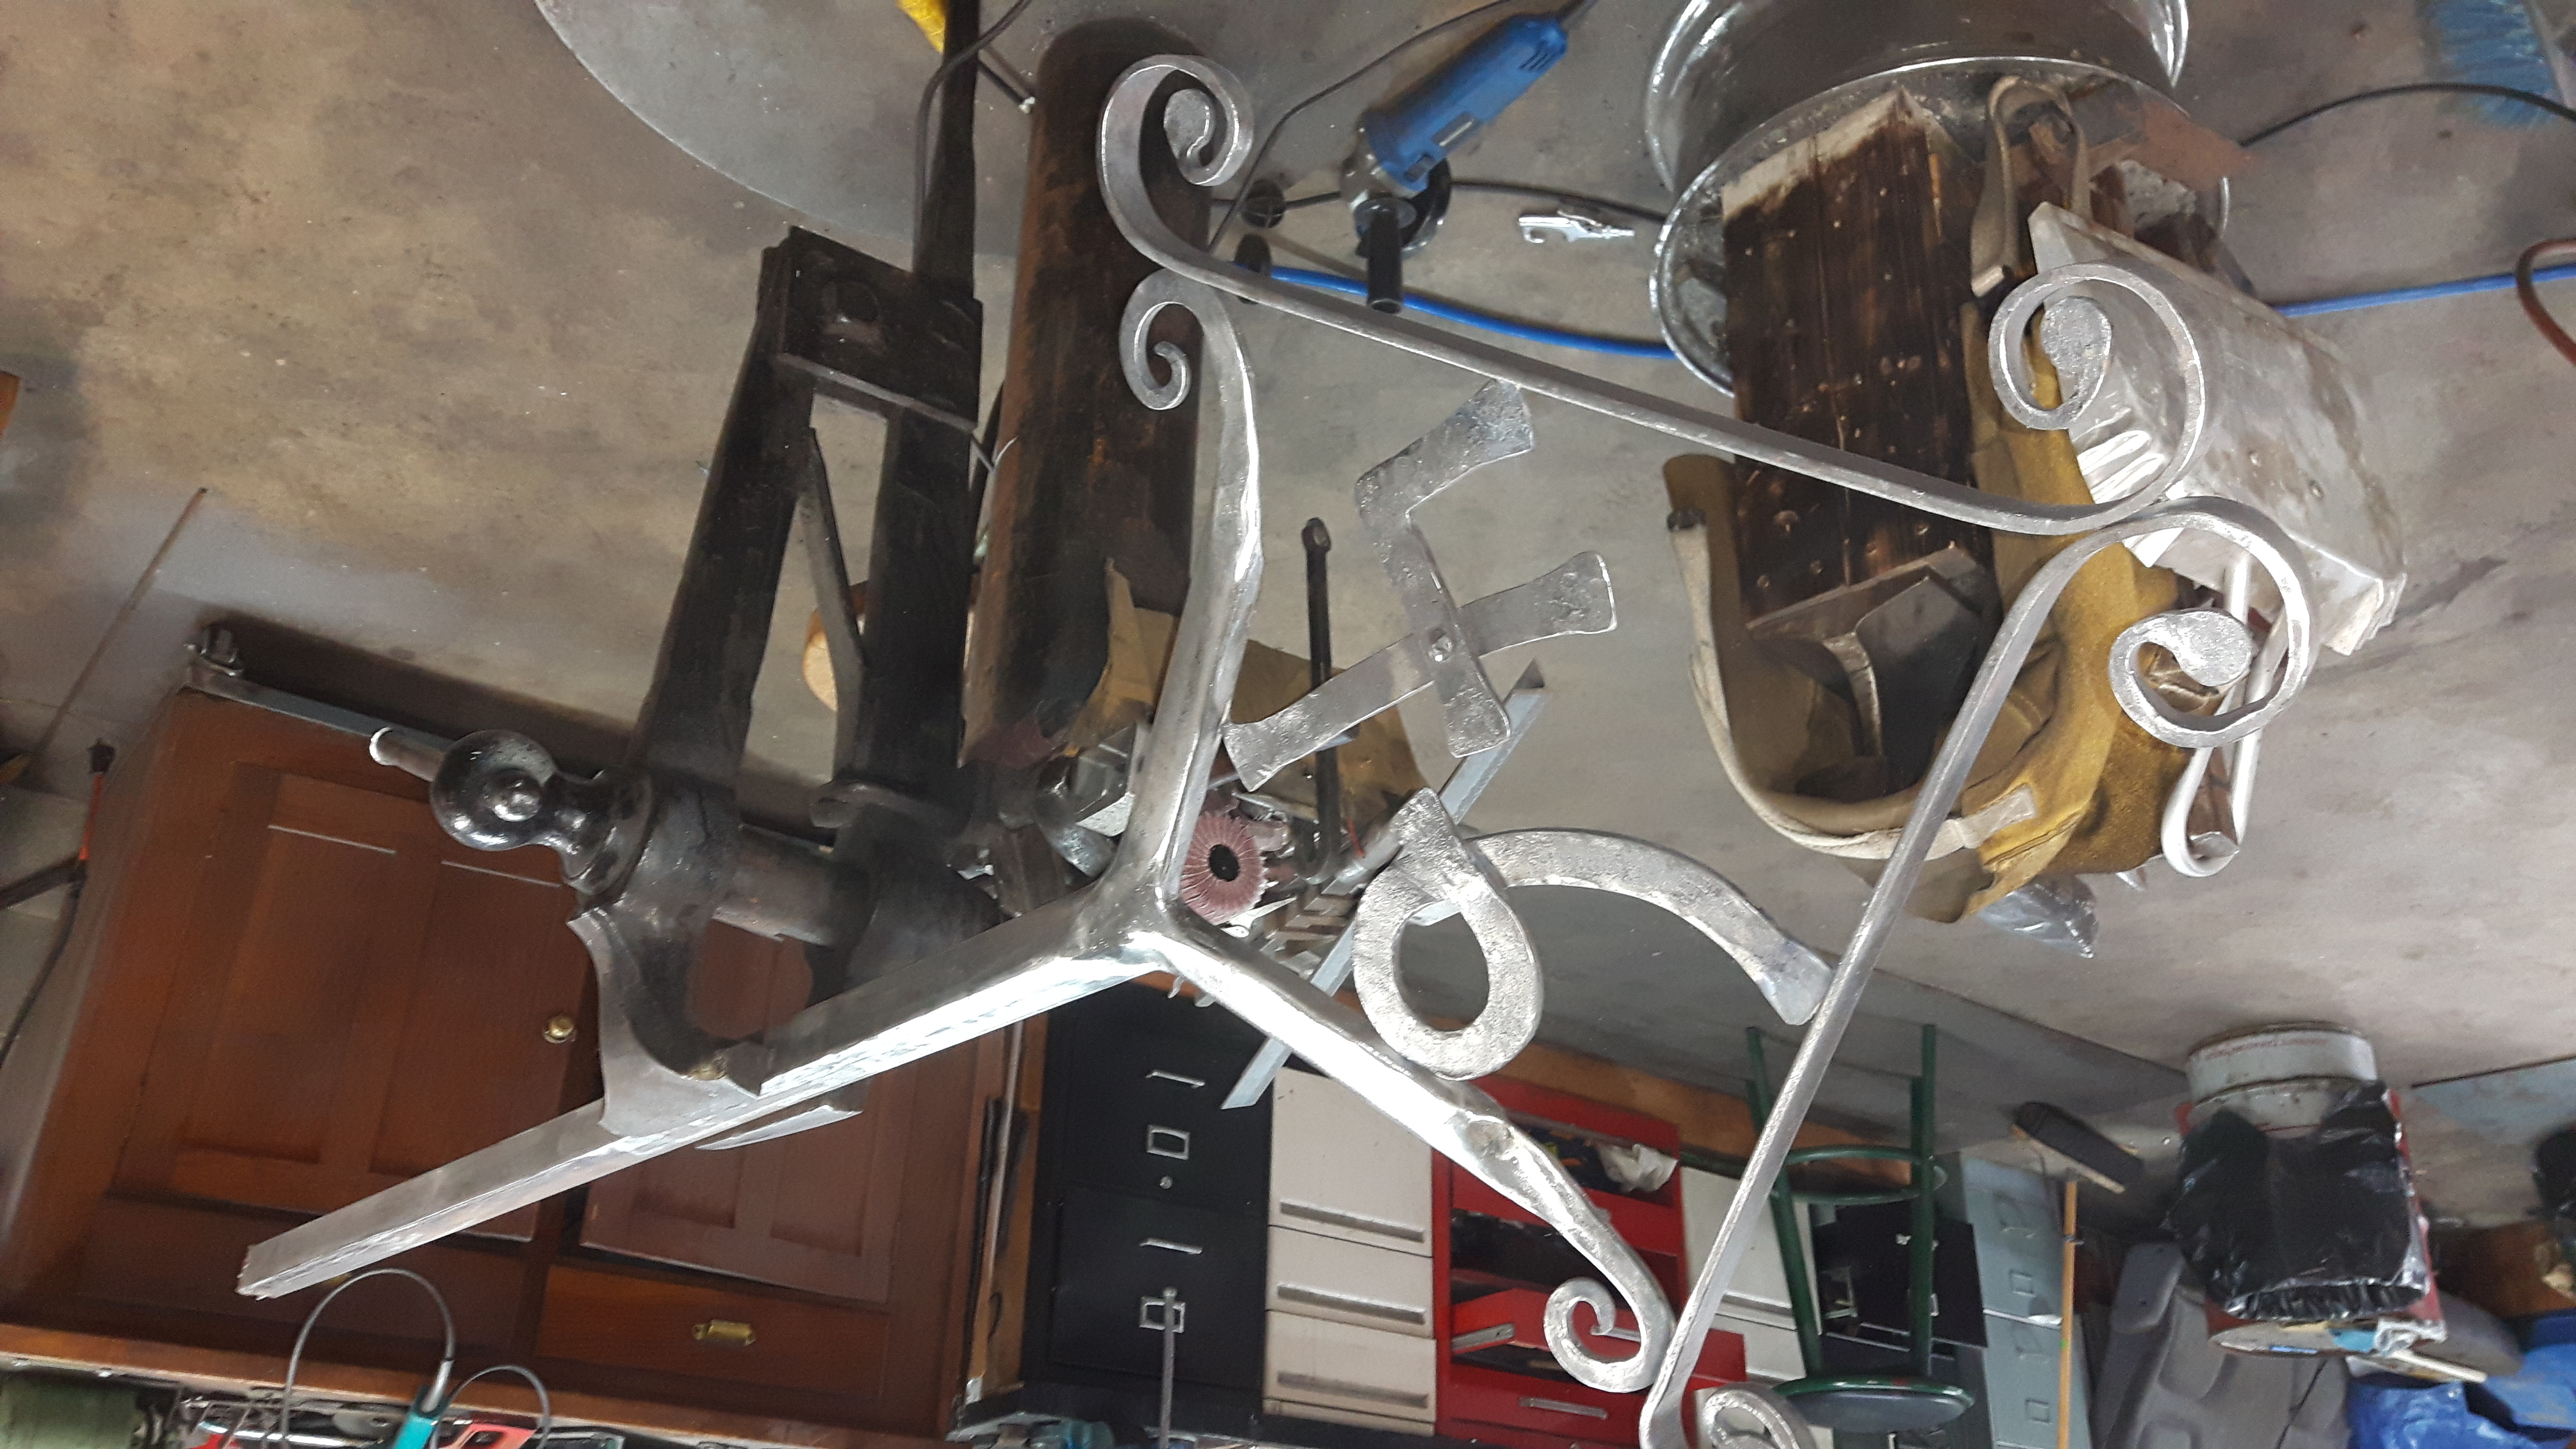
Been working on this for a couple of days..... first time doing freehand scrolls. Still need bit of tweaking. A question..... how would you go about attachibg the numbers? I plan to weld the scrolls and hide them with copper collars... my street name will hang from lower scrolls on a wood board....
-
-
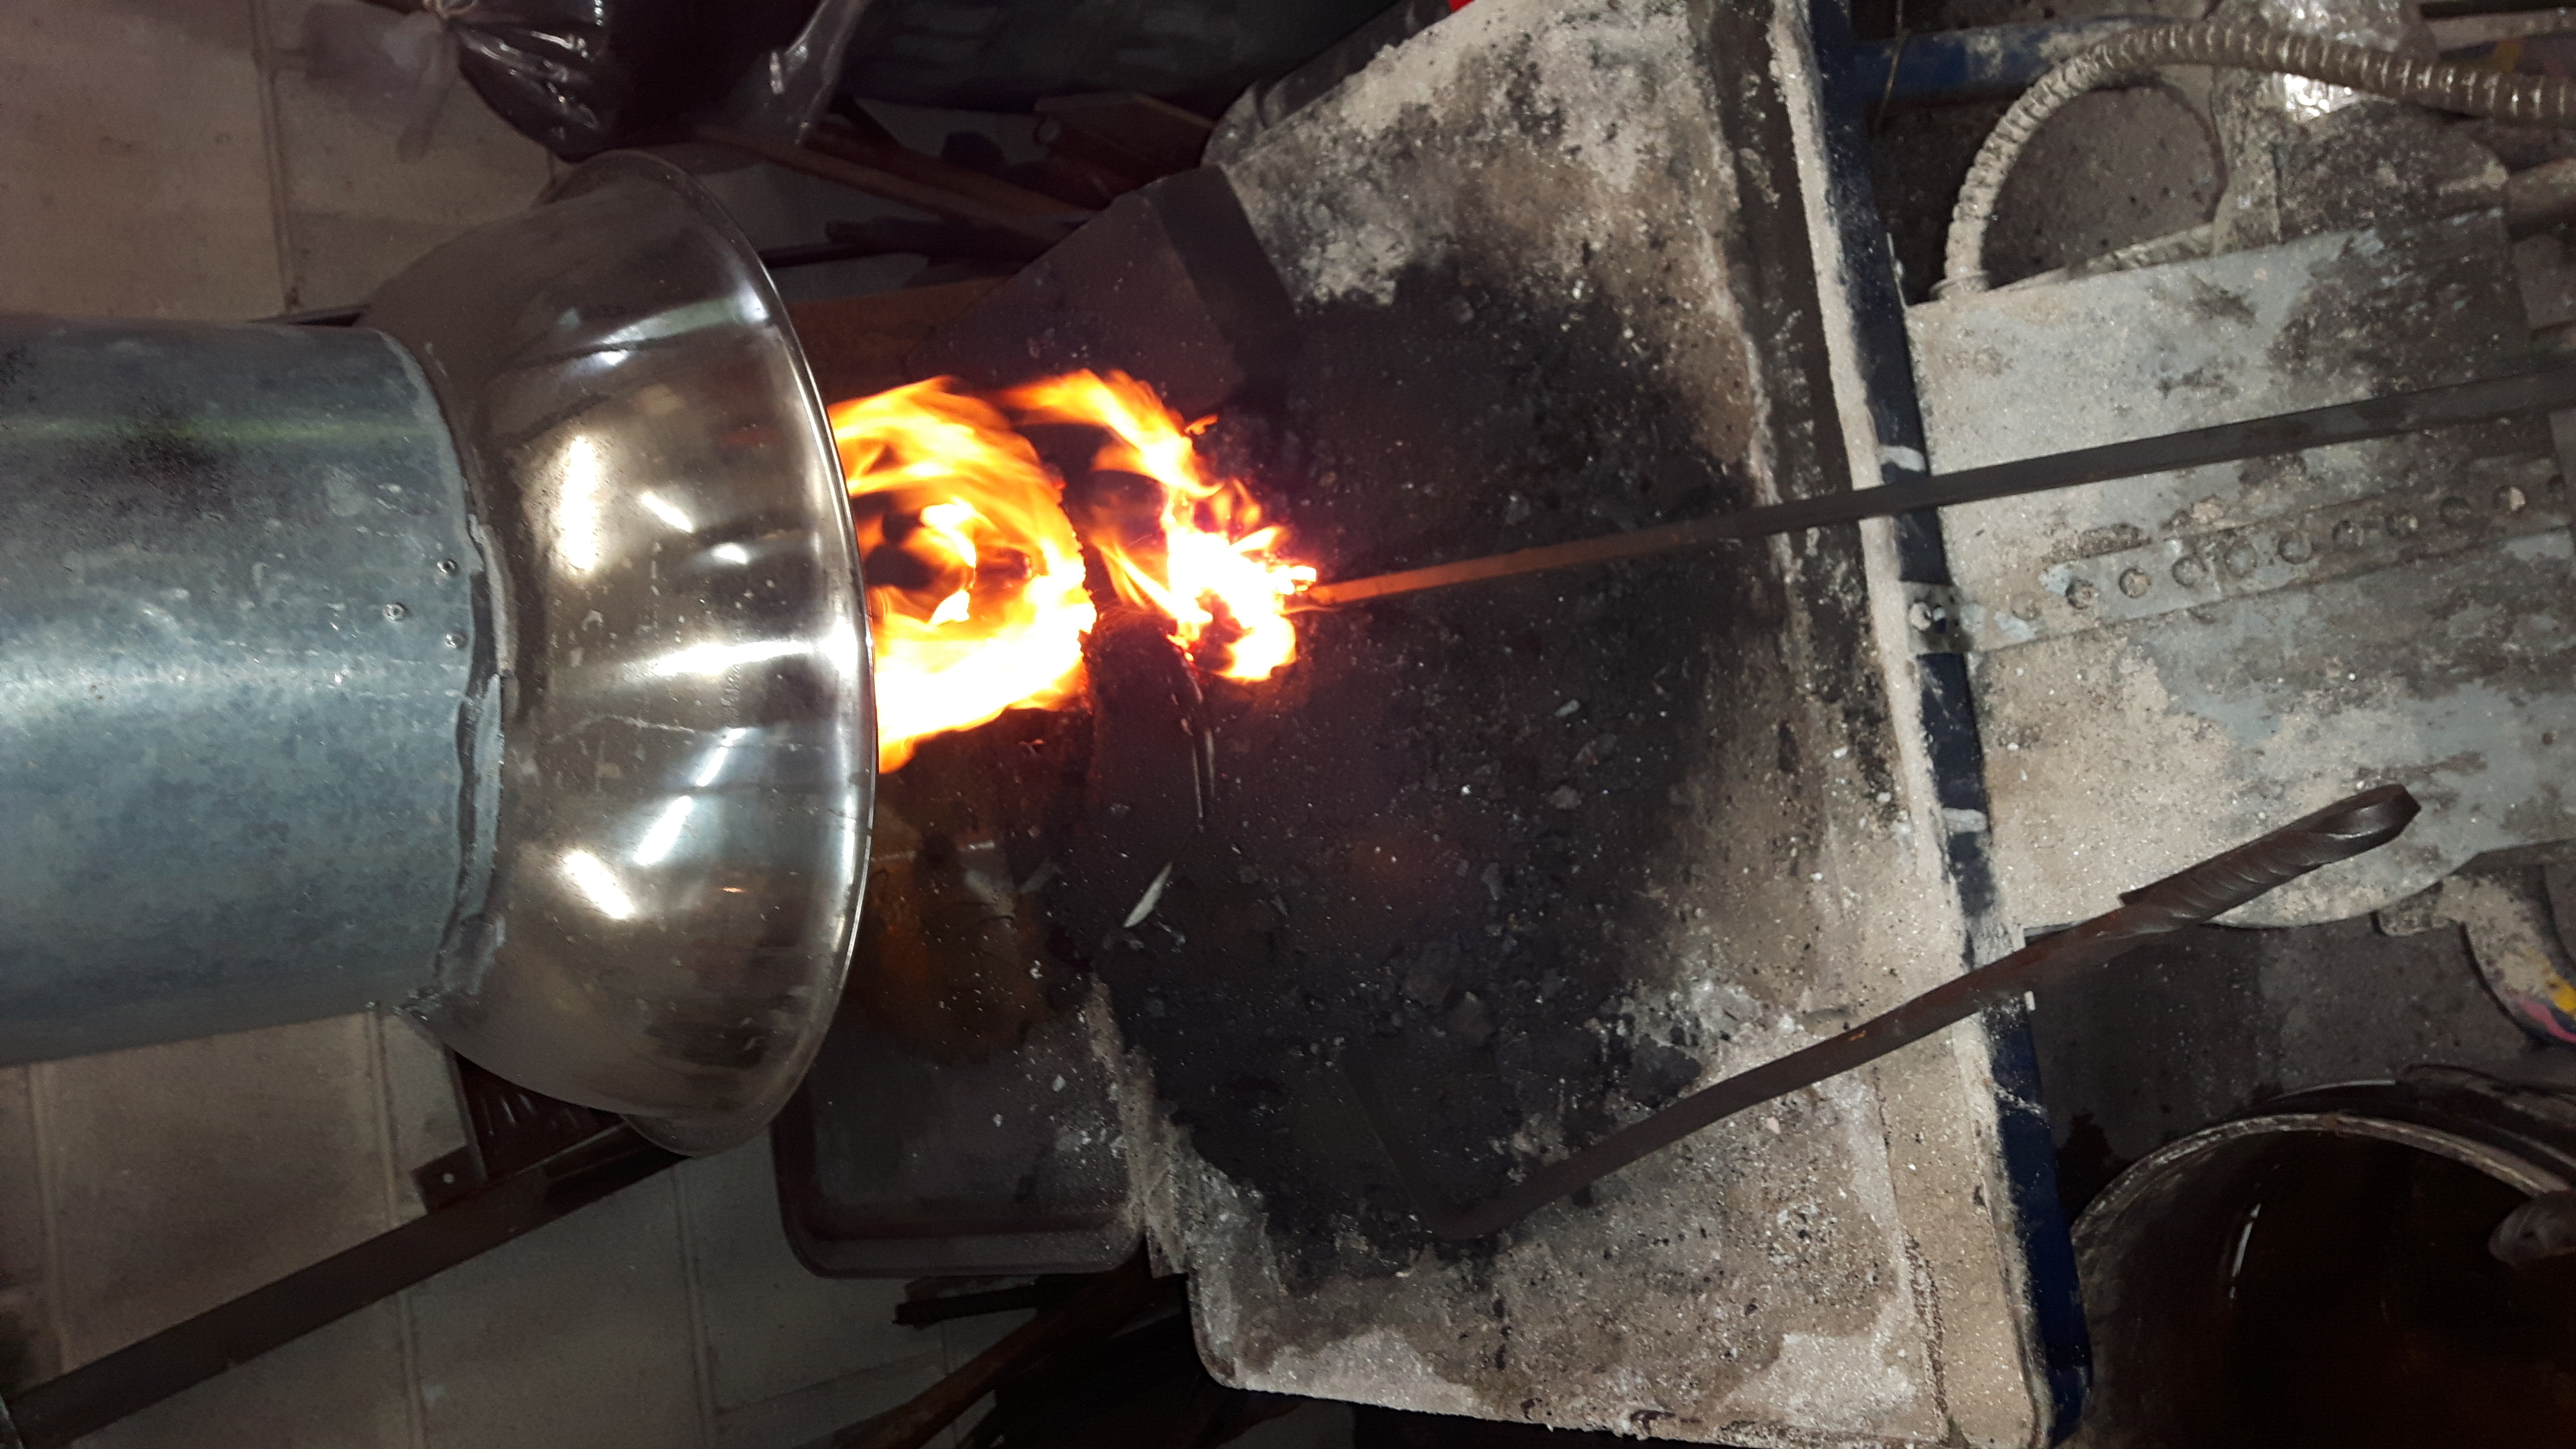
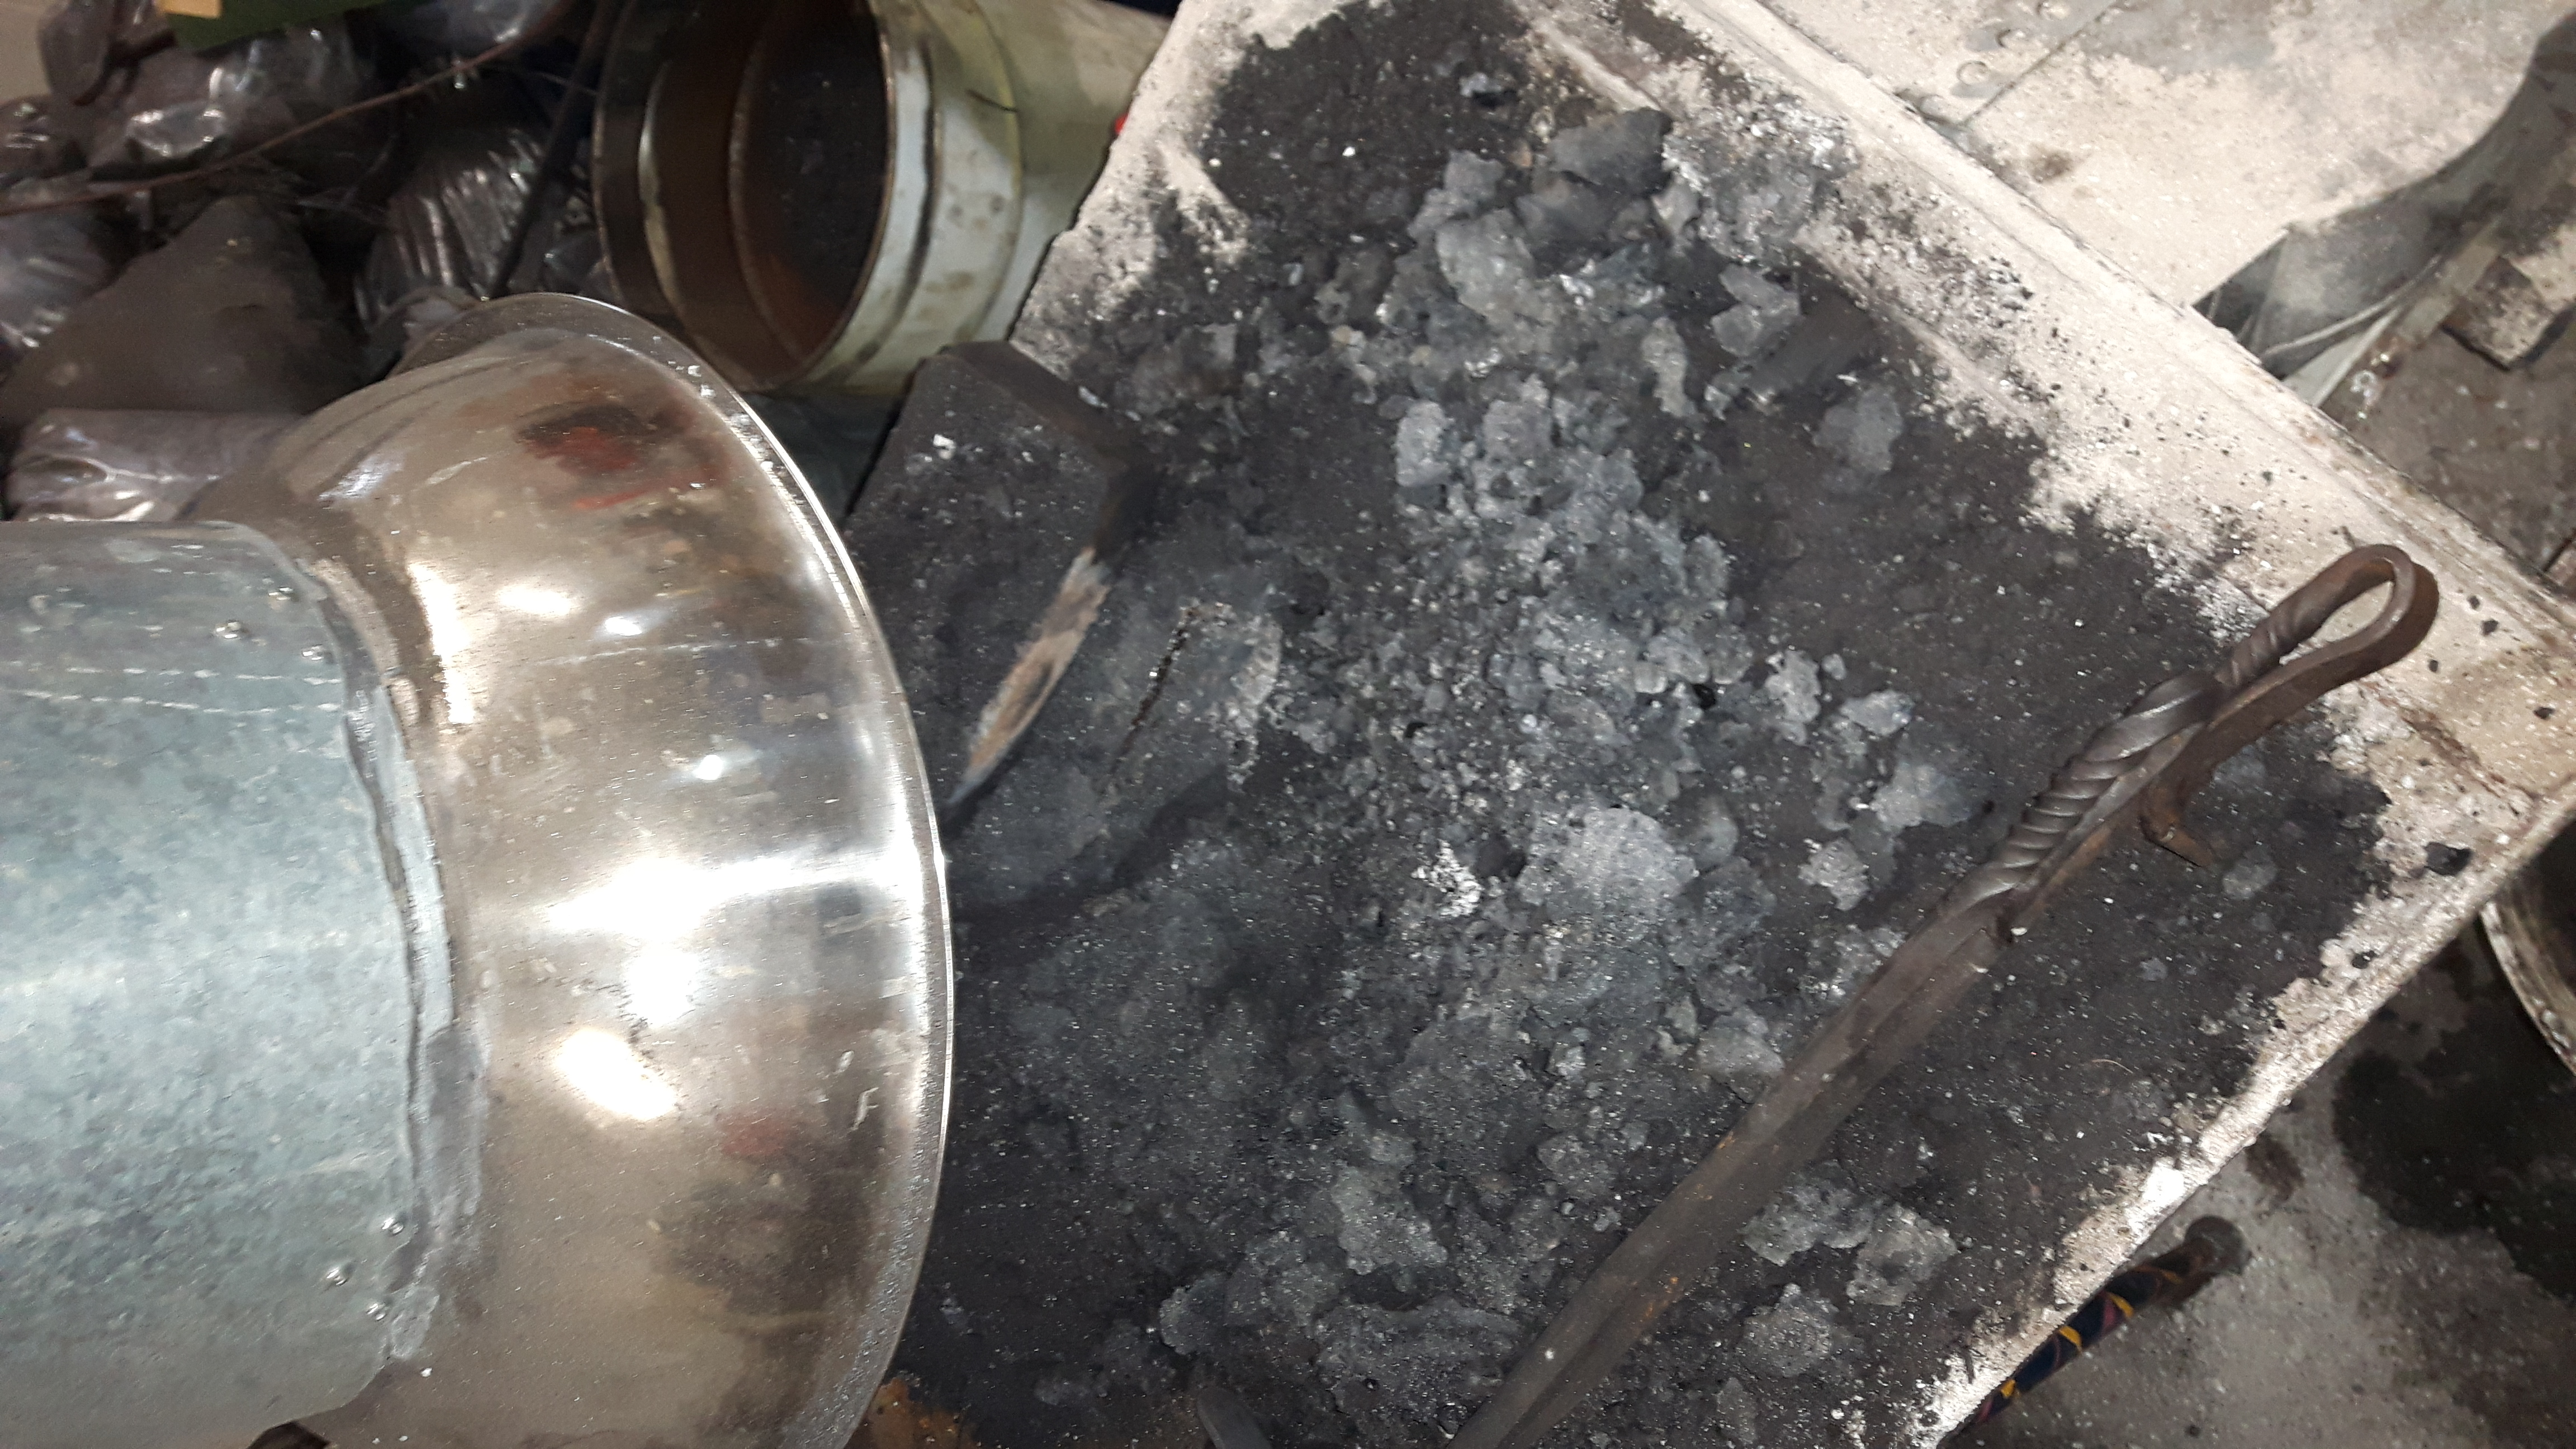
So i have been using this forge along with a propane forge I later built since my original post. Over time i realized that I pretty much use whatever fuel I have around (charcoal, powdered black coal of unknown origin, proper bituminous coal etc etc...), so I decided to heed the advice of some on here to convert to sideblast in an effort to accommodate the various fuels. Took about 2 hours to re route the plumbing, 3/4 pipe nipples and a hunk of 1/2 steel as a disposable boss tacked to the end of the pipe where it enters the ducks nest. nothing fancy as you see in the pics, but I will put a solid mount for the airflow valve. Used left over fire brick and wood stove ash to make the nest and table base, So.. first fire: Started with a small wood fire and added coke and powder as i went ( the powder coal i get cokes into dense coke piles after a while), All was good at first but I added a brick on one side to stop the from falling as it coked -- The top of the tue is 2 1/4 below table surface -- A nice fist size fire ball was easily achieved in about 20 minutes. I forged for about 2 and a half hours, and all went well-- not much work done as I was still getting used to the fire arrangement playing with air speed and coal piles, but all in all it worked well! the sweet spot was more stable, and I was able to lay the pieces across the table without nearly as much oxidation as before. Also noticed that there were less fire fleas at the beginning when i was burning the wood -- horizontal vs vertical air flow seemed to make a diff. The air supply on the outside of the forge stayed warm, but not too hot to touch until after the fire was out. And then warmed up a bit, but nothing crazy. Once it cooled I was able to scoop out a nice chunk of clinker at the bottom. which makes sense as that is why I shut it down - the fire started to give me trouble finding the sweet spot - I will need to get the hang out of scooping these out without killing the fire! All in all, I am looking forward to another go at it : )


-
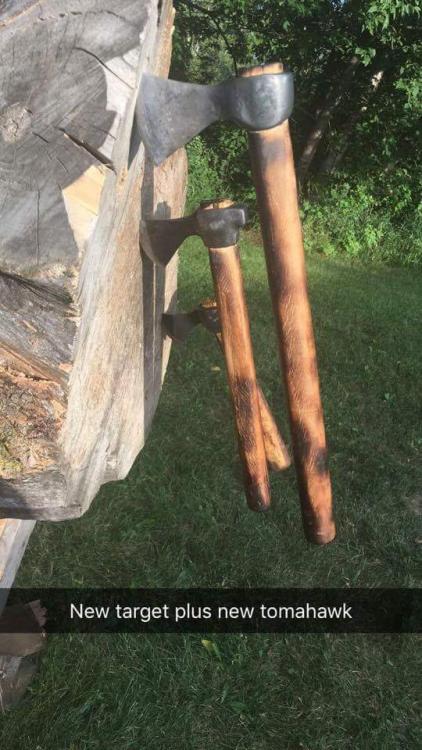
Yes! I got the idea from that post. Tried it out today, nice for starting a notch (tong ends. Boss).... but way to heavy for repeated blows. Looking forward to using it for other applications where a heavy precise blow is needed.
-
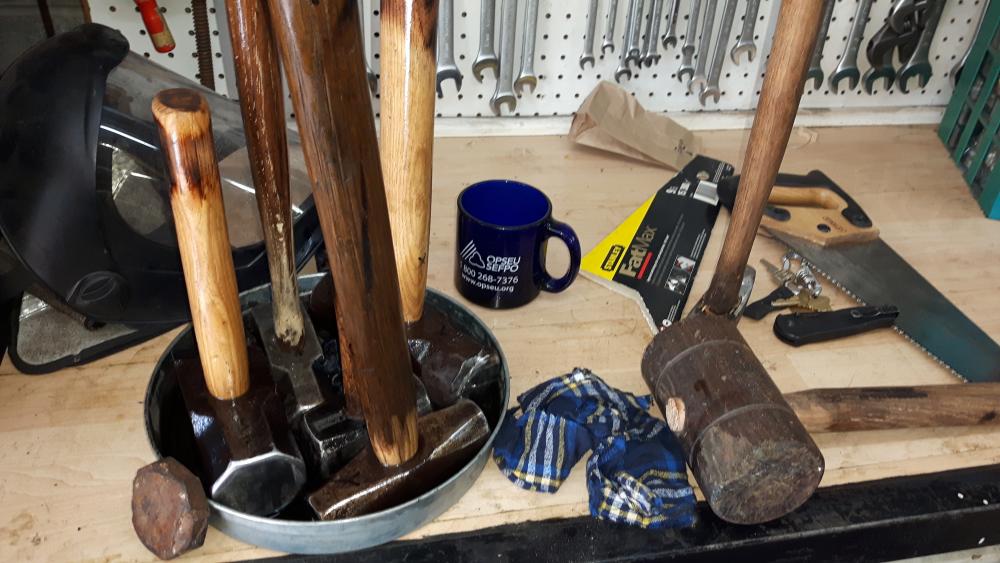
Have not posted in a while, but have still kept up with you all! Great work, and so much inspiration all the time. I have had the need for some heavy hand hammers from time to time and some shorter handled sledges, so finally got to refurbishing some oldies that I had picked up as either broken or broke soon after I bought and used them. The big cross pien had some chipped edges and way too pointy a pein, so I used a cut off wheel on a hand grinder and shaved off an half inch from the face and radiused the other end to a roughly 1' pein. Then ground flat and used the flap wheel to soften the edges and begin the polish, final finish with the 300 scotchbrite on a buffer motor. The rest just needed the flap wheel and polish. Used a rasp and 1x30 sander to shape the handles \, bought the wedges from a local hardware store -- only place in town that sells em individually. I usually make my own if doing a handle on the fly, but had 4 to do so the 4$ was worth it! After oiling the handles I set them all upside down in a pool of boiled linseed oil thinned out a bit with lacquer thinner. Looking forward to using them!
-
Thanks -- not my post, but I am interested.. From my understanding air tools are rated by providing the necessary CFM@ 'x' PSI. So -- can someone provide this figure for us? ie. the cylinder requires 10cfm@90psi for continuous use? That said, I have used a lot of different air tools, and agree that more is better!
-
I built my forge from plans online and reading posts on here. Here are my lessons learned: 1) Bigger is not better, I built a 2 burner forge out of an old 20lb propane bottle that could melt a 3inch bar if I let it, -- way overkill. The only time I've needed to use the whole thing was to heat treat a machete -- and I could have done that some other way. 2) follow proven burner plans to the tee unless you are an engineer or Frosty 3) read and absorb all of frosty's posts: He knows his !@#$. 4) invest in a good CO/ LP detector: mine was 30can$ and reads parts per million on a LCD screen, move it around high low, etc, to learn how much ventilation is required. For my 20x30 shop, to ensure a 0 reading on the meter I need my man door open half way and the big door open about 2' --- creates a good cross draft. Now that it is warmer, I just open both up all the way. CO poisoning is no joke, and should be a number one priority. 5) don't use hard fire brick for he floor of your forge -- it takes WAY TOO long to heat up, and wastes a lot of gas: I will use ceramic kiln shelf when I have to re-line the forge. 6) Furnace cement works as a liner (applied as a coat over the kaowool, but is not great, has 0 IR reflection, but does a decent job of protecting the wool. Just be sure to wet the wool before you apply any liner -- not wet -- it'll just fall off the first burn (ask me how I know lol) Anyways - that is all for now, I like my forge, but still use my charcoal / coal forge for an EQUAL amount of projects, and beleive they both serve a purpose. I will re-iterate one point: don't try an re-invent the wheel until you have built a few burners based on proved plans -- I used and ejector style, it worked right -- just follow the plans :)
-
Thanks Dan and Brian, Basher Alec etc. Despite any feathers that may have been ruffled, this (and the conversation in the tools section) are the first threads I have followed with relish for a while. Here's why: I love a good discussion and debate. For us newbies / amateurs that live far away from or cannot afford to go to conferences, It is great to see the pros argue / explain why they do things their way. I am the type to absorb like a sponge and then test play for myself -- the more discussion, the more to absorb. I have learned a little bit of a lot of differrent trades, and one lesson I have learned is to first master how your teacher explains it, do it the way he/she does, ==== and then (and only then) try to come up with your own way. So..... I can see where Brian is comming from on this: if we teach a weld that has limitations as the 'baseline / first' weld someone learns, this may, in the long run do the person a disservice in their further attempts at welding non-poker like items. So to all those that teach this, beware that welding theory is just as important as getting a weld to 'stick' the first time at the forge! On the otherhand, I agree totally with Basher etc (and did the same last night with a 1/2" and uglier version of a poker I made...dragged a whole tree out of the snow and up the hill with no issues) -- The weld holds for pokers, and I am sure many other non critical lifting senarios. Bottom line -- In this and the other thread on welded tongs, I have learned a lot about forge welding theory, and loved the discussion. I just want to say thank you to all the pros / semi pros for their contributions -- I am energized for the weekend to get out and try some new things, In the end isn't that the point?
-
Got it all put together yesterstay, with a little help from a friend. I will try to get out there and get pics by the weekend. Seems really solid so far! In spite of its roundness....it is still a beast to move, so I may end up puttting the wheels on ( I have a a few sets of casters laying around -- one of the many things I hoard -- never know when you might need a wheel for something --big or small)
-
Here is my attwood, 100 lbs ish. Has good rebound, a file skates on it, but not so hard it wont dent on a mis blow..... it is my first real anvil though I have used a couple of others . Got it locally here in northern ontario, from a guy who says it came with his property when he bought it. It does all ive needed it to do so far from small stuff in copper to inch and a bit for hardys andother tools.
-
That is the plan! 3/4 by 1/4 bar for lip, and I was thinking of trying some fancy twists on some bar for the racks (one low rack, and one on the table) Once she's all welded solid do you think this baby will tilt and roll with one person doing the work? That was my hope, but after some rough match the whole works will weigh in around 400lbs..... I think I may have to weld a little axle and some steel wheels for mobility......(the kind where you tilt with a bar and the wheels touch only when tilting the unit)