Pearl Yeti
-
Posts
12 -
Joined
-
Last visited
Recent Profile Visitors
1,466 profile views


-
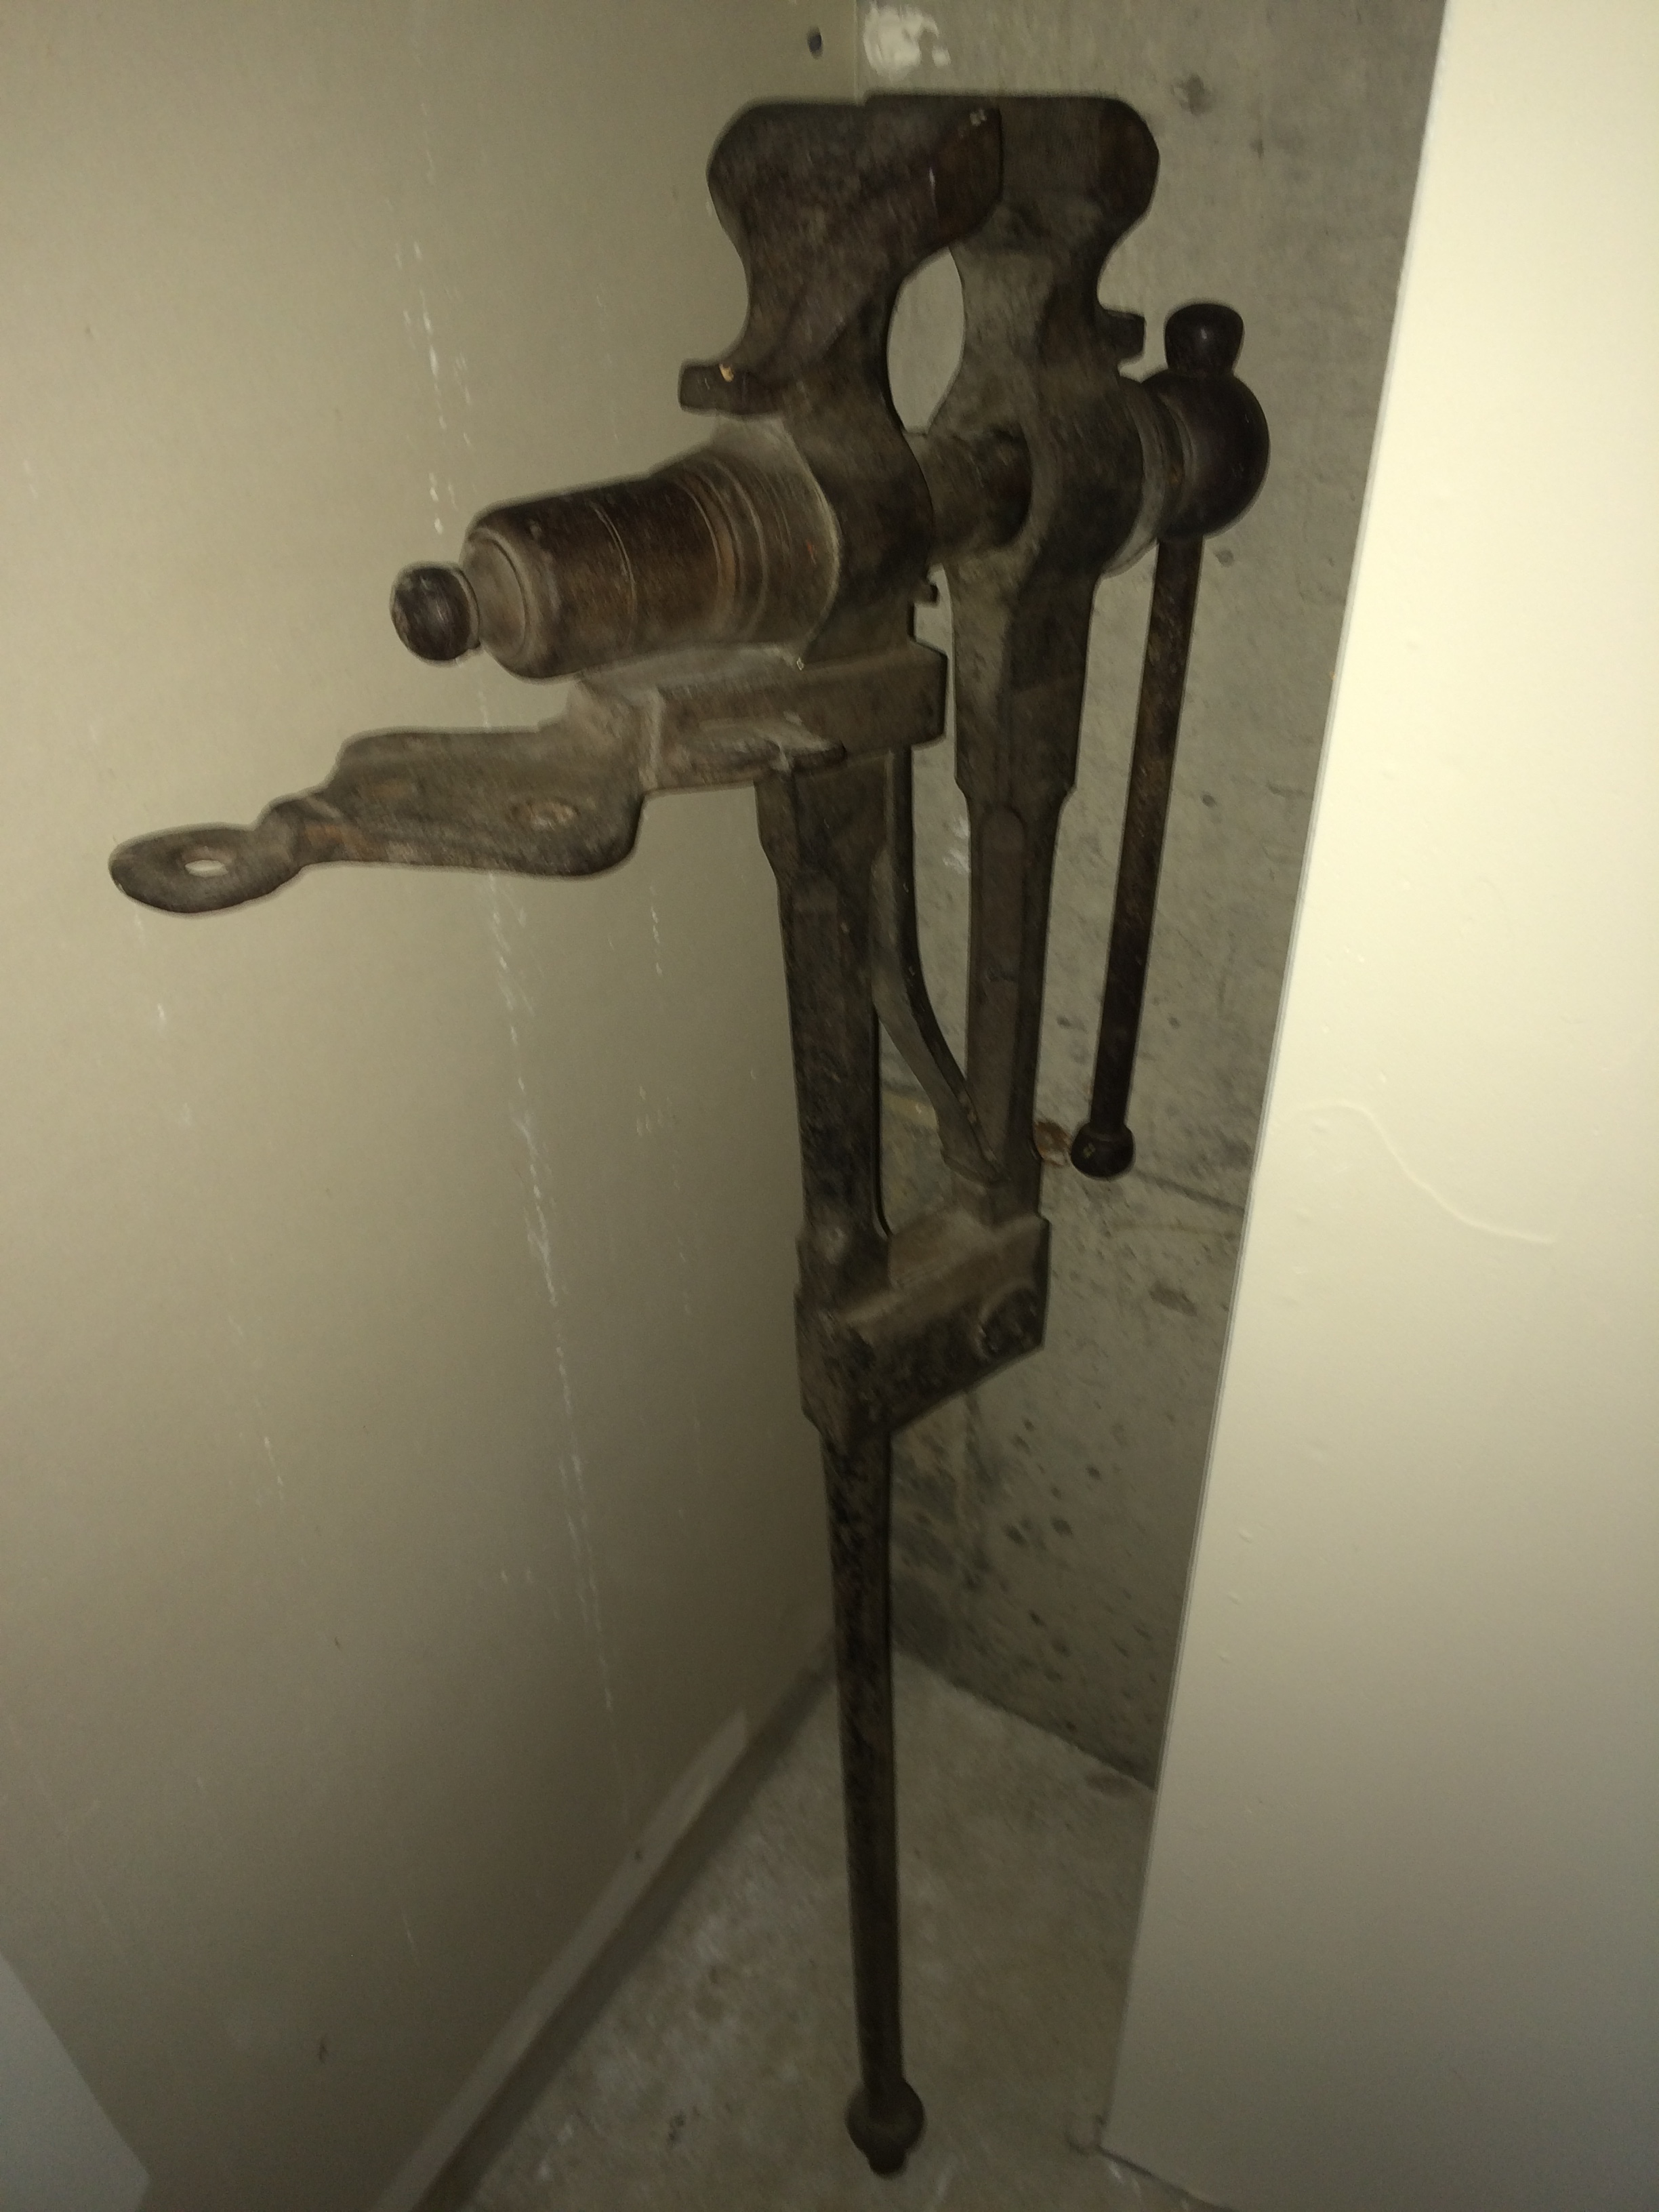
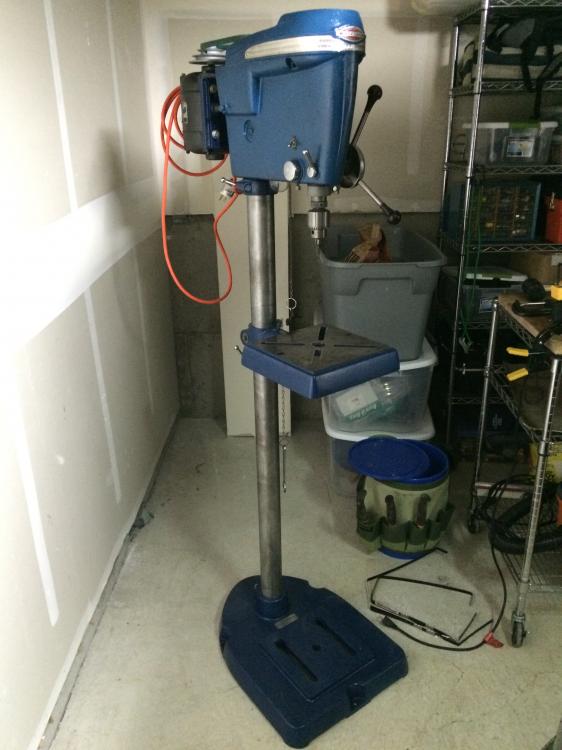
While I was running around buying anvils I was also researching how to build a forge. I decided I'd give a shot at making my own, and I would go with a venturi design. Since it looked like I'd need to drill lots of holes, I decided I should get a drill press. I drove out toward Astoria and bought this lovely giant Kitchenaid stand mixer from Dan Westlind. It is a 1950's Craftsman that Dan had renovated. Out of all the tools I got to make the forge, this is the one I didn't come to hate. I'm looking at you, angle grinder. By curious coincidence, Dan turned out to be a blacksmith. I spent the better part of the day being shown his shop, his knives, and listening to him talk about forging different patterned steels. It was a lot of fun, Dan is a great guy. At this time, I had been having a lot of trouble tracking down a post vise. They were either being sold for outrageous amounts or were missing pieces. I lucked out, as Dan had a lovely one he was willing to sell me. If anyone could help me figure out the maker of this vise, I'd appreciate it. I don't see any noticeable maker's marks. With hole drilling thing in hand, I was now ready to start making the forge...

-
I would edit it out, but apparently the edit button disappears after a while. If any parents needs help with an explanation, I recommend this as a primer.
-
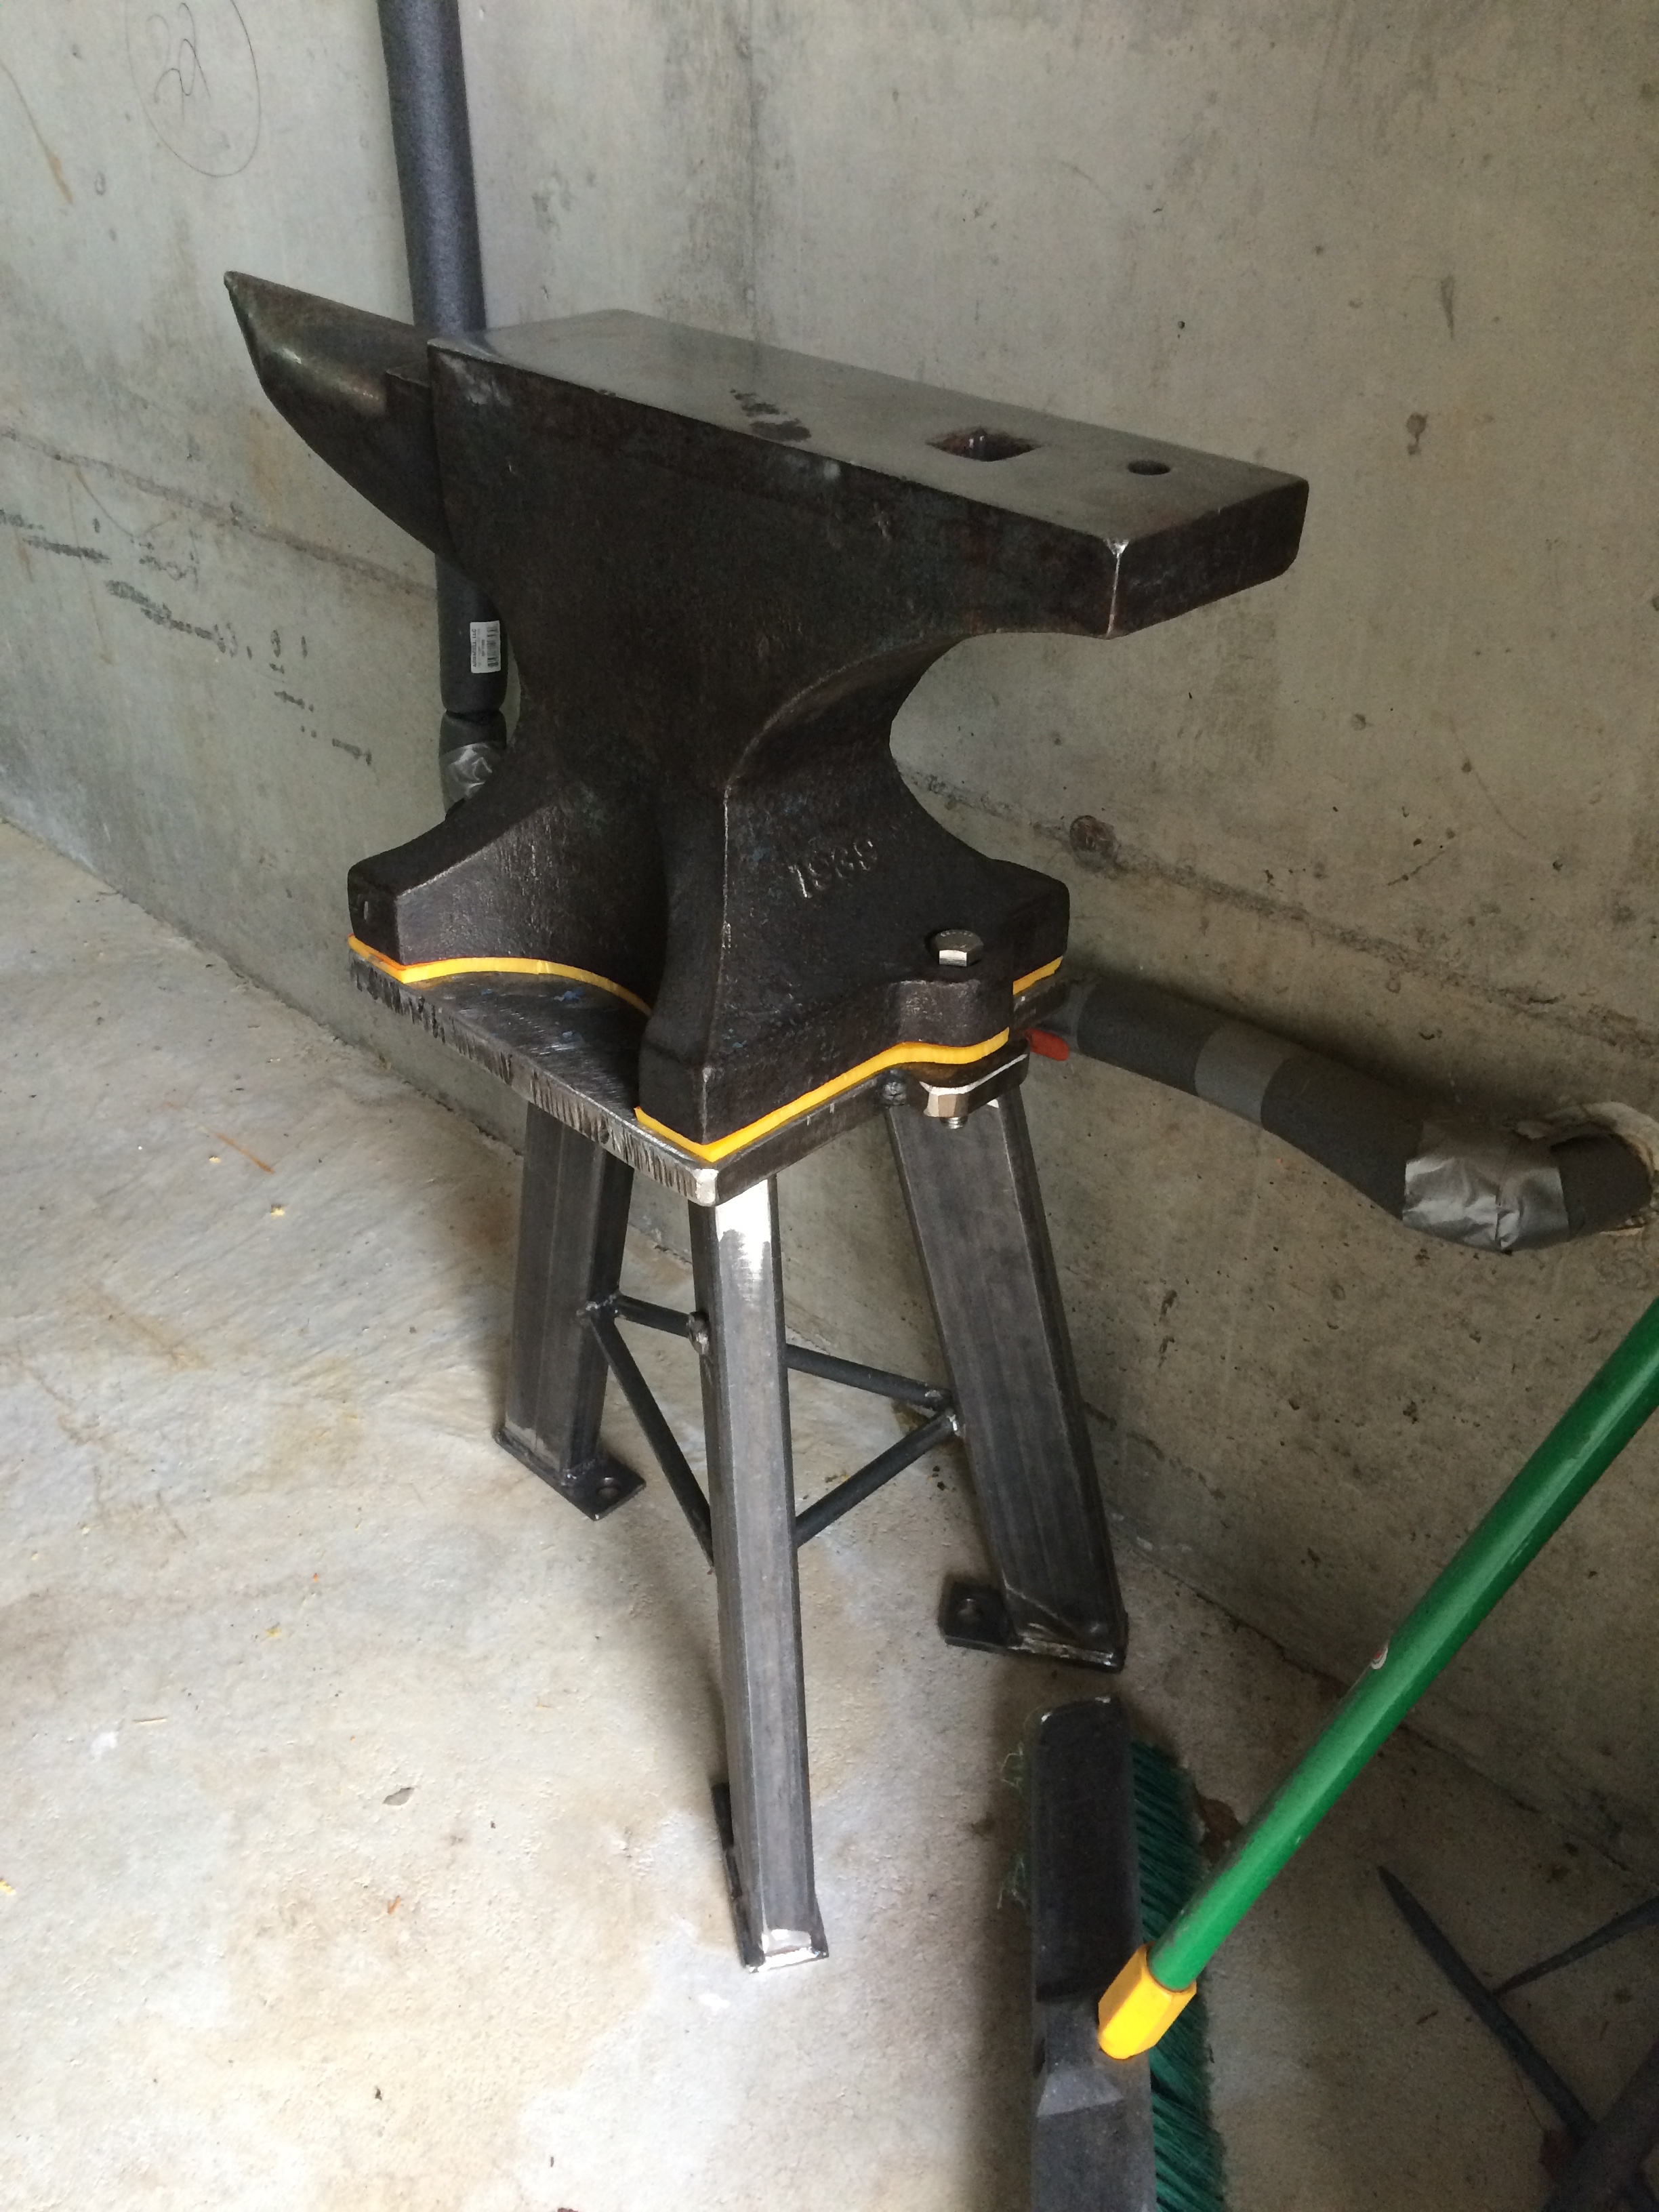
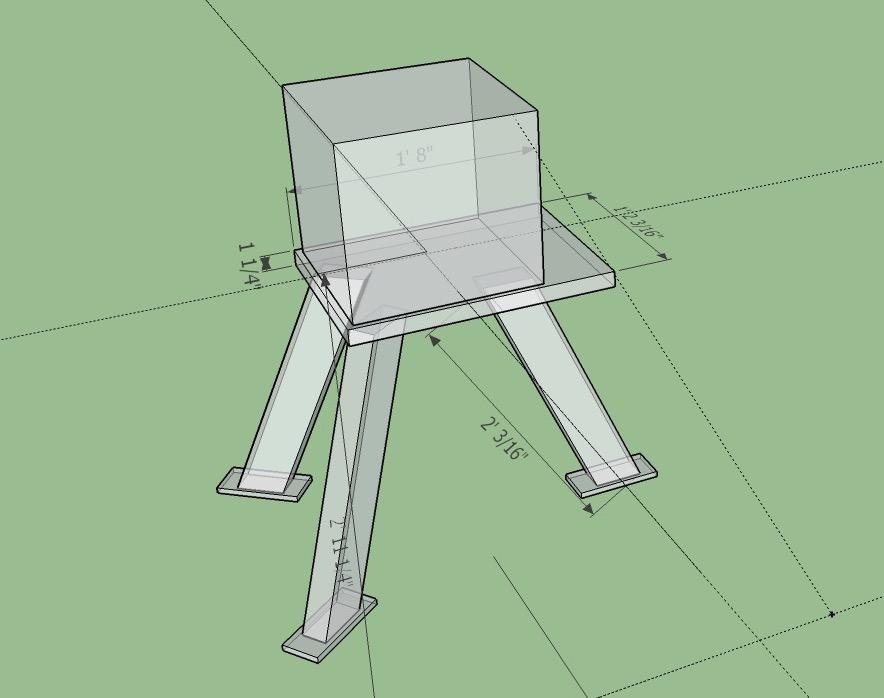
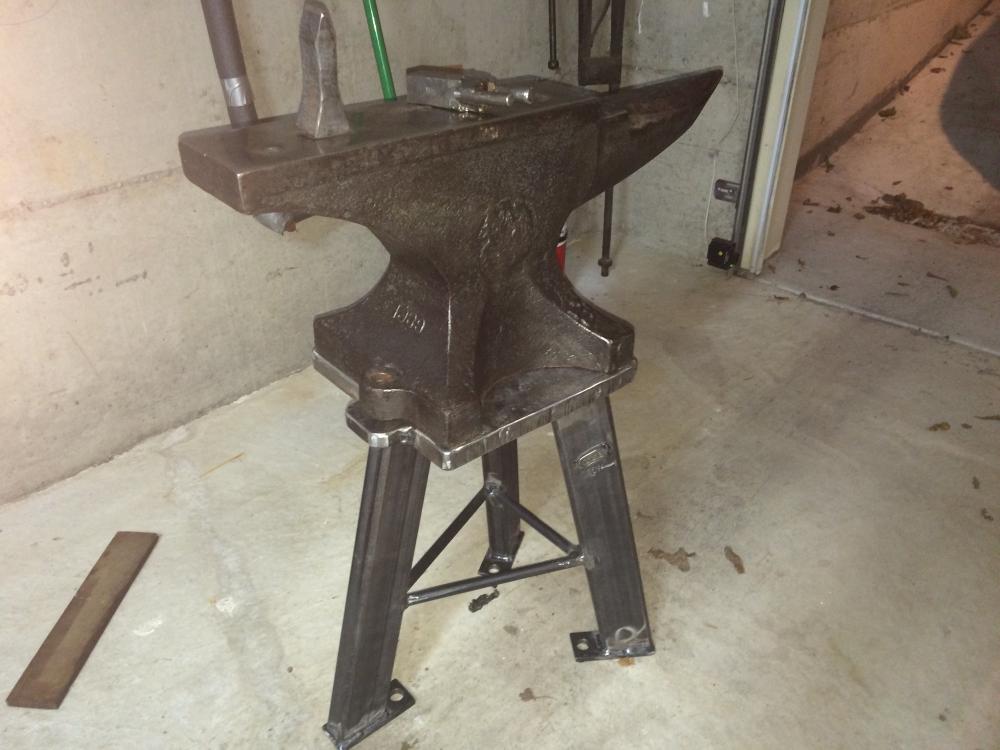
I had Nitzan Lilie fabricate the stand for the anvil. I went with a tripod design as that is what I have learned on. The stand bolts to my garage floor. I have limited space, so I unbolt the stand and slide it to the side so I can fit my car in when I'm not smithing. Here is a rough sketch I gave Nitzan. Here are the first few moments of the anvil being on its stand. I haven't bolted it to the stand yet, or the floor. Here is the stand in its finished form. The yellow is a polyurethane mat I cut to shape to help reduce noise which works really well. The anvil is bolted pretty tight to the stand, compressing the polyurethane.

-
It is a hard trick to learn. I'm getting faster, but nowhere near 1 heat. But I do have an every growing hoard of leaves...
-
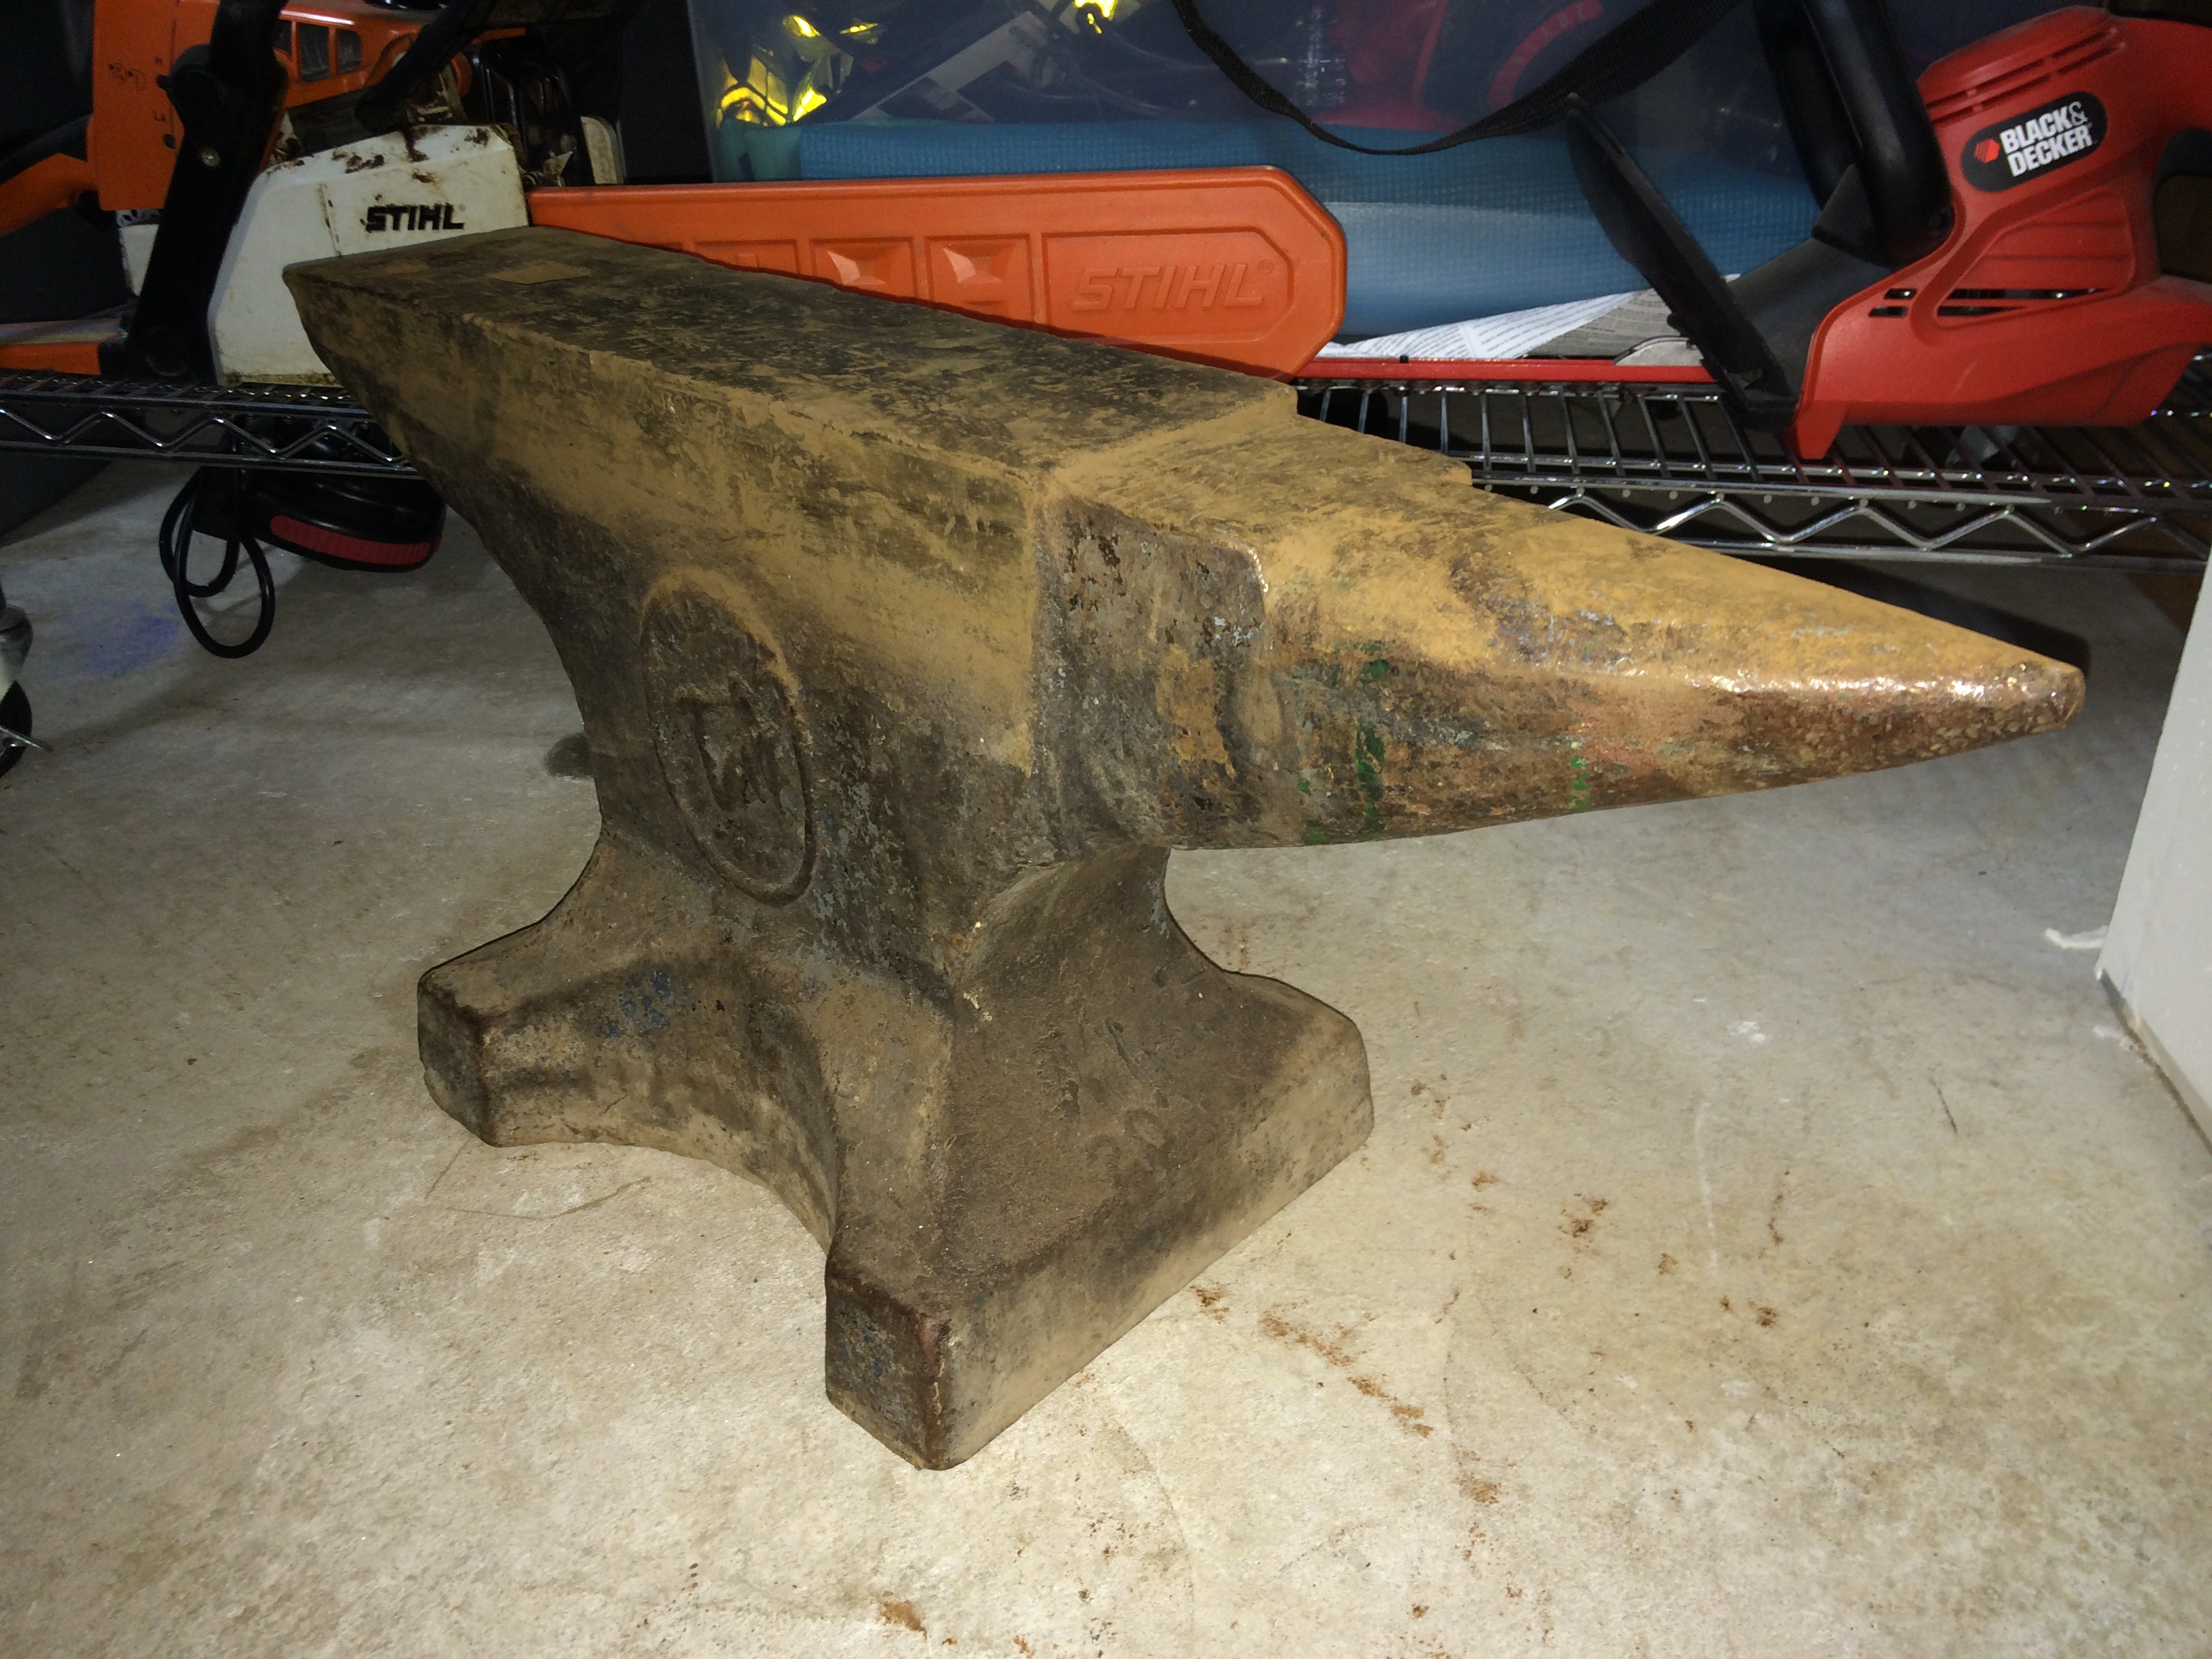
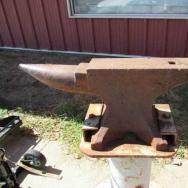
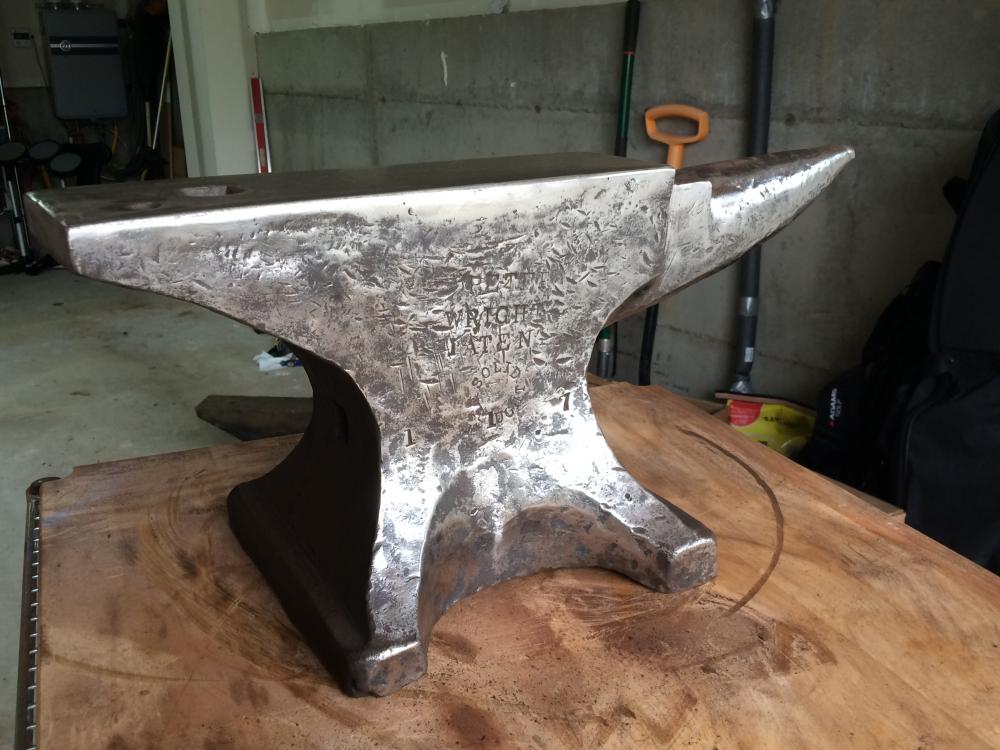
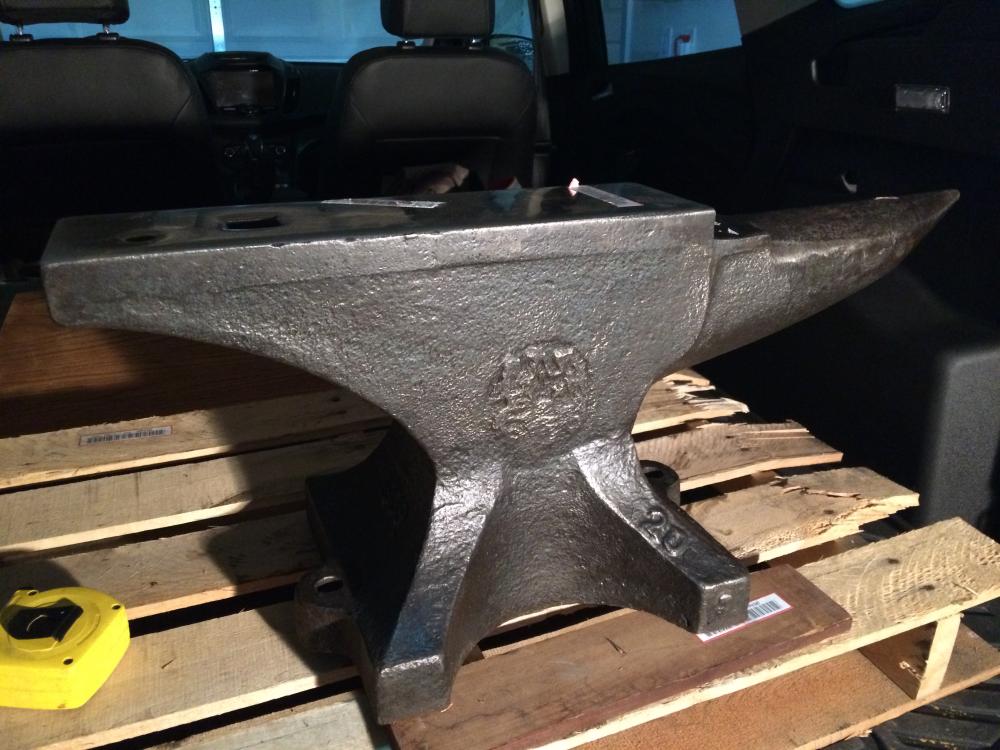
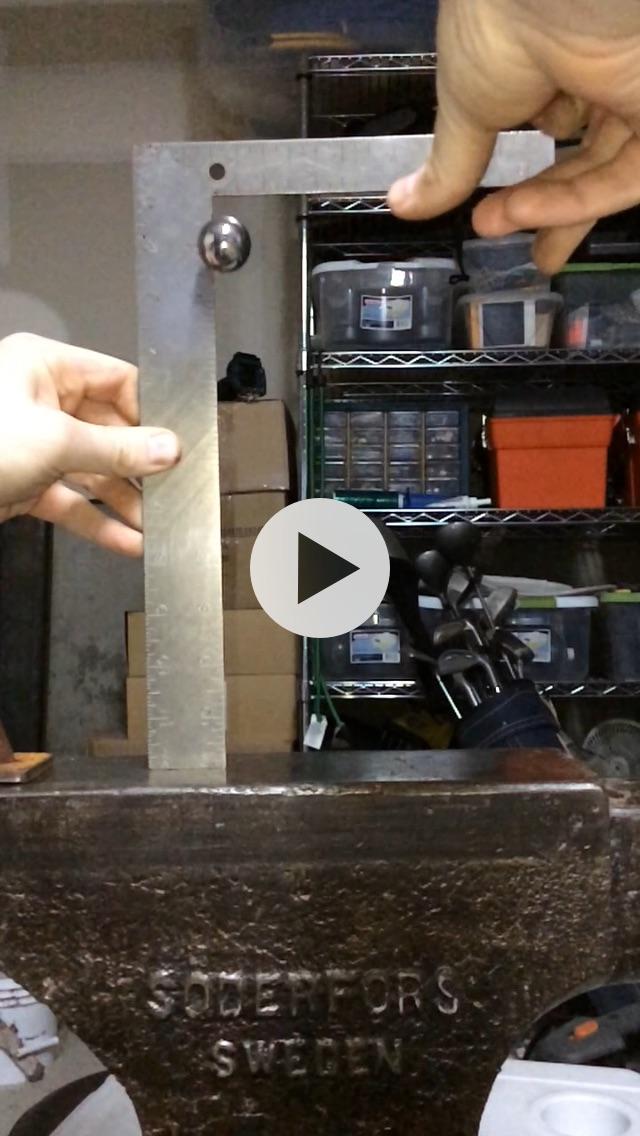
After I was bitten by the bug I began buying anvils like they were candy. I purchased three in fairly quick succession. There is a wealth of information out there on how to buy an anvil, but I'll repeat here some of the tips I followed: Buy a 1" steel ball bearing. Place the bottom of the ball bearing 10" above the anvil. Drop it. Record the highest point the bottom of the bearing makes on its bounce. I used an iPhone on the slo-mo setting which makes it very easy to scrub through and find the bounce height. Take the bounce height and divide it by 10, this is your rebound %. The first anvils I purchased rebounded 60-70%, my final anvil rebounds 95-97%. You may want to perform the bounce test a few times to get an average reading.Check for any discoloration around the edges that may indicate welding. You don't want a welded anvil unless you're pro enough to discern if it was done correctly. I checked the edges with a file and light pressure to make sure the file skittered across a hard edge.Lightly tap the entire anvil with a lightweight ball peen hammer. Anvils are fairly consistent in their sound, and get a little higher pitched as you go to the heel or horn. If you come across a spot that sounds different, dull, dead, crackly, snap (?) the anvil may have internal damage.Of course, I followed none of advice when I purchased my first anvil. I had been looking on Craigslist for a couple of weeks and nothing was coming up in my area. Finally, a blurry imaged anvil showed up in Caldwell, Idaho, about 2 miles from where my grandmother lives. And I hadn't visited in a while...road trip! I was nervous when I went to buy my first anvil. I also lacked my tools: ball bearing, ball peen, and file. But the anvil looked like an anvil. And that was about as discerning a customer as I felt like being at that moment. I bought the anvil, loaded into the trunk of my car and drove off happy. It turned out to be a Vulcan 200 pound anvil. It was in okay condition, but needed some work done. And then, three days later, a beautiful looking Peter Wright showed up in Astoria on Craigslist. I drove halfway there and met the owner. After my first purchase, I felt a little more confident. I tested the edges, tapped with a ball peen, and determined the anvil was worth of purchase. Now with two anvils on hand, I had done enough research to stumble across the ball bearing drop. I tested both anvils, and they were rebounding about 60-70%. I was a bit disappointed the Peter Wright wasn't doing better, and I suspect those shiny edges were due to welding that may have sapped some of the hardness from the anvil. Lesson learned. At around this time I began working on my forge, but also trolling around on eBay a little bit. That is when I found what looked like a nearly mint Fisher anvil in Portland...Maine. Somehow I won it for a fraction of what it is worth (even after freight costs). I have no idea how since there was plenty of other action on much less worthy anvils that week. I guess everyone was scared off by the very blurry images that must have been taken by a circa 2002 flip phone. Waiting the 7 days for the anvil to freight was torturous. Portland to Portland is not a short trip. But it turned out to be worth the wait. The Fisher arrived with just a couple nicks in it's far too sharp corners, but otherwise looked like it had never been struck with a hammer in its life. Testing it with the ball peen was interesting as I had come to expect a much sharper sound coming out of an anvil, not this dull thwack. I was a bit worried I had bought a dead anvil. Dropping the ball bearing relieved my worries as the ball rebounded 95% over the entire face. So it took three anvils to find my anvil. I have been happily forging on the fisher for half a year now. In the next post, I will show the stand I had fabricated for the anvil.

-
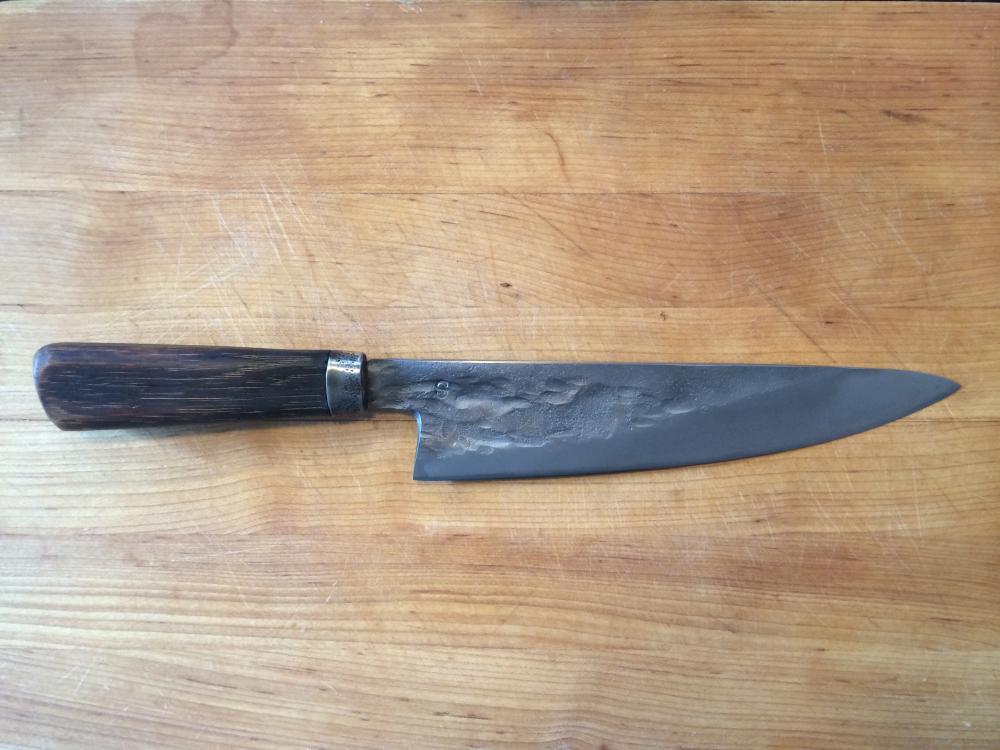
First off, the knife. I figure it's fitting to begin here since it is what finally decided me on having my own smithy. It was made during Arnon's 3 day Japanese Chef Knife course. It was a fantastic course. Arnon and Nitzan were great teachers, and hilariously entertaining. If you are near the Portland area and have a chance to take this course, I highly recommend it.
-
Hi, My name is Sean and I live in the Tabor neighborhood of Portland, OR. I have been getting into smithing the past couple of years by taking classes from local smiths. Last summer (after a particularly good Japanese knife making class taught by Arnon of Bridgetown Forge) I decided to take a jump and buy an anvil. Months later and my garage is slowly turning my smithy. I wish I had shared a bit of the journey as it happened, but oh well. I'll play catchup in this thread.
-
Hey...the cousin here. Uploaded a pic of the bearing bounce. Started the ball bearing touching the inside edge. It's a 1" bearing so that puts it at 10" above the anvil. Bearing comes up just a smidge past 9.5". I had a hard time keeping the smile off my face in front of the seller when I saw that it had a 95% or better rebound.
-
 I just wrapped up a three day intro course. Definitely made some good contacts. I am going to do my best to go to the NWBA conference in Enumclaw. And I'm searching Craigslist right now!
 -
 How are you liking the Tabasco? I'm just starting out and have my eye on that forge. Beautiful picture. You should sell that to Chile, great ad.
 -
I am browsing around at the selection of new anvils that are available for domestic shipping. However, If you know of an anvil (new or used) in or around Oregon that is up for grabs I'd appreciate the info. I live in the Portland area. Beyond an anvil, I need a lot of other stuff as well! I have my hammer, and will be looking to get the other basics here in the next few months as money allows.