

Michael
-
Posts
1,062 -
Joined
-
Last visited
Content Type
Profiles
Forums
Articles
Gallery
Downloads
Events
Posts posted by Michael
-
-
Looking forward to seeing how these turn out with the etch.(I have some of Bill's tire wrought, haven't found the right project yet) Jig to get the bends all the same or will you be bending in the vise?
-
Nobody, you seem to know Monterey quite well, Better than me actually! We were on the beach "across from the paddle boats" or so I directed the guests before heading there myself. I'll check with the bride, but aside from the cake plate my responsibilities mostly consisted of writing checks and not asking too many questions. ;-)
-
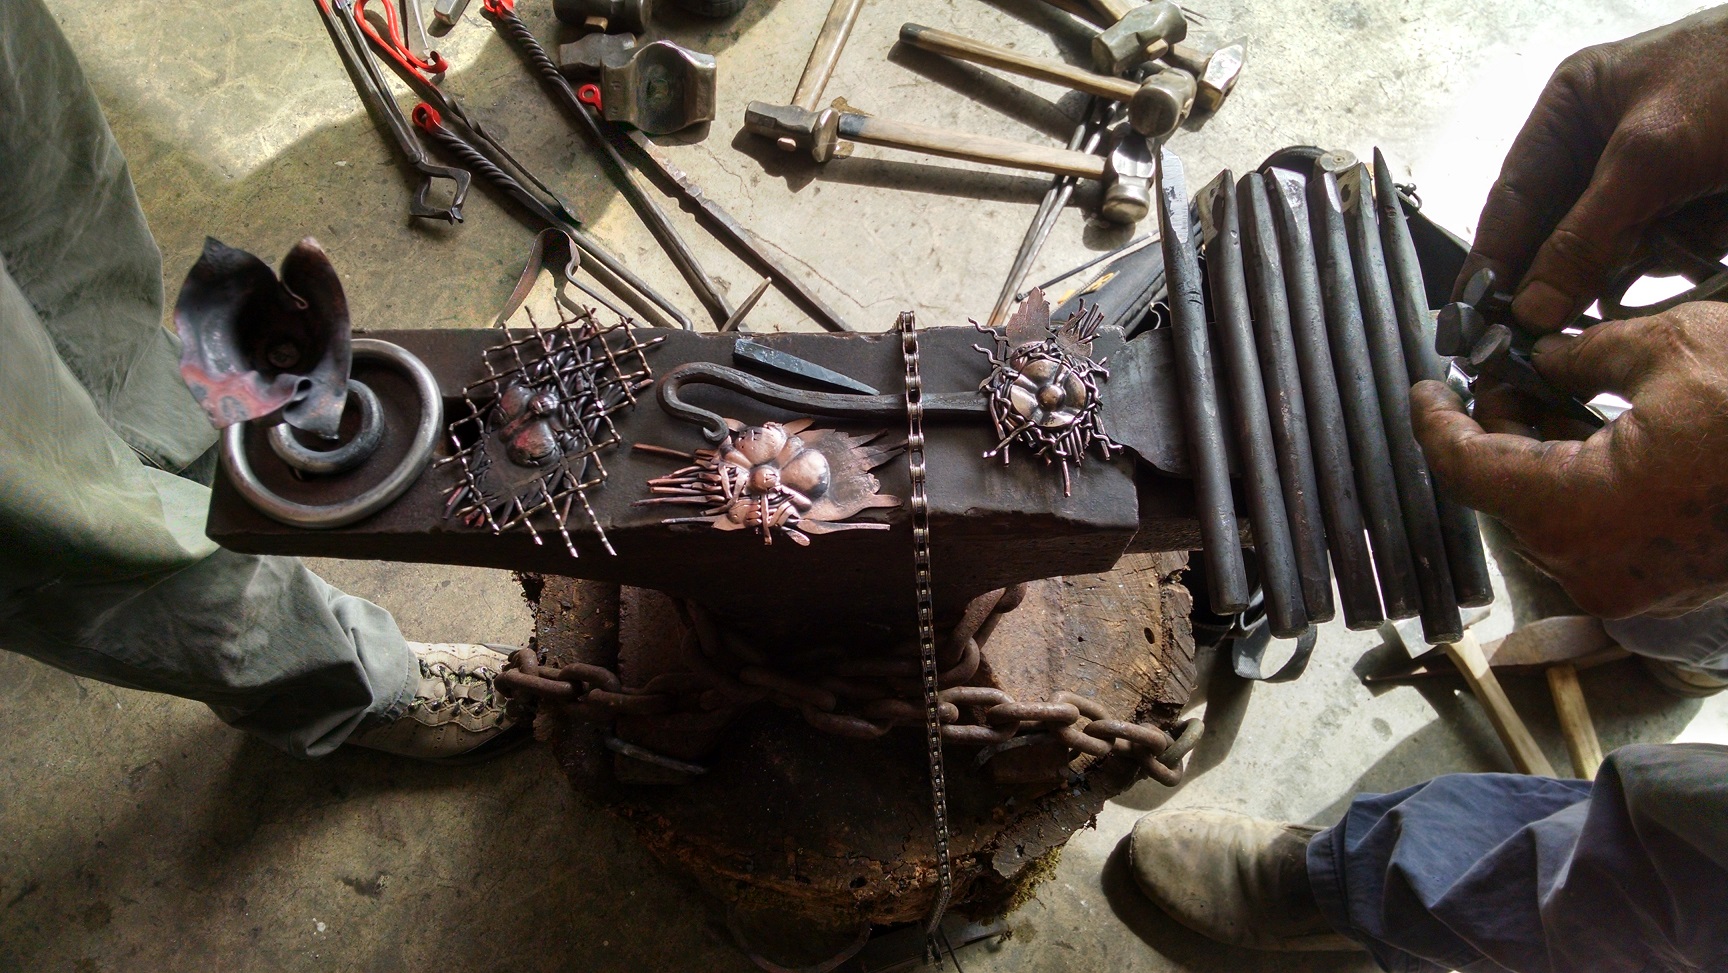
I had no idea about his holiday, where smiths open up their shops to the public, but Bill K (madwing)
convinced me to drive down to Russell's shop in Watsonville for the day.Got there early and help Russell scroll the ends of some 10 foot bars for a gate project, and by the time Bill and Dovid arrived, the 100 lb propane tank was plumbed in and the Anyang 88 was warmed up.
We got a few members of the public, drawn by Dovid's giant anvil signs planted out on the road, but mostly is was us four.

Russell showed off his specialty, stainless mesh layered with copper wire trimmings and bronze, heated with a torch and driven into a die with a power hammer.

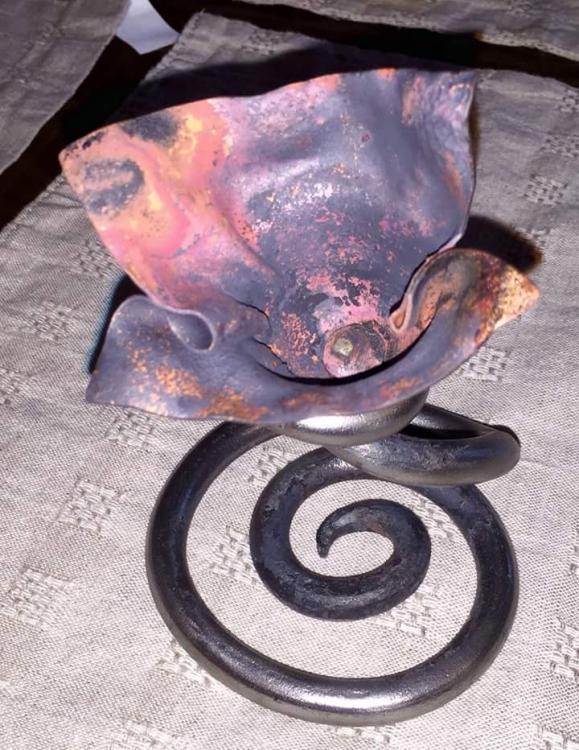
Bill, with his tendency to start gift projects under tight deadlines, made a copper and steel candle holder.
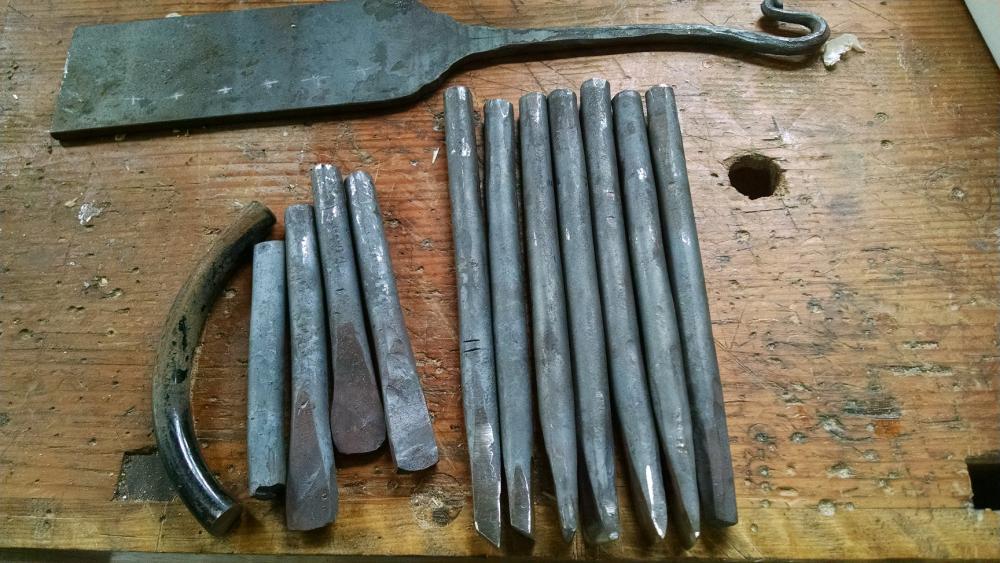
and me, with a dozen feet of 1/2 inch coil spring, cut, straightened and shaped a handful of chisels for shaping hot steel into dragons and trolls. The I got to play with the Anyang and drew out a handle from a piece of 1/4 by 4 inch plate to start a bolster plate.
Never have I seen 4 guys working out of both sides of a little freon tank forge so smoothly, no knocking projects around or crowding. 3 anvils, 2 brought by Bill and Dovid, helped.
Dovid made nails you could hold railroad track down with before forgetting which end of the bar was which. He spent the second half of the day melting ice in his hammer hand!
Great time was had by all, and much thanks to Russell for letting a bunch of yahoos mess with his shop.
-
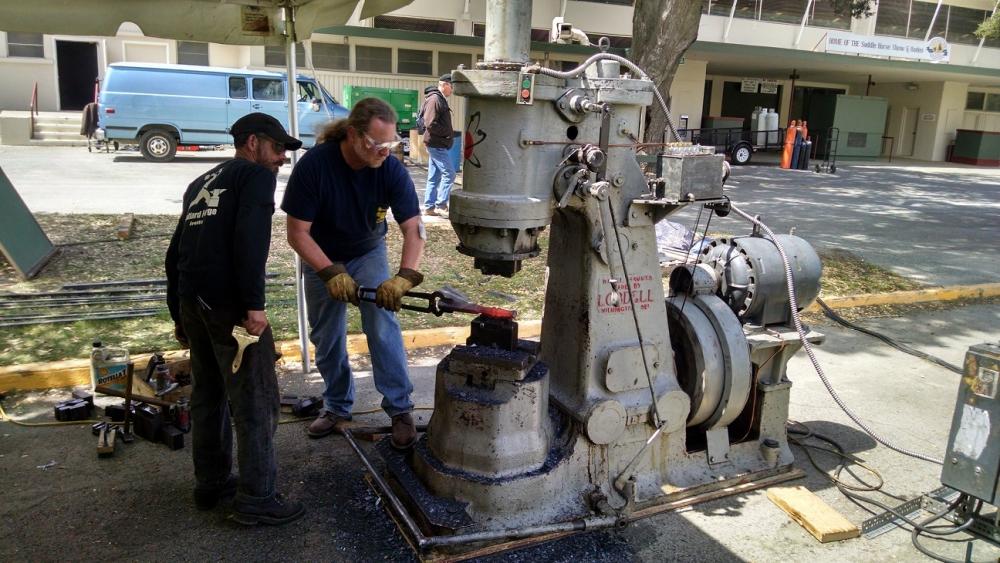
Here's the beast,
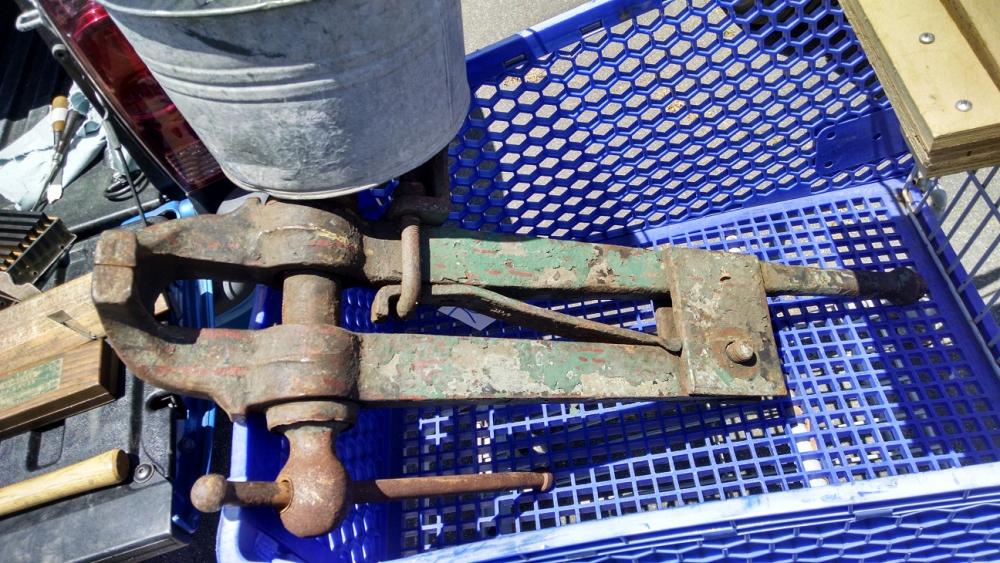 took 3 of us to carry it out, with a 4th guy running blocker for all the crowds looking at their cell phones. Once we got moving there was some INERTIA in our forward progress.
a few years ago I got some help carrying a 60lb vise out of that flea market, that was a feather compared to this thing.
That's an oversized, Costco style shopping cart by the way.
-
castellated head nuts are usually held in place with a cotter pin thru a hole in the bolt prevent vibration ratting the whole thing loose. Sounds like a critical component.
-
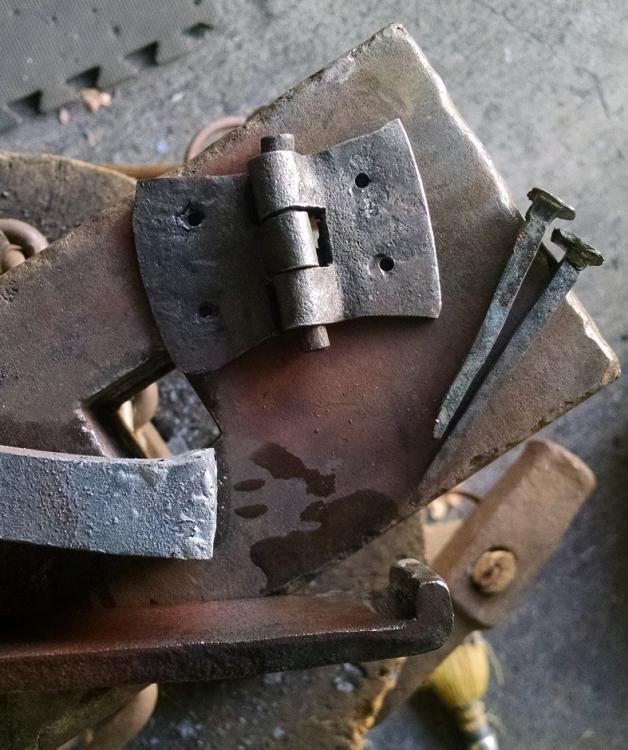
I've made some big gate hinges, rolled barrels and lagged pintels, but never little hinges like this.
Thin stock, from fake barrel hoops, took a couple tries to get the first bend straight, rolling the barrel was interesting, as the stock would cool quickely. I only checked my Peter Ross notes (saw him demo the jigs once) after I was done, the image on the bottom is the simple jig to roll the barrel.But the welds! They were the lesson learned. I've tried getting thicker stock up to proper heat for welding more times than I can count, and my welding is sort of hit or miss. This time, I set up the fire (windy enough to burn coal yesterday) the way I'd seen another smith set it up, more like an amphitheater than a cave. An open topped depression in the fire and was able to watch the fluxed leaves of the hinge get right up to almost sparkly heat and then weld them. A bit incomplete, but grinding the edge shows mostly no line. Much easier to judge the temp in this thin stock than I would have thought.
Need to make more with the jig, and finish my bolster plate so I can punch the holes instead of drilling them.
-
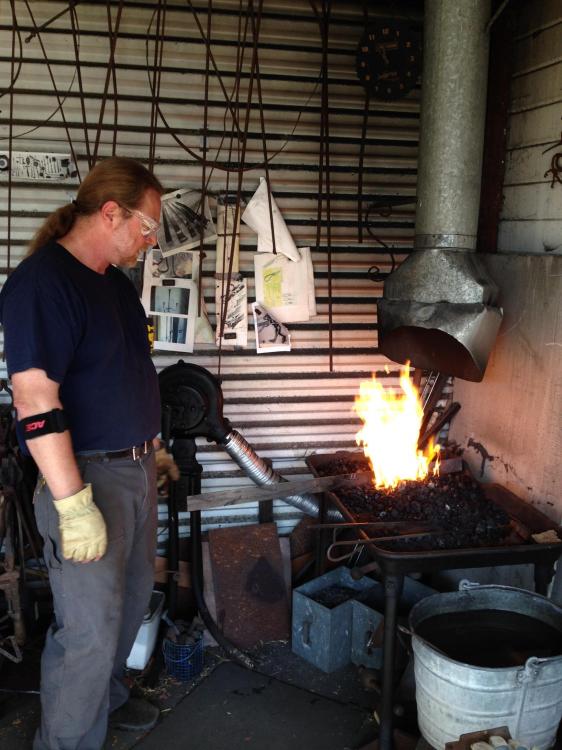
Yes, we want to see your smithy!
-
Well drawn! Very clear and concise. Do you have any other step by step drawings you'd like to share?
Nice shamrock too, I know a few Irishmen I'll be making these for next March.
-
Nicely done. Was it designed to fit that specific sized candle? I'm picturing progressively shorter versions to use as a candle that tall burns down
-
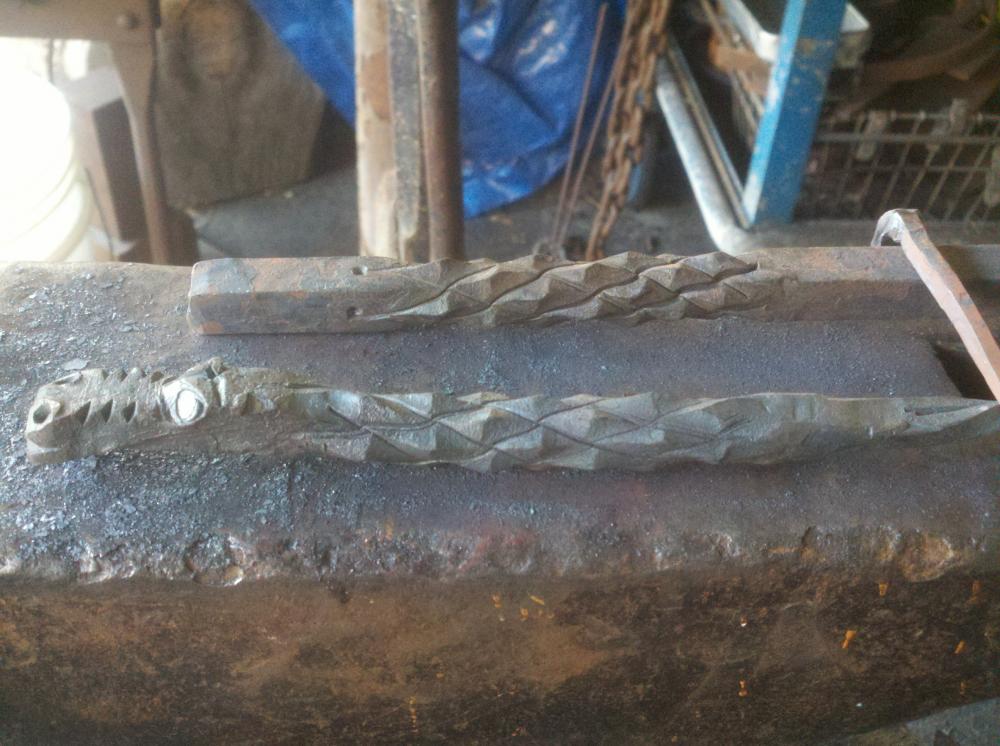
Don't grind it!
-
Nice!Especially the pineapple twist. A couple of cuts with a narrow chisel, between and over the eyes, along the snout, make things more reptilian. Never been able to make horns that long, we'll done. With a chisel?
-
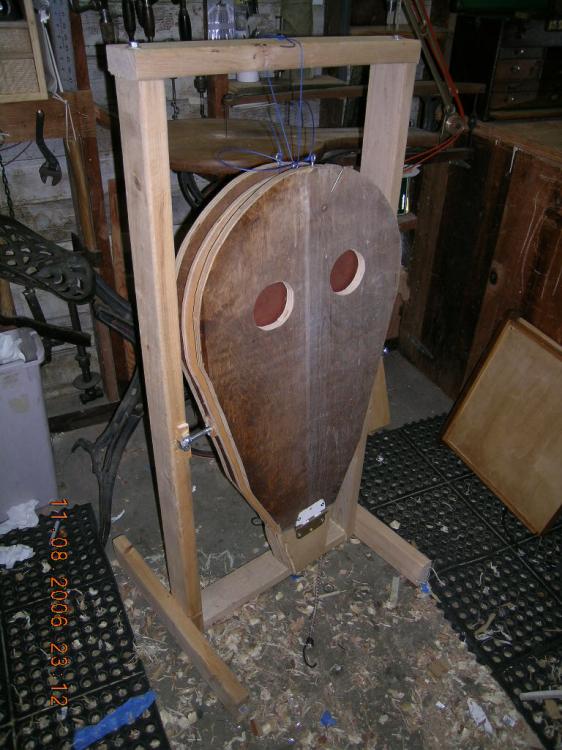
Here's my first forge, took me 4 months of scrounging, drilling and bolting (no welder) to get to there.
 Anvil was an I beam, fuel was charcoal.
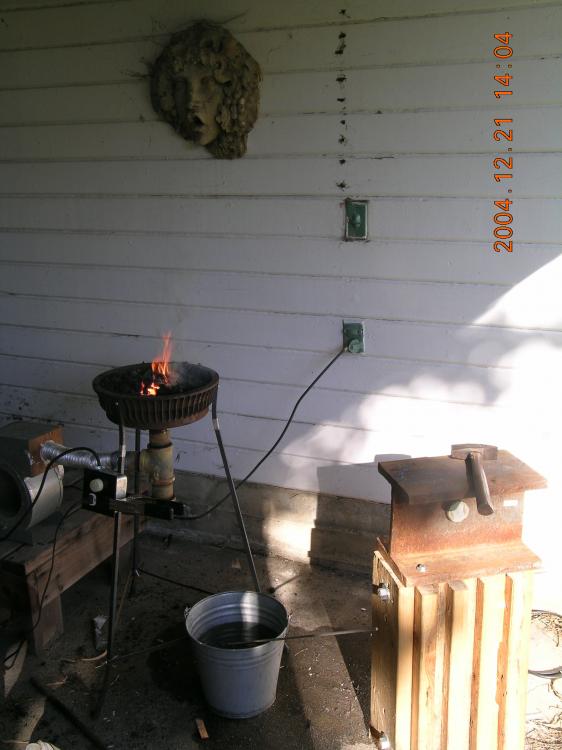
I took me YEARS to find a blower, $80 at the back of a garage sale.
Tried to build a plywood bellows in that time. Didn't work, too heavy, and the naugahyde instead of leather wouldn't seal against the plywood, messy caulk and nails, ended up tossing it after hours and hours of work and pondering.
Experience is what you get when you don't get what you want.
I just saw a box bellows in use at Western States. Don't discount that route, dead simple, effective and you get a surface to lay your tools on, less stooping.
-
Apologies Frosty. While I have an intense interest in the lovely bride and my new son in law, I didn't want to speak for everyone else.


Monterey, CA wedding on the beach
-
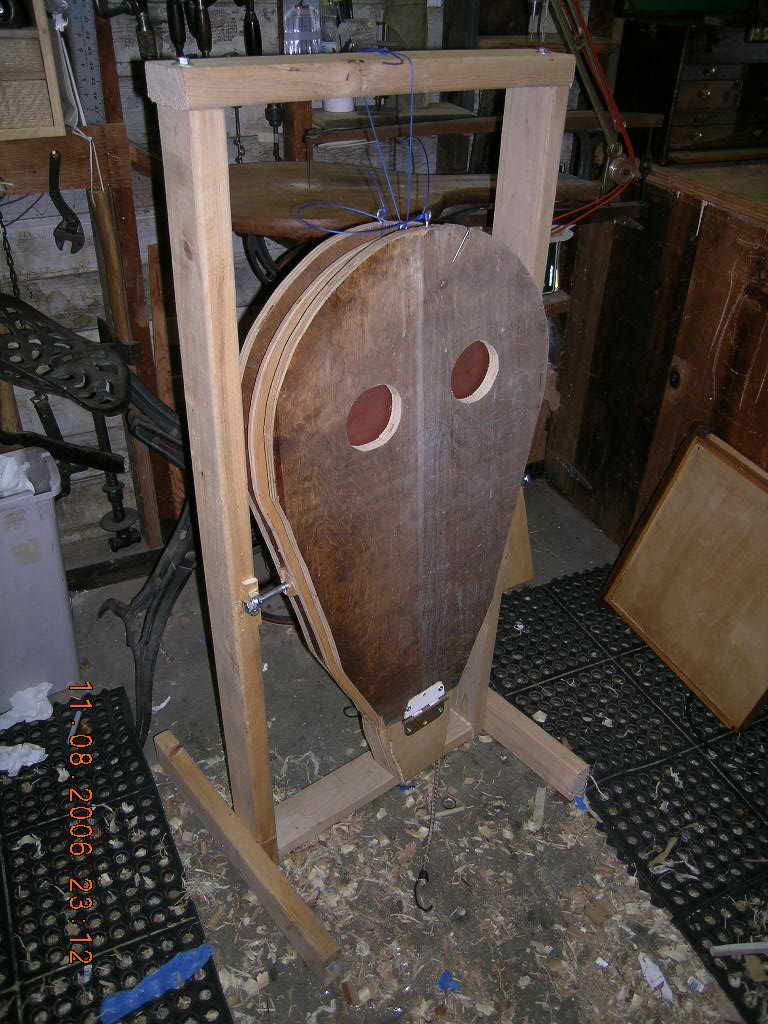
The eldest daughter was just married and the father of the bride (me) was tasked with:
'make a swoopy iron plate for the wedding cake, lots of hooks to hold the bling, and strong, the cake is heavy!'.
Yay, something substantial (for a wedding), requiring forge time!Pen and napkin design and off to the scrap yard. Didn't have much hope of finding 7 gauge plate in a cake sized disk, but you never know (7/8 octagonal tool steel? Yup. Steel plate, not so much)
Supported a local business, Albany (California) Steel. They plasma cut a 16 inch disk on a phone call.
Money well spent as the wedding day was approaching.
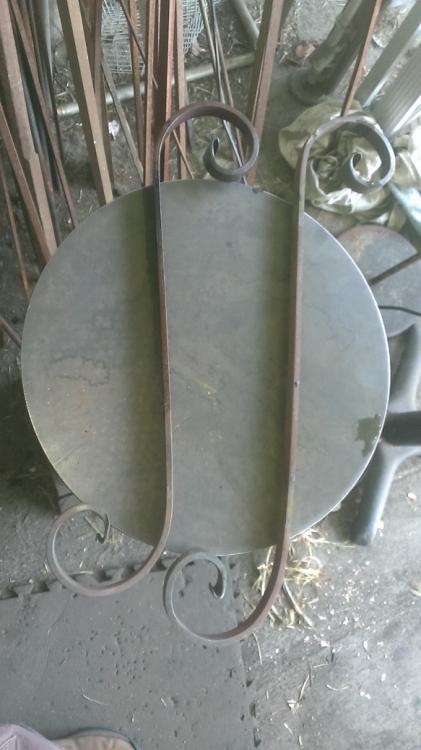
1/4 x 3/4 bar stock for the legs, fishtailed and scrolled on a jig from another smith's moving sale. Used ahandful of rare earth magnets to temporarily attach the legs to the plate.
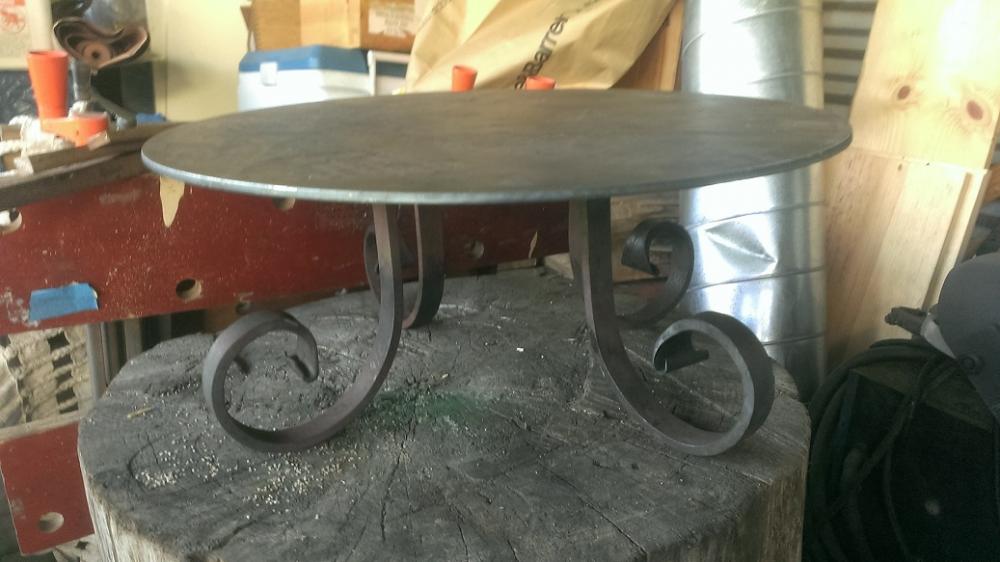
Happy couple review: "maybe a little shorter?" They thought I'd have to remake the legs.Re-bent the right angles at the tops of the legs, added another scroll and drilled rivet holes to
temporarily bolt it all together.
Next were hooks around the rim to hold...stuff.
The designers request an odd number of hooks, spaced 'a napkin width' apart. Came up with 9 hooks,and ended up making twice that many to get 9 that were close in size and shape.
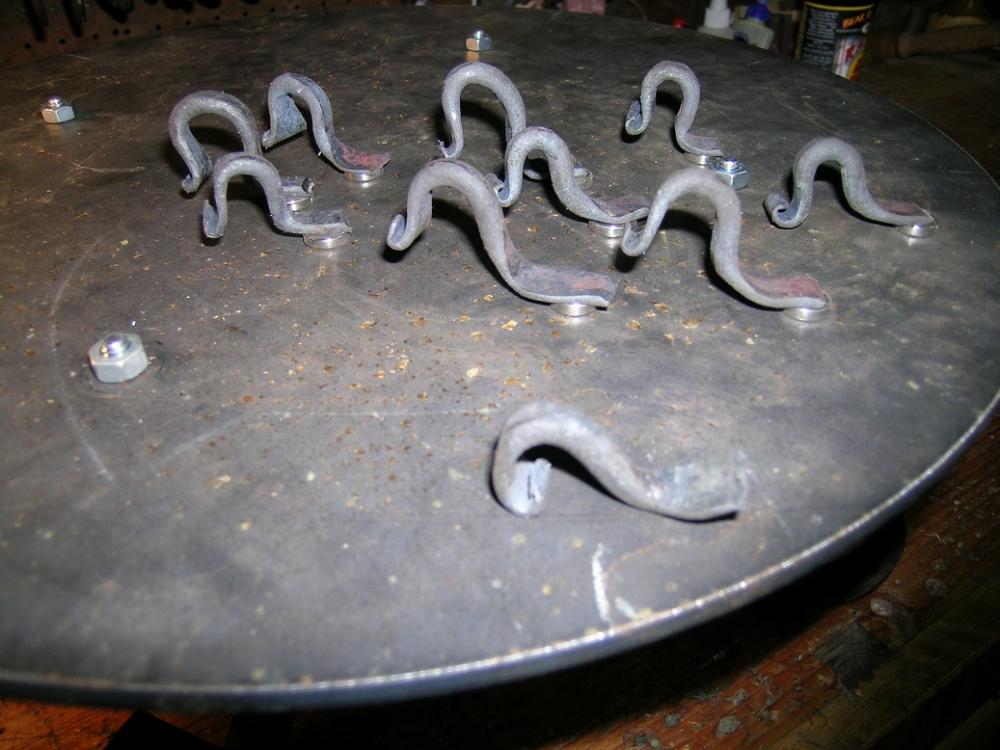
Soft iron rivets for the legs, peened into countersunk holes.
Each hook was riveted with a cut off box nail, using a 3x3x12 inch block of steel on end as a bucking
block under the rivet head. The last few were a little complicated to get over the anvil.
And here it is in use!
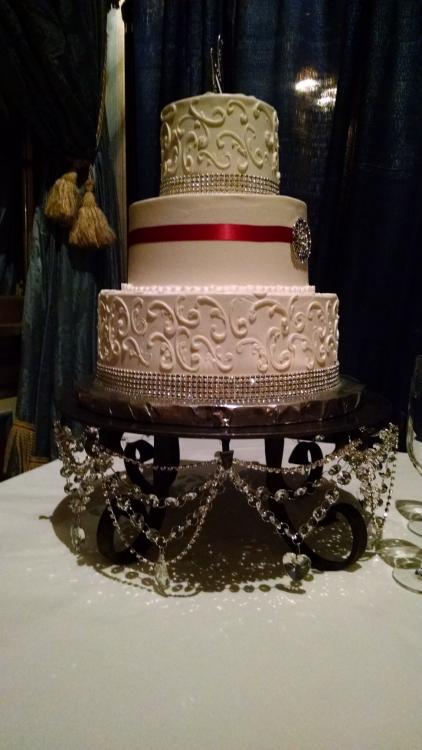
It holds my 15 stone with no flex so the cake was fine. I understand the
happy couple have covered the plate with large candles that are melting into one
massive, multiwicked candle. I thought it would make a fine pizza platter. -
Great Spring Conference! There was more to see and do than I was able to take in. The E.A. Chase exhibit was amazing, with large scale photos of the gates he's made and the drawings the they were based on. Got to see a japanese box bellows in action, try some drop tong welding, make a SeaHawk bottle opener (and me surrounded by Packers and 49ers' fans) at Darryl Nelson's direction.
Best of all, got my first attempt at using a power hammer.
 A Nazel 2B, very finely tuned up (I was told by other smiths) by Mark Krause. Great fun!
 -
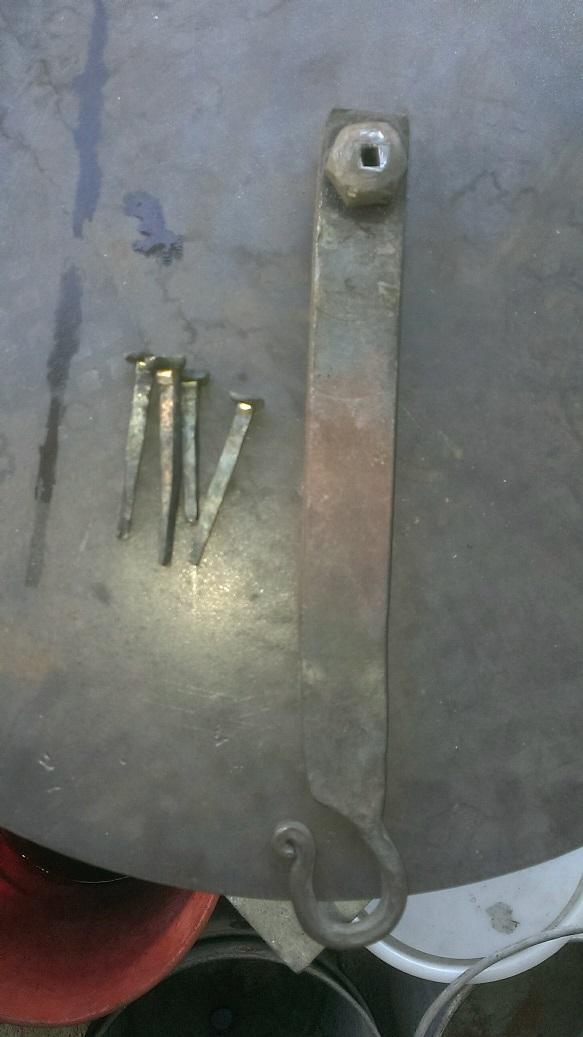
Those big nails will make nice hooks. Use the nail head as the end of the hook that you bend up. You could make a leaf on the pointed end of the nail. Flatten the nail shaft a bit and punch (or drill) a couple of screw holes.
My experience with RR spike knives has been disappointing, but your mileage might vary.
Have a bucket of water and either a small can on a handle or bundle of rags on a handle to wet down the charcoal around the outer edges of the fire. A charcoal fire wants to spread and you have to keep it contained with the water.
You are off to a good start.
-
"There's no cryin' in Blacksmithing?" Obviously written by a man!
Not sure if he originated it, but Toby Hickman (R.I.P.) is known to have said that.
-
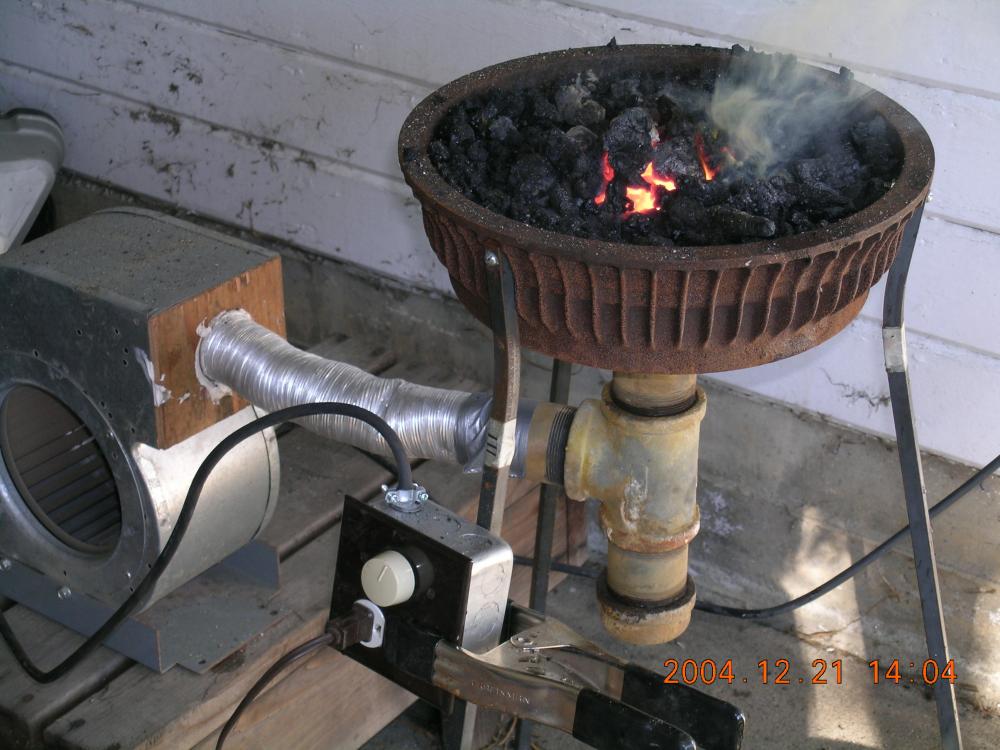
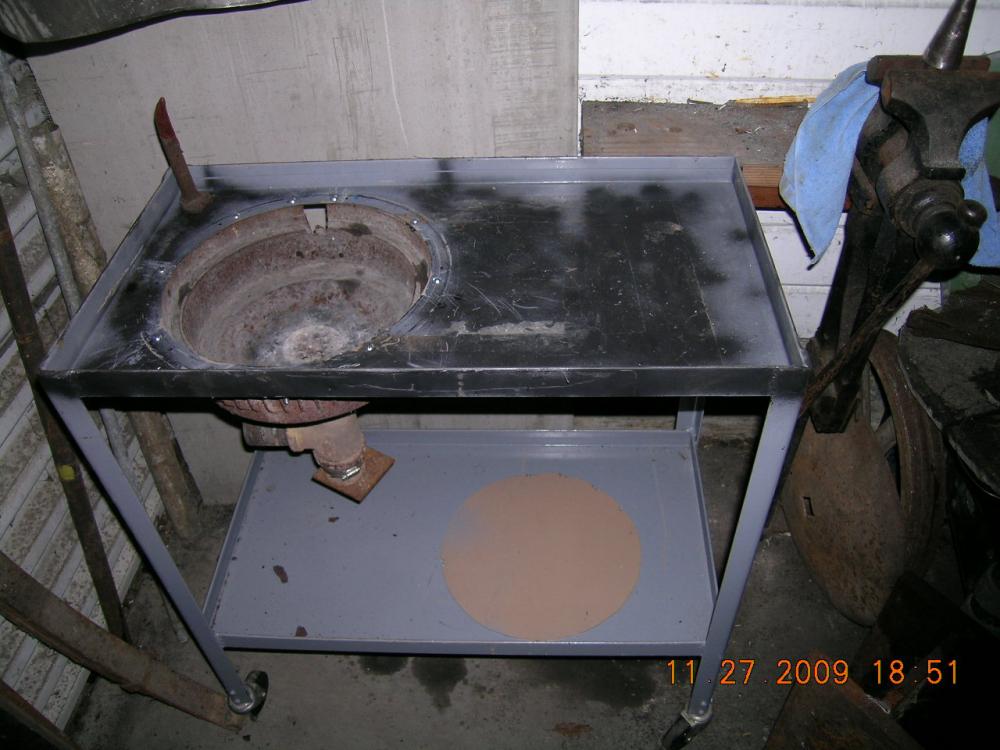
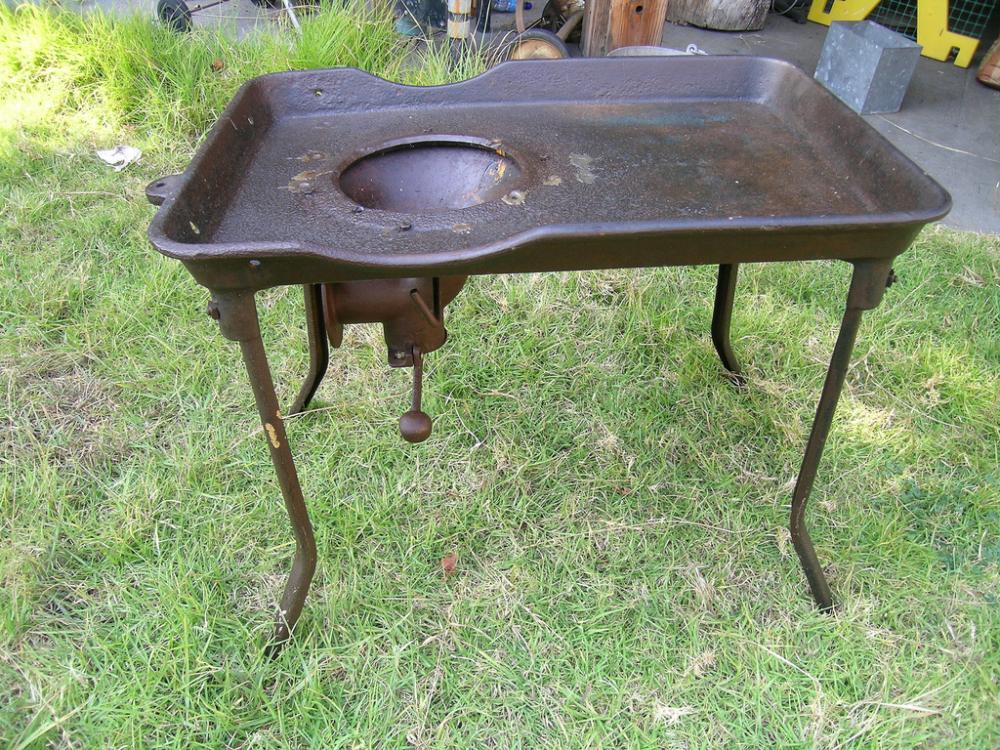
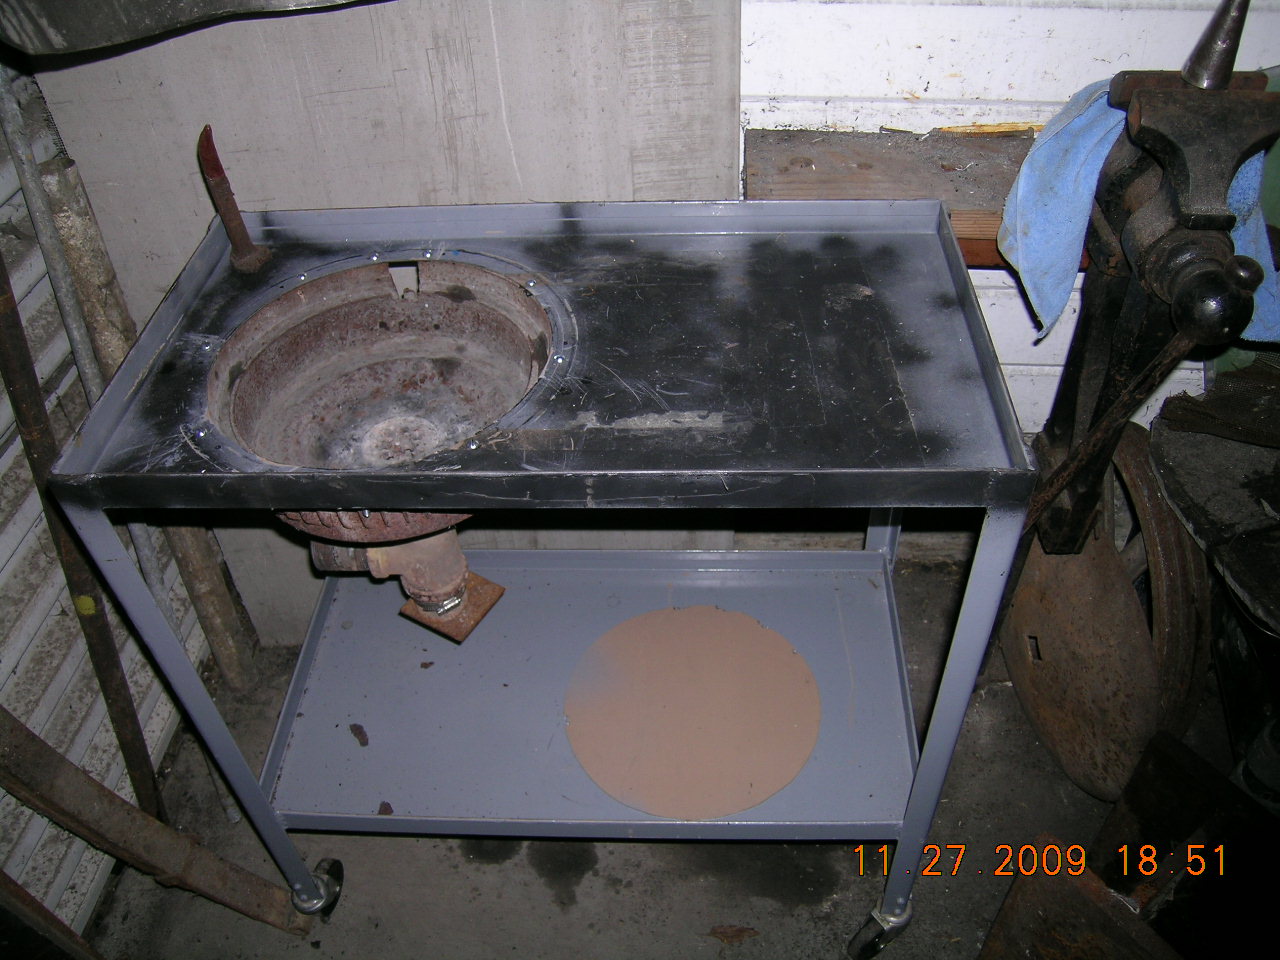
Oops, pics reversed. Oldest form of the brake drum forge at the top, newest cast iron forge table at the bottom.
-
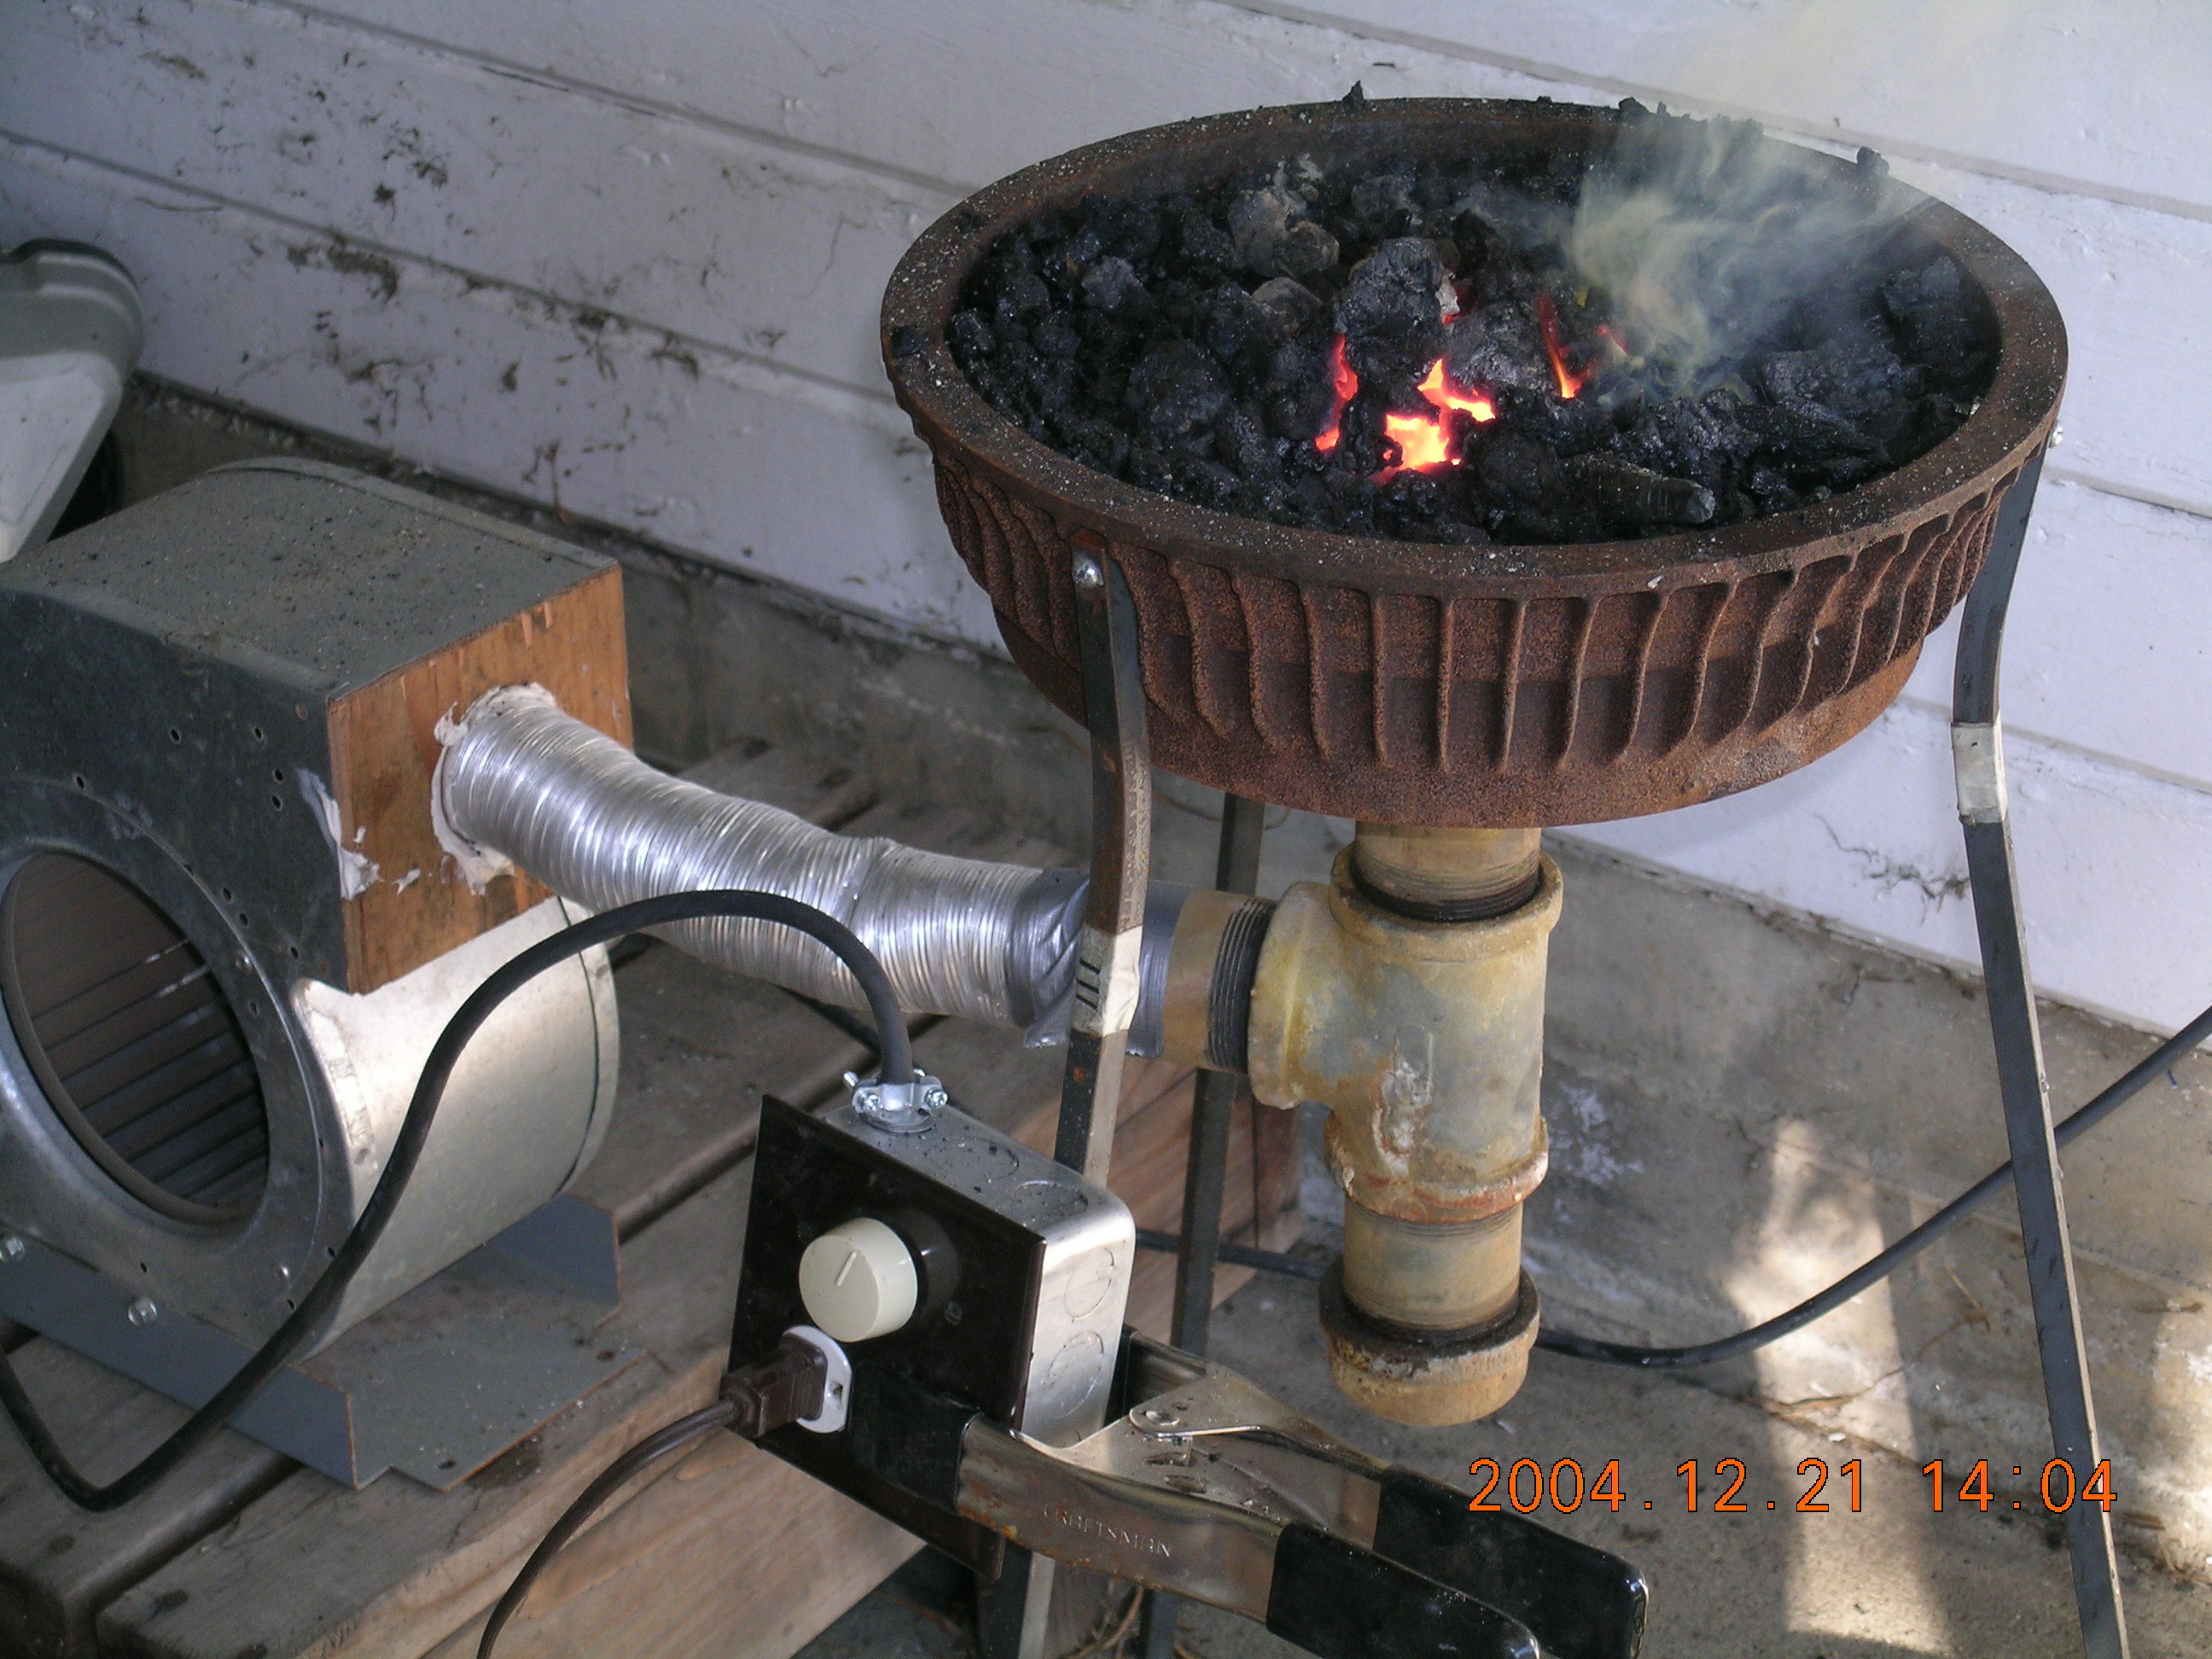
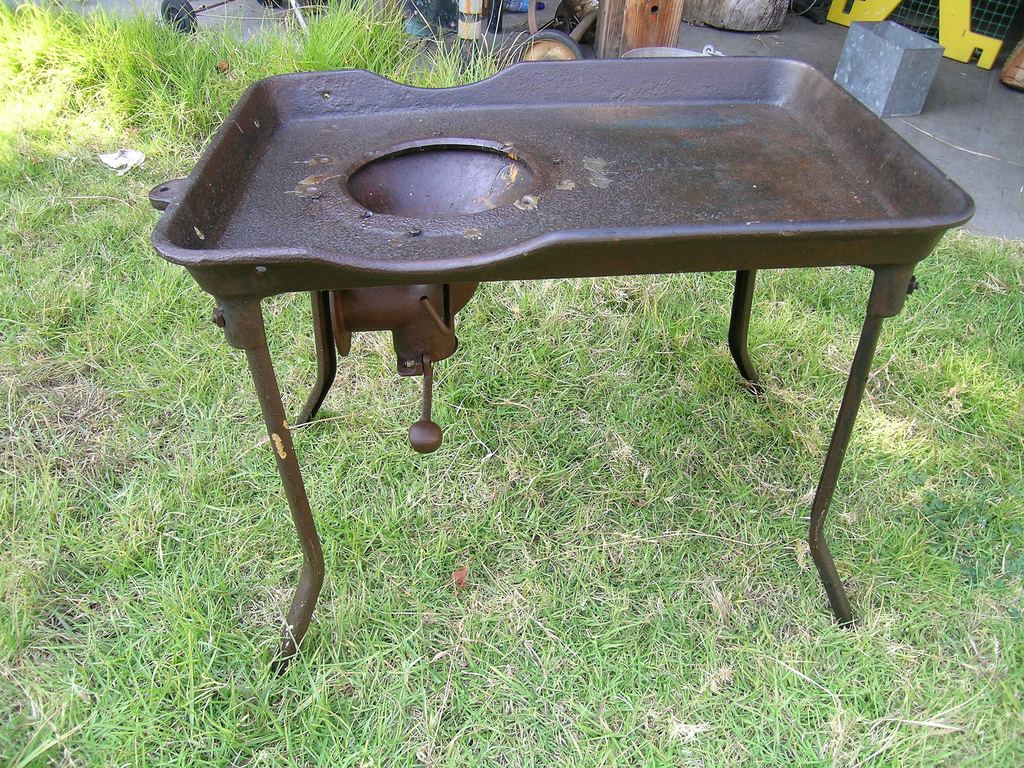
Here's my forge, cast iron table with the firepot. Great Craigslist deal (lousy, sideways photos). In use, though I'm in the process of rebuilding my hood/chimney contraption. Before the cast iron table, I re configured the same brake drum forge a couple of times. First with bolted on 1/2 inch square legs, then I dropped the brake drum into a plant stand and added shelves. Finally a steel utility cart came my way and I bolted the brake drum under a hole cut in the cart (gave that forge away to an iron in the hat collection)


-
Nice coupler by the way! Excellent substitute for an anvil. I looked into acquiring one of these back when I got started and the restoration railroad enthusiasts were aghast at the idea of using such a precious bit of necessary equipment to pound on.
-
Frosty, I have to ask, just how big are the pictures you're hanging?
These "picture hooks" are still an inch and a quarter long, small enough to be useful in the shop for nailed together projects.
I may be overdoing this for some simple little nails, but every time I light the forge, I make a few nails. Just about the only thing I make a lot of, other forging projects are all over the place. Trying to make them well has become an itty, bitty personal goal.
thanks for the tips, nice to know the little ball peen I've been using is appropriate.
-
That's a nice wide stump! You've almost got some table-like surface around the anvil, that should come in handy.
-
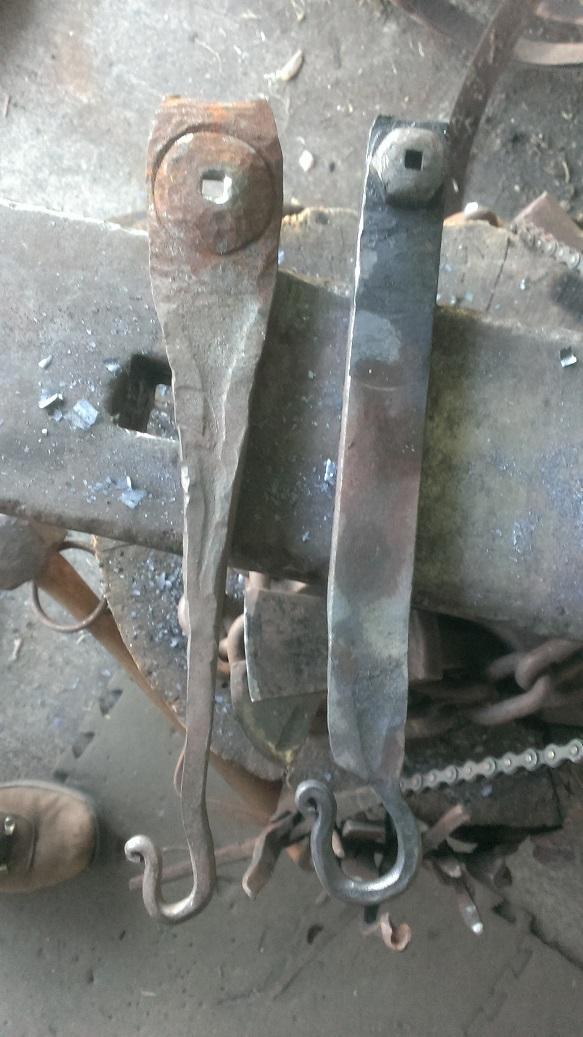
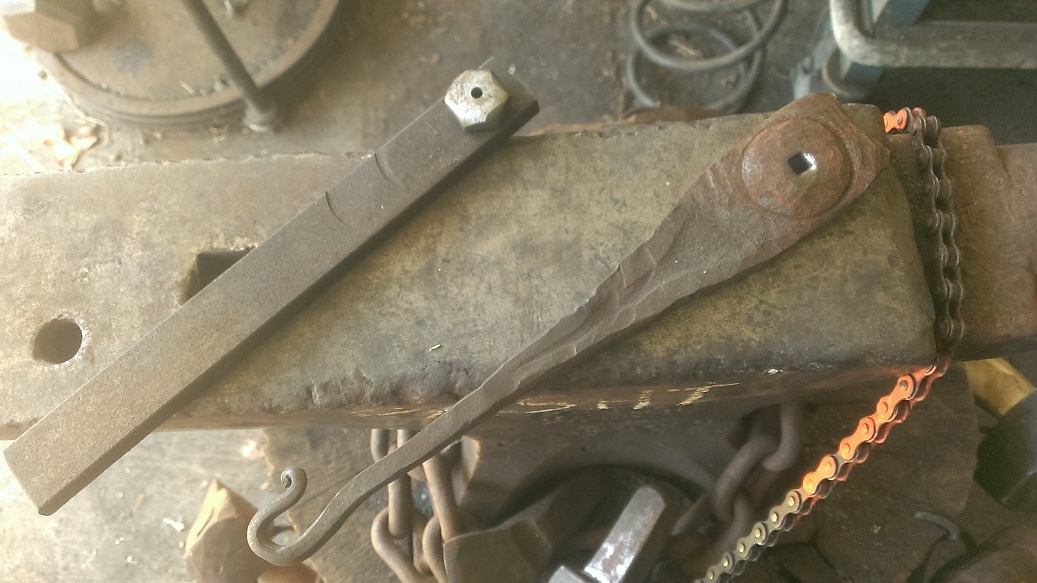
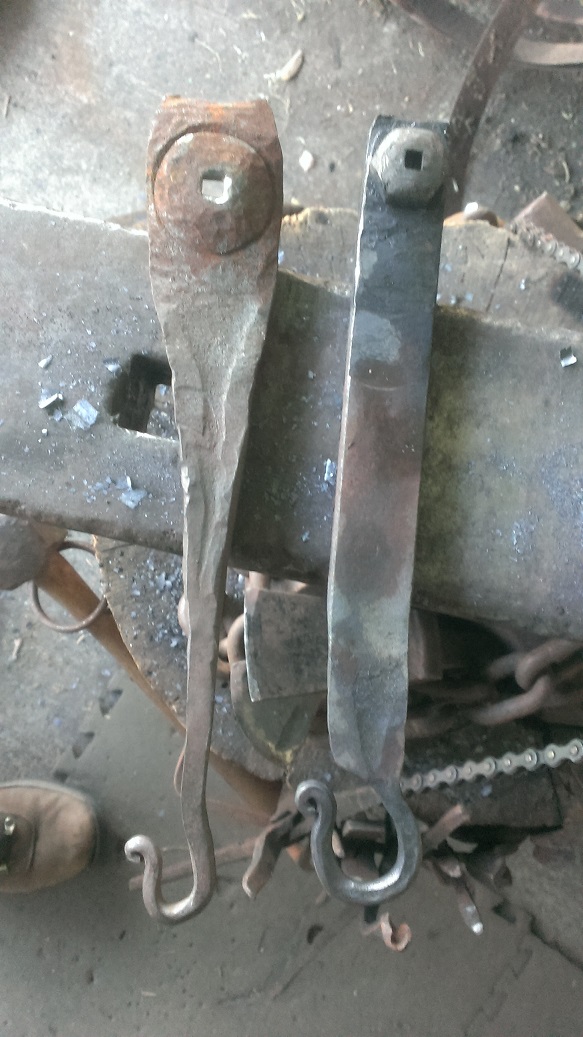
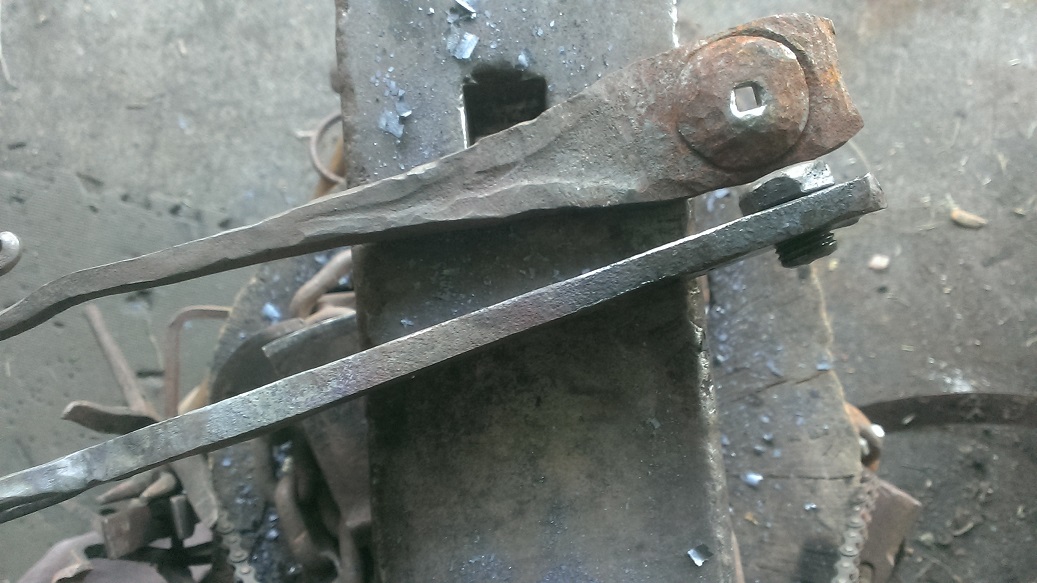
Finally got around to remaking a header the other day. My original, on the right, made 6 or 7 years ago, with a crooked, asymmetrical hole, slams into my hand when I put the head on a nail. Numerous mods haven't helped. First attempt at this I tried to screw a Grade 8 bolt into an undersized hole in an orange hot handle, to cut threads. That didn't work, not sure where I got the idea it would. Even after filing a notch in the bolt threads, the hole in the handle ended up polished, not threaded.
Second attempt with a Grade 5 bolt, (didn't have a tap that would fit the Grade 8's) screwed in to a tapped hole in the handle stock. After drilling a stepped hole and rounding the top of the bolt on the grinder, got the bolt hot and drifted the hole square with a teeny tiny punch made from an old sharpening steel. Quenched from red and put a loop on the handle.
The threaded end of the bolt that sticks out under the handle is a loose fit in the pritchel, and the high dome of the bolt head seems to make it easier to center the nail head (80% of my nails have L shaped heads, despite my best efforts). Having just figured out to pivot the header around in the pritchel after the first blow might have something to do with that as well, but this new header sits flat on the anvil which is nice, and doesn't jump up to poke me in the palm.


-
Nice big fuller there. got a striker?


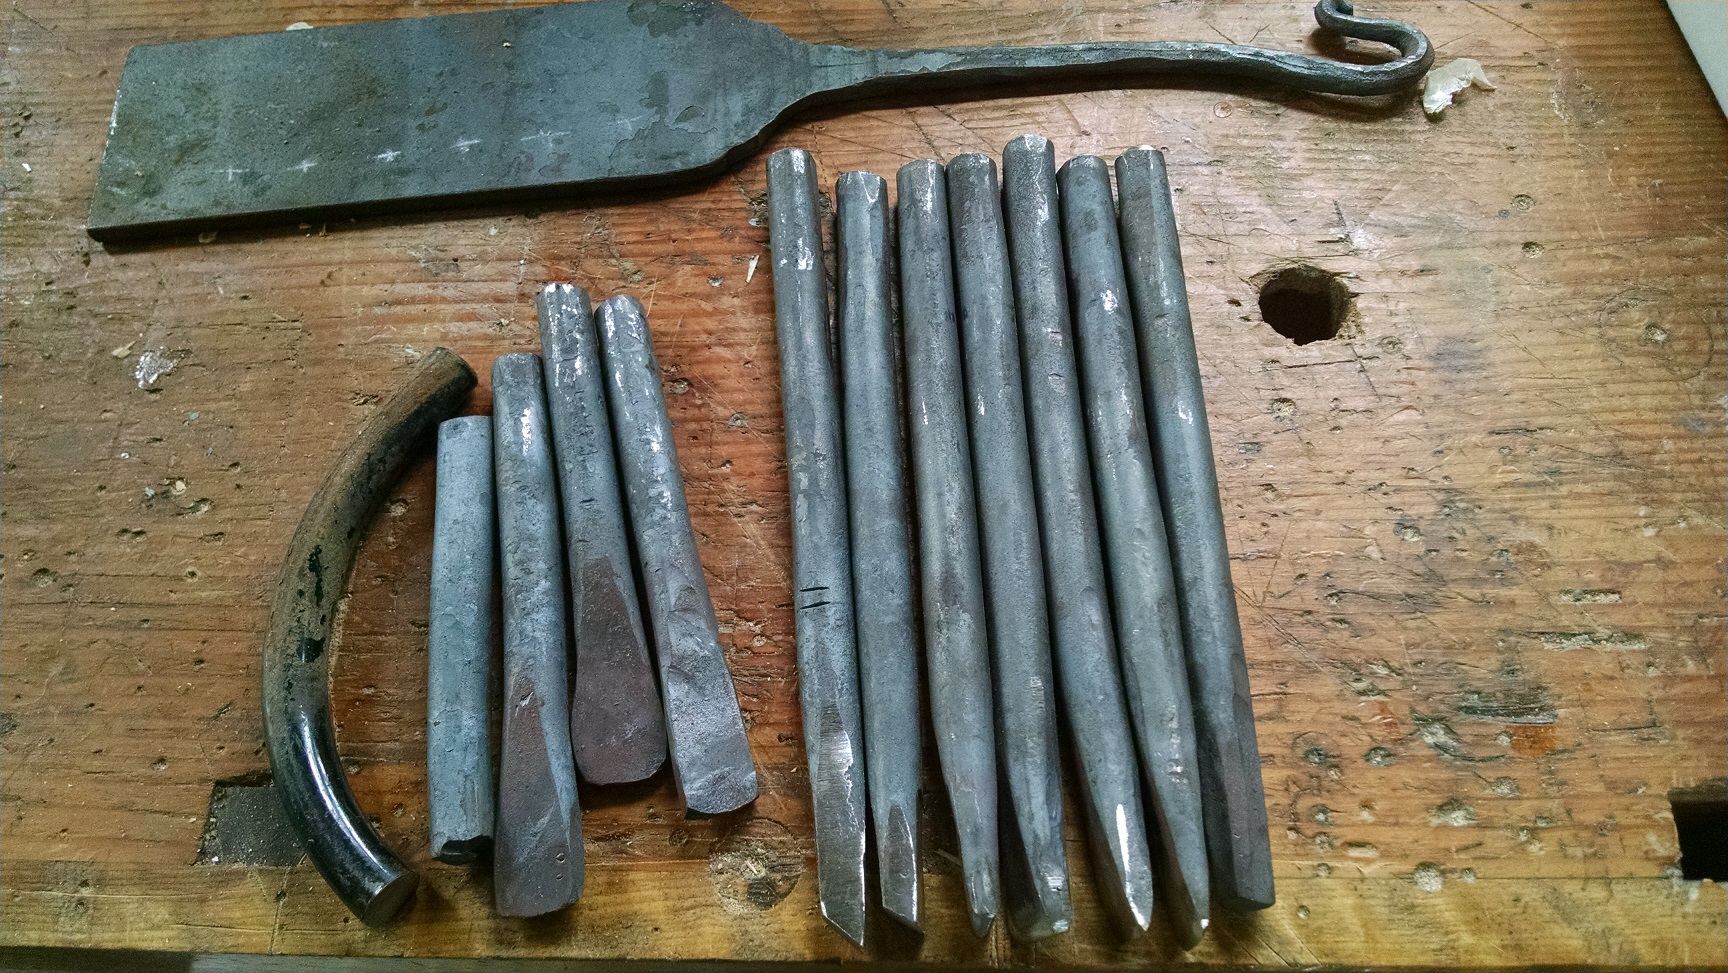


Spring steel vs Car Axle steel for Punches?
in Slitters, Punches, Drifts, etc
Posted
Springs for punches, axles for hammers and fullers. Sharpening steels, for carving knives, also make great punches.