

Michael
-
Posts
1,061 -
Joined
-
Last visited
Content Type
Profiles
Forums
Articles
Gallery
Downloads
Events
Posts posted by Michael
-
-
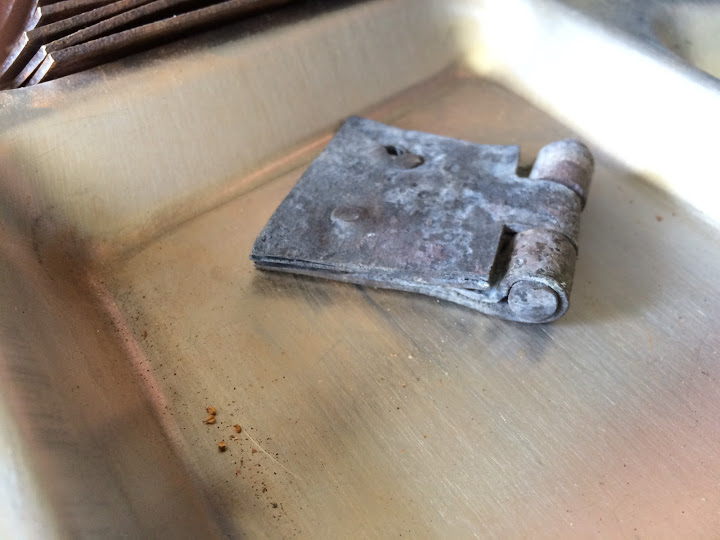
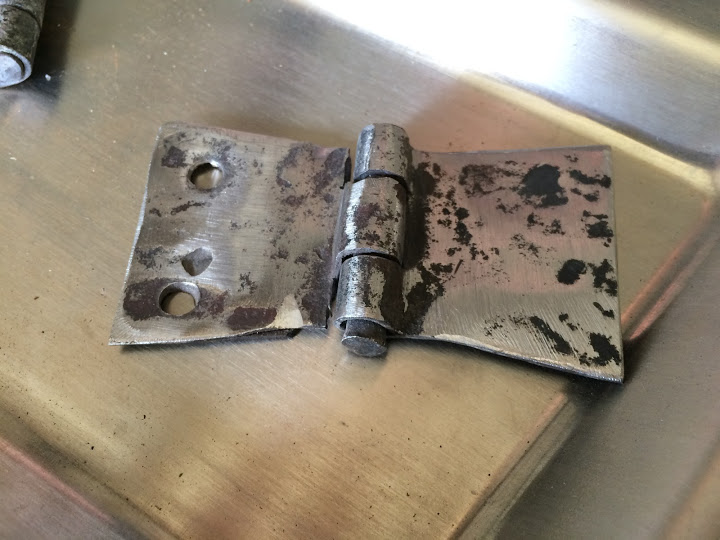
Seek, I recently did a demo for a period furniture group on small hinges. Working from the Peter Ross video (well worth the $10 download fee) and I used barrel hoops for the material.Found a half dozen non galvanized hoops at my local building material recycler,
I've also struggled with forge welding, but oddly enough, when making the hinges in a coal fire, the wide surface of the hinge leaves (really, only an inch by an inch and a quarter) and the thin material made the welds easy. I was able to see the slick, melted butter surface of the steel as it reached welding heat and the thin material was very easy to get heated all the way through.
After the welds were done it was easy to peen the hinge leaf out to the butterfly shape. The techniques in the PR video would be easy to translate to your style of hinge.
-
I'd leave a throwing knife dead soft annealed, you'd rather it bend than break if it hits a rock on the ground. Throwers don't really need an edge, just a point.
-
Isn't drill rod from the hardware store O1? I would get the boy a couple of 3 foot sections of 3/8 or half inch drill rod to play with. Readily available and a straight forward heat treat. He'll get a feel for working higher carbon steel too.
Did he get to use the Nazel at the Spring conference? That was one sweet hammer!
-
That looks great! Nice and wide for a cassarole or a meatloaf pan. Where are the welds?
-
A couple of fire bricks set around the tuyere will give you a deeper fire. You can knock the corners off the bricks with a masonry blade in an angle grinder, or a brick chisel. Cut corners will fit the round side of the drum. No need to cement anything in place. I did this with my brakedrum forge burning charcoal. Works great, deeper fire and less fuel burned.
-
Love the wraps with the viney squiggles. Nice leaf video too. I like the texture you get with the peen. Great work!
-
My neighbor is a car guy, cleaning out his garage to move. Knows I hit hot metal (it pays to pass out bottle openers to neighbors).He left this pile on my doorstep. Great punch stock, and a hammer blank


-
Yes, please repost the picture, This sounds very interesting to see.
-
Nice video. Charcoal fire, improvised anvil. Great work. I started smithing by making lathe tools out of files.
-
Great interview Frosty. Your description of the T burner was probably the most clear description of a naturally aspirated propane burner I've ever heard. Made perfect sense. You should transcribe that description verbatim when you blueprint the T burner.
-
Mr. Roeder, yes, please elaborate on the details of the show, Myself and a whole bunch of amateur smiths, and some of our metalworking adjacent buddies, have been hashing out what happens on Forged in Fire for months now. The show is not really instructional, but compared to a lot of reality TV out there, its pretty good. People with skills, who respect each others work, and compete based on those skills in admittedly contrived circumstances? That's a far cry from a lot of reality shows, where the most dysfunctional personality rises to the top.
I get the exciting TV bit, slow mo swords through meat and sand bags (I want an 'it will kill' t shirt), but personally, I'd rather see smiths forging Suffolk latches or hinges, maybe with everyone using the same kit of hammers, tongs and punches.
-
I found the Reil burner to be a breeze to put together, based on a careful reading of Ron's instructions. There's a couple of different paths thru his documentation that all lead back to the same place.
Worked first try, very little adjustment to do and still going strong 2 years later.
-
Yeah, striking anvil is what I would make.
-
Those look great! Beautiful freeform work.
-
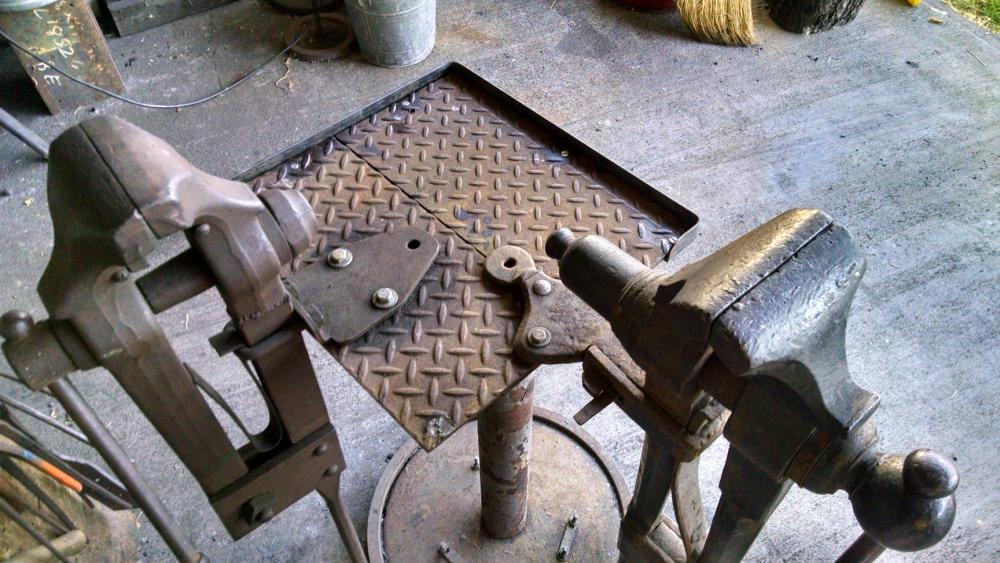
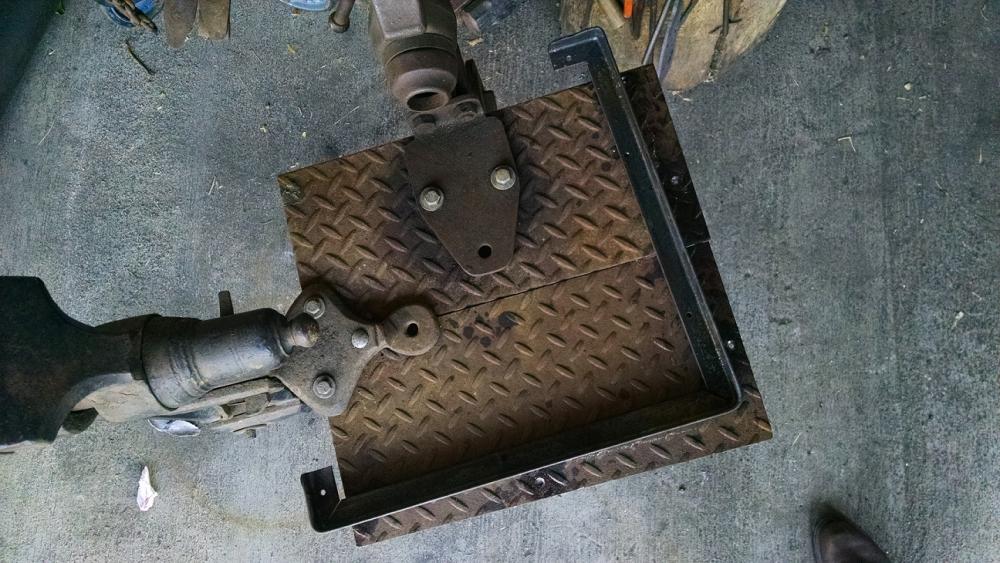
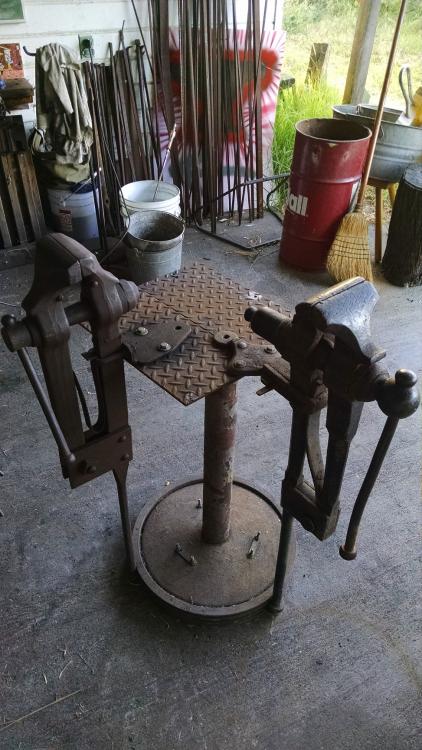
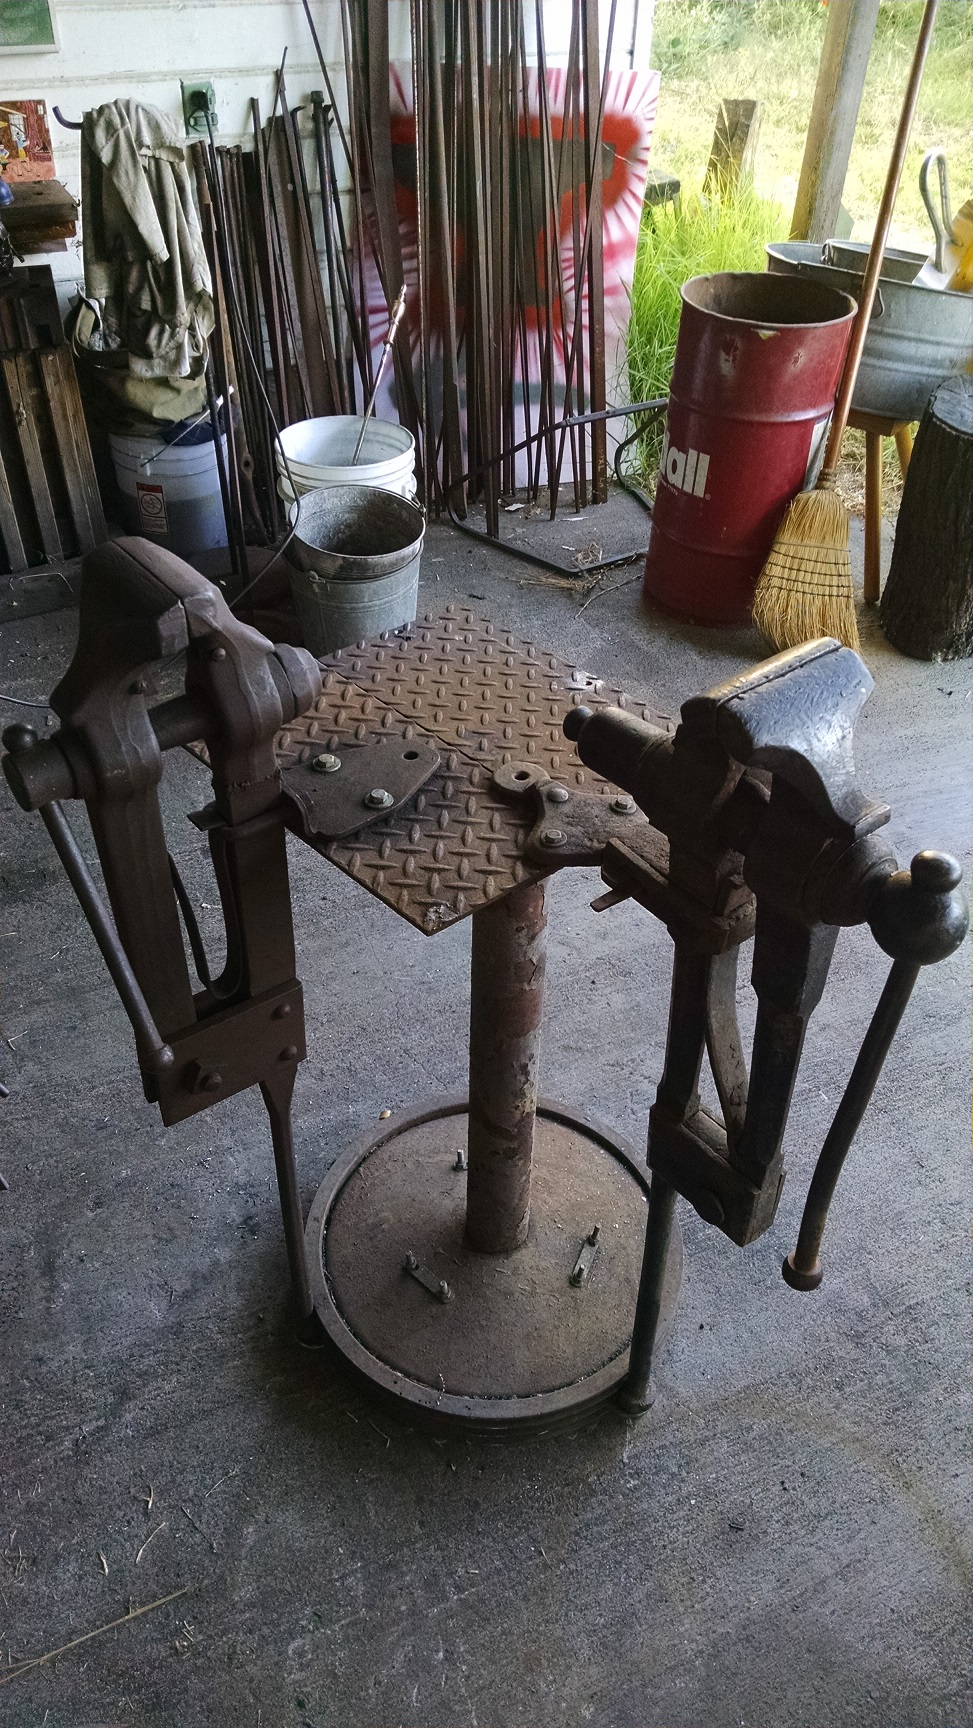
I bolted this vise stand together a few years back. Big cast iron sheave, a cafe table base and some plate for a table.
Then the table filled up and stuff started dropping off the edges. Lived with it for a long while.
Recovering from a bad wrist strain, forgot I wasn't twenty years old, and couldn't forge for a bit.
Decided to do something about that table. 36 inches of angle iron, a couple of notches for bending, fired up the propane forge for some bends.
A few more bolts and the table has a lip! Should have used inch and a quarter or inch and a half angle instead of one inch. Didn't take the 1/4 plate table into account.

-
AMEN, ... and AMEN again.
A high, wide and long leather apron, is almost as good as a suit of armor.
I like mine right up under my chin, ... and reaching well below the knees.
I'm always burning through my shoe strings, ... and last Winter I had a hot bit lodge in my shoelaces, and burn right through the boot tongue, ... and right on into my foot.
( There was just no way to get it off fast enough. )
Based on that recurring problem, ... I'd recommend a smooth toe "pull on" type boot, ... and Steel Toes ALWAYS.
"Always have a bucket of water you can get your foot into!" Overheard at a hammer in one time. Haven't had to use it, yet.
-
John B, I like your eye and nose punches, have to make some like that. Nice work.
-
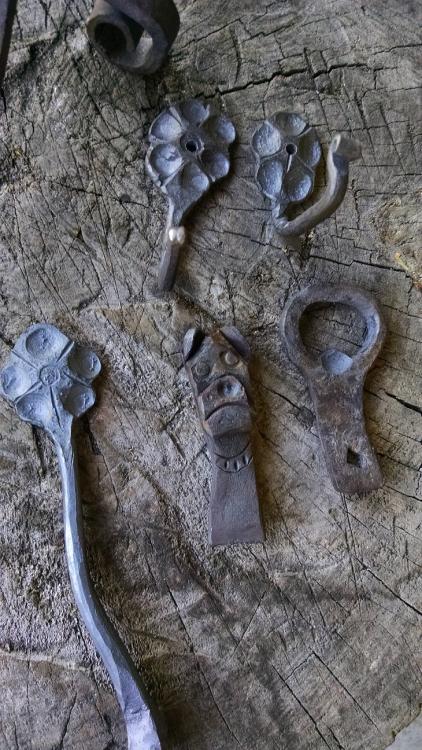
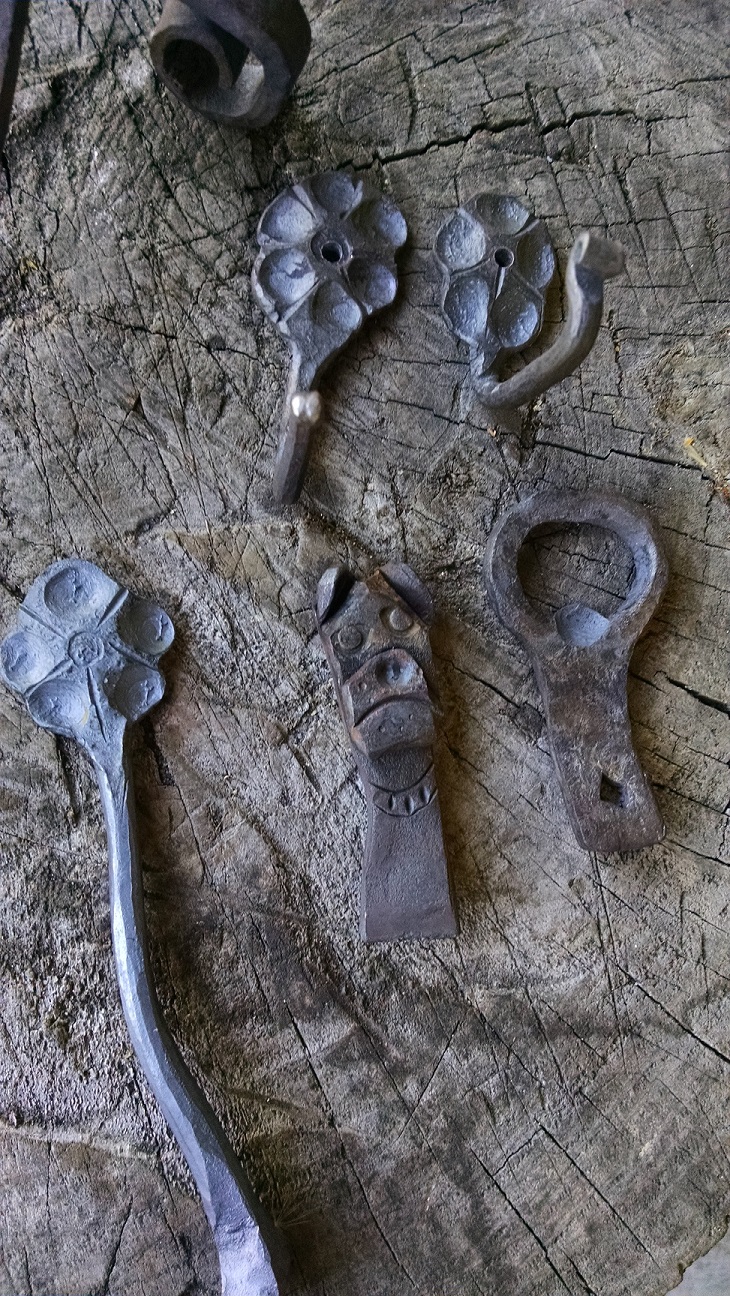
Got a little forge time yesterday after the kid's 11th grade registration. Ongoing hook project: the lovely wife has a collection of cast iron and brass trivets, all different and most requiring custom hooks to hang properly on the wall. Flower theme to go with the sunny yellow kitchen. Upper left is for a cast iron trivet with a tiny hang hole, upper right for a trivet I forged a while back, stands well out from the wall.
Lots of requests from dog owners for leash hooks that don't feature a dog's butt (go figure).
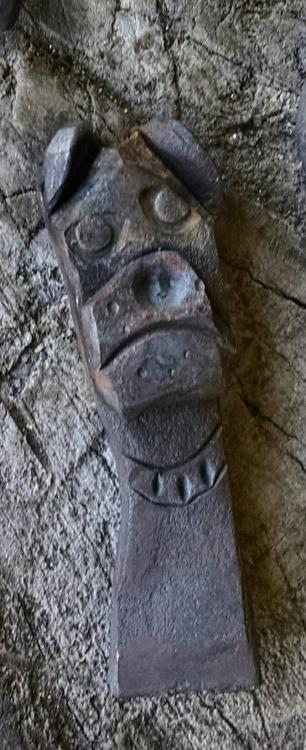
My first attempt at a Lyle Wynn style bulldog. Copied the pics from the gallery, perused to put in the correct order and then numbered and printed out to make a tutorial I could bring out to the smithy.Fun, have to practice it a bit more to get the nose right and make a little punch to make the nostrils and mouth shape. Looks just like my dog.
-
Make nails. I start every forging session with a couple-three nails, works your point and taper forging skills. 100+ nails later I can sort of get the heads centered. From there J or Drive hooks, then S hooks (know anyone with hanging plants?)
That should get you going until you figure out what "you" want to make.
Fireplace pokers are the usual progression from there, unless you are into knives. Whole different slippery slope for the budding knifemakers.
-
That screwdriver handle is called a Perfect Handle. There were patents back in the day but after a while a lot of manufacturers made them that way. Some of the Old Tool Galoots will redo the handle slabs with exotic scraps of wood. The really rare ones are the Perfect Handle Philips head screwdrivers. Should have bought them new in the 80's when I had the chance.
You'll occasionally see hammers, wrenches and hatchets with Pefect handles. One guy I knew, an expert welder, used to make all sorts of Perfect handle tools that were never handled like that originally.
-
I managed to score several rolls of Kaowool for cheap when a local paint-your-own ceramics place went out of business. 5 rolls of 2 inch thick, 3 foot long for $2 a pop! Not sure what the next gas forge will look like, but I've got the insulation.
-
Turned in the jig in the vise, much more consistent that way. Once you get the weld the pin acts as a drift to size the barrel correctly. Interesting that the small hinges need the weld to keep them from levering open, but big gate hinges (like yours) can just be rolled and butted and they'll hold.
-
Lit the gas forge last Saturday afternoon while the wife and daughters were getting their nails done. Made a couple of sturdy hooks for a co workers' beloved cast iron cookware. He needed substantial hangers for what I think are Lodge frypans. Also heat treated a half a dozen spring steel chisels, quenched and tempered in used fryer oil.
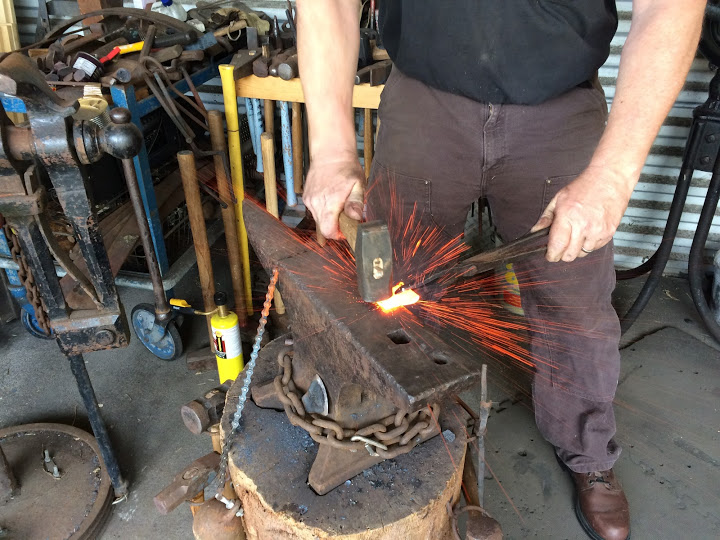
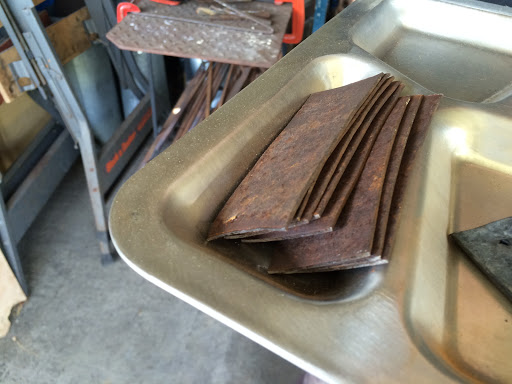
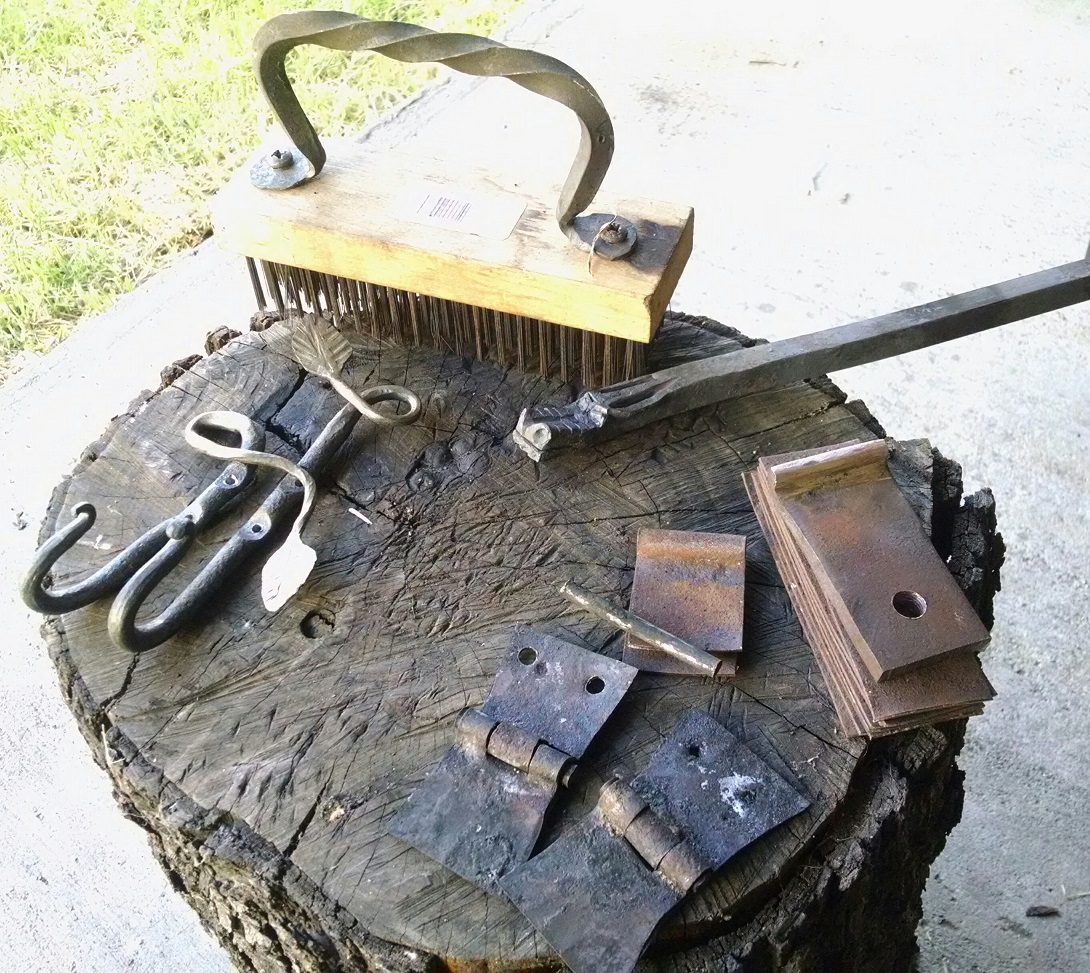
Sunday being Father's Day, my chores were delegated to the loving family and I got to light the coal forge. Helpful that it was a windy day to carry the smoke away. Started out handling a new wire brush, a little tall but it bears down well. Then practiced some hinge welds, a local chapter of a period furniture group asked me to demo some hardware this Saturday. Made a little jig last week to roll the barrel in the vise, bent a section of 1/4 by 2 inch bar and rounded the square end to match the 1/4 inch pins I'm using. Pins are a bit large for this hinge but it's what was at hand. Cut a stack of hinge blanks (under the jig at right side of the photo), next a bent, unwelded blank.
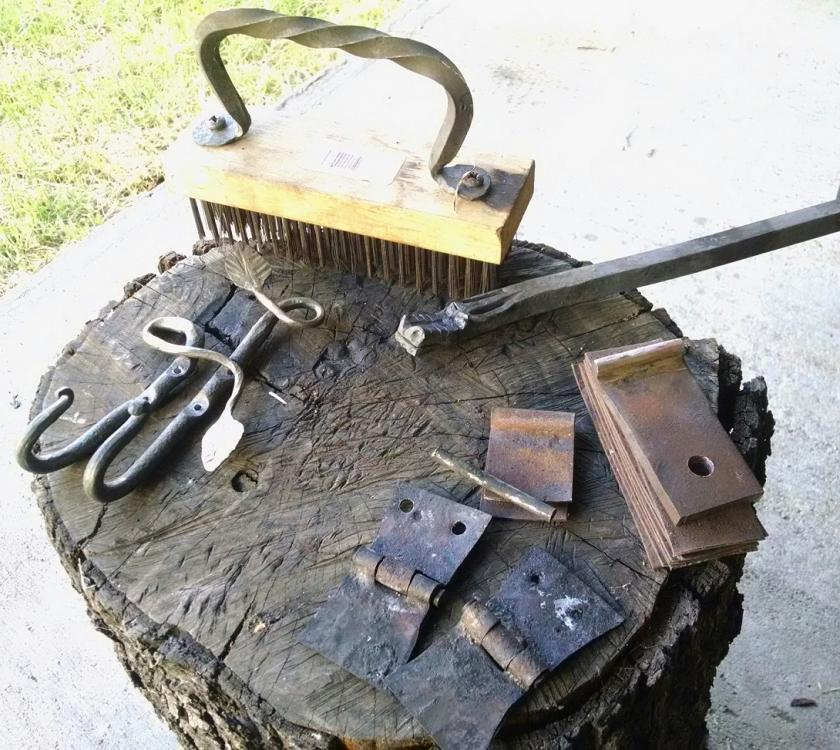
The welds in thin stock are very instructive, its very easy to see the surface get liquidy, the frying bacon look that I've read about, in this 1/16 inch strapping, rusty decorative barrel hoops. The barrels are decorative, not the hoops. Once I get this demo done I need to practice some welding in thicker stock.
tried some more dragon head shaping with the new chisels.
-
Springs for punches, axles for hammers and fullers. Sharpening steels, for carving knives, also make great punches.


Holdfasts
in Tools, general discussion
Posted
Family life has taken its toll on my smithing of late, but I managed to grab 3 hours the other day.
Worked on holdfasts (old timey bench clamps) for a woodworker I drew in a gift exchange this year.
5/8 cold rolled was where I started. Holdfasts are often done from 3/4 round stock, but I couldn't find any 3/4 that wasn't plated and didn't have the time to safely remove the zinc. 5/8 will work and makes for a lighter tool.
Isolated a knob at the end for the pad, squared up 4 inches (width of the anvil face) behind the knob and then bent to 90 degrees and inch past that.
Square (ish) corner, then sorta straight to draw out the arm, squish the pad out to round (ish) and try for an artful bend.
First side came out better than the second, forgot the square corner, so the arm was drawn further that it should have been to upset back into the corner.
After cutting the main bar in half, I put a few facets on the shafts to grip the holes they are driven into.
A little tweaking on the pad angles and then I like to contact cement a bit of 1/4 inch leather onto the contact surface.