

Michael
-
Posts
1,062 -
Joined
-
Last visited
Content Type
Profiles
Forums
Articles
Gallery
Downloads
Events
Posts posted by Michael
-
-
Never seen an Anvil at a garage sale, maybe I don't live in the right place...
I find tongs and set tools everyone once in a while, few and far between.
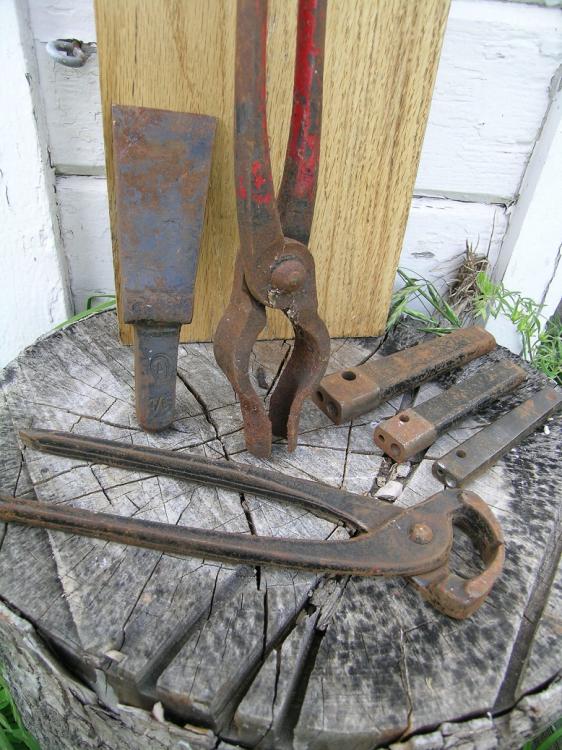
Best I've done at a garage sale in the SF Bay Area is this....
Tongs, nippers, rivets sets and an Atha hardy that fits my oddball 7/8 Peter Wright hardy hole.
Post pics when you can.
-
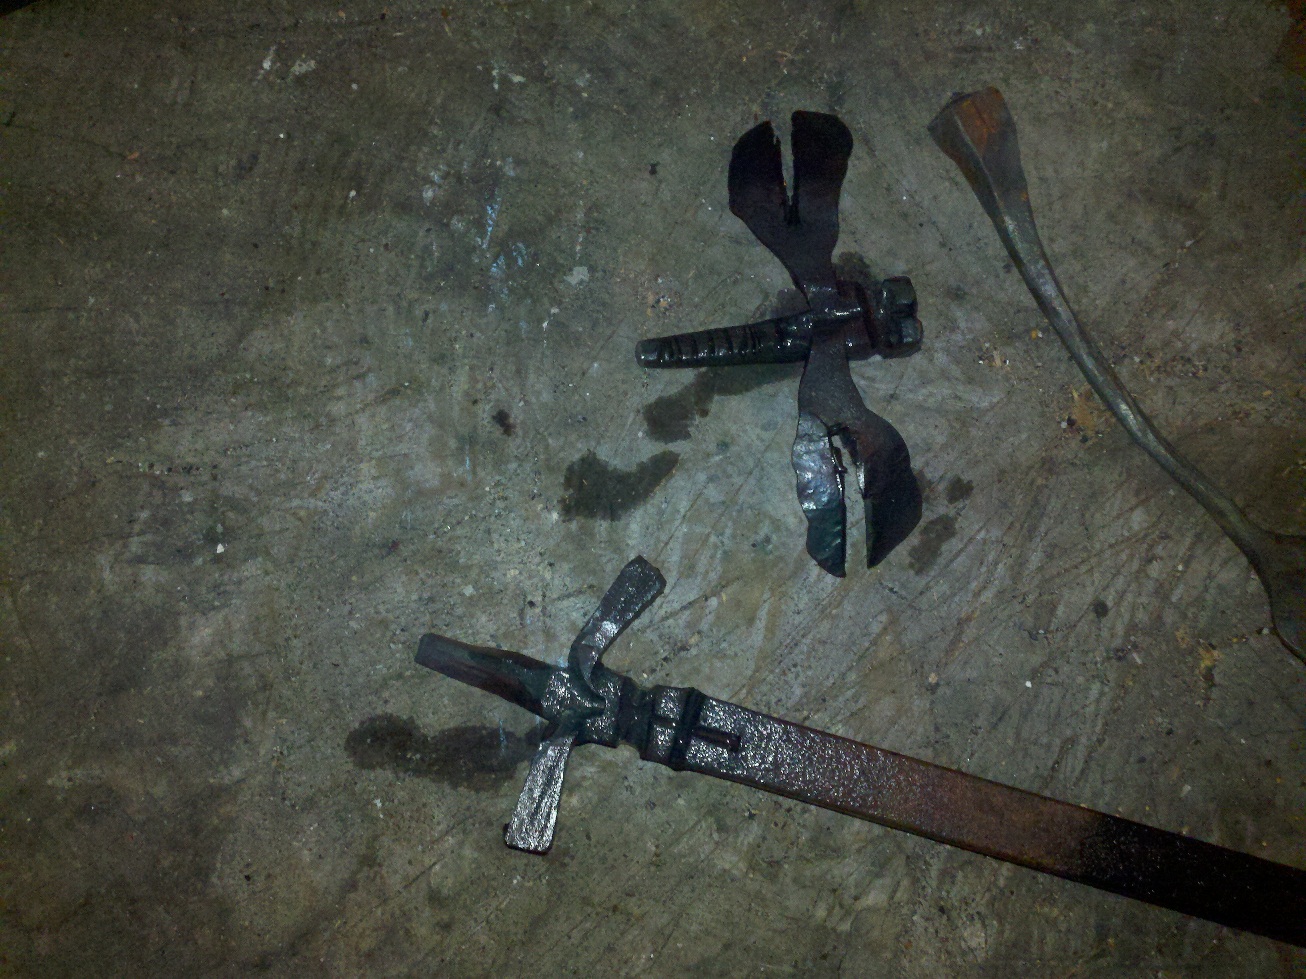
Nice trick on the ball holding the striker in the bight of the upper loop. Never seen that done before.
-
when I've done dragonflys I'll hacksaw down from one end at an angle, the wider end of the cut leaves more material for the wings. That wide section is then bent up out of the way of the "tail" and, after it cools off, sawn in half again to make the two sides of the wings. I've seen guys do it with a thin hot cut chisel but I have to use the saw.

-
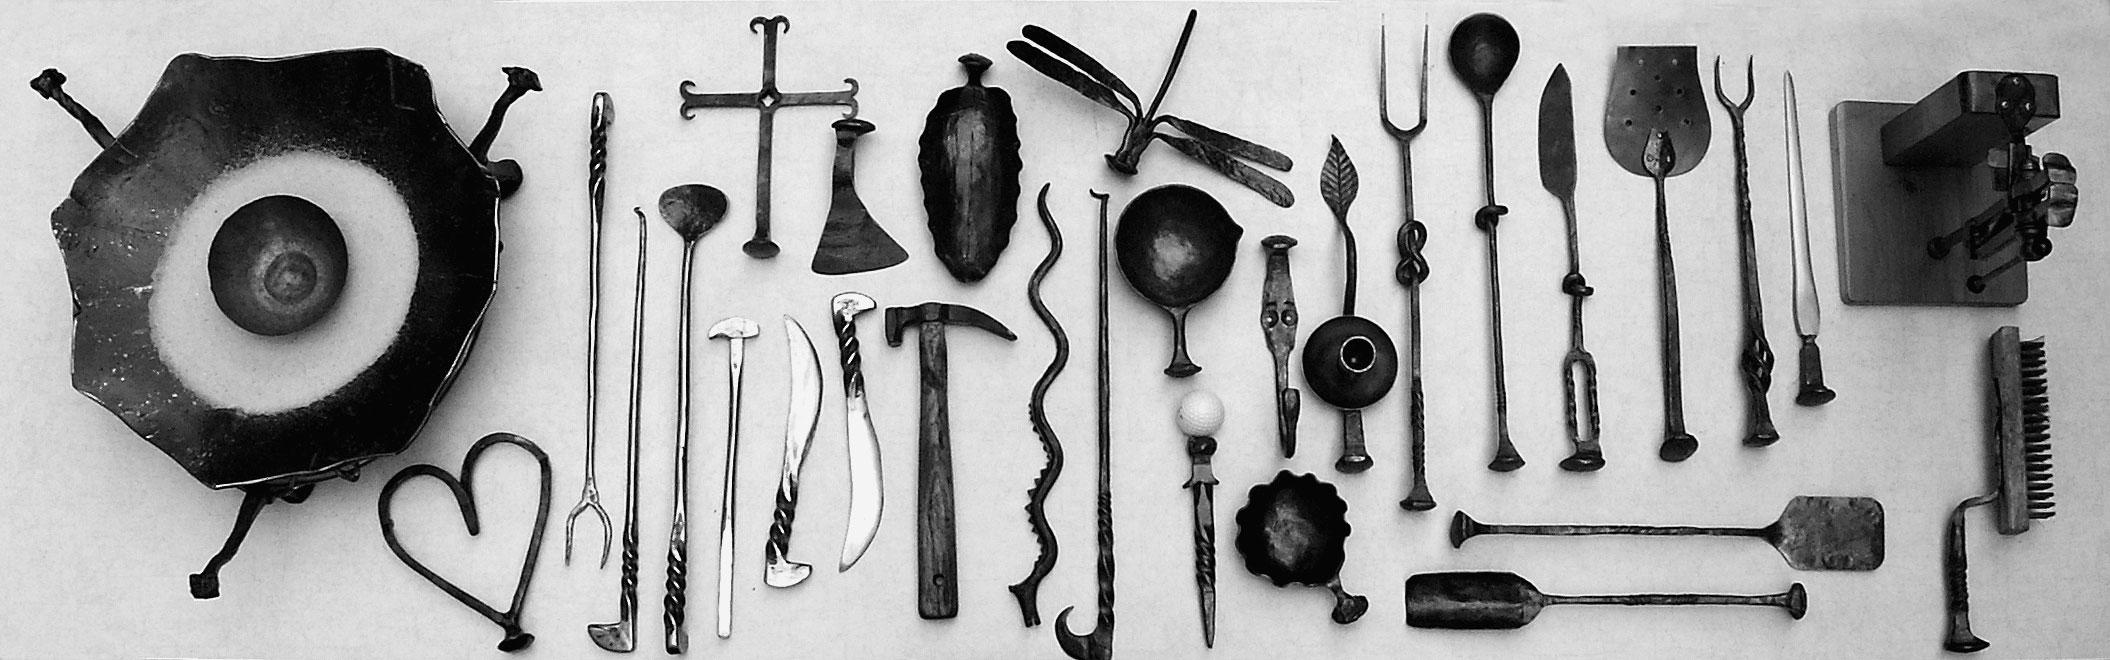
With proper credit to the Kootenay Blacksmiths Association. I keep a print of this out in the smithy for inspiration.
-
That's a very thoughtful gift for a woodturner, nicely done.
-
Anvils, they stack so well.
")
-
Off to a real good start. Got a hammer?
-
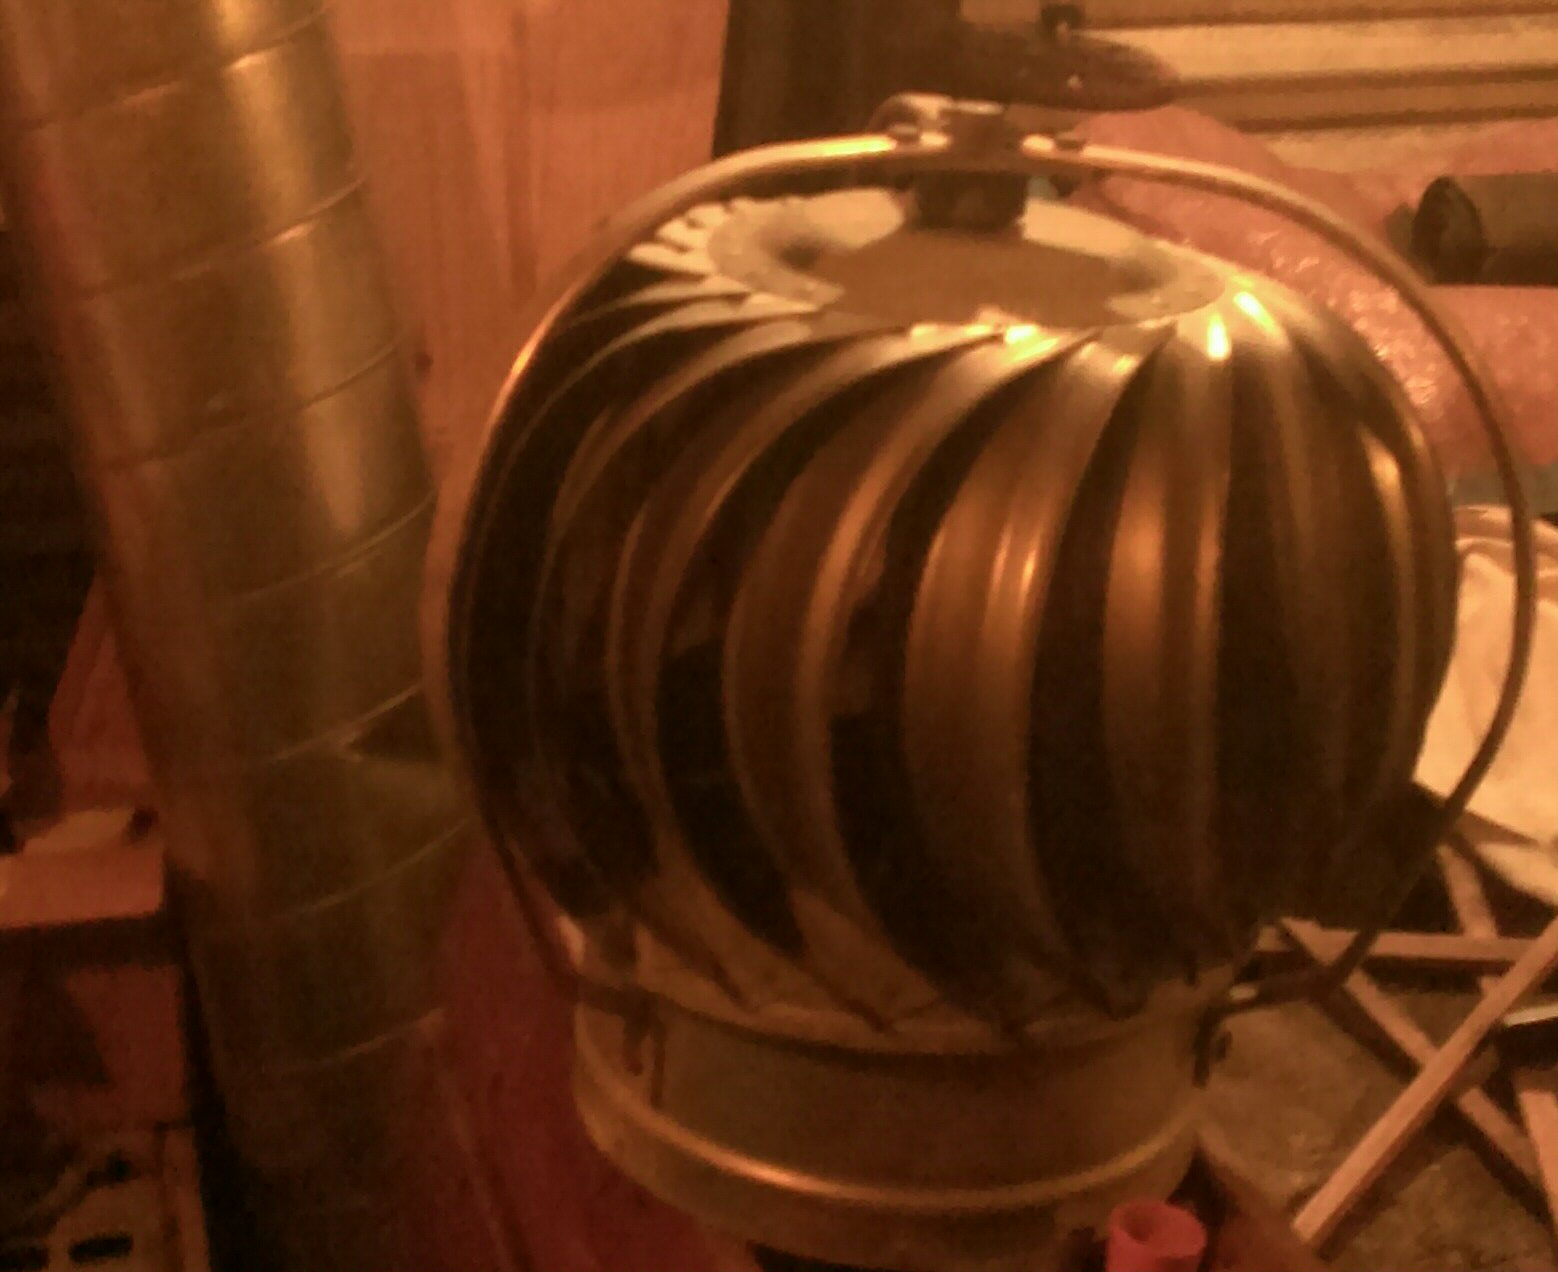
Walking back from lunch, past the loading dock, three of the these turbine vents were set next to the dumpster. I guess they finally broke down the
second floor restaurant that closed last year.Grabbed the best looking (ie non bent) and tucked it under my desk till the end of the work day. Trash bag for the train ride home. Nice 12 inch turbine vent to match the 12 inch spiral duct in the background.
This will replace the inadequate 6 inch stove pipe over my coal forge.
On the way home, the other two were gone.
For Free!!!!

-
Great work, it looks fantastic! Would you care to elaborate on the production process?
is the dragon body forged, laser or water jet cut? How much welding? How did you make the head?
How much trial and error to get the balance right?
and with wings that big, is anything holding it down on the pivot?
-
If this is for a portable set up, then make the wooden stand. When you take the anvil off you can flip it over and use it to carry tongs or shorts of bar stock.
Make the "top" a little wider so its more stable when upside down, couple handles on the sides and it will do double duty when loading up your demo gear.
I could knock out a wood stand like that in an hour or so, a little envious that you'd have an easier time cutting and welding up a steel stand.
I came to smithing from woodworking though.
-
Don't know anything about its composition or quality, but it sure looks nice. Wonderfully heavy and thick. I'd trade my London Pattern for it in a hot minute!
-
Last time I was in horse country (Napa, CA, don't laugh) the local flea, along with rounding hammers, were good quality work gloves with the fingertips cut off and stitched. I'd been doing this to my work gloves for years now.
Bought 3 pair, seller said they were "roper's gloves" but I may have misunderstood her.
-
When you get the thin crust of hard metal in the hole you are drilling, a tiny sprinkle of baking soda or chalk will give the bit just enough grip to drill thru the....not workhardened.....friction heated layer and keep cutting.
Picked this trick up on a machinist forum a few years back, trying to drill 1/16 inch hole in thick music wire.
-
Kegan, zoom makes it very viewable, nice embellishment on the #8 especially.
as to jigs, I did use a bending fork in the anvil to bend the bottom curve of the five, but that was about going thru the same motions repeatedly to try and get consistency. I did all the 5's first, then the zero
Thinking that house numbers might make good, USPS mailable gifts for far off family members, though I should google street view their addresses to see just how cheesy their current house numbers are.
-
Meant to do this project for a while now. Weekend got away from me and only had an hour or so at the gas forge before dinner. Started with 1/4 inch square. First #5 came out great, bending the first two corners around the heel of the anvil (104 lb. PW) on all three #5's to keep them consistent, then trying a Habermann bend on the corners. Couldn't get the gas forge up to welding heat, so the zero is just lapped with the nail hole going through the overlap.
Getting 3 numbers all roughly the same, easier than expected.
Getting 4 numbers red hot on the anvil for a picture,not so much.


-
Second here for the lovely wife looking over the shoulder and going "wow, can you make one of those for each daughter".
Not a lot of iron projects evoke such a swift, positive response.
you done good!
-
Been trying to get my daughter to help out in the smithy for years now, no luck.
Off to a nice start there.
-
Those look great, nice wide eyes. My top tools always have small eyes, need to make a larger drift.
-
my tool rack, gas forge and shop cart are on wheels, not that the cart and rack move all that much. Anvil on the stump and the vise stand both have round bases. All my stuff gets tucked together under the non leaky part of the patio roof and covered with tarps when I'm not working. The round bases on the vise stand and anvil let me tip and roll those out into the workspace, like barrel.
-
I ran a bottom blast charcoal forge for years before switching to coal. Works just fine, though after a few hours the bottom blast does tend to blow the little bits of burning charcoal out of the forge. Building a forge with brake drum, pipe, scrap metal and a squirrel cage blower, a bottom blast was the clearest path to a working forge. If all I had was wood, clay and leather for a bellows, a side blast might make more sense.
-
Said before, get a regulator. Makes adjusting the gas pressure to tune the burner a breeze. I get worried about gas leaks and before I start with the gas forge, I open the tank valve with the ball valve at the burner closed, and I keep a little squirt bottle of diluted dish soap on hand, to put a little squirt on all the connections between the tank and the burner. With pressure on the system, any leaks will show up as a little wreath of bubbles around the fitting. I do the same with the fittings past the ball valve, though I'm pretty sure the gas pressure at the cap on the lamp tube is minimal.
-
Actually The transition was formed by angling the metal over the rounded edge of the anvil an setting it down kind of like a shoulder
Its actually pretty good practice for learning some good hammer control and anvil edge usage. (That being said. though I've done maybe ten of this kind of transition and this is the first one that came out so perfectly! )
Great technique that I'll do my best to recall when next at the anvil. Made a few marshmallow forks and that transition from flat handle to round shaft is always a weak point, this adds just a bit of metal. Thank you, Just realized its on the backside of the spatula handle.
-
That looks great! Really nice overall.Did you use some sort of forming swage to make that little triangular transition from the round to the wider, flatter sections of the handle?
Very consistant file work on the round section in the middle of the handle.
-
Contact him and ask. Google James Austin Blacksmith and it'll take you to his site.
Jim has been studying, practicing and developing this curriculem for a couple of years now. Currently he's teaching a class making Viking style hammers, soft iron bodies with welded steel faces. A buddy is taking the class next week (and crashing on my couch).
I've heard Austin speak on this field of study, viking axes/hammers. There's a wealth of knowledge he has to impart. I don't think you could go wrong with either DVD.


Dinner Bell attempt
in Member Projects
Posted
I had a big jack hammer bit clamped to my makeshift anvil to use as a horn. Big C Clamps, section of I beam, it all worked pretty well until I was able to find a real anvil (PW 0-3-20)