

Michael
-
Posts
1,061 -
Joined
-
Last visited
Content Type
Profiles
Forums
Articles
Gallery
Downloads
Events
Posts posted by Michael
-
-
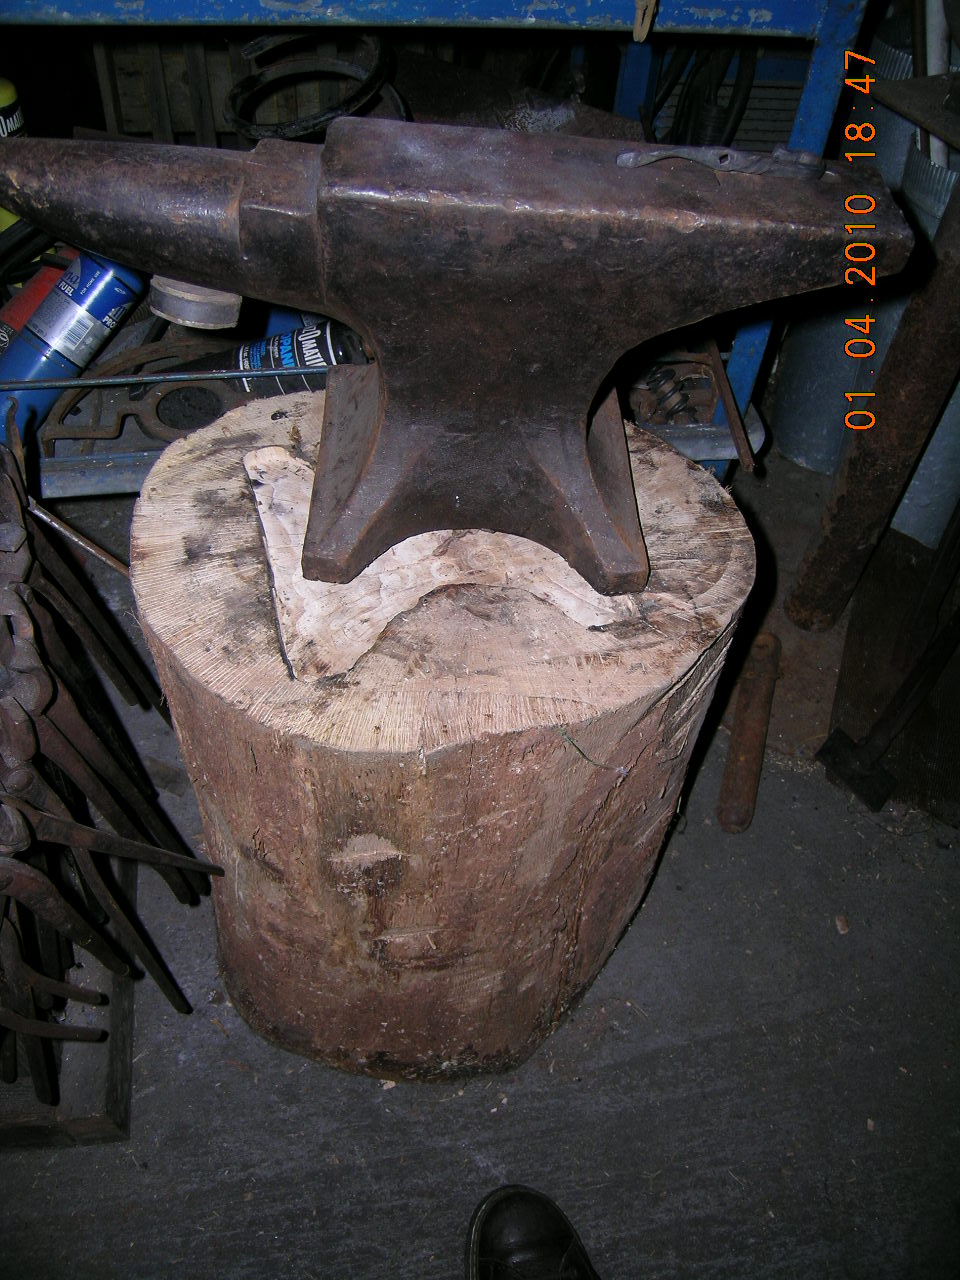
Here's mine, a black oak stump under my 104 lb Peter Wright. Bark drawknifed off, recess for the anvil routed in the top. I routed 3 "feet" on the bottom so its a sort of tripod.
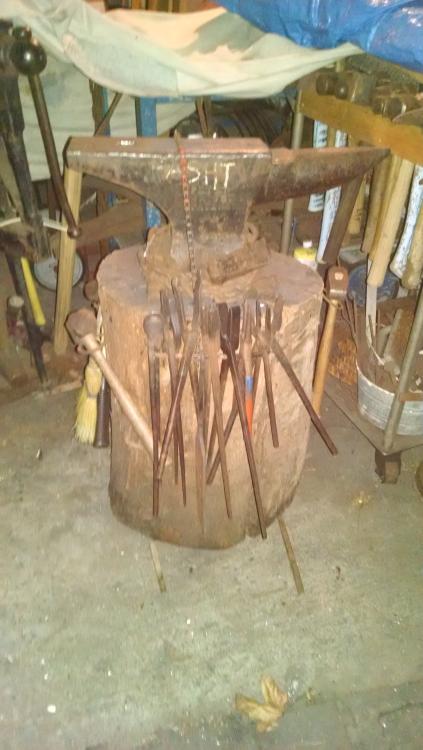

rings for hammers, a rack in front for the tongs in use. Bike chain stapled to the front with a weight on the other end as a hold down.
the stand before that, 2x10's held together with all thread, the boards staggered to make pockets for hardy tools and tong.
 Ended up putting a cookie sheet from the Goodwill under the anvil as a tray, just drove the anvil staples thru the sheet metal, that was useful. Swage block is on that stand now.
-
6 hours ago, clinton said:
"Striking anvil" in use. And yes it did take a beating at midnight madness
(Professionals closed course do not attempt)
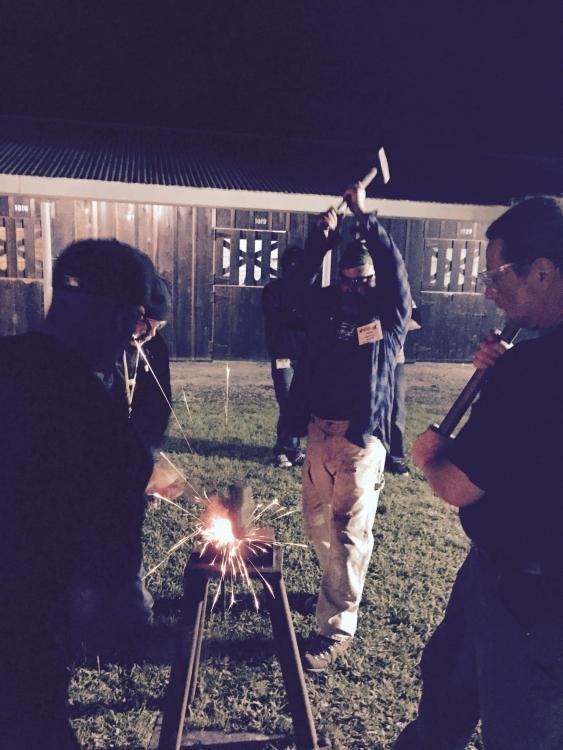
Hey, that's me on the right! Didn't know anyone was taking pictures at Hollister, I would have smiled (was probably grinning anyway)
-
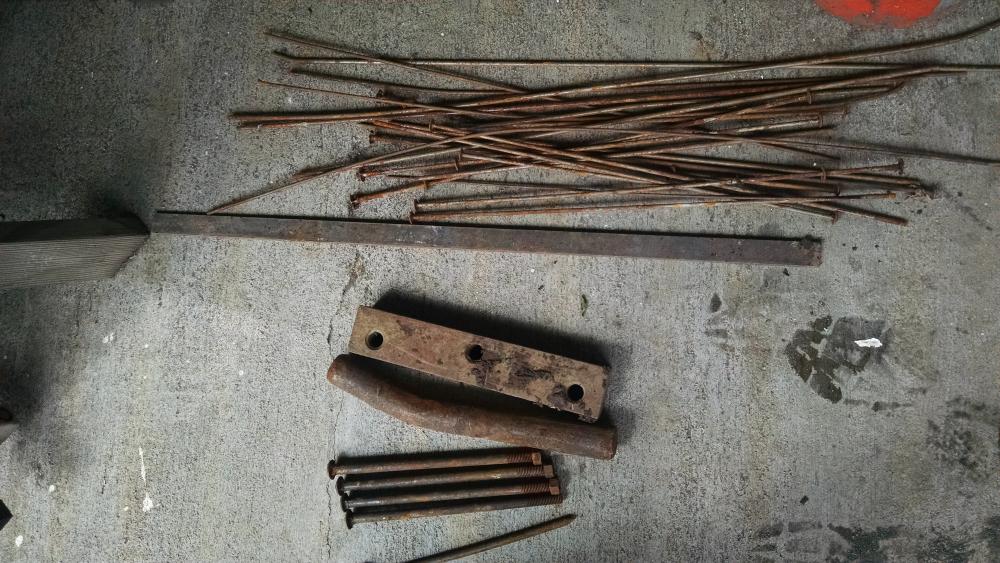
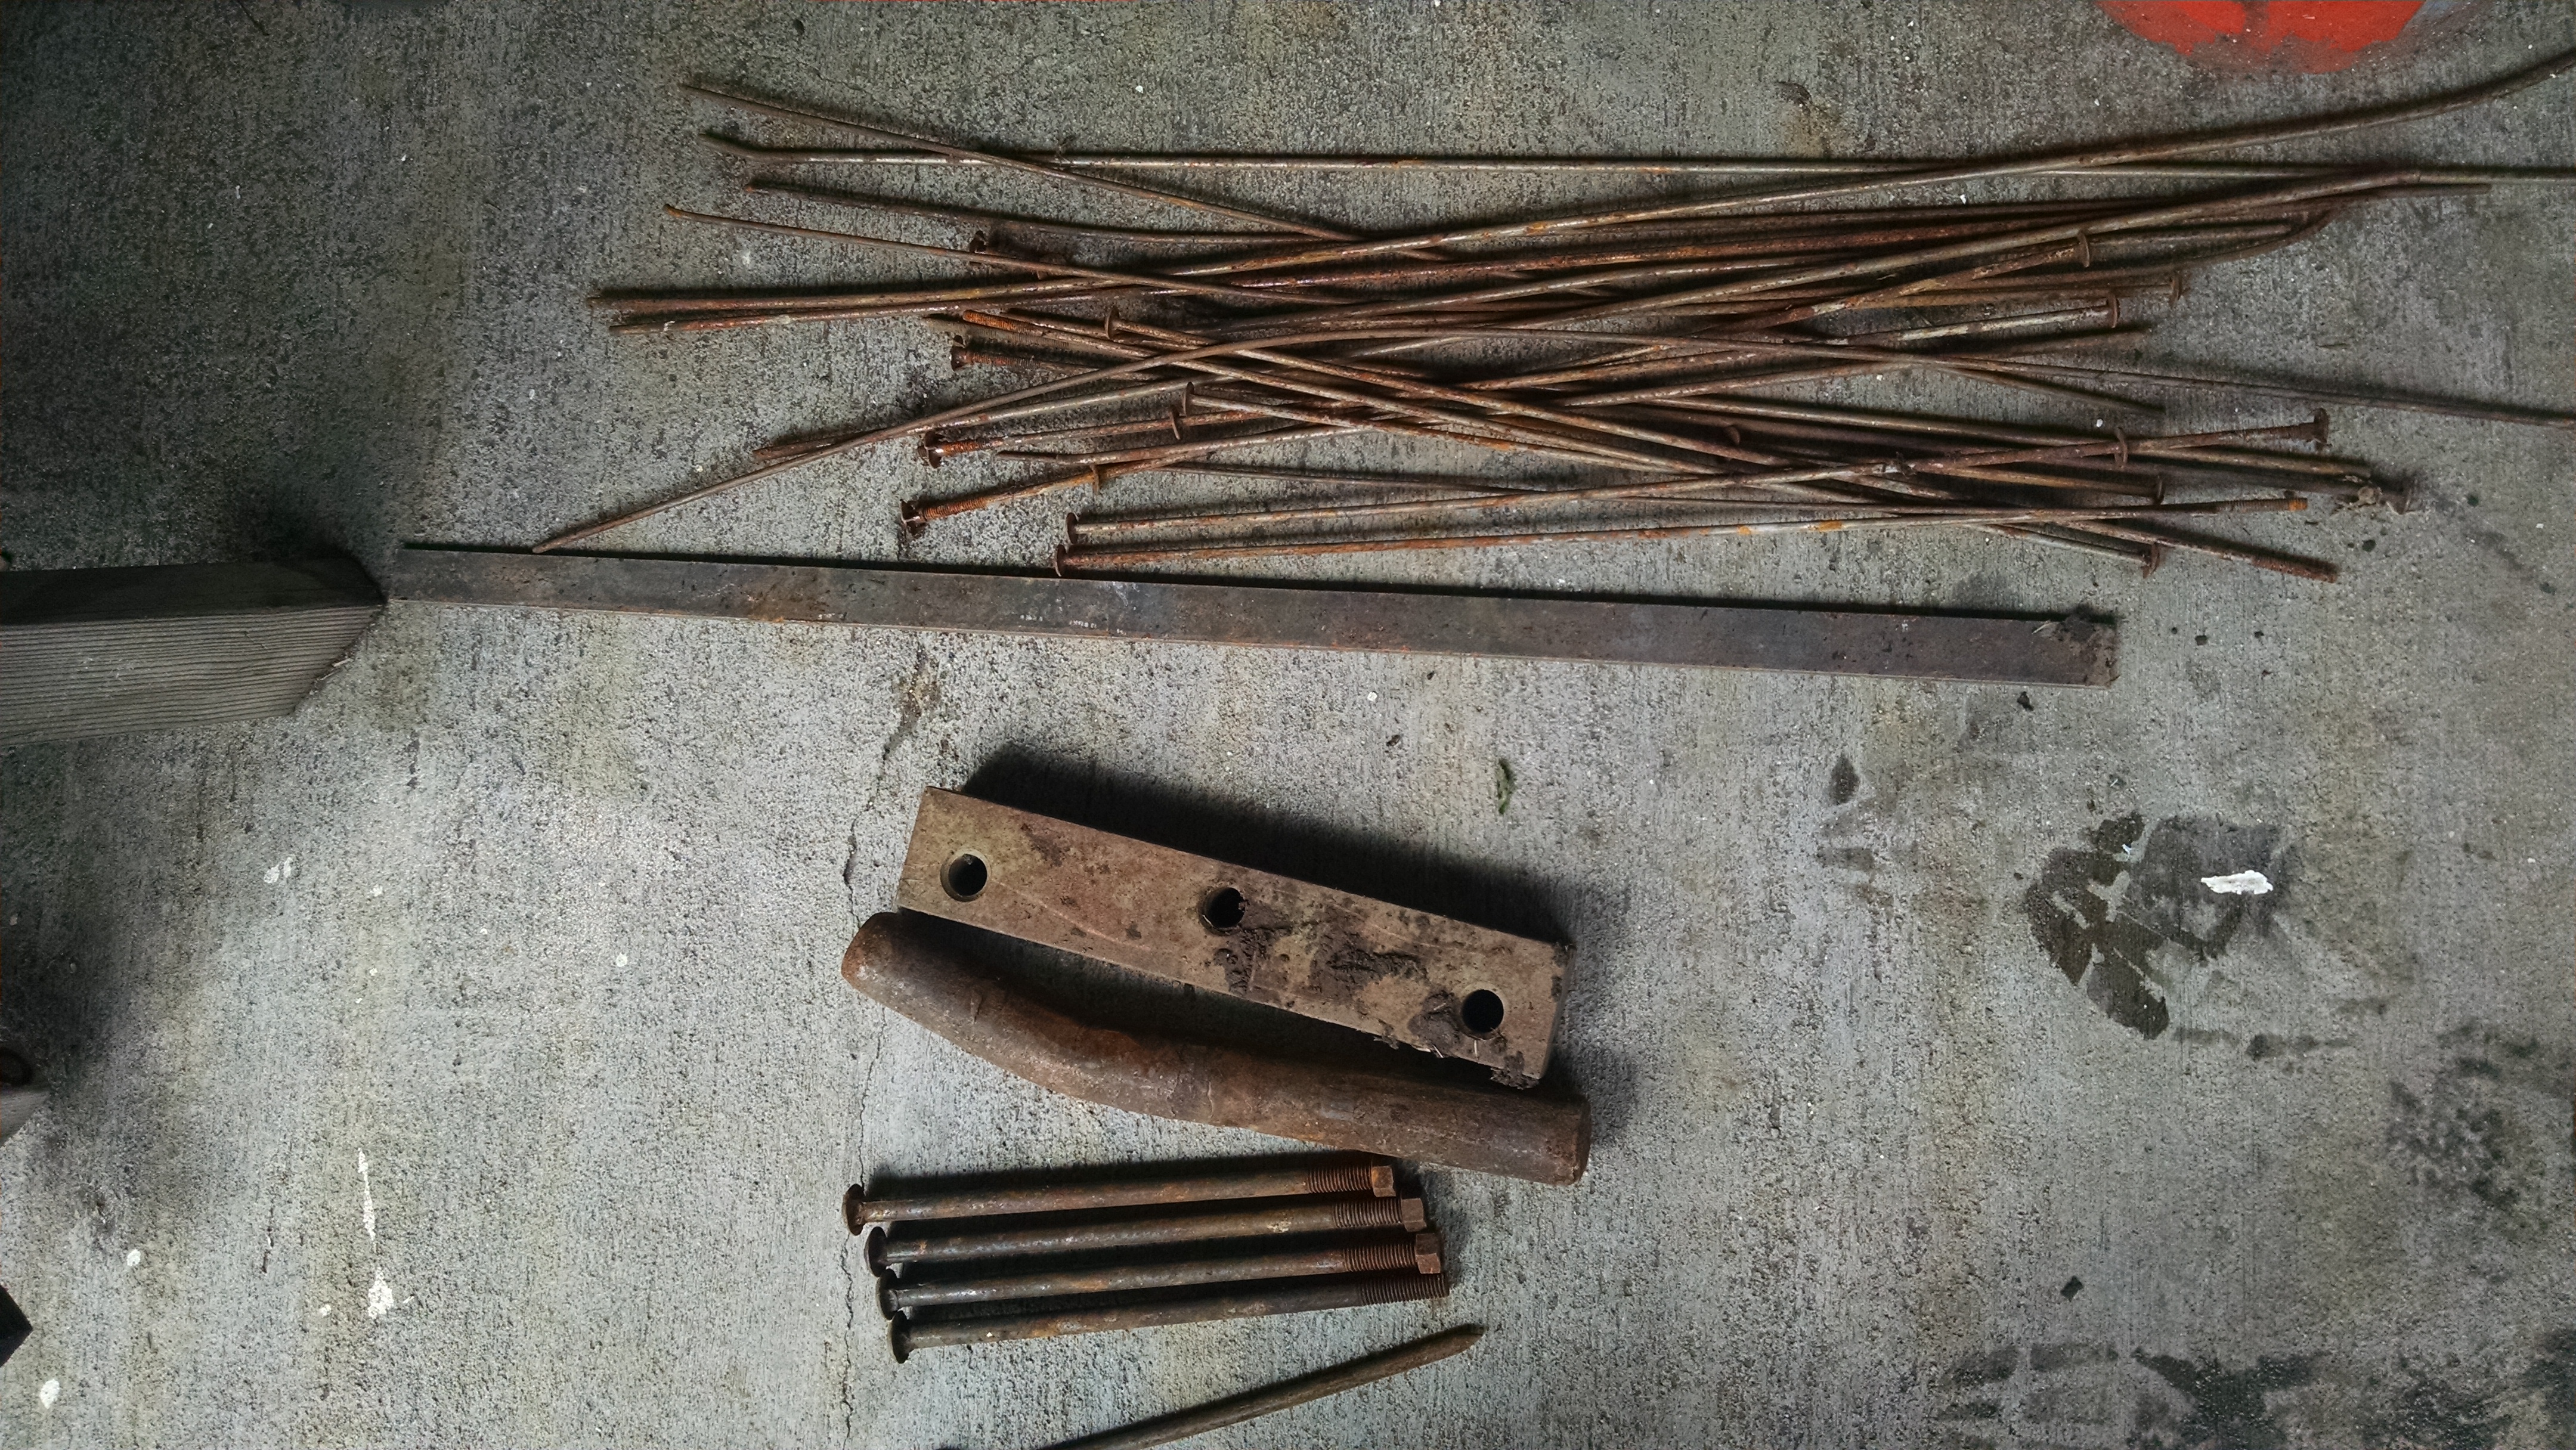
Walking the dogs past a neighbor's house, a lot of metal scrap in the recycling bin. He was happy to get rid of it. 3/8 by 1 inch flat bar, some long carriage bolts, section of what looks like axle that might make hammers or top tools. Not sure what the rectangular block with the threaded holes is for, but any heavy piece of steel is worth having. It think all the thin round stock might be braces for concrete forms? And all for free!!
-
I do mine length wise along the horn. With the center vein over the curve of the horn and drawing half the leaf over the top of the horn
-
On 2/25/2016 at 6:12 PM, Forging Carver said:
Do you think that you can show me a picture of that homemade swage block and freon forge. Homemade swage block sounds interesting, and I am building a freon forge. Pictures would be a great help! Also, I like your set up. It is a nice sized work area. Thanks
Here's the swage block, though I didn't make it, Got it when a a friend was moving her shop, don't know if she made it either. I think it started as a section of RR track with a lot of welding and grinding, but I could be wrong, About a foot long and a little under 6 inches square. Not sure of the weight. I find the bowls and curves on the side facing the camera in the first pic the most useful.
Freon tank gas forge, before I cut down the burner tube as per Frosty. 1 inch of kaowool, ITC 100 and kiln shelving for the floor and back door. I close up the front with firebricks. Very important to make the floor of the forge and the opening one fire brick high, so you can stack bricks in front to make a porch the work can rest on. I followed Ron Reil's instructions to the letter and the 3/4 burner worked great first time I fired it up. I've not had to mess with it since except to cut it shorter. I did all the bolting of the legs, handle, back door brackets and burner holder thru the narrow opening cut in the Freon tank, then once it was standing, measured with a firebrick and cut the front door opening. The kiln shelf floor rests on the ends of the bolts holding the legs on, the whole space under the shelf filled with kaowool.
![IMG_20160227_095041367_HDR[1].jpg](https://www.iforgeiron.com/uploads/monthly_2016_02/56d2324a8efd4_IMG_20160227_095041367_HDR1.thumb.jpg.57f6f34bab3272e37203ca977fc48457.jpg)
![IMG_20160227_094845404[1].jpg](https://www.iforgeiron.com/uploads/monthly_2016_02/56d232801f042_IMG_20160227_0948454041.thumb.jpg.fa4493ed8b90c9b3685aa6264ec93ccc.jpg)

-
Made this a few years ago and just found the picture.
Should make some more of these, I think they are called a sash light?

-
Great wings!
-
Rwolfe, Leaf end is a nice touch on a drive hook.
-
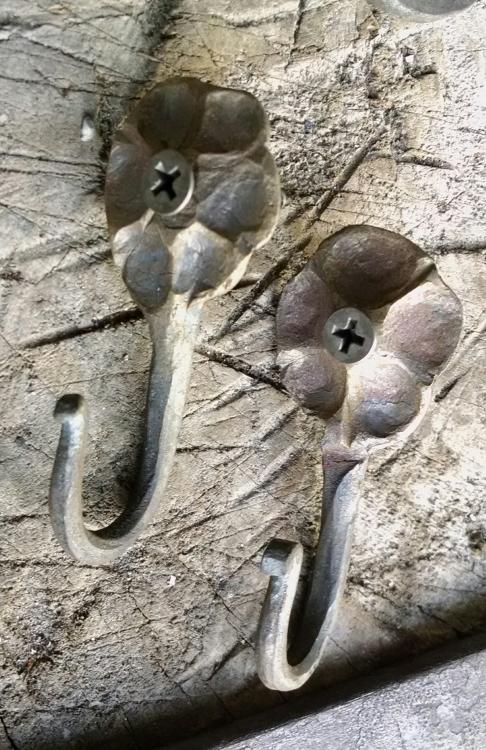
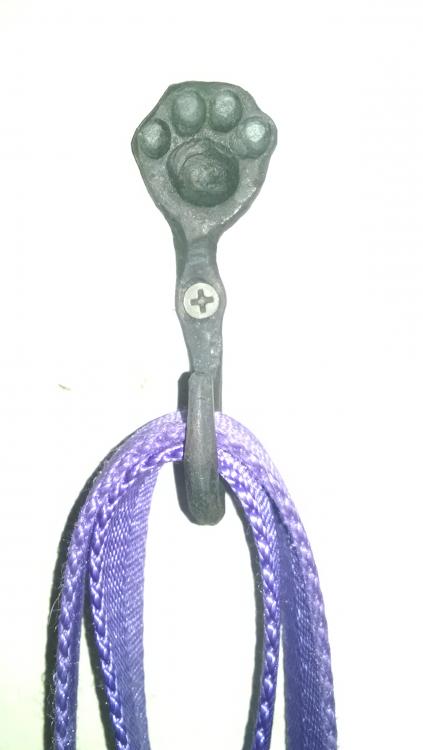
Leash hook, kitchen hooks for trivets
-
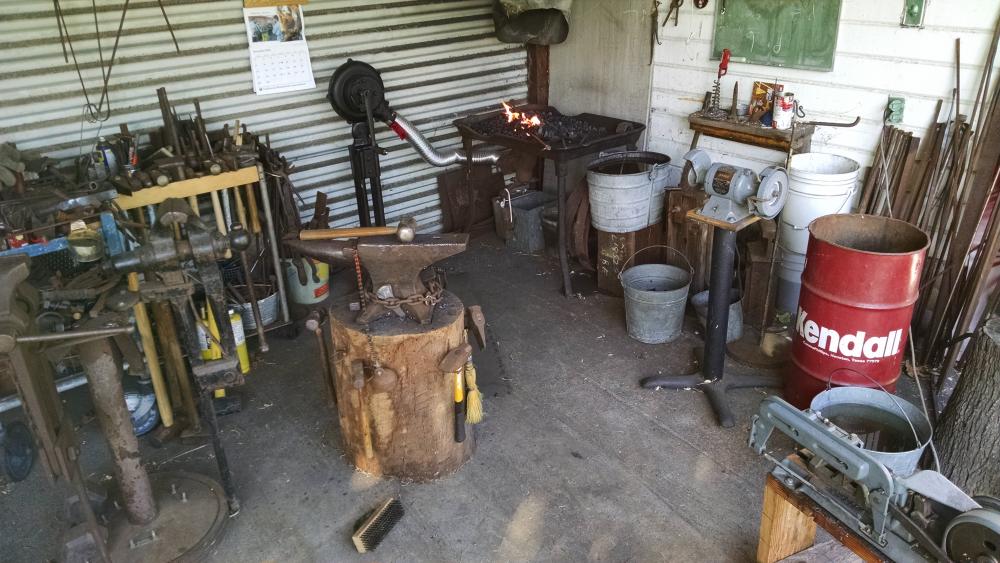
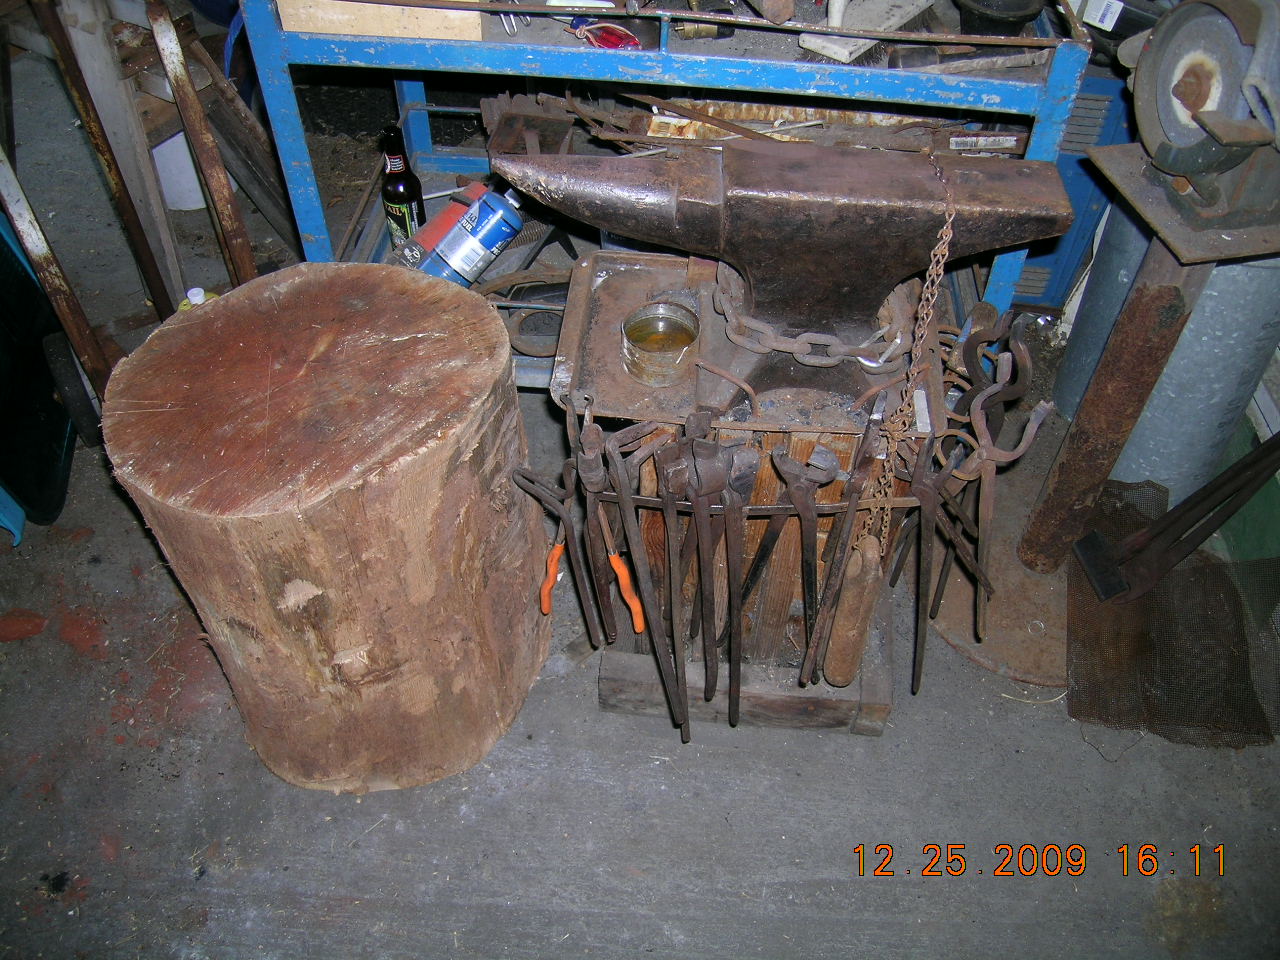
I'd replied to this about 5 yesrs ago. Pic ssems lost but here's my corner of the patio setup. 104 # PW, pair of vises on stand, tool table, Tiger blower, forge table, grinder/wirewheel and power hacksaw. Not seen are a homemade swage block and the freon tank propane forge.
-
As a buddy with decades of propane grill experience told me, when I first built a gas forge, "it's a low pressure gas".
Reasonable safety paranoia in place of course. I worry more about acetylene hickups than propane
-
You should look into the work done by Marco Terenzi (sp?)
http://www.marcoterenzi.com/miniaturework/
Great stuff there PVF, love to see a little vid of the forge fired up.
-
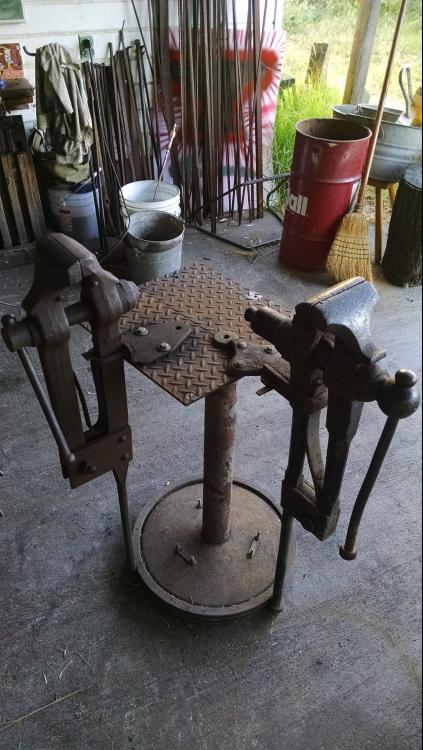
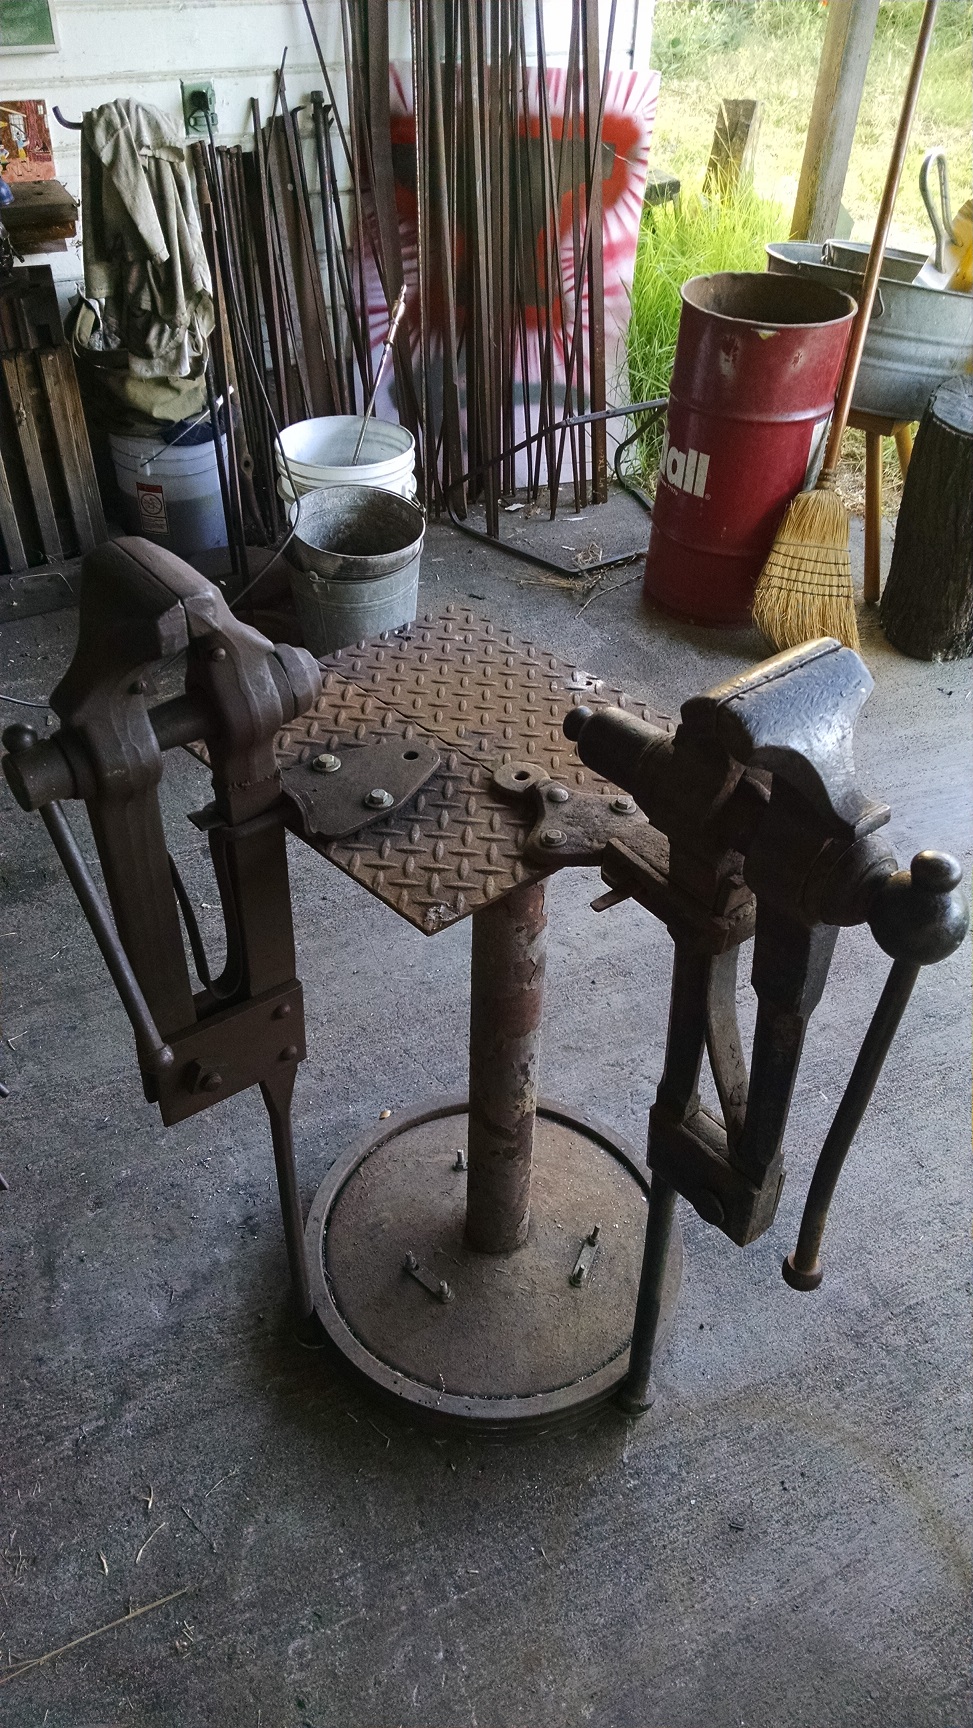
I always wanted to do a vise stand with a base I could stand on, a vise like that never moves, but I've never found the piece of scrap that was right for the base.
Here's mine, big cast iron sheave in the bottom, bolted to a cafe table base with a diamond plate table on top of that. Two vises, I'll pile sandbags, freeweights etc on the base to keep it from moving too much. It does roll around pretty well.
-
-
Those came out great!
-
Galvanized mop bucket for me, raised up on chunk of Ibeam (my old makeshift anvil) so the top of the bucket is level with the anvil and forge table. I always keep an eye out for metal buckets at the scrap yard and garage sales, those little Mexican beer pails are useful for clinker and ash. Gotta get me an aluminum beer keg now!
-
I found this curly hickory hammer handle at the very back of the rack at my local Ace a long while ago. Been saving it for just the right tool. Then the ash handle on my fave cross peen went. Probably too fancy gor a gorging hammer.

-
I made these spike tongs from nippers early on when I barely knew what I was doing. More grinding that anything, but they work, There's a notch filed across the short jaw that grabs the back of the spike

-
Those look great! How many feet if stock do you figure you have in mind he spiral and handle?
-
Some west coast smiths recently rescued a LOT of wrought from a collapsed dam on a river. The plan, if asked, was to say they were 'clearing the river of debris'.
Battery powered grinders and pack horses were required, as I understand the tale.
-
I just took my firepot apart to secure the clinker breaker which was rotating on the handle. The little hex bolt had roinded off where it pressed on handle rod. The breaker, clearly a replacement, is a section of I'm assuming mild bar, hacksawed and ground triangular. Certainly easier to work than stainless.
With the blower going I'd think that whole area of the firepot would be ,...cooler, as cool az its going to be anyway. I saw a couple firepots glowing at a workshop just recently!
Green Rot!?! The things you learn when smart people are talking!
I'd save the stainless for something else. Find a chunk of anything easy to cut, that will fit the tuyere of your particular forge.
There were a couple of water cooled, sideblast forges at the workshop and Octoberfest. Very neat to work with and a little odd at the same time
-
On the Third day of Christmas my true love gave to me.
3 pounds of wrought iron
2 texturing tools
and a hammer from Uri Hofeeeeeeeeeee
-
my old improvised anvil (75 lbs of I beam) with the improvised horn, (jackhammer bit C clamped to the center web)
probably could have ground the corners off the jackhammer bit.
note to self, make a bick out of that bit.
-
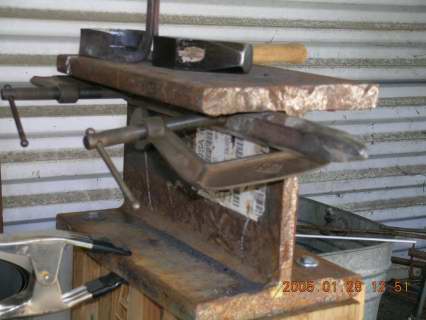
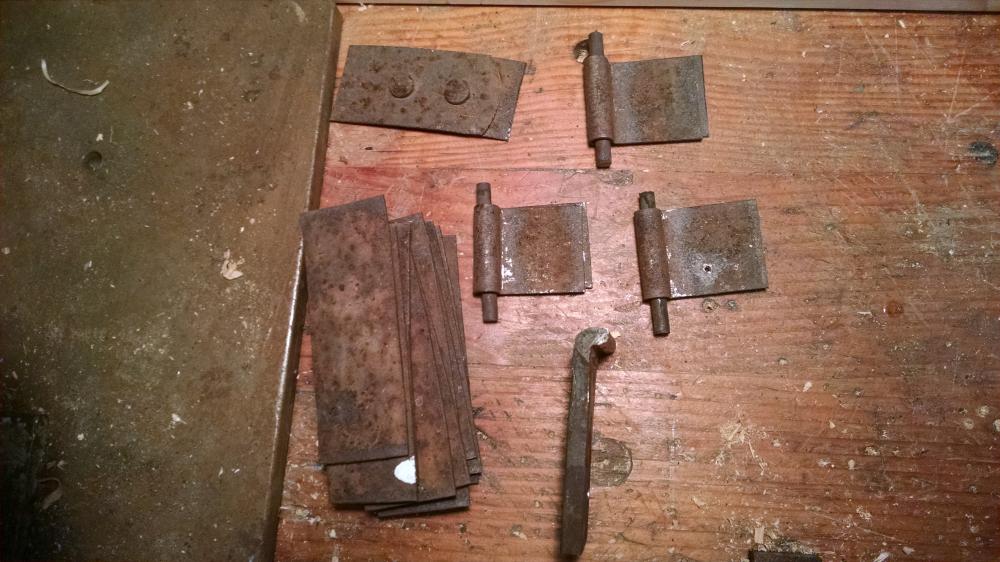
Seek, those look great! Nice little weld there on the edge of the hinge leaf. Did you make a jig to wrap the barrels around?
the jig I made, a plate of 1/4 inch steel bent over at a very sharp angle, then filed and ground sort of round, was a bit thicker than it needed to be, hence the huge 1/4 inch hinge pins on my hinges. Jig is on the lower right


![IMG_20160227_095041367_HDR[1].jpg](https://www.iforgeiron.com/uploads/monthly_2016_02/56d2324a07543_IMG_20160227_095041367_HDR1.jpg.a690b78db6733ad3043bd8e9b5b638a7.jpg)
![IMG_20160227_094845404[1].jpg](https://www.iforgeiron.com/uploads/monthly_2016_02/56d2327fa4b7b_IMG_20160227_0948454041.jpg.3d45ef02ae170036071cf20208324c74.jpg)


What is this?
in Blacksmithing, General Discussion
Posted
Could you do a closer picture, or better yet a scan of both sides of the package. Great advertising images from back in the day.