

Michael
-
Posts
1,061 -
Joined
-
Last visited
Content Type
Profiles
Forums
Articles
Gallery
Downloads
Events
Posts posted by Michael
-
-
Great work! Nice save on an old tool. Impressive addition of the WF Barnes lathe comment by the way (Velocipede in the shop here)
Bookbinding buddy of mine recently tried to piece together odd ball parts of dividers like this and ran into odd little differences in different years of manufacture.
-
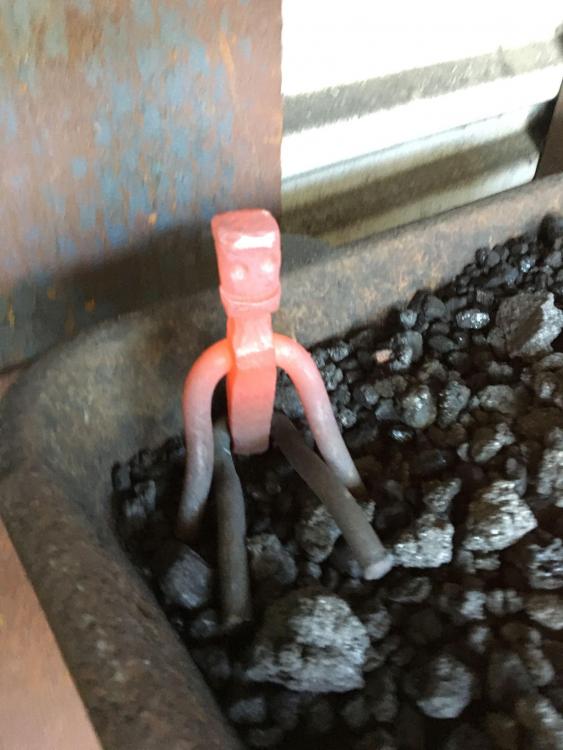
Made a little Forge Buddy on Monday. 3/4 square and 1/2 round. Pretty straightforward after the Anton Yakashev figure the NWBA demonstrated in November, and I spent most of December completing. This makes for 6 or 7 figurative projects since lockdown started (and forge access has been 15 feet out the back door all day!)
-
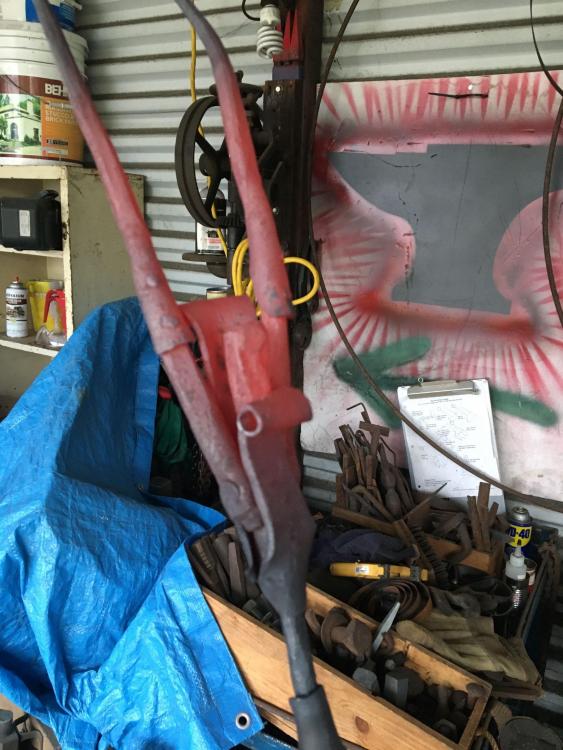
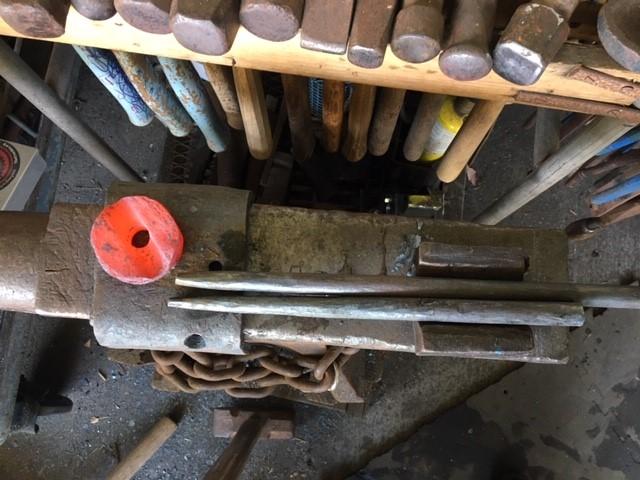
Another 'junk on hand' hold down. Motorcycle chain nailed to the stump on the front, the cast iron weight hangs just above the ground on the other side. Chain usually at the step or back of the horn when not in use. Square tube is my "bridge" fixture for fork tines and the like. The foot of chain across the face WAS painted red in the last incarnation of this hold down, haven't had to on this one, the recollection of grabbing too close to the hot part is still fresh in memory.
-
My local burger joint was happy to give me 5 gallons of fryer oil to use for quenching. Does make you hungry for fries though.
-
That'll be a great space for hammer and tool making. What are your (current) plans for the floor? DIrt? concrete? I'm setting up a similar sized space (8x16) to replace the leaky covered patio I work on, figuring out drainage in the new space.
Looking forward to seeing your new shop!
-
On 12/22/2020 at 5:02 AM, Glenn said:
Outside forges (and the 55 forge) can benefit from a plastic, or other material, cover over the forge.
My cast iron forge table is under a leaky patio roof. During the rain, I have one of those save-your-driveway drip pans, 3 foot by 4 foot that covers the whole of the forge and overhangs quite a bit. Keeps everything dry. Tarps over the tool tables, lots of long, heavy bars to hold everything down.
working on a watertight structure, having to figure out drainage in that part of the yard before erecting anything though.
-
Nice little shed you have there!
I would also considering cutting a hole in the floor, once you decide on an anvil location that works for you.
In the meantime, you might consider stacking up some cribbing under the floor where you're anvil is for the moment. It looks like access underneath is not a real problem.
if one of the pier blocks is convenient to back up the anvil stand, start with that and see if its absorbs enough shock, not a big fan of cement for anvil support, but if its what you have.....
-
20 hours ago, twigg said:
I got back at the forge for the first time in a long time this week. Trying to spend a little time forging each day. Today, I made two halves out of a hammer!
 In all seriousness, nothing worth writing home about yet. Just getting the feel back.
I like your rail anvil set up!
-
First garage sale in I don't know how long on Saturday.
Picked up this little bit of kit.
I'm assuming this is one end of a machinist clamp I have vague memories of seeing.
-
titanium! those must be wonderfully light!
-
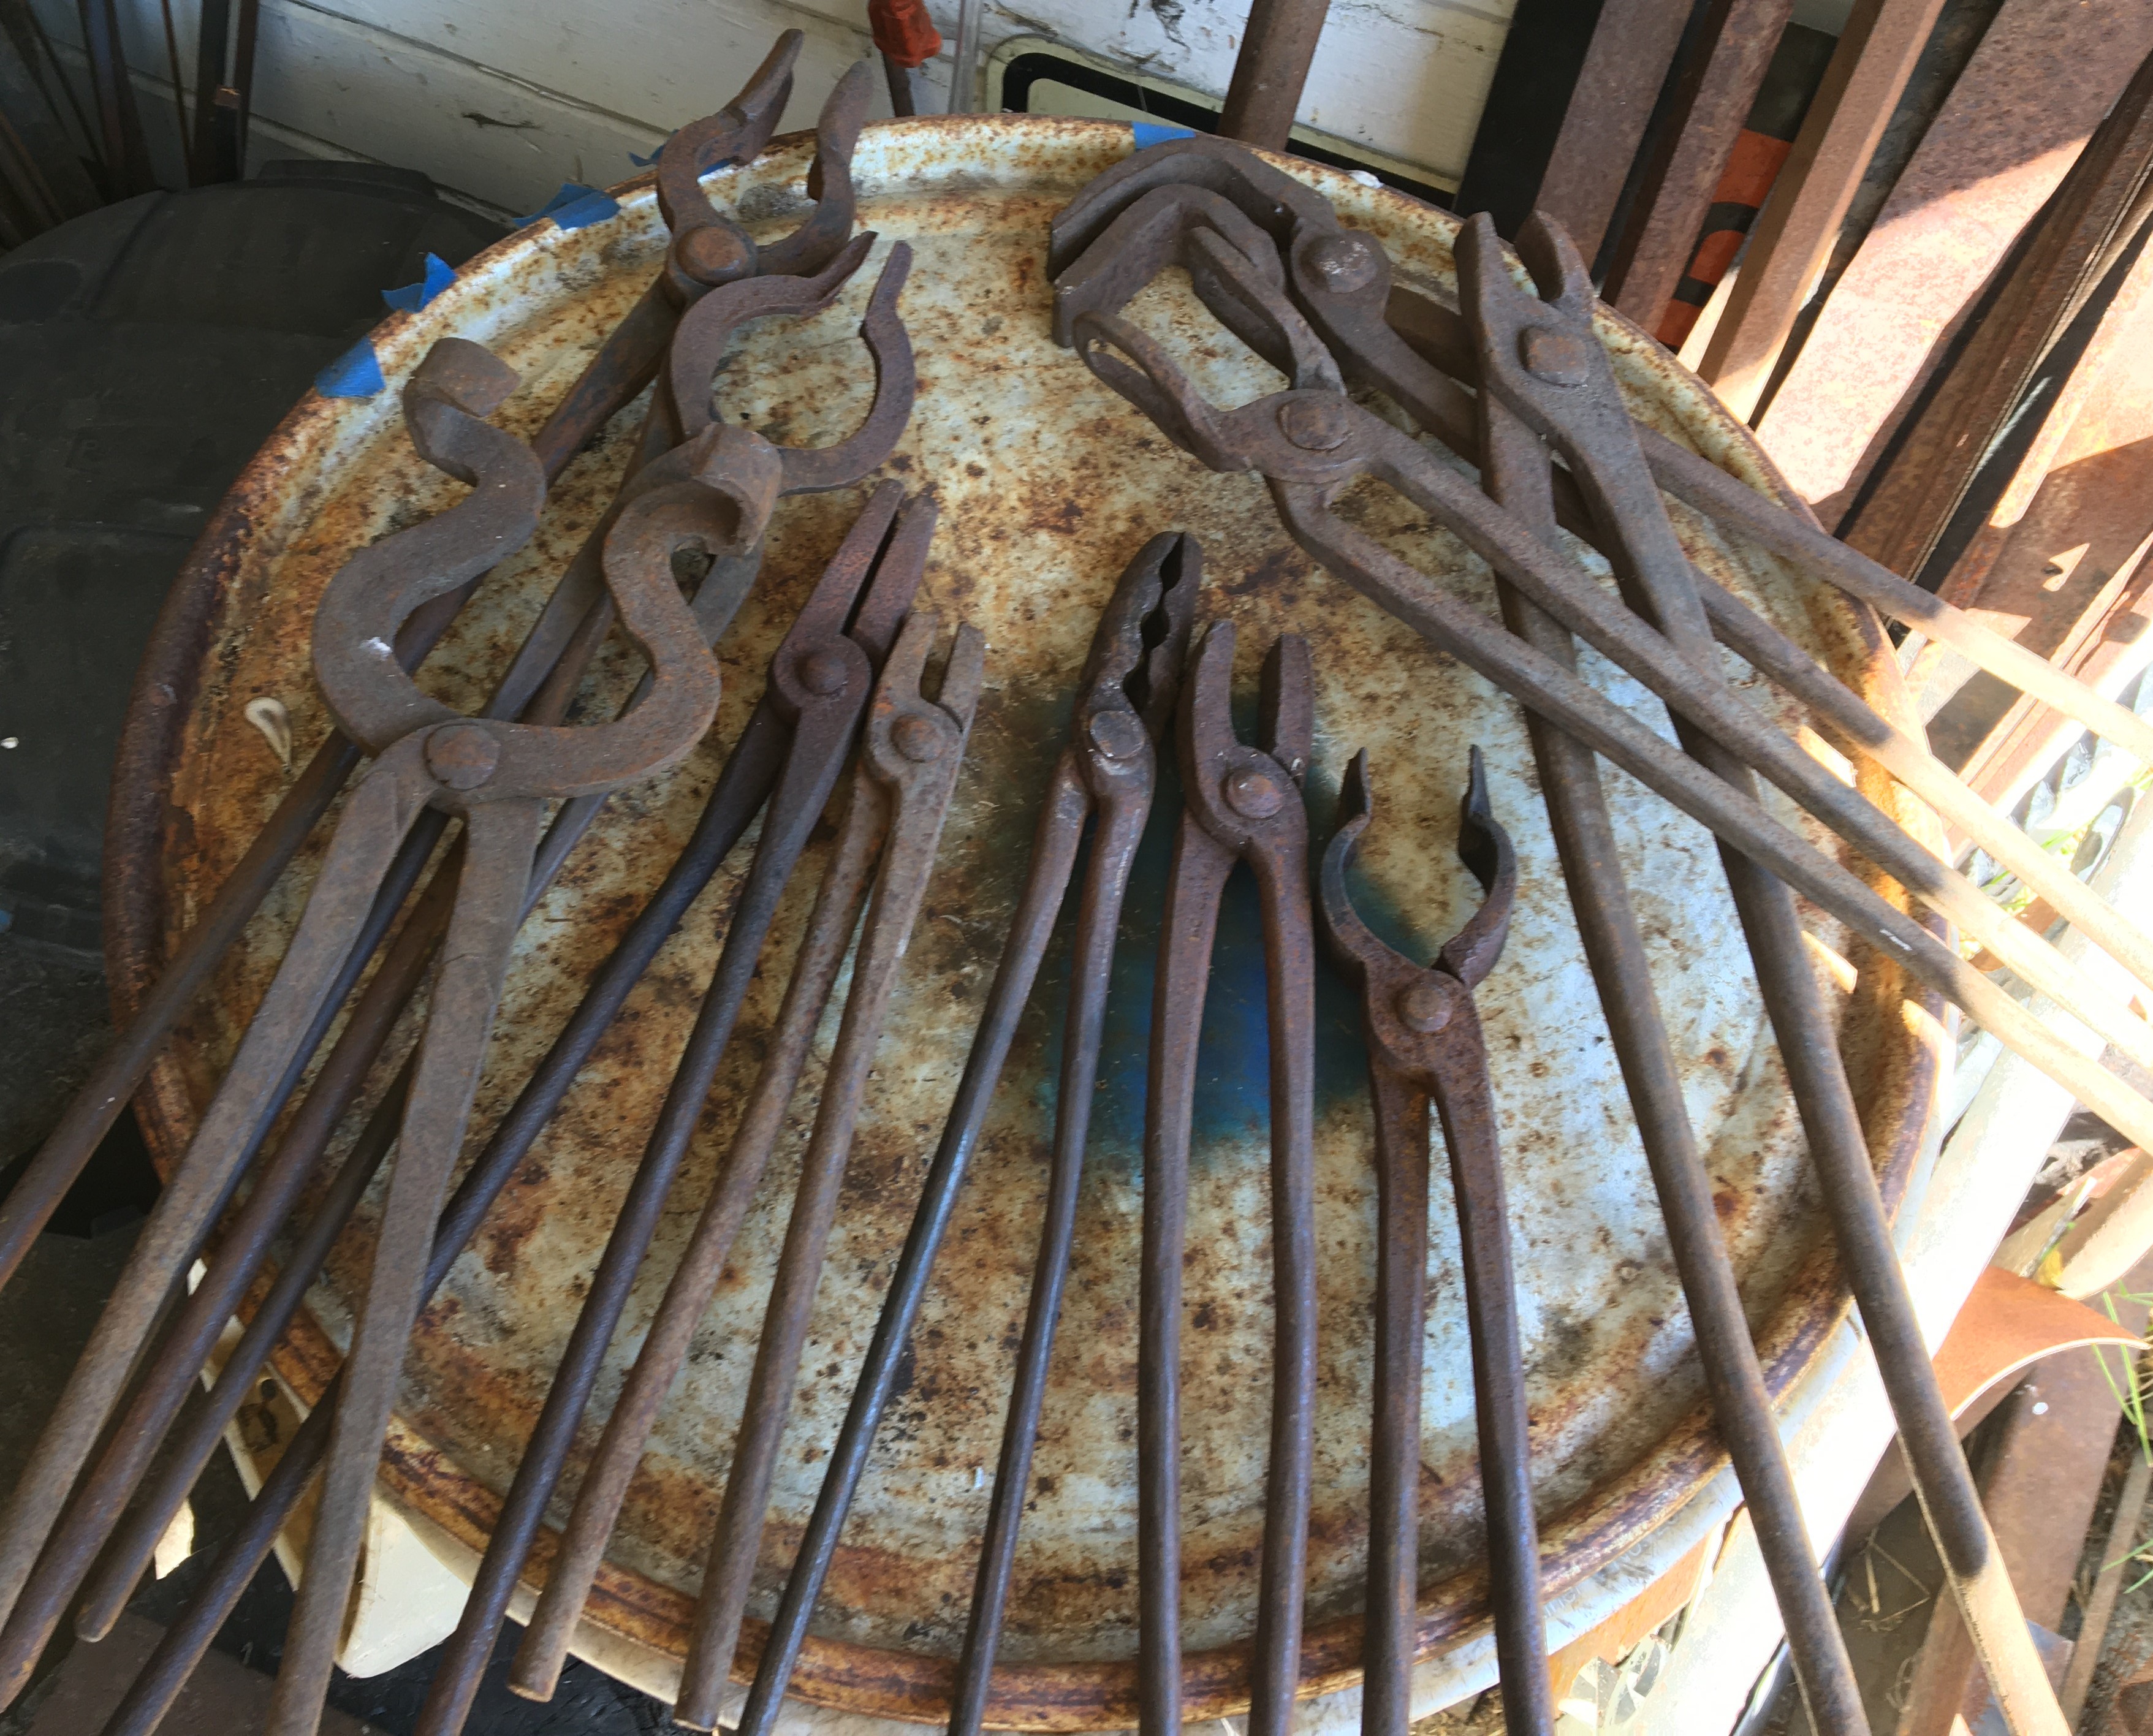
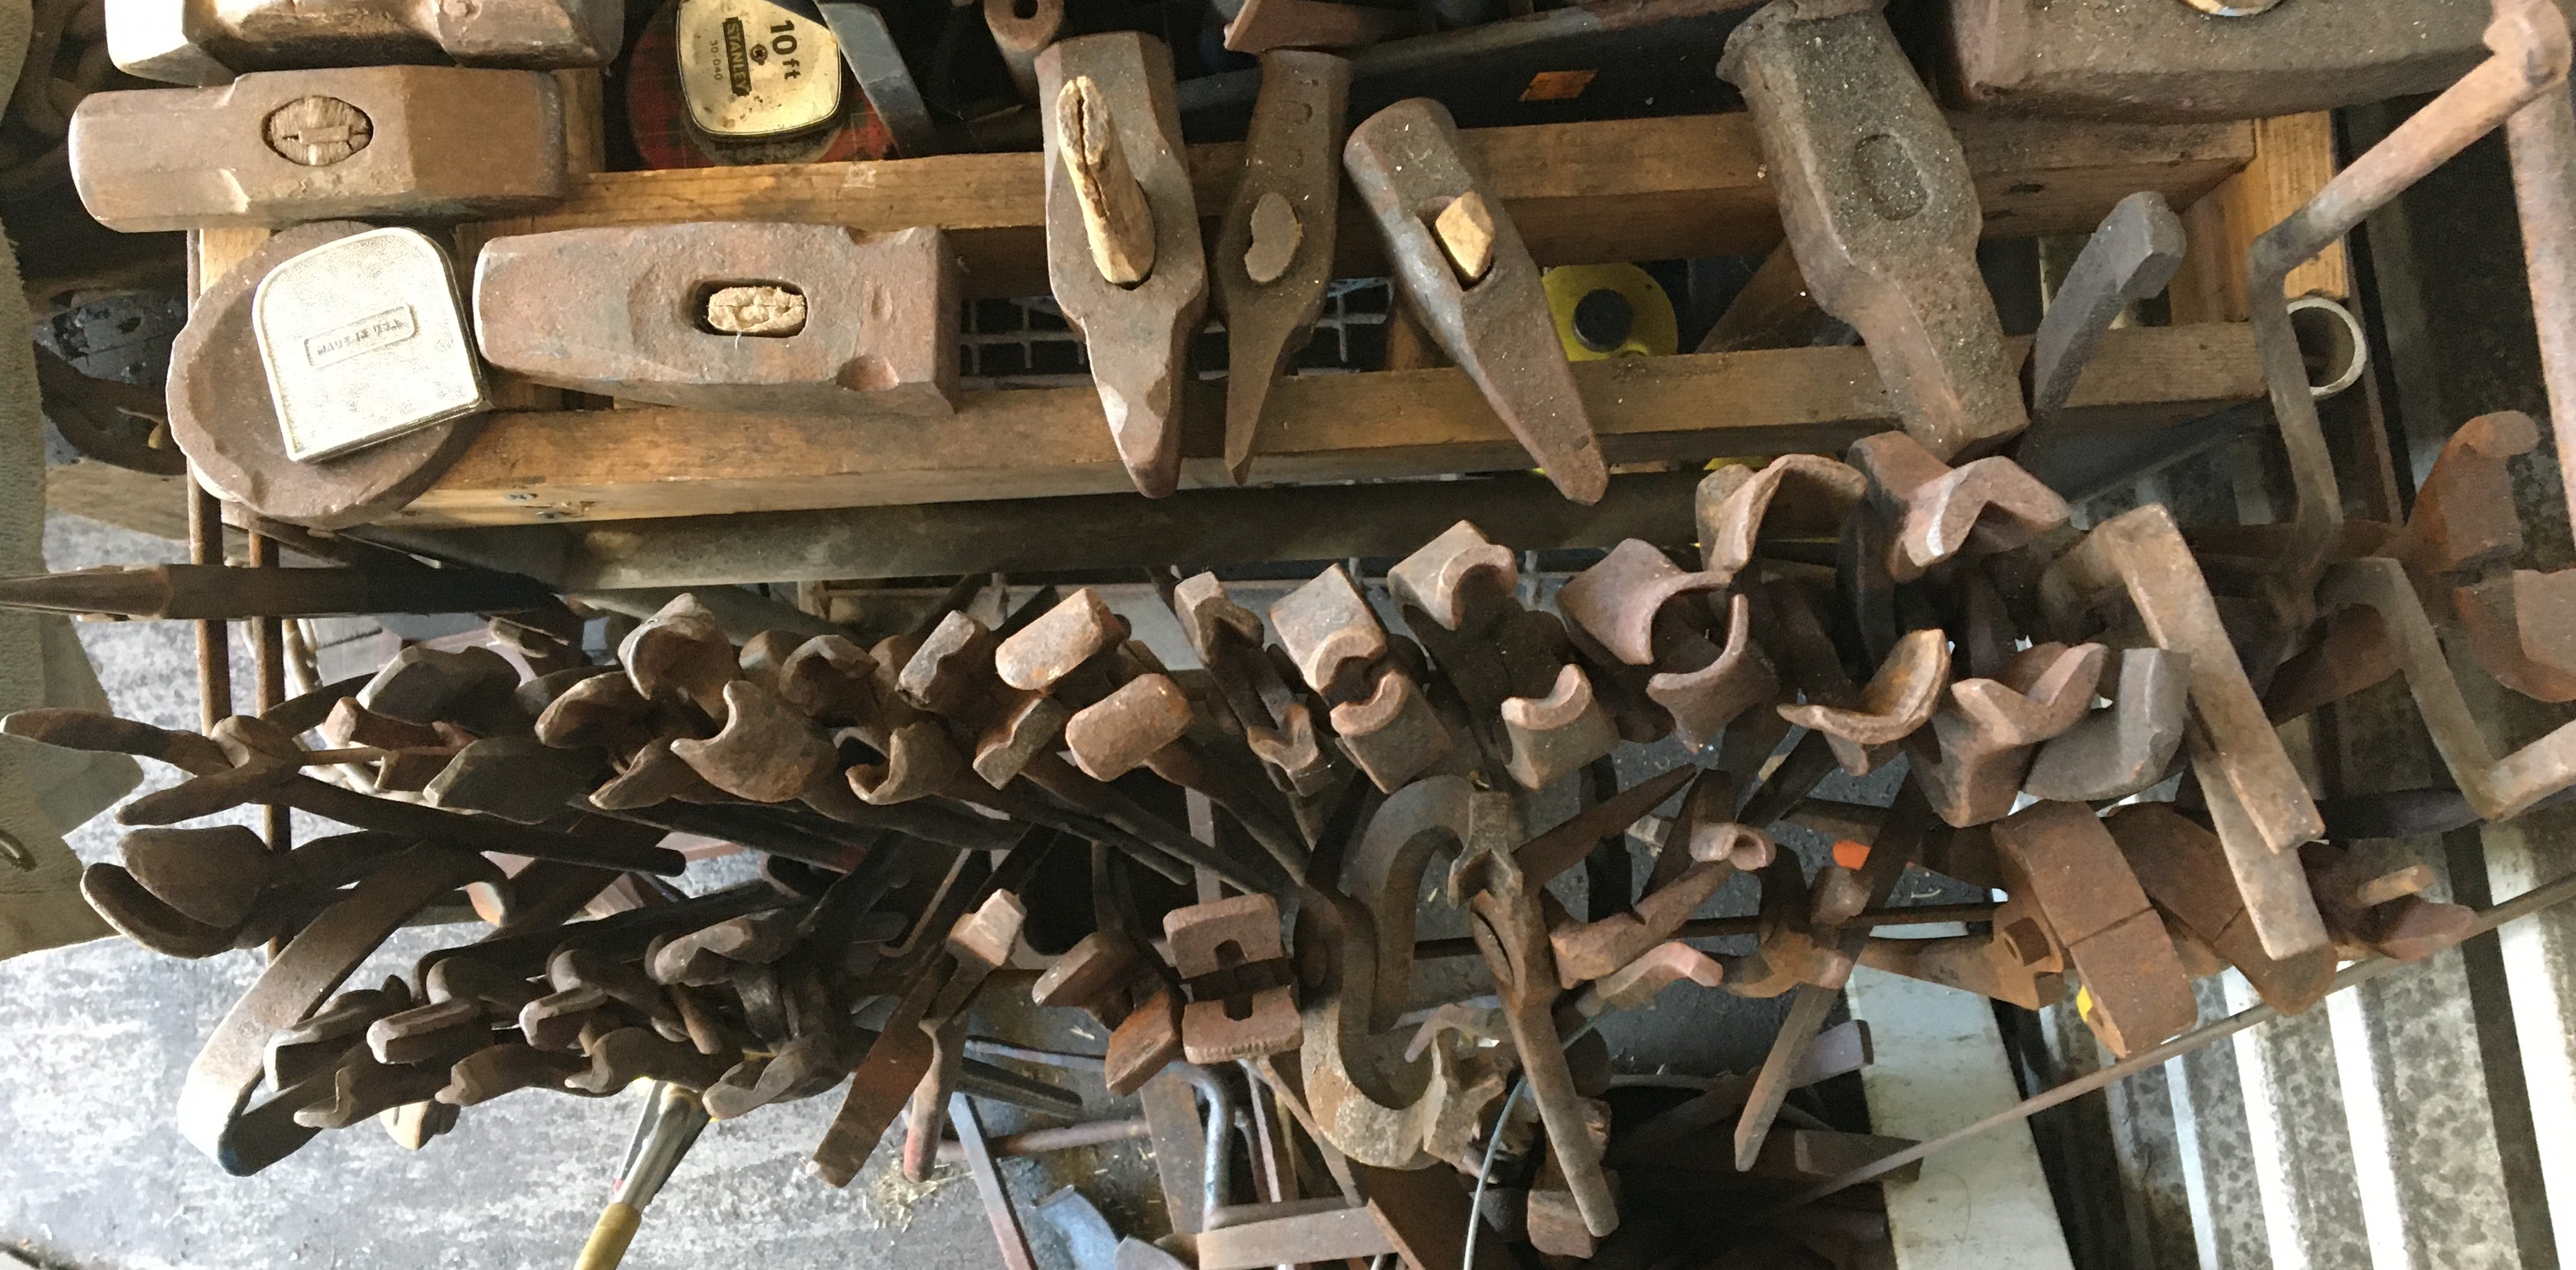
Went through all the tongs on the rack (and the pile under the rack) and sorted out almost a dozen to be gifted to a good friend who opened their blacksmith shop about 6 months ago. A lot of those were bigger than what I normally used day to day, but she's doing gates, railing and running a 25 ton press with just a couple small pair of bolt tongs

The gifted pile, most from an estate sale 3+ years ago, $5/pair (couldn't just leave them there!)

Top down view of the now roomy tong rack, 30 sets or so should be plenty!
-
 there's an Italian paper model artist (Paperpino) who has devised plans for a sand powered paper model of Da Vinci's hammer. A free download though it is a rather involved paper model. He has a handcranked version as well. This model would last all of about 10 seconds in a a shop setting, being cardstock and all. Considering a hard material version at some still toy sized scale.
No affilliation etc. I've built a half dozen of the paper models from the free .pdf downloads.
-
I have one of these little HF 110 Flux Core welders and I love it! As long as the washing machine isn't running, the breaker doesn't trip and I've yet to run up against the duty cycle yet (which is more about my stop and start welding than the welder!) Great for small jigs and fixtures that I'd previously bolted together. Buy an extra 1 pound spool of wire and plan on burning thru a whole roll to get the hang of these little guys.
I've stuck 1/4 inch plate together with it. Took a couple of passes, grinding the welds between and the flux core is almost as messy as stick welding, a can of anti spatter is your friend.
The best part is not having to stop a project, gather everything up and get to a "real" welder
-
On 3/4/2020 at 9:31 AM, james austin said:
That is an awesome grinder Michael! Is the chain return just a bungee cord?
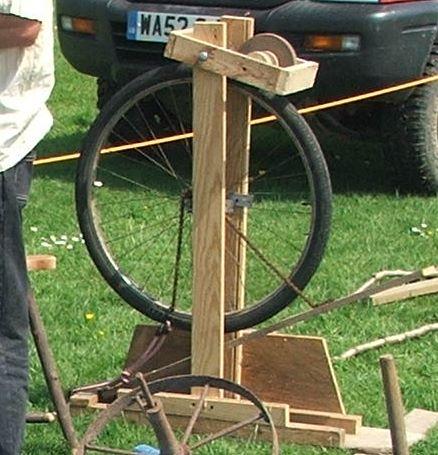
I think so, and a freewheel sprocket from a bike so it only engages the gear on a downstroke. I think hardest part would be a arbor the grinding wheel rides on and the tire presses against. Again, I never got around to building this, the scrounging gene in an urban area meant powered grinders found me before this got built.
-
It seems you have some definite ideas about the treadle grinder you're planning on building. I had also toyed with the idea of casting a concrete/square holed grinding wheel but never got much past the design phase.
The design attached has been sitting in my 'projects to do' folder for a long while now, but might help a bit in your design process.
-
took a day off yesterday to take the car and the dog and my teeth into their respective maintenance appointments. Got the forge lit about 11 AM, nothing like mid week coal burning in the suburbs (gas forge for weekend forging) .
Made some pass thru joinery tooling, punch and drift from coil spring, bolster from some axle steel, the end of a hammer attempt that went wonky punching the hole. Finished a set of Ken's Iron tongs, took a while to figure out the bends to make them offset tongs.
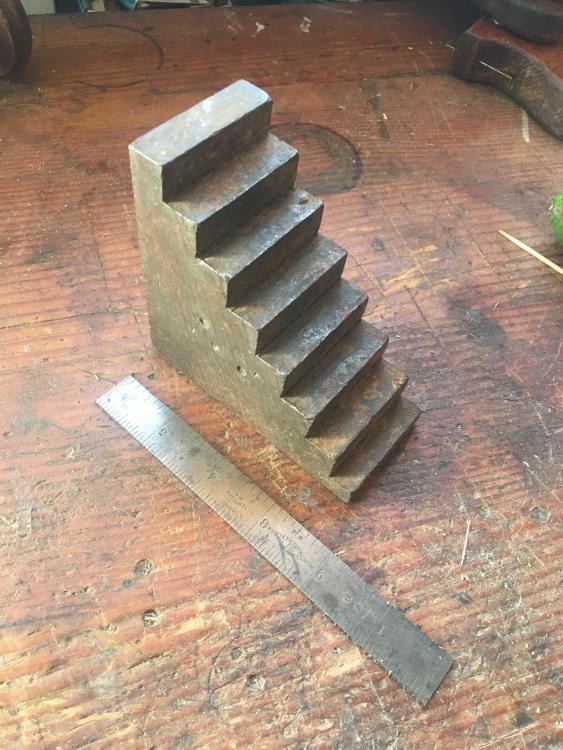
finally hammered out a 150mm Challenge piece, started at 6 inches (150mm) of 3/4 square. 3/4 is about the limit of what I can move wiht just a hand hammer. Happy how it came out.

-
Looks like the last anvil stand you're ever going to have to make! Love the plywood Anvil mockup!
-
Being in often tinder dry California, I have hardware cloth screens screwed in to both the top and bottom of my forge chimney.
Not that the coal/coke fire produces a lot of sparks, but you can never be too safe and the effort was not a big deal.
I have neighbors on 4 sides, and there are times in the fall when I'll when hose down the grass in the yard, before firing up the forge. It doesn't take much smoke to bring the fire department nowadays.
A friend up north in the grass lands would fan exhaust his forge hood horizontally onto a section of the yard with a sprinkler going on it.
-
I have to agree. There's not much of a need for refractory in a solid fuel forge. When forging with charcoal (before figuring out my neighbors don't care AND i've got the wind on my side) I'd sometimes put a plate of 1/4 inch steel over the forge to try and reflect heat back to get to a welding heat, but that reflection just heated the charcoal into ash before I could get the heat needed for a forge weld. Piling up a huge pile of charcoal was the solution. Now with coke/coal, welding heats are easy, burning heats are even easier!
-
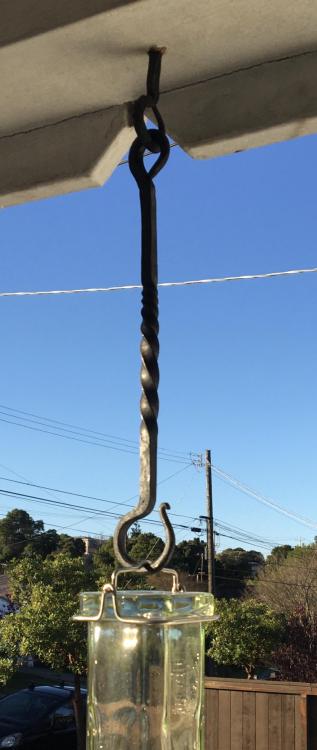
5 hours ago, CtG said:
Michael, wouldn't want them big birds to break the hanger! Beefy, looks nice too!
thank you! the lovely wife made a similar comment, which I take as a hint to remake the thing in 1/4 stock like the other feeders have.. Honestly, I started with the first ungalvanized lag bolt in the pile and was striving for a particular length specified by said lovely wife and didn't pay much attention to the starting stock.
-
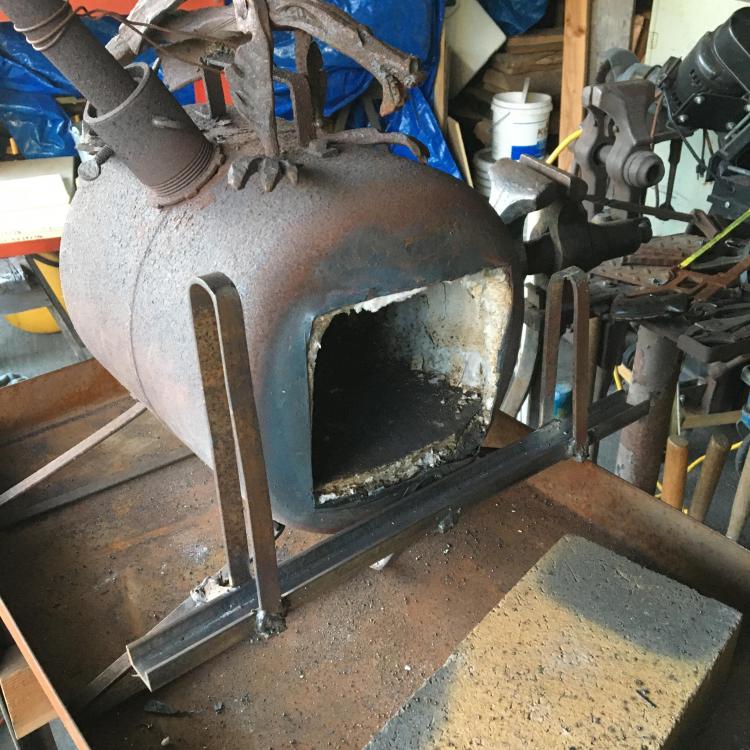
Last week I welded up some channel and bar stock as a forge door frame. Got a deal on some kiln shelving to replace the disintegrating firebricks. The lever action handle concept closes well, and opens well enough to get tongs in there. Next gasser I’ll weld channel directly to the forge shell. This forge is 8 years old and cleaning off the rust might not leave enough metal to weld to!
forged out some blanks for flower hooks, and made a new hanger for one of the hummingbird feeders.

-
Nice Get!! I'd stand it on end and box that end up in wood. You would not need much of a stump to bring the whole thing up to a nice working height.
-
I'm set up in a residential neighborhood and when lighting up a coal fire, I try to keep a good bright flame burning to keep the green/yellow smoke at bay. Not much heating of metal going on at first, but a good 10 or 15 minutes managing the fire, opening the top to keep a tall, wide flame going and eat up all the coal smoke goes a long way towards keeping the fire department at bay.
Once a nice double handful of coal has coked down to be reasonably smoke free, I can pile green coal around the perimeter of the fire, wet it down and if the smoke gets to be a problem, open the top of the fire again to burn it off.
At least in my neighborhood, a plume of smoke will get the neighbor s to call the fire department.
This is exactly why I buy a bag of coke whenever I'm at a blacksmith event or hammer in.
-
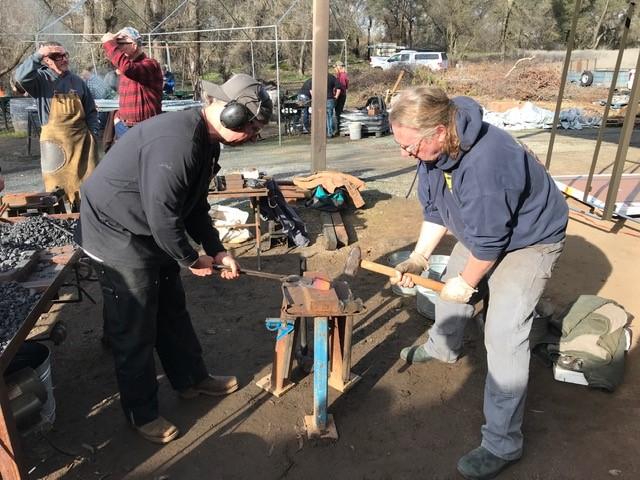
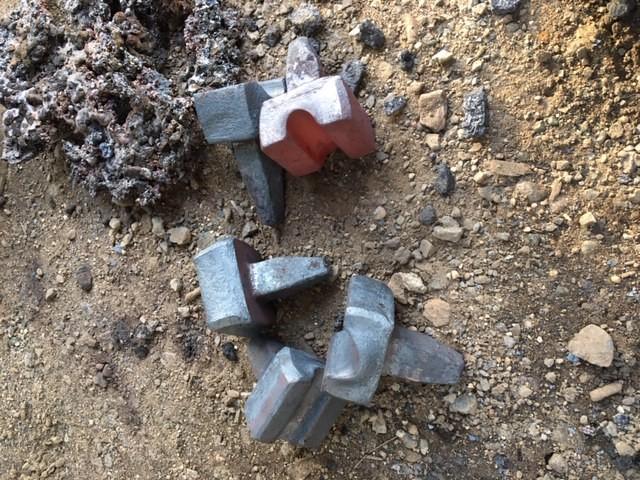
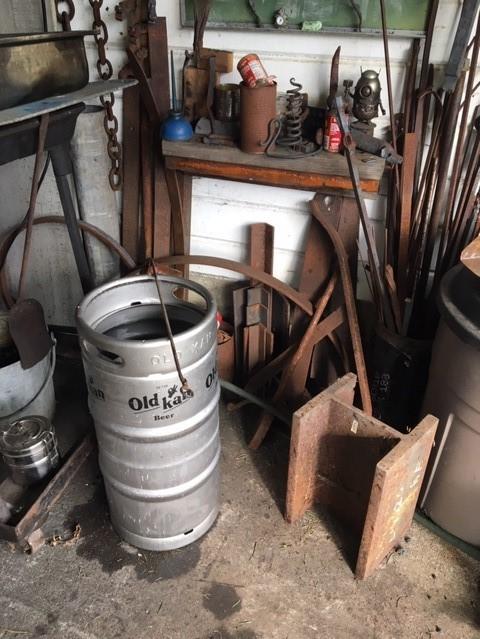
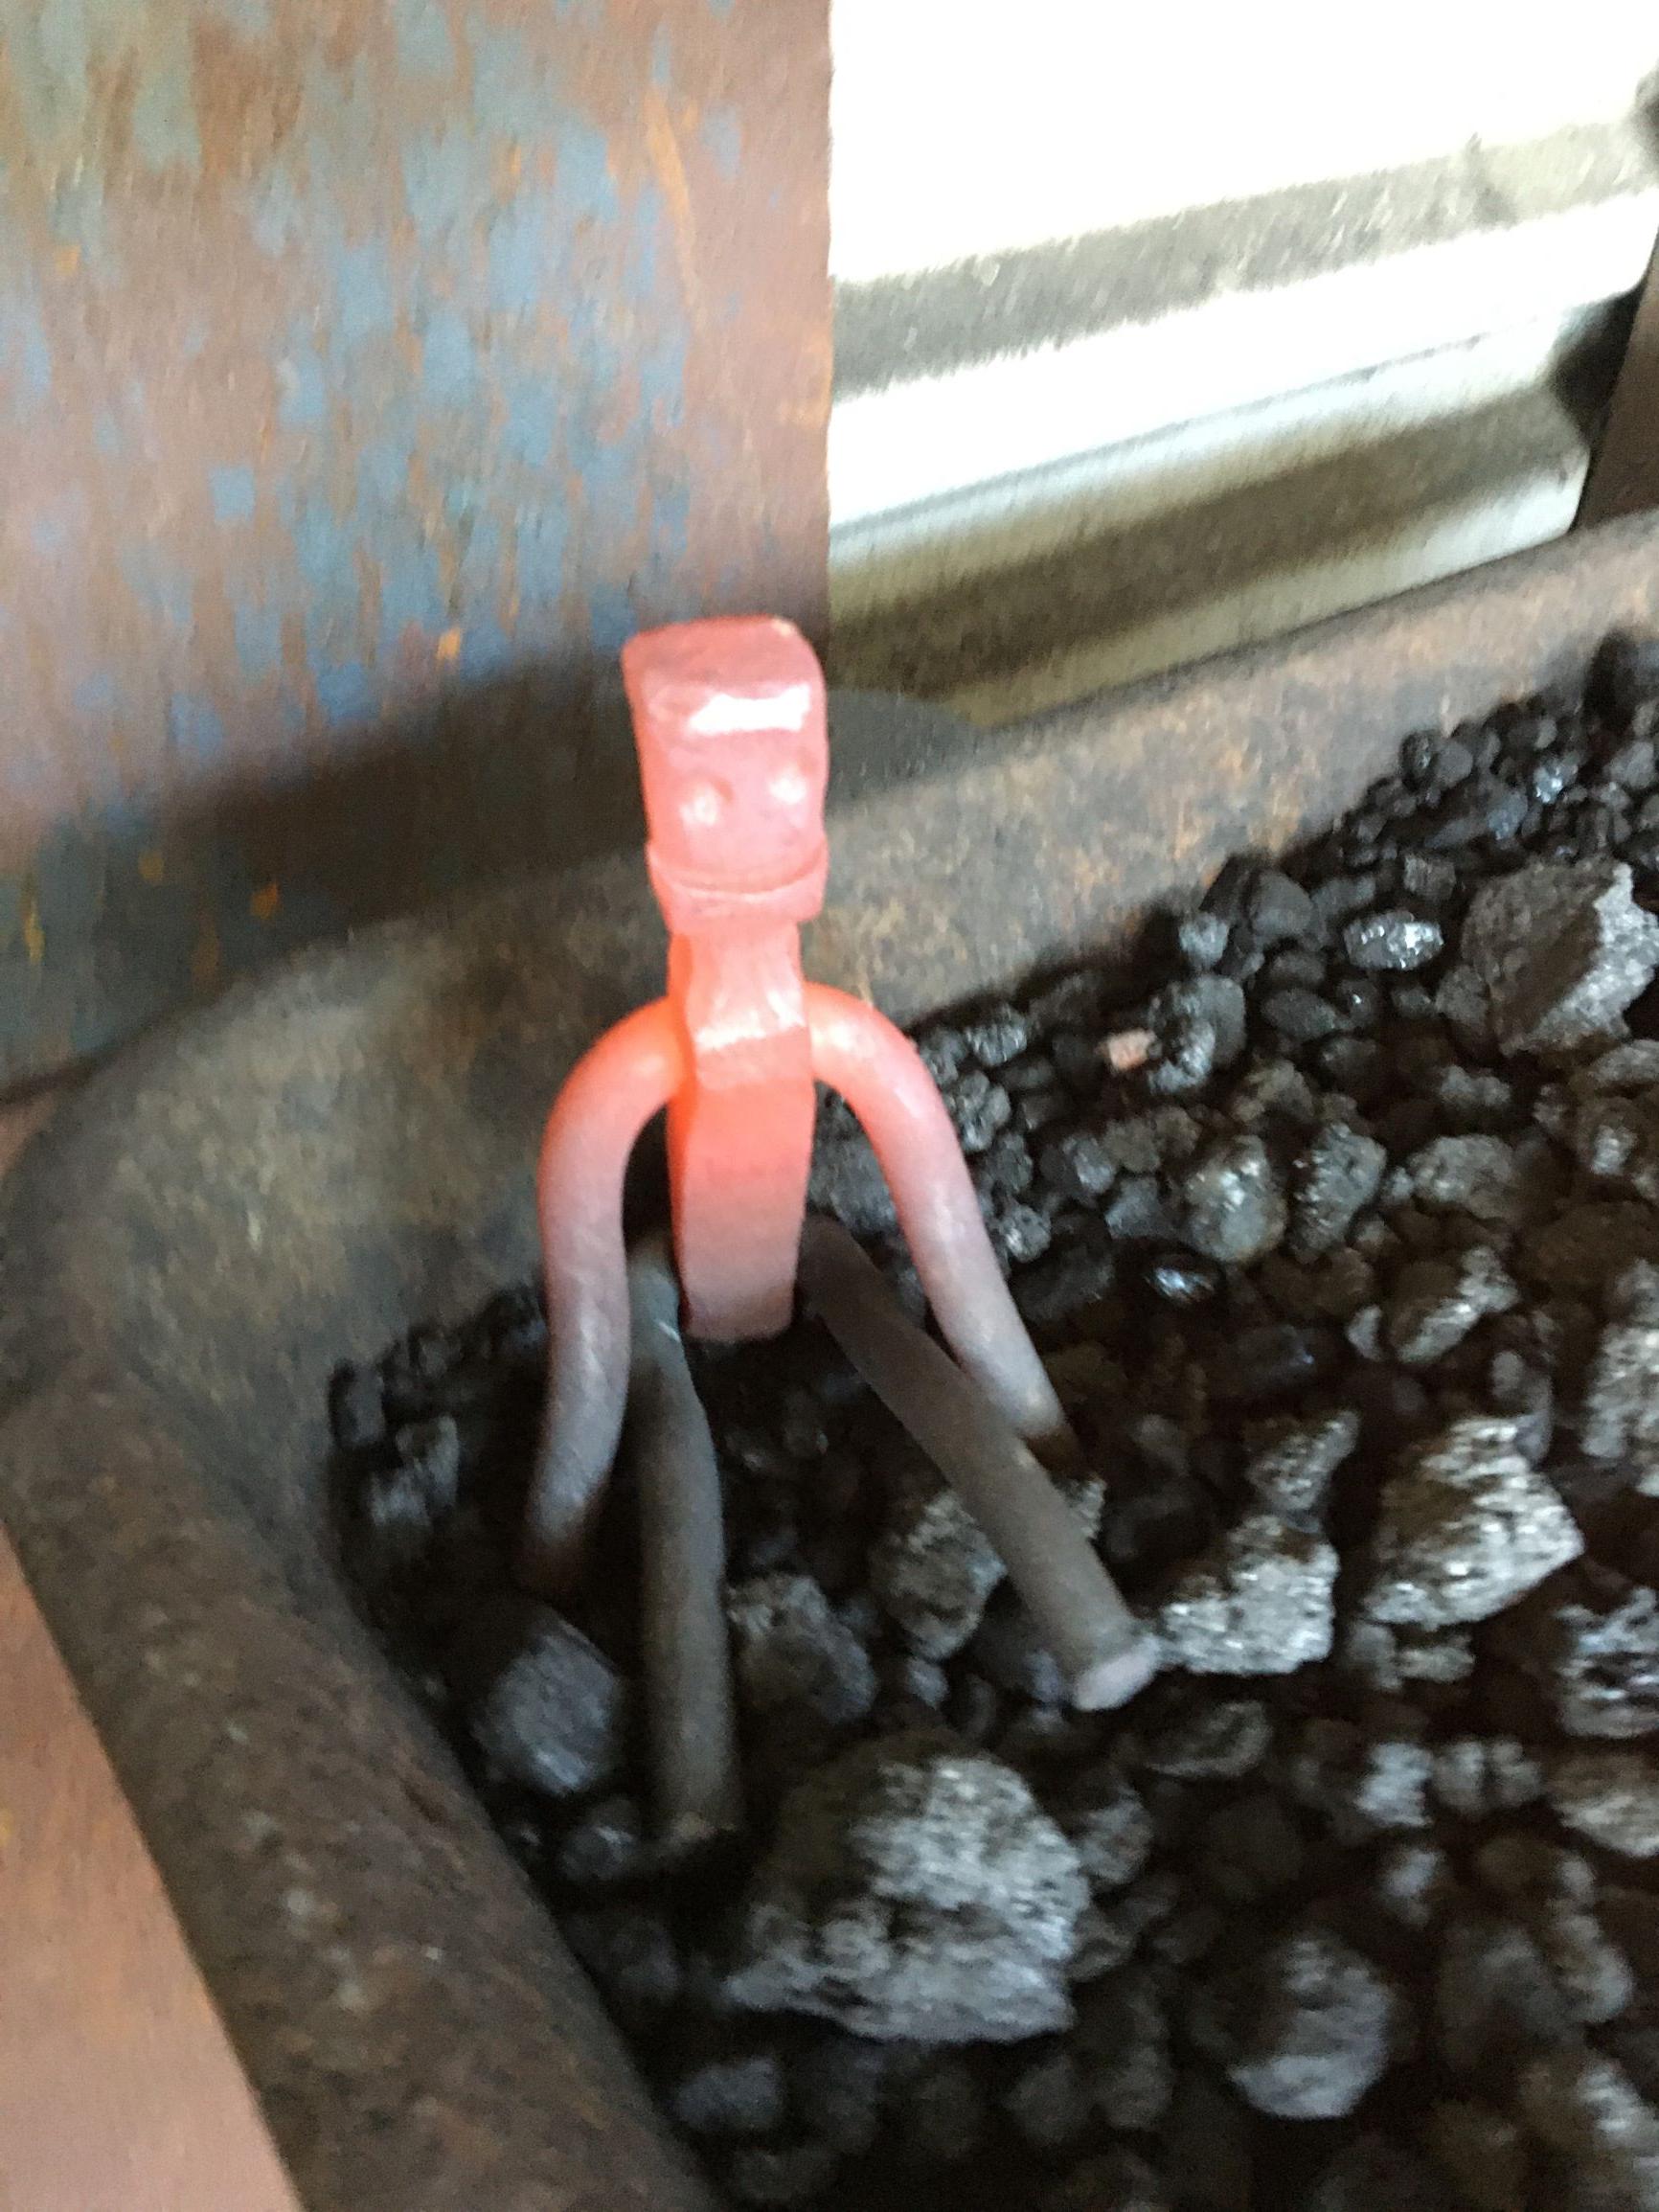
Workshop about 90 minutes away on Saturday to make tools for the CBA Education trailer. Got to strike and direct making bottom swage, and break in a nice old 8 pound sledge, recently found and re handled.. Then on Sunday the local scrap place had beer kegs again! After burning a hole in the bottom of the quench bucket, I've been looking for a small keg to use. A pleasant hour with an angle grinder cut the top off. Local brewery that I have to try, they have a red ale that looks promising.


What did you do in the shop today?
in Blacksmithing, General Discussion
Posted
As long as you don't lose too many arguments, I think you're good.
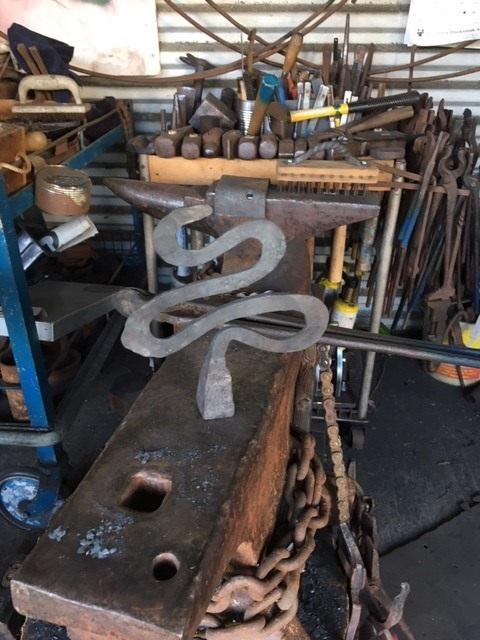
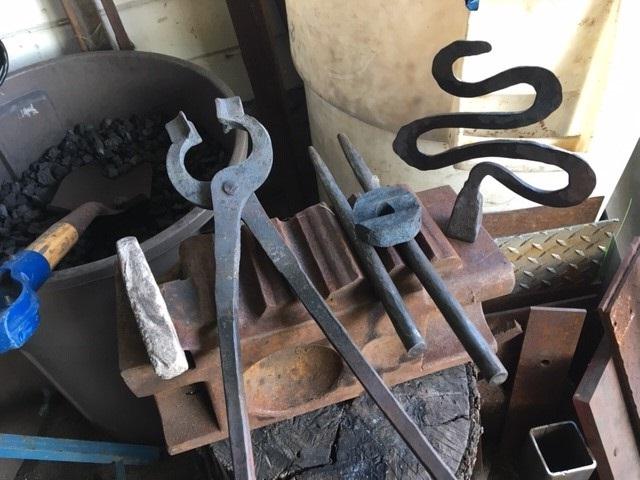
Chimaera-he does look a lot like Kerbal Space creatures, Bug eyes would be great, hard to do by punching, maybe rivets? Been trying to figure out a forged Dalek (nerd alert) and those have a lot of 'frighteningly convex' shapes.