Orangejoe Posted April 12, 2019 Share Posted April 12, 2019 I built this coffee can forge almost a year ago. It's shortcomings along with the council of folks more experienced had driven me to try my hand at an improvement. I do not have access to a welder, so I had to get a bit creative. The housing was a piece of lawn art at a flea market, the legs are a old steel rack that I bent. The legs are chained together under tension to add rigidity. Thin steel cable secures the tank to the legs, was pulled taught, and then a steel bar was heated, bent and driven in under the cable. I plan on adding two 1" layers of wool, buttering and rigidizing as I go. Around 1/2" of kastolite 30, and a coat of plistex. Thank.you all for the help, will post after completion, God willing. Quote Link to comment Share on other sites More sharing options...
Frosty Posted April 12, 2019 Share Posted April 12, 2019 I like it Joe. That is one blacksmitherly forge build! I'm looking forward to seeing it in action. Frosty The Lucky. Quote Link to comment Share on other sites More sharing options...
Mikey98118 Posted April 12, 2019 Share Posted April 12, 2019 It looks like a good beginning to me. Quote Link to comment Share on other sites More sharing options...
Orangejoe Posted April 12, 2019 Author Share Posted April 12, 2019 I appreciate it! One thing- what specifically is the steel fitting called that it fitted into the hole cut for the burner? I speak not of the pipe the burner is secured into, but the.... gasket? Nipple? Nozzle collar? Edit- seems it's called a flange mount. Quote Link to comment Share on other sites More sharing options...
Frosty Posted April 12, 2019 Share Posted April 12, 2019 That's still kind of open but a floor flange is an off the shelf fitting intended to connect pipe to a floor for railings. Nipple is another off the shelf plumbing item, shorter lengths of pipe threaded on both ends. Gaskets are something else entirely so nope on that term. I think sleeve or collar is close enough to serve till something more definite comes up. A lot of sleeve thingies are made with a nipple and floor flange though, just to make things more . . . interesting? Frosty The Lucky. Quote Link to comment Share on other sites More sharing options...
Mikey98118 Posted April 12, 2019 Share Posted April 12, 2019 You wouldn't be referring to Larry Zoellers's locking rings that he discuses on his forge pages, would you? Quote Link to comment Share on other sites More sharing options...
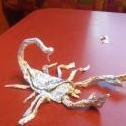
Orangejoe Posted April 15, 2019 Author Share Posted April 15, 2019 On 4/12/2019 at 1:18 PM, Mikey98118 said: You wouldn't be referring to Larry Zoellers's locking rings that he discuses on his forge pages, would you? I was not, although I do thank you for introducing me to his idea. I had never considered it. Decided to give my coffee can a good death, and to try my soft hand at a ball pein. Quote Link to comment Share on other sites More sharing options...
Orangejoe Posted June 21, 2019 Author Share Posted June 21, 2019 Got sidetracked for a while, few developments. The old setup lacked rigidity I prefer, so I came up with this odd thing. 4 rail spikes firmly driven form a base for the tank, I used a bubble level to ensure the heads ended up parallel to the floor. Large spring I found in the trash is fastened on one and and hooked on the other, provides a surprising amount of downward pressure. I was going to initially use a cylindrical design for the chamber, but upon doing some math, 5 inches at 12 long was too much volume for my needs. I used some leftover ceramic wool along the floor for a sort of oval shape. Still need to rigidize, apply a kastolite flame face/ plistix and I would like something to allow me to close it up if need be, thinking of bending some round to support a section of kiln shelf. Any suggestions or comments are appreciated, I'm still a ways from knowing what im doing. Quote Link to comment Share on other sites More sharing options...
Mikey98118 Posted June 21, 2019 Share Posted June 21, 2019 I think it is maybe a little bit better than a standard oval shape Quote Link to comment Share on other sites More sharing options...
Orangejoe Posted June 22, 2019 Author Share Posted June 22, 2019 Mikey, I appreciate it. Brief sidebar- Is your book online or print only? Finally going through forges 101 and saw mention. I'm going to rigidize tomorrow, God willing. Do you have a reccommendation as far as makeshift door material? Was going to go with hard firebrick, but am wondering if kiln shelf would have better insulating properties. Quote Link to comment Share on other sites More sharing options...
Mikey98118 Posted June 22, 2019 Share Posted June 22, 2019 Sorry, but it is out of print. There are pirated copies online, and it can still be found in some locale libraries. Old copies of Burners for Forges, Furnaces, & Kilns are sold for way too much money on Amazon.com. On the other hand, once read the cost can be recouped the same way, since their prices keep going up... Quote Link to comment Share on other sites More sharing options...
Orangejoe Posted October 9, 2019 Author Share Posted October 9, 2019 (edited) It has been a while, but l have a working forge. I understand the red brick can spall, so I heated very slowly to force any water out and watched from behind a face shield. The rounded stones are for fire rings I believe. All of these are heatsinks that will need be replaced with kiln shelf asap, I got impatient. Seems to get up to a nice lemon in about 10 min at 7 psi I estimate. 3/4 inch t burner, 1/4 inch kastolite 30 hotface, would like to add a wash of metrikote at some point. Thank you to everyone for their council and wisdom, and a special thanks to Wayne Coe. Materials would have been a bear without him. Edited October 9, 2019 by Orangejoe Pics Quote Link to comment Share on other sites More sharing options...
pnut Posted October 9, 2019 Share Posted October 9, 2019 1 hour ago, Orangejoe said: I understand the red brick can spall, so I heated very slowly to force any water out You can bake the water out in an oven also. Lowest setting for a few hours. Pnut Quote Link to comment Share on other sites More sharing options...
Mikey98118 Posted October 10, 2019 Share Posted October 10, 2019 The forge is obviously getting plenty hot enough Quote Link to comment Share on other sites More sharing options...
pnut Posted October 10, 2019 Share Posted October 10, 2019 17 hours ago, Orangejoe said: . The rounded stones are for fire rings I believe. All of these are heatsinks that will need be replaced with kiln shelf asap, I got impatient. Those are cement edging pavers for flower and mulch beds and the like. They are definitely a heat sink. Hard firebrick is a heat sink also but you're less likely to have them fall apart or crack. If there's a TSC near you you can get a couple hard firebrick for about six or seven dollars. The bricks with the holes look fine. I would change the cement ones though. Kiln shelving will work better than firebrick but you probably can't get it as easily. Pnut Quote Link to comment Share on other sites More sharing options...
Buzzkill Posted October 11, 2019 Share Posted October 11, 2019 Just curious here. In the last picture we can see the reflection of the hot bar in the slack tub. To your eye was the true color of the steel closer to the glowing bar in the foreground or the reflection in the background? If it's the reflection I'm thinking this might be a better way for us to show others what we are really seeing when it comes to hot steel. Quote Link to comment Share on other sites More sharing options...
Recommended Posts
Join the conversation
You can post now and register later. If you have an account, sign in now to post with your account.