October 15, 20169 yr Author Hi, I have put my anvil together and thought I would show you guys what it looks like. Any feedback is greatly appreciated. Thanks,
October 15, 20169 yr Looks pretty good. Are you planning to grind fullers and a cutoff onto the top edges of the web and the foot? Can you give us a low-angle shot, so we can see below the table surface? Does the bottom end of the RR track rest on the top of the I-beam, or is there a layer of wood in between?
October 15, 20169 yr I can't quite tell, but it looks like the head of the rail is positioned over the intersection between the web and the plate of the I-beam. That's good: it puts more support right under the hammer blows. Also, you might want to round off the corners of the table or turn it into an octagon. Those square corners could give you some nasty thigh bruises.
October 15, 20169 yr 2 hours ago, JHCC said: Looks pretty good. Are you planning to grind fullers and a cutoff onto the top edges of the web and the foot? Can you give us a low-angle shot, so we can see below the table surface? Does the bottom end of the RR track rest on the top of the I-beam, or is there a layer of wood in between? Great idea JHCC. I'd seriously round off a part of the middle section to act as a bottom fuller for drawing out. I think I'm going to go looking for a chunk of RR track like this just for the utility of it! It would be a fun project to make a hybrid swage.
October 15, 20169 yr Author It is positioned so my main working area since right over the intersection. There is a layer of wood between the metal, it is an old hardwood chopping board my friend was throwing away. I will look into rounding it off however because of its previous use it doesn't actually have a sharp edges on it. I will try to get some more pics however just as I finished the rain started so I had to move it into the shed. The design of it is so I can easily break into two parts and move it without any problems. I like the idea of cutting into the middle section for a fuller.
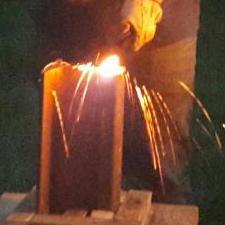
October 16, 20169 yr Author I have had my first go with my new forge and anvil. They both worked really well. Thank you for all the advice I am definitely hooked now.
October 16, 20169 yr real handy to make a section of the bottom flange of the rail into a hot cut. The proof of the pudding is in the eating; may you have a lot of dry weather to forge in this fall!
October 18, 20169 yr On 10/16/2016 at 6:29 PM, ThomasPowers said: The proof of the pudding is in the eating And the proof of the anvil is in the beating!
Join the conversation
You can post now and register later. If you have an account, sign in now to post with your account.