HWHII Posted February 6, 2014 Share Posted February 6, 2014 I make a lot of open center crosses. This is my set up for making the blanks. I make them in 1/2, 5/8, 3/4, 1 inch solid square stock. This set up works for all sizes. Quote Link to comment Share on other sites More sharing options...
Frosty Posted February 6, 2014 Share Posted February 6, 2014 The only thing different in my "setup" is the lack of the feed screw and I've been planning on one but . . . Frosty The Lucky. Quote Link to comment Share on other sites More sharing options...
John B Posted February 7, 2014 Share Posted February 7, 2014 The only thing different in my "setup" is the lack of the feed screw and I've been planning on one but . . . Frosty The Lucky. I don't think you need a feedscrew Frosty, its a length stop isn't it? Block and clamp work just as well for varied material lengths, or even a chalk, pencil or sharpy mark will do, or go posh and have a calibrated back plate. Quote Link to comment Share on other sites More sharing options...
Eddie Mullins Posted February 7, 2014 Share Posted February 7, 2014 I understand the puropse (I think) but can you explain how ou set it up for different stock sizes? Are you just measure from the saw blade out ro where you want the guides clamped and the squaring them up somehow? I have a small porta band that I mounted and built a small table for, I'd like to build a larger table for it so I can use guides, squaring things up and splitting stock is by eye and chalk line now. Quote Link to comment Share on other sites More sharing options...
HWHII Posted February 7, 2014 Author Share Posted February 7, 2014 John it is a feed screw. When I set up to do these I cut a 100 or more at a time. Eddie, I have a master blank for each size. The jig to the left of the saw blade is the stop. It is also use by turning 90 degrees to the blade to make the final cut. The master is placed into the bottom of a cut to make a certain length cut then removed. Every cross blank requires 3 cuts a 1" bar requires 8" cut which is the longest. I had used pry bars to push the bars through before. The feed screw allows a little faster feed and a lot less effort. Quote Link to comment Share on other sites More sharing options...
FieryFurnace Posted February 7, 2014 Share Posted February 7, 2014 I am soooo making one of these! :) thanks for sharing! Quote Link to comment Share on other sites More sharing options...
John B Posted February 7, 2014 Share Posted February 7, 2014 John it is a feed screw. When I set up to do these I cut a 100 or more at a time. Eddie, I have a master blank for each size. The jig to the left of the saw blade is the stop. It is also use by turning 90 degrees to the blade to make the final cut. The master is placed into the bottom of a cut to make a certain length cut then removed. Every cross blank requires 3 cuts a 1" bar requires 8" cut which is the longest. I had used pry bars to push the bars through before. The feed screw allows a little faster feed and a lot less effort. Thanks Harold, that makes it a lot clearer, and more sense. I love a good tooling setup, shame I don't get to do them very often now I am retired with no workshop facility Quote Link to comment Share on other sites More sharing options...
Eddie Mullins Posted February 7, 2014 Share Posted February 7, 2014 Thanks! Quote Link to comment Share on other sites More sharing options...
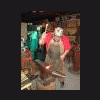
HWHII Posted February 7, 2014 Author Share Posted February 7, 2014 Giving it some more thought, some new people who might need a little more info. So here is a photo of the master blanks. Also a photo of my little bandsaw and stand. I started with this one for 1/2" stock. I still use it for 3/8" and 1/4" which make great pendants and ear rings. As far as size goes, I like the arms and top 1/3 of the overall length to the center of the opening. The opening I try to get it the same as the dimond on the square stock. I could give you the exact size but what fun would that be. Everyone is different you can't make 2 alike. They can be used in so many things. Quote Link to comment Share on other sites More sharing options...
Recommended Posts
Join the conversation
You can post now and register later. If you have an account, sign in now to post with your account.