NicZa
Members
-
Joined
-
Last visited
-
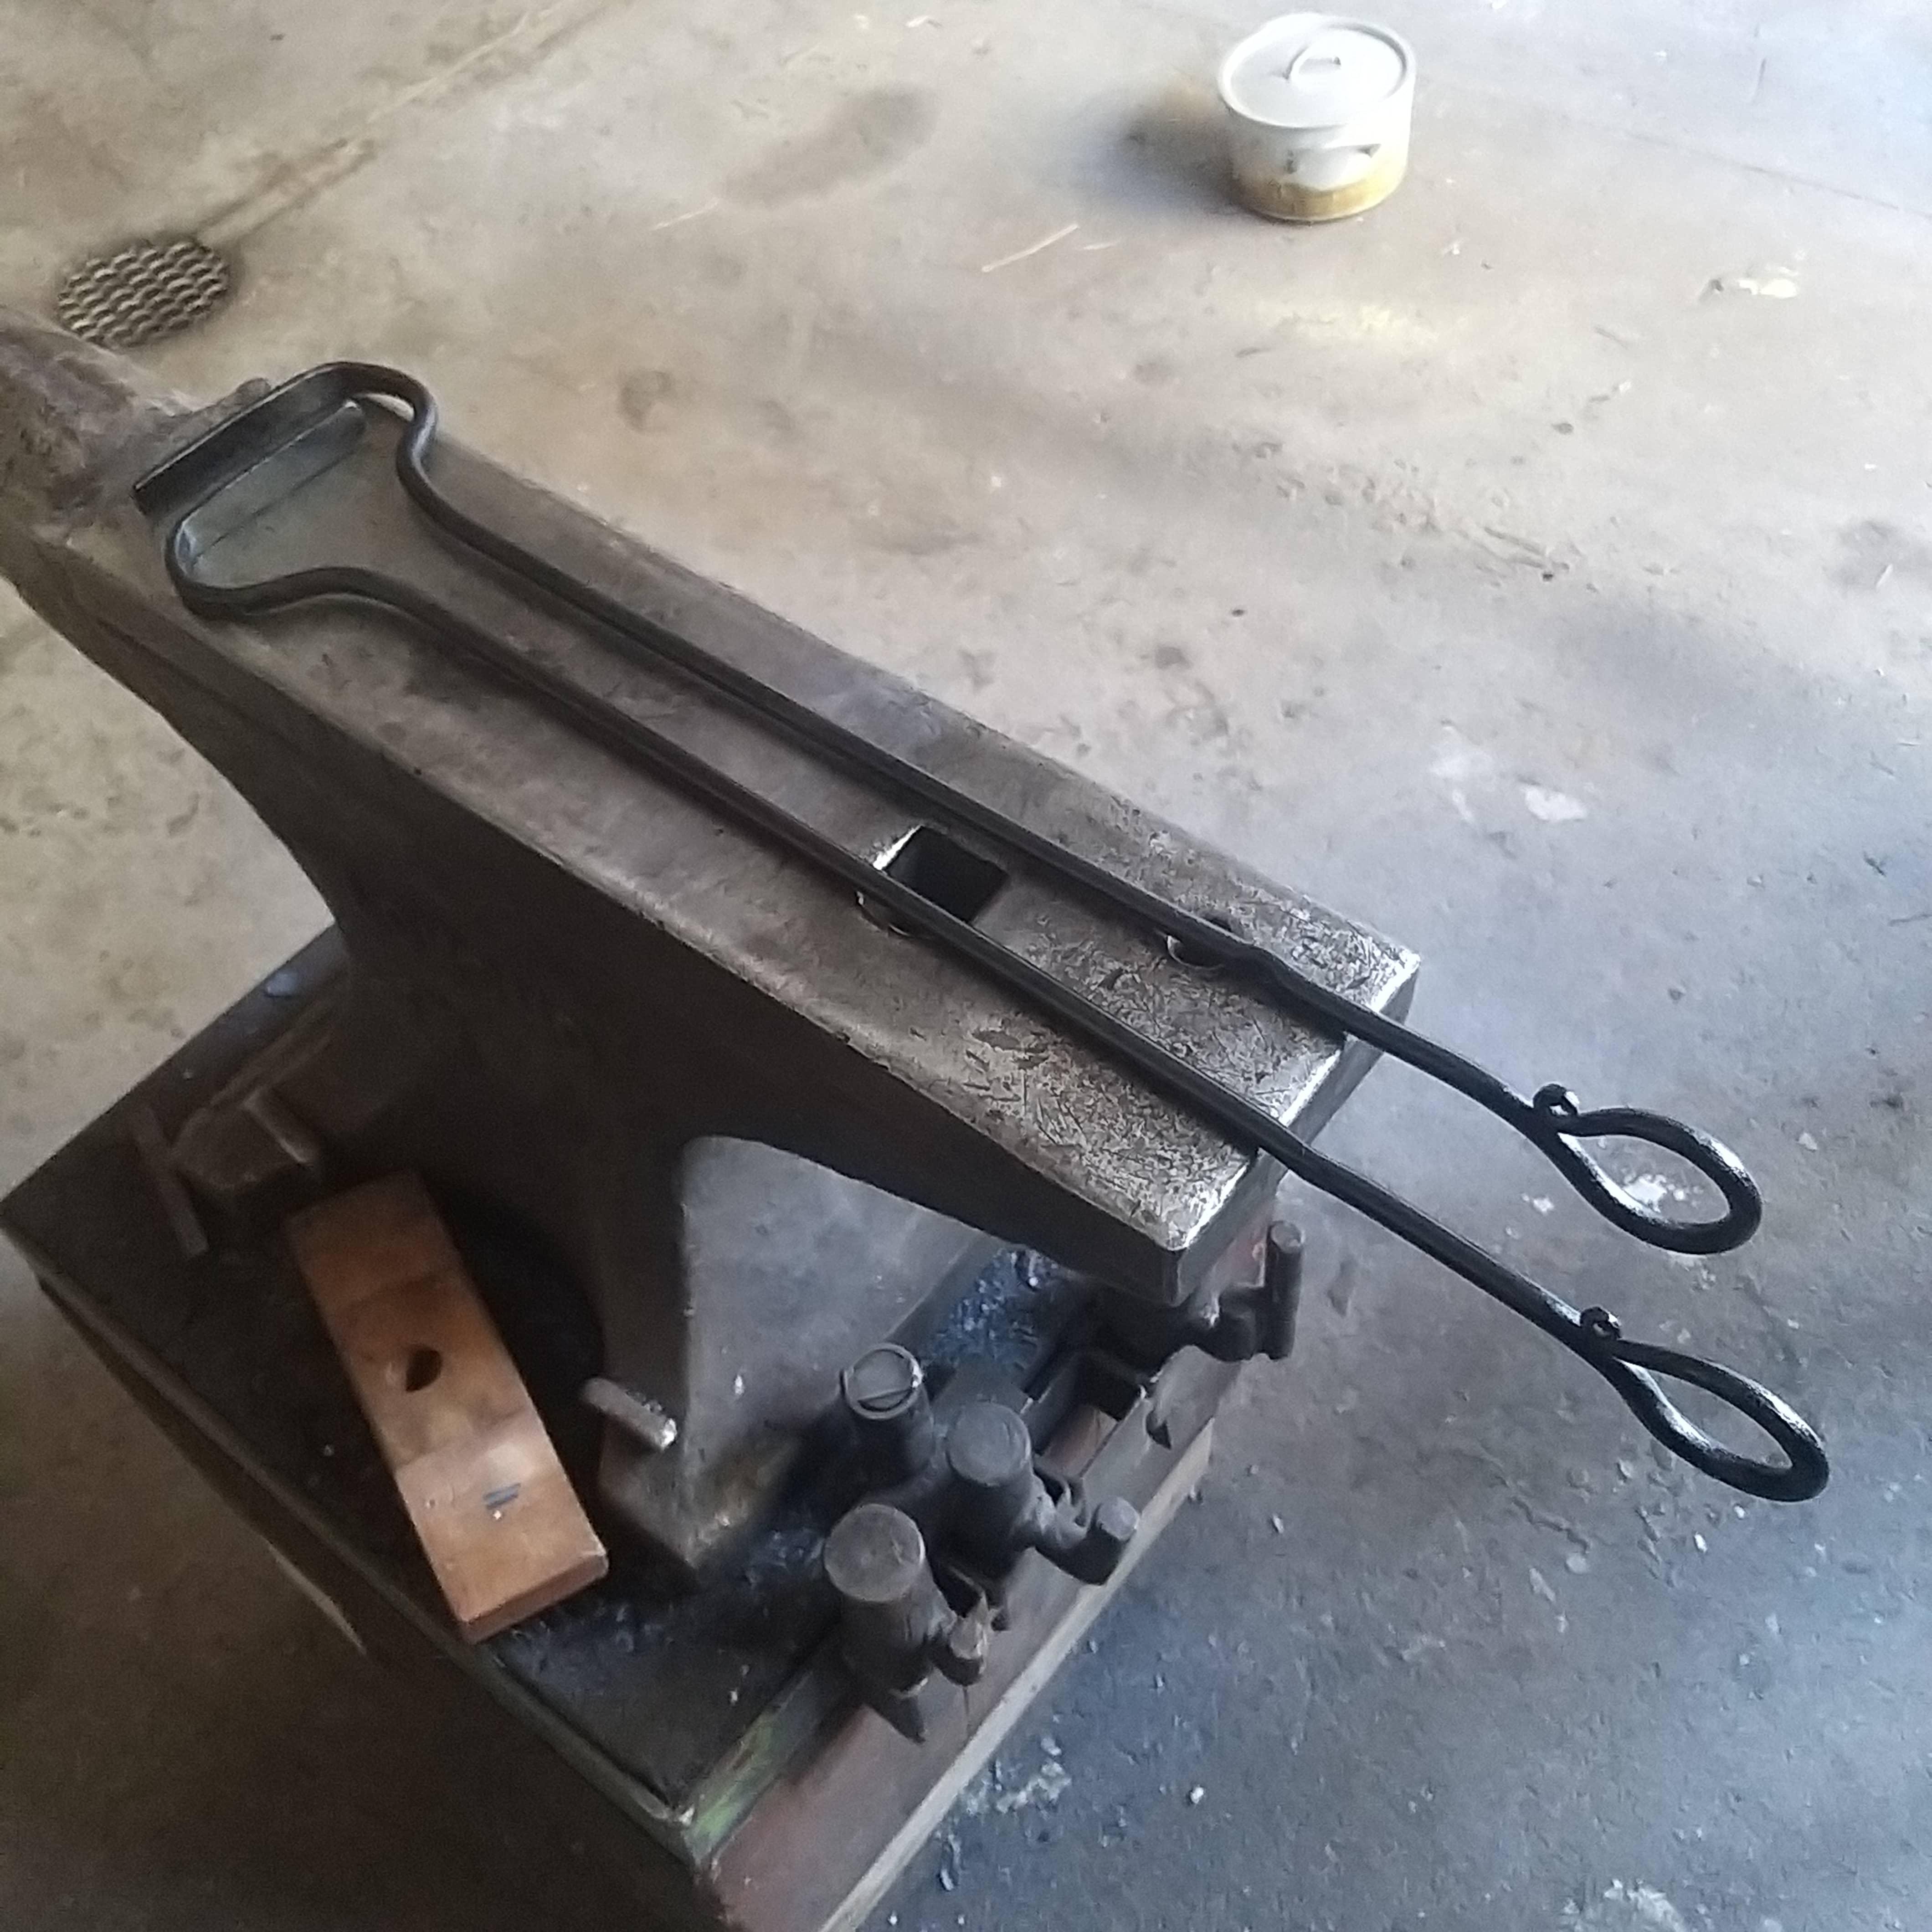
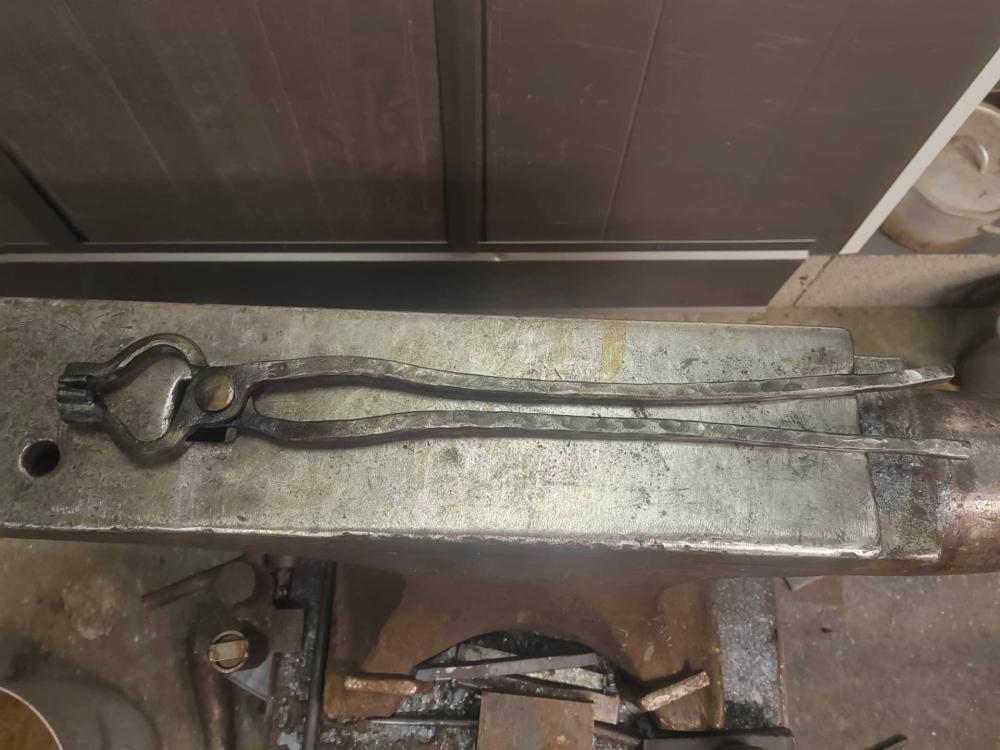
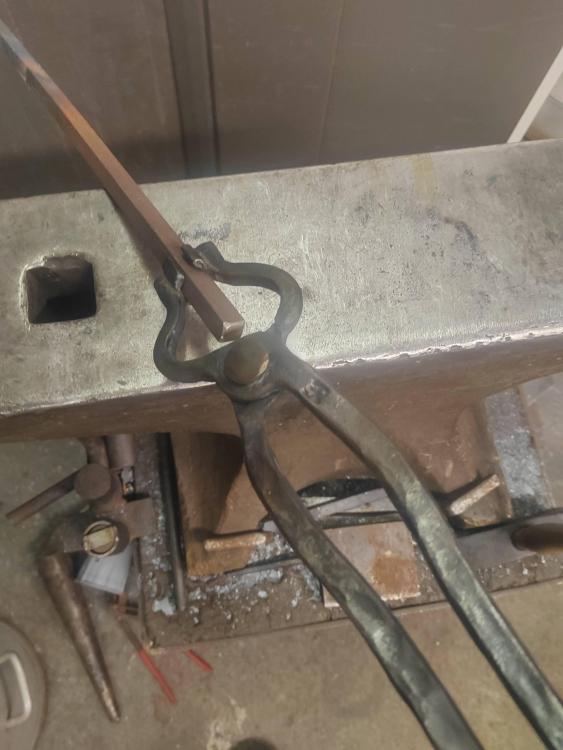
Decided to have a go at my first pair of tongs. I'm pretty happy with the result, I got really fatigued by drawing out the reins so they could be a bit smoother but they hold material really well. // NJ
-
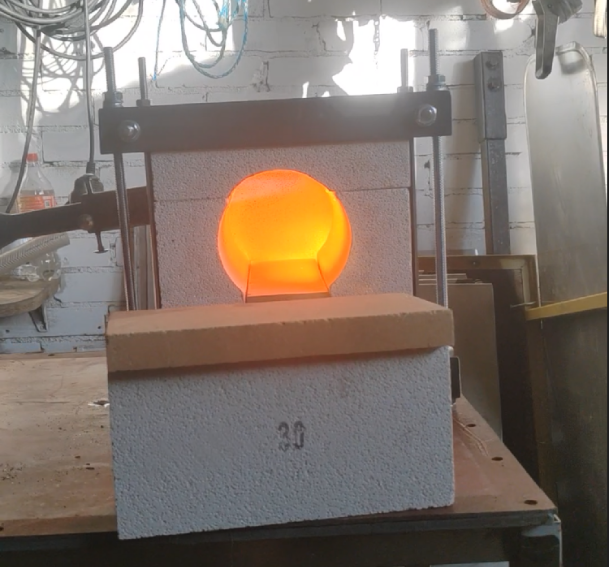
Is it doing what I expected? Well it's too early to tell, but then again I'm amazed how promising it looks! I'm really happy how fast it gets up to temp, how easy it is to fire up, how compact and light it is and how quiet it is!! I don't know how much gas it uses yet but my guestimate is that it uses below half of my old forge, how much below? I can't wait to figure it out! And I haven't tried to get it to welding temp yet, but I'm guessing it will get there by the looks of it. Biggest question yet is how it will last, time will tell I would like to coat it with a high alumina kiln wash since I've heard only good things about it, but I haven't managed to locate one from Europe. The coating I'm using have to suffice for now. I had to reapply it yesterday since it started to flake. But I think I shouldn't have used the adhesive sealer, and I did the initial coating with the bricks cold and room temp round 10 degrees Celsius. Now I reapplied it while to forge had cooled down to around 200 degrees Celsius, let's see how it holds up this time. Thanks for the reassuring words Mikey, and yes I'm running the forge on quite low gas pressure. How low? I don't know yet, but the dial at the bottle is at 1bar (~15psi) and the needle valve before the burner is barely open. At times I'm questioning if I'm running it too low. (I wouldn't say I'm running it completely wide open at both ends. I have the back closed off with a small window at the top, maybe it still qualifies as wide open?) // NJ
-
Here you go: // NJ
-
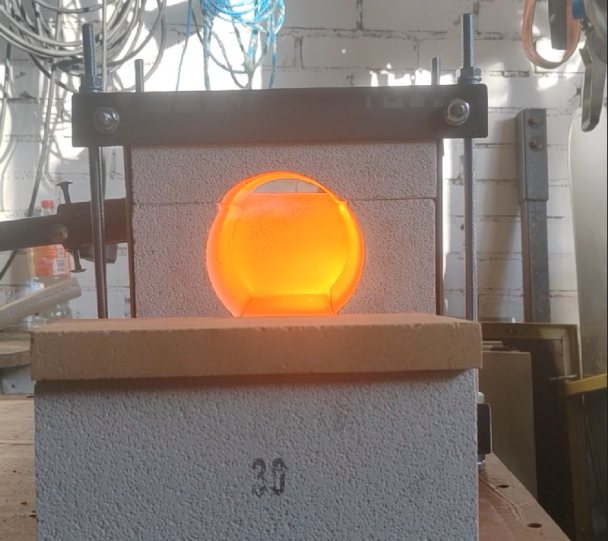
First test fire today! It looks really promising, it's already way better then my old double burner forge! First vid ~30 seconds after light up: https://www.youtube.com/shorts/l_1i8hNGbqg Second vid once it got up to temp: https://www.youtube.com/shorts/olVBYh5x3N0 // NJ
-
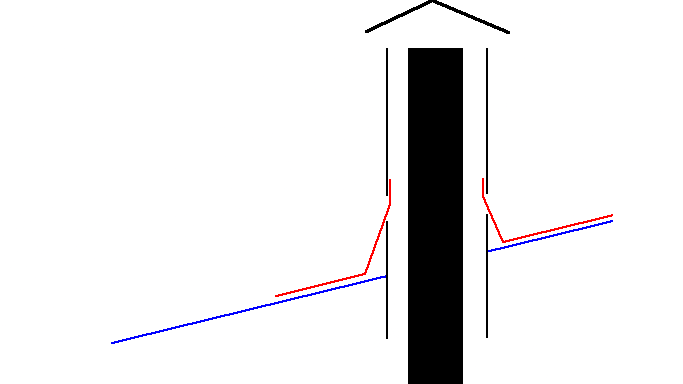
Looking good Paradigm! I've been making and installing all kind of roof penetrations by hand for well over a decade so I thought I could share how I would make it if I were you. I wont get into detail of explaining you precisely why I would do it this way, feel free to ask if you have questions, but here's my key points. If there is a way of avoiding putting a whole in a roof, more often than not it's better to take that route, in this case it's through the wall. Don't ever put any trust in calking, it will always fail, often sooner than later. Always try to penetrate the roof at it's highest point, or as close to it as possible. This way, WHEN the penetration leaks, there will be the least amount of water available to leak trough. I would also recommend installing underlayment (ice/water shield), it's not only for leaks but it also keeps the condensation forming under the metal roofing from absorbing into the wood construction making your roof and building last way longer. Here's how I would do it: The black box is the chimney, around it a larger diameter air ducting pipe. This creates a air channel around the chimney, the chimney will warm up the air and create an upward draft through the ventilation pipe, free ventilation to bring in fresh air to the shop (an alternative is filling the space with fire-proof isolation.) In red is the chimney roof jack Frosty mentioned. I would also recommend installing underlayment (ice/water shield), it's not only for leaks but it also keeps the condensation forming under the metal roofing from absorbing into the wood construction making your roof and building last way longer. // NJ
-
Got a lot done today! There's a bunch of tweaks and additions left to do but it's getting really close to a test fire!! // NJ
.thumb.jpg.b6198bae7e081e577a7cd73d43148414.jpg)
.thumb.jpg.39f76a5a0587f46706e3230c1ecd1f67.jpg)
.thumb.jpg.2614798bc0347b9e55e53abe23f9584e.jpg)
-
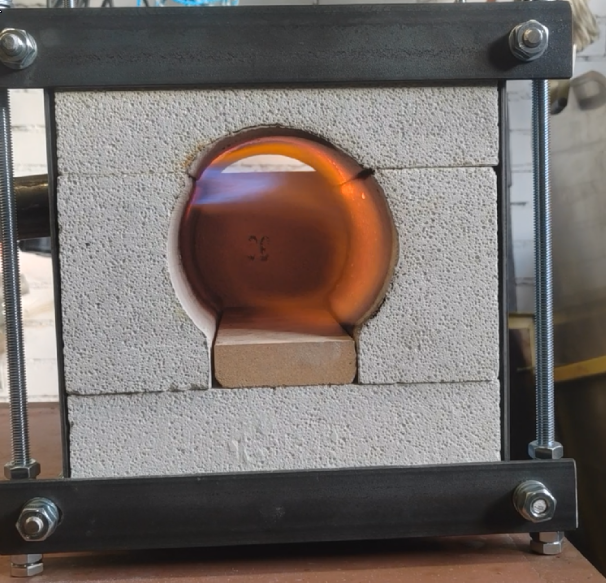
Hi Frosty, I got away with using an old rasp/file since the location is between bricks, worked wonders. I used a large whole saw to shape the burning chamber though, I'm going to keep my eyes out for a smaller one for future builds! I used a ziconium zilicate coating from Vitcas, they claim it has a maximum service temperature of 1750°C / 3180°F. // NJ
-
I might as well post some updates along the way: I made the channel for the burner today and coated the bricks. I'm not too happy about my placement of the burner since it's between 3 different bricks. Then again, in worst case, it's just going to be one of many mistakes to learn from! // NJ
.thumb.jpg.d9325a9ecebfc7abaf5ef218239d4da6.jpg)
-
Thank you guys!! Now I think I got everything I need to get to the first test-fire of the forge! I just need to find the time to get there // NJ
-
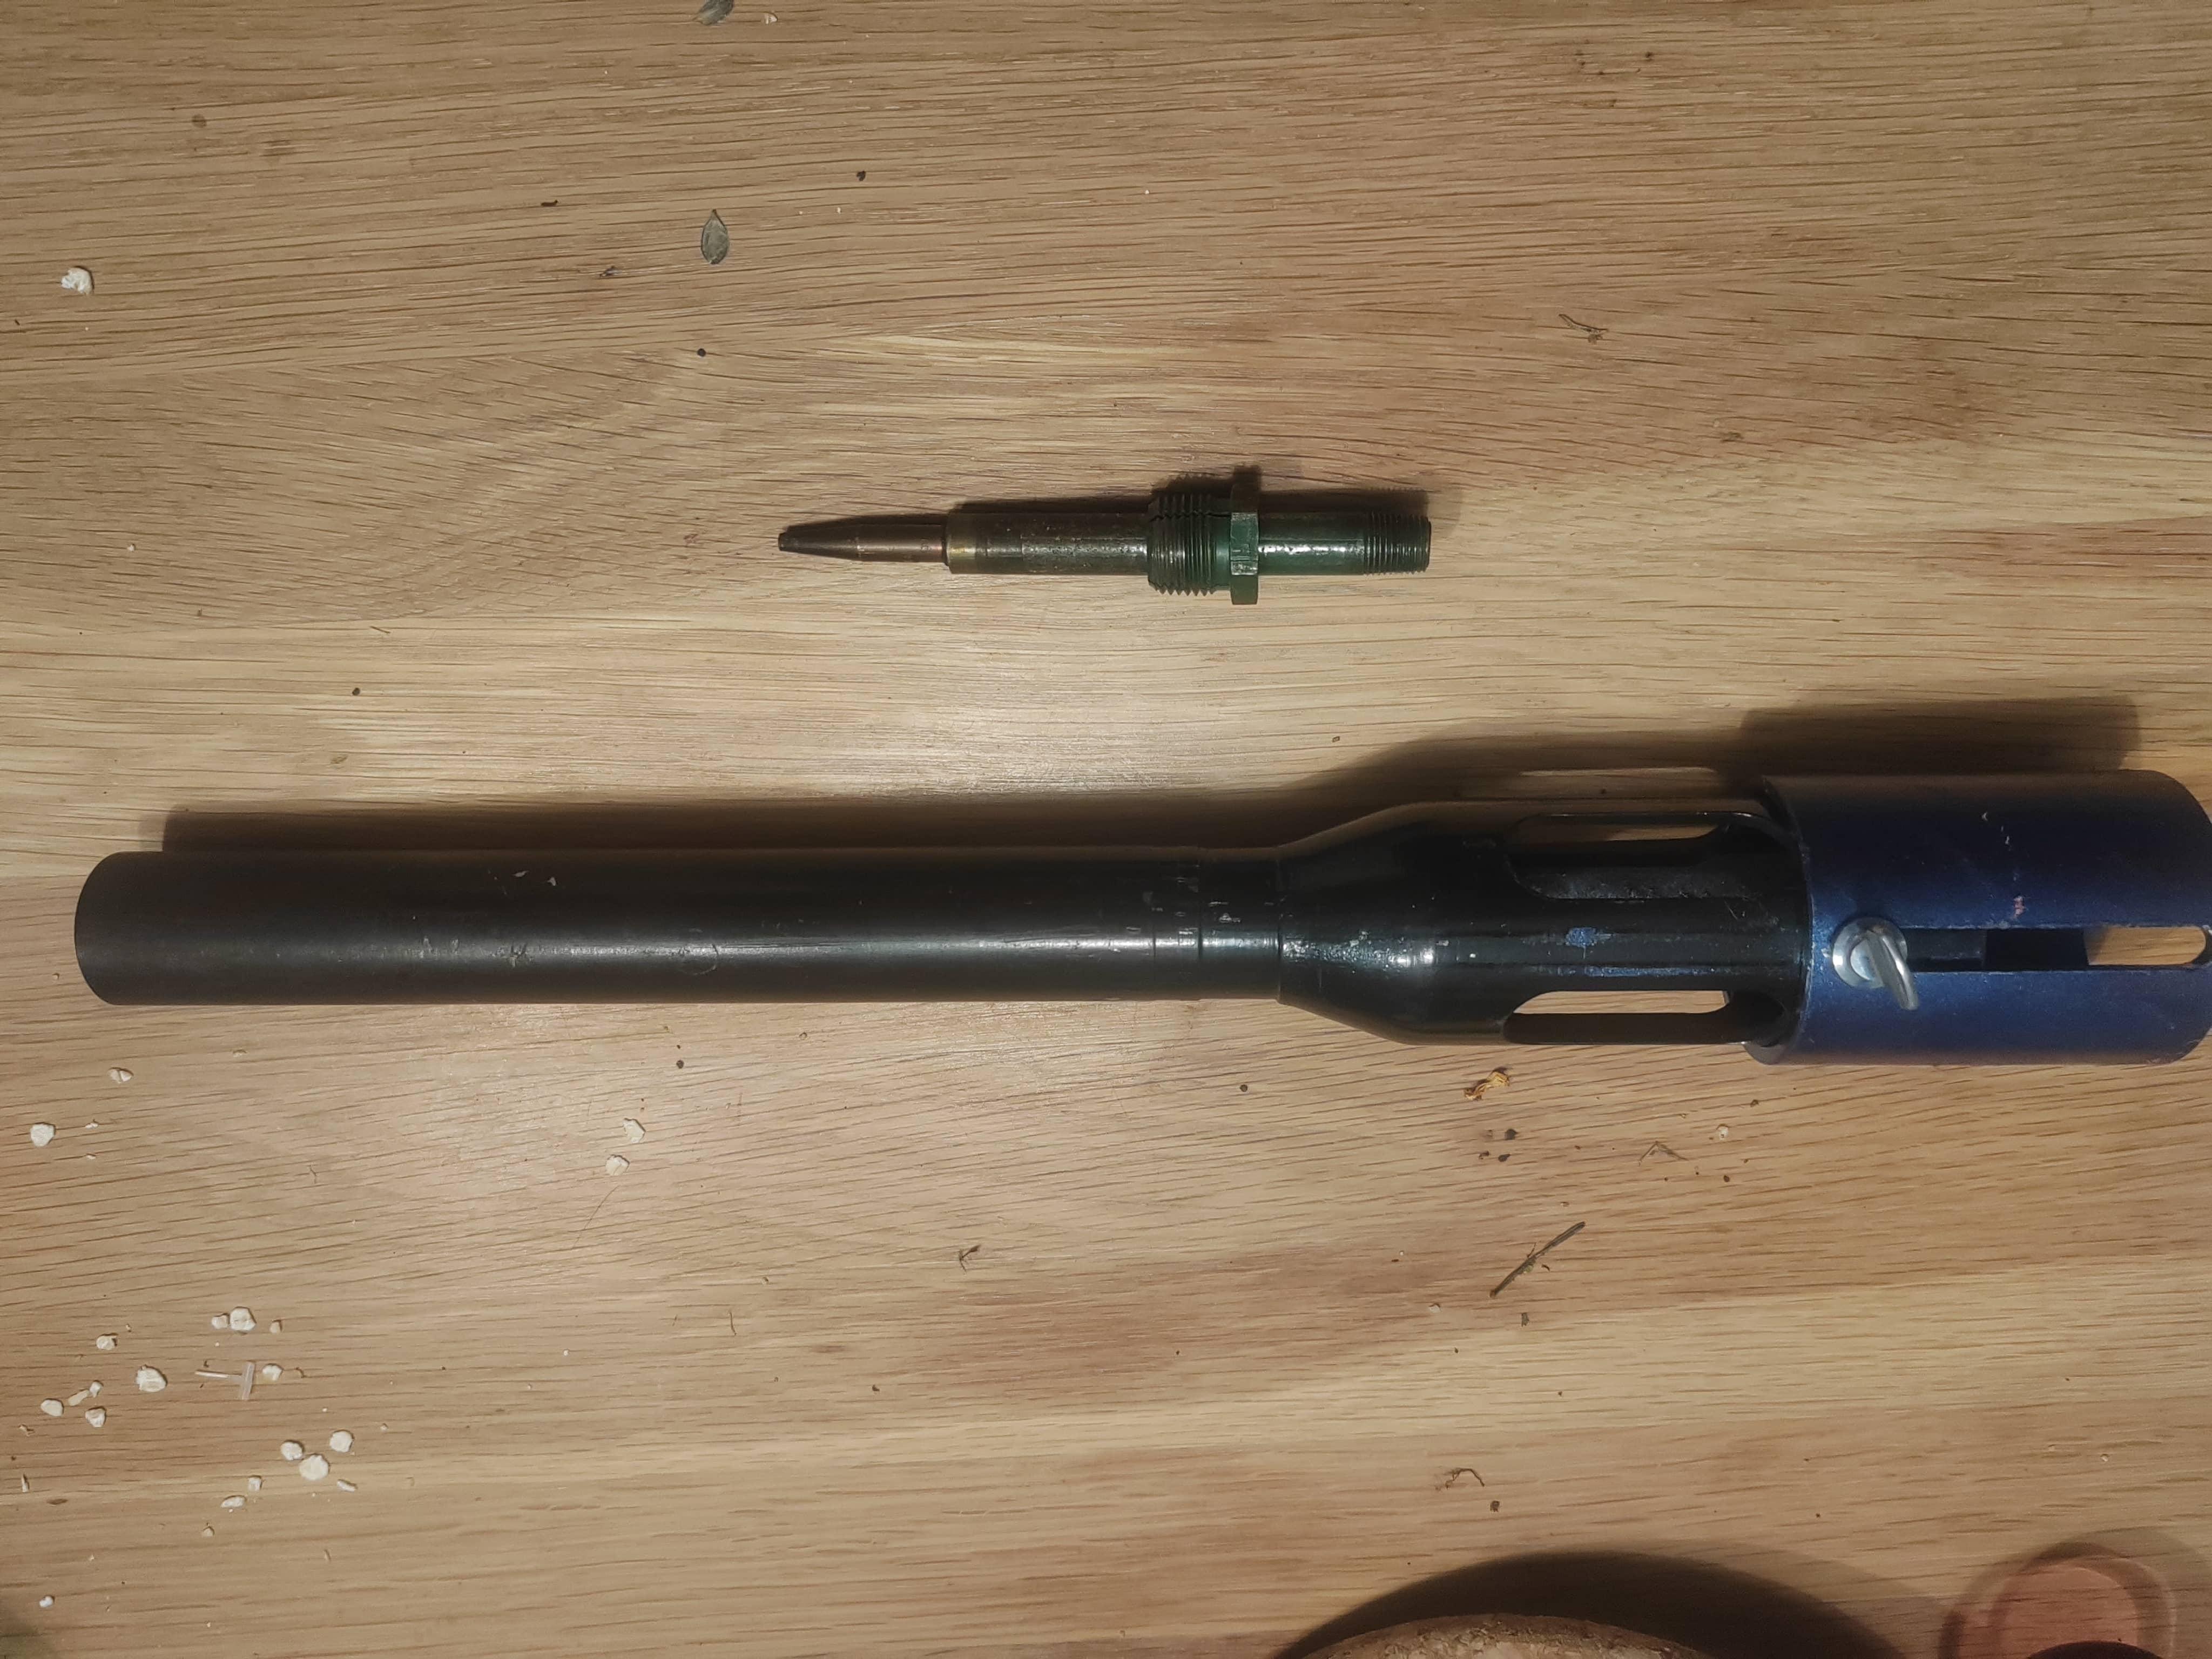
So here is a picture of the burner, the previous owner have unfortunately lost the nozzle. The outer diameter of the burner tube is 1" and the length is 12" excluding the nozzle, jet tube and its compression fitting. I have a hard time finding good information of the hybrid burners, but as far as I understand this burner is larger than the T-Rex? Does anyone here know what sized burning chamber would be ideal for this burner? // NJ

-
I'm going to my shop today to get the burner so I can try to figure out the model. I am indeed planning on having the forge liner double as a nozzle, and to make a frame from angle iron and plate once the size and shape of the forge is finalized. I want to try avoiding placing the burner on the top of the forge. My reasoning for this is that heat rises, putting unnecessary stress on the burner. And due to the configuration of the choke, placing the burner horizontally would allow operating the choke with one hand. The stress of the flame on the soft-brick is a valid concern, even with the coating. I try to think of a better solution for this. On the other hand, the top-right brick is rather easy to replace once it gives in. I really appreciate all of your tips, thoughts and comments! // NJ
-
Thanks Jim, they where made in Finland from 1915-1970 by Lokomo Oy. Lokomo Oy was originally a machine shop manufacturing train locomotives, but began making other things such as anvils, churchbells, ship anchors and propellers to increase revenue and sales. // NJ
-
I read somewhere that you guys like pictures so here are the best pictures I could find of mine. It's a Lokomo A150 (weight 150kg, ~330 pounds) It's probably the closest I will ever get to my dream anvil. I'm so happy to have found it, and really lucky to find it in such a good condition and for a really good price (I guess price is subjective). That size is quite rare even here in Finland, or at least they don't change owners often. That's the only one I've seen for sale in 7 years, and I'm frequently on the hunt. // NJ


-
If I remember correctly the burner is smaller than the T-Rex, I think its one of their middle range in size. Thanks for the tips Tim, especially about the threads! Mikey made some good points about the nozzle as well! I think it's probably best to use the nozzle at least in the beginning. I'd like to think the burner is designed with a nozzle for a good reason, whatever it might be. But I'm not against experimenting without the nozzle once I'm more accustomed with my new forge! // NJ
-
Not a mystery burner anymore! I looked up hybrid burners and the burner is indeed one of theirs, thanks Mikey! // NJ


.jpg.a1f4147933327dd602d011fb1122cc1a.jpg)
.jpg.00a966bbab09defe063d84b8240df506.jpg)
.jpg.8e4122ebdf3e07c75d0434367709bf51.jpg)
.jpg.b7b511bd652d3d14db59d2a1e0012a6c.jpg)