TryingLobster
Members
-
Joined
-
Last visited
-
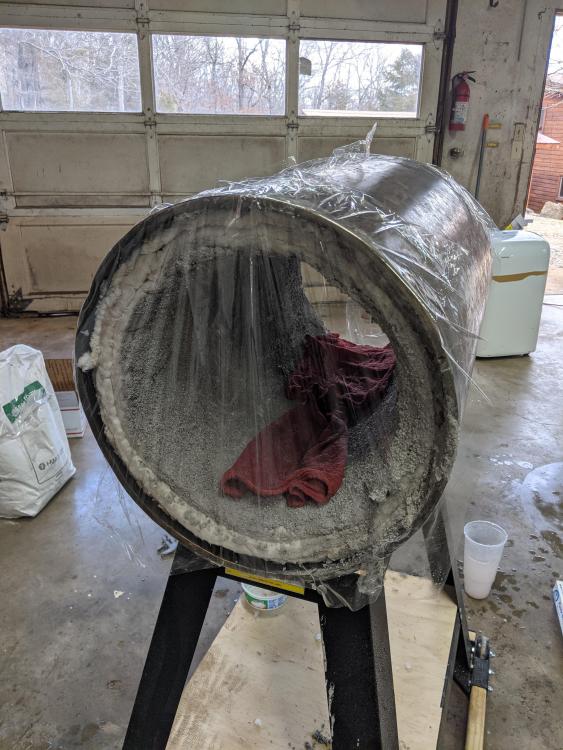
A quick update on the forge: Sure enough, after a couple hot firings that cement started the crack and fall apart. Y'all were right, I didn't use any rigidizer the first time around so I stopped using the forge once cracks started to form. I took a break from forging for a few weeks (I had several house projects that needed attention) but recently I've gotten back to it, starting with ripping everything out down to the shell, which I scrubbed clean of rust and old cement with a steel brush. First off, I didn't care for the size or position of the one burner hole I had previously drilled. It was far too close to the front of the forge. My plan is to have two burners in this forge, so I measured out a ratio of 2:3:2 for the spacings between the front of the forge, the first hole, the second hole, and the back of the forge. I think this will work well for using the full length of the forge or when adding a false wall to use only the front half the forge. I also drilled holes in the steel shell that pointed towards the middle of the future bottom of the forge, instead of pointed towards the center of the forge. This should help me angle the burners further down than previously and keep the burners from sagging so much. By the way, I've significantly shortened the burners, shortened the 1/8" propane pipe, and added right-angle fittings to minimize the strain on the burners. Next I re-lined the shell with the same kaowool I used previously, but this time I sprayed each layer down with rigidizer after buttering it. I used a good fitting N95 mask to avoid inhalation of any of the silica, don't worry. After letting that dry a bit, I re-buttered the outer layer and mixed up some Kast-O-Lite 30 and have my first 1/8" layer on. I've wet down some shop towels for extra moisture and covered the shell with plastic wrap to let the whole thing wet cure. Tomorrow morning after letting the first layer cure for a while, I'm going to put a second layer on to get about 1/4" all the way around and also add refractory onto the ends where you can still see the exposed kaowool in the pictures. Eventually I'll also add some Plistix to the lining, but I need to drive out any remaining water from the Kast-O-Lite and kaowool first, and I plan on running the forge up to temperature once or twice to see how it heats before I get to that. One other improvement is that since I know my burners work, I cast the flares into the lining with the Kast-O-Lite. The previous version of the forge leaked heat around the burner holes and the burners had way too much play. I think the smaller holes combined with the flares being cast into the lining will help reduce heat leakage around the burners considerably. So, what else am I missing? Any other comments or improvements that I should consider before proceeding?


-
George, that's exactly what my situation was. I called a bunch of delivery places and the only one that picked up the phone actually laughed at me for thinking they could get a refill out to me. They couldn't get enough drivers. I set mine up in the back of the SUV as vertical as I could and just went for it. No problems.
-
When I first signed up for an Xbox Live account I needed a screen name, and they had an autogenerator in case you have no imagination like me. "TryingLobster" came up and I really liked the ambiguity of the name. Does it mean a lobster that's trying really hard? Or a lobster that's really getting on your nerves? Both were appropriate for me so I stuck with the name. Uh, except the lobster part, I'm not actually a lobster.
-
ThomasPowers, interesting, a lot of those pieces look relatively light. Newbie question: how important is it to have a heavy base for holding forging tools compared to the importance of a solid anvil base?
-
Thanks, Nodebt! The story isn't terribly interesting, but I'll post it there to satisfy curiosity. I have my forge in my shop which has a large garage door just to the right in that picture that I open when the forge is running, so I feel pretty confident on ventilation. My fiance won't have me risking my health or safety even if I wanted to. George, there are also laws around how to transport propane tanks over a certain size. When my main 100# tank ran out over Thanksgiving, I had no "correct" way of transporting it because I didn't own a truck at the time (I know, can't live in the south without a truck!) I had a very nice chat with the main propane technician lady at my local Tractor Supply on refilling propane tanks, cracked some jokes, made friends, and now I have the inside hookup both on knowing what you're SUPPOSED to do with propane tanks as well as well as being able to get my propane refilled in emergency situations even if I don't exactly dot my I's and cross my T's. JHCC, ouch, that's a bit of an ego bruise to have to tear the thing out after having it only a week or two. I get that it's not designed for this purpose, but can you give me a little more info on why it's not good for this use or how it fails when used this way so I know what to look for? I'd really like the use the forge for a while to at least get started, but I also don't want to use a dangerous forge. I'm sure this is a rooky mistake, but a lot of things I've read recommend getting a high-temp cement for starter forges. These are the same places that recommended ITC-100 as a forge wash though, so I wouldn't be surprised if there are other mistakes in my understanding. I'll read through Forges 101 here (I only found this site after the forge was nearly complete) and try to get up to speed.
-
Thanks, Frosty! I really appreciate the feedback! Yeah, several of the pipes on the burner are a bit long and you're right the resulting torque on the burner is a hassle. I've already got a second burner in the works and I'll shorten things up before I get it all assembled. I'll probably swap burners, then shorten up the first one to match. Totally agree on the right-angle right off the nipple. I just haven't had a chance to assemble all the appropriate parts to get that plumbed. The regulator and hose are 3/8" flare, but I converted to 3/8" NPT (including yellow teflon on assembly) because I was able to find more fittings locally (especially tees, see the comment below about multiple burners). The plumbing is definitely a work in progress! Relatedly, my propane tank ran dry in the middle of Thanksgiving dinner about 2 weeks after moving in, so I had to learn propane pipe standards pretty quickly. I've got the quarter turn valve at the burner because I anticipate putting that second burner into this forge and having valves on each so I can have the full forge volume with two burners or half volume with just the one. Thanks for the reminder to not leave the hoses pressurized. I've been usually cutting off the propane at the tank itself so everything is at standard pressure when not in use. I'll be sure to make a habit of doing it that way. I'm surprised hearing about ITC-100. Sounds like things have changed quite a bit since I initially planned out the forge. I had always heard it was the best you can get for a top-level coating given its IR reflectivity, though I did hear it was quite sensitive to poking. I had no idea it was a release agent. Using something more resistant to flux sounds like a solid win. The refractory cement I'm using is Meeco's Red Devil. It's listed for use up to 3000 F, but I take your point. I'll look into the Kastolite; the flux tolerance again would be a win. And thanks again for the feedback. I appreciate the thorough review! I figure if the forge was total garbage, nobody would put the effort to call out the individual changes you have, so I take the suggestions as a compliment of sorts. This first forge has gotten me melting aluminum and forging iron, so I'm sure as heck excited to be using it as-is. To know it can get even better is just more to look forward to. PS. "Meeco's Red Devil Refractory Cement" to be specific. I forgot "Red Devil" is a whole suite of products.
-
Thanks, JHCC! I was planning on forging some tongs, but I appreciate the recommendation to just buy some good ones to start with. I may just do that. My goal was to get a little practice before attempting to forge tongs since I'd be using them constantly and need them to be good, but buying some would guarantee they don't fail on me.
-
"Weldable steel" is exactly what this was. That's my plan for sure. I'd like to get my basic technique figured out before I get into HC steels and heat treating, and from what I've read many times here, "cold mild steel is still harder than hot HC steel".
-
ThomasPowers, cool! I only recently moved here but I love it. I will look into the caving, thanks for the recommendation! I might be a bit err... thick-set for much caving myself, but I do love geology and the geology in the region is really cool. I'll look around for a cave that isn't too narrow. Irondragon, FANTASTIC! Hit me up and I'll be there!!
-
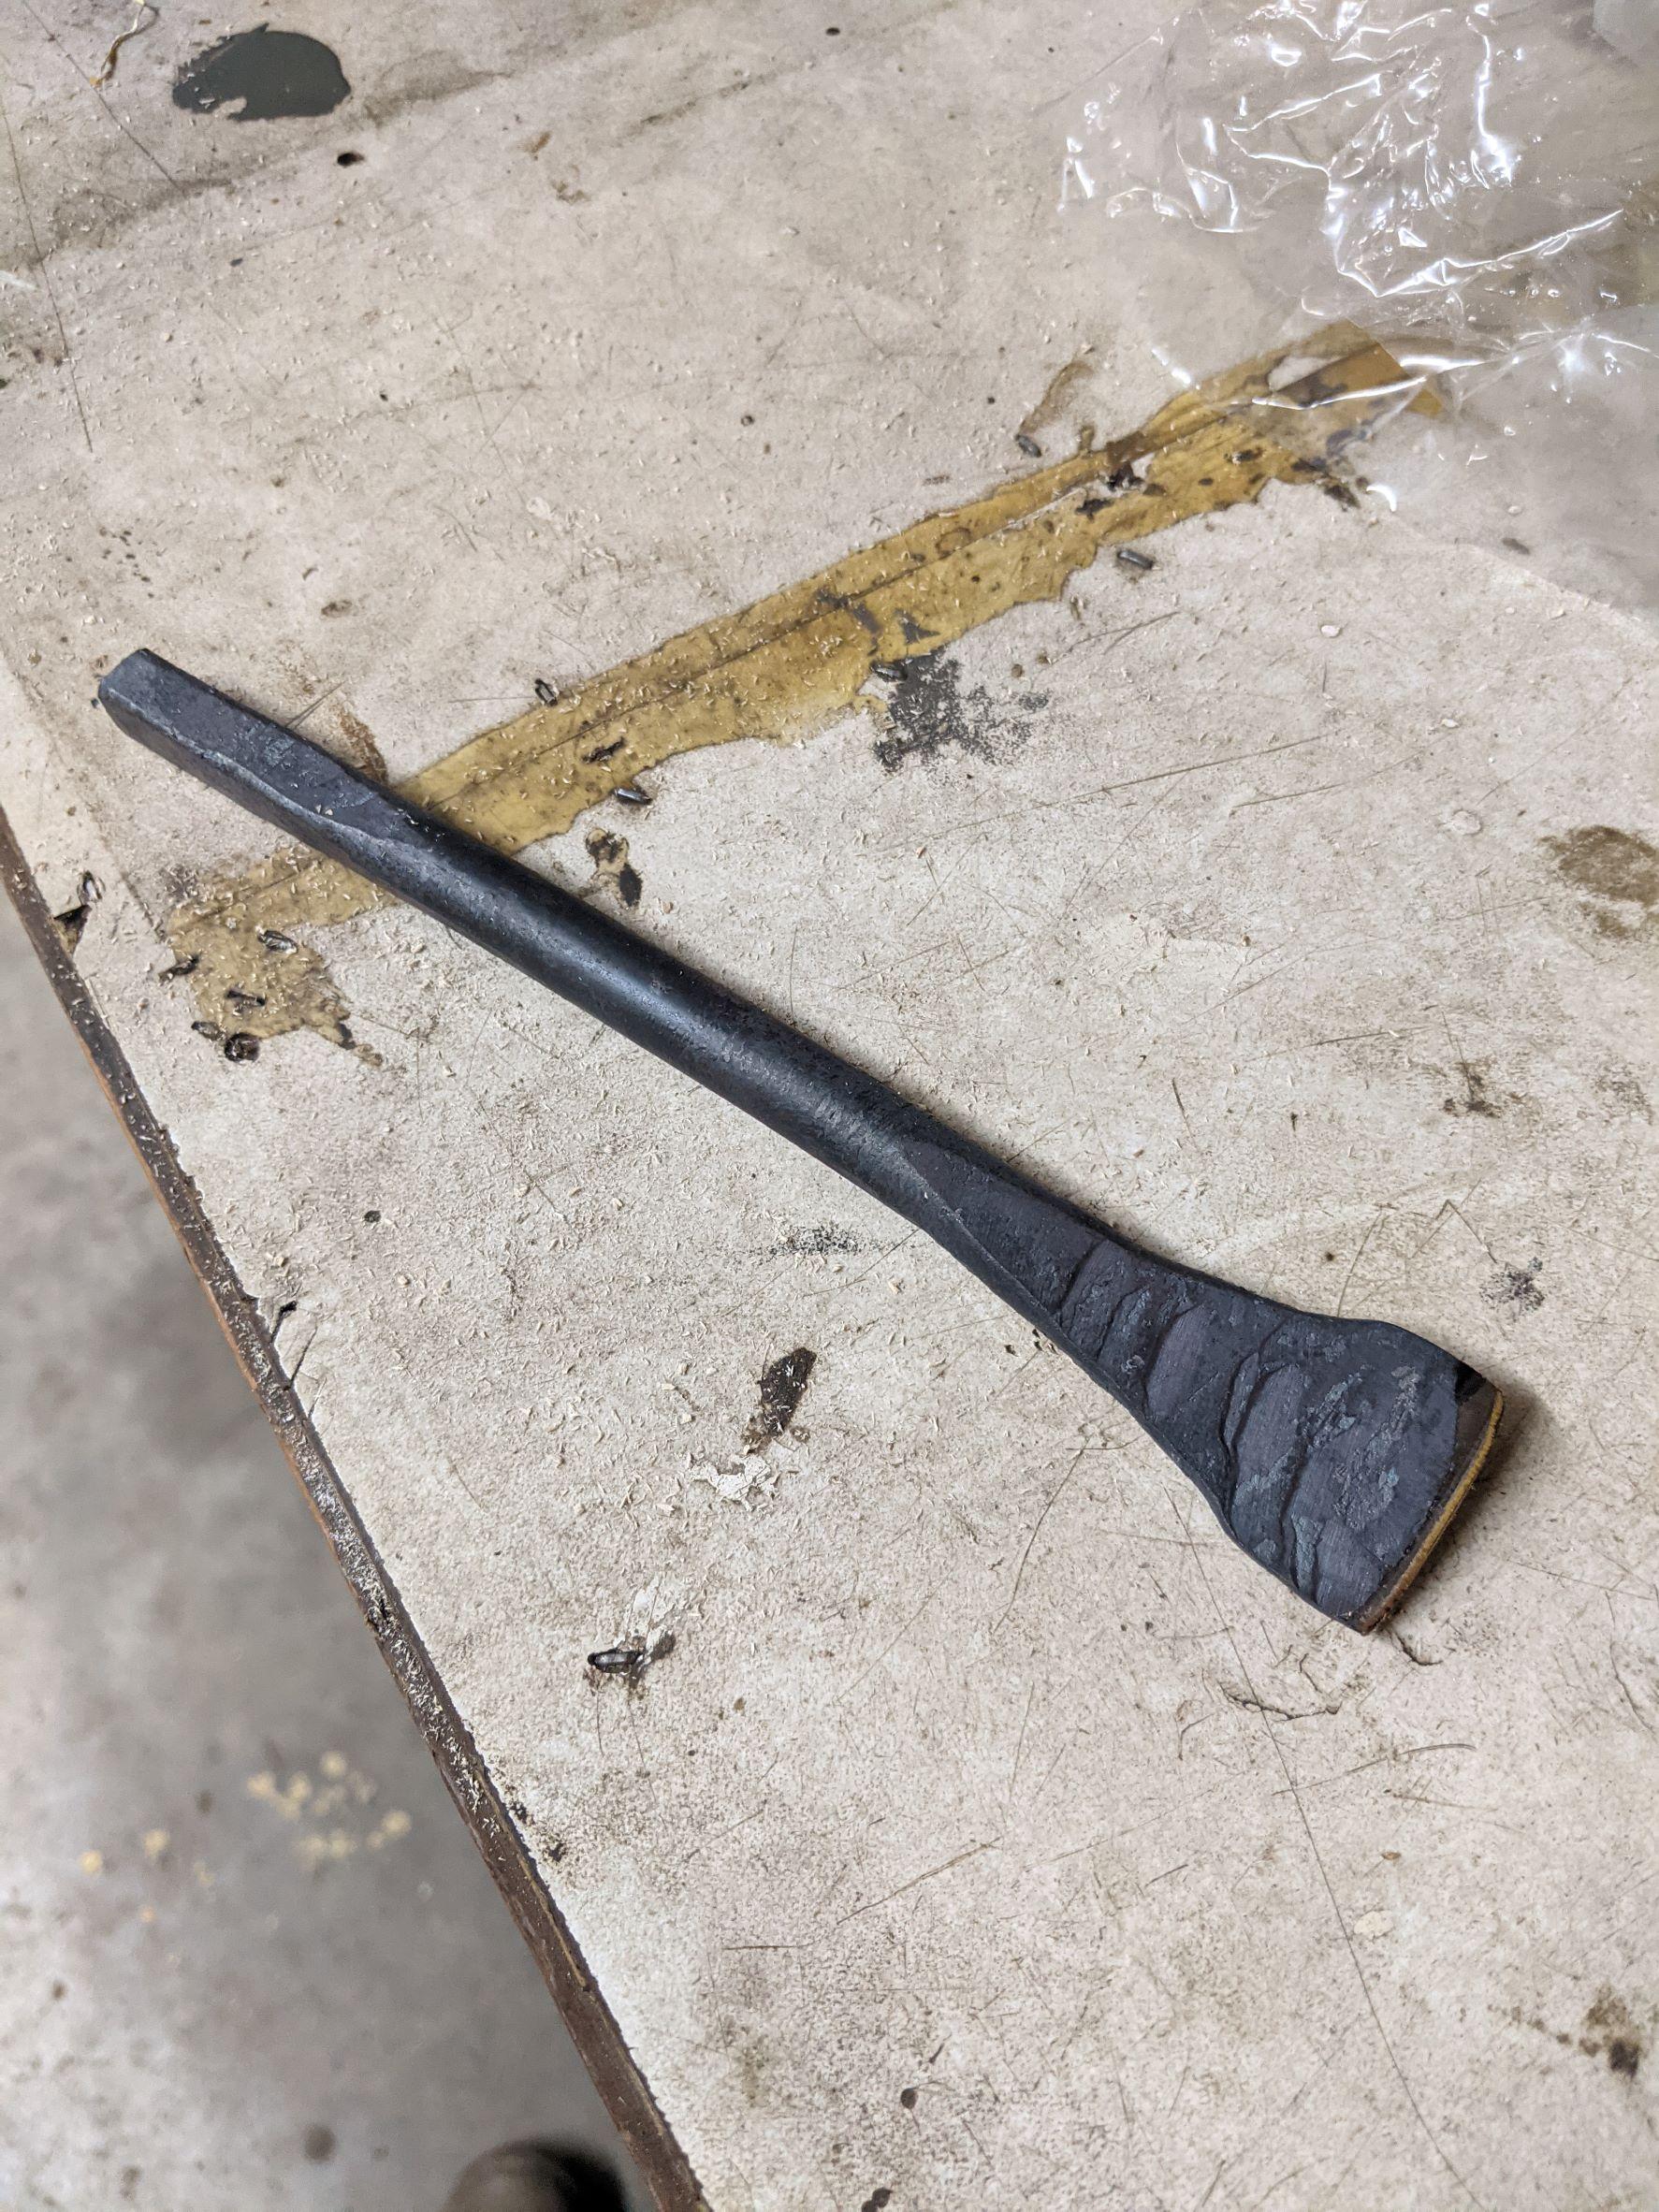
Thanks BillyBones! And I don't mind curmudgeons. I once had a professor who was so curmudeonly I had to write a letter of recommendation for HIM to the school saying that he was actually a good professor, he just didn't tolerate people wasting his time. Good idea on floating the tank! I just put in a shelf under the forge for the tank to sit on so the whole thing is more mobile. So far I've only had a little bit of frost on it after running it for maybe an hour or two. I have some cracks in the forge the fill in, but once that's done and cured I've got some ITC-100 wash I'm excited to put in. If I'm still freezing the tank after that I think I'll sink a little water-tight tray into the shelf that I can put water in to help keep things flowing nicely. The chisel is made out of an extremely exotic alloy called "whatever Lowe's had in stock". I have no idea how to read the codes on the rod stock they had so unfortunately I have no clue. I need to find a good store for stock here in Fayetteville so I know what I'm buying, but the snow around here has to melt first.
-
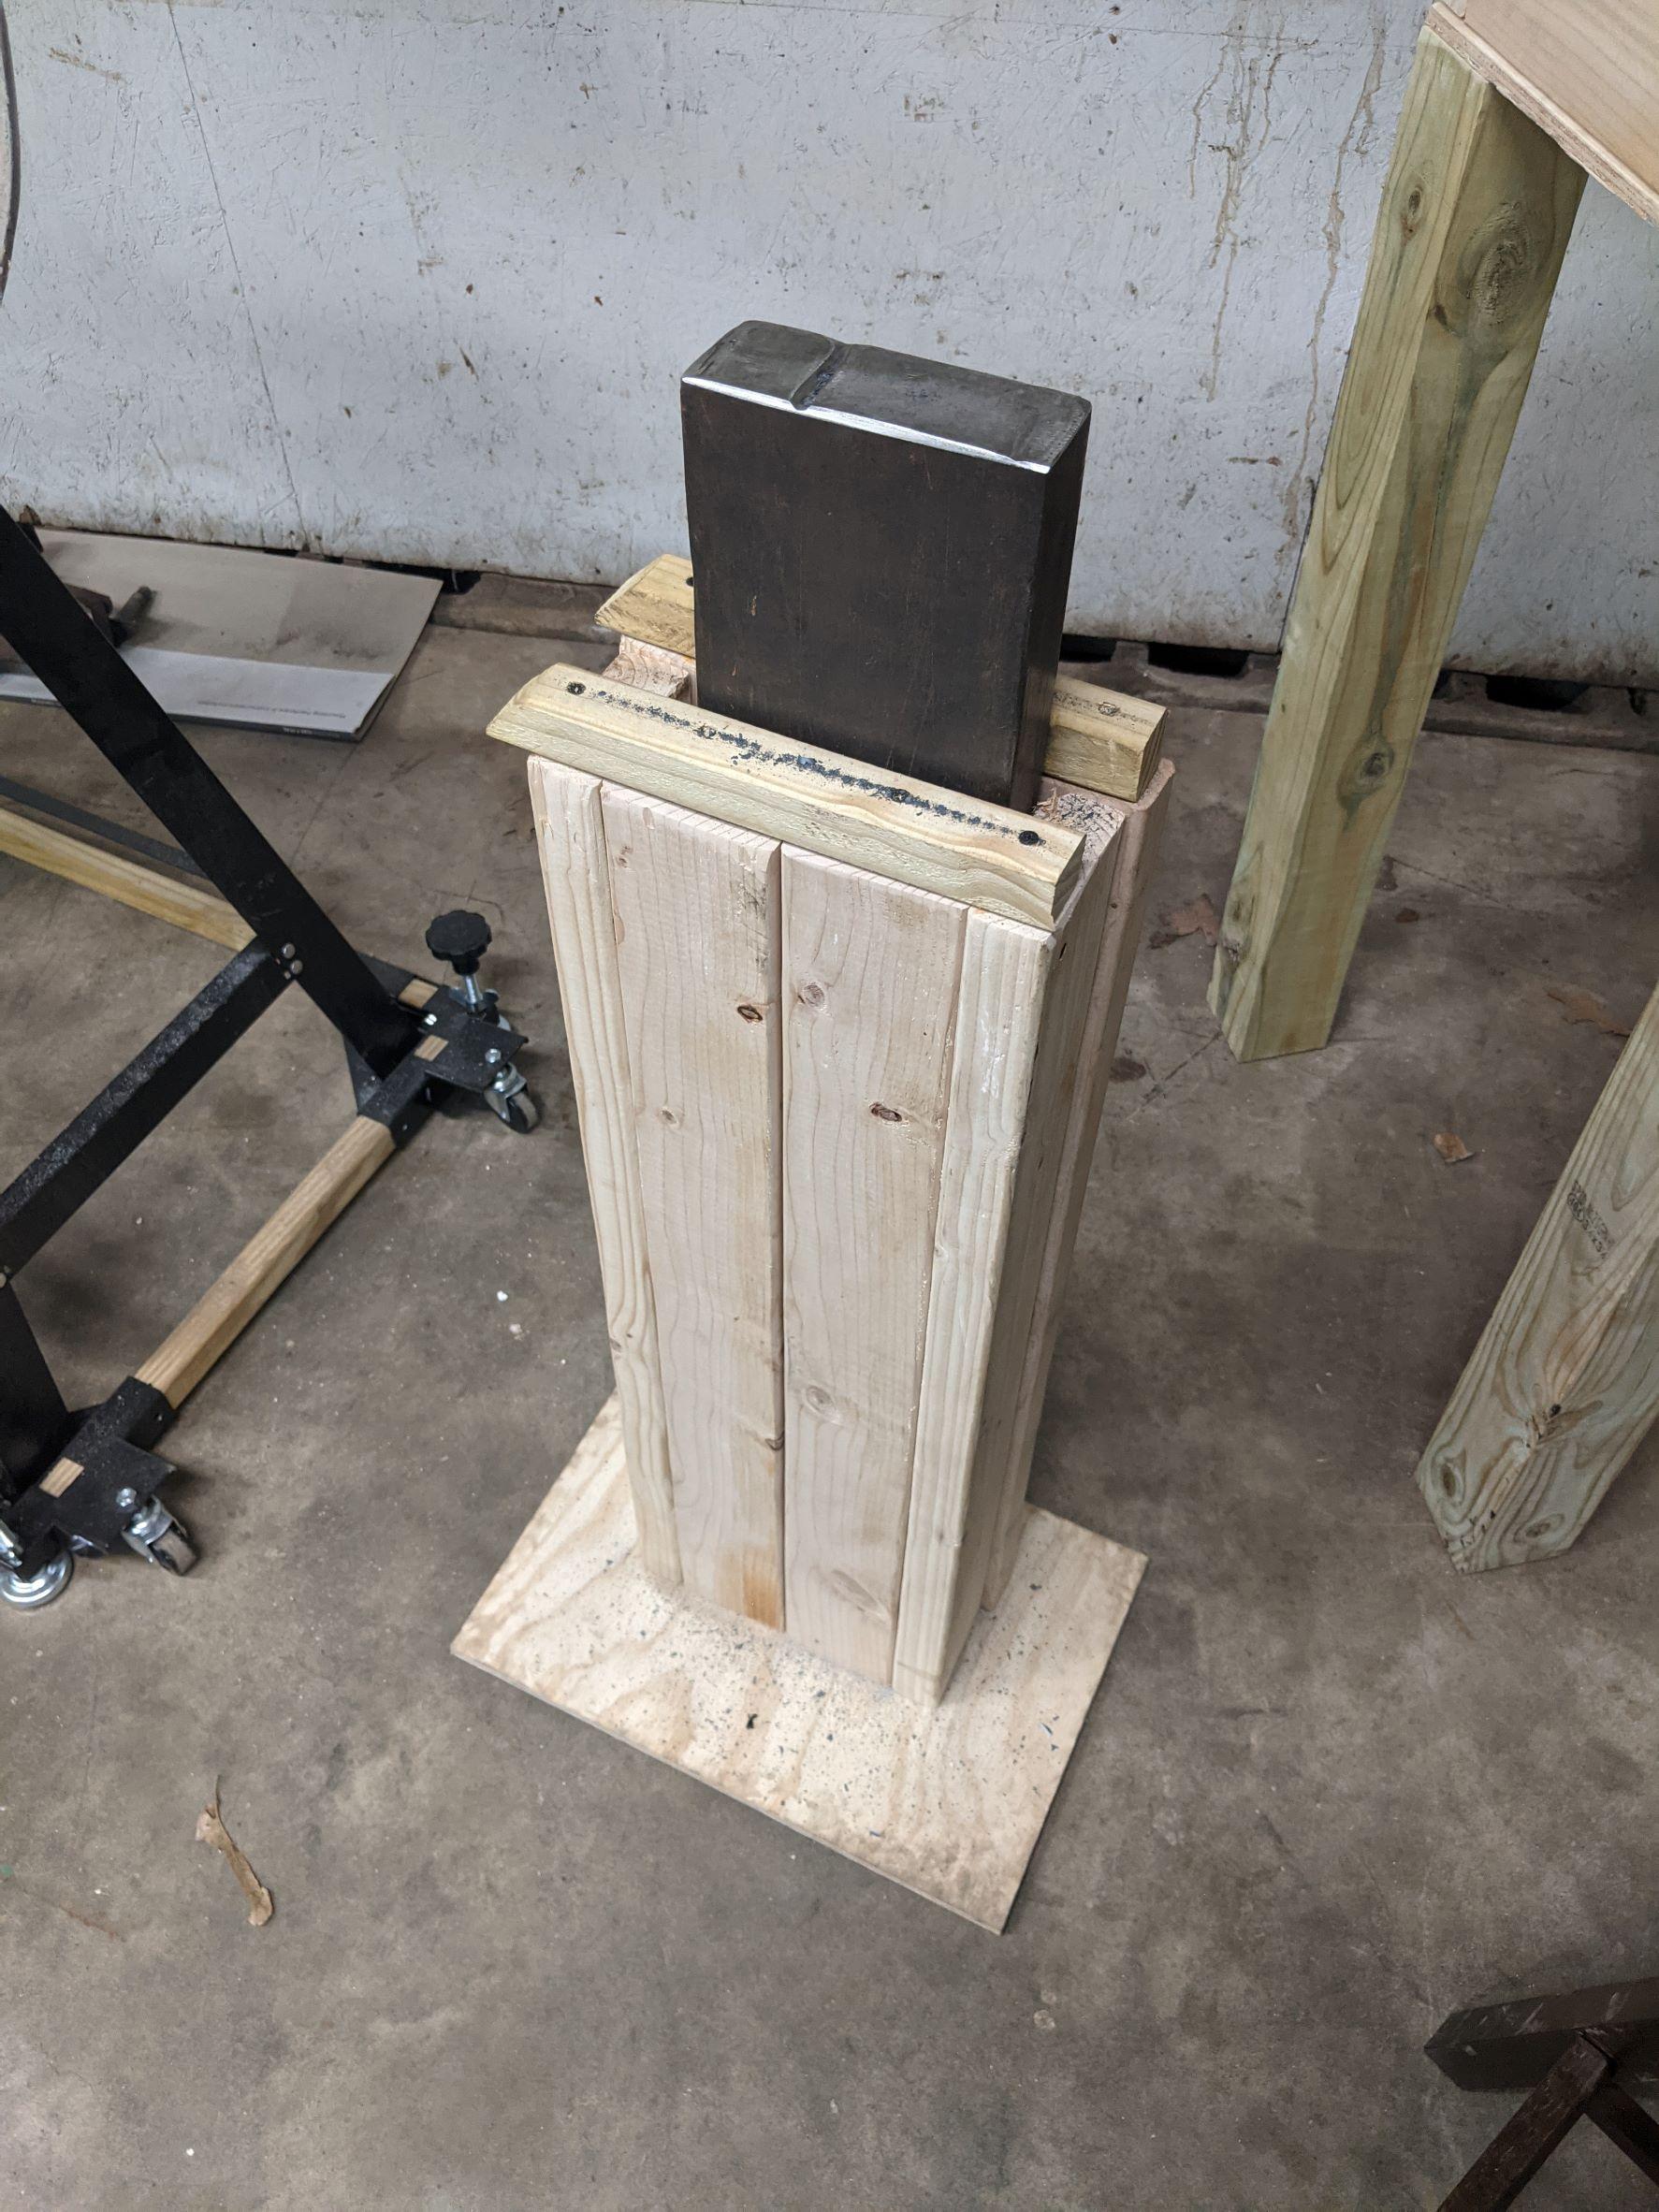
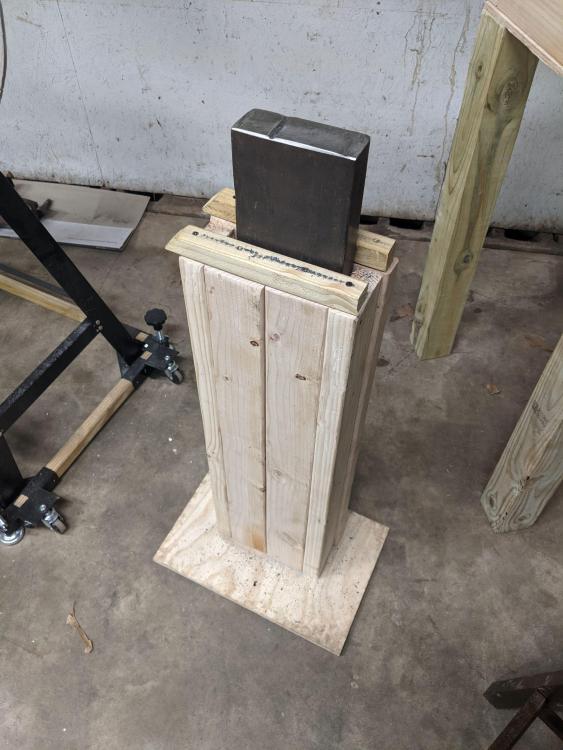
Adding to the list of forklift tine anvils, with just a sprinkling of fresh scale for flavor. This is 98 pounds of steel I got at the scrap yard for about $0.40/lb. I realize the plywood base isn't the greatest; I'll figure out something more solid maybe this spring. I also have some steel set aside for banding, but after I assembled the base I found that the tine was so solidly wedged in there (I barely got it to drop all the way down) that I haven't prioritized it. I keep thinking about ways to improve the anvil or the stand, but I think my skills need a LOT more practice before putting much more effort into this anvil! It does need a hardy hole somewhere though. Any suggestions where that might go to be most effective?
-
Hi all, My name's Dane, though TryingLobster is the handle I've been using most recently. I've wanted to work with my hands and build things since I was very young. Some years ago I got really into reading about iron metallurgy and I've been wanting to get into blacksmithing since. At the end of last year, I had the opportunity to quit my tech job and move to the Ozarks of Arkansas and start practicing instead of just reading about blacksmithing. Since moving in November of last year, I've set up my first forge out of a steel pipe I bought from the scrap yard. The walls of the steel pipe are covered in 2.5" of kaowool with hard firebrick for the floor of the furnace, then covered in refractory cement for protection. I've only got a single propane burner at the moment, so I've closed off the back half of the forge's volume with soft firebrick to keep the temperature up. The burner is homemade following Larry Zoeller's sidearm design with a 0.035" tapered welding tip as the propane orifice and works really well for my purposes. I've also set up a table for sand casting. So far I've just practiced by melting aluminum scrap and casting it into ingots, attempting to get my greensand mix right. I spent Tuesday of this week sifting play sand because I haven't found a good local source in NW Arkansas yet, but I think my greensand is pretty usable at this point, if not quite perfect. I'm also starting to make my own iron tools now that I set up an anvil out of a 98# scrap forklift tine. I'll post more details on the 'Improvised Anvils' thread, which has been a massive help to me! So far I've only made a chisel, which I'm both extremely pleased with and also makes it quite obvious how far I have to go! I need a LOT of hammer practice before I stop marring up the piece I'm working, haha. I'm really excited to find such an awesome community online, especially with so much wisdom available for me to read through for hours. I like to do a lot of reading and research before I get started, and this site has already been a tremendous help. I'm really looking forward to actually interacting with folks who do this stuff regularly, both online and in real life! I signed up with ABANA. Side-note, I actually did some web development for LeeAnn Mitchell for ABANA about 15 years ago; that may have planted the seed that eventually brought me here! I'm still looking for local blacksmith groups in the Fayetteville/NWA area to get involved with. I suspect things are pretty slow conference-wise with the pandemic, but I'm looking forward to meeting folks when things settle down a bit. Dane