twigg
-
Posts
205 -
Joined
-
Last visited
Content Type
Profiles
Forums
Articles
Gallery
Downloads
Events
Everything posted by twigg
-
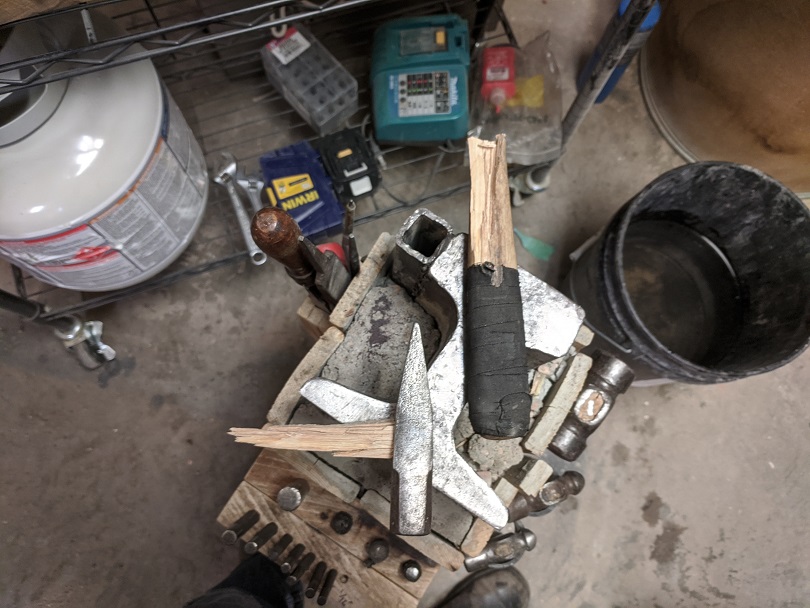
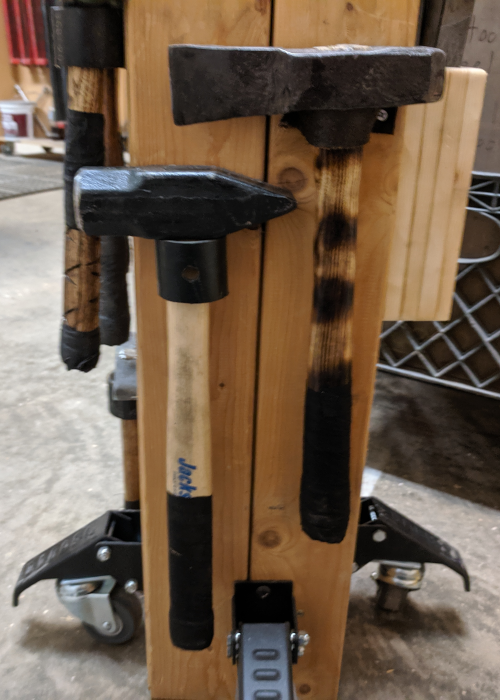
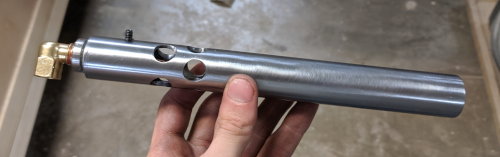
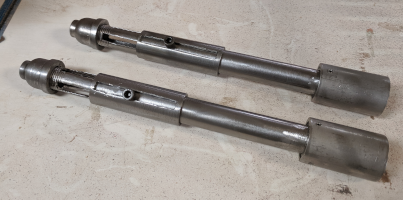
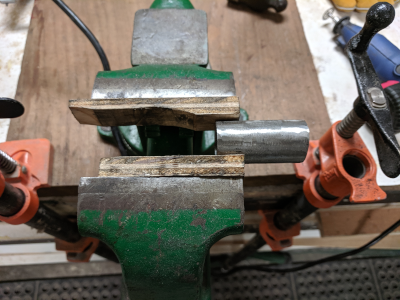
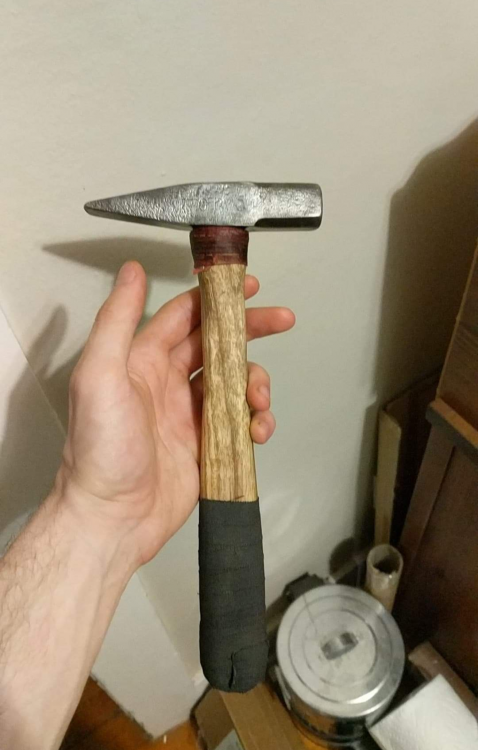
So this is the third time this year I've snapped this hammer's handle. I'm very much a weekend forger, and the longest time I've had between snappage was probably about 10 forging sessions of a few hours each. It's my favorite hammer head at the 16oz size so I'd like to get this right. I'm gonna give you all the details if any of you feel inclined to post-mortem where I went astray. First break: For the handle, I took a concrete tamper and cut a chunk off the handle. It was labeled as and ash handle, but who knows. I cut a slot for a wooden wedge on the band saw, drove a wooden wedge and a metal wedge in. I've made all my own wooden wedges using shim scrap and a palm sander. The wooden wedge went with the long axis of the eye, and I put the metal wedge at a 45 to the wooden wedge. After driving the metal wedge, I saw a crack about 3/4" long running down the length of the handle starting where the eye touches the handle. I filled it with epoxy and forged away. Lasted quite a while, but broke after about 10 forging sessions with a jagged fracture under the eye. I didn't get any photos of this break. Second break: While rehandling after the first break, the handle snapped on a diagonal plane while I was driving in the metal wedge. I just took the first handle, cut off the snapped part and rasp-ed the end down to fit in the eye, and cut a slot for a wooden wedge with a borrowed dozuki (it's not mine, I'm not one of those guys, I swear! ). This time I used linseed oil on the part of the handle inside the eye and on the wood wedge after researching the forums here. This time I took a photo: Looks to me like the metal wedge was too much stress and caused a crack or propagated what was left of the crack on the first attempt. Third break: I ran out of tamper handle, so I dug through my box of saw drops and found a piece of kiln-dried plane-sawn that was so white it had to be ash or maple. As I'm writing this and looking at the rest of that wood, it doesn't have the grain to be ash and I'm pretty sure it's maple. I shaped the handle on my belt sander, and did the same procedure as the previous two times, wood and metal wedges. I didn't see any cracks on the wood after driving the metal wedge. Two forging sessions later, the head flies off. I have pictures, but I'm pretty confident I just solved this one by realizing I used maple instead of ash. Overall, the common denominator of the first two failures seems to be the metal wedge, and the third was a material mistake. The wedge is about 1/8" thick by 5/16" long at the widest and tapers over 5/8" ish, with three "barbs". The hammer eye is very roughly 3/4" x 1/2". When I use no metal wedge, the wood wedge always starts backing itself out after the first few strikes (both for band saw cut slot and dozuki cut slot). I haven't tried waiting long enough for the linseed oil to set before swinging, but I feel like the wood wedge shouldn't back itself out that easily linseed or no. Any advice here?
-

What did you do in the shop today?
twigg replied to Mark Ling's topic in Blacksmithing, General Discussion
Yes on the linseed, yes on wooden wedges (I had both wooden and metal in there, metal on a diagonal), and yes on homemade handles (all ash). I didn't let it set for a week, but the wedge didn't back out the whole section in the eye snapped off cleanly. I didn't use glue because I used the linseed also on the wedge, hoping that once it hardened it would be like a glue and keep water out. I'm gonna go head and start a new thread about the hammer woes rather than dilute the awesome work showing up here. Really inspiring stuff, as always, Alexandr! -
What did you do in the shop today?
twigg replied to Mark Ling's topic in Blacksmithing, General Discussion
58er those are stunning. I like the compass too. Nice work! I shimmed and glued my anvil stand back together for the short run. Finished the twisty bit of a corkscrew, but I made it a lefty tighty by mistake. Also it's got some big cracks from cold forging. Seems like I spaced out at the anvil. I busted that same hammer again, for the 3rd time. Is there a rule of thumb for how big the metal wedge should be for a given eye size? -
What did you do in the shop today?
twigg replied to Mark Ling's topic in Blacksmithing, General Discussion
Fixed a lot of stuff the last few days, and finished the first of three paring knives for christmas gifts. Wish I had dyed this piece of oak before staining it, but oh well, next time. Should age well. Now I've gotta fix a lot more stuff! It's funny you should say that because guess what I broke next I got what I deserved for using pine boards with no corner brackets in an anvil stand. Next one is gonna be oak and steel! This should last long enough for Christmas stuff though.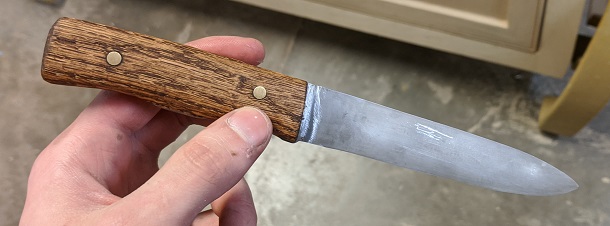

-
What did you do in the shop today?
twigg replied to Mark Ling's topic in Blacksmithing, General Discussion
I got back at the forge for the first time in a long time this week. Trying to spend a little time forging each day. Today, I made two halves out of a hammer! In all seriousness, nothing worth writing home about yet. Just getting the feel back.
-
What did you do in the shop today?
twigg replied to Mark Ling's topic in Blacksmithing, General Discussion
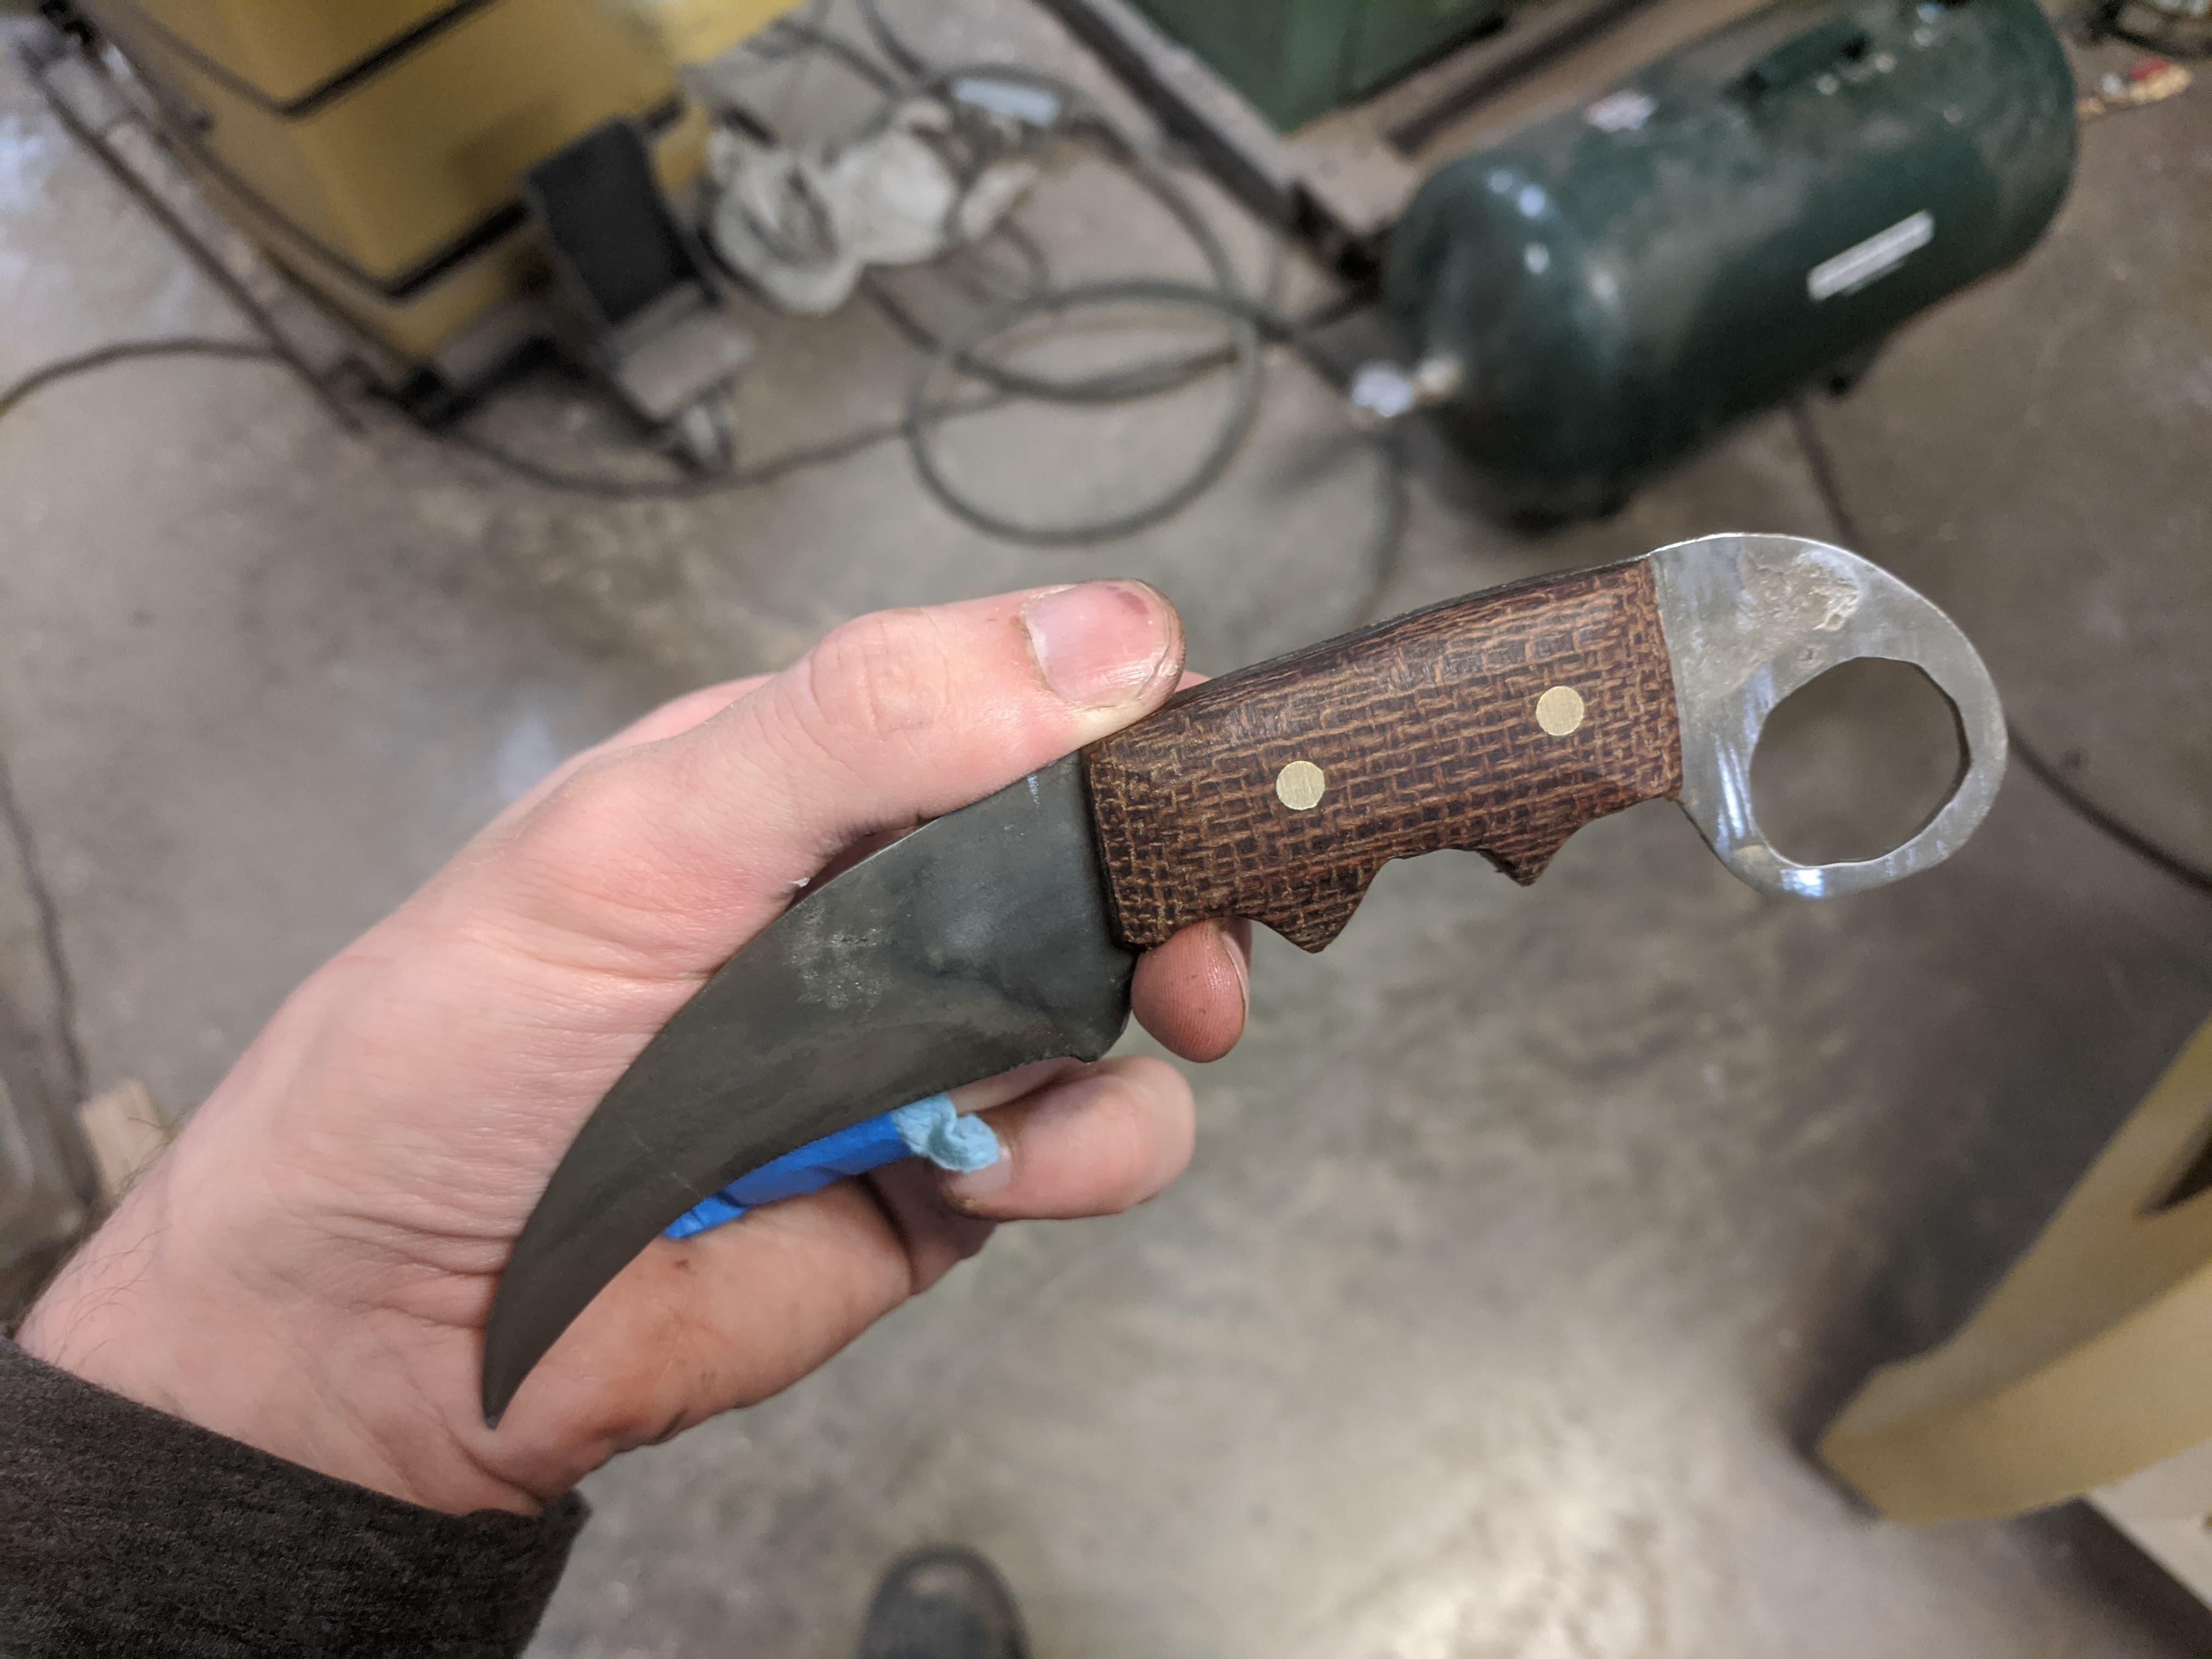
Helena, glad to hear your surgery went well! That leaf is awesome! I got a little time forging last week. I made my first karambit out of some leftover 1095 last week (it's pretty rough). I could've done a better job with the grinding, scales, and finish, but I didn't try too hard because the blade is cracked from me experimenting with an interrupted water quench. Overall, it's far from a good blade but it was a fun project and I'm satisfied. I got my hands on some mild steel 1/2" round rod, so I've been practicing leaves the last few days.
-
Chris, you were 120% right. I couldn't preheat because my "welding table" is a piece of sheet metal on a wooden workbench, and preheating would've done some damage. I had a crack near one of my welds while trying to force the assembly square after it had bent out of shape. I'd like to temper the joints now, but I know if I did the assembly would bend all over the place. Oh well. Lesson learned that mild steel is my friend for furniture projects
-
What did you do in the shop today?
twigg replied to Mark Ling's topic in Blacksmithing, General Discussion
Got it. Thanks all!! Sounds like I really dodged a bullet. Steam explosion inside the concrete... phew -
What did you do in the shop today?
twigg replied to Mark Ling's topic in Blacksmithing, General Discussion
Yeah in hindsight that makes a lot of sense. I did isolate the concrete from the heat with 2" of kaowool, but still I did not have a plan for if the concrete cracked from thermal stresses and the forge spilled. It's times like these when I'm really glad I joined this forum. I really appreciate the save Frosty What if I make a metal form for the slab, and leave the form on? That way even if the concrete cracks in half, it won't cause the forge to fall over. I just know that material as thin as this stove pipe is beyond my skill with welding, and if I tried to braze it I'd end up with a potato chip. -
What did you do in the shop today?
twigg replied to Mark Ling's topic in Blacksmithing, General Discussion
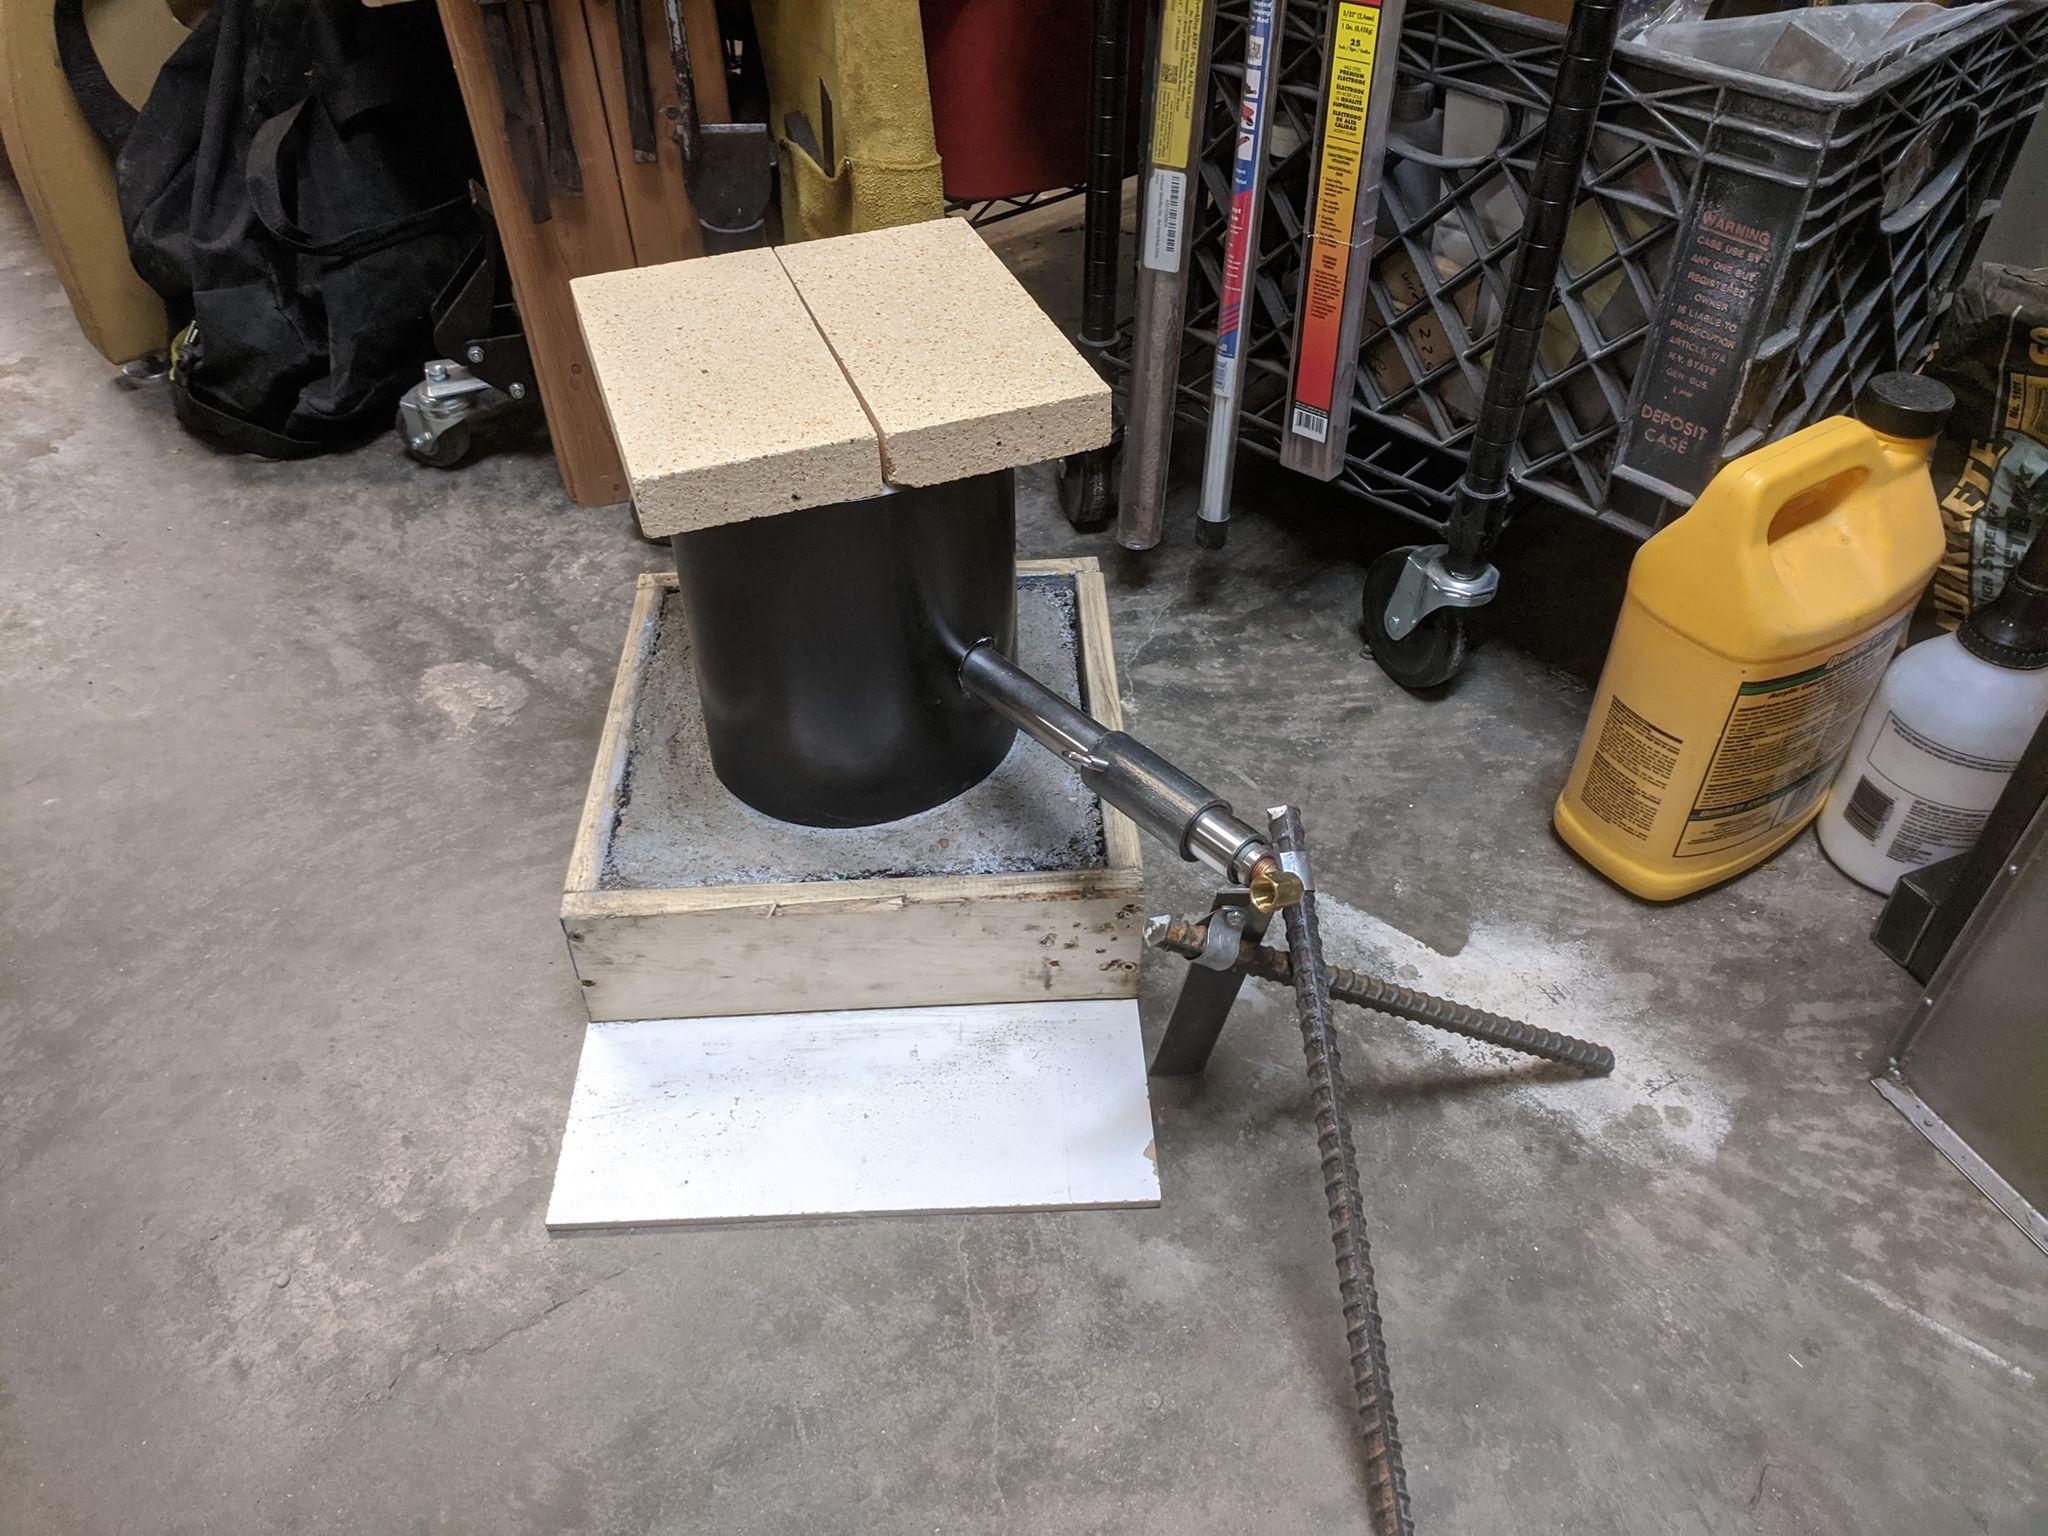
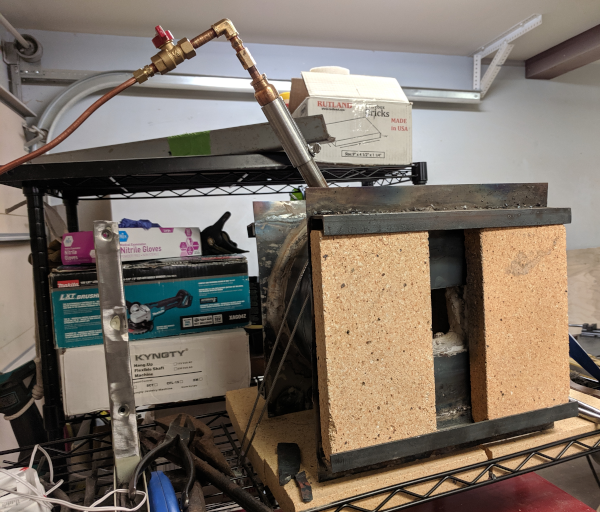
Made myself a casting forge yesterday by sinking a 12" x 8" diameter piece of stove pipe into an 11" x 11" x 4" quikrete slab, and lining the inside with 2" of 8# kaowool, rigidized with cement sealer. Used a 3/4" burner following David Hammer's design. I know that 2" of kaowool isn't a real lining, but I'm only trying to cast aluminum for now. The slab fell apart today when I took the form off and picked it up (this was after about 12hrs of setting). Oh well. Still usable, but it makes me sad. Guess I can add masonry to the list of things I suck at haha. I'll give it another whirl with a metal form, and I'll leave the metal form for support in the future.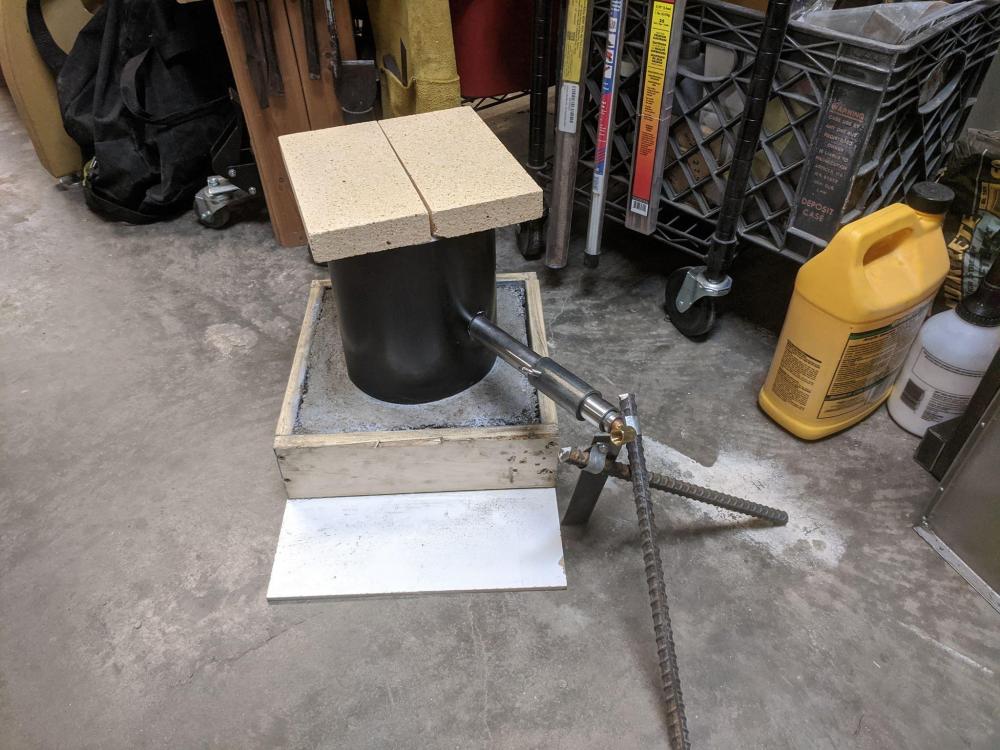
-
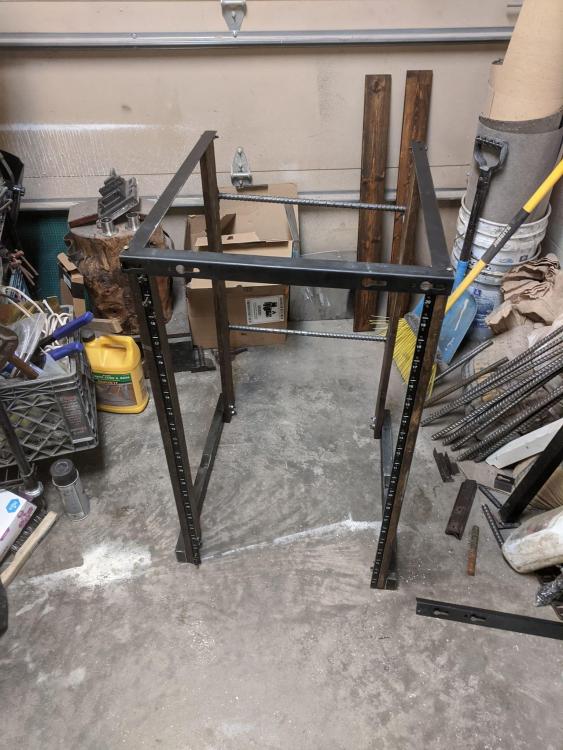
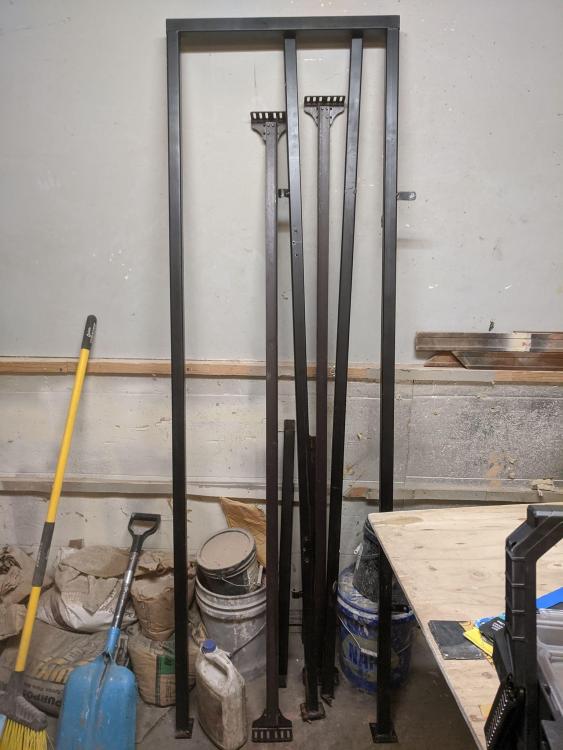
To all those who warned me about bed frames being high carbon, I wish I read your replies sooner hahaha. May those drill bits rest in peace. Had to use my only carbide bit to finish the job. Luckily it didn't break. I was amazed by the sparks I was seeing on the grinder. If it's recycled railroad track, then that explains that. Anyhow, this is where some of that bed frame ended up: a 20U 19" server rack for some of my hobby computer projects (building myself a little cluster out of the computers people list on craigslist for throwaway money around here, looking at 12 cores, at somewhere around 3.6 GHz). In other news, I found an old drawer heater at the pizza restaurant next door. The grease oozed into the rockwool insulation, so I had a fun time cleaning that out. But now I have 30" of what looks like 10ga nichrome and plenty of sheet stainless. I was hoping to 3ft section of rebar between the bedframe rails (cut to 5ft length) like a ladder to make an overhead shelf. No way I can anneal that whole thing. Any recommendations? Should I braze it instead?
-
That's awesome. I have a use in mind for these already, but if I have any leftovers now I know what to do with them. My plan for these is to make a storage shelf over my computer desk and use the bedframe for a homemade server rack. I've been accumulating computers over the years and I feel like it's time they paid rent! I figure I have about 12 cores across several CPUs that could be put to work doing numerical simulation of forge/burner designs. They just need a home and some TLC. It's surprisingly easy to find high end hardware in my neighborhood because of all the folks who dump money into bitcoin mining machines only to end up losing money on electricity (no one ever considers the cost of running the AC to offset a the heat generated by a machine that eats as many watts as a space heater). Now I'm just in the market for some rebar to complete the shelf. Found some on the ol' craigslist. Possible updates tomorrow.
-
Rumor has it that the fine was put in place because folks would pester students moving out for pre-dumpster contributions. They must've forgotten to bring donuts
-
Not as exciting as a lot of the hauls on this thread, but this was my first major score. It's been driving me nuts because there's tons of construction on campus near me, but there's a $1000 fine for dumpster diving. For the last year I've been looking out the window where I work, drooling at enormous piles of scrap. Today I finally got lucky: a restaurant off campus redid their bathroom stalls and I swiped 32' of 1.5x1.5 square tubing. There's also a bed frame I picked up from a moving-out sale for $30, making 22' of 1x1 angle iron.
-
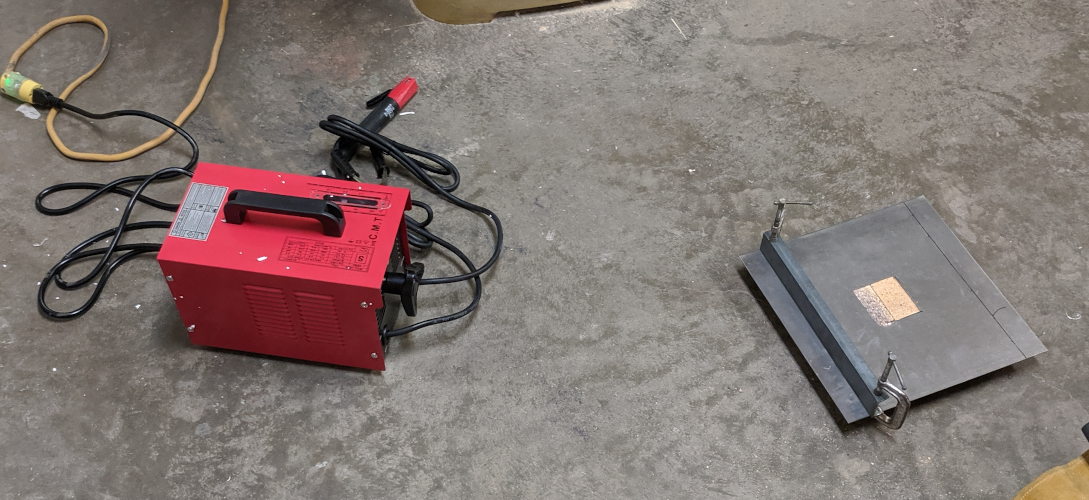
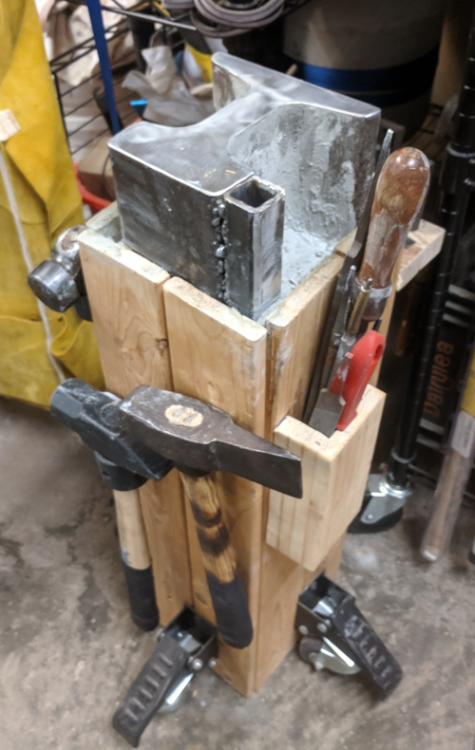
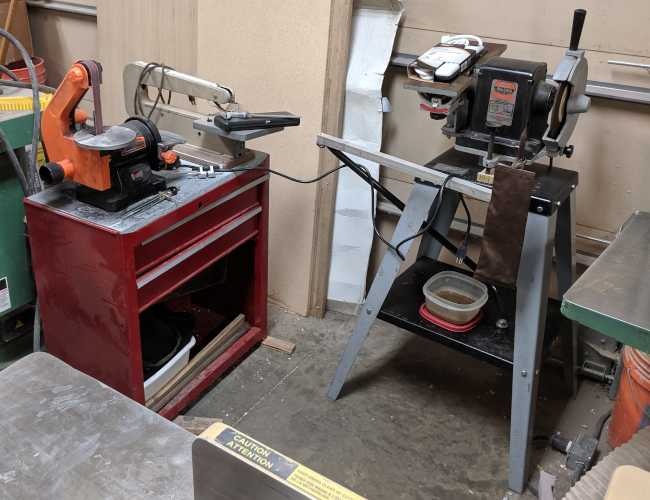
Thanks all for the encouraging words! I appreciate it. George, thanks for the heads up! I'll reach out. I'm in for experimental physics. It's what got me into working with my hands. Frosty, right now I have an improvised crane rail anvil, a very sad gas forge, a 5" bench vise (it's my hero), the cheapest plastic belt 1x30 belt sander on the market, and the cheapest AC stick welder on the market. My landlord (cabinet maker) lets me use his tools (drill press, air compressor, MIG welder, plasma cutter, lots of woodworking tools) so long as I don't cause problems. (He's an awesome guy!) I avoid his welder though because I am a total greenhorn welder and worry I would somehow break it. Anvil: The crane rail was one of my first purchases, and I really regret it. I paid almost $300 for 70 lbs of hardenable but structurally flexible steel when I should've just looked for the biggest hunk of mild steel I could find. On a ball bearing test, I get about ~30% of the energy lost, whether I use the hard horizontal surface or the soft vertical surface. It's better than my shop vise, but honestly it was nowhere near worth it. Anyways, this is how I make the most of it: The setup is really top heavy, because the first 18" off the ground is all wood boards, with 70lbs of steel and 10lbs of cement on top of it. The shop casters are really convenient though and worth every penny. I intend to use this setup until the stand inevitably falls apart (the screws holding it together keep stripping cause it's soft pine I got from a friend's old ikea bed). Gas forge: This was a custom build (as you can tell by my ghastly welds lol). I made a post about this in the gas forge forums, but I don't think I ever showed the final product. The body is a helium tank (same as in the earlier post) with 16 gauge steel sheet front and back. It lets me do basic forging but there are multiple red flags. The interior is 4.5" diameter x 6" long (95 cu in). There's 3 inches of kaowool and 1/8" of refractory coated with ITC-100 HT. The burner is a 1/2" burner following Mikey's designs with the flexible accelerator. On my last forging session, using 30 psi of propane I was able to heat the end of a 3/16" x 3" flatbar to a bright orange. Based on the prescribed burner-to-volume ratios, my burner is seriously underperforming for some reason. But more importantly, the forge shell started ripping itself apart from thermal stresses. I wasn't able to get very sturdy welds between the helium tank and the sheet metal ends with my stick welder, and those joints have opened up. I accidentally melted a bunch of the helium tank while welding, so I ended up only having a few scattered tacks holding it together. If I do try and repair it, I'll probably braze it together instead. Grinder: These two machines are a 1x30 belt/disk combination sander and a Foley-Belsaw 1055 sharpening tool. I bought the belt sander on the cheap hoping to get up to one year off it to play around before doing anything serious. A lot of screws have already seized up from metal dust though, even though I use the dust collection system. The Foley I inherited from my grandfather, but I'm not sure how I use it to do what I want. Arc welder: Another bad buy. I knew I had to be careful about amperages, but I goofed up and read "30 amp" as "20 amp." (It wants 120V 30A, but comes with a 20A plug). I can do a little work on it, but I have to constantly stop and reset the breaker. I'm postponing my welding practice until I can replace it. I love that it's so small though. I can deal with 10% duty cycles, but my storage space is really limited. I went with stick because I eventually want to learn TIG in the long run and because having such a small unit seemed really appealing. Other blacksmithing tools: A quick note on the burners: There are two 1/2" burners following Mikey's designs, and one 3/4" burner following David Hammer's design. I was just having too much fun building these things and couldn't help myself!

-
Hi all, Been a while since I've posted on the forums. I'm a total beginner who opened shop last summer. Grad school and family emergencies had me out of action since October. I'm just getting back into it now. I have to downsize my shop at my landlord's request (he was totally fair about it and I knew it could happen). For the next few years at least, it looks like I'll still be able to do some forging, if the grad school gods are feeling merciful. I've got a ton of broken equipment to fix before that though haha
-
How do you find a useful scrap yard?
twigg replied to twigg's topic in Blacksmithing, General Discussion
Thanks all! There's a bunch of replies I just caught up on. Since my last post, I spoke to a mechanic on my commute to work. They pointed out their scrap pile and said I could take what I like. Apparently, there's no centers in the county that buy steel. On another note, I've just run totally out of storage space with my last few acquisitions. Gotta take a hard look at my shop plans and inventory, and I gotta get rid of the stuff I don't need. -
What did you do in the shop today?
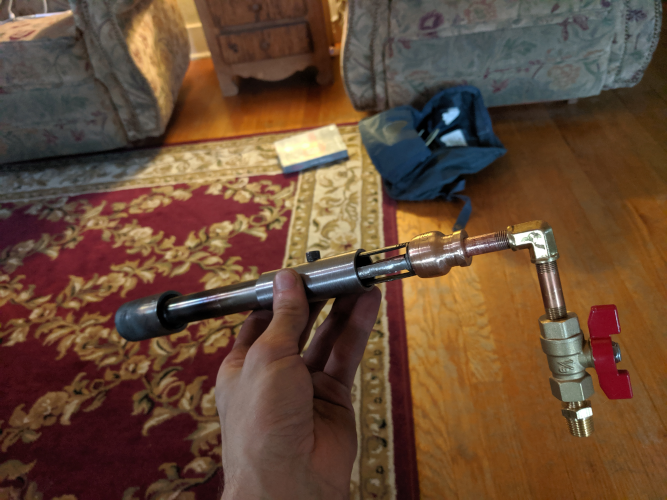
twigg replied to Mark Ling's topic in Blacksmithing, General Discussion
Haven't done any forging recently. My brain's been preoccupied with a 42000 RPM vacuum pump at the lab where I work that's been making a concerning amount of noise. Time to start bringing my face shield to work... I did manage to braze flexible accelerators for my 1/2" burners (design from Michael Porter's book), and hang a 15 oz cross pein. Used a section of ash I got from a dirt tamper my folks were getting rid of to make the hammer handle. I ended up needing a steel wedge and cracking my handle. I gave it 50 or so whacks on my already-swiss-cheese railroad anvil, and I didn't see the crack grow. So I just filled it with epoxy and wrapped some thick thread over the cracked part to hide my shortcomings. The coverup is mostly so I don't have to look at it all the time.
-
How do you find a useful scrap yard?
twigg replied to twigg's topic in Blacksmithing, General Discussion
Thanks all for the input. I hear you about getting known steel for razors. I've already started stockpiling 1095 and 52100 stock from ebay auctions for when I know what I'm doing. I've been practicing my forging technique on RR spikes in the meantime. I was thinking of scrap steel mostly for kitchen knives. I can probably get 6ish razors or 1 chef's knife or 2 paring knives from a single knifemaking billet like I'd buy online, so it's way more economical for me to buy known steel for razors than for kitchen knives. And I don't know if I'll really enjoy making kitchen knives until I get started. That's why I'm hoping to find some spring steel. Also, I'm just curious what the best quality I can get from scrap materials is (again, not for razors, I know from experience the feeling of shaving with a razor that doesn't hold an edge and all I can say is ow) Also, I have no idea where my interests will lead me in the future. Razors are a nominal goal for me, just something tangible I can aim at while learning. I'm totally willing to be seduced by other crafts. It just turned out that razors were an interest of mine that lead me to blacksmithing in the first place. I started by restoring antique razors by hand, and it got out of hand from there. I'm a serial dabbler with no shame I'll keep an eye out for plow discs. -
How do you find a useful scrap yard?
twigg replied to twigg's topic in Blacksmithing, General Discussion
Thanks all! Really appreciate the heads up, both. Definitely out of my comfort zone. I'm hoping to make straight razors and kitchen cutlery, so that would mean scrap tool steel (O1, A2, W1, etc) or 1095 for the razors and I probably want to experiment with a variety of mid to high carbon content steels for the kitchen knives. I have a feeling 5160 will probably be the most available knife steel, if I manage to get some scrap springs. I'm also trying to learn to weld, and have plenty of small fab tasks, so I'm always on the lookout for A36. Putting together all the advice thus far, it sounds like my best options are to ask for the foreman at the university construction site, and to try the nearby mechanic. I have a hunch that the price of scrap must be relatively high around here, but it's still worth a shot. I'll definitely take your advice and show up armed with pastries. I'll start asking around and letting people know I'm looking. -
To be honest, I'm pretty embarrassed to have to ask this. How do you find a scrap yard where you can buy material? I've looked up some scrap businesses in my area, but if they do sell scrap to the general public, they don't advertise it. All the websites advertise that the yards buy scrap, but don't really mention selling any. Plus, I have yet to find a single business in my area that advertises itself as a "scrap yard" or "salvage yard". Instead, I find salvaged auto parts sellers and recycling centers, and I'm not sure which businesses would sell and which would tell me to get lost. What do you all look for? I'm in Boulder, CO if that helps. I have a car. I have an angle grinder and hand tools, but I do not have jacks. So I'm not able to take leaf springs or axles from auto scrap yards unless they're already removed for me. (I would just buy jacks, I know they're cheap, but I am completely out of room to store more tools for the time being. On top of that, I've never used jacks before and I've got some anxiety about going under a raised car for the first time with a grinder and no one watching out for me.) Of course, I do keep my eyes open for other sources of scrap. Last weekend I snagged a cheap metal desk off the curb and broke it down for rectangular pipe and sheet metal. I always keep an eye out for bed frames and such. The only construction sites I know of in town are on the university campus, and I haven't bothered asking for drops there because they're large outfits and the foreman probably wouldn't take the time. Other than that, I am networking with local fab/welding businesses, but, well, I'm a painfully shy individual and I'm taking my sweet time before I feel comfortable enough asking for anything. I prowl craigslist regularly, but I'm too slow on the draw. The big reason I'm interested in scrap yards is because it would be great to be able to shop a larger variety. Not likely I'm ever going to find A2 on the curb (not in my neighborhood anyhow ) P.S. I do realize I could solve several of these mysteries by picking up a phone. It'll be less of a strain on my nerves if I have a better idea what to expect going in. I couldn't tell you why but my millennial instincts would rather get a broken arm than call up another human being
-
Thanks! I really appreciate all the time and energy you put into this thread. I'll be back when I have made progress on the 3/8" burner.
-
What did you do in the shop today?
twigg replied to Mark Ling's topic in Blacksmithing, General Discussion
Total beginner here. I forged my very first piece yesterday from about 1-1/2 inches of railroad spike. It's more letter opener than actual straight razor. Plenty of issues (cracks in the tang on the other side, grinds are nowhere near slim enough, completely zoned out and misplaced the pin hole, left the tang too skinny, etc etc). Purpose of the project was to have fun and get me excited enough to keep trying. Managed to do that. Learned a bunch along the way. Also, I'm glad to be making these mistakes on bits of railroad spike instead of 1095. Also, to be fair, I did a bunch of grinding to get that shape. More or less, all I forged was beating the RR spike to length, forming the tang, and bending the tang. Going to add on forging the bevel next time around. I didn't bother trying to get the proper edge geometry because right now all I've got is a bench grinder. I plan on getting a 2x72 belt grinder in the future, so I'll start the fine grinding then. Plenty to practice in the meantime.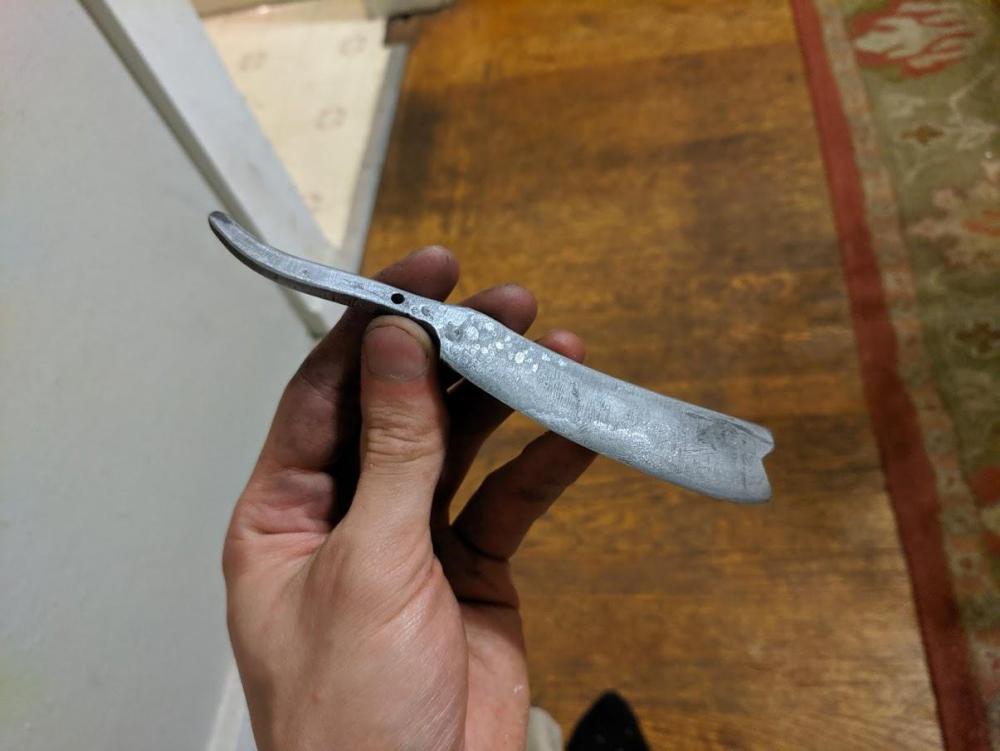
-
Thanks! This is really helpful! I did a little more forging in the forge, in the same status as my original post, just to get a feel for things. (I already layed some ITC-100 down, so I figured I might as well play until the lining breaks down.) I decided I would like even less forge volume (got tired of reaching deep into the forge to position a tiny straight razor blank near the hot spots). I don't ever see myself working anything more than 2" wide, and I don't see why I'd ever need length (actually length seems to be a real pain). Also, my burner angle is not what I hoped. With all this in mind, I came up with a redesign plan. My thoughts are: I can cut the length by ~3" by removing the front and back domes and replacing them with flat sheet metal. While I still have the interior open, I can add another 1/2" of ceramic blanket and bury it in a 1/2" protective layer of refractory, followed by ITC-100. That would make my total lining as follows: 2" ceramic fiber blanket, followed by 1/8" satanite + ITC-100HT (oops!), followed by 1/2" of ceramic fiber blanket, followed by the 1/2" sealing layer of refractory. That should bring me down to an inside diameter of 2.75". According to the gas forges / burners book I mentioned, a 1/2" burner needs 5" of clearance before hitting the work piece. So, if that clearance scales with burner cross sectional area, a 3/8" burner would need 2-13/16" clearance before the workpiece. That I could easily achieve by slightly recessing the burner more than 1/16" from the lining. Because I will be replacing the front and back, I can rotate the forge to have any burner angle I want. With such a small diameter forge, I don't think a swirl would be helpful, so I'll just go roughly 15 degrees off TDC. Biggest remaining issue is that the burner collar will be huge relative to the burner. Oh well. I shrink the opening a bit with refractory. With all those changes, that should bring my final forge volume to 90 cu in. This might be a bit off the deep end, but here goes. I was wondering, would it be worthwhile to try and internally flare the entrance of the capillary tube with a 00 size center drill? My thought was tapering from the 1/16" tube OD to 0.025" (drill diameter for size 00) would preserve more momentum in the transition from the MIG tip to the capillary tube? I guess that would also reduce the pressure a bit. Again, I could be making a fool of myself. I just find these design challenges fascinating
-
Ain't that the truth and thanks a bunch, Mikey! So I did a little more playing around with the forge. Even forged myself a (fake) straight razor for practice/experiment. Saw a couple of issues: First off, turns out my burner collar isn't the issue, it's the opening in the lining that sets the orientation of the flame. If I try and tilt the burner up, the tunnel through the lining steers it right back down. So I'm going to have to mess up the lining one way or another. Might as well fix the whole darn thing and bulk up that refractory layer! To avoid having this same issue again, I'm going to try and make a funnel shape in the opening where the flames enter the forge. That way I should be able to adjust the pointing of the flame without smacking into the lining. Another line of thought I'm having. With another 1/2" of refractory, my forge inside diameter goes down to 4" and my forge volume goes down to 113 cu in. I'm worrying I will absolutely roast this forge with a 1/2" burner. Also, after I did about an hour and a half of forging, I set off my CO alarm, an hour after I turned off the forge. I take that to mean I've got a bunch of chimney effect, and I'm pretty sure I know the reason. Mikey, I believe it's your design I followed for my 1/2" burner. It's from the book Gas Forges for Forges, Furnaces and Kilns. The reason I think I was chimney-ing was because I had an unexpected twist where my bell reducer would not thread on the burner tube far enough to meet the choke collar (it did just fine before I drilled out those slots! must've banged up the threads somewhere along the line), so there's about 1/16" of gap when the choke is fully closed. I was sick of filing at that point and left it as is. It would be an easy fix, but with the volume constraints, I'm thinking of scaling down to 3/8. This time, I'd take my burner tube and choke collar to the machine shop where I work. They got a couple of Bridgeport mills. I was just feeling too shy last time. Now I'm too sick of hand filing to care The other option, as I understand, is to use less regulator pressure on my 1/2" and position it further outside the forge. Makes me uneasy having the burner in such a mechanically unstable way. Set screws / position screws love to back themselves out during heat cycling, and I've never arc welded before, and I suck at silver brazing (as you saw!), so I'm not gonna risk that setup. Also, will a 0.023 mig tip still be the proper size for a 3/8" burner, or should I go smaller? I'd love to understand the math behind the accelerator dimensions if it's not too much to ask. Thanks!