Dan Manns
Members
-
Joined
-
Last visited
Everything posted by Dan Manns
-
oops. BVV stabilizer cures at 194F not 110 as stated in my post. 110F? It gets that hot in Arizona all the time!
-
thanks for this thread. I've used the BVV product. It's slightly cheaper than cactus juice. the company offers a couple of different qualities in stabilizing fluid too. I haven't used cactus juice yet so i have no basis for comparison. I bought the standard BVV stabilizer and used it in my vacuum chamber. It cures at about 110 F. i have stabilized a dozen or so blanks of cherry, spalted maple and birdseye maple. I like the results thus far. standard ($38/64oz): premium ($60/64oz)
-
Thank you Steve! Will add the oil to surface as I gave some on hand. Now onto the PW anvil...
-
I haven't give the anvil a name yet Neil. Perhaps "William" or "Bill" - those sound like they have a "ring" to it. Thx for reaching out!
-
George, thank you for sharing. It sounds like your FIL has had an incredibly interesting life! Now that you describe the place - I am very familiar with that area and drive past it frequently. Ironically the anvils that were gifted me came from a gentleman who lives in Lancaster near the intersection of William St & Aurora. Best of luck with all of your blacksmithing endeavors George! If you set up a shop for teaching - send some pics sometime if you get the chance!
-
thanks ridgeway, that's what i was thinking but i wanted some confirmation before i start. the scotch brite pad worked really well. didn't hurt the steel/ iron at all - not a spark to be seen - plus i like the way it cleans it up.
-
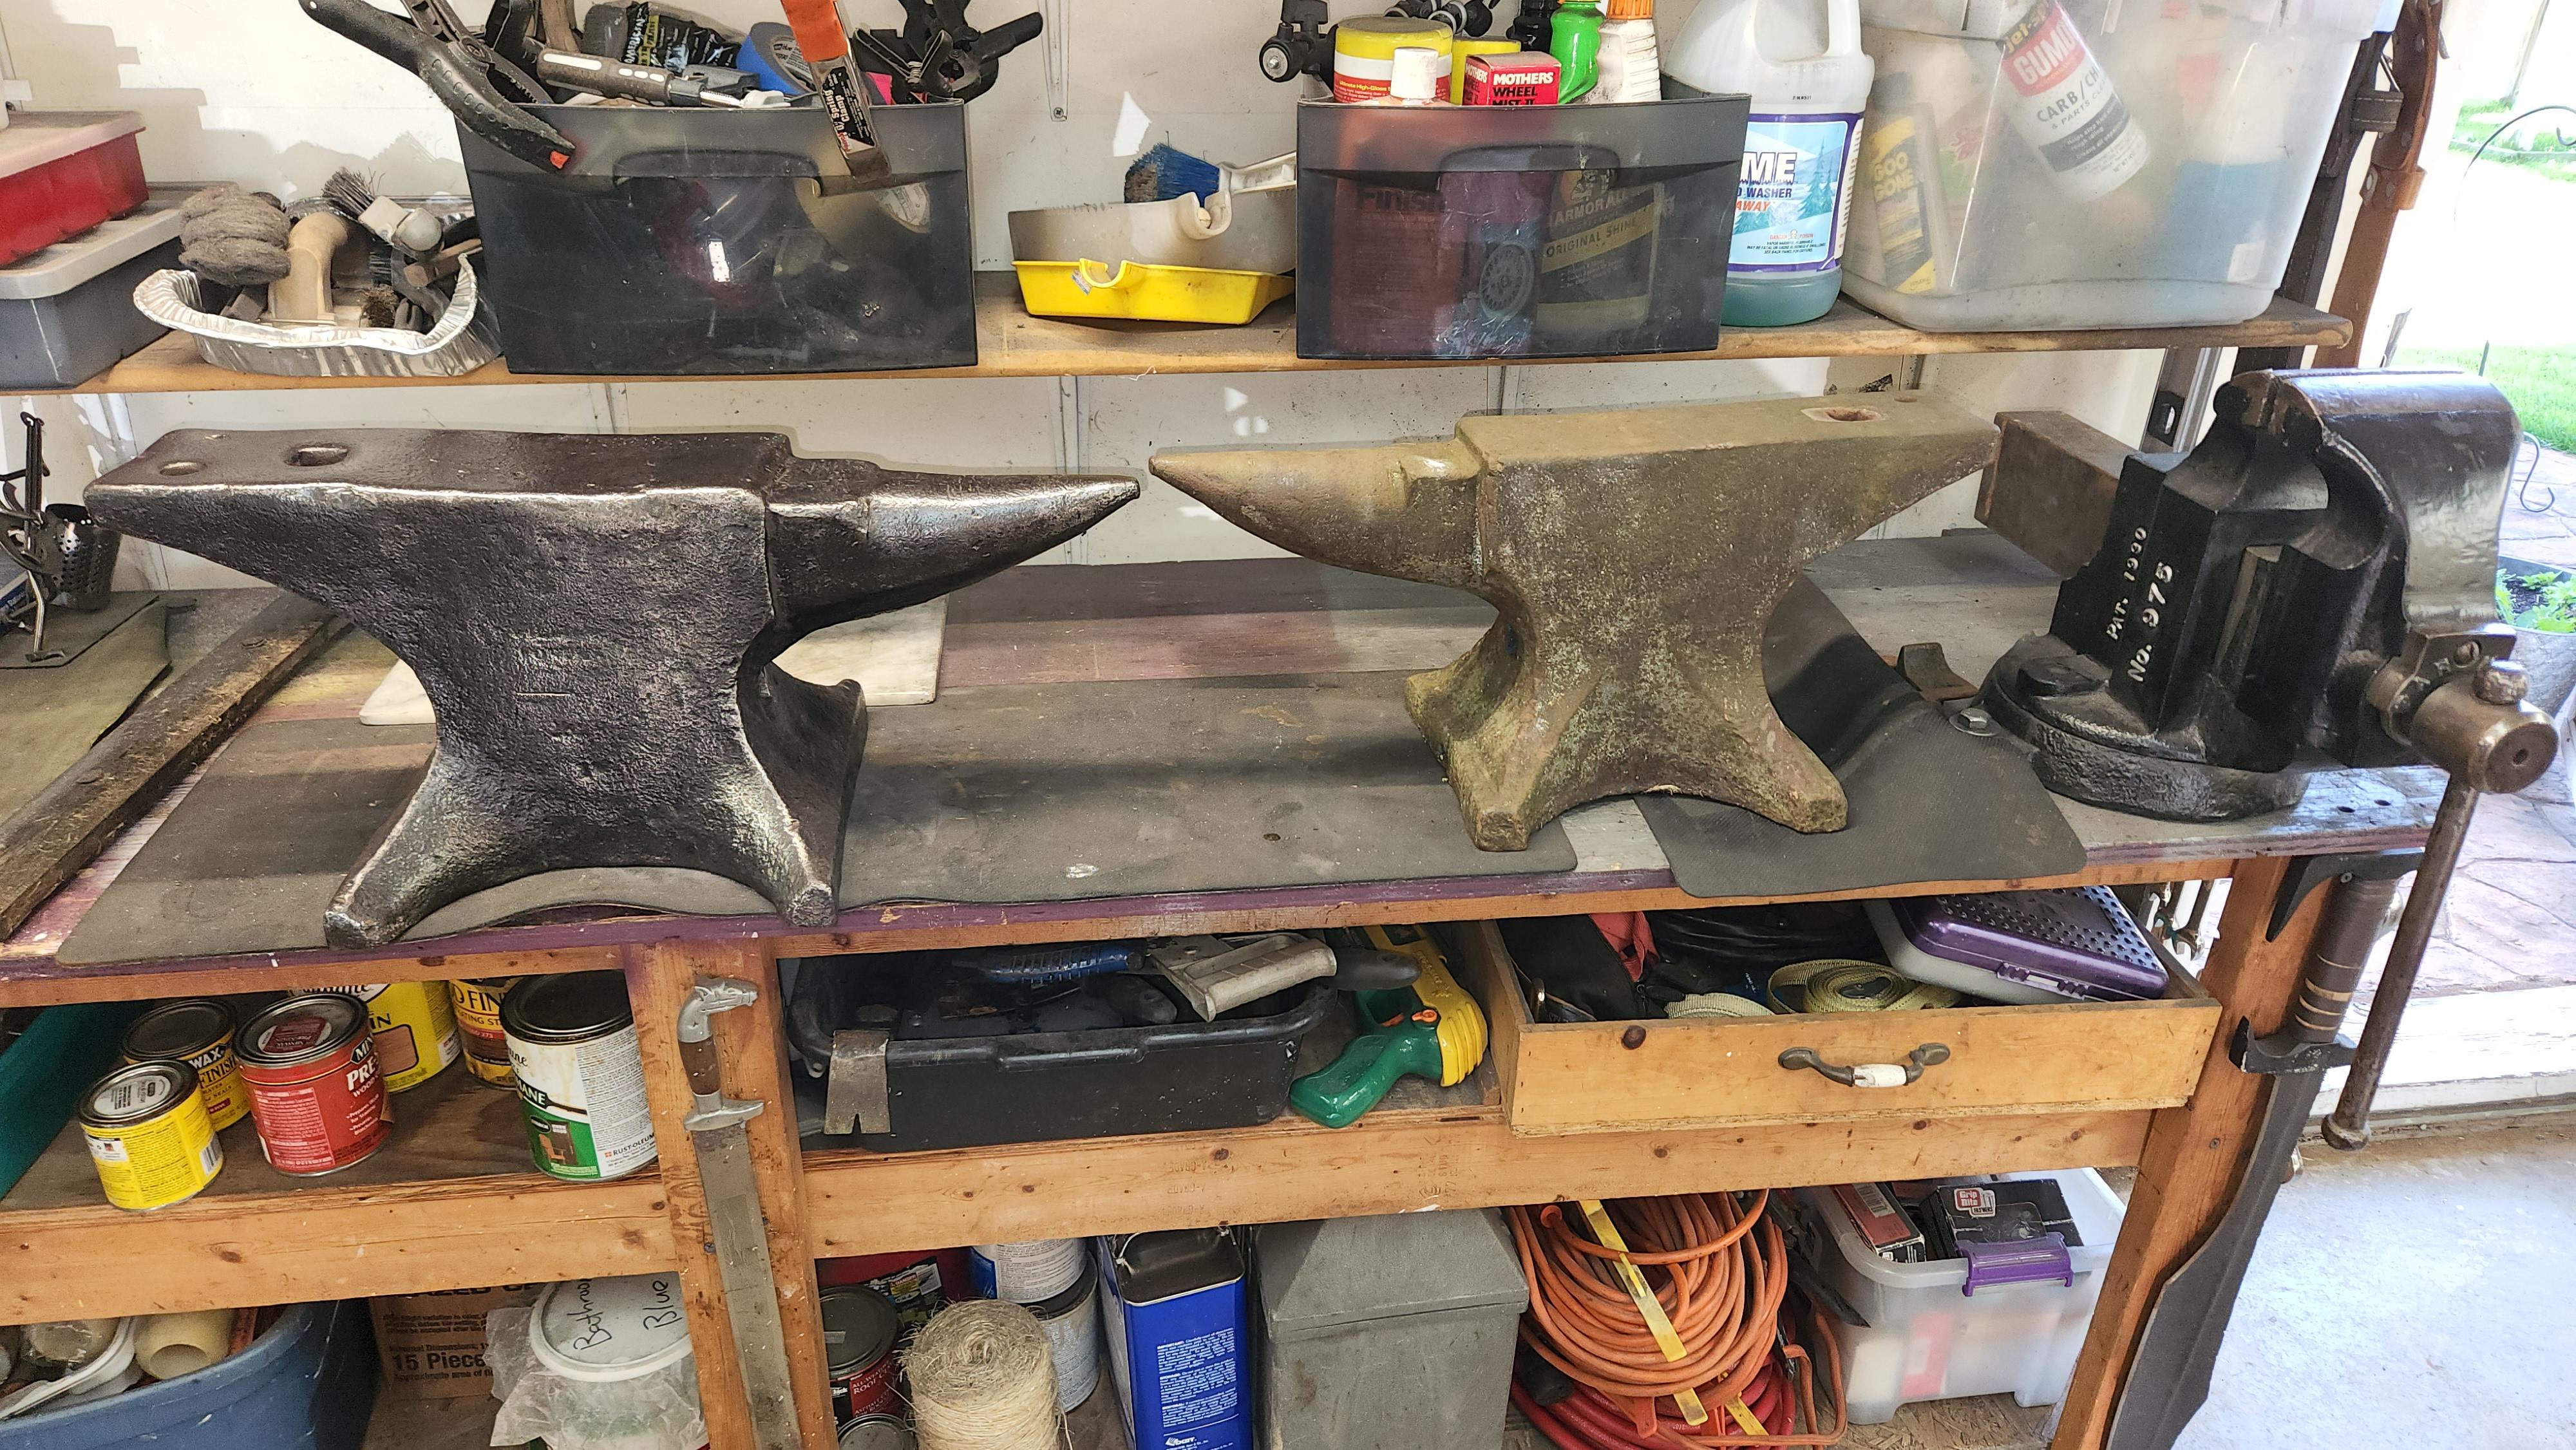
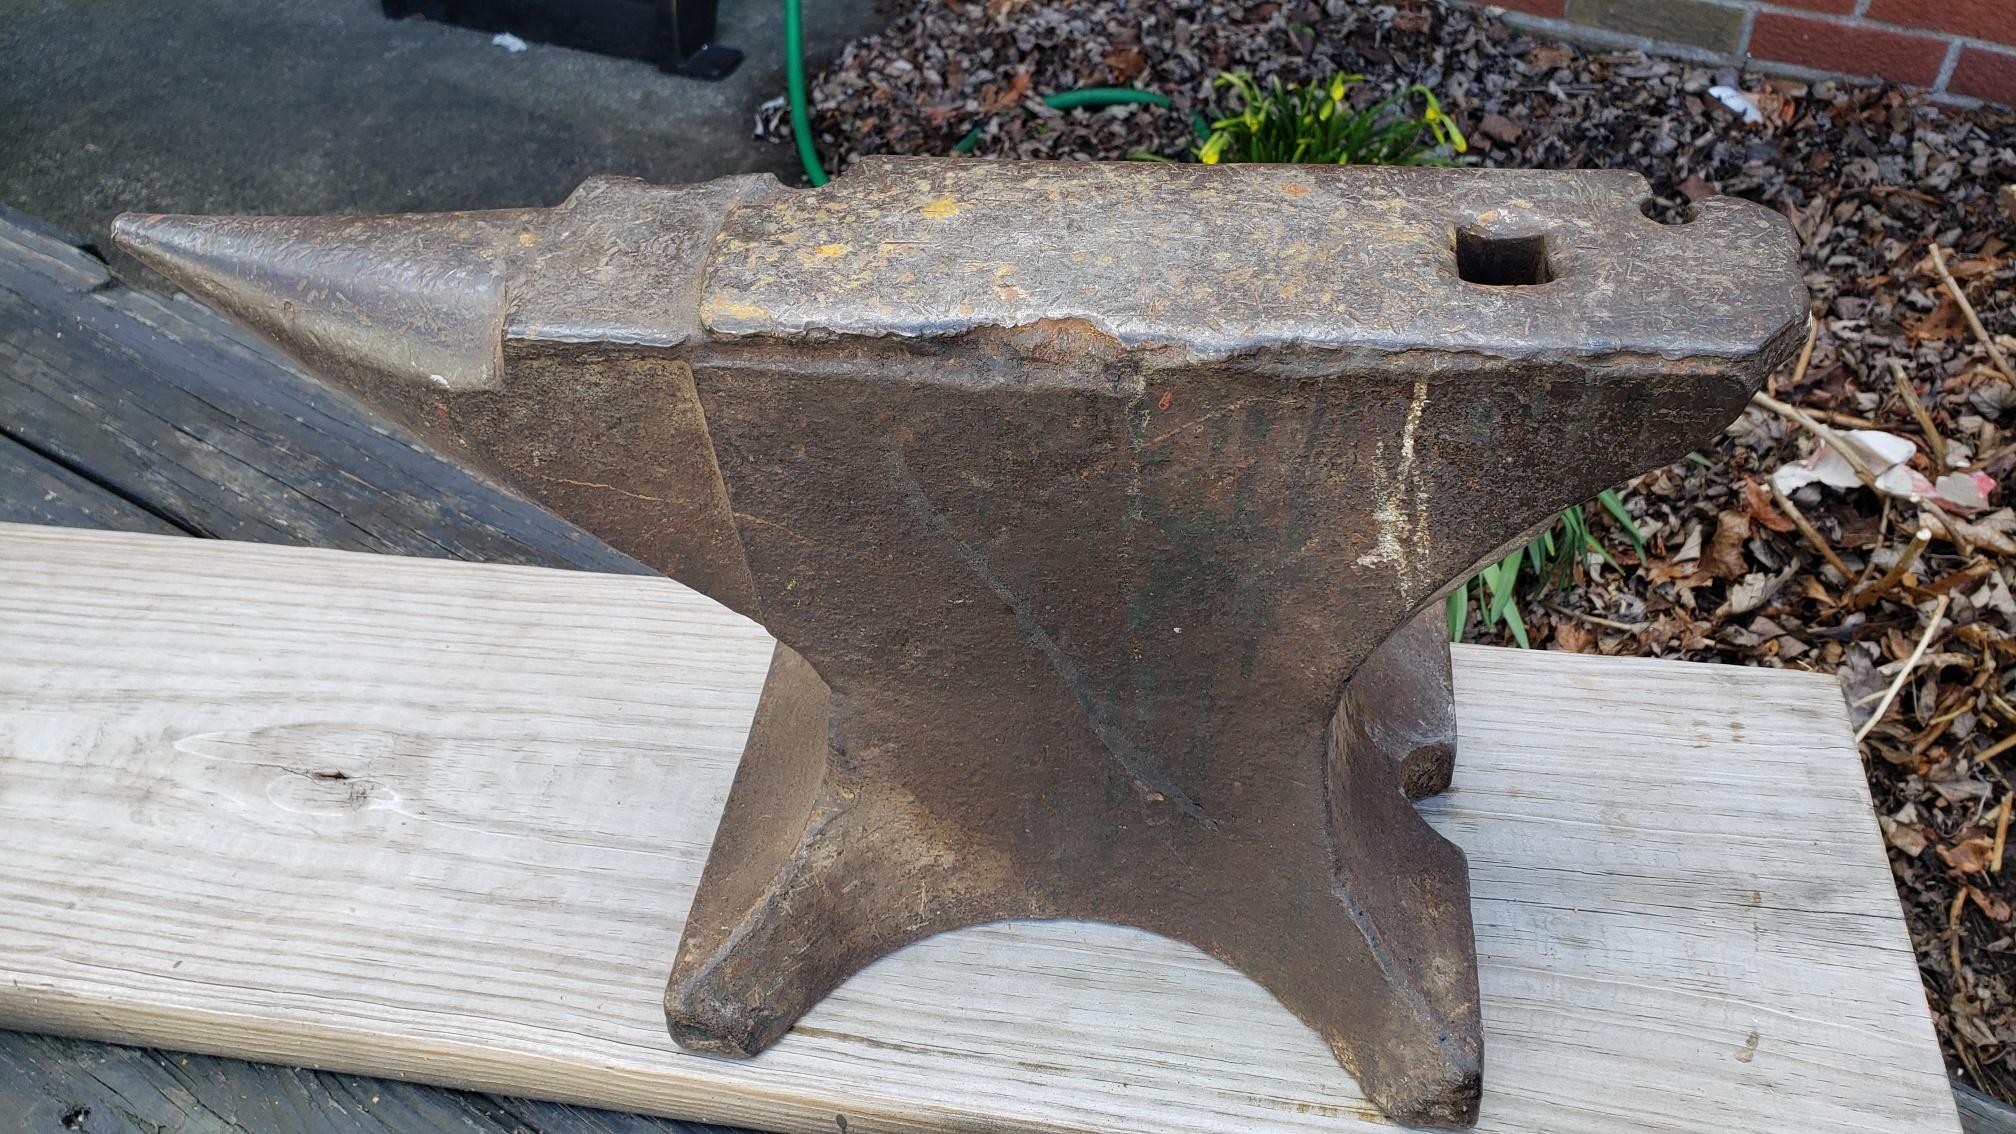
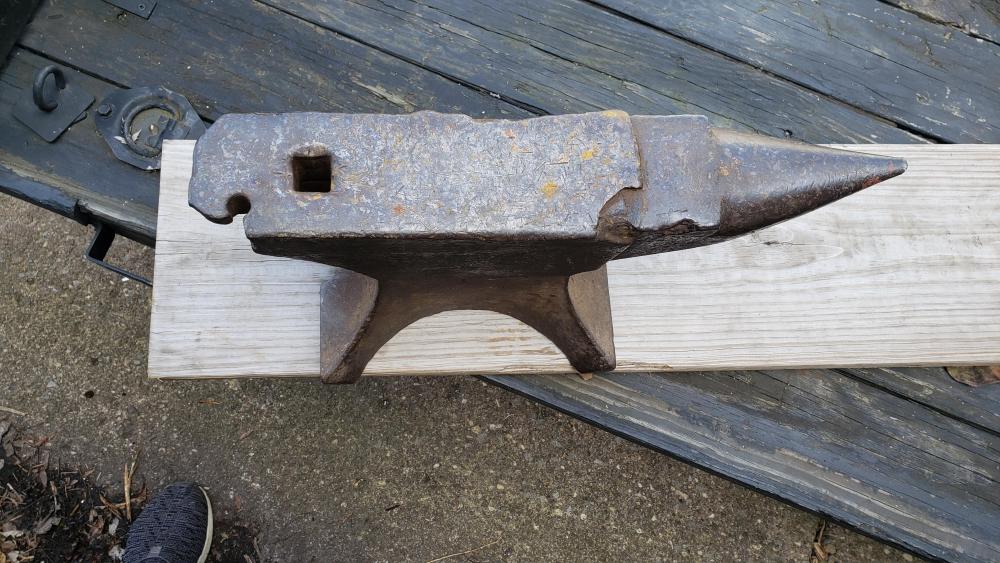
I just cleaned up the anvil on the left using an angle grinder with a wire brush attachment and then a Scotch Brite conditioning disk. I love the way it turned out. With it cleaned up I was able to read the faint marks and identify the maker as William Foster and the year of manufacture as 1828. The Foster was in the same condition as the Peter Wright on the right was before i started the cleaning process. I am thinking of doing the same process to clean up the Peter Wright as I love the way the Foster turned out. What say ye oh wise ones? more info and a better shot of the Foster: https://www.instagram.com/p/CezXgEIg3U3/

-
George - the plan is to teach knife making and blacksmithing and use the anvils for educational purposes! i live near the airport in depew. not familiar with that intersection you mentioned. is that in the town of amherst?
-
was gifted a couple of anvils by a family friend. if you have a moment and can check out the vid - there's some details and some up close shots.
-
That is the most creative use for a 3D printer that i have ever seen! It's genius! I know someone who has a couple 3D plastic printer. That makes the "lost wax" method a possibility. I've never cast bronze before but hey - I'll just add it to the list of fun things to get to when out in the shop! thanks fellas! You've got my creative juices flowing!
-
-
-
Thank you fellas for the responses! JHCC - i do not know anyone with a Cricut machine. (TBH I had to google it to see what it is exactly!) Frosty - I like the idea of a mask plastic stencil. A piece of mylar, some spray adhesive and a sharp exacto may just do the trick! I I will definitely look into that! A CNC EDM would be amazing. a little out of my price range right now Latticino - thank you for the referrals and for the San Mai advice! I am definitely going to give it another shot. I may have lost the battle but the war's not over. I should have mentioned that my inner core was Magna-cut. It's some new knife steel available from Niagara Specialty Metals (i happen to have the good fortune of living close to NSM). The Magna cut has .6% chromium and though not at the 2% mark for "stainless" much of the Chromium in the steel is considered "in solution" as pure chromium and not tied up in Chromium carbides. So it behaves a lot like a normal stainless even though by standards it is not. I knew it was a long shot! And Yes I joined the Niagara chapter of NYSDB. Unfortunately during COVID they weren't meeting (but then again who was?) and now that they've resumed, most of their meetings are on Sunday mornings and I happen to work every Sunday. Lately they've been meeting at the shop of one, Andy Chambers - a very talented local smith. I am considering taking a day off on one of their meeting dates just to attend a meeting and meet Andy and see his shop. Thanks All! Once again the community doesn't fail to come through for me!
-
Good morning gentlemen. I have searched the site for an answer to my question without luck. I am sure it is in here among the other 638k forum posts - I just haven't stumbled on it yet. Any help would be greatly appreciated. I am looking for a vendor who can make vinyl decals so I can electro-etch my logo on my knives and blacksmith projects. I have a logo designed and available in .jpg & .png formats - now I just need someone who can print and cut for a reasonable price. I have run into 3 issues in looking locally for someone to do it: #1: Print shops are unable to print a logo in the small size that I would like (as small as 1"x1/2") #2: Affordability. I have been unable to find a vendor that can print a small batch of logos for a reasonable price. Because the logos are so small, one sheet of them would last me a while. The best price I've gotten is $150 for a sheet. I'm getting crushed by setup fees on this small run. #3: I've had a friend print out logos on his vinyl printer that he has at home but the quality hasn't been the best. The decals aren't "sticky" enough and can come off during the etching which, of course can ruin the work that I've spent a lot of time working on. If anyone has a recommendation for a vendor who does this kind of work and can point me to them - I would greatly appreciate it. Lastly, let me just say "thank you" to the community, especially the moderators and administrators of iforgeiron. I am getting better at making shiny metal things and I am thoroughly enjoying the process (even the painful failures that happen from time to time. Like working on a San Mai blade for 5 hours only to have it split like a banana peel. I can provide pics). But I know I wouldn't be where I am today without the help of others including many here on the site. Heck - I wouldn't even have been able to build a forge without the expertise and design for the burners which I found here on the site. I am attaching a copy of the logo I am looking for. "MFF" stands for Manns Family Forge.
-
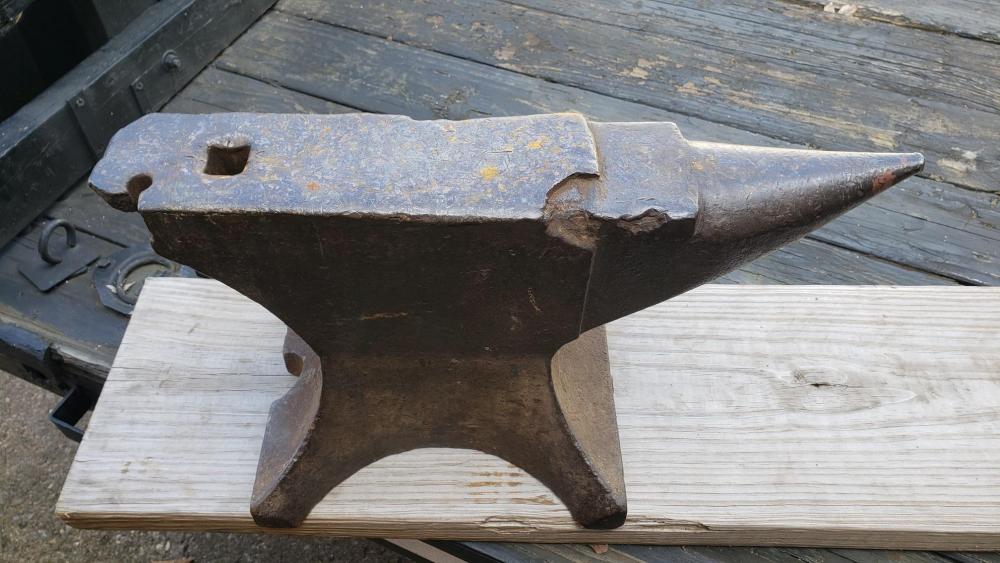
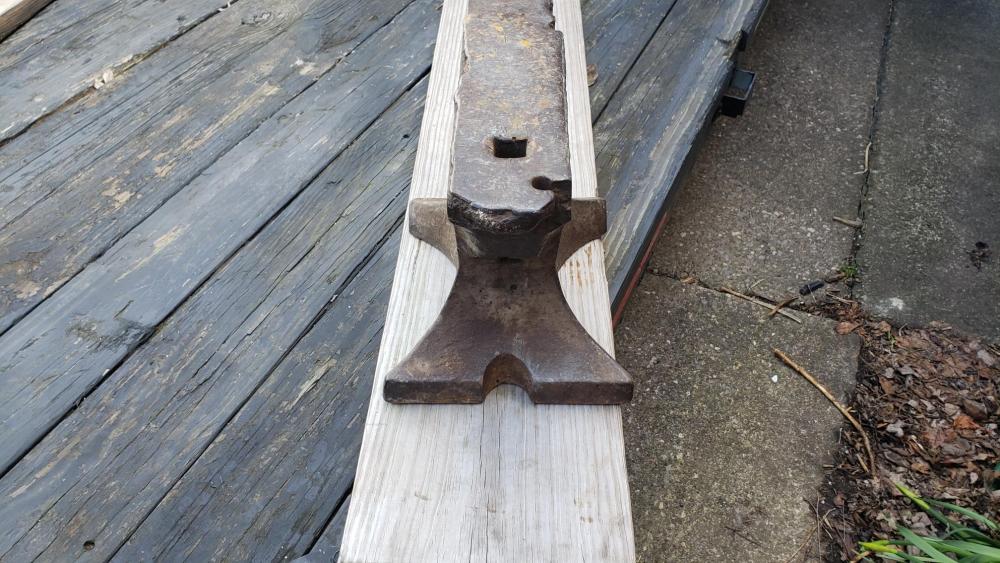
thank you anvilman! I appreciate the information! Any idea what the number/ letter on the front indicates? It look like the number 2 or a cursive "d".
-
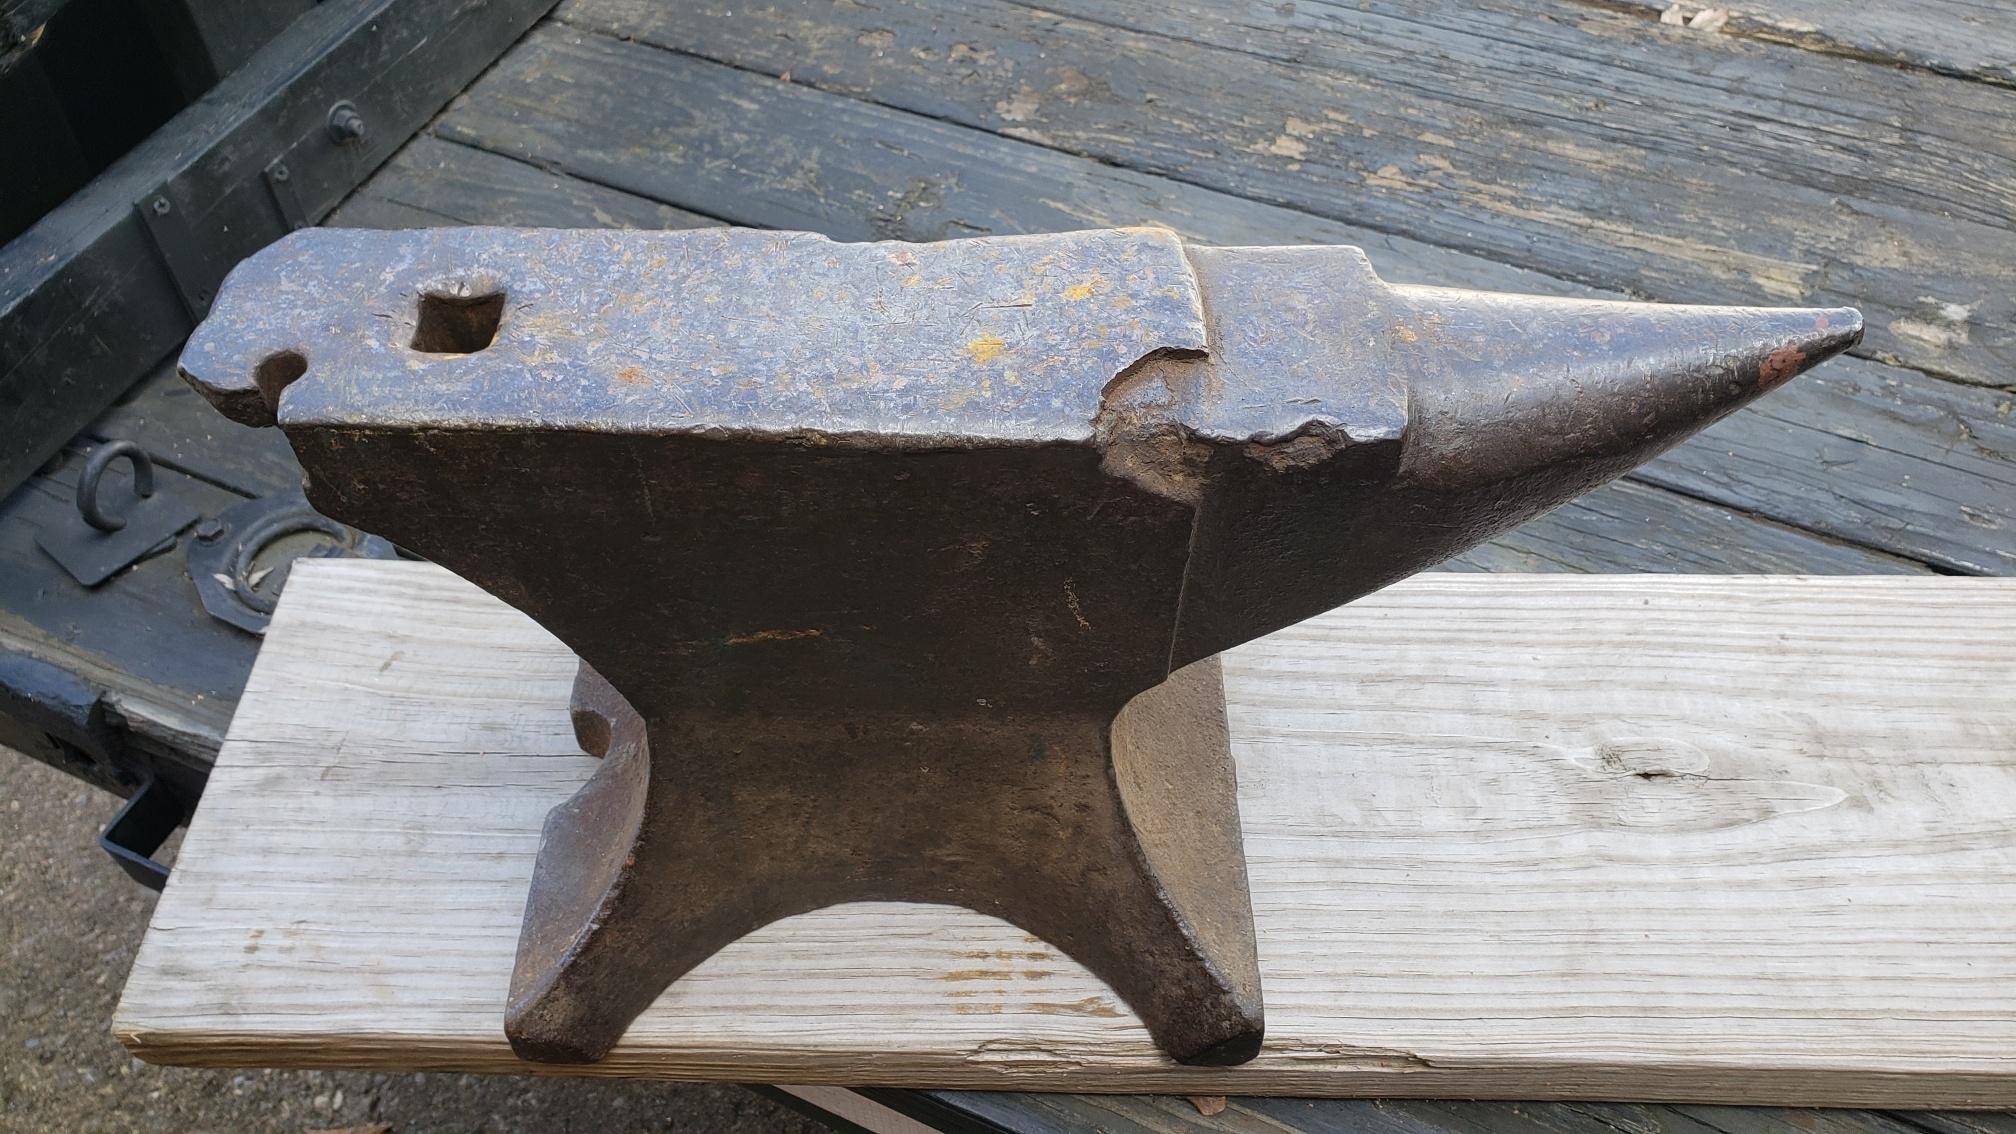
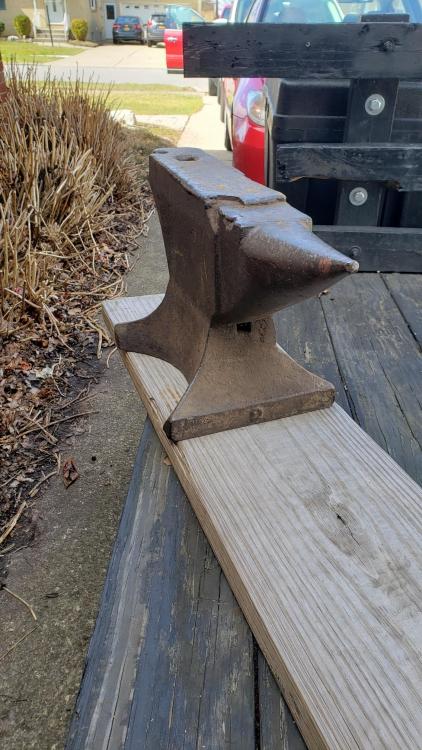
A friend of mine found this anvil while antiquing. He knew I would be interested and contacted me. I know it's worn but boy does it have character. And the price was right at $150. I may keep it as is and just use it from time to time. My other anvil doesn't have a Hardy hole so this one will come in handy for that. The other option is to fix it but I don't think it would be worth the expense. If anybody recognizes this old girl and can provide info that would be helpful! I don't know looks like an anvil out of an old SEARS Roebuck catalog.


-
thanks jlp, now it's time to finish grinding that sucker and get to some forging!
-
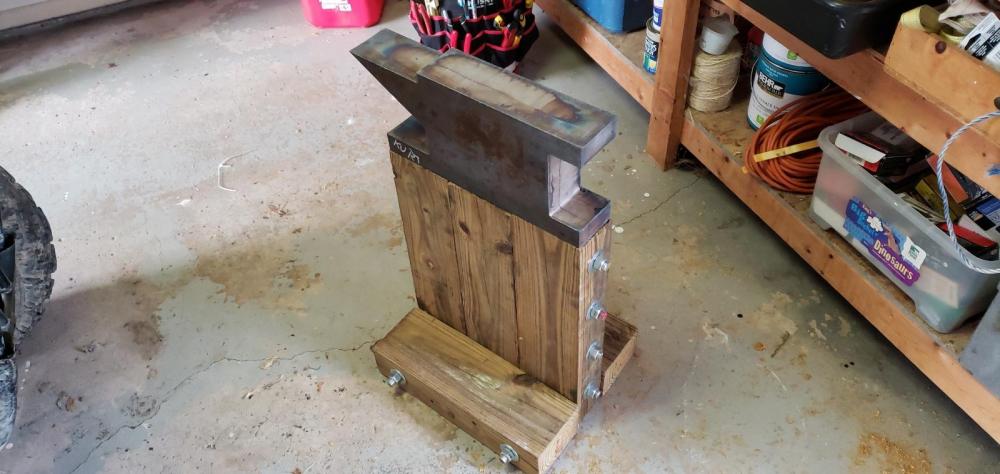
had an old 4x6 - 8' long. just the right amount of lumber for the stand.
-
thanks nobody (ouch! that sounds ungrateful - but I'm not!) and jlp! Keeping my eyes peeled for a big hunk o steel!
-
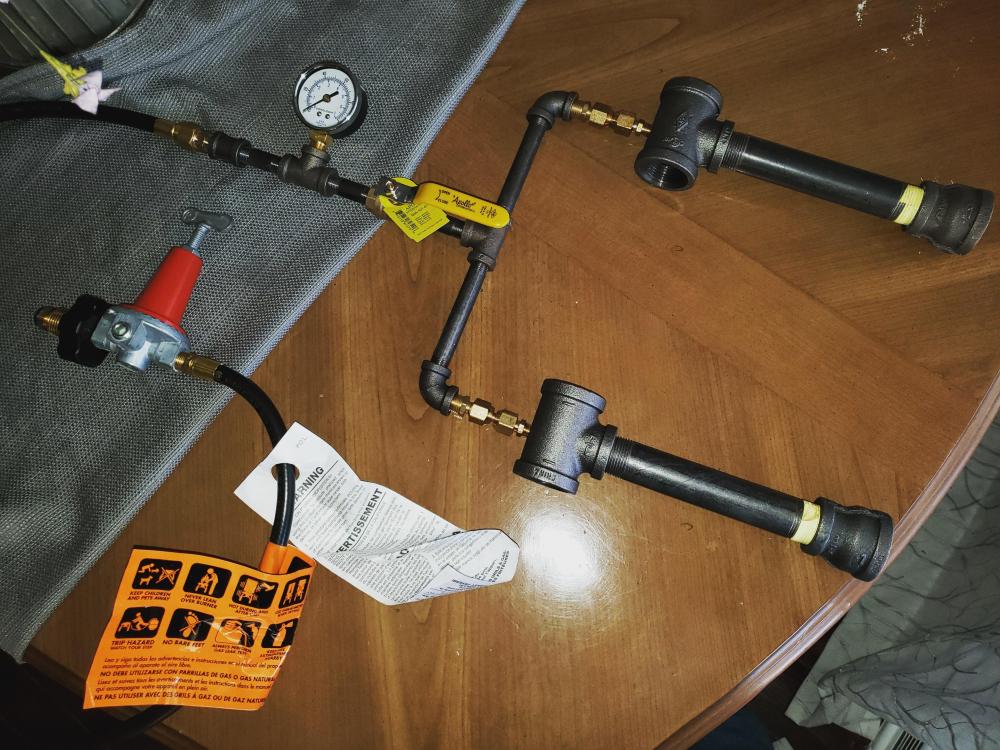
just realize that the last pick was a mockup before the needle valve arrived in the mail. there's a valve between the shut off valve and pressure gauge.
-
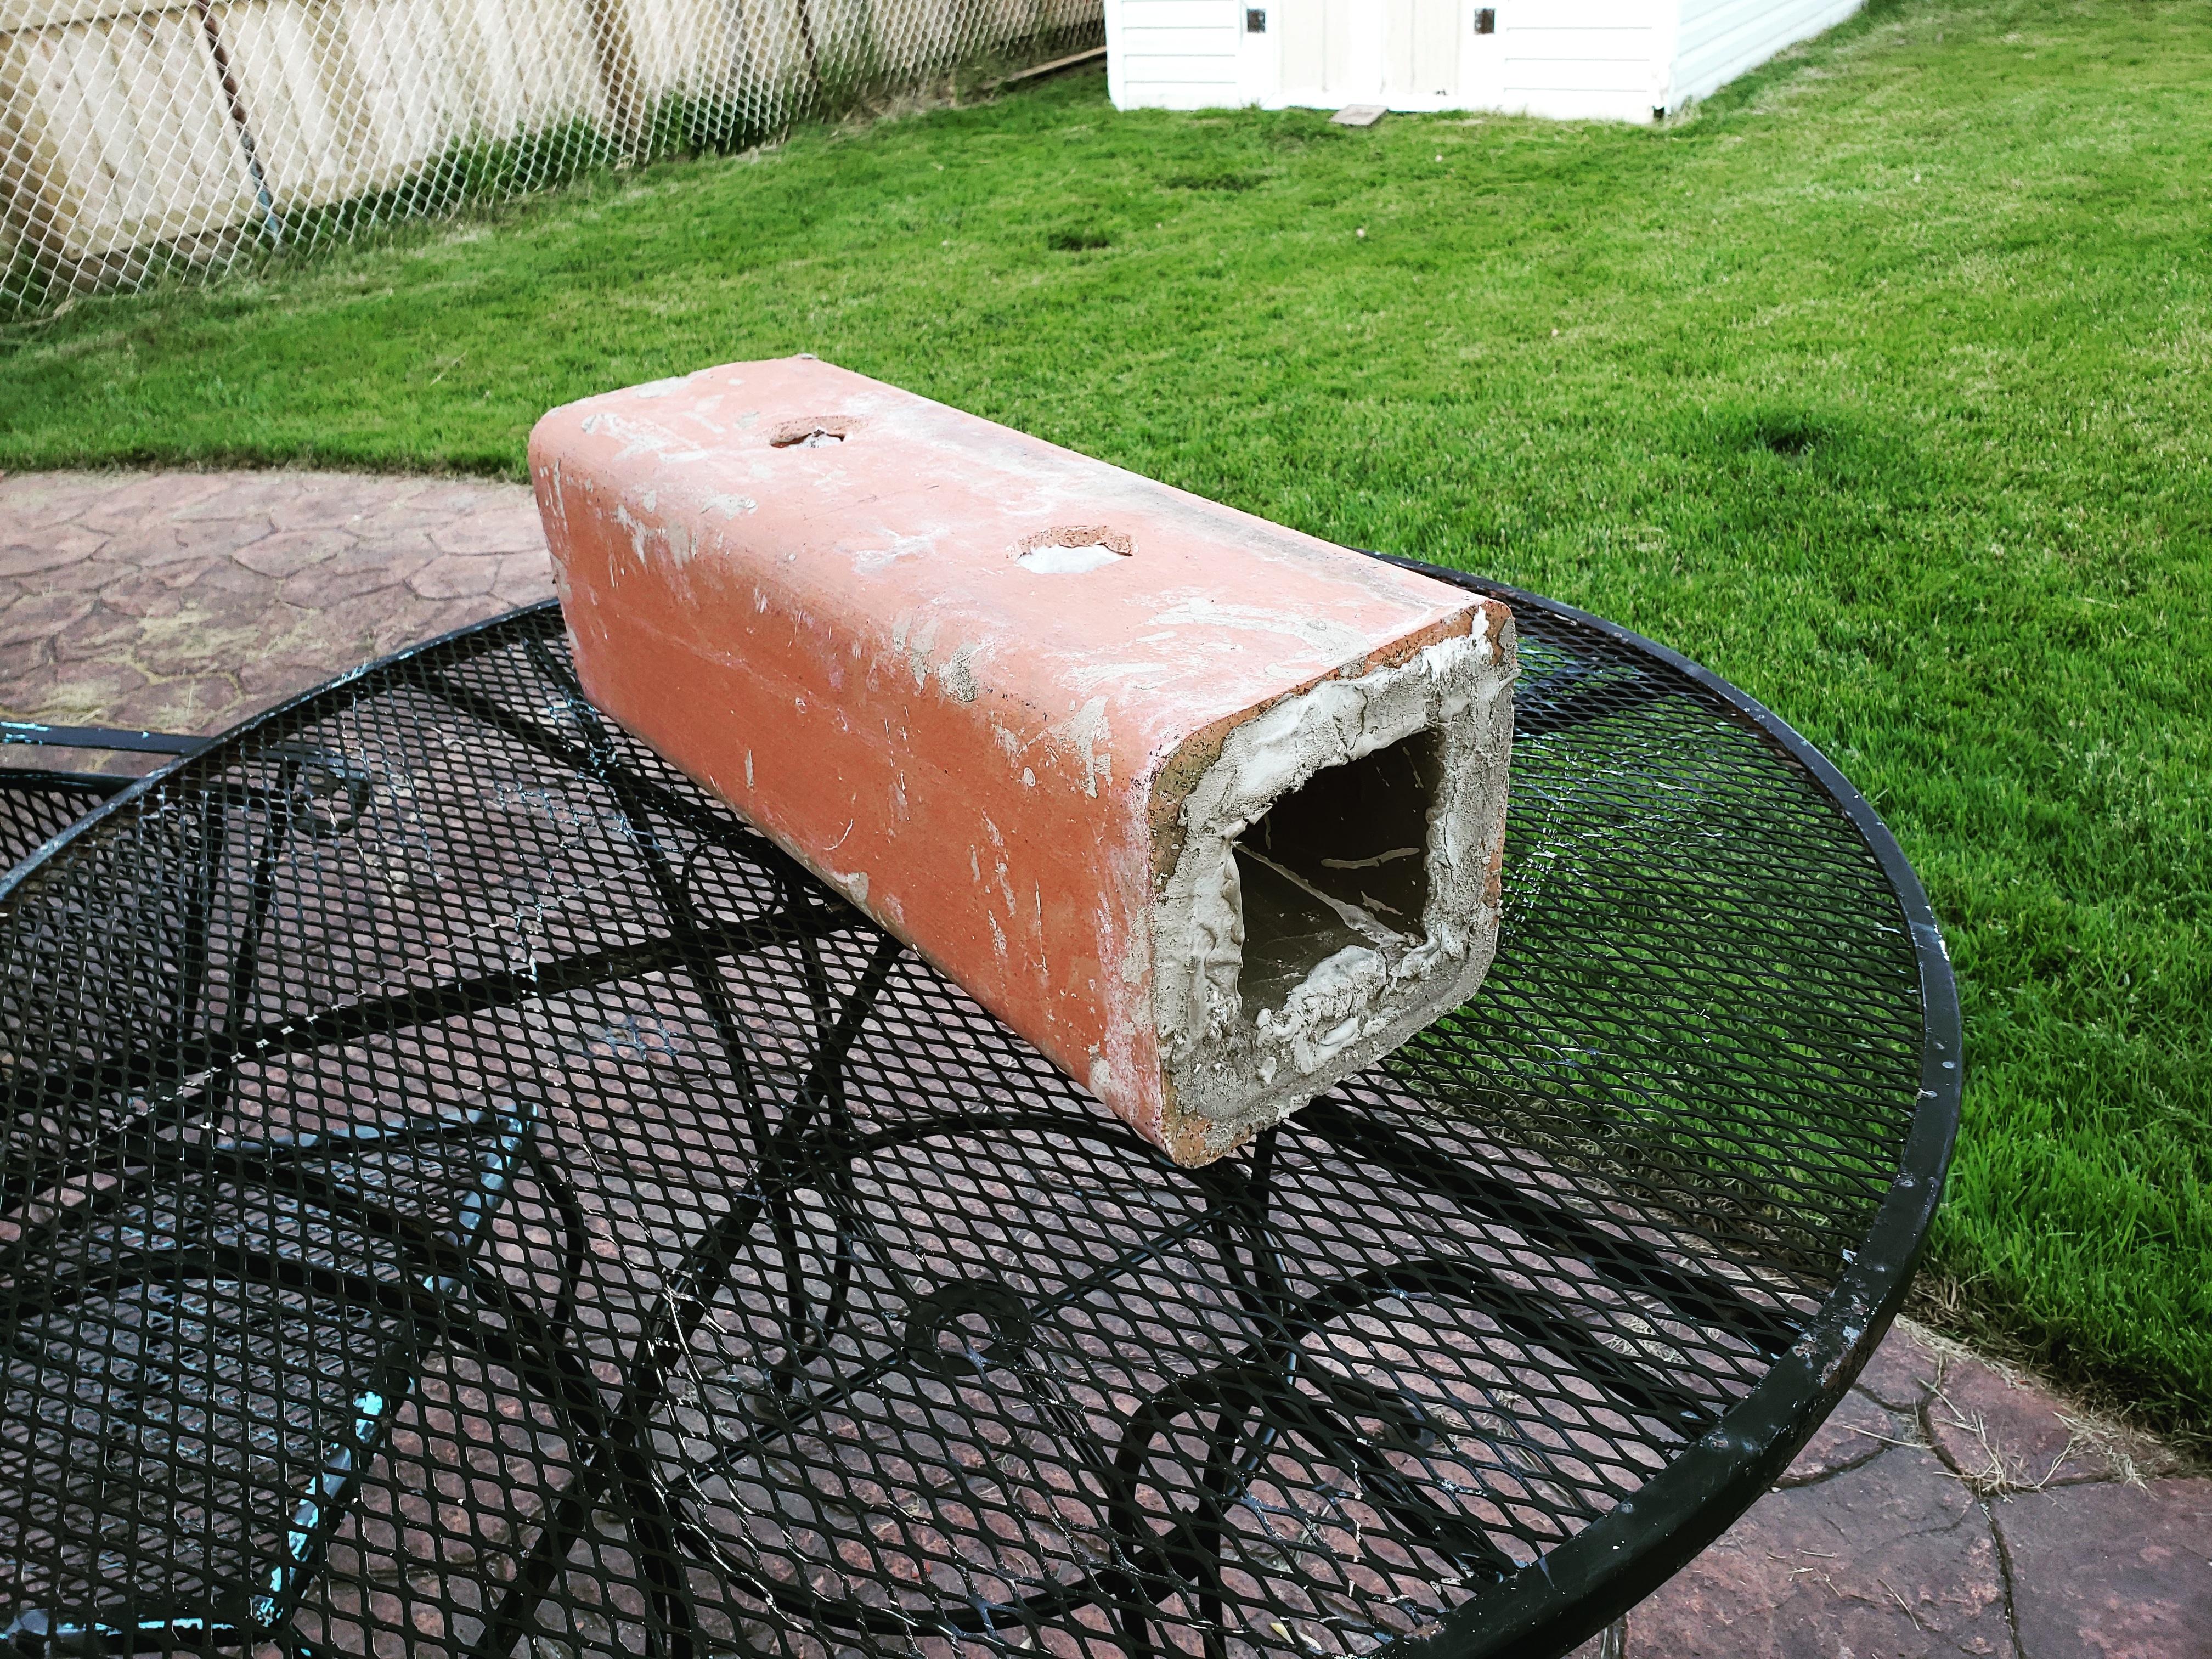
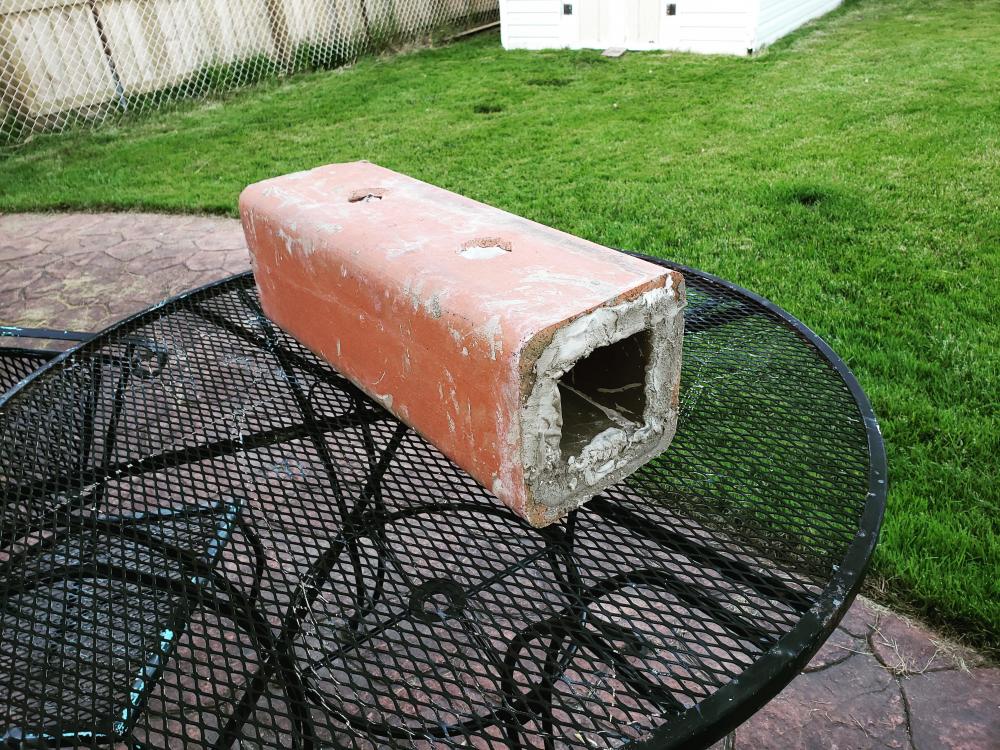
haha! so true frosty! i am going to take you up on the idea of not cutting the heal, keep the mass and make a bolster instead. BTW the forge i am using was made from an old ceramic chimney flue liner, some kaowool and high temp mortar. working ares of the forge is 5" x 5" x 24" I built a double burner after researching, studying, reading and of course consulting YouTube. I used a burner design that I believe is attributed to you after what I read in the video description. you have my thanks sir.
-
i'm pulling a favor on this one and getting it for nothing! i must be living right. Now... what to do with the 2 pieces of 12" x 6" x 3/4" pieces of 4140....
-
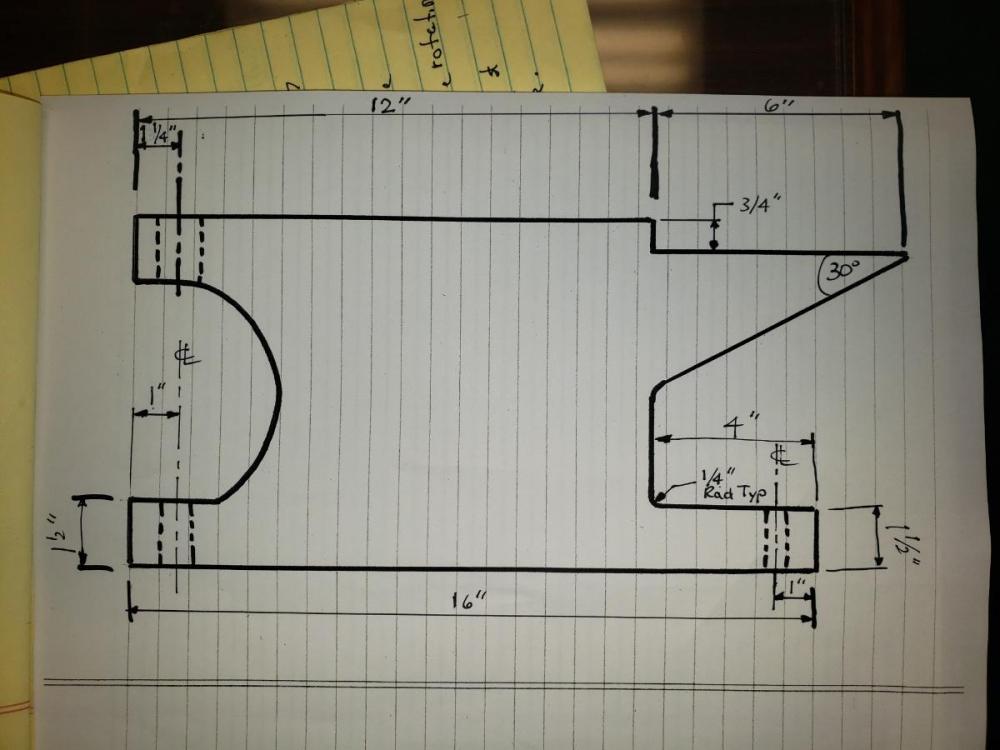
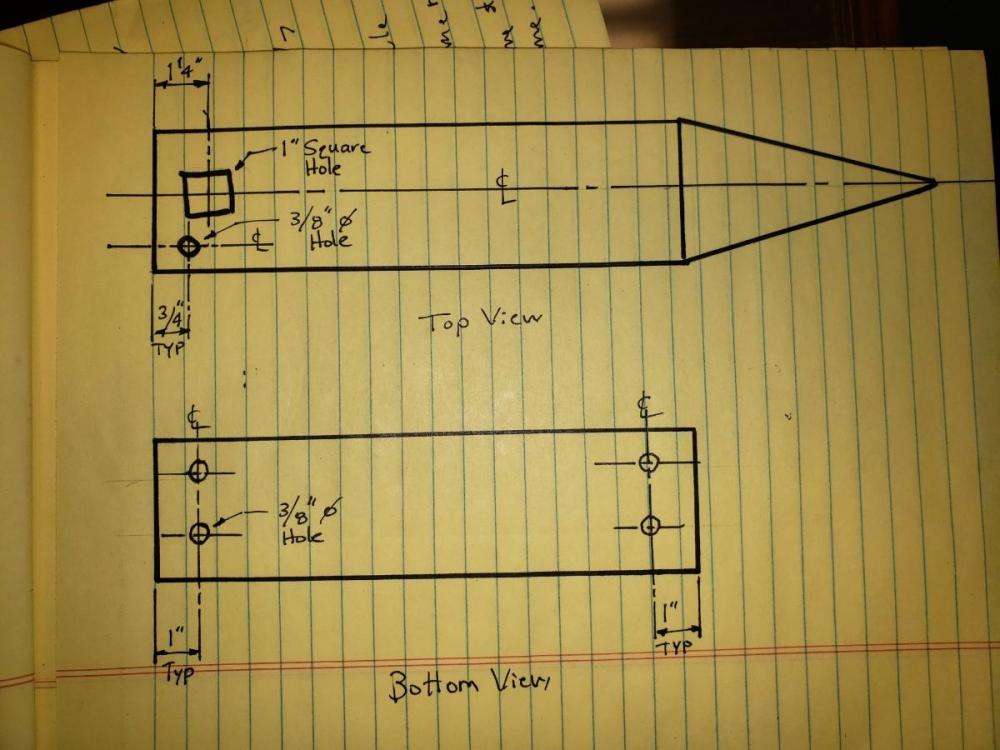
Back to the drawing board. Found out a friend works in a machine shop and can cut out a 3" piece of plate to any shape. What do ya think of this setup.... I'll be grinding the horn down of course. Anvil should weigh around 85 pounds. I'll be using for bladesmithing and basic blacksmithing - nothing super heavy.
-
thx frosty!
-
thanks fellas i will do just that. i actually have (2) pieces of the 4140 so maybe i will double them up and end up with a 12"x6" plate that is 1 1/2" thick. i appreciate the input!