
Jon Kerr
-
Posts
293 -
Joined
-
Last visited
Content Type
Profiles
Forums
Articles
Gallery
Downloads
Events
Everything posted by Jon Kerr
-
Another couple of newbie question, sorry. I have done a quick forum search and couldn't find anything directly answering the question. Is there a major benefit to grinding blades on a belt sander rather than a bench grinder? It seems most people on videos etc use a belt sander for grinding knives. I assume its because the larger grinding surface area gives potential for straighter/flatter/more even ground faces? I currently have a bench grinder, and am wondering whether this will get me far enough in terms of grinding blades. Of course the bench grinder is also nearly useless on wooden handles etc. so I will need a belt sander in the long run. Also- does anyone have any advice regarding swapping out wheels on a bench grinder? I've used polishing wheels in the past and they appear to be similar pieces of kit, but I'm aware there are safety pitfalls such as max RPMs etc. Can I swap out one of the wheels on my bench grinder for a polishing wheel or no!?
-
Awesome ideas! Will definitely copy some of these in future. Thanks for taking the time to mock up the hot cut! Thats definitely on the list of items to make soon.
-
Do you have any pics of examples? I did something similar with my G-clamped pritchel hole so i guess I need to make “saddle hardie” tools similar to that! Cheers Das- yes it was Charles’ “swiss army railroad anvil” I was thinking of taking inspiration from!! Thanks both for advice re/ rounding the edges- I’ll do that.
-
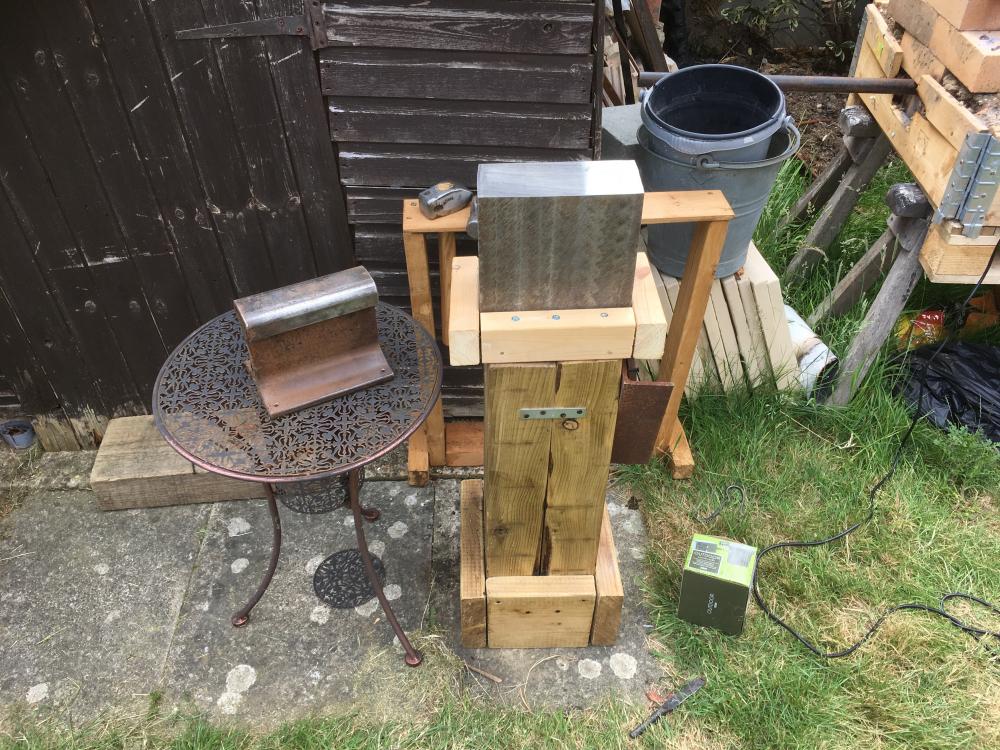
Another freebie- an anvil upgrade. Apparently its a piece of breech steel, leftover from manufacturing a Howitzer.... don’t ask It weighs 44kg (97lbs) so ideal for my requirements as its still fairly portable for tidying away. The difference between this and the rail track is phenomenal. The ring and rebound is great. I haven’t tried a ball bearing yet. The material is so hard the workshop at work didn’t want to try cutting a hardie hole for risk of breaking the CNC tools. So I still dont have any way to mount hardie tools. Open to ideas for that- my best one yet is to grind the rail track into a fuller and hot cut for those jobs? And possibly drill holes for bending jigs. I can make a larger anvil stand and mount them together.
-
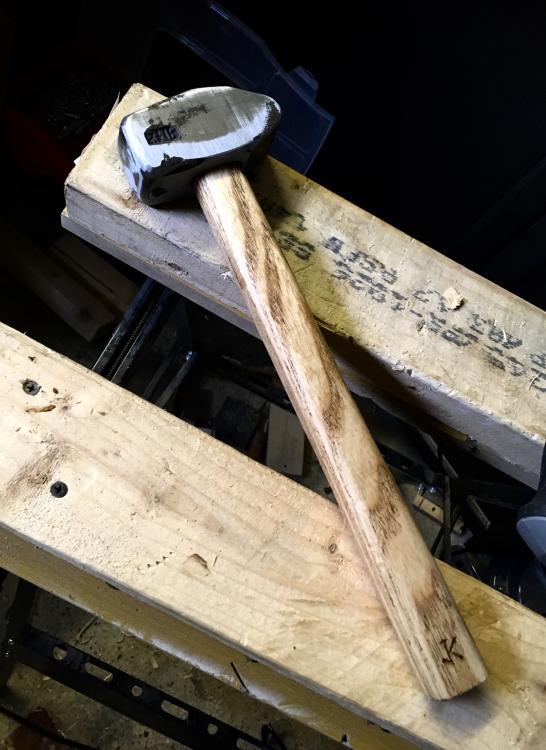
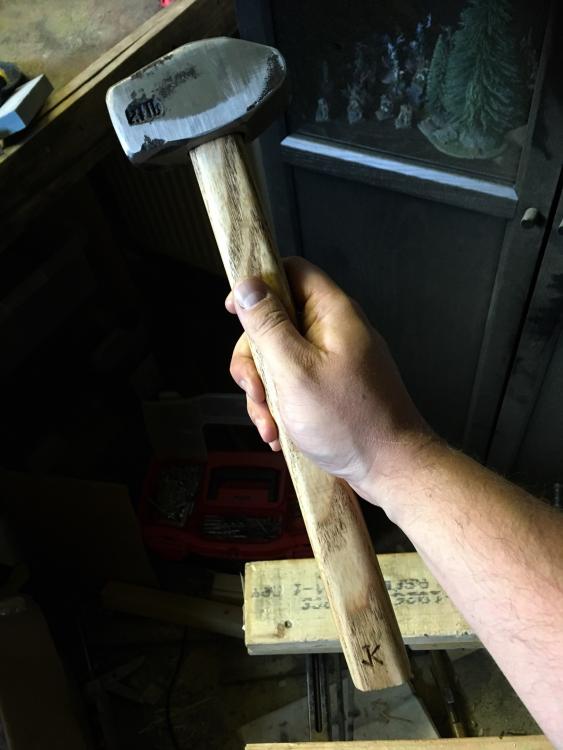
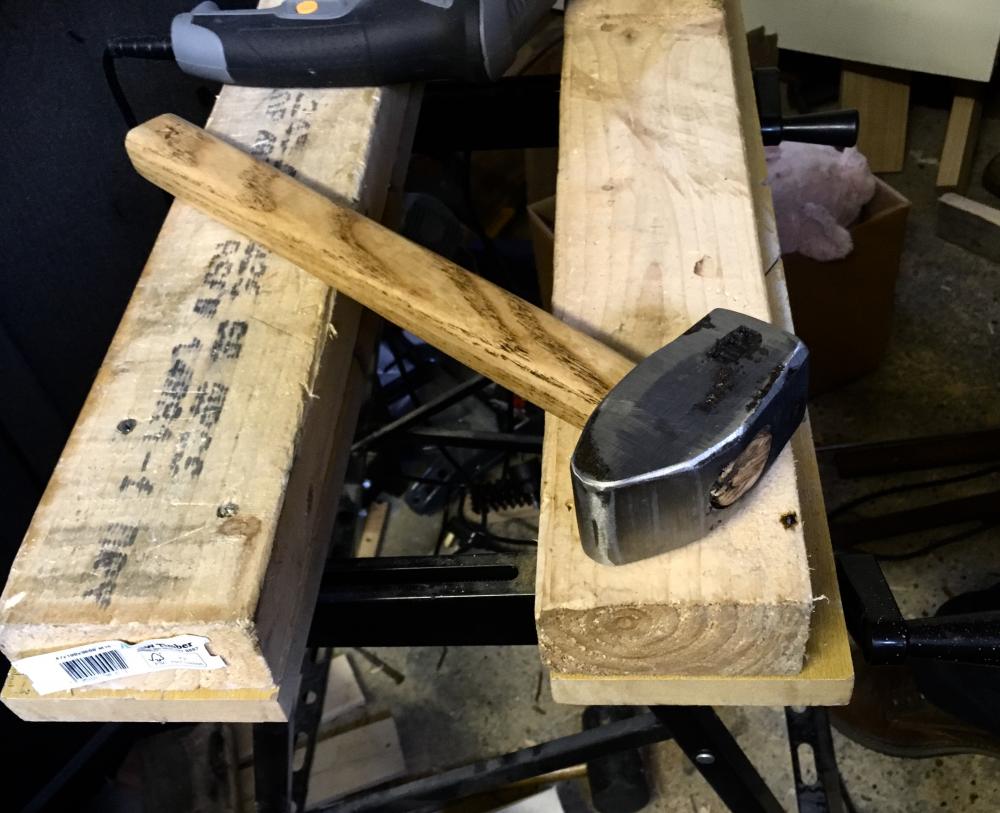
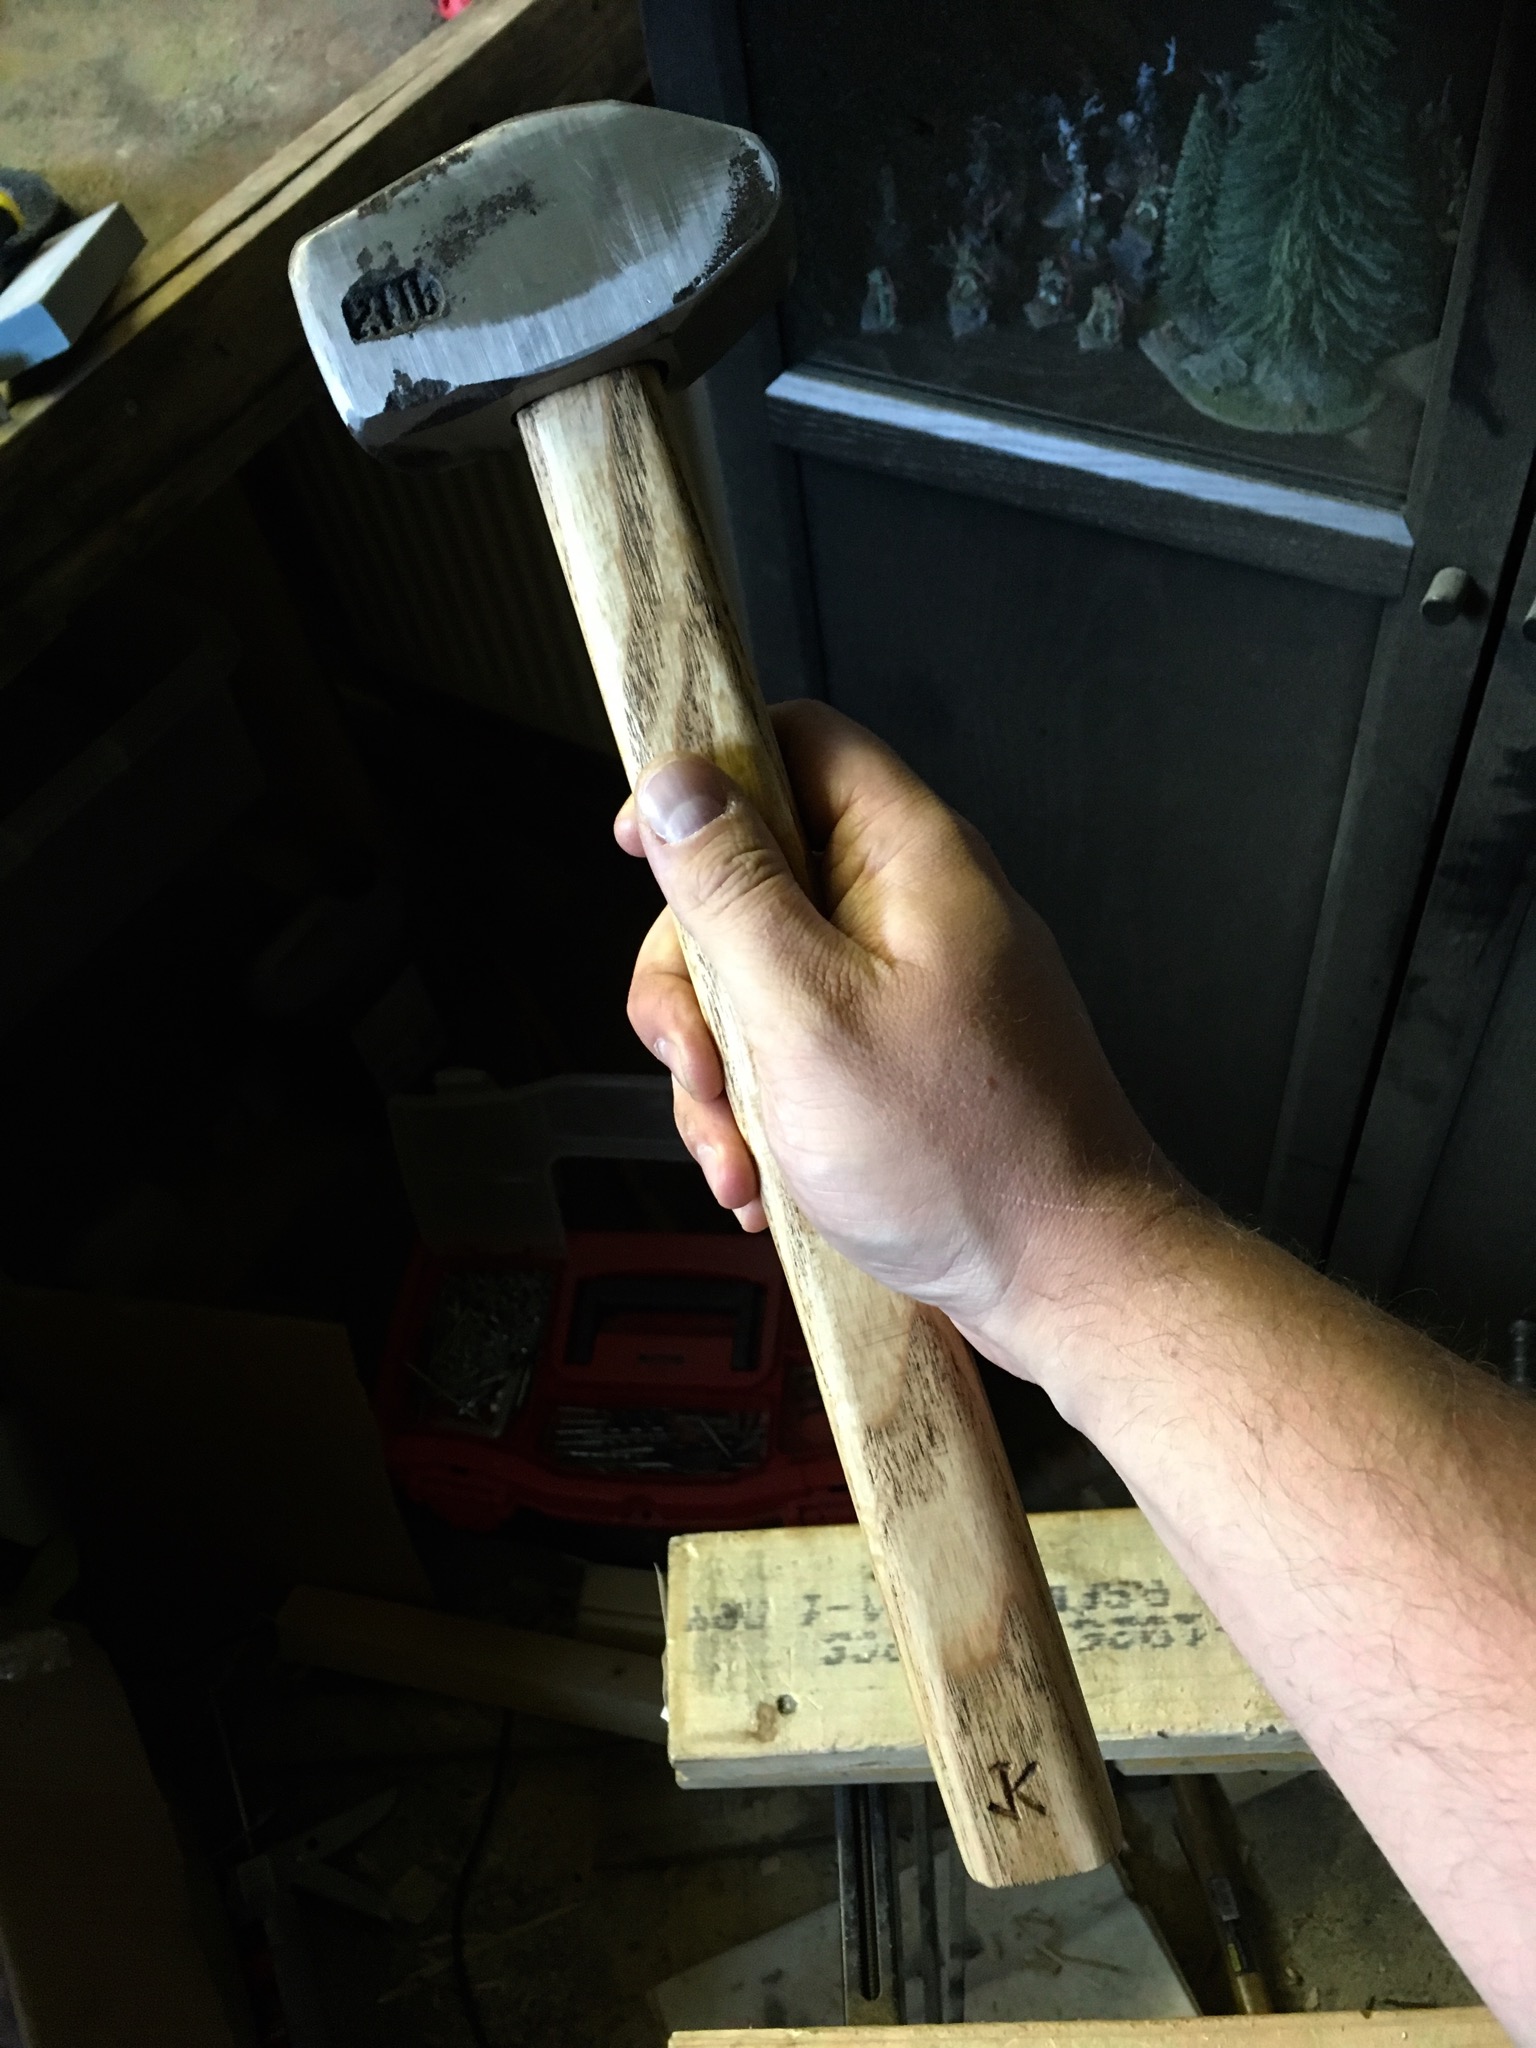
Hammer finished! Super pleased in the end. Beeswax on handle, and engraved a logo that I might turn into a touchmark eventually. (Just for fun...). Can’t wait to hit hot metal with it.
-
Unfortunately I get much more time to mess about with tools than I do to actually hit metal.... ... I finished sanding the handle for the hammer. Its a little straighter than I hoped- I wanted to do a hofi style shape but that was impossible on our workshops very straight linisher. Hopefully the thickness is about right to avoid the "death grip". The real challenge was getting the handle straight and square relative to the head, since my poor-mans modified sledge doesn't have a straight punched eye!!! Fortunately I succeeded. Next- get the wedge in, and finish with some beeswax.
.thumb.jpg.302a28ea0454fad9c7efaf7ead5e2aa2.jpg)
-

Tomahawk story board
Jon Kerr replied to Gerald Boggs's topic in Axes, Hatchets, Hawks, Choppers, etc
Hi there, apologies for the newb questions but I'd really like to try this project. This would be perfect as "limited tooling" is most defiinately where I'm at currently. Between steps 5-6, is the part forge-welded? Or is it just hammered together, until the high-carbon bit is added, and then forge-welded all in one go? -
True, thanks. Yeh I haven't even really started working on the handle itself.... I'll be sanding it down to size as I said. Just waiting for some sanding belts to turn up in the post.... I'm really excited to get that hammer finished. It's definitely not wrought iron. Its steel of some description. The section I was working with was BADLY rusted and I should probably have just chopped it off and started on a relatively intact section. I learnt my lesson with the brass, I need to be more careful. I only lost about 10mm out of a 2m length so it's not the end of the world. I'm planning to place an order with FH Brundle soon, for a couple of bits of reasonably thin steel stock for practicing with. Then any doubts around my materials will be gone. I would love to. I'm having trouble finding someone local to learn from. As we discussed in PM I might get in touch with your colleague and arrange a visit but its a fairly long way. Thanks. This was definitely my problem before, with the hairdryer. Now I've switched to the electric bed pump (which is a bit lower pressure than the hairdryer) and I'm altering the air flow by pointing it at the tuyere. I have a valve and t-piece which I'll look to fit before the next session. It's incredibly frustrating to know that if I could get an experienced blacksmith in my garden for about 10 minutes, they'd instantly be able to tell me what the fire should look like, whether my air supply is correct, and get me started on some basic forging! I'll struggle on though and I greatly appreciate all of your advice on this thread!
-
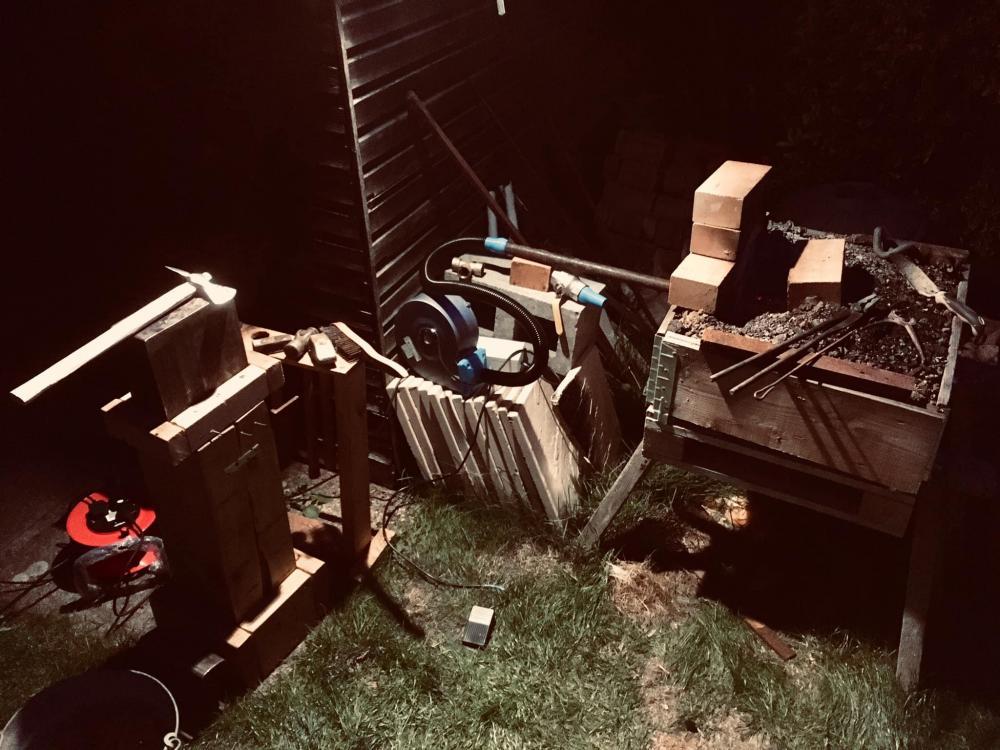
I finally made a little progress this weekend.... I fitted the modified sledge to a new handle, awaiting wedge. Before that, the handle needs sanding down to a nice shape and size (I'll be copying the hofi style handles a bit). I fired up the JABOD again this weekend. I'm still struggling a little with fire management but I feel like I learned a lot. The only easy-to-find Lumpwood Charcoal around here is "easy light" stuff, which comes in individual paper firelighter bags. I've been cutting the bags open and using the lumpwood charcoal inside. My fire tends to "spit" burning hot bits for quite a while until the coals start to turn white, which leads me to think the charcoal has some sort of coating or such. I'm going to try and find an alternative (I think a friend of mine knows where to get some). The problem is, once the spitting and smoking has stopped, the level of the fire has dropped so I never get the "volcano pile" I'm looking for, with the "hot centre" of the fire at dirt-level. As such, putting my steel horizontal in the fire never seems to be an option and I end up getting frustrated and shoving it deeper into the fire just to get something hot so I can hit some metal! I guess I just need to REALLY keep piling it up till the middle of the fire is higher up? I put approx 3kg of coal onto the fire before trying to forge and the fire was still low in the pit. I made a hook, which was absolutely rubbish. The steel cracked and crumbled a lot when tapering, and when flatting the other end. Any suggestions as to why? Did I burn the steel? Or just bad steel? It was very old and rusty scrap steel. I found a good solution for a pritchel for my railroad anvil, using a piece of equal angle which I found that already had a nice machined hole. It worked pretty well. The anvil worked great when I was hitting the thinner stock to make the hook. Later, I tried to draw out a big railway screw, and I was surprised to find I could really feel the "bounce" in the anvil and that my blows were losing significant power. I'll be getting a second chunk of rail to add on end as you have all suggested, for heavier work. It will also allow me to grind a built in fuller and hot cut. The new hammers were great. The dressed sledge was much easier to use than the ball peen for most jobs. Once I have the handle finished on the modified cross pein I'm hoping that will be even better. I attempted to modify my "new" tongs. The jaws were pinching at the tips of the jaw, so I followed what I'd seen on youtube, warmed up the jaws to red hot, clamped them around a piece of stock and hit them on the anvil. Immediately I felt the handles come closer together, and I seemed to have made very little impression on the jaws. Now, the tongs don't close properly as I've alterned the angle of the bend instead of the jaws. Not sure why it went so wrong, and I now have some work to do next time to fix the tongs again....! The fire issue is frustrating and stopping me from getting on, really. I spend approx 2 hours at the forge on Sunday, less than 10mins of which I was actually hitting metal..... All in all, not a good session, which is a shame as I'd been looking forward to it all week.
.thumb.JPG.85940a296636e02348b53d4fdb081942.JPG)
.thumb.JPG.24c4c4f5091d296e3ed6a1adb30c3aba.JPG)
.thumb.JPG.729be9077b693b6038831b9fb92af926.JPG)
.thumb.jpg.a5d04f565d0736a78bdfffe1f6c05e58.jpg)
.thumb.JPG.e027e1b72f70fcb6aeab6d3e3b5eeb4c.JPG)
.thumb.jpg.806ecd28d2b1af431880b307b7ef856d.jpg)
-
Hello! Welcome to IF..... I'm very new here (and to blacksmithing) too, but I thought I would respond and perhaps be able to help with what I've learned from the good guys here so far.....! If you haven't read this yet, please do: Read this first Regarding your forge, you'll learn a huge amount from reading this thread about the JABOD Mk1, and also this one about the MkIII. The JABOD (Just a Box of Dirt) forge is a cheap (free?) and easy to build side blast forge, suitable for charcoal, which lots of people have had success with. Be aware of the major forge safety issues- heat, fire, carbon monoxide, etc. See the Improvised Anvils thread for inspiration and ideas. "Real" anvils are expensive but you can do a lot with improvised alternatives. Hammers you can pick up from car boot sales, yard sales, etc. Look for a mini sledge/drilling hammer, or a ball pein, or a cross pein, or all three. Scrap yards are a good source of steel. Be wary of any metals which might be plated, galvanised etc- they're dangerous to heat up due to fumes. If it's left outside and not rusty, don't trust it. Alternatively- find a nearby steel merchant and buy some steel 6mm round or 6mm square lengths to get started with. PPE (personal protective equipment) is vitally important. Eye protection for a start. Appropriate clothing.. etc. I'd warn against spending too much money before you know you enjoy it! Doing a course with an experienced smith is worth its weight in gold... best way to learn. My own thread in this Intro section has a lot of great advice from the guys here, perhaps have a read through and look at all the links etc? Hope that helps, Jon
-
Yeh they give a discount for taking it as-sawn. Planed reduces the thickness from stock size by 5mm. I'll take the cheaper sawn stuff. 1.5" x 1" is an option, but the hammer I modified above needs slightly more than 1". It's got a pretty large eye. I may buy a mixture of 1x1.5 and 1.5x1.5 for future projects. Now I need to forge a drawing knife so I can draw the handles down..........!
-
I’ve cracked it- found a local hardwood timber merchant who sell lengths of Ash, in 1.5in x1.5in. Perfect. (The story: looked for wheelbarrow handles but seem to be hard to find in UK. Broom handles etc are generally pine so no good. Boot Sale rakes is dodgy as you dont know what the wood is. boot sale hammers to steal handles is an option, but then what to do with the spare head again?!? I need to use it! Vicious circle.)
-
"I want to start blacksmithing"
Jon Kerr replied to Marc1's topic in Blacksmithing, General Discussion
As one of the self-confessed-beginners-who-wants-to-make-knives...... A few random personal thoughts on the subject: Many people have a fascination with knives, swords, axes... any kind of weapons. Especially fantasy fans, and a history fans. I've always wanted to own my own sword. I'm also a generally creative and "hands on" person. With the above two things combined, naturally it doesn't take long to come to the conclusion that you could make your own sword. Blacksmithing in general just isn't "visible" to most people. When you see forging in popular culture, it's almost exclusively things like weapons, or something stereotypical like a horseshoe (which your average person doesn't necessarily have an interest in, unless they're a horse owner/rider.) As such, it never really occurs to most people that blacksmithing could encompass making awe inspiring pieces like the attached lamp (by 58er on this forum), useful tools, beautiful hinges and handles. I seriously doubt that most newbies (once drawn into blacksmithing by the idea of making knives/swords) dont end up opening their eyes to the possibility of blacksmithing rather than just knives! Does that make sense? What I'm saying is.... I came here to learn to make knives, and now I want to make everything else too. I just want to learn general blacksmithing (including bladesmithing, eventually)..jpeg.0764e6493050651c761ef473a9be245d.jpeg)
-
Hello! Welcome to IF..... I'm very new here (and to blacksmithing) too, but I thought I would respond and perhaps be able to help with what I've learned from the good guys here so far.....! If you haven't read this yet, please do: Read this first Regarding your Forge, you'll learn a huge amount from reading this thread about the JABOD Mk1, and also this one about the MkIII. The JABOD (Just a Box of Dirt) forge is a cheap (free?) and easy to build side blast forge, suitable for charcoal, which lots of people have had success with. There are similar ones made from brake drums but they're often bottom blast, which seems to be less efficient according to this thread. I don't know much about harbour freight anvils (I'm in the UK), but I don't see why it wouldnt be ok, at least to begin with. Ultimately, you want as much mass under the head of the hammer as possible, but the anvil doesn't need to be huge- metal only moves under the head of the hammer anyway. See the Improvised Anvils thread for inspiration, ideas or validation. Are you using the forge inside or out? Watch out for carbon monoxide poisoning (amongst other things) in a confined space. Not to mention the fire risk in a busy shop. Welcome to the club! Seems like many people here (myself included) started wanting to make knives. Unfortunately, it seems thats actually extremely complex and you need a LOT of skill and knowledge before its possible to make anything resembling a half decent knife. Regarding "where to start", someone pointed me towards this excellent post by VaughnT here, on How to Get Started and Effective Time Spent at the Forge. He basically recommends starting by making lots of hooks.... 50 or so. The stock is cheap (5mm steel bar) and you can practice a number of basic skills one by one..... drawing out, tapering, flattening the head, scrolling, bending. There is a video online of CCI forging a hook although they add a spade end which isn't necessary really. I'm sure there are many more "wall mounted hook forging" videos out there. Wherever possible really. Just be careful that whatever you find is steel or iron, and not coated, painted, galvanised, etc. One of the motto's I've seen thrown around is "in rust we trust." ie/ if its gone rusty, then its probably some form of plain old iron or steel. If its been left outside and its still shiny, there's something suspicious. There are a few dangers here- one of the main ones being metal fume poisoning from accidentally burning something like Zinc on a galvanised piece. Rebar is cheap and often readily available. Be aware that its pretty naff metal, and many would say it's not a good idea to practice with poor steel as its not the same as working with decent stuff. I'm using it because I have some lying around and its convenient. Scrap yards are a good source of cheap metal. I hope that helps a bit?!
-
Do I need to be picky about the type of wood? I can get wooden broom handles easily but I cant imagine they’re decent wood (pine)... Whats the advantage of hickory as a handle for example? Is it simply strength and durability, or is it also to do with stiffness for efficient blows etc?
-
Will do! I just looked at the IFI article on how Hofi makes his hamer handles and I might just copy that. Who knows where I can find a suitable piece of wood though....? I doubt my local timber yard carries 1” hickory. I used a belt sander with a new belt. It really ripped the material away pretty easily. The shape on the corners etc isn’t perfect but hopefully its good enough for now. What I really need now is to find time at a reasonable hour of the day to hit some hot metal in my garden!
-
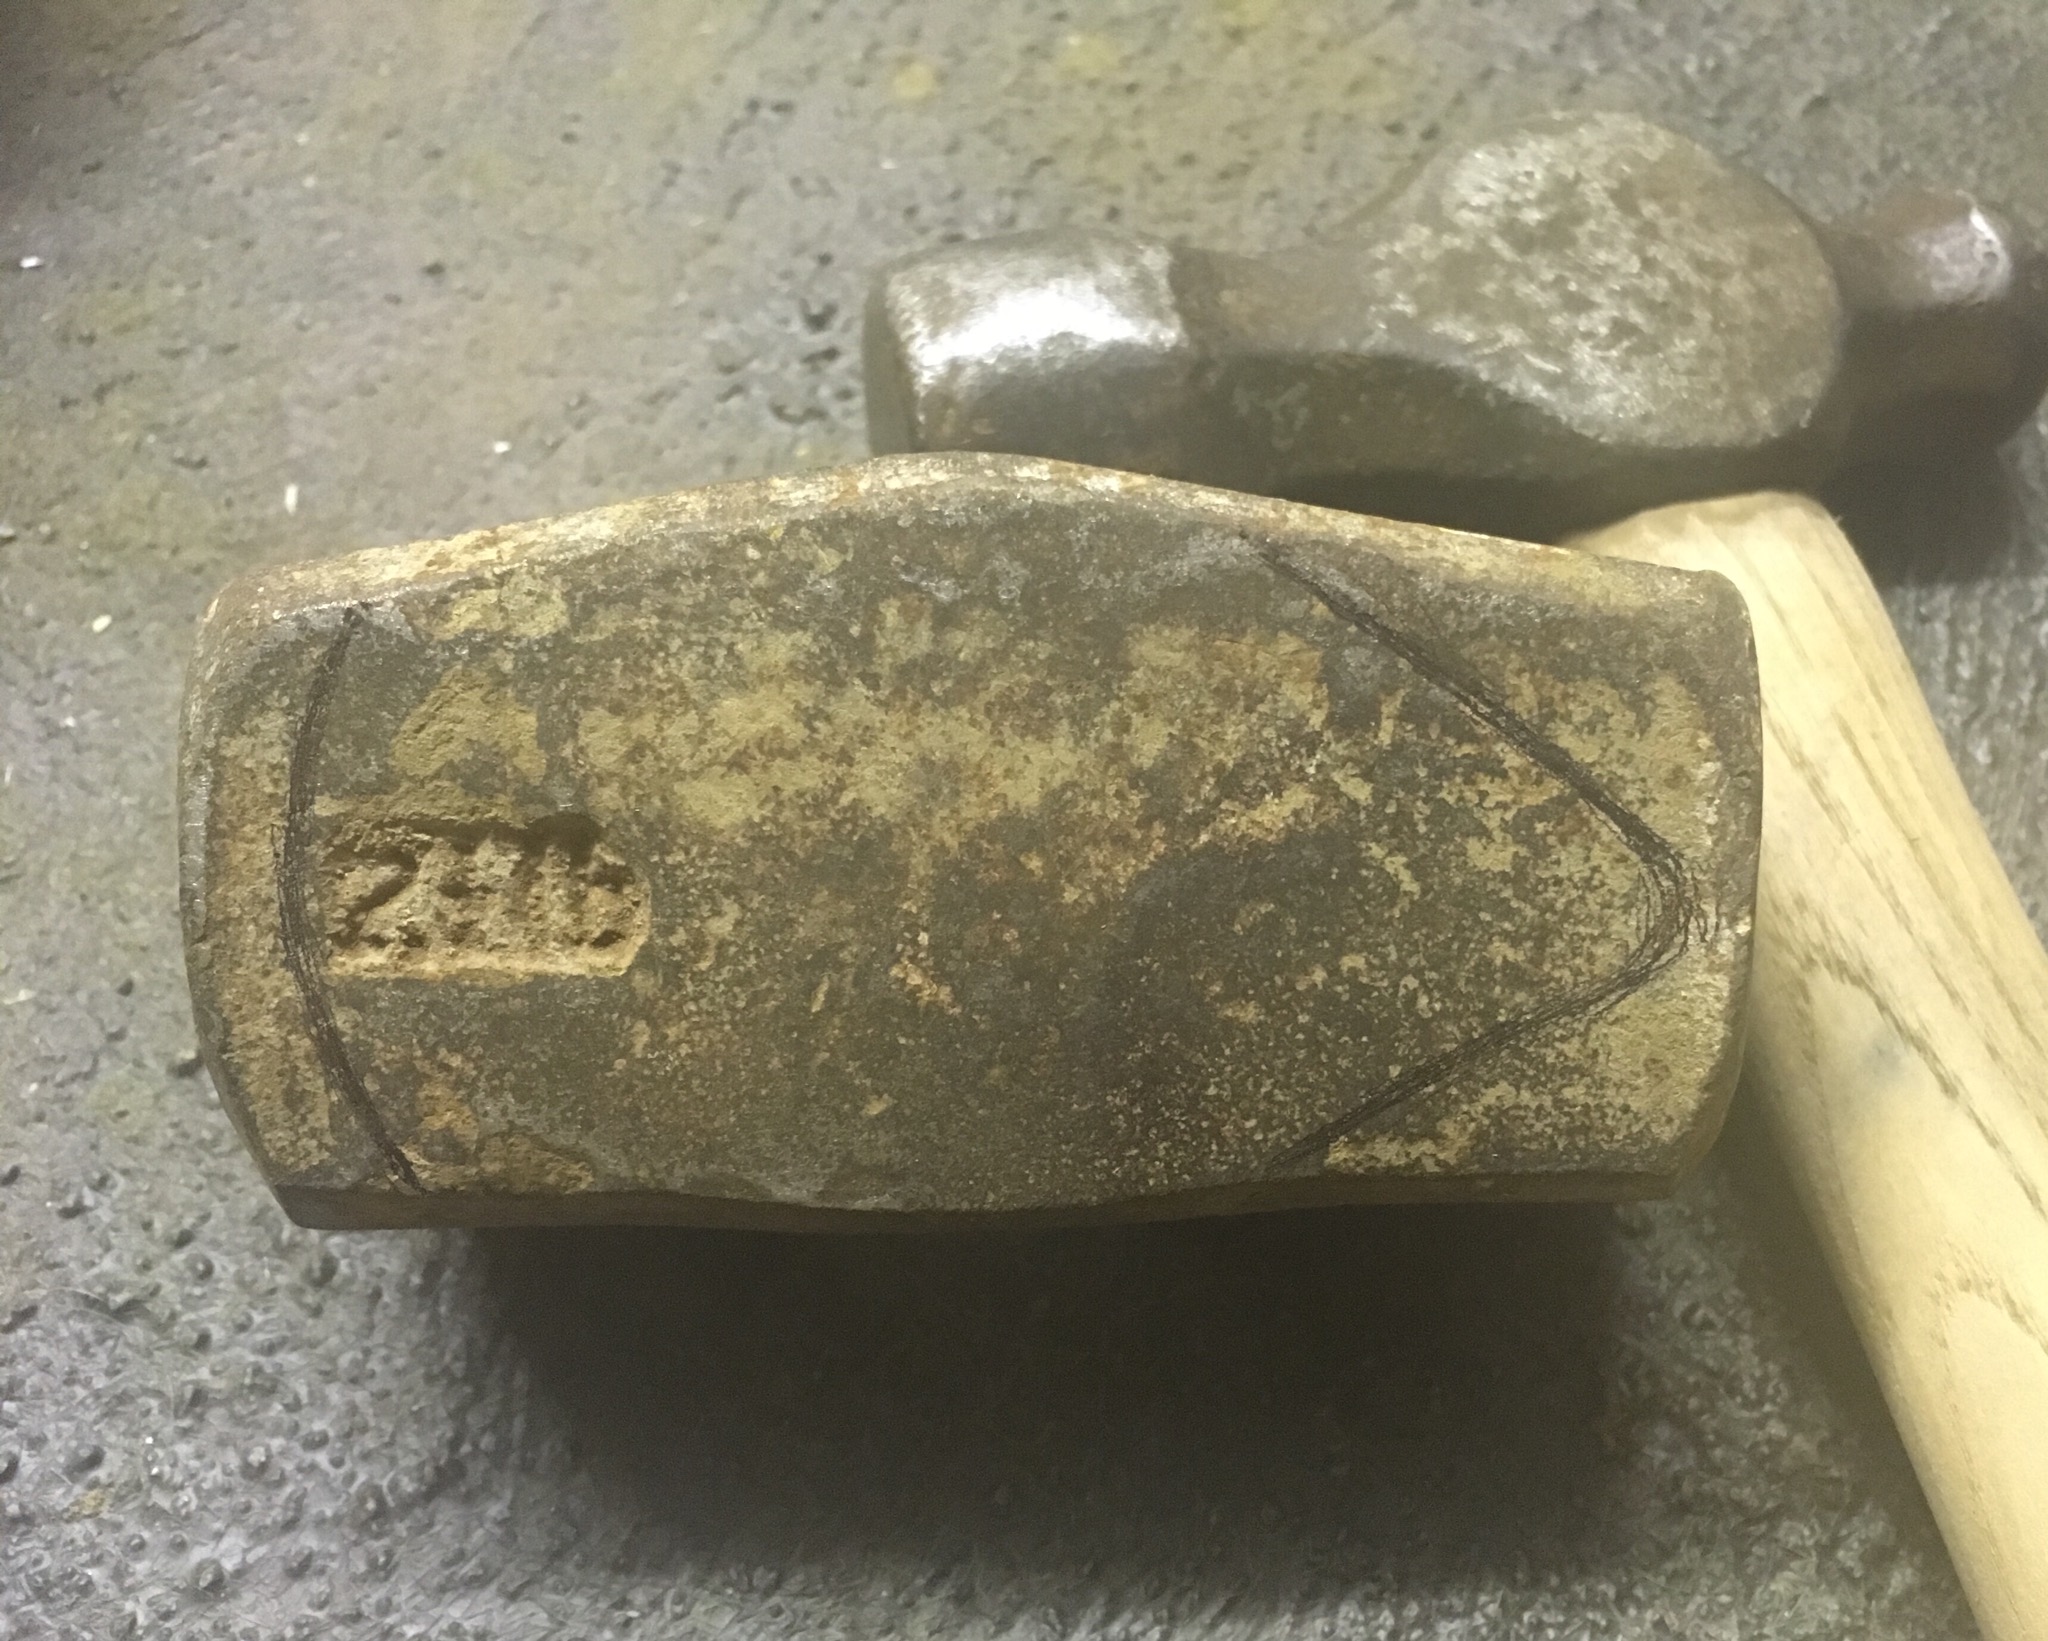
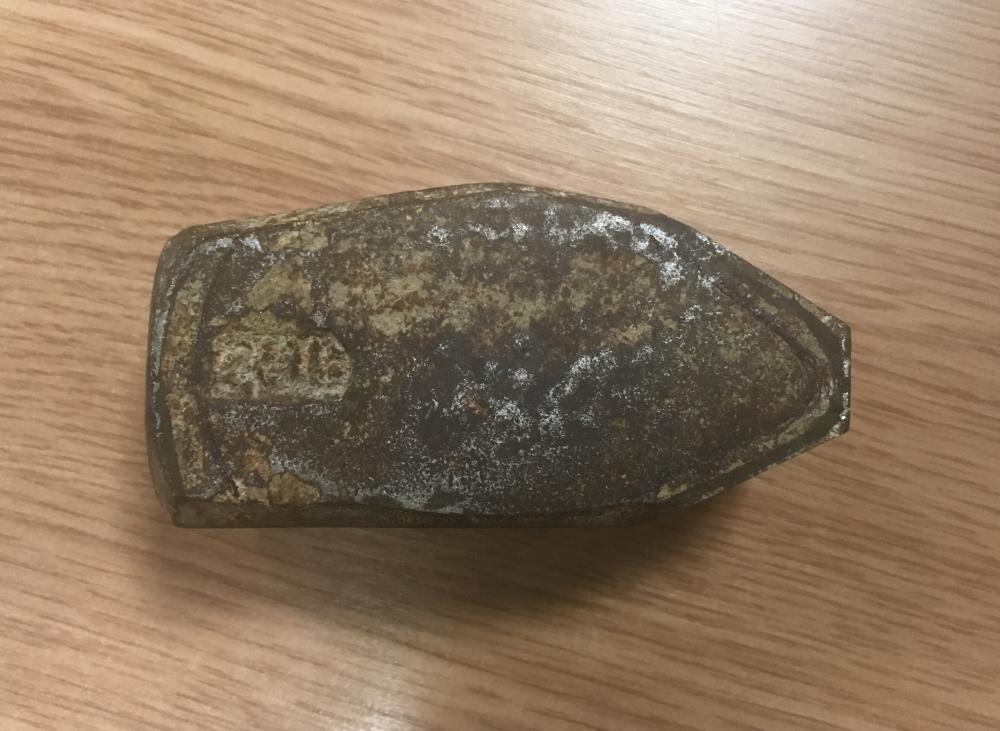
No it didn’t change colour, even during the milling. I did have the coolant running. Perhaps I got away with it? Yeh I wanted to polish the sides up a bit as it was pretty manky before. Those rust pits went fairly deep, as you can see since there are many pits remaining. It will weather off again in time Thanks for all the tips etc- glad the face and peen look right!
-
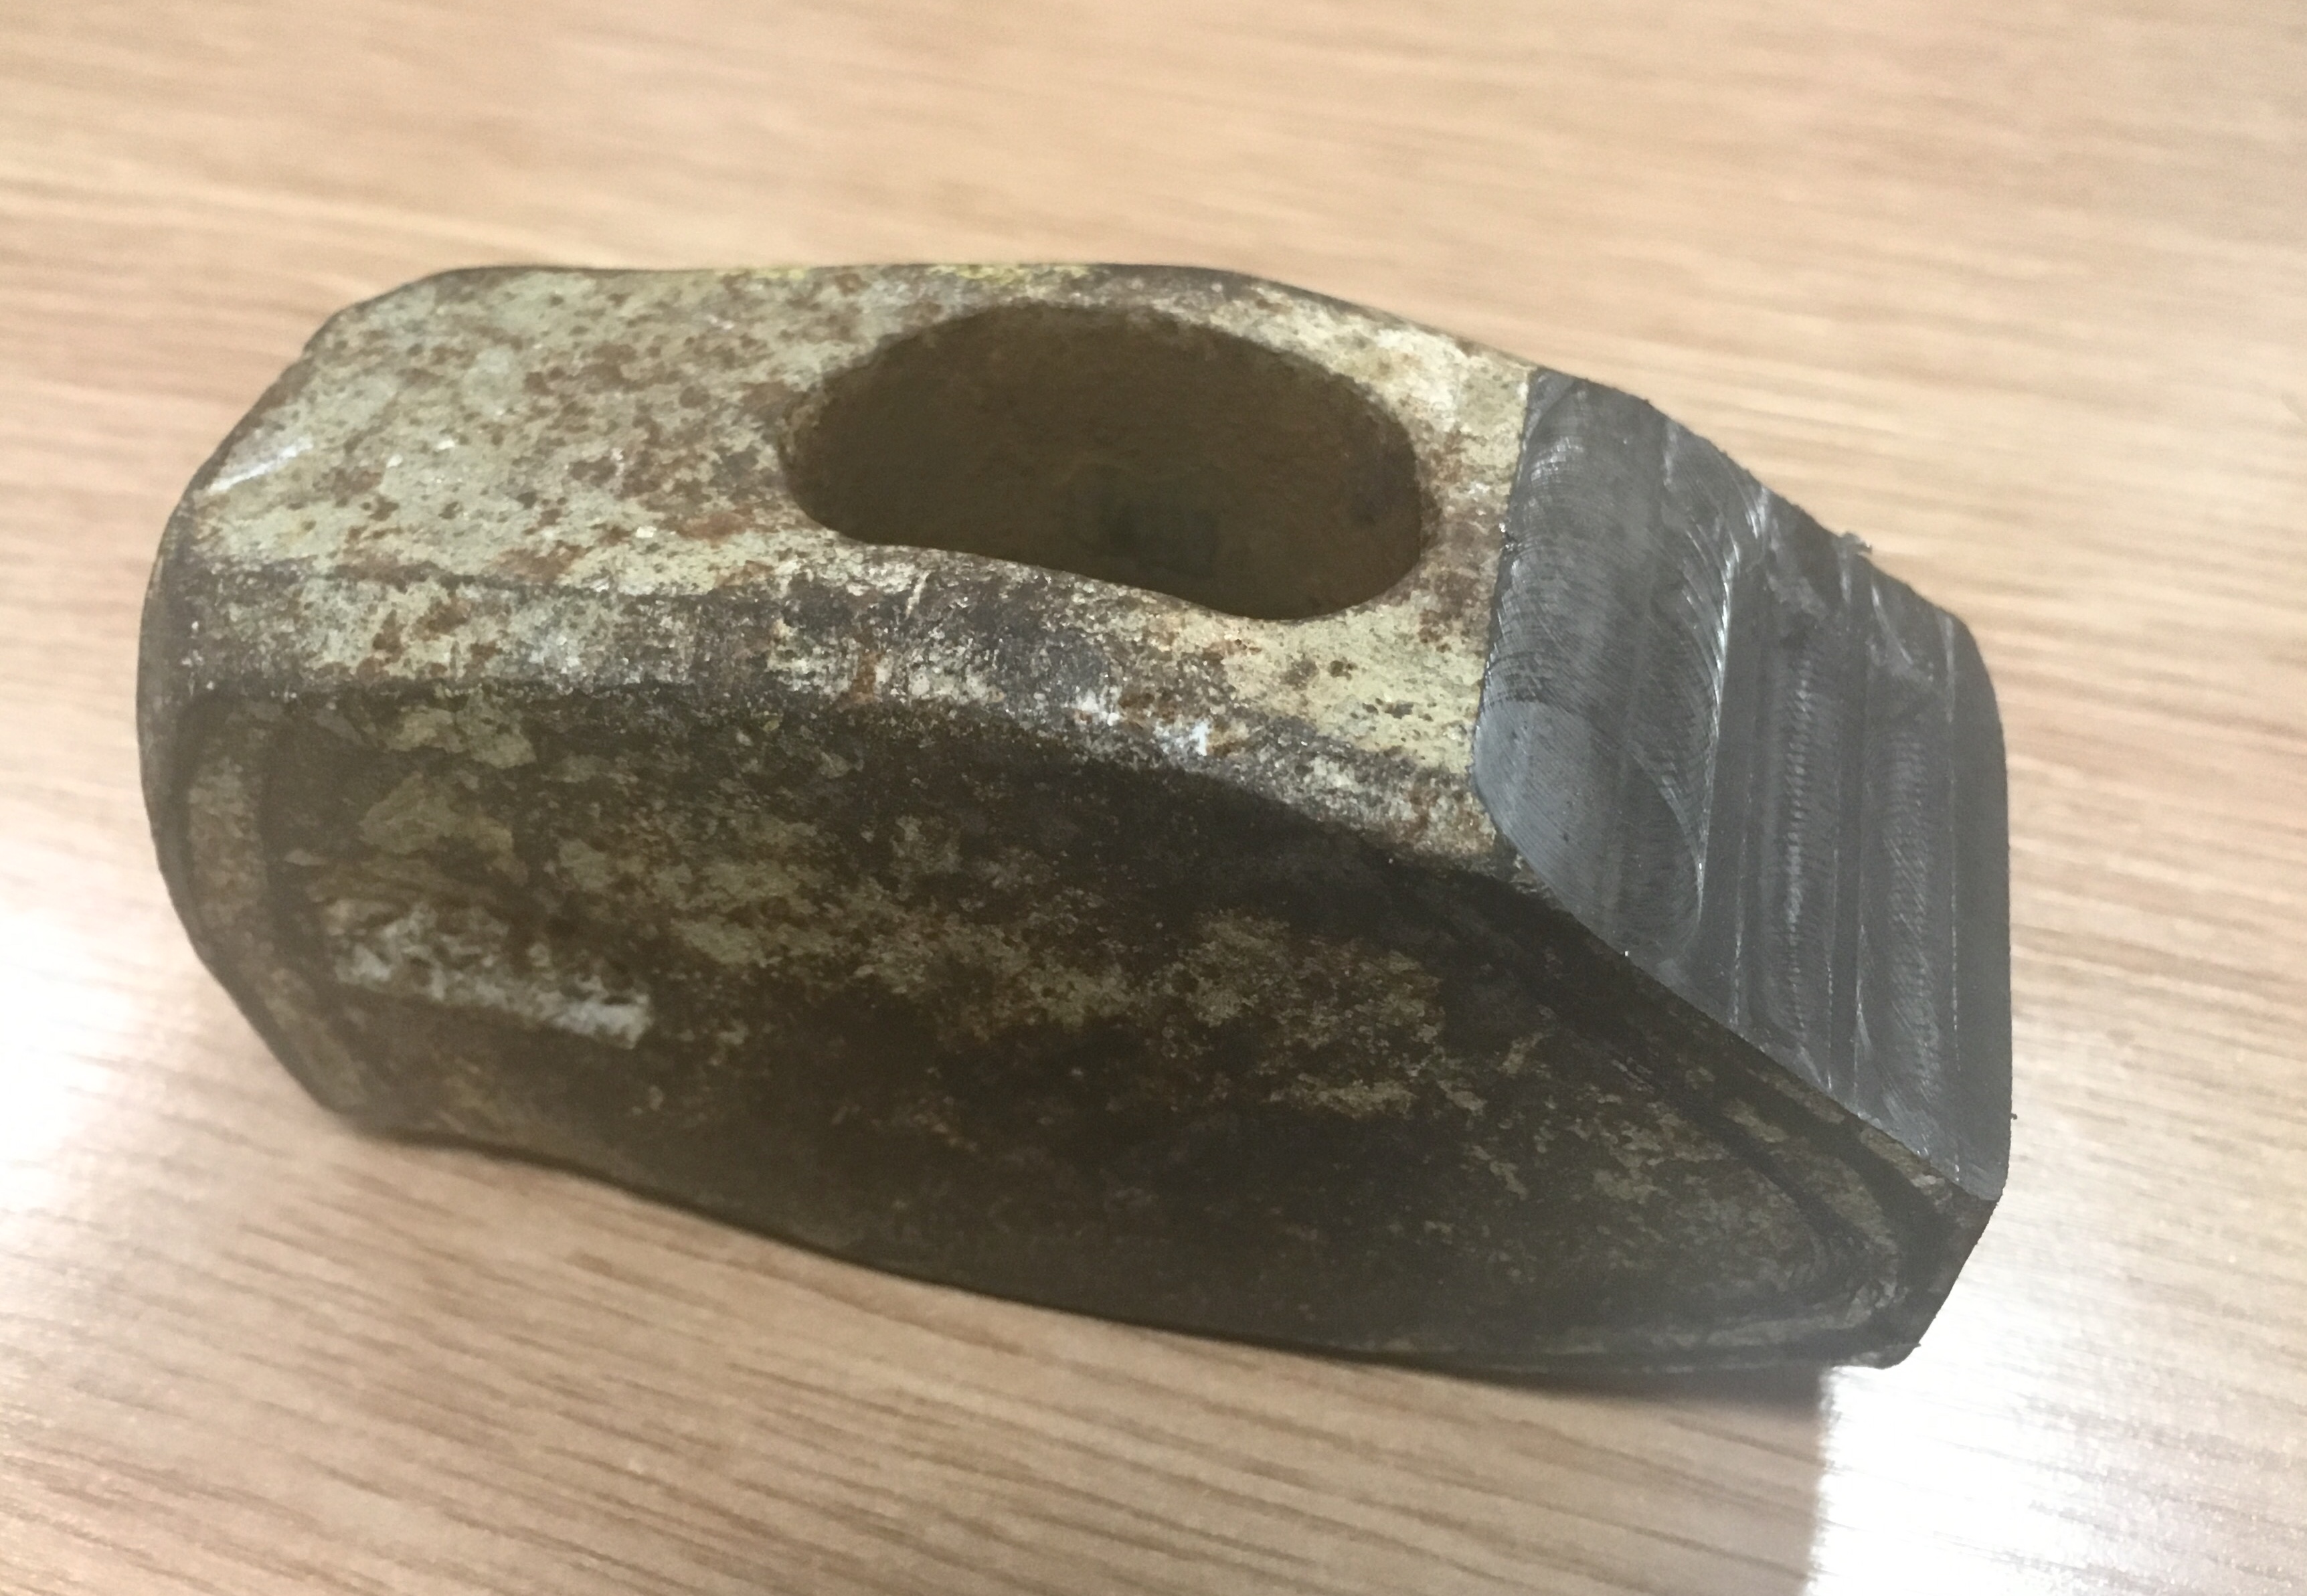
I’ve been busy dressing the hammers and modifying the one without the handle into a cross peen....


-
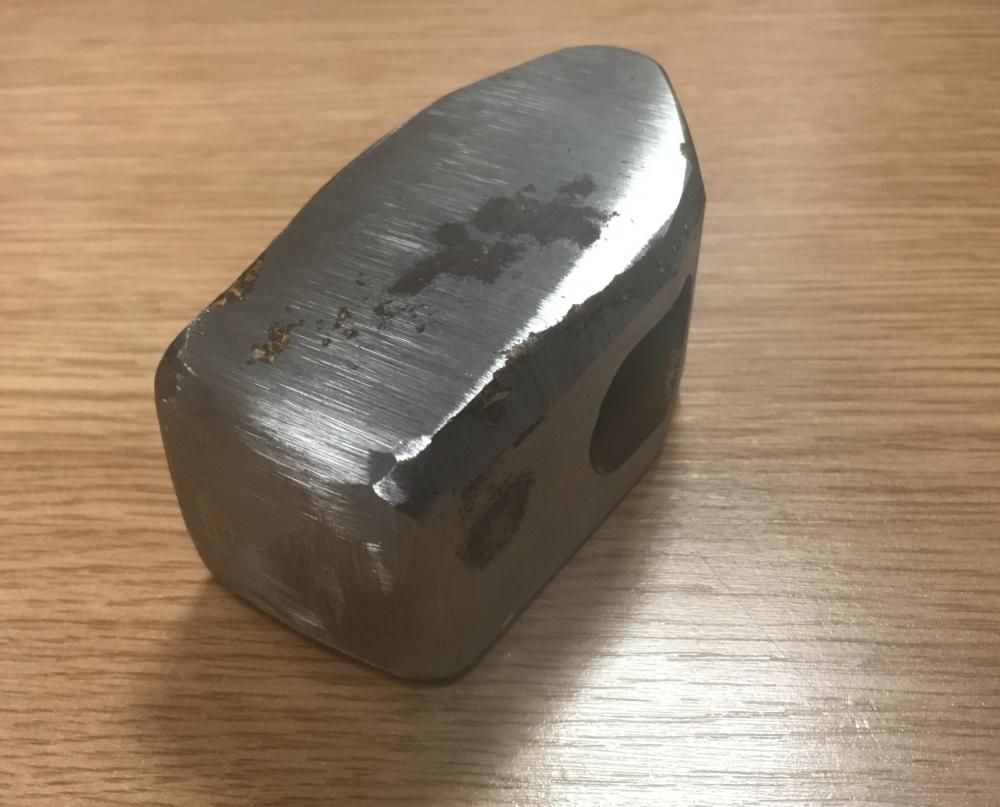
Haha. I’ve just finished belt-sanding the hammer head. Matched the 24” radius and 1/2” corners as best I could. How do I tell if I’ve ruined the temper? Most likely i have!


-
Thanks TP..... added "Tomohawk" to the list of near-future projects. That would be awesome. I'll definately grab some more cheap for making drifts, hotcuts, etc.
-
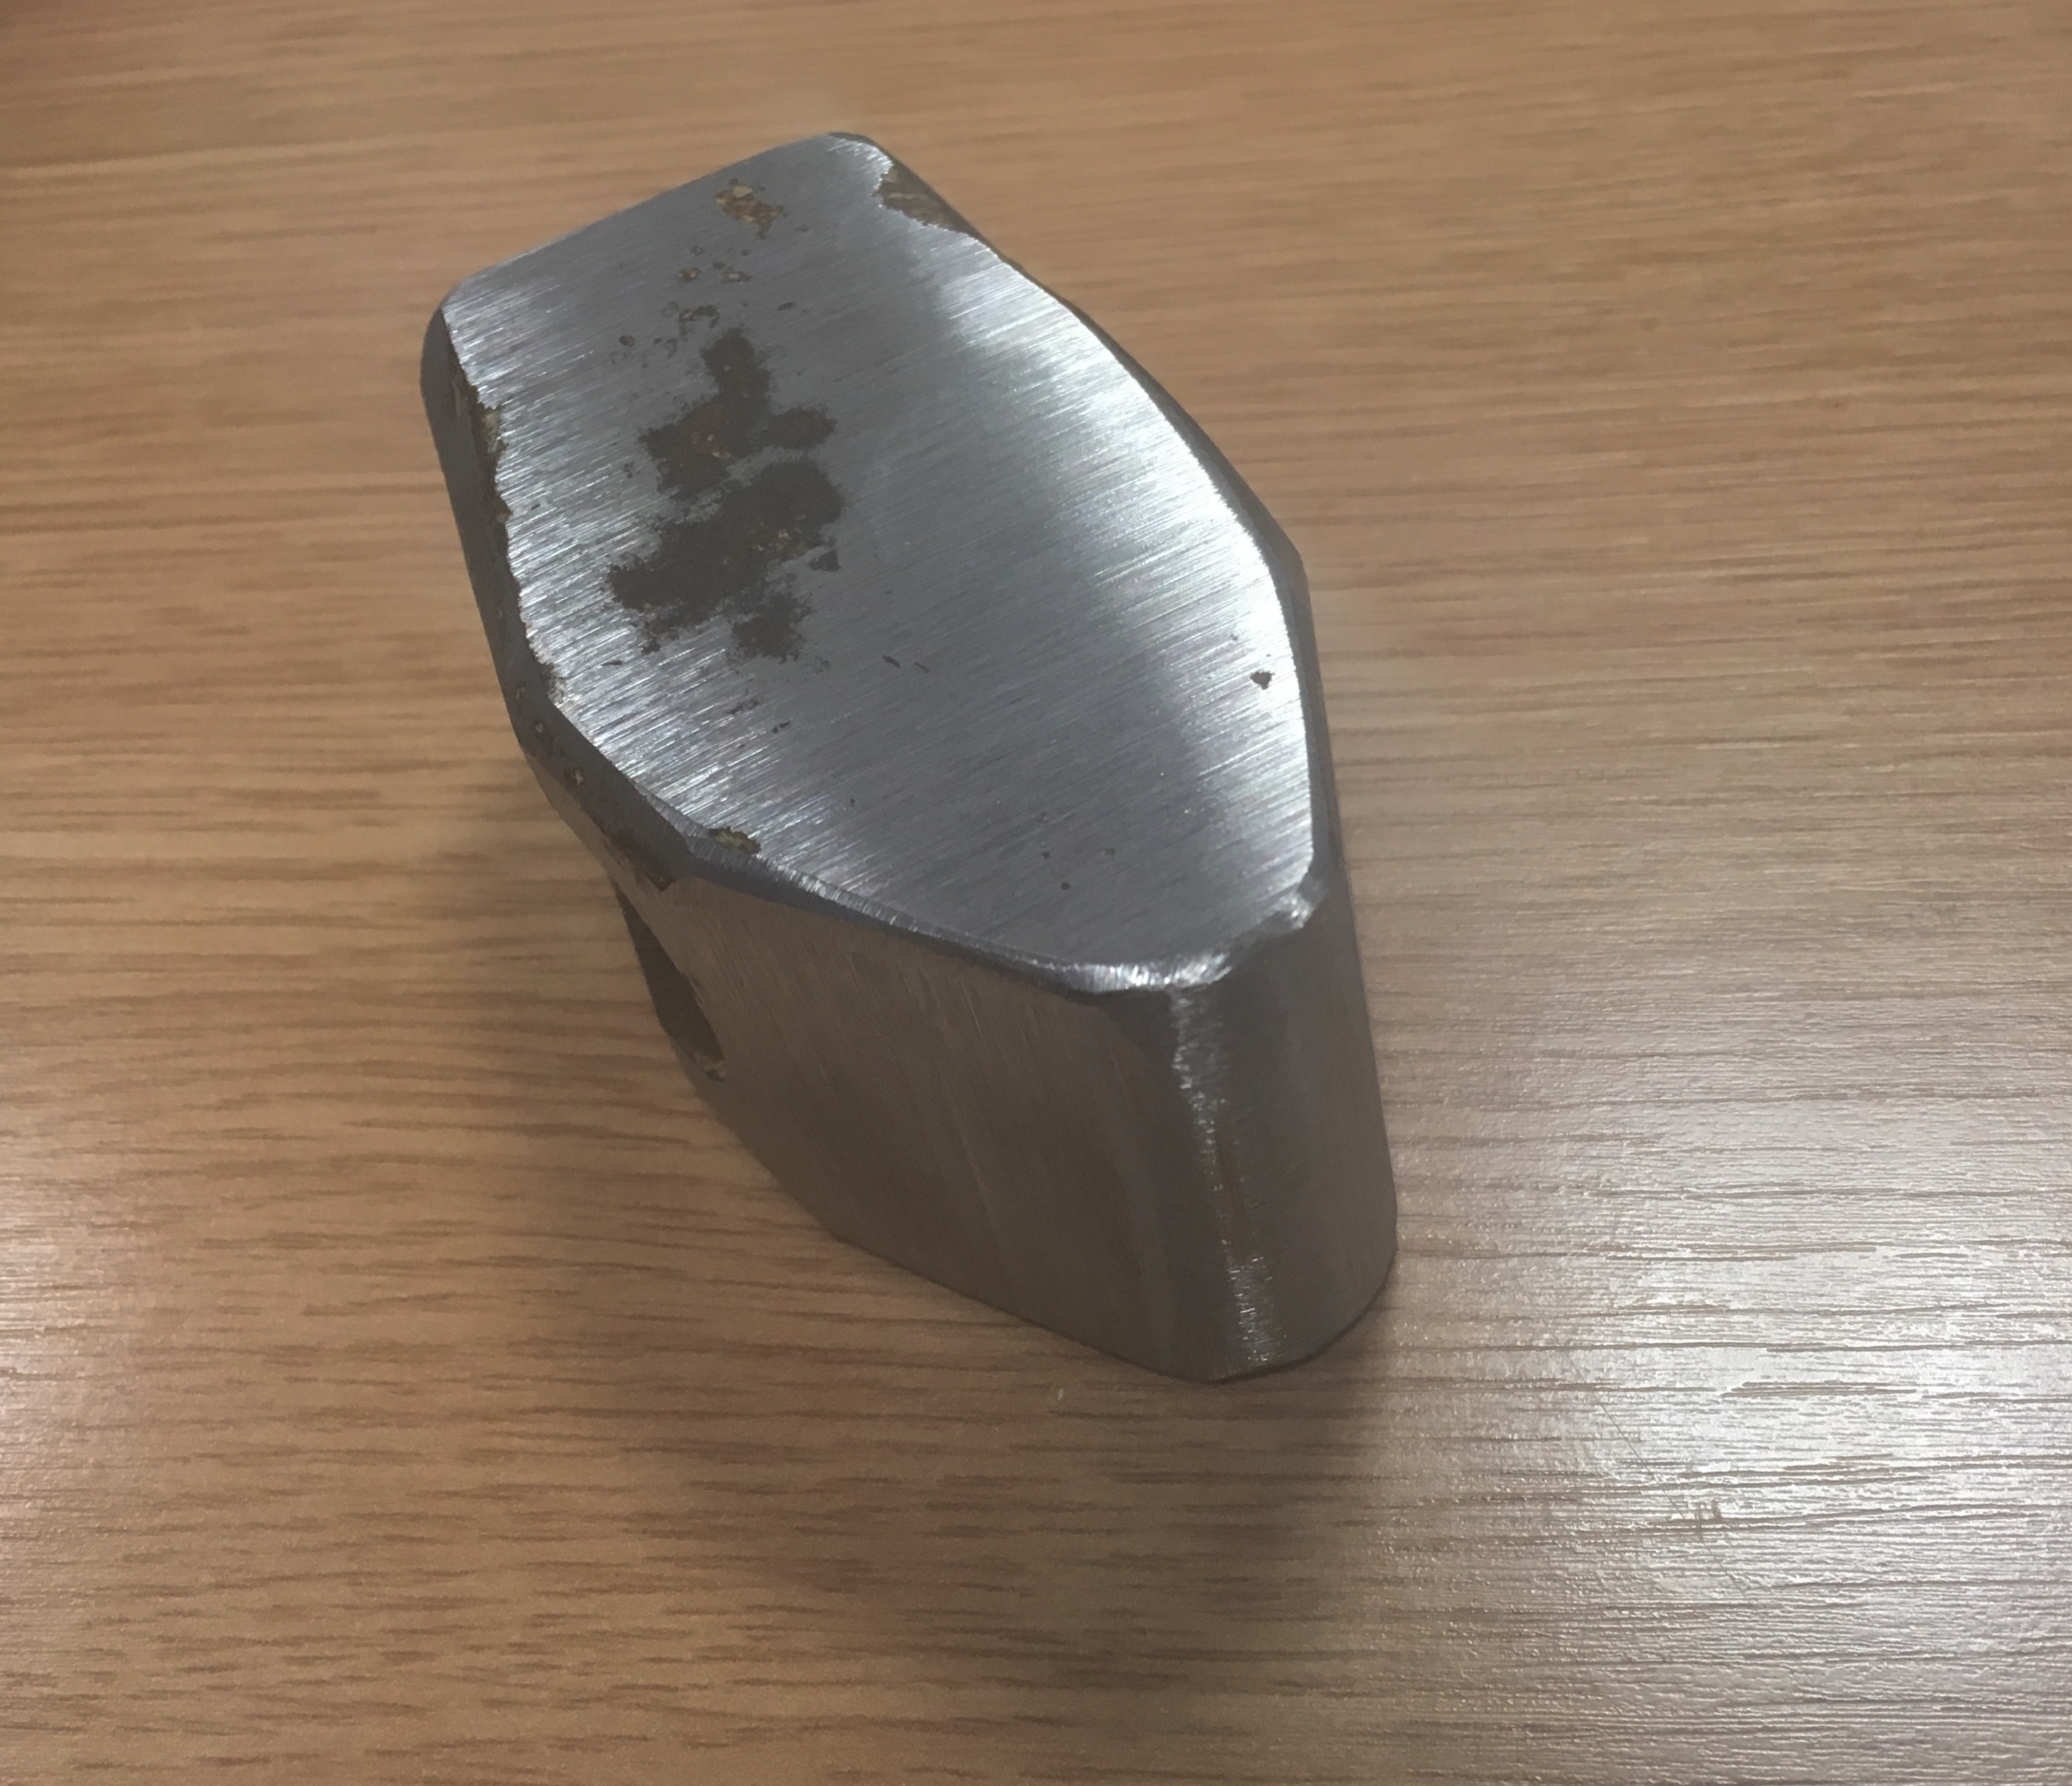
Here we go... step 1- milled the corners off. Was easier than cutting.

-
Its very hard to read but I think you’re right, 2.5lbs. I’m keen to try the cross pein- I can probably get it band-sawed at work to start with and grind from there. How critical is balance? any tips for re-hardening and tempering? I’ll have to read up.
-
Ah cool- what sorts of tools?!
-
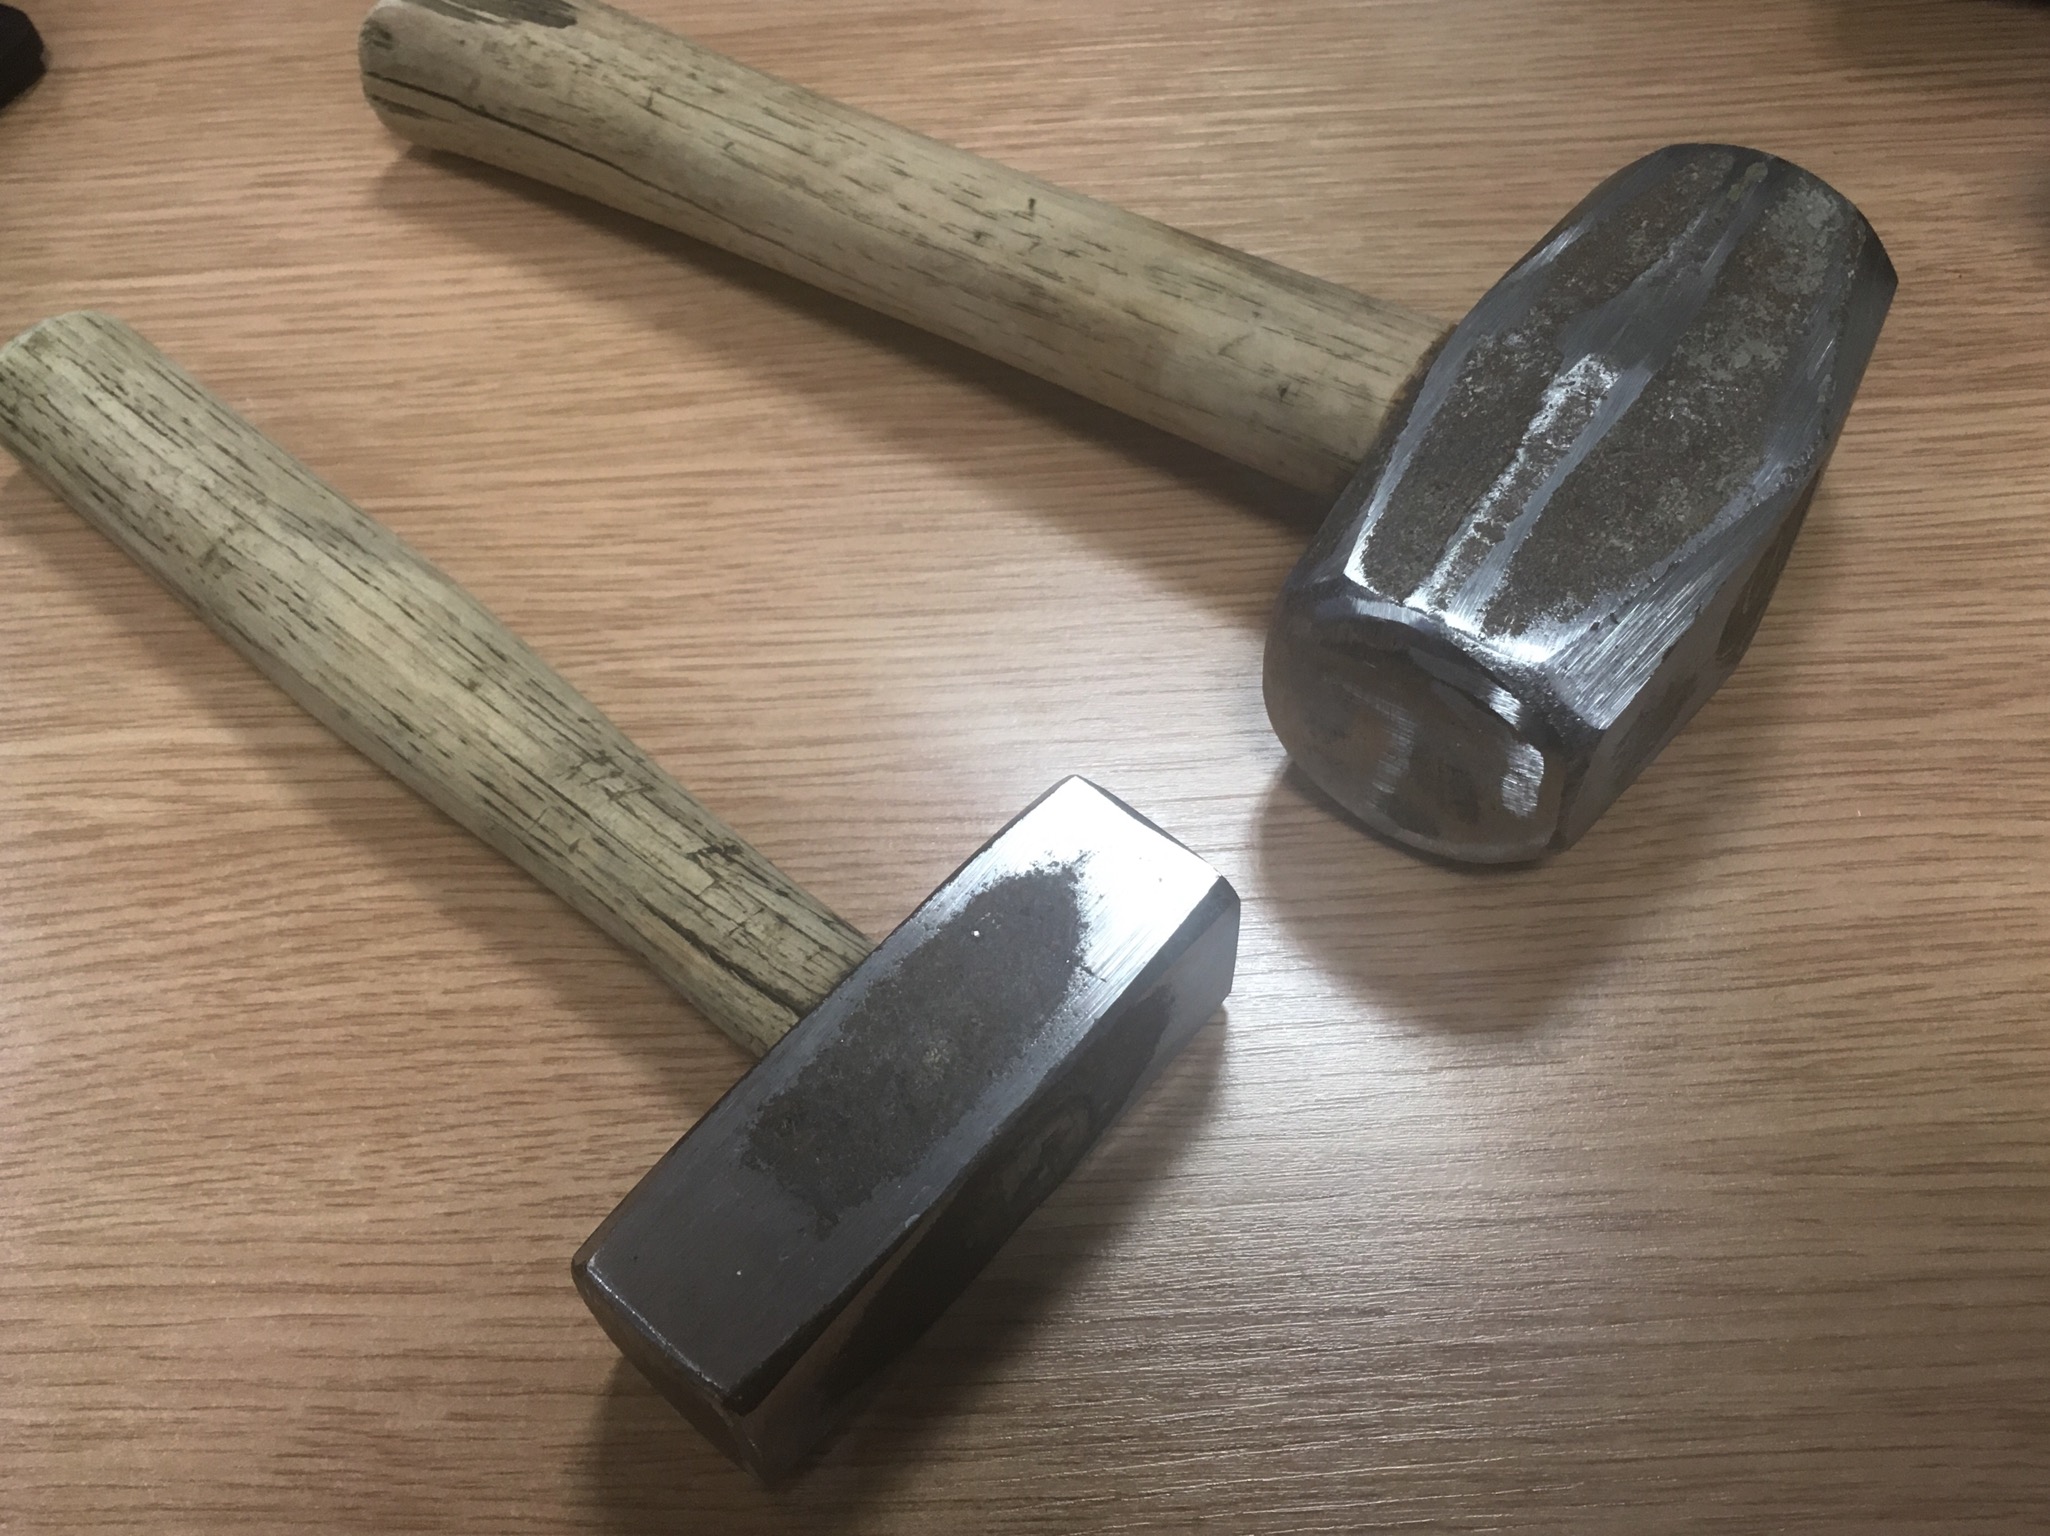
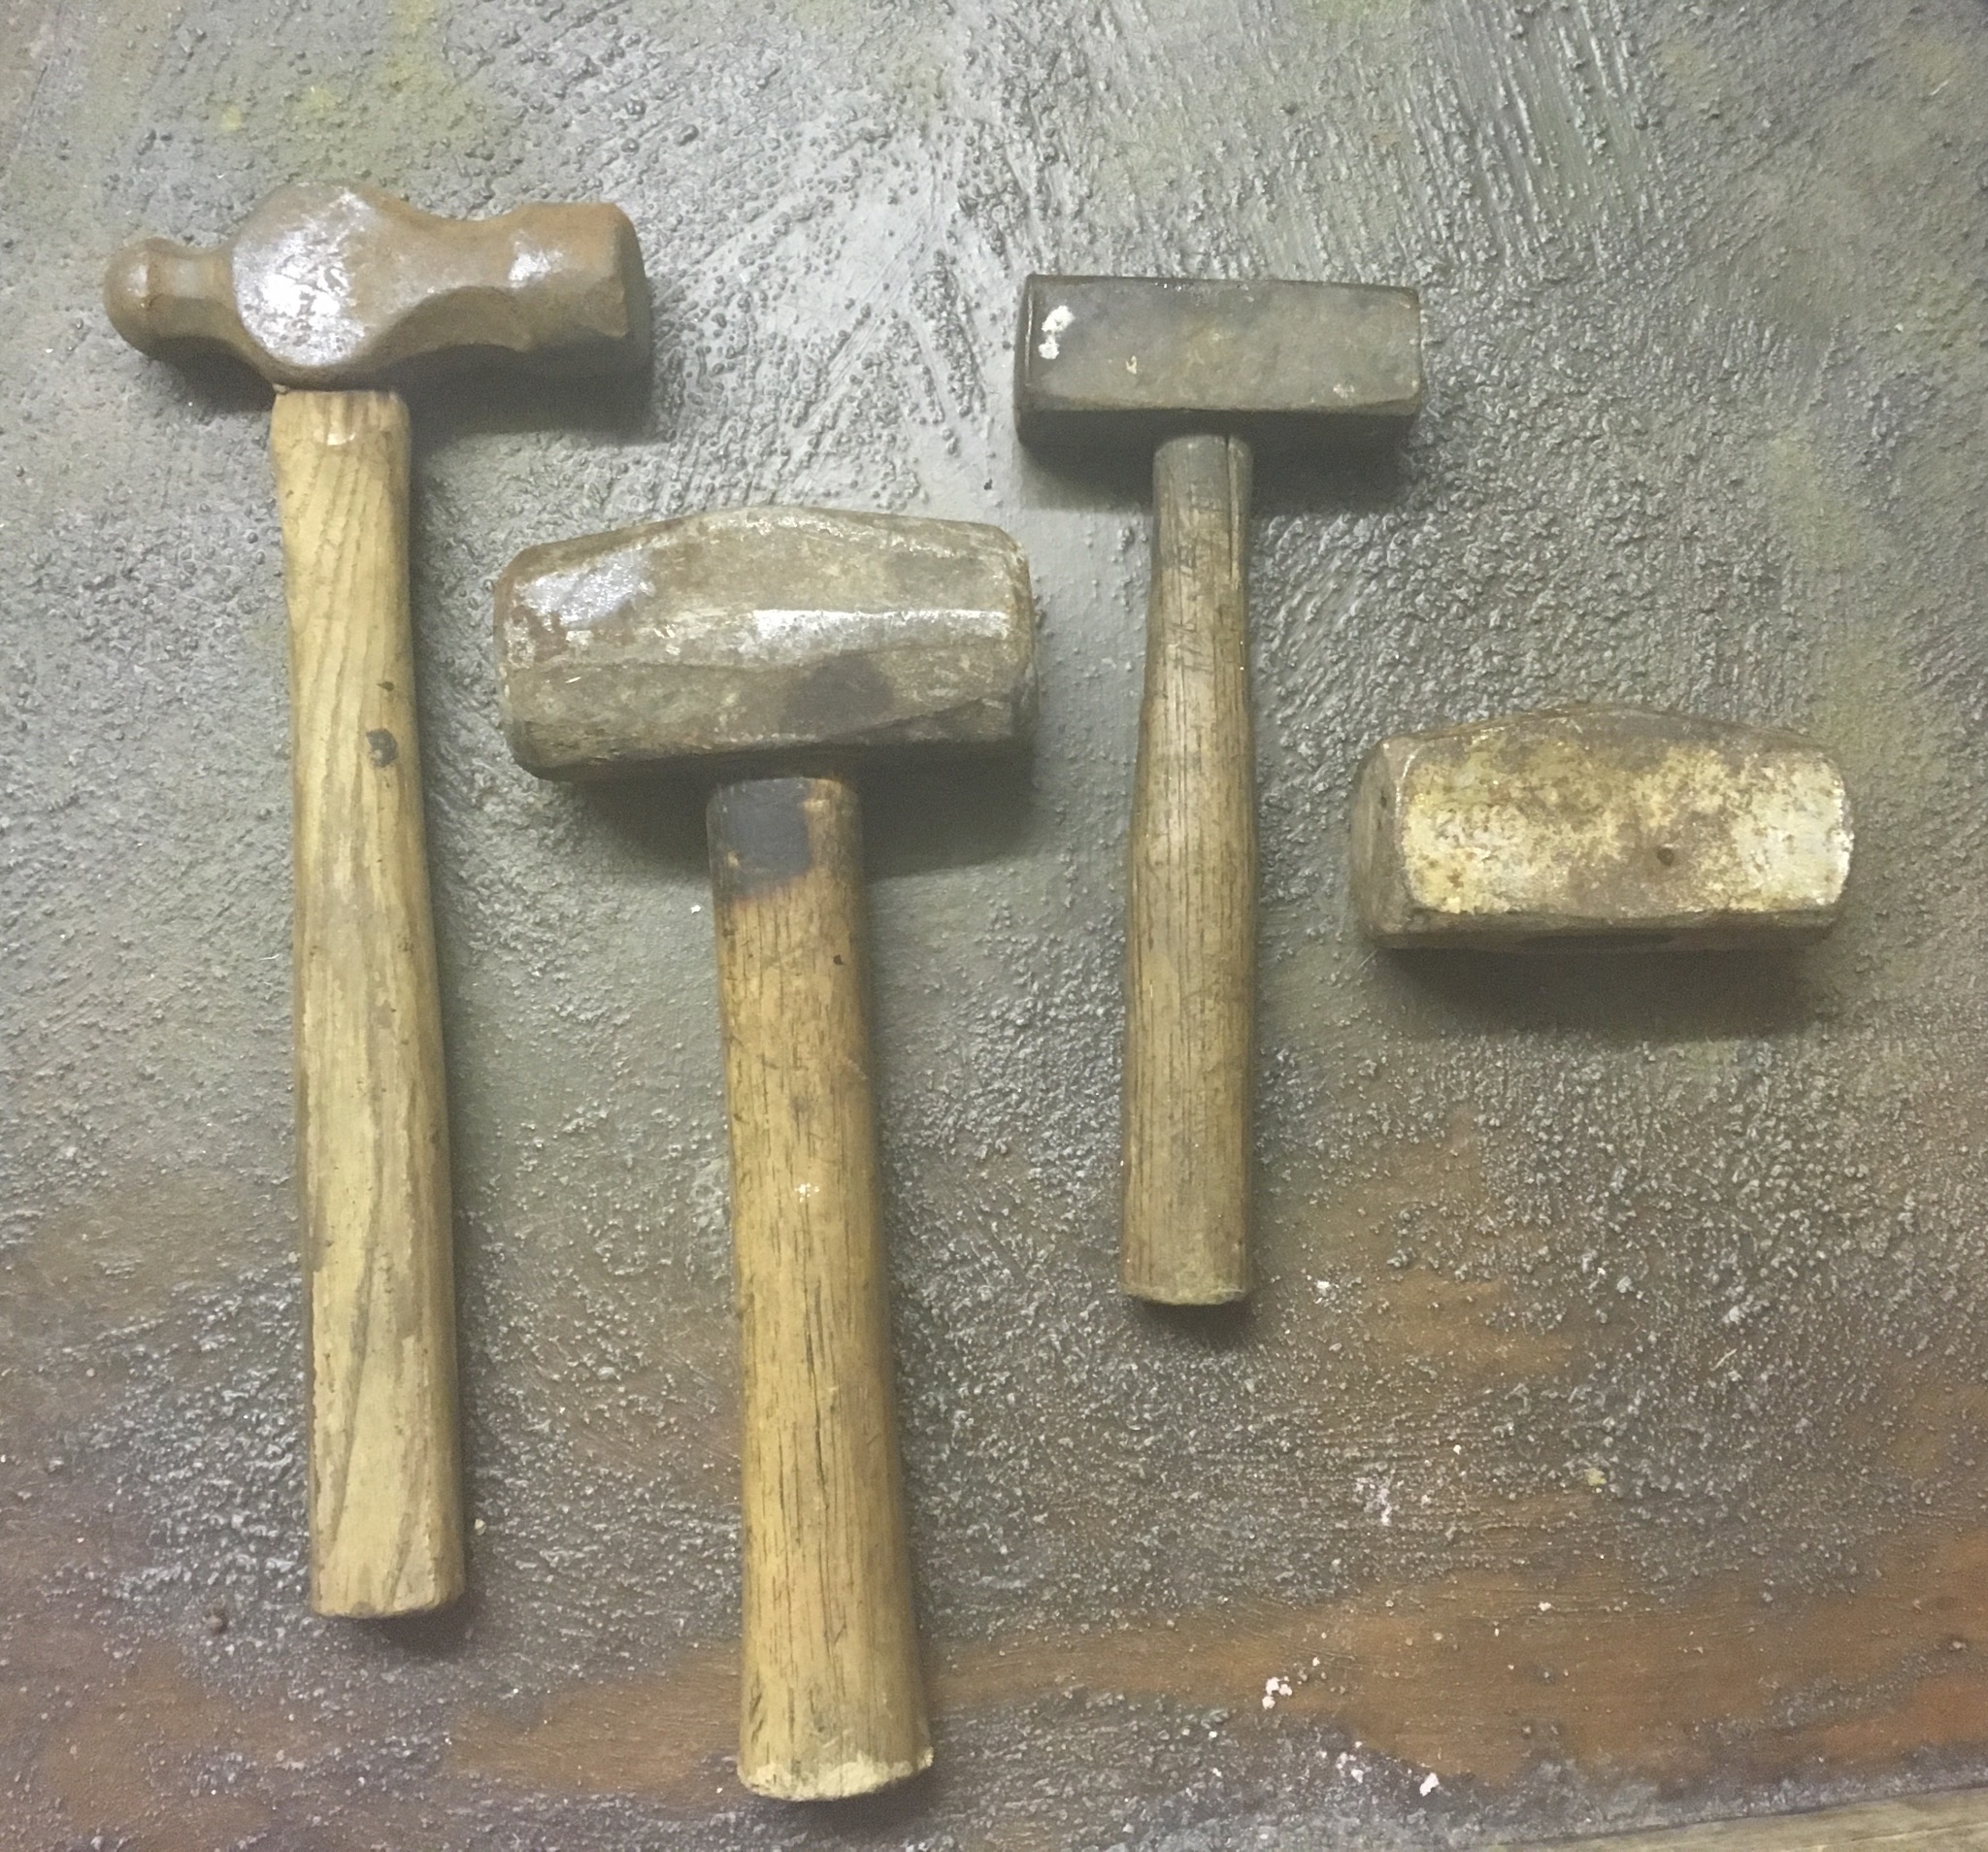
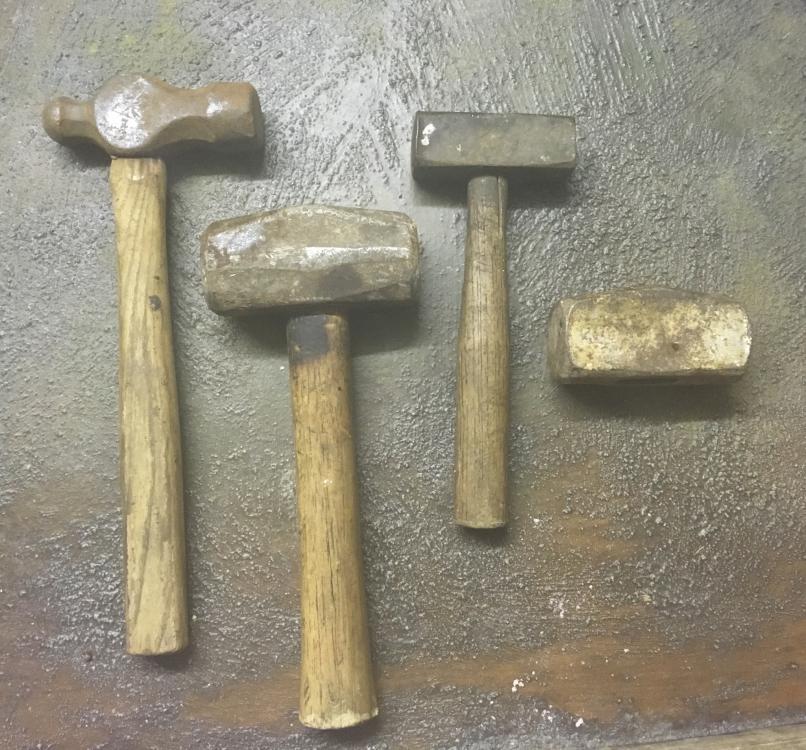
Here’s the hammers I got cheap. Any recommendations for modifications? I’m thinking of grinding the handle-less sledge as shown in the image. Its only 2lb to begin with so I’d only be left with about 1.5lbs. Not sure its worth it? I might just dress both sides of the sledge with the handle, but I’d really like a hofi-ish style cross peen for drawing out. Suggestions welcome.


-
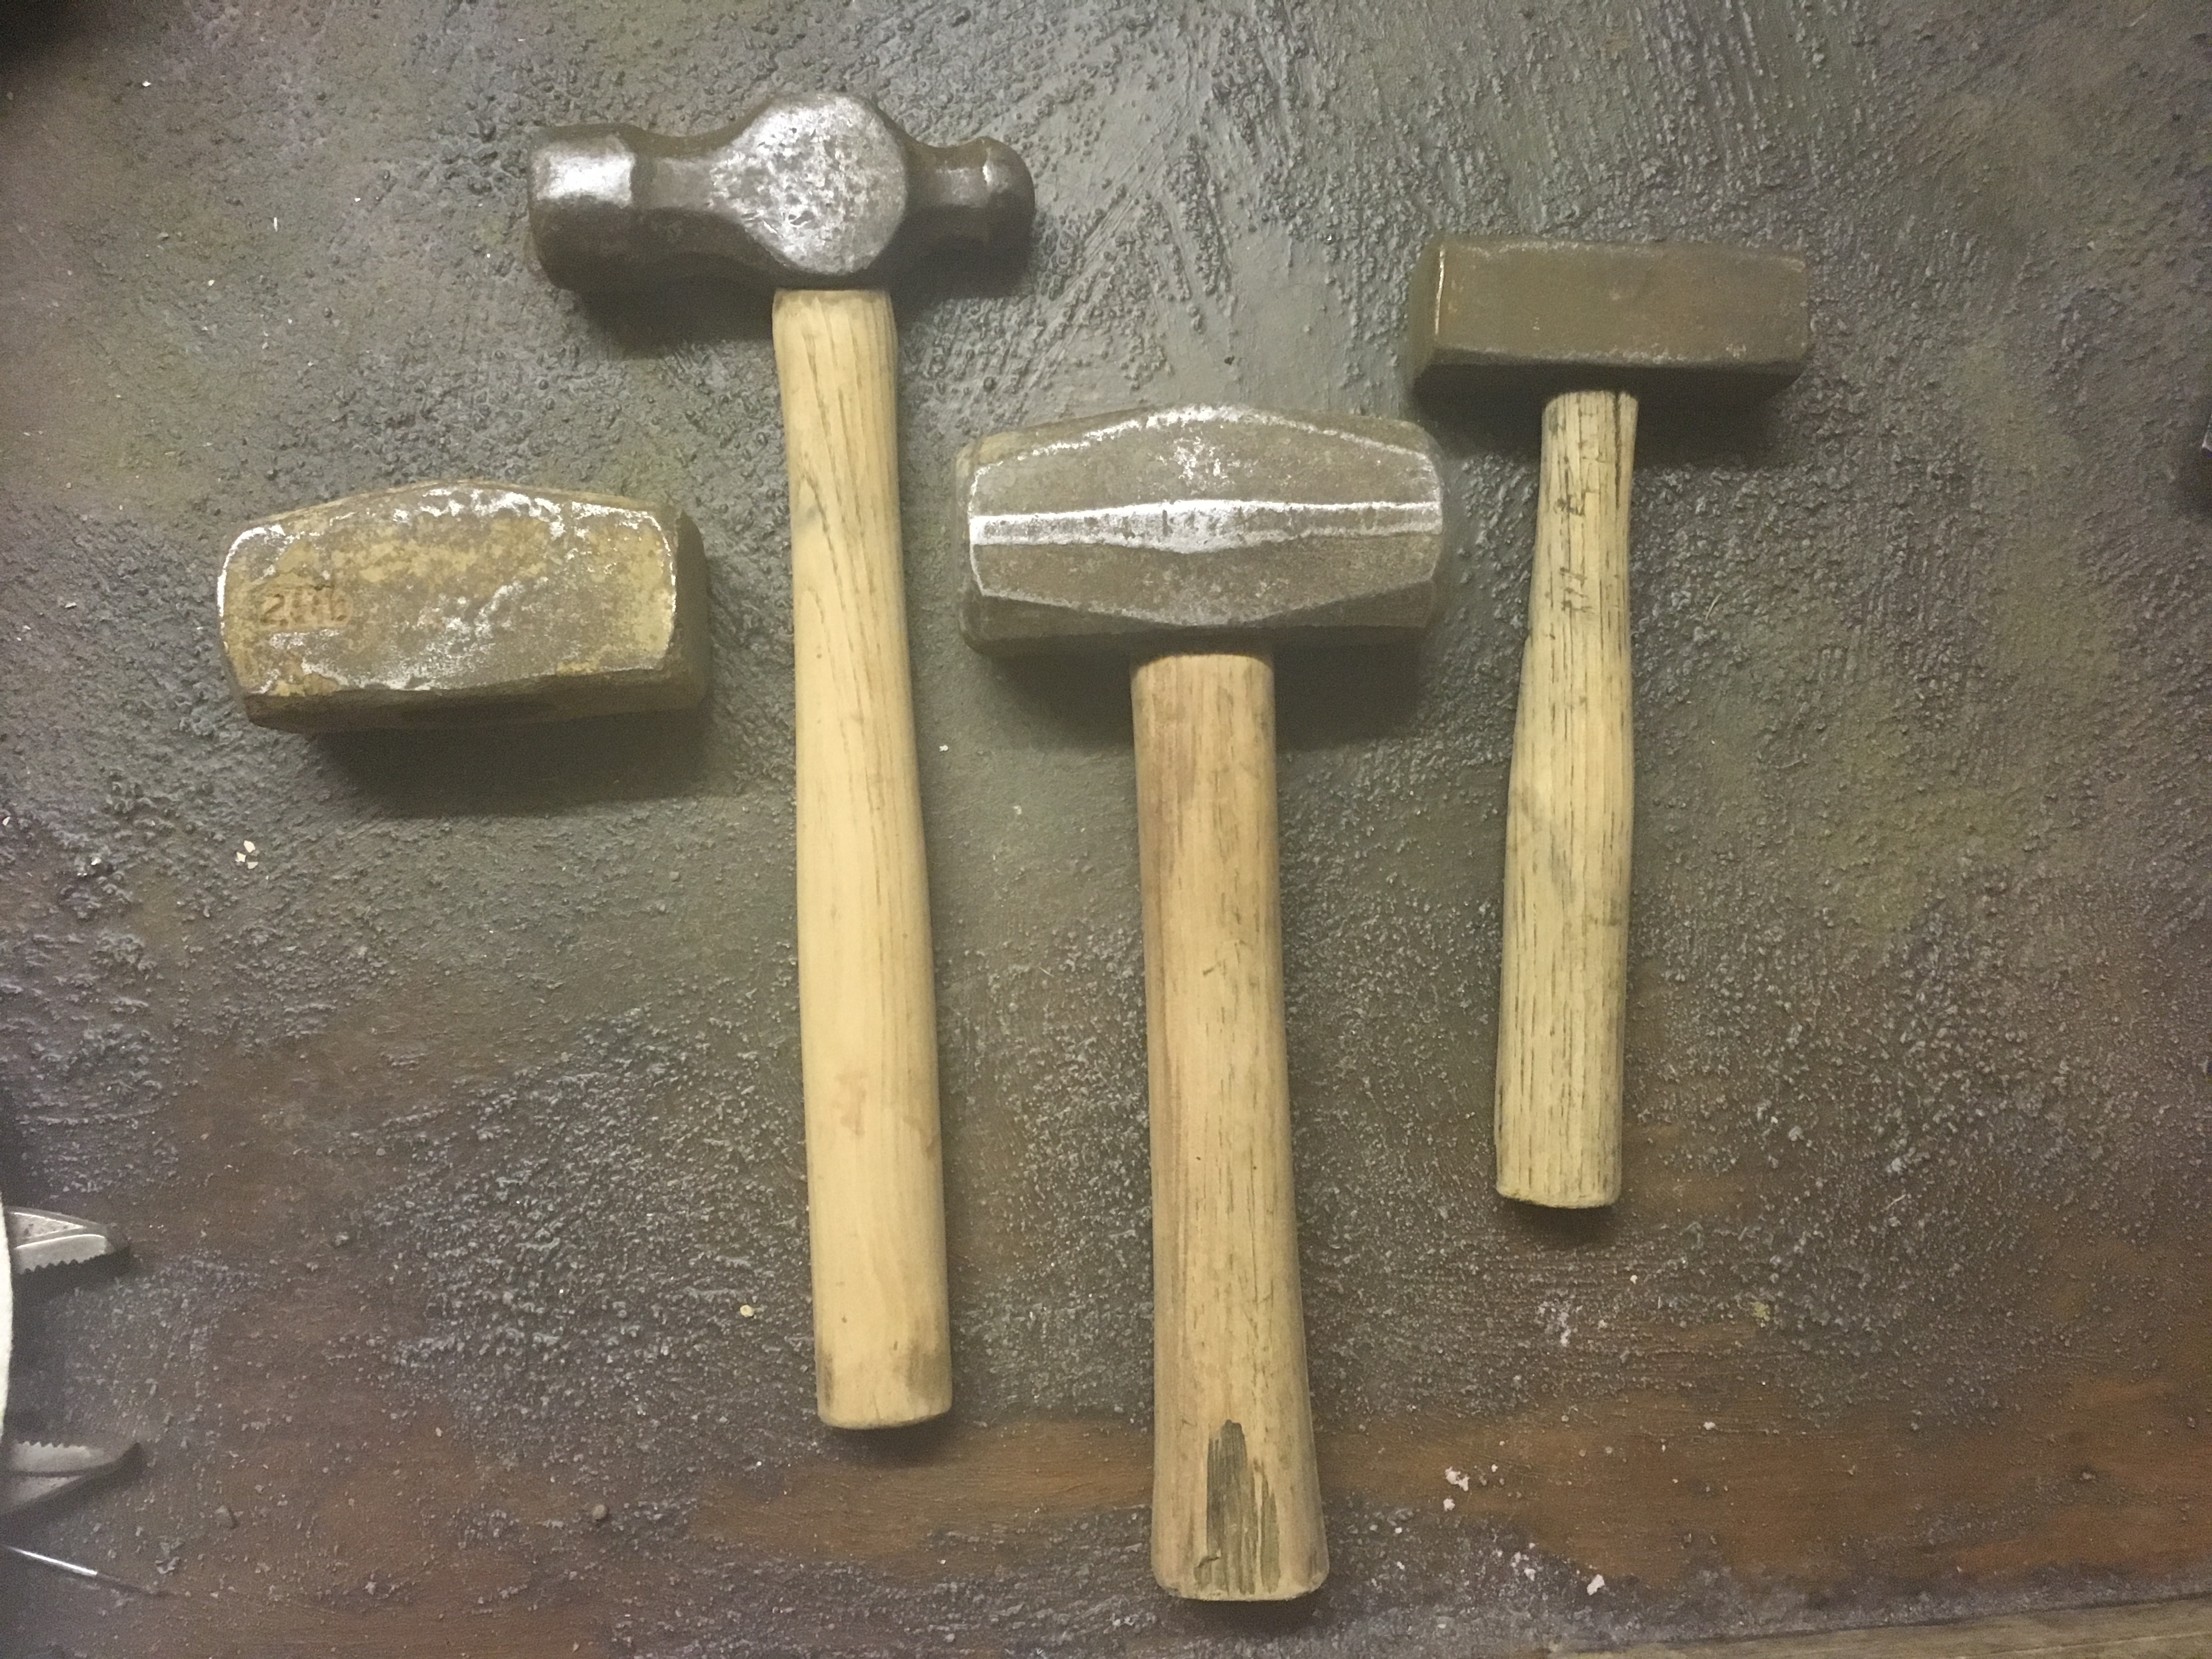
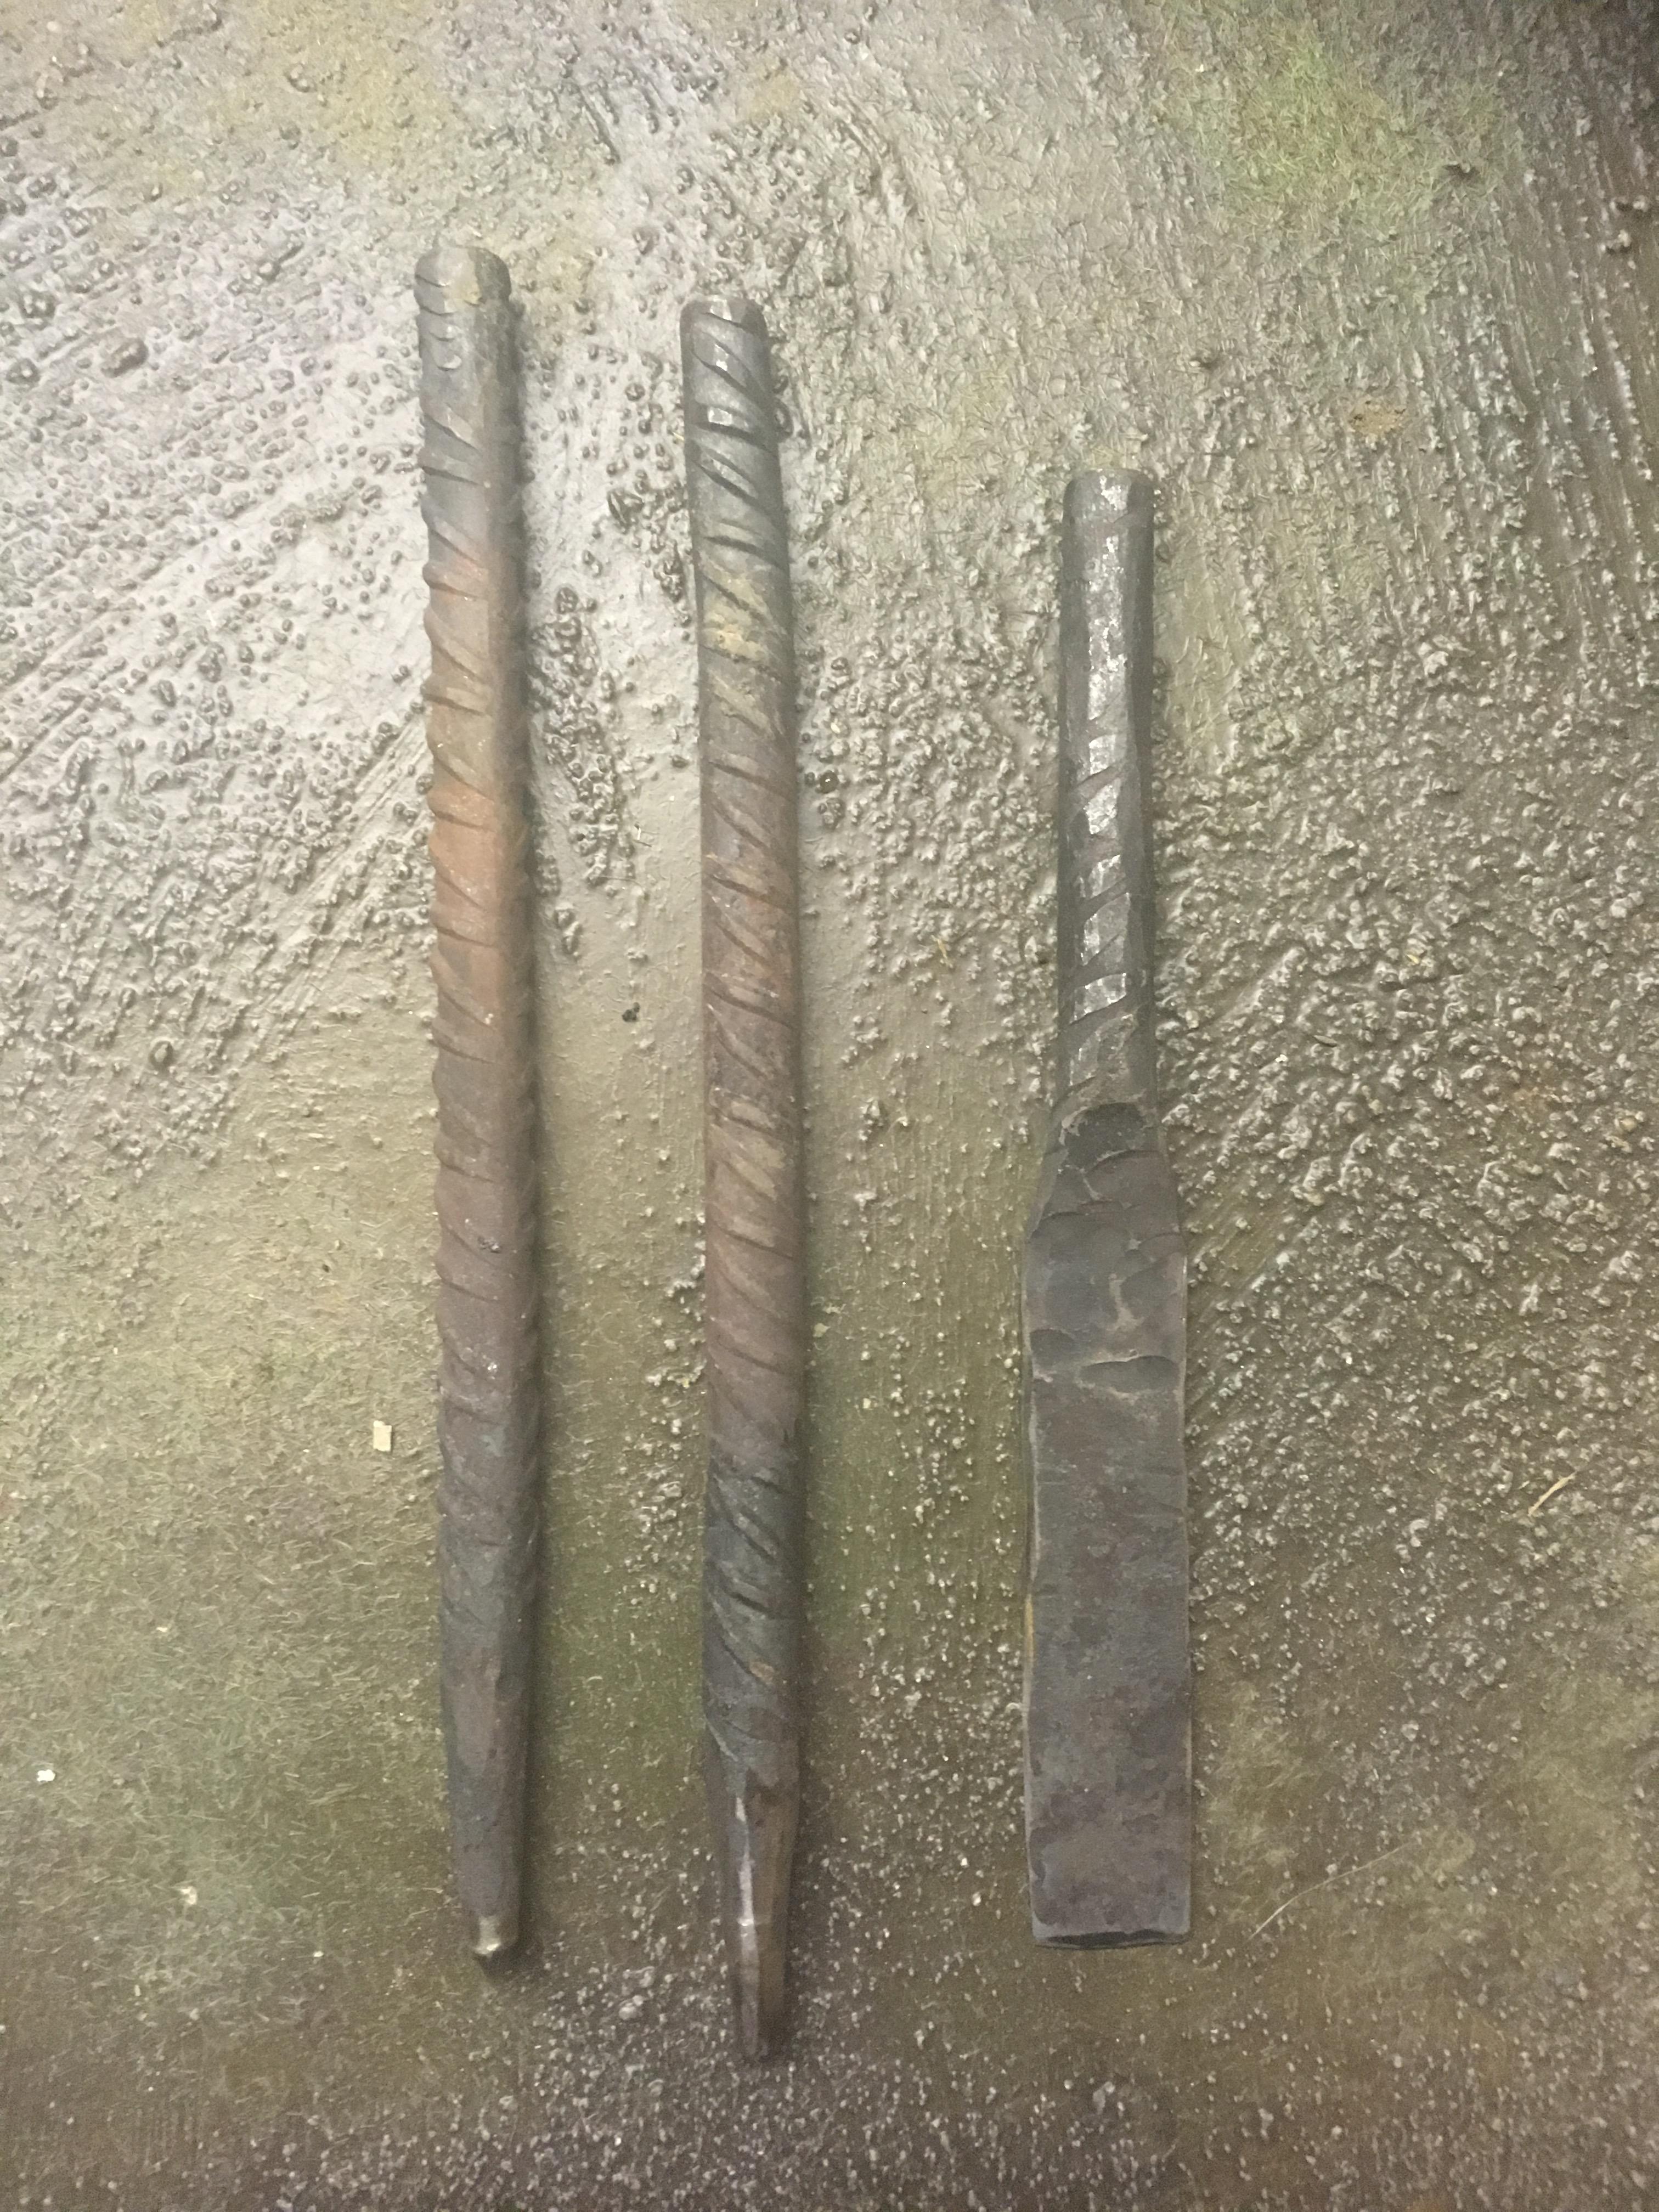
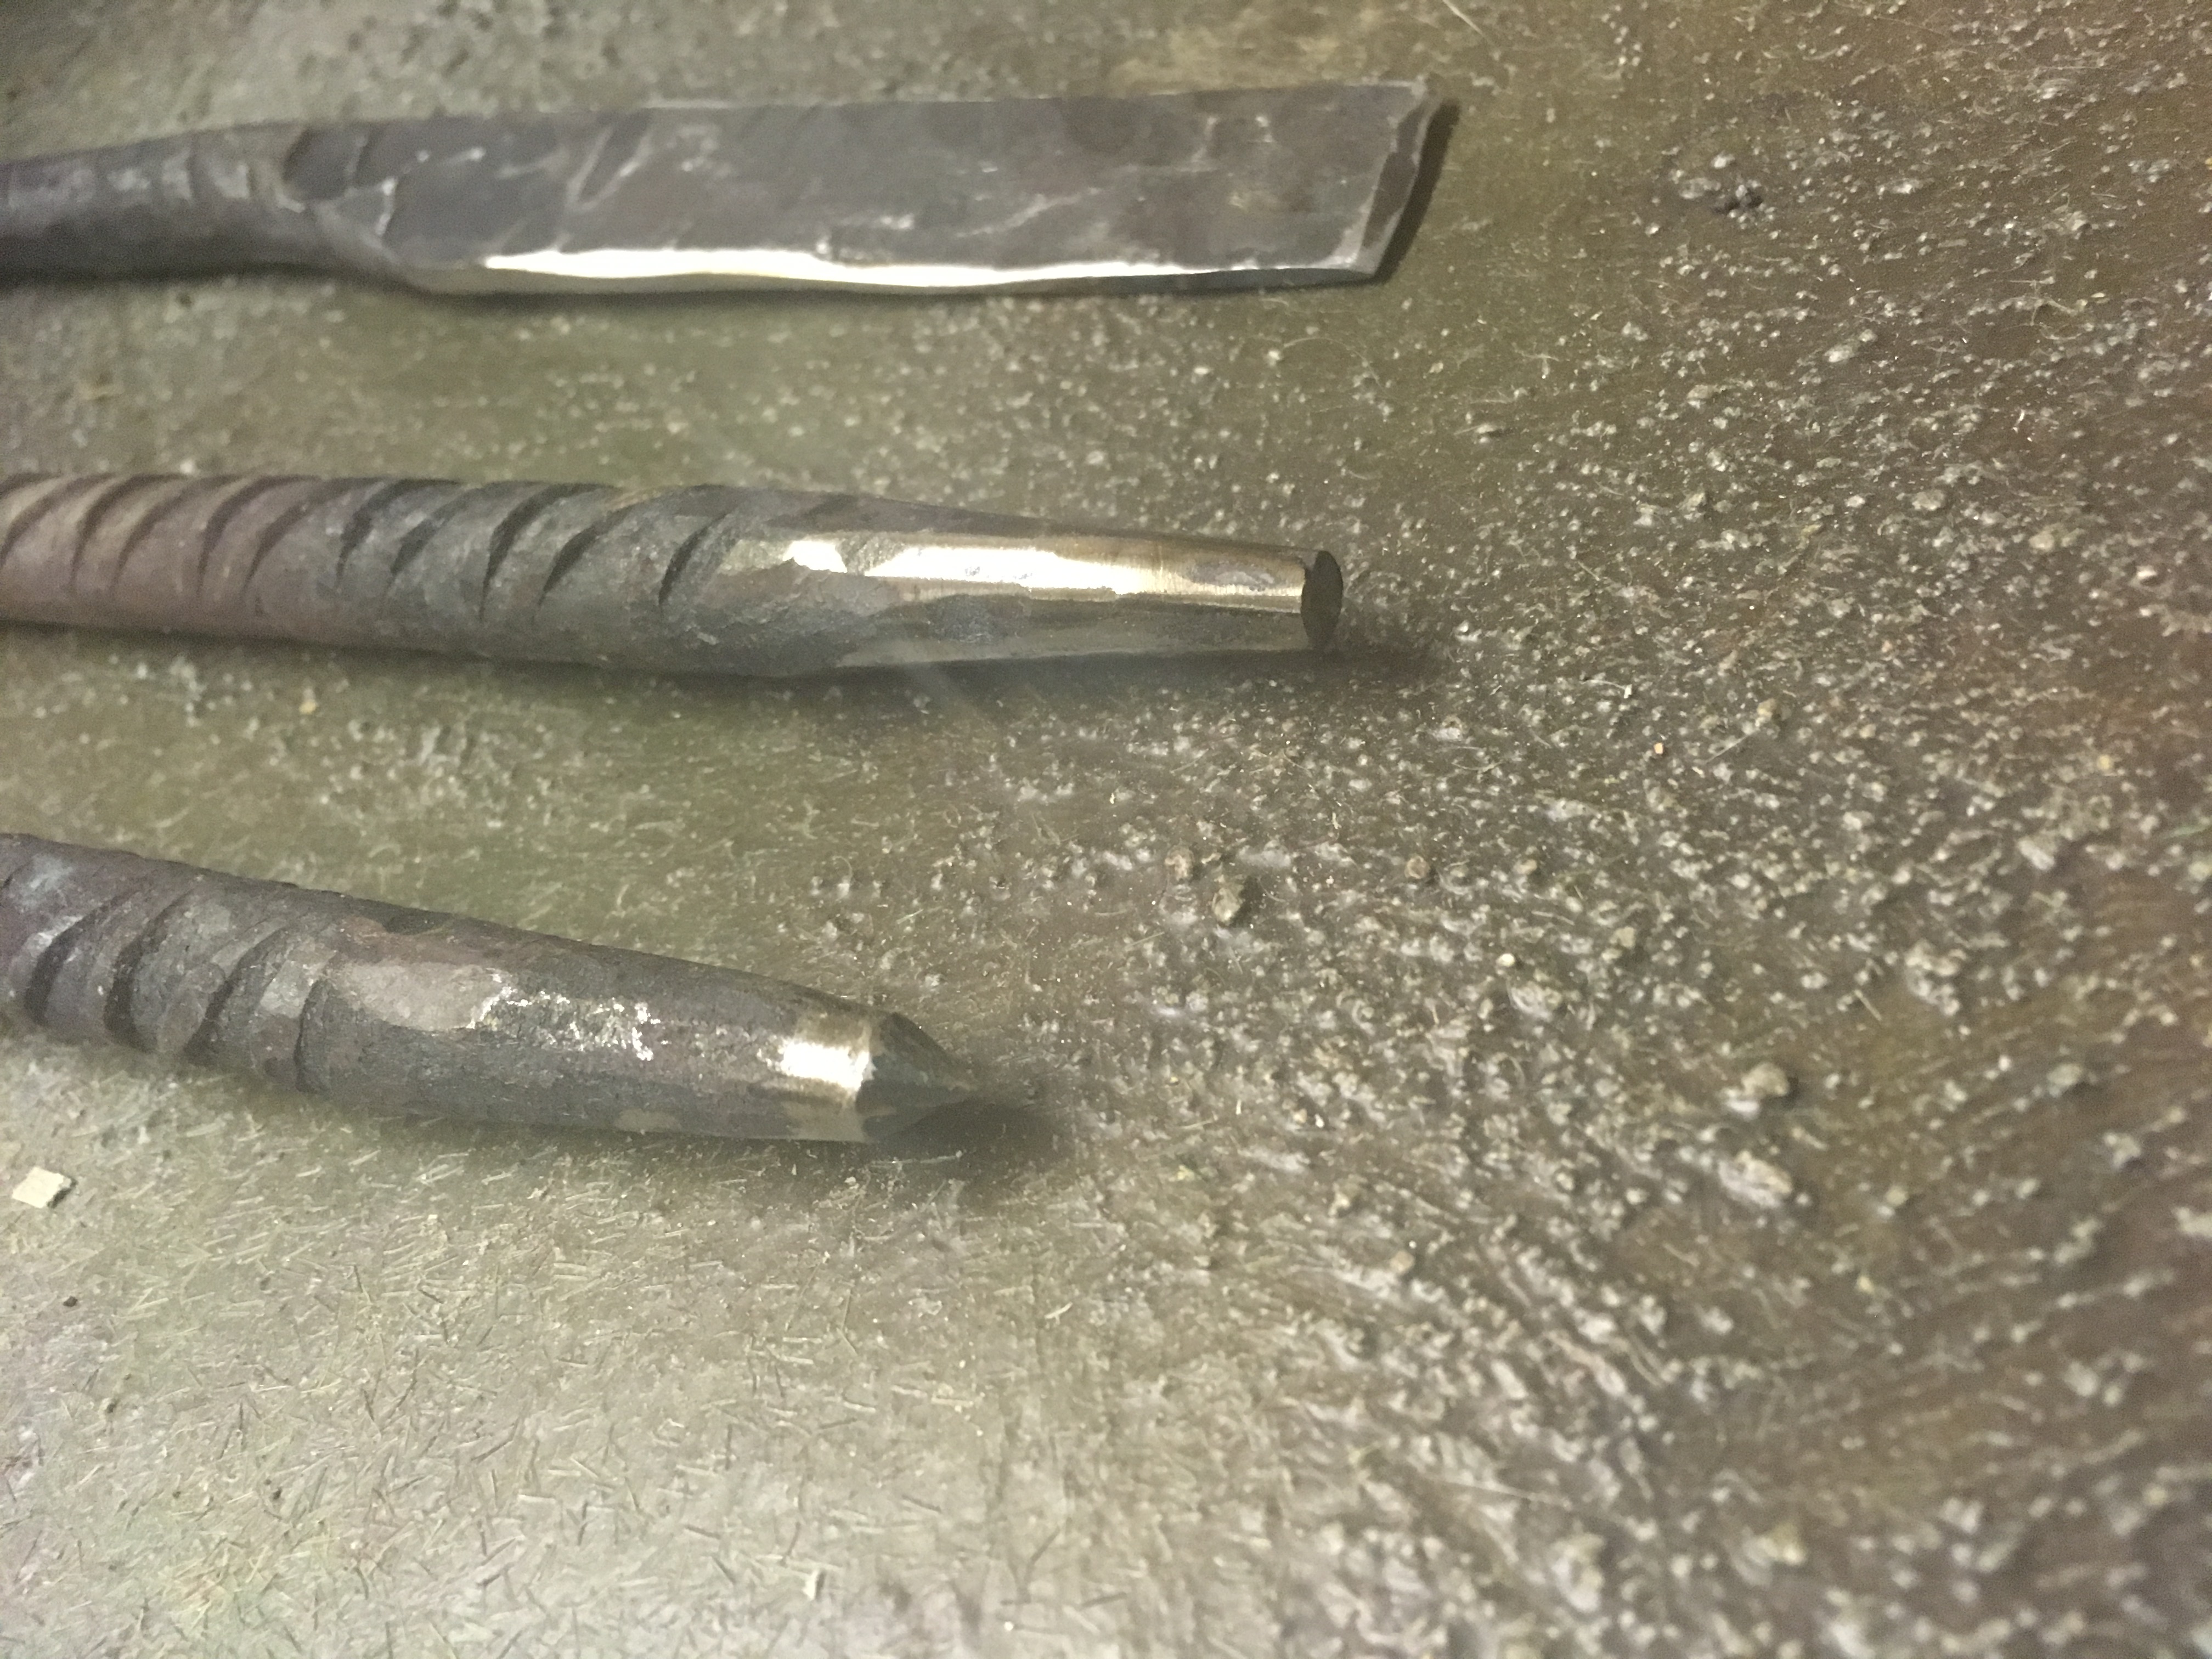
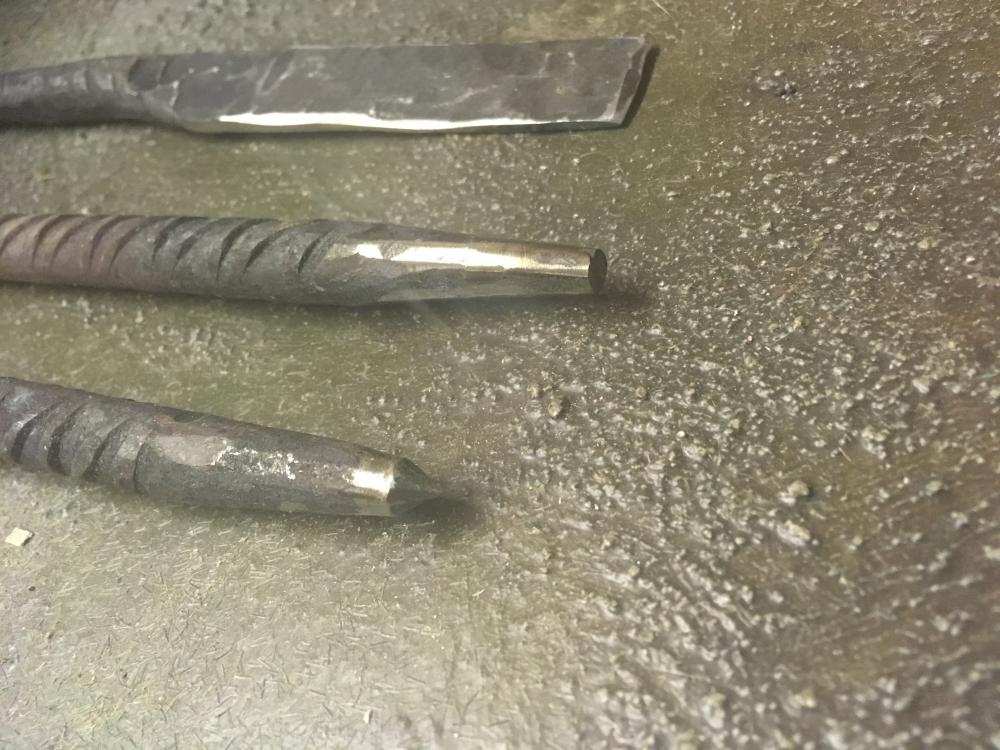
Here’s some pictures of my aforementioned car boot sale haul... (before and after cleaning)... total cost was £2.75. I also got some shears (not pictured) that a might be able to twist into tongs. Hoping I can dress the hammers, and possibly modify the sledge head into a small hofi-ish/german style? Will probably be 1.75lbs in the end so not sure its worth it? Please see my other thread in the “Hammers” section regarding modifying the sledges. Also pictured are my first 3 handmade tools. Terrible, admittedly, but its a start. I’ve not tried them to see if they work yet.


.jpg.52e9c22152df4f2fd920efbfa8a791a3.jpg)
.JPG.ed9a768f0ae59b877176865967b5c6da.JPG)
.JPG.86e6898f8708ce0ebe33328034e42a01.JPG)
.JPG.7460a05b6a39641dcdb0d4bc9b60b362.JPG)
.jpg.e060573b7c6fa9862f595b9c749f7ae0.jpg)
.JPG.cfddb6e81c2fa544cae7d65177c02938.JPG)
.jpg.f015659f82855130476f5704d9483fb4.jpg)