
Jon Kerr
-
Posts
293 -
Joined
-
Last visited
Content Type
Profiles
Forums
Articles
Gallery
Downloads
Events
Everything posted by Jon Kerr
-
Brilliant advice, thanks so much everyone who took the time to reply! This makes total sense to me now: Forging close to final shape, including shallow bevels, means the angle between the "brut de forge" section and the ground section is minimal meaning some of the deeper defects show through in a fading transition. Thanks!
-
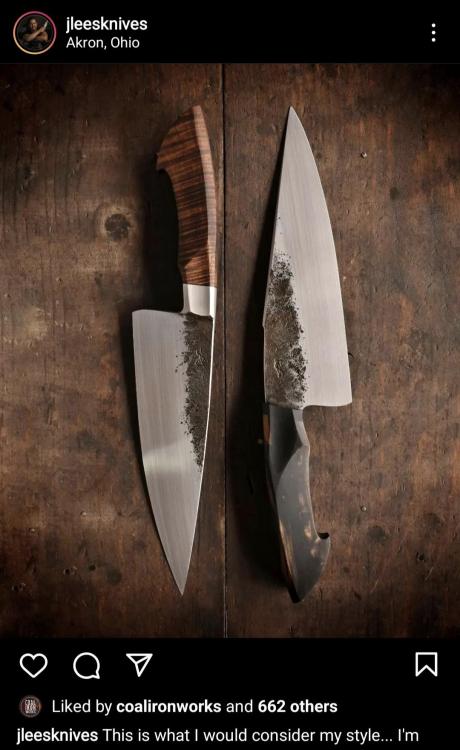
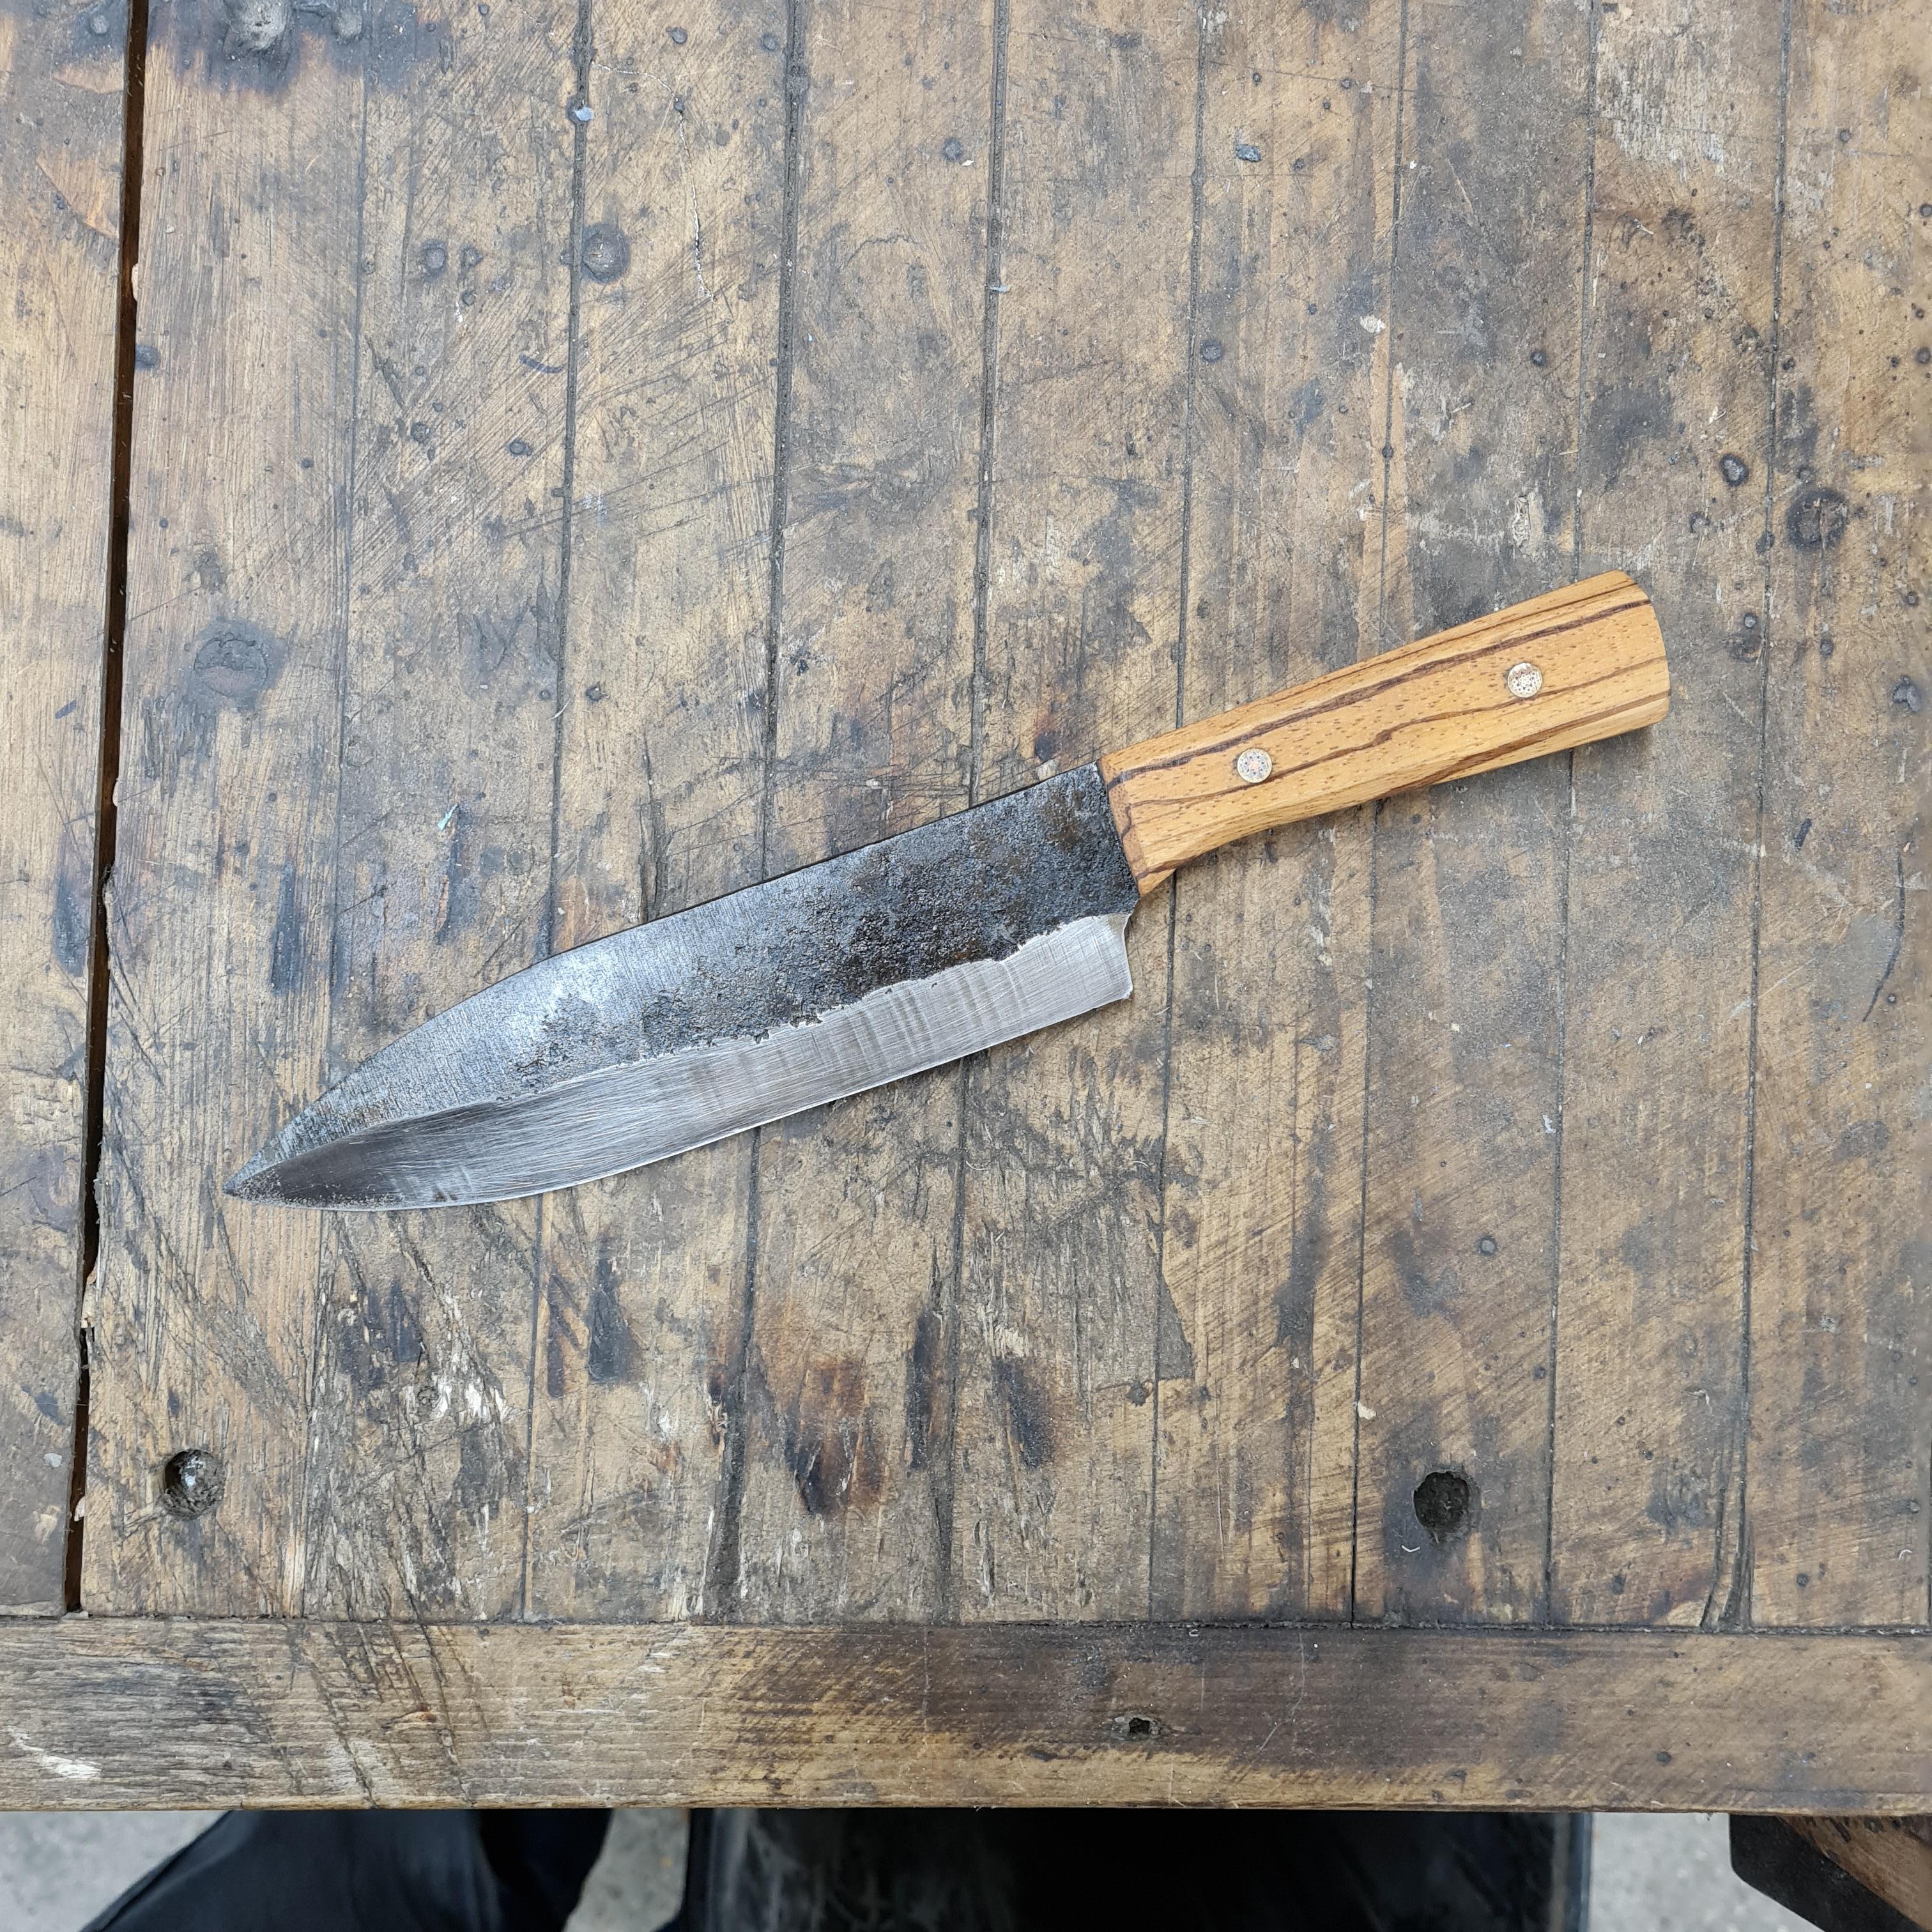
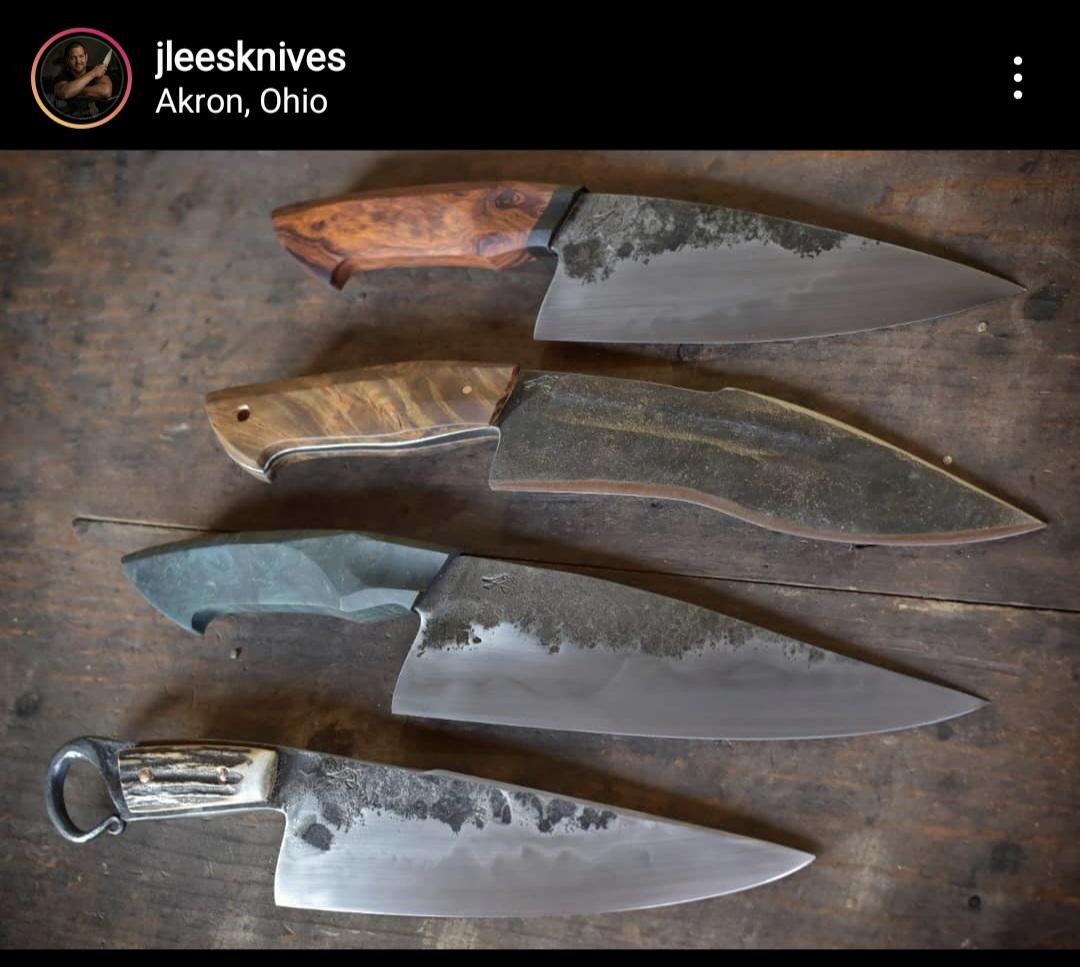
Hi everyone, I'm trying to understand how lots of bladesmiths achieve a beautiful random/organic blend between their ground bevel and forge-scale effect towards the spine of the knife. My grind lines are generally very stark between the shiny and black, but lots of makers achieve a blended, wavy/speckled transition. Are they somehow deliberately driving scale into the surface to achieve this effect? Forging on a scaled up anvil? Or perhaps using a ball peen to create an uneven surface to deliberately disrupt the grind line? Owen Bush and JLees are the stunning examples below.... along with an example of one of my knives with a very stark but imperfect grind line which doesn't look as good. Owen Bush: JLees: Mine:


-
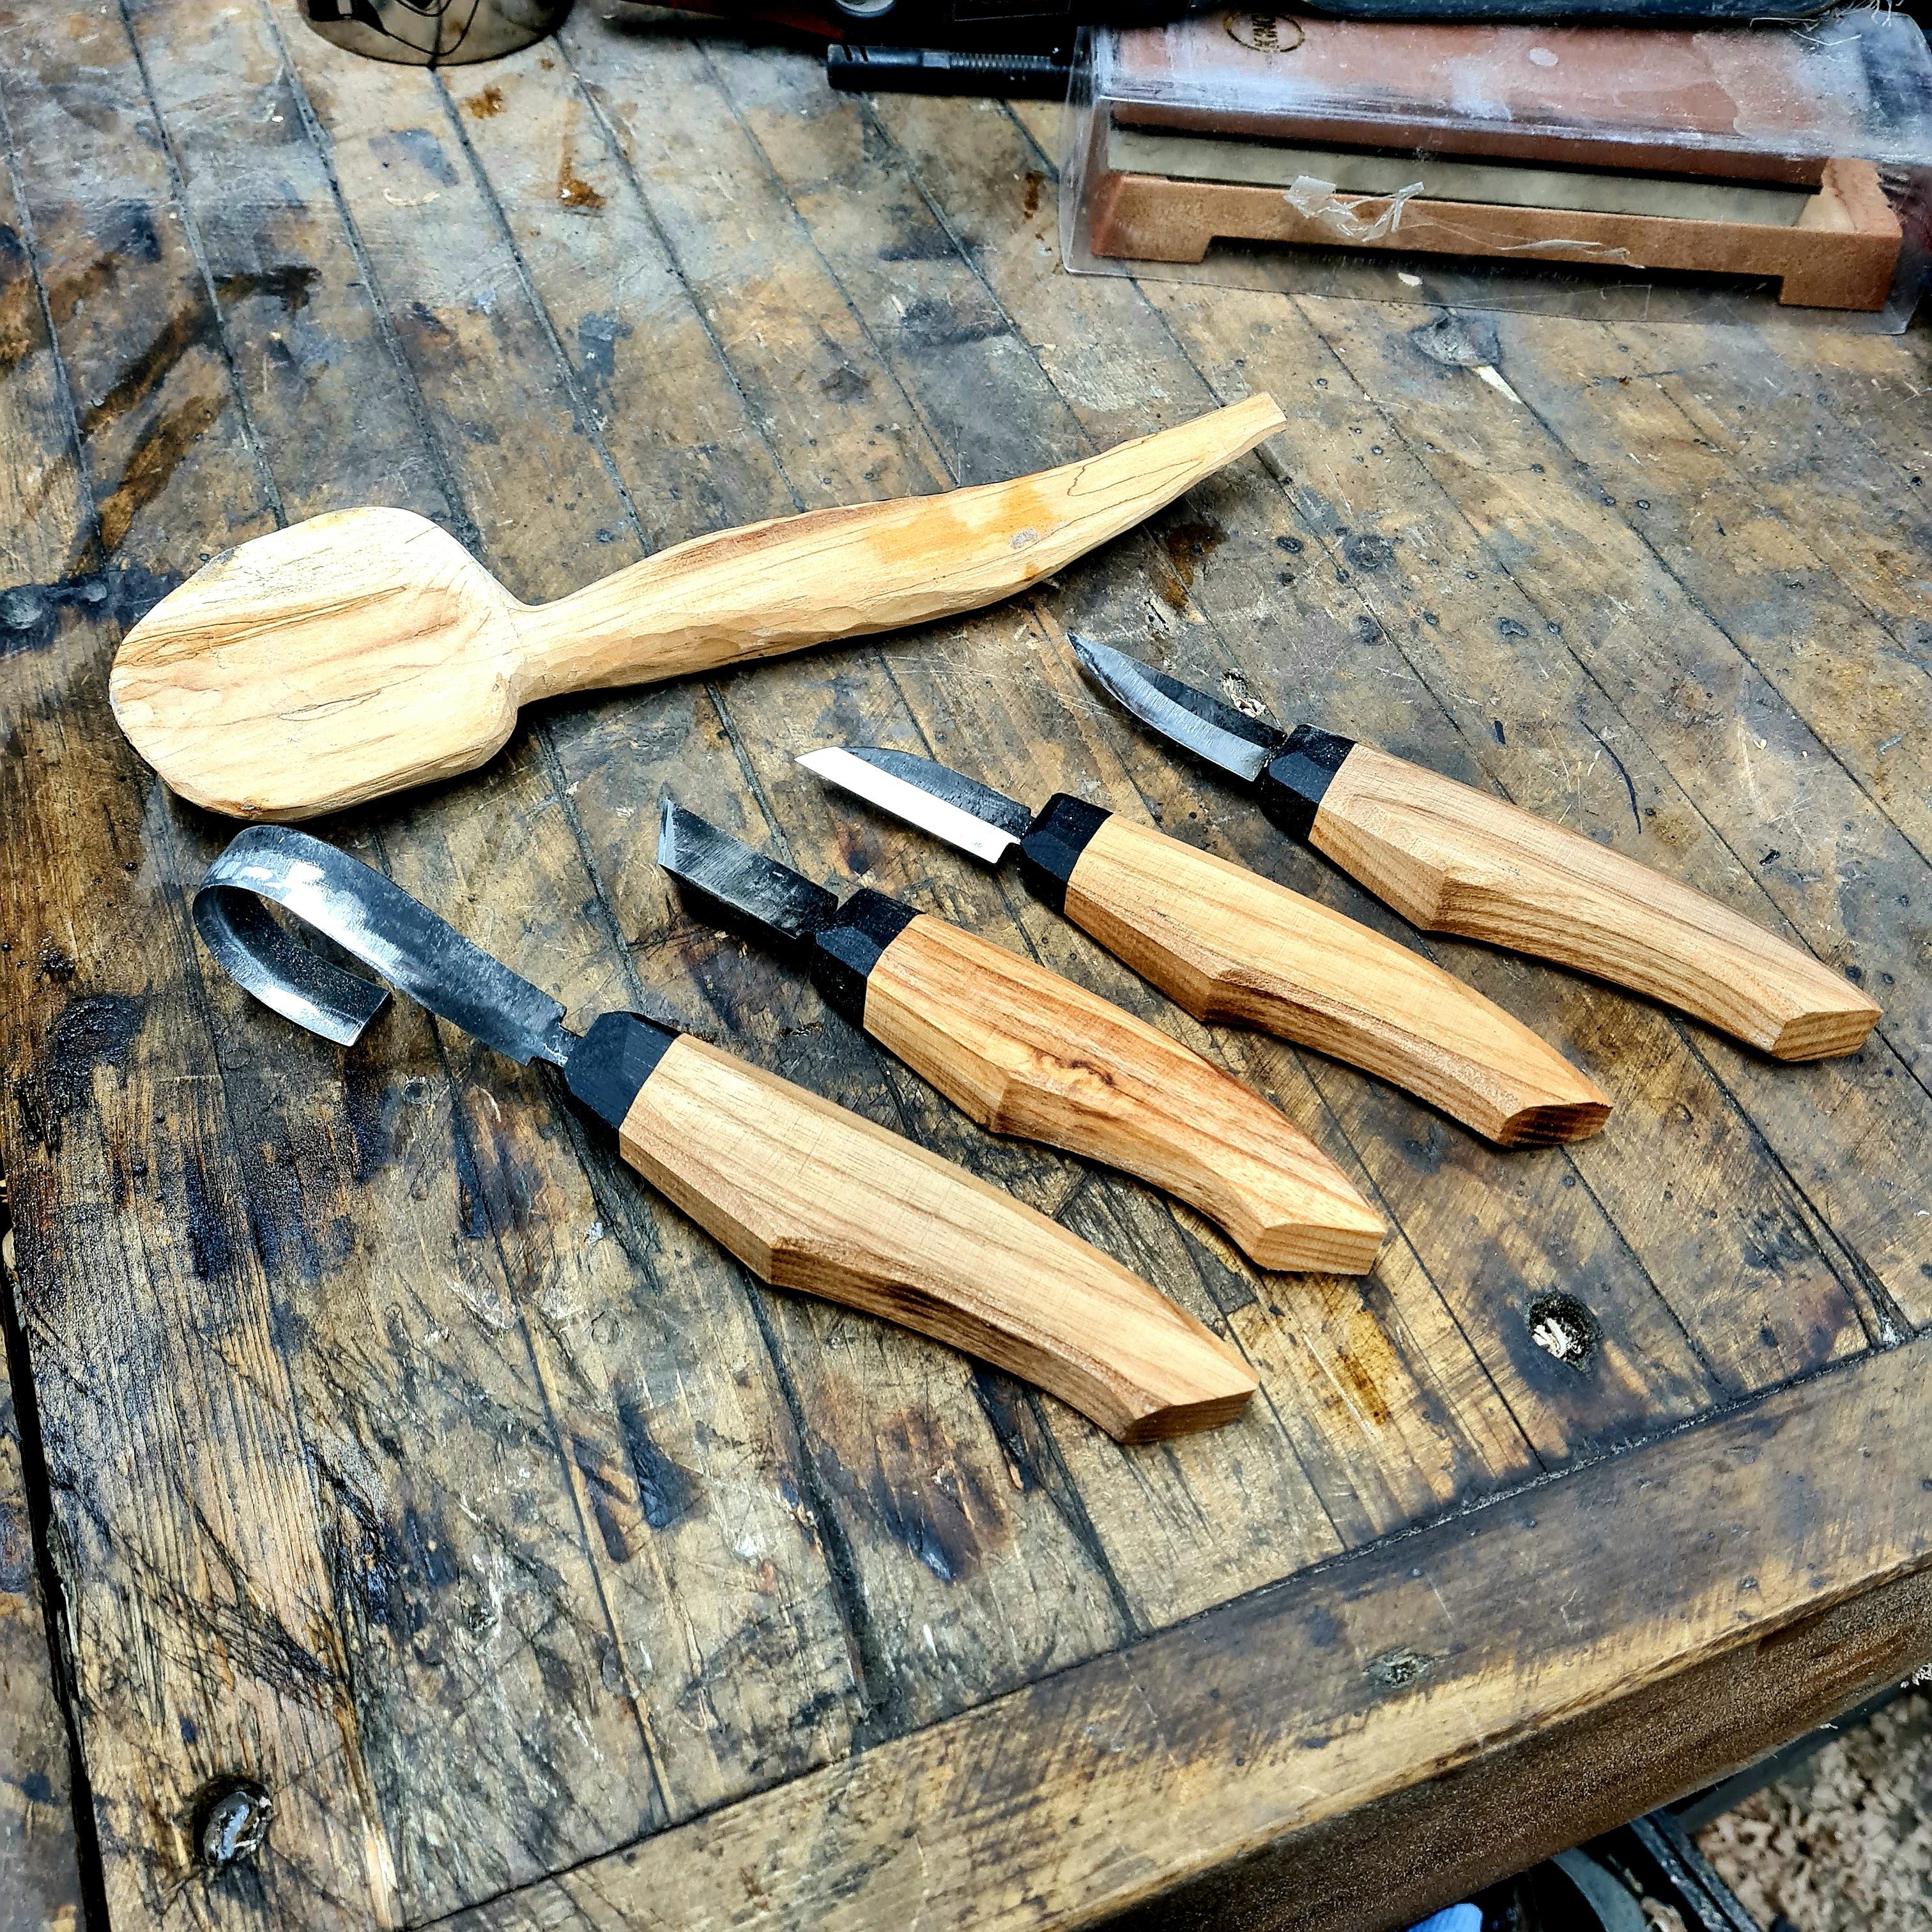
Some green woodwork knives I made recently, with Ash and Bog Oak handles.


-
Thanks Thomas, good to know, I will stick to H-13 where possible when making new tooling. Stash- thanks for the detailed response! Thats exactly what I was looking for in terms of the basics of operation, etc. Sounds like its fairly simple. I actually ordered my 12ton with a foot pedal (might be a new accessory theyve release?) so its good to know handheld tooling is an option. Cheers Jon
-
Hi all, I have a Coal Ironworks 12ton press on order to me in the UK, should be here this week. Im crazy excited and also very nervous. I've never used a hydraulic press of any kind before so I'm expecting a steep learning curve and hoping not to injure myself in the process! If anyone has any tips I'd greatly appreciate them. My first, possibly daft, question is- can you use handled tools under the press in the same way you would under a power hammer?
-

A collection of improvised anvils
Jon Kerr replied to Charles R. Stevens's topic in Anvils, Swage Blocks, and Mandrels
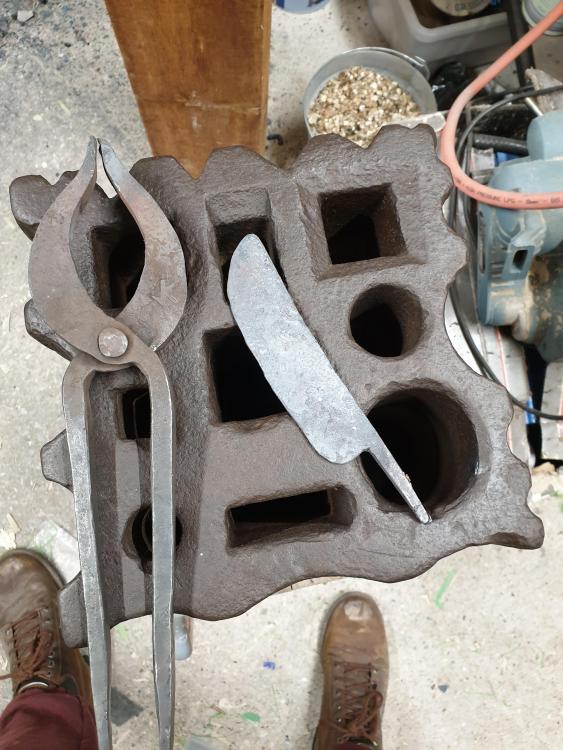
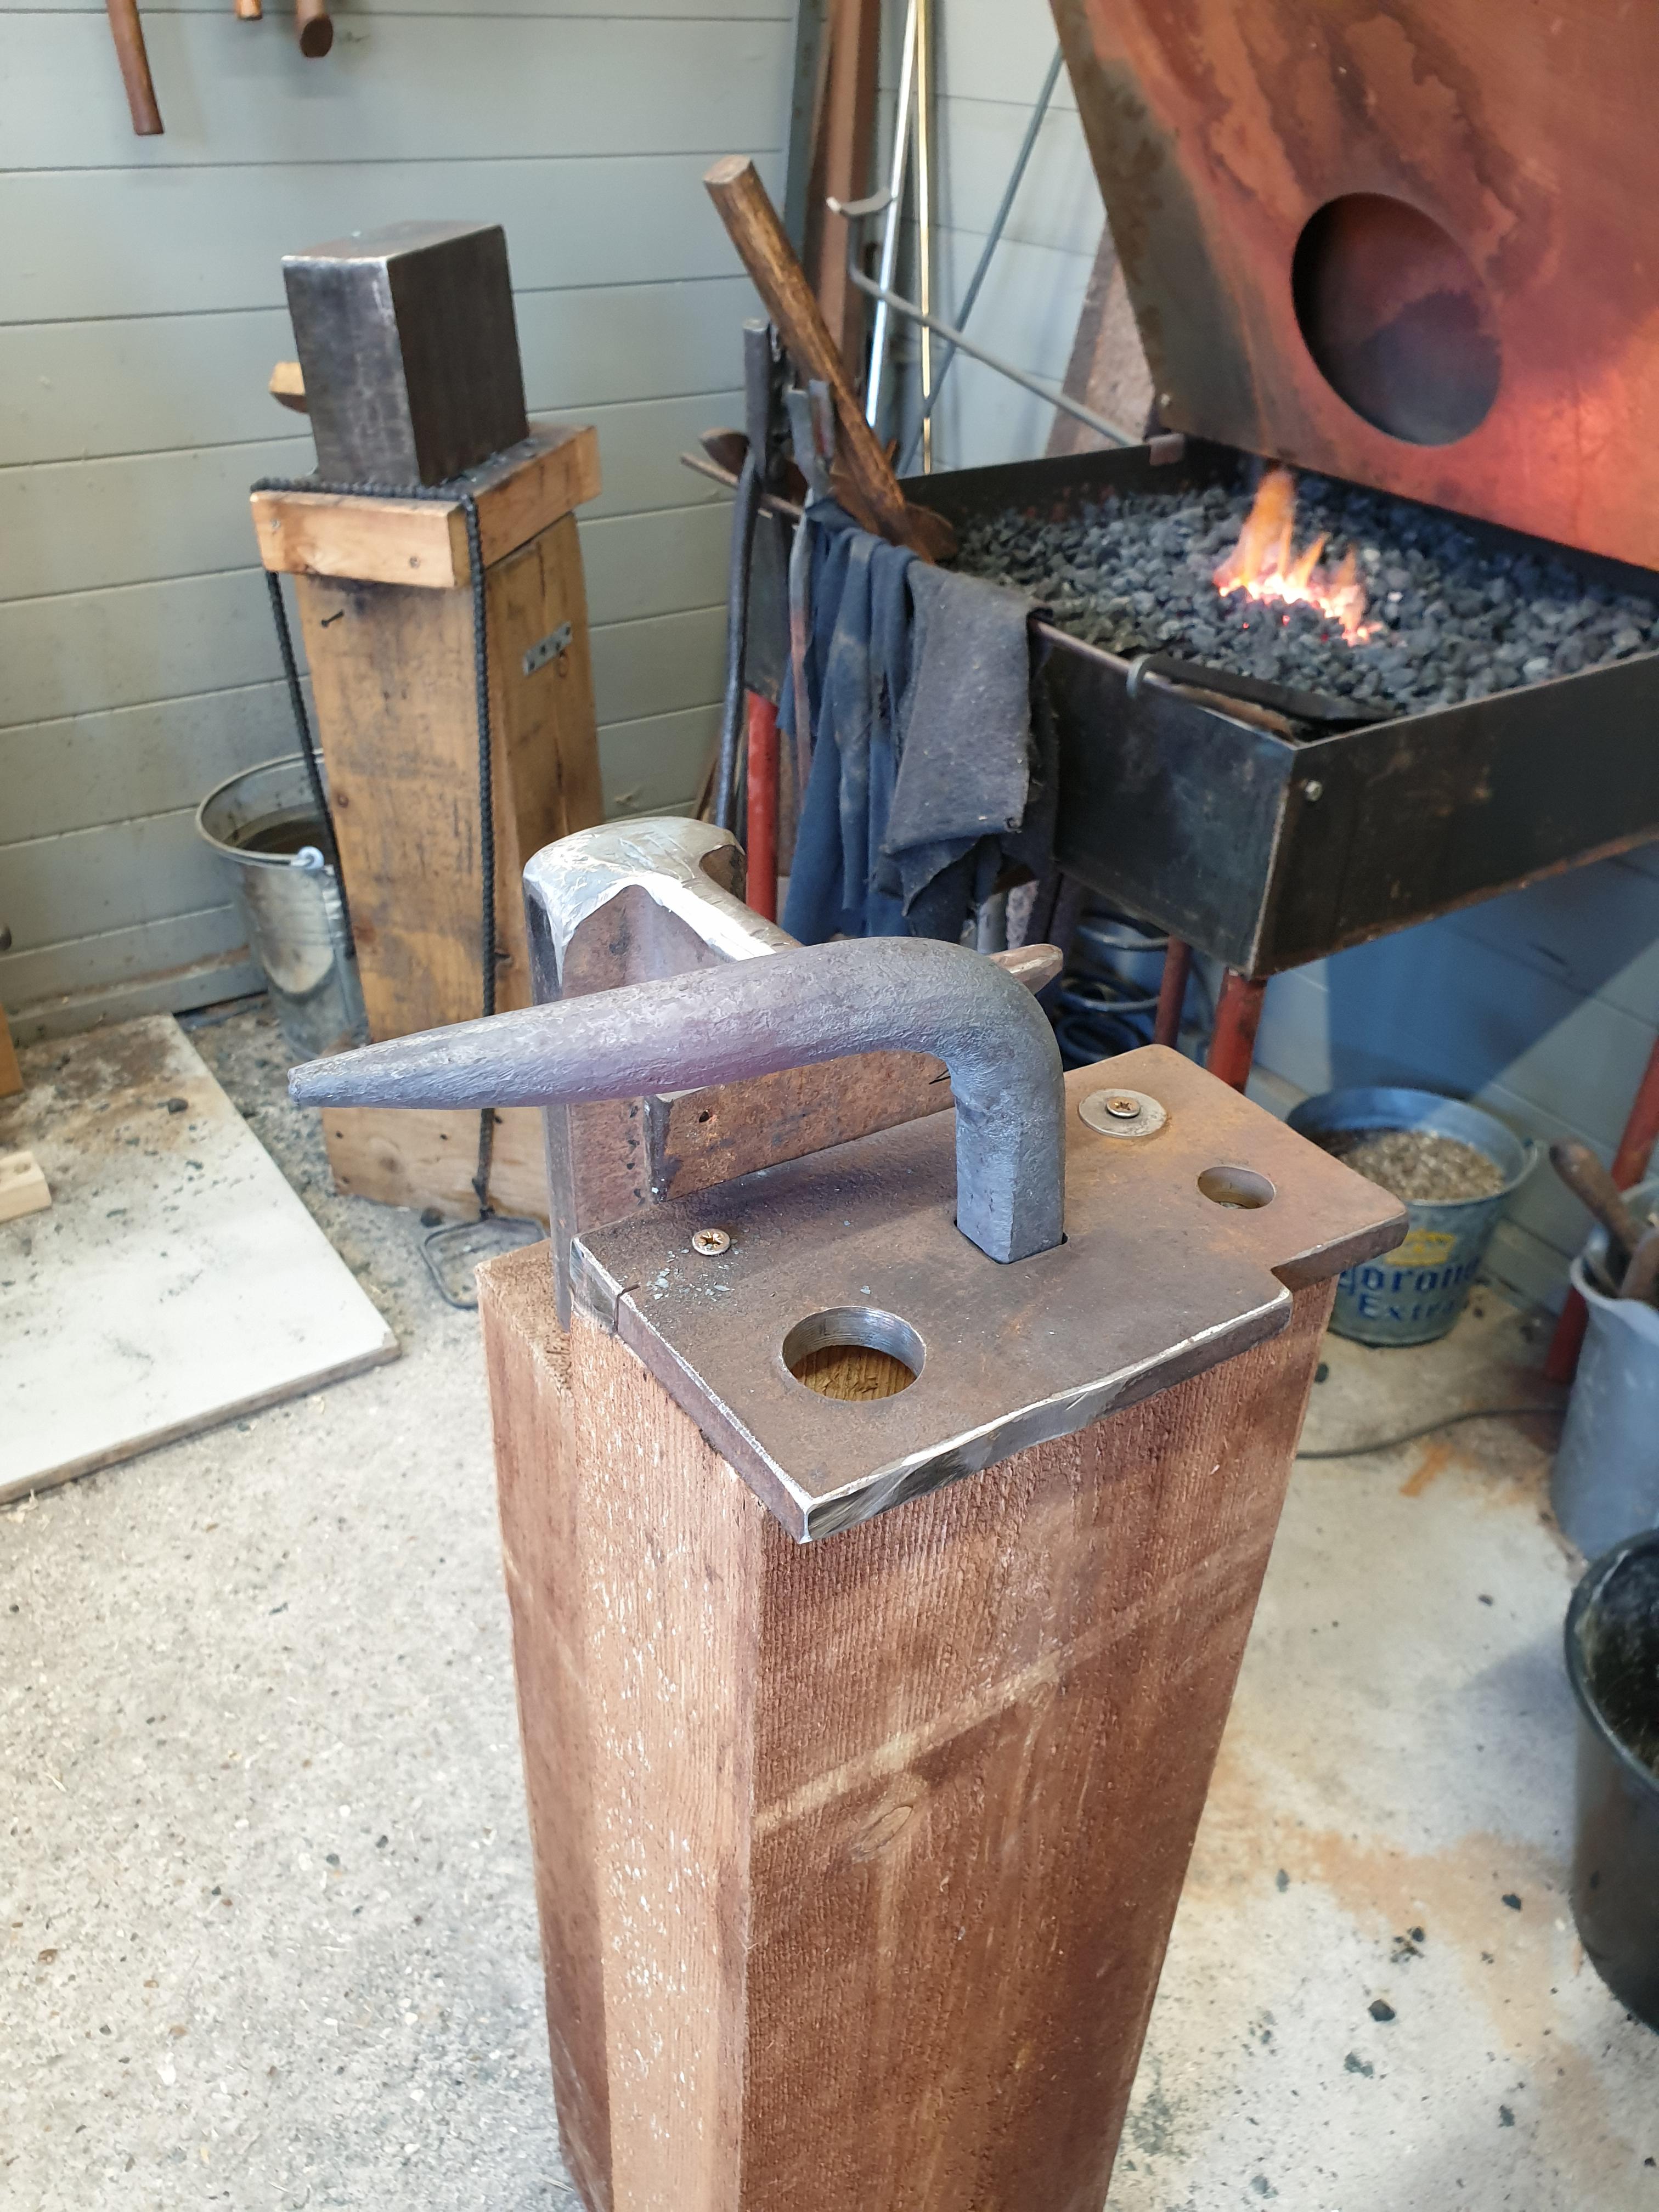
This is the multi purpose railway track anvil that I now make with my blacksmithing students, here in Essex, UK. Many thanks to Charles for the idea! It includes: - flat forging section with plenty of mass under the hammer. - fuller ground into the web. - mini horn - hot cut with safety cover! - bloster plate with 16mm hardy hole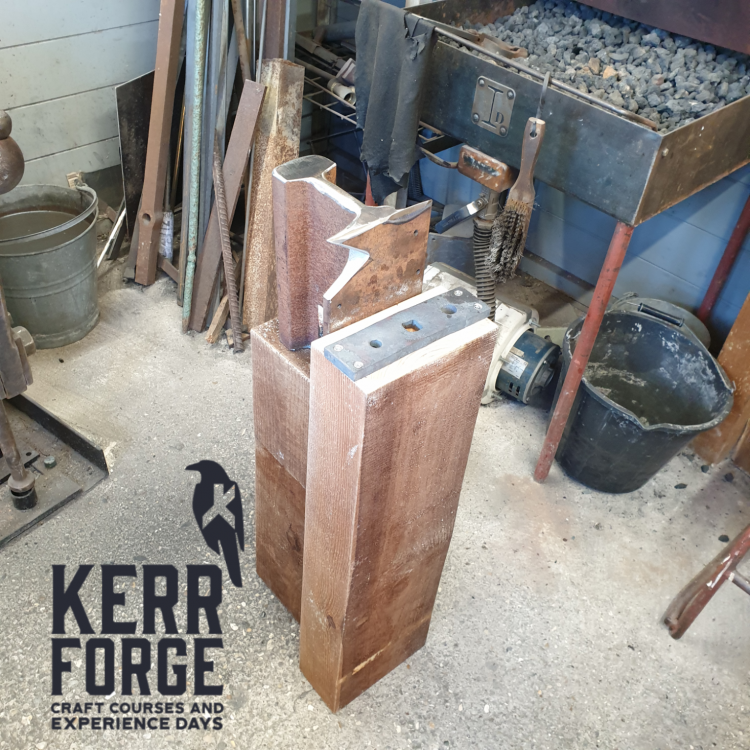

-
Hi guys- sorry to ressurect a long dead topic. Is it not possible to do this with a 4" angle grinder and cutting wheel? What happens when you try, does it just burn the wheel out and no cut? Can you not cut the bottom flange (softer) with a grinder and then hit with a sledge to crack the hardened top section? Maybe also score with a chisel as described above?
-
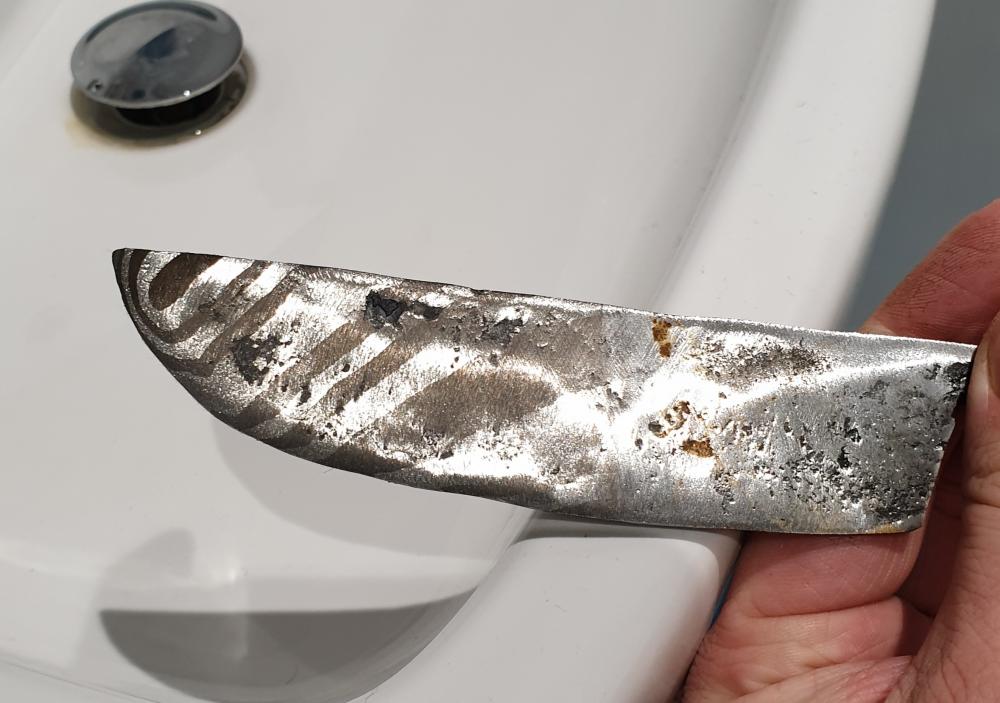
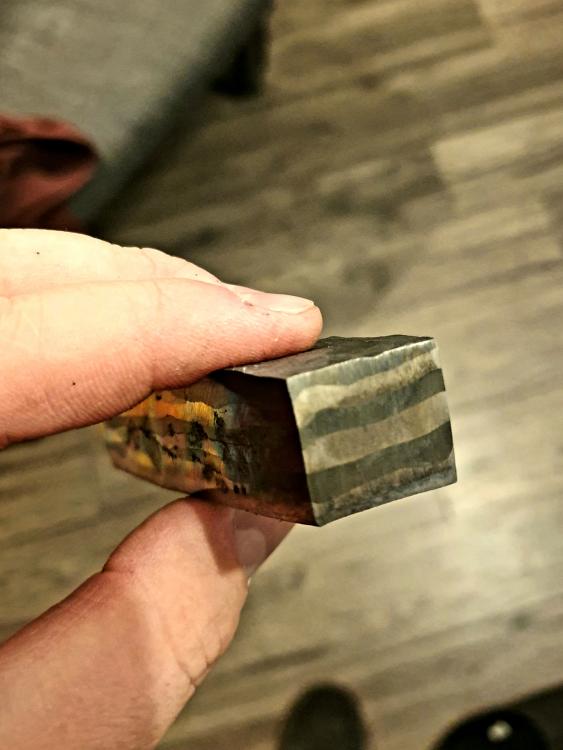
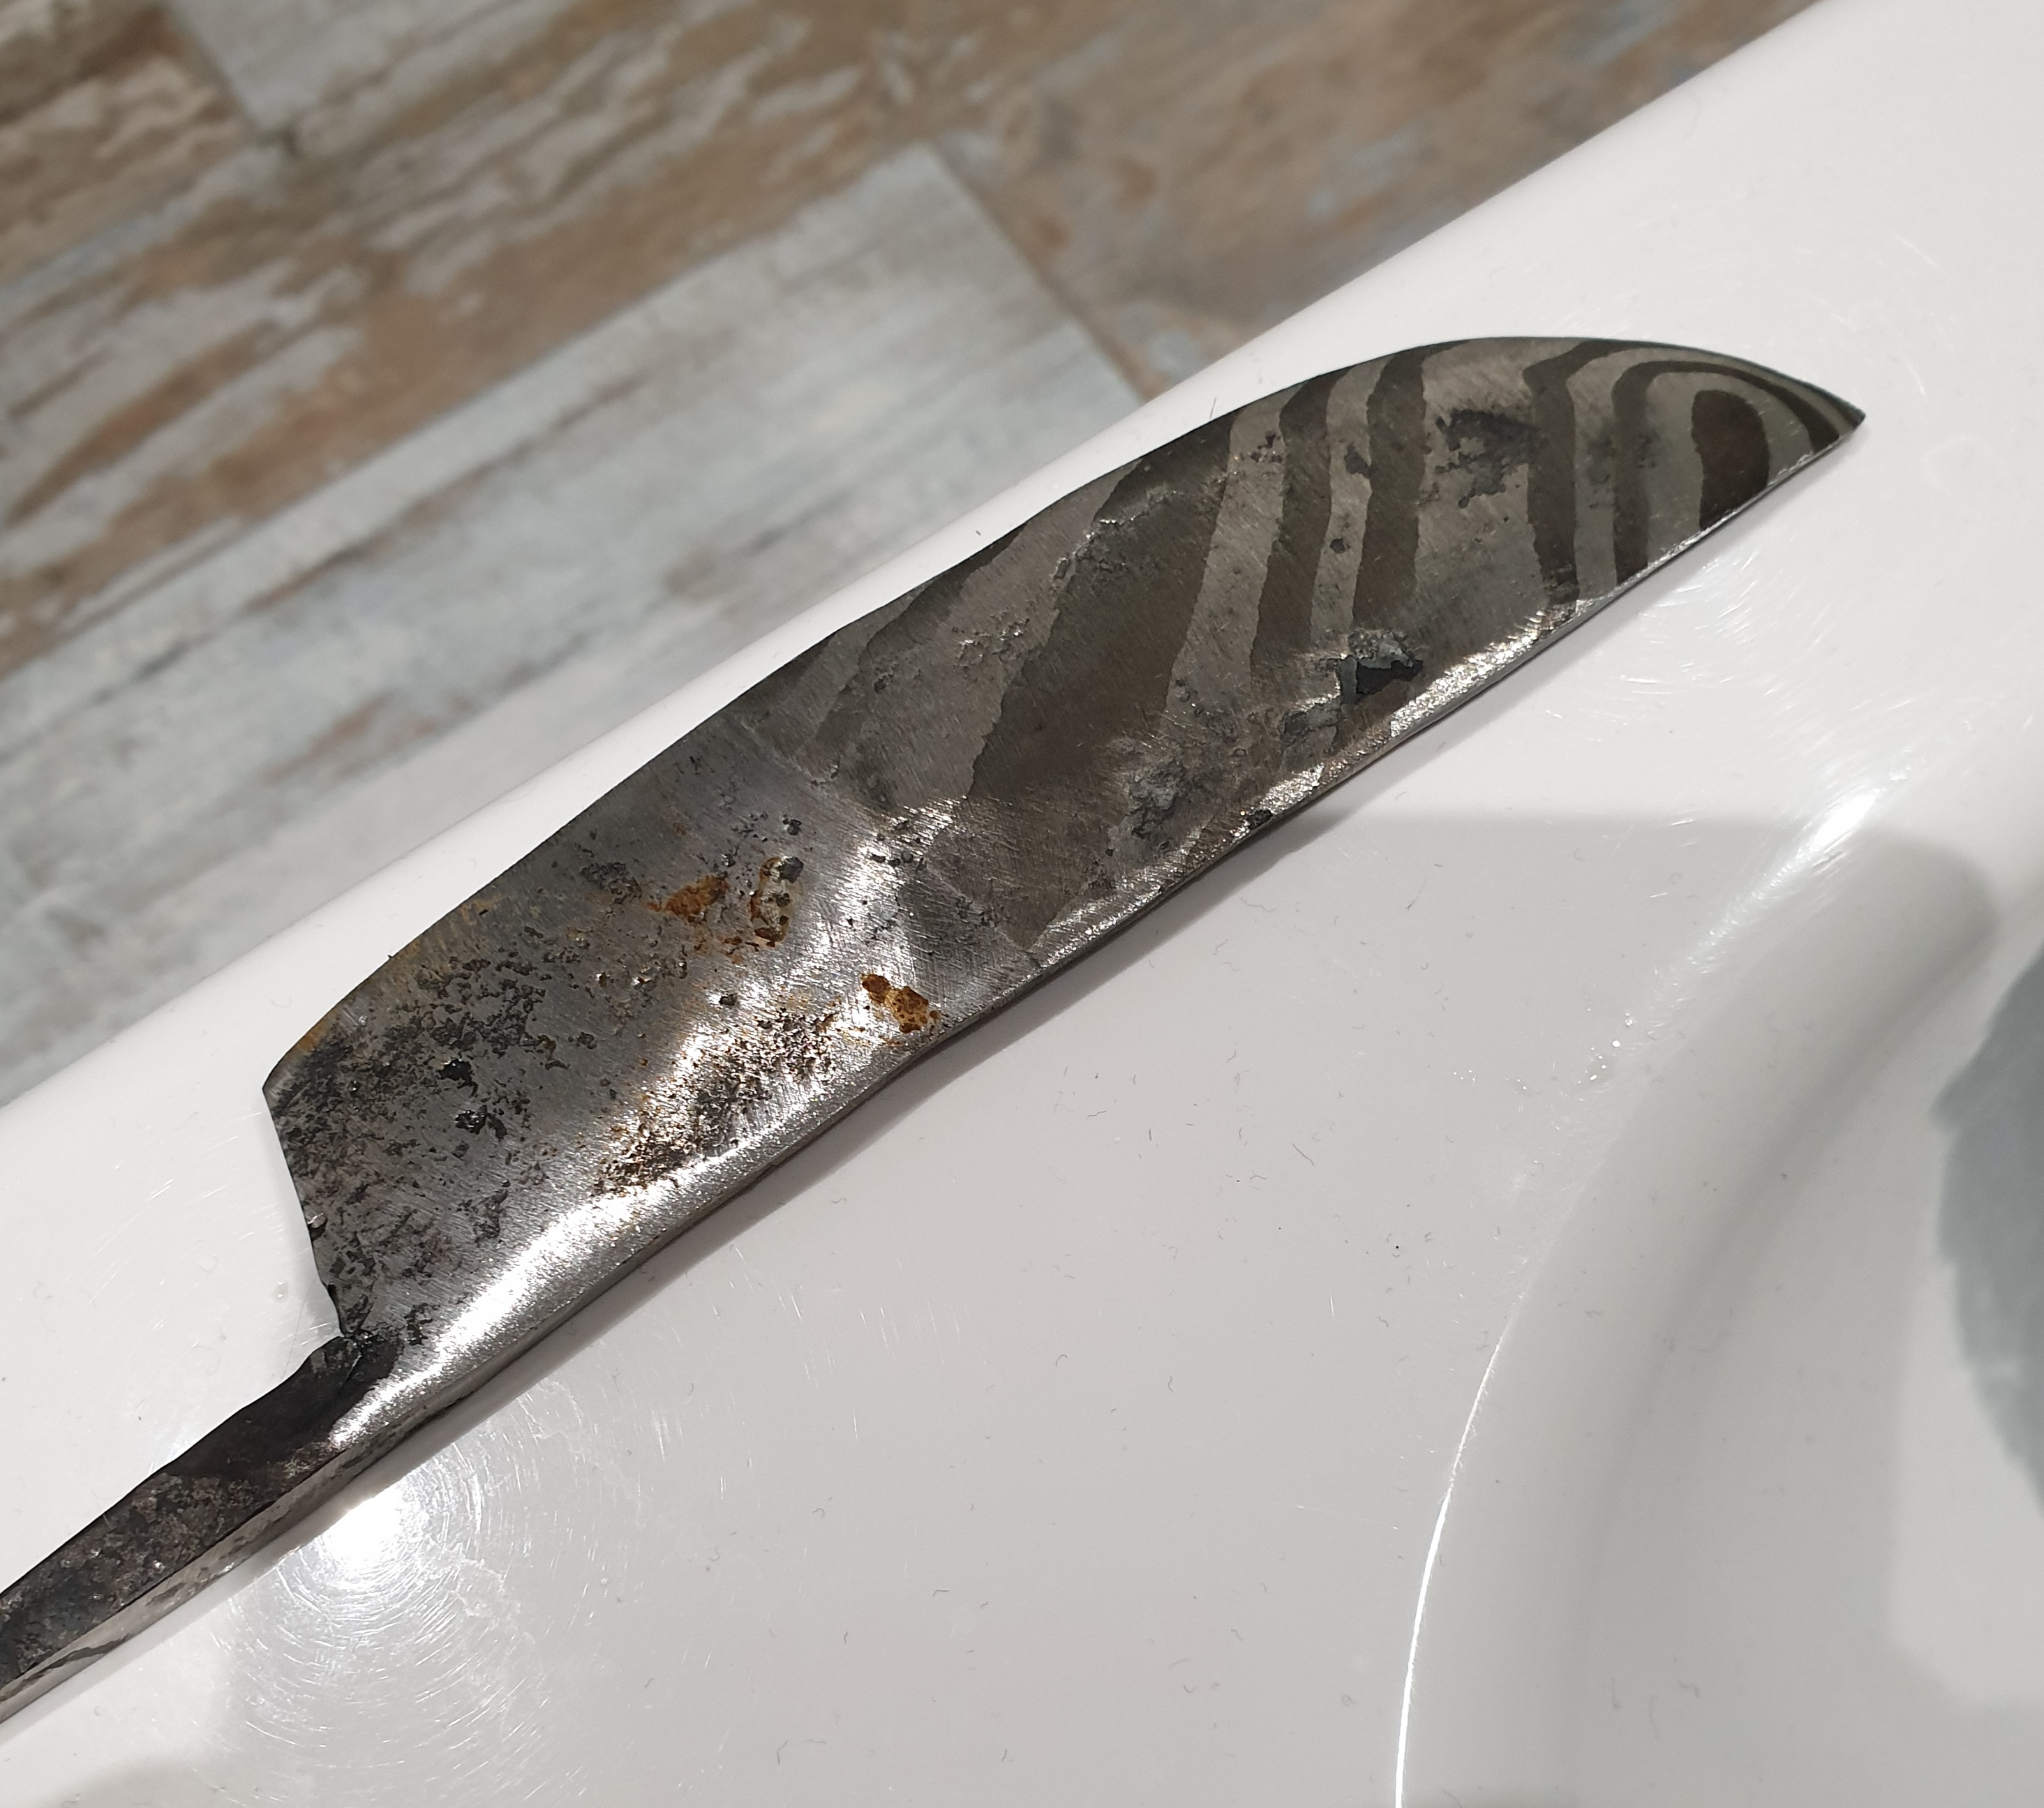
Thomas- yes hopefully. Theres a fair bit of material to grind away. My backup plan is to scale it back up on the forge and go for a partially scaled/blackened finish. Welshj- yes the line is jusy where the coffee stopped! I quite like the broad pattern too, just different. I will follow the above advice and go for a much higher layer count next time just to try different styles.
-
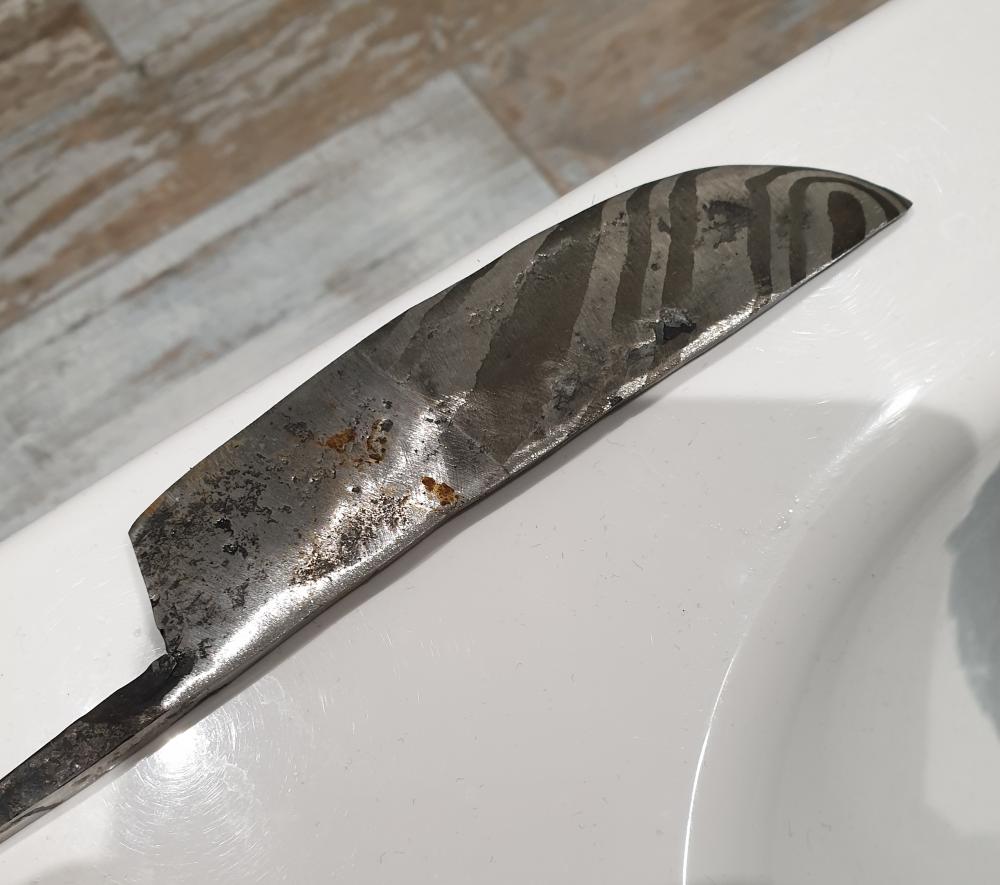
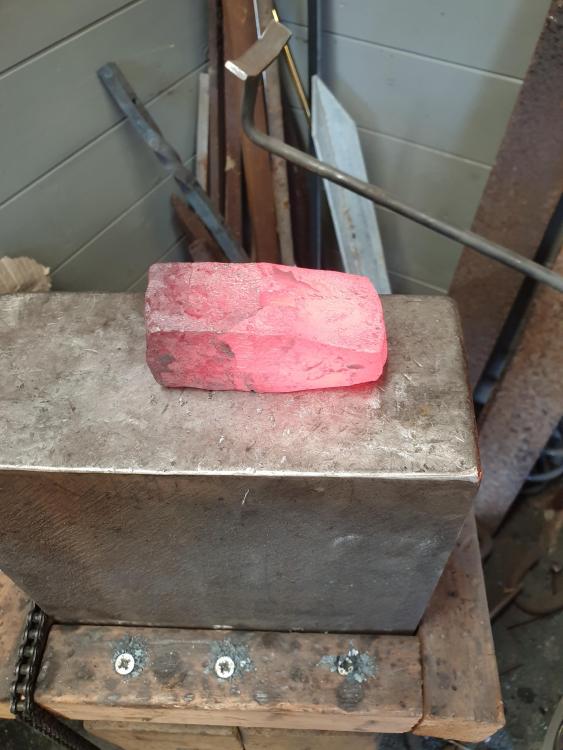
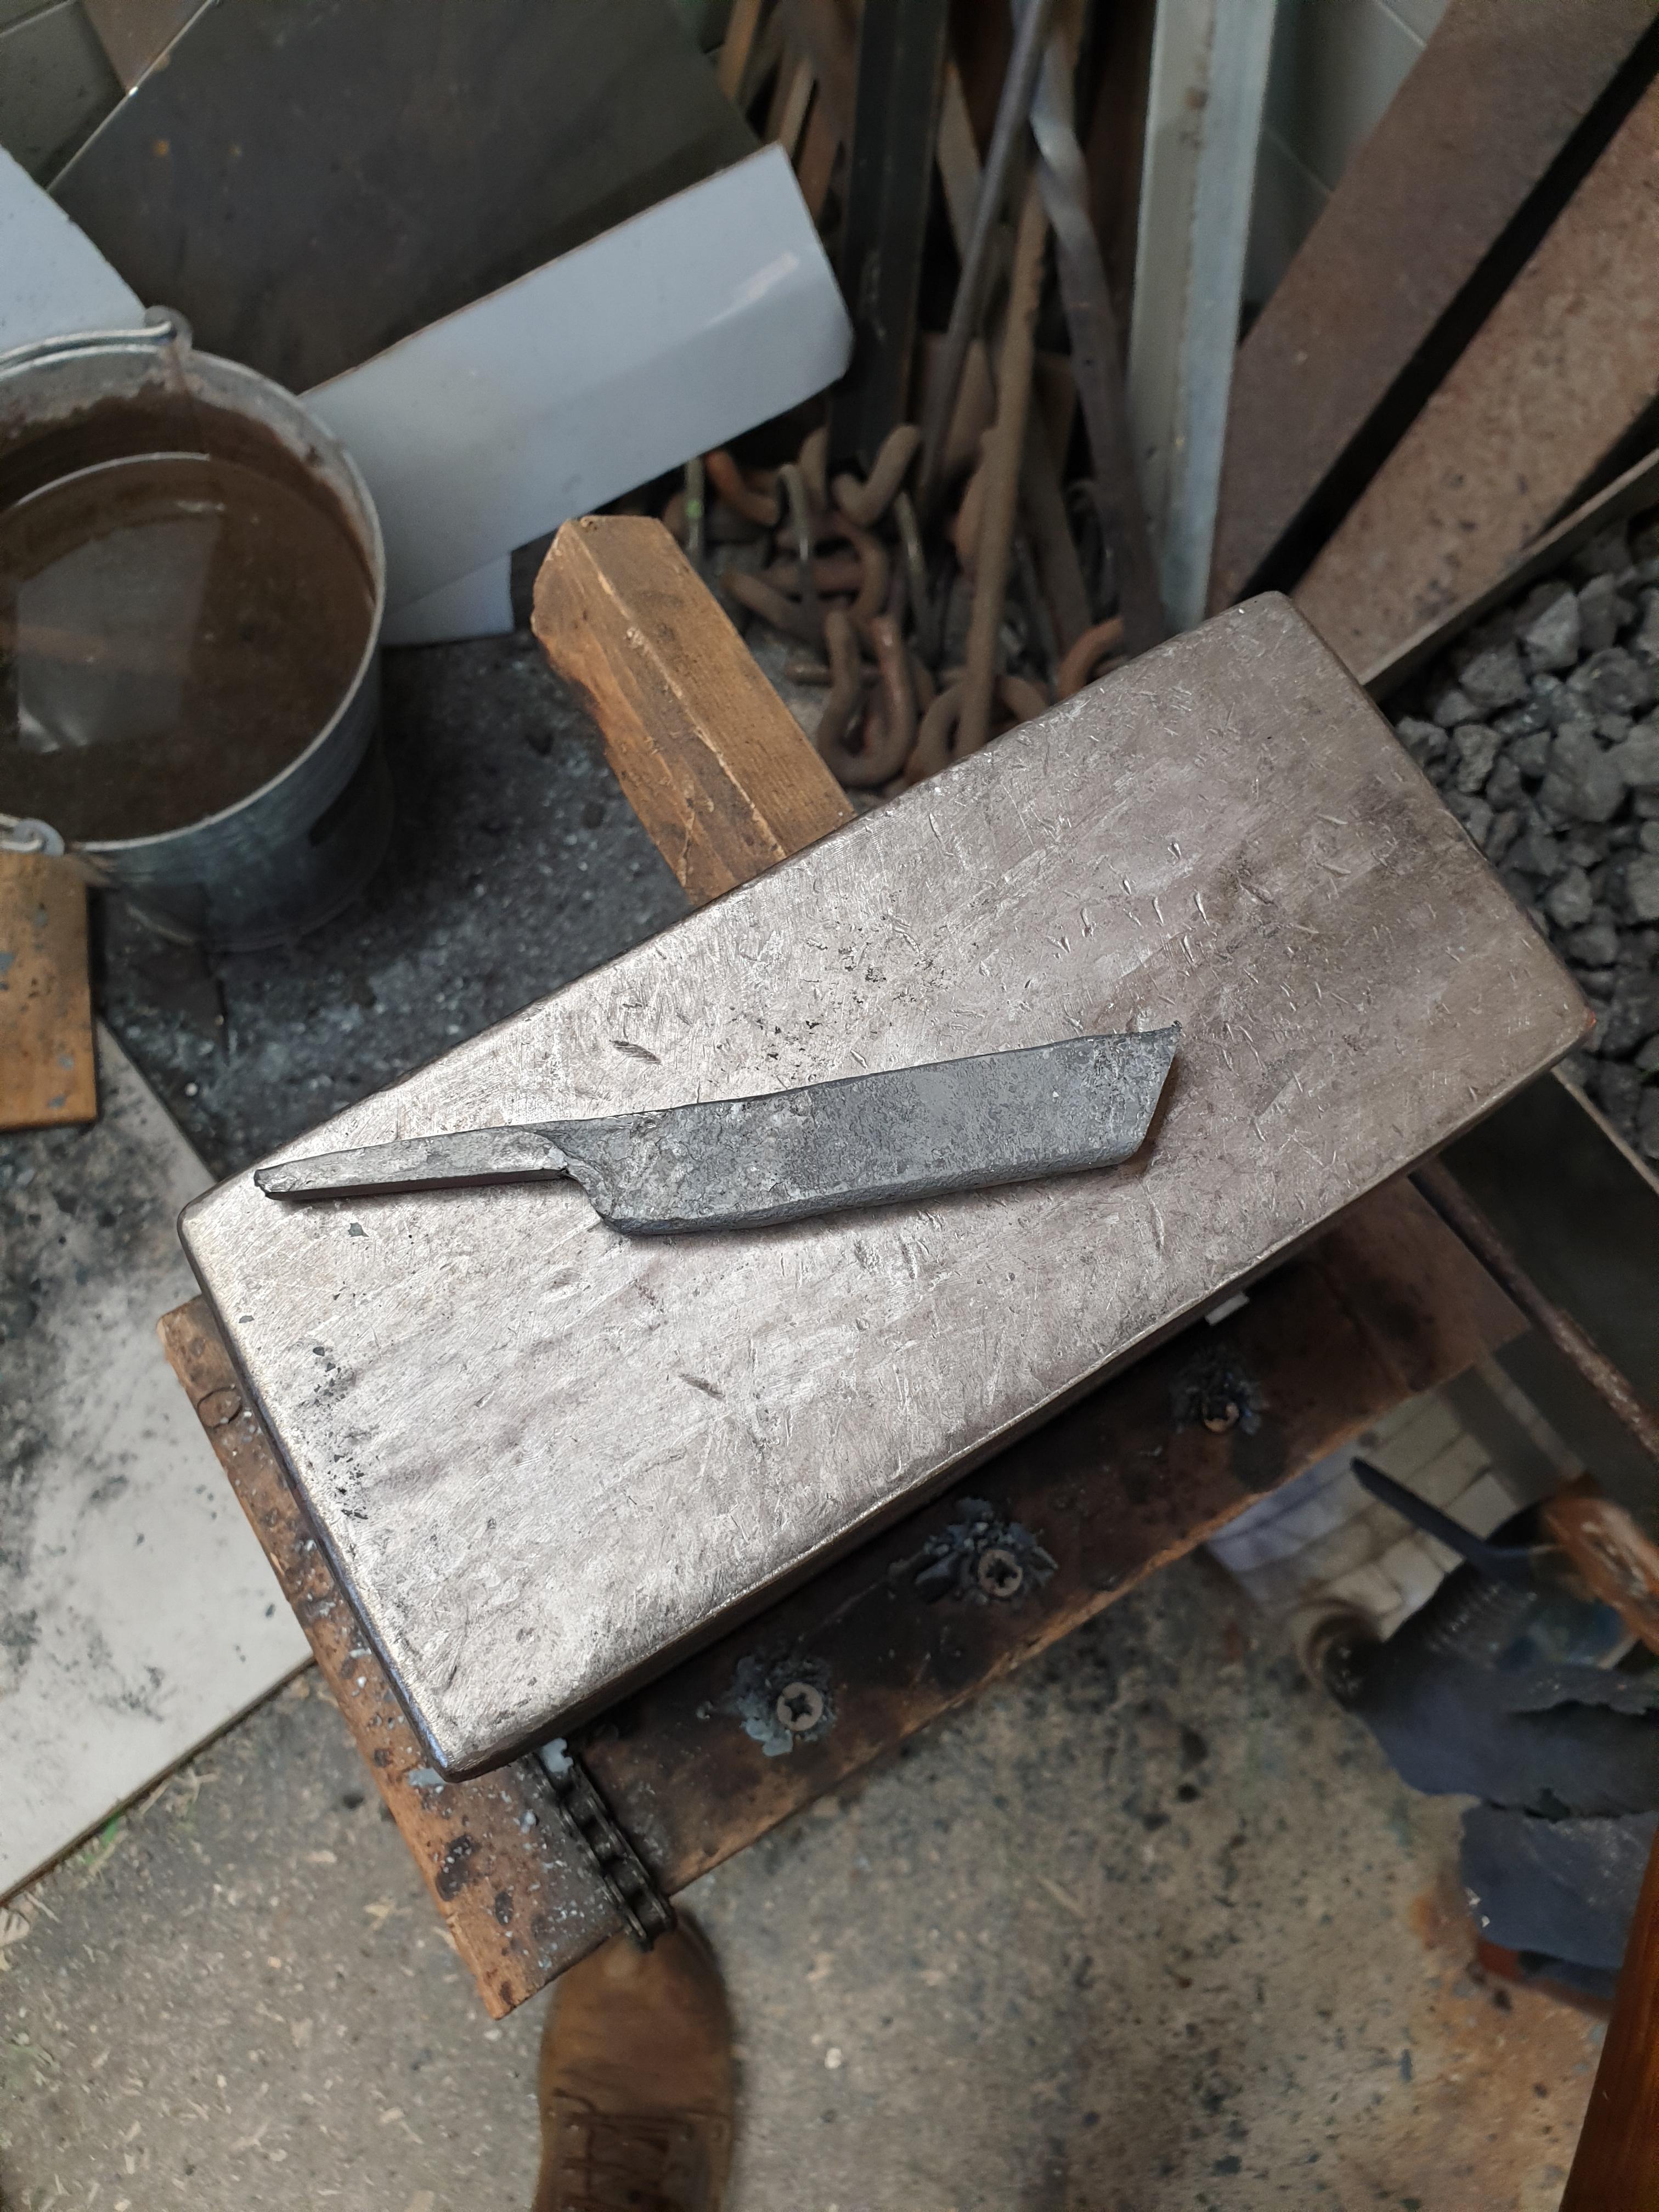
Well, I did as I said. Ground out the problem areas and forged the rest back to round, then square. ... and I made a quick kitchen knife. Couldnt resist a quick grind and test etch. Looks decent, I'm happy! I wish Id been stricter with wire brushing the scale. I have some bad pitting from hammered in scale which may be too deep to grind out.

-
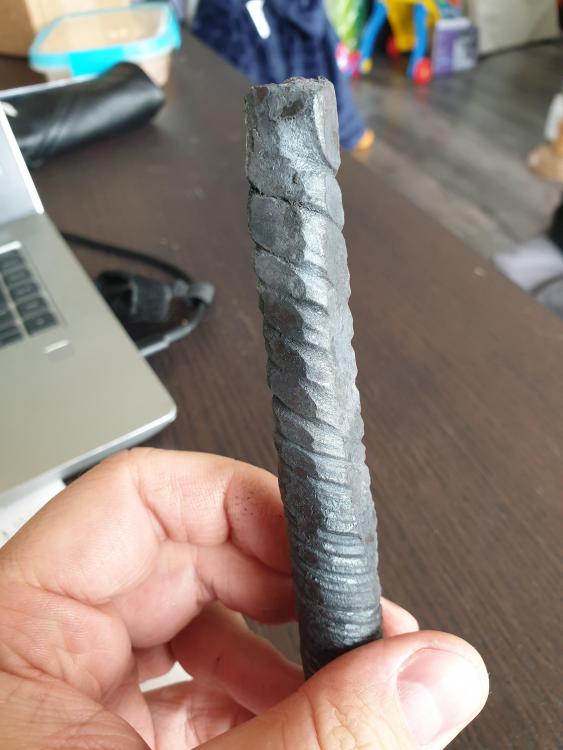
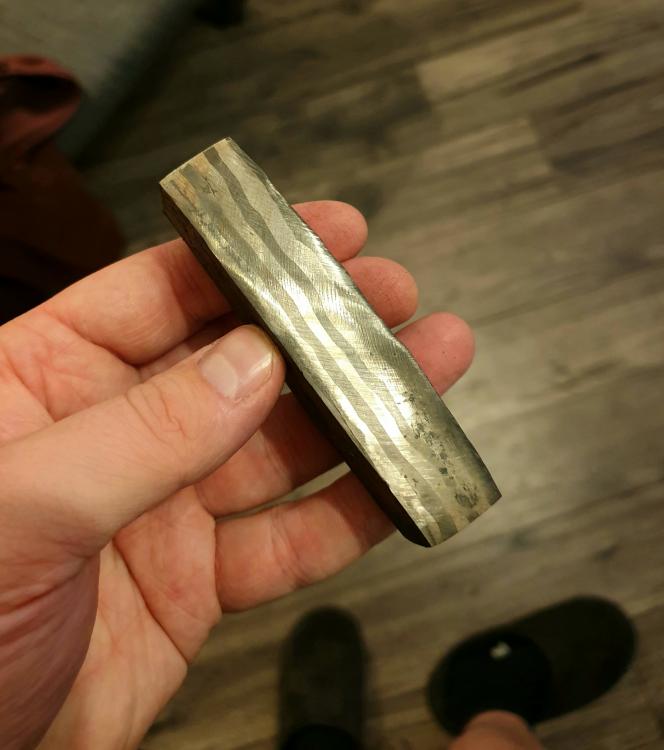
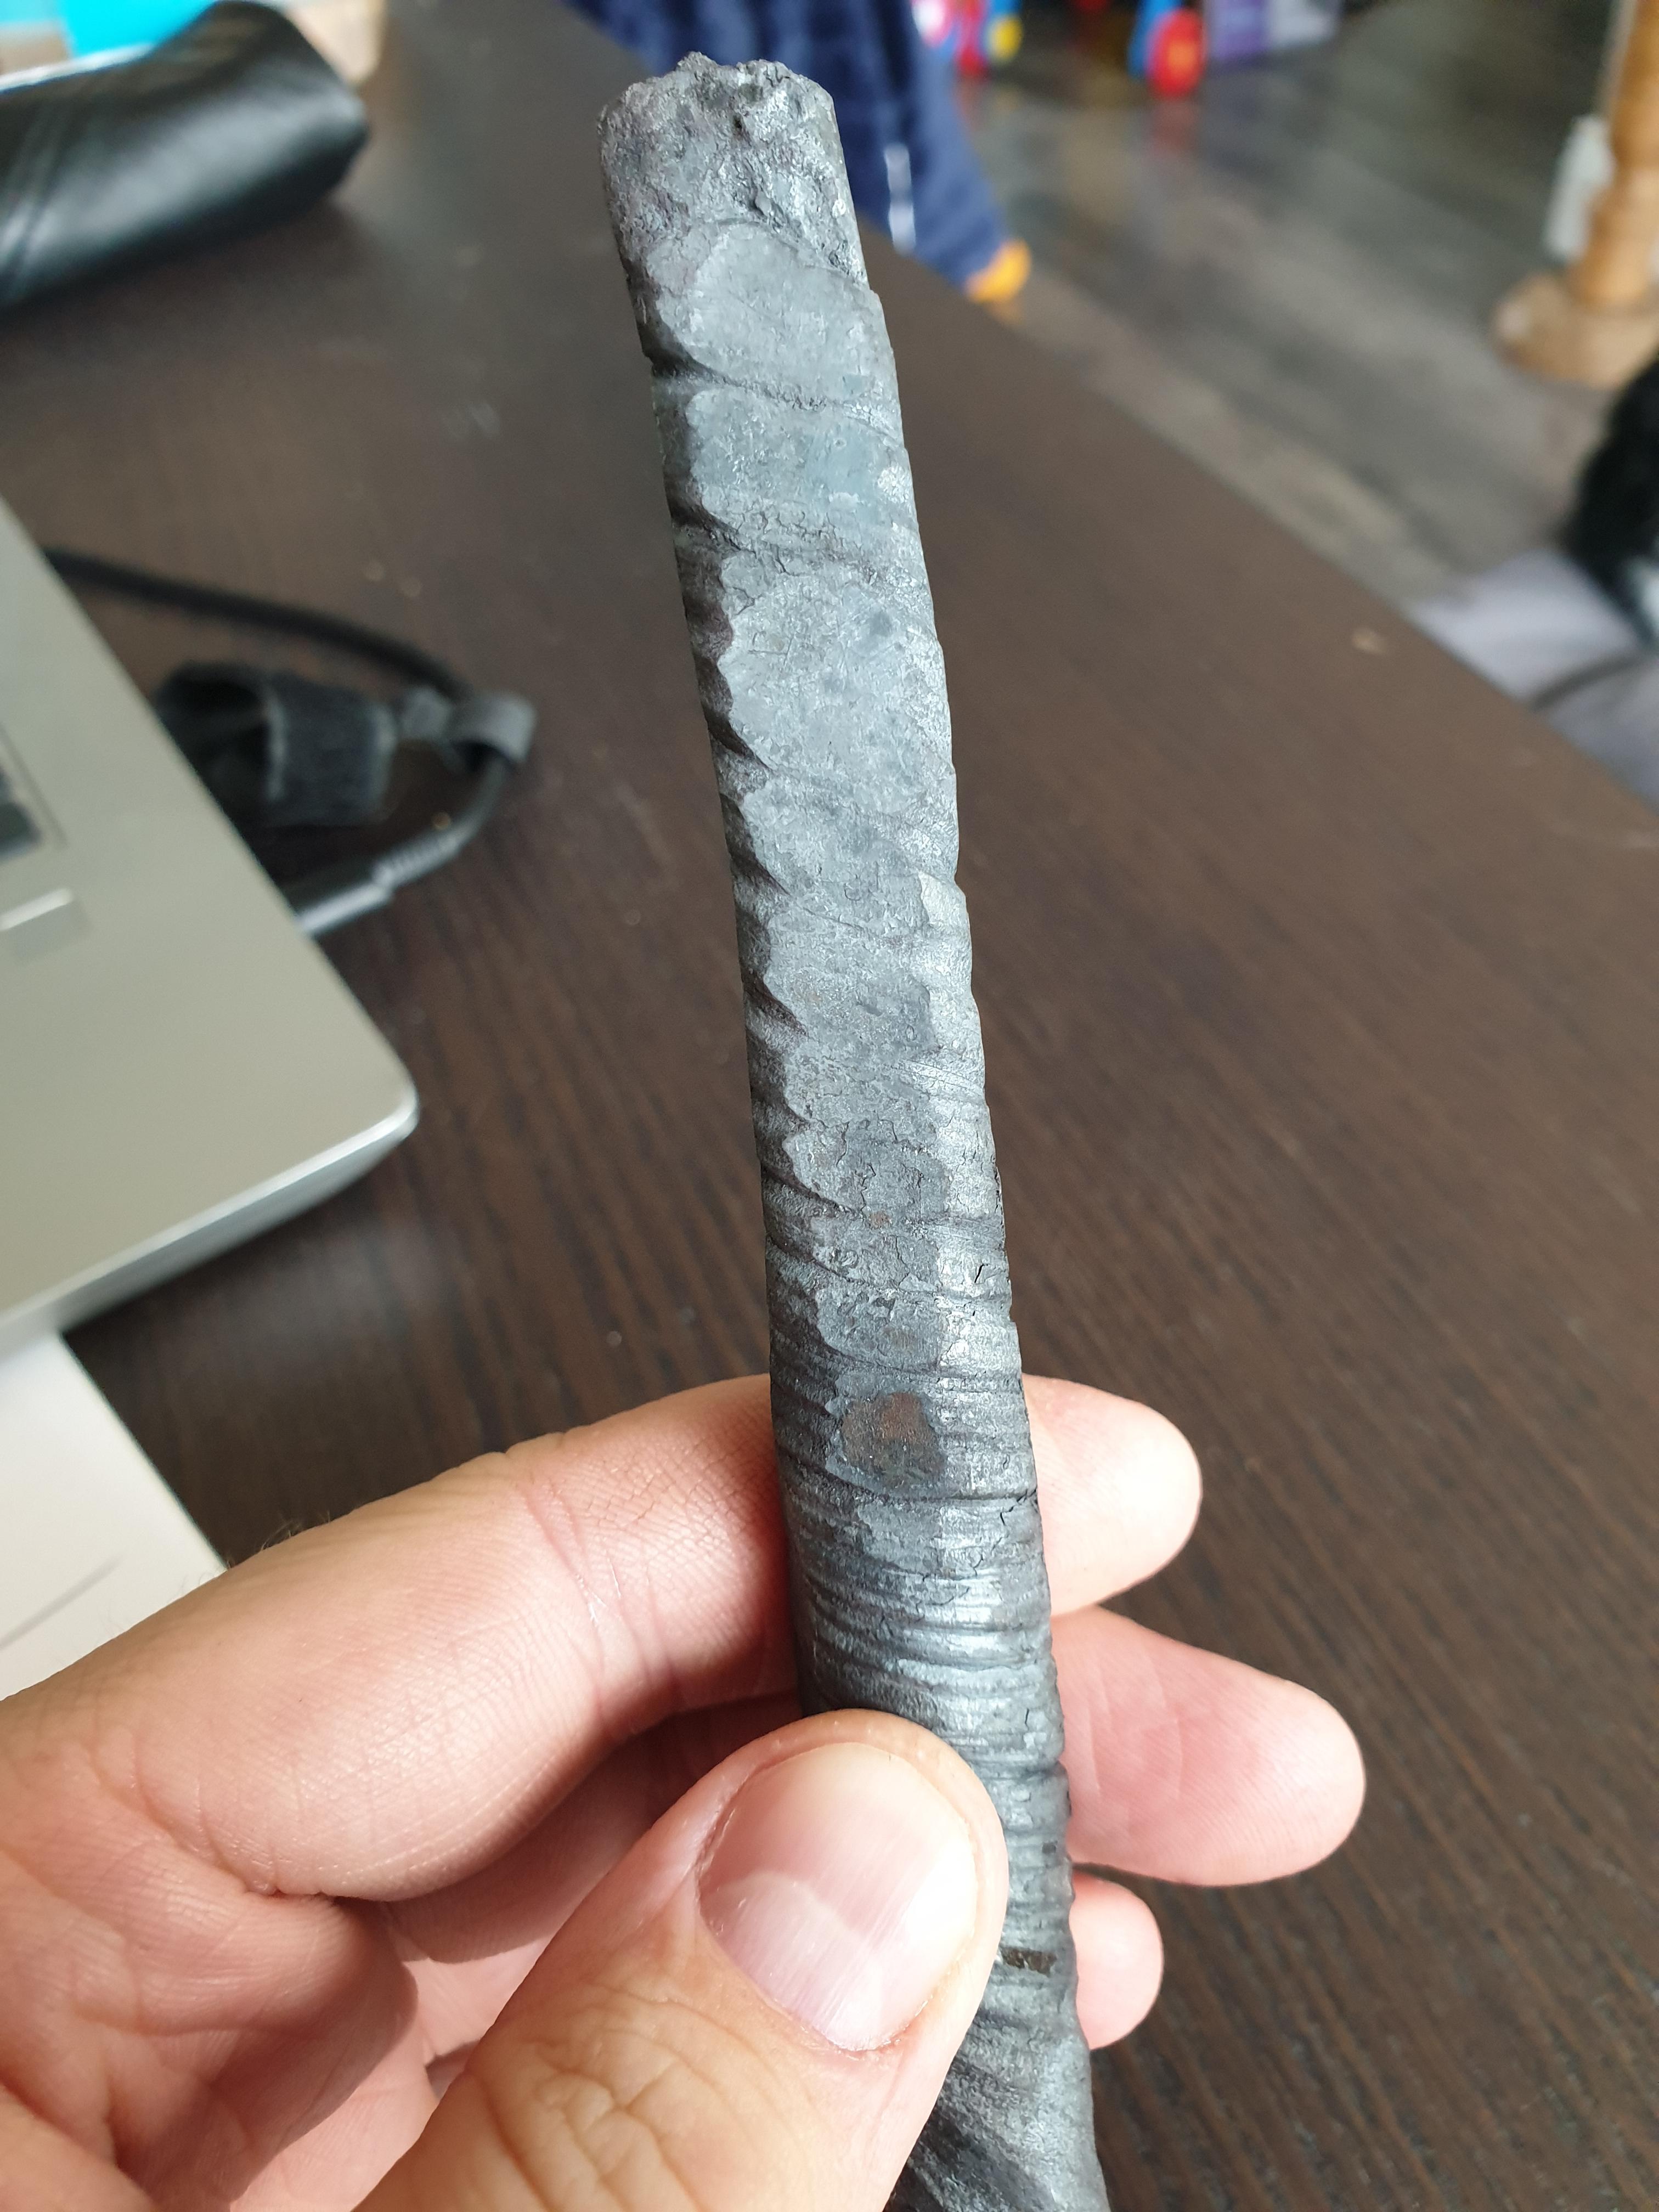
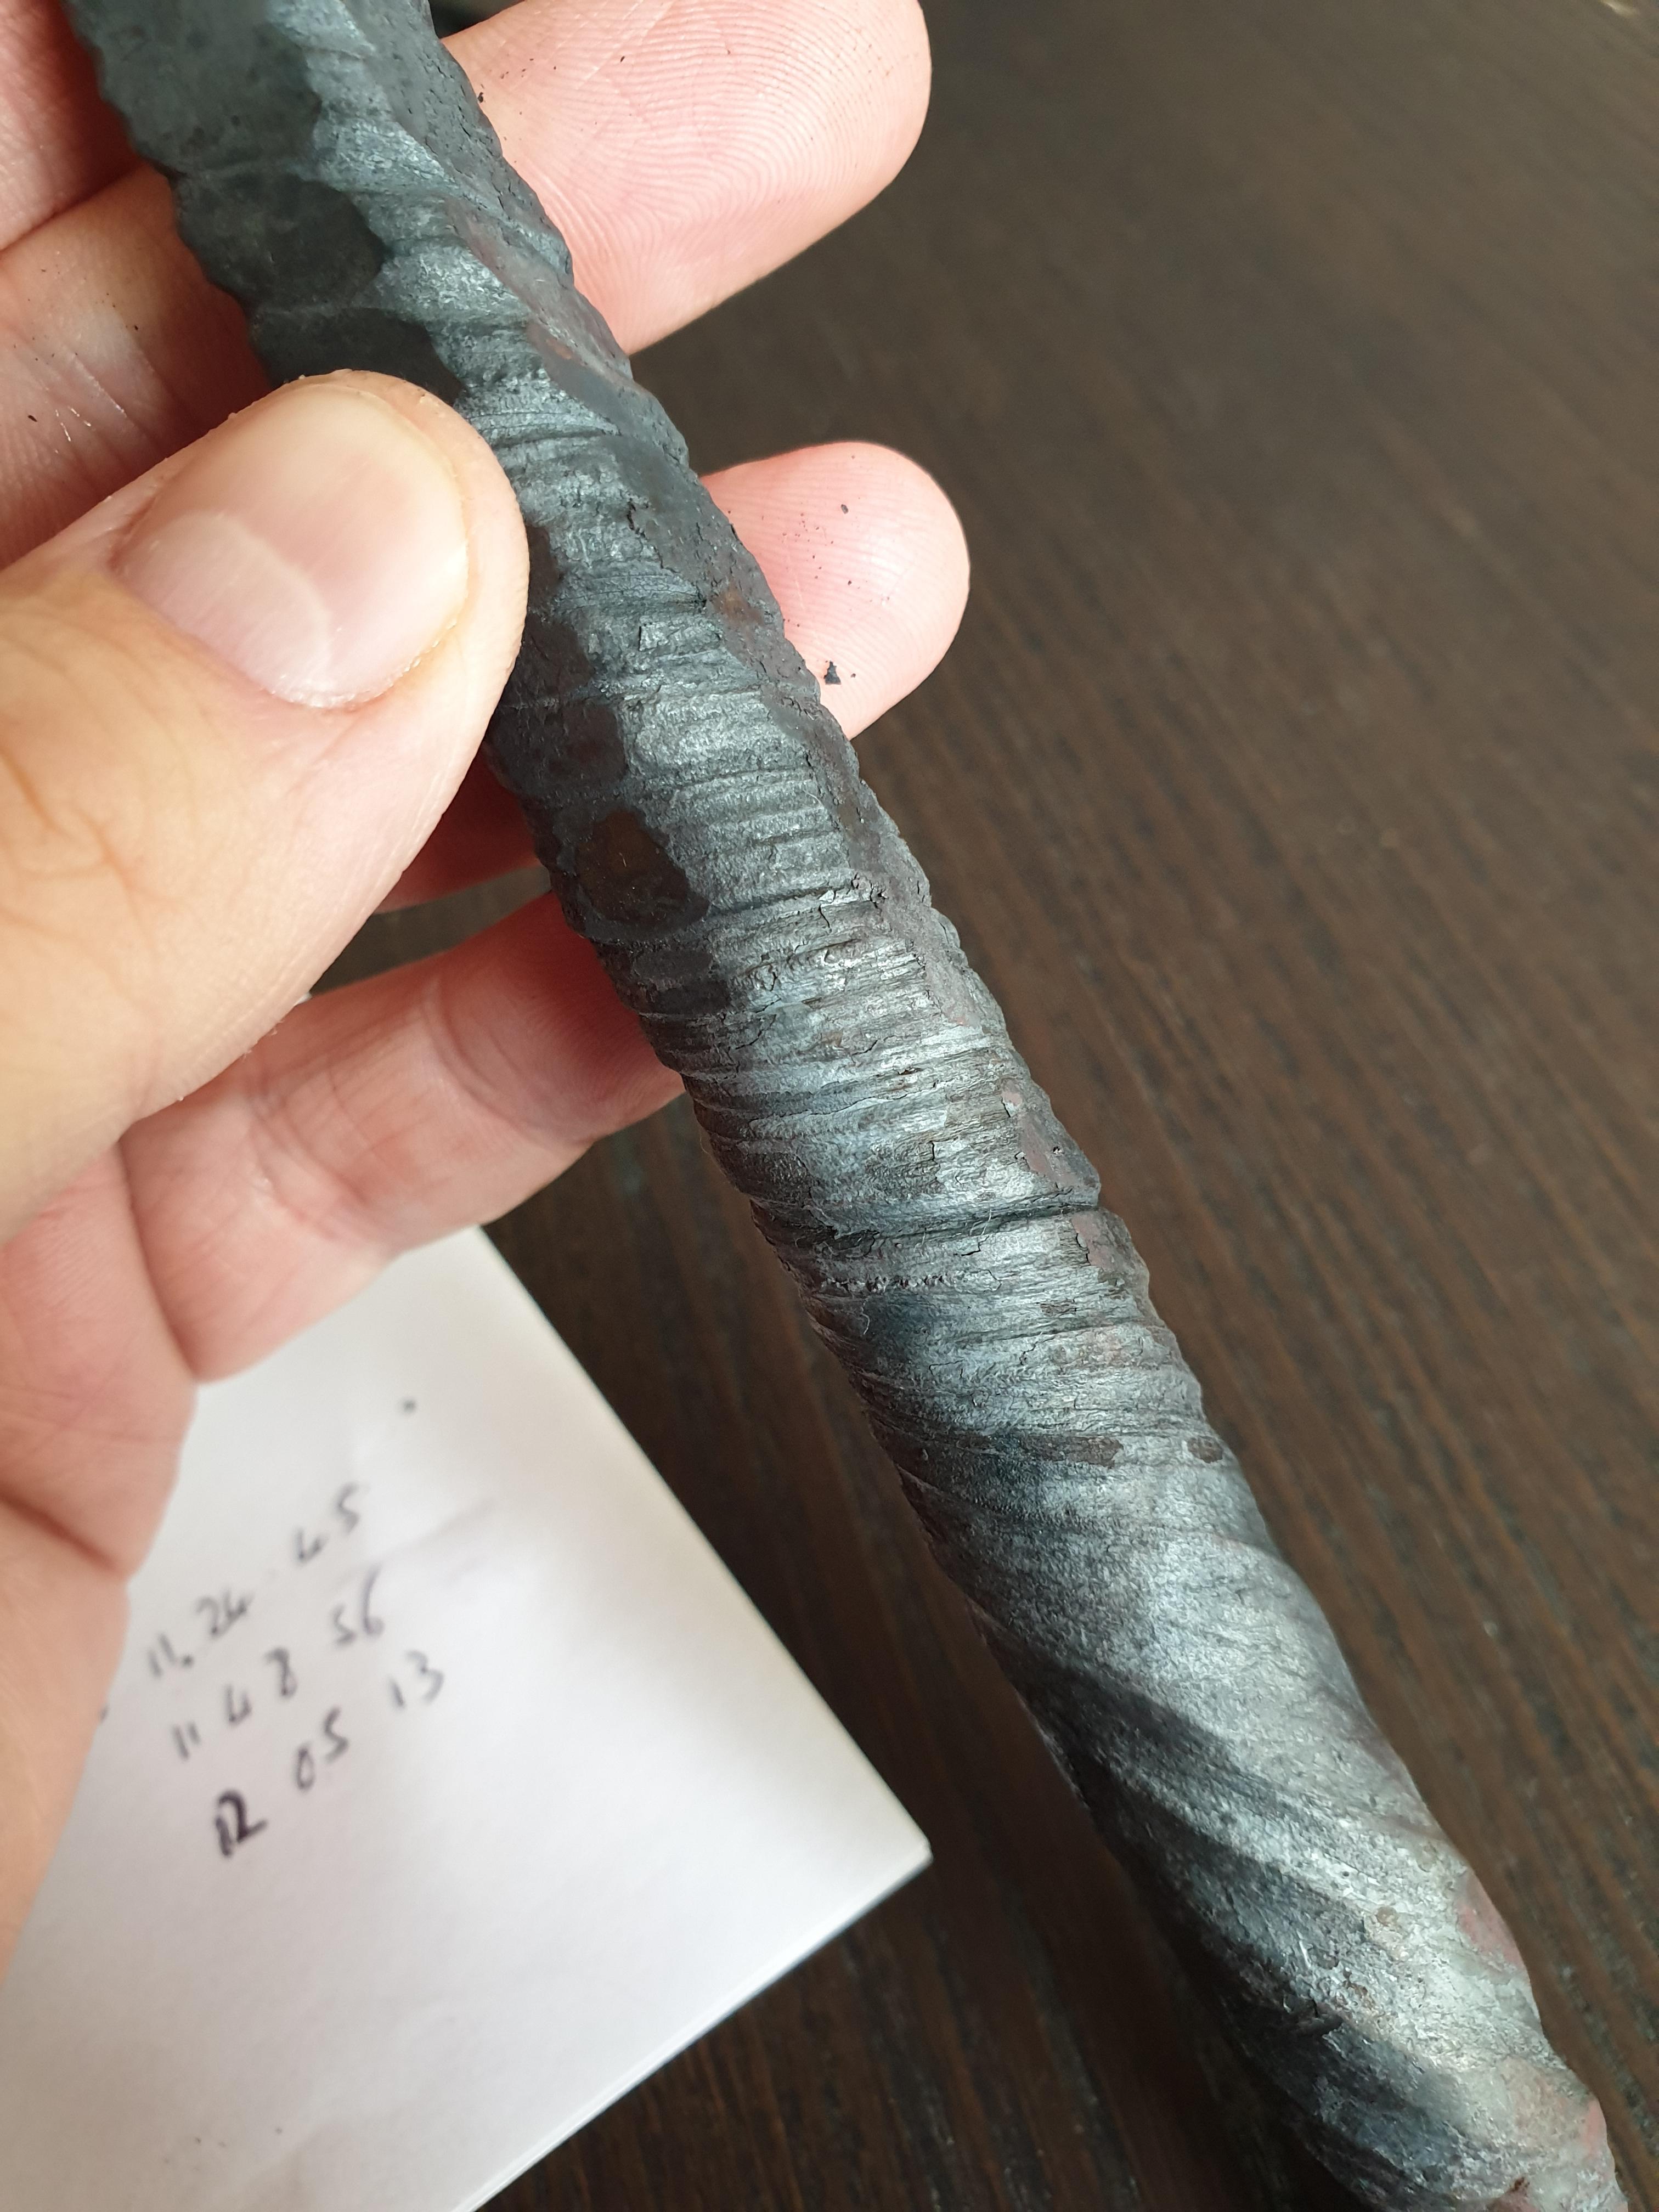
Hi guys, Thanks for the advice, greatly appreciated. I gave serious consideration to the layer count and.... decided to choose the lazy option and leave it as 6 layers as a learning excercise. I just want to see what happens with a really low layer count. I forged to roundish before twisting, but not perfectly round. I regret not taking the time here to get it perfect as I assume it would have avoided the below issue? What do i now do about potential cold shuts? Some sections already seem to have cold shuts from the tight twist, while other look like they are ok and could be forged back to flat without issue. Do I just grind out the problem regions?


-
Tonight I did a test piece for my first ever damascus. Just a simple weld of 6 layers, but something Ive never achieved before. Incredibly happy, this feels like a huge step forward. Tomorrow I'll give it a twist and see how the pattern turns out.
-
Thanks- I'll have to have a dig through the old books as I'd love to find new ways to get the most out of this tool. For the most part I'll be using it to drift hammers and axes without ruining the cheeks, or for bearded style axes. Thanks for the tips for the 90degree bends. It probably seems like an odd request but its because my anvil isnt deep enough (its a block anvil sitting into a wooden frame) to bend the brackets on the edge of the anvil... hence previously using the vice. I imagine using the swage block grooves might be quicker too!
-
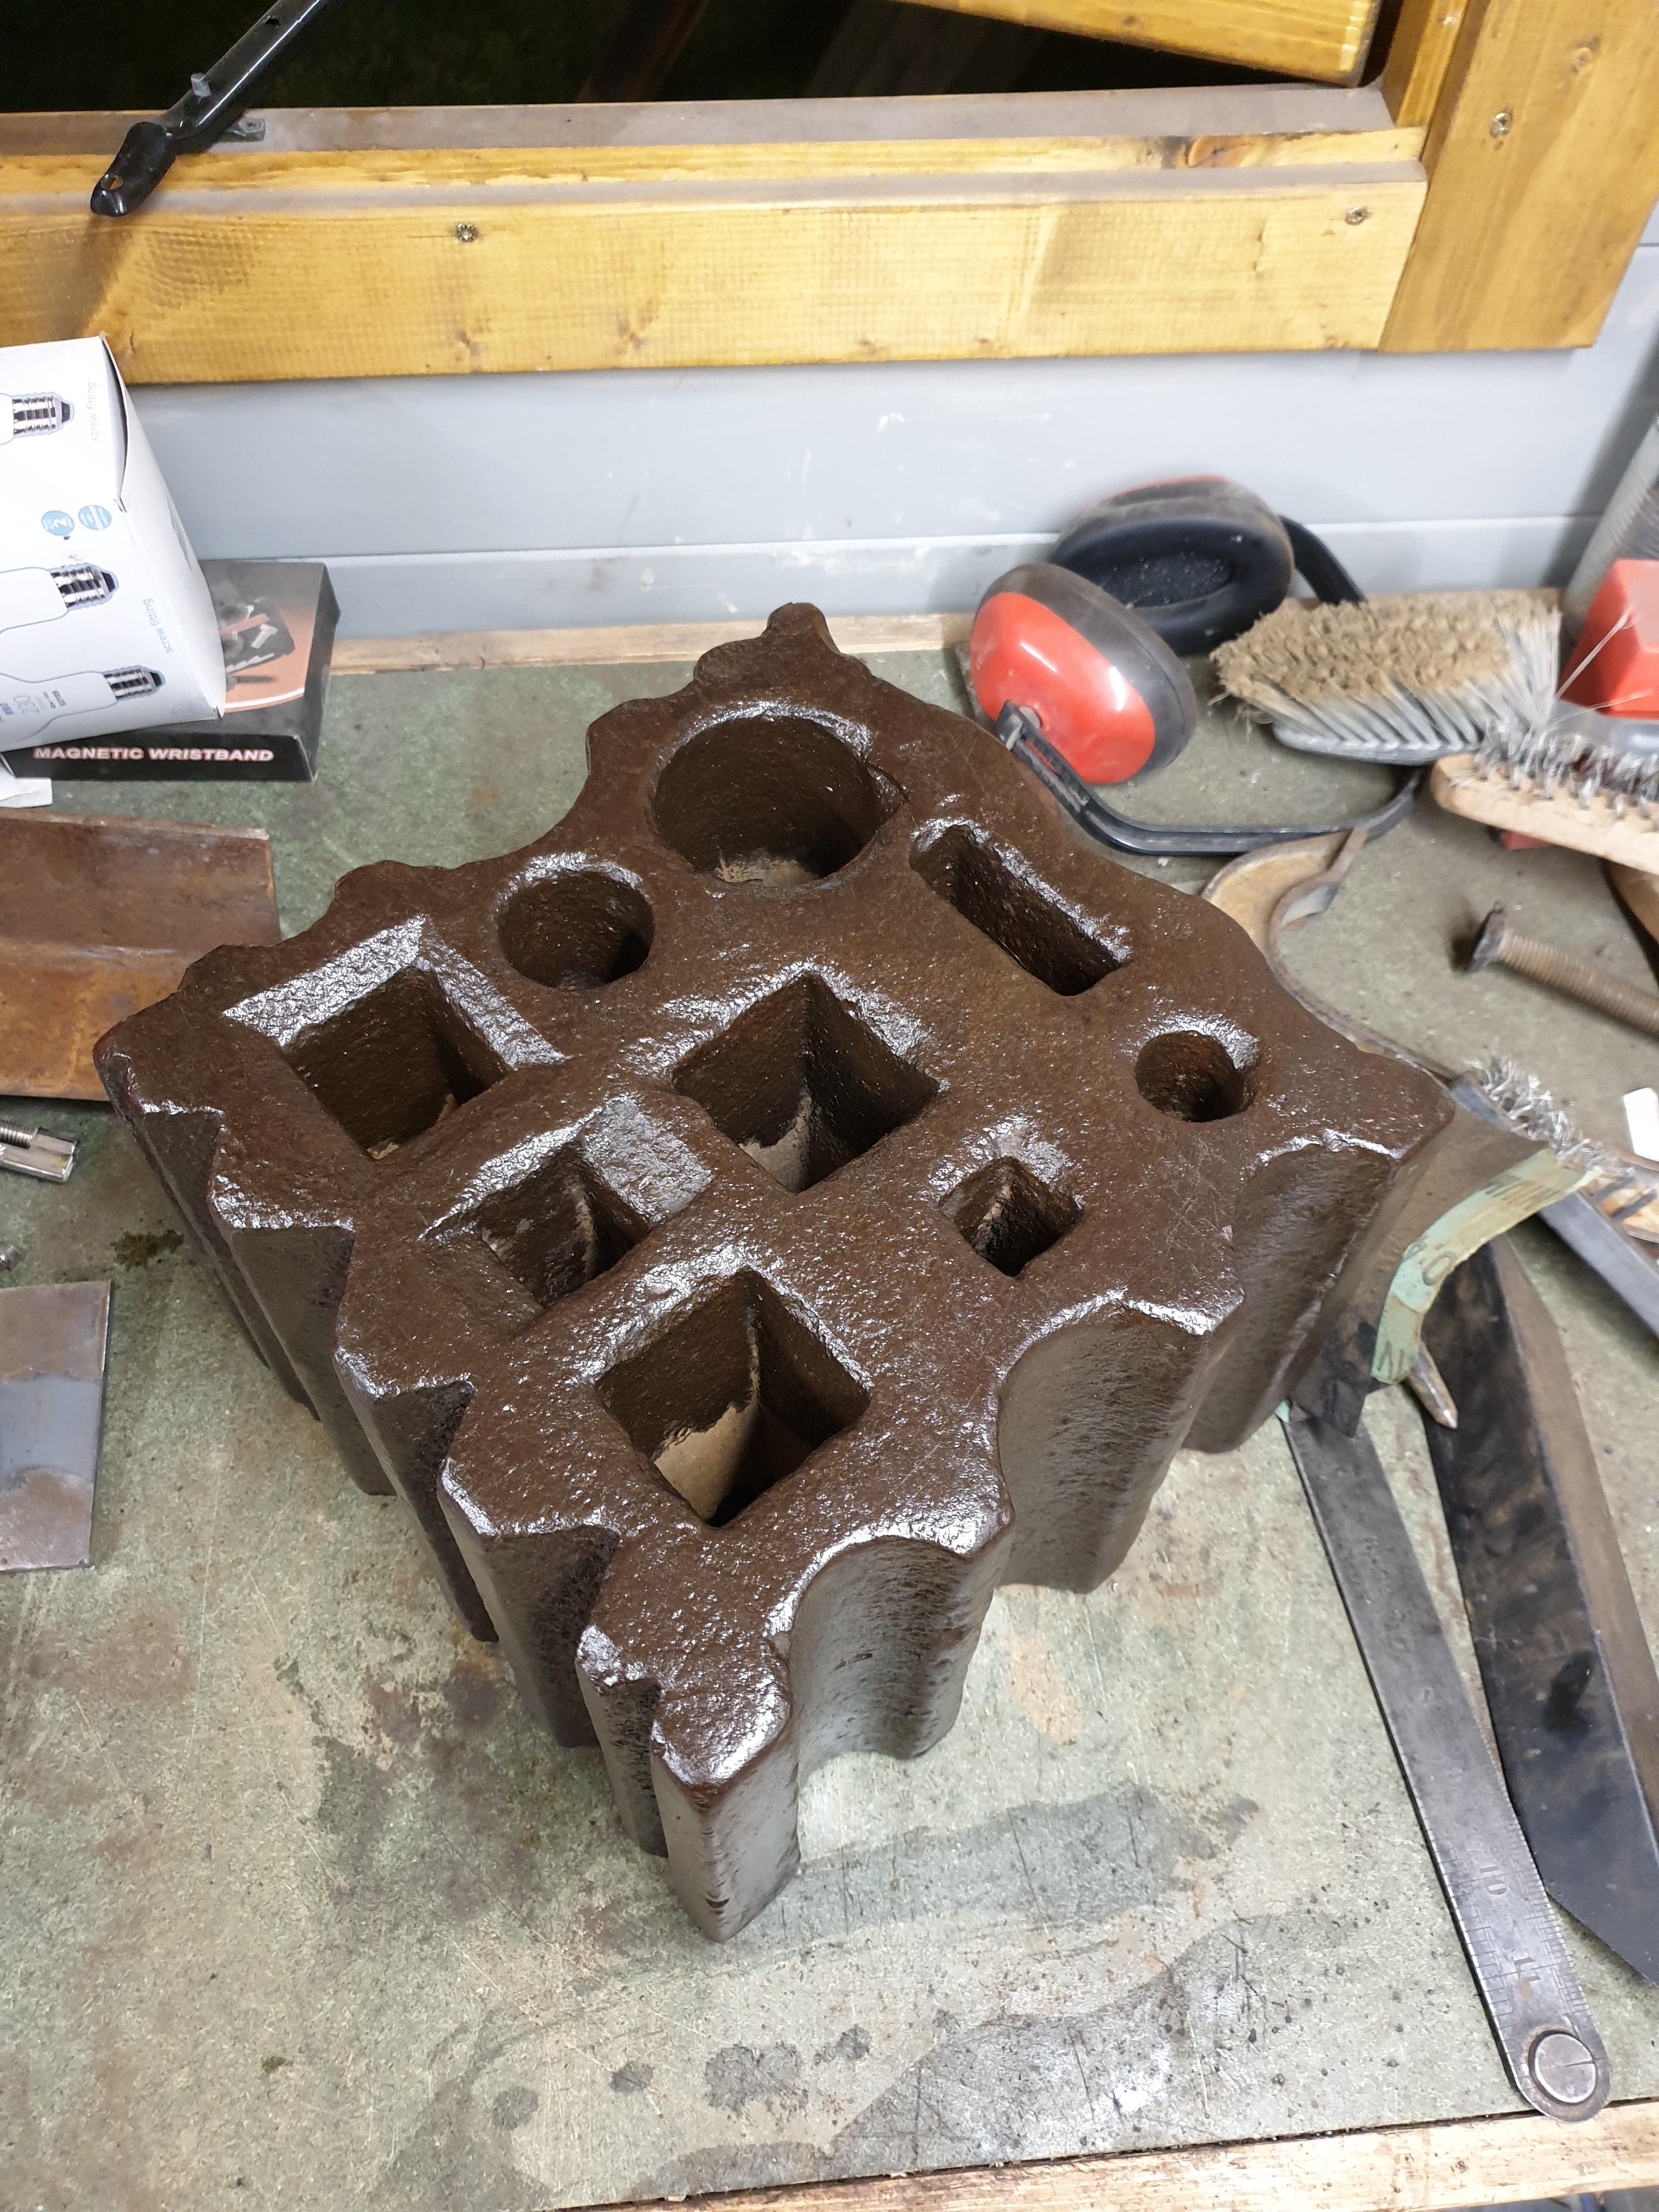
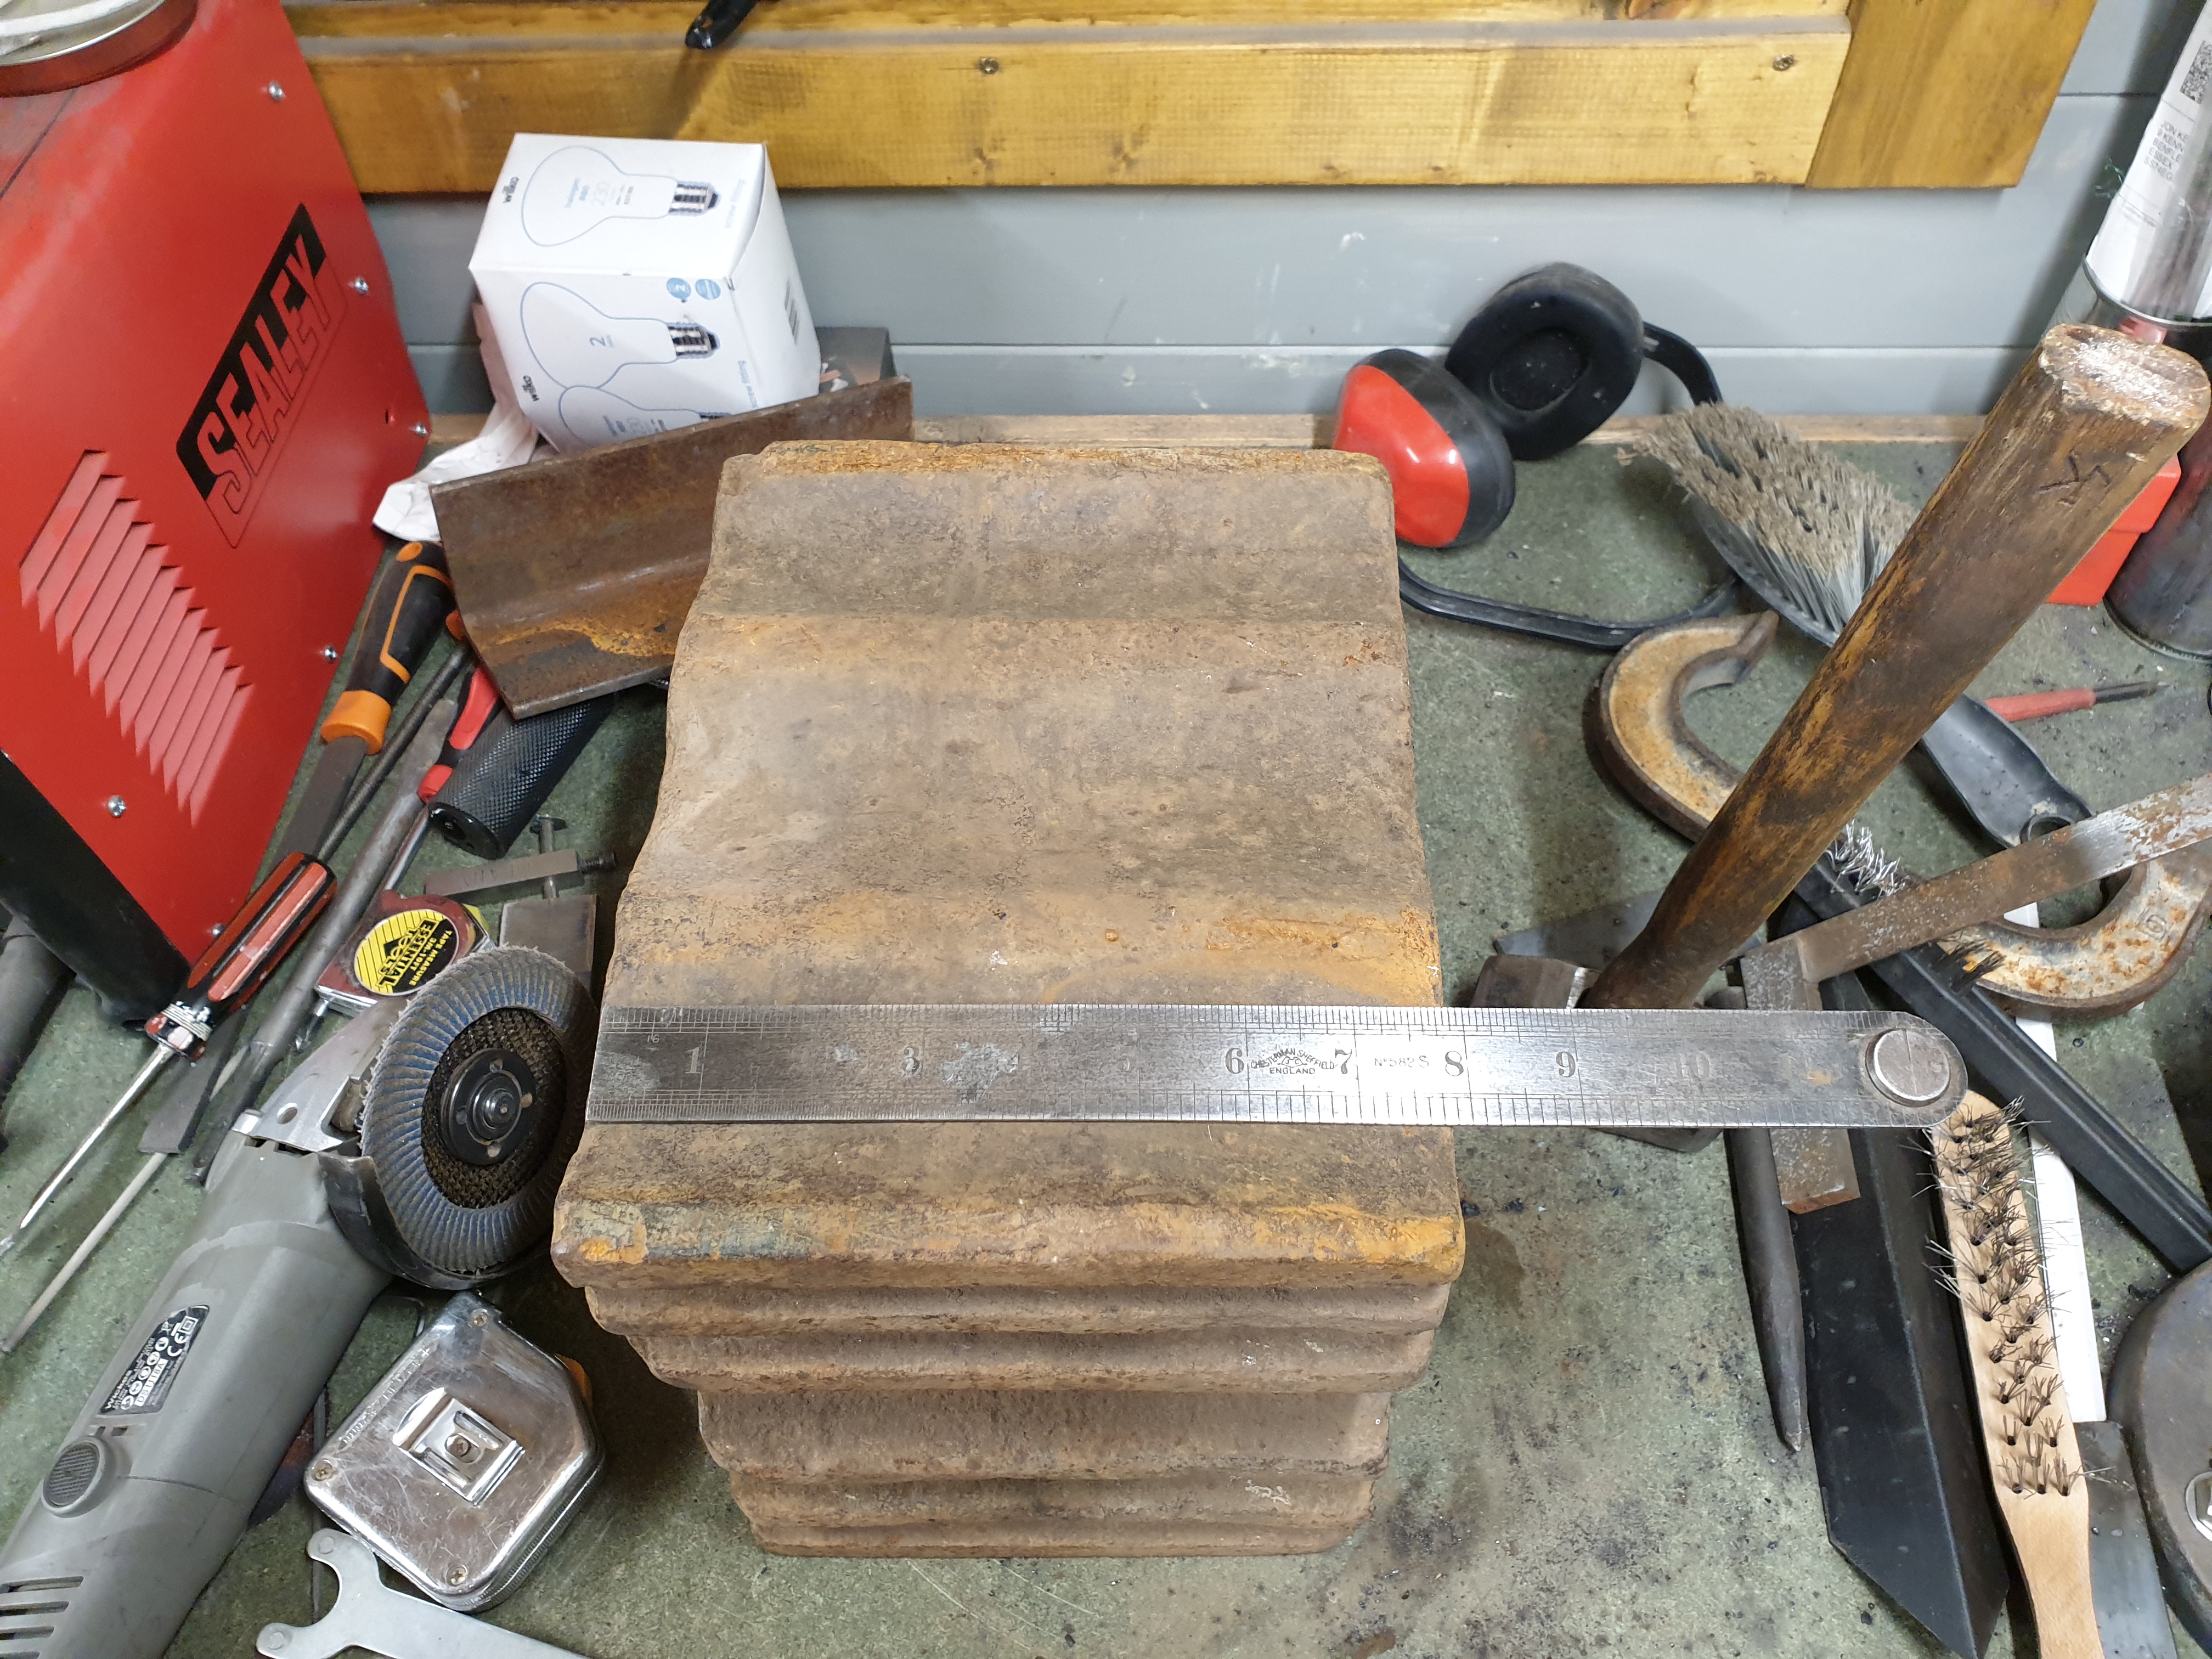
Thanks George, Thanks for the info! I did notice there were 2 types of angles there. Any tips/examples for uses for the 60degree grooves? Could the 90 degree ones be used as an easy way to perform an exactly 90degree bend in flat stock for something like a shelf bracket? Ive been making brackets recently and bending in my vice and they always come our skewed to one side due to the slope on the vice jaws. Would I need a corresponding 90 degree top tool for this job?
-
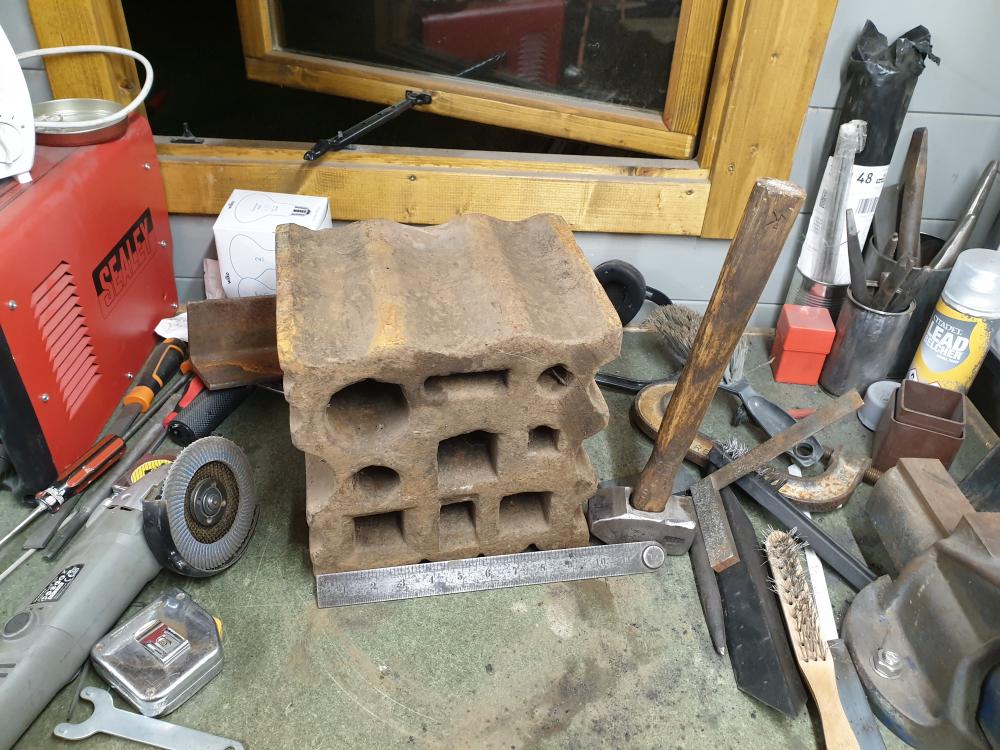
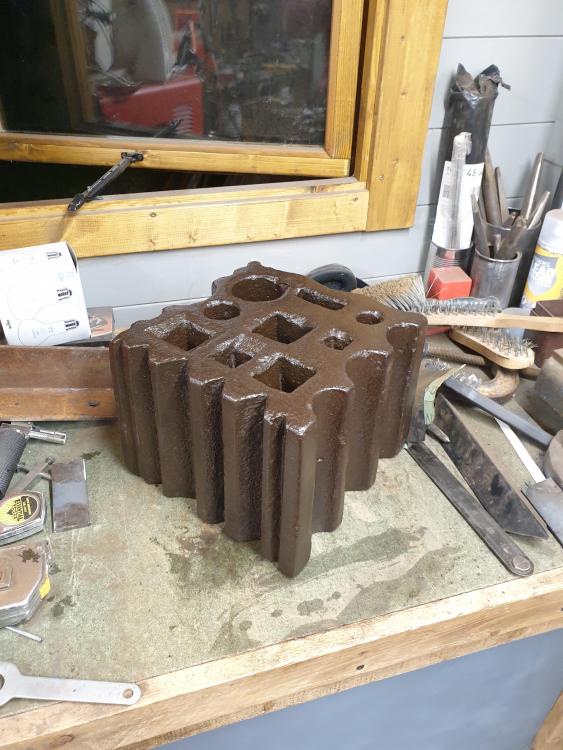
I managed to aquire this for the bargain price of £50. No markings, seems ancient. Very strange proportions, anyone ever seen one this size/shape and have any info on the style? Happy is an understatement! Cleaned it gently with a hand wire brush and oiled with WD40 and 3in1 mix.


-
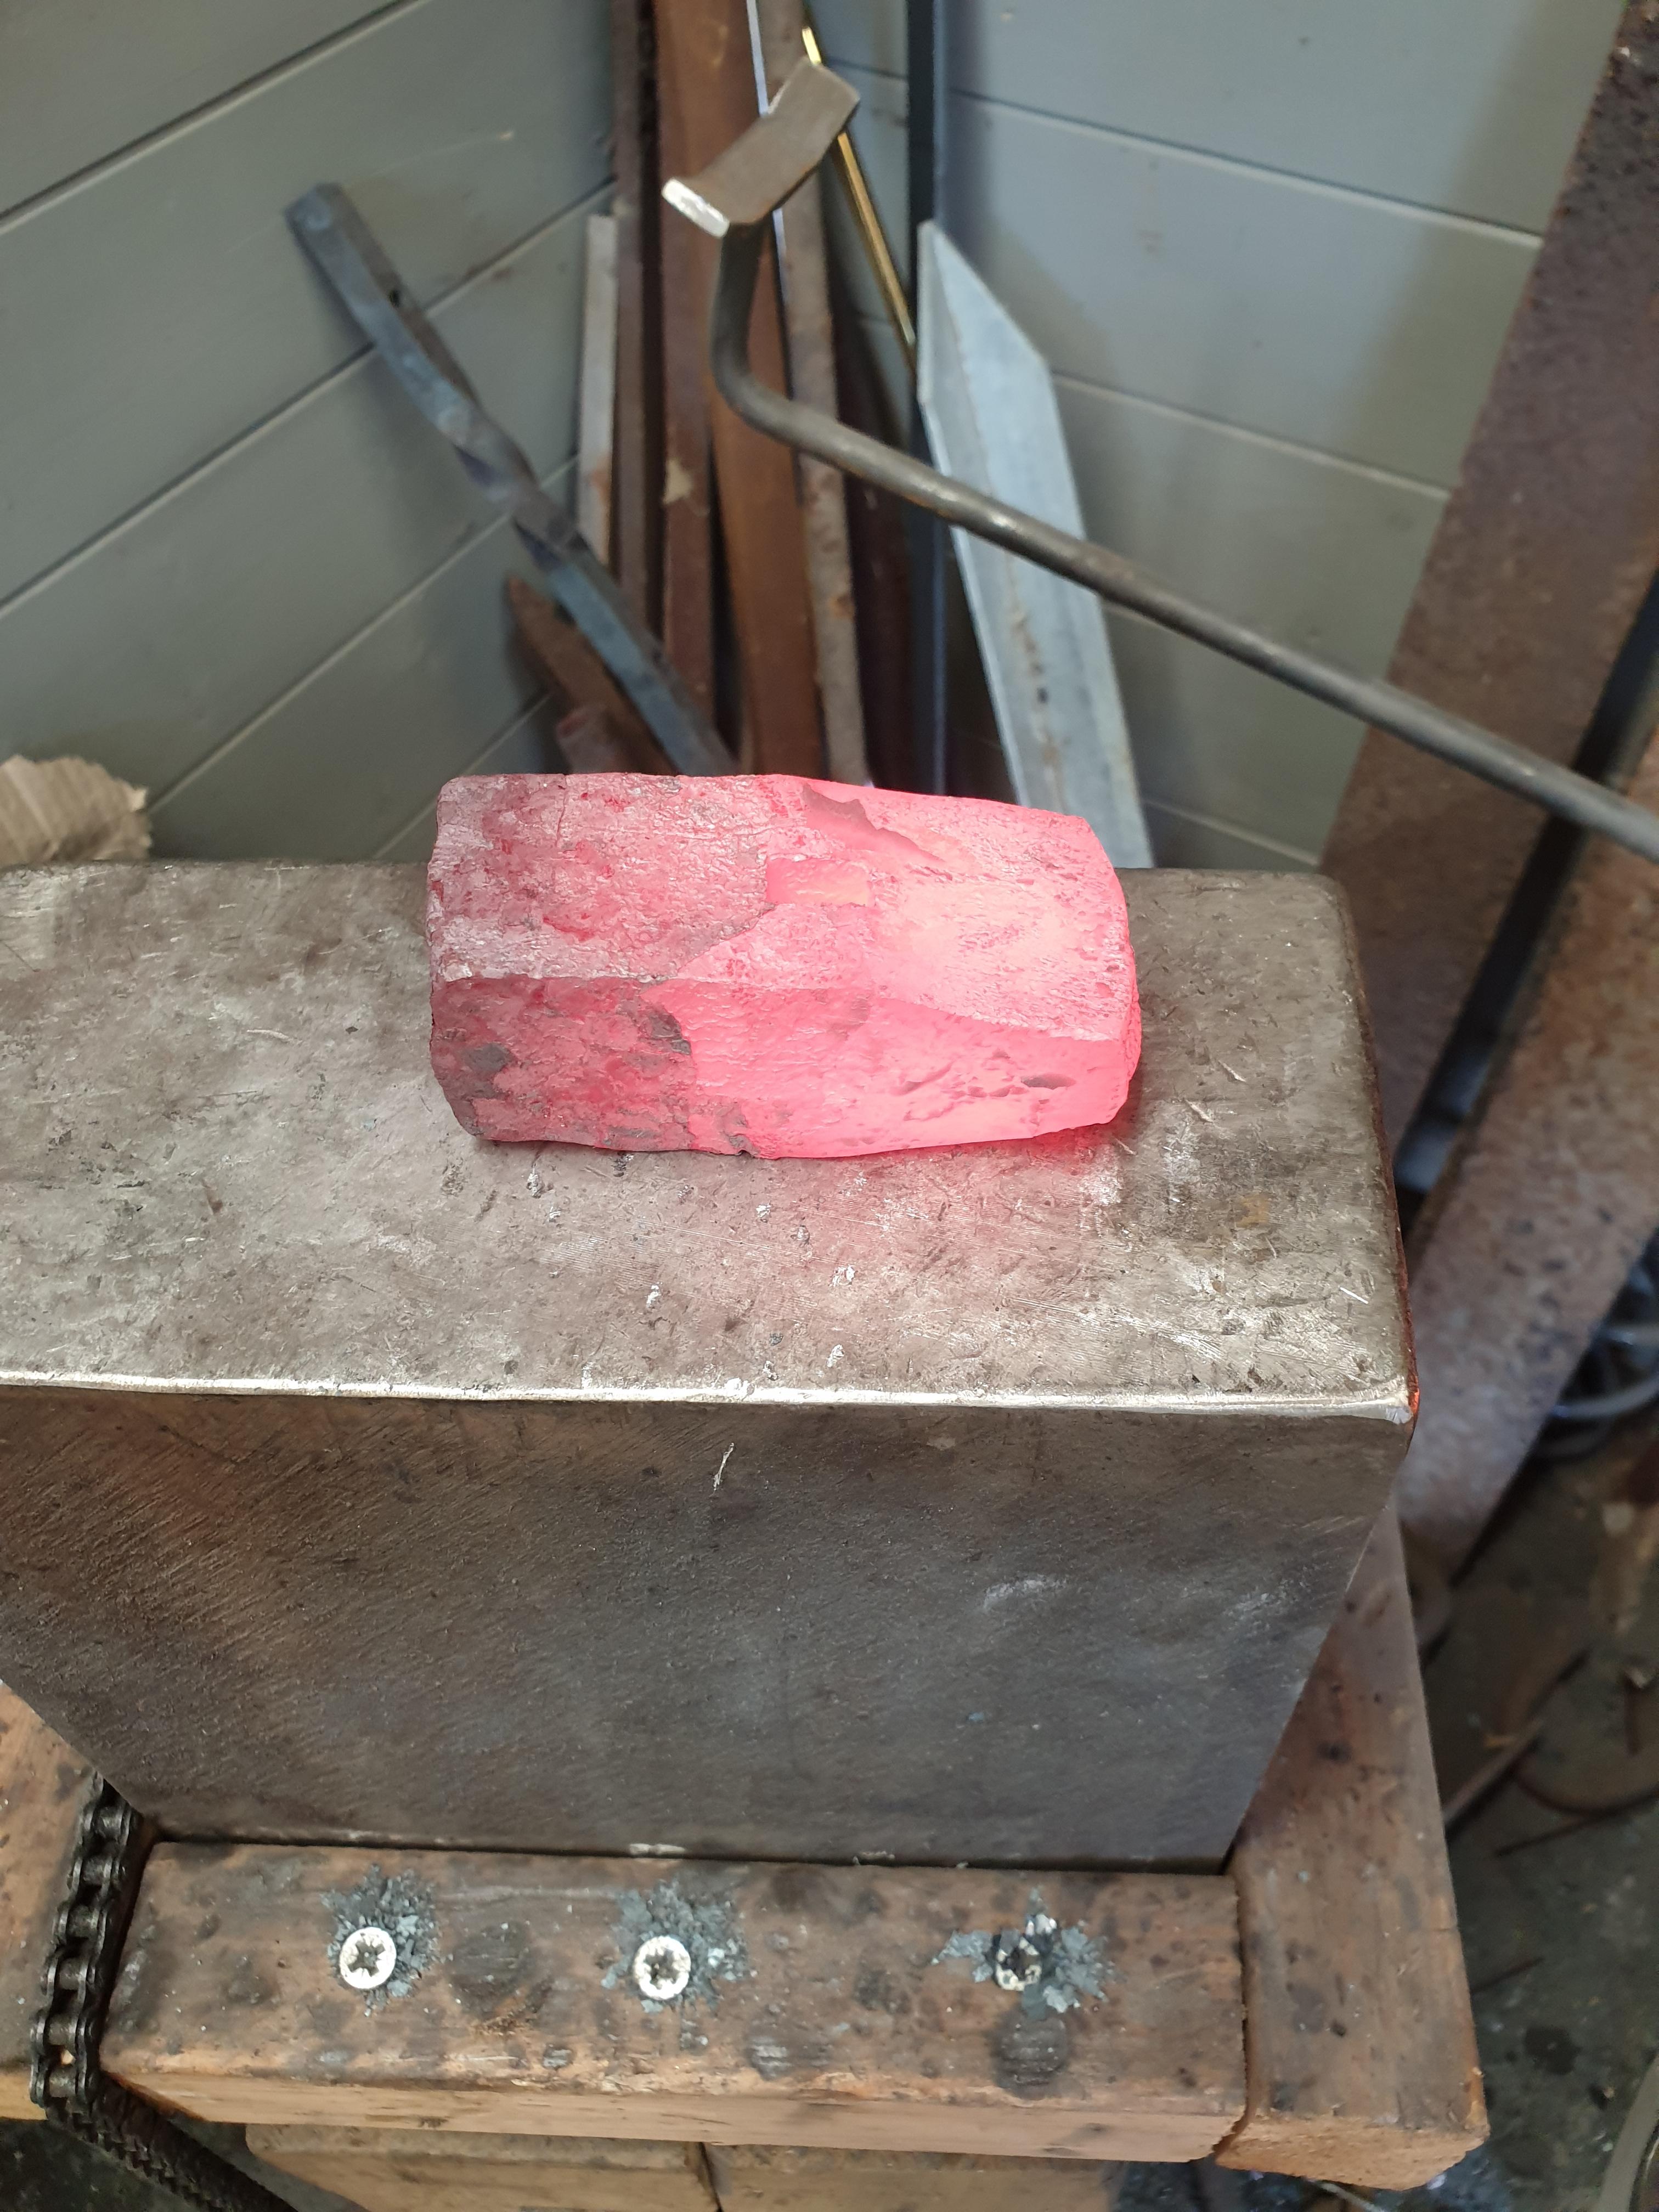
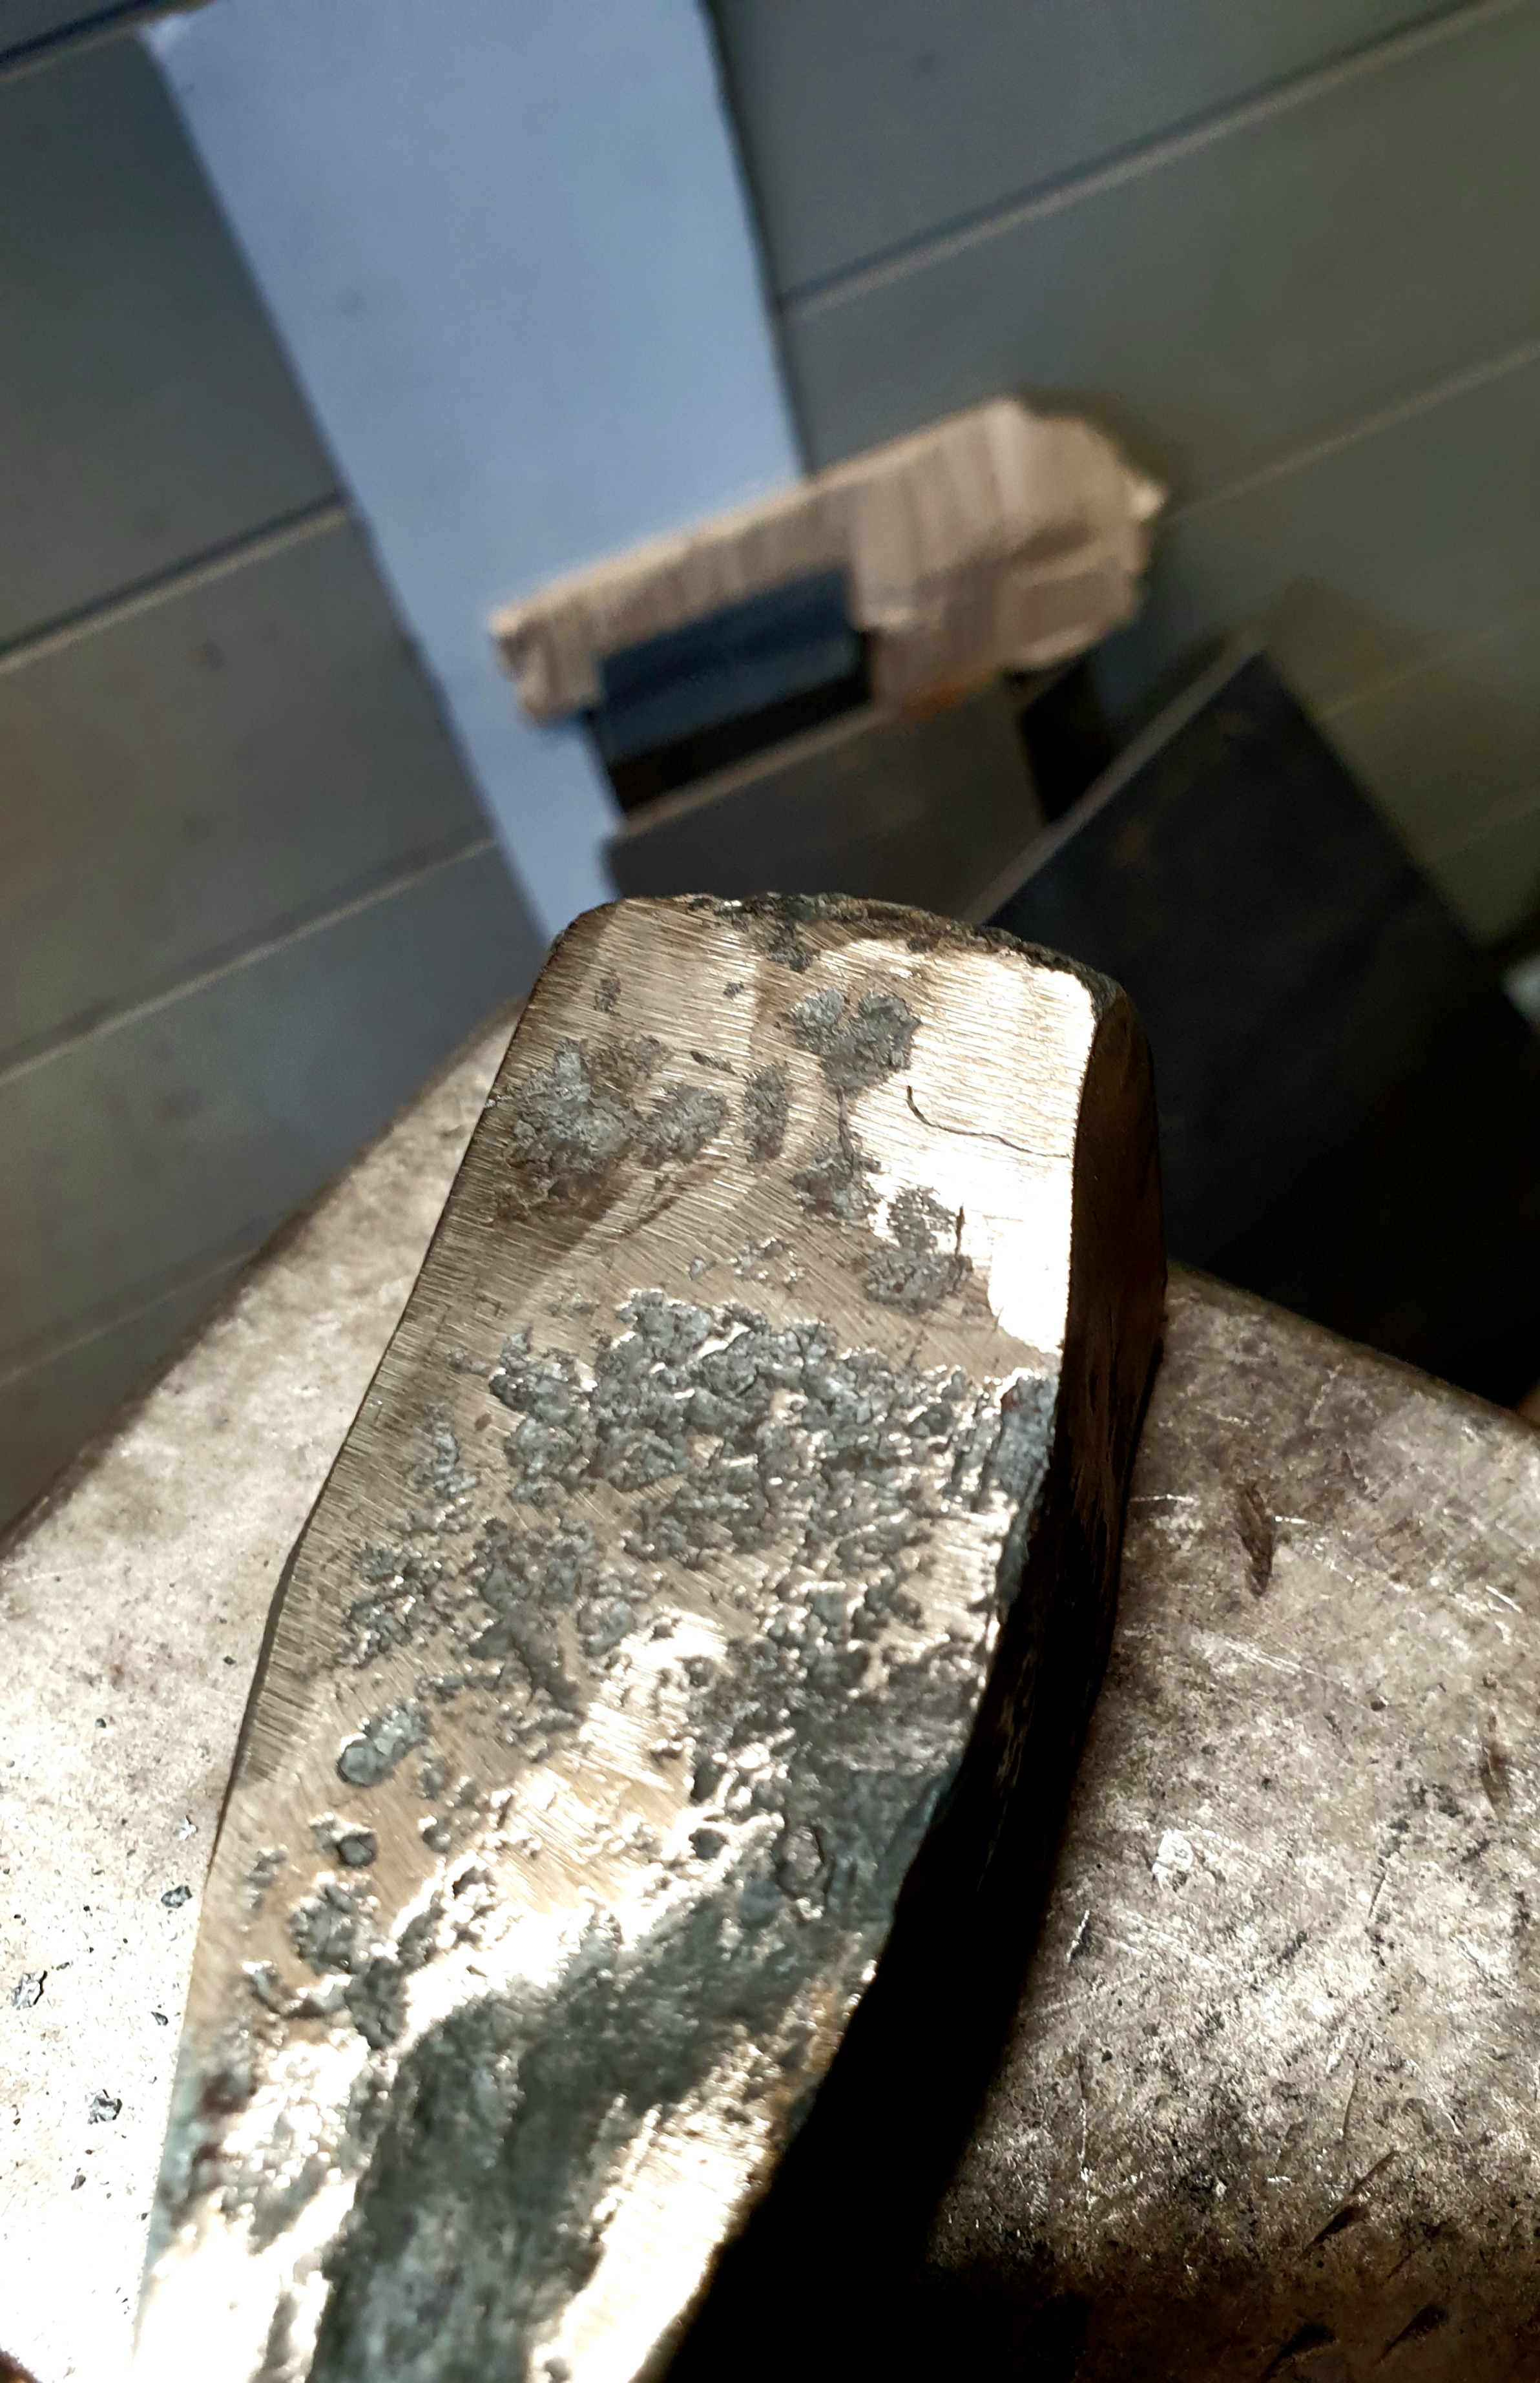
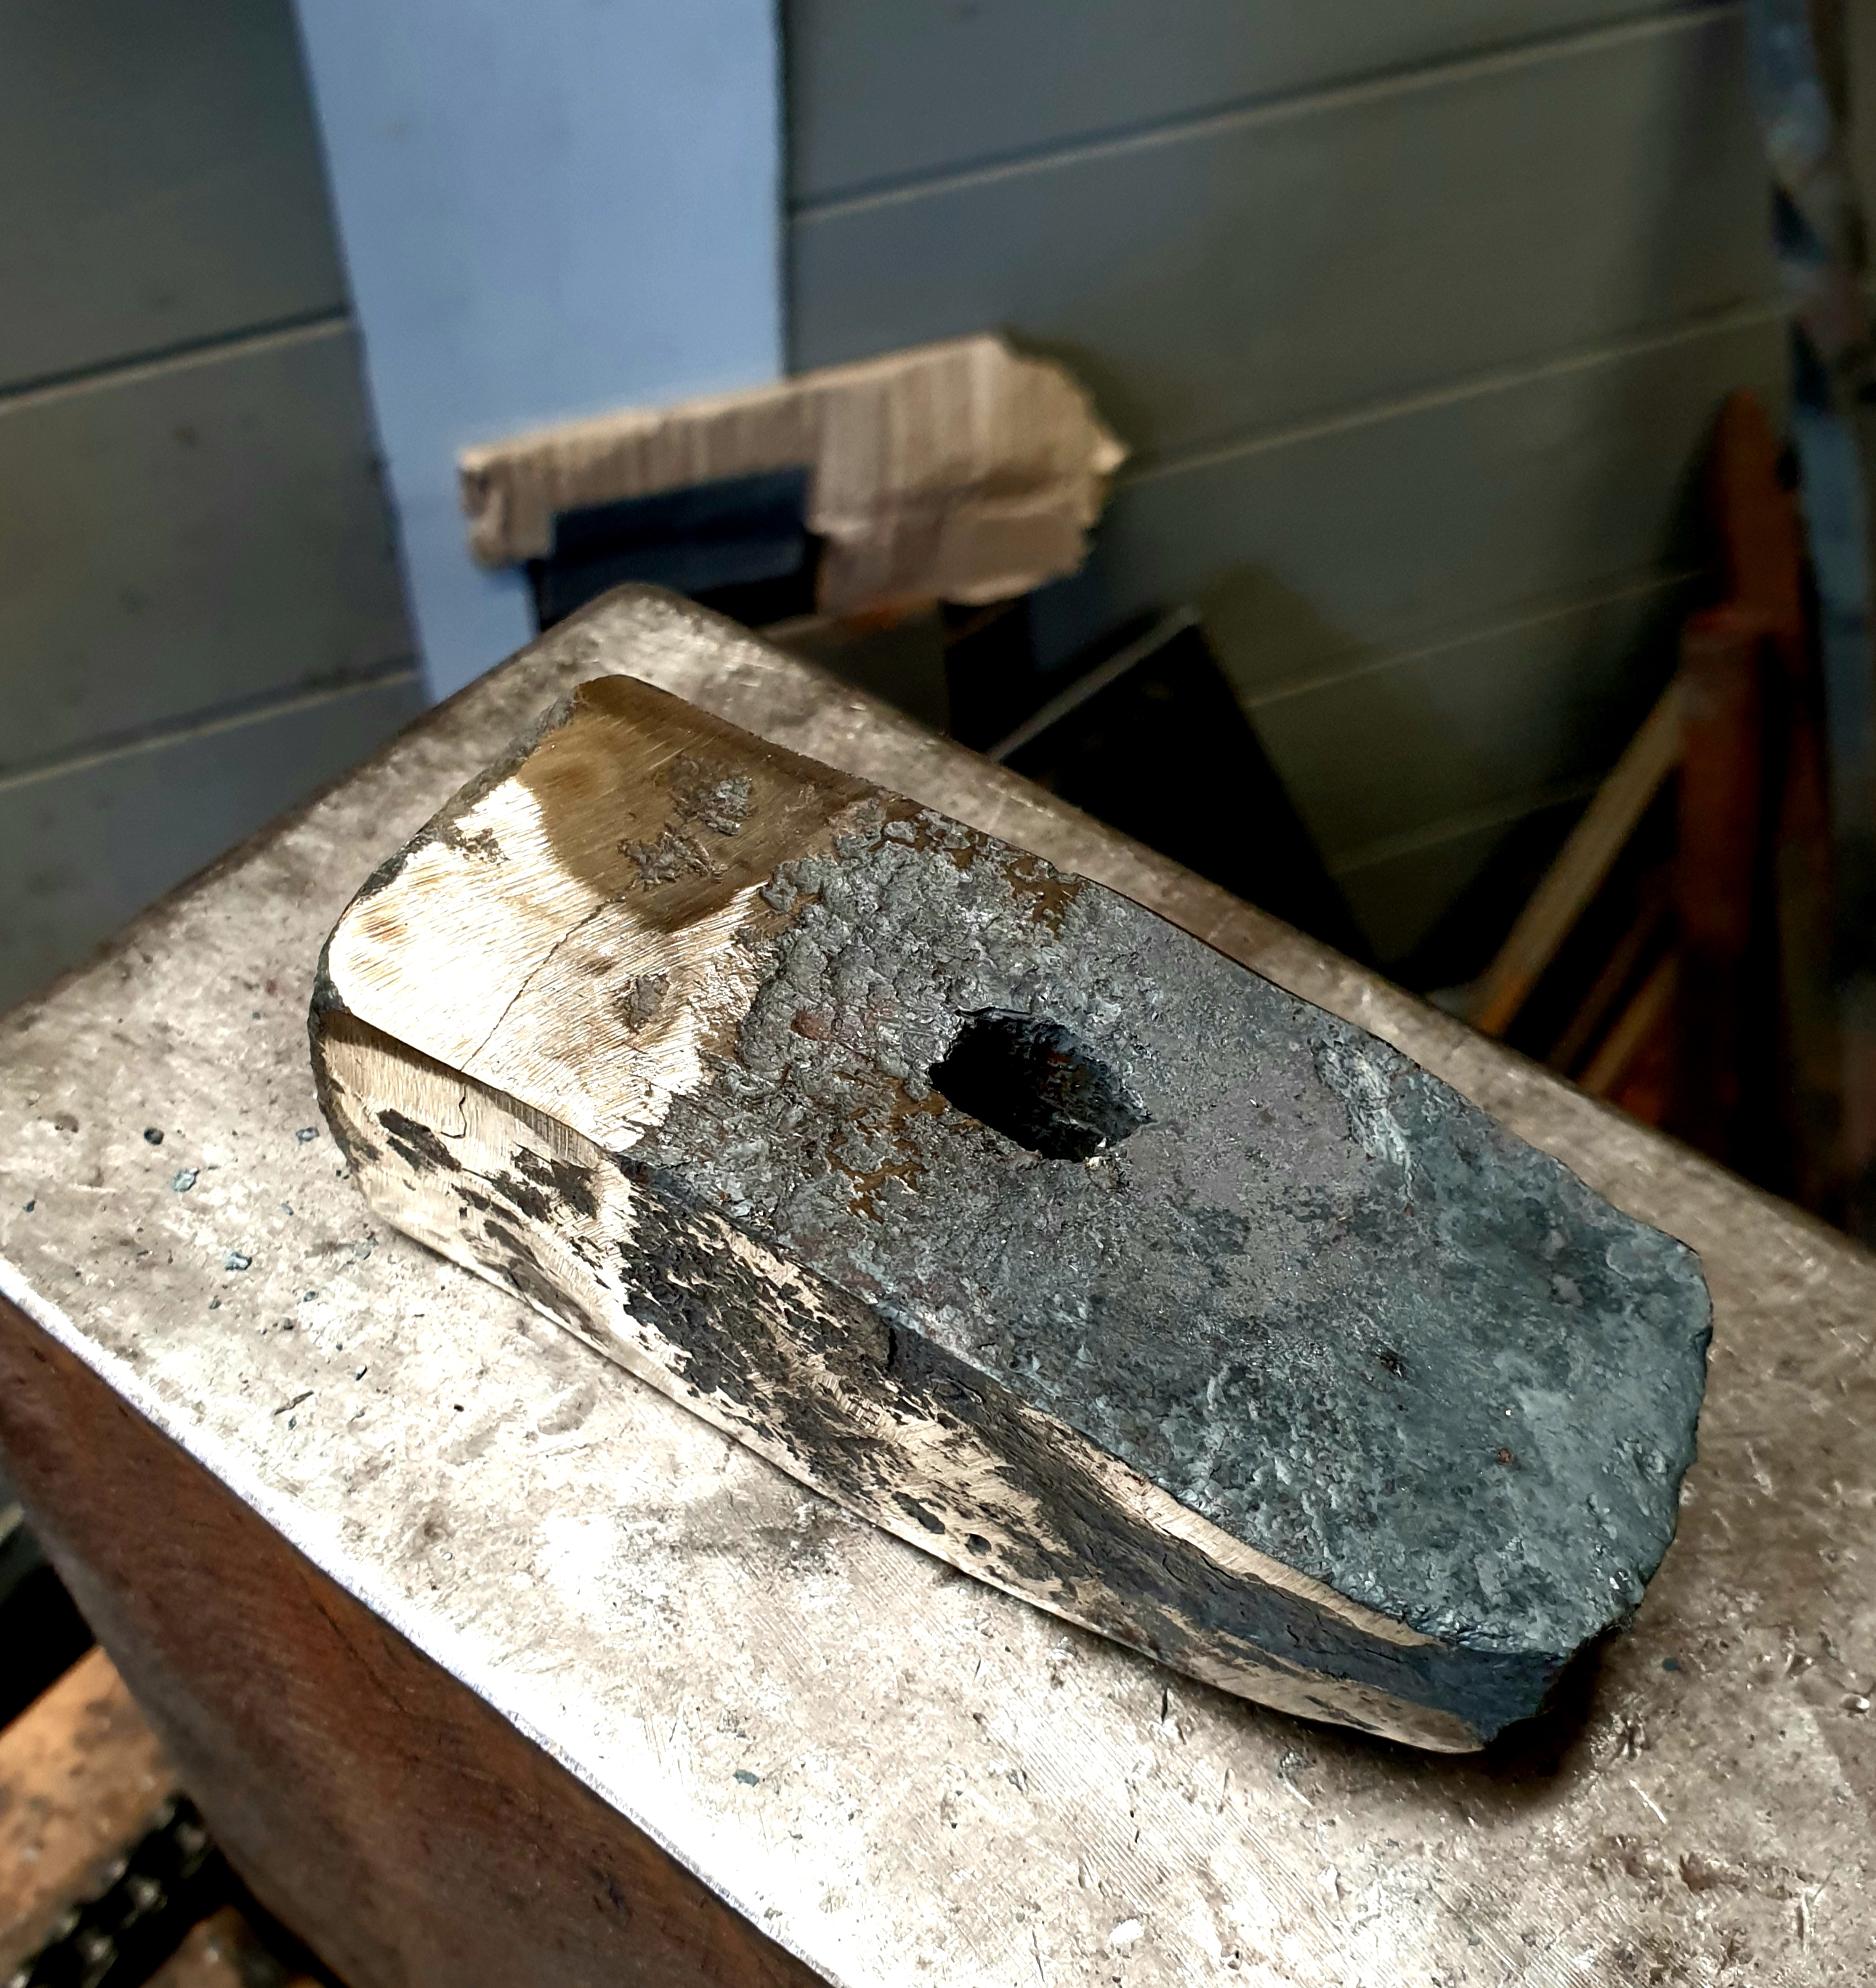
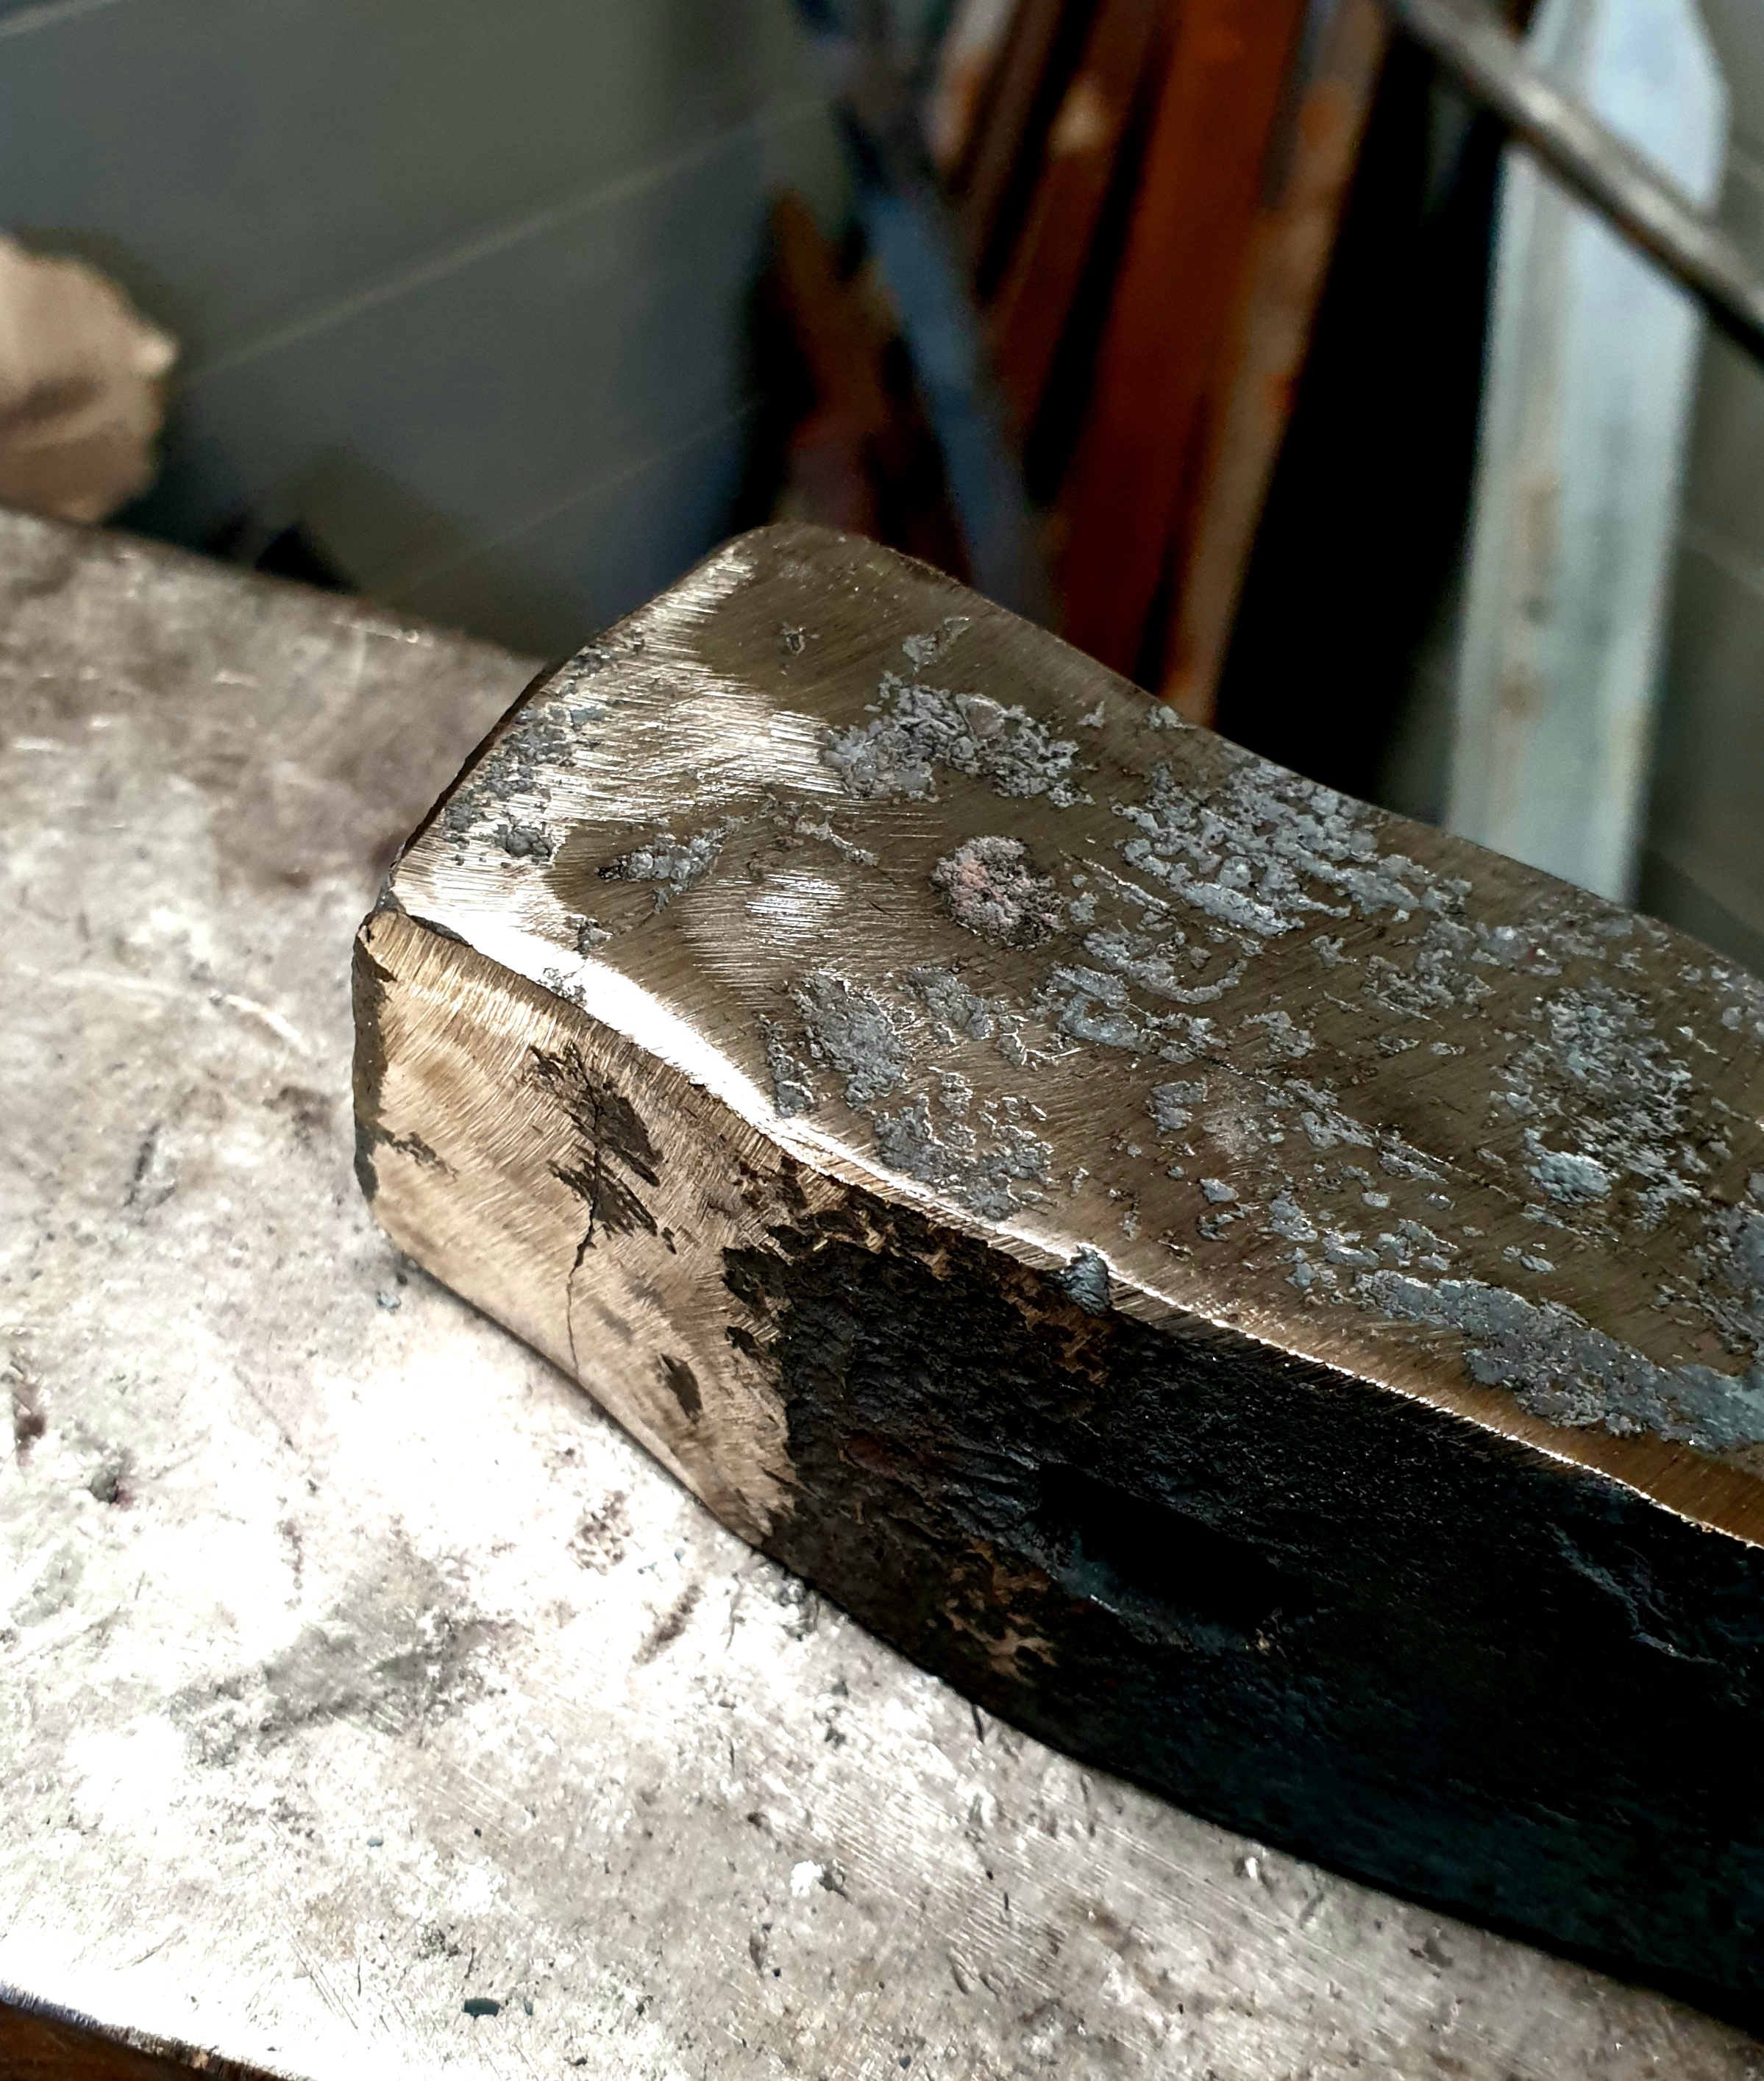
Hi all, Not managed as much forging as I'd like, but Ive been steadily hammering away. I wish Id managed to keep these thread up to date- I may do a big photo dump of my progress at some point for anyone whos interested. My latest project (well, actually, I tried and failed on this around 9 months ago, came back to it today and had a lot more success), I need some help from the curmudgeons please! I finally got the weld to take on this hammer face- its a mystery steel welded to a wrought iron body. The face and body werent perfectly size matched so I did try to do some blending once the weld was set. Ive got these cracks/cold shuts/delamination (im not sure- most likely cold shuts from the attempt to blend) along 3 sides. Can these be fixed? Will they close at a welding heat?


-
How I build and manage a cave style fire for welding
Jon Kerr replied to GregDP's topic in Solid Fuel Forges
Dear mods- is there any way to rescue the pictures from this post? Seems very informative and Id love to learn from it. -
Yes but I've heard it rubs off?
-
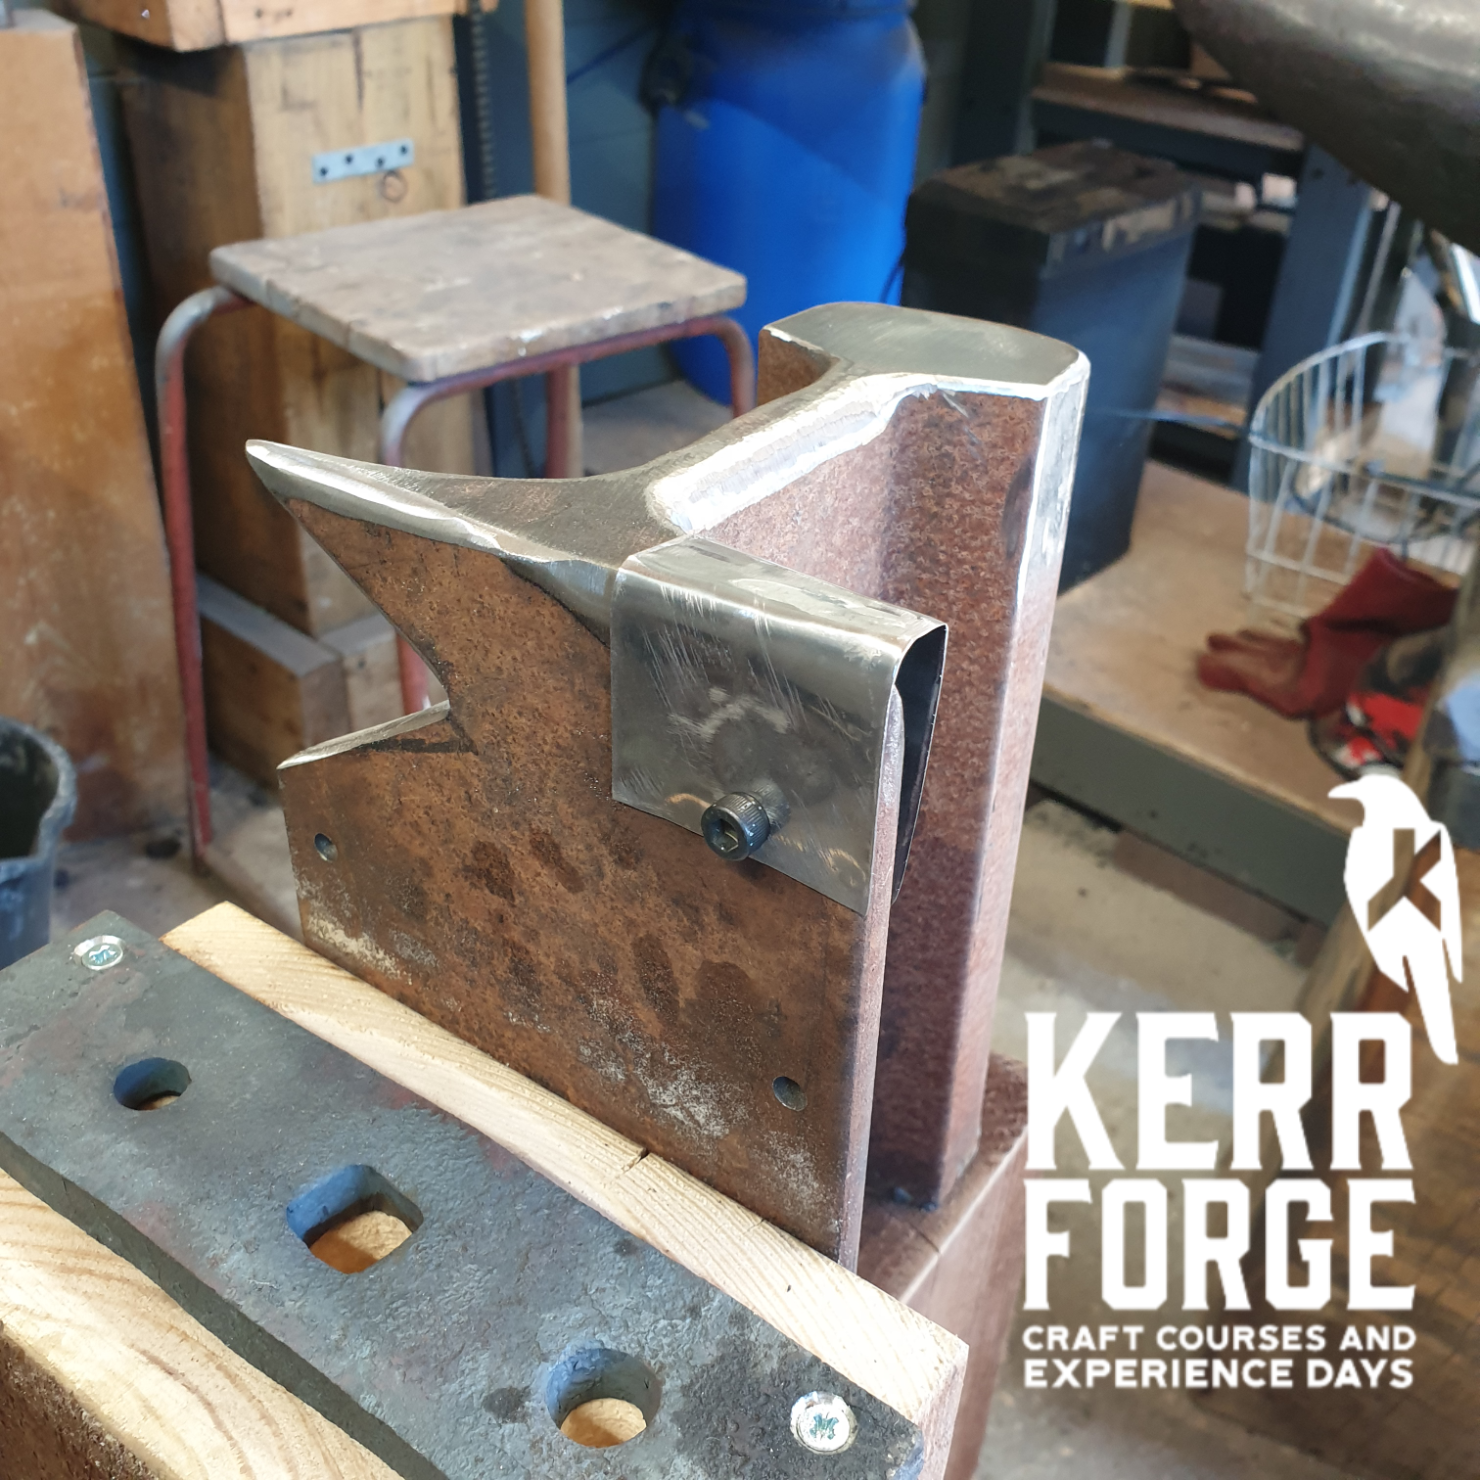
Made my bickern yesterday. Hoping to try it out today. Would you heat treat it?

-
Continuation of the previous post... more pictures... sorry! - I've joined a Facebook group link removed. Its a great idea and there's quite a lot of people joining in each week, from a range of different skill levels. I joined in for the first time this week and the challenge was Bells..... This was my first time forging a bell, and first time forging pipe rather than solid stock. The first one started out well but quickly became a disaster when my attention wavered for a minute or two and it melted horribly. The nerds and wargamers among us may appreciate that I've named it Nurgles Holy (holey?) Bell of anti-Distraction, and hung it above my forge. I'm hoping its magical power prevents me from burning my stock in future but I doubt it somehow. Expletives were uttered. I then realised I could rescue the project by turning the pipe around and using the other end as my new bell... since Id already done the hard work necking it down. The irony? The new, fancy looking bell doesn't ring. The mangled Bell of anti-Distraction rings beautifully. See video. As I type I'm currently working on trying to fix it. I need to isolate the bell from the heavy section of hook above with a much smaller neck. I also want to thin the walls of the bell and thereby make it spread out to a larger diameter. For this I need to forge a bicker because my tiny rail-anvil horn isn't long enough. I'm on it.... - A snail..... which would be a very minor achievement except I SUCCESSFULLY FORGE WELDED THE TAIL. I'm so happy. Bell_Ring_JK.mp4
Bellofanti-Distraction.thumb.jpg.5123e3c315b296024ce7b168396ea52c.jpg)
Bellofanti-Distraction.thumb.jpg.f6f0052f8febc3278016f9d9f7b9545b.jpg)
BellChallenge.thumb.jpg.3772cb8fcdf538b6615cdd1841096a51.jpg)
BellChallenge.thumb.jpg.39435c199191c50f57f77b8e93addd48.jpg)
NewSnail.thumb.jpg.904c95ec30bc801b105578347eff1beb.jpg)
NewSnail.thumb.jpg.23d48103c2df4fe0a69900e35e6d97d6.jpg)
-
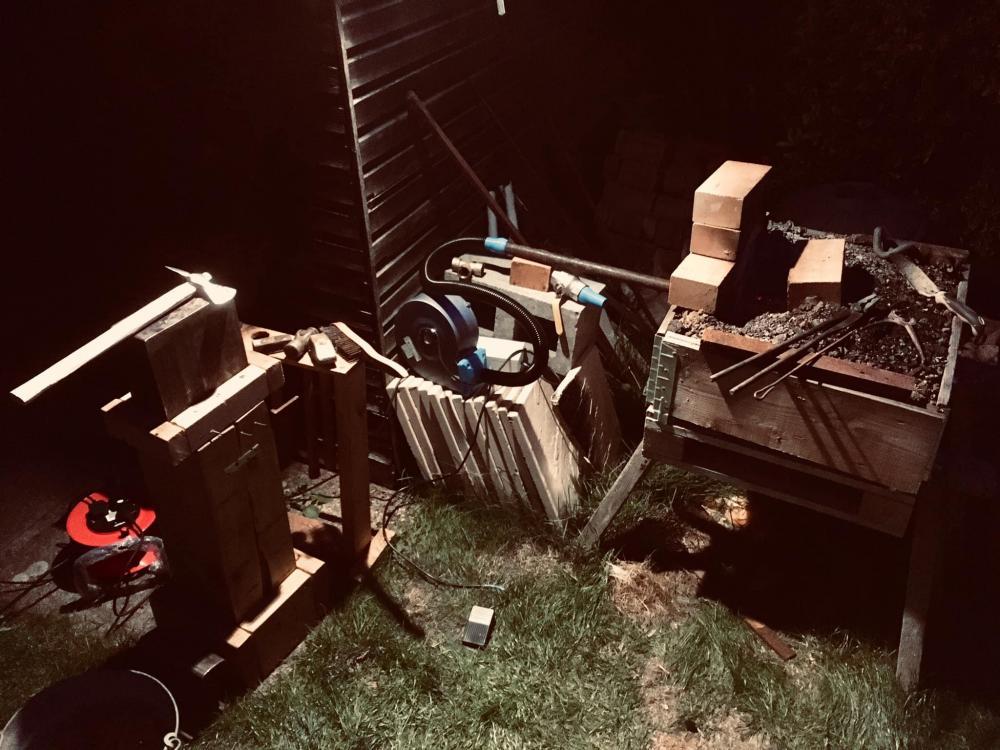
Its been a while since I've posted but I've been busy on the blacksmithing front. I have to say... despite COVID-19 and the UK lockdown being pretty terrible for the most part.... its done wonders for my ability to make time for forging! While everyone else is going insane with boredom and lonliness, I'm in my absolute element and have managed to get work done on all kinds of projects which have been weighing me down for ages! I'm having major trouble learning to weld.... its a nightmare. I picked up an arc welder but so far all I've managed is to blow a bunch of fuses and make a mess on a steel plate. I havent drawn a single bead. Beginning to wish I'd gone for MIG. I'm constantly blowing 13amp fuses and thinking I need to upgrade to a 16a plug and socket... which my workshop should be set up for in terms of supply/breakers... but I cant get an electrician in till after the lockdown ends. As for projects- huge number of pictures here in one go, so I'll rundown each with a quick description of what I've been up to. - BBQ hook tool for my brother in law. He has a fancy upright oil drum style smoker which has all kinds of hooks and racks inside for different meats... and a tool for simply hooking onto the hooks to take them in and out of the barrel. He lost the tool so I made him a new one..... the original was very basic but I thought I'd embellish this one with a twist and a leaf for a bit of fun. The leaf creates a loop for hanging it on a hook so here's hoping they wont lose it again! - Arm Ring. My brother-in-law and sister-in-law gave me a piece of Damasuc steel for Christmas which they had purchased online. Its essentially ready to be made into a stock remove knife but I figured there is enough material to make a few extra things too. The first thing I wanted to try was an arm ring for a bit of fun. I need to get hold of some suitable acid to etch it and bring the contrast back out in the pattern. You can steel see the pattern a bit though. - Scaffold Board Shelves. These were inspired by some pictures I had seen online by a UK smith called Padgett Ironworks. He has a nice little online store which both inspired me for a few projects and tempted me to spend a fortune...! Fortunately for me (but not Mr Padgett) I managed to resist spending any money but I did shamelessly copy his shelf idea. - Updated picture of my forging area for anyone who's interested in such things. I love seeing pictures of other people's work areas and tools!
ArmRing.thumb.jpg.94be894105837d13fc18004b73d2c2ea.jpg)
ScaffoldBoardShelf.thumb.jpg.1ac4b0cda93a37702aa4d5b73e7ecbb5.jpg)
ForgeUpdate.thumb.jpg.ff2e022d45d4e19e2b8a294a006a8c77.jpg)
SmokerHook.thumb.jpg.b013097e3fb15da66567ff4d3dc4edd0.jpg)
SmokerHook.thumb.jpg.eafbf17e2a6a9bbb2b700bfbf4b8931e.jpg)
ArmRings.thumb.jpg.dd516b97550ac4c328ead2e490d8996a.jpg)
ScaffoldBoardShelfBracket.thumb.jpg.ad1e5195cea4acae2efa0b3c0bc8923b.jpg)
ScaffoldBoardShelfBracket.thumb.jpg.007bfaae47b18124d605a7ca39820d2c.jpg)
-
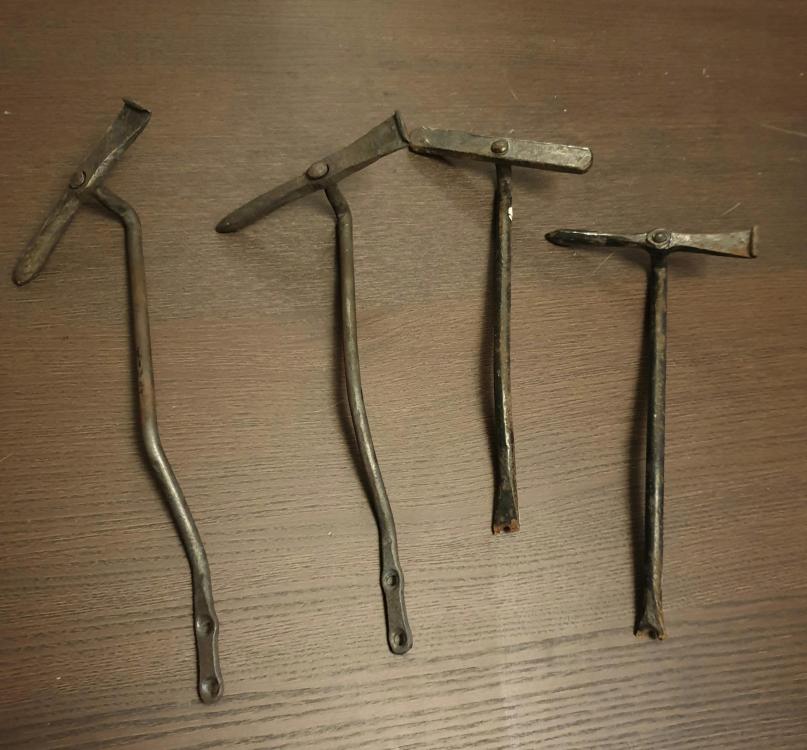
This is my favourite video on making tongs. I must have watched it 30 times. 3 different methods- and each time he uses the last set of tongs to make the next ones. The guy has the bare minimum of tools- a simple stake anvil, hammer, punch, and material. Note that he has no tongs to hold the first tongs. You dont need tongs to make tongs. As he does in the video- start making a light-duty set from a long piece of material.... then use the light duty set to draw out the reins on a heavier set.... and so on. I personally love the middle style, "viking style". Less worrying about offsetting the boss etc... and they look cool.
-
Thanks GuardedDig2.... perhaps once I get my welder working properly my first project should be a guillotine! Welshj, thanks for the kind words! Its great to know people find this thread useful/interesting and hearing that gives me enthusiasm to keep going and keep updating here. I feel like I've made incredible progress so far, from my humble beginnings with a JABOD and hairdryer.... the help and support from this forum has been incredible. Tomorrow is a dedicated forging day! Cant wait.
-
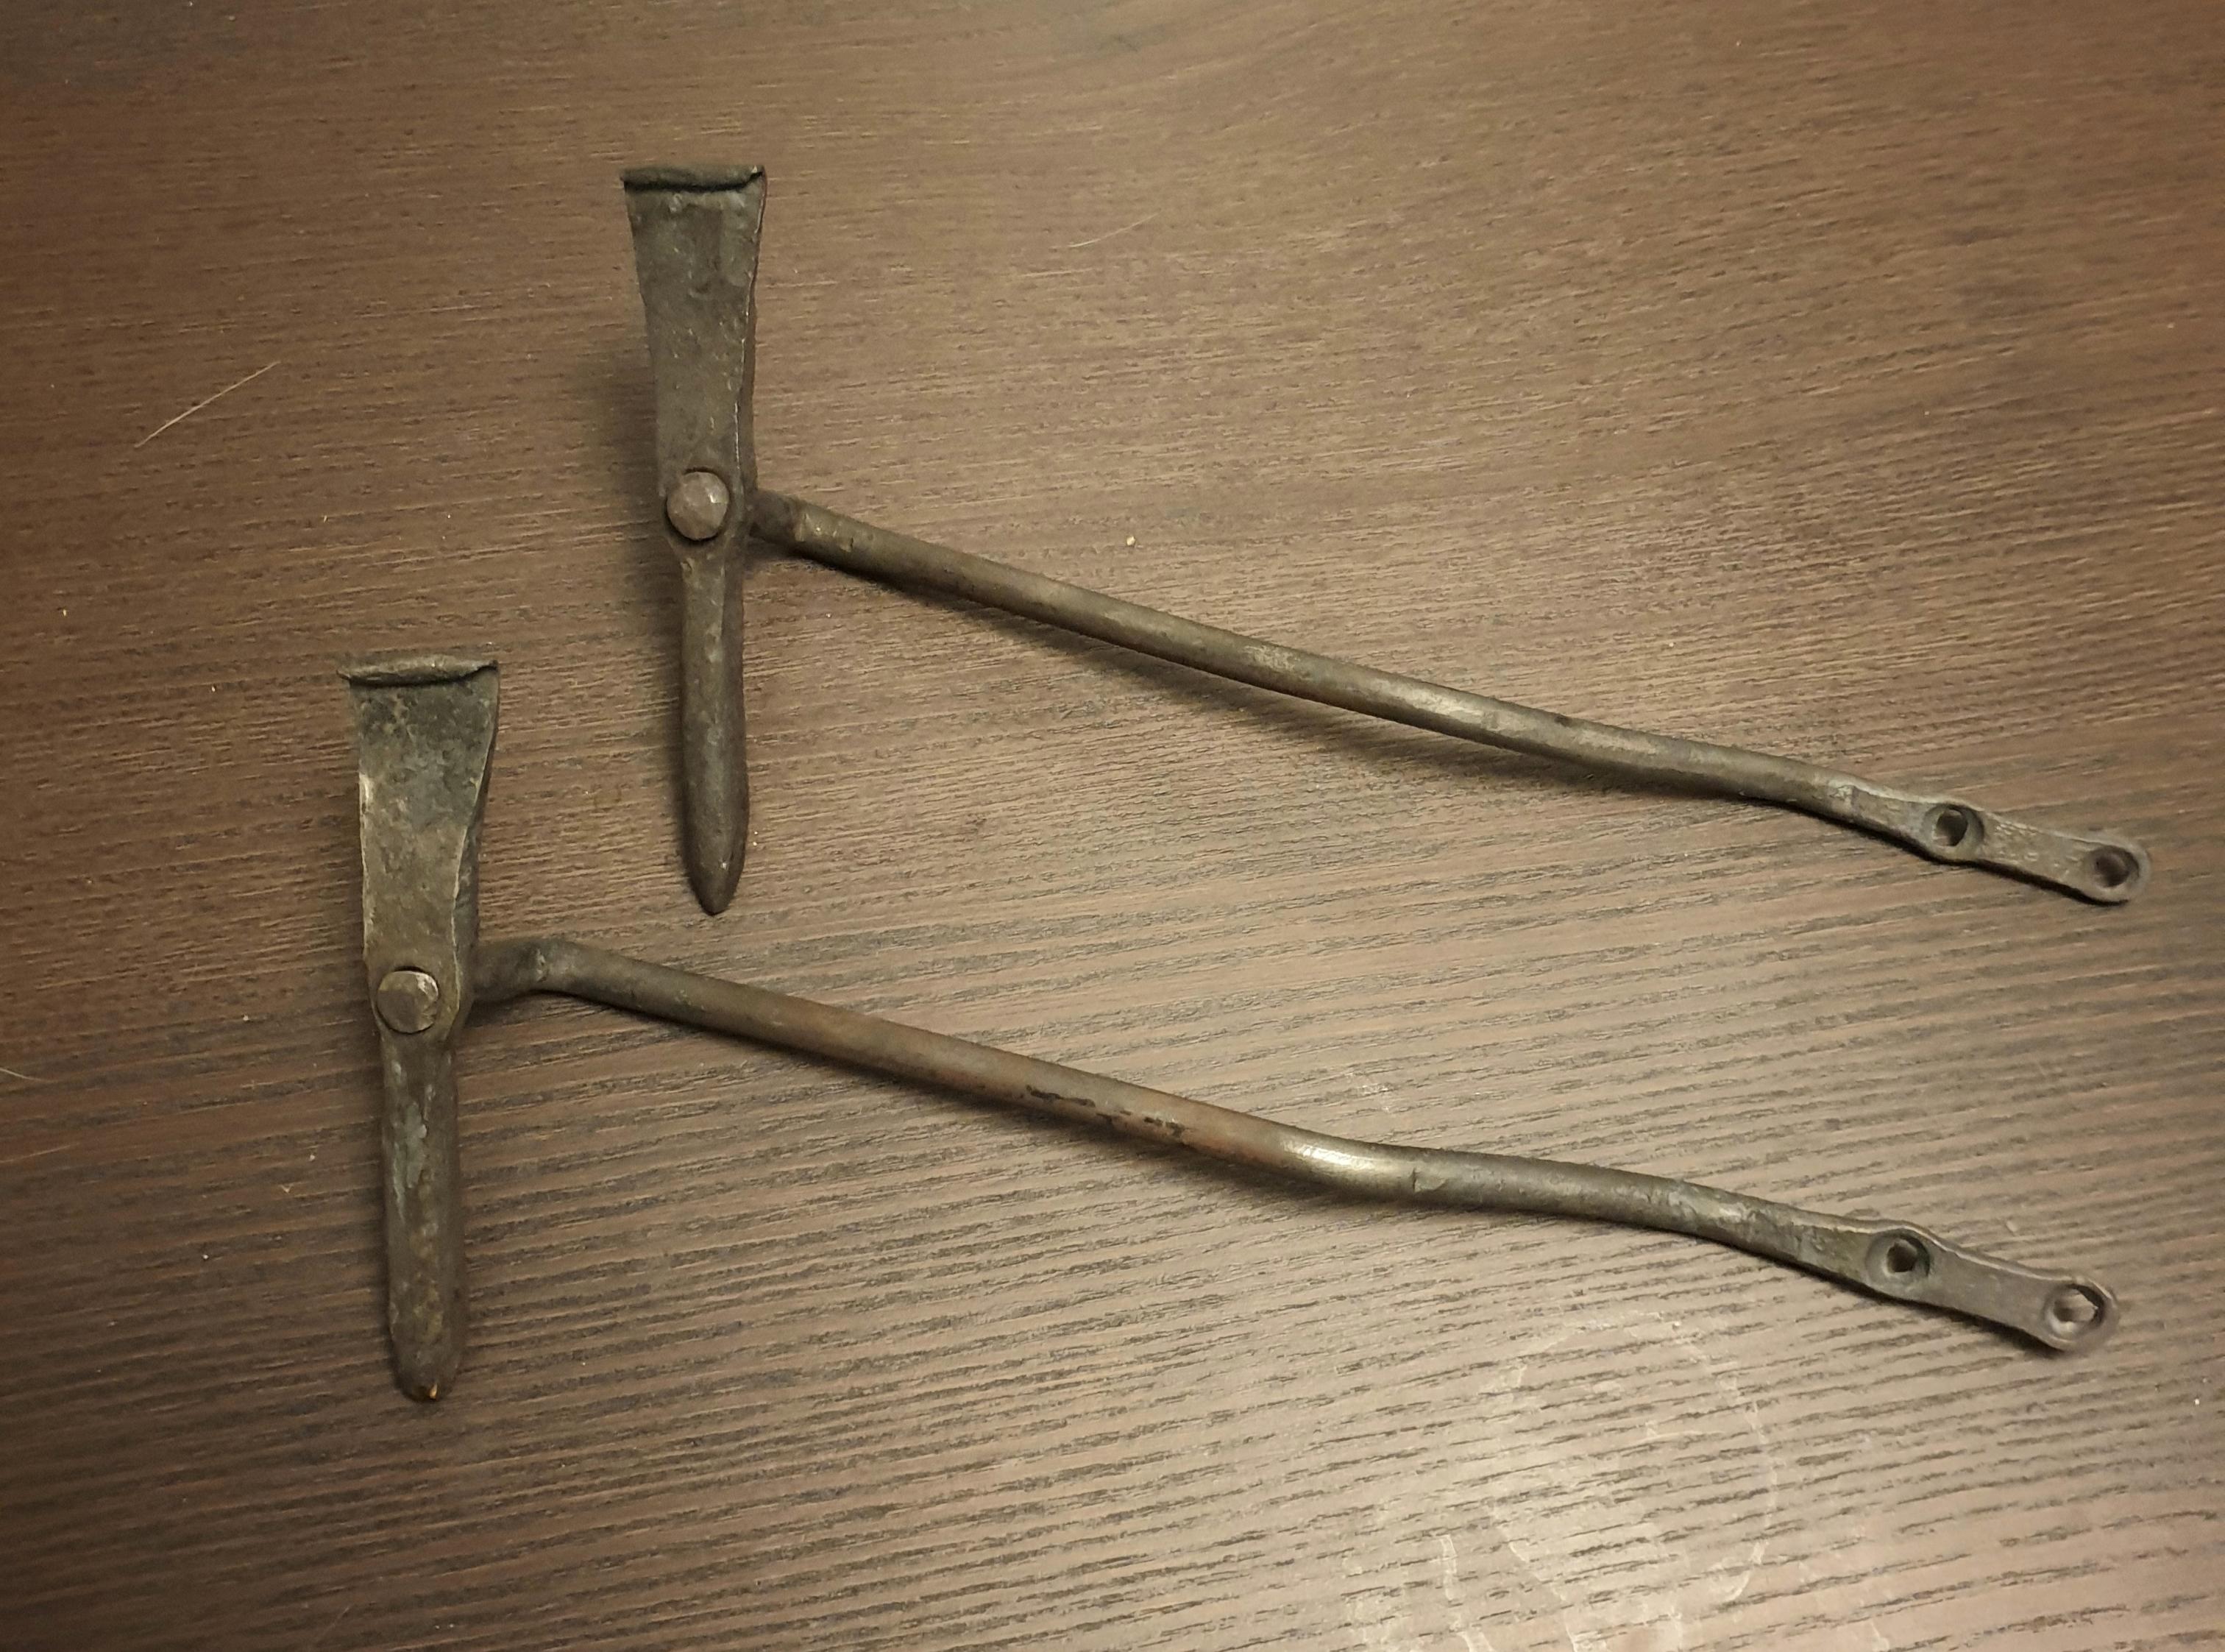
Thanks very much GuardedDig2! Things have been a little quiet in the forge lately- too many other things going on including decorating most of the house.... I have managed to finish my first little commision. My father in law maintains a very old house for a client. It has shutters and a couple of them had rusted so badly as to fail and drop off. He asked if I could replicate the originals. The piece at the end needed to spin freely and also rest upright, so weight at the bottom. Worked pretty well. Forging a shoulder for a tenon is really difficult. Is this possible to do well withour a guillotine or monkey tool? I made it work in the end.

-
Thanks everyone! Some great links to follow here. I'm excited to have a go... albeit how "authentic" my methods and results will be will be limited. I'm partially interested from the perspective of..... these "ancient" blacksmiths created incredible items with limited tools and materials, so maybe I can take inspiration from their methods to get things done in my own shop..... particularly given my lack of a london-pattern anvil .... and partially interested just because.... its interesting! JHCC- that book is especially good, thanks.... !
-
How to tell if a blower is tolerant of being restricted?
Jon Kerr replied to Jon Kerr's topic in Bellows, Blowers
Yep- albeit a noisy option?


Bellofanti-Distraction.jpg.1f629e15bc356642b8e1e1d3958faa57.jpg)
Bellofanti-Distraction.jpg.84f078a689620fe3a96f6d6bcb2411d2.jpg)
BellChallenge.jpg.970827b75345ea8b40a790b377b0c4a1.jpg)
BellChallenge.jpg.a7c35d35edc785bf931c126181ea64f2.jpg)
NewSnail.jpg.2d11bc1946ee40f69c1e3f0f5d49f532.jpg)
NewSnail.jpg.db090d1ec82cca256b94f47f5cf40d80.jpg)
ArmRing.jpg.2e85a52620a1ee0fdba1657a28645cfa.jpg)
ScaffoldBoardShelf.jpg.4131931d6fdcb52d275839783eb6aee2.jpg)
ForgeUpdate.jpg.0d75099f28a8ce51ee8d36c4d1ded40b.jpg)
SmokerHook.jpg.0c673725c2fe7ce397680a28a1296e92.jpg)
SmokerHook.jpg.79282294ddacc35810454781f92b7373.jpg)
ArmRings.jpg.f9967d2bdea2499f0779512c9b7b50cd.jpg)
ScaffoldBoardShelfBracket.jpg.6761bb6716c6b0315a279a462be0f993.jpg)
ScaffoldBoardShelfBracket.jpg.c9d41de4dce4360c364c067d68f3bcc3.jpg)