Binesman
-
Posts
327 -
Joined
-
Last visited
Content Type
Profiles
Forums
Articles
Gallery
Downloads
Events
Everything posted by Binesman
-
Reasonable priced source of Rigidizer
Binesman replied to ede's topic in Insulation and Refractories
I used red for the first inch of blanket and grewn for the second. I was feeling christmasey -
Reasonable priced source of Rigidizer
Binesman replied to ede's topic in Insulation and Refractories
Sorry typing quick on my phone on breaks at work. Just cope wit id -
Reasonable priced source of Rigidizer
Binesman replied to ede's topic in Insulation and Refractories
I thre silca in and stirred u till i got something akin to uncooked outmeal. Then i trowled it all on and let it sit for 2 days. I feel i may have used more silica then necessary. But it got the kob done. -
I will begin building my proper forge this weekend.
Binesman replied to Binesman's topic in Gas Forges
Definetly workimg and way better than the old one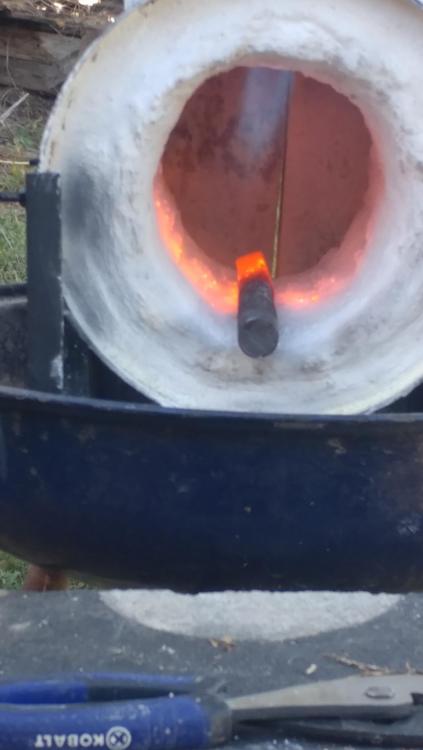

-
Setting Up Gas Forge, Ventilation Considerations?
Binesman replied to Iowajones's topic in Gas Forges
Welcome aboard. I would recomend building your own. Not only does it save some money but you get the satisfaction of using something you made. The forge body itself is pretty simple and all the supplies you need (except the shell) can be purchased from wayne coe for a good price. The burner is a bit more fidgety. Frosty has very clear instructions posted in his pinned tburner section and is a huge help in getting these built. -
Sorry 81 i posted an amazon link wich apparently is not allowed. Just do a search for fumed silca...thats what you want.
-
Like frosty said add water and food color to get rigidizer. Amazon link removed.
-
Reasonable priced source of Rigidizer
Binesman replied to ede's topic in Insulation and Refractories
https://www.amazon.com/gp/aw/d/B002K9R51Q/ref=mp_s_a_1_1?ie=UTF8&qid=1505220755&sr=8-1&pi=AC_SX236_SY340_FMwebp_QL65&keywords=fumed+silica&dpPl=1&dpID=41j192Mi1GL&ref=plSrch Add water -
I will begin building my proper forge this weekend.
Binesman replied to Binesman's topic in Gas Forges
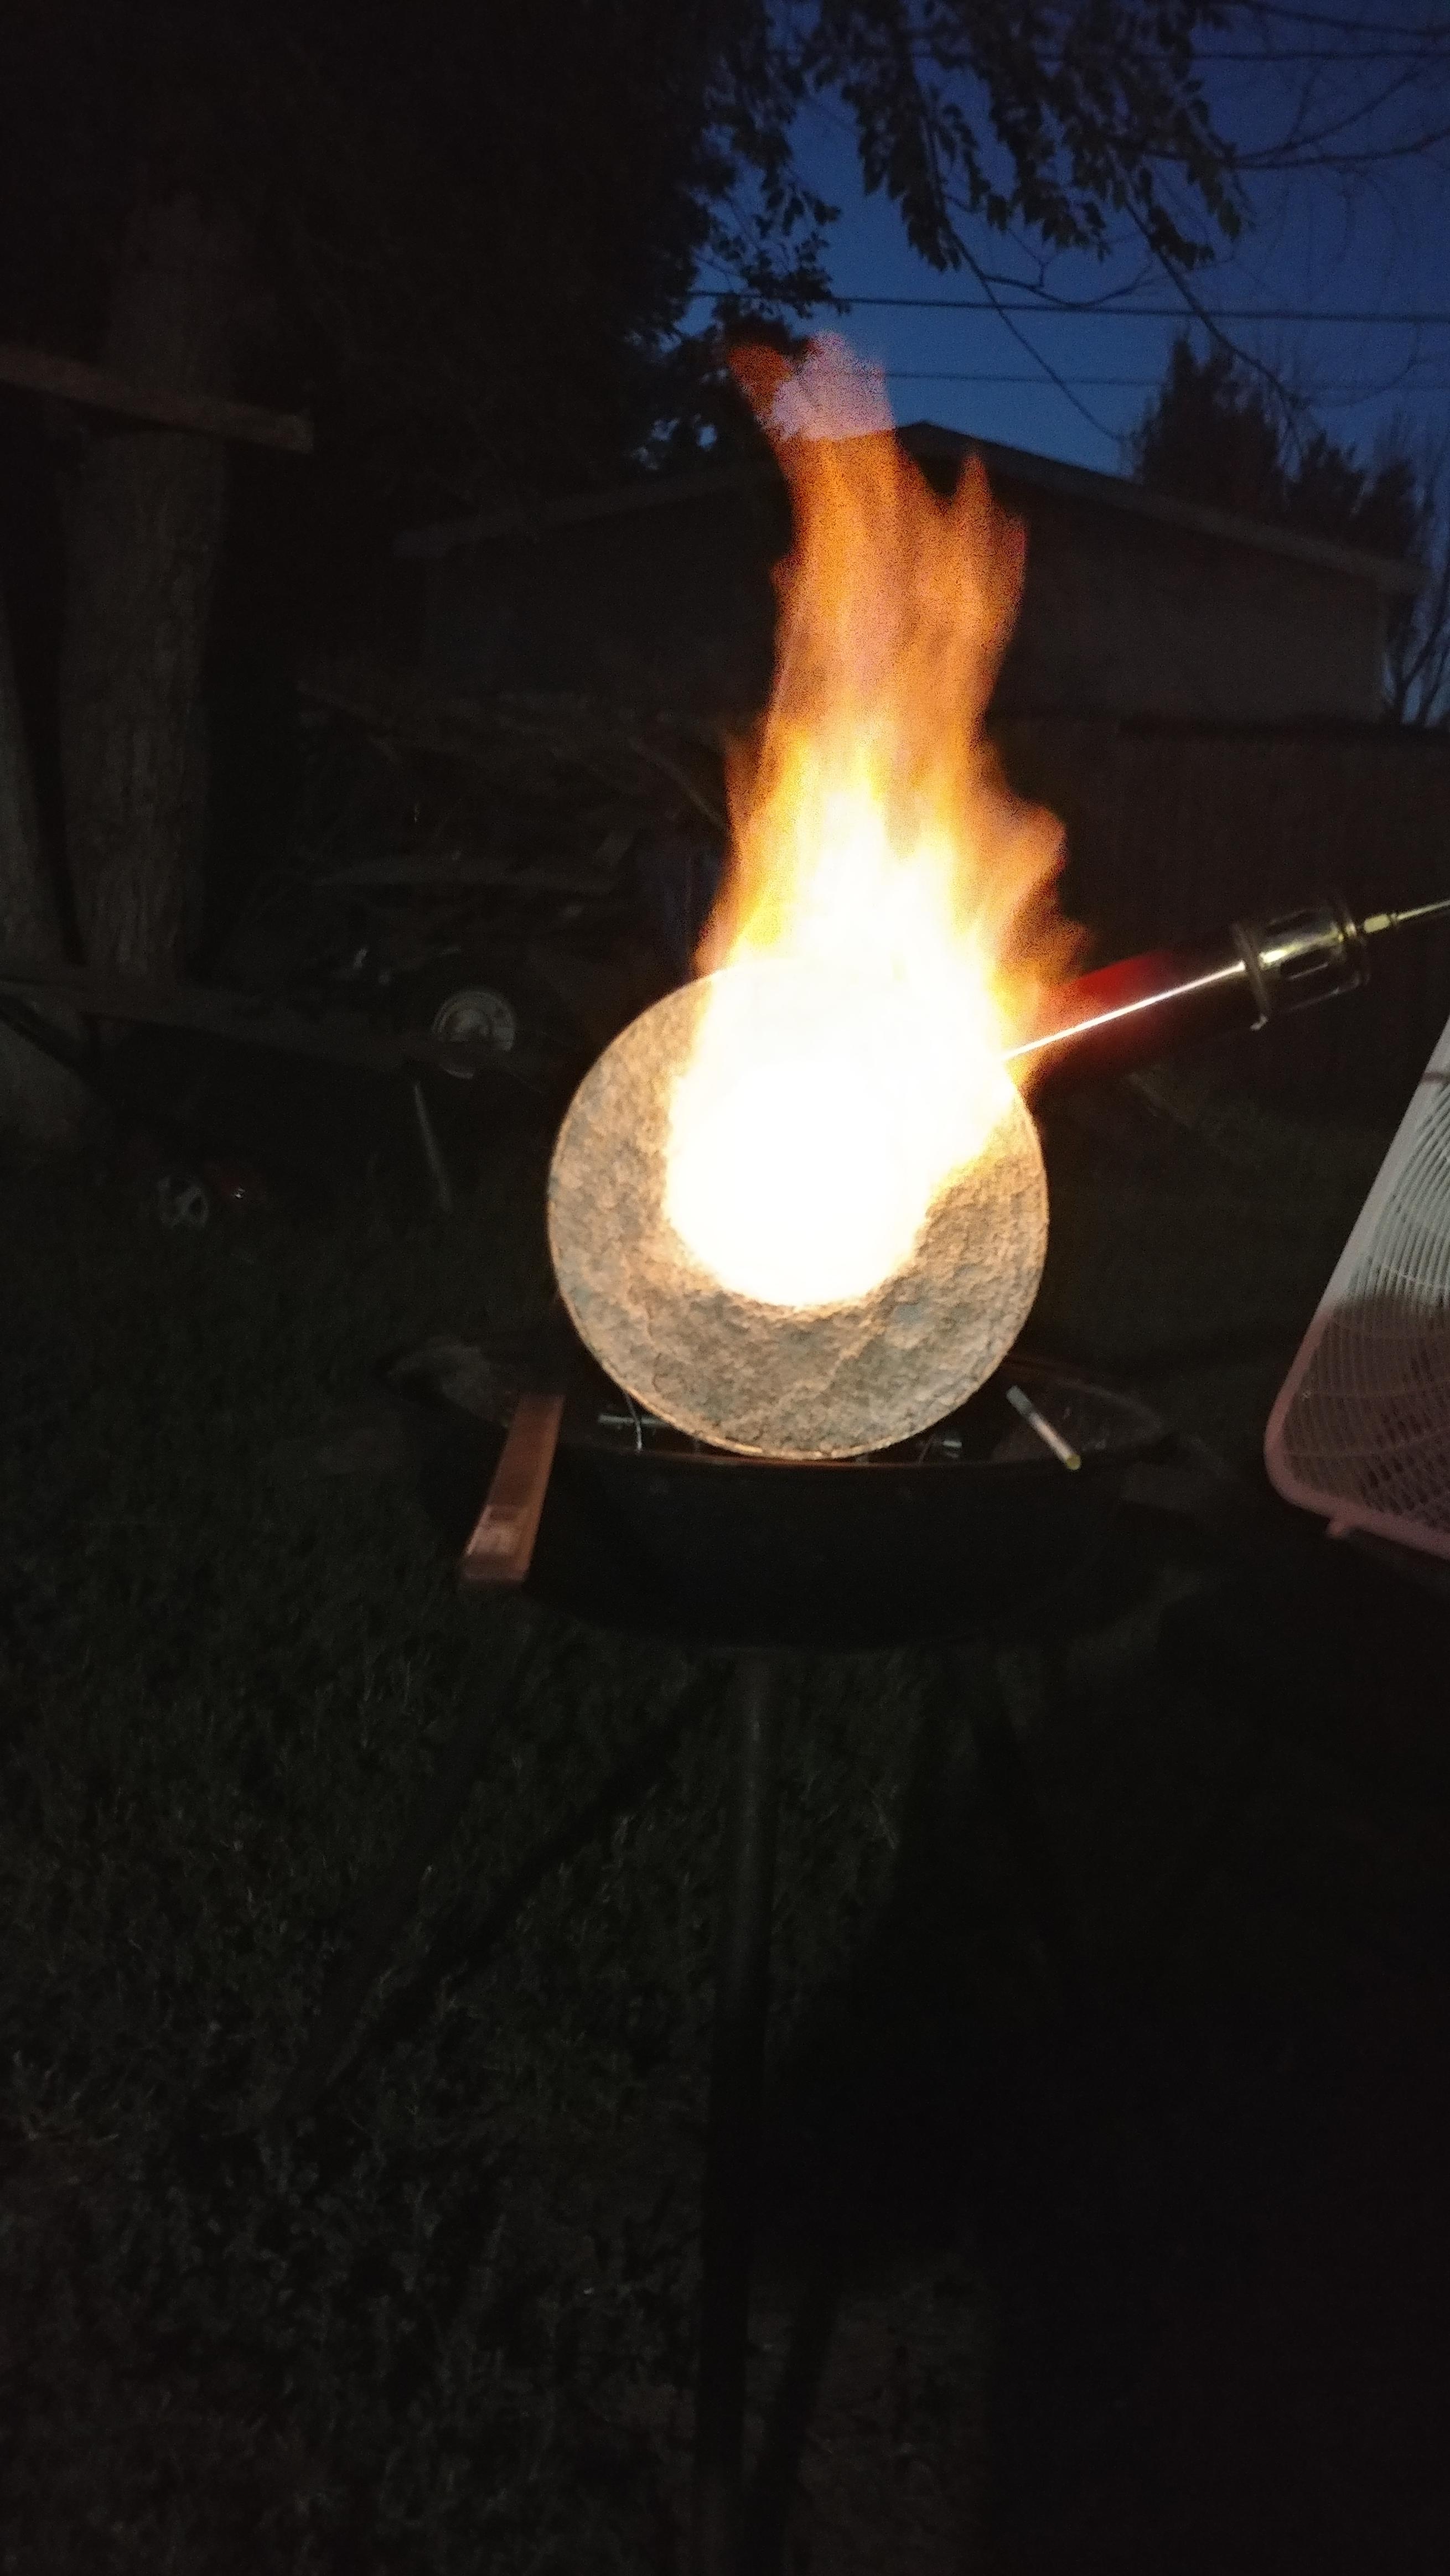
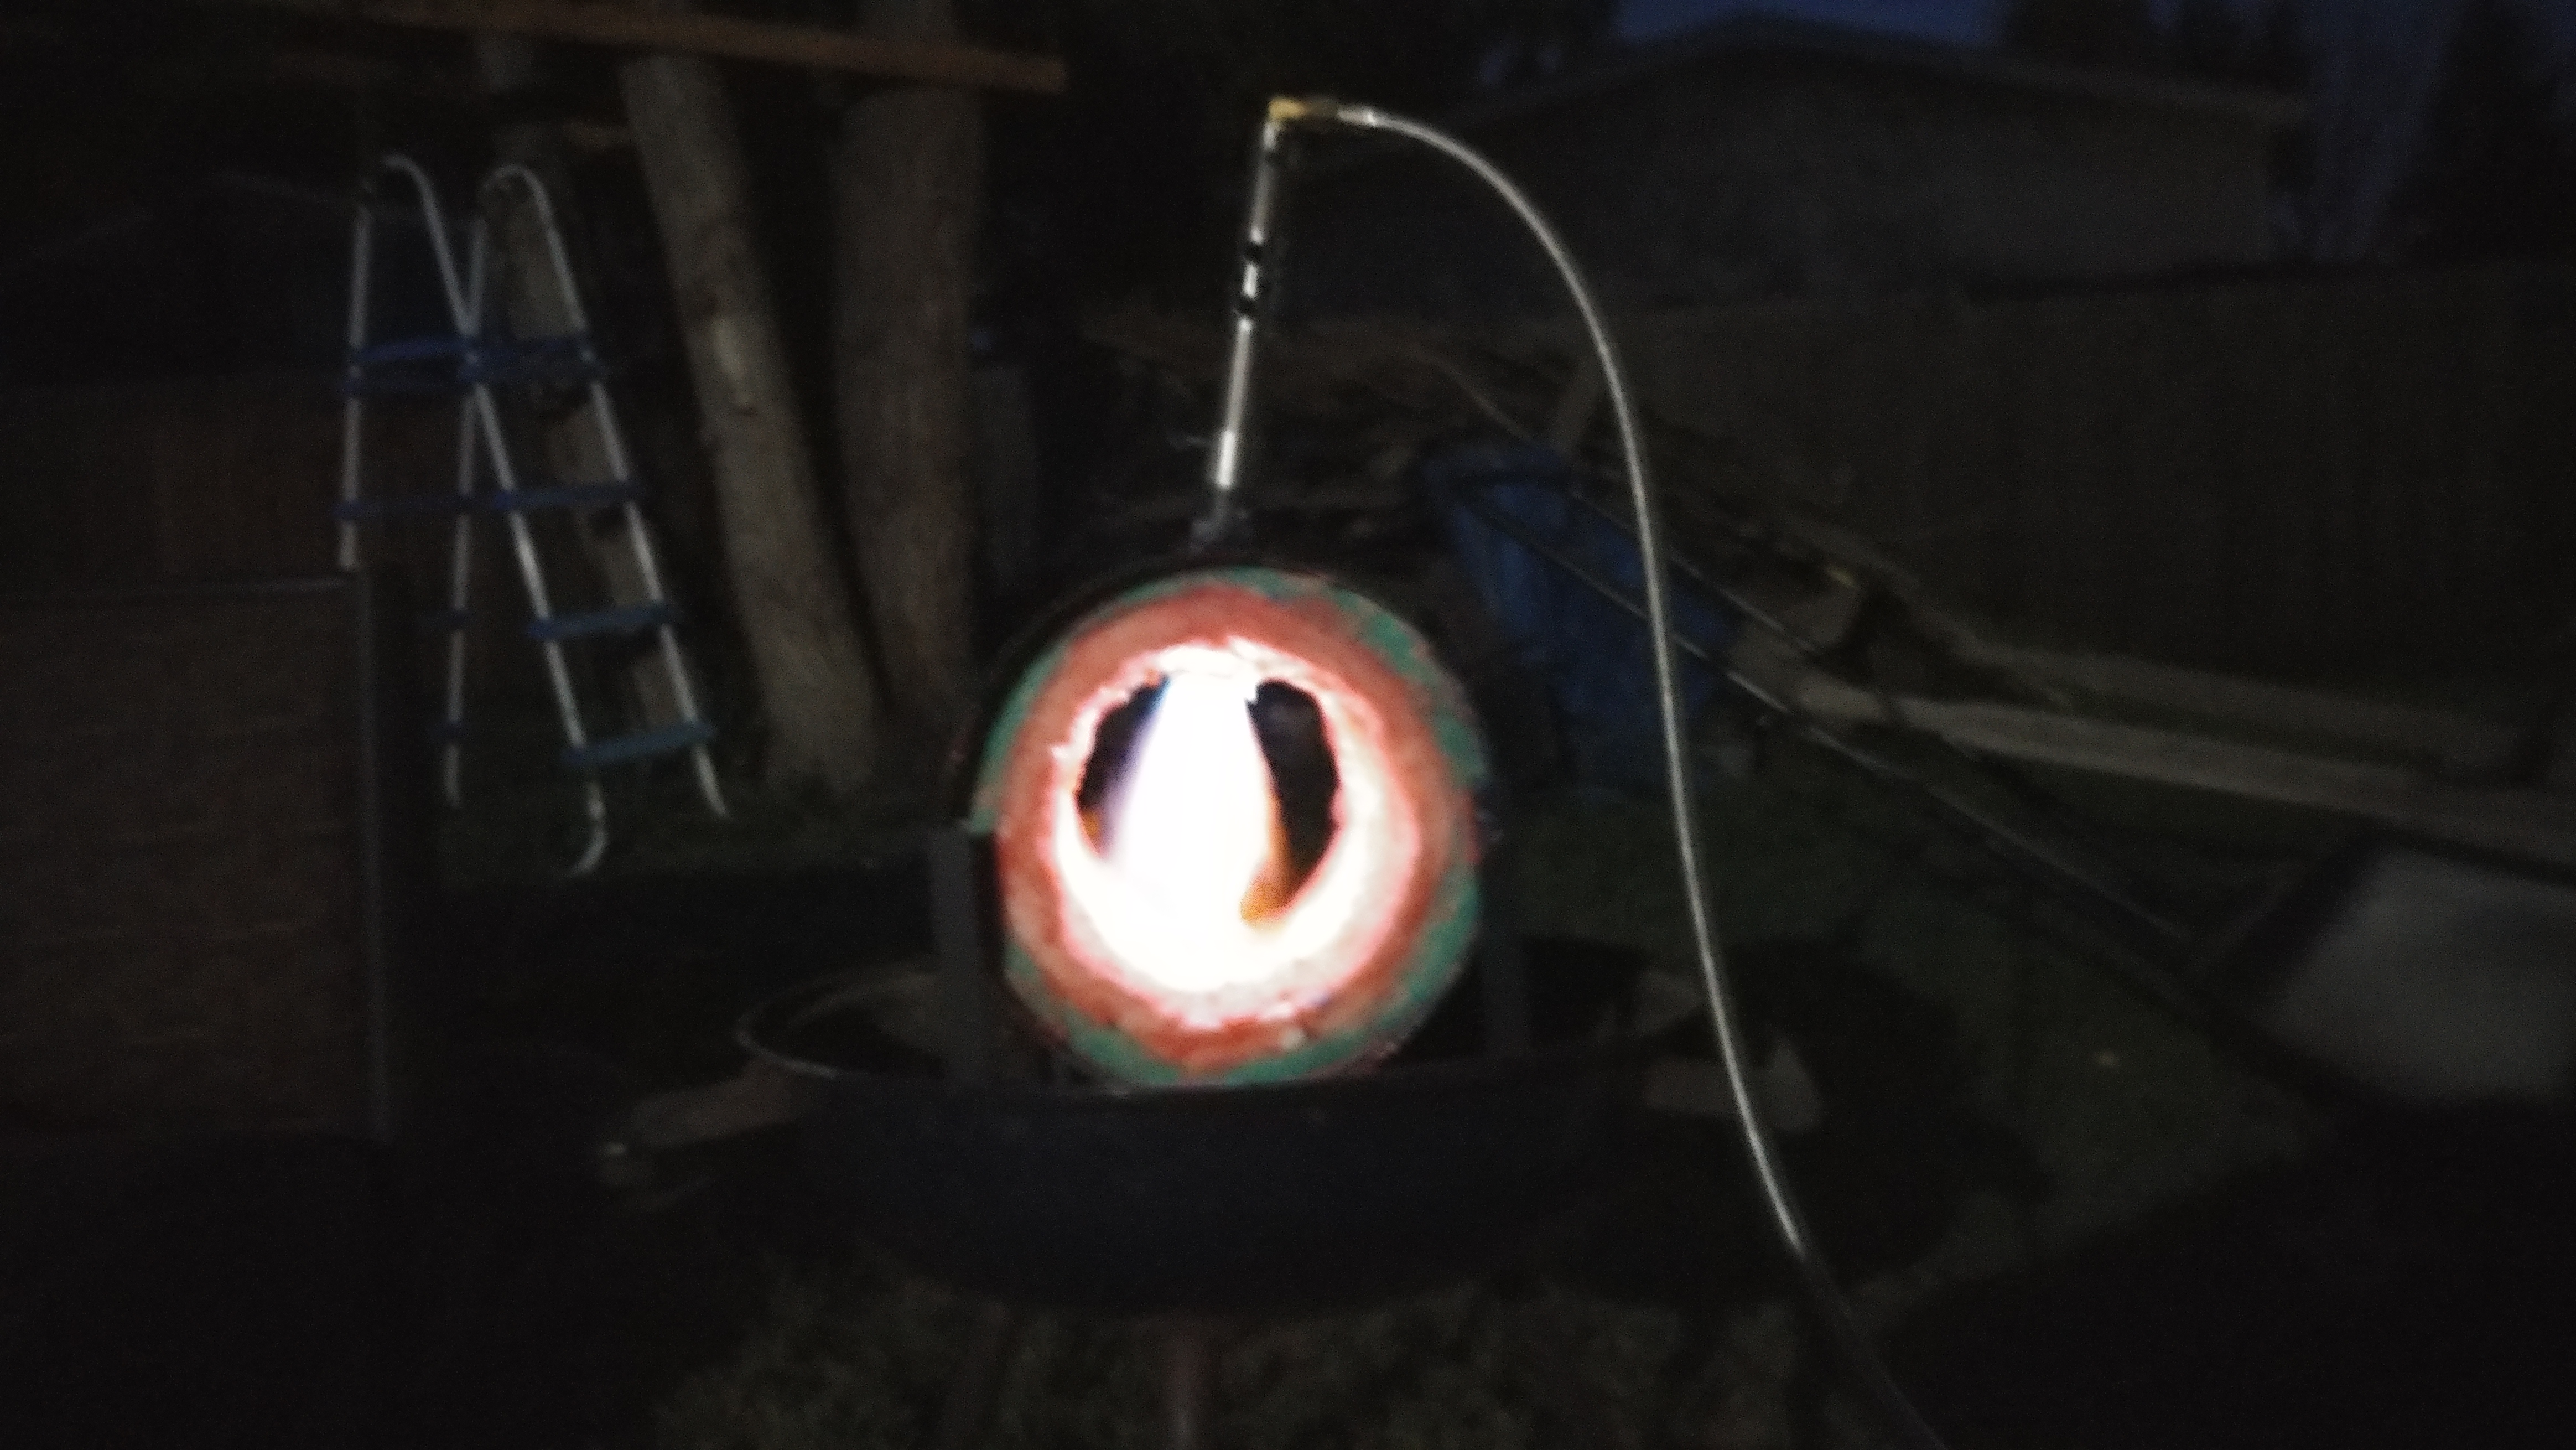
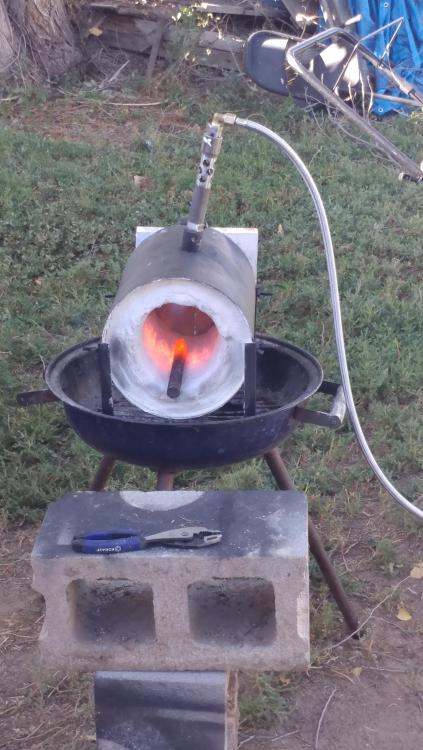
First picture is the first forge i built following youtube. It works but its a mess. Second and third image are of the forge im still building following the advice from you all (thank you all again). The burn was just a test burn and to help dry out the insulwool. Tomorrow i will castolite it. Wednesday ill plistex it and a week from today ill try not to accidentally melt steel.

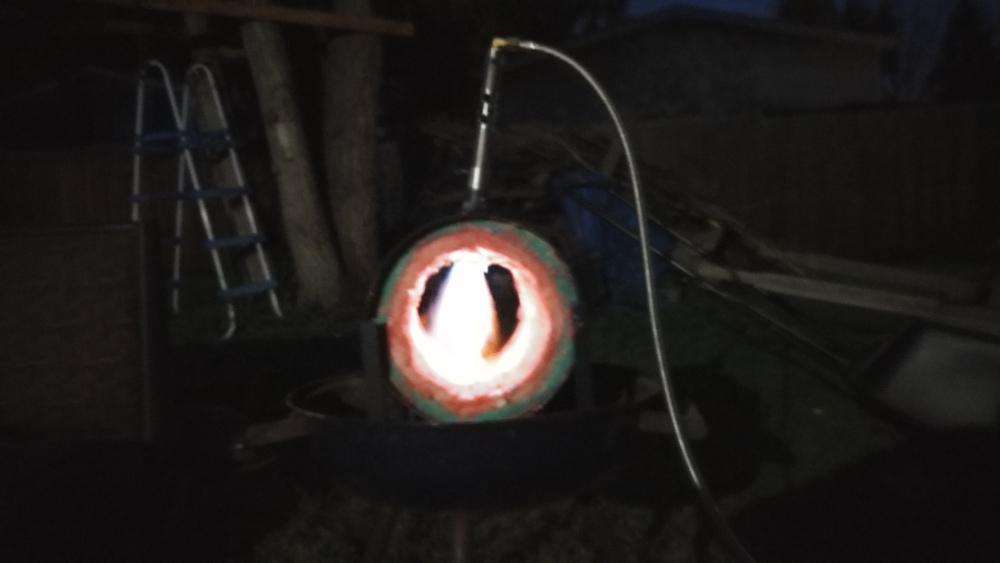
-
I will begin building my proper forge this weekend.
Binesman replied to Binesman's topic in Gas Forges
Will do frosty as always thank you. What about installing the second layer while the first is still wet? -
All of my parts have arrived. Thank you wayne for your awesome pricing and quick service in getting the parts out. Ill begin my build this weekend but i do have a few questions for you all. My questions are in regards to the insuwool. Ill be using 2 1" sections. After installing and rigidizing the first do i need to wait for it to dry or can i install the 2nd while the silca is still wet? next question is in regard to the second lining of blanket. My original intention was to wrap the entire forge with the second lining "except" for the floor where i will be using firebrick that will only be a 1" of wool. However reading the forge build instruction from wayne he says he uses 2" on the floor and only 1" on the roof. Do i have the idea backward should it be a heavier insulated floor?
-
Have to agree with charles. Theres just something special about using a tool you made to make something else.
-
I can only speak to this as theoretical as i have not done so personally. My understanding from research is that with 2 to 3 inches of insowool the outer shell is somewhat irrelevant (other then staying away from anyrhing with zinc). I have seen videos of people rolling insowool up holding it in place with a piece of wire and using it as a forge. Again this is theory and if im qrong hopefully someone with experience will correct me. Either way be sure to rigidize the wool before use.
-
81 welcome aboard. Like you i am pretty new to this whole thing. I built my first forge following youtube videos. It was a giant mistake and the knowledgeable folks on here pointed that out quickly. Im still using that mistake for the moment but only because im waiting on parts i ordered from wayne to arrive. As for price honestly i think building the forge priperly is going to be cheaper then following the youtube guide. Ill be making a square 6x6 10 inch long. With 2 layers of 1 inch thick insuwool each ridgidized. $27 for insuwool from wayne $5 for fumed silica from hobby loby. Ill put in about a 1/2 inch thick coating of kast-o-liye 30 $15 from wayne followed by a coating of plistix $20 from wayne. For the shell im going to use some 3/32 sheet metal 12x36 cost $10 from a local supplier. So before a burner im less than $100 in. Honestly i get the work on a budget but what ive found in my short time on this site is this. Listening to the wisdom of the people on here and doing it right is the cheap way.
-
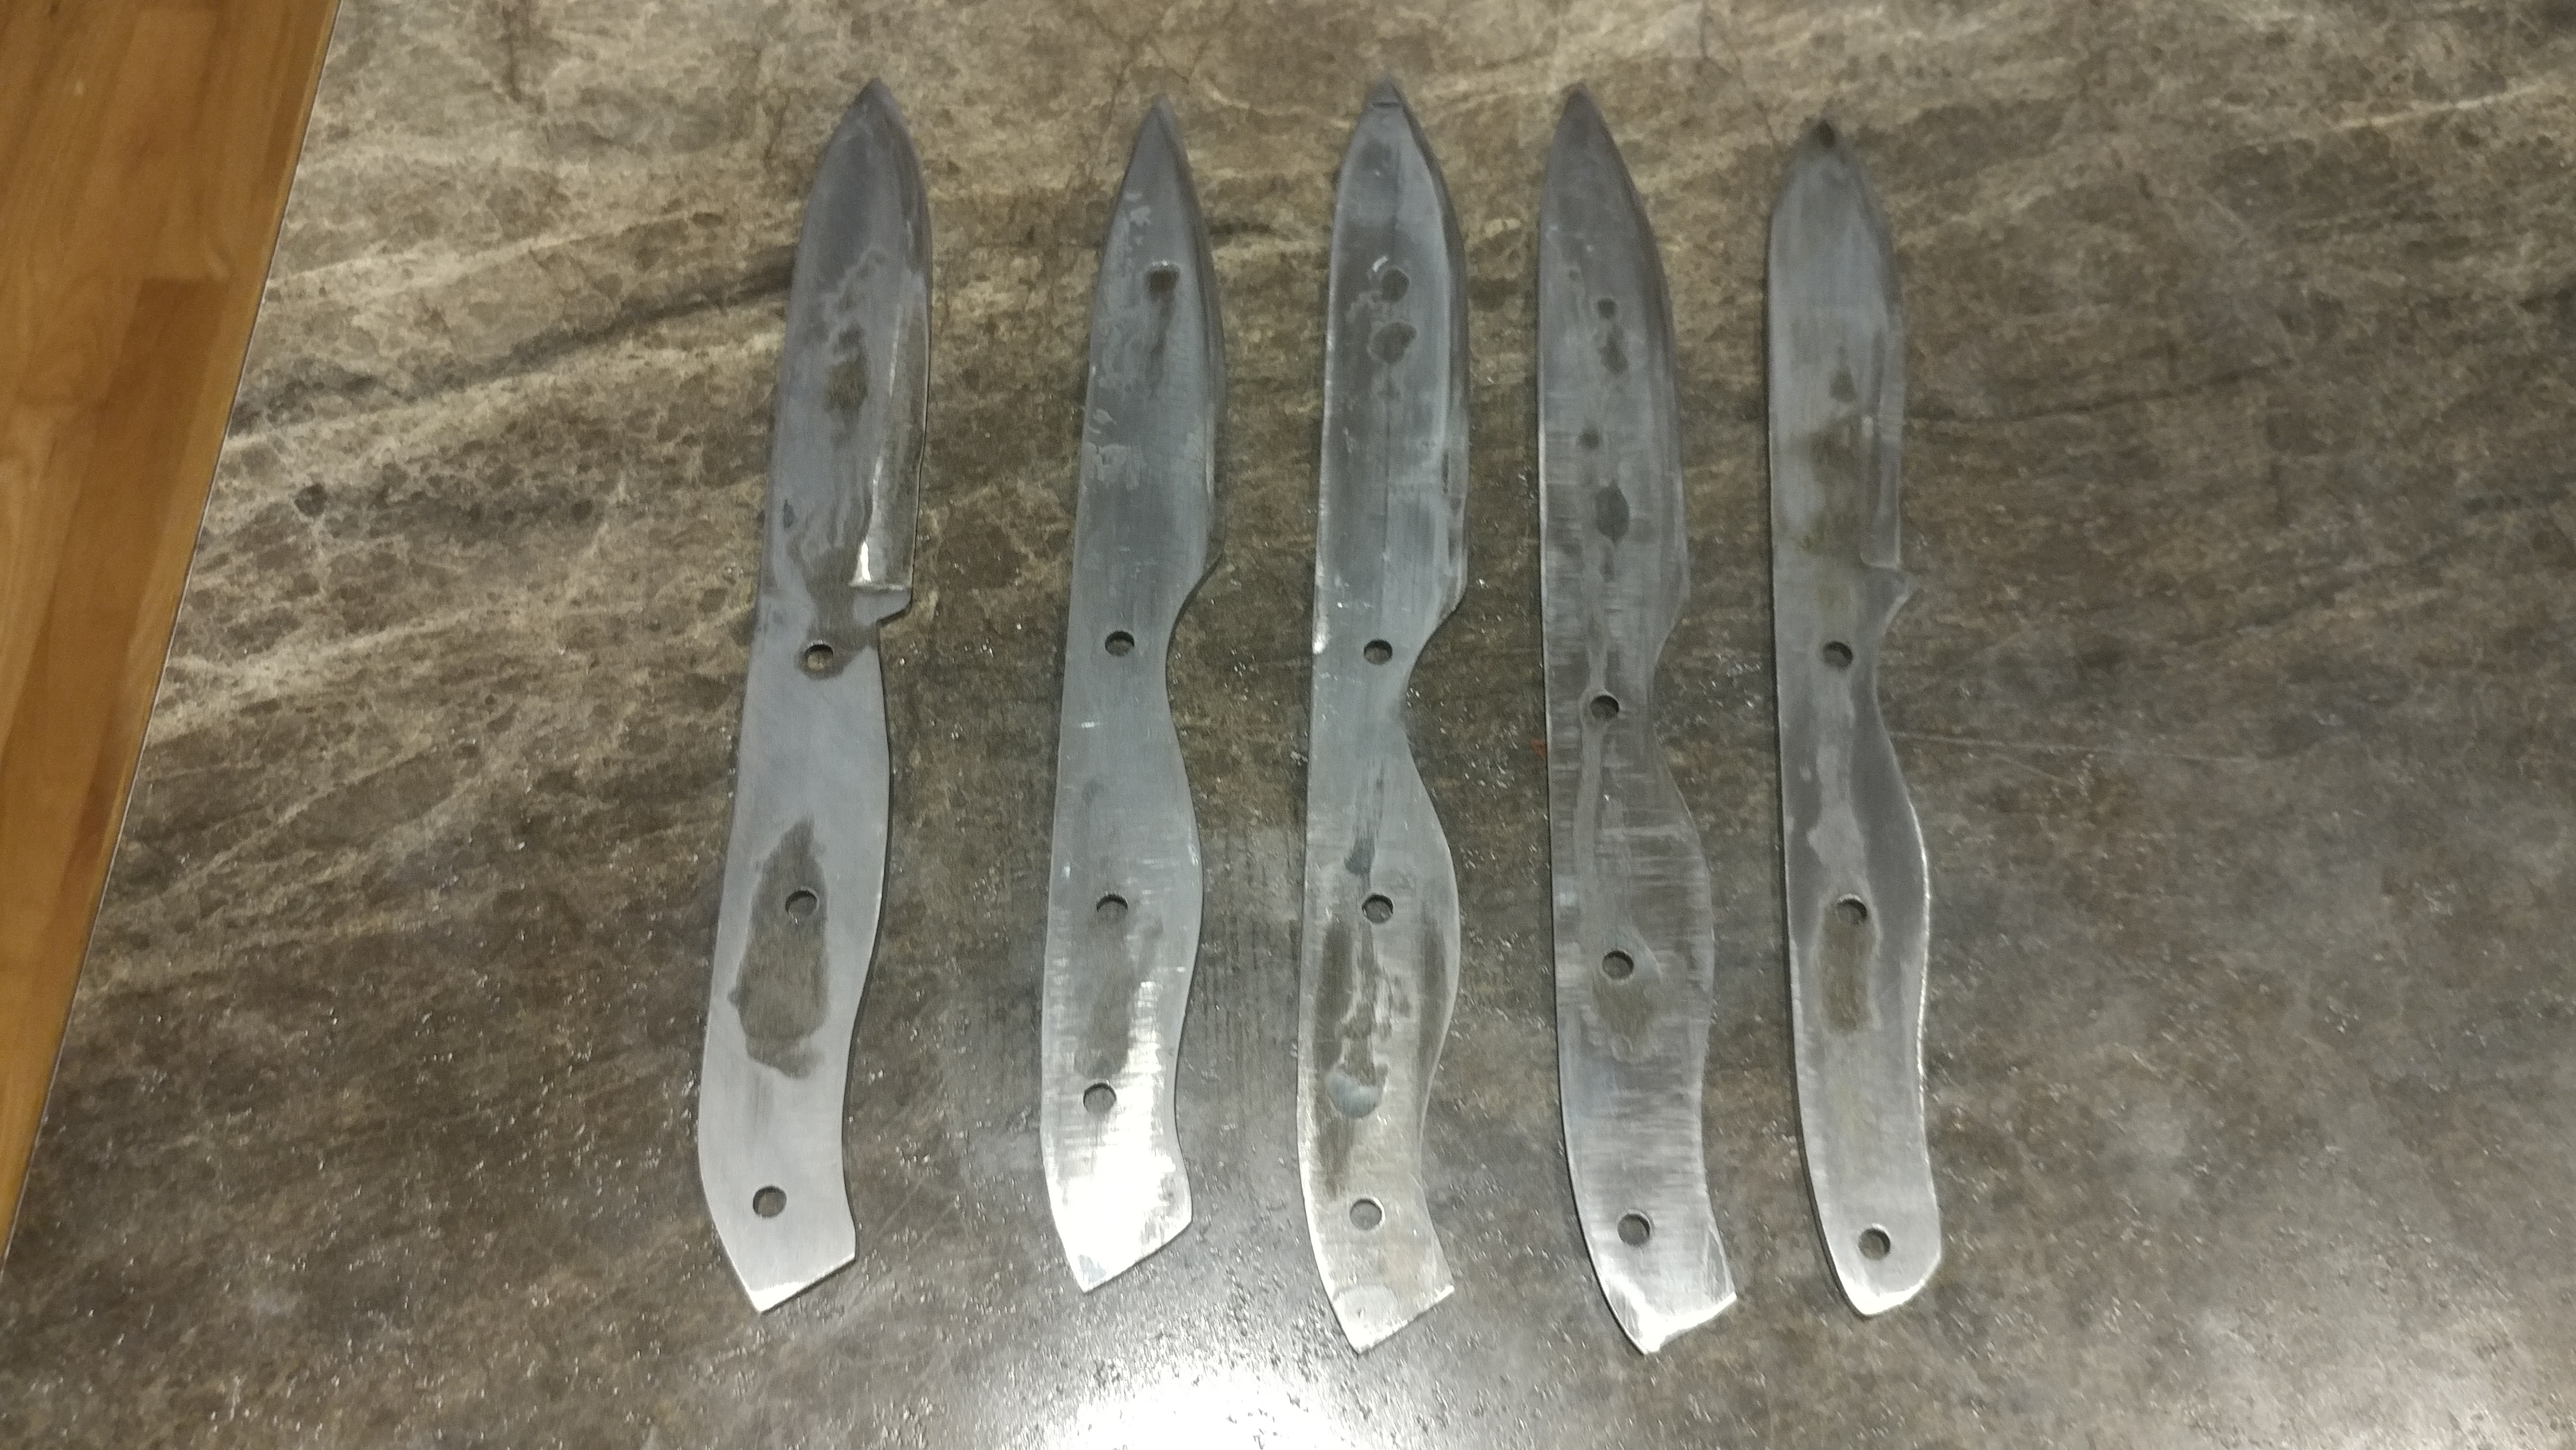
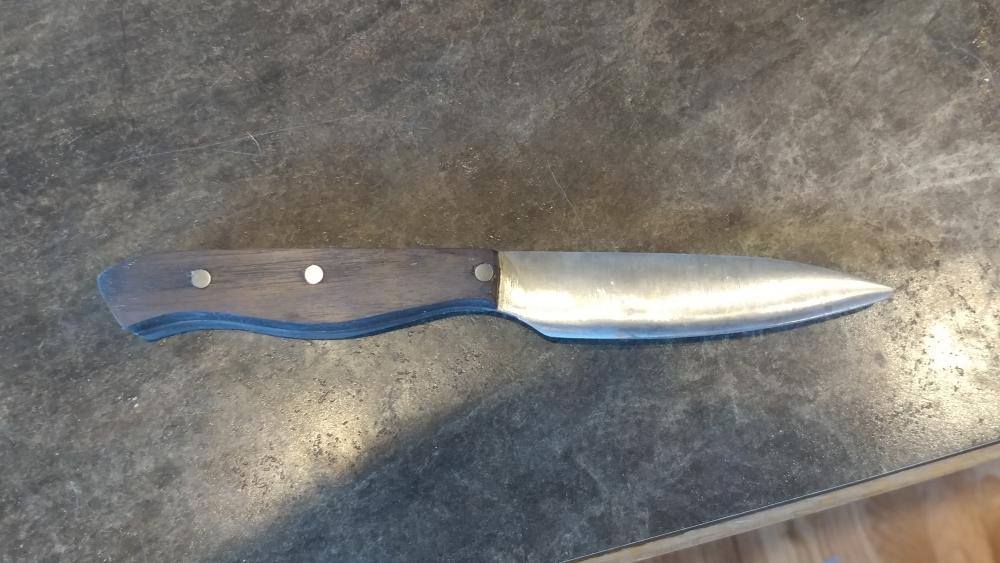
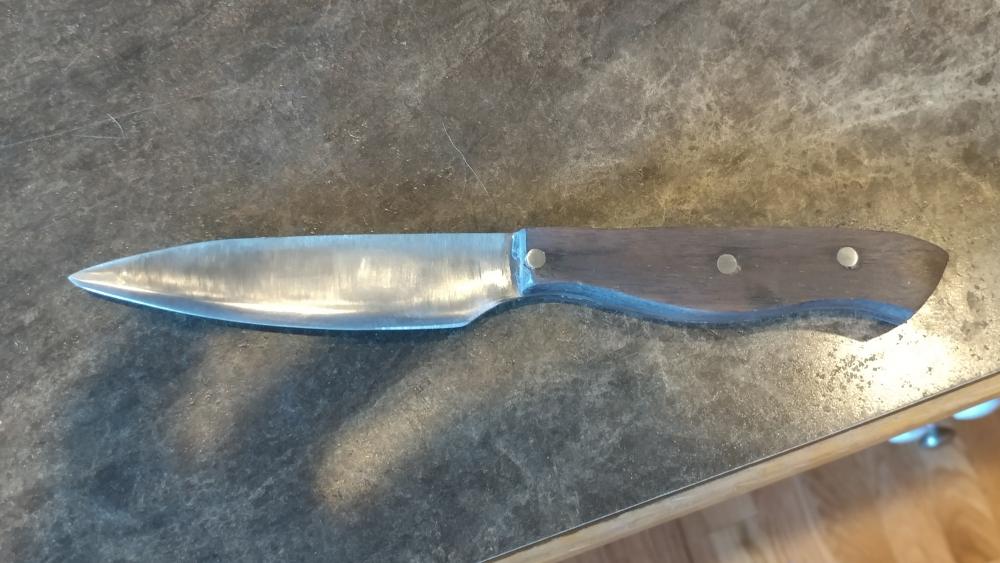
Lol yeah frosty i agree i think they are a little to big for a steak knife. However i drew up a bunch of patterns and that's what the wife wanted.
-
Its for a candle holder so it will be handled
-
I have a piece that i would like to keep the gold temper color on. Is there something i can do to help preserve the color?
-
Woop sorry. They slip out sometimes without me even realizing. Ive eaten a lot of soap in my day.
-
Already put my order in with wayne. I didnt order silica as i didnt remeber it. Thats why i was wondering about the waterglass. I have read that just water and fumed silica will make do? Also the point to the mailbox is to poke fun at my wife. Im a mailman and after about the 10th night in a row of heading out to the forge she said to me " all you do at work is shove xxxx in a box all day id think youd be sick of doing that by the time you get home". So since im building a new forge may as well make it a mailbox so i can tell her im just heading to work.
-
So I'm going to be taking people's advice and building a proper Forge the second go-round. I'll be doing two inches of kaowool with a castalite face and an IR. My questions are these. I have read that I need to spray the kaowool down with silica to rigidize it. Will waterglass work for this as it is just a mixture of silica and lye? Second question is a steel casing really necessary? With that much insulation is it possible to use say a mailbox? And yes I realize that that is somewhat of an impractical item but there are reasonings behind it.
-
Frosty Not to worried about blade failure. These are just steak knives for the wife. If we manage to put enough force on one to cause failure i need to stop buying such cheap steak.
-
Jhcc Good to know i will keep rivets further back in the future.
-
Love the advice of big schunk of steel on top and whack away. I am definitely capable of that. Nit measing yp in the first place...sound and accurate advice. However not in my nature. I managed to get one of the knives cleaned up and done today the rest will have to wait for next weekend.
-
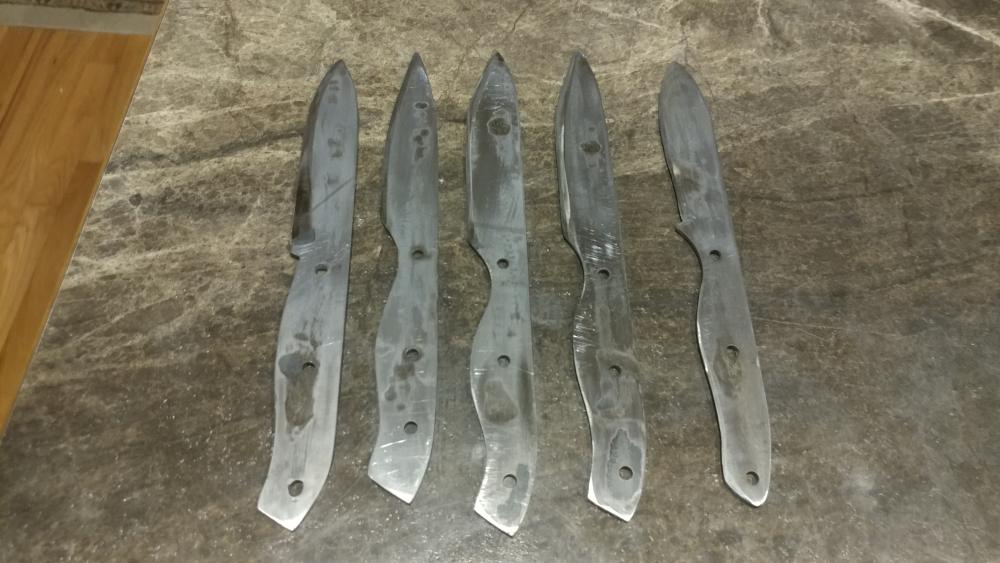
Looks like im still a lil heavy handed with the hammer and the grinder. These are currently hand sanded to 1kgrit. Any tricks on how to get rid of the hammer marks beyond just grinding the crud out of them?

-
Recomendations from the experienced please.
Binesman replied to Binesman's topic in Anvils, Swage Blocks, and Mandrels
Good to know ty all for the advice