Gillinomics
-
Posts
22 -
Joined
-
Last visited
Content Type
Profiles
Forums
Articles
Gallery
Downloads
Events
Everything posted by Gillinomics
-
Latticino, you are probably closer to the mark, the blade length is 9" for sure but the rest was an estimate, embarrassing certainly haha. The rear finger notch on the handle I find comfortable for my pinky/ring fingers to land when using a pinch-grip where the hand rests mainly above the ricasso, something that this chef does almost exclusively. If you are referring to the notch on the heel of the blade, that is simply aesthetics. The blade shape is designed to be a quick mince with a full roll. Davies, I have not made it to an IBA meeting yet, my work schedule prevents me due to high volume weekends, but I plan to make it out as soon as I can! I am in the metro indy area near Broadripple. Picker, I did not stabilize or dye this myself, it was purchased from a supplier online. I can certainly ask him what his methods are, however I can understand him being hesitant to reveal his process from my previous interactions.
-
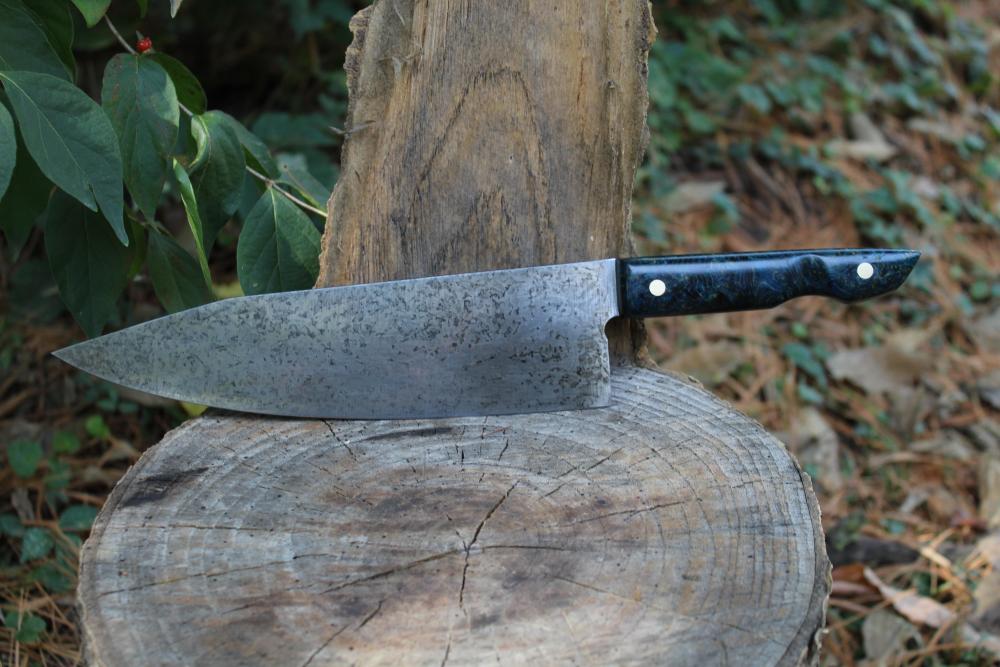
Thanks! Absolutely, I am a cook by trade so all chef knives that I make go through a week long test in the kitchen. edit: blade is 9", 12.25 oal
-
Hands down my best work to date, a chef's knife for a former employer that is going to a large cooking competition next week! Handle is stabilized and dyed box elder burl purchased from a supplier, blade is recycled 1930s era sawmill blade. For whatever reason the pins appear misaligned due to the shape/angle of the handle. I do most of my handle shaping with a rasp and sandpaper, if anyone has pointers for a nice glossy finish they'd be appreciated. I treated with boiled linseed oil and a butcher block wax mix.
-
I find that doing at least a 6+ hour soak in a coffee etch is ideal. I usually return to clean the blade off with isopropyl every hour or so helps achieve a nice dark, even etch. The patina from working with it afterwards looks really cool too, the etch stays put with no problems. As others have said carbon content may be a factor, but your welds in the final blade look like they held up nicely!
-
Very impressive! I'm up to 40 layers on my second pattern weld, I can only pray that it comes out 25% as nice!
-
I've come across multiple non-zirconia hones that were sans-knurling, and they work just fine. I'm with Kozzy in thinking you would want a fairly high rockwell value compared to the knives you've produced. Perhaps even a few passes of hot sanding to give the rod some "grit" prior to HT and do a snap temper to prevent over-tempering. (by no means am I an expert, just my flow of consciousness on the matter)
-
Very nice, and that's why we're craftspeople first with some scientist secondary, we're allowed to let things go unexpectedly.
-
I've worked in several kitchens around the city where I live, so I luckily have a large group of people eager and willing to test my work. I usually leave them for a week or two and ask that they don't hone or strop at all. This also has the helpful side effect of advertising my work and nabbing a sale or two.
-
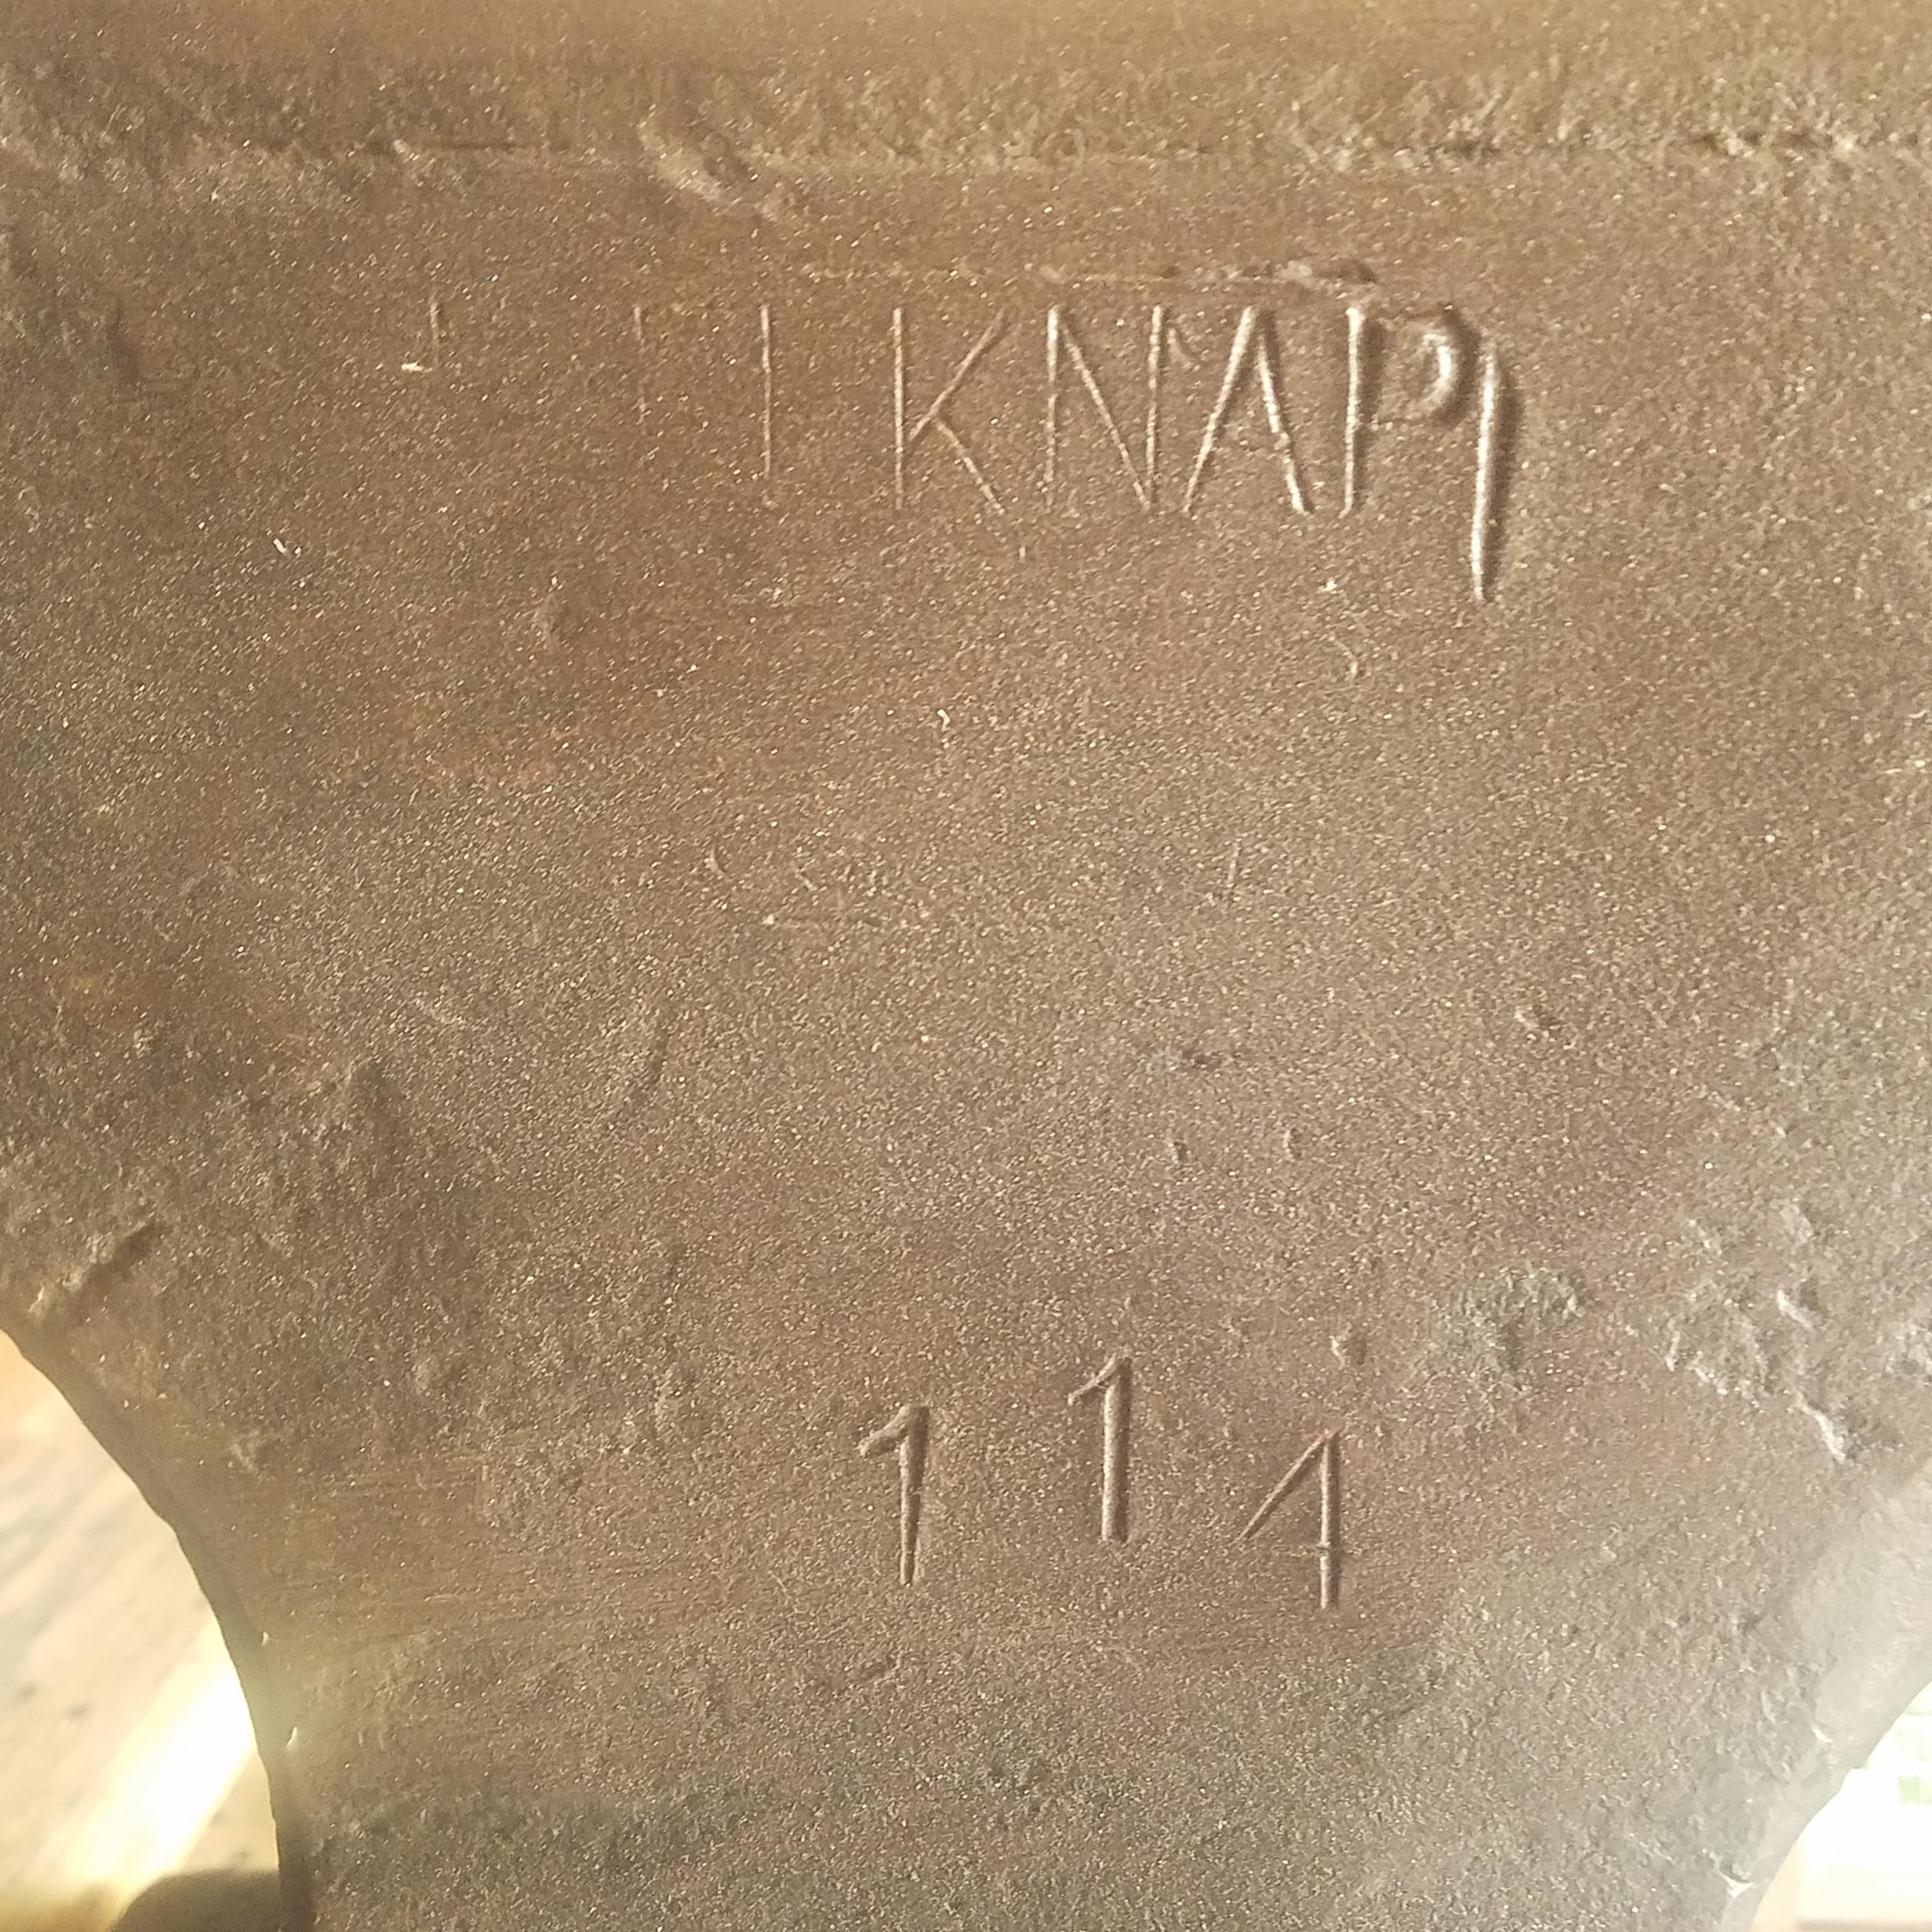
sure thing, unfortunately the side logo was poorly stamped intially and time has not helped it stick around, but here's what I can get.

-
awesome, Thanks for the info!
-
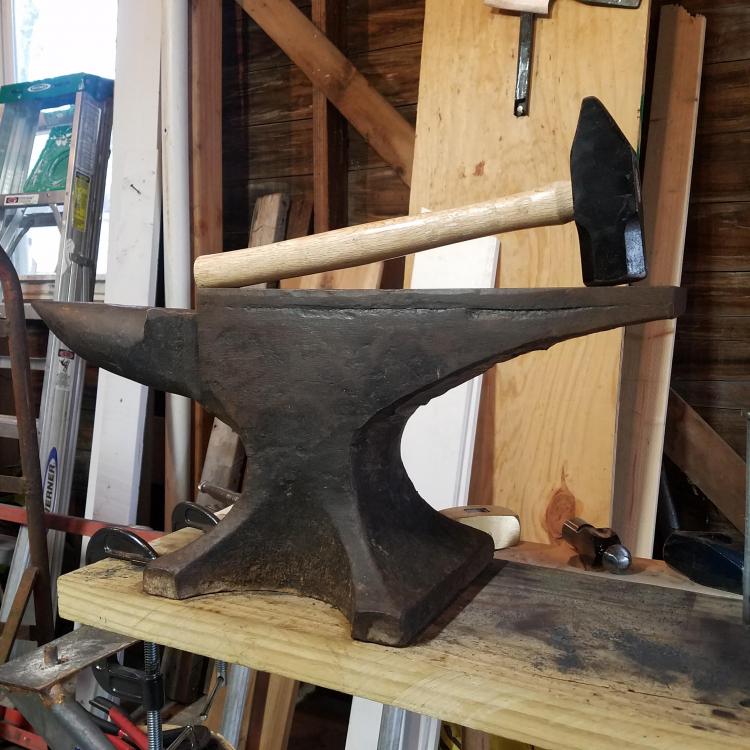
Here is the only picture that I currently have of it, it does have the pill indent on the underside and has the steam hammer marks on the underside of the heel.
-
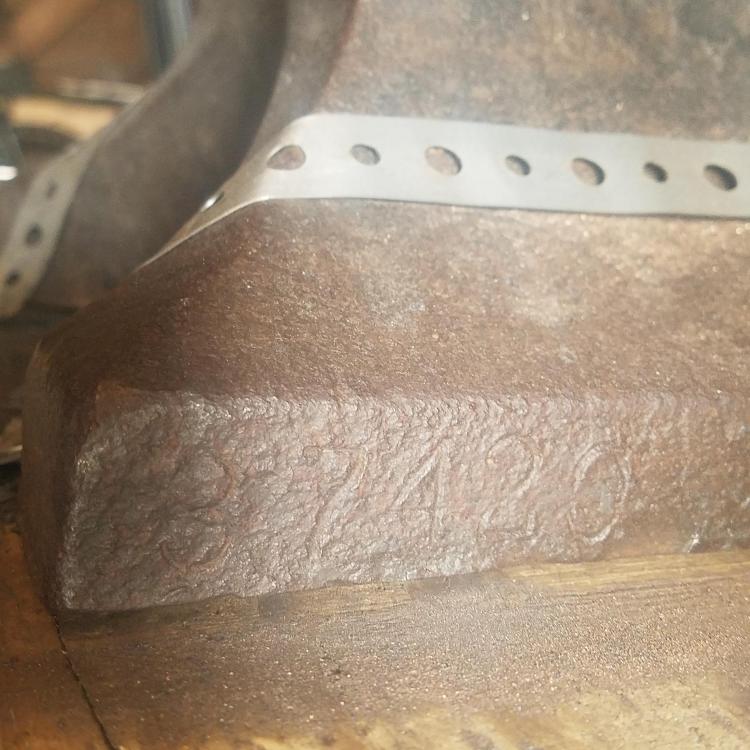
I recently inherited my grandfather's Belknap anvil. The serial number is either 87420 or 37420, anyone out there with a copy of AIA that could shed some light on the history? My family is from Louisville and the "knap" is the only identifiable part of the original logo stamp, so I assume it was a licensed A&H from the early 1900's. The edges are still sharp and the striking face is dead flat, I never knew my grandfather so I feel extremely lucky to have this piece of history connecting us.
-
Tips for combating moisture in a shop
Gillinomics replied to Gillinomics's topic in Shop Tips n' Tricks
Thanks for the replies, all good advice; especially the part about getting away from the humidity all together! I know the rust isn't a major hazard to the anvil, but my day job can keep me out of the shop for days at a time and I always feel a little guilty when I see that rust starting to form -
I'm having problems with moisture condensating on surfaces in my shop, namely my anvil and (propane) forge. (I know this is not a good thing for the liner, I take extra cautions to preheat slowly) I started working out of my detached garage around 3 months ago in the dead of winter and this issue had not occurred to me. Now that spring is -kind of- here in the Midwest we are seeing rain almost every day. A powered dehumidifier is not sufficient for the space, and I'd rather not throw more money into my electric bill. Does anyone else have this issue, and what are your solutions?
-
Thanks for the input everyone! I am gathering the parts I need and I'll get back with an update when they're complete.
-
Hi - longtime lurker, first post. First off, thank you for sharing your wealth of information Frosty. I am an apprentice blade smith and am slowly bringing my own shop together, and have been considering building 2 Reil type burners for my 280 cu forge, but the plans for your T burner have me intrigued. I would like to run two burners but have a singular brass or iron nipple running perpendicular through the T section with a cap on one end, In your ratio you state that tip distance from start of burner tube is .5 x D, is it possible to forgo the MIG tip all together and use a #57 bit drilled directly into the nipple, assuming that it runs perpendicular through the T and in parameters with this ratio rather than descending from the top? Or would this create unwanted turblence? I would imagine the vortex effect would be strong enough to negate this, but admittedly know very little about this subject with the exception of knowledge garnered here. I am on a tight budget and trying to work with parts that are available to me, but if this is definitely an o-no situation I can wait to build my burners to spec.