TastefullyPeenedIronWorks
-
Posts
65 -
Joined
-
Last visited
Content Type
Profiles
Forums
Articles
Gallery
Downloads
Events
Everything posted by TastefullyPeenedIronWorks
-
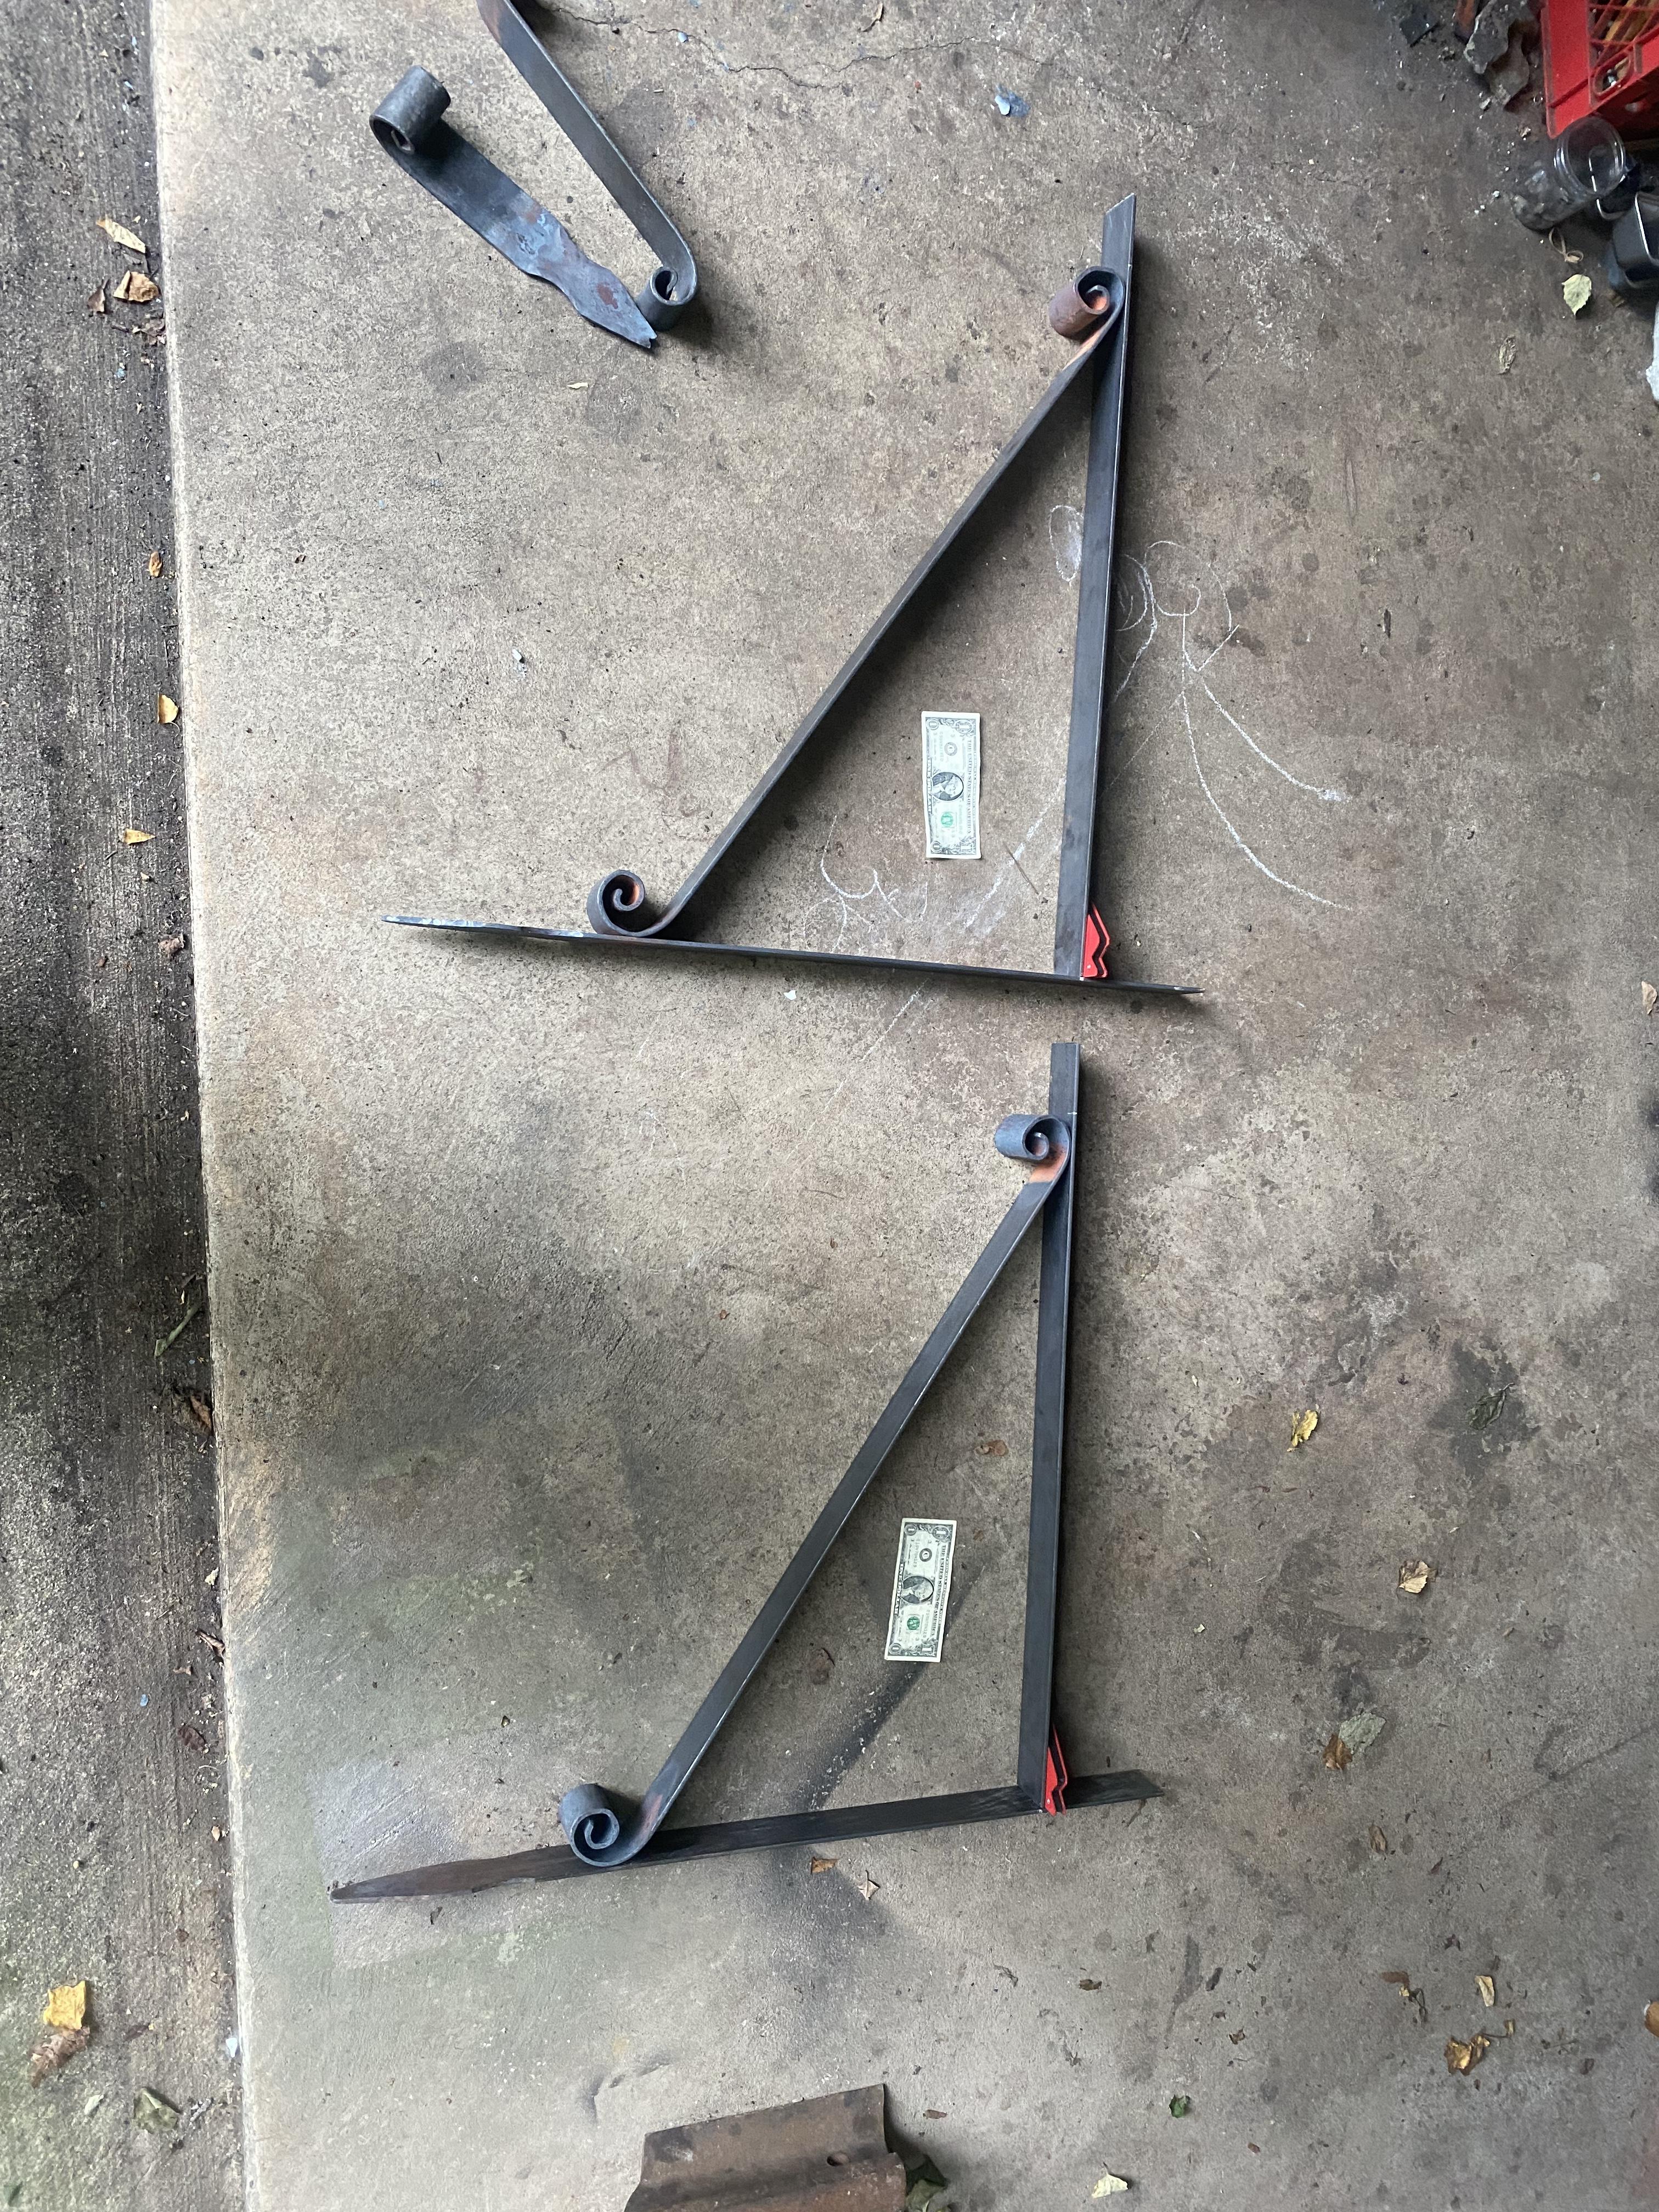
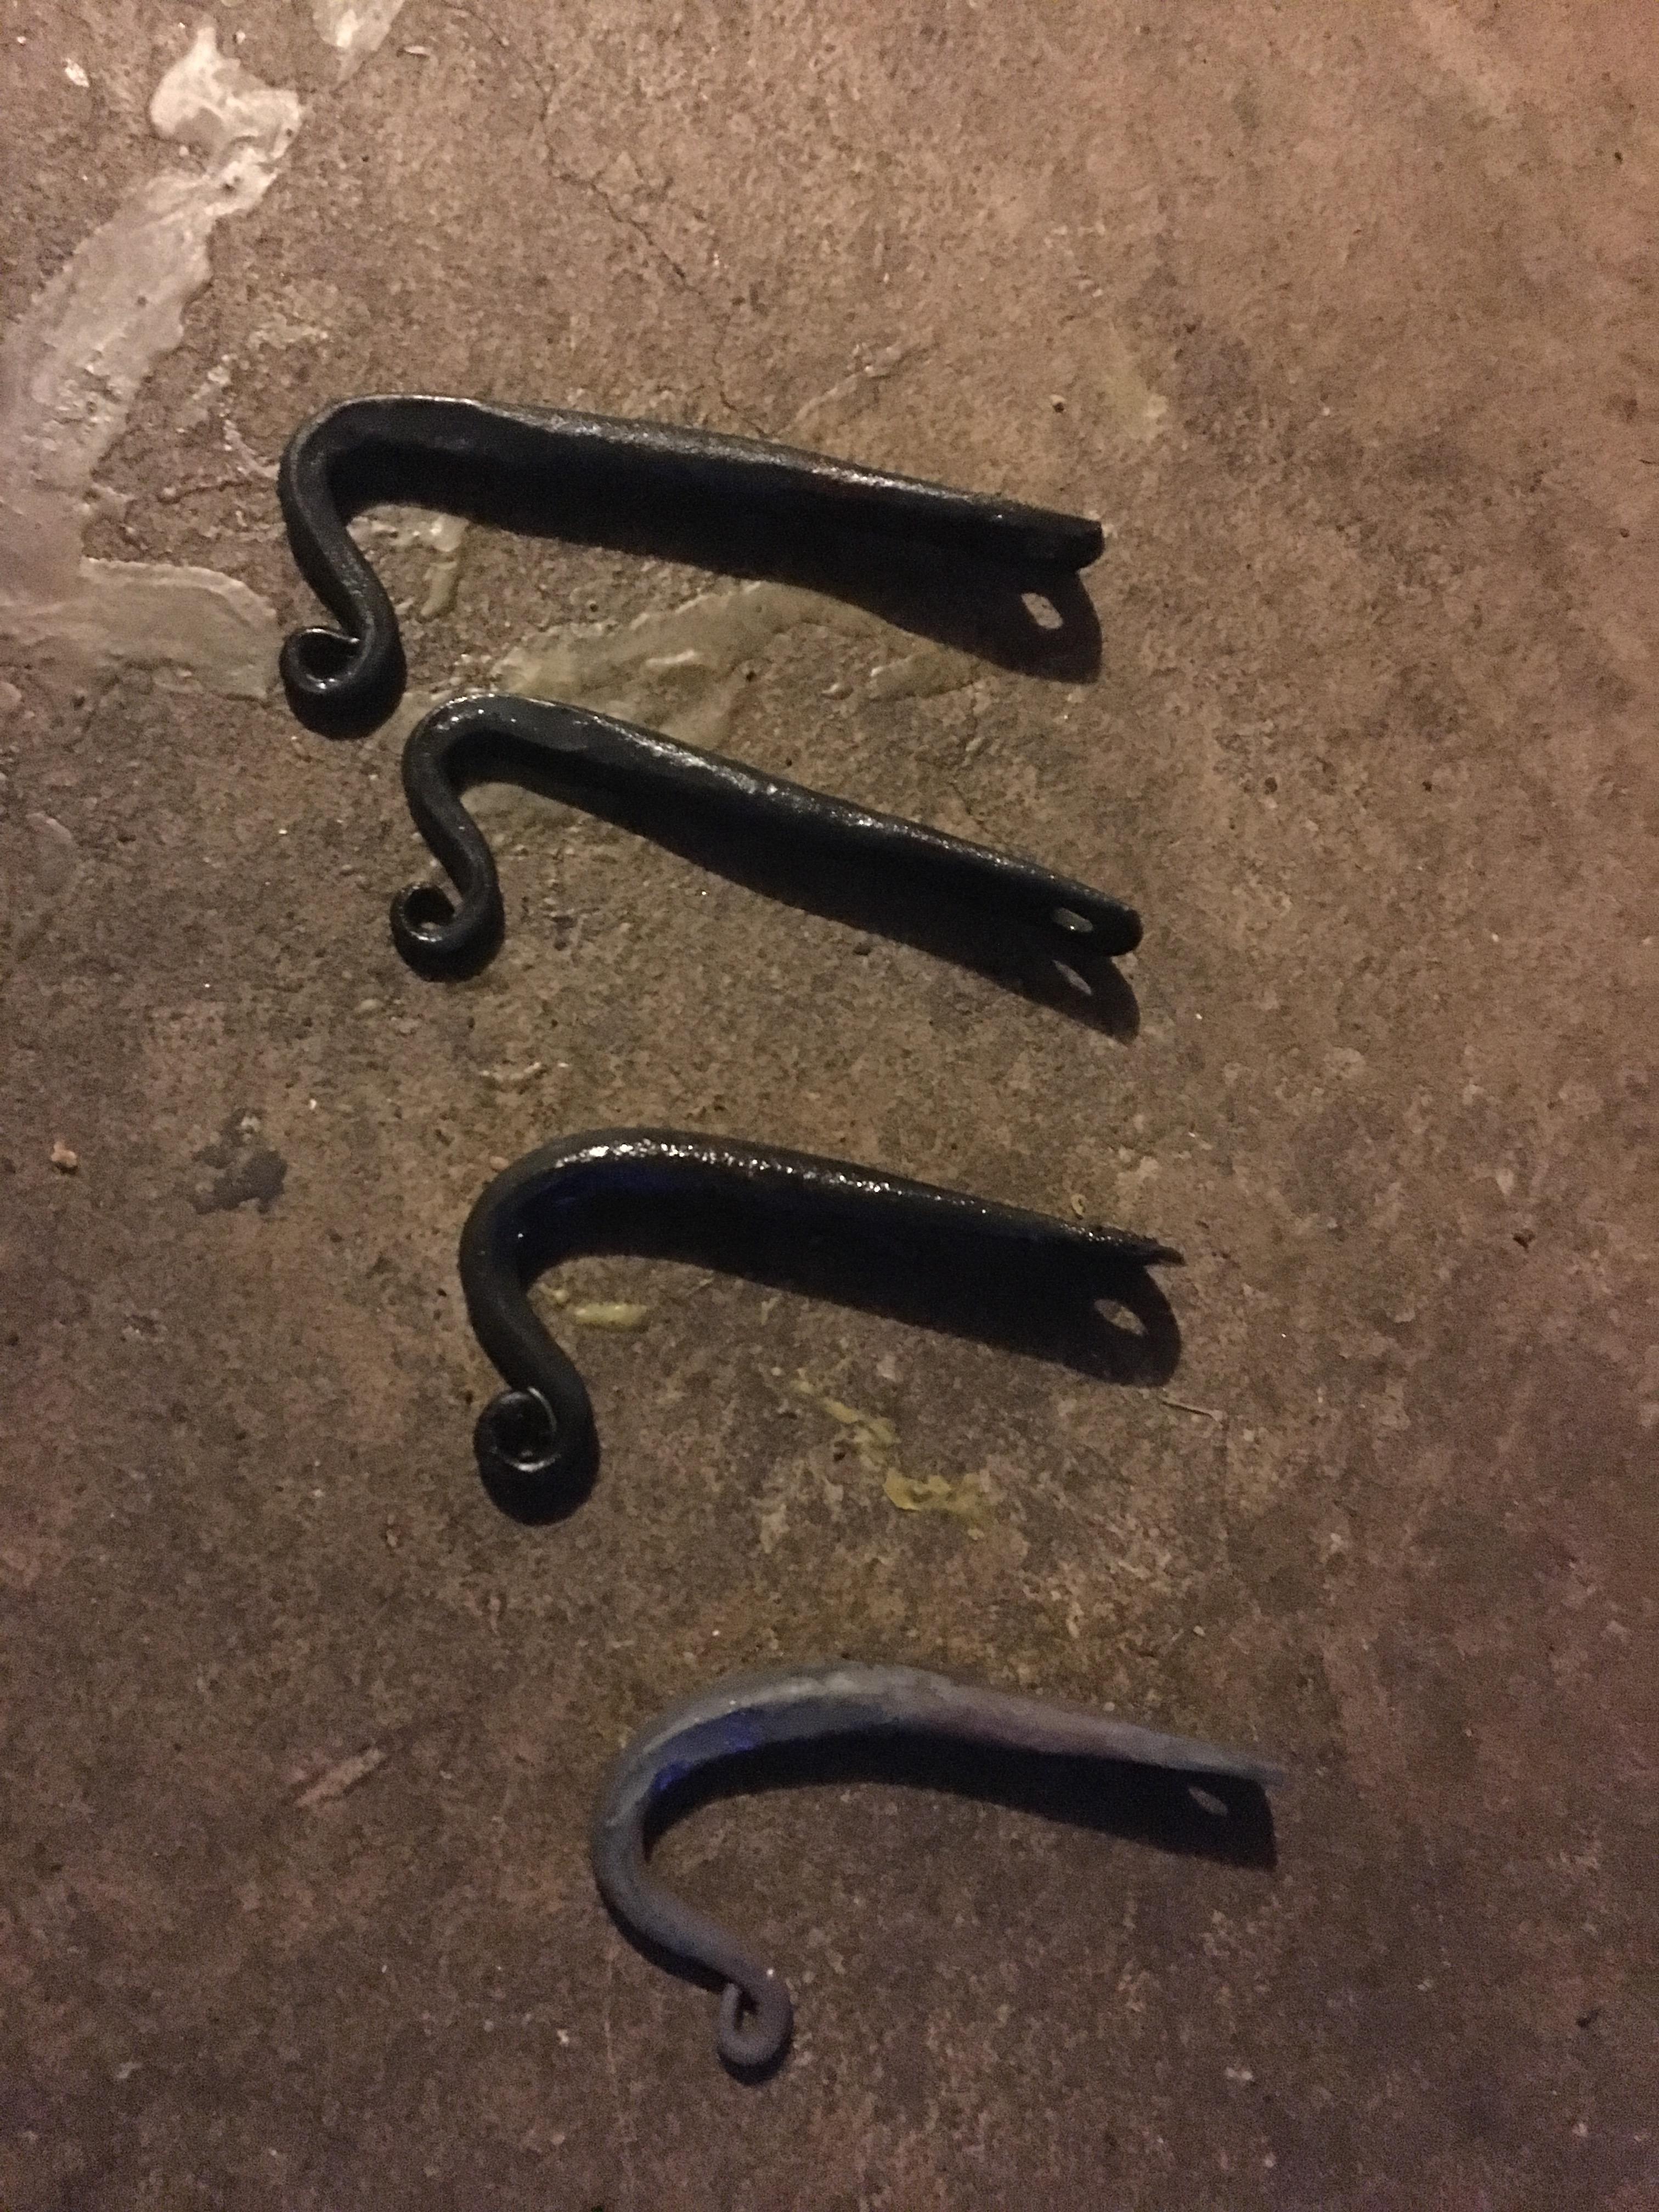
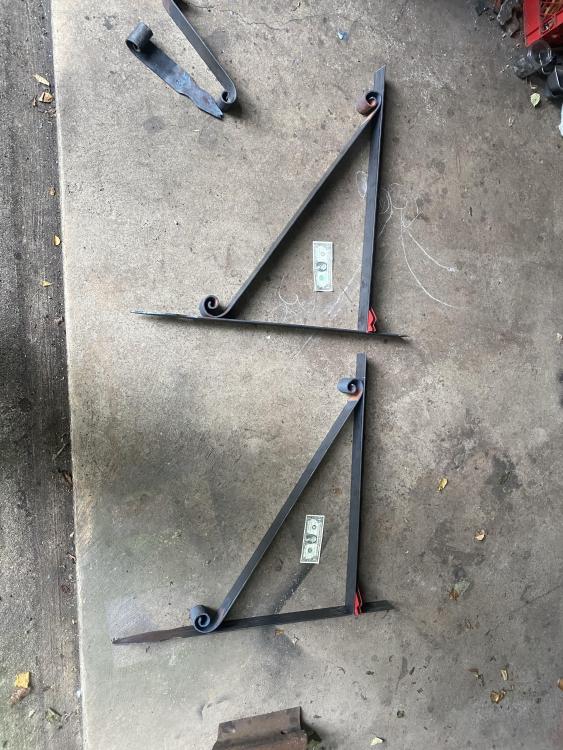
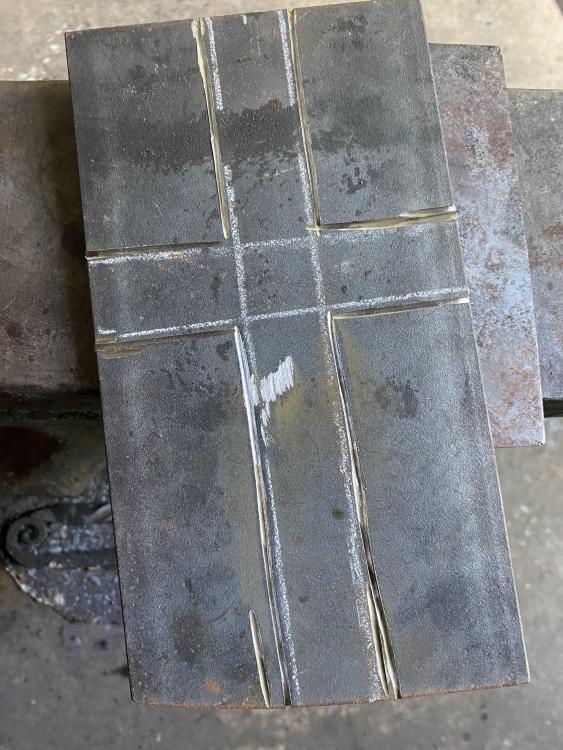
So, I haven’t posted in a while, things are going ok, getting a few jobs here and there. I need some help. I am making a pair of roof brackets, 34”x 30”, of 2 1/2” x 3/16 flat bar. The client wants a dimpled or ‘Peened’ texturing to multiple surfaces of the project. The flats are pretty easy/straight forward. I am having difficulty with peening/dimpling/texturing the scrolled ends. I have tried texturing before scrolling but, this pulls most of the texture out. I have tried texturing after scrolling but can’t get the entire surface textured and this process throws the scrolls out of proportion and distorts them to a point of near ruined. I can’t seem to find a good solution to this issue, anyone have any clever ideas? Thank you all in advance, ya’ll are more clever and have waaaaay more experience than I. Cheers! John
-
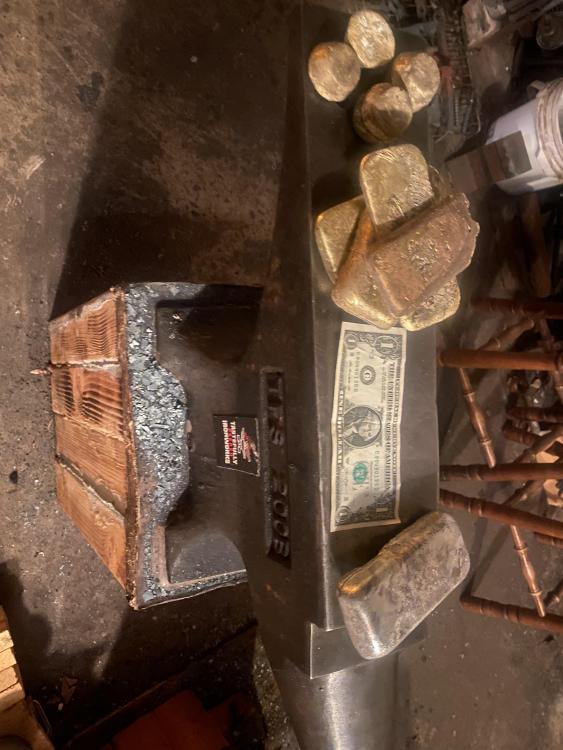
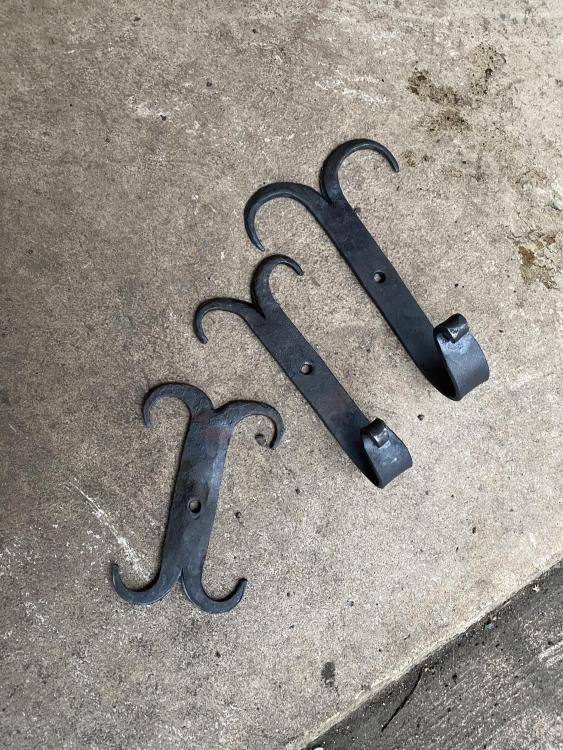
 Trying to keep up with seeing what everyone is up to is nearly a full time job in and of itself. Here’s what I’ve been up to! Hooks, bottle openers, keychains, handles for an assortment of things, and some of the ingots cast in brass.
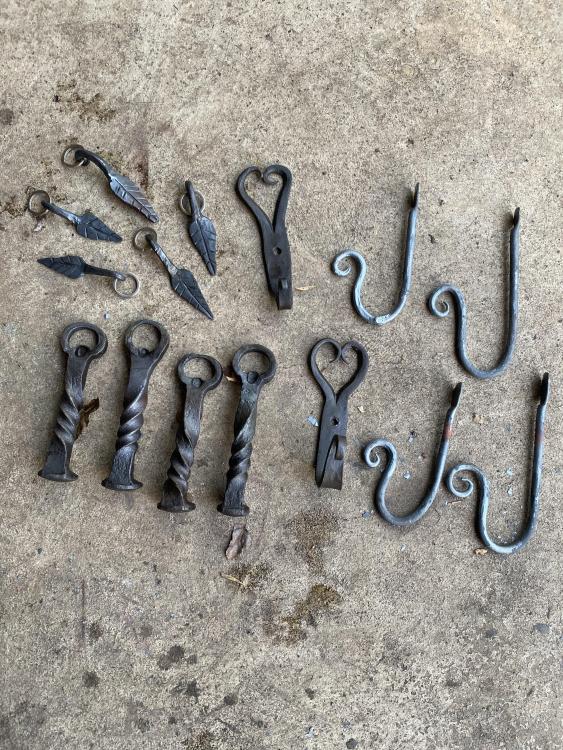
-
Got some things done

-
If you YouTube, ‘sounds of the anvil,’ to fall asleep to at night. Better than a mothers heartbeat.
-
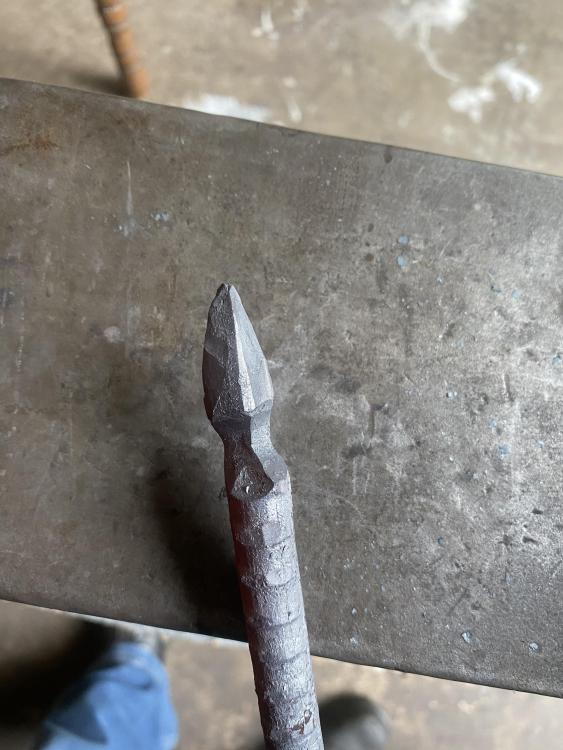
Forging different sizes, shapes, some vaguely resembling the real thing, definitely, ThomasPowers, it’s on the list. For my Eagle Scout project many moons back we removed a ton of non-indigenous plant life from a nature center, those pictures of not only what we removed but what not to remove will come in handy. Frosty, thanks, now I have been challenged to not only up my stem/rounding game but also to do raised veins as opposed to the inset ones. Aaaand now I can not sleep before 3rd Shift as I am wide awake with forging ideas. I very much feel like the kid (I’m 34) who needs to learn to type so I can convey my thoughts in a much faster medium because my brain is racing a mile a minute with ideas and possibilities. I am developing an obsession, have hammer and anvil (insert vaguely anvil shaped object here if necessary) will forge. Must forge. Forge your steel, see it molded before you, hear the lamentations of cheap mild!
-
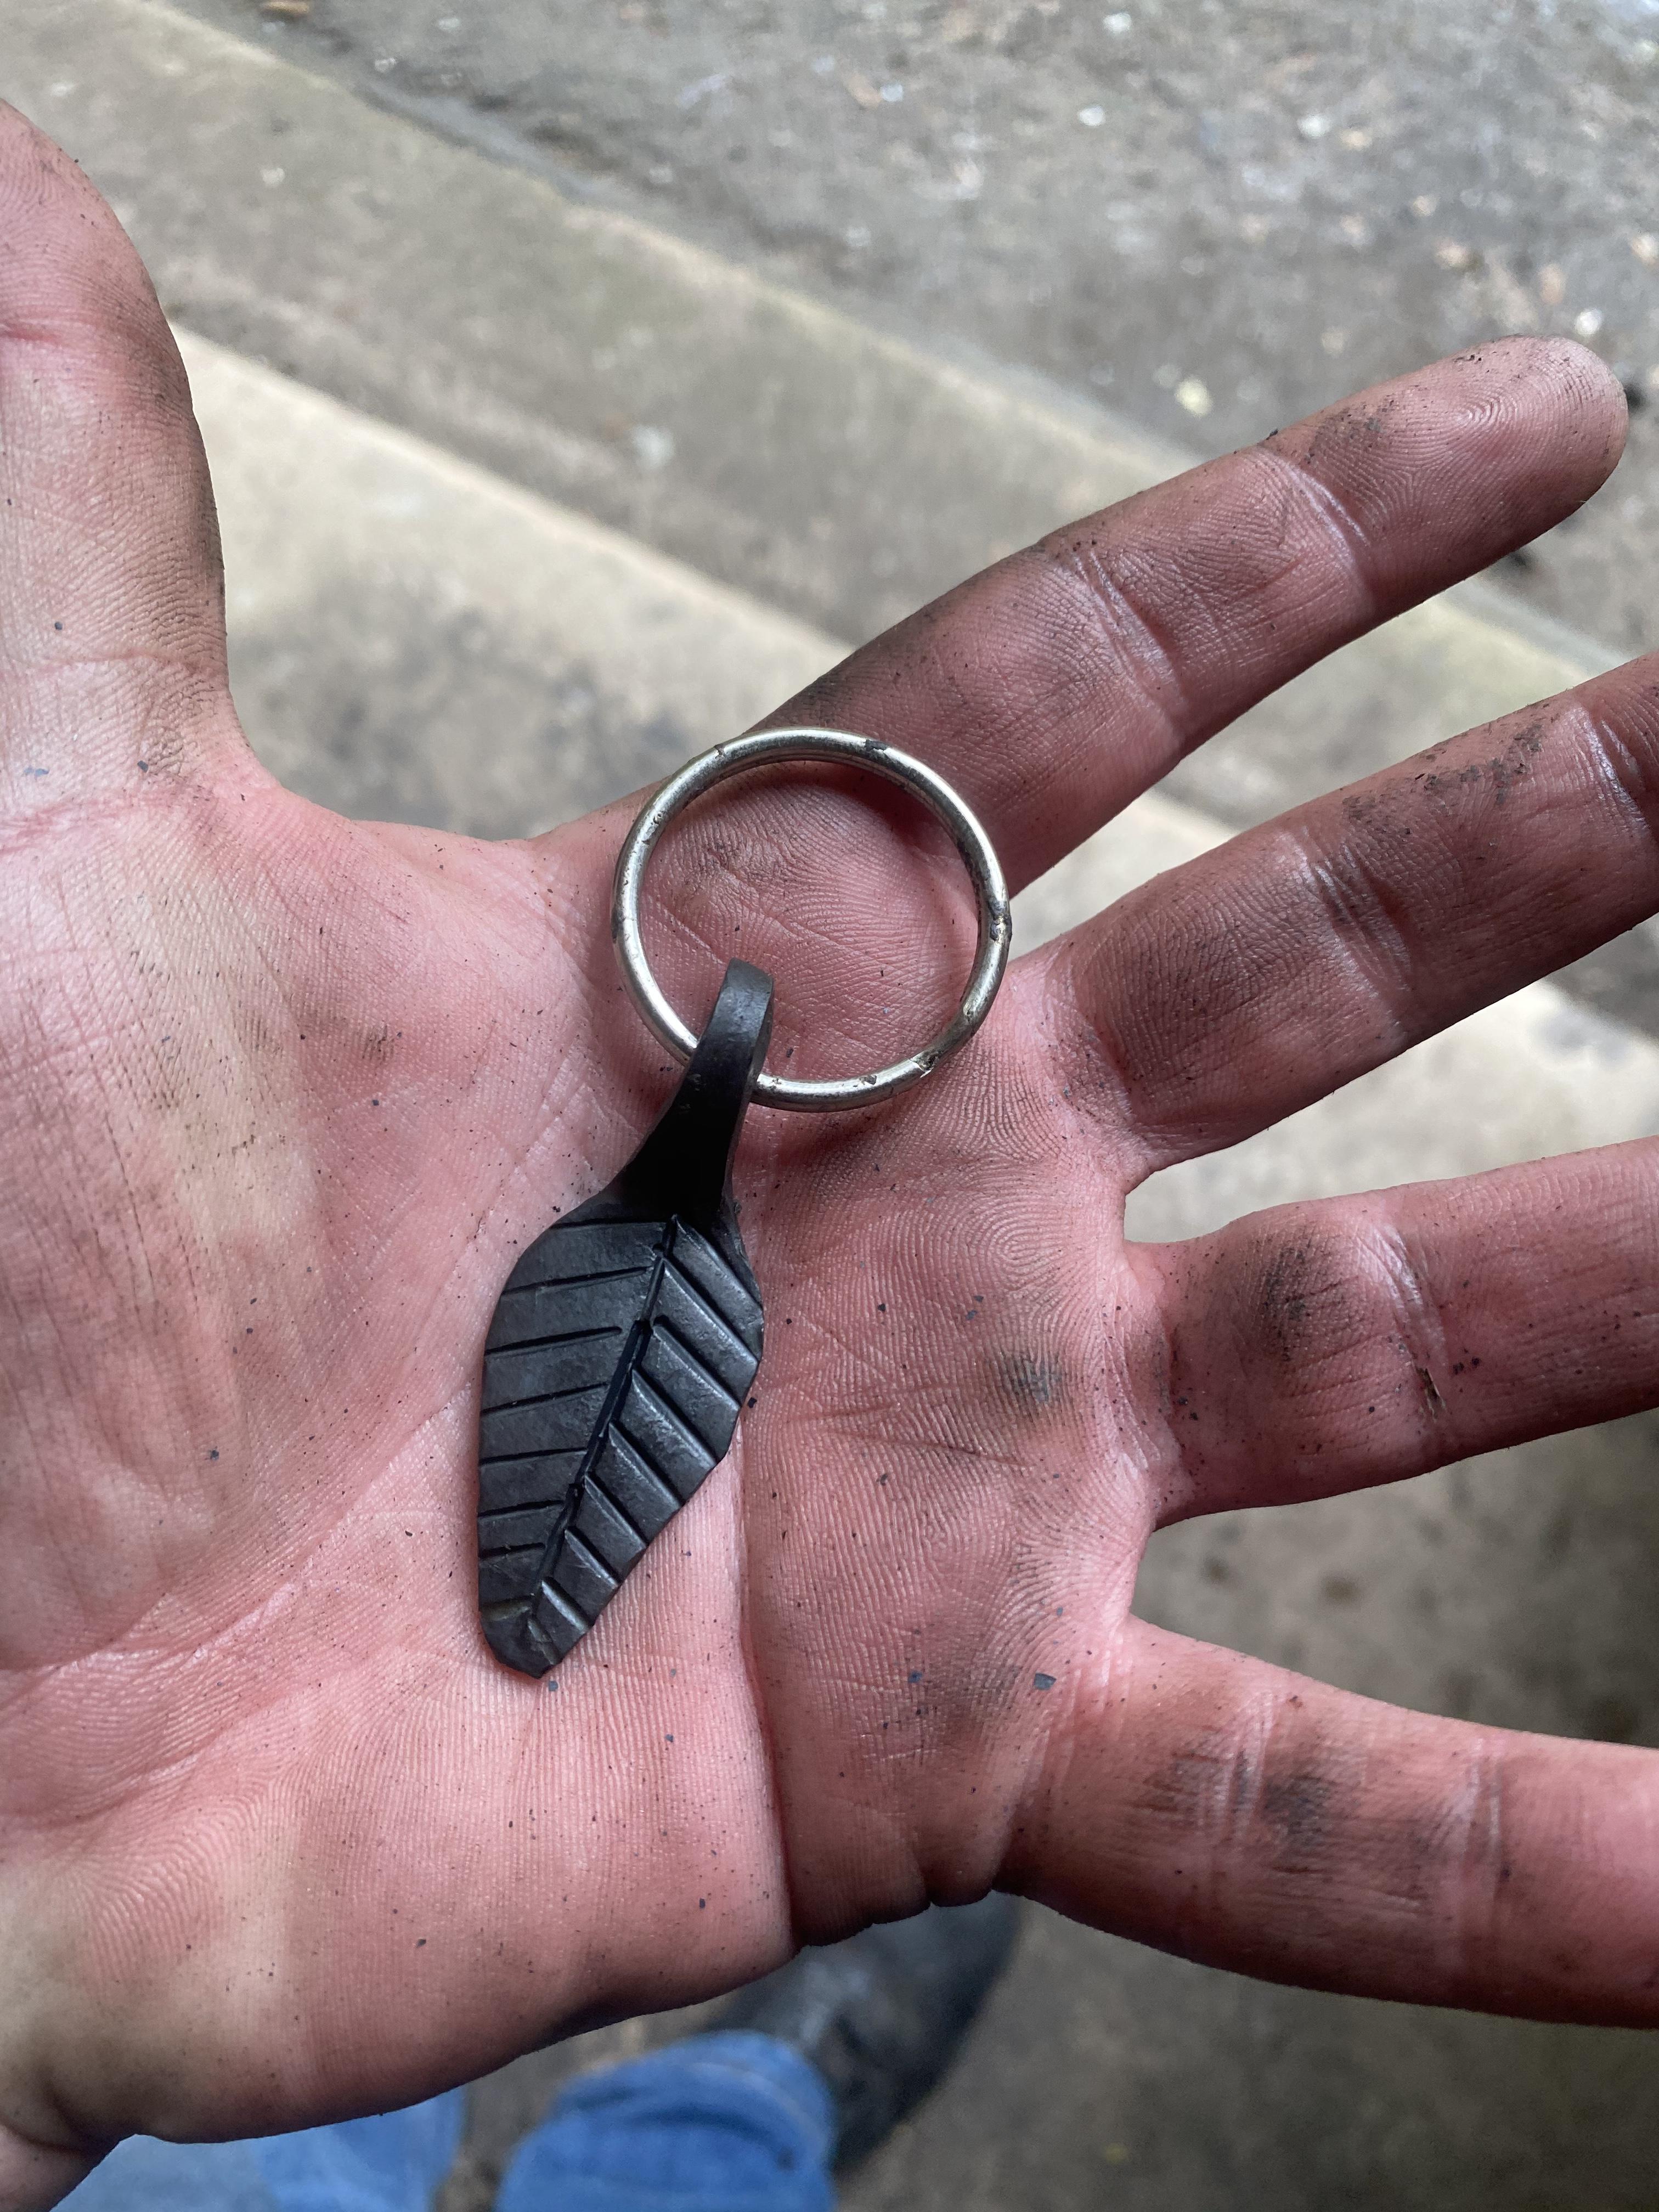
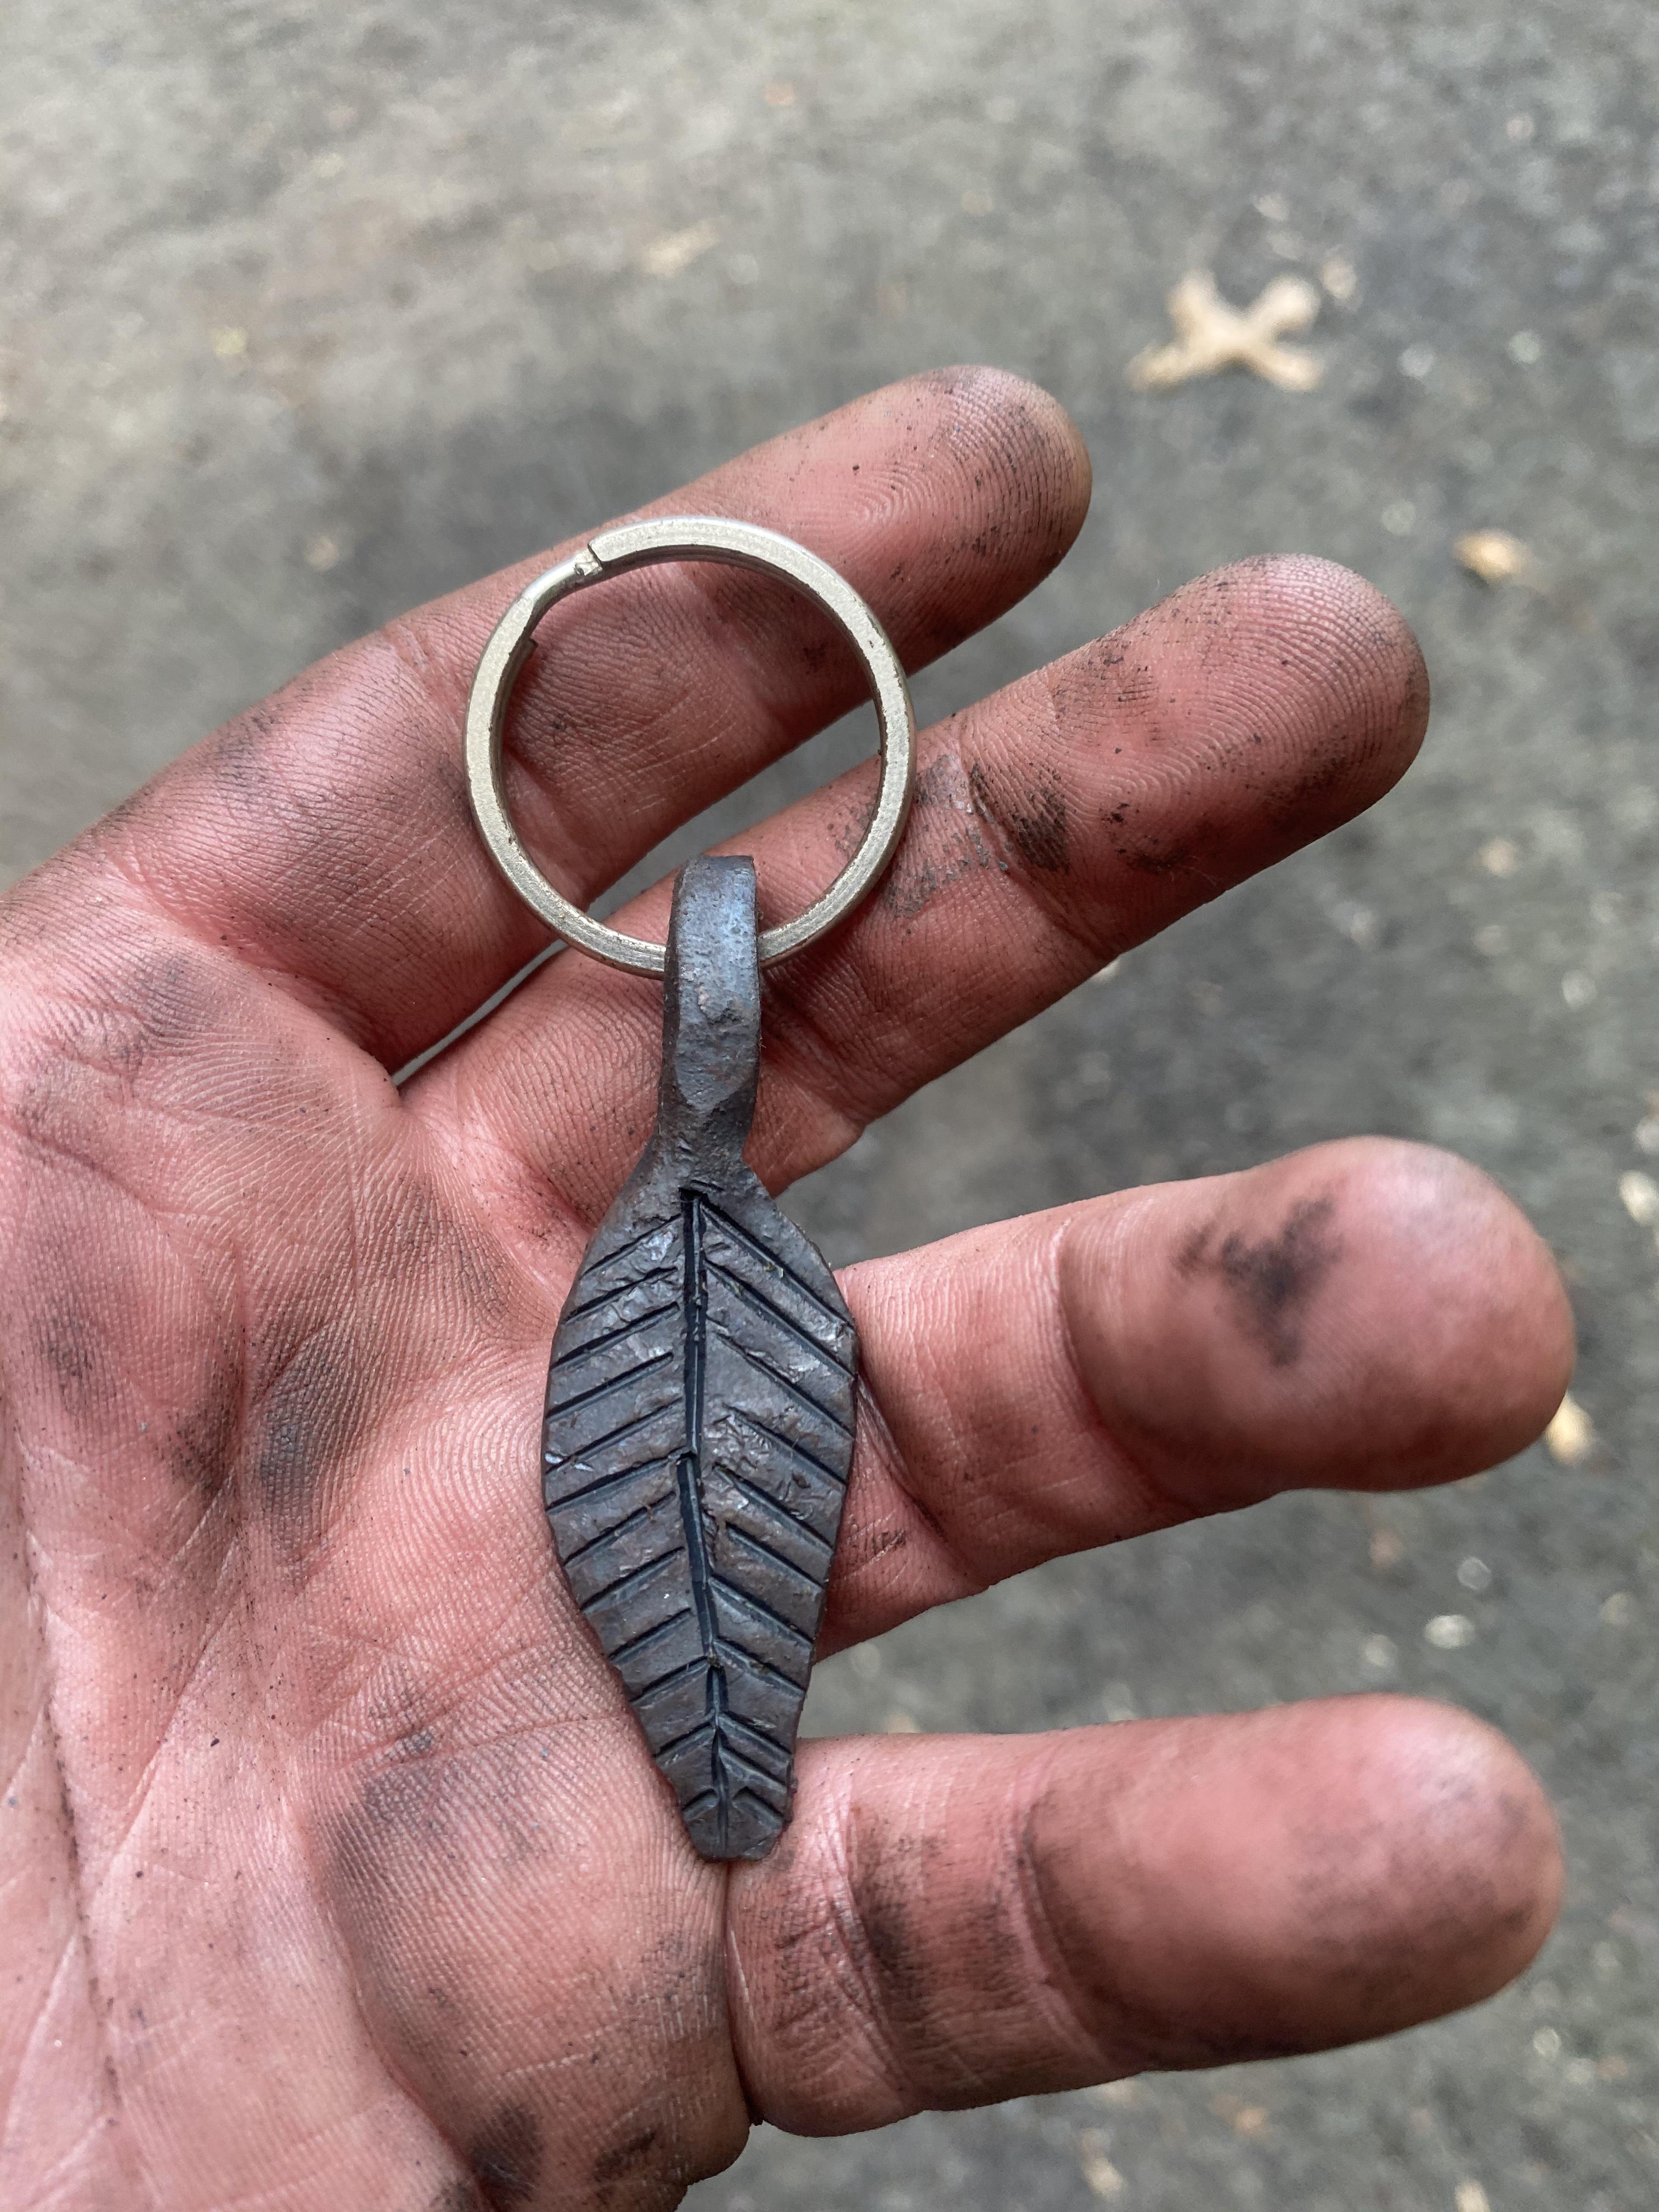
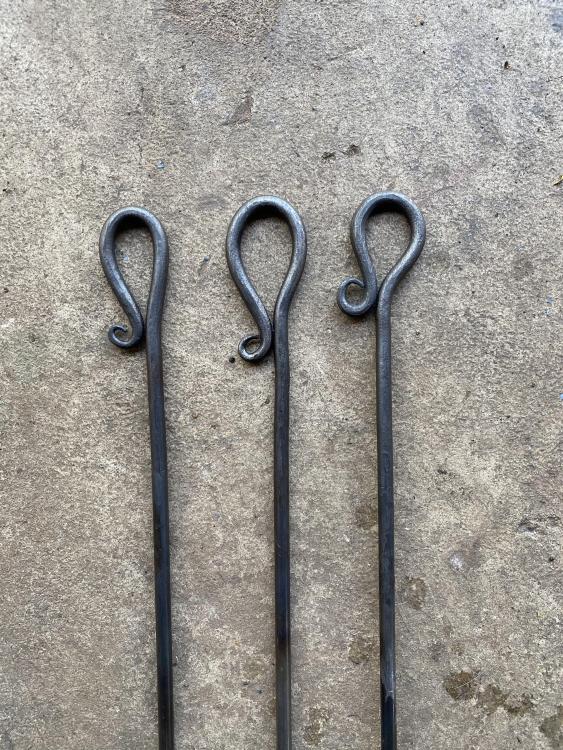
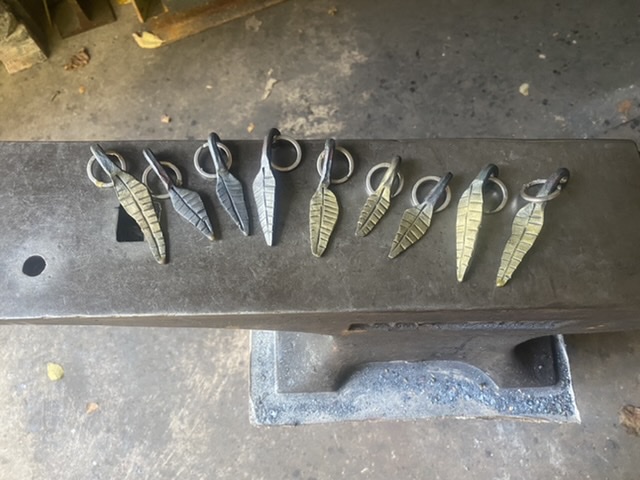
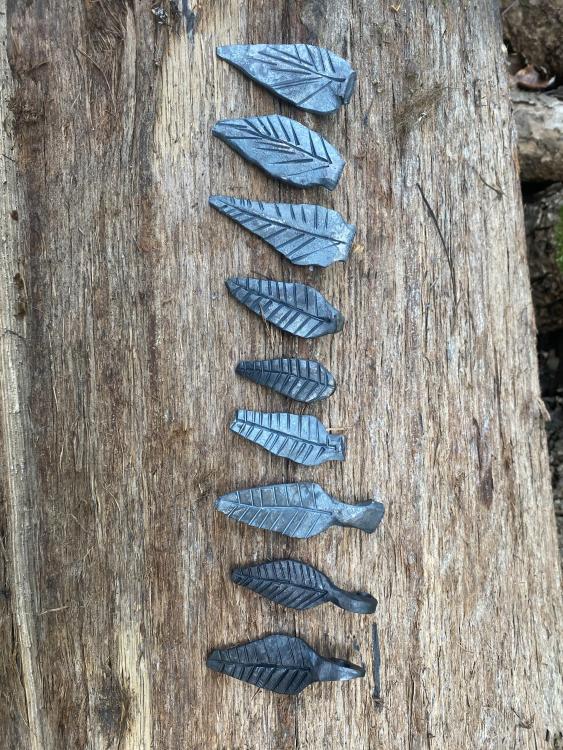
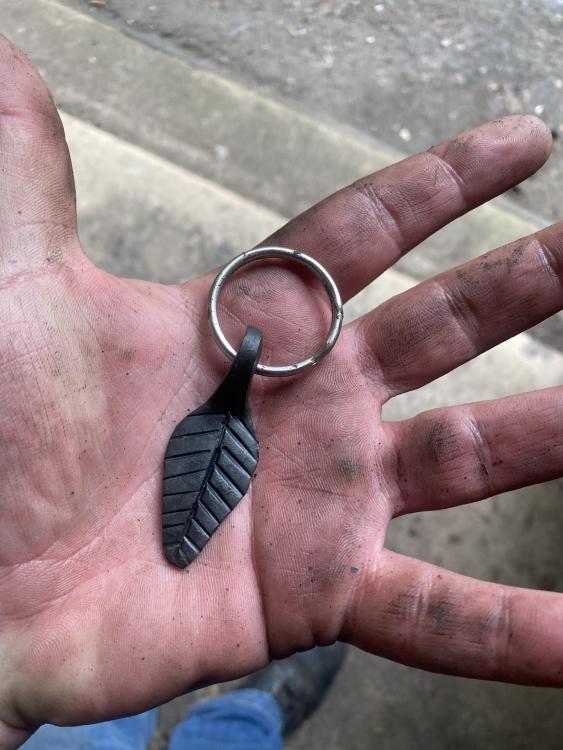
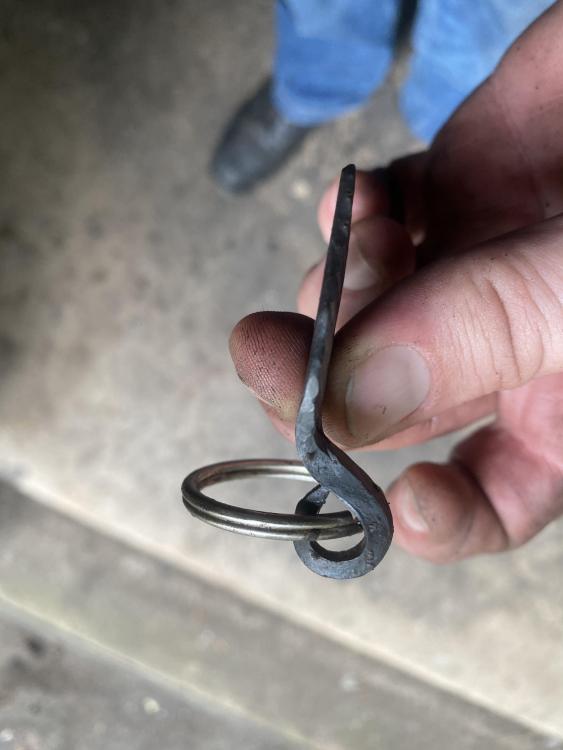
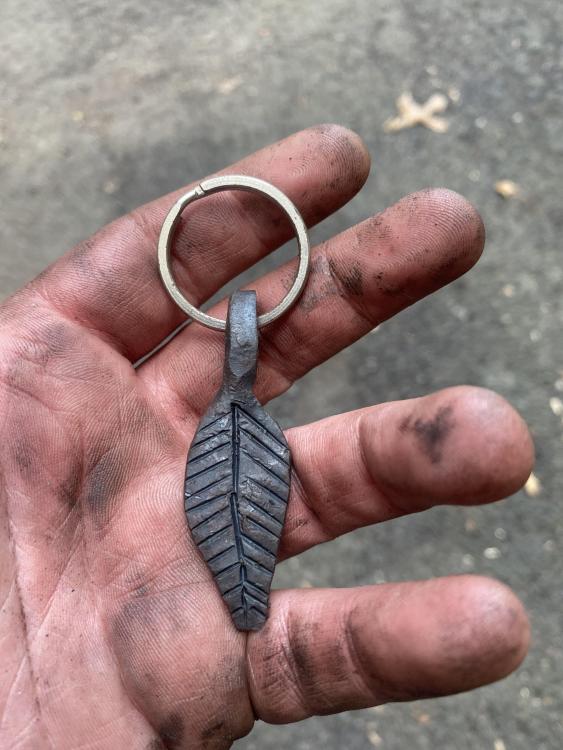
Never made leaves before, the first few were trash but after that I found a good groove and kept it up. Made 10 in total, 3 of which are now keychains. My wife loves hers and was very surprised!

-
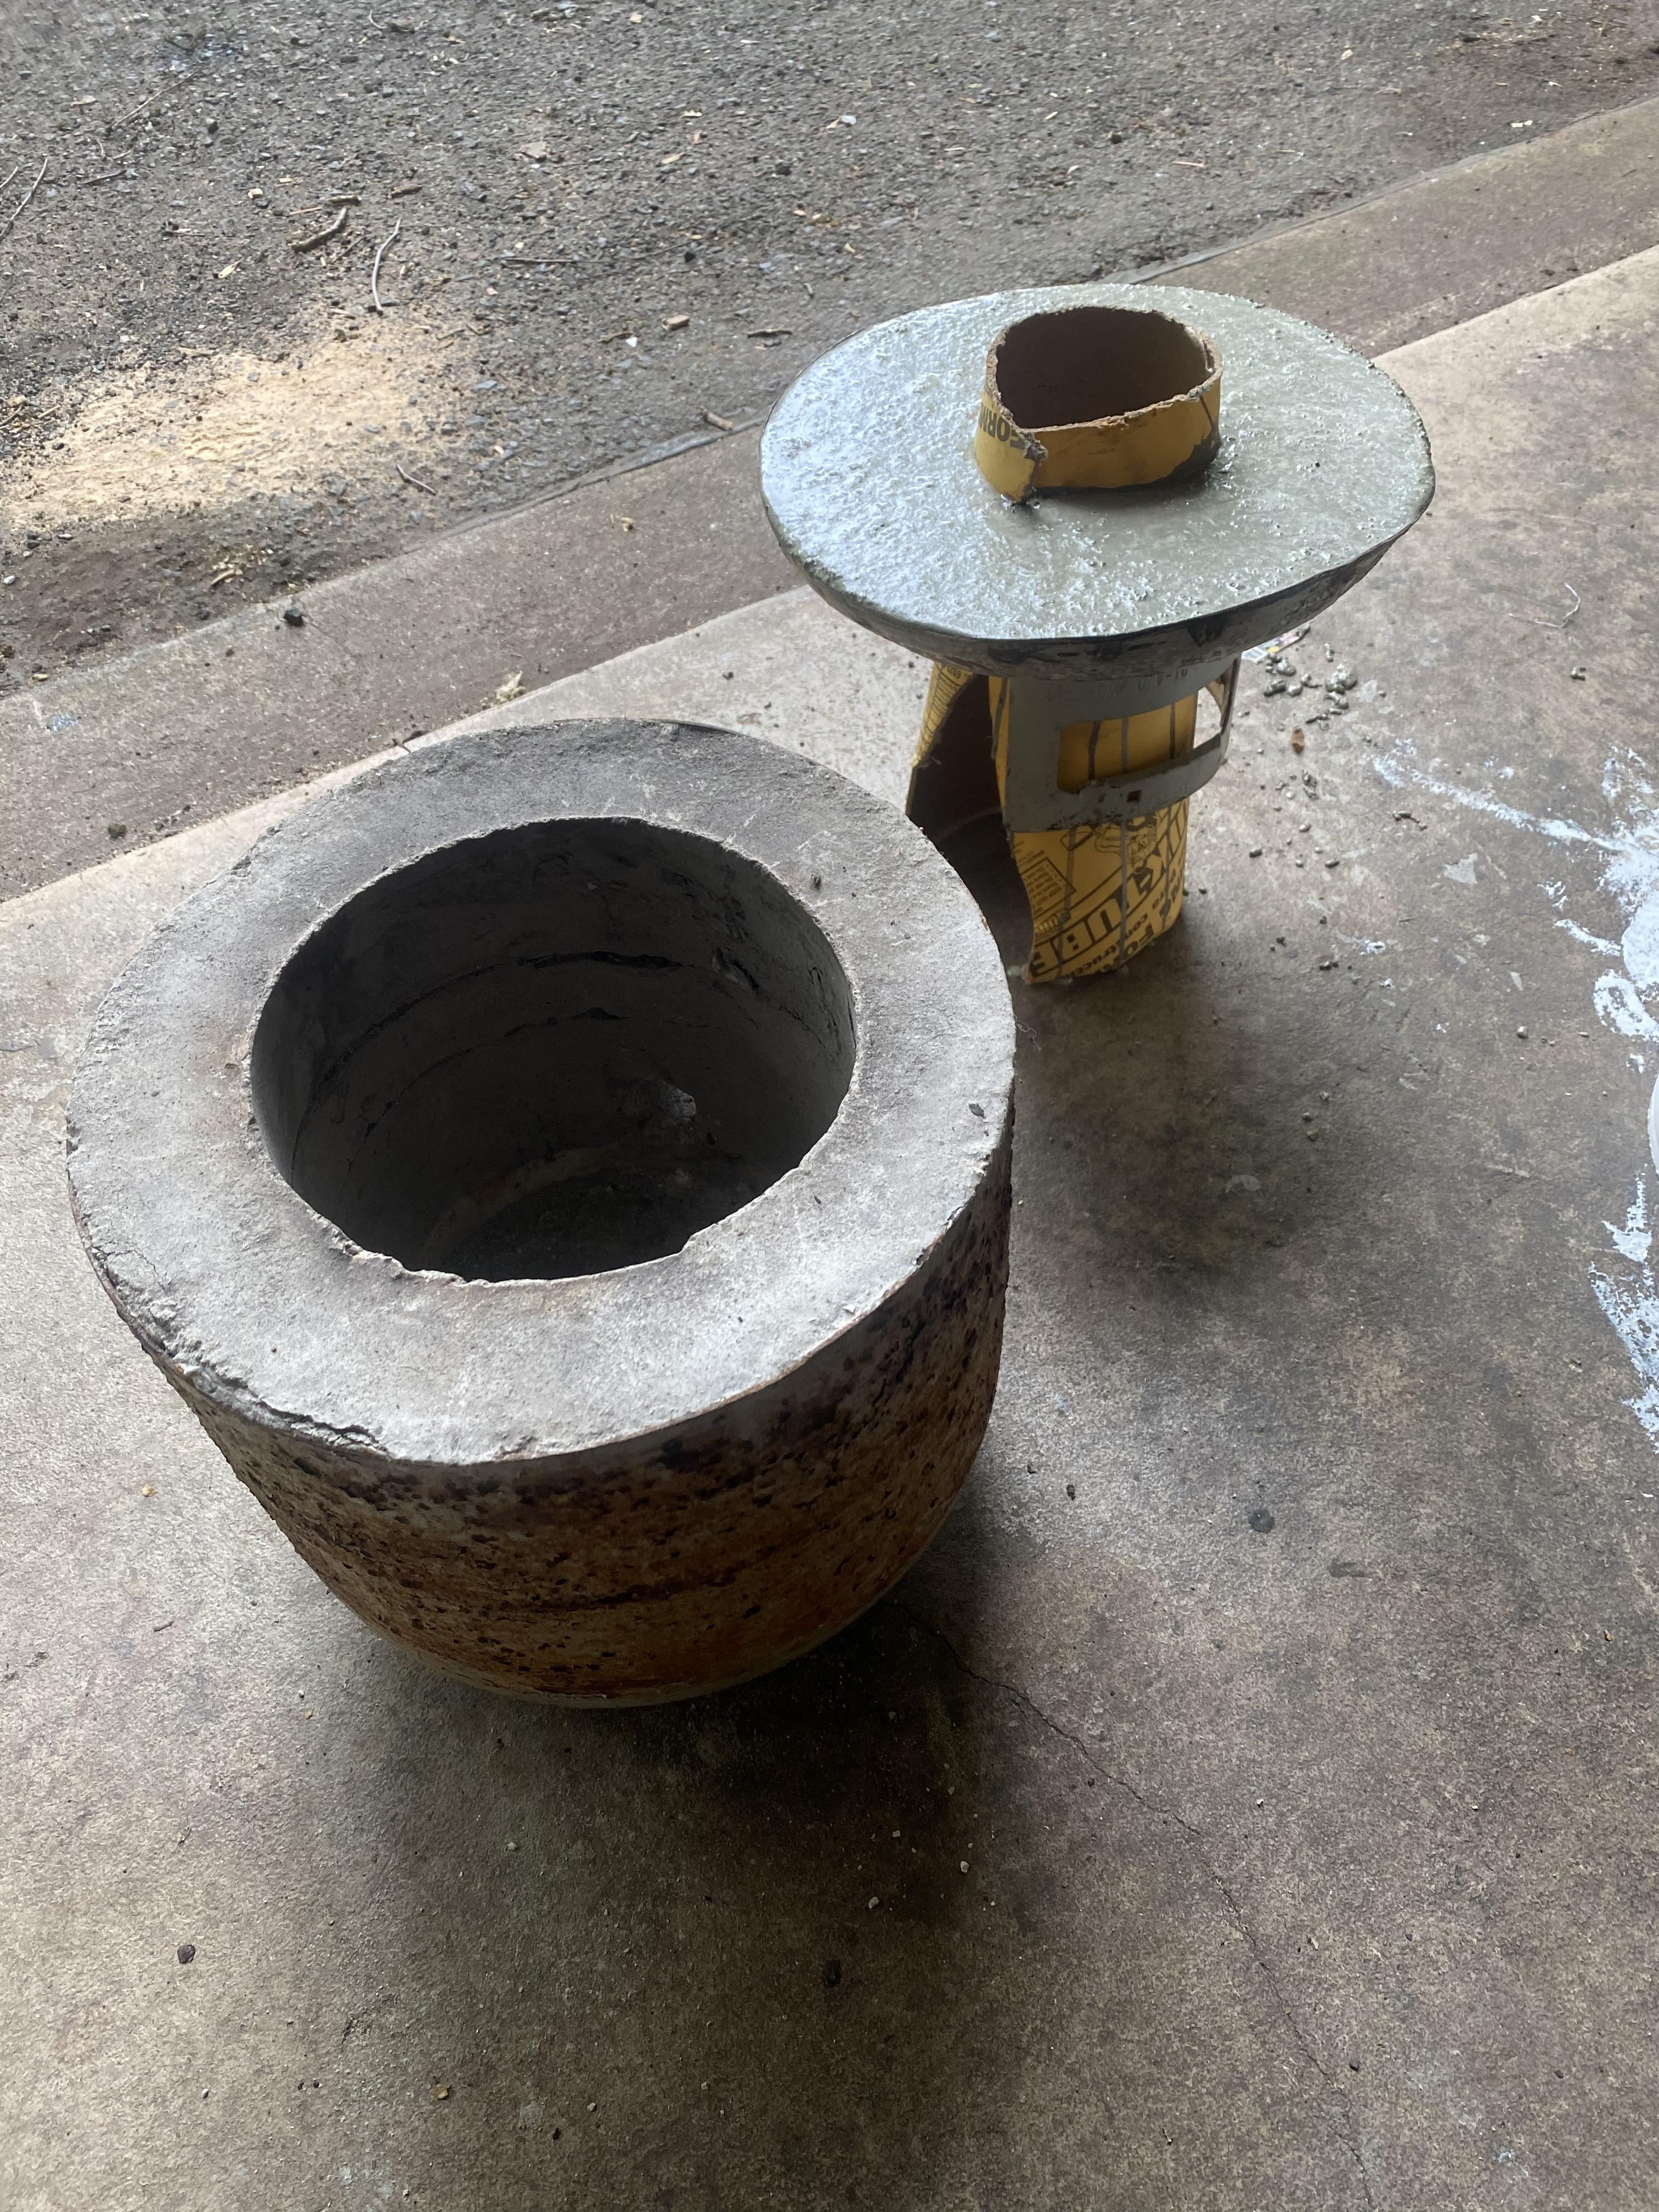
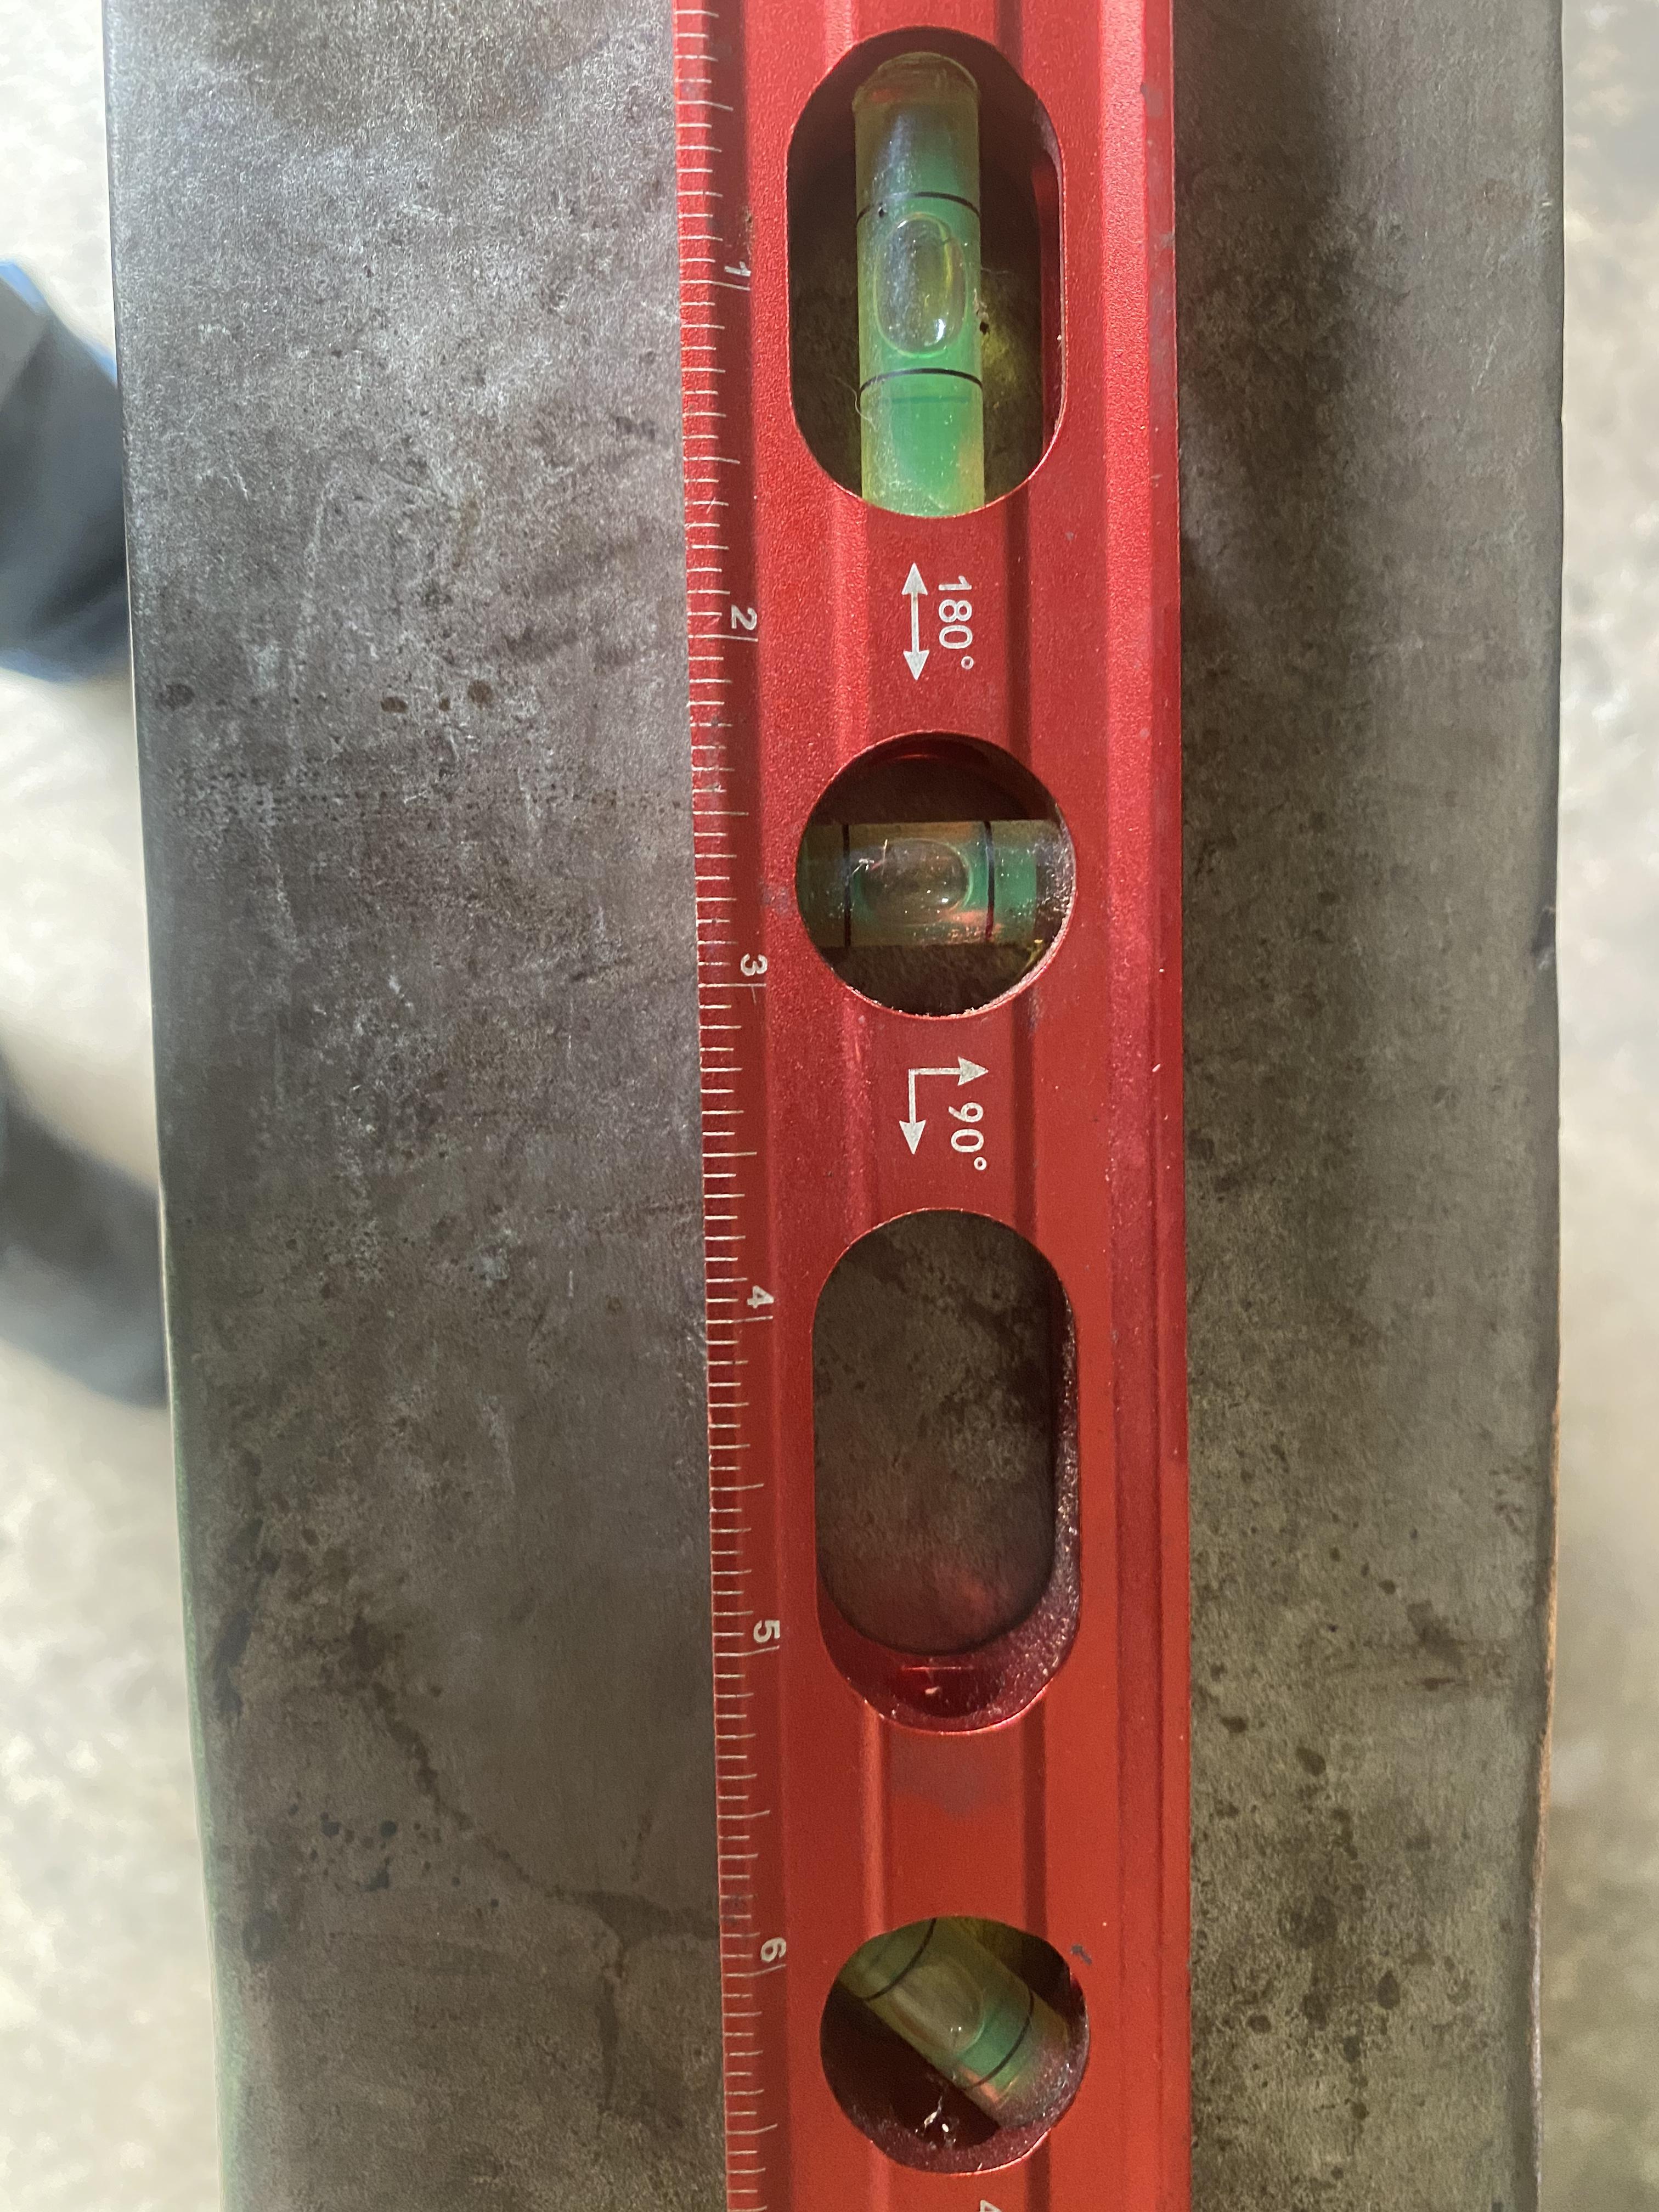
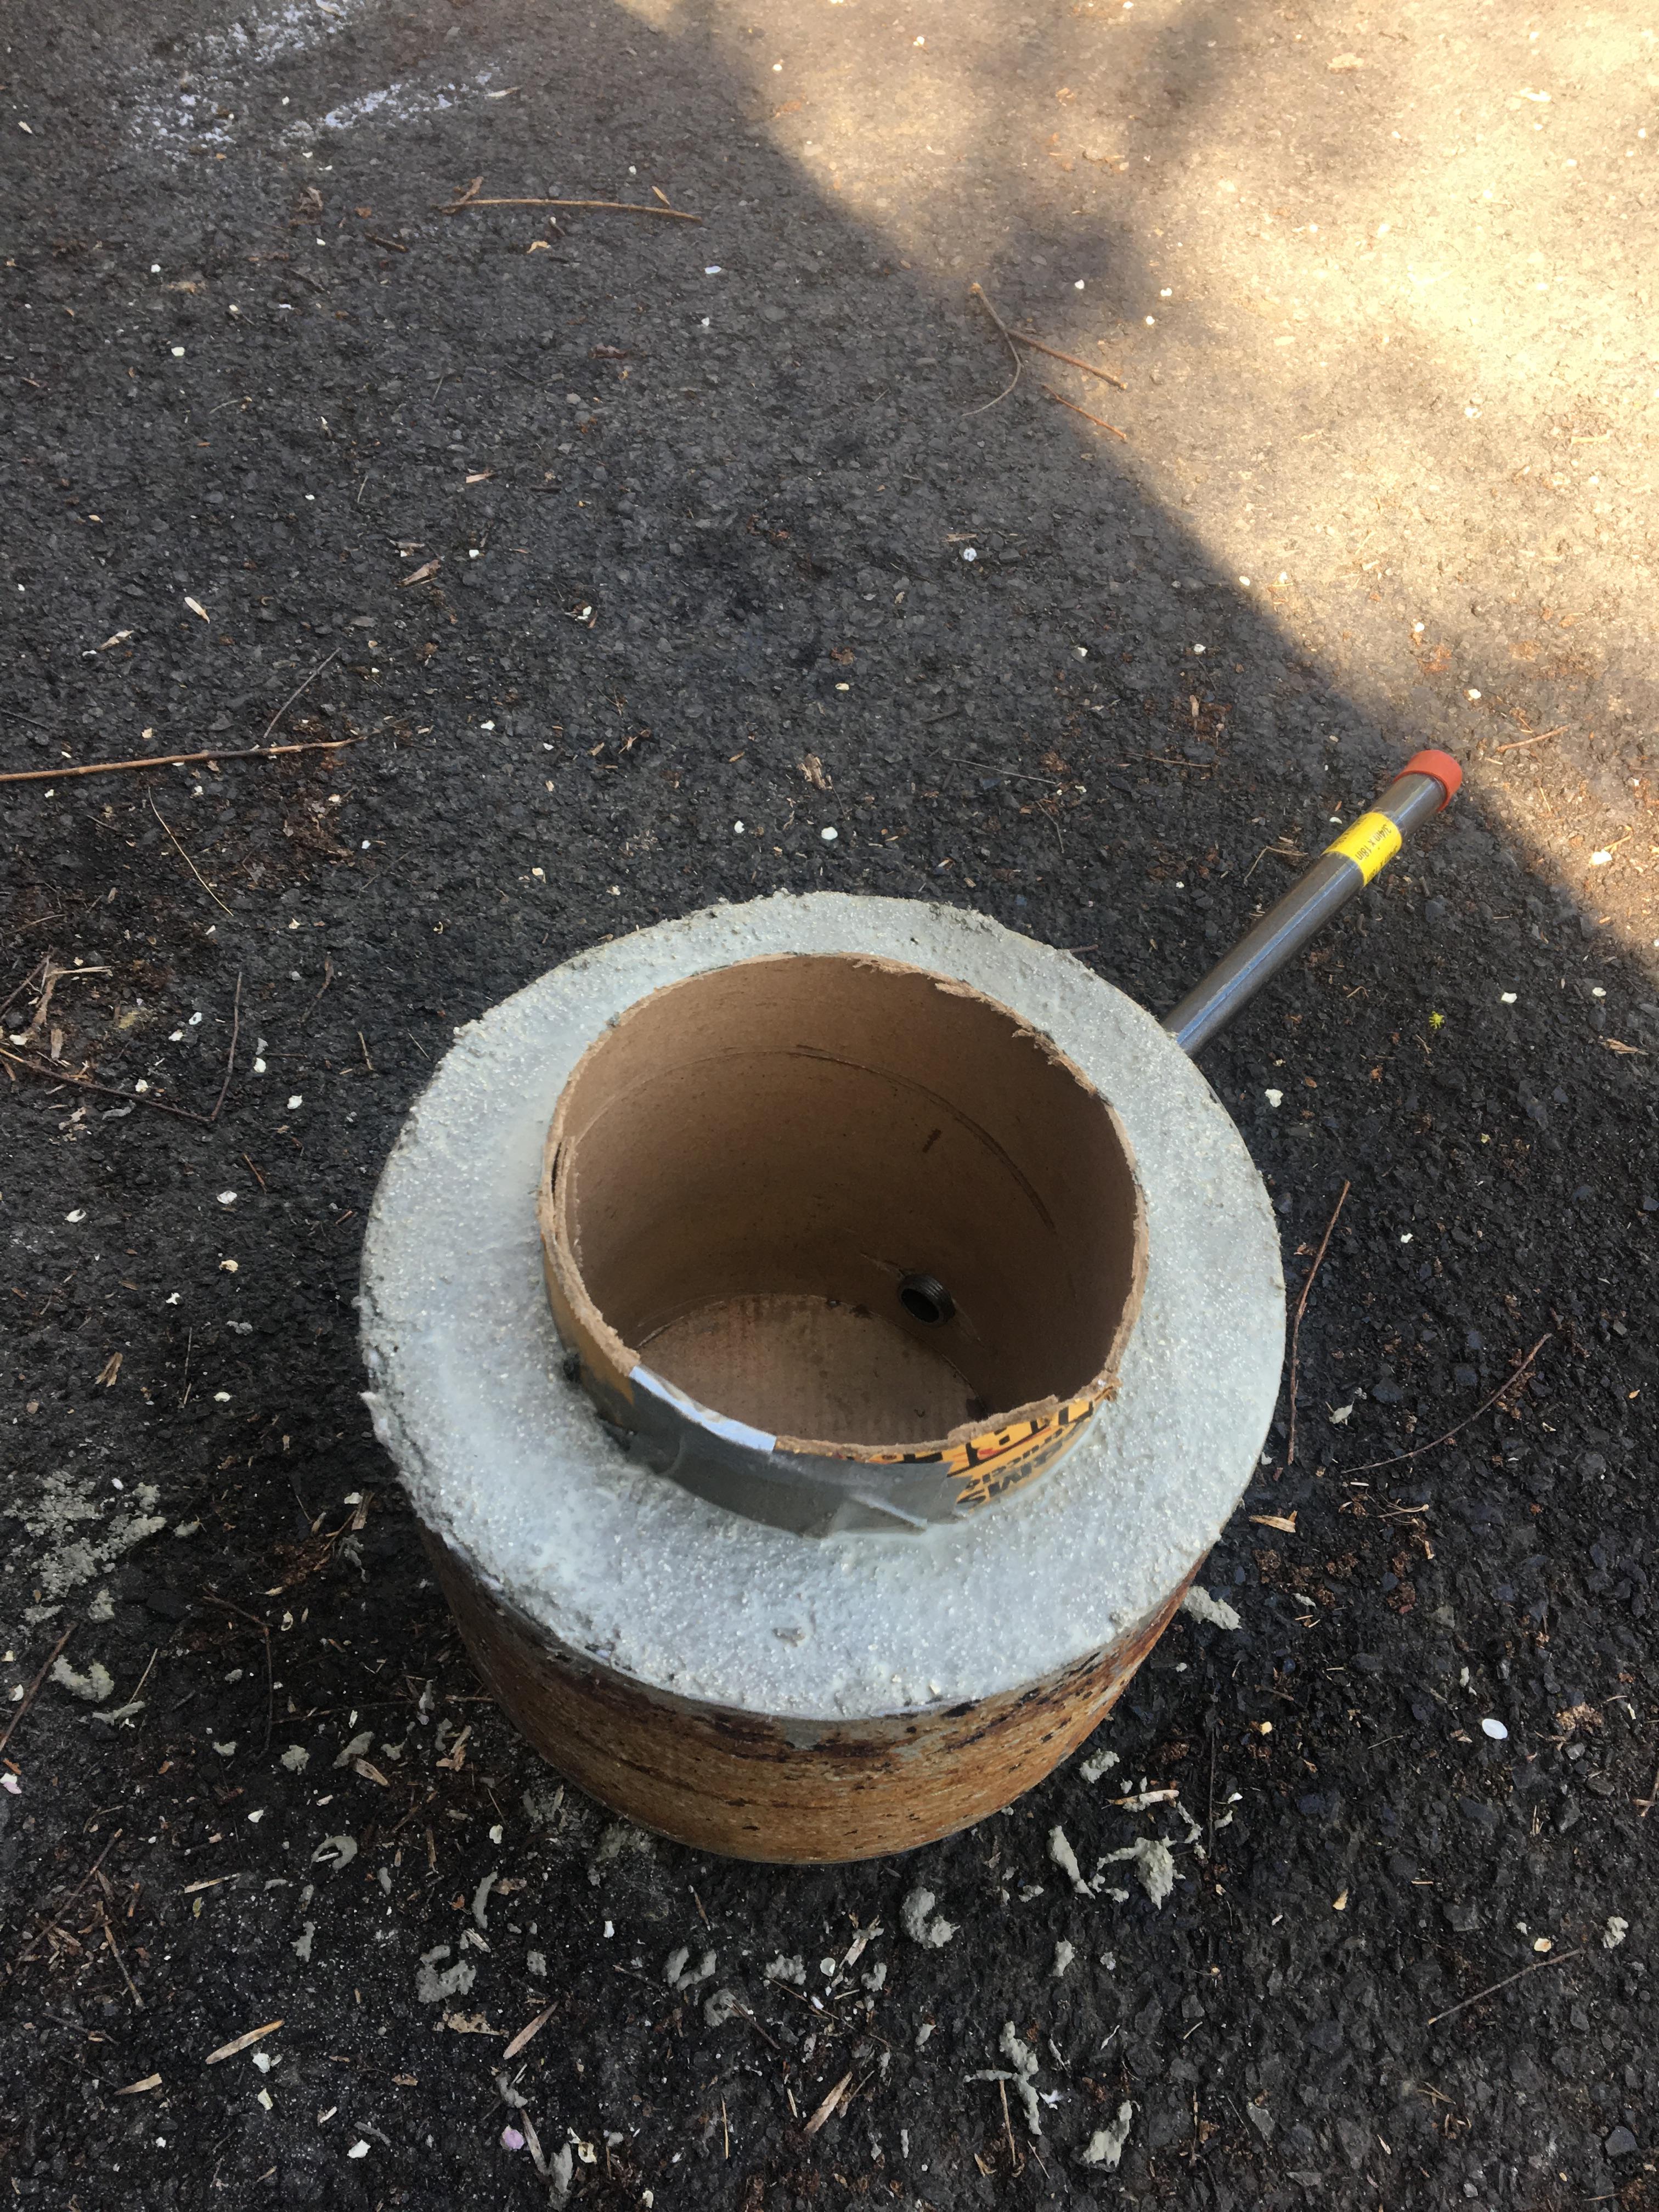
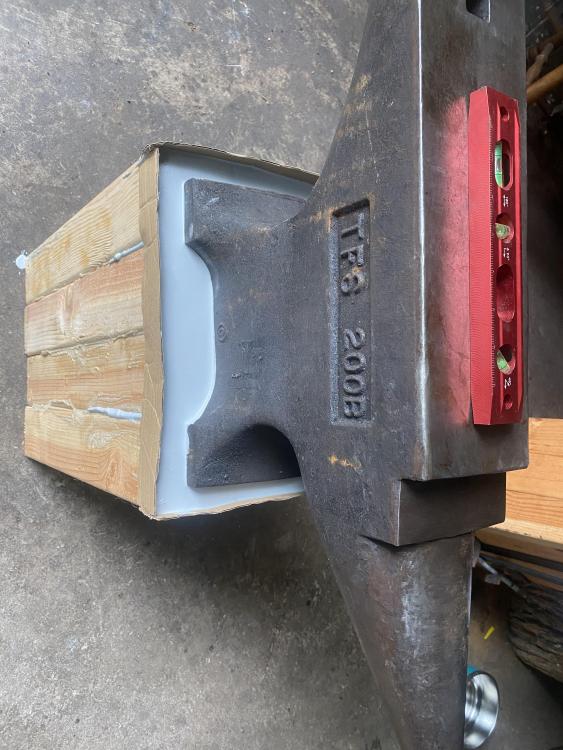
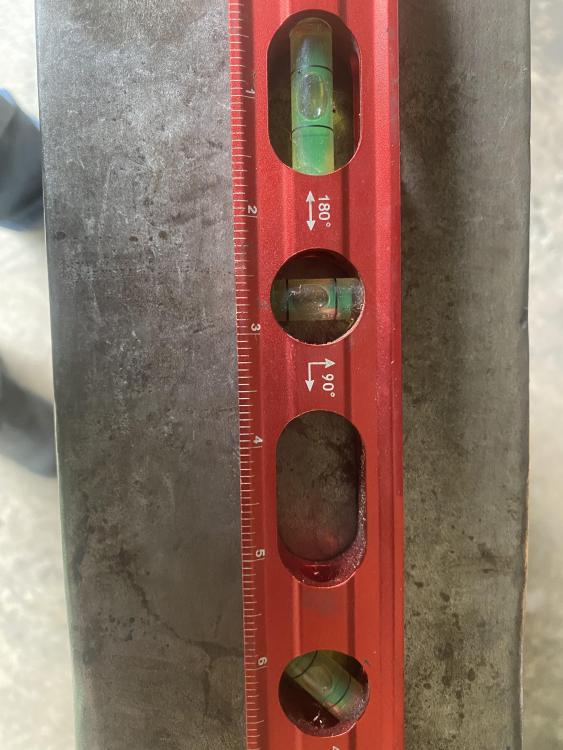
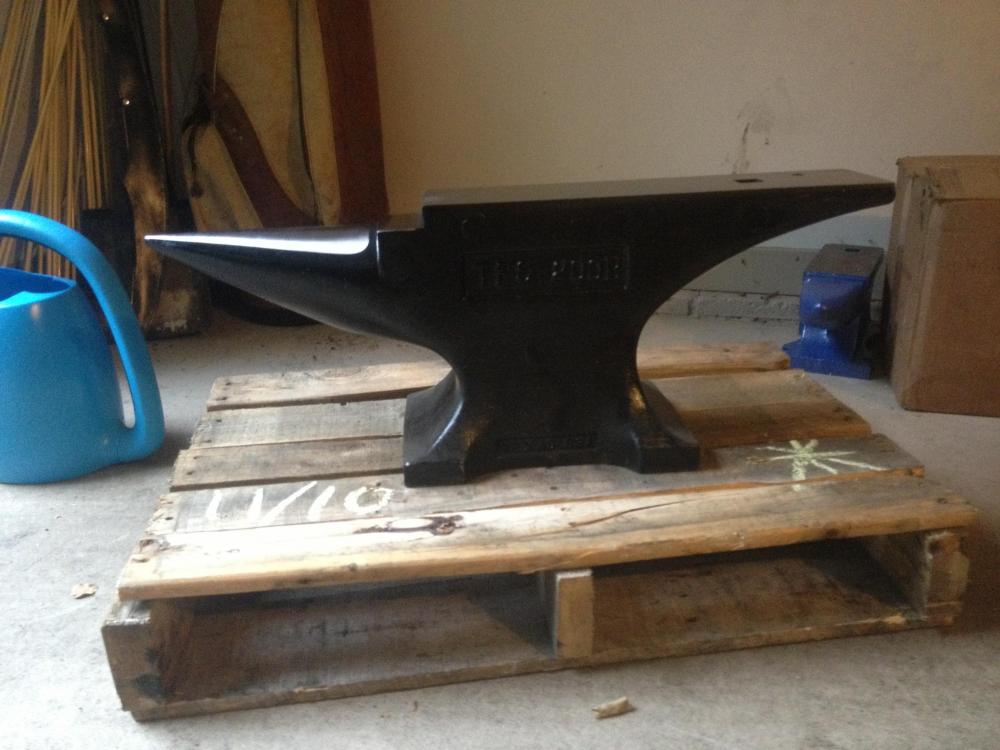
Oooh, these look excellent! Finally got around to mixing the refractory for the lid of the melting furnace and got the anvil level and mounted to the new stand, working on the brackets next. Boy, using this self leveling, polyurethane sealant is messy but Totally worth it! The ring is almost completely gone and the rebound doesn’t seem to be affected in the least. Been bouncing ball bearings off the center face and the rocket back. I don’t think I could get it any more level if I tried ( see attached photo of red level).

-
It followed me home
TastefullyPeenedIronWorks replied to Glenn's topic in Blacksmithing, General Discussion
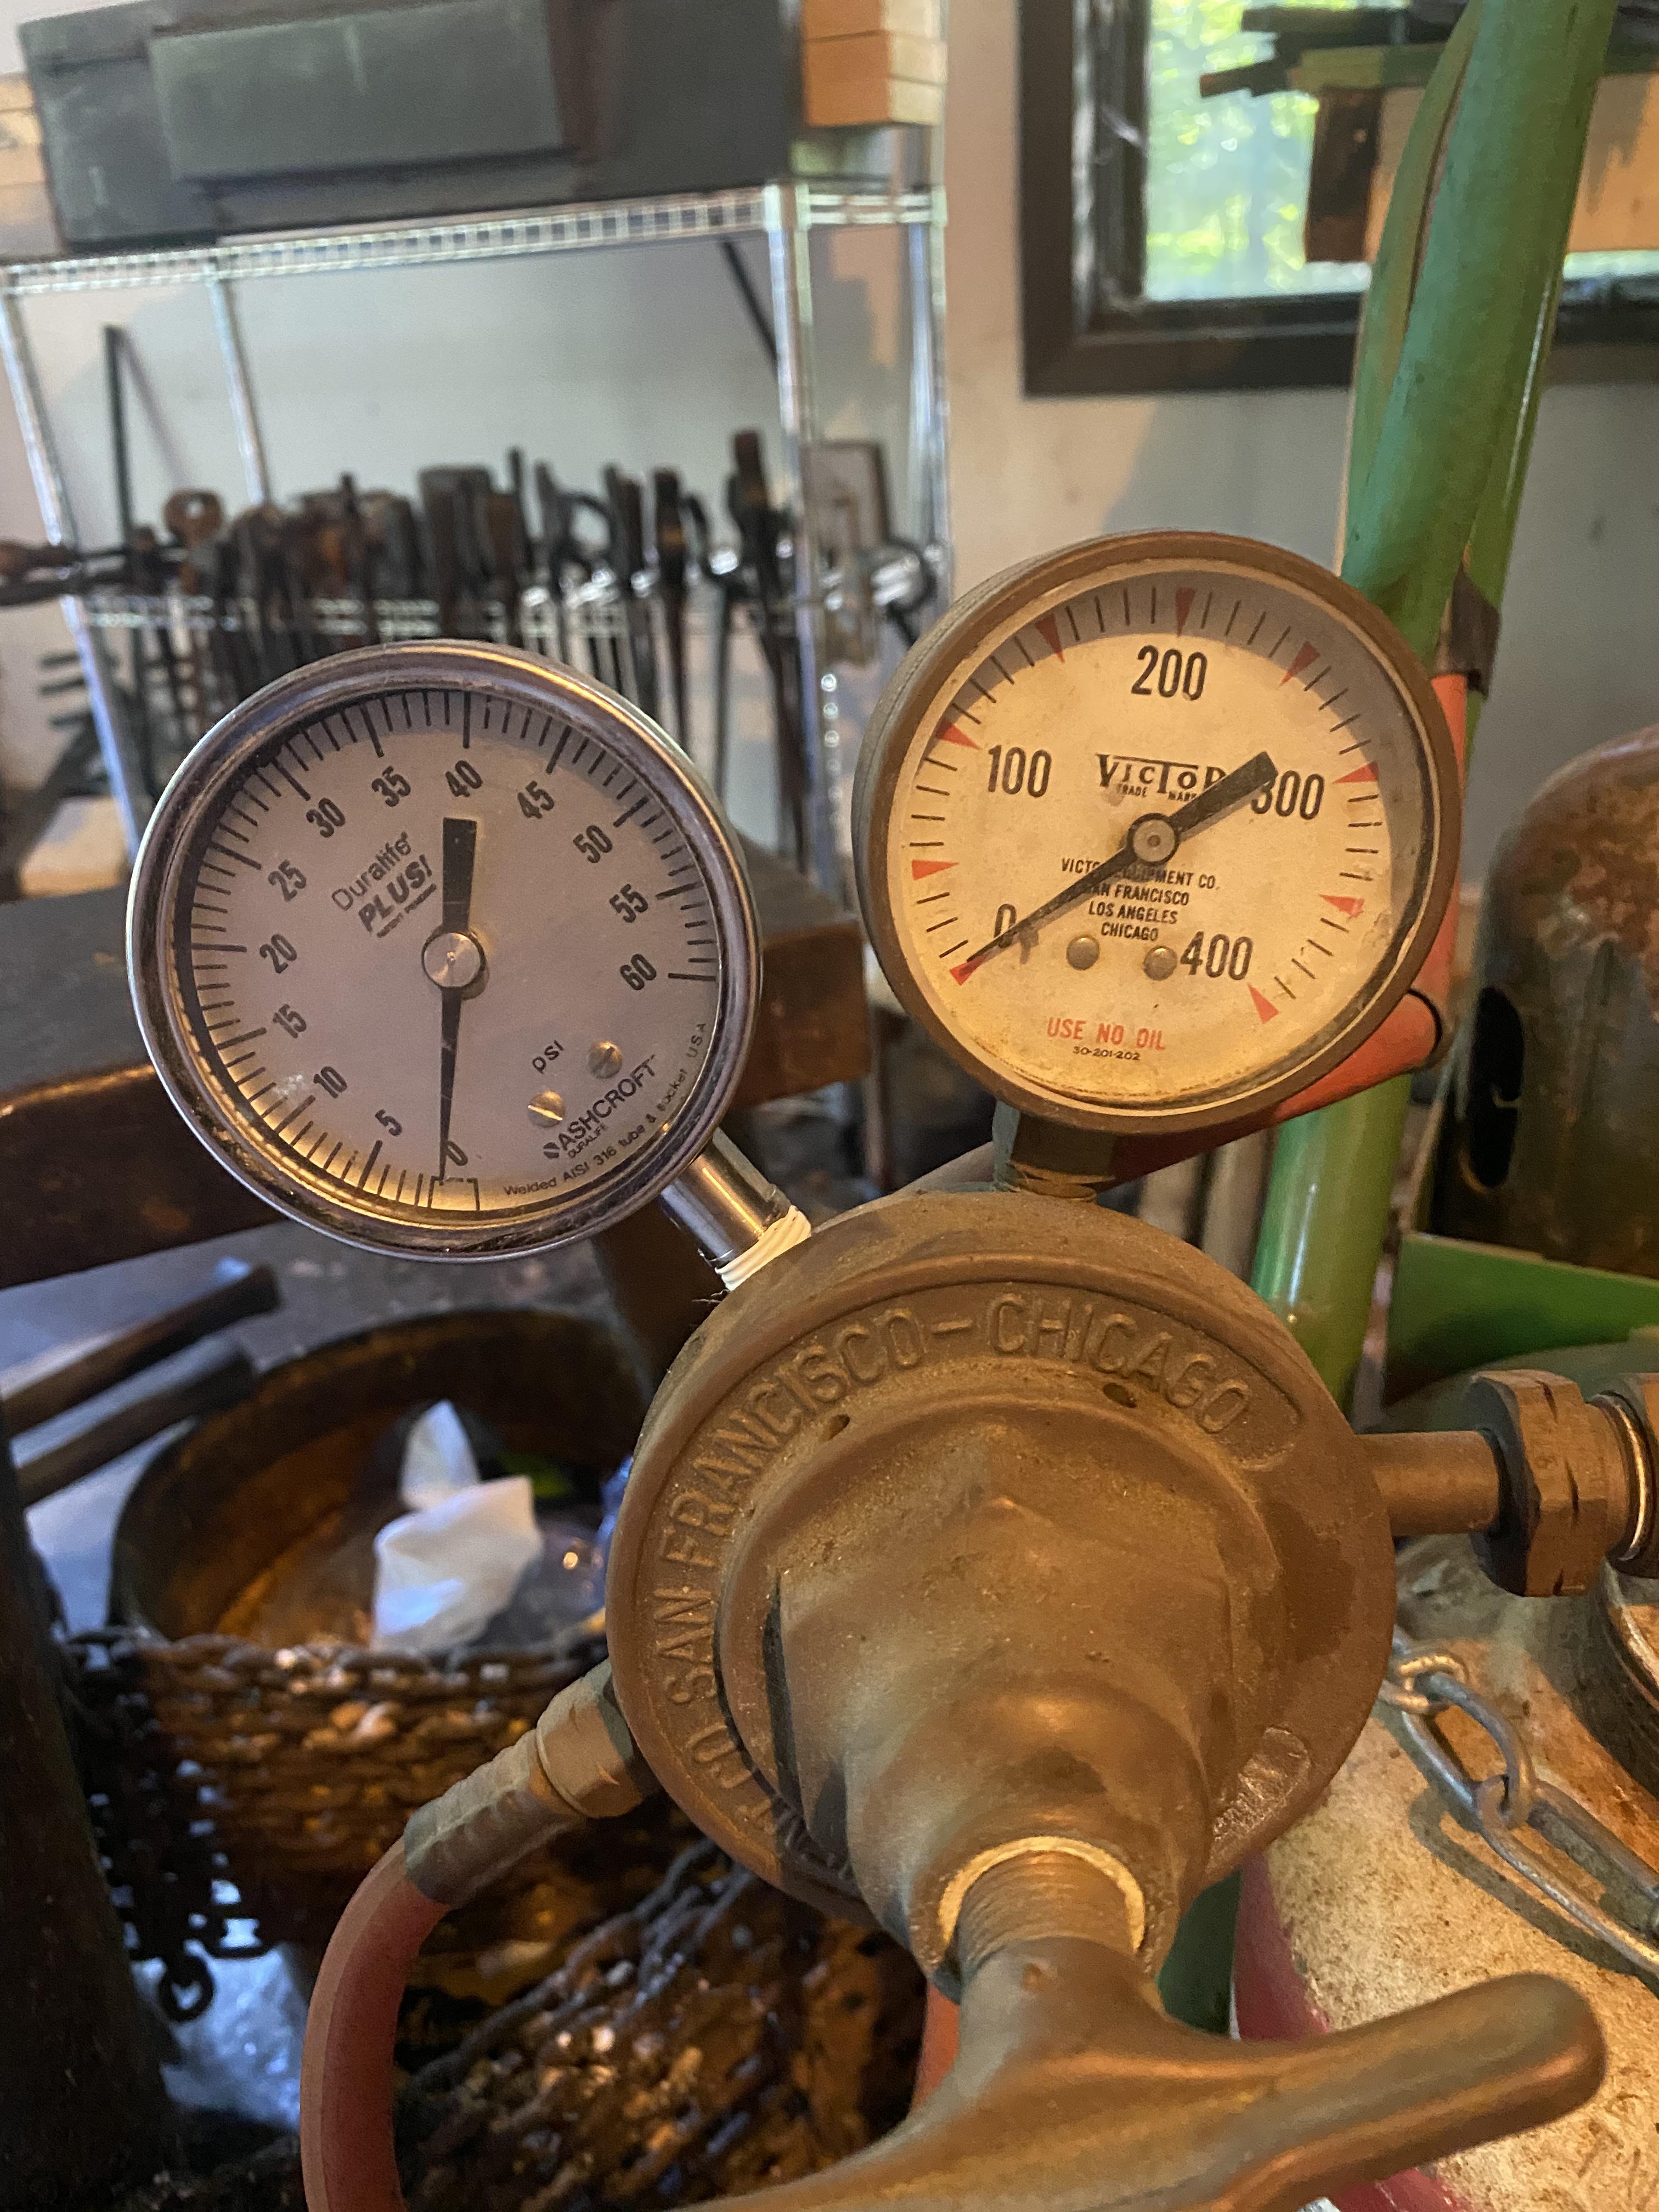
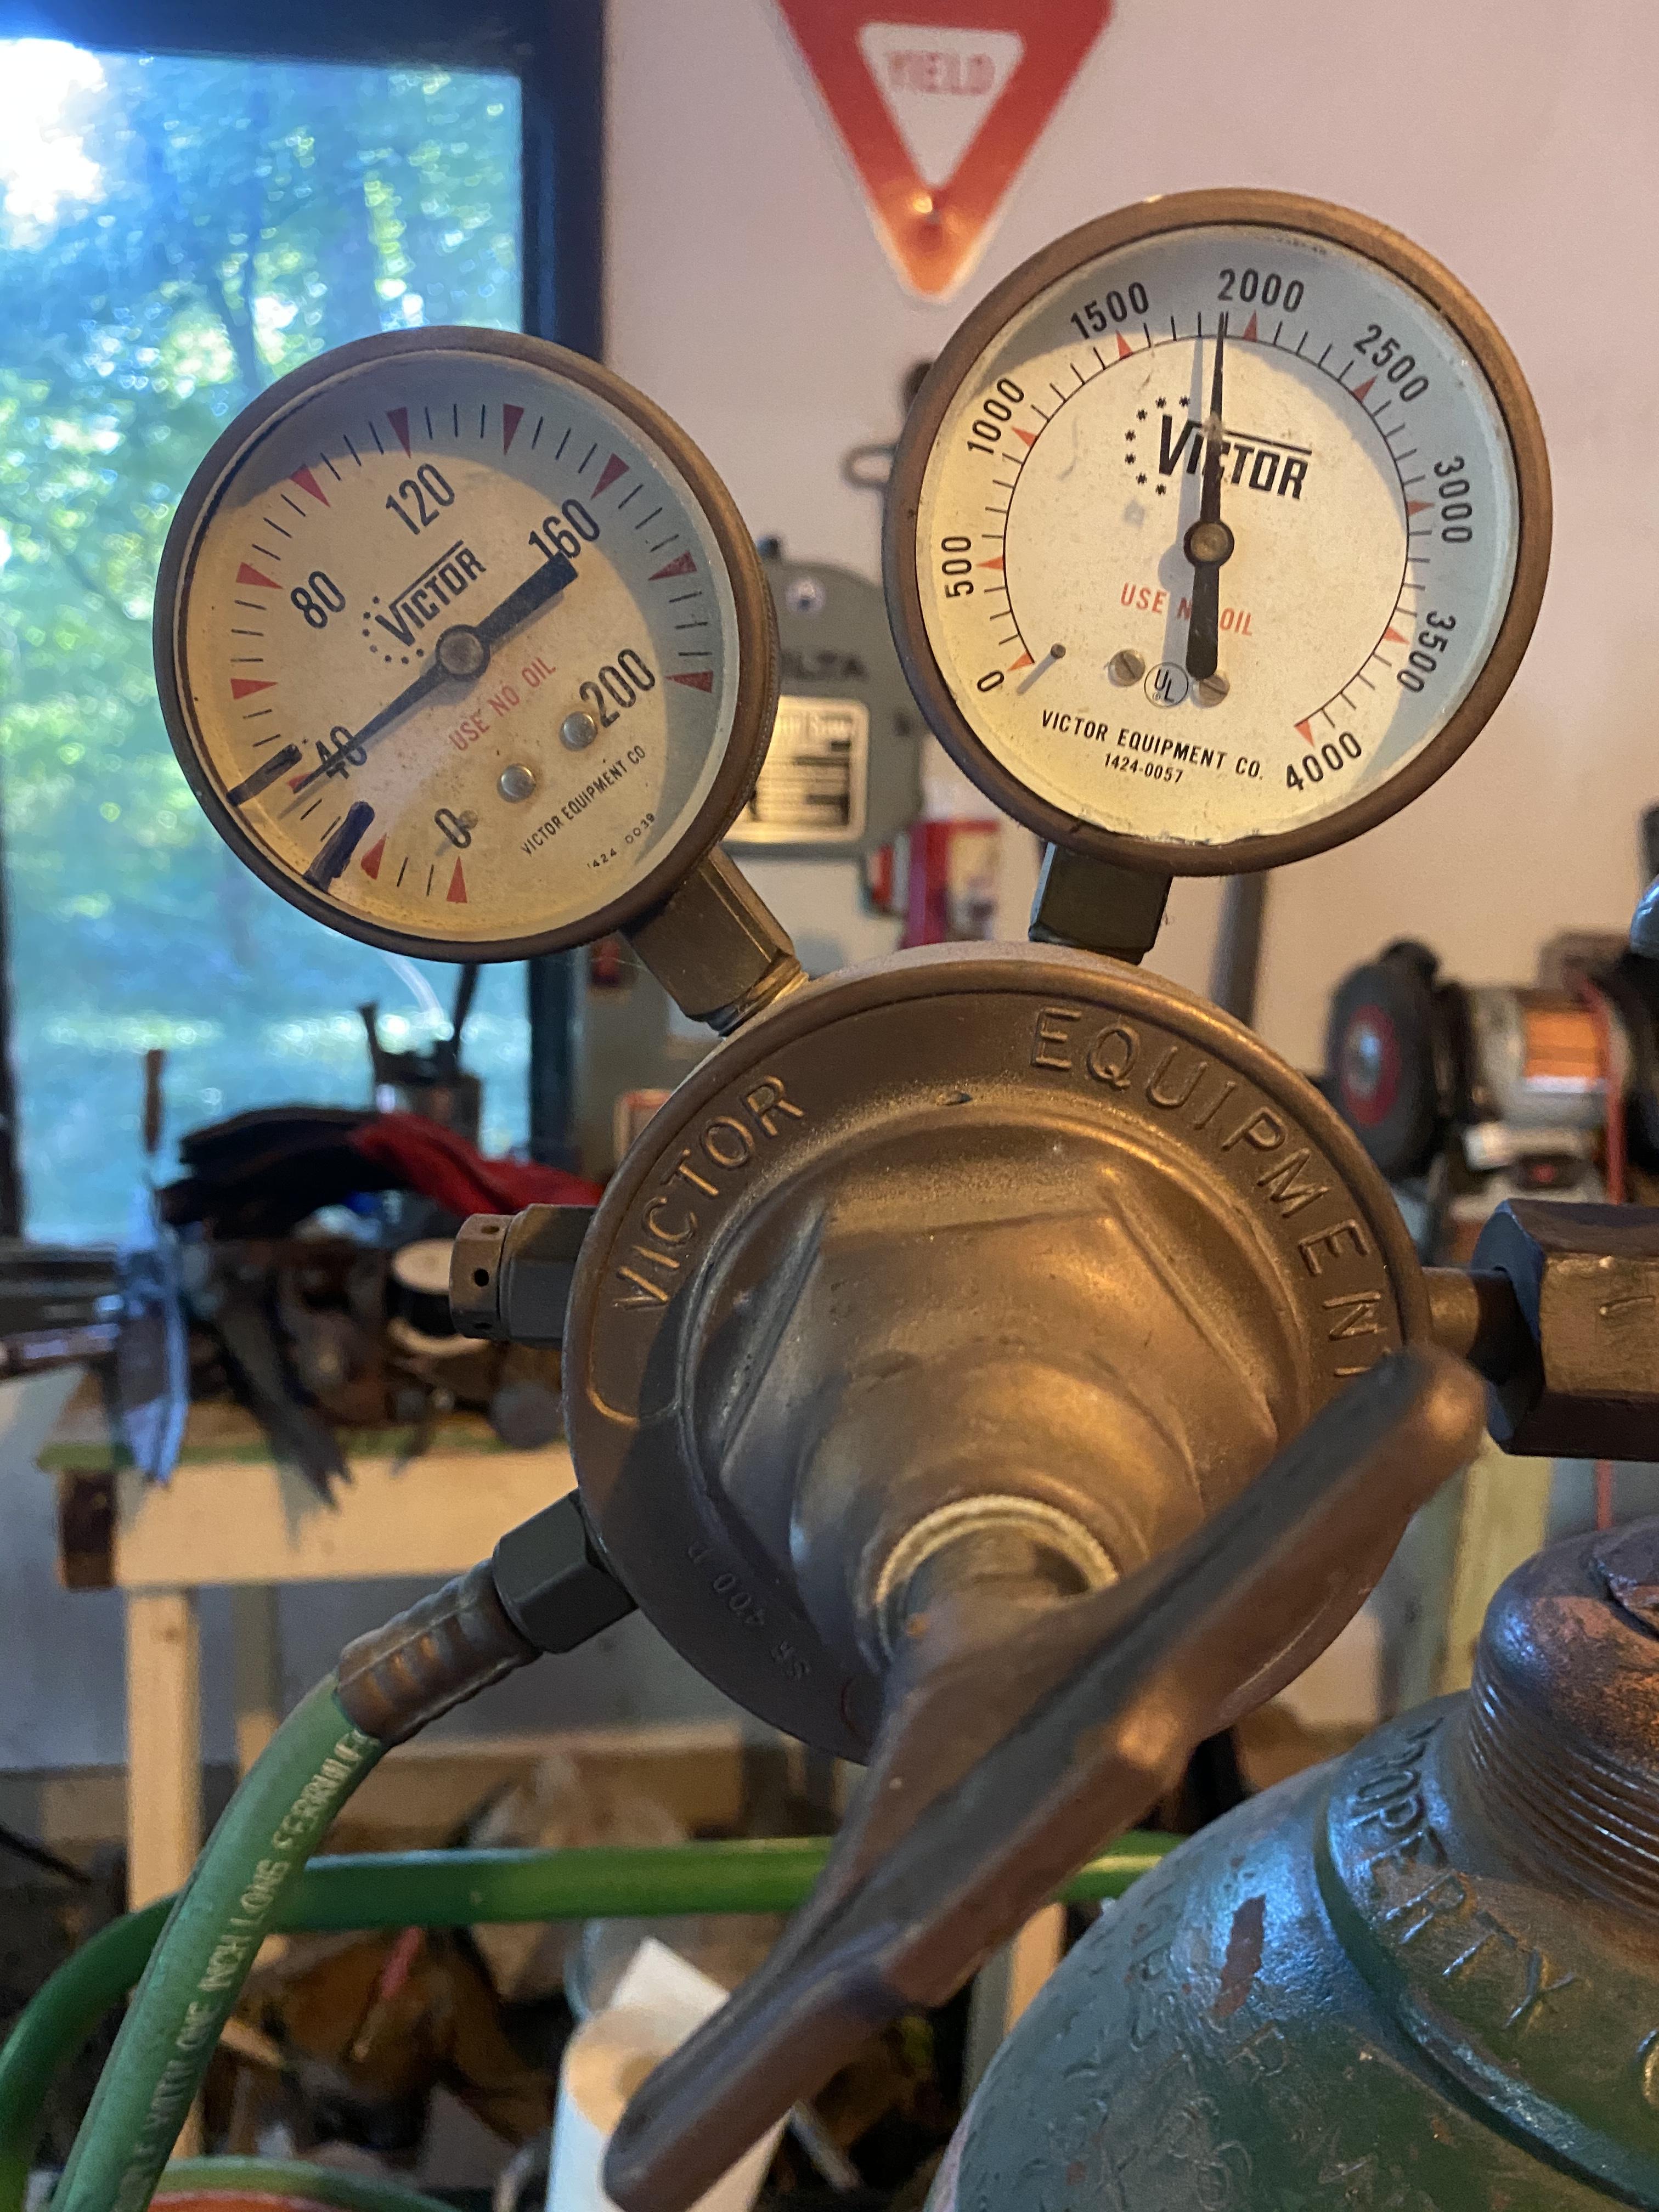
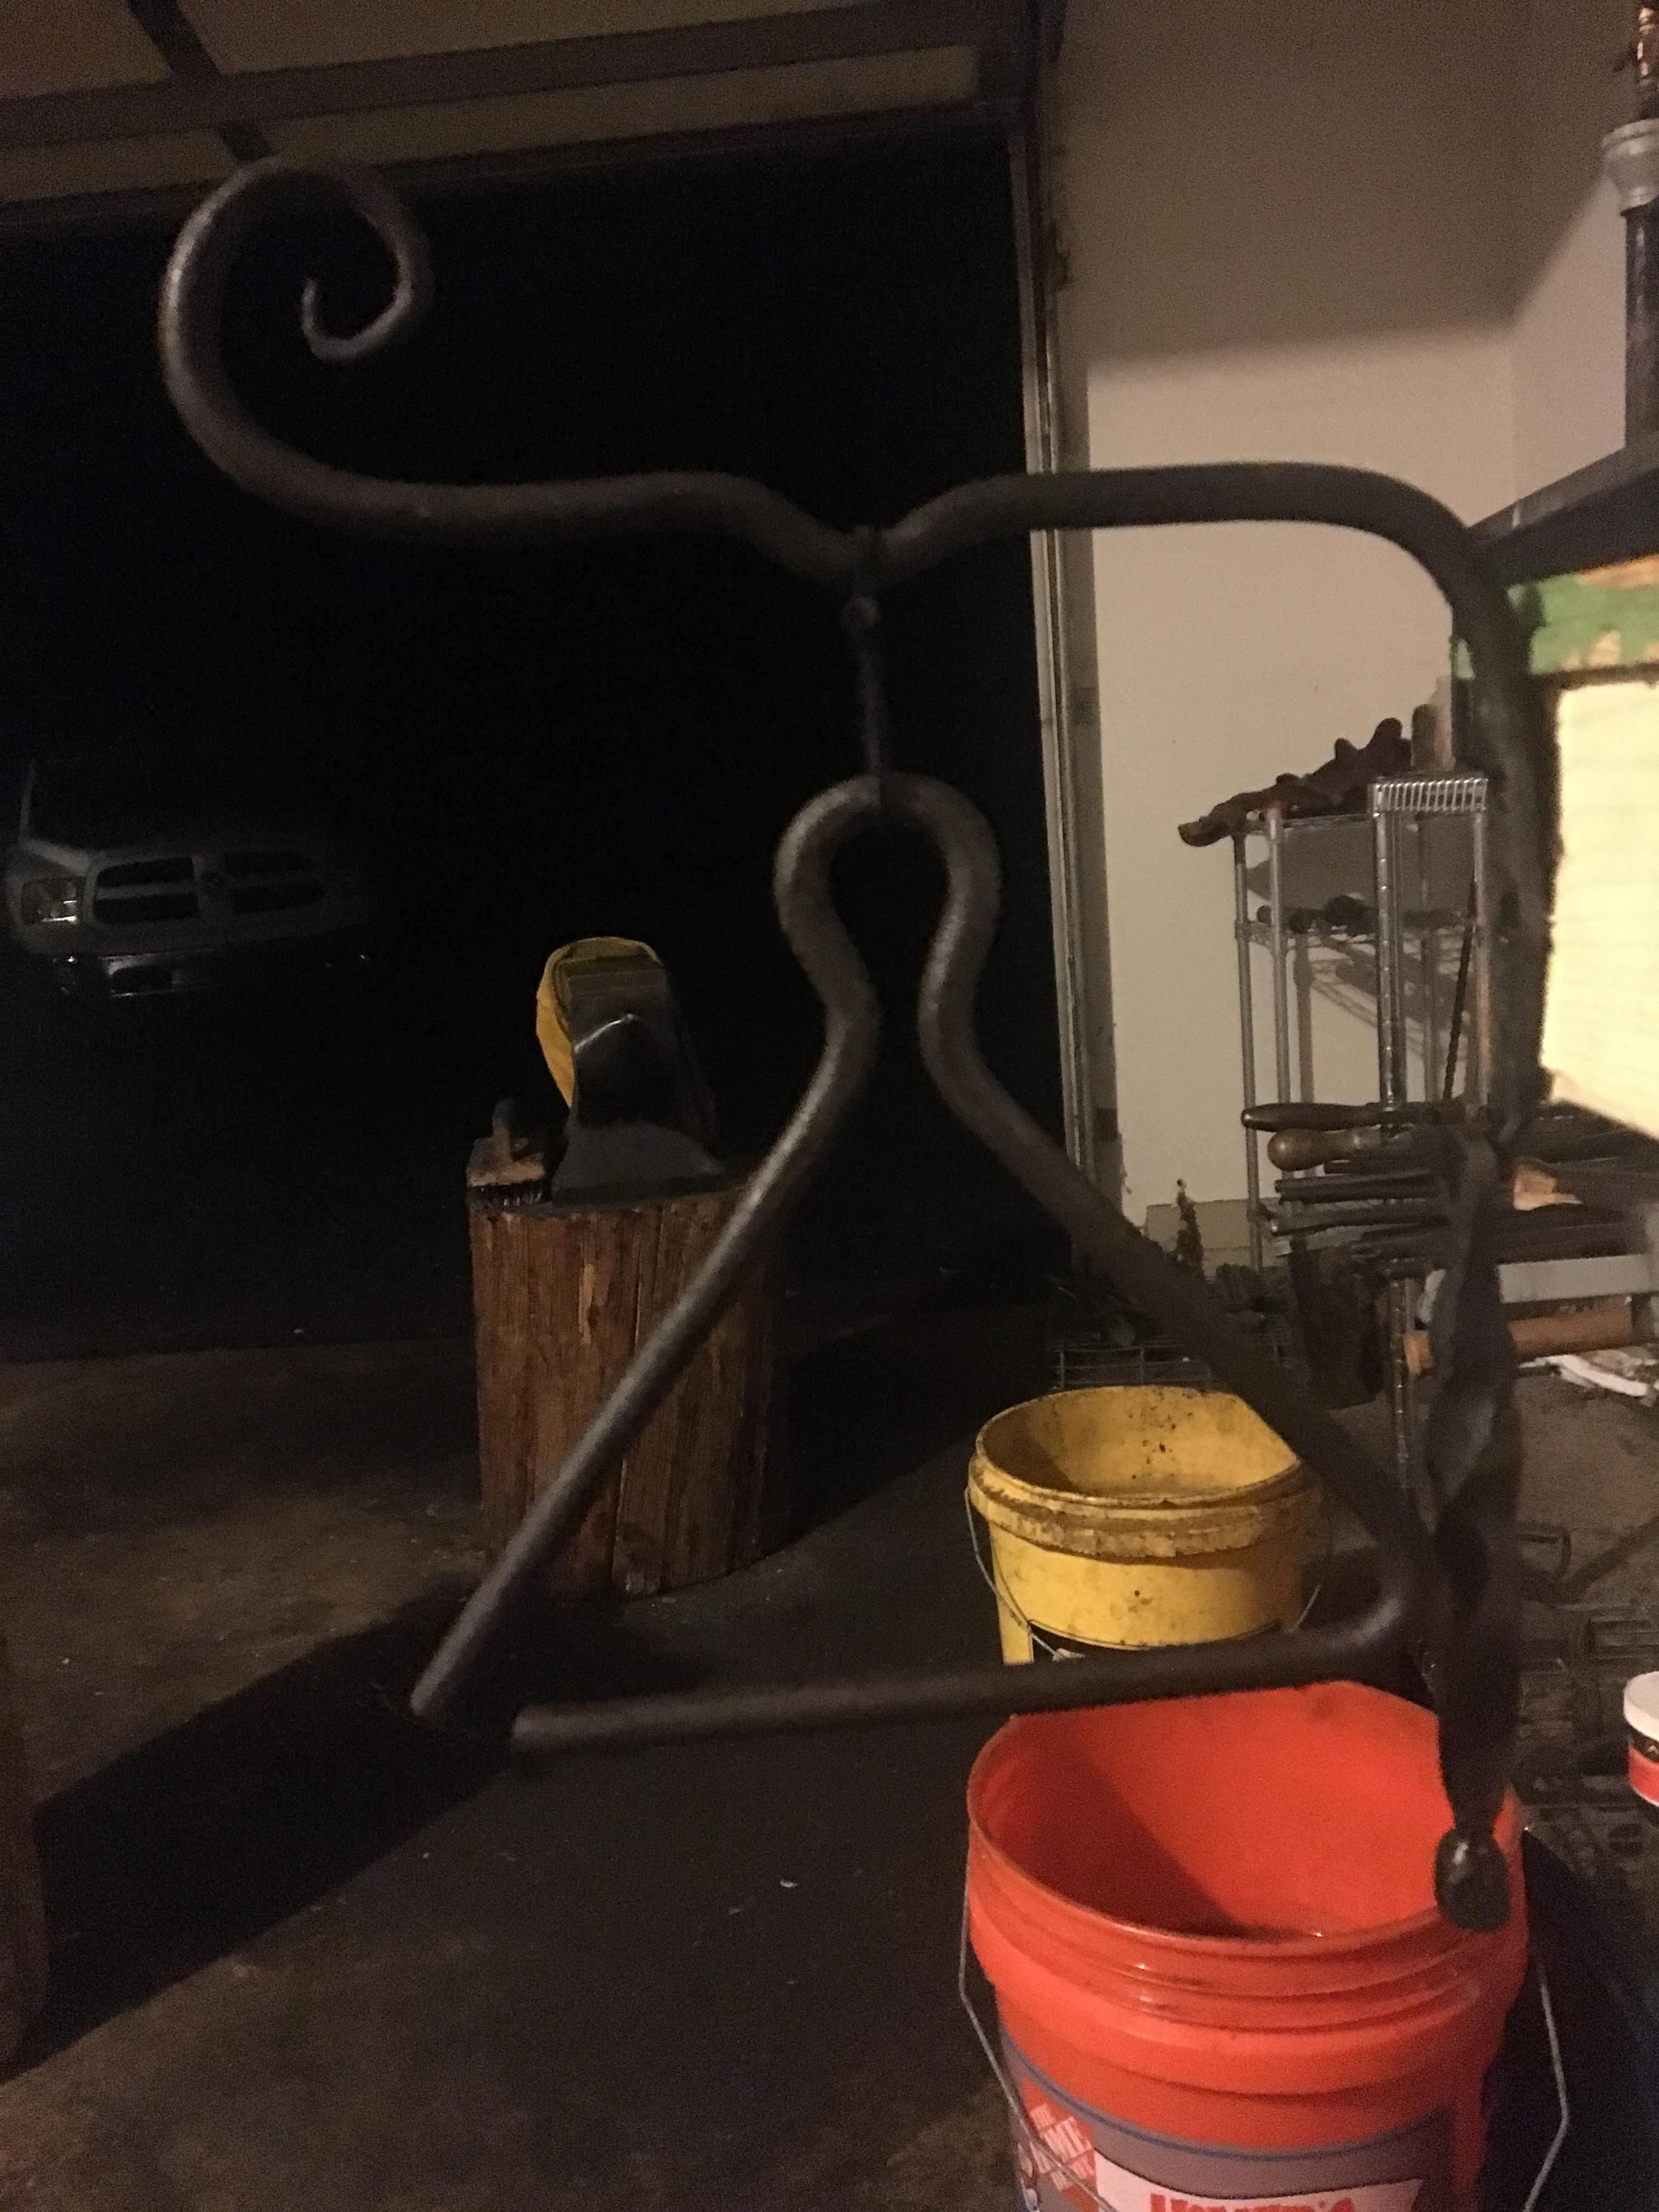
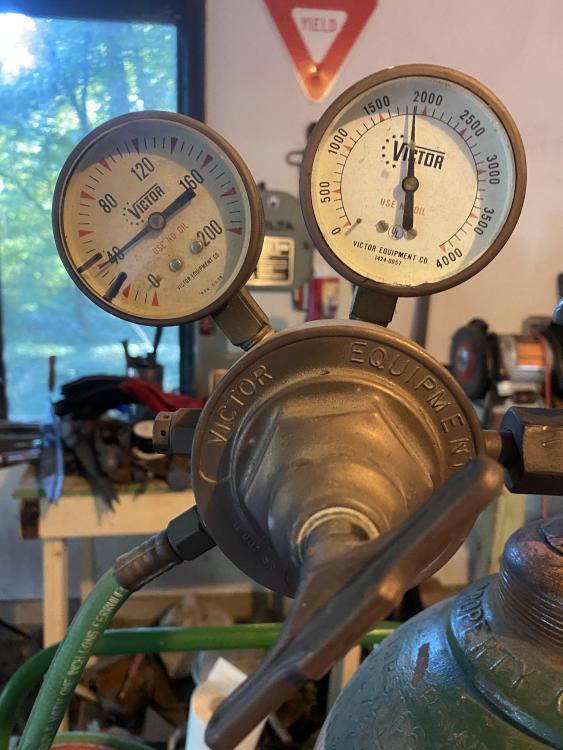
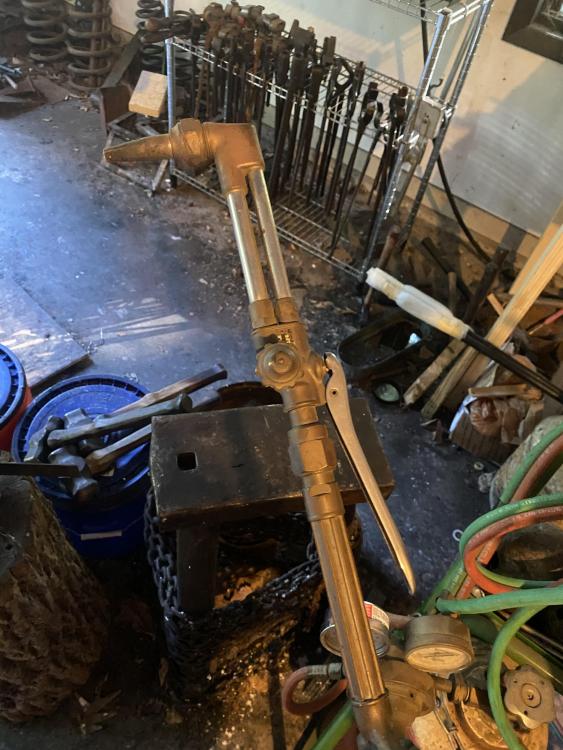
This followed me home after a long night shift. The neighbor was reducing some of his fathers things and wanted it to go to somewhere where it would be loved and taken care of. With a handshake, some cash($265), and a forged bottle opener from the shop the deal was struck - the cart, both tanks (nearly full), 20ft long hoses, two torches with tips, cleaning tools, striker with spare flints, goggles, the whole lot of it. Can not wait to test it all out, and help it find its permanent home somewhere here in the shop. My wife is slowly watching her two car garage be consumed by the trappings of a blacksmith shop, she is too good to me.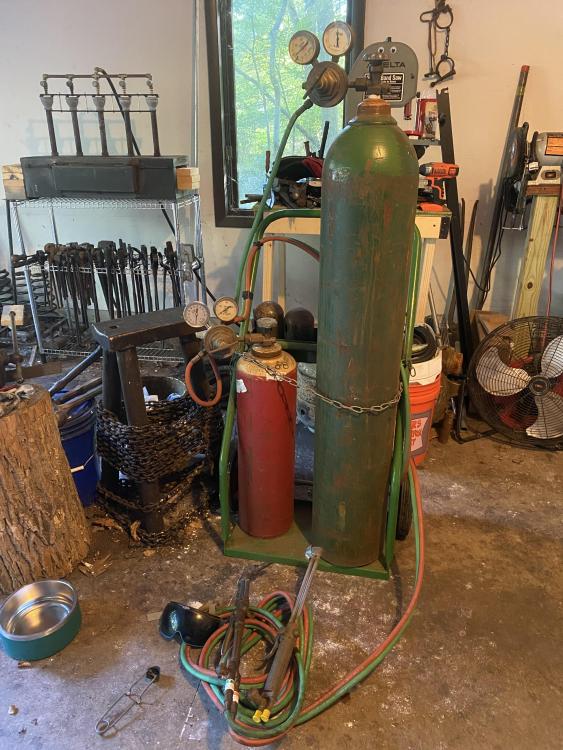


-
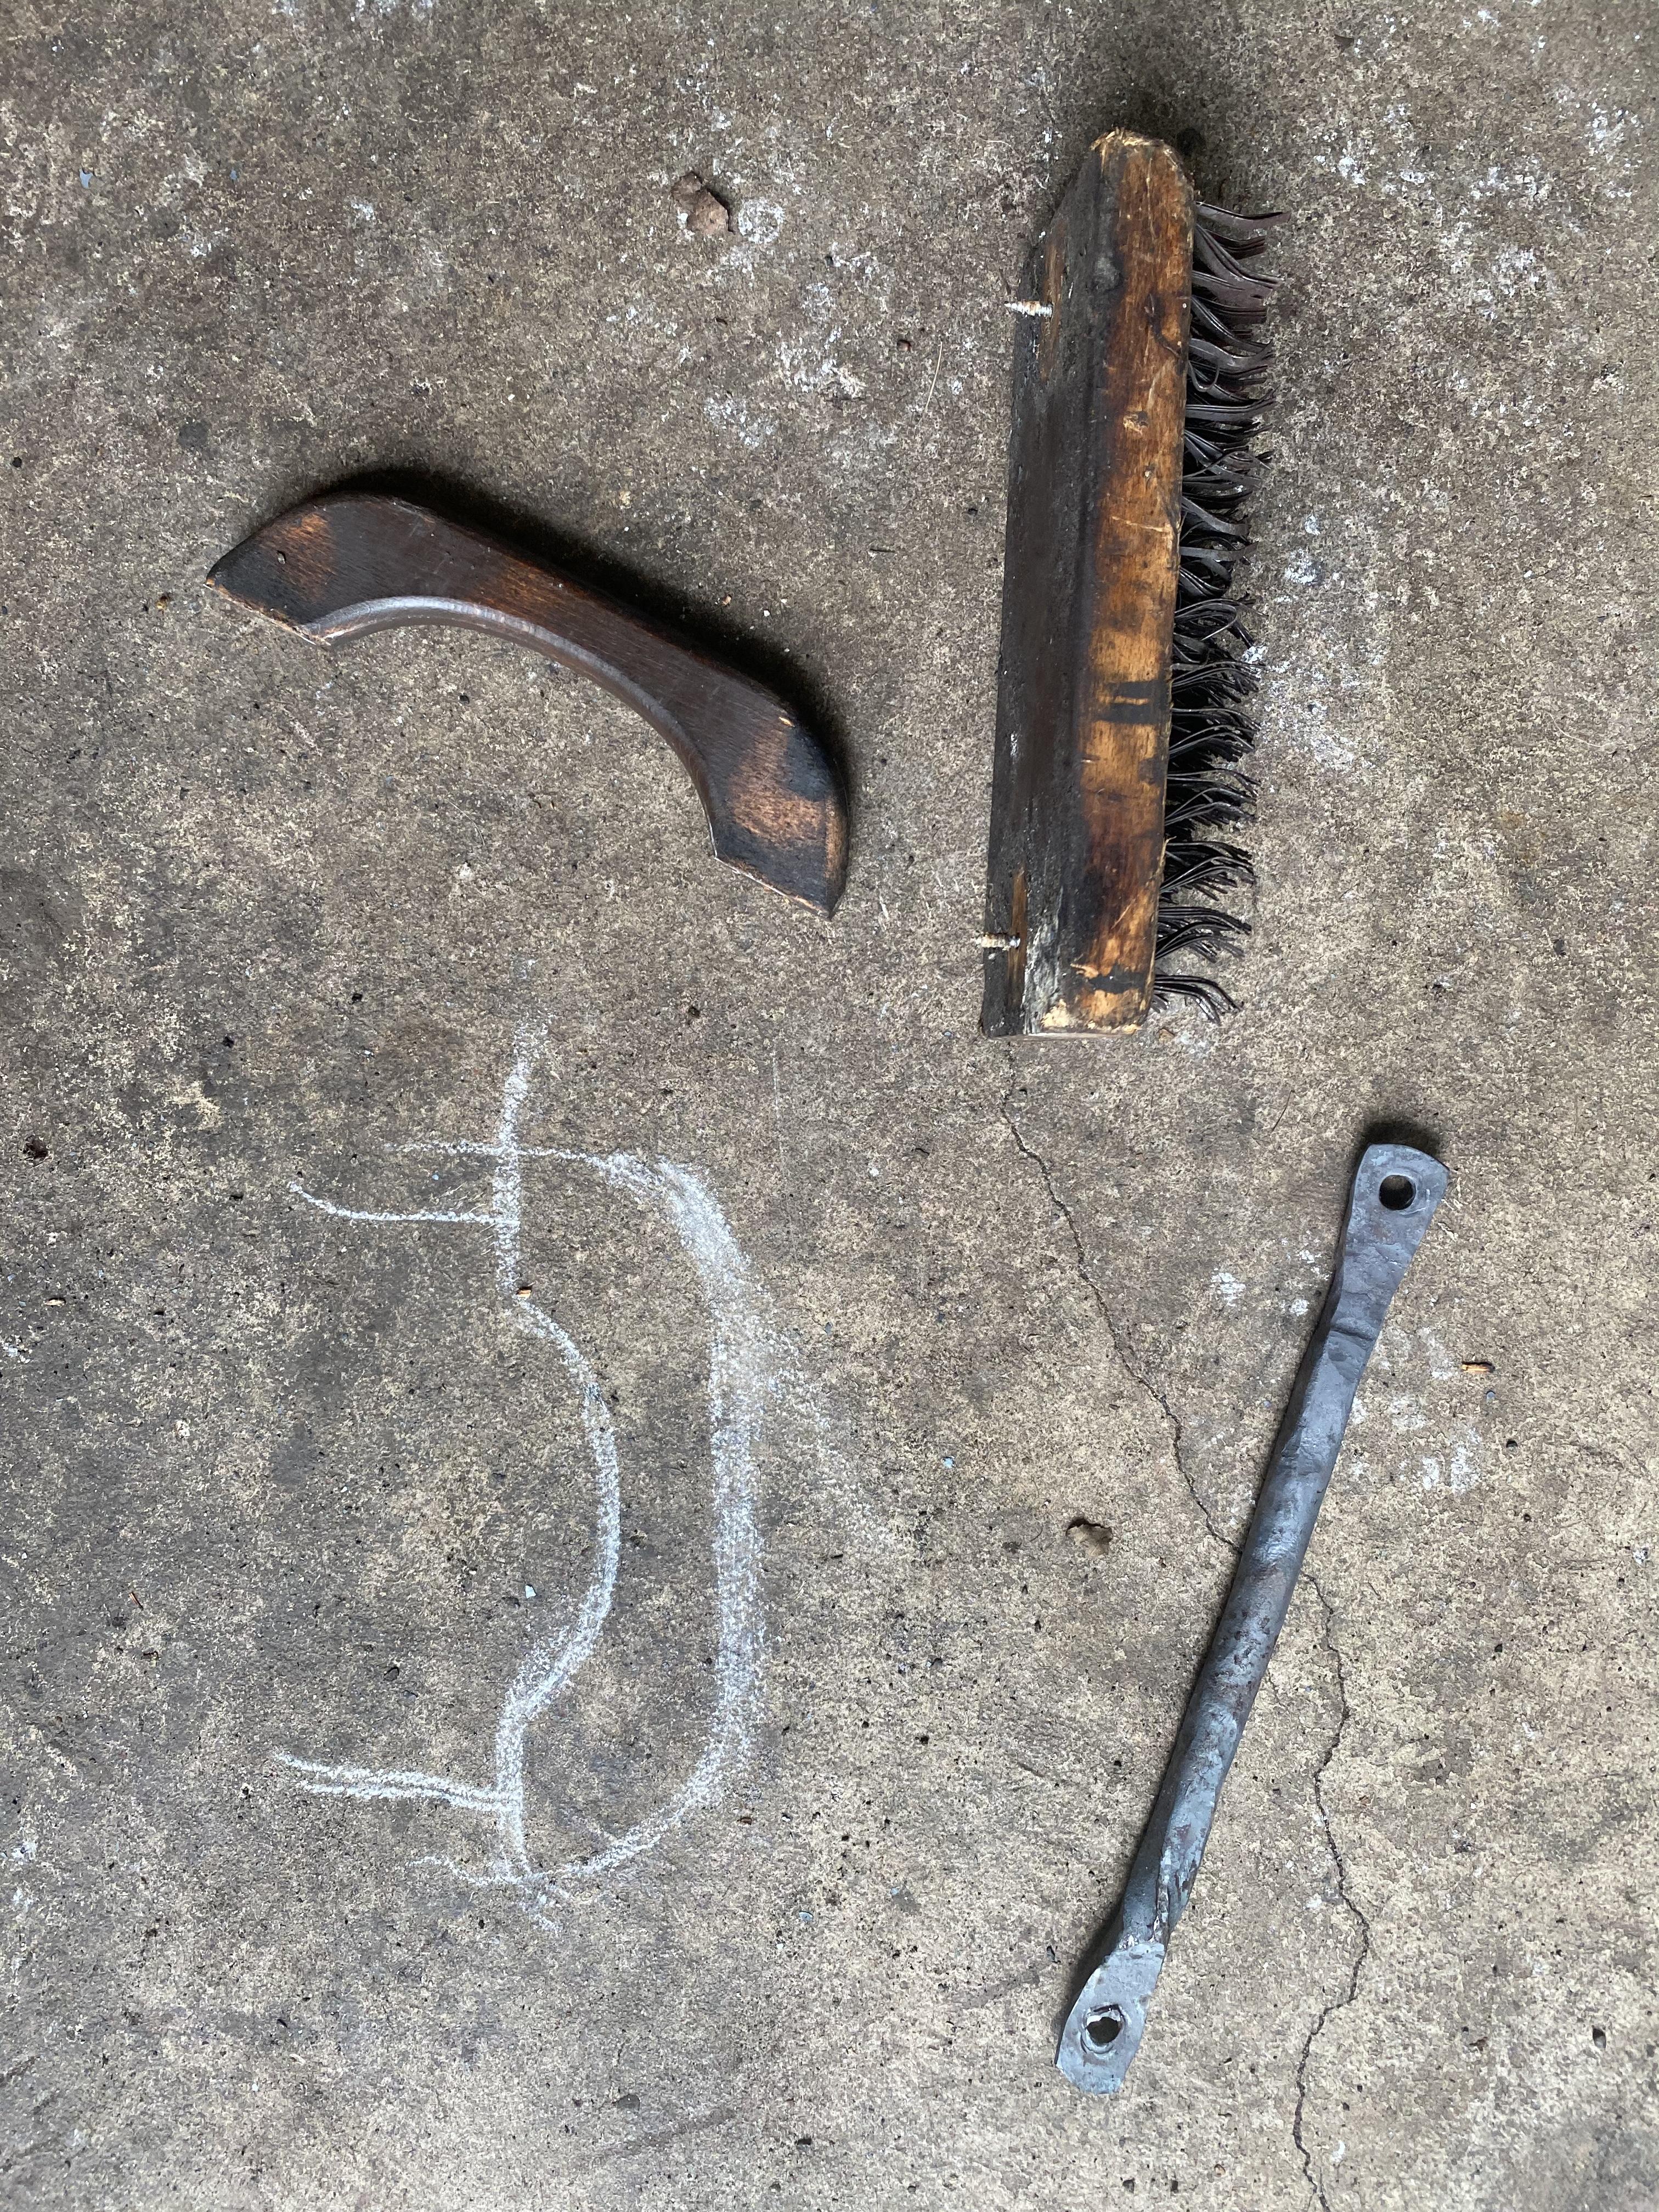
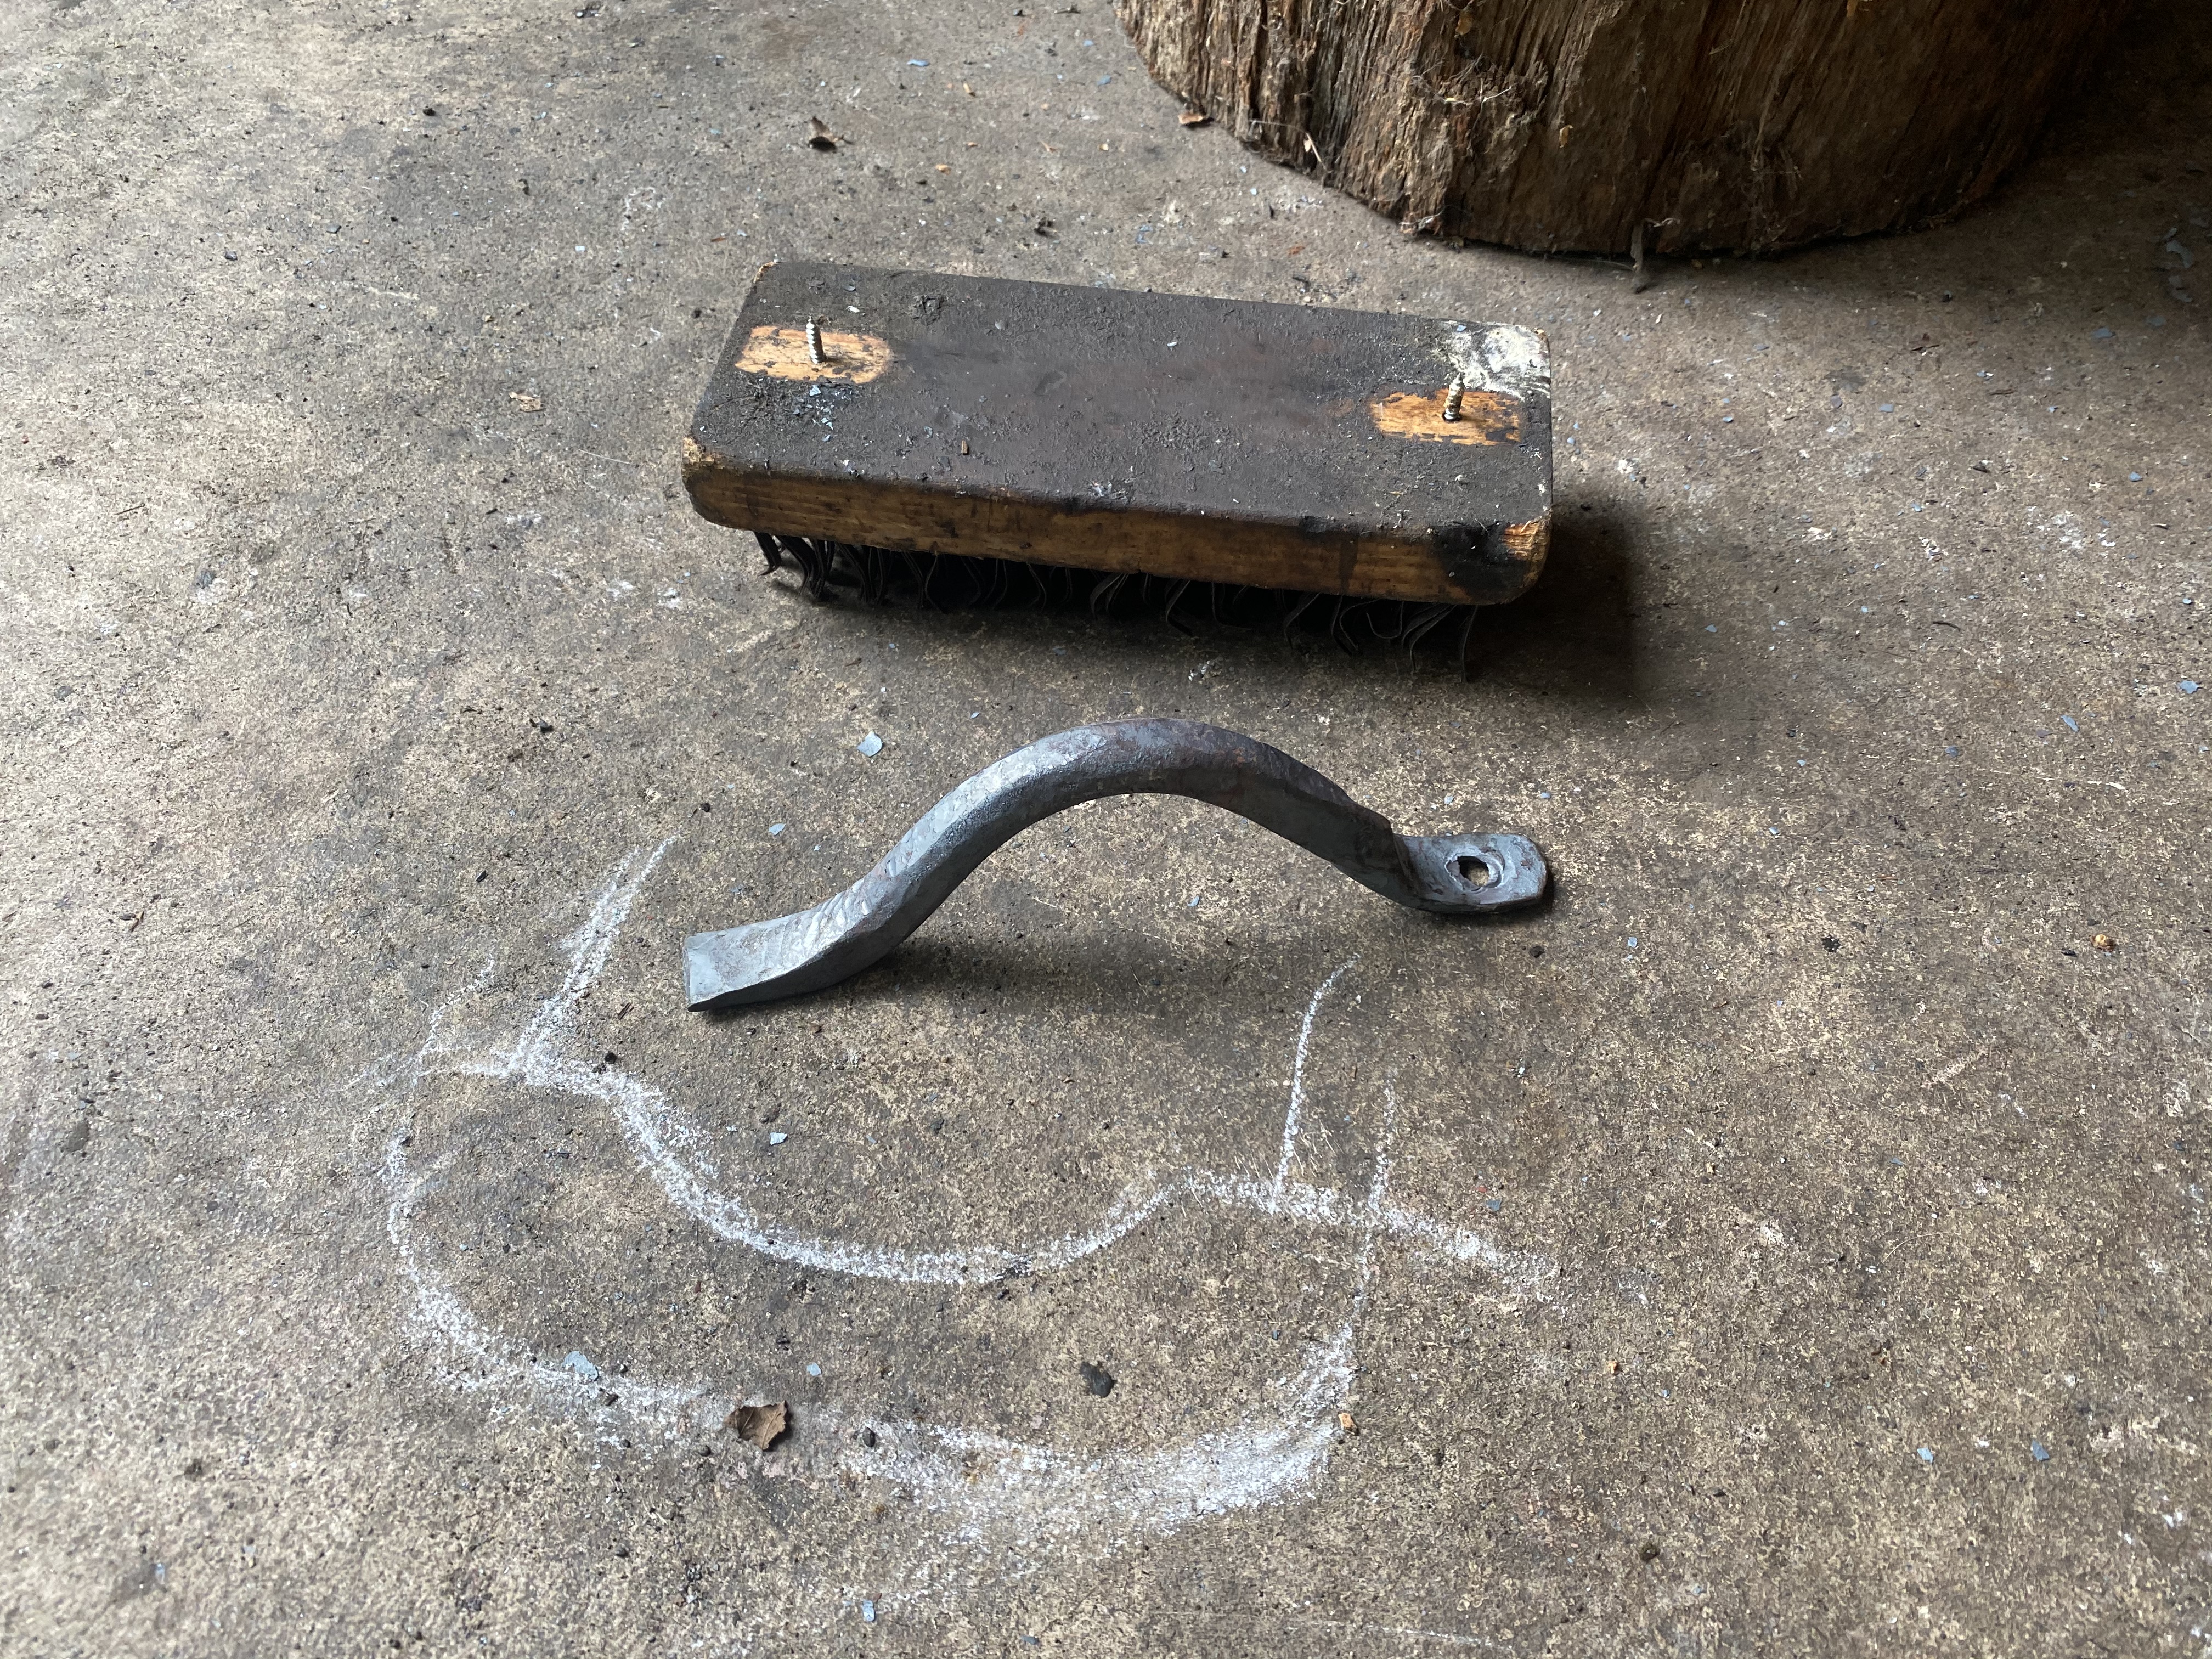
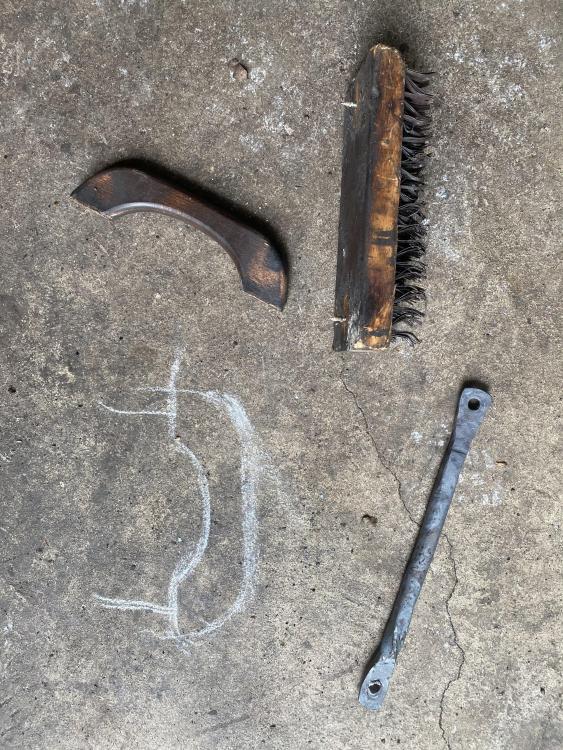
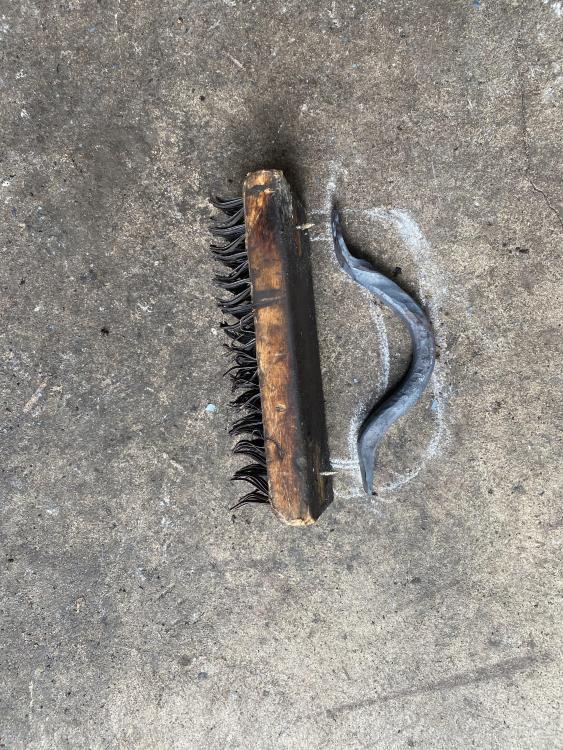
Went to get to work this morning and the rather flimsy, stock, wood handle on the butcher block brush finally went. Admittedly, I have been prolonging making something a bit more durable for a while, constantly using slightly larger screws and the like. It’s not pretty, it’s not meant to be, perhaps one day I’ll pretty her up a bit but for right not it functions just fine.

-
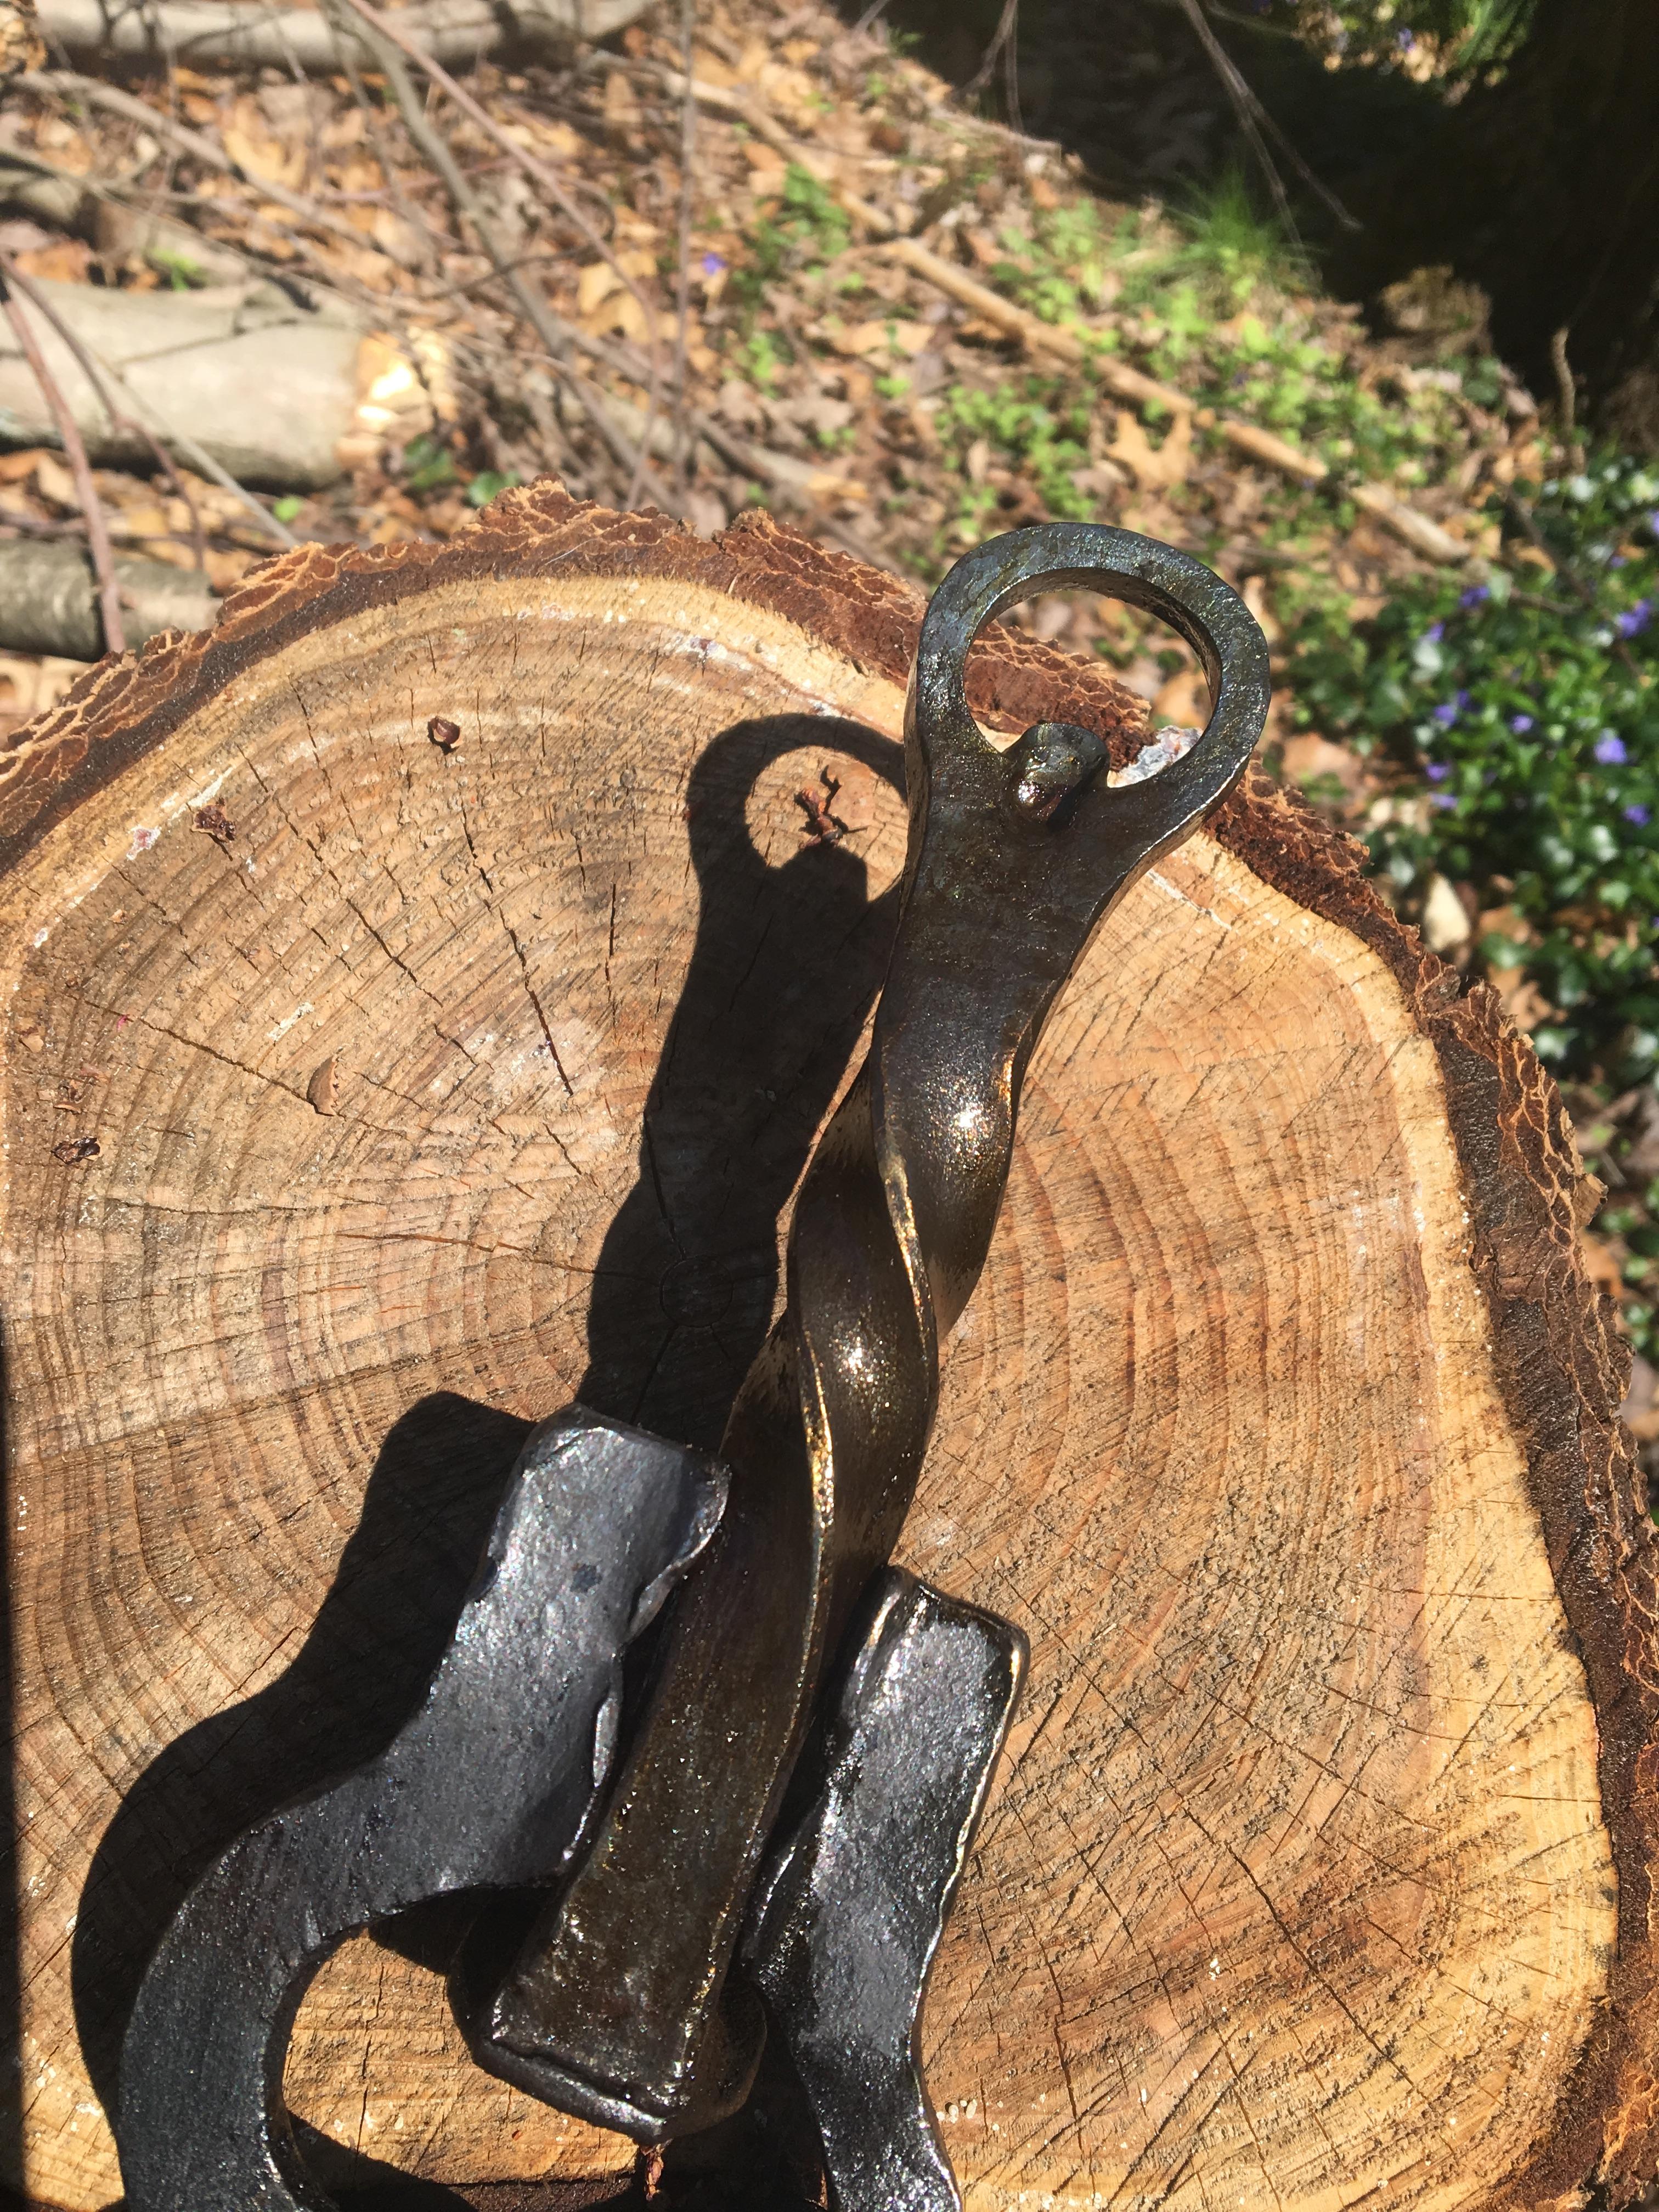
Show me your Bottle Openers!
TastefullyPeenedIronWorks replied to Arbalist's topic in Blacksmithing, General Discussion
Thank you for the input! I will correct my mistake. -
Christmas 2020 is headed this way
TastefullyPeenedIronWorks replied to Glenn's topic in Blacksmithing, General Discussion
I gave my wife her gift a bit early. I decided not to take pics of the work, I like it being a private piece just for her. I made a pocket sized billet/coin of Mokume-gane and put my touchmark on one side. It’s polished and you can see the laminations quite well - at least on the edges. I had some mild difficulty forming it as it wanted to keep separating/delaminating but, with some heat low and slow I got the job done. She carries it now, I suppose as a type of keepsake or ‘worry stone.’ No matter how you view it, Happy wife, happy life. -
Show me your Bottle Openers!
TastefullyPeenedIronWorks replied to Arbalist's topic in Blacksmithing, General Discussion
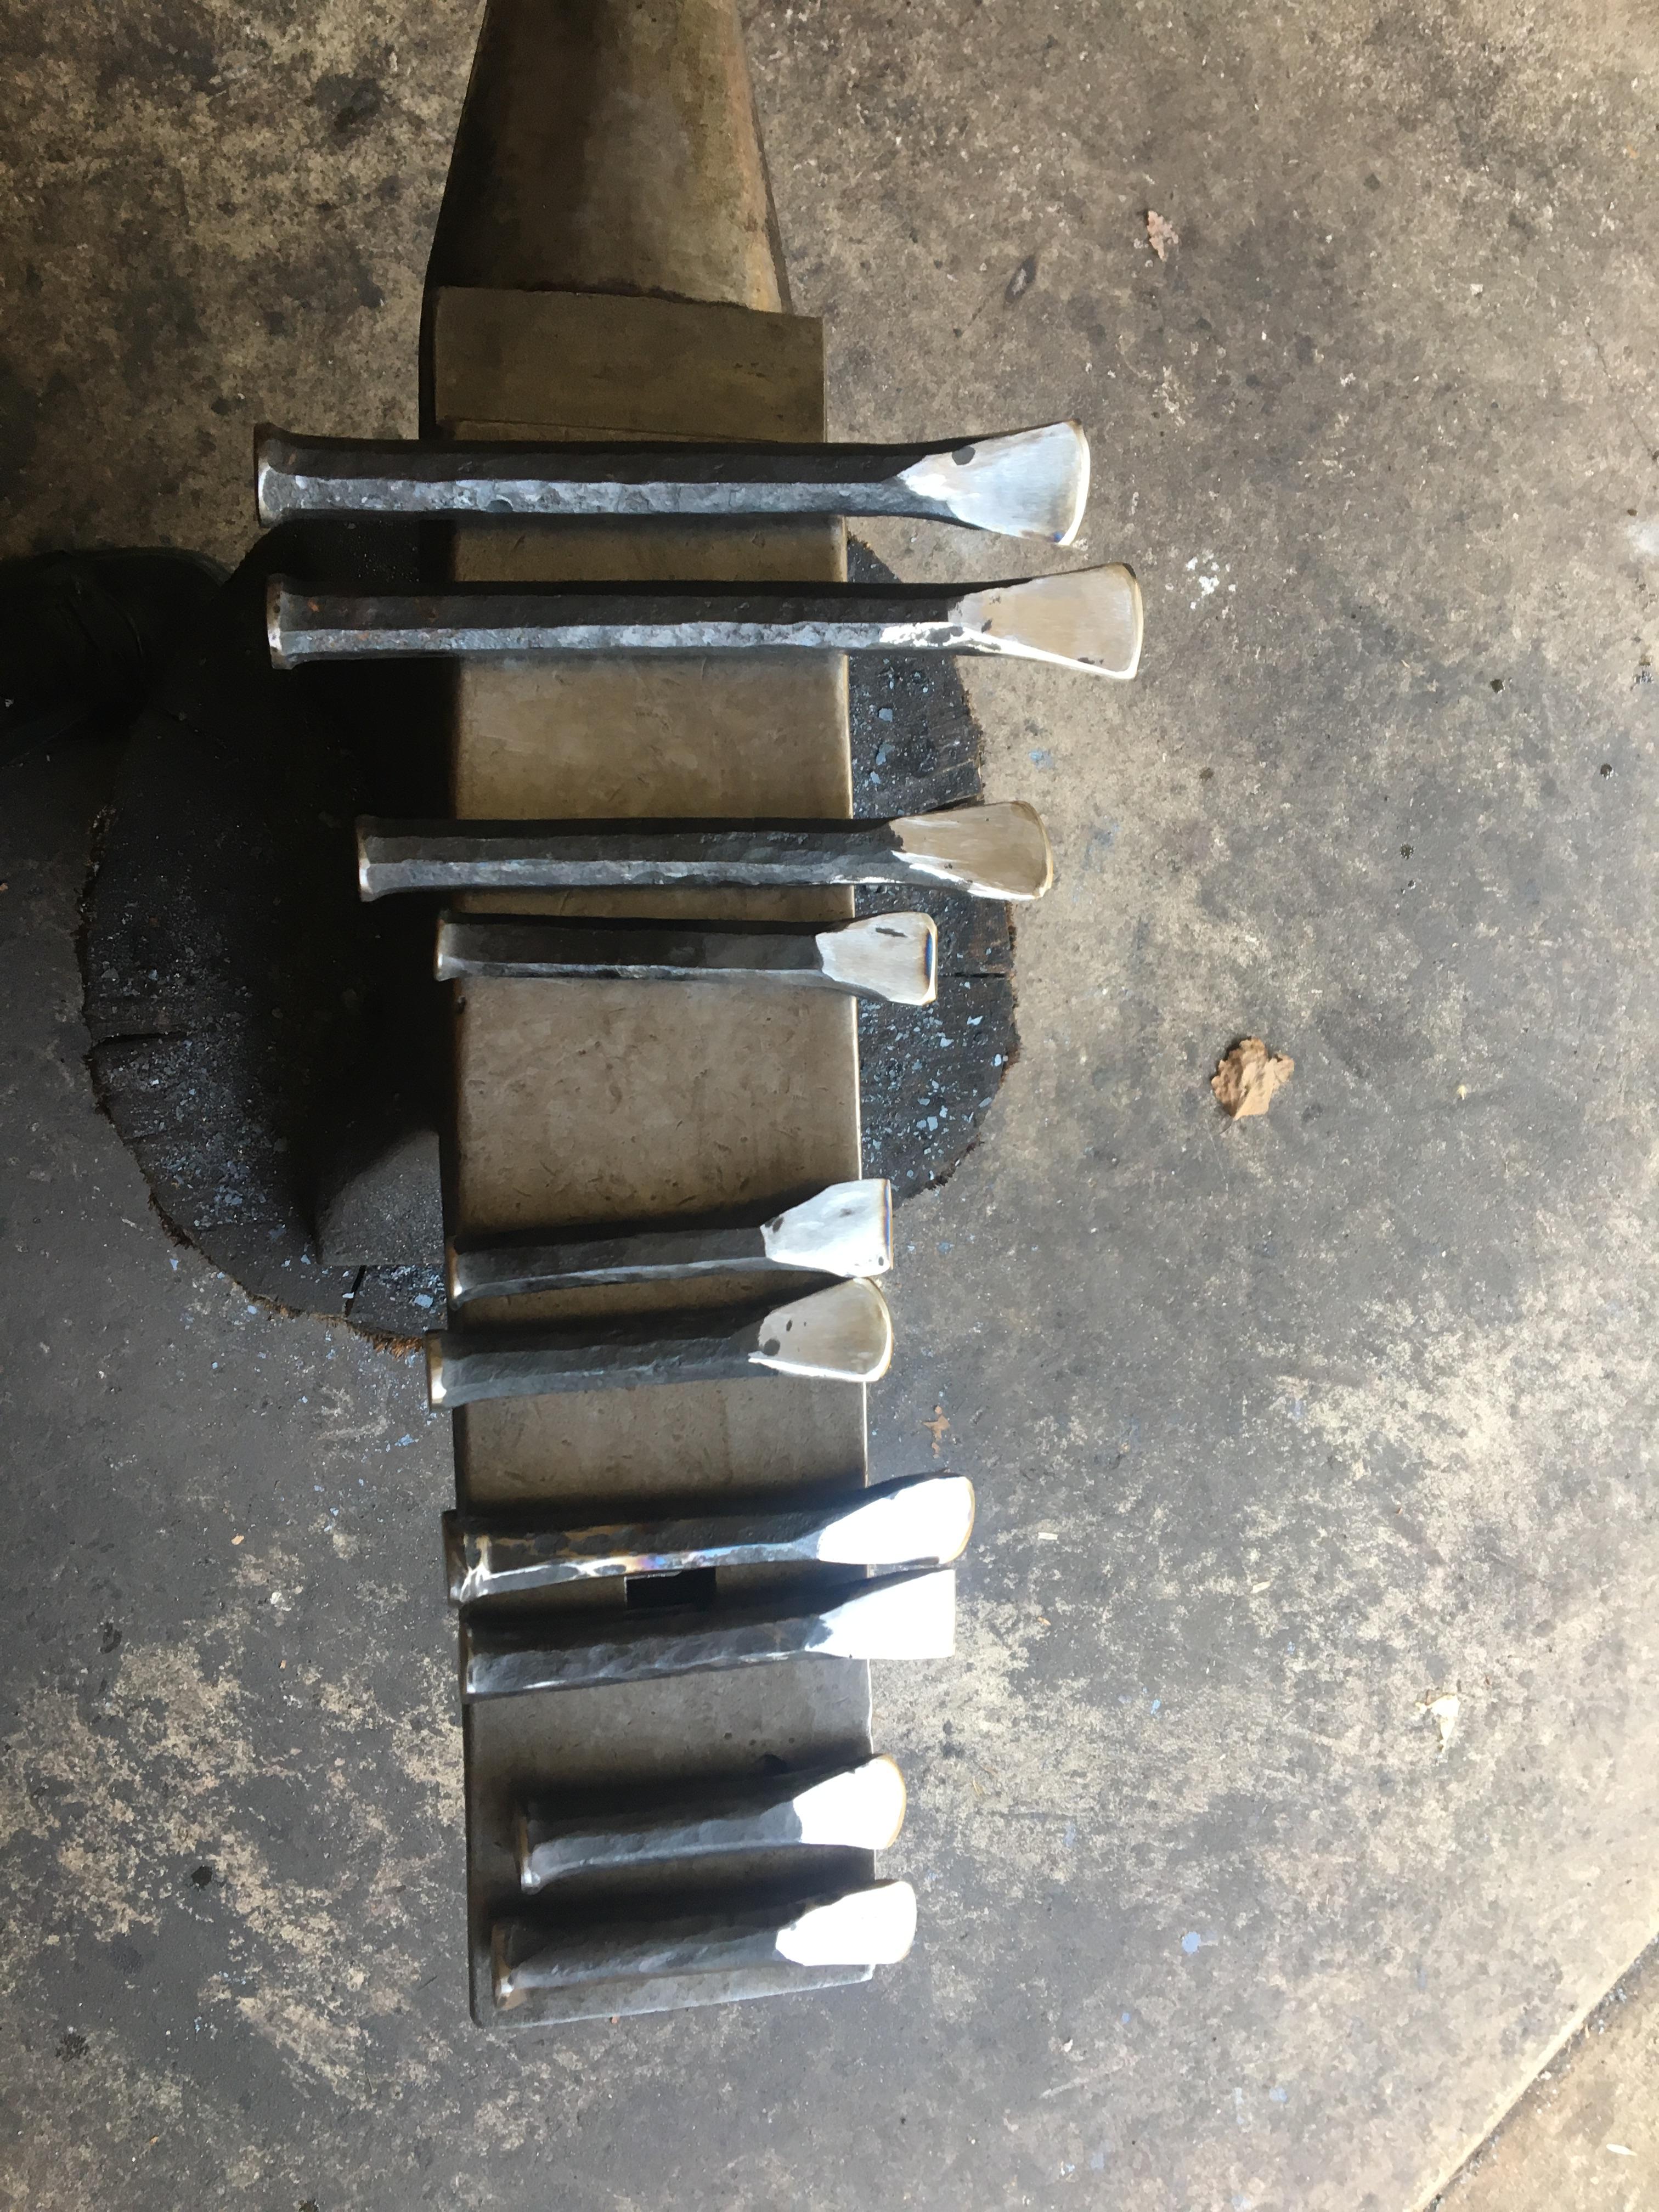
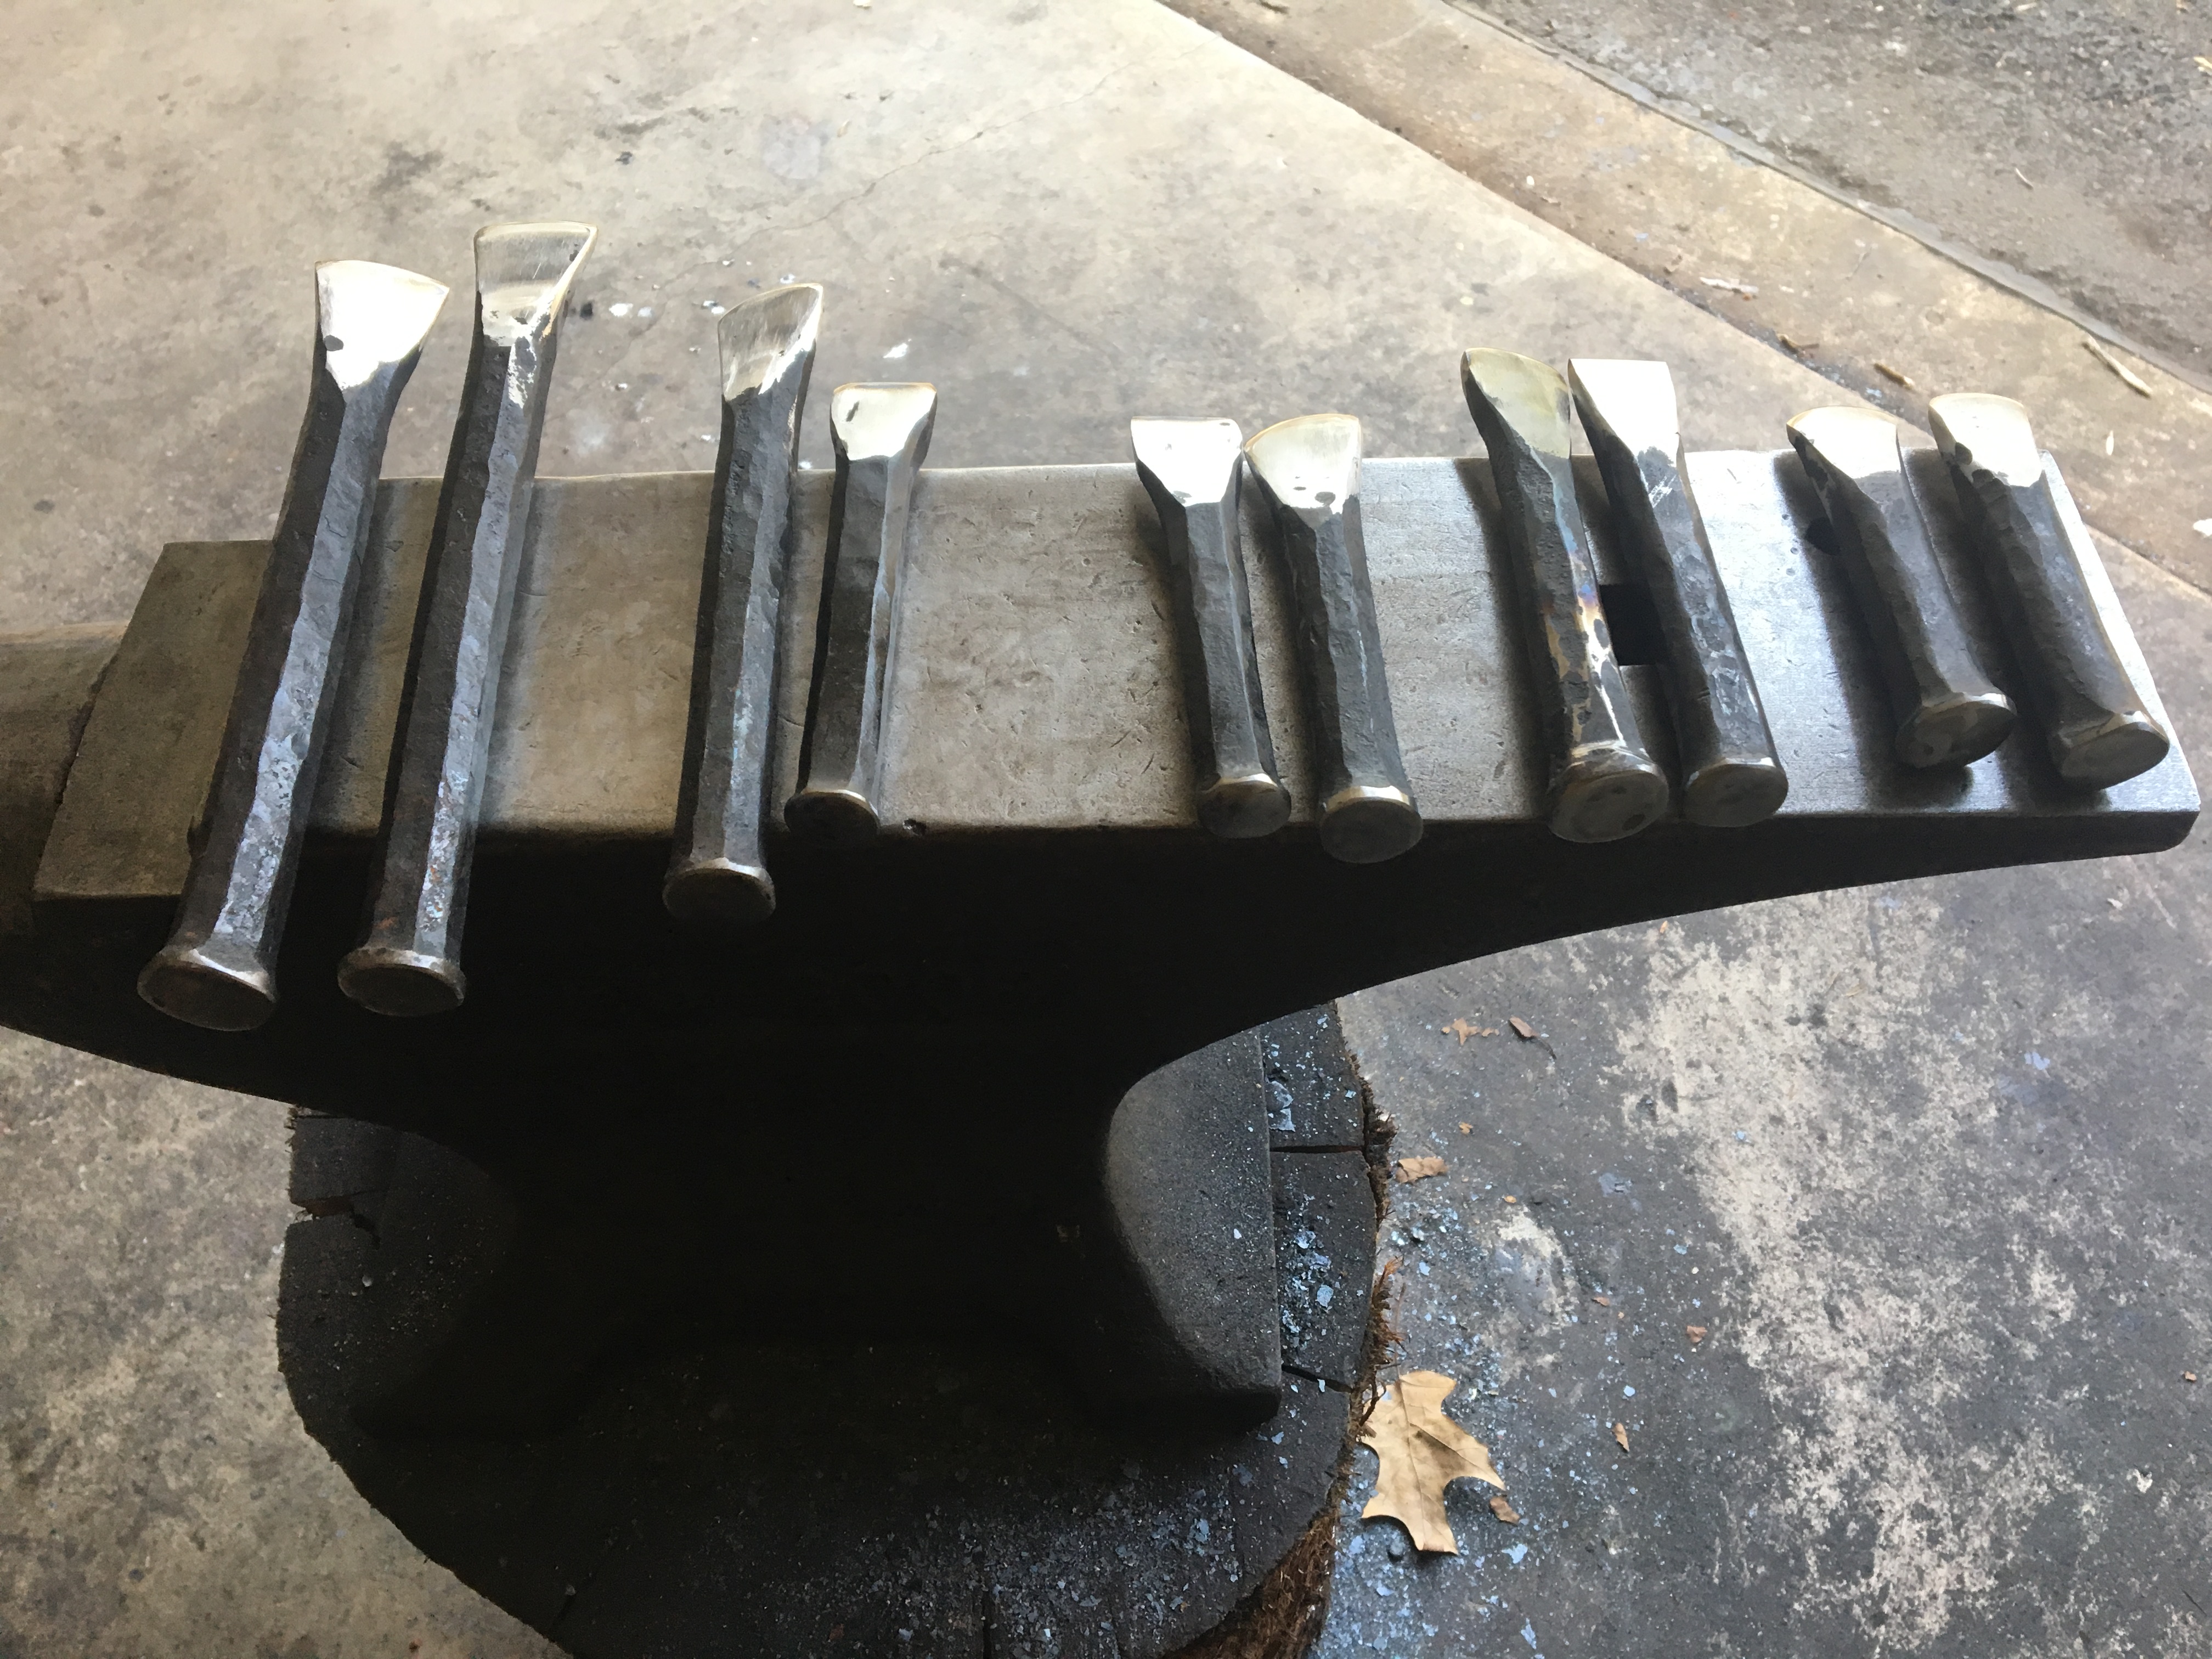
Made a few more rr spike openers in the shop the other day. The third one from the left I believe is wrought, never forged that material before, gonna try a different approach, maybe punching and drifting a hole is asking a bit too much of not only the material but my skill level.
-
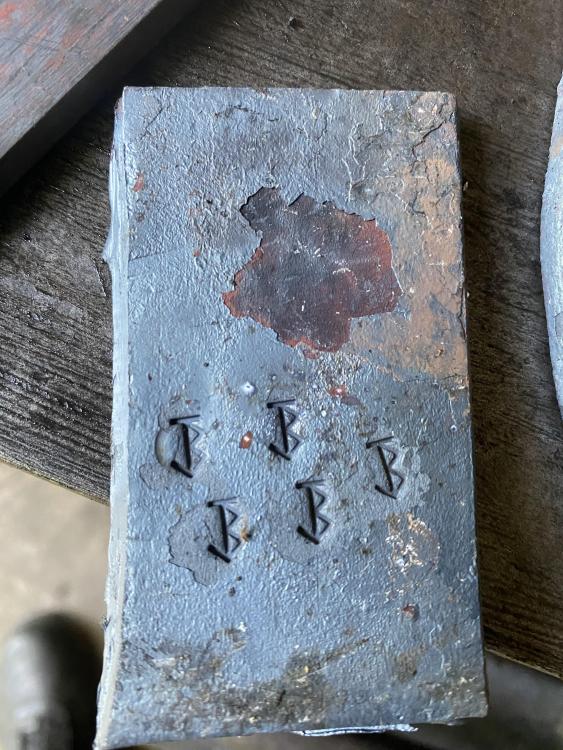
Touchmark/Makers Mark stamps?
TastefullyPeenedIronWorks replied to Glenn's topic in Tools, general discussion
For my birthday this year my wife treated me to a set of touchmarks. I am humbled and proud to finally mark my work.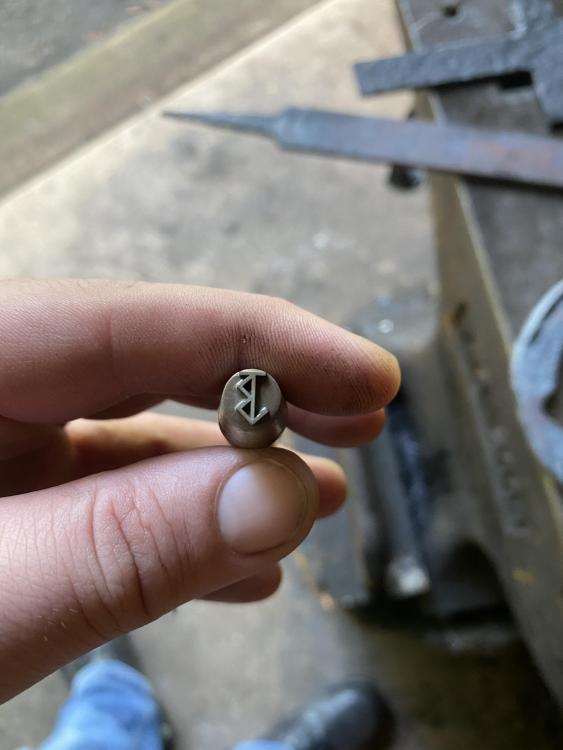
-
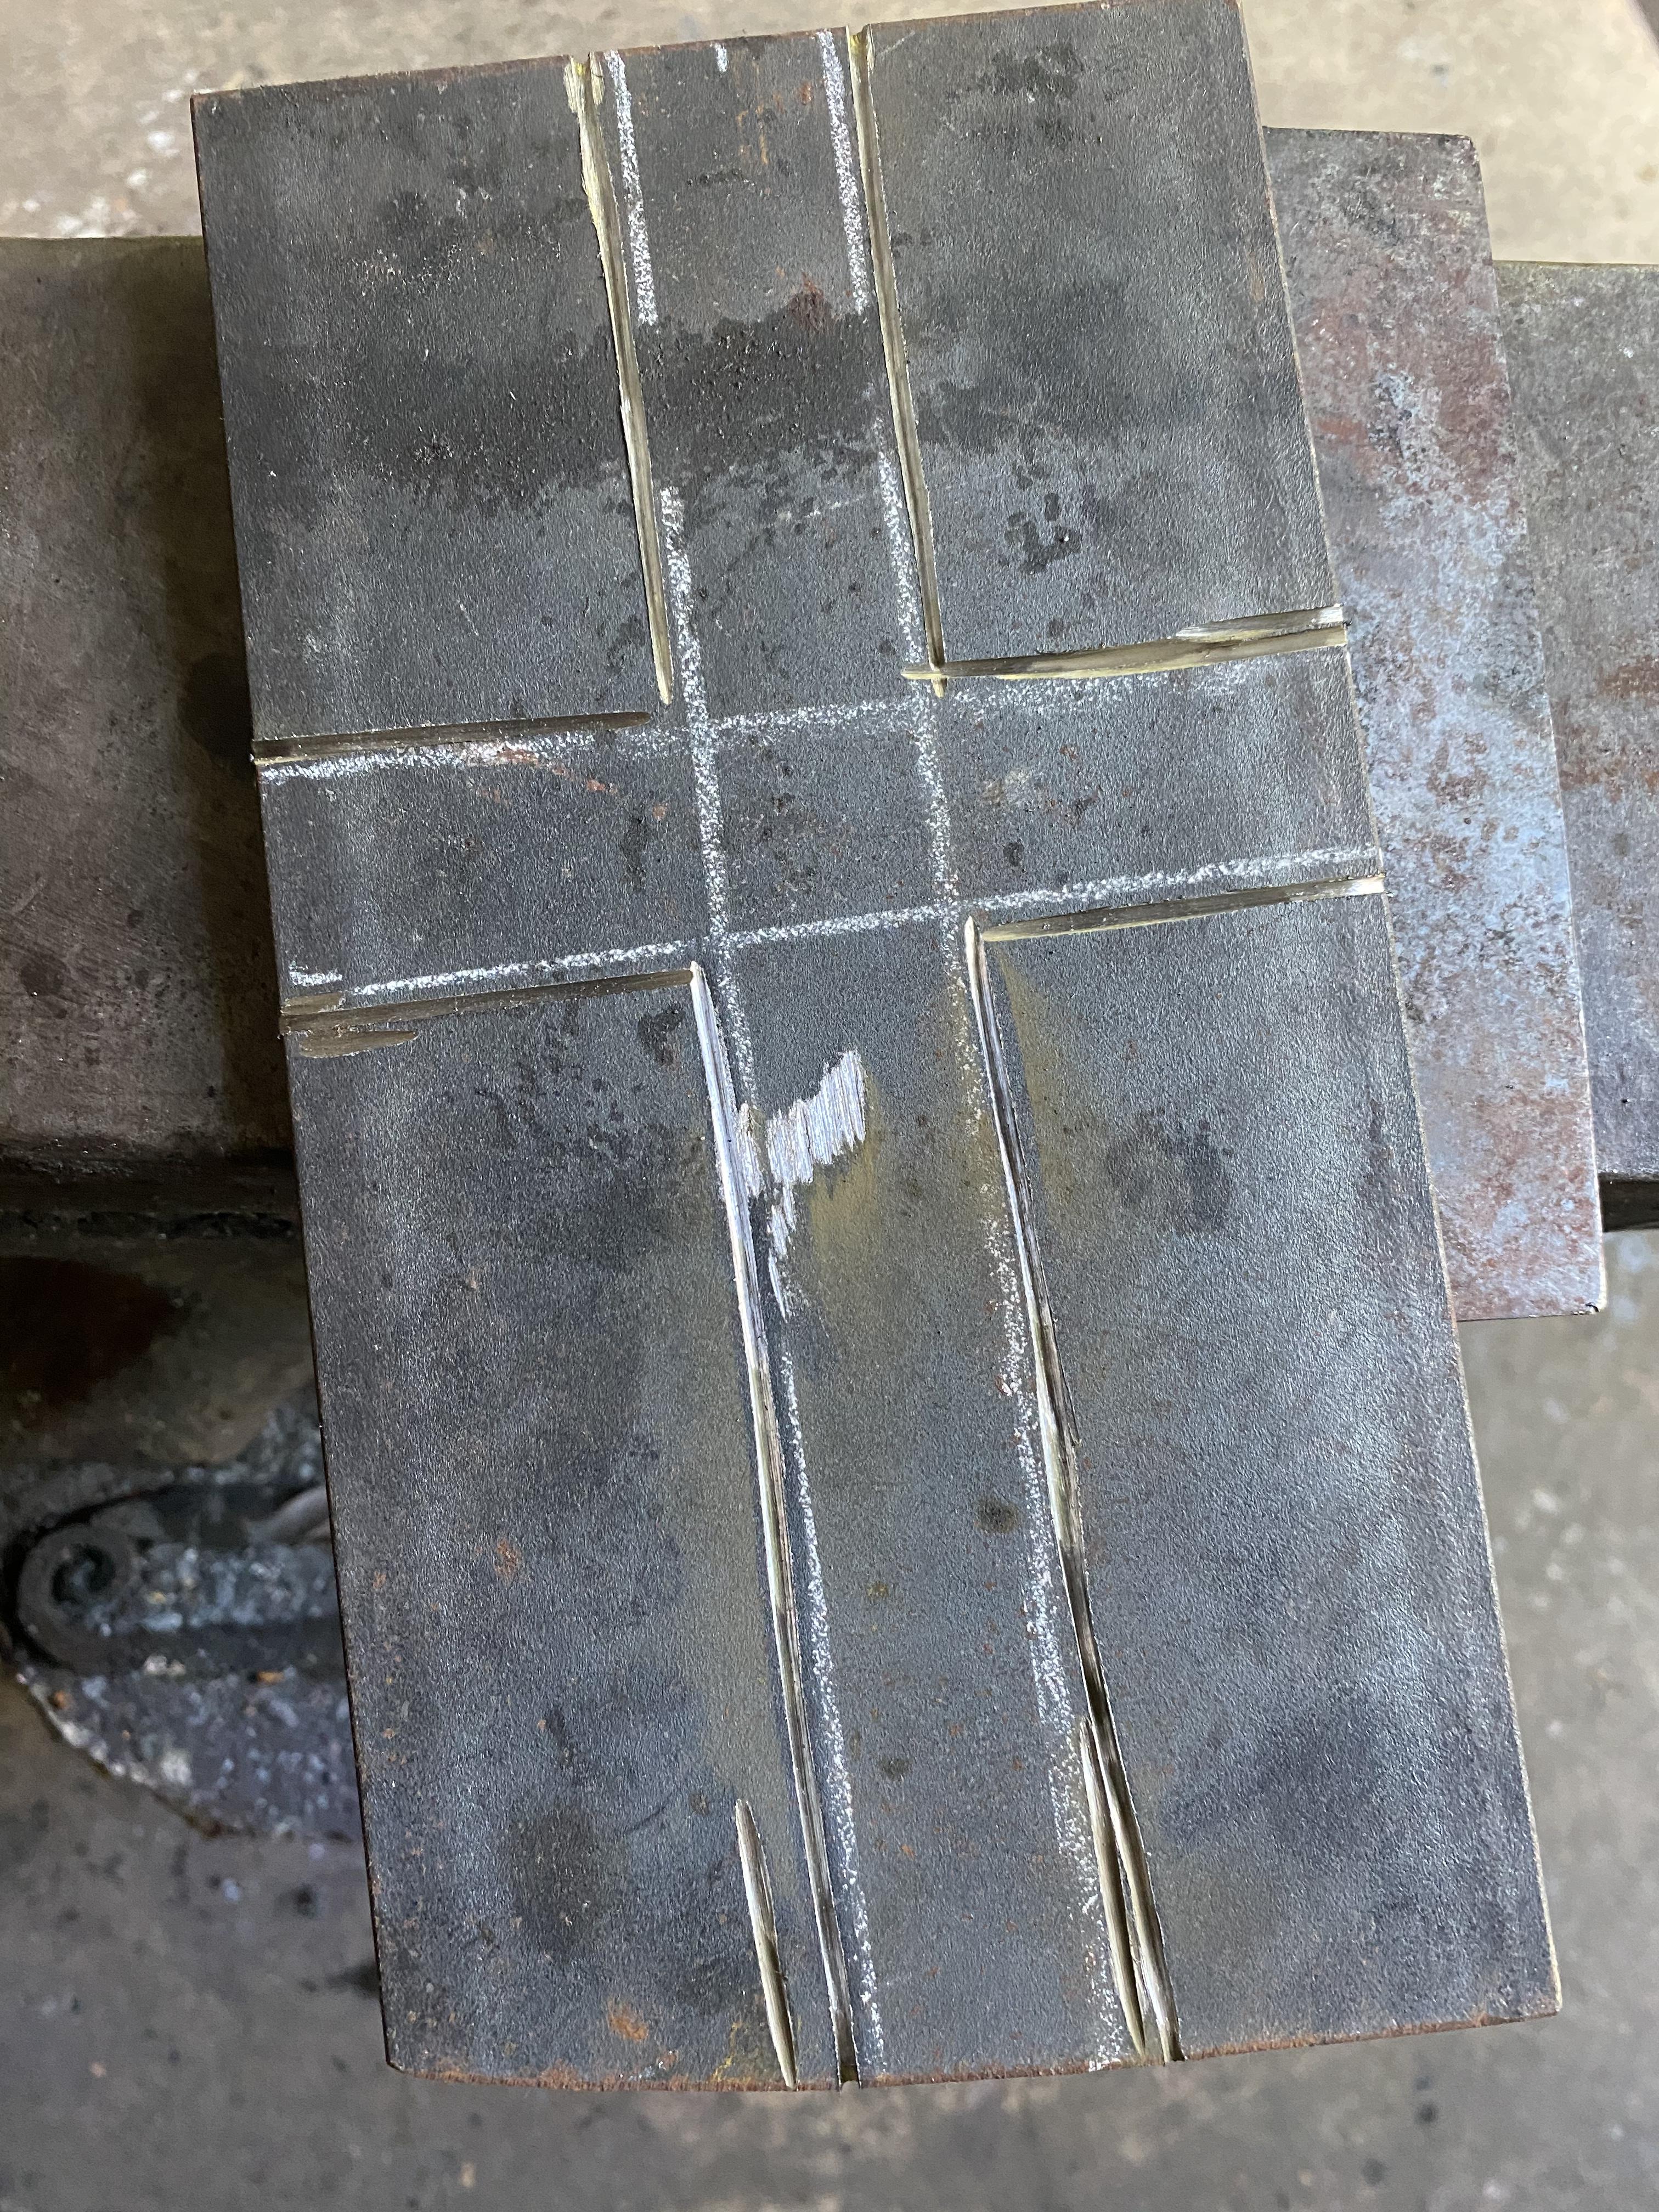
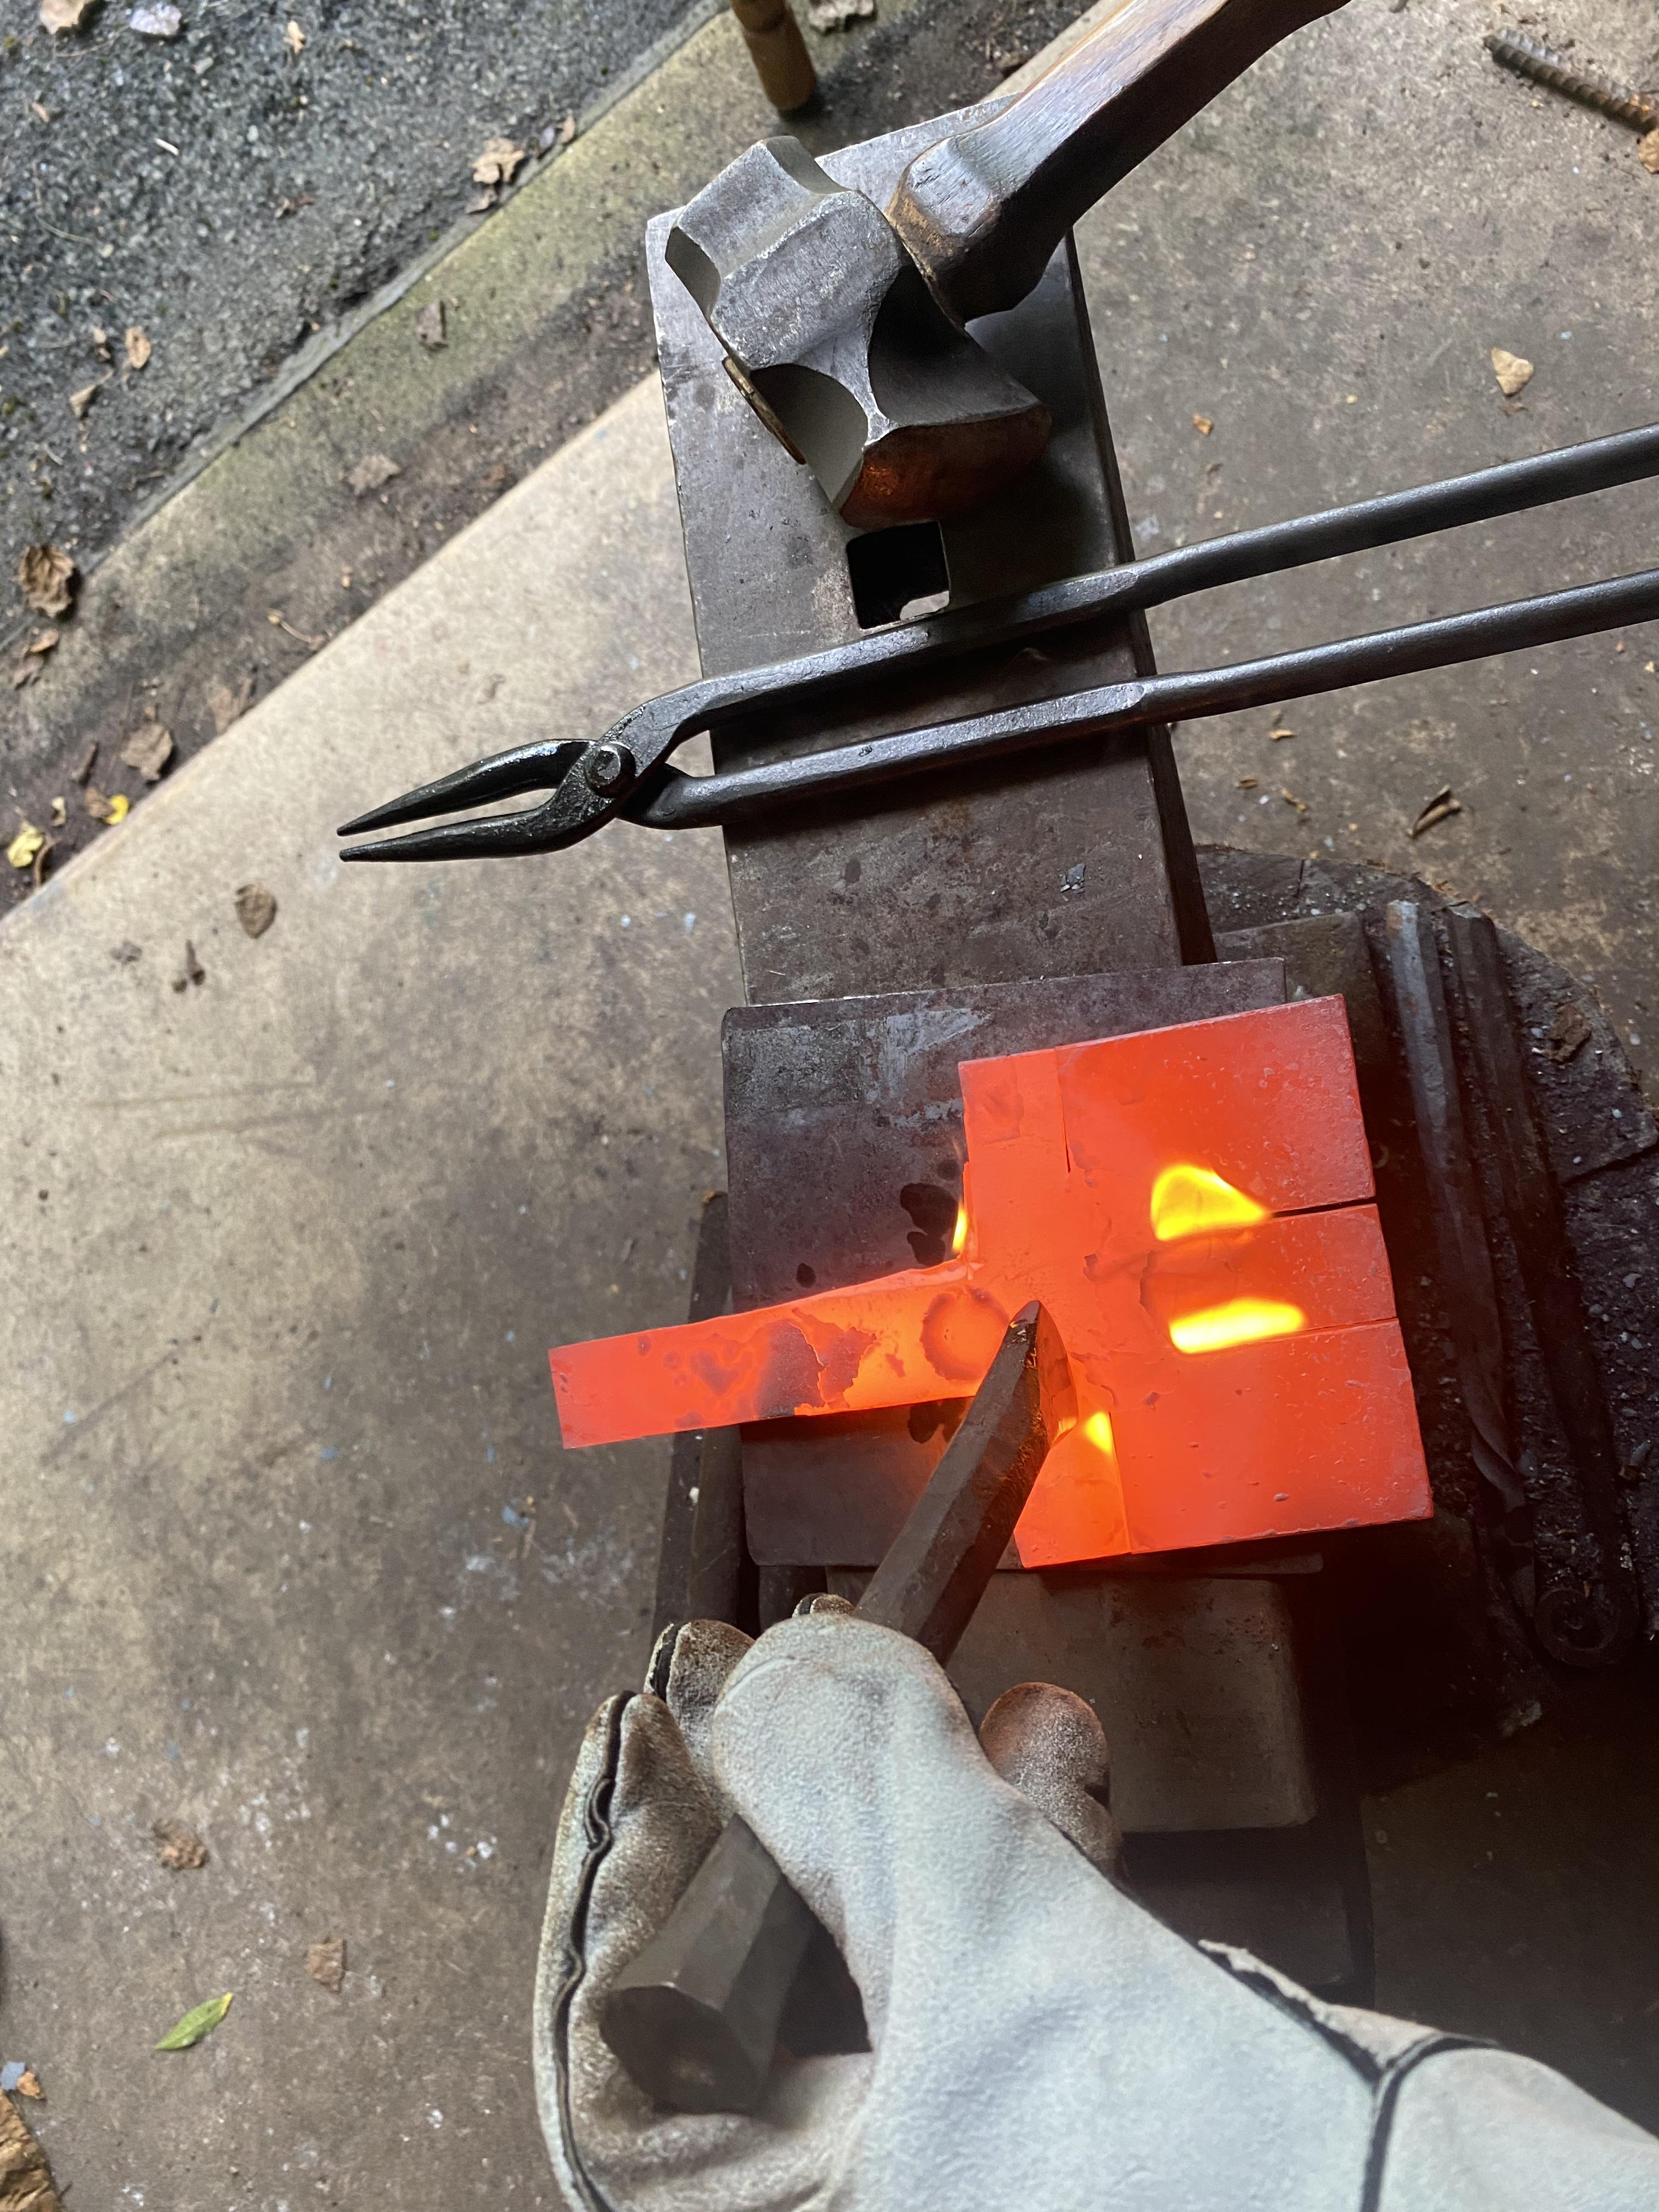
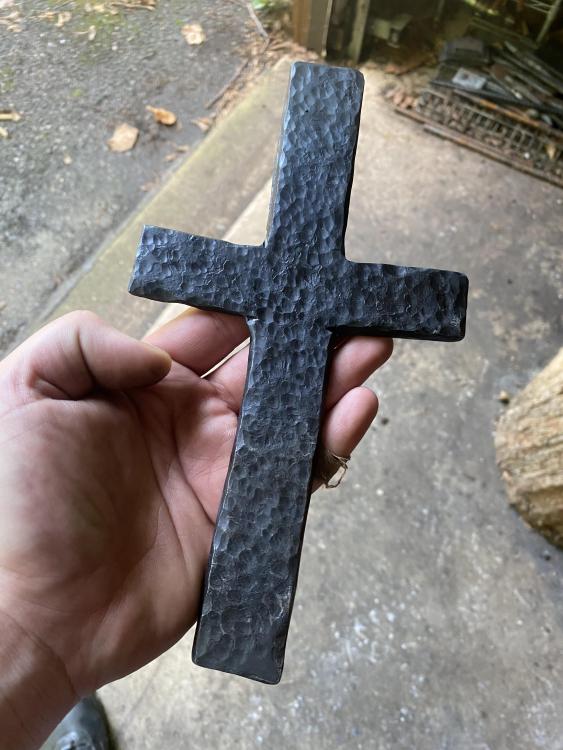
Worked on a project for a friend of mine. When I’m not forging I work in healthcare and a good friend of mine is very sick. A few months back he asked for one of these. I was able to forge this cross for him on the day in between our birthdays.

-
First and foremost, a better understanding of material science and what is happening on a molecular level as we mold and shape steel and other metals. I have gained a finite understanding that, if I forge well and work hard there is a good chance that some of the things I make will outlast my lifetime, possibly by many generations - In this way we become Immortal. I have gained a better understanding of self and what I think I should be doing with my life. I have gained a better understanding that my father will never, ever, quite get what I am doing and why I want to make a living off of it; The hard work he understands. I have gained the knowledge that, like martial arts, Smithing is a Discipline. One must focus both mind and body to constantly strive for perfection and beauty. I have managed, beyond my own knowledge, to gain lots of forgeable steel and many new/new to me tools! Oh, I also gained a Dog as a shop buddy, he stays on the lawn, don’t want him getting tinnitus as well.
-
It followed me home
TastefullyPeenedIronWorks replied to Glenn's topic in Blacksmithing, General Discussion
Farmall, Thank You for your input -
Productive day. I’ll just leave this here.

-
It followed me home
TastefullyPeenedIronWorks replied to Glenn's topic in Blacksmithing, General Discussion
Honestly, we are always lucky when they aren’t seized. I have seen so many beat xxxxx I paid $70 for it which I thought was a bit steep considering the missing handle but I wasn’t going to turn it down. I believe it has a 5 inch air pipe coming off of it -
It followed me home
TastefullyPeenedIronWorks replied to Glenn's topic in Blacksmithing, General Discussion
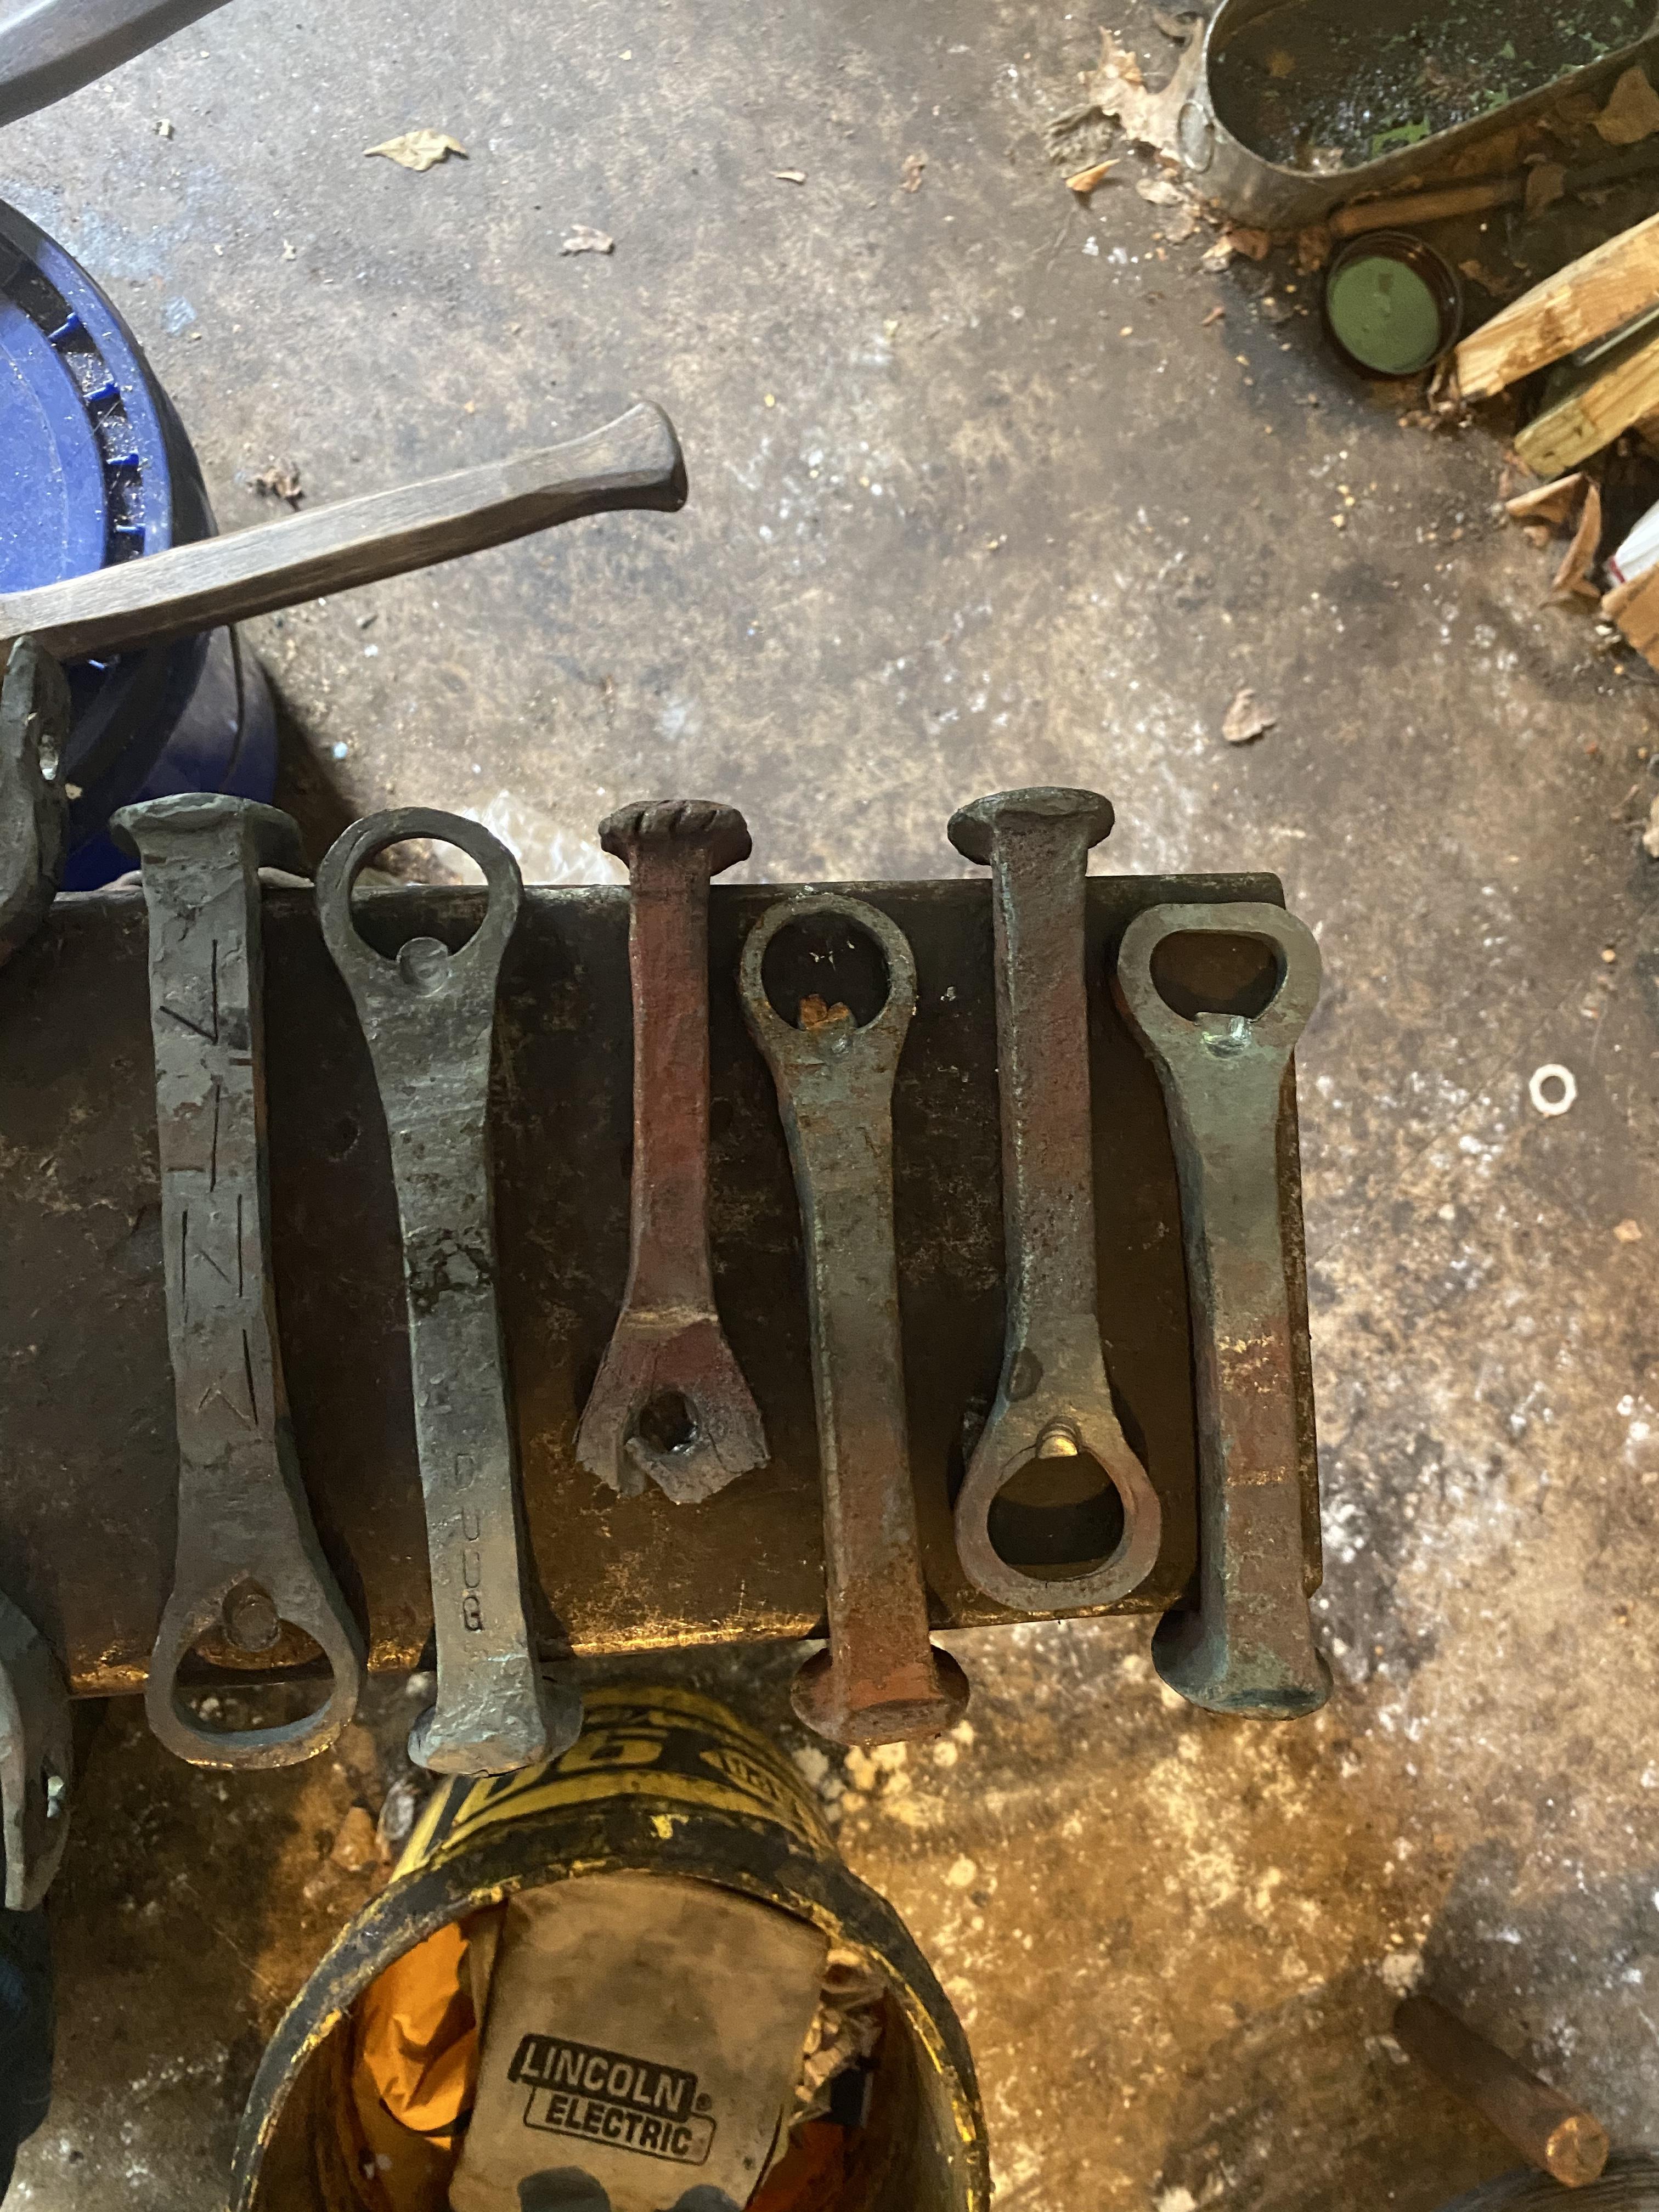
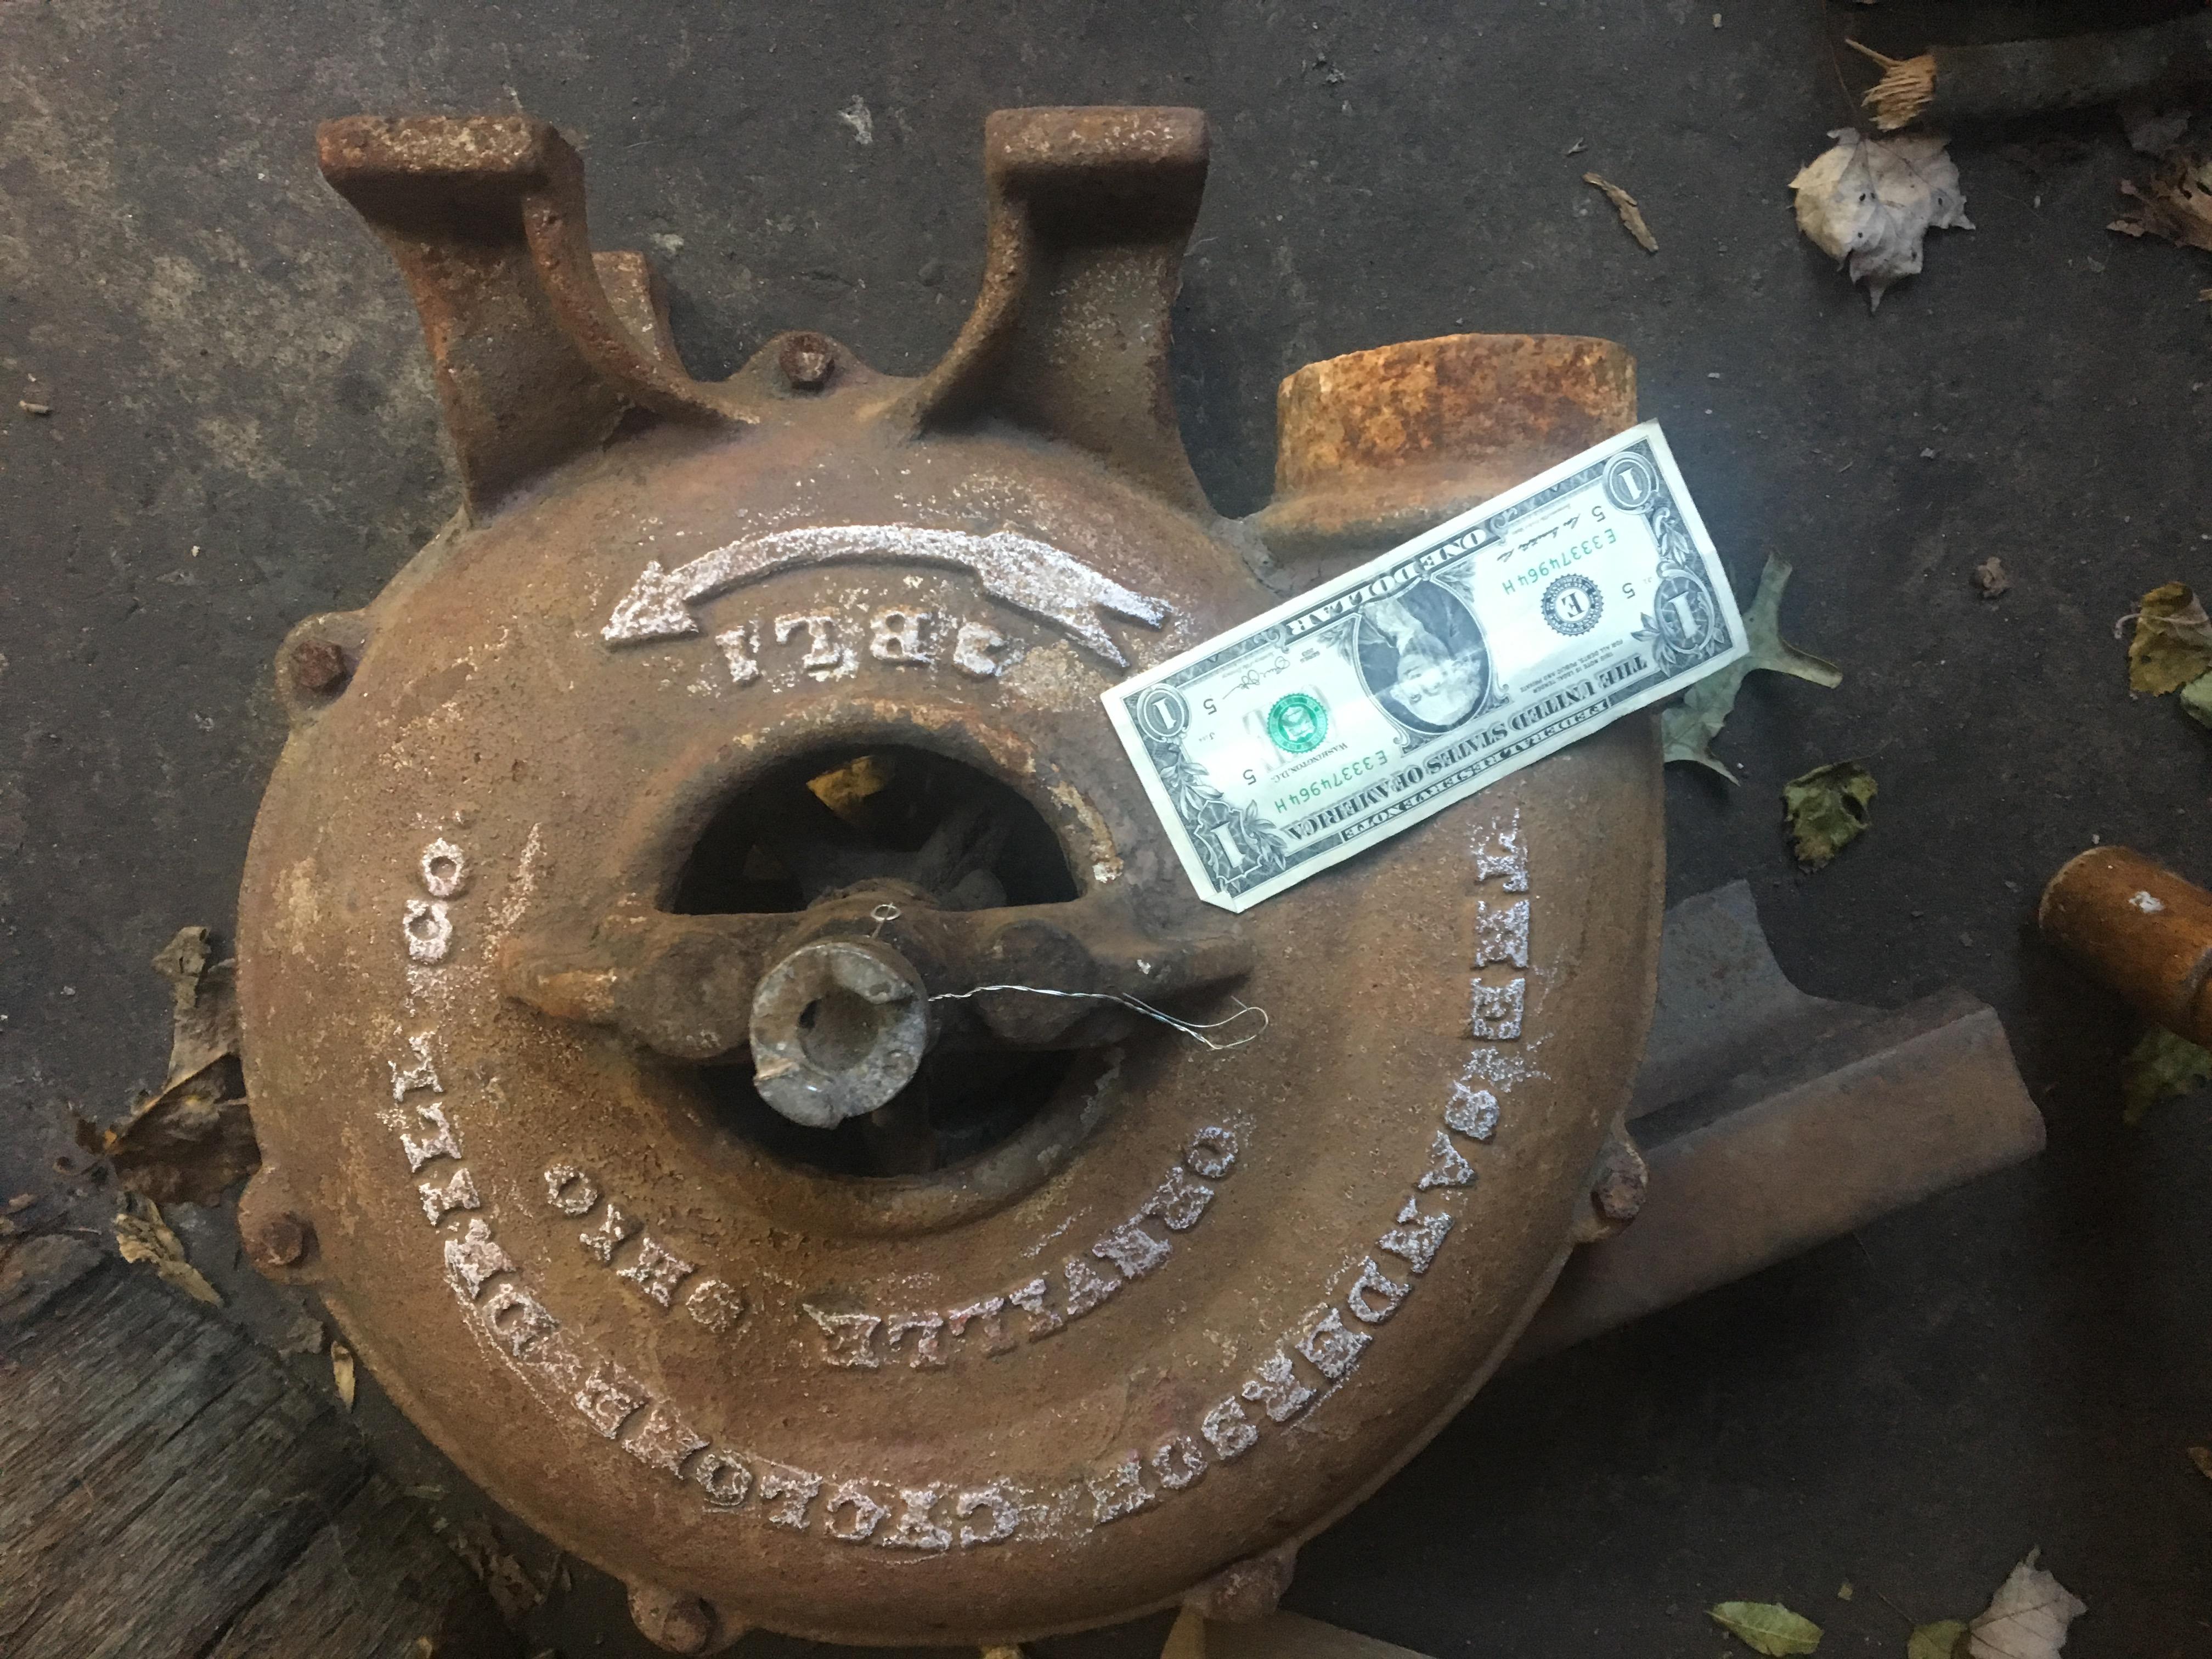
Found this big bad blower at a local wood working shop. The fan is free, i.e. it spins and produces Air! One draw back, no handle for it. I haven’t been able to find a ton of information regarding it, XXXX I haven’t seen too many that match it. It is from The Sanderson Cyclone Drill Company, Orrville, Ohio. I believe above the arrow reads 3 B L 1 (?) not sure what that is designating. If anyone knows anything regarding it I would greatly appreciate some genealogy regarding it. Not sure if I will leave it as is, if I decide to restore it I am not sure where I would start. Definitely needs a handle to blow though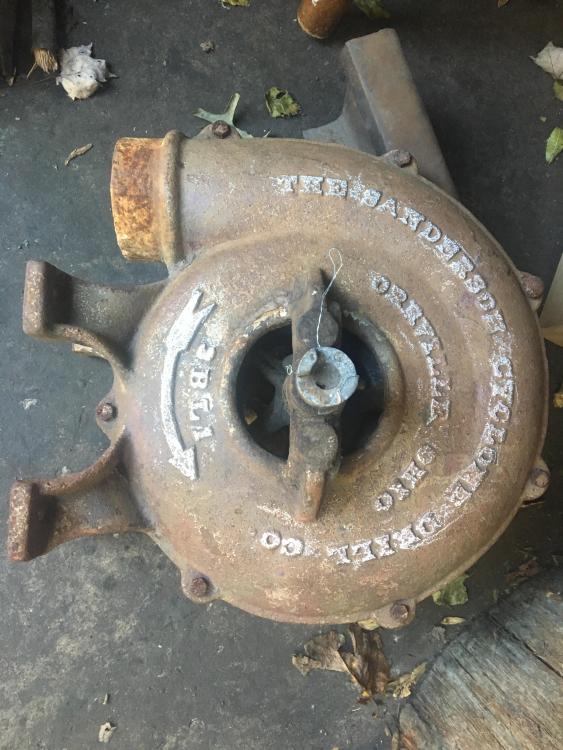

-
Thanks, ThomasPowers, Makes sense.
-
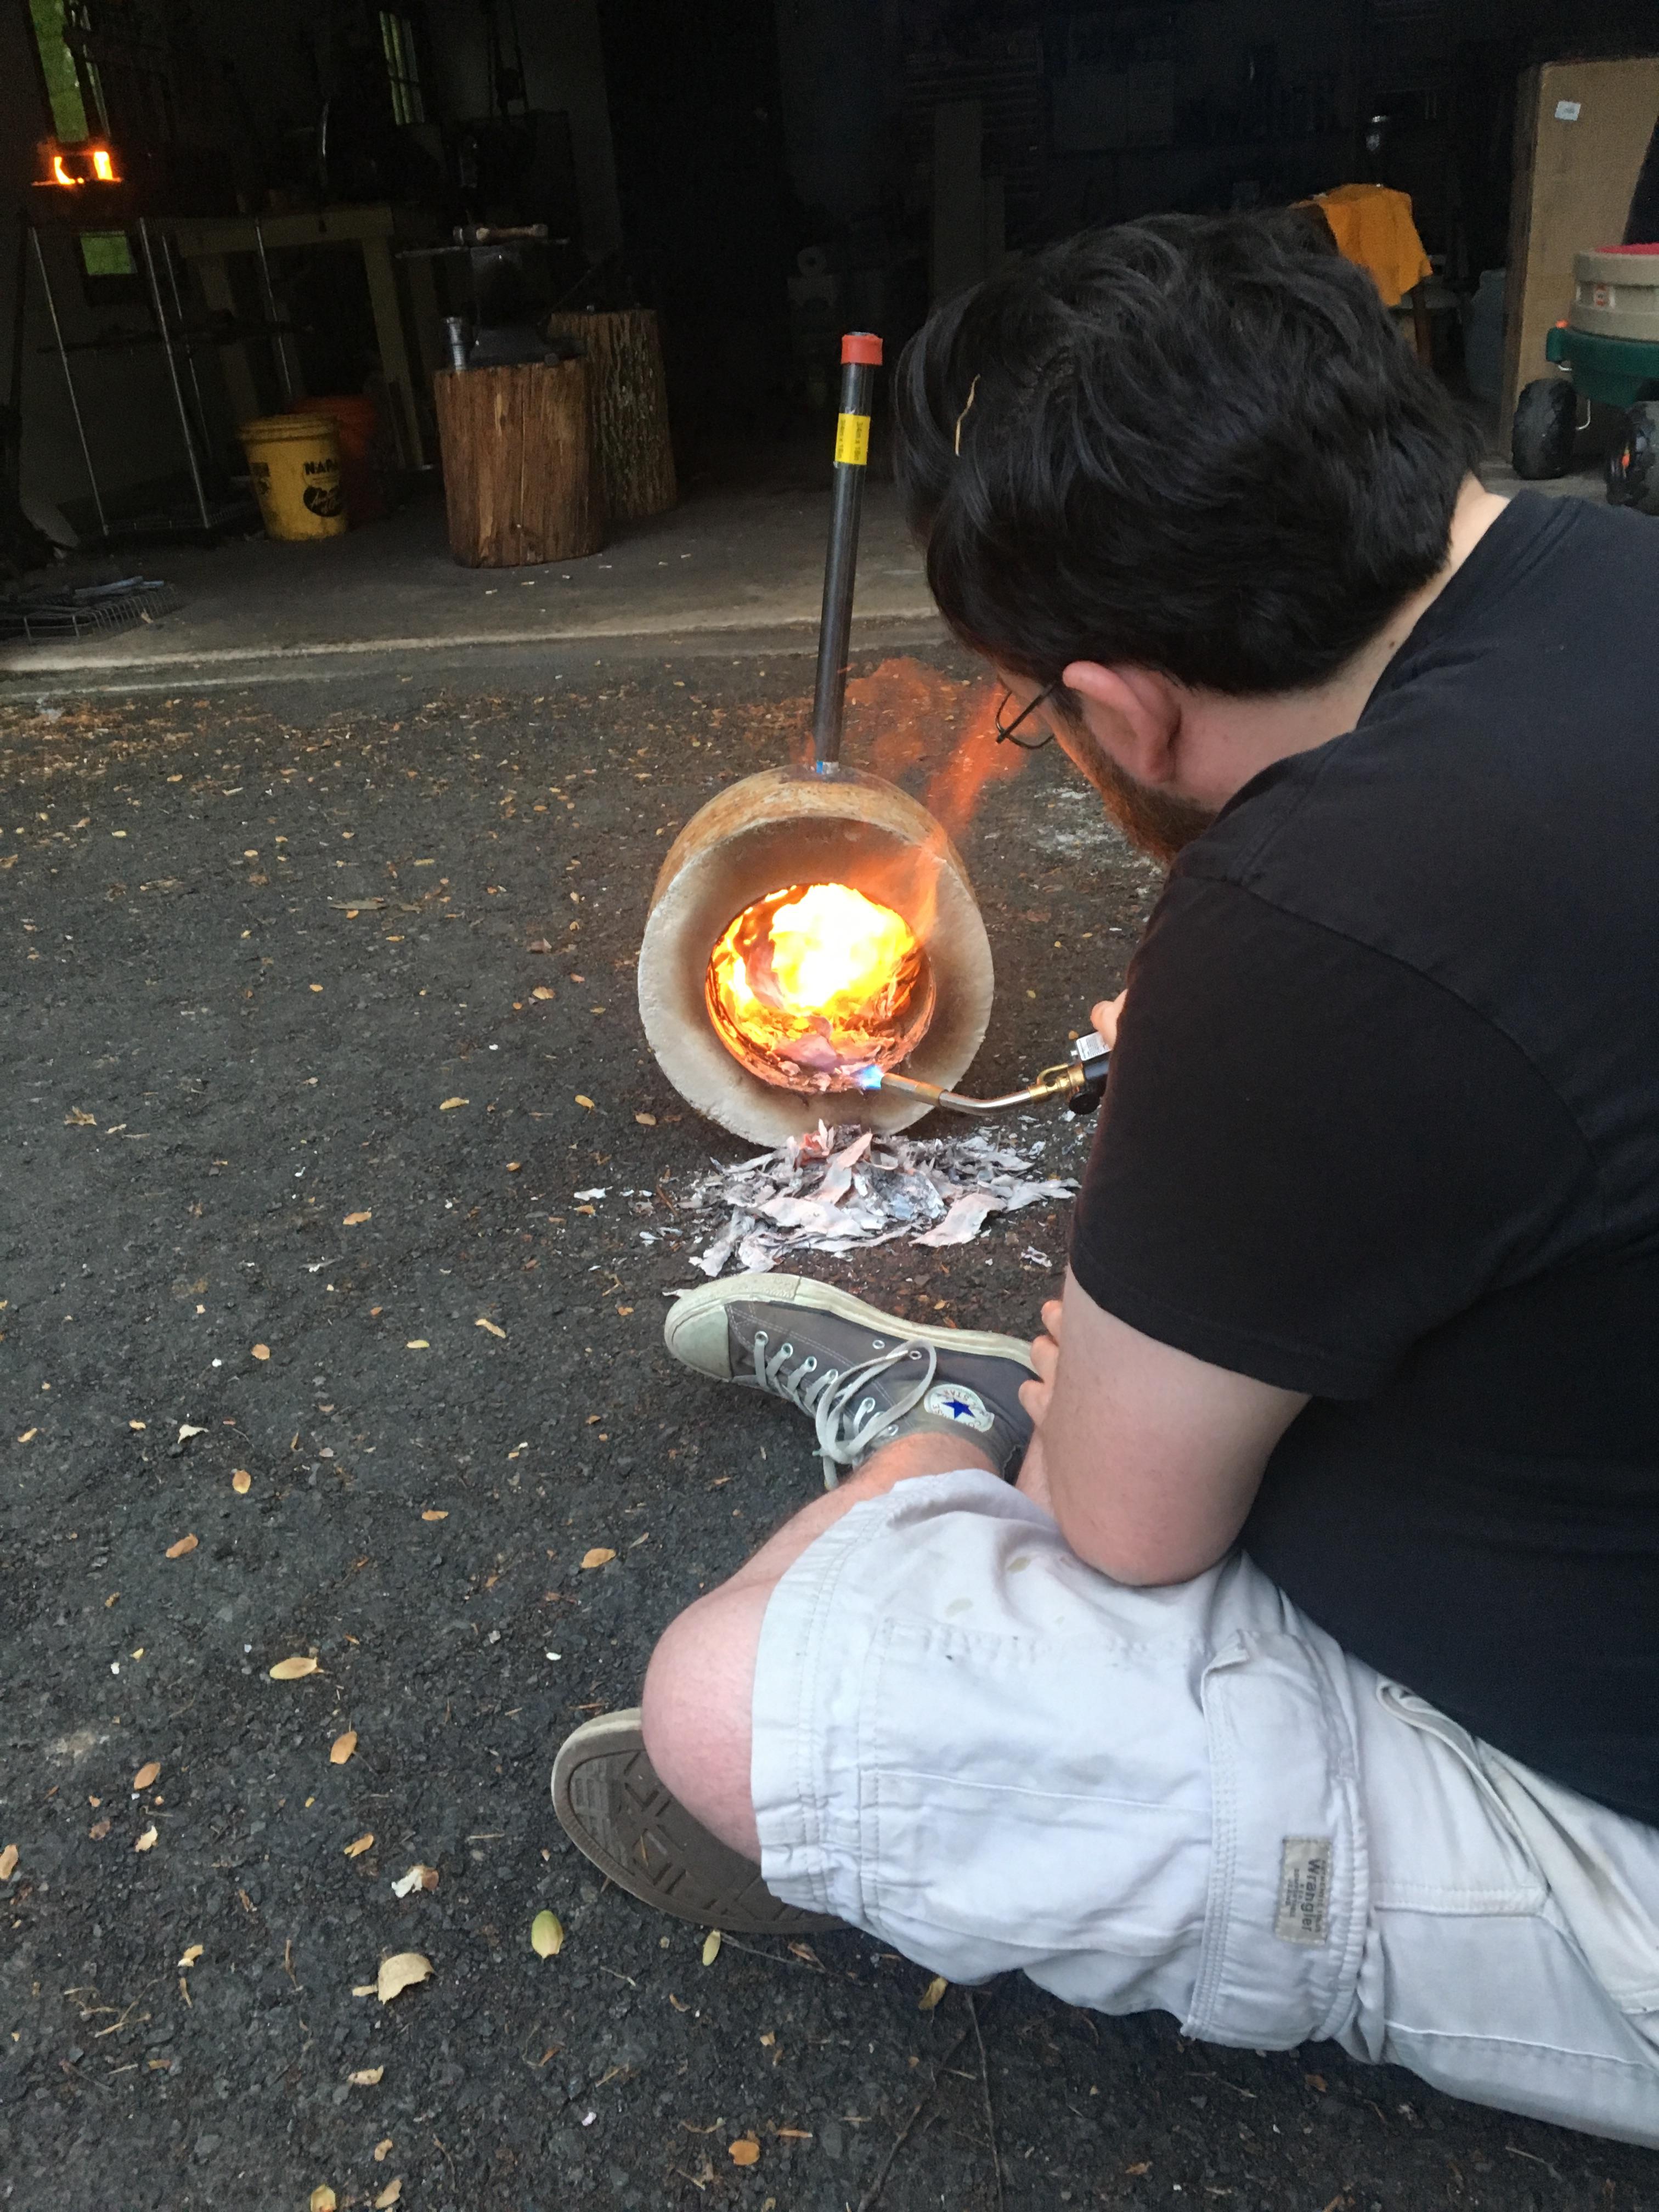
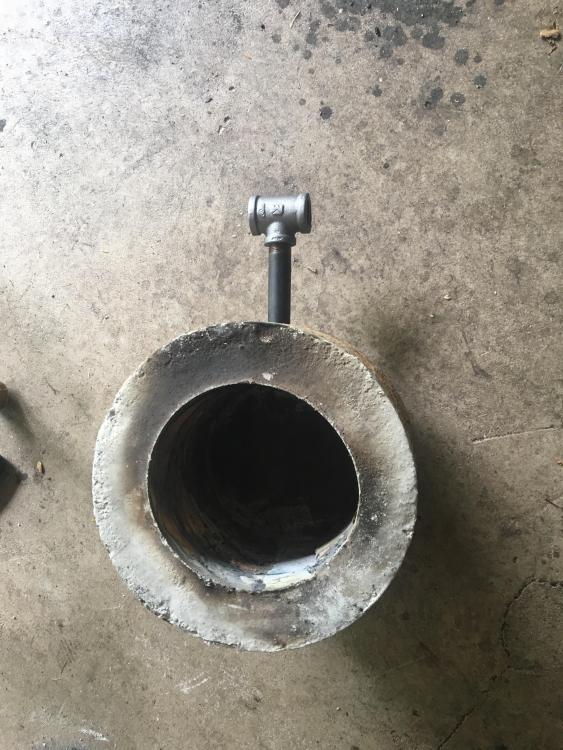
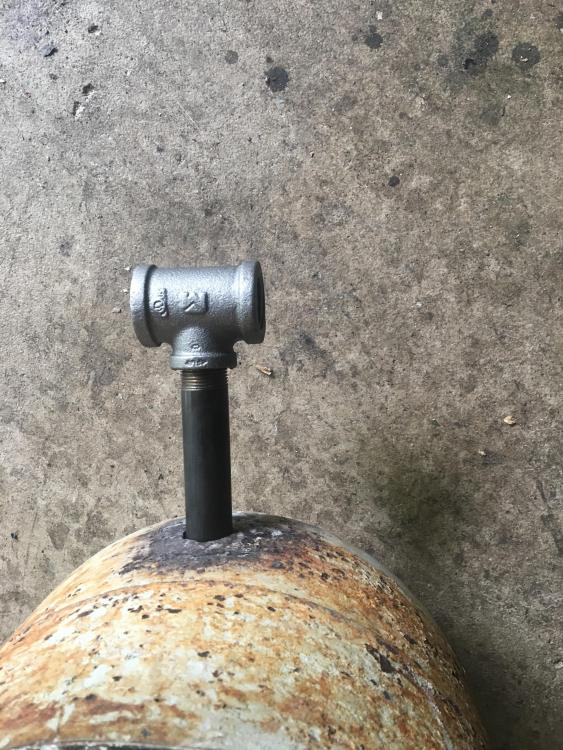
Hi John In Oly! Thanks you for your reply. Drain hole is off to the side, I keep forgetting to get pictures of it. I don’t quite follow, do you mean having a plinth underneath the crucible? I haven’t read much on having the crucible up off the foundry floor while heating, I suppose more reading is in order! Yay! At least I am on night shift tonight. I am filing the hole for the burner to readjust its angel. You are correct, it will definitely help with heat distribution, I don’t want that flame directly hitting my nice, new crucibles. Even, incremental heat is what we are aiming at.
-
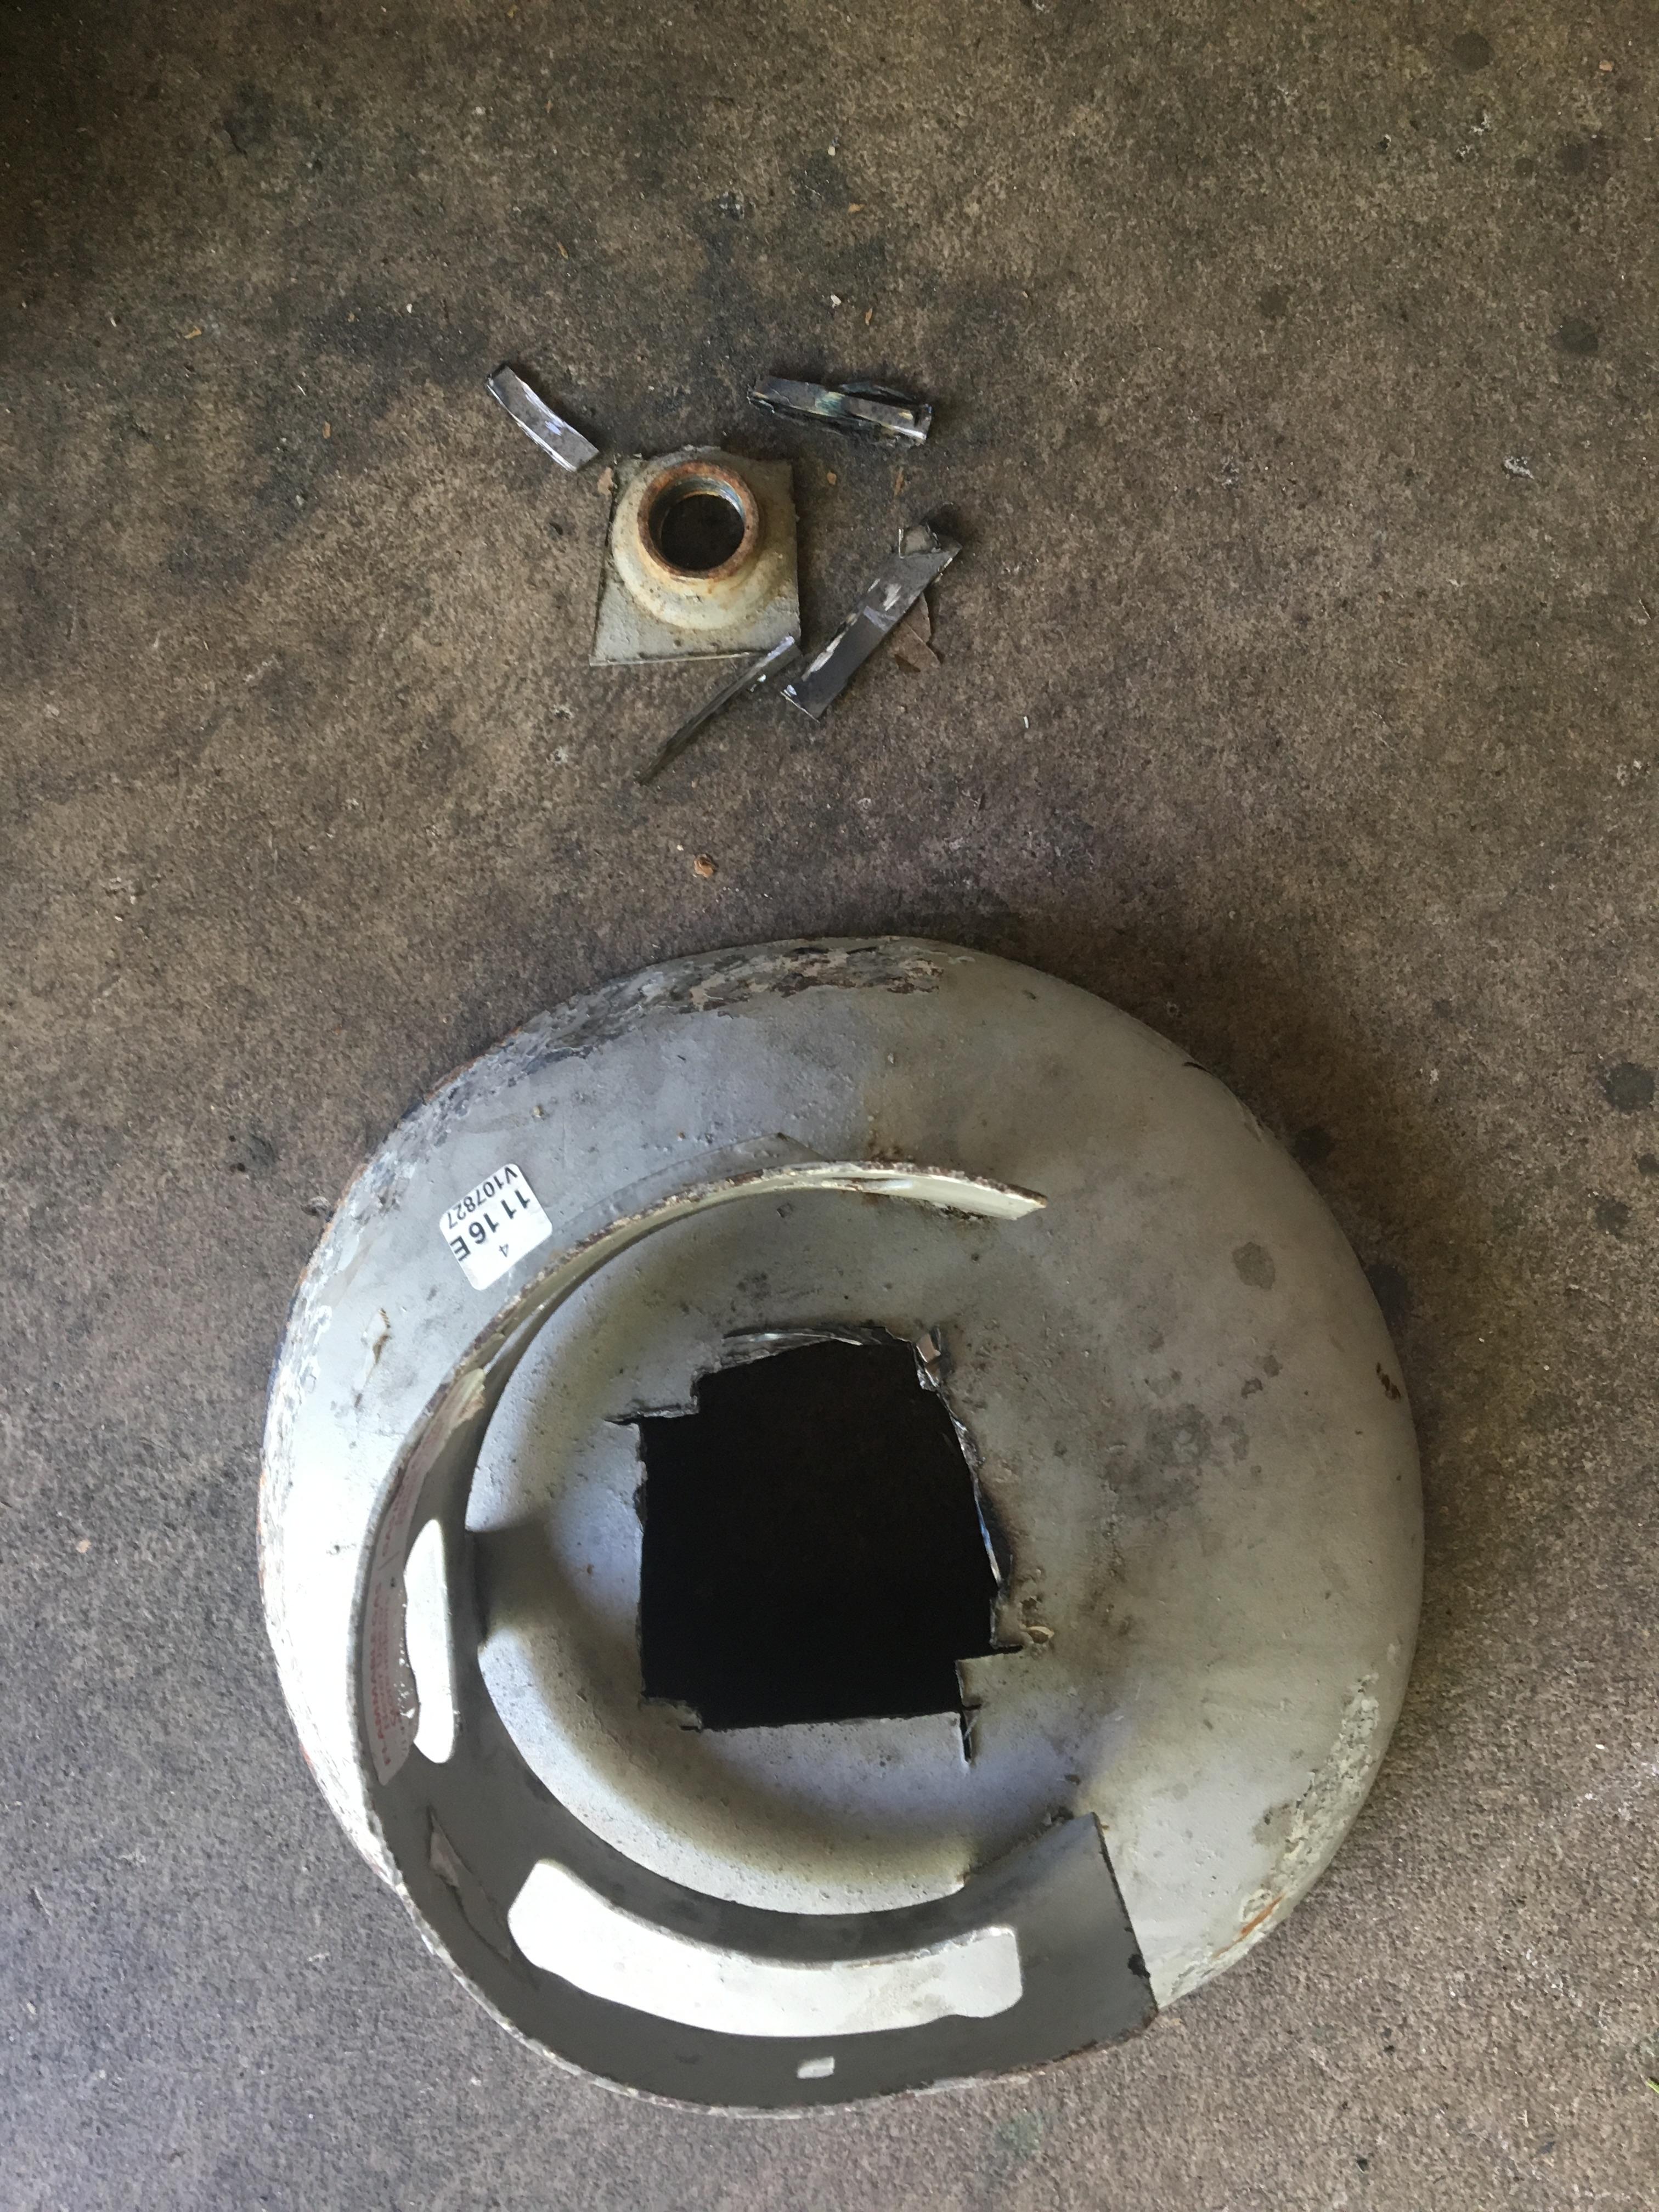
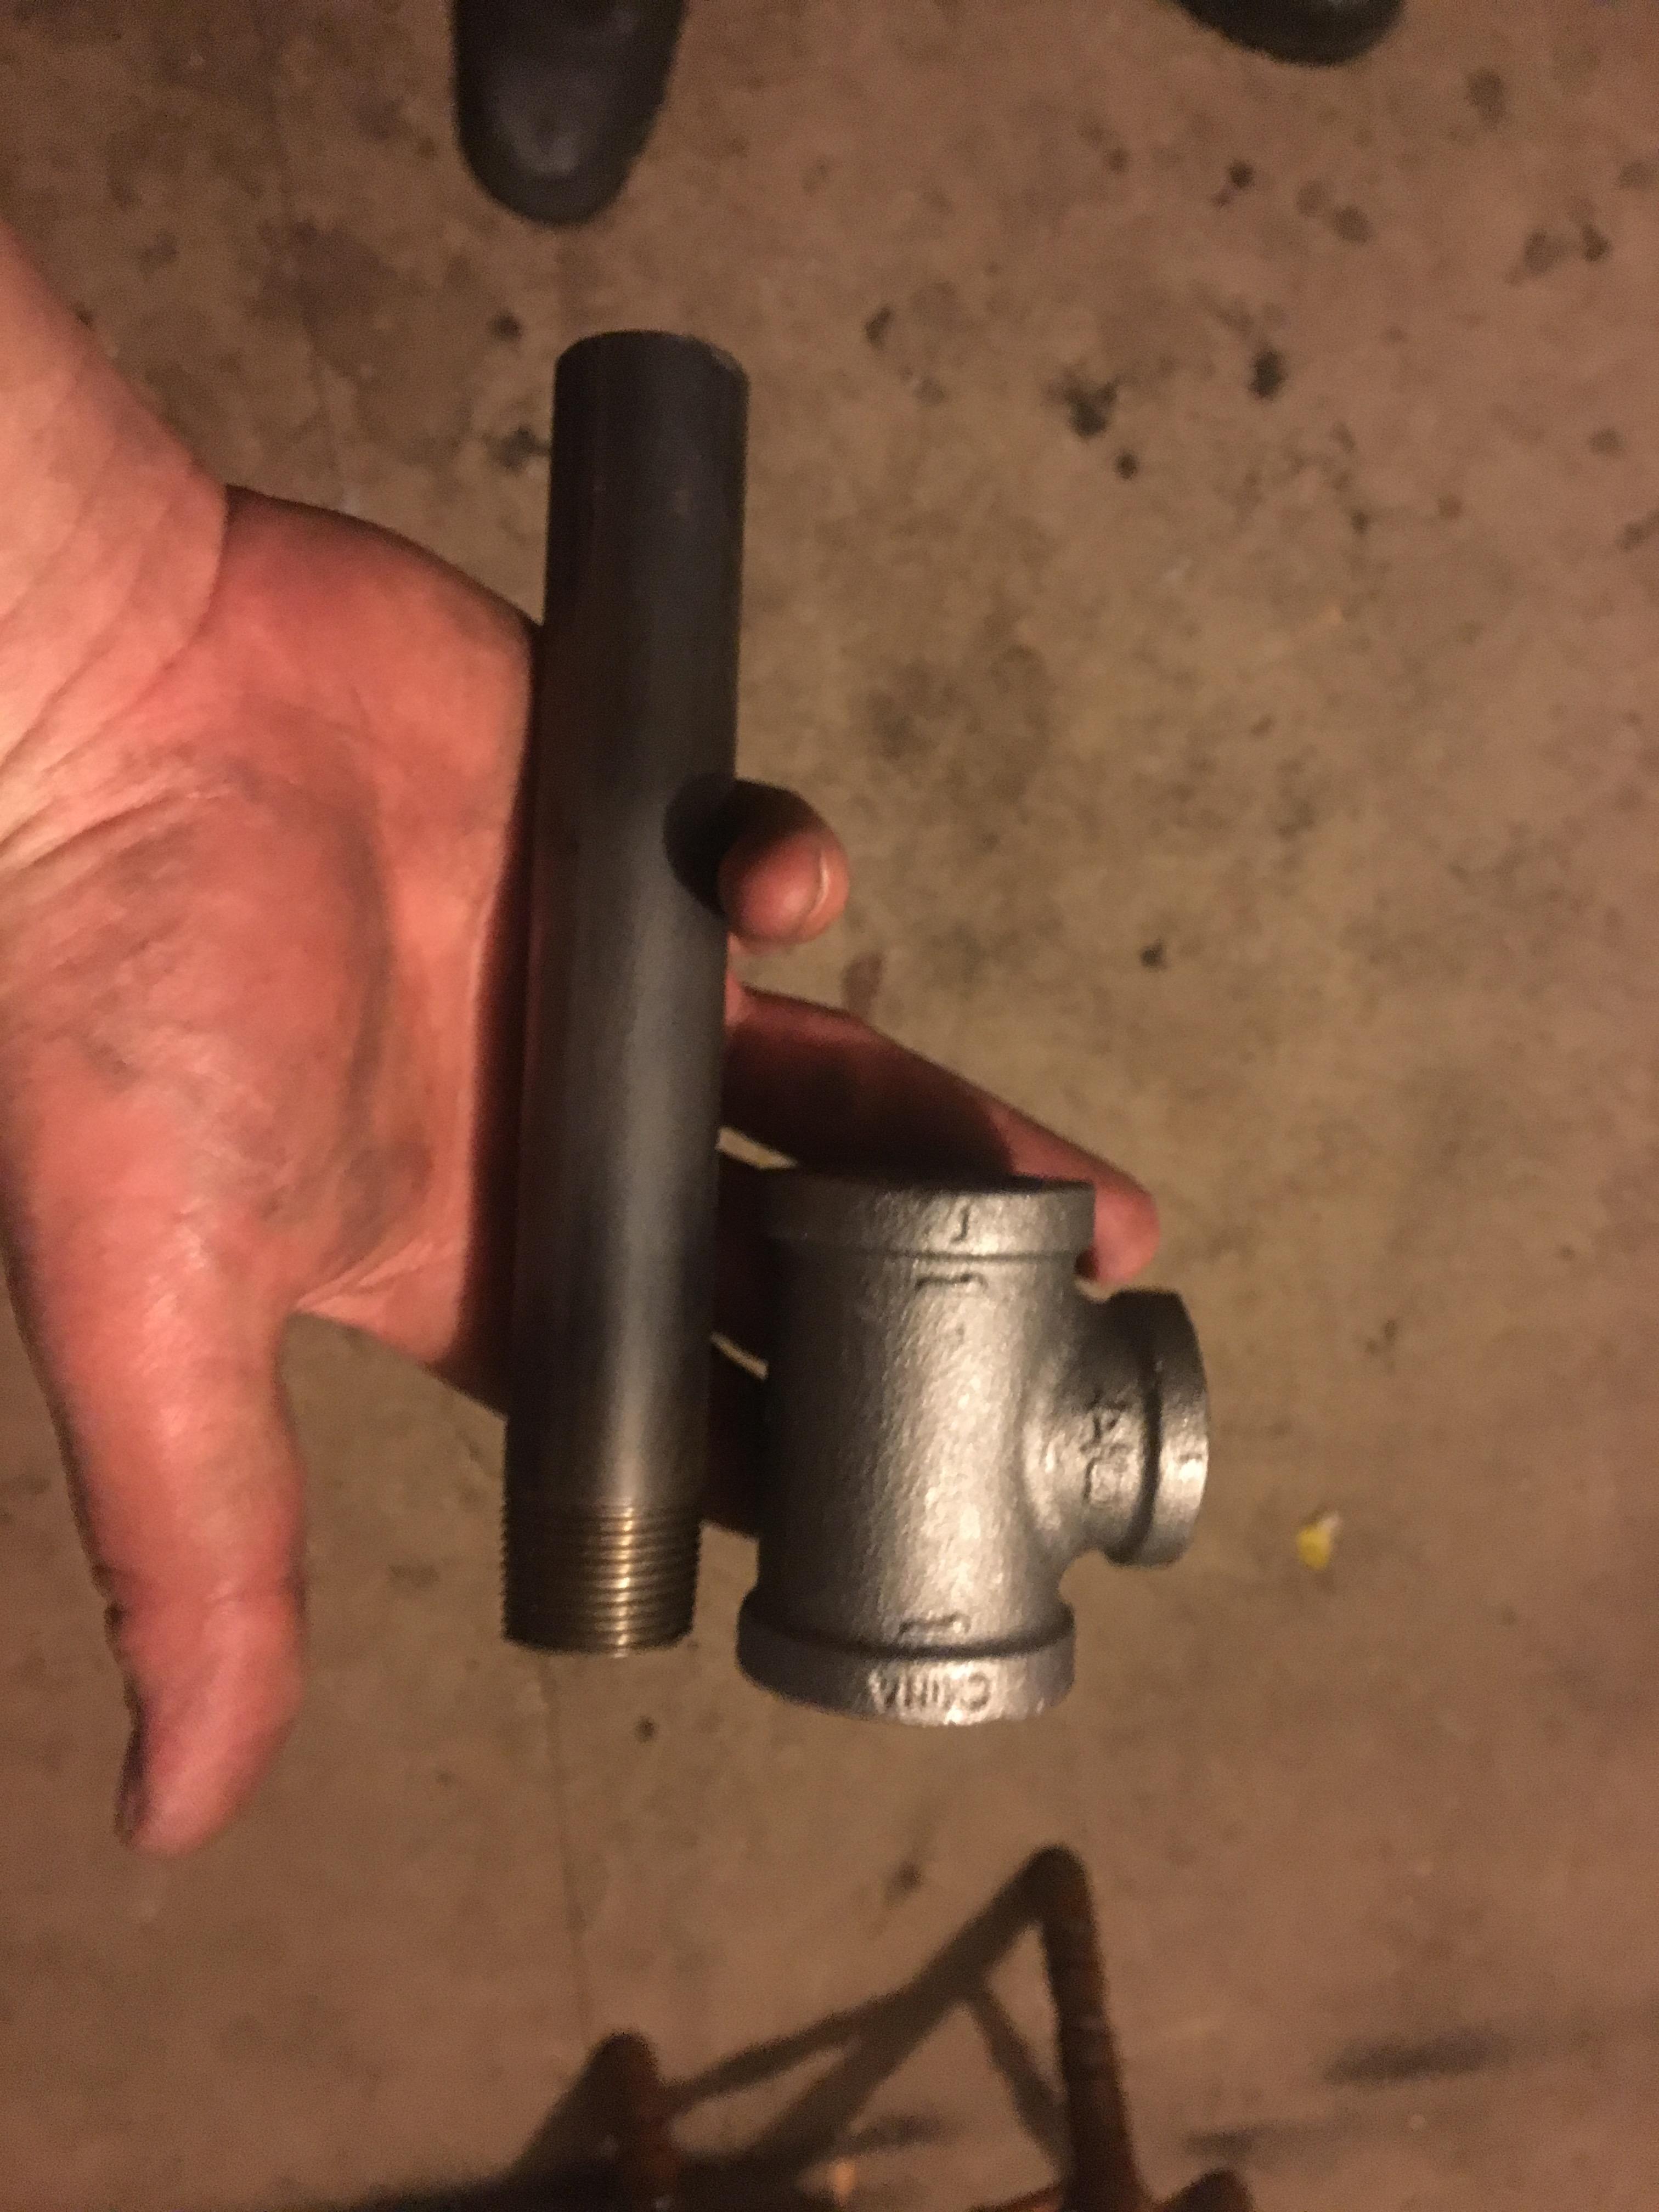
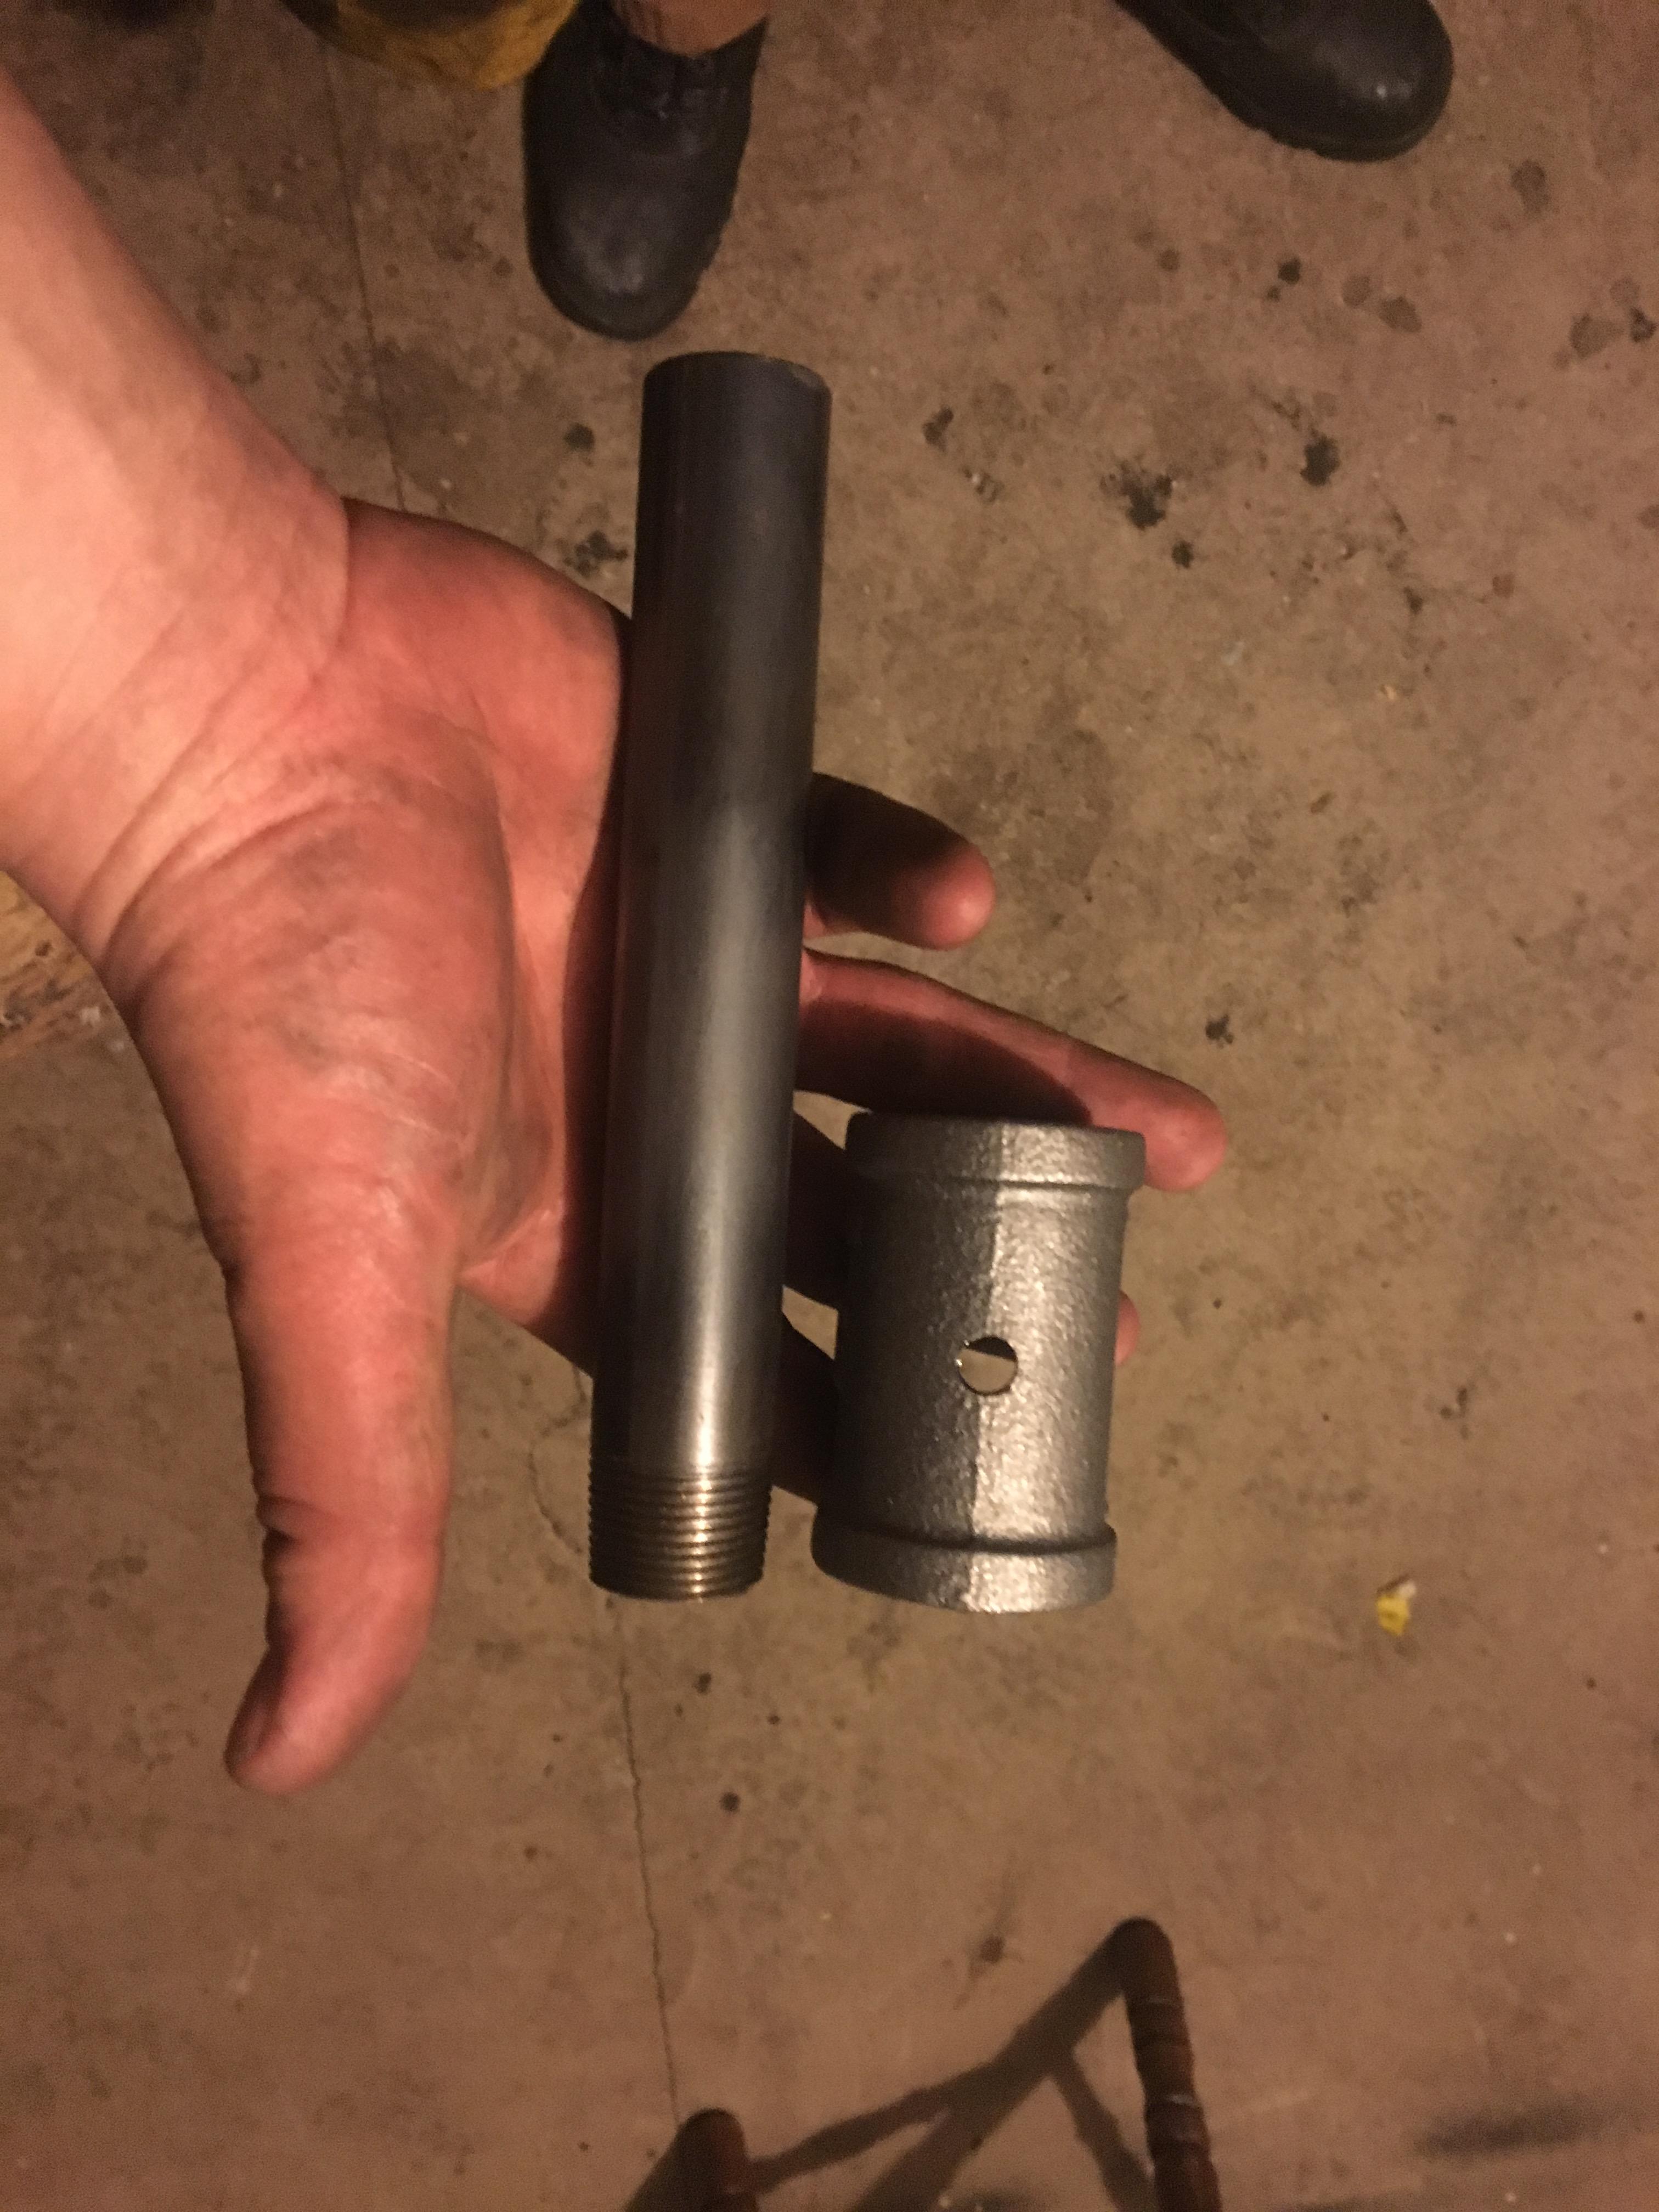
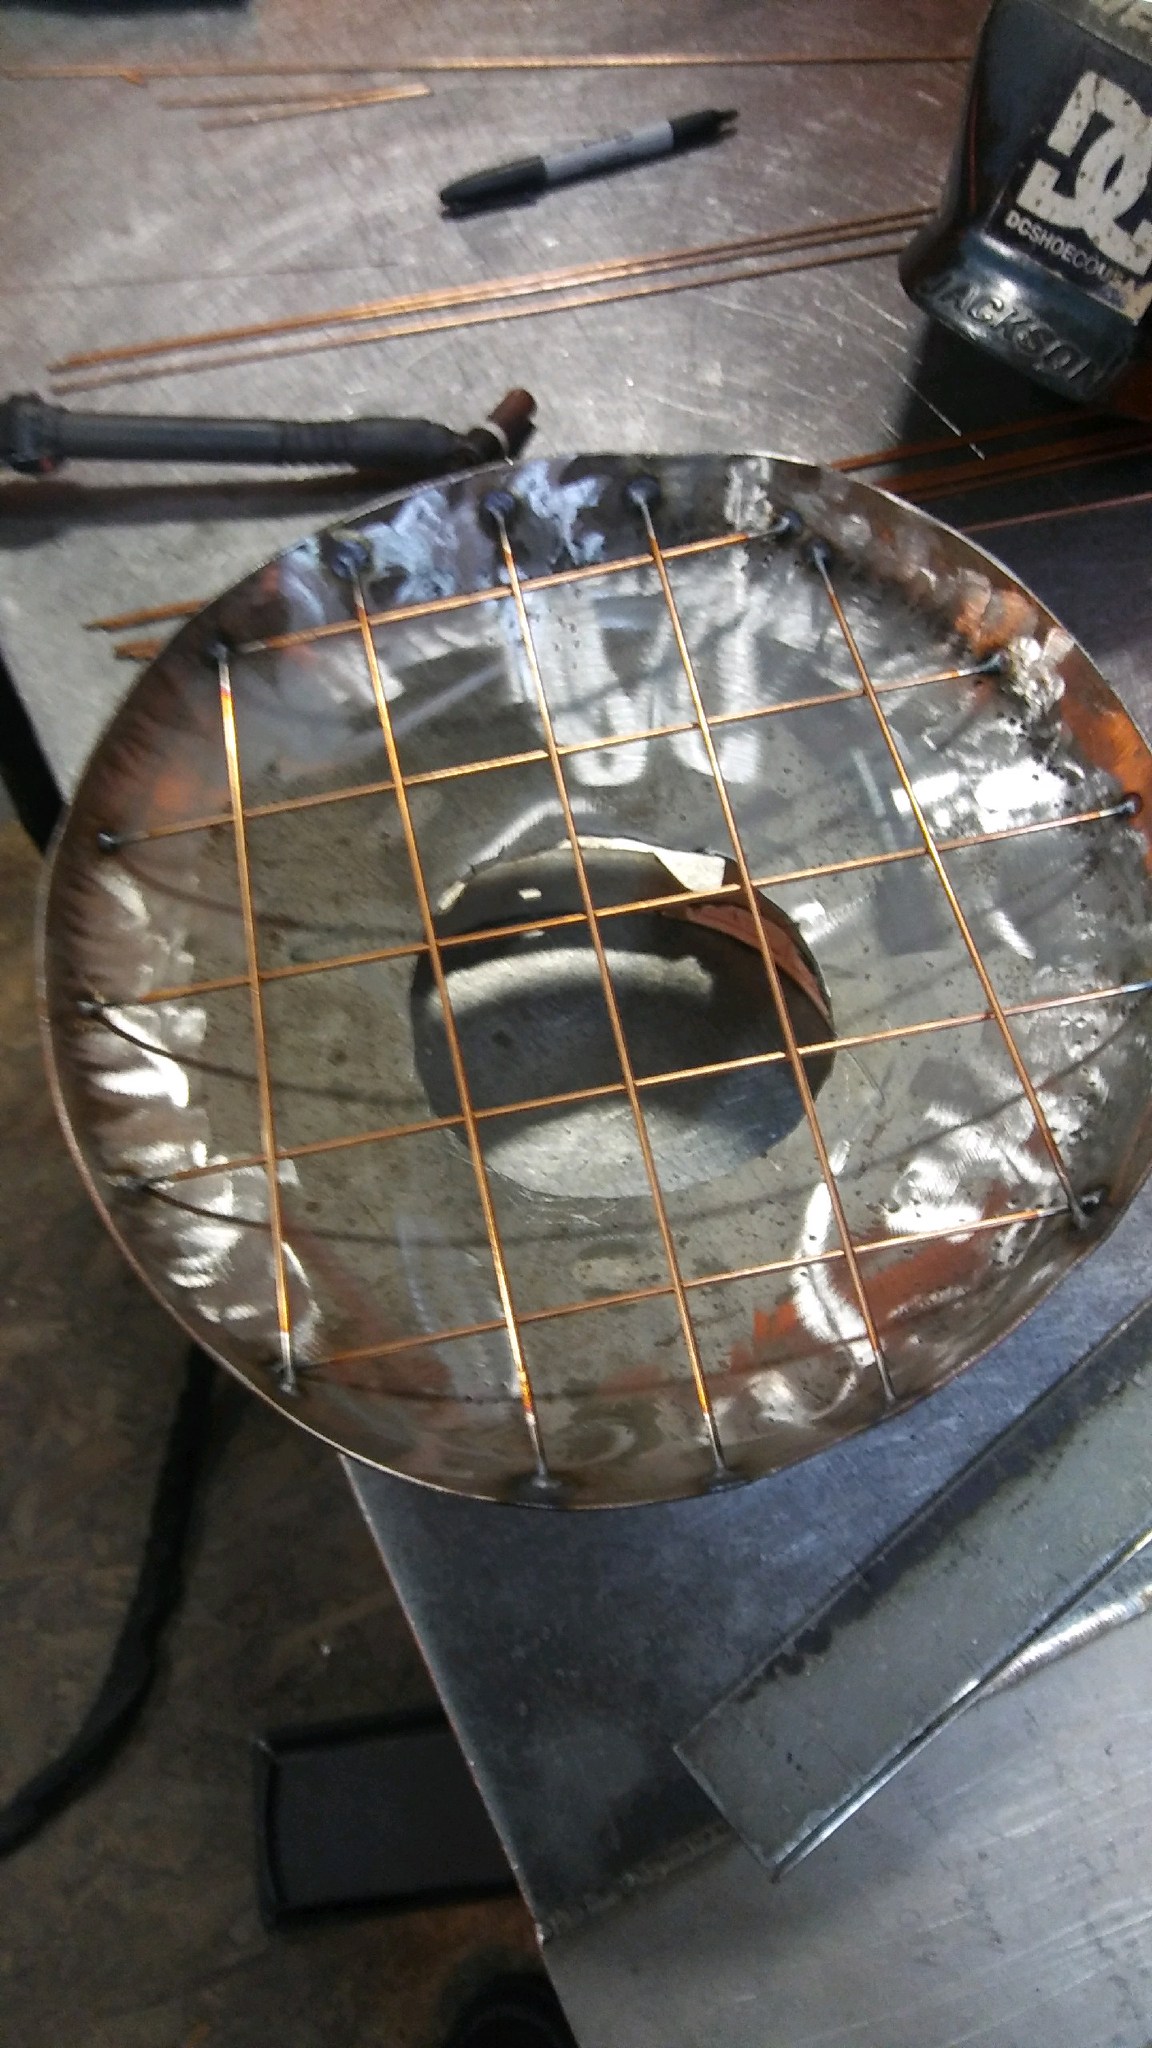
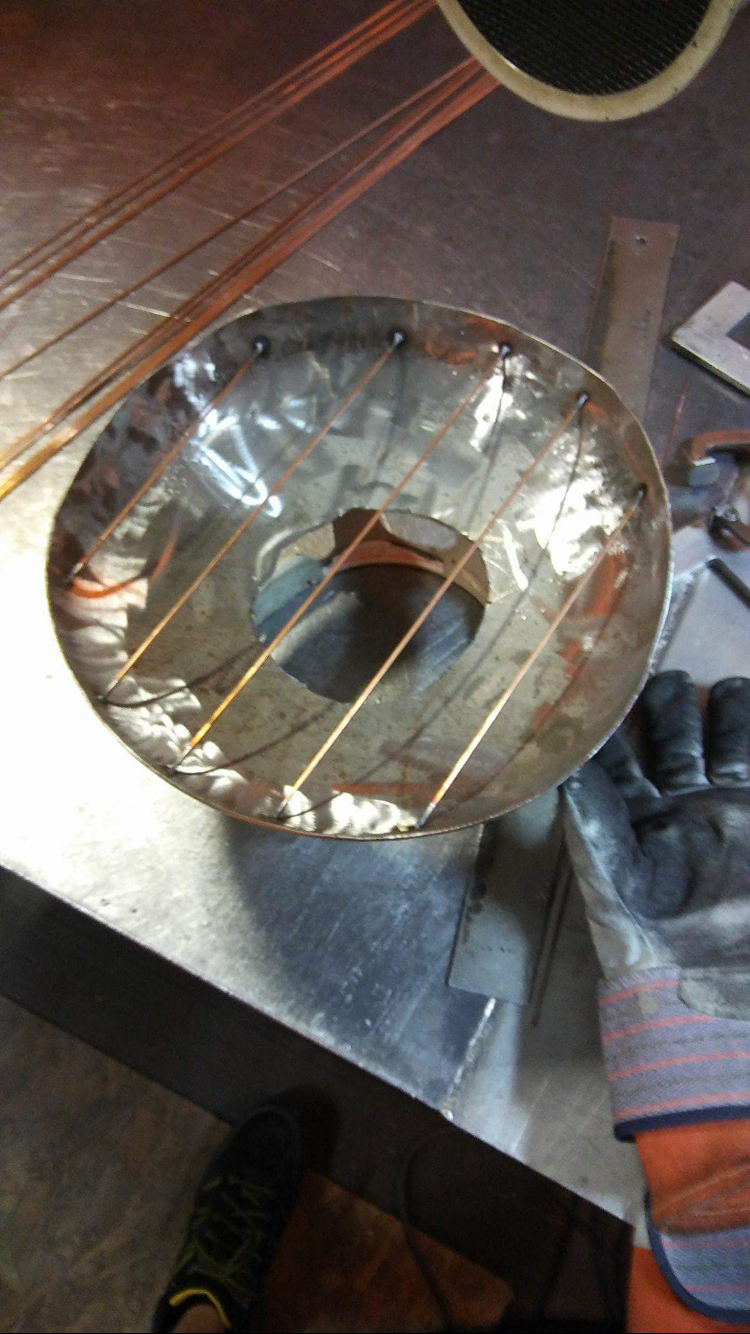
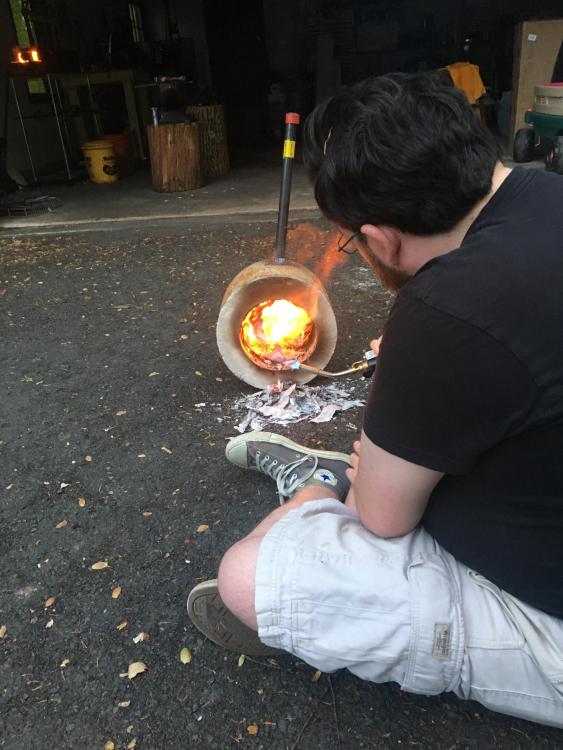
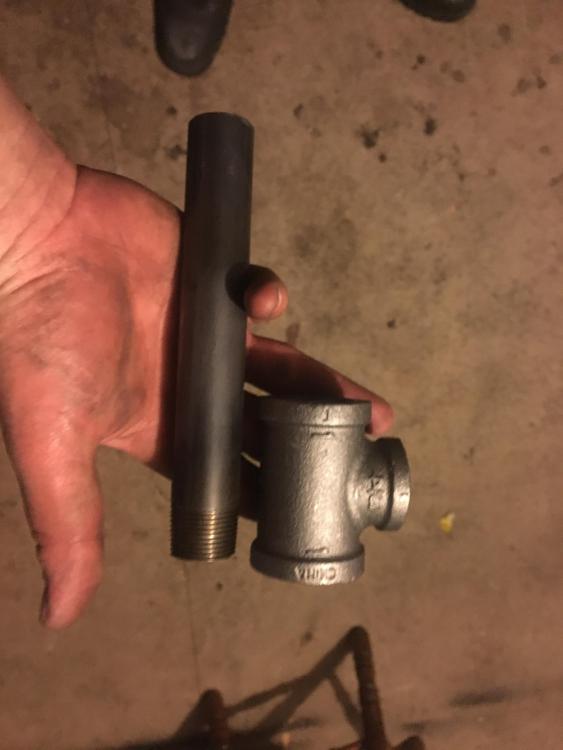
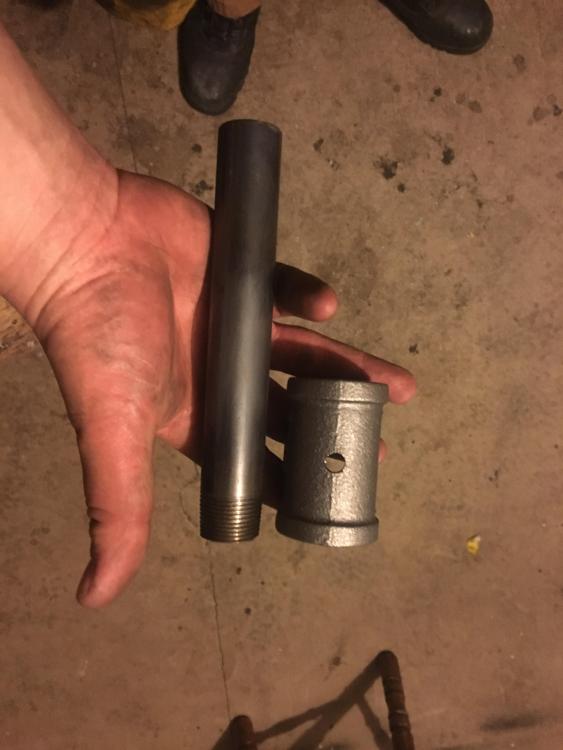
Update**** We have successfully cast the remaining portion of refractory in the foundry, New, Frosty-T burner is half way there, lid has been welded and will be finished in upcoming days. Currently working on tweaking the hole for the burner due to afformentioned oversight. It felt like eating a bowl of grapes only to realize they were olives. Hope you enjoy following our build! More to come...


-
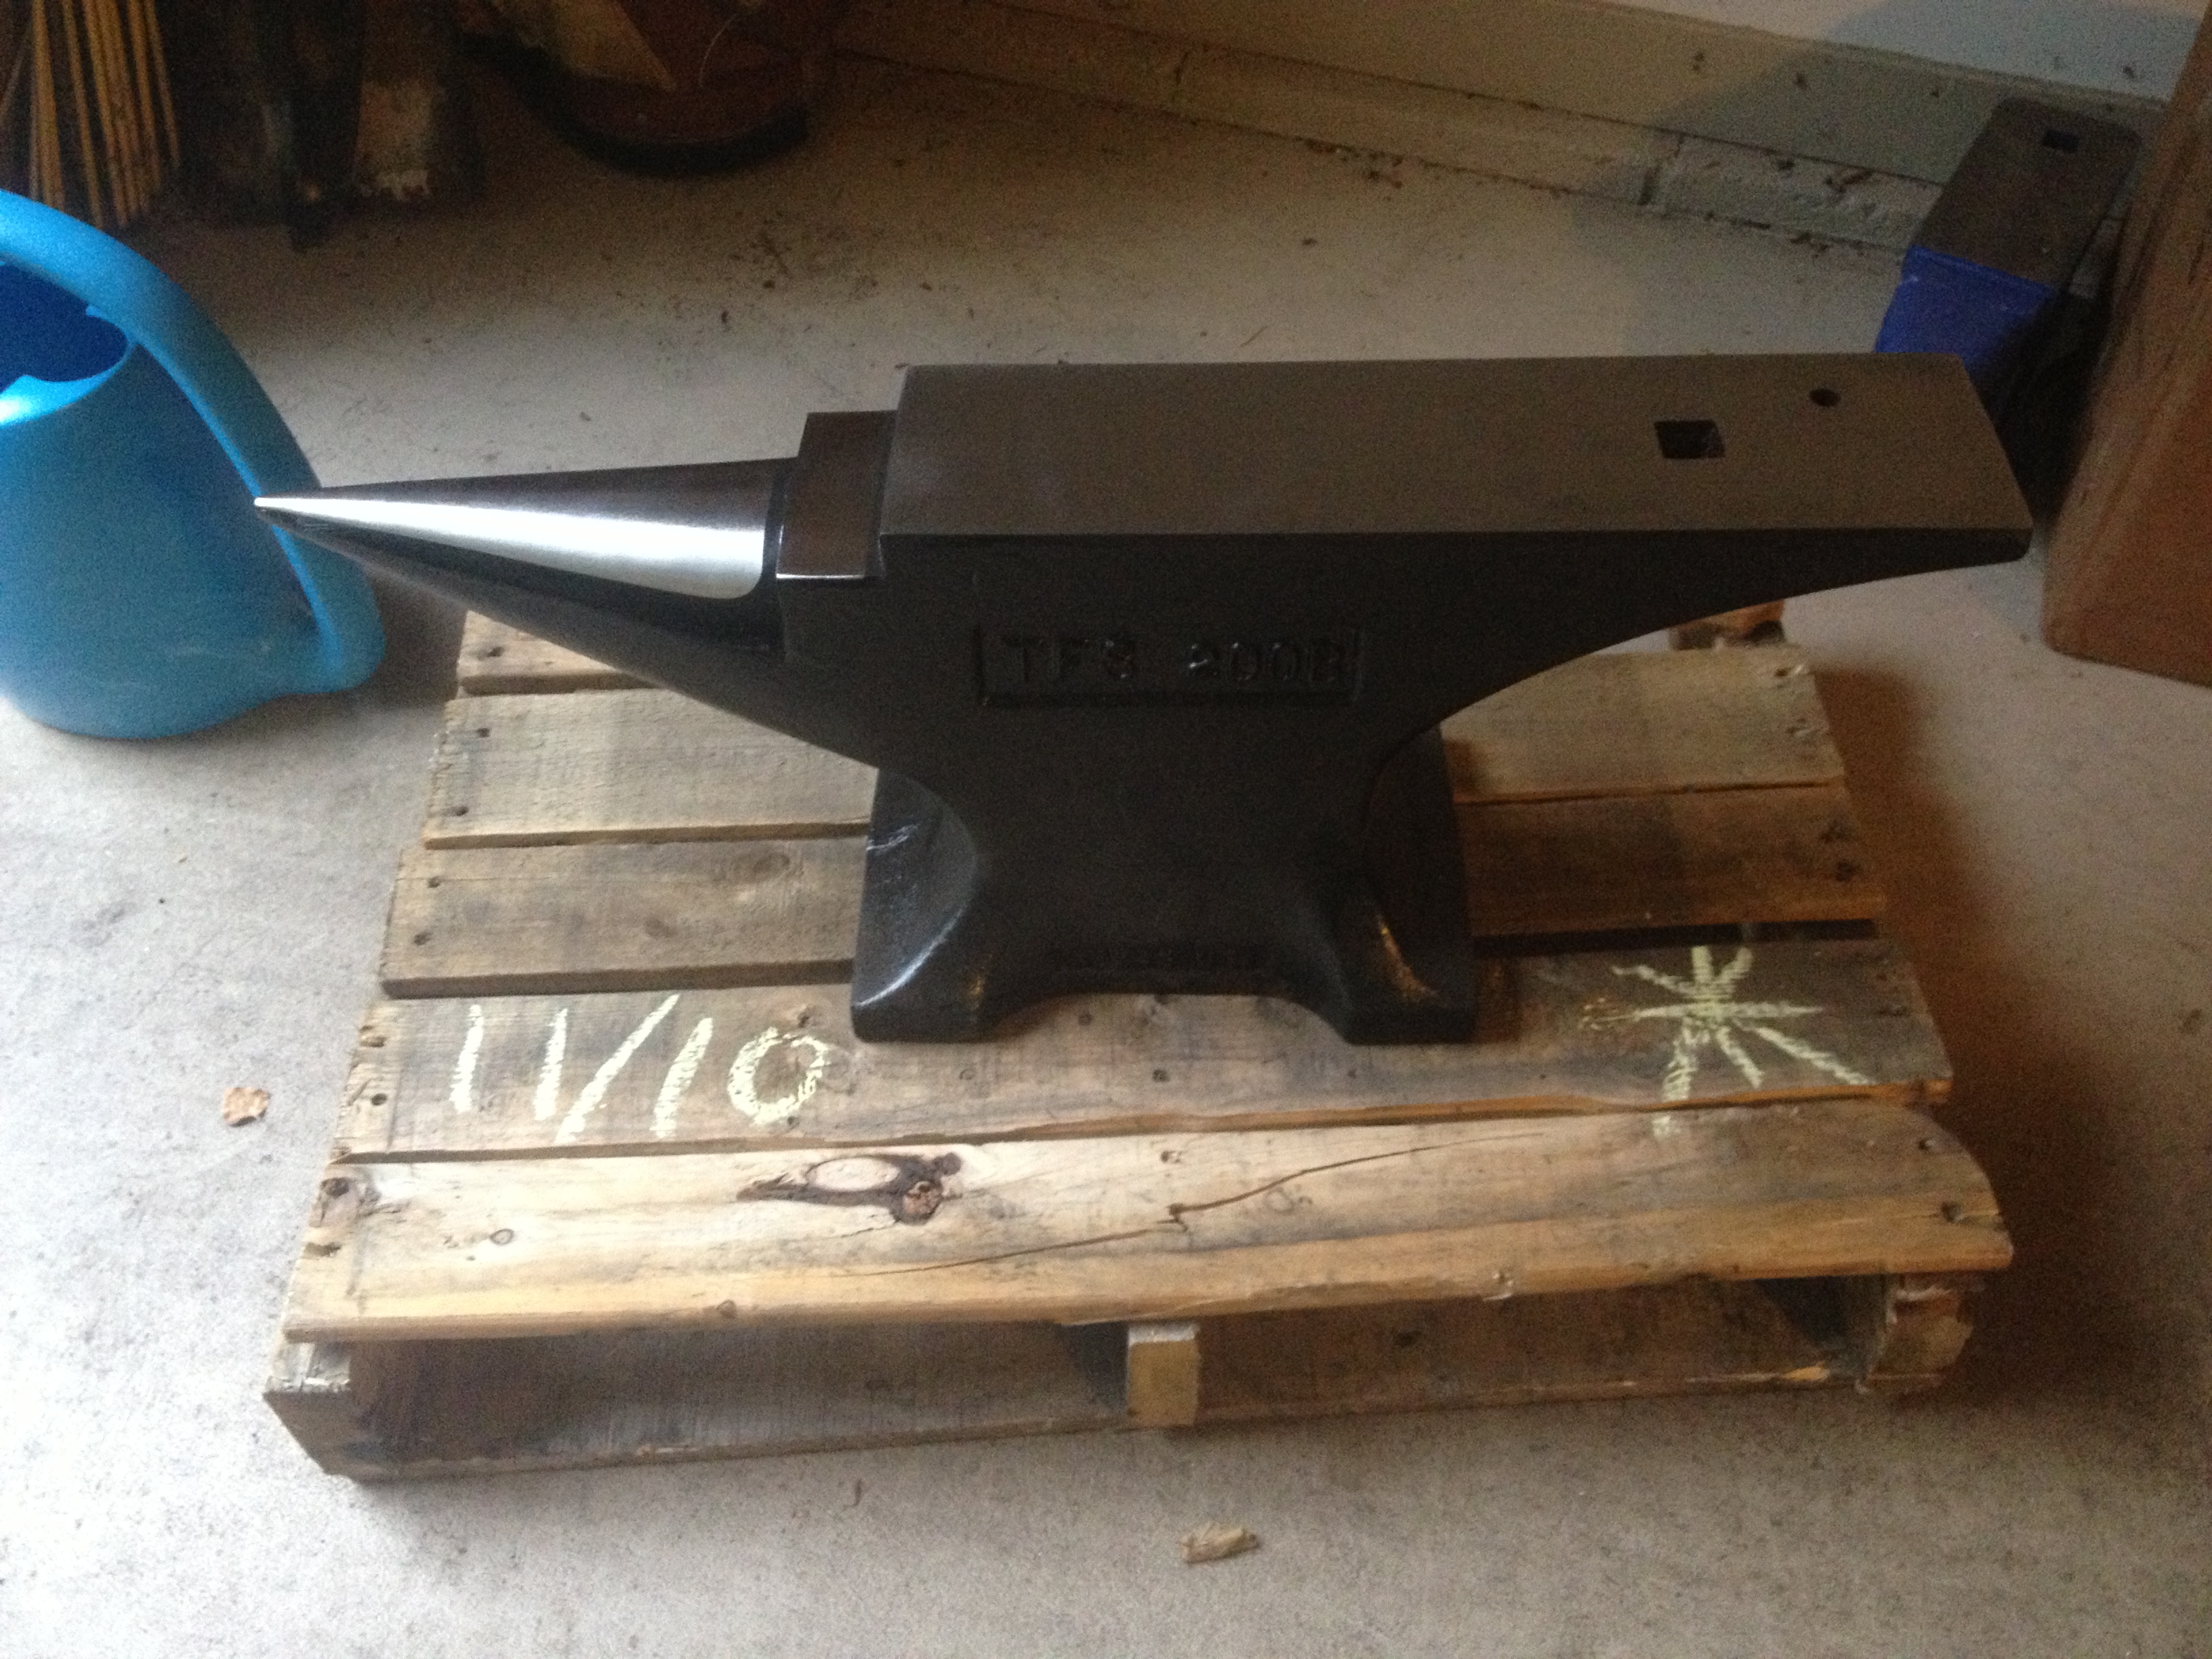
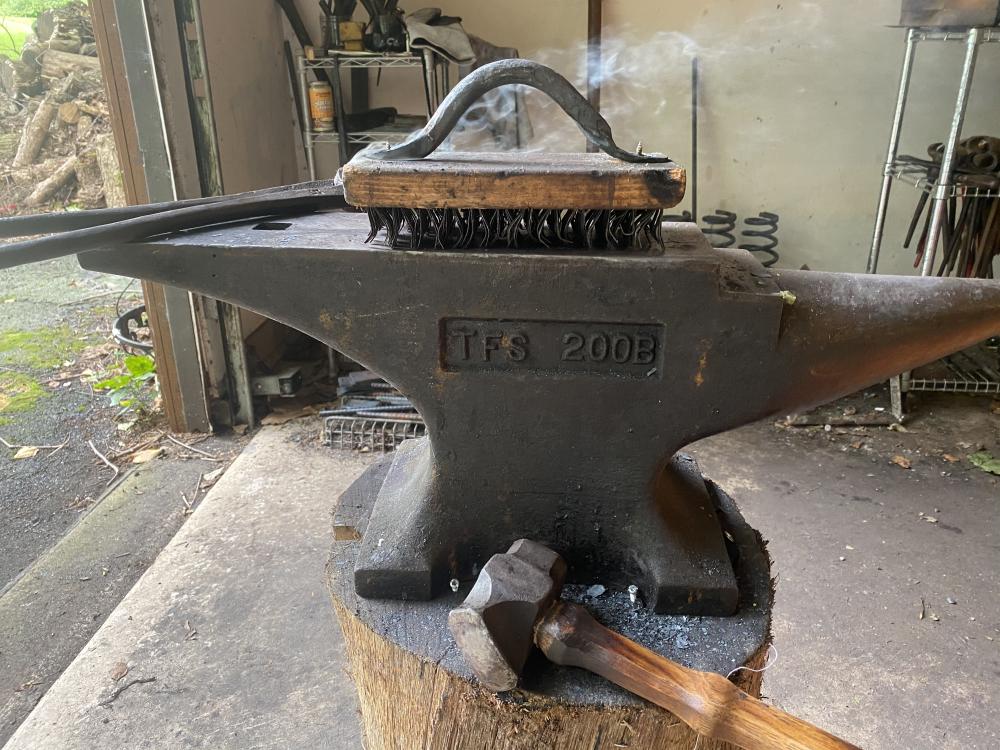
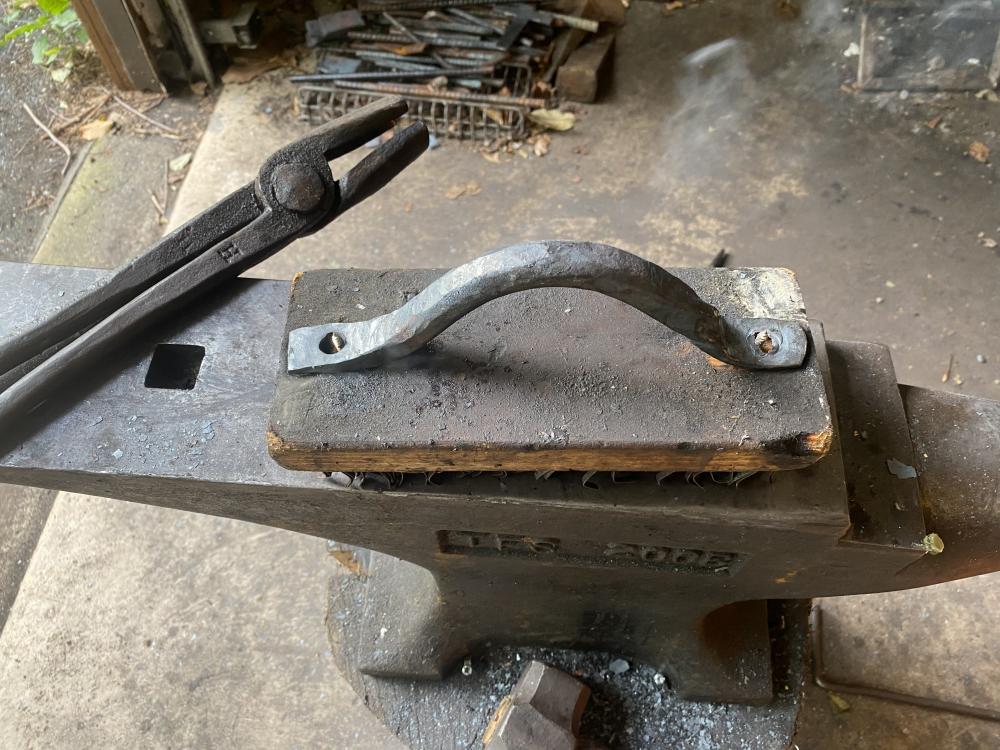
I forge on a 200# TFS blacksmiths anvil. Works well for what I need her for. Honestly, wish she was a bit bigger. If you do buy one brand new it will need a light clean up and the edges will need to be radiused.


-
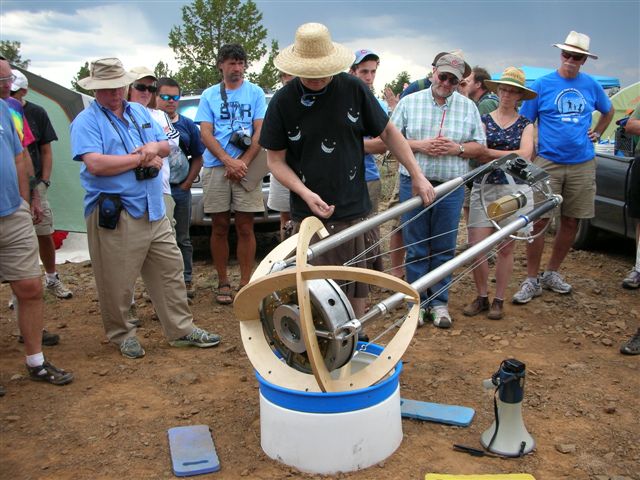
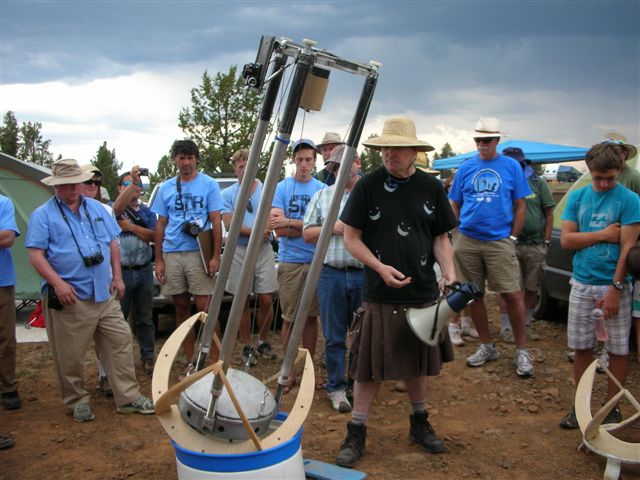
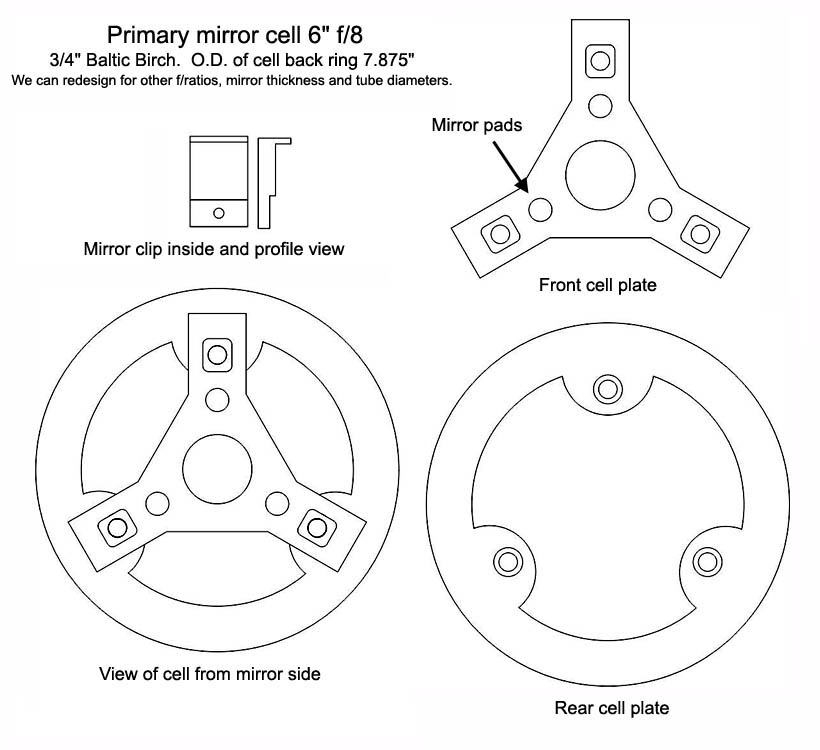
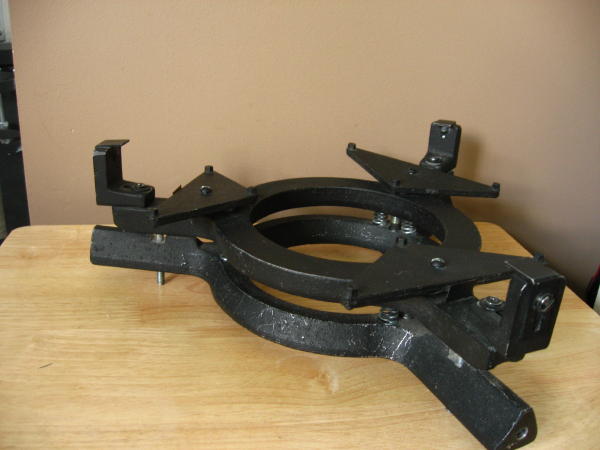
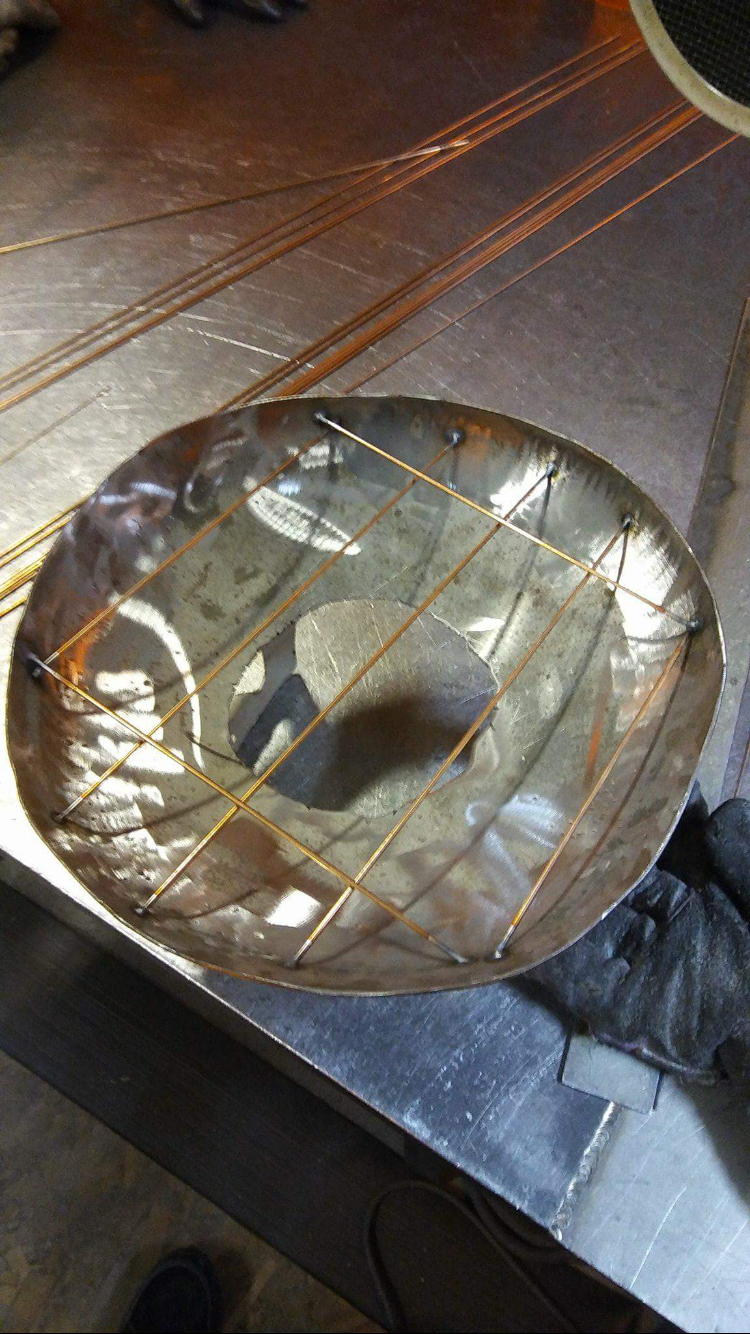
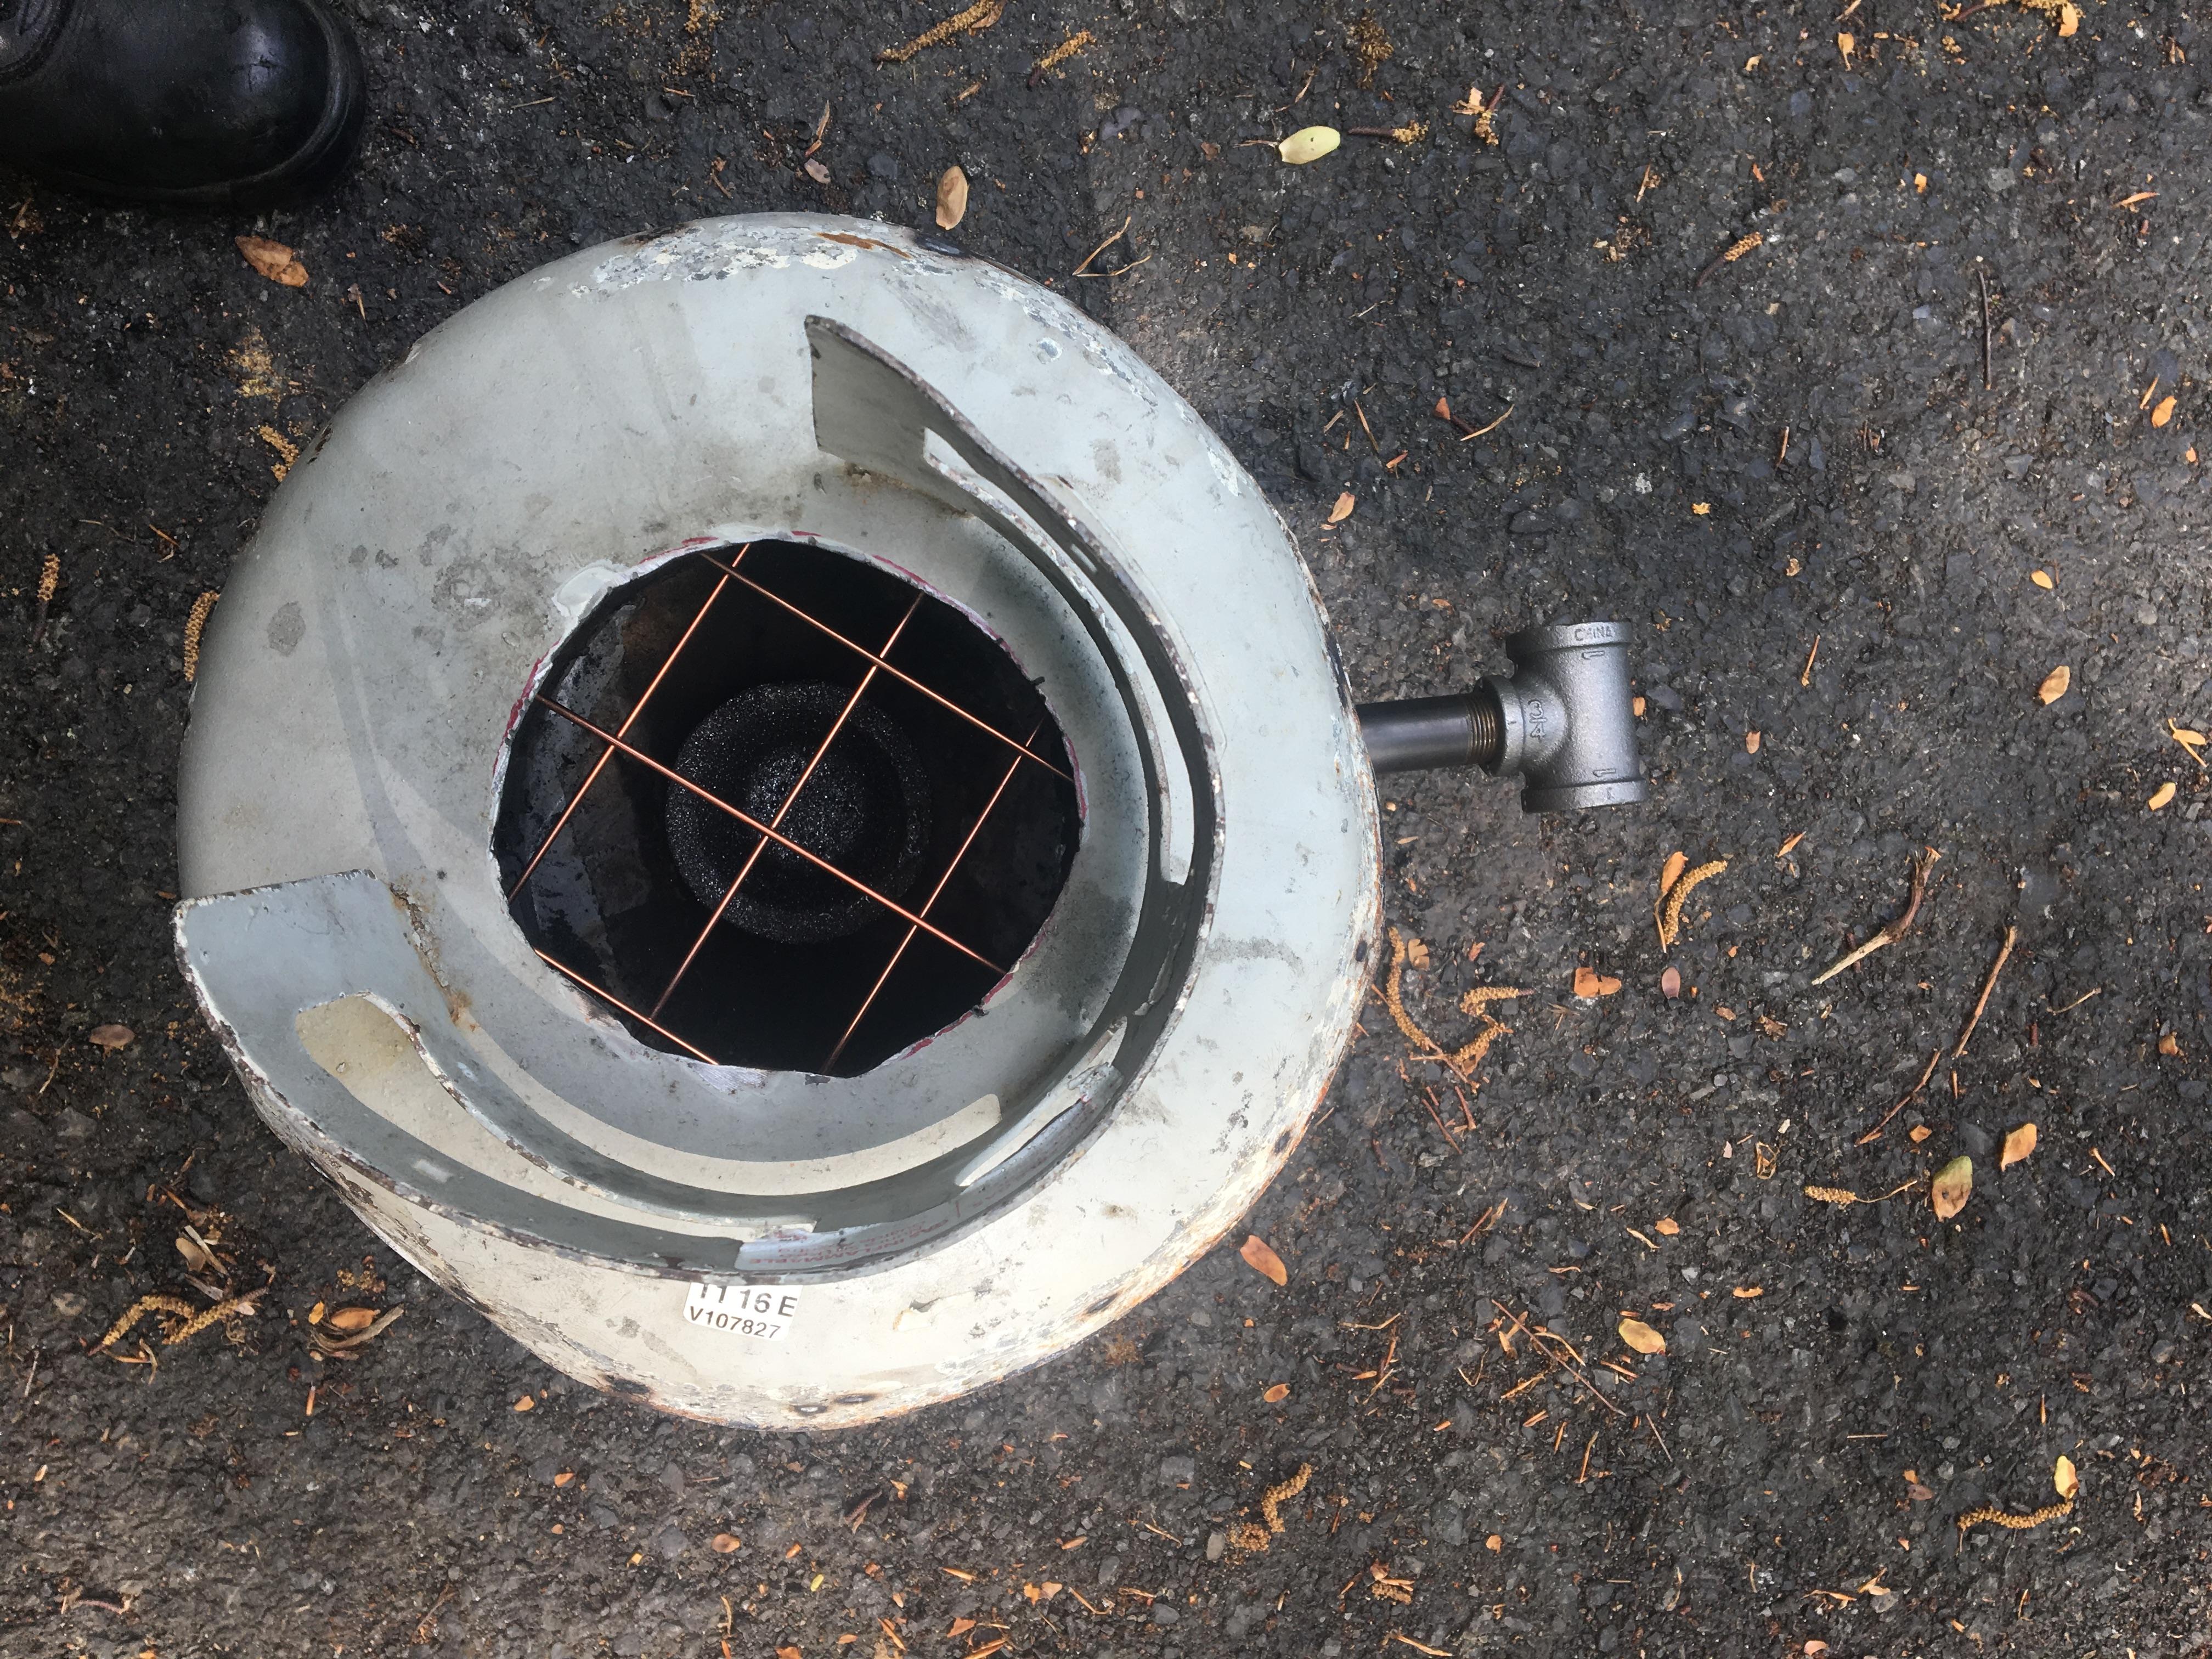
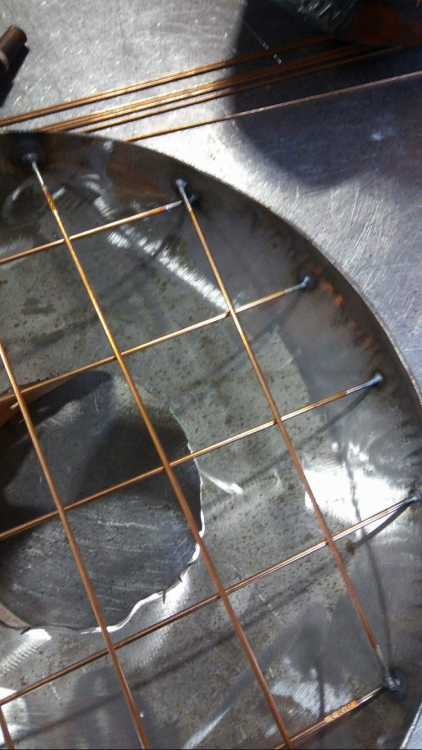
Hi, Smoggy. This is friend. The telescope we’re building is an 8 inch Newtonian, so a reflector. I’ve ground out the mirror and it’s all ready to go. The “Sudiball” base is going to be made from baltic birch but the mirror cell itself is the only bit we’re casting. Using metal for the part is much better than wood due to having fewer fluctuations in damp environments and because metal will normalize to the ambient temperature faster to reduce air currents over the mirror. A heavier mirror cell will also work to counterbalance the secondary cage. The atmospherics are certainly a consideration. There is a long history of using brass in telescopes so I wanted the design to harken to that. Here are a few pictures of the design from its creator website and the casting we hope to make. https://ix.cs.uoregon.edu/~tomc/Hobbies/Astronomy/ATM/