jlpservicesinc
-
Posts
5,770 -
Joined
-
Last visited
Content Type
Profiles
Forums
Articles
Gallery
Downloads
Events
Everything posted by jlpservicesinc
-

JLP Blacksmith Teaching Center.
jlpservicesinc replied to jlpservicesinc's topic in Building, Designing a Shop
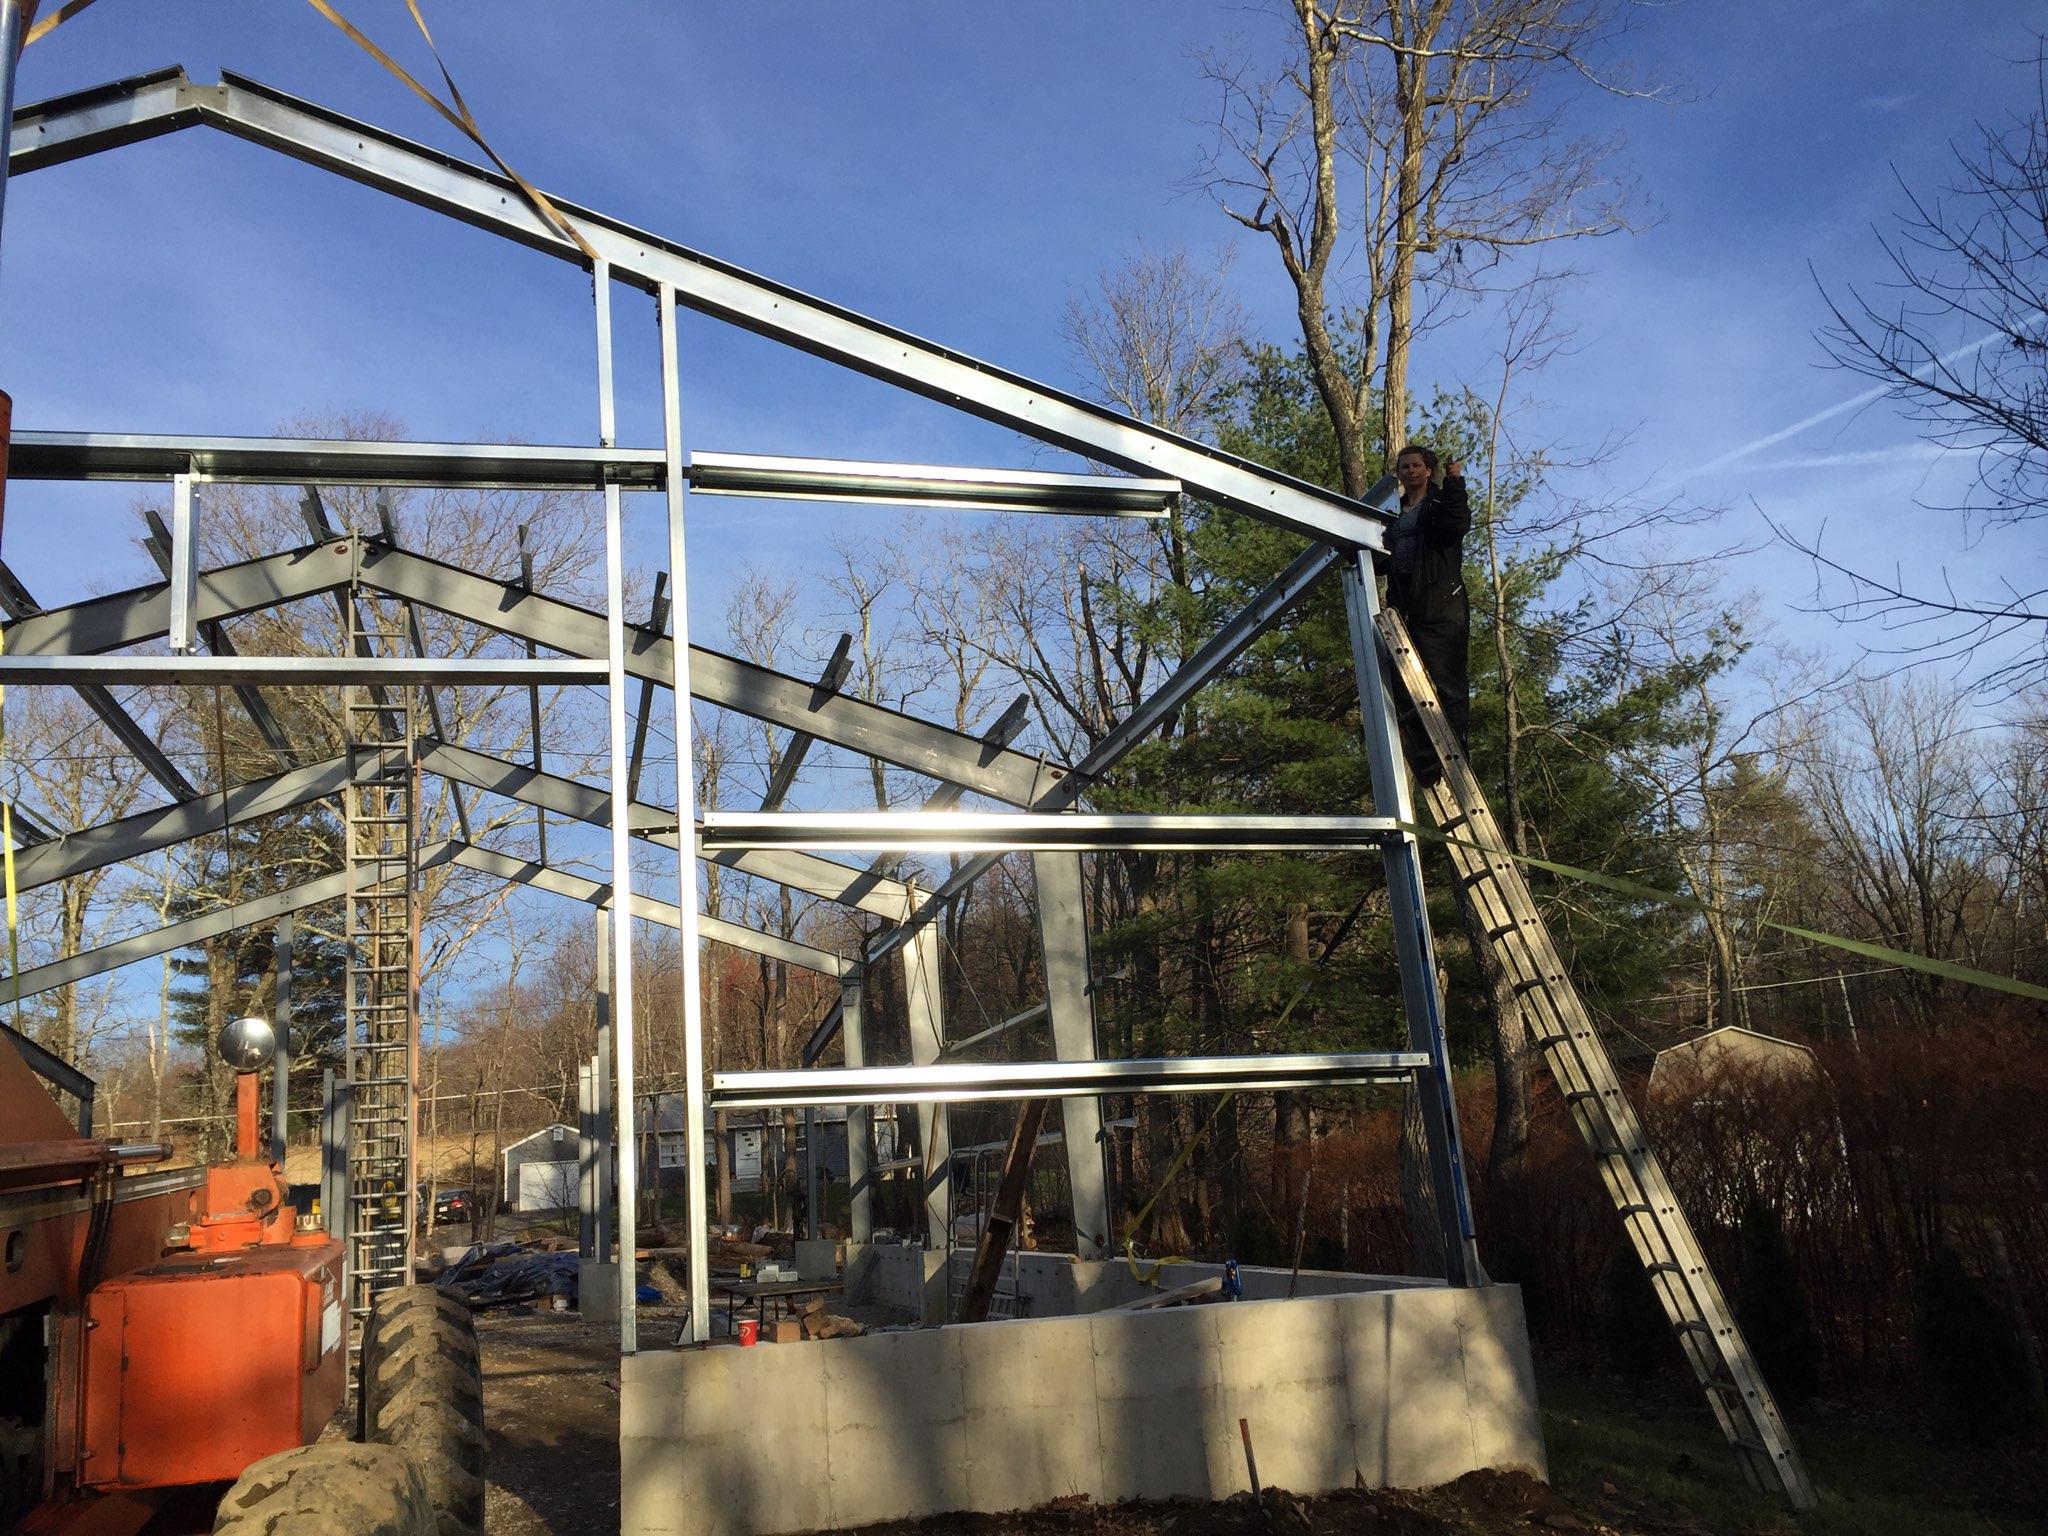
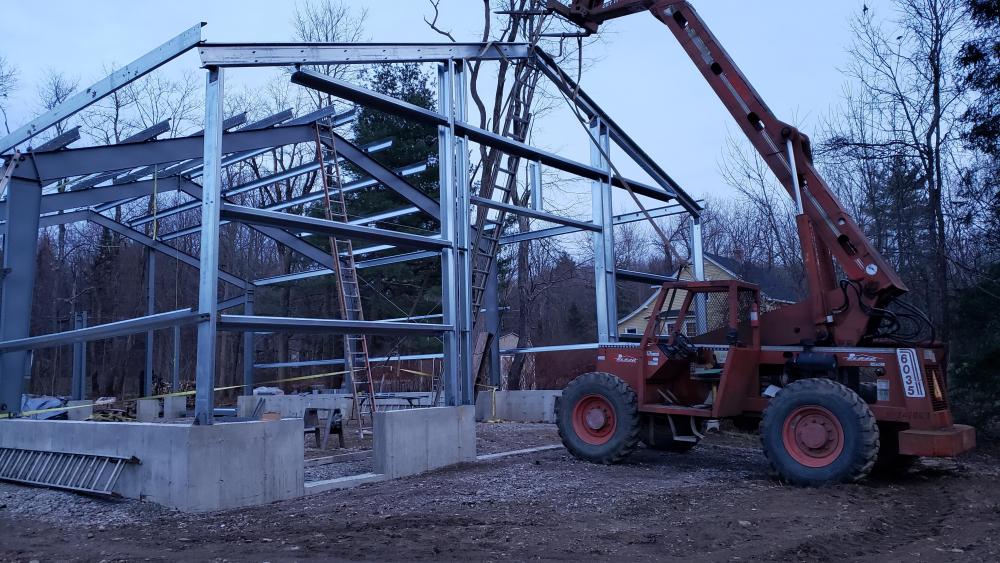
Frosty , No problem at all. All information is good information and your build was most excellent. its Moving along at a decent pace so far. I think it's 8 days today since building arrived. November 15th arrival and unloading of building. had 2.5 days of heavy rain on top of my normal farrier work. So all in all I think it's coming along nicely. Never fast enough for me though. As a side note. Frosty did bring up some great points about safety. So, now is probably the time to address some of it. I take another persons safety as top priority and have been a scuba diving Teacher/ instructor, a rock climbing instructor, a Ninjutsu teacher, A white water rescue instructor, etc, etc. Most of these jobs one has to be a really good assessor of activities and dangers taking the whole groups ages, fitness, mental sharpness. thinking ability under pressure. etc, etc. and make it so the activity is both safe and fun. While working on a building I suppose it can be fun. I'm an arrival person vs journey. We all have either or. My own back ground involves many activities doing steel girder work as well as many other fun activities like Free style Solo rock climbing and well as training in Ninjutsu since I was 8. I do what others might consider to be the dangerous stuff, but for myself it's just everyday living. To do all of those things one has to have a very good understanding of the dangers at hand. (risk assessment). Of course there is always an accident ready to happen no matter how much training or prepared you are. Things simply happen. IE accidents. Anyhow, my point being that I don't endorse or encourage anybody else to take on a project like this, nor to hang on the end of a semi free rafter end to tie in an eave strut. There is a professional workmens basket for the LULL which helper use and I use the ladder as well as ropes and such. There it is. Others safety above all else. -
JLP Blacksmith Teaching Center.
jlpservicesinc replied to jlpservicesinc's topic in Building, Designing a Shop
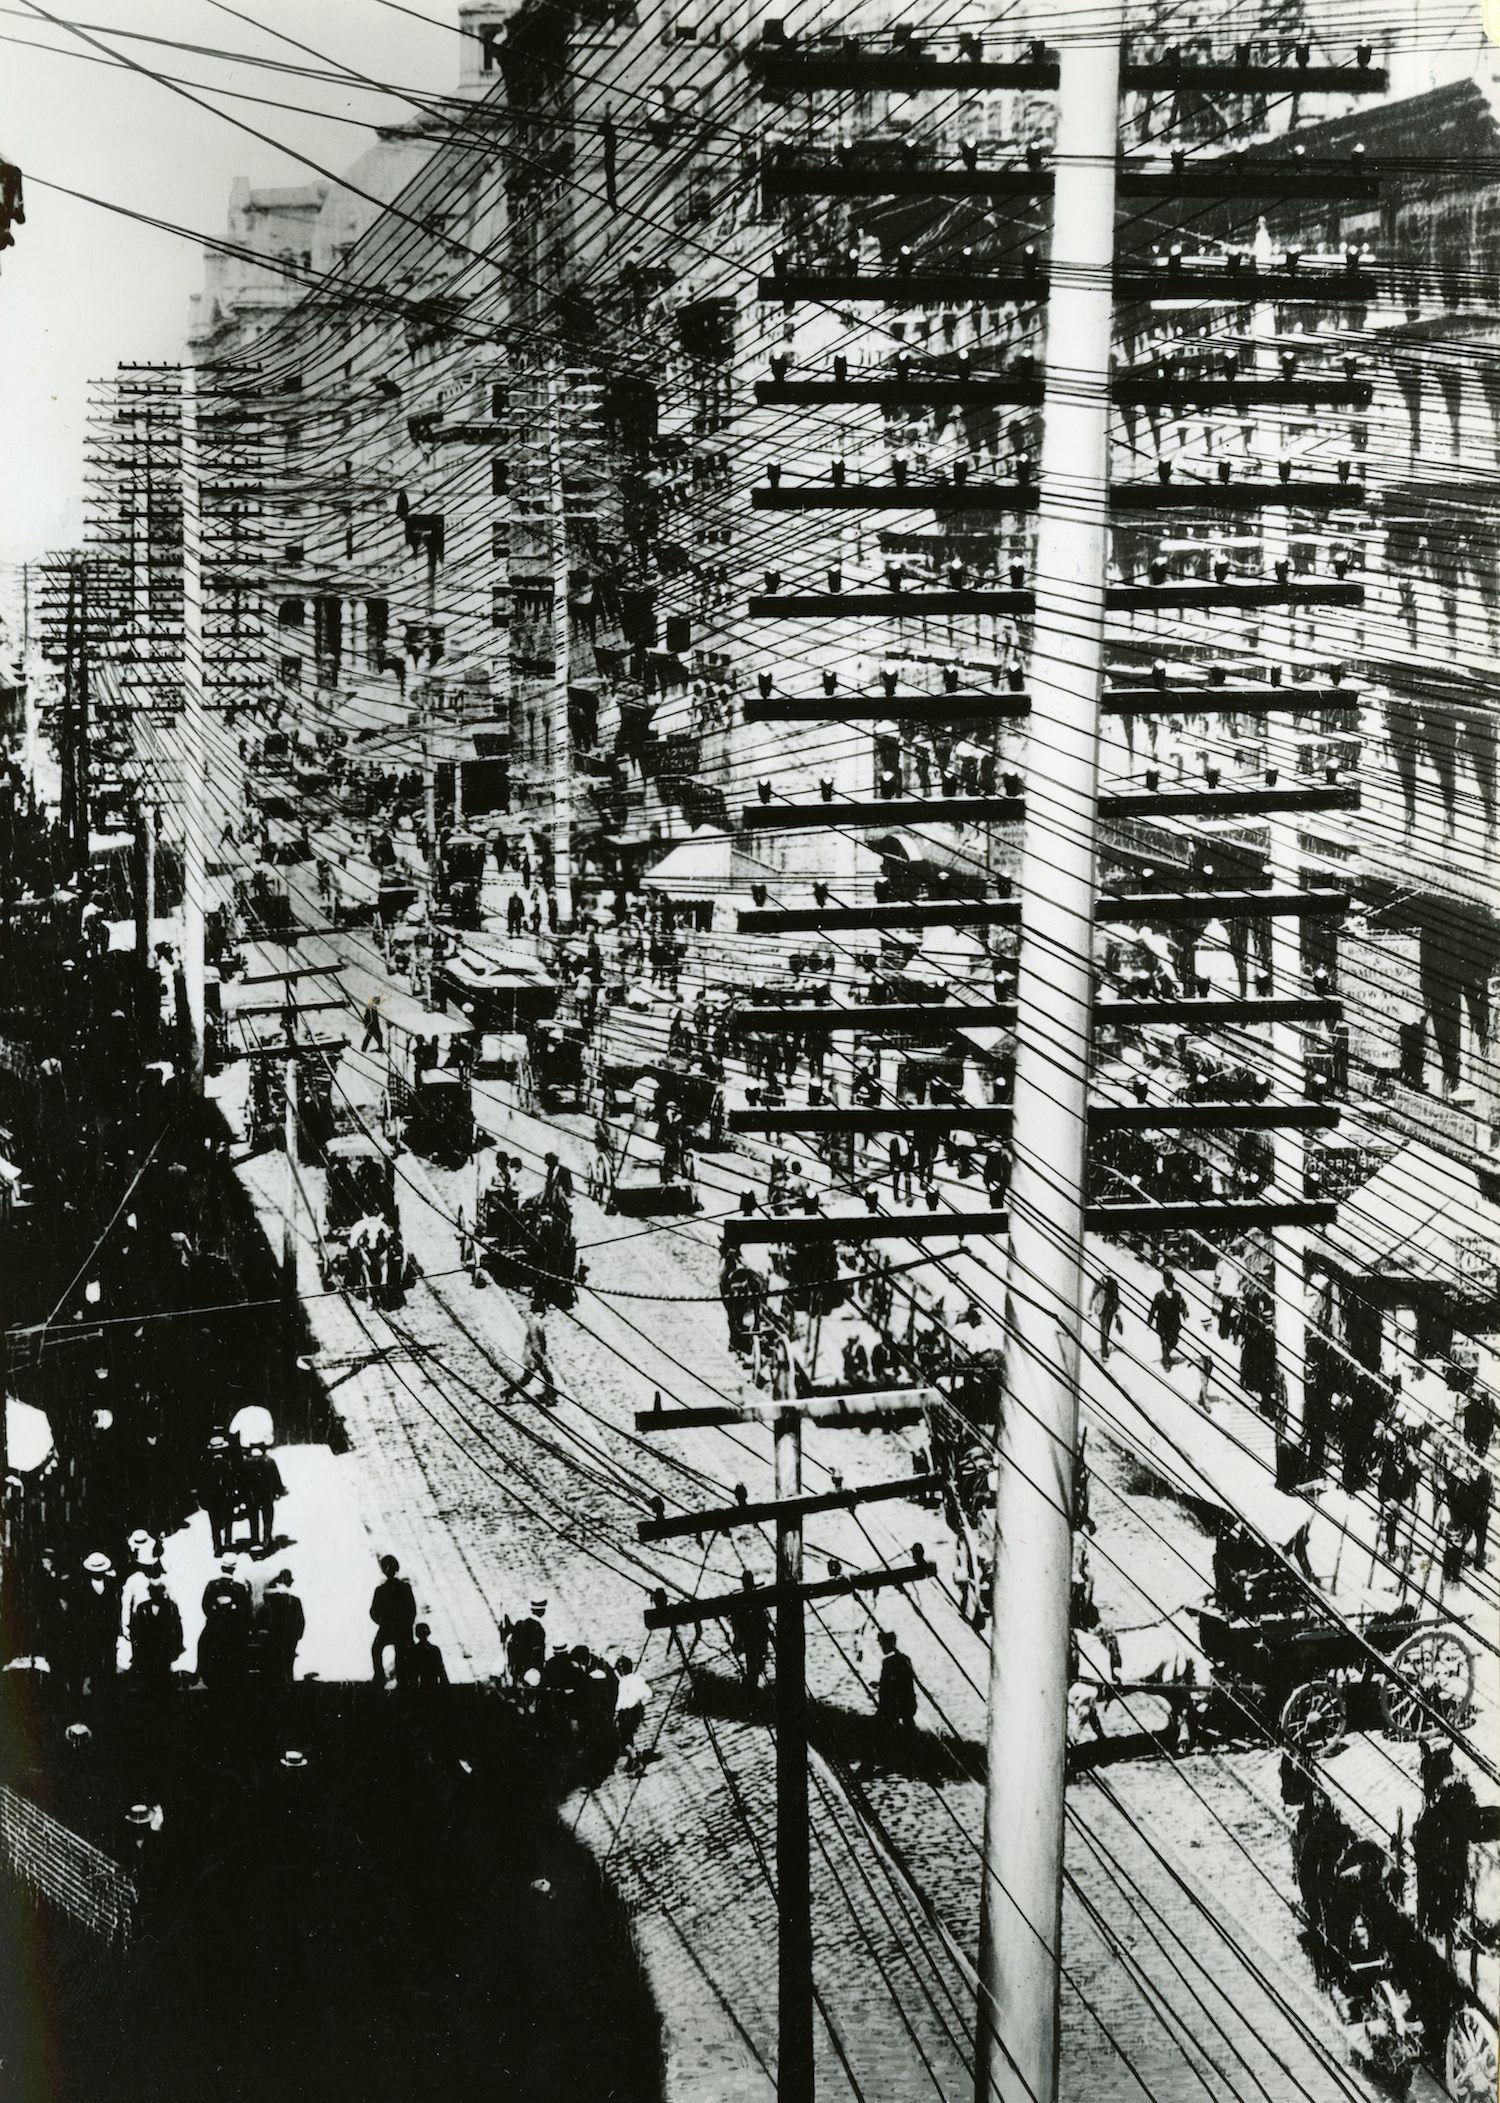
thanks David, Your guidance has been much appreciated. I can't tell you how much I appreciate it. If you are ever out my way a lesson is yours for sure. From our conversations and from seeing some of your other work I had faith in what you told me. I certainly did not Just go.. Oh, so and so told me this.. Lets do it blindly. I did risk assessment based on what I know, what you told me, and then what I have read base on the material at hand. Your information certainly sealed the deal and made for a much better outcome. Easier too, as doing the work on a ladder would have been brutal, It would have looked like a historic street corner at the hey day of telephone and telegraph service in NY. Your initial idea of building on the ground and lifting it would have made for a smoother transition from flat to upright as the amount of cupping was amazing. Having the extra support in the middle would have been nicer. Not sure if you noticed in the photo, but we clamped on some 2X4's on the bottom for the CLs and door opening to hold in place. When I started lifting it it shrunk in width so by the time we got to the 5/8 up point there was only the ends still on the wall. that was when the guy yelled at me to stop. I just kept on going and then it went upright. Having it at waist height was a wonderful idea from one of the guys Jimmy. having some sort of support under the base line would have worked too. I can not fathom what getting something like what you did setup and implemented. The crew you worked with must have been top notch to have so much going on and everyone pulling their weight. Again, thanks for reaching out, sharing your knowledge and experience and helping so much with my questions. Its been a lifeline.. thanks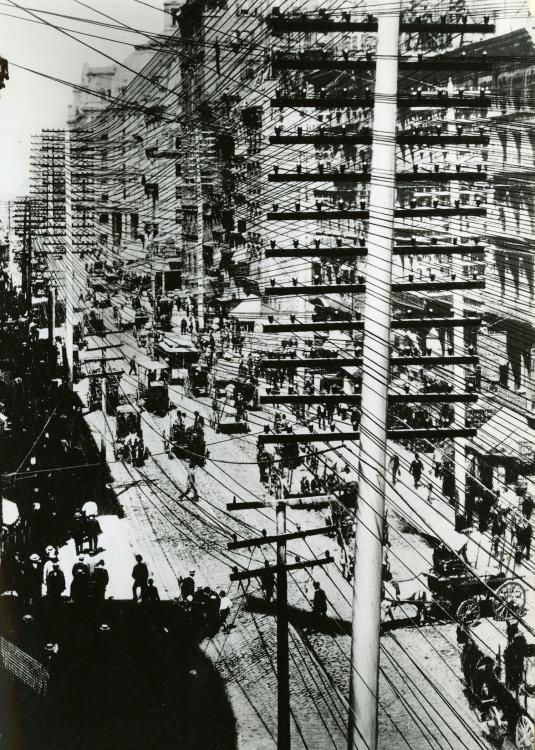
-
JLP Blacksmith Teaching Center.
jlpservicesinc replied to jlpservicesinc's topic in Building, Designing a Shop
chuckle, chuckle.. Rain all day tomorrow. -
JLP Blacksmith Teaching Center.
jlpservicesinc replied to jlpservicesinc's topic in Building, Designing a Shop
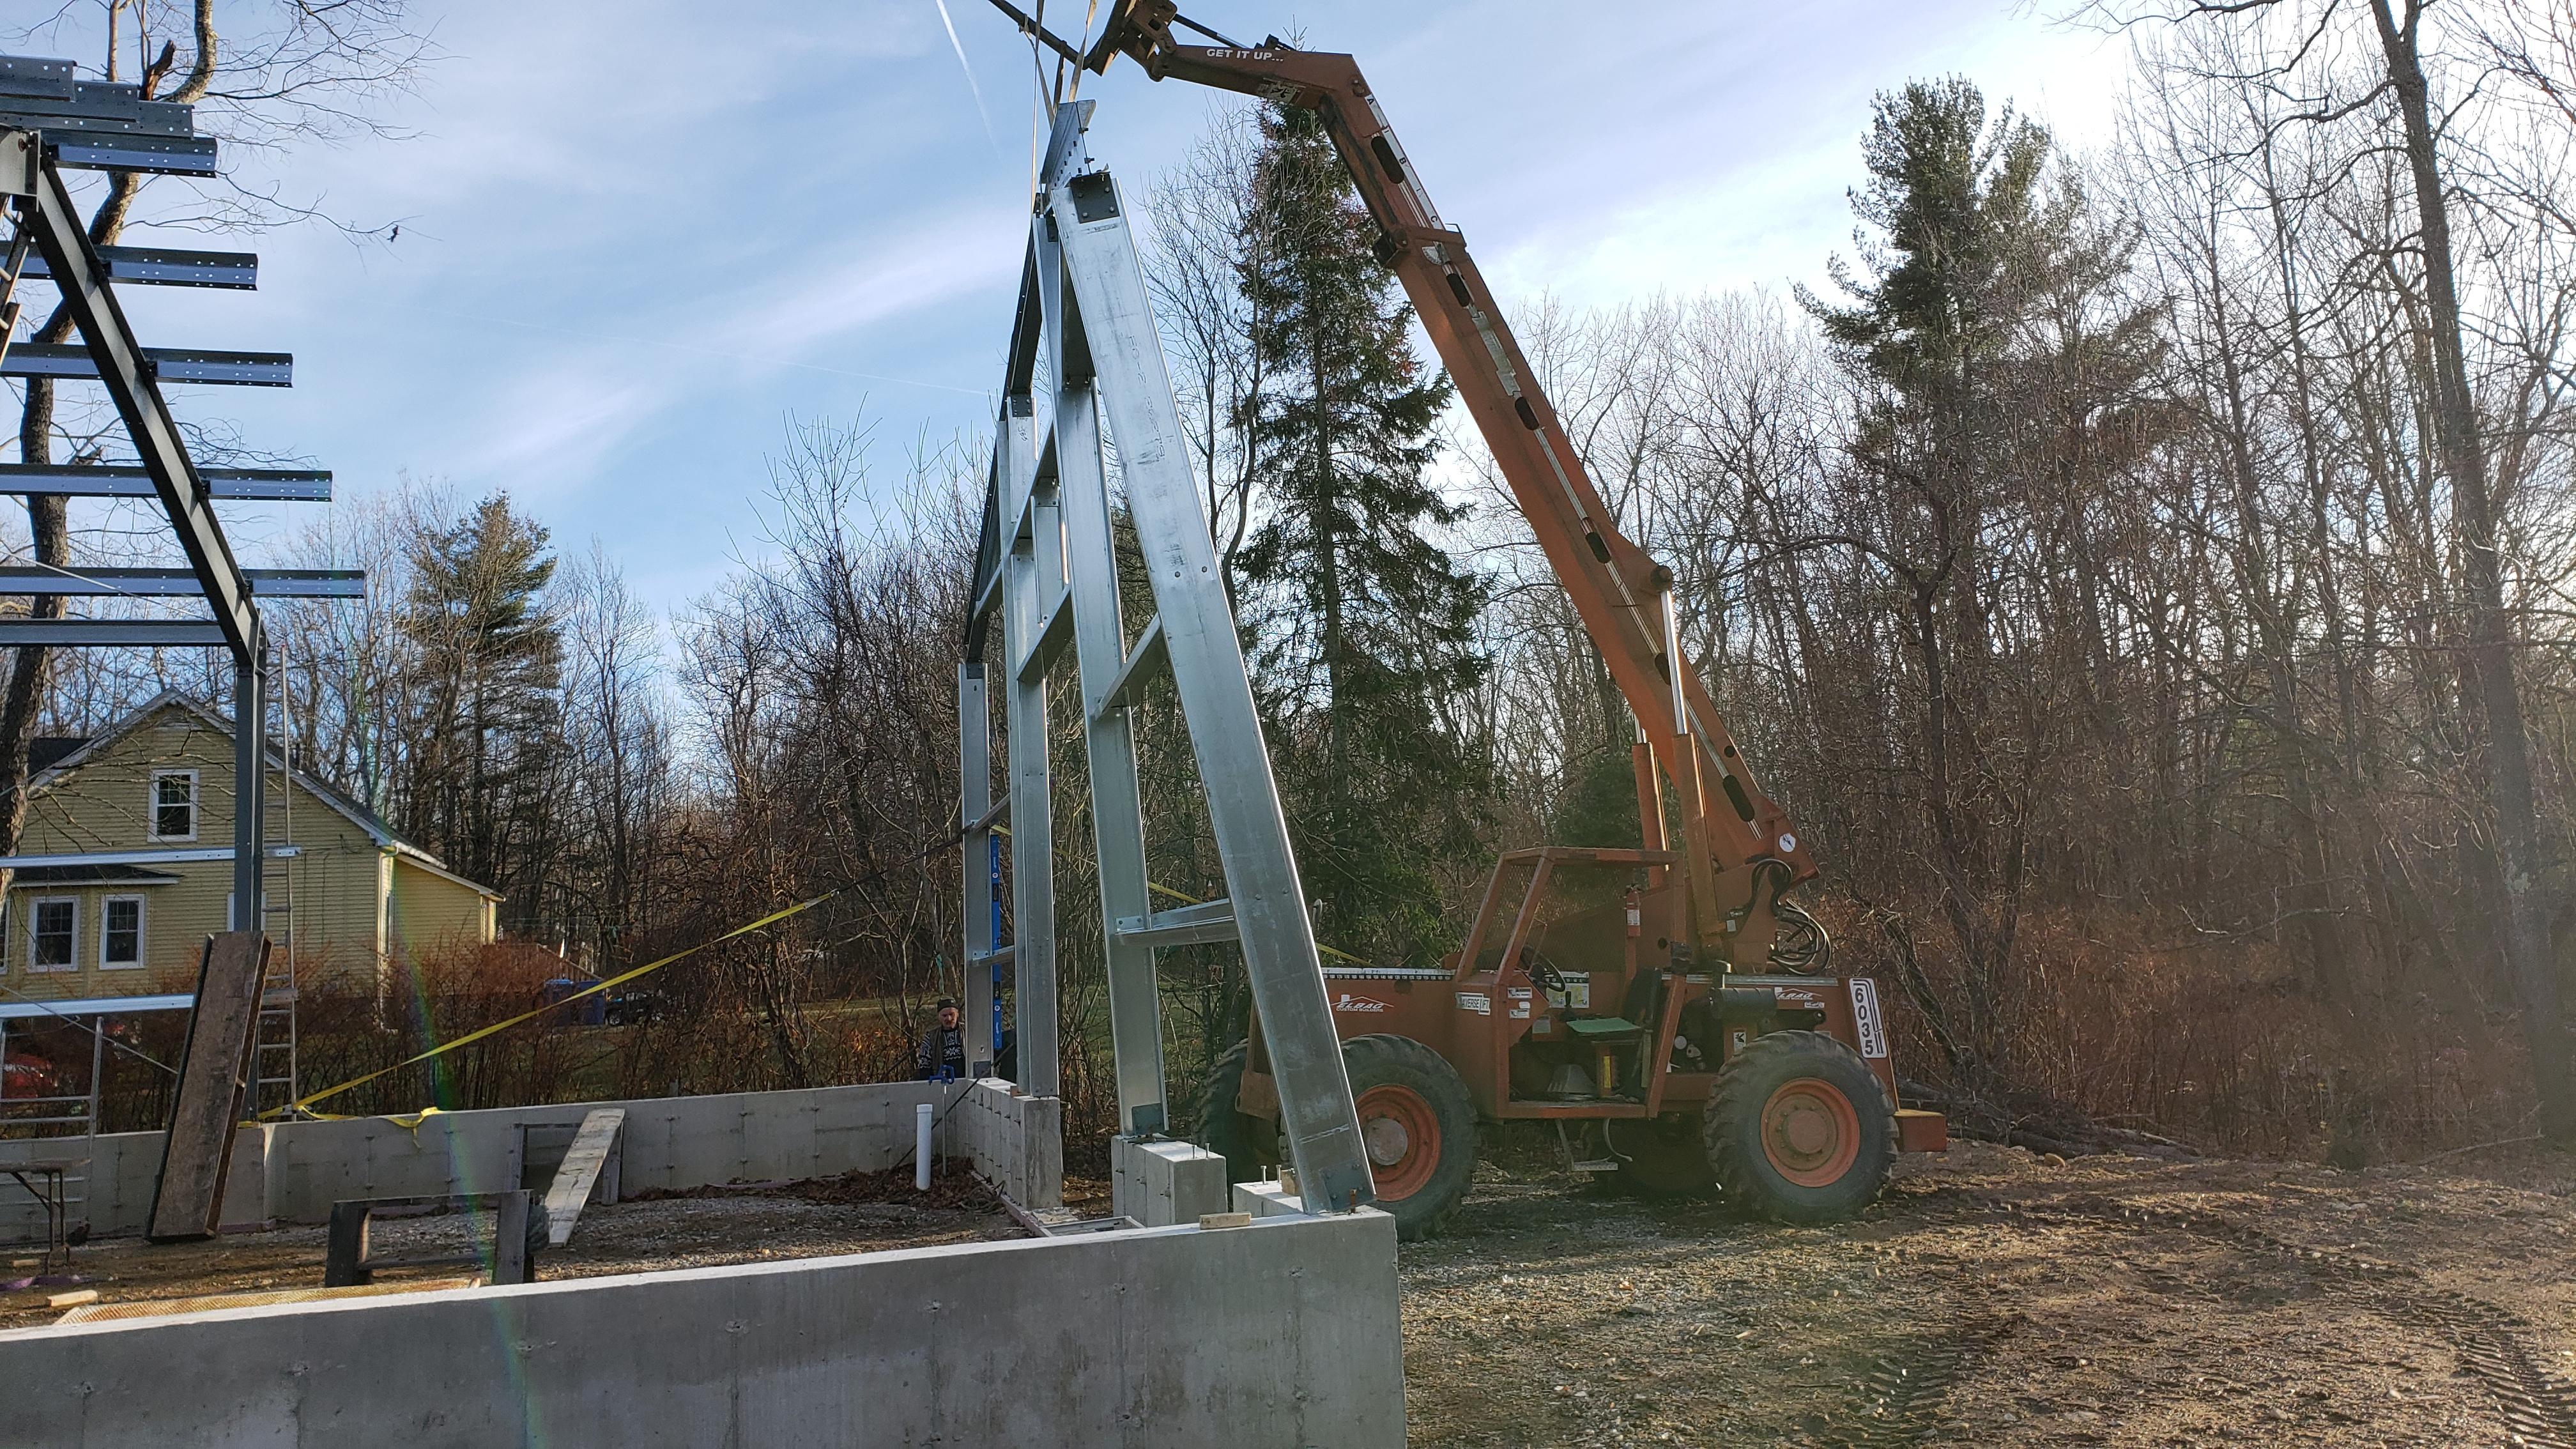
One of me putting the bolts in the corner at the eave strut.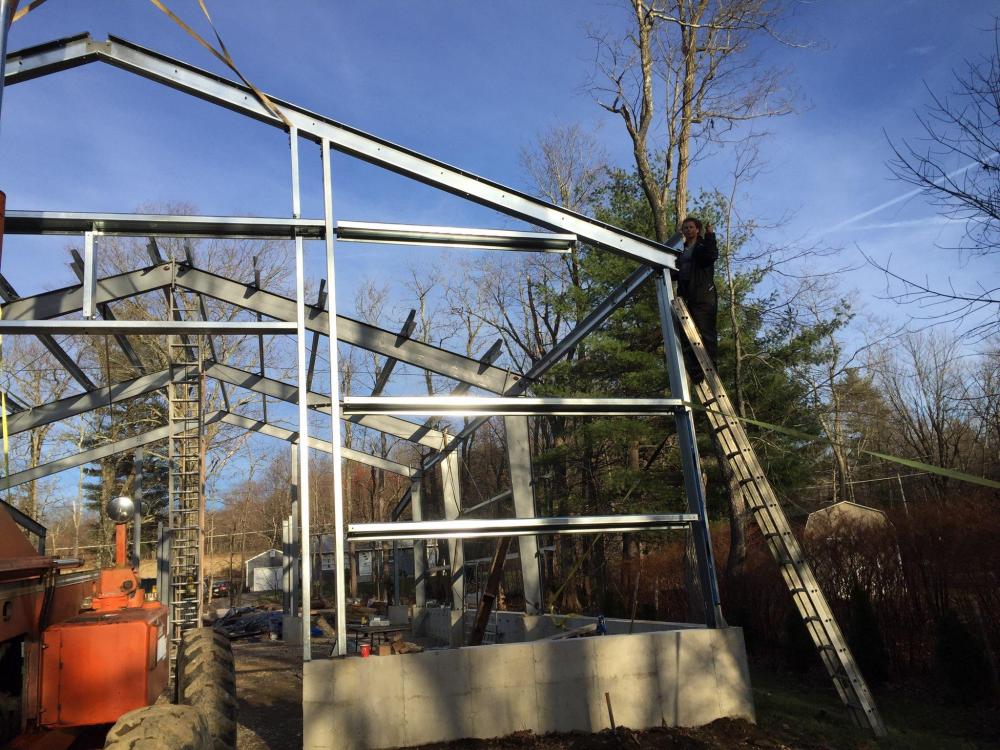
-
JLP Blacksmith Teaching Center.
jlpservicesinc replied to jlpservicesinc's topic in Building, Designing a Shop
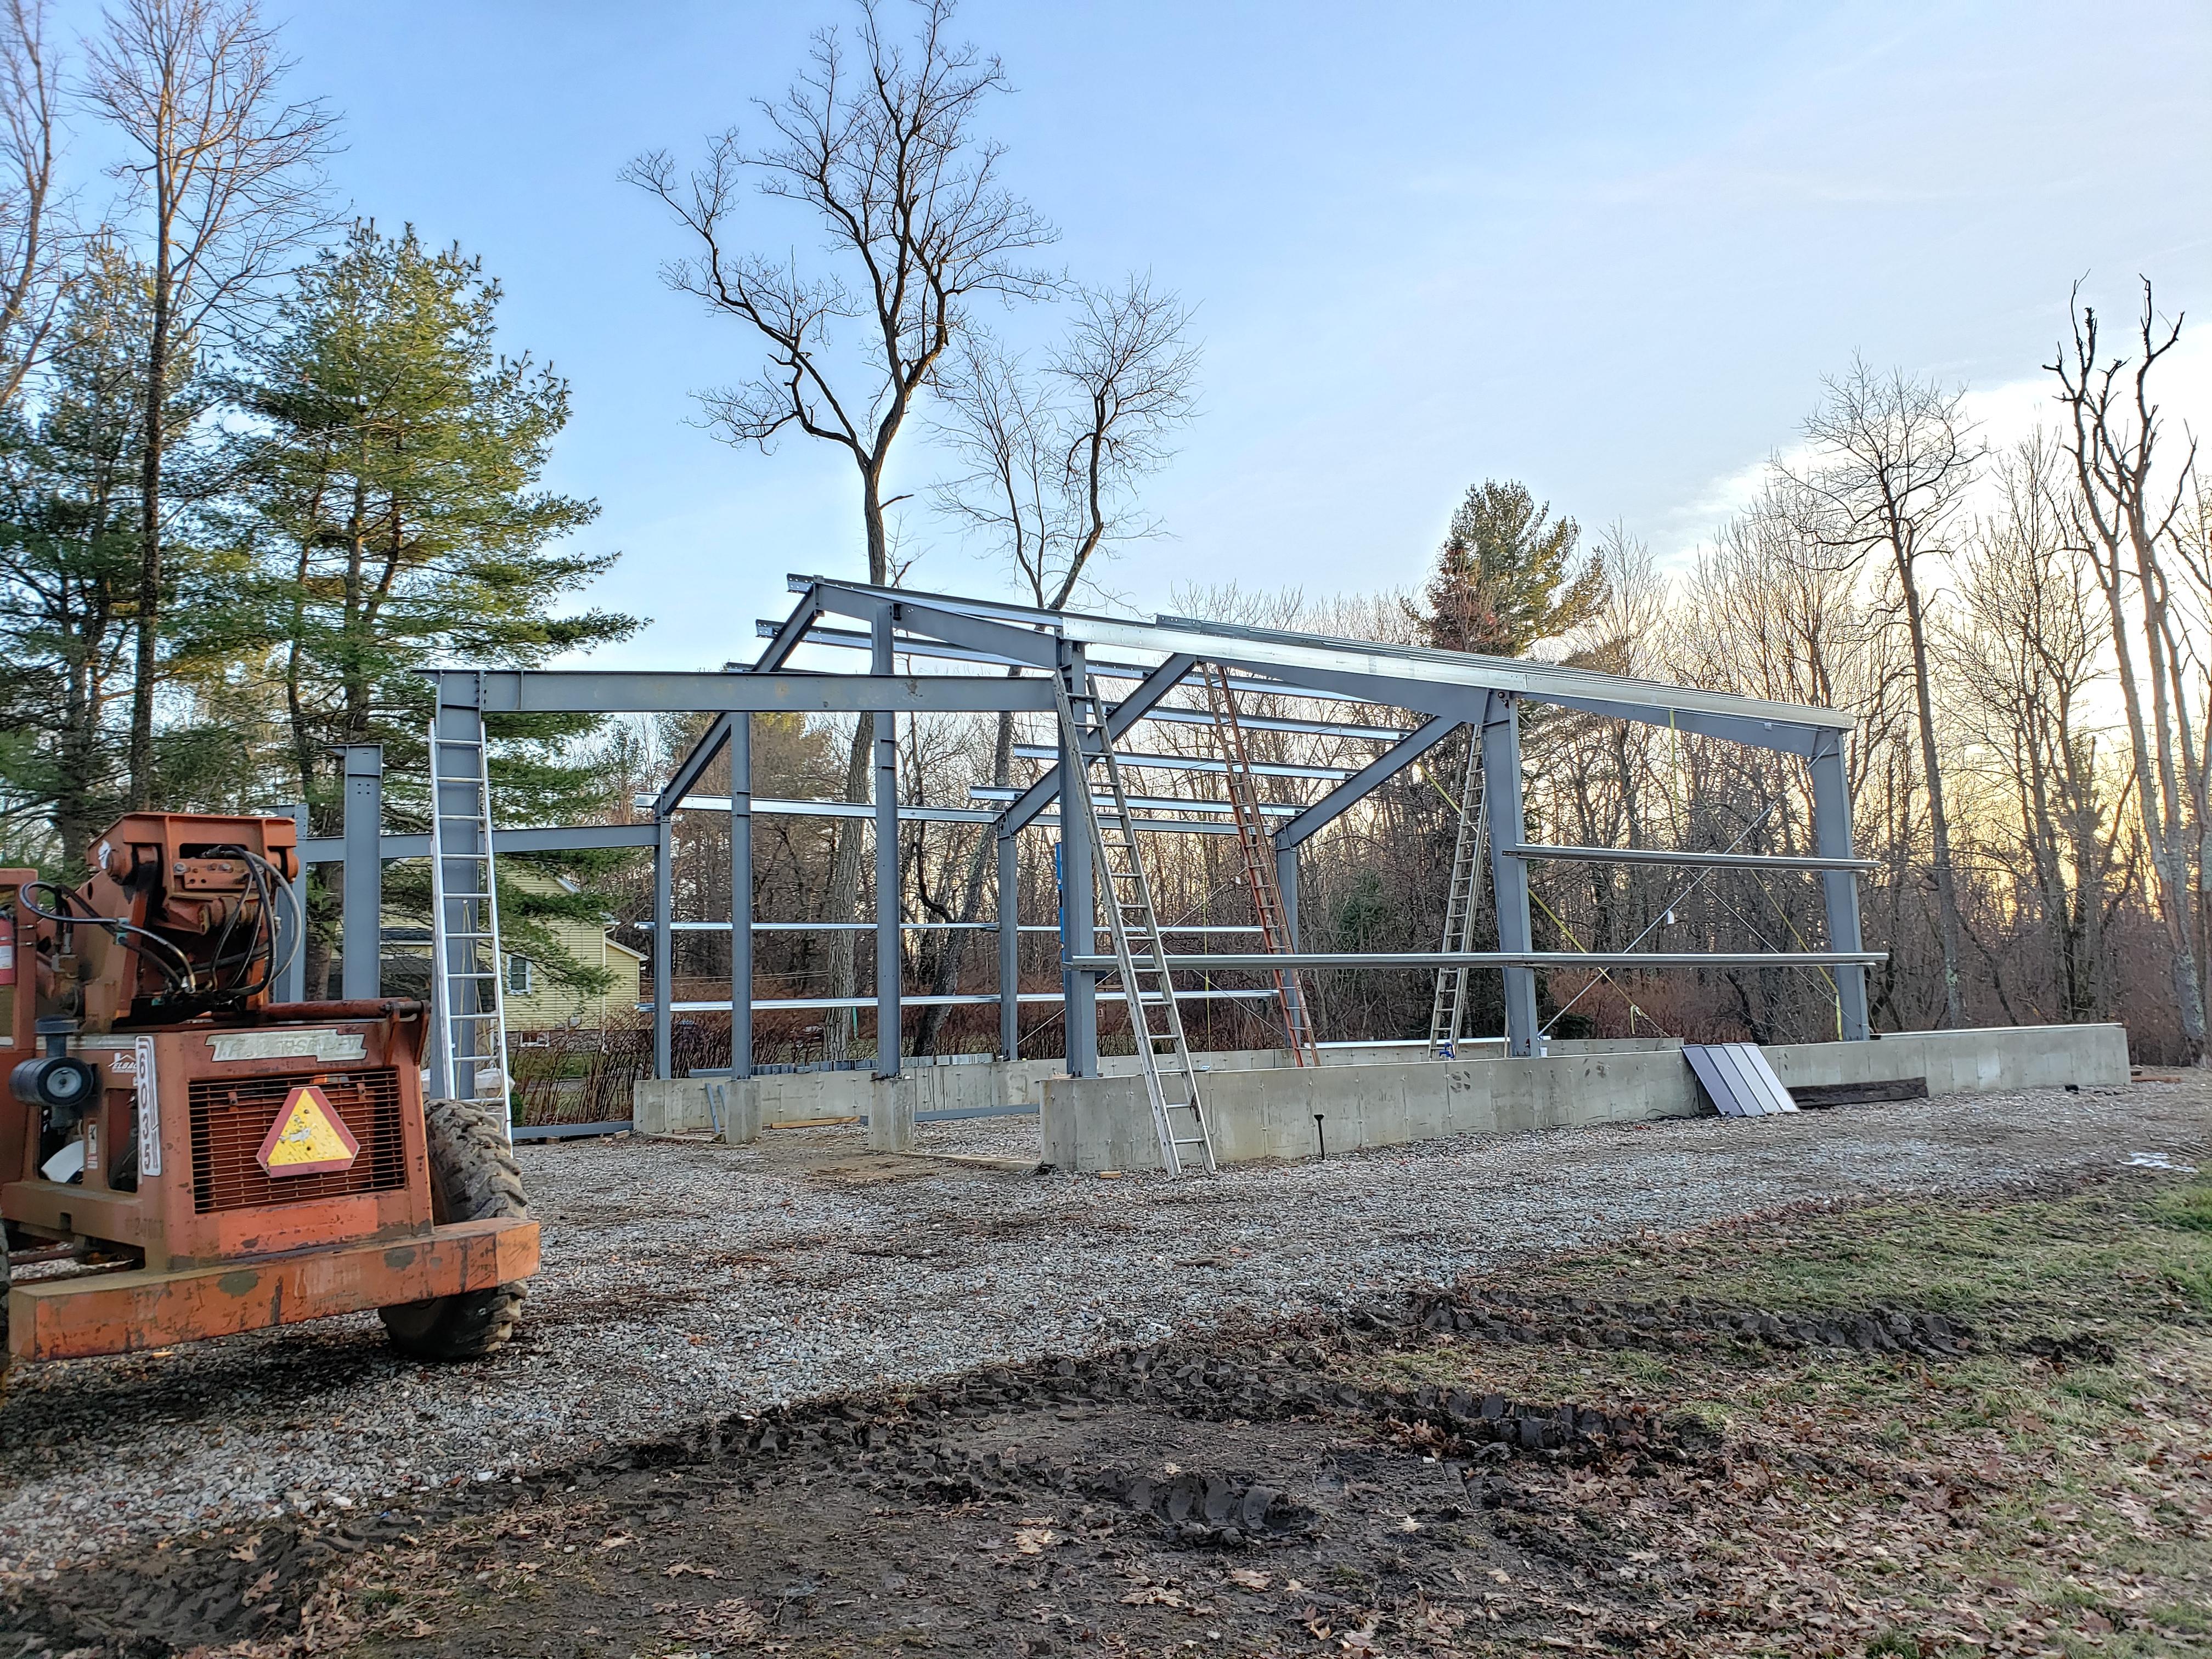
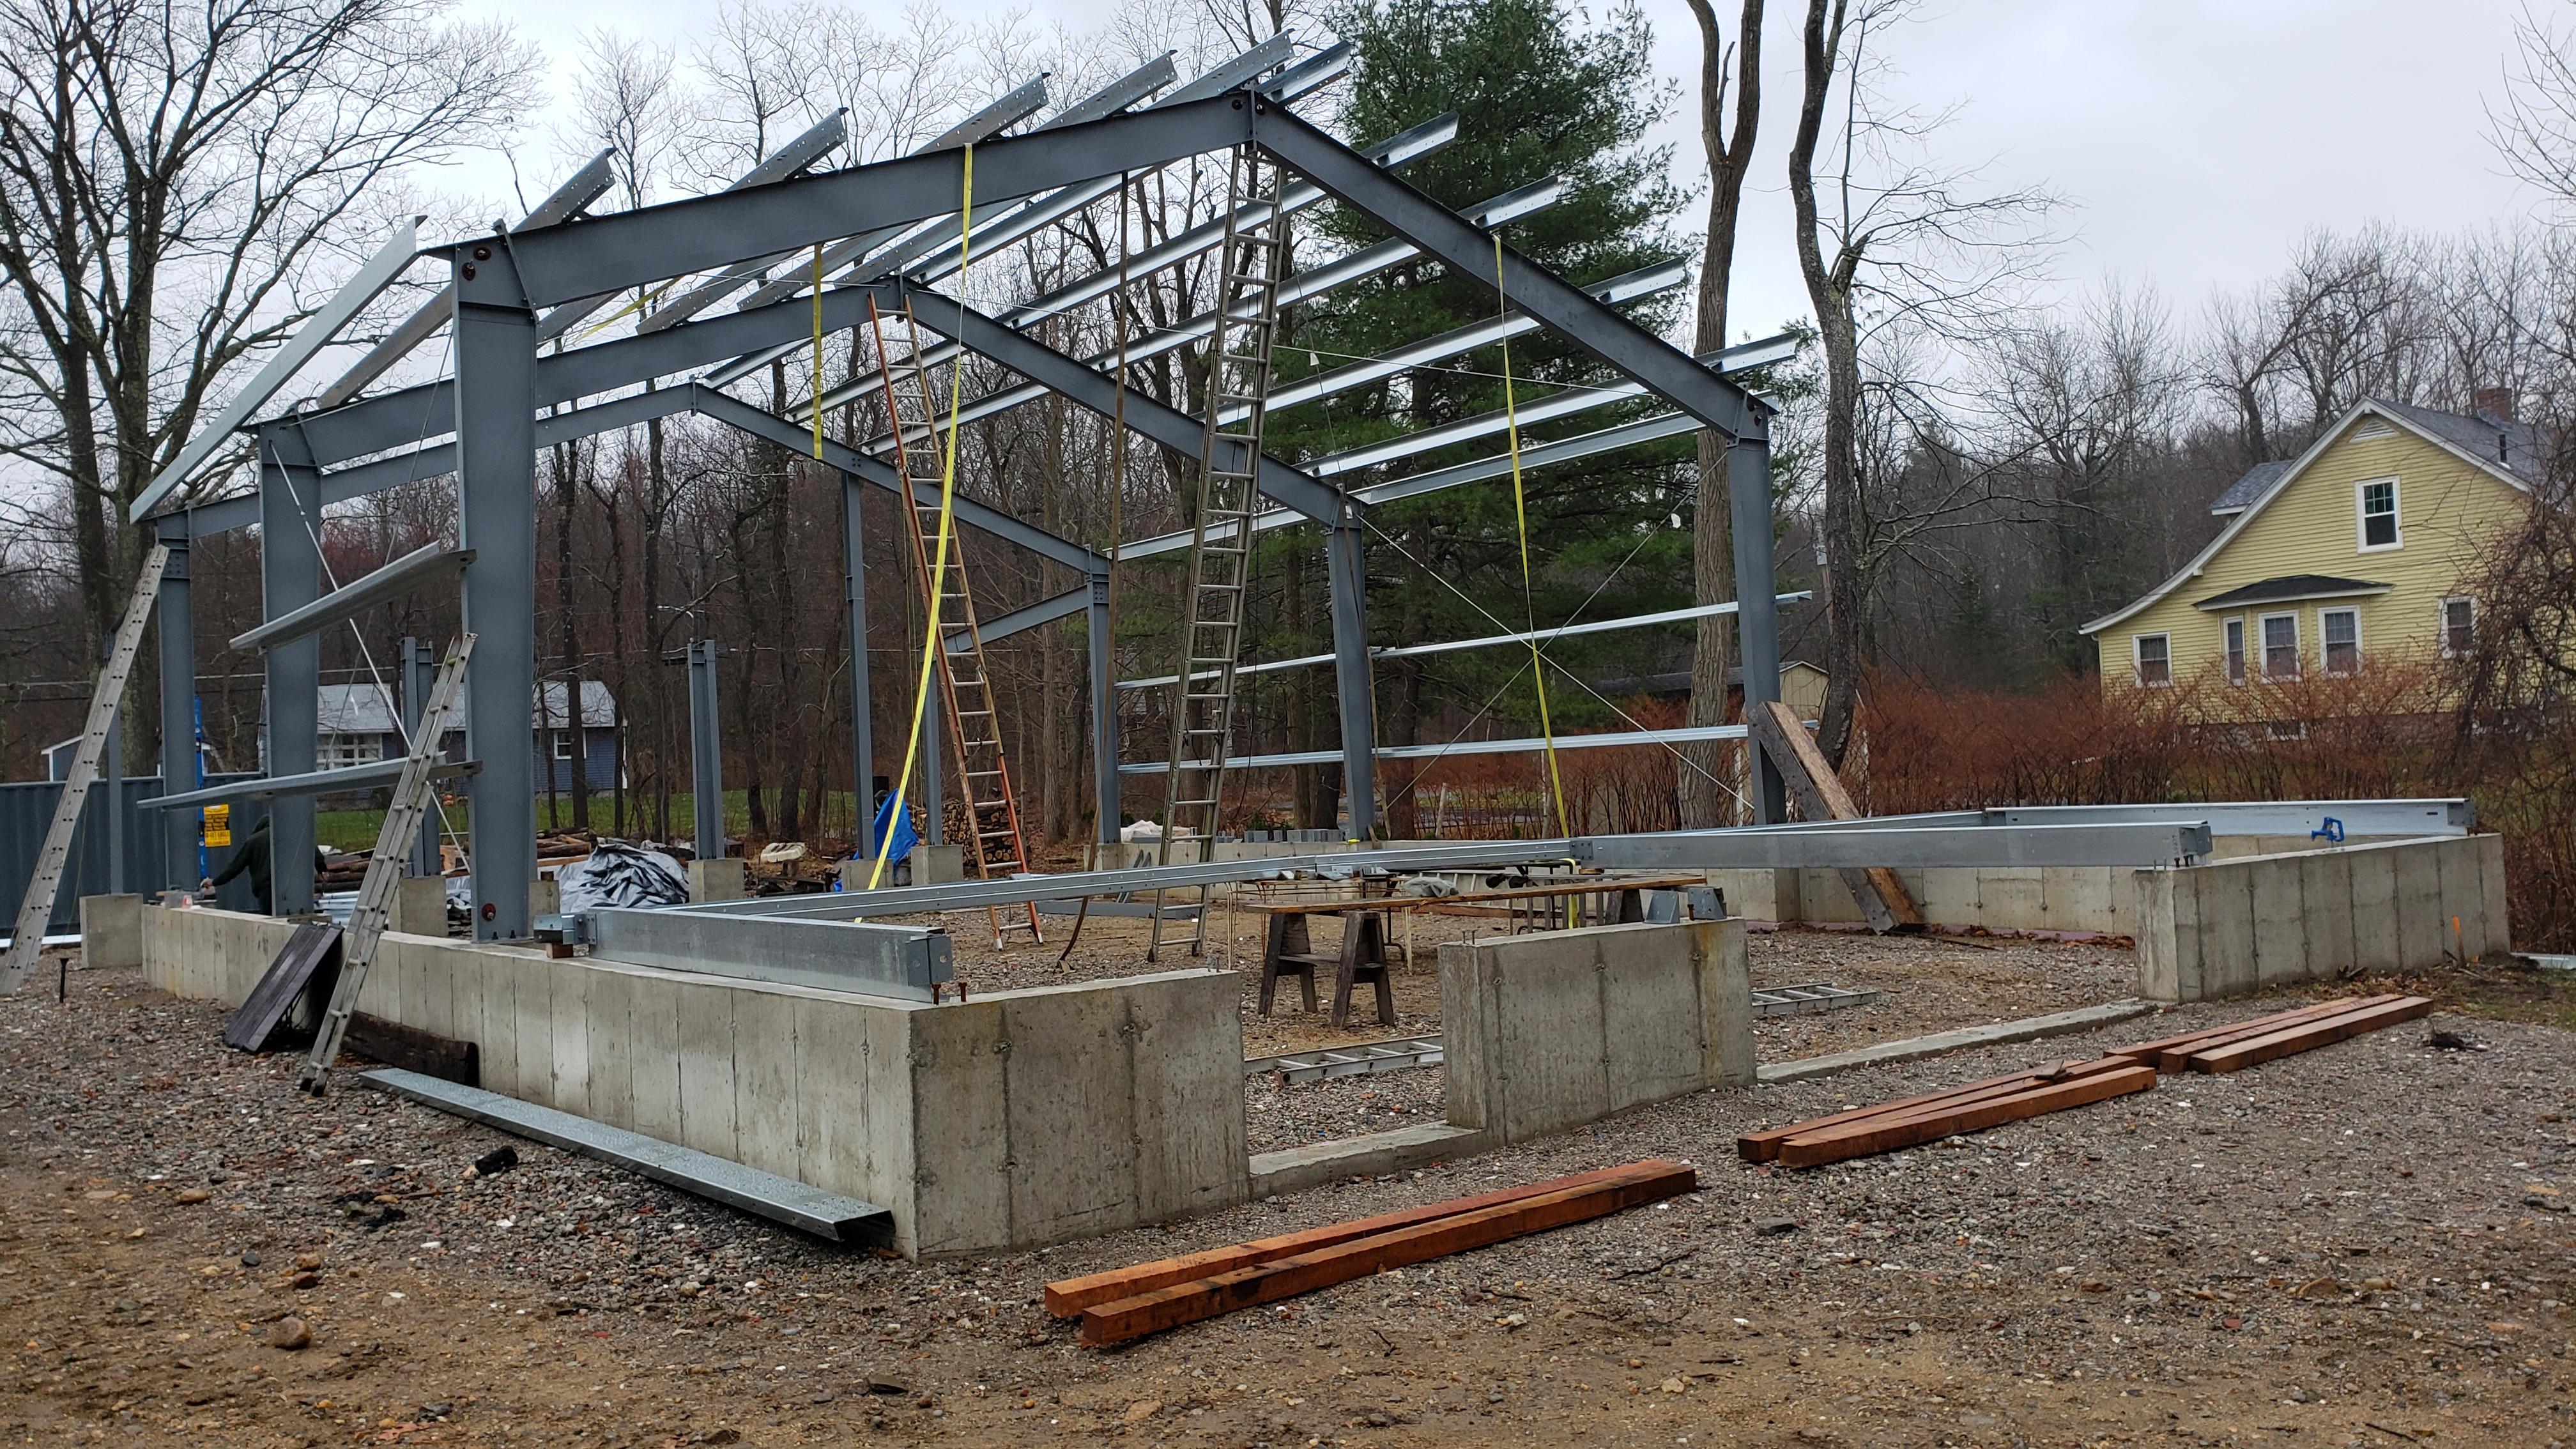
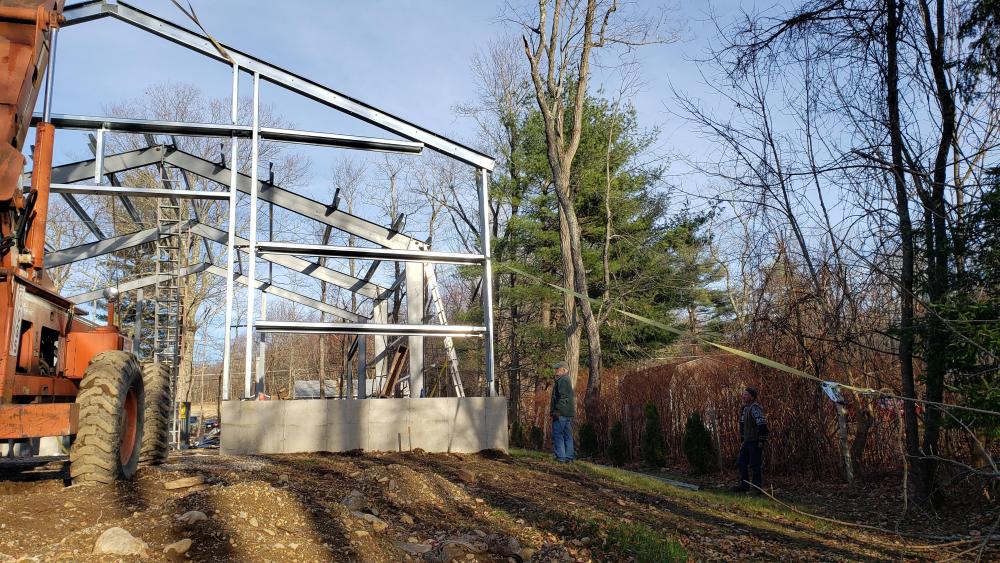
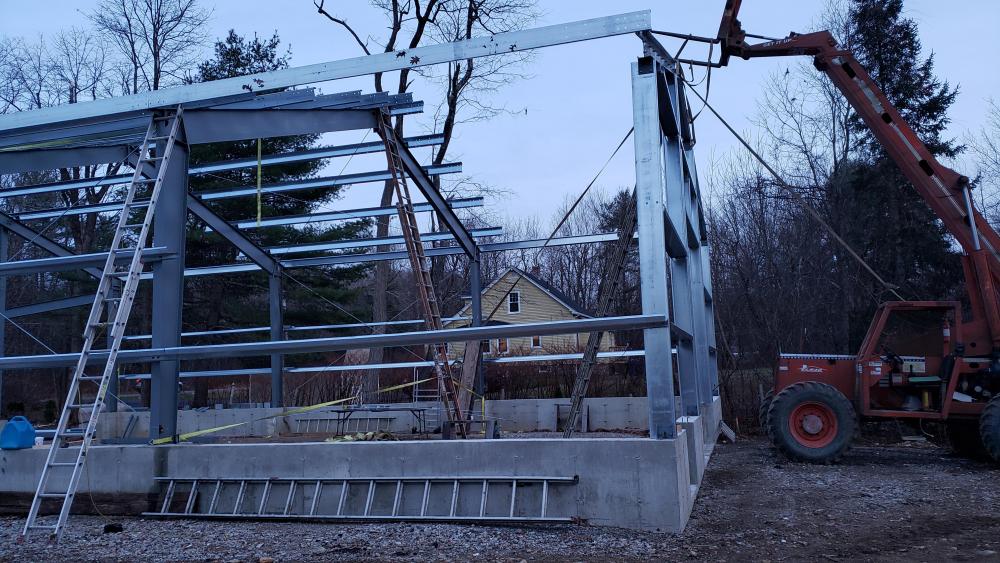
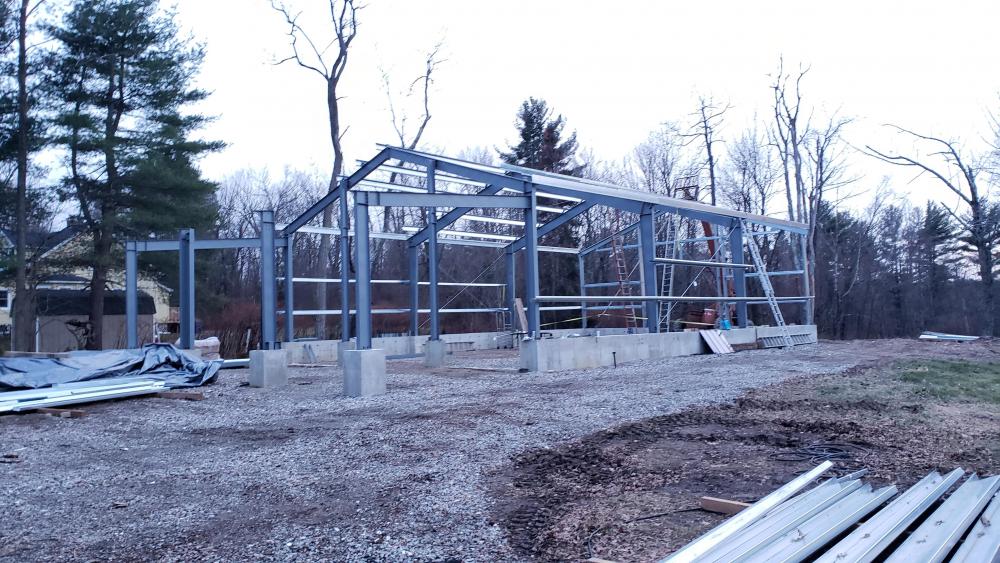
Well after some suggestions and support in a can do attitude from Old Crew, the back wall is up. It was the most insane thing I have seen in a long time and if I wasn't super sure in the information that it would work I would have been stuck with starting over or splitting it in half or such. Thanks @Old Crew it worked but you would not believe the looks on the guys faces when I lifted it and it bowed in the middle and pulled at the sides. One of the guys yelled at me to stop it but It was a brazen move to continue but had faith in your words. and taa dah. there it is. Putting it together was/is one of the hokiest, insert swear here a few times, crazily put together things I have ever seen. The parts are barely marked from left to right. The information for the center support over the door was nearly missing. (it can only go in 1 way) but there is no mention of it. The side EC uprights and the ones on the sides of the doors can only go in 1 way and yes they are not marked this end up or anything. Yes, I am complaining for sure.. it was not only a learning process but a painful one emotionally. It's up and over now and the little funky stuff which was a huge time sucker taking it apart, putting it back together only to find something else was off. Etc, etc. Today was a full 10hour day and still no purlins on the roof top. I didn't have it in me to climb the ladders with the purlin on my shoulder and everyone was exhausted. So I sent all the other guys home (2 guys were all day) 1 guy came to assist whos a builder of fine homes (Lull owner) and he was instrumental in it coming together as the measurements were off and he found it. (super smart guy). I also had the foundation guy over to talk with him about the spacing on the foundation and he thinks i should just leave the spacers CL041 as is and just shim the foundation for the offset or lean of the base plate. All in all it was a great day to have this part of the journey finished.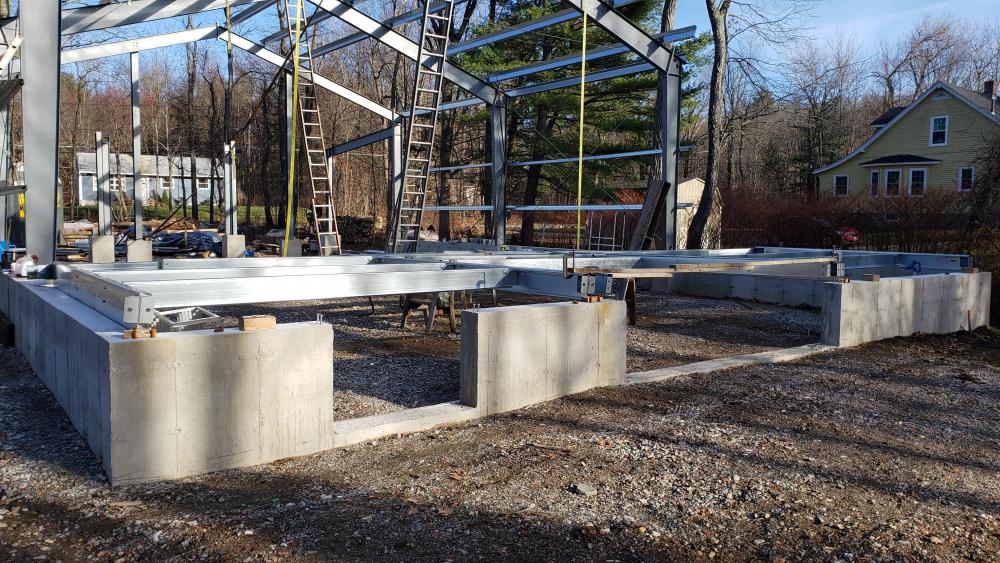


-
JLP Blacksmith Teaching Center.
jlpservicesinc replied to jlpservicesinc's topic in Building, Designing a Shop
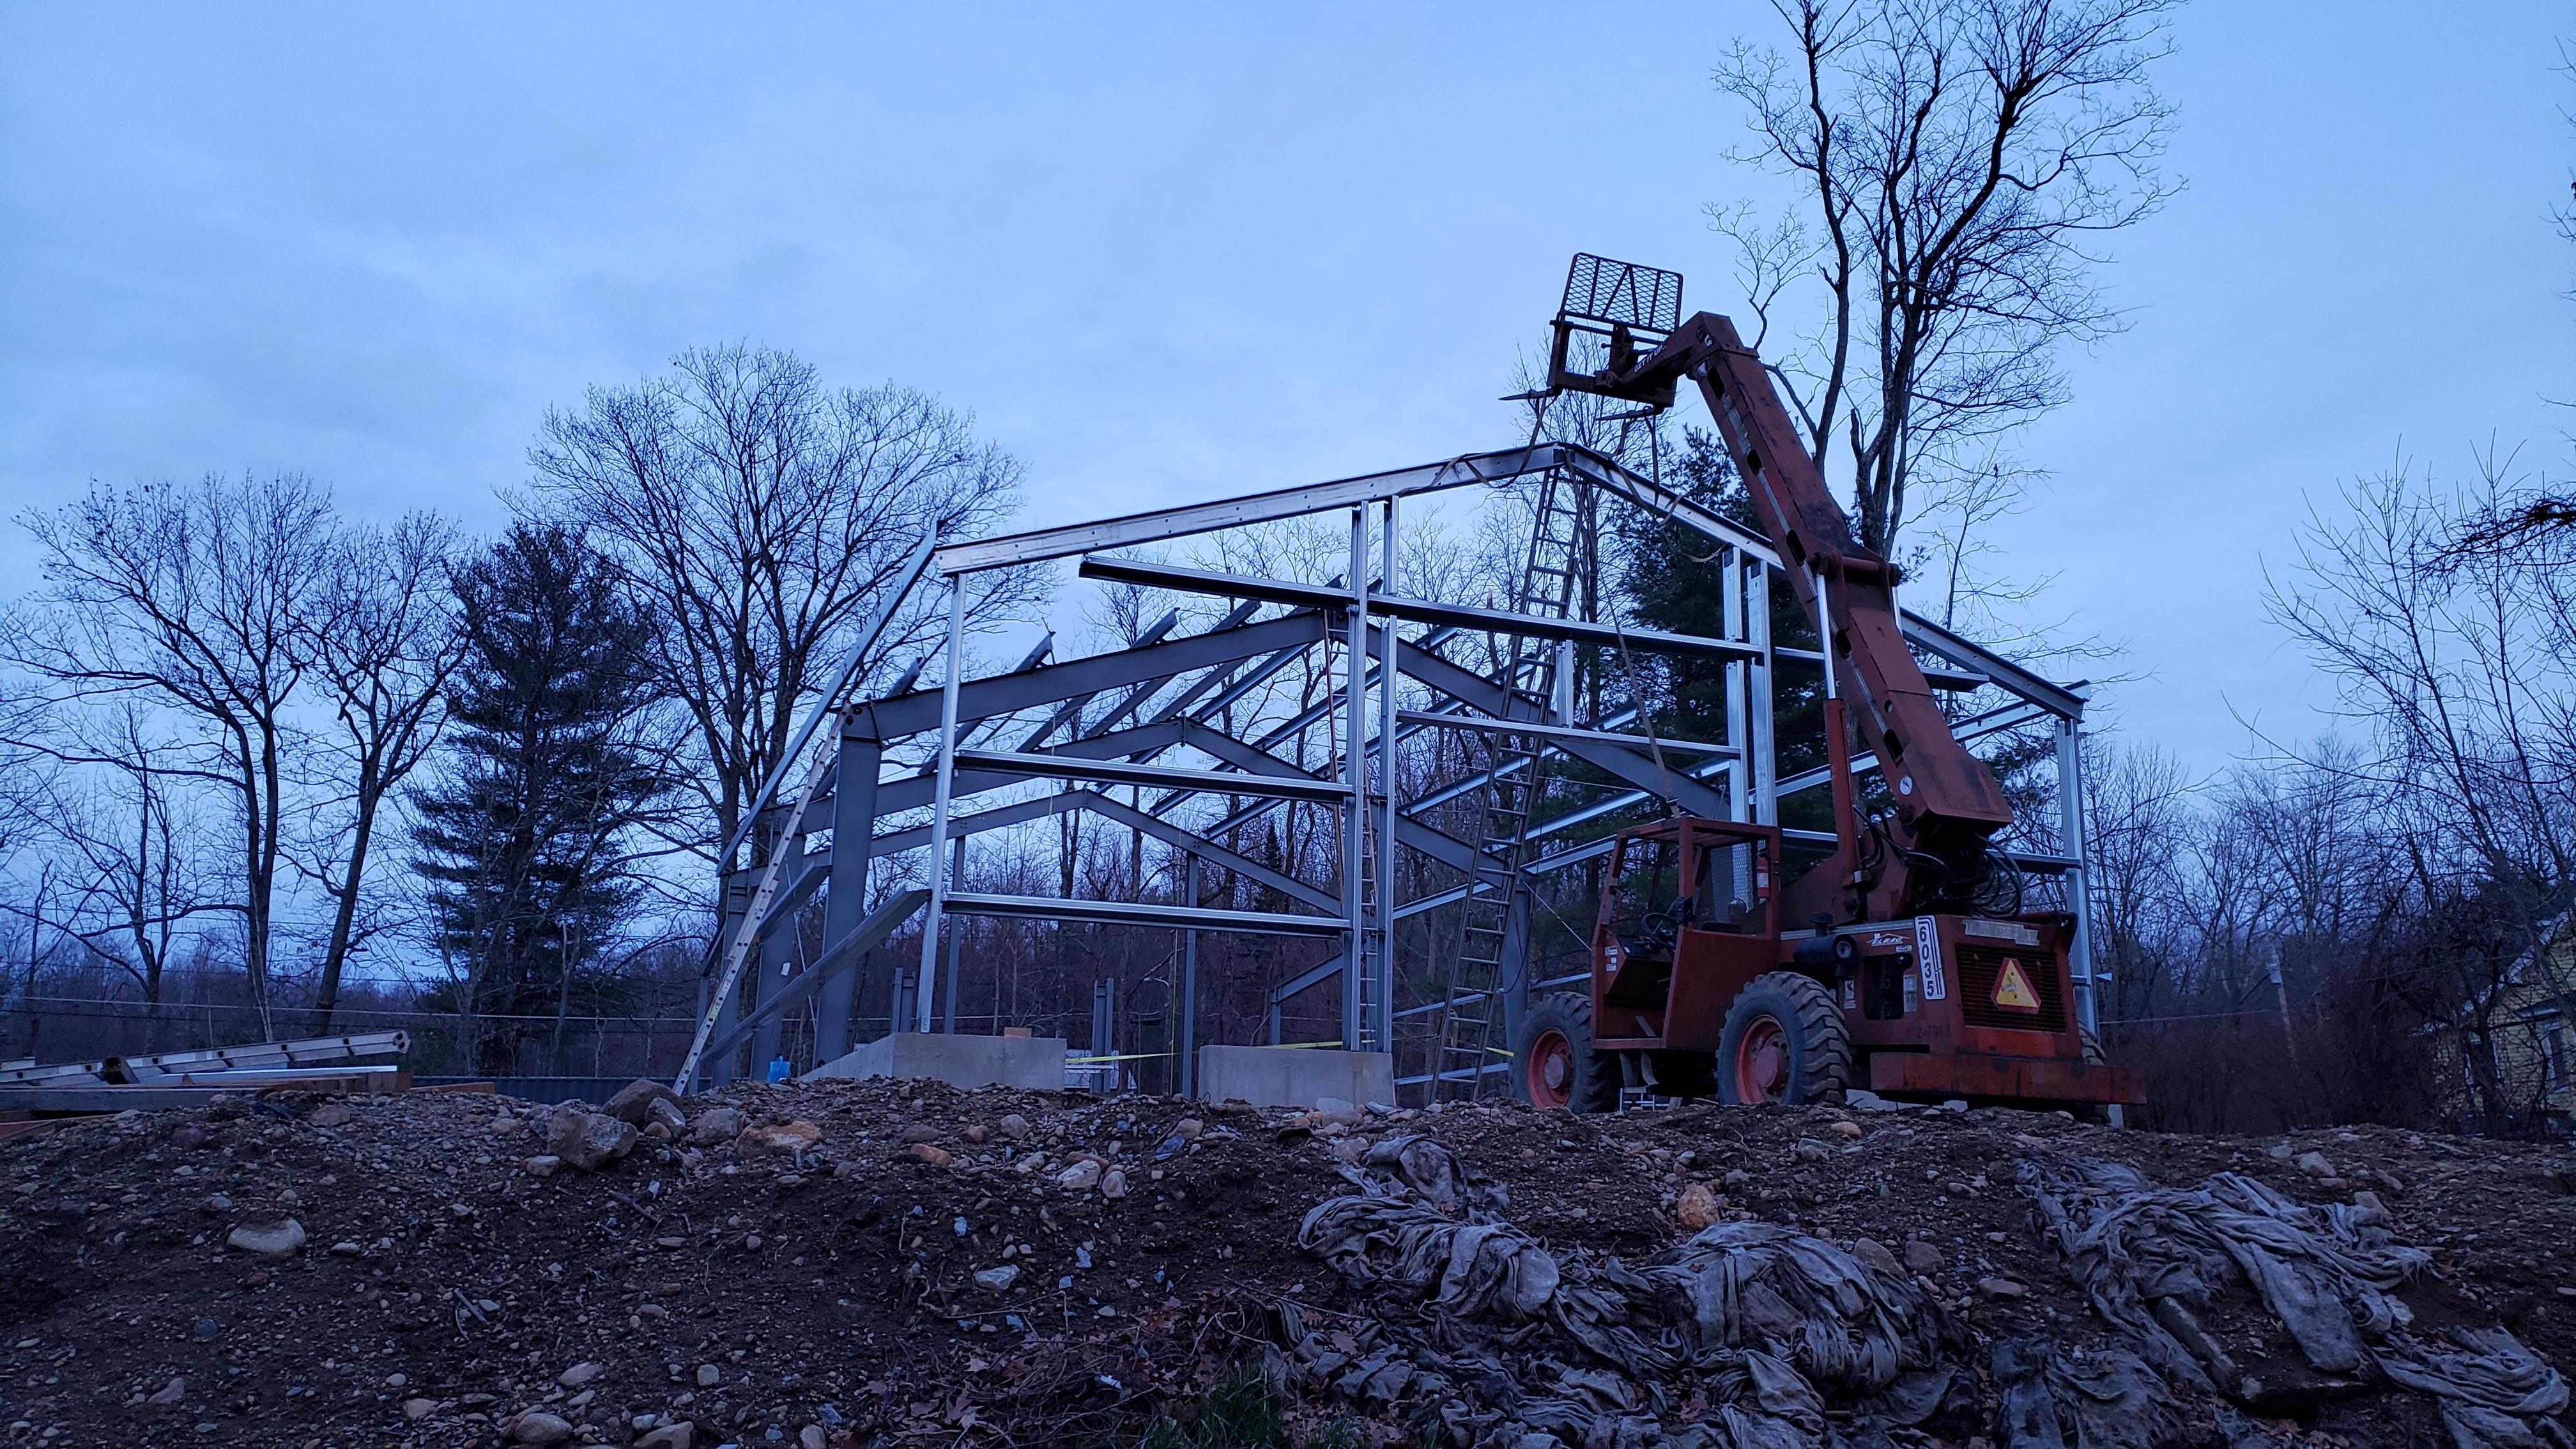
This building came from Sukup. Bison steel is the Broker/distributor/retailer.. (Sales team). All the beams are welded fabrication or bent galvi sheets. What makes this building unique is the front shed dormer.. From the guy who pointed me to Bison the shed dormer setup was completely new for Bison when he asked them to build it.. He had to have welders come in to weld on the tabs and such as it was Field located work. I was expecting to do the same. -
JLP Blacksmith Teaching Center.
jlpservicesinc replied to jlpservicesinc's topic in Building, Designing a Shop
I don't know.. Its questions like this that would benefit it's own "Steel building" building thread. I do know that the walls of this building are supposed to go on first and it has to do with the trim. Old Crew was the one who filled me in on this factor. -
JLP Blacksmith Teaching Center.
jlpservicesinc replied to jlpservicesinc's topic in Building, Designing a Shop
Well I like your thinking. Hind sight is always 20/20.. I think there should be a thread on here for steel buildings being bought and erected. I have learned so much in the last week or so. I have learned why its so important to verify what it is they are actually doing on their end. I have found that dealing with MFG's and distributors is nearly impossible as the information they are sharing is really only half truth from a person who may or may have never used or installed the very product they are selling and really there is no follow up other than the base line information that gets handed out as an installation package. There is just so much that goes on that most will never see coming. there are 2 basic designs of buildings. More than that. but.. One design you can put the roof on before the wall sheets. The other you have to put the wall sheets on before the roof. Anyhow, I know it will all work out because I have been told so. -
JLP Blacksmith Teaching Center.
jlpservicesinc replied to jlpservicesinc's topic in Building, Designing a Shop
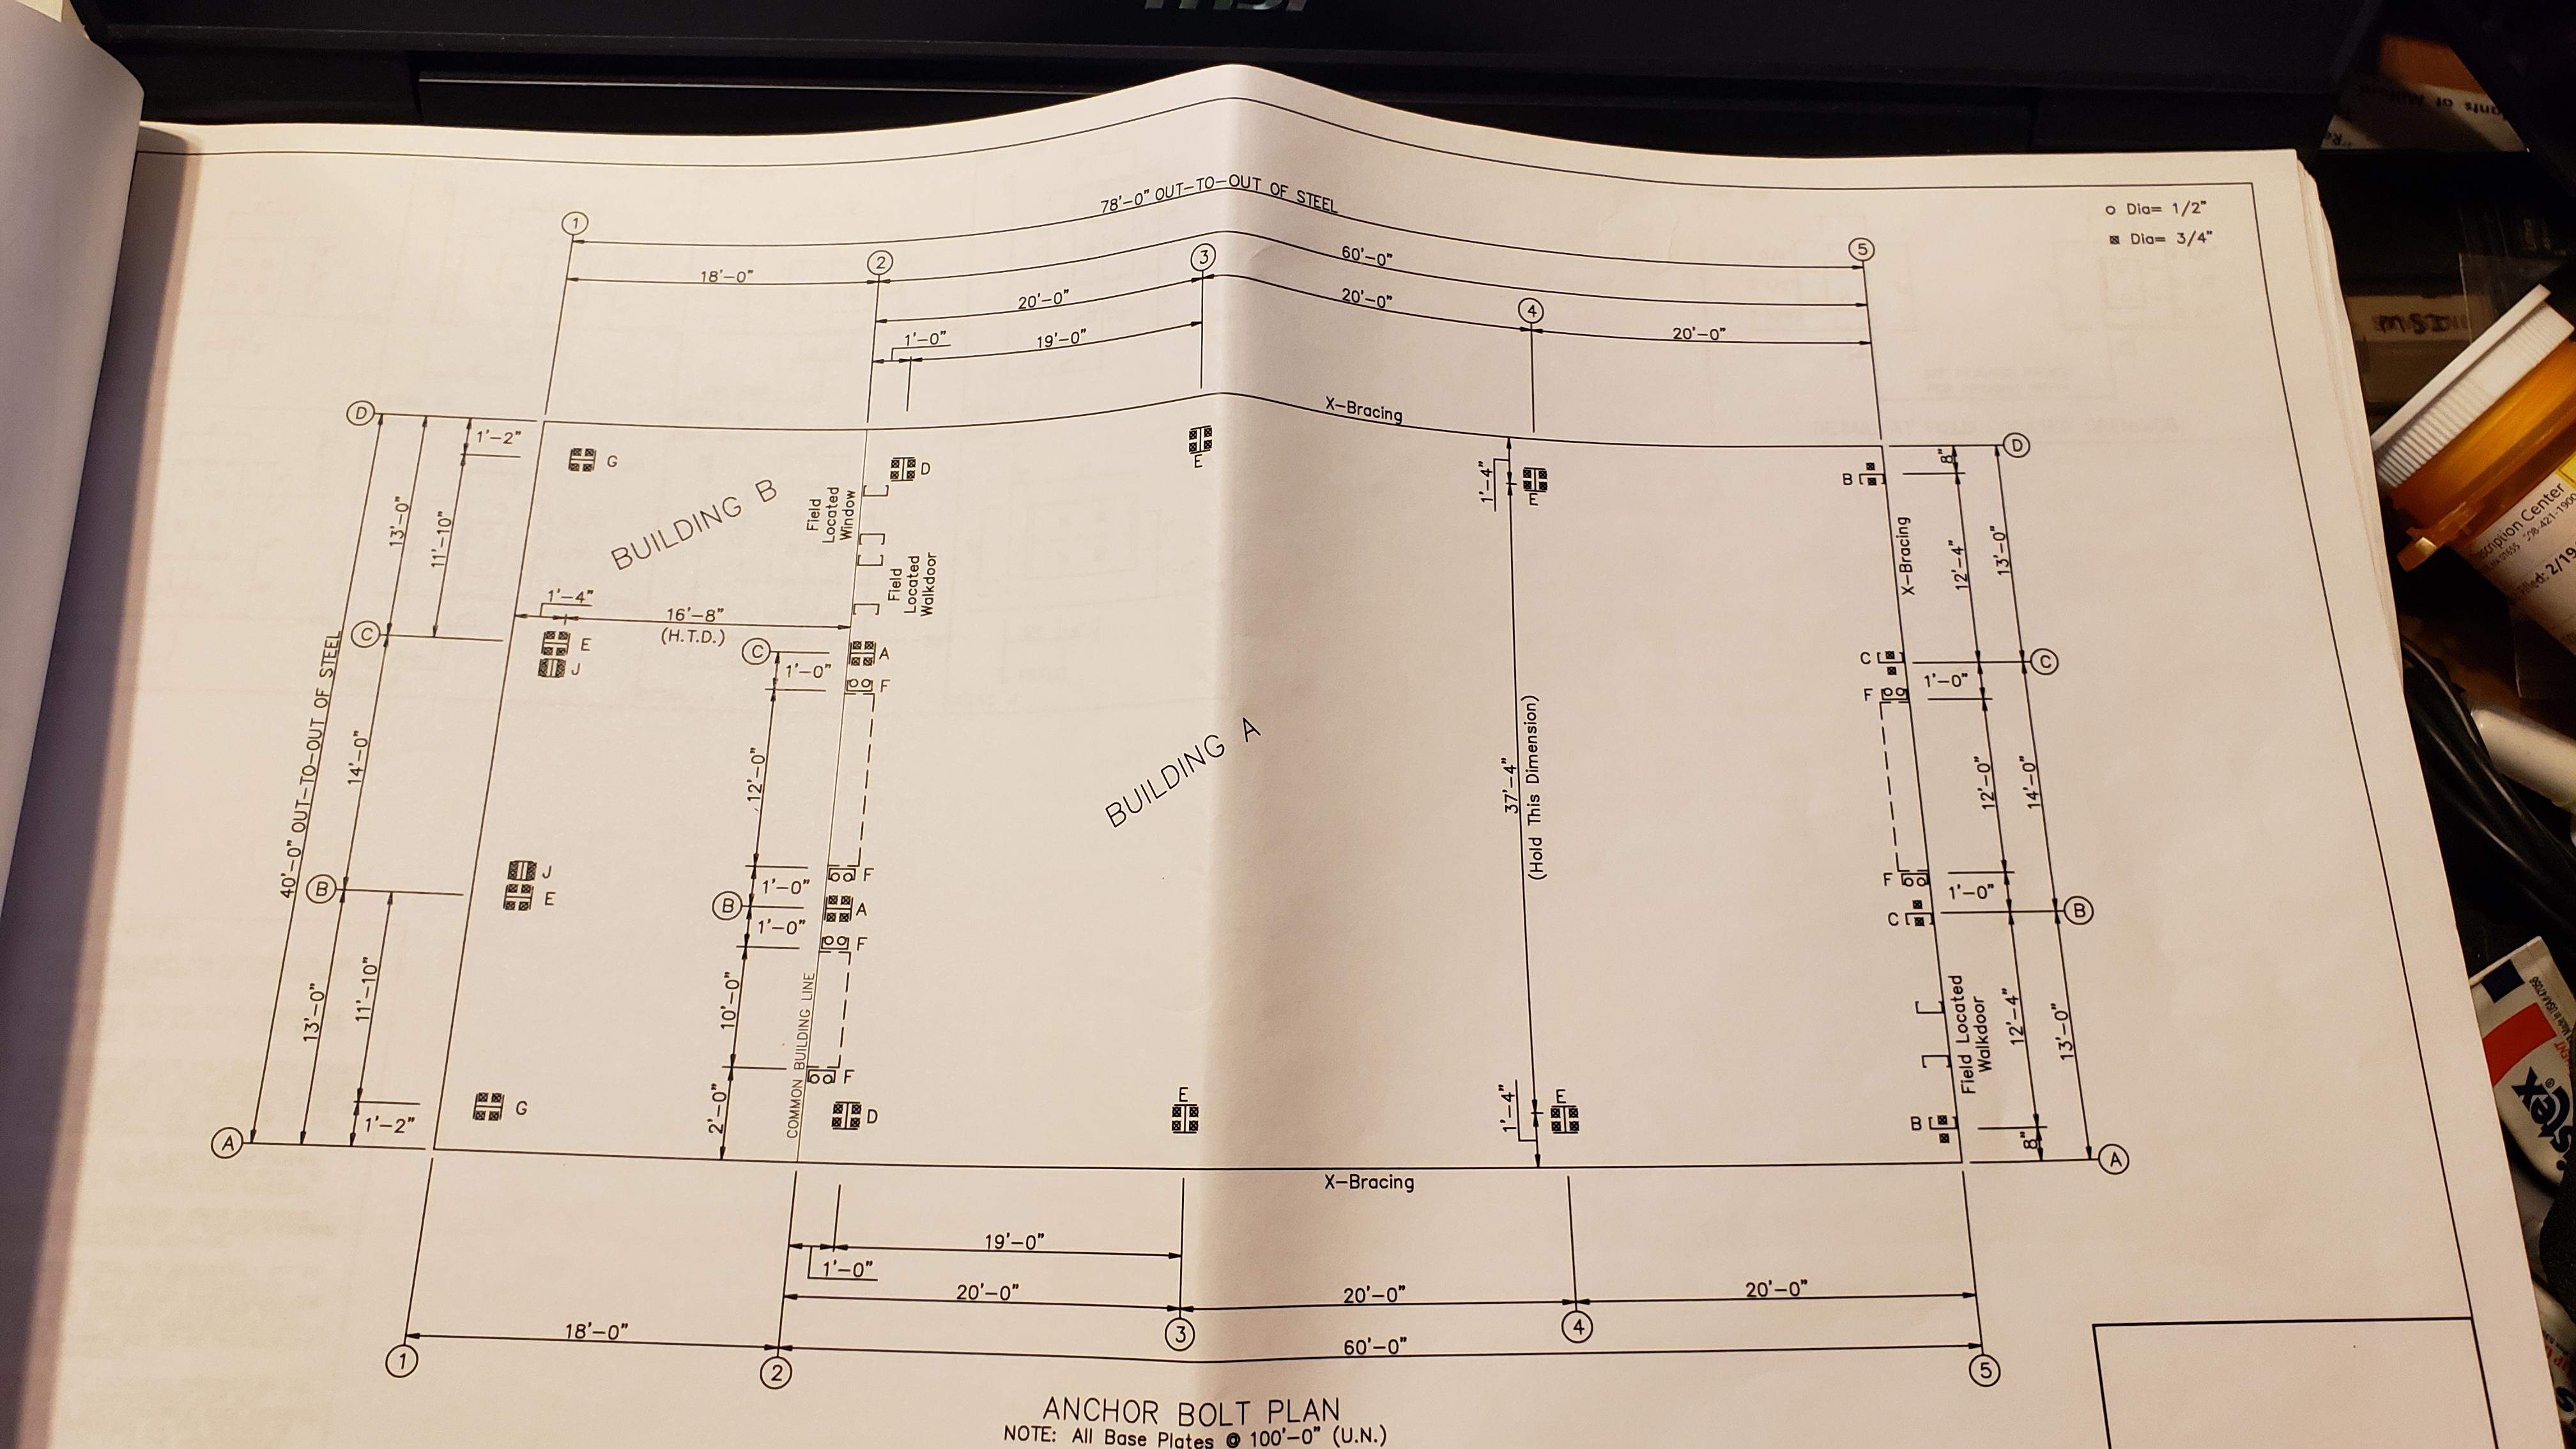
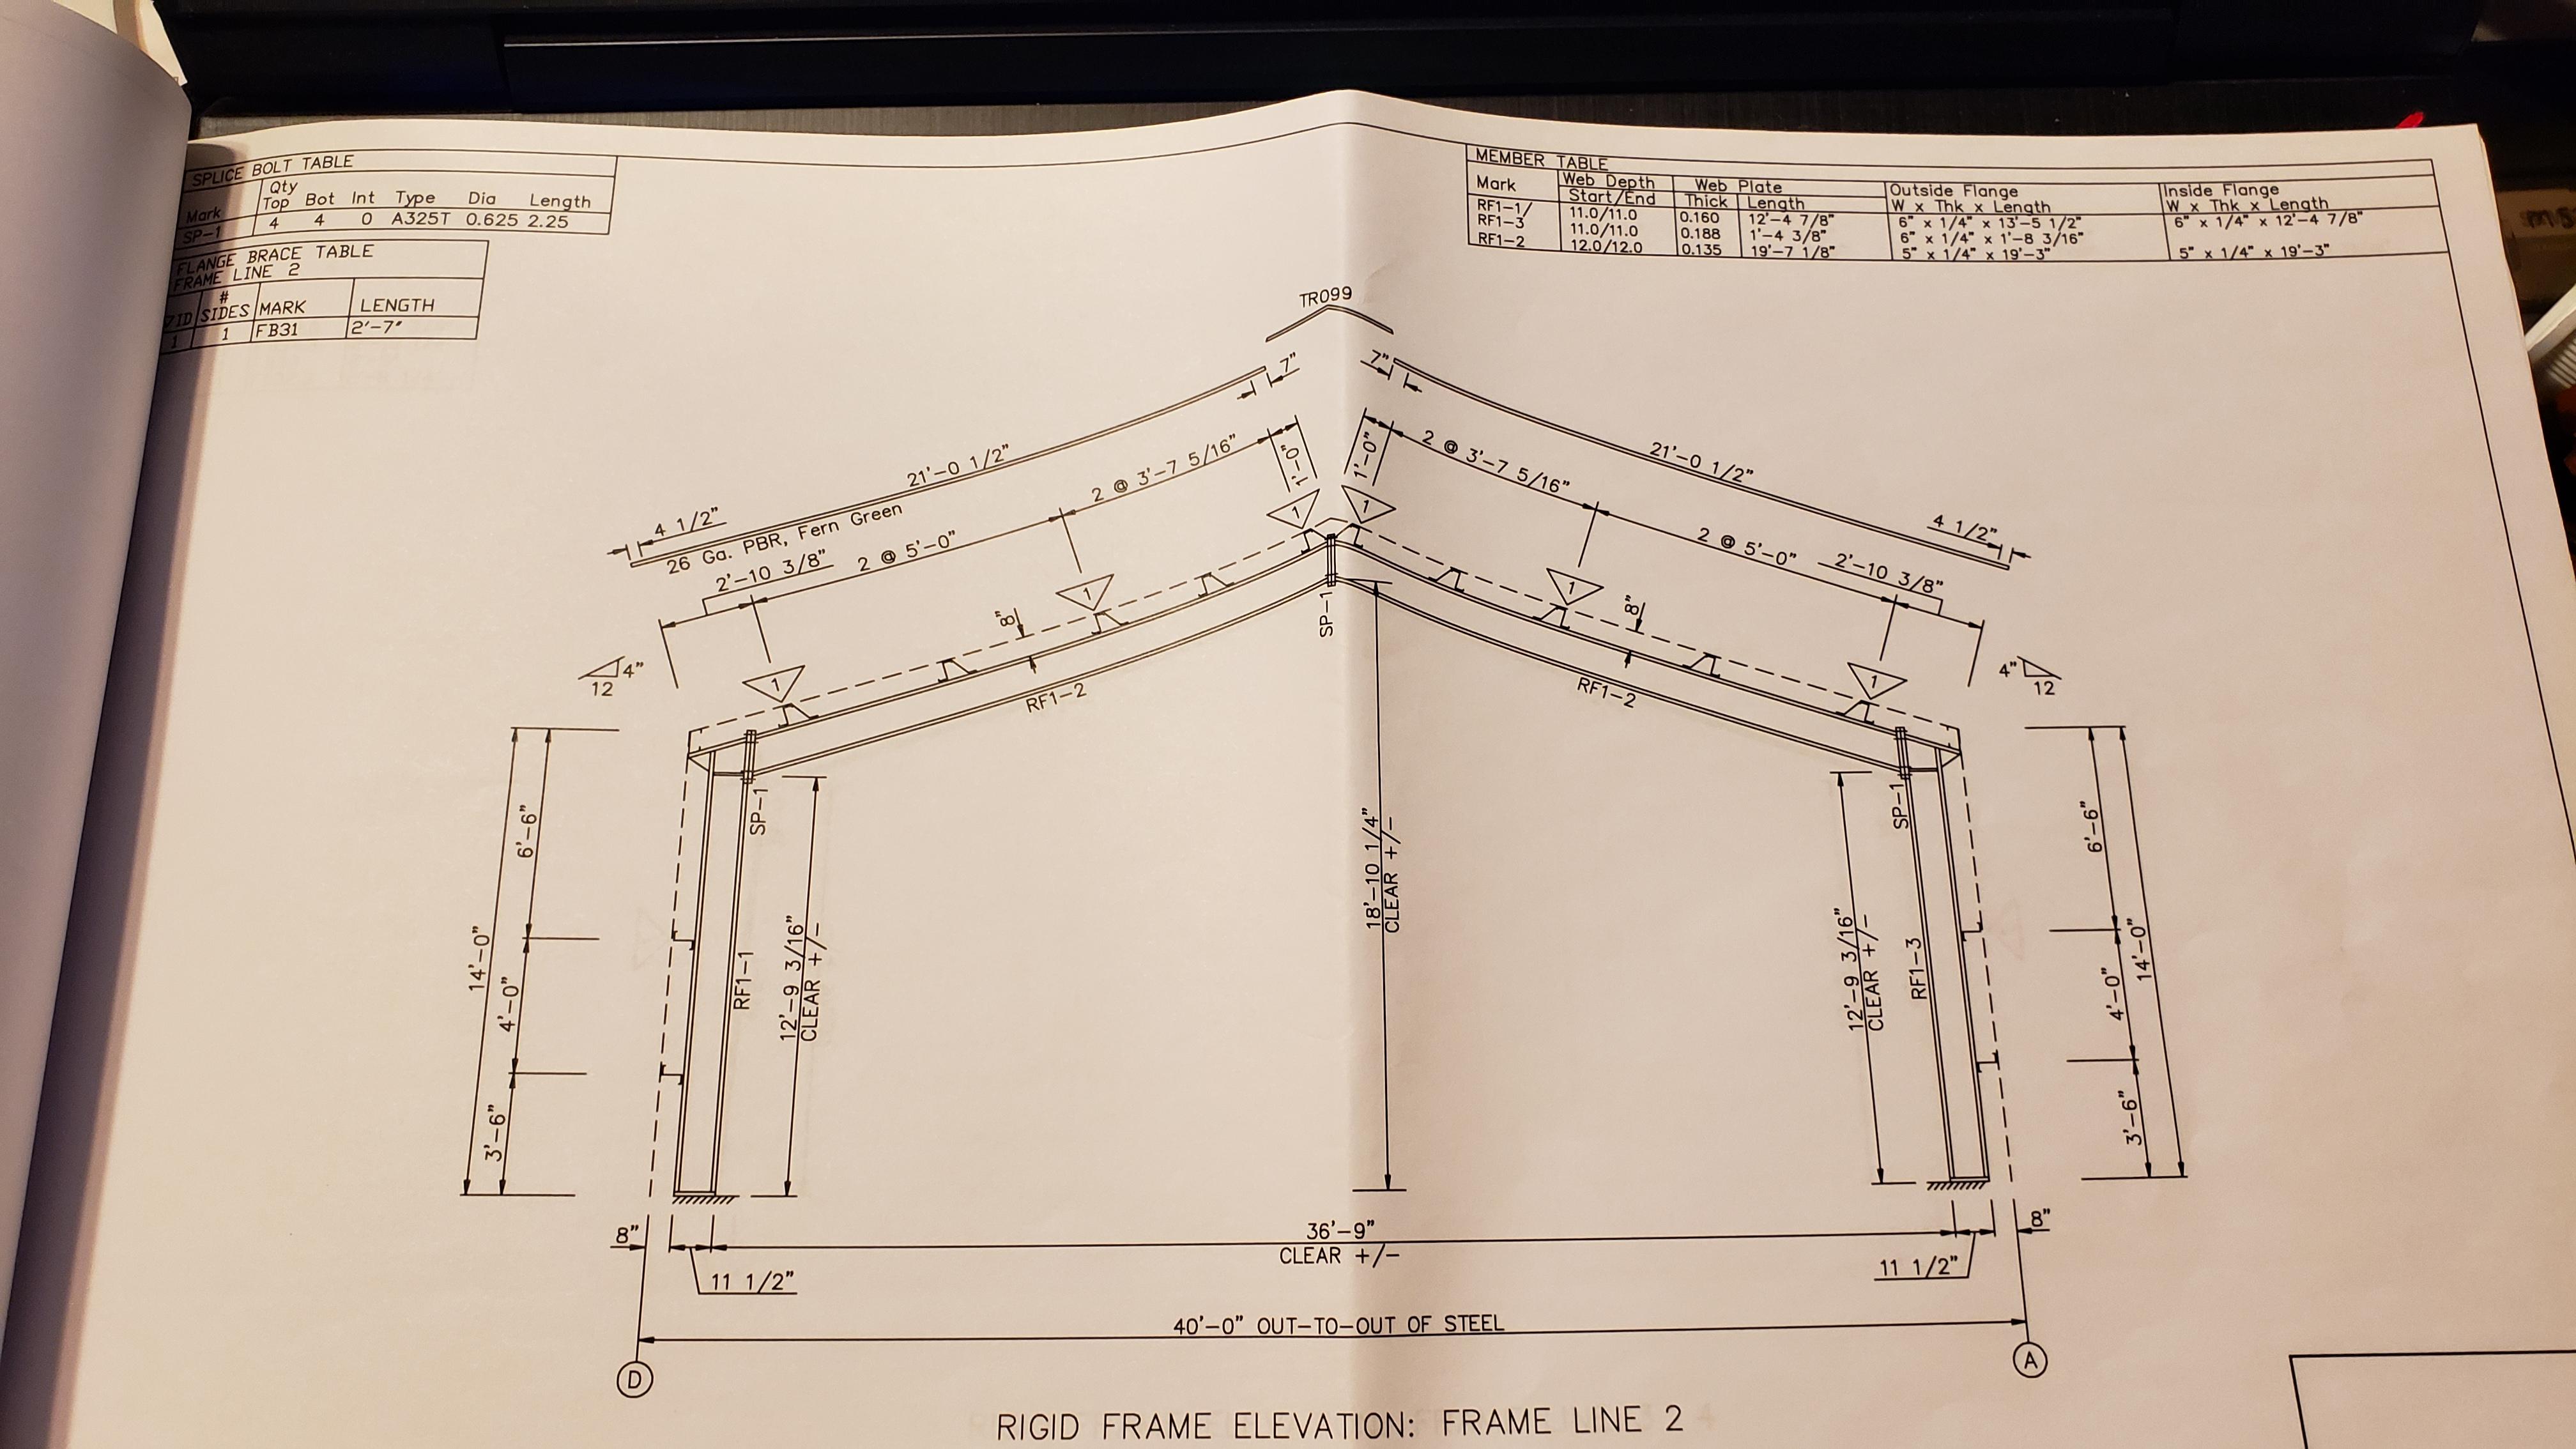
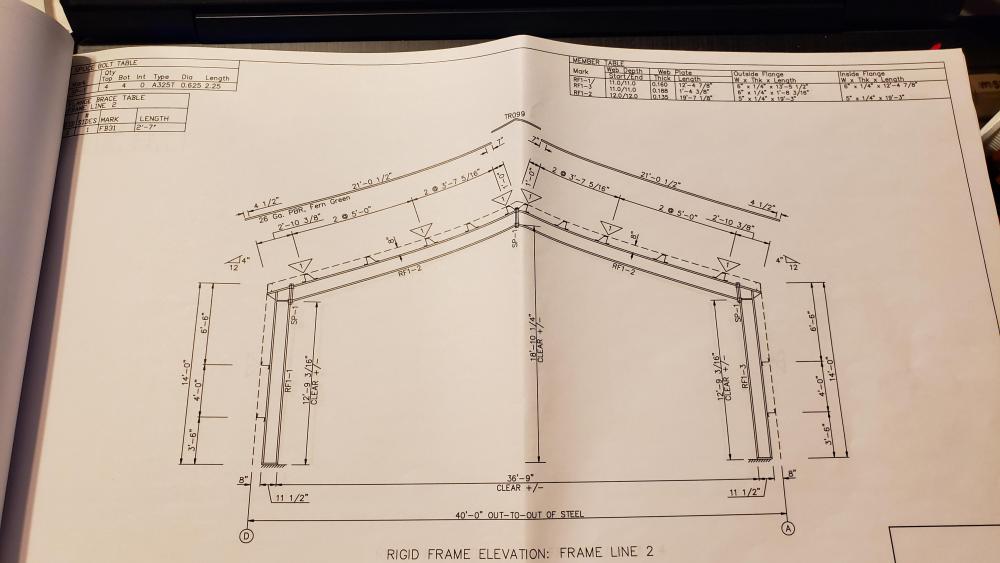
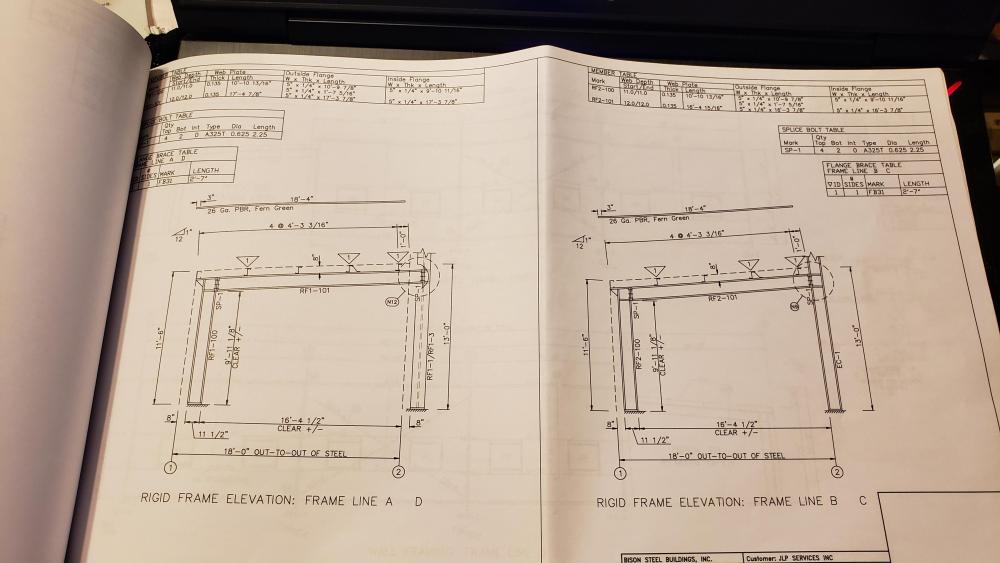
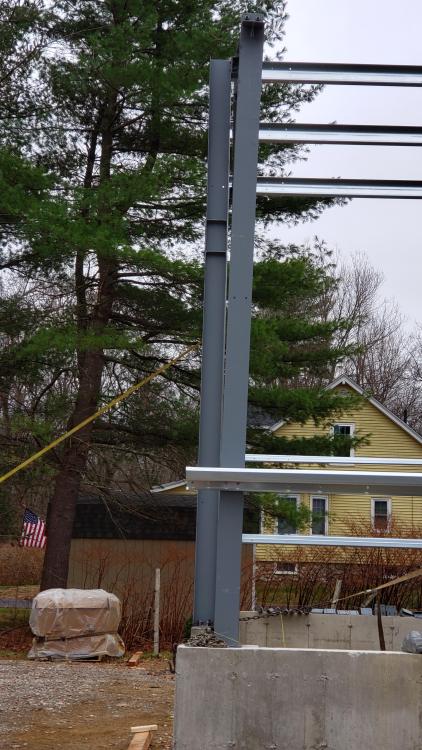
Yes. Grid 2 A, and yes. for those that are curious as to what we are talking about. the foundation is setup on a grid type arrangement and the first drawing is the foundation plan and bolt plan also showing which way the I beams are facing. On the left and right of the page, The A side and a B, C and D. On top and bottom 1, 2, 3, 4 and 5. On the Rigid frame elevation: Frame Line 2 you can see the D and A on the page just under the picture. With this and the Page numbers it's a lot easier to navigate.
-
What did you do in the shop today?
jlpservicesinc replied to Mark Ling's topic in Blacksmithing, General Discussion
For years it cost me nearly nothing. Everything was scrap or junk from an old metal yard. Fuel was wood. Took me about 3 or 4 years before I started really looking for a better anvil. Last few springs I have been going to the Orange engine show. It is a vintage engine show with lots of 1 lunger and steamers and such. Last year a guy gave me a tour and he even said it's a new time. He said it's on old persons game as the prices on the engines and parts are way to much for a youngster. Back when he was coming up they used to give the engines away. I'm always amazed when they show a TV show or a video of someone who has started smithing in the last few years and they have every bell and whistle out there. Then I start to wonder where it all went wrong. -
Burgie, you did a very nice job on that stand. it is a beauty for sure and should be proud of the work.
-
Thomas makes some very good points. If you have the anvil and stand loose so you can turn it then you can choose which ever way you need to. Personally, I like my horn to the right and am right handed. Traditionally the horn is opposite the handedness. Right to left and left towards right. I spent about 10 years of the horn to my left and for making chain I still prefer it that way. But for nearly everything else I like it to the right. this past year I did a competition making chain and it meant having to stand at the tip of the horn of efficient movement.
-
JLP Blacksmith Teaching Center.
jlpservicesinc replied to jlpservicesinc's topic in Building, Designing a Shop
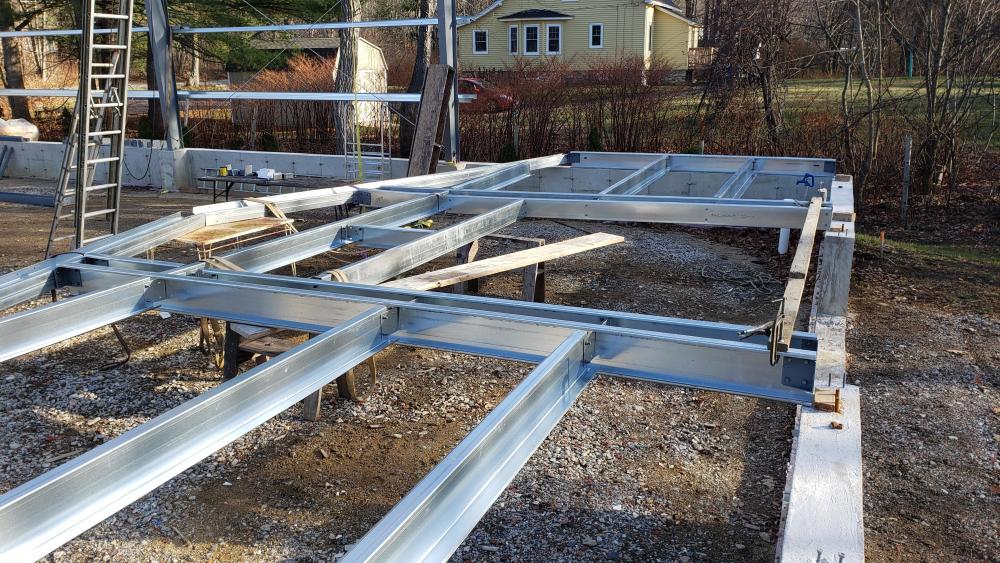
David, I can't thank you enough for reaching out and helping me along. Still no PDF from the insulation company and getting the run around on the CL issue with the building MFG. you can see that both uprights are being bent away from each other with that spacer. I will have to measure out what is there and maybe just make the spacers myself. I can't seem to appease them with photo's of the inaccurate CL041 and BSCL and they just keep telling me the spacing is off on the foundation though I measured everything 8X and it all looks right on the money. The secibd photo is the BSCL and they expect that 8" long spacer to fit between that web and flange.. LOL.. Not in any universe I'm in. and the CL041 us at the top and the space is easy to see it is not parallel. Gonna have to spend some time up on the ladder. Thanks Marc1, I thought I would have to be going it alone a little more than I have been. Luckily the other guy is retired so able to come more often. JHCC was laughing when I said I could use 4 more of me on this job say we can barely handle1. But, boy it would make things a lot easier.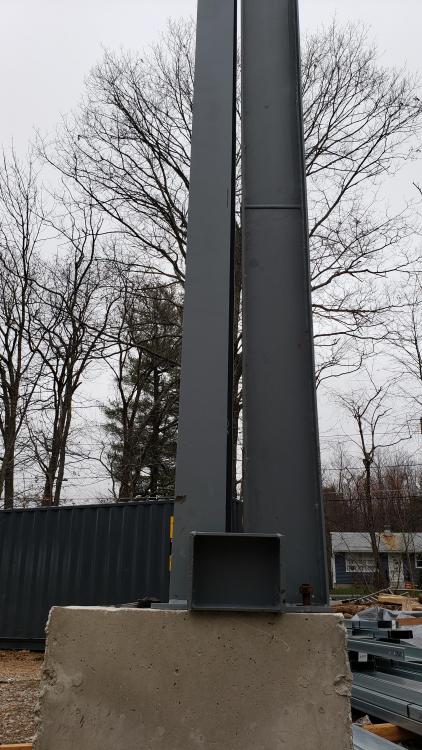
-
JLP Blacksmith Teaching Center.
jlpservicesinc replied to jlpservicesinc's topic in Building, Designing a Shop
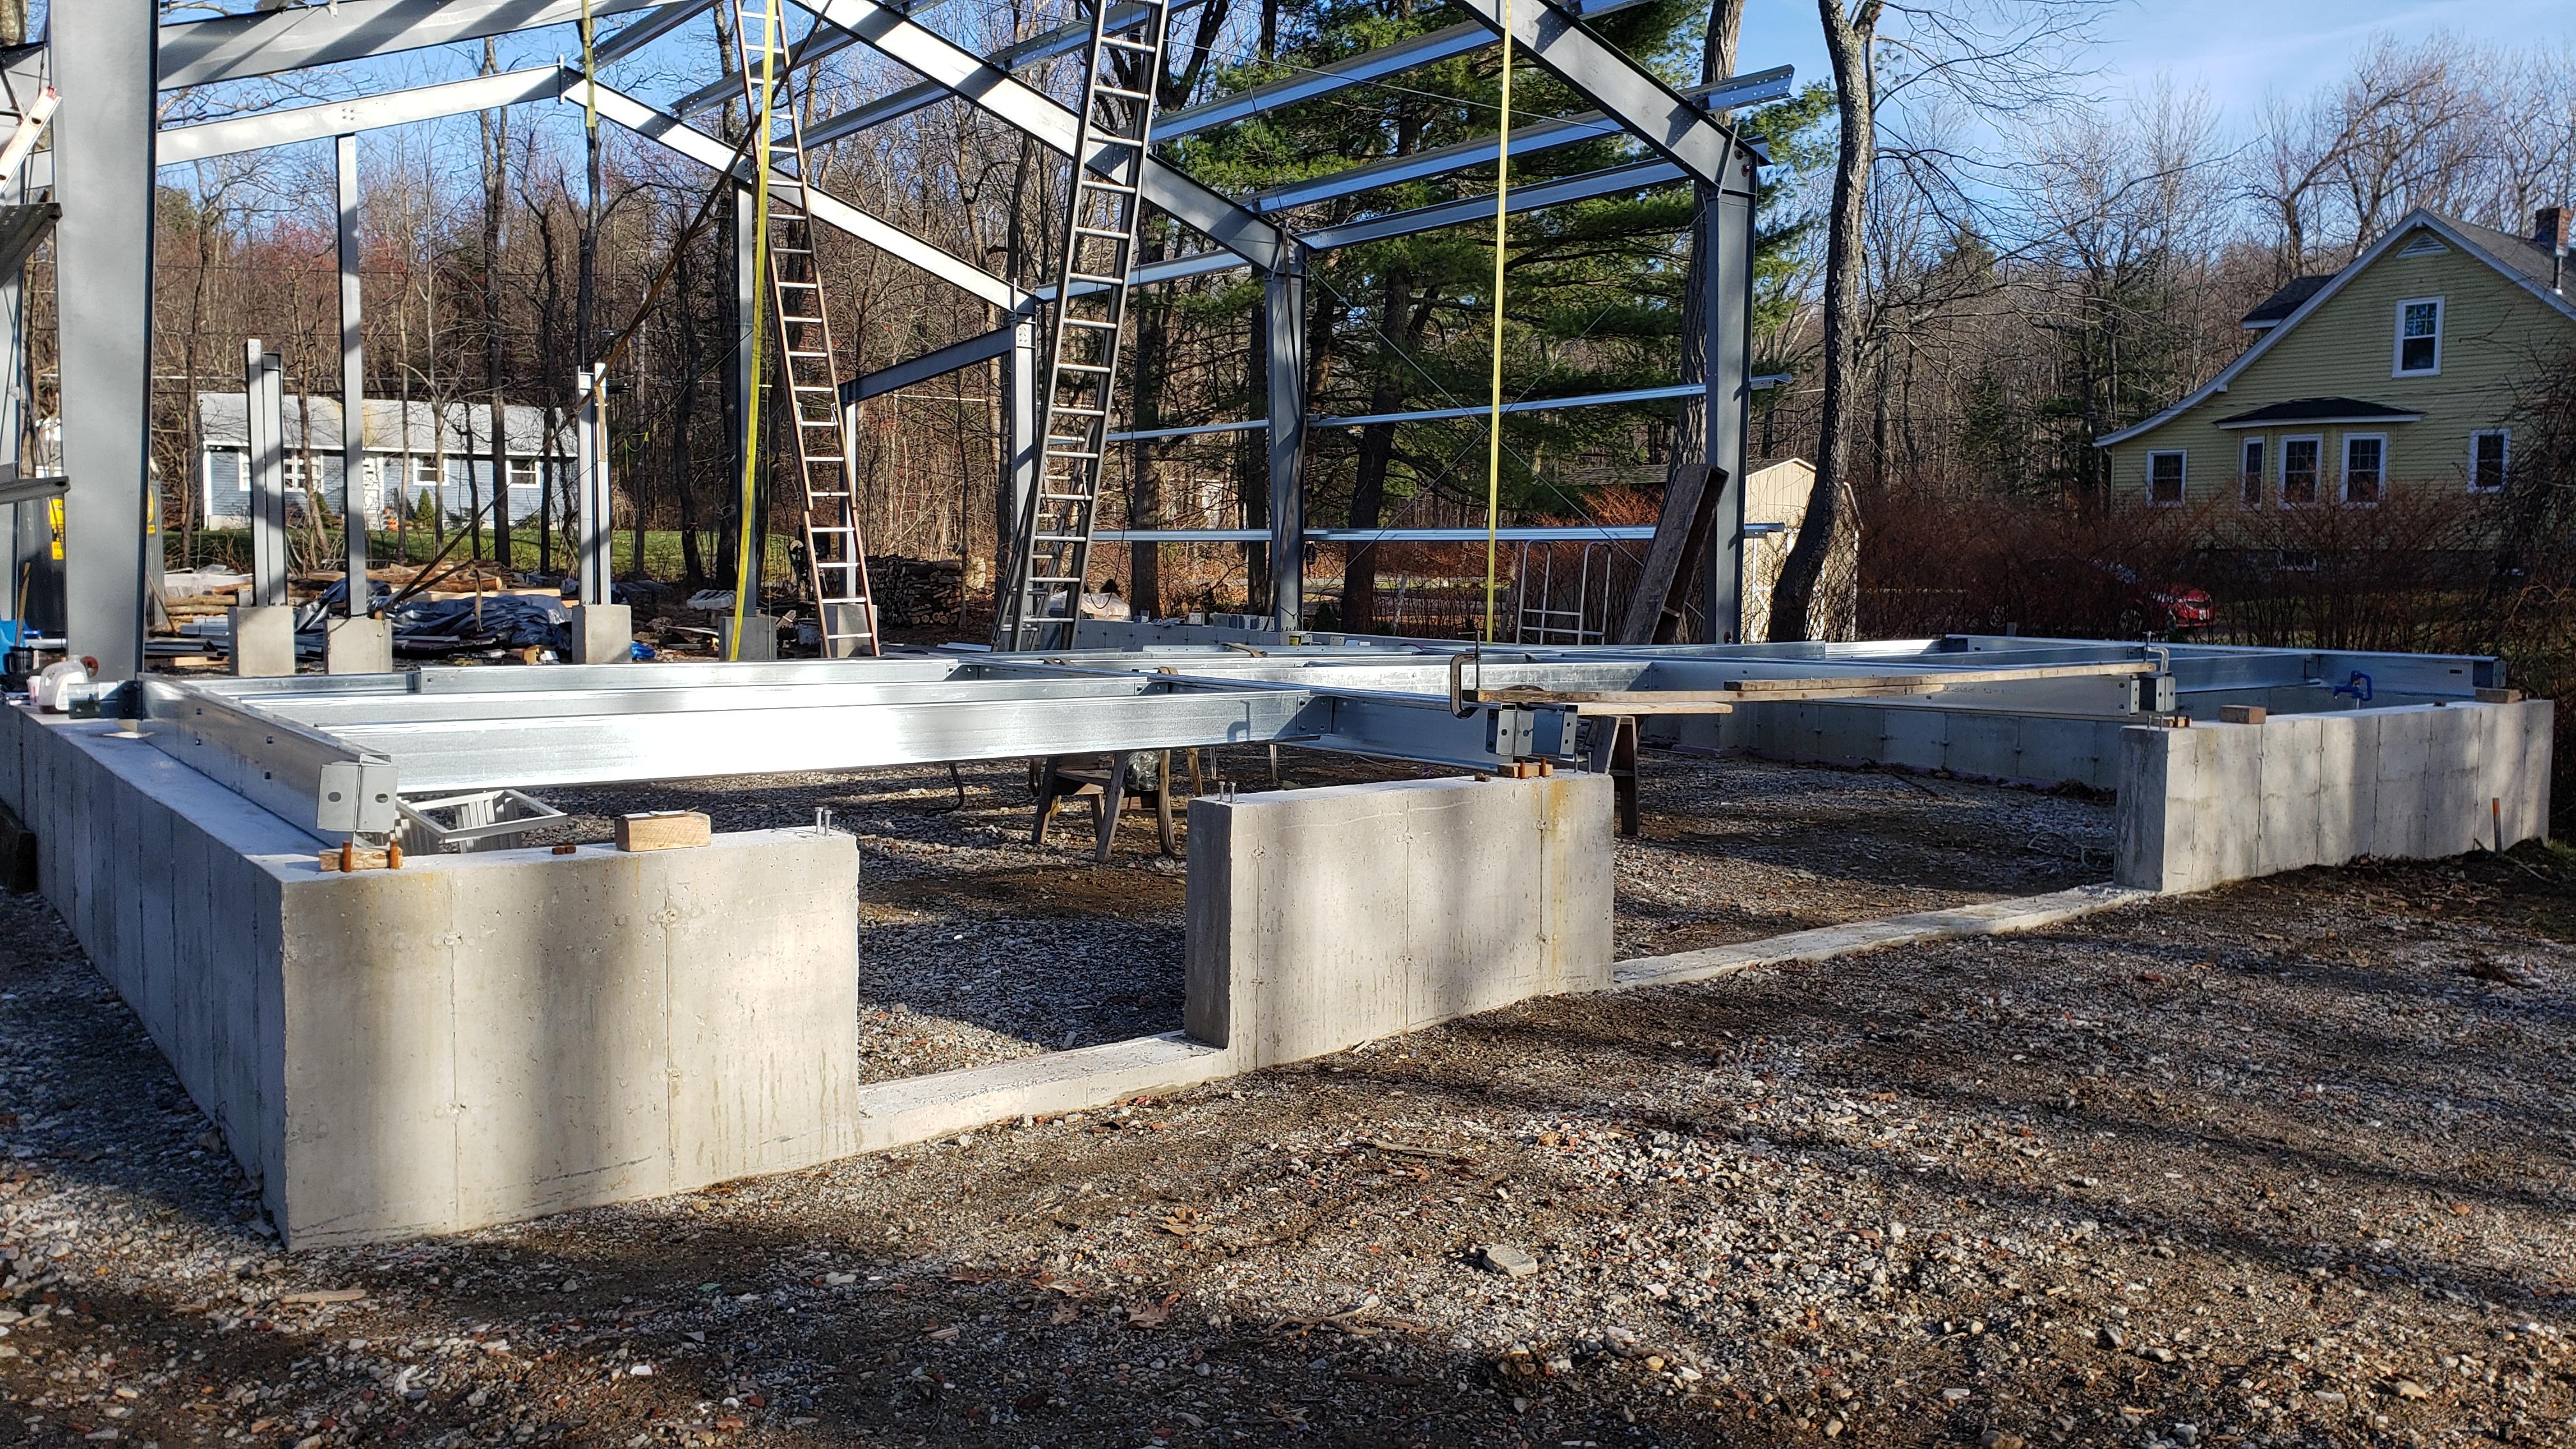
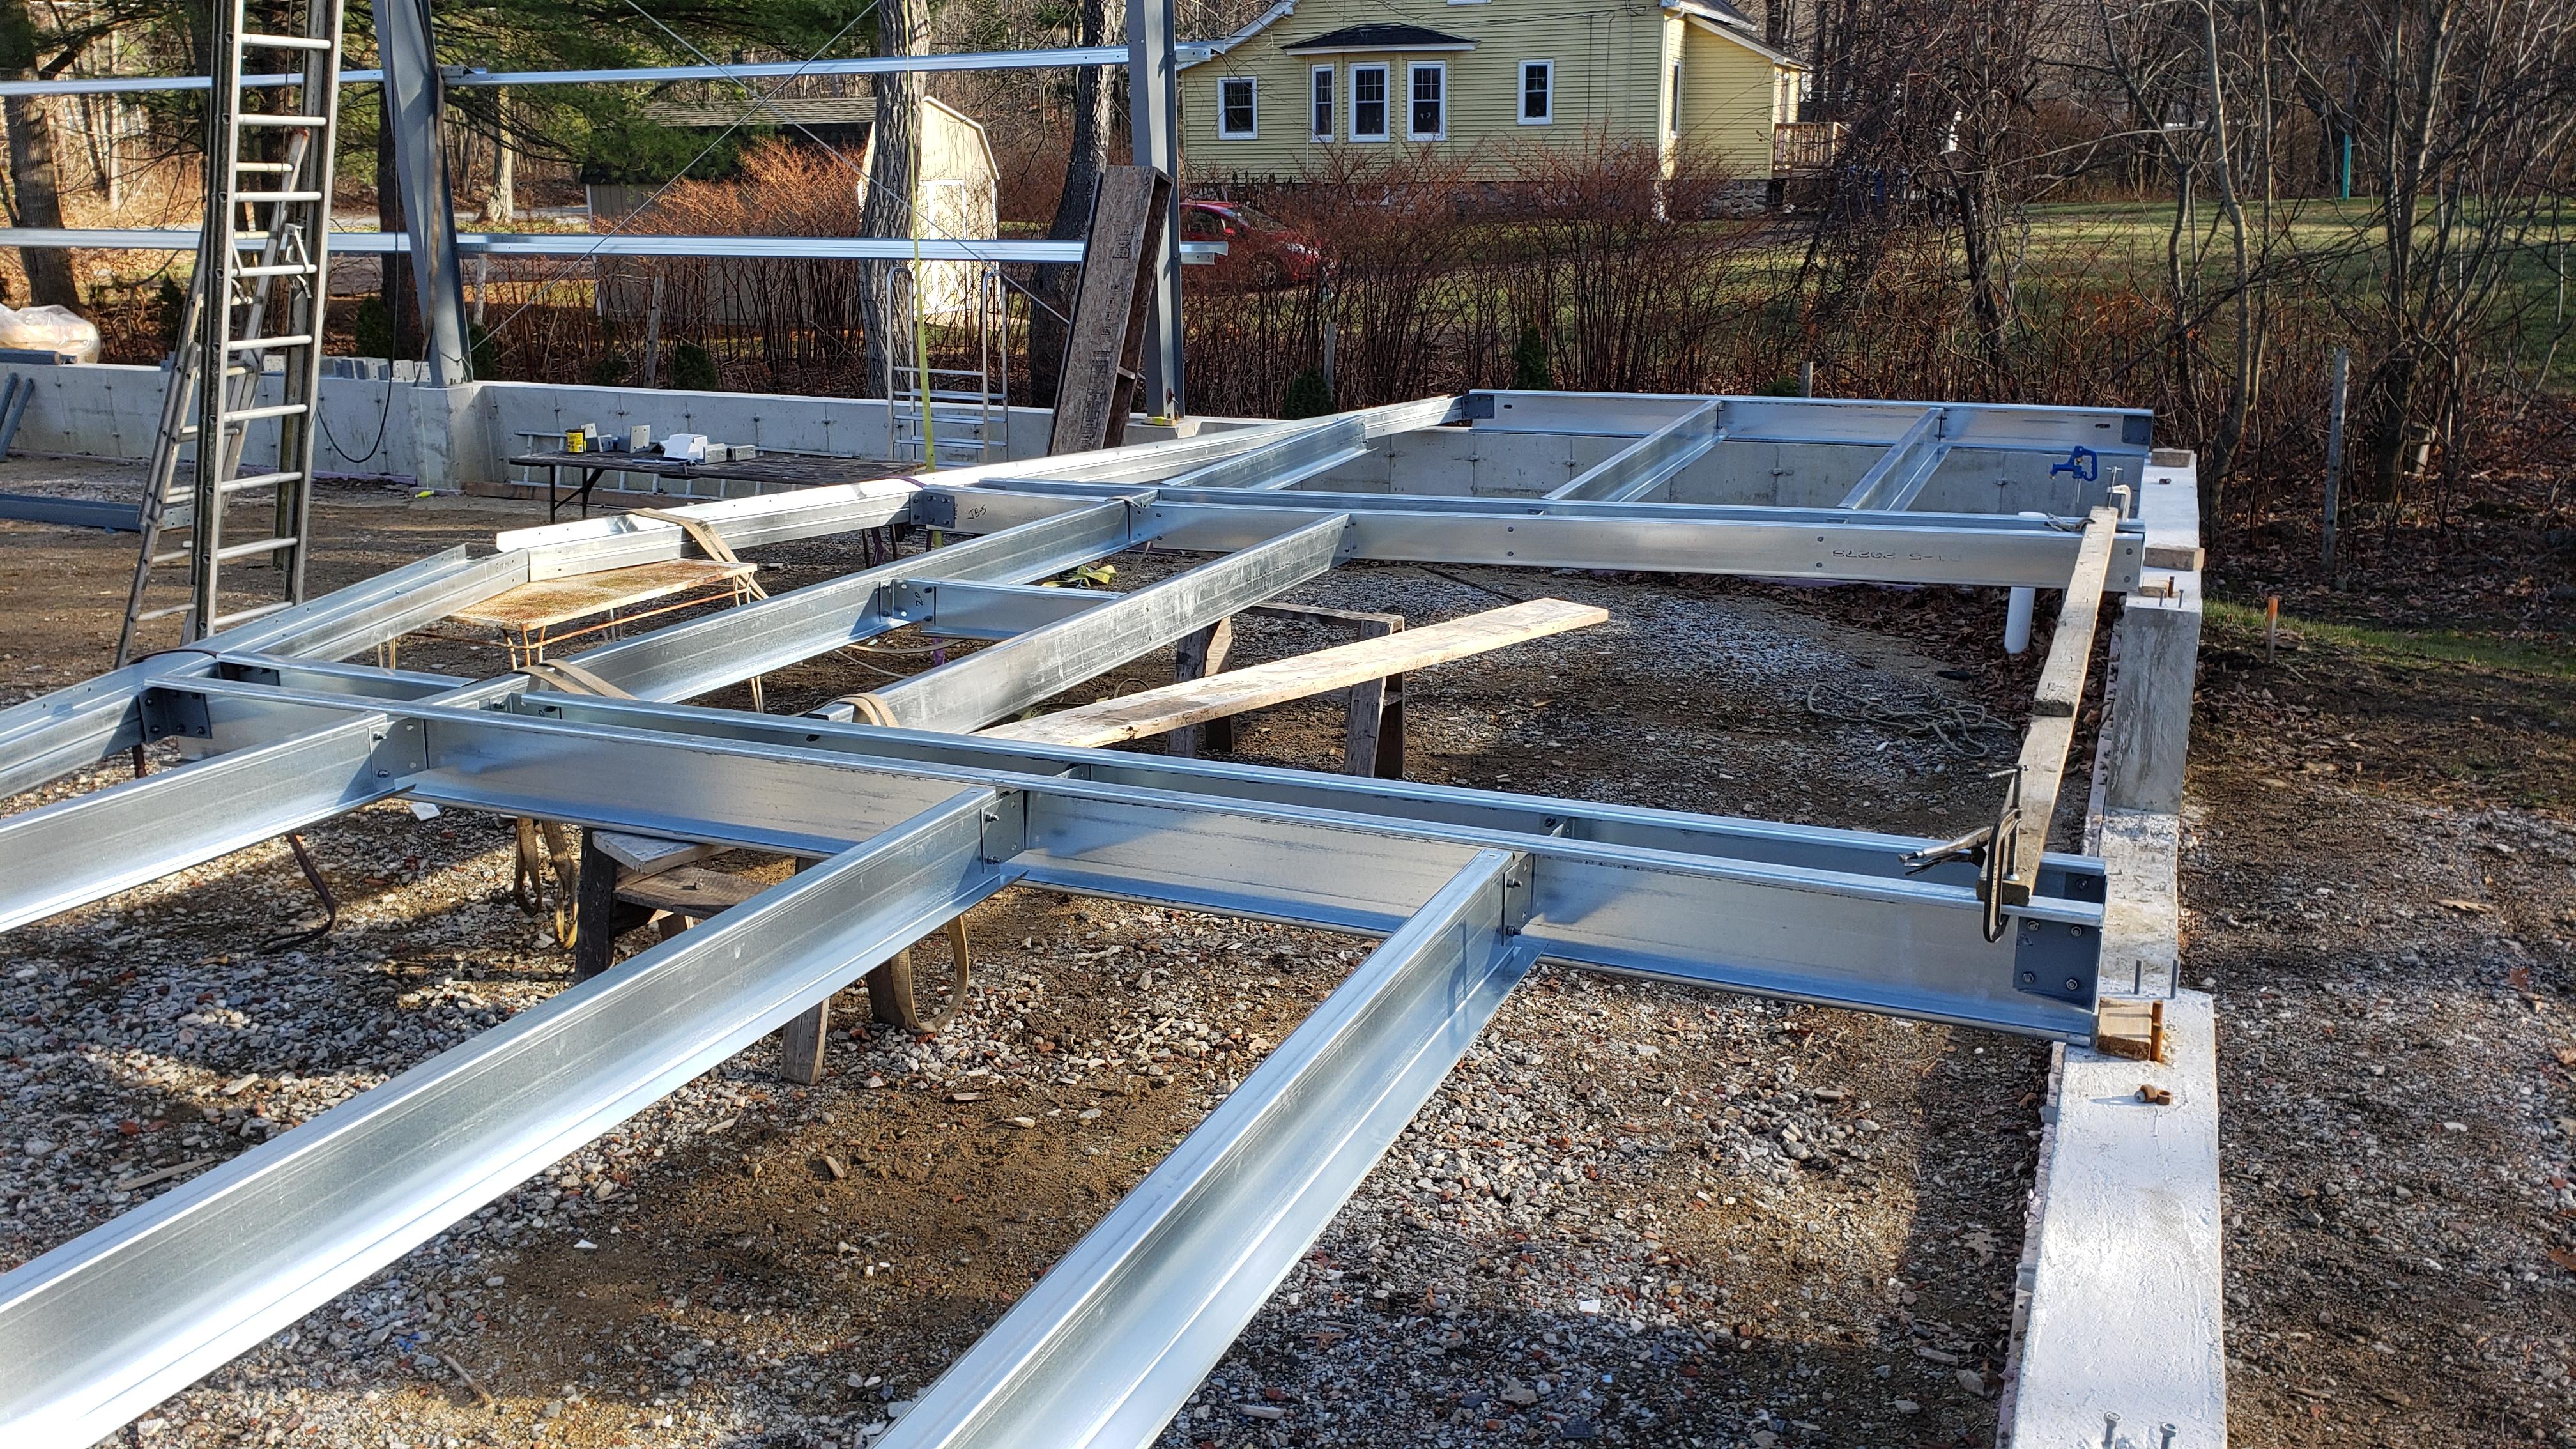
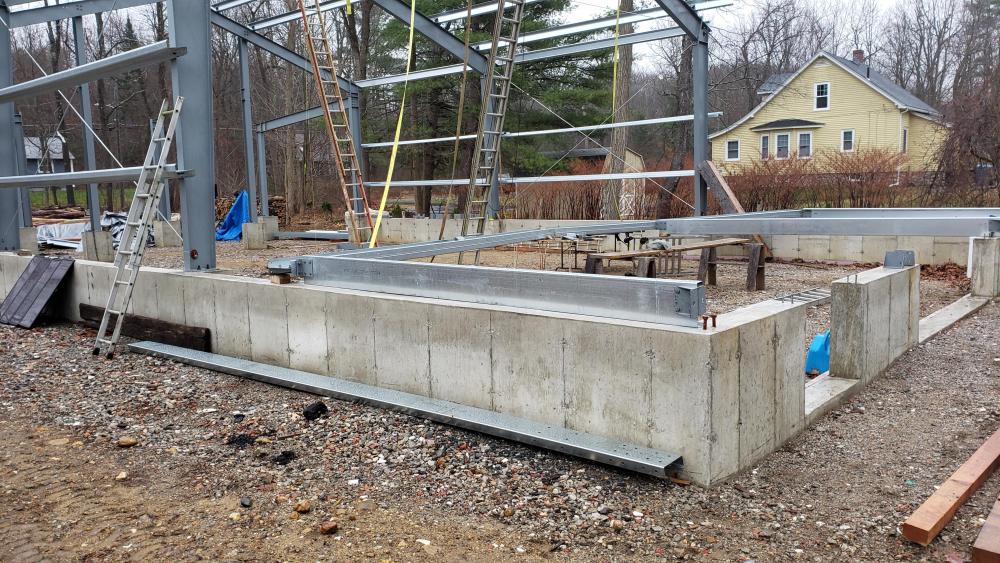
Thanks CGL, Its a slow go. Luckily I have some help so that works out well enough. funny thing is we both gimp around as I had back surgery years ago and the Gentleman helping me has had a few back surgeries.. So Between the 2 of us, we both walk like a Yeti's and we have to move nearly exactly the same. It's funny. So, today we got rained out. Sorted all the pieces from front to rear walls, got all the pieces moved to their proper areas and got part of the rear wall together. @Old Crew has been giving me wonderful advice and helping me to stay on track. Not sure if it's a good or a bad thing but we started to build the back wall up off the ground as we were all ready gimping around.

-
What did you do in the shop today?
jlpservicesinc replied to Mark Ling's topic in Blacksmithing, General Discussion
the smaller end is used to cleaning out nail holes when they fill with dirt. They are also used for back punching a nail hole if the hoof wall is thinner or thicker as the nail needs to be driven only in at the white line. Back punching is a shearing action where with the shoe cold a nib is taken off the inside or outside web of the shoe so the nails spacing can be changed in relation to outer or inner. -
What did you do in the shop today?
jlpservicesinc replied to Mark Ling's topic in Blacksmithing, General Discussion
Here are a few I made back 04, and 07 ,5160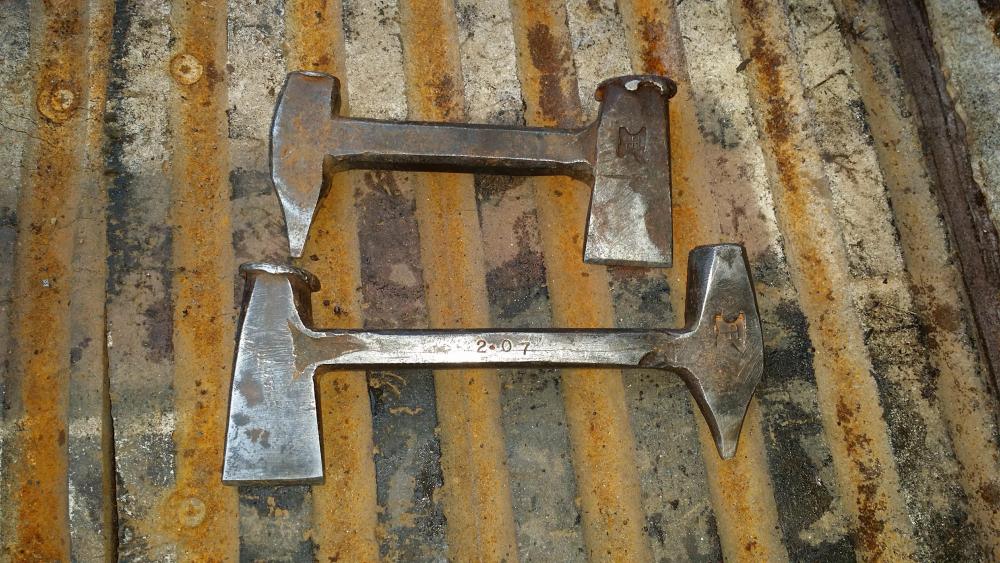
-
JLP Blacksmith Teaching Center.
jlpservicesinc replied to jlpservicesinc's topic in Building, Designing a Shop
CGL, It made me chuckle a little too. Well, today the main frame was squared the rest of the way. So now it's time to move on to more construction. Got a few pieces up like the eve struts on the front and others moved to the back. Tomorrow will be the back wall and get it attached. -
What did you do in the shop today?
jlpservicesinc replied to Mark Ling's topic in Blacksmithing, General Discussion
Jasent, Hello that punch looks a lot like a clinch cutter. Billy Your making some pretty good progress there. -
JLP Blacksmith Teaching Center.
jlpservicesinc replied to jlpservicesinc's topic in Building, Designing a Shop
Charles I hope it's a small horse. You'll have better luck as it will fit in the cars driving seat better especially with many of the smaller cars on the roads today. -
JLP Blacksmith Teaching Center.
jlpservicesinc replied to jlpservicesinc's topic in Building, Designing a Shop
David, 200 miles and horses to boot. didn't get in till late. I did text over a list of the materials. Not sure if you had seen it. -
JLP Blacksmith Teaching Center.
jlpservicesinc replied to jlpservicesinc's topic in Building, Designing a Shop
thats cute Thomas. I'm with you. these next 3 days I hope can get a lot done. -
JLP Blacksmith Teaching Center.
jlpservicesinc replied to jlpservicesinc's topic in Building, Designing a Shop
Stash, for sure. Next 3 days are supposed to be decent so I am hopeful to get a lot done. Tensioning the cables tomorrow will be the big one and once this main section is squared then we can get the end wall up and so the purlins and girts. -
Show me your anvil stands
jlpservicesinc replied to pkrankow's topic in Stands for Anvils, Swage Blocks, etc
Marcusb. I was just being playful. Guess it's my amazing sense of humor. -
Show me your anvil stands
jlpservicesinc replied to pkrankow's topic in Stands for Anvils, Swage Blocks, etc
Ah man I was hopeful. The Refflinghaus when forging out the bolts was all over the place. I shot video of the process. Was kind of neat seeing it moved by a 2.75lb hammer. -
Show me your anvil stands
jlpservicesinc replied to pkrankow's topic in Stands for Anvils, Swage Blocks, etc
Marcusb, What do you consider a hand hammer?? I must be doing something wrong. Oh, thats right I don't have any 500lbs anvils.