bryson489
-
Posts
52 -
Joined
-
Last visited
Content Type
Profiles
Forums
Articles
Gallery
Downloads
Events
Everything posted by bryson489
-
Awesome pattern. Nicely done
-
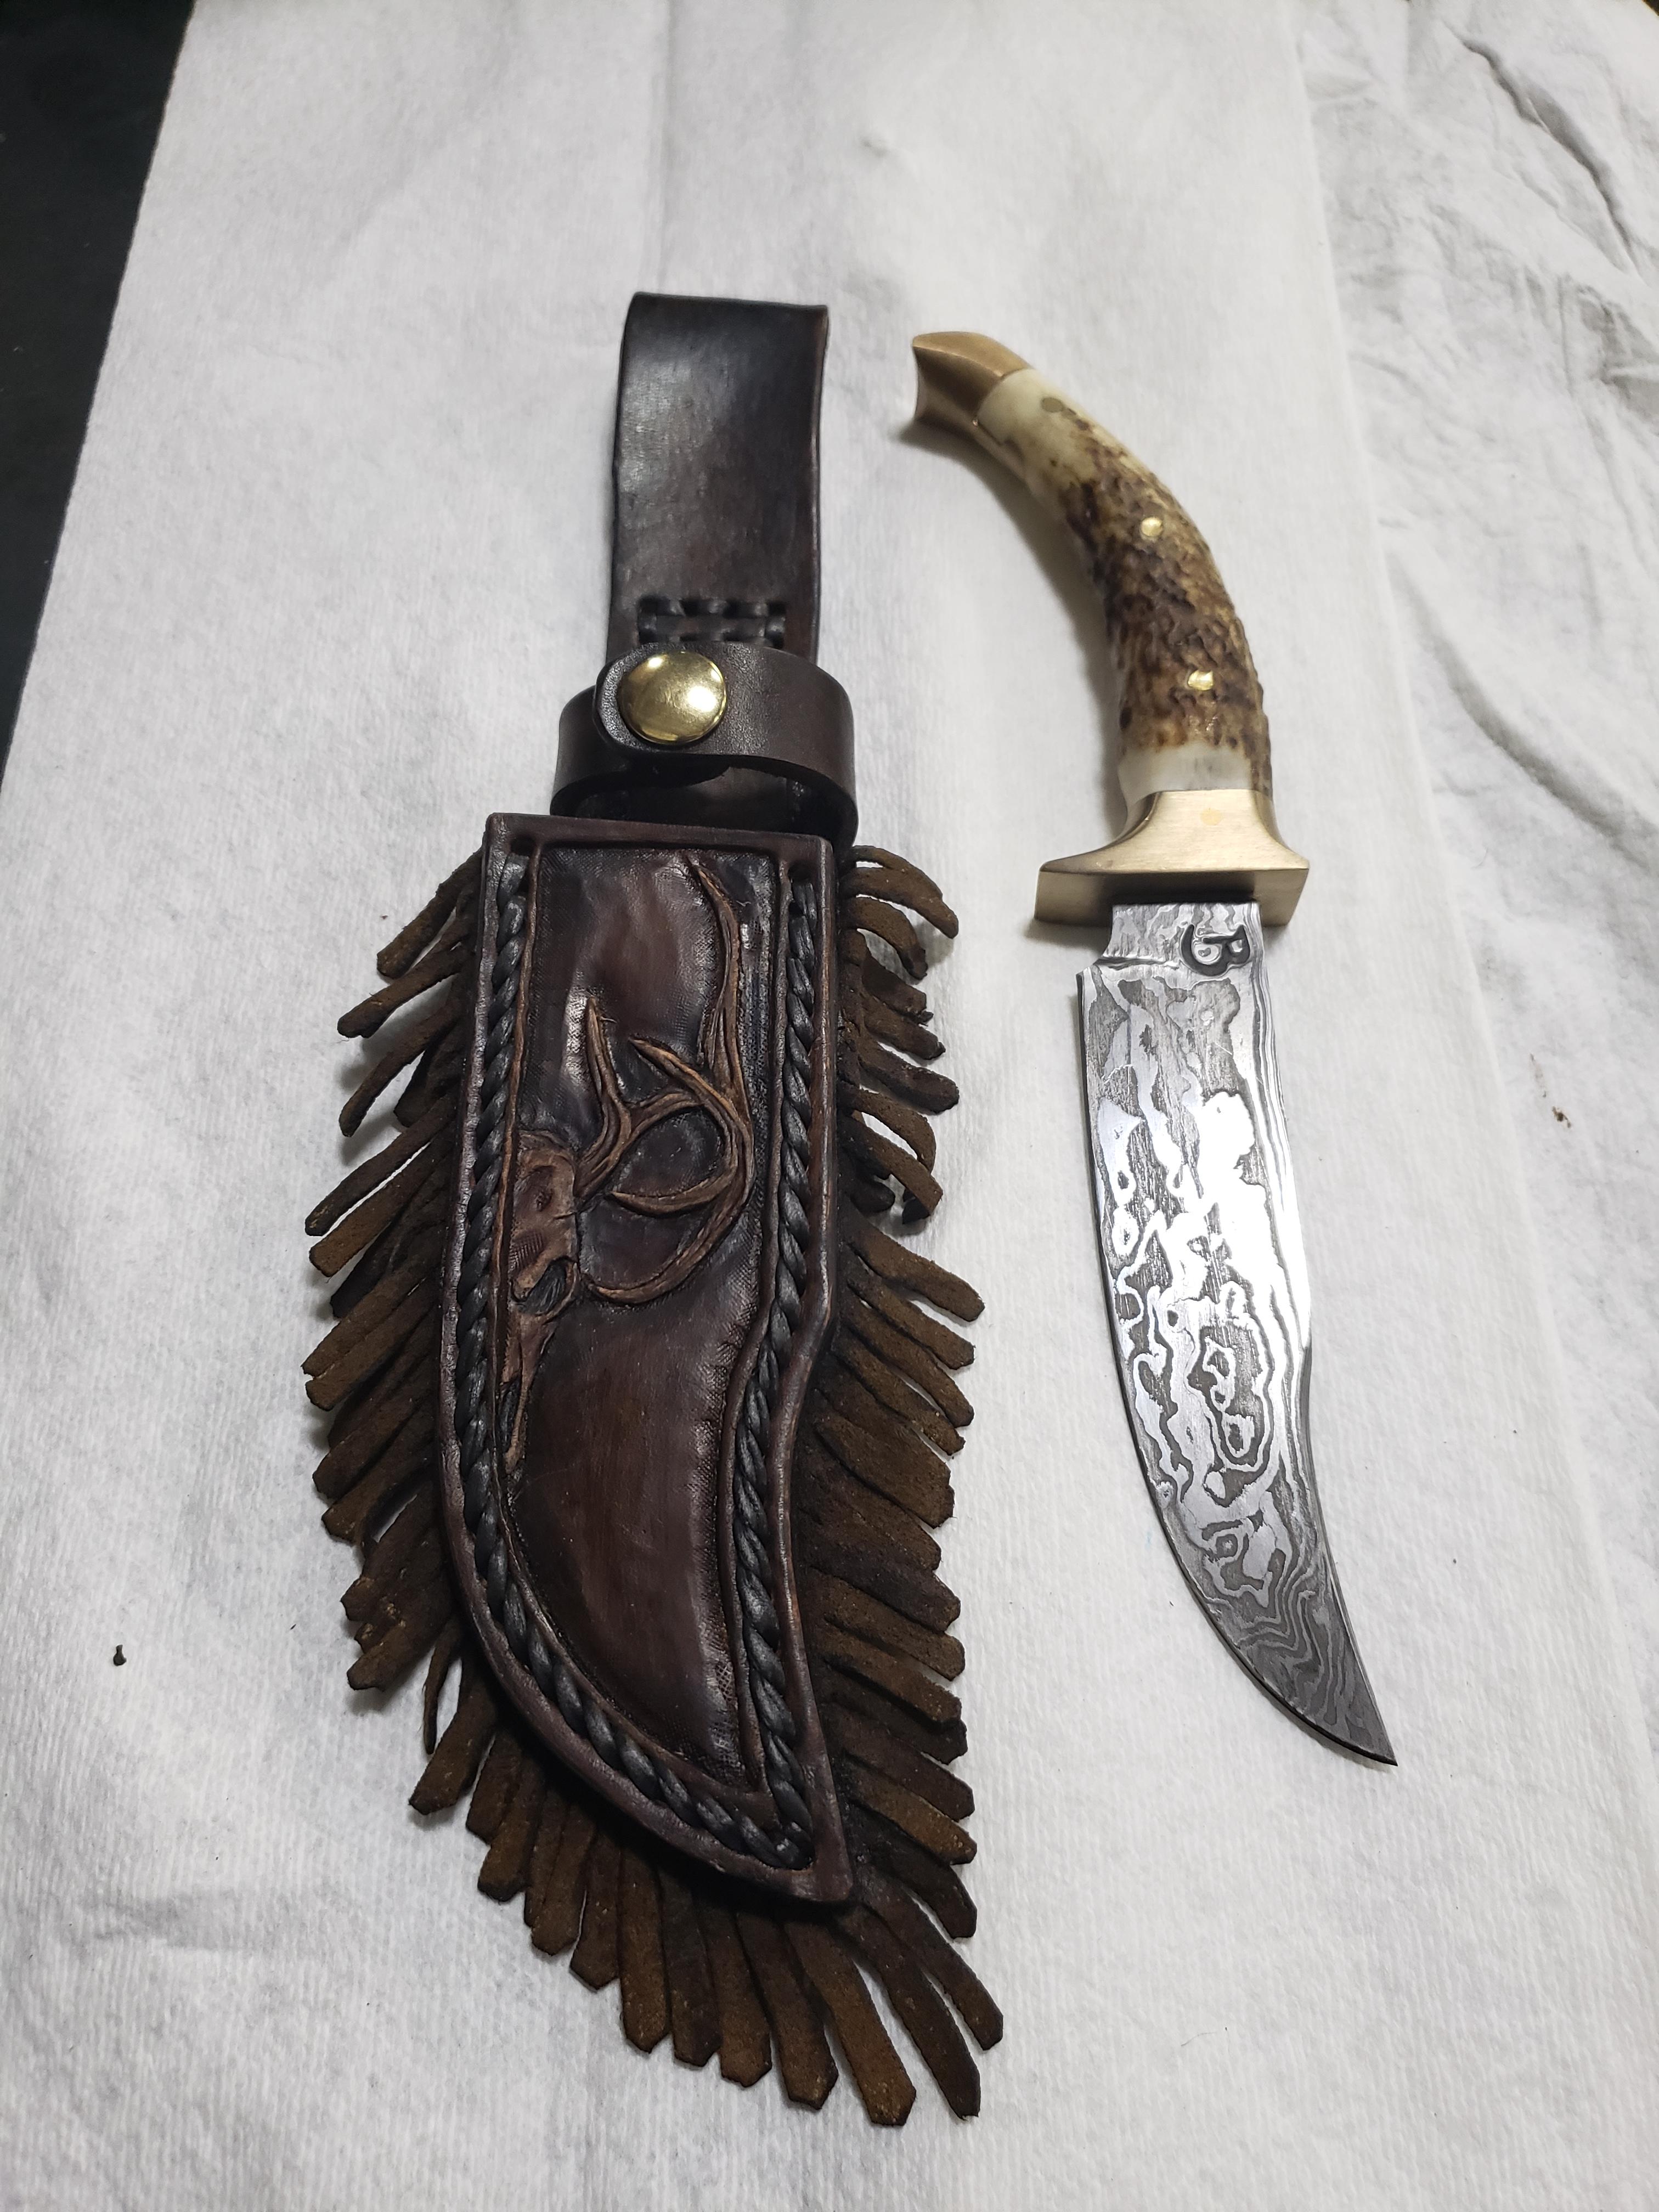
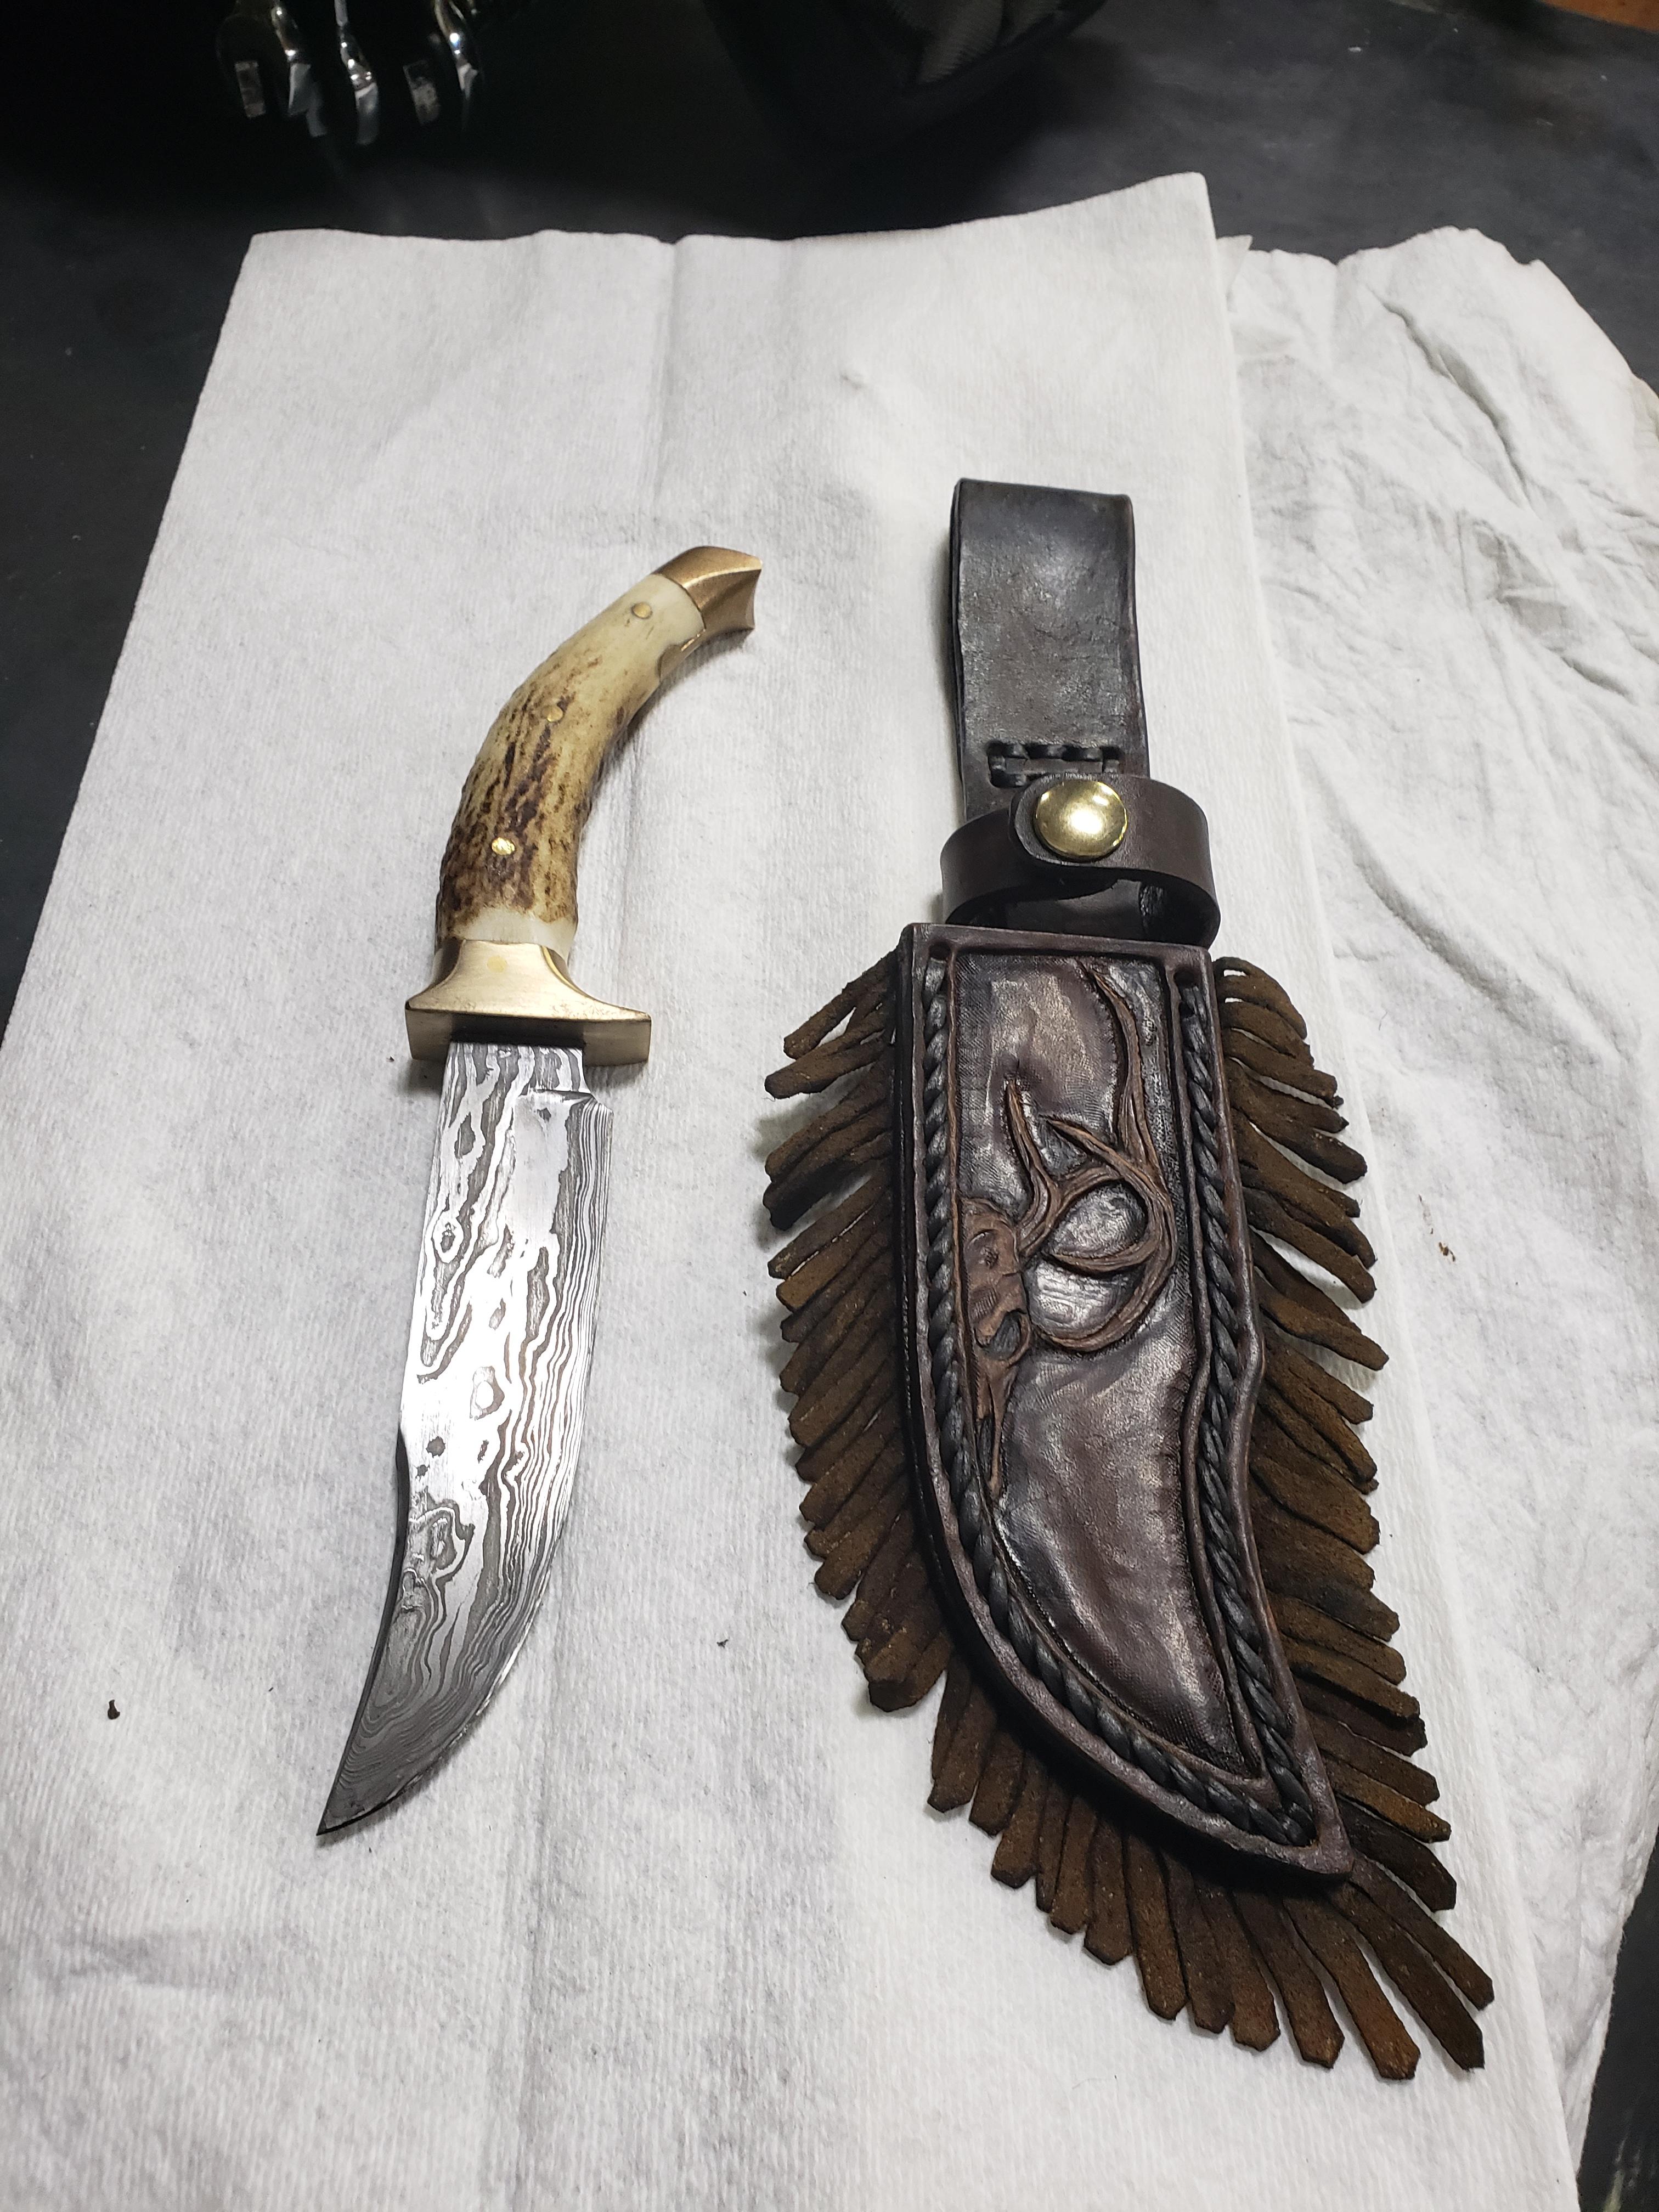
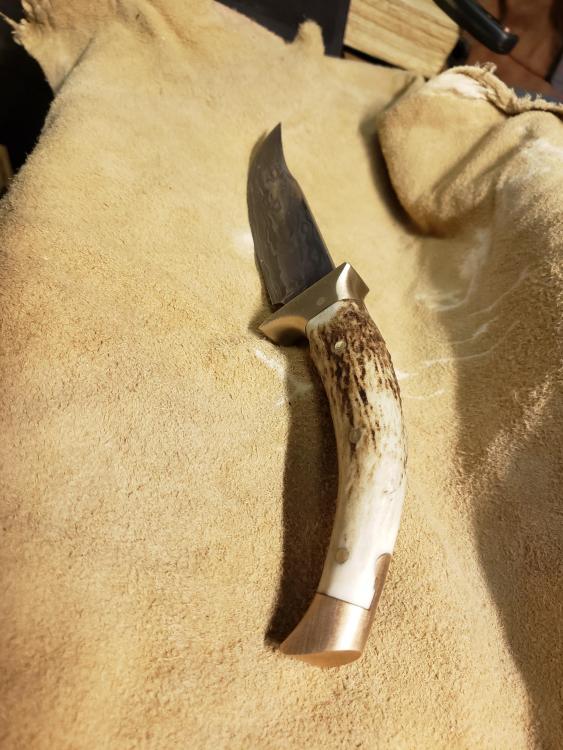
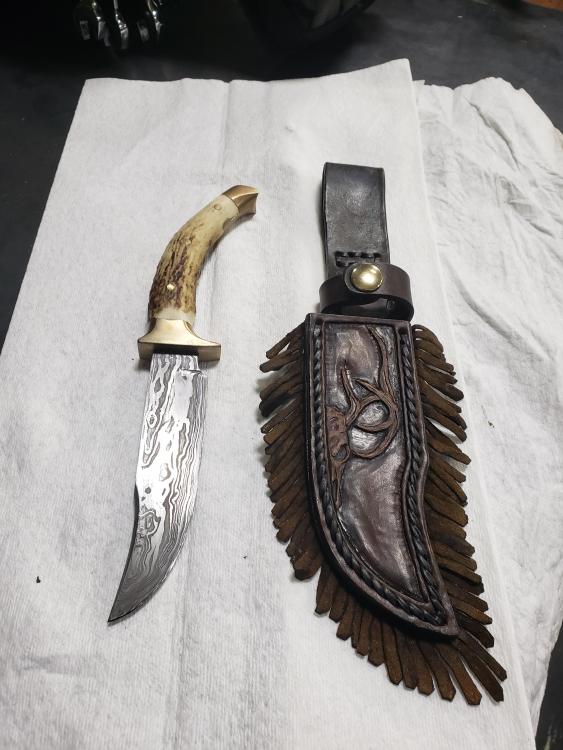
Thanks guys. I usually try to keep the sheaths simple, unless requested otherwise. He showed a pic of what he wanted for a sheath and it was a pretty plain design with the fringe. It was my first time doing the fringe so i decided to add the skull to try dressing it up. Its definitely a fun process. As long as you have patience. That's why i stick to small peicess haha
-
Thankyou. All i can say is do it! It'll kick xxxx xxxx but it's so worth it getting that billet together. I wish i had some presses or power hammers so i could do larger billets. But until then i can usually get a knife and a bottle opener out of one billet.
-
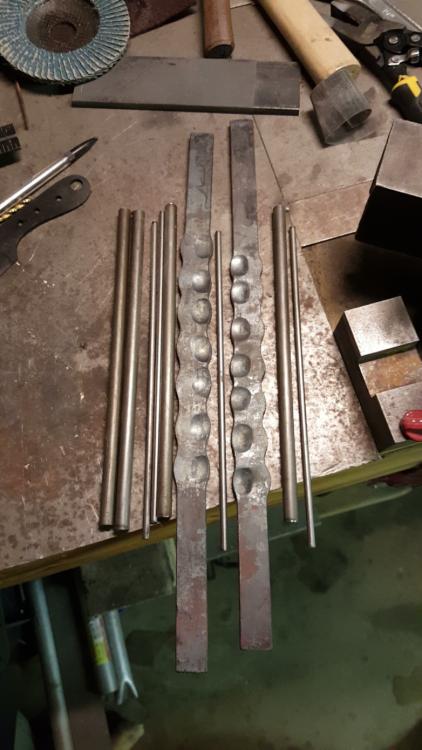
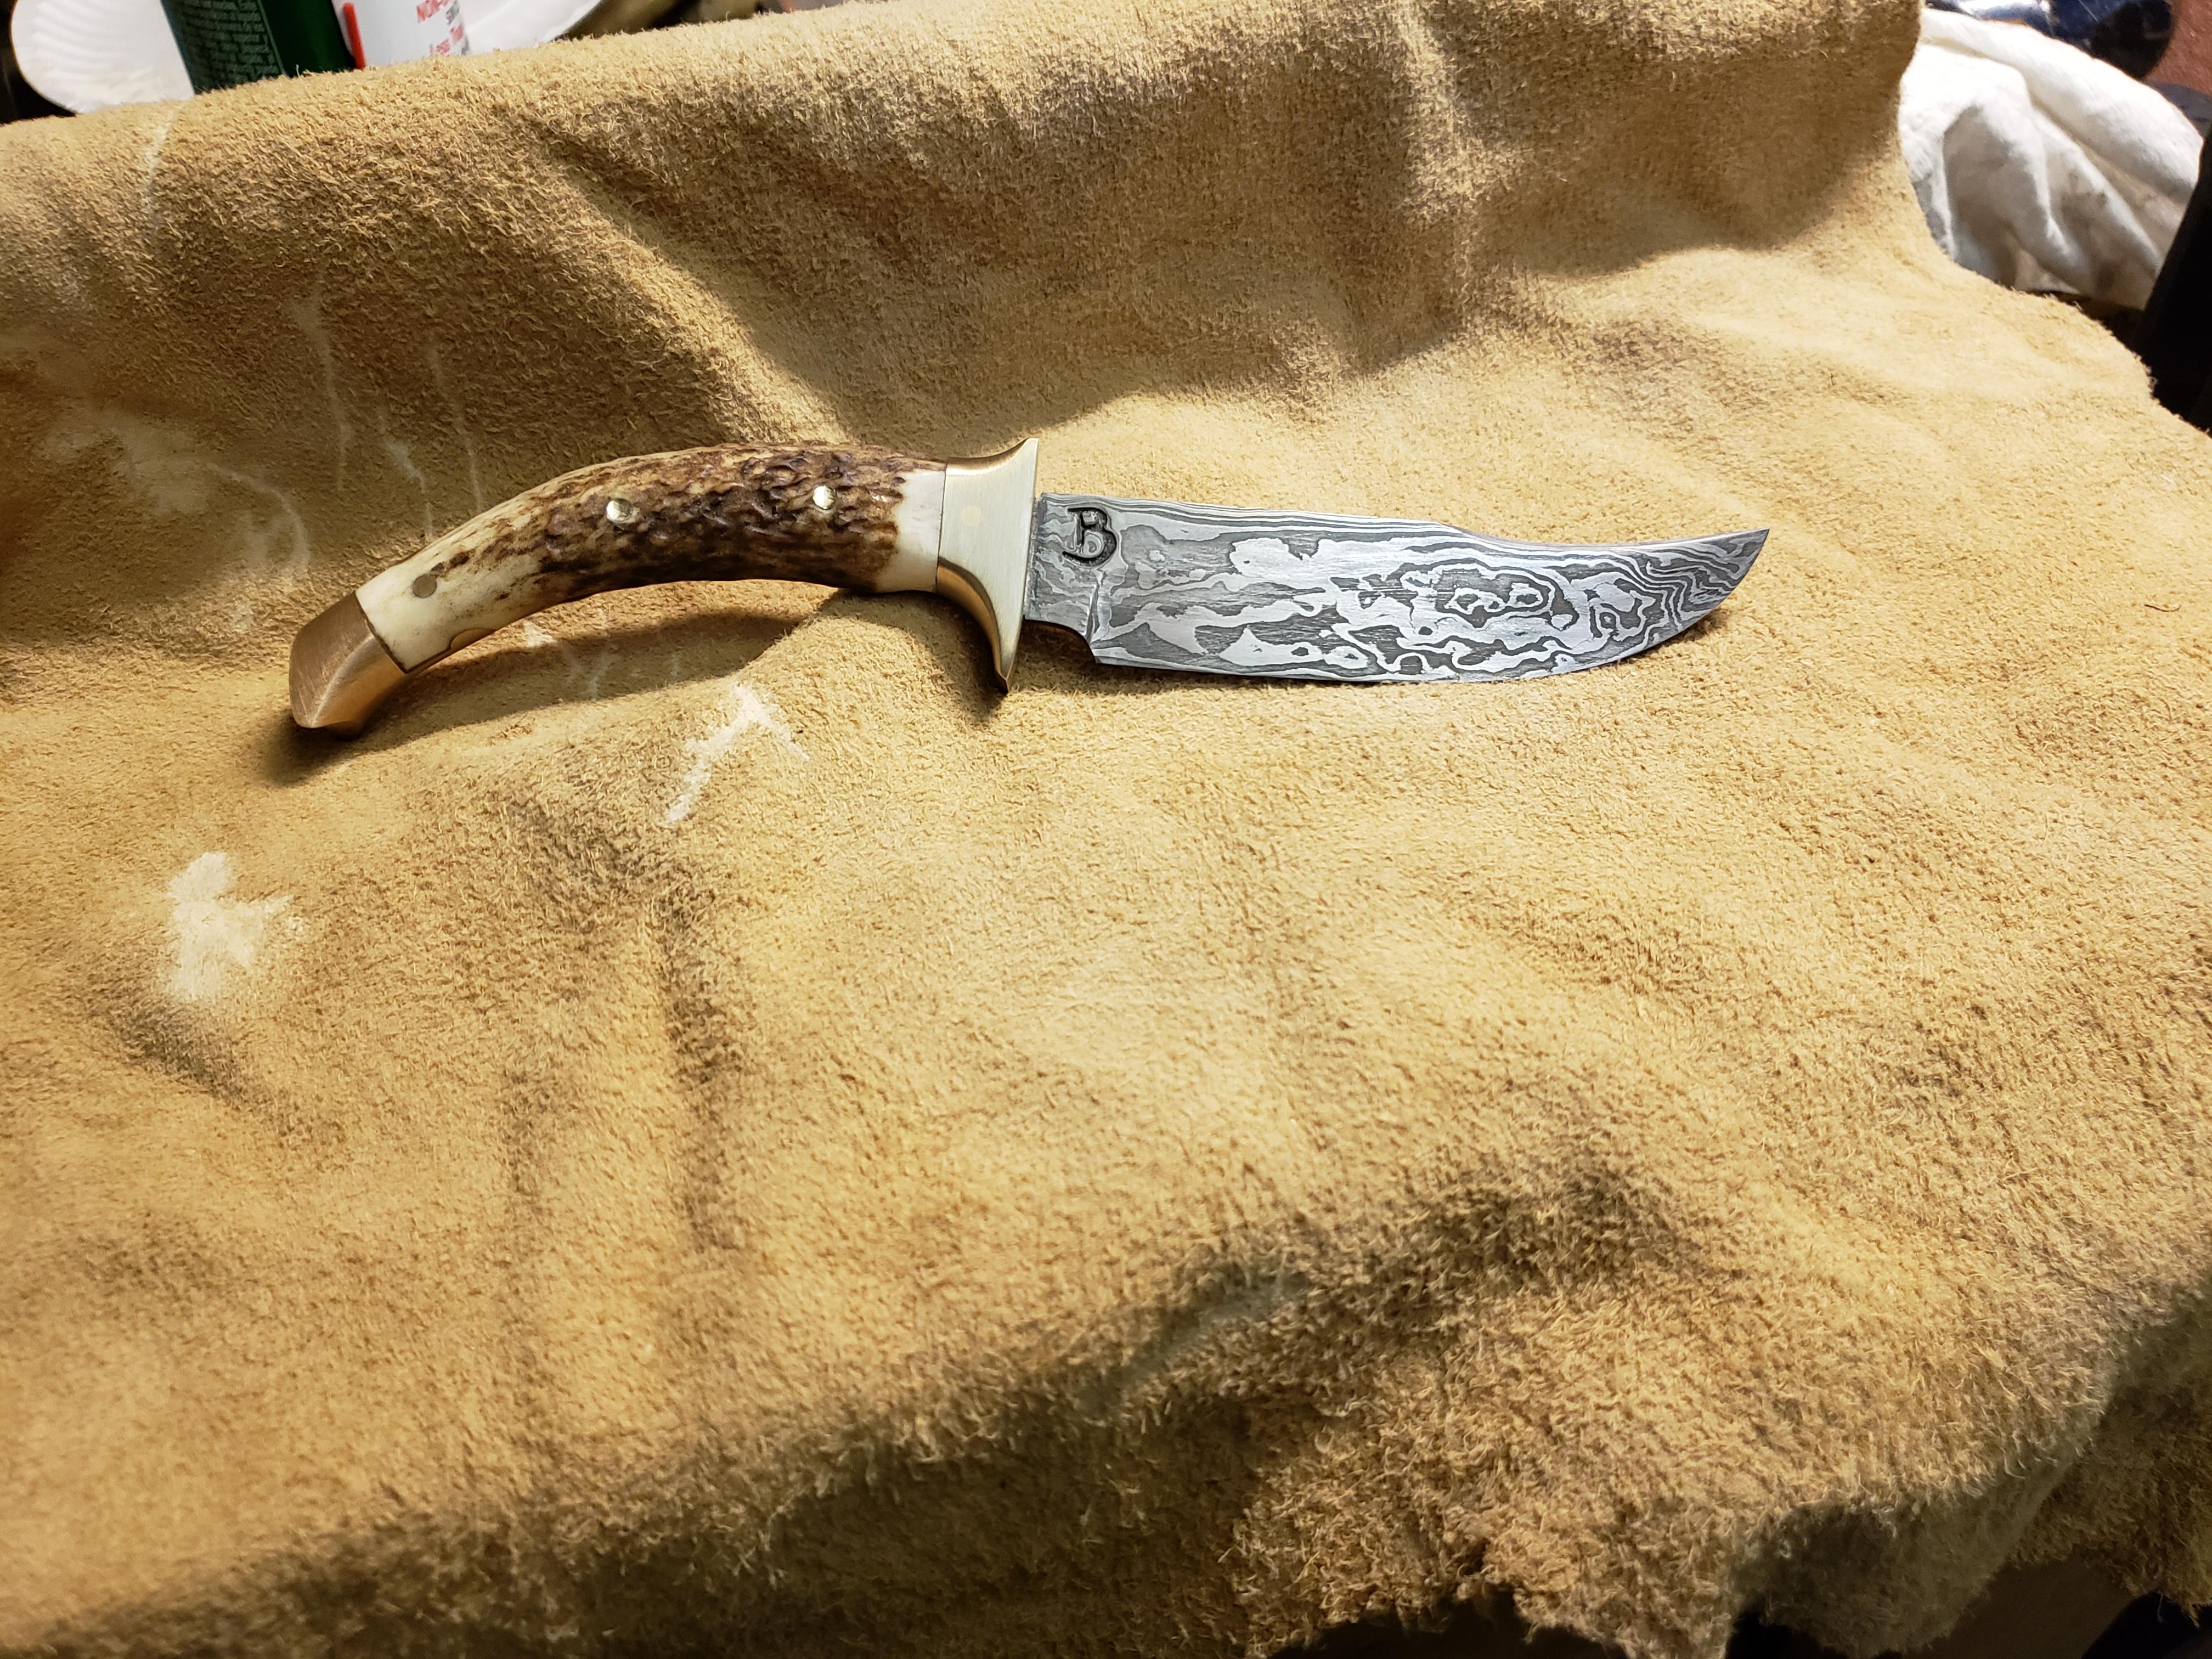
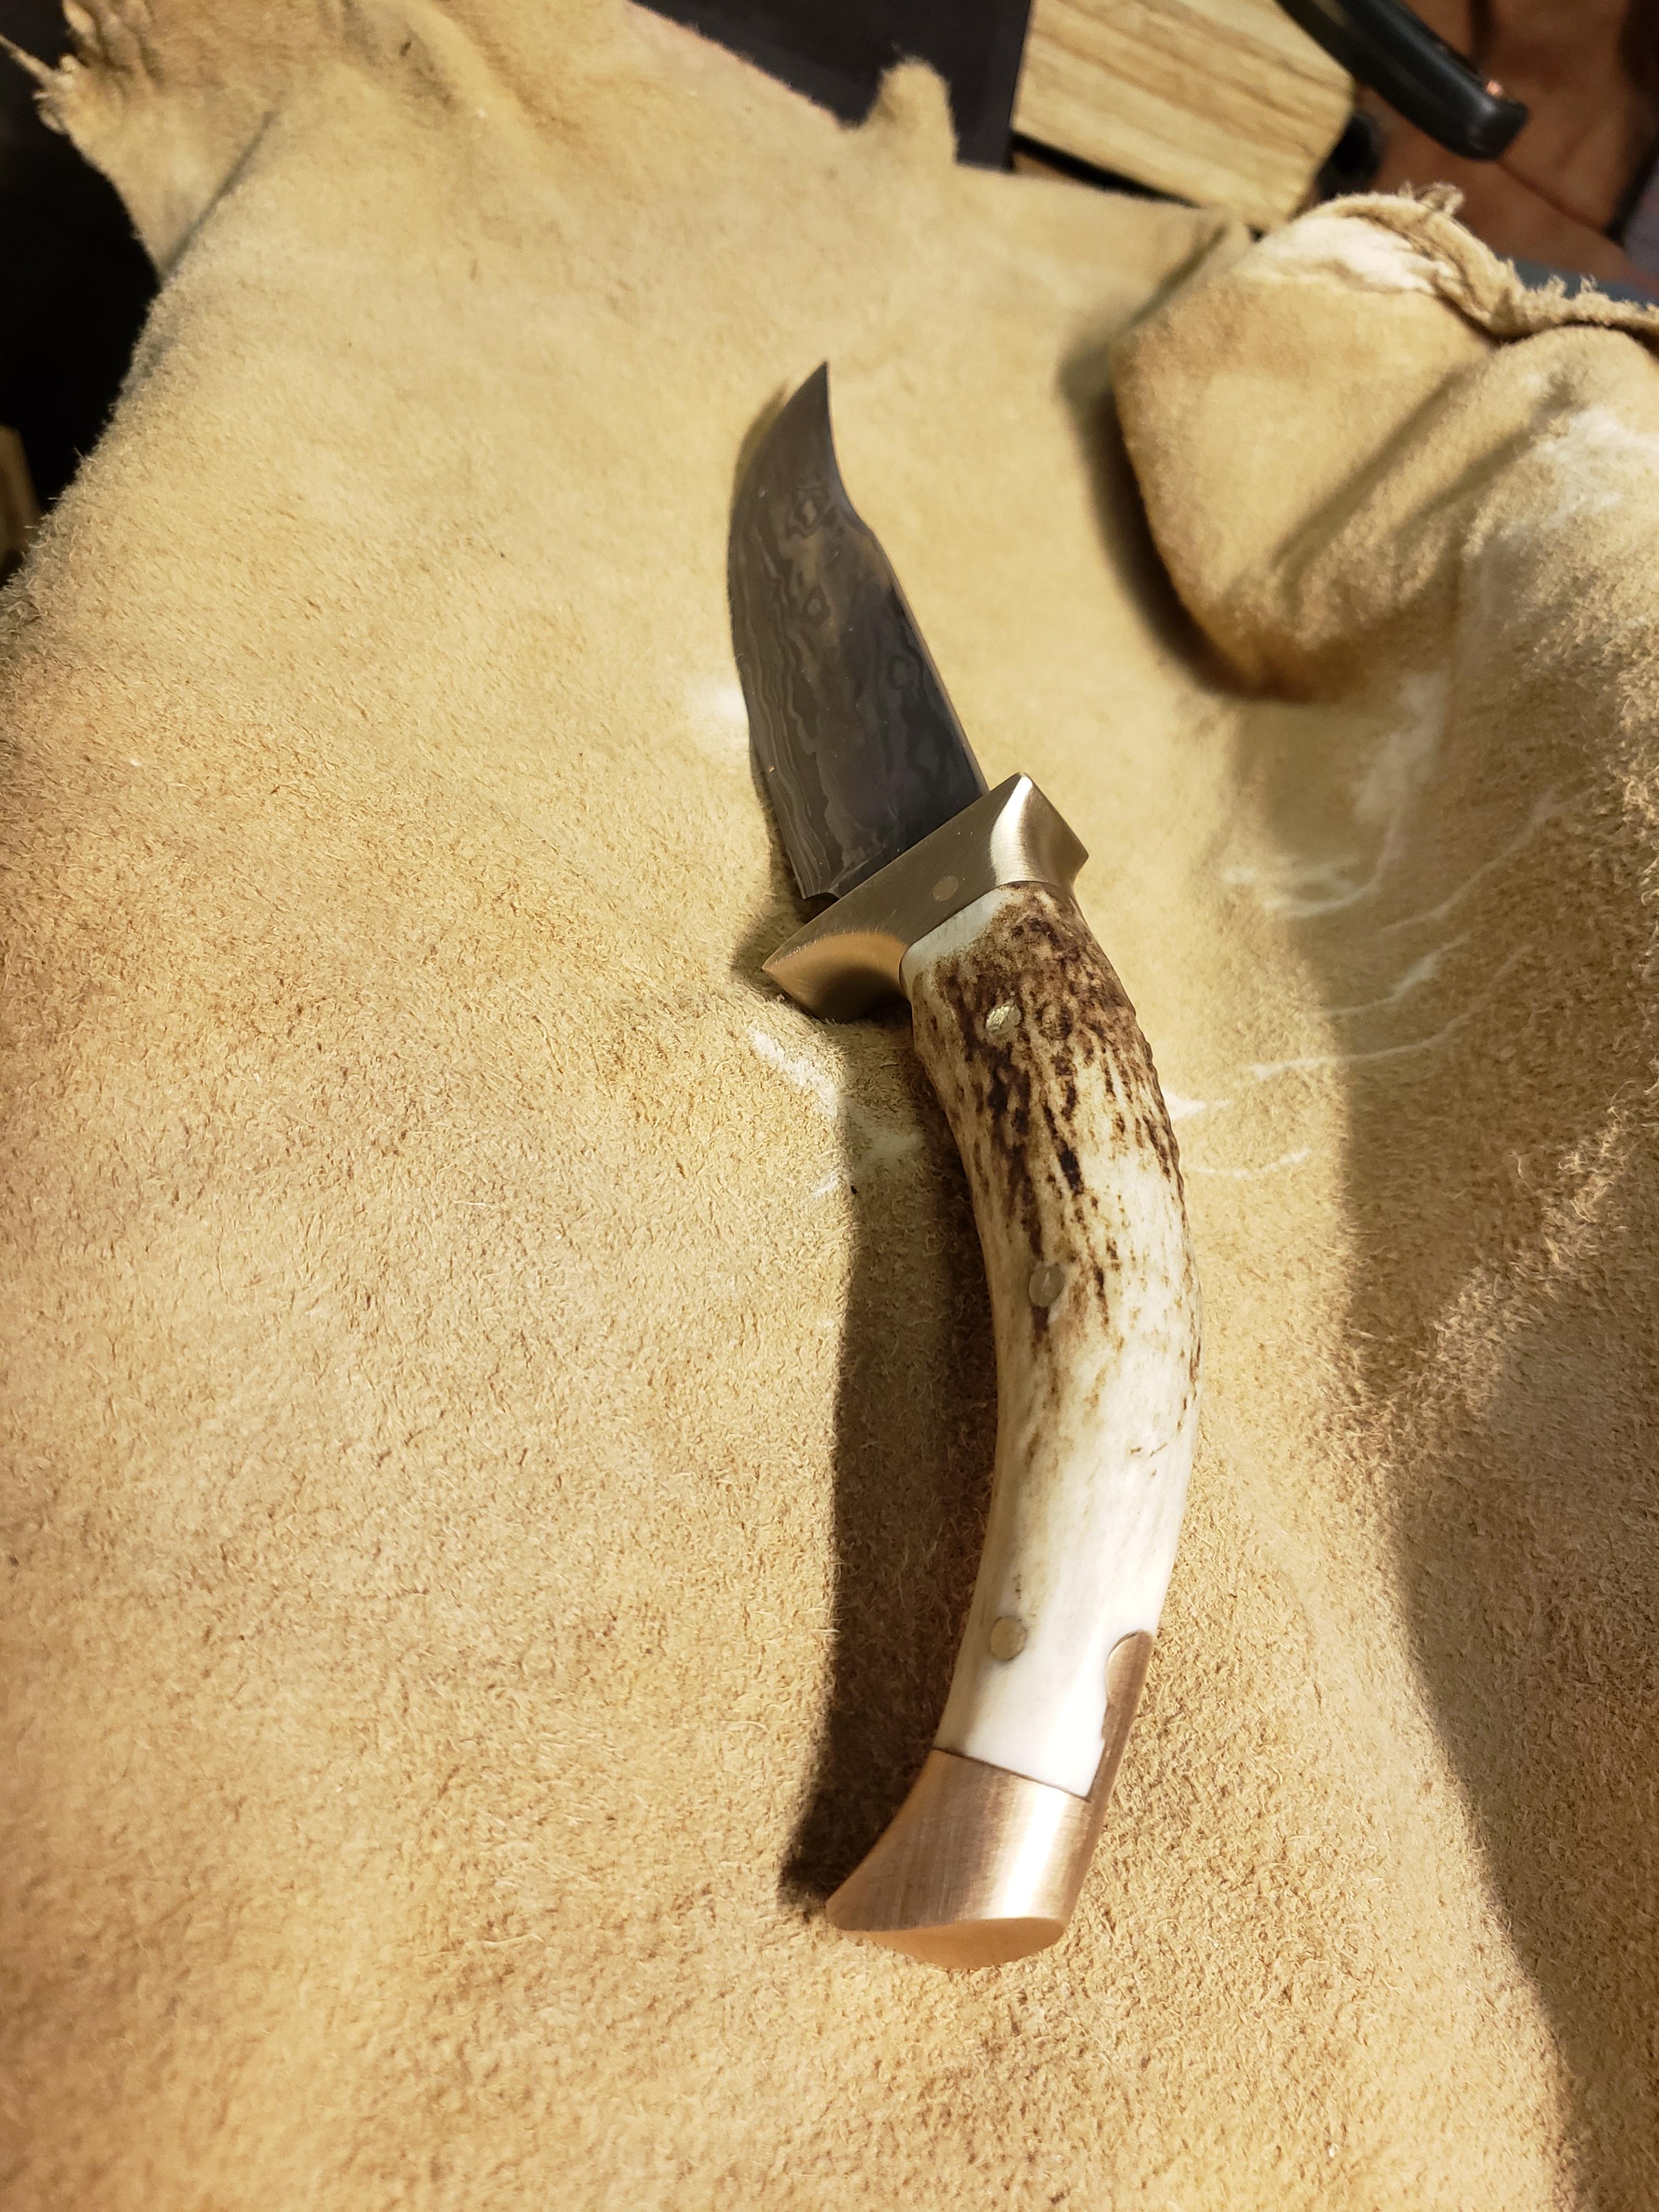
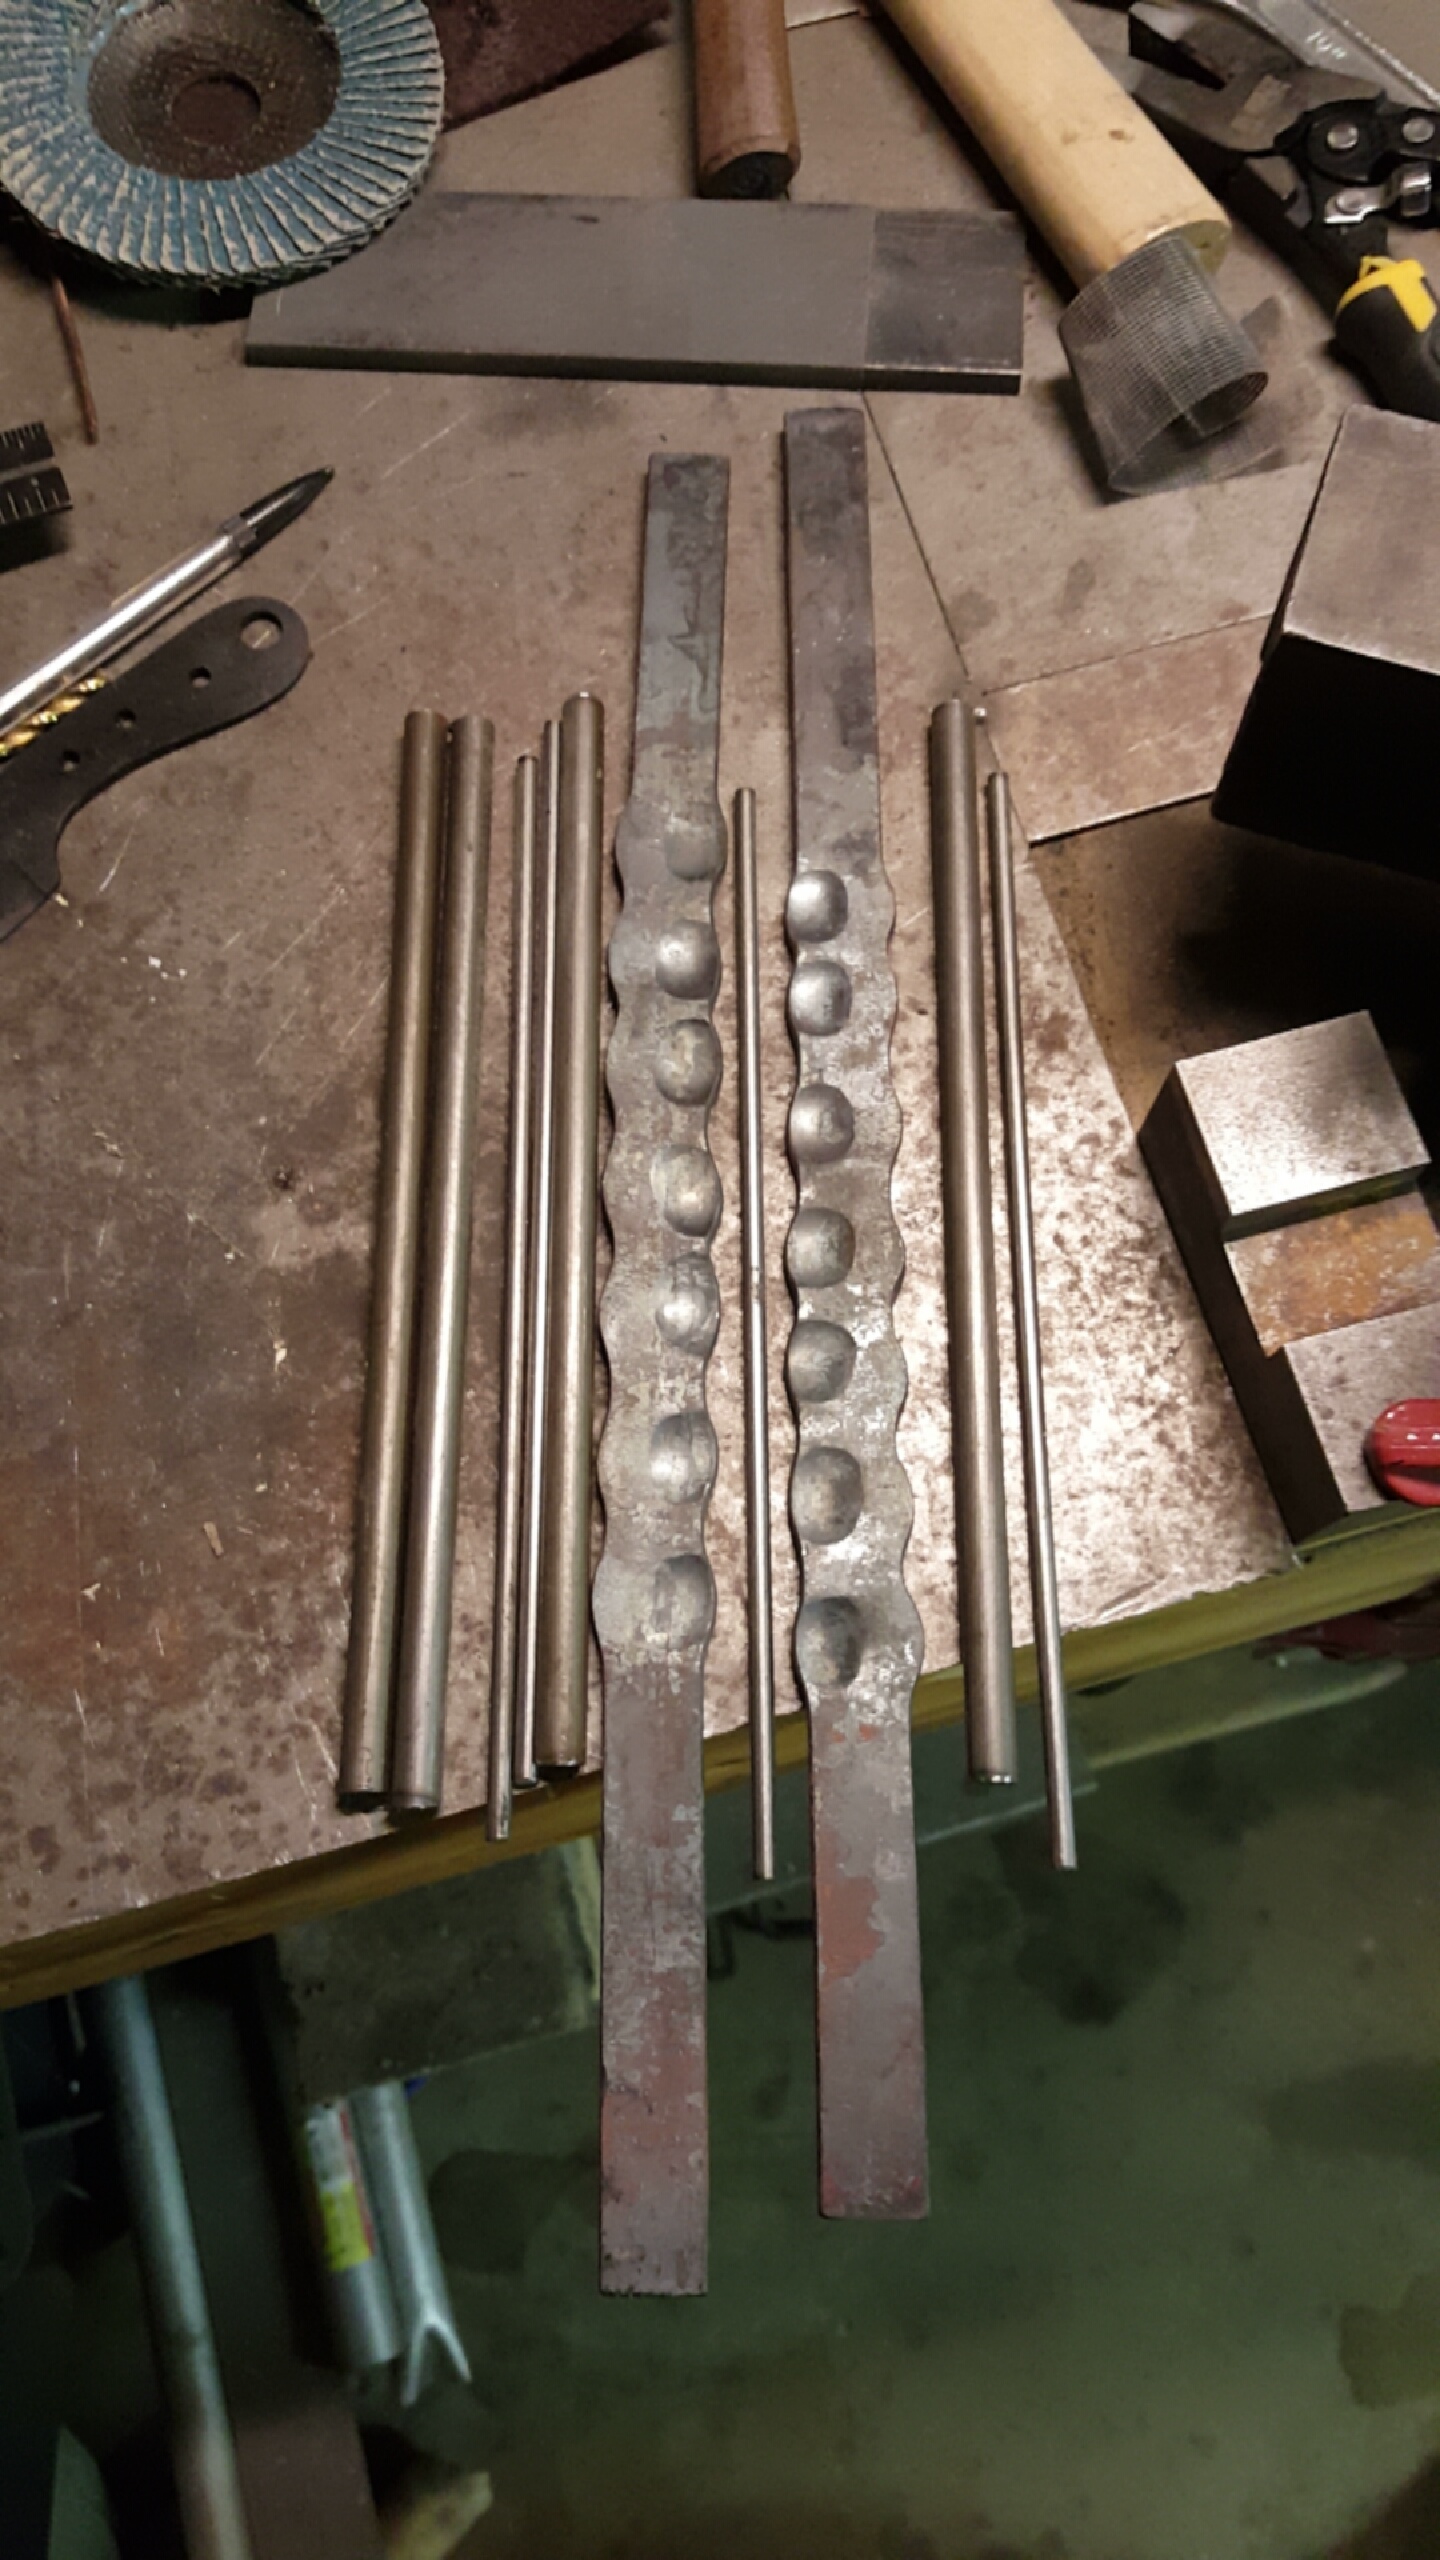
Finally finished this one up and off to its new owner. It's about 220 layers of 15n20 and 1095.


-
Damascus with only hand hammers?
bryson489 replied to JonathonCrow's topic in Blacksmithing, General Discussion
I'm pretty new to doing damascus, but the few billets that I did were manageable. I've been using .125" 1095 and .065" 15n20. I've been stacking them between 1.25 to 1.5 inches tall. Getting me about 13-15 layers at 3 inches long. Stacking to make over a hundred will usually get me just enough to get a decent sized 6-8" full tang blade. With maybe enough to squeeze a bottle opener or pendant out of the left over cut off. I've tried up to 21 layers, that was tiresome and a one time thing. Others have said it though. If you need the a large chunk make a couple billets and once they start getting small you can put them together. Just did one over the weekend with some 5160 sandwiched between a couple smaller billets, so far so good. Its not something I'm going to do all the time (until I get something with some power), but it helps beef ur arm up and every swing gets you a little better at control. The hours def add up but it's still a blast. -
Guillotine tool you should have one DIY for under $30.
bryson489 replied to David Kailey's topic in Tools, general discussion
Just finally got one out together. Probably way overkill but that's the bonus of had having plenty of scrap laying around work. Now to start making the dies Got it all welded up, but it won't let me load the finished pic. I believe i have to take a lower resolution pic.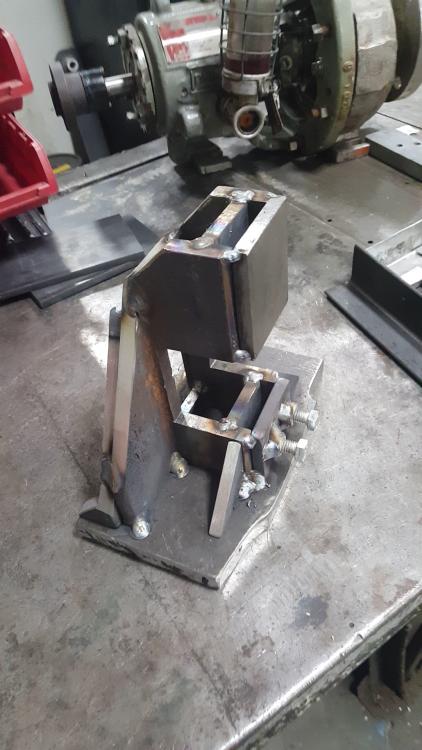
-
Amazing work! I love seeing people build every nook and cranny just the way they need it. You've got a xxxx of a set up there.
-
My New Treadle Hammer. Straight Line Linkage
bryson489 replied to Jason M's topic in Power Hammers, Treadle Hammers, Olivers
So I've been thinking of attempting this design for over a year now. Was really hoping someone would've came up with the plans for it by now but still no luck. My fear is there's no plans due to the design not holding up to the beating a treadle hammer will take. We shall see. I'm starting this 1/4 scale model to make sure it'll work and so far so good. I have been acquiring the materials for this for some time now and finally have enough to get started on it soon. It'll prob be a long build but its gonna happen. It's not letting me put the picture in so heres a little video Snapchat-761976095.mp4 -
Everything blacksmith/craigslist
bryson489 replied to cma68's topic in Blacksmithing, General Discussion
I feel your frustration. Dont rush, things will turn up. I was lucky enough to score a nice chunk of train rail in the beginning. Made a decent burner after reading Ron Reils website over and over. I wish i would've found IFI at the beginning, so you're already off to a good start. Be careful what you bite into, this trade will consume you. Btw, there's the IBA conference June 2nd-4th coming up. Little closer and sooner than the quad state -
Making some progress on this hunk of metal. Wanted a fixture table to do scroll work and other work with hardy tools. Most holes are gonna be 1" for the tools, and a couple other sizes for drifting holes. This is the final pass on the bottom. Just have to do a second round on the top, finish the sides, then level it off on the mill.
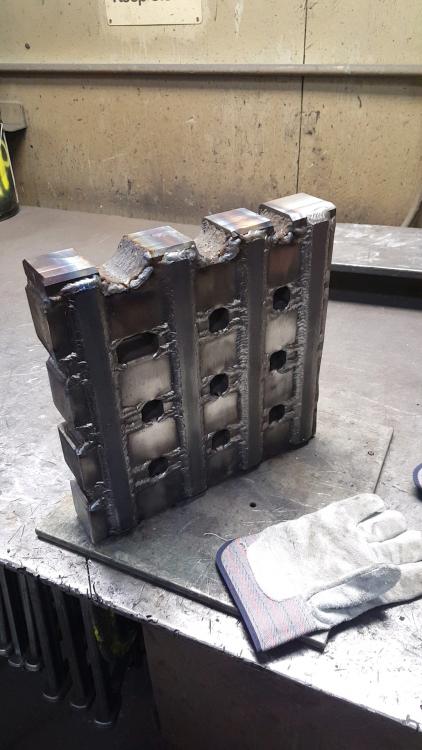
-
What did you do in the shop today?
bryson489 replied to Mark Ling's topic in Blacksmithing, General Discussion
Made my first tripod. Needs a little adjusting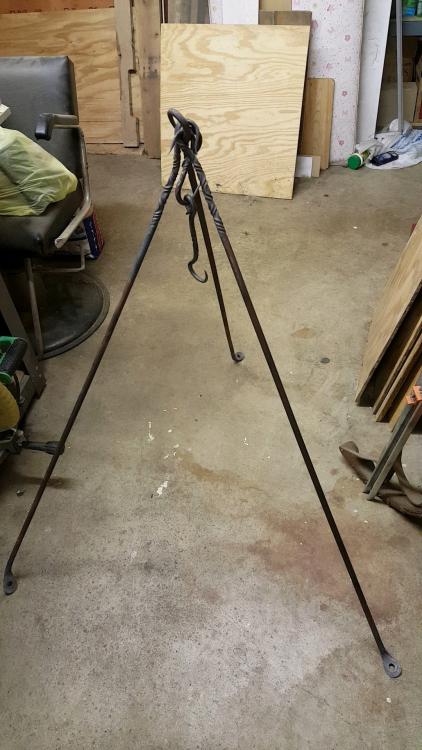
-
Thanks Tom. Noticed your prob the only member on this post thats still active. To bad they're not still having them there still. Almost be worth the road trip to look it over. Can't find much anywhere else.
-
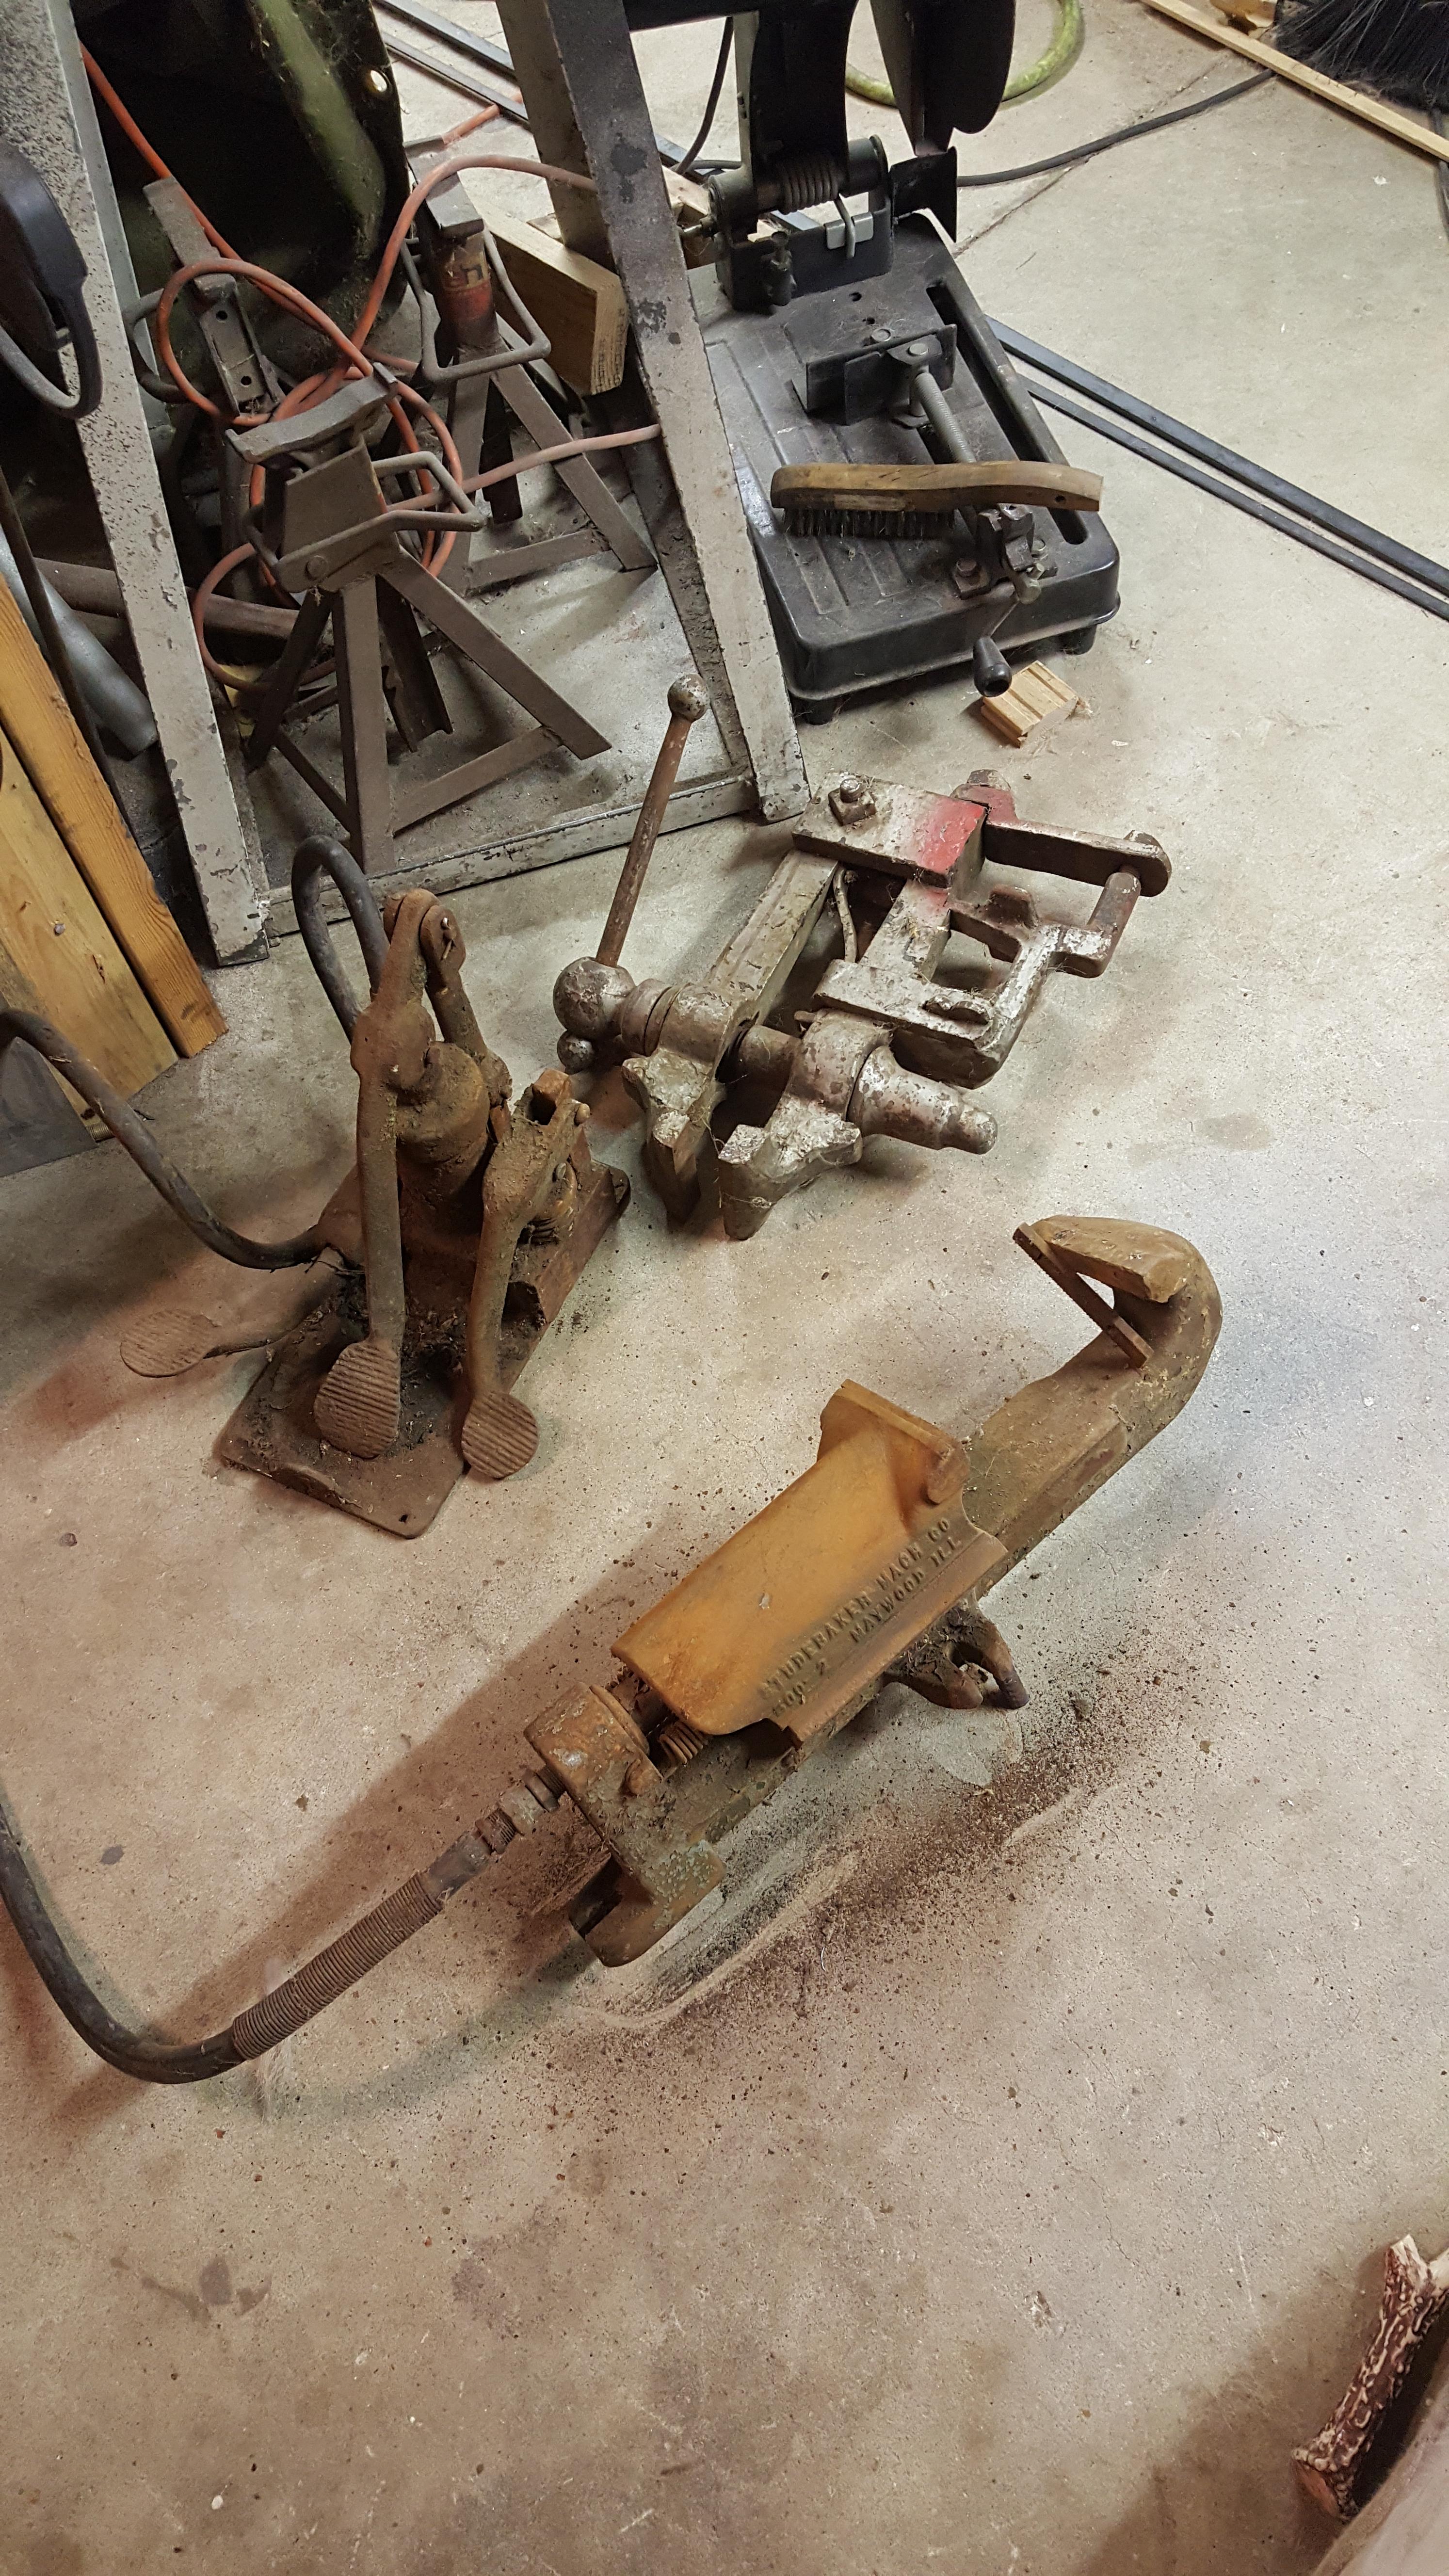
Has anyone had any luck finding info on these Studebaker? Trying a rebuild now.
-
Show me your Bottle Openers!
bryson489 replied to Arbalist's topic in Blacksmithing, General Discussion
Thank-you. Still getting the hang of how the metal moves. So addicting -
Show me your Bottle Openers!
bryson489 replied to Arbalist's topic in Blacksmithing, General Discussion
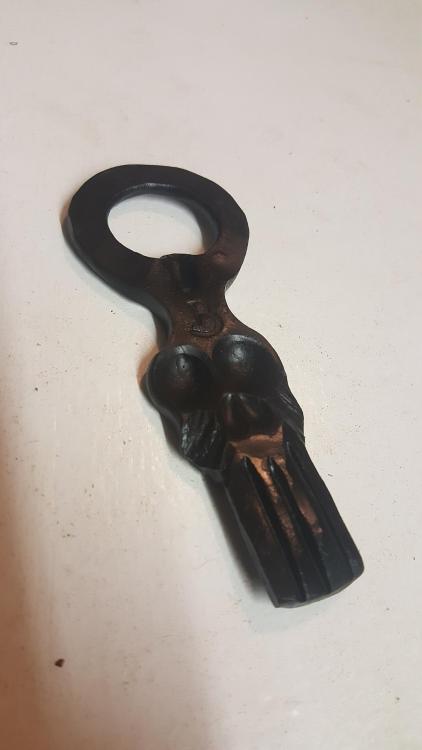
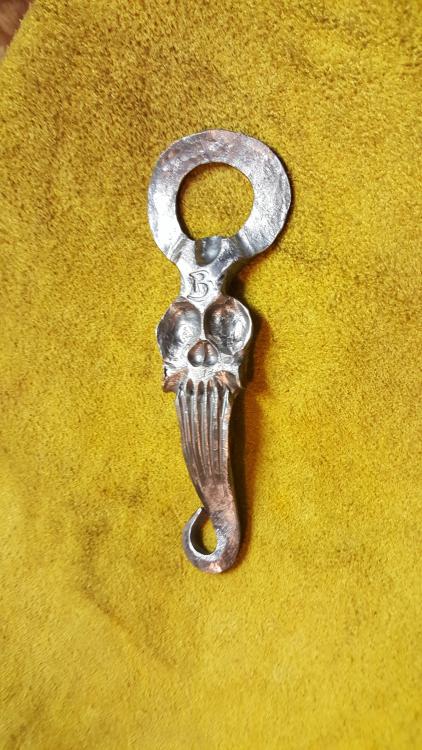
Been making some punches lately to try and build up tooling. Been wanting to try out skulls so I made a nice nose punch, now on to finding a good rhythm so I can knock these out quicker.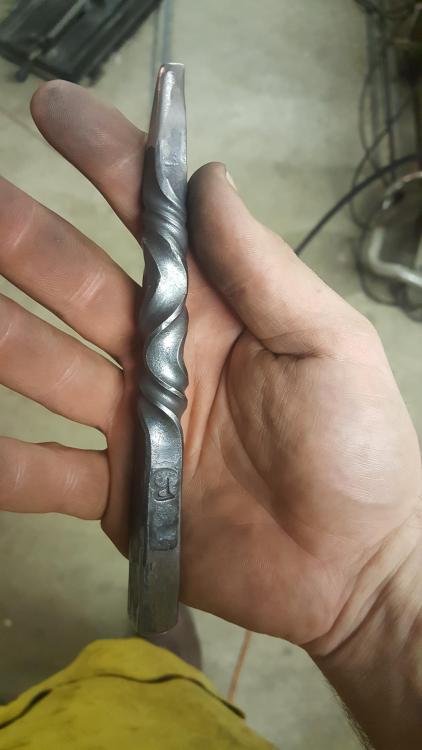
-
That's what I though with the first one. The second regulator is a bare bones one from work. Shouldn't have it but I can't garrantee that.
-
I've had this same problem. Am sorry to say I don't have an answer though, but look forward to someone else's input. Similar set up. I've got one 100lb and a couple 20s. It's happened on both sizes and with a couple regulators. Once it cleared up after switching tanks and cleaning everything I could take apart on the line from the tank to the burner. But the second time it did it, it just went away after turning the gas off then relighting the forge. So I have no idea what's causes it. I feel your pain though, very frustrating.
-
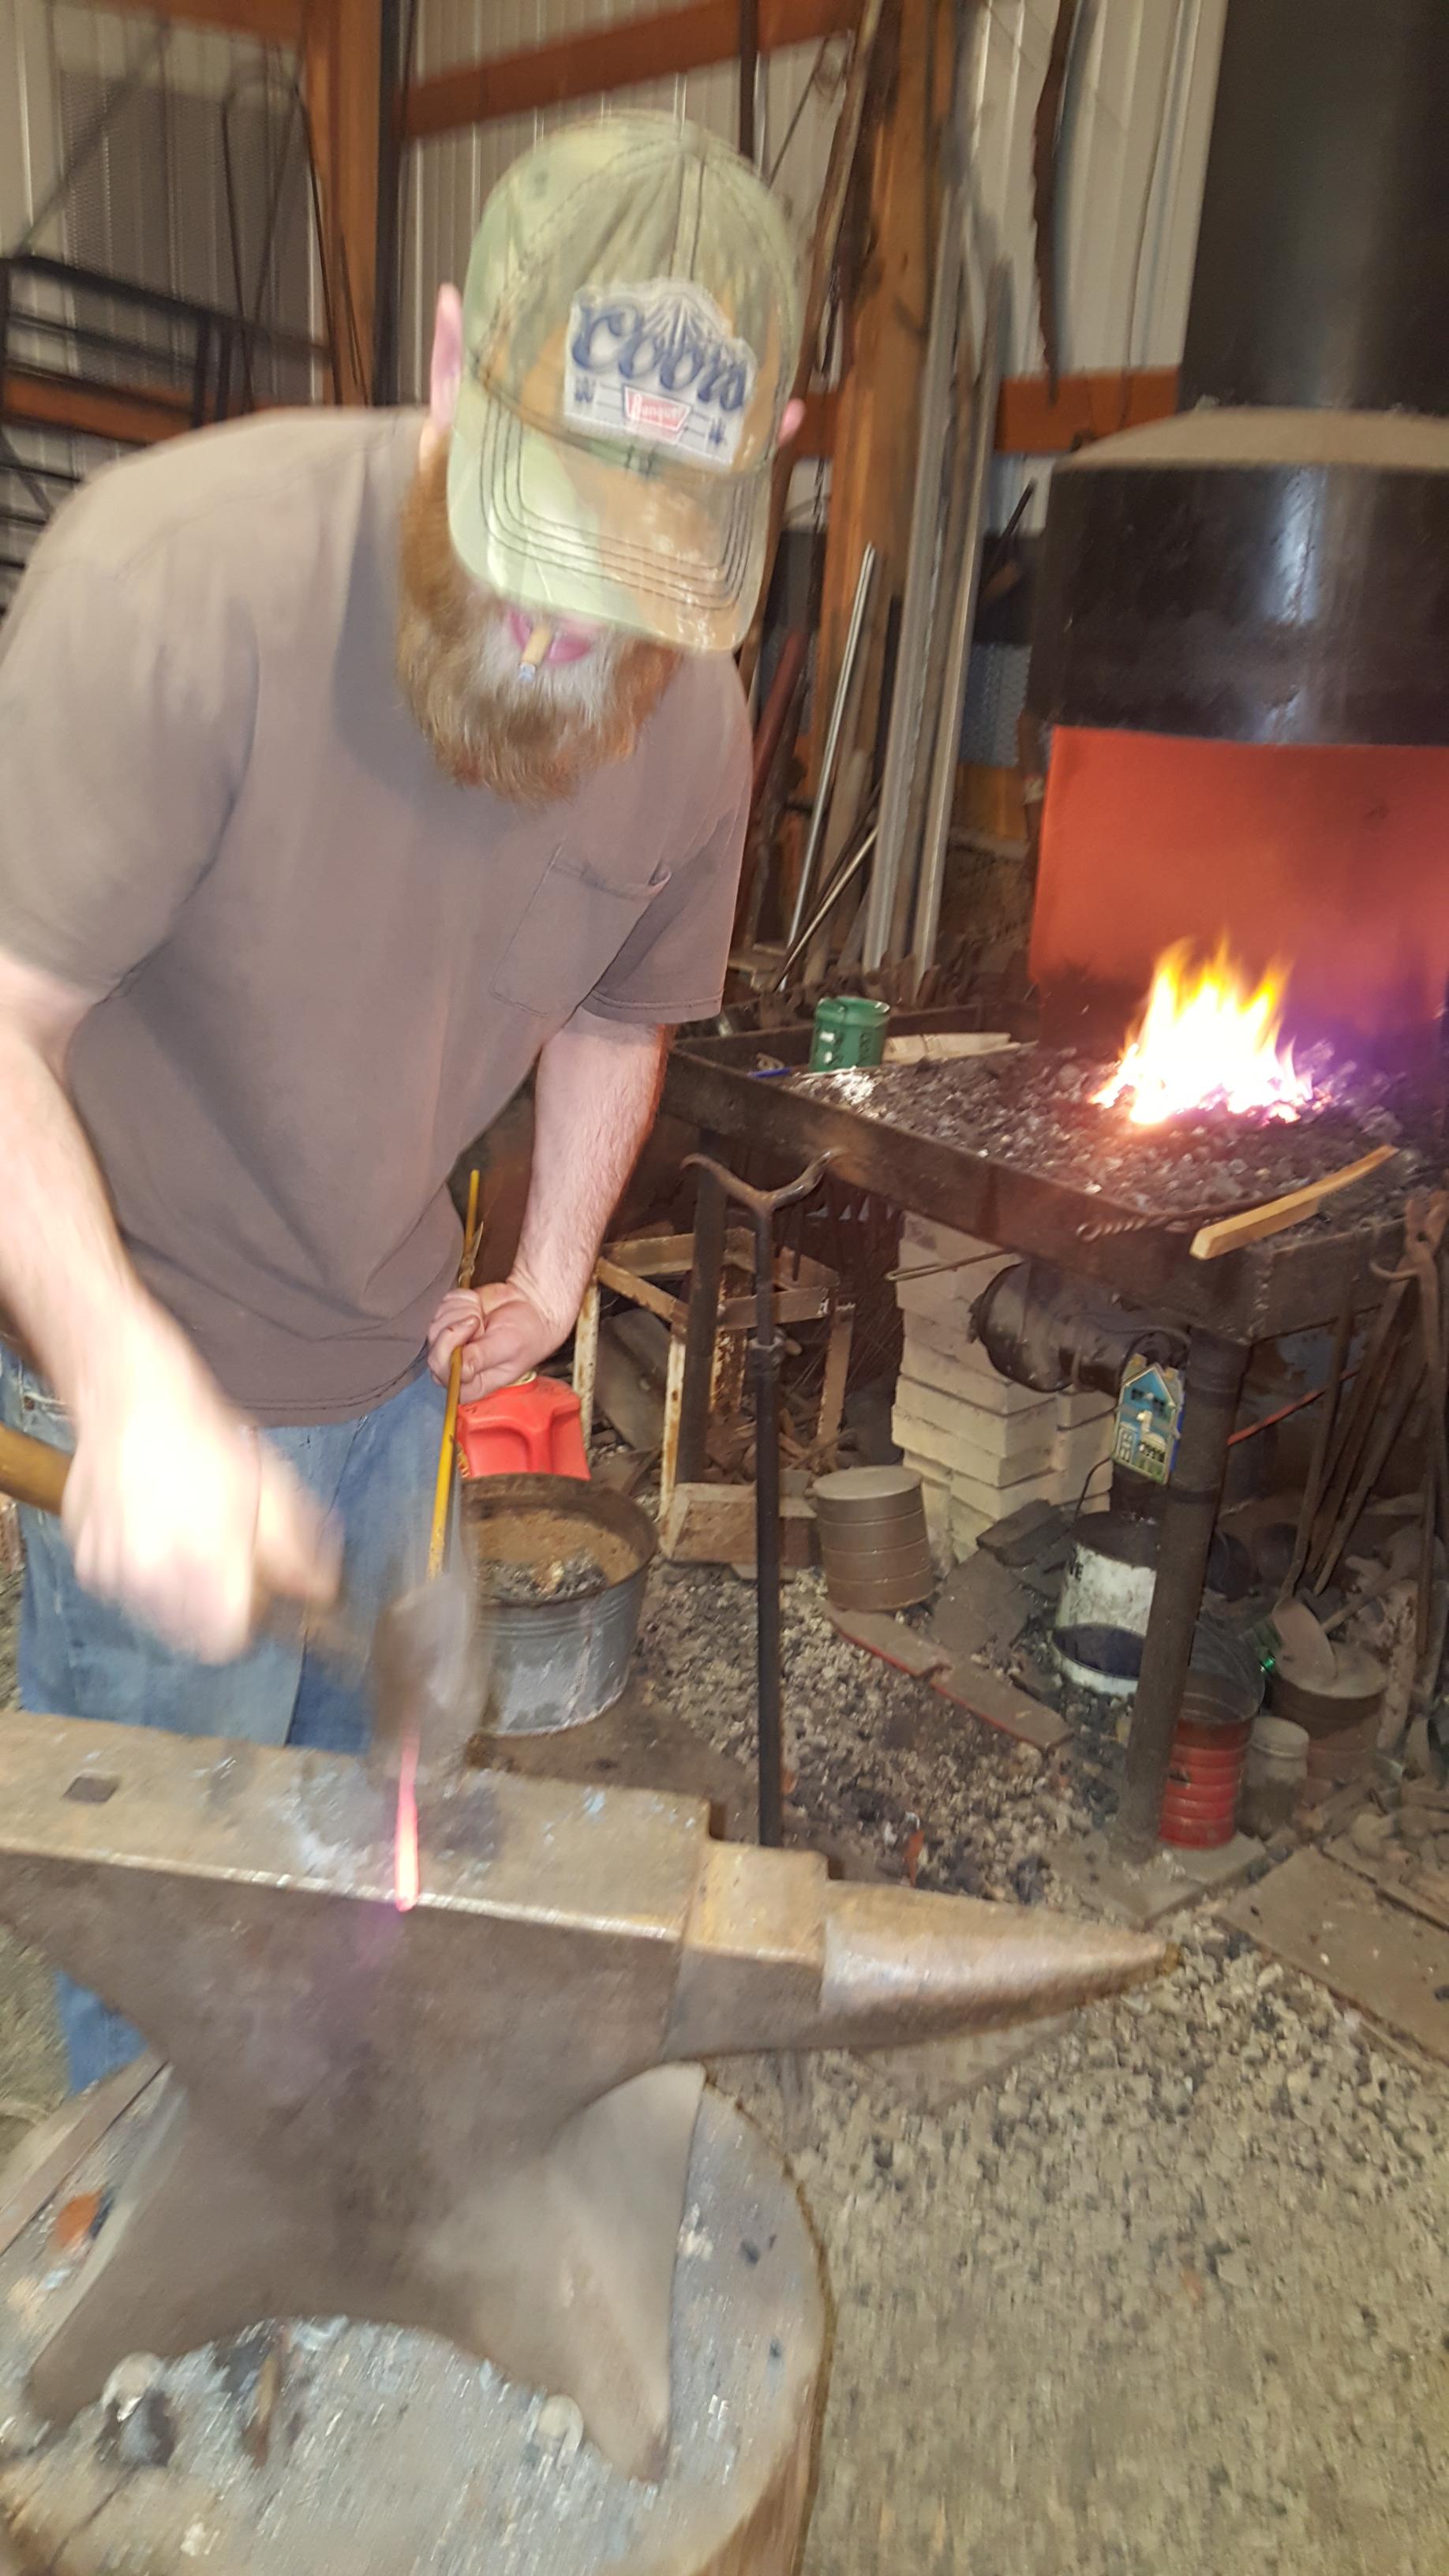
Big thanks to Jerry Carroll for today. Got some shop time in today with Jerry this afternoon. First time on a coal forge, first time using a power hammer, and did my first faggot weld. All in all it was an awesome day. Only downfall is it may have fueled the fire a bit more for this slight blacksmithing obsession... like that's really a problem. Jerry's a great guy of many many skills and am grateful to of met him, and his wife. Now I just need to get in gear making more tools for tools, to make some more tools so this fire keeps burning. Now to go tinker with the gas forge to get it hotter, now that I've witnessed that white heat. Thanks again Jerry!

-
I've had a few of these nails laying around for years and after seeing this post had to jump on the wagon. These are so simple yet so cool. I gave it a try with a couple sized nails. Gotta love this forum.

-
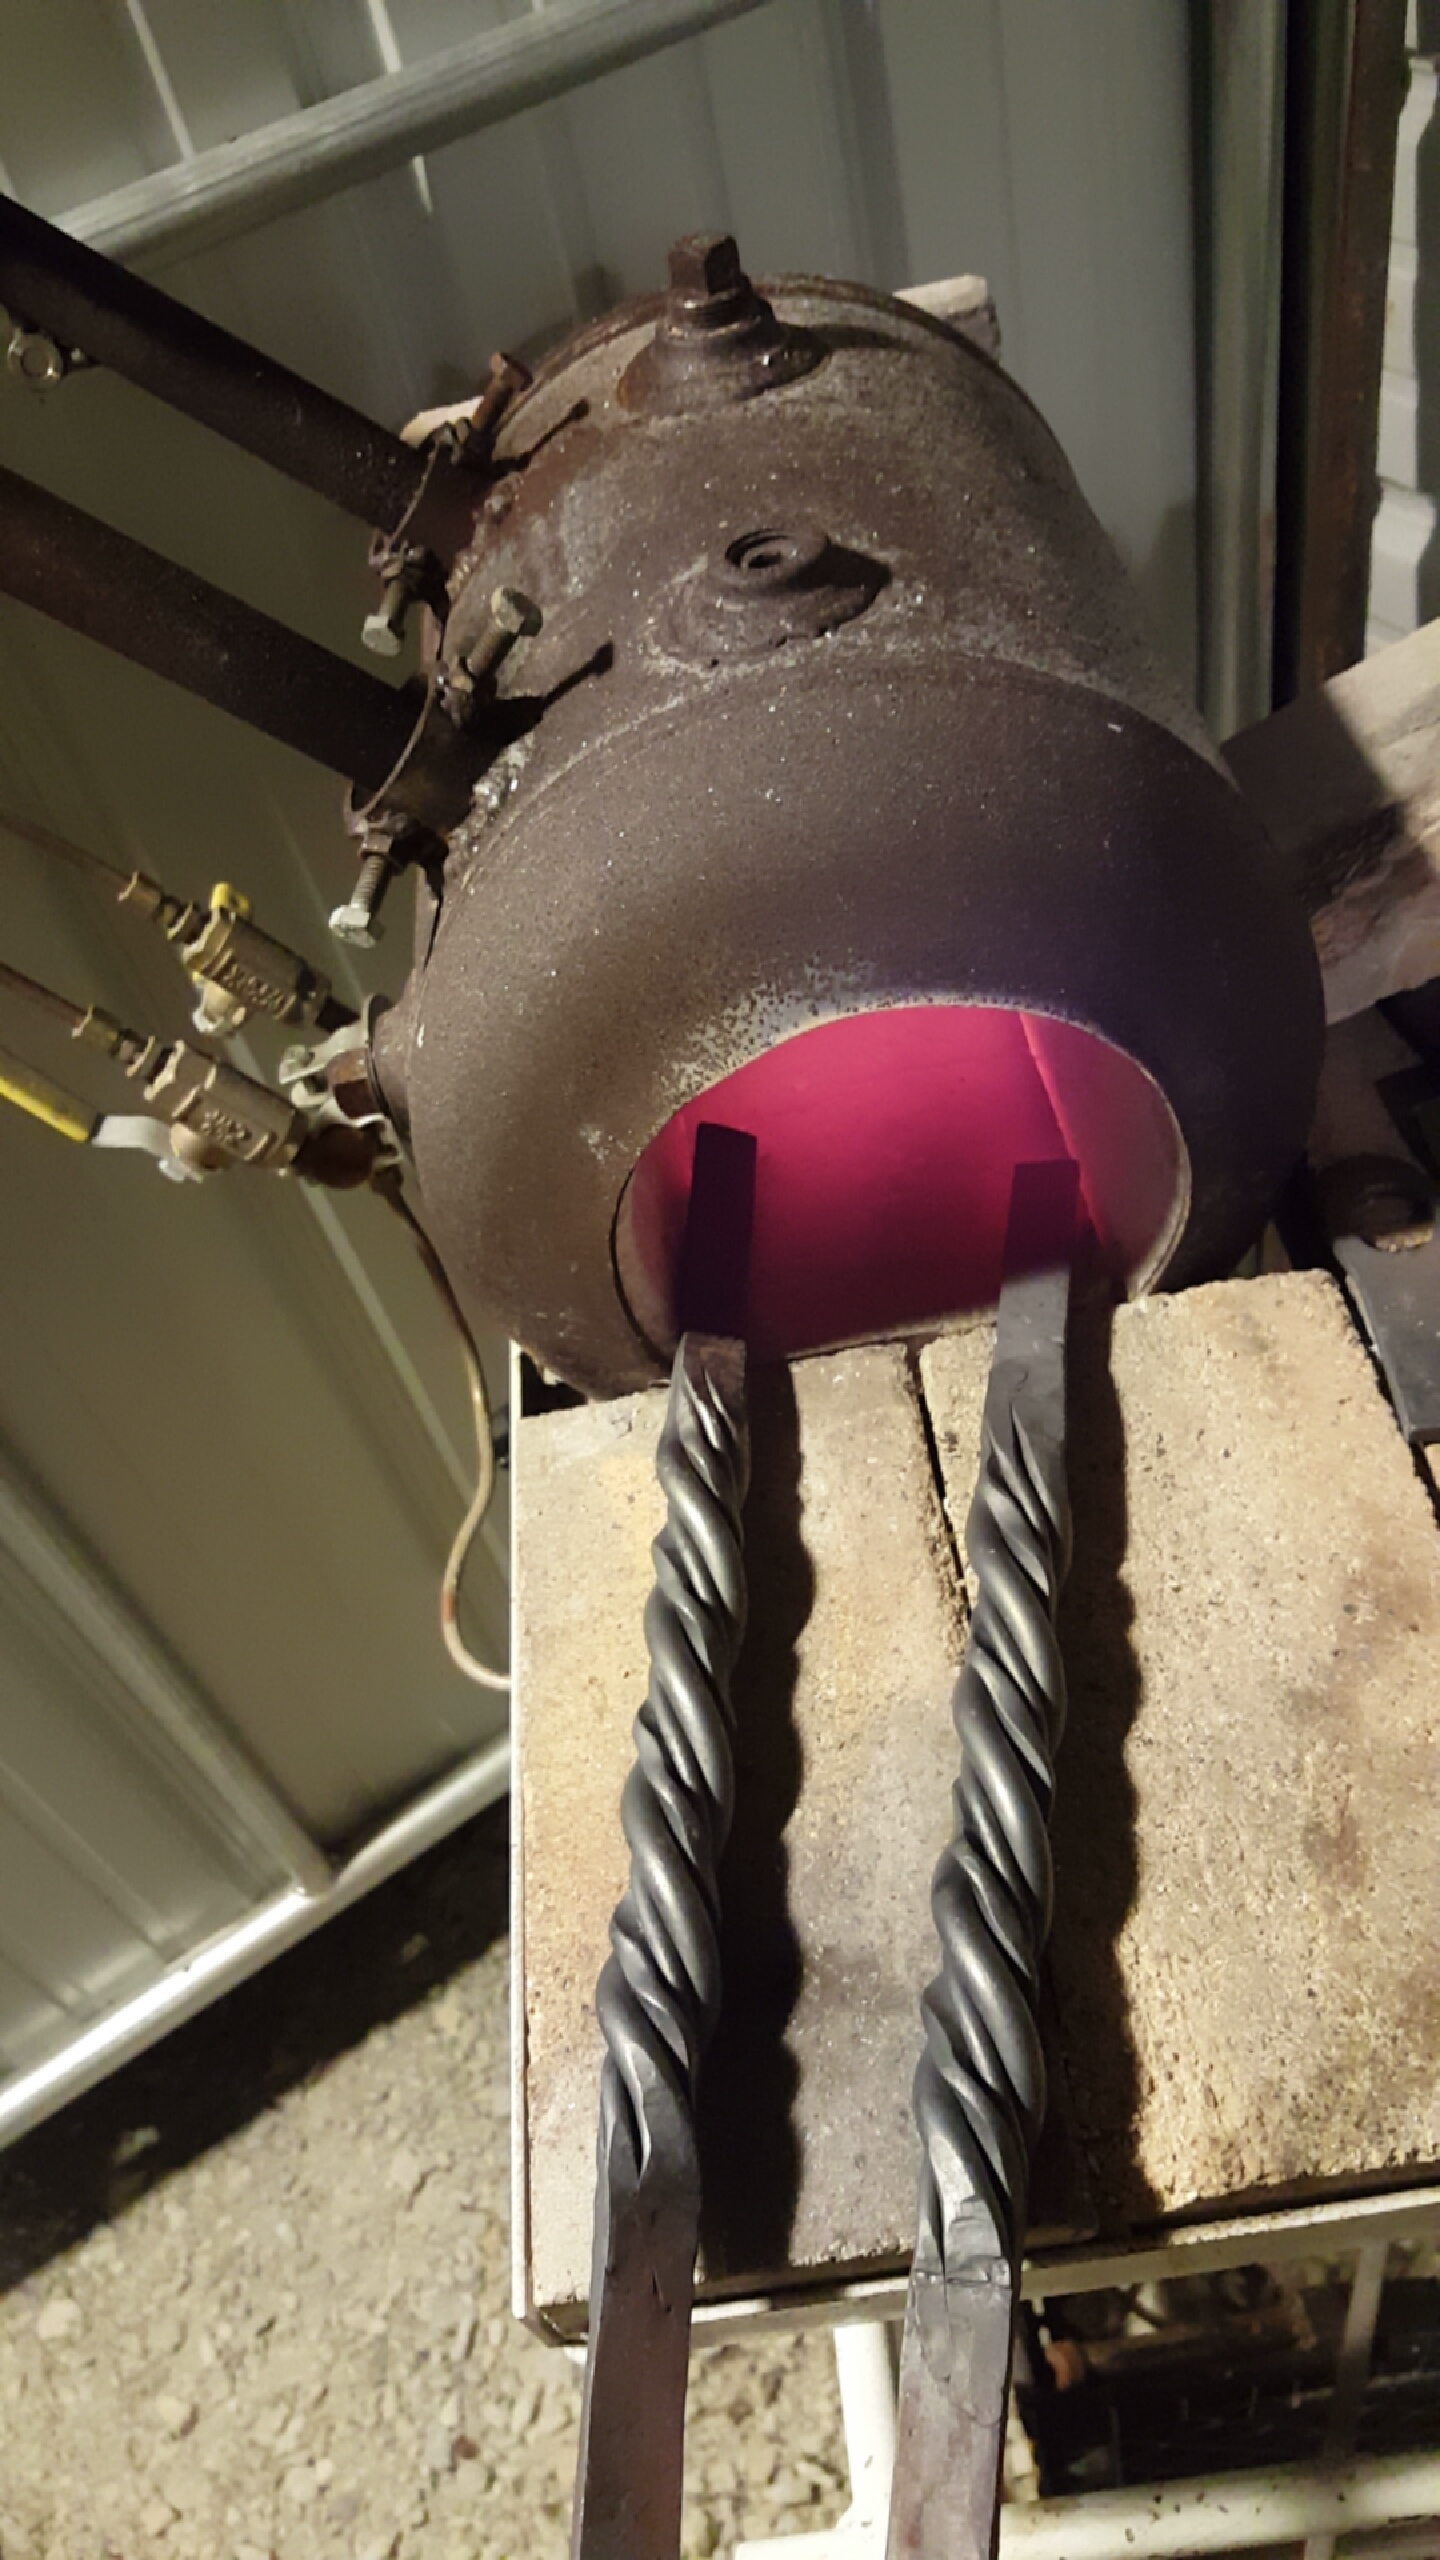
The inside is coated with refractory cement. Next gas one in going with some kaowool instead. And three burners... Thanks Wayne, I see room for improvement already. It's decent for knives and bottle openers and such, next one will be able to open up more if needed.
-
What did you do in the shop today?
bryson489 replied to Mark Ling's topic in Blacksmithing, General Discussion
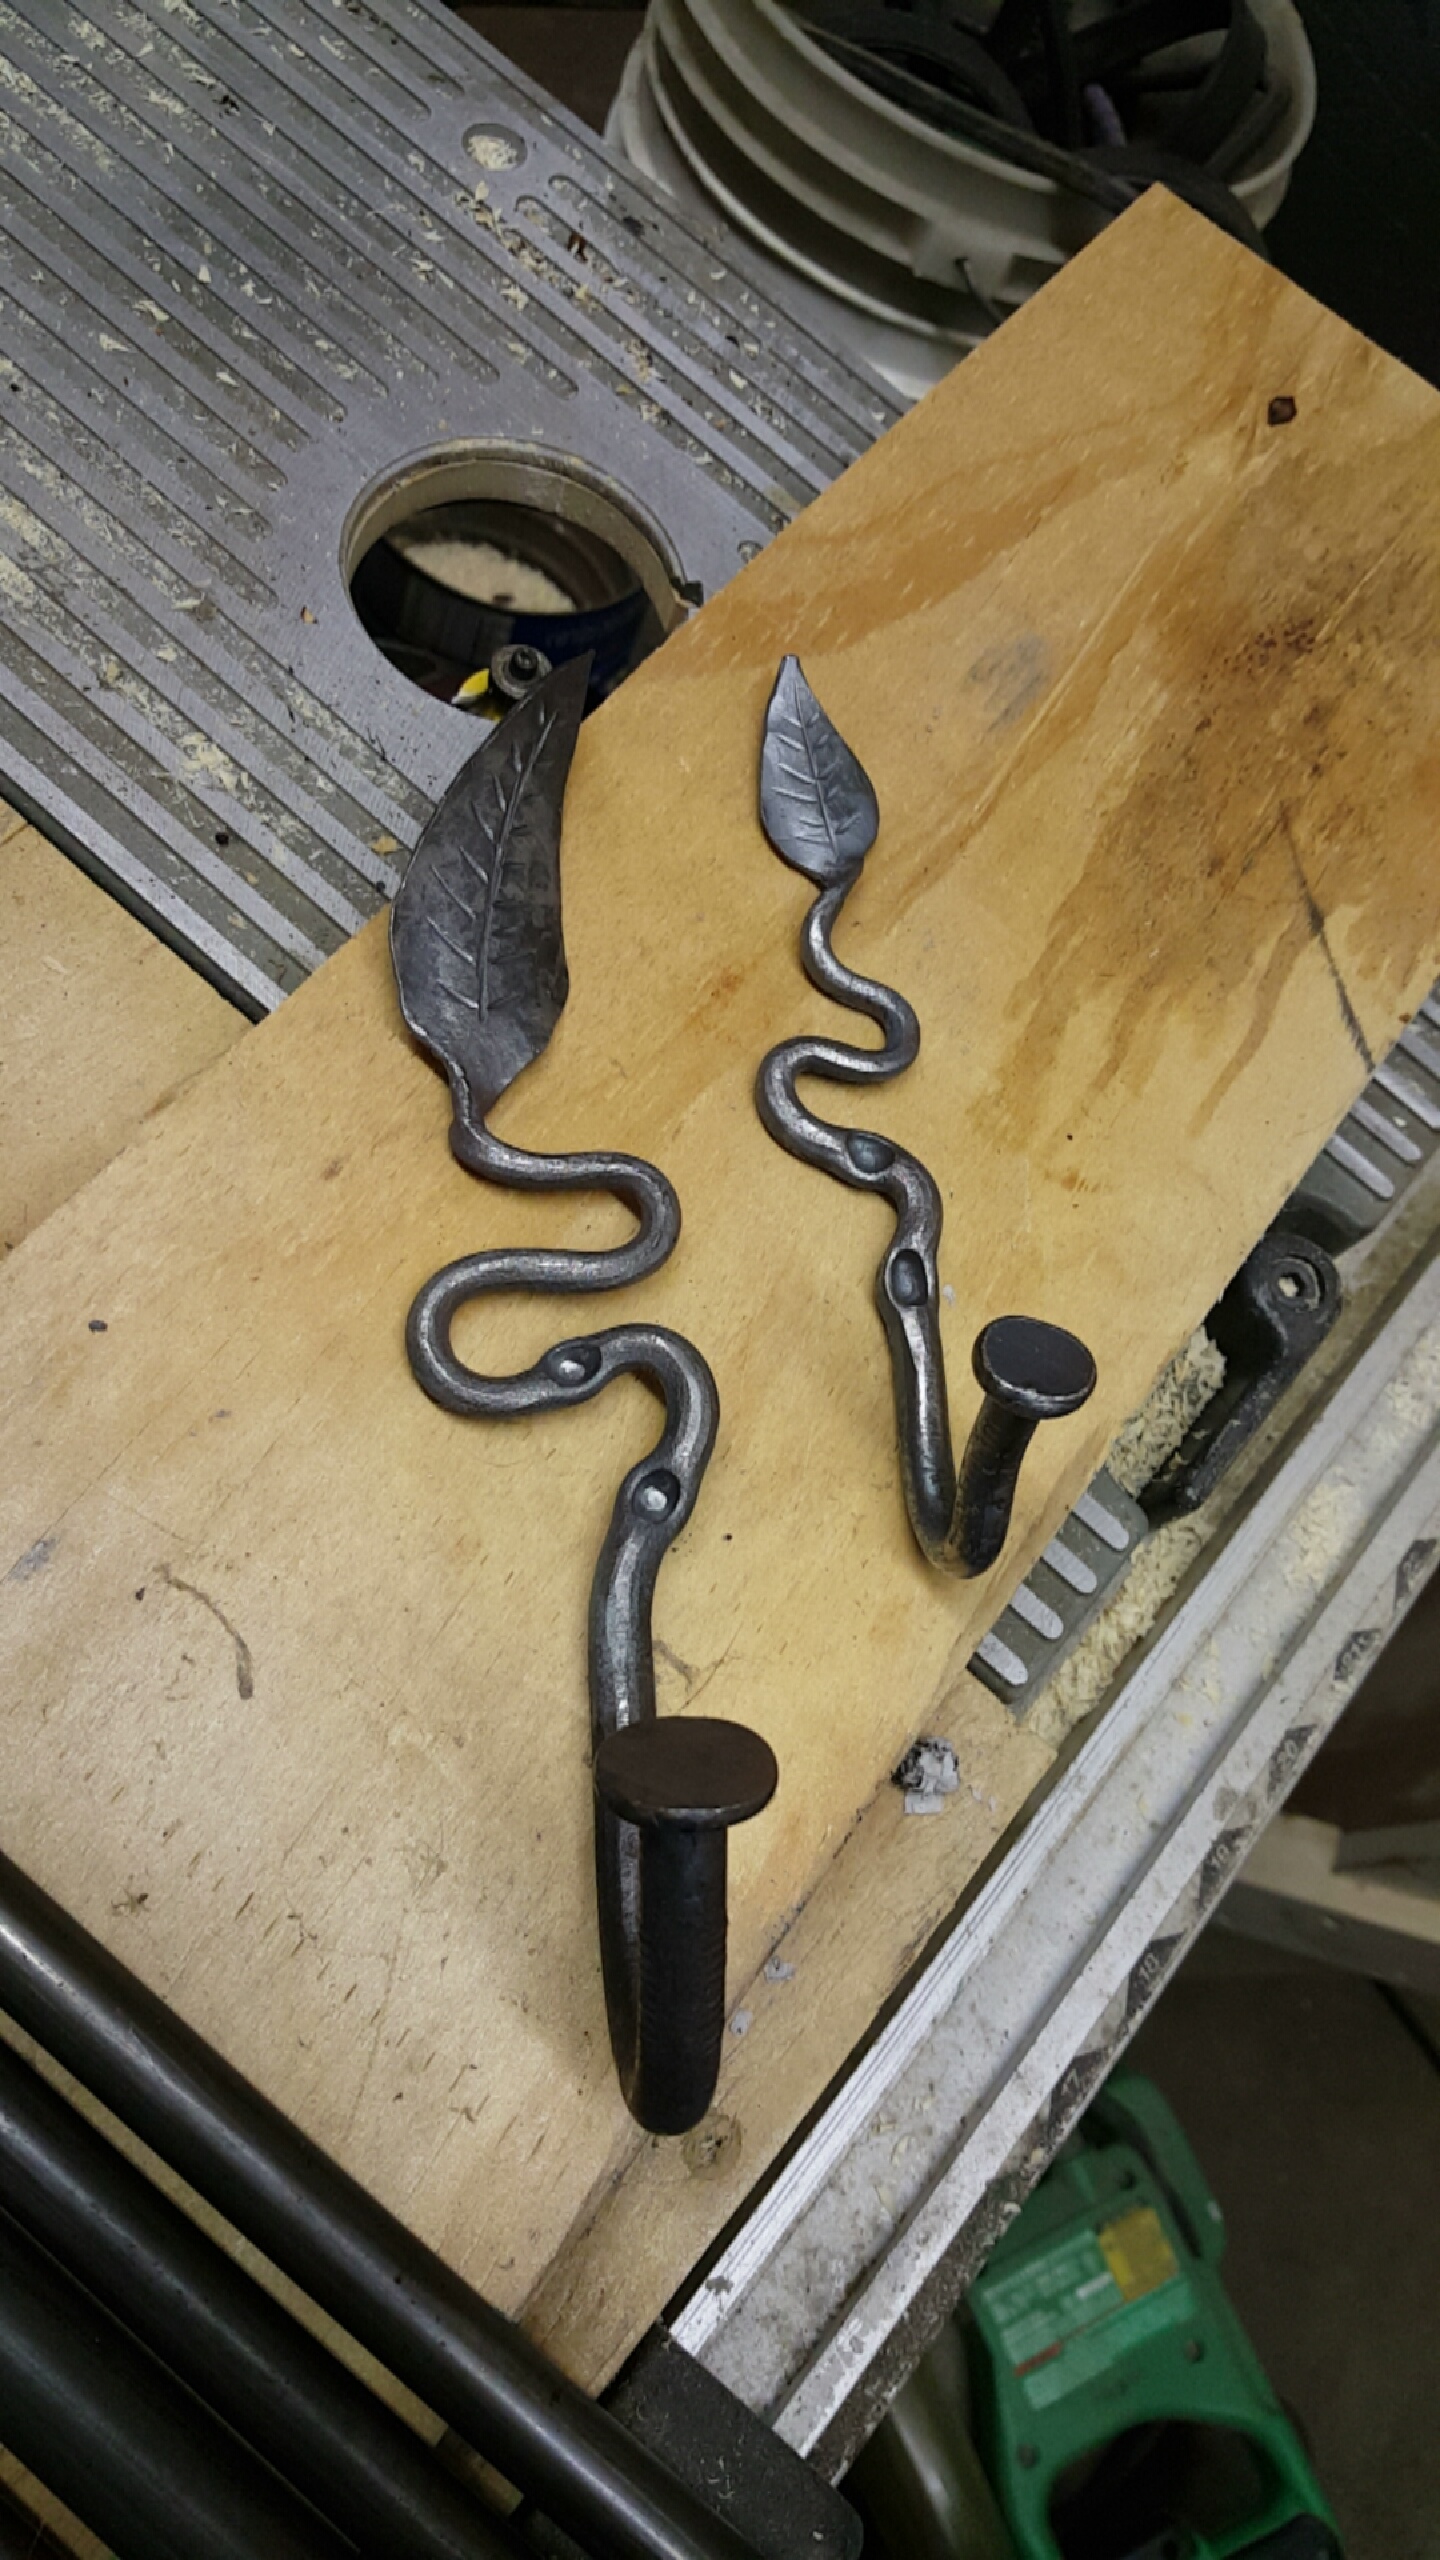
Decided to try a new twist today. Think I'm gonna turn these into some door handles.