Bobby Campbell
Members
-
Joined
-
Last visited
Everything posted by Bobby Campbell
-
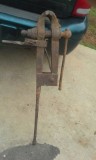
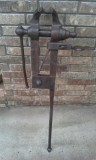
Yea and all for only $35 I just couldn't pass it up.
-
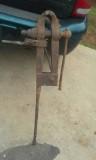
Here is the before picture, when I first brought it home
-
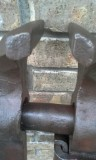
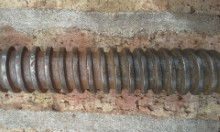
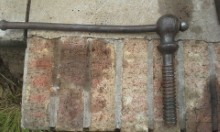
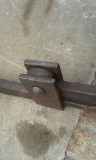
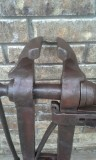
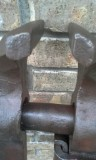
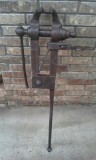
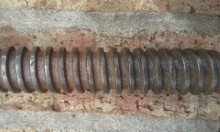
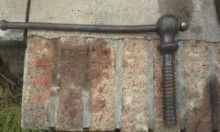
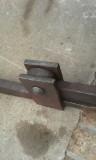
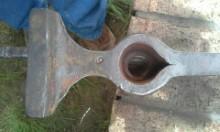
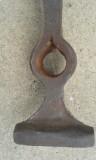
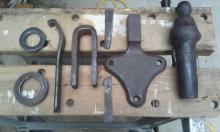
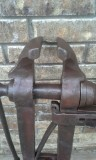
I found this little beauty while at the local salvage yard digging up a trailer hitch for my truck. It was laying over in the dirt beside the weigh in scales. It was locked up when I bought it. I disassembled everything and wirebrushed all parts before putting it back together. I only found 2 markings on it, a number 6 on the inside edge of one of the jaws and a number 2 on the screw assembly. It now works very smoothly, it appears to be hand forged with the slots hot punched and you can see where the bends in the metal were made while forging. post 10.htm
-
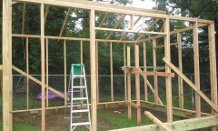
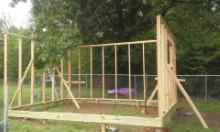
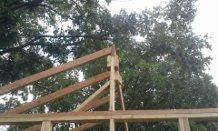
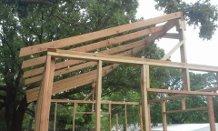
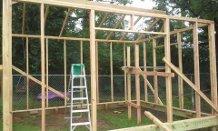
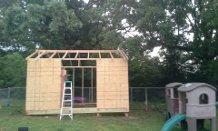
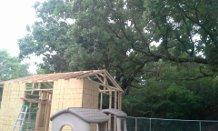
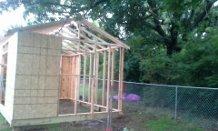
Thanks Thomas, he seems to be enjoying it. asking a lot of questions and watching closely as I made the cuts for the birds mouths on the rafters. Here's some more pictures of todays progress. Ready to put the decking on top and get to nailing down shingles. The severe thunderstorms ran us inside so had to quit for the day. Its been over 20 years since I've done any kind of framing even so its turning out as planned. I have a few minor mistakes here and there but it is level, square and solid so that's a plus in my book.
-
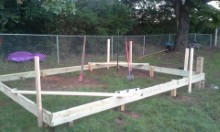
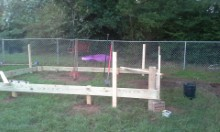
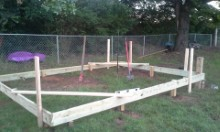
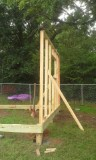
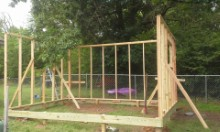
I have started working on a shop area to hold my tools and stuff. Here's the progress after two days work (fighting the rain stinks). Day one was setting the 2x8 forms and 4x4 support posts. One side wall was laid out and framed in and set to the side for later use. Day two saw the 6x6 corner posts sunk 18 inches in the ground and set in concrete. All the holes were dug by hand with post hole digger and the mandatory rock bar. We also got the rest of the walls framed up and set. Everything squared and leveled, weather permitting we will start on the rafters tomorrow. (If the tornadoes stay away tonight and don't blow everything down). I didn't get a picture of the last wall to go up as it was dark and the rain ran us back into the house. I'll post it tomorrow if possible. It is 12ft x 16ft will have a 6 ft door opening on the South side and two 2ft x 4ft windows on the East and West sides. My 14 year old son is helping me which gives me the perfect opportunity to teach him how to frame simple structures. I will load more pictures as we progress with the build.
-
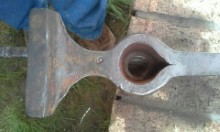
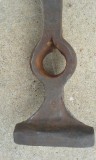
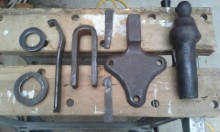
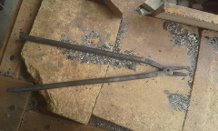
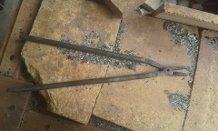
Frosty, Actually that's what I was trying to do was build a set of tongs =) They turned out ok I think for my first time forging anything. I still need to "pin them" and I drilled the hole cause I don't have a punch yet. Here's a pic of the tongs.....
-
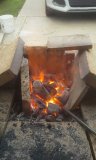
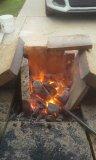
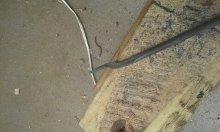
Fired it up for the first time today. I couldn't wait until I had it lined so I did a test fire and beat on some stuff. Just worked on tapering a bit and trying to shape a tong side.
-
Just thought I would add my two coppers in this thread as I have direct experience with synthetic fabrics. When I was 13 or so I was in an unfortunate accident which involved fire. I was wearing those polyester sport socks, you know the knee length ones that have the colored bands at the top... Well suffice to say the fabric not only burned but it also melted to my right leg. Removal of the left over material made matters much worse. Third degree burns and several years of rehab later. I watch very closely what I'm wearing while working around heat.
-
Charles, I had honestly started my pan with a side blast in mind, but once I started my angles were all wrong and the sides didn't seem like they were steep enough to try and get a pipe to go through them. My fabrication skills leave a lot to be desired when figuring angles etc. Once I round up some more scrap sheet I'll make another attempt to see if I can get the next one cut right. I really would like to try our both types side/bottom. Just got stuck with bottom for now. I had planned on mudding up the pot quite a bit to close up some of the size and to protect the pot. I don't know the exact thickness but its pretty thin stuff. Think sheet metal they use to build guards around a drive belt system. It's definitely not ideal but hopefully it will work to let me heat smaller stuff. I appreciate both yours and Frosty's posts. Every time either of you reply to one of mine you impart more tidbits of info. I plan on digging around in the back yard tomorrow for some of our famous "red clay" weather permitting. I hope your dodging the worst of the storms that are blowing through tonight. We haven't gotten any bad winds yet but it has dumped a ton of water on us today.
-
-
Thanks Frosty, I have plenty of brick scraps to double it up. I may want to get it where I plan on using it first though as its already getting pretty heavy. I hope to have some extra cash coming my way in a month or so. I plan to use some of it to build a shed/shop. 12ftx12ft I think with two sides closed off to start. any bigger than that will take up too much room in the yard and might get the wife to yelling at me (wink).
-
DSW its 12"x14" and roughly 3" deep metal pan only. The brick I am using is roughly 1.5" thick and I have some more scrap pieces that are about 3x3x5" that I can put along the edges to build the fire deeper or I can mud it up to make it deeper. Will be using Charcoal to fire with (edit)
-
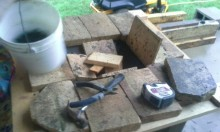
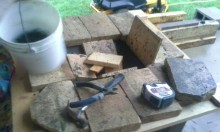
I work at a plant that uses a 150ft long rotary kiln and a few years back during a rebricking of the kiln I was able to obtain some of the scrap brick material. I have seriously been using this firebrick scrap as edging material around a flower bed for the last two years. First dry fitting of the firebrick...... That's as far as I have gotten today as severe thunderstorms fought me all day long off and on.
-
Here is a picture of the skilled labor I recruited to help me out. She's serious about hammering in that woodscrew (wink)

-
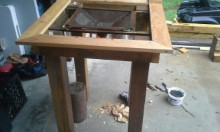
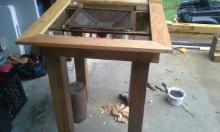
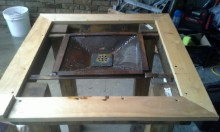
I then attached legs to the frame from the 4x4 scrap lumber I pilfered. And added a lip around the frame box (why will become apparent in my next post).
-
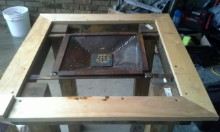
I actually started assembling all this today as I have been gathering materials for close to two weeks now. I used some scrap angle to build a support frame and some old pallet wood to build a box to hold the angle frame.

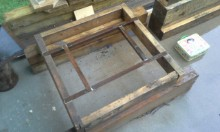
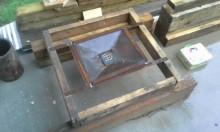
-
Ok so I am putting together my first forge (charcoal). With scrounged materials that I have found. So far I have invested $0 in this forge, I expect to have to buy some piping for the air/blower portion. I think my pan is too shallow but it was seriously my very first attempt and fabrication from scratch so I'm going to go with it and adjust with clay/mud to deepen it up. So some pics here is the pan I built from scrap. It's pretty thin stuff but I'm going to line it with clay and even if it doesn't last long it will get me started.
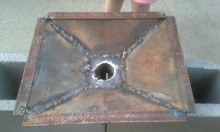

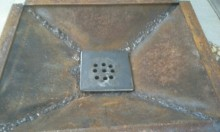
-
Thanks Doc, I may try that when I get access to a torch. Charles, I'm hoping I'm not overthinking it I'm going to start a forge thread over in the Forges area so as not to lump everything together like Frosty suggested. I haven't made it over to the Saltfork page yet but I do plan on it, would be great to meet up with others and just being able to watch first hand how things are done. I have quite a few pics of the work I did on my forge today I'll be uploading there in just a bit.
-
Bobby Campbell replied to basher's topic in Blacksmiths and Metalworkers Association of the South West UKI enjoyed this very much. Thank you for sharing.
-
Amazing gates, Not just the fixtures which are great by themselves but the woodworking too. Bobby
-
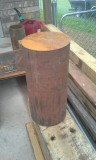
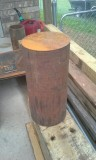
Charles, I'm in Sallisaw just West of the Arkansas state line. Here is a picture of the round stock I'm going to use as an anvil. It is soft enough that the cut marks will smooth out when I hit it with the hammer but not so soft that it deforms or dents when struck. It has some rebound but not like what I have read about. I still think its a solid piece for me to practice on while learning. Frosty, You named off a ton of more interesting firepots than what I am currently making, although I have changed my direction 3 times today based on scrap I was able to find. I will start putting it together tomorrow and then upload a picture for suggestions. I already think my firepot is too shallow but I'll be lining it with clay as its pretty thin stuff, so mebbe I can deepen the dish as I put on the clay? Still need some sheet scrap to finish out my table around the firepot, I have an co-worker who will be bringing me about 1/2 a bucket of castable refractory Monday if its still good, and some piping for the air. but I should be able to make a good start on it tomorrow. Oh I salvaged and old pallet today and recovered two 6ft long treated 4x4s and some rough cut 6x6s...I have to stick a tape to them, but I'm working around in my head how I'm going to build a anvil stand for the round stock. Glenn, I really do appreciate the welcome as well as the advice. Bobby
-
Thanks for the replies. I've been "lurking vigorously" for a while now studying plans for forges from charcoal to gas. Debated the pro's and con's of each (within my own limited understanding). I finally settled on charcoal more for the "real fire" feel if that makes even a bit of sense to anyone. I have access to scrap pallets etc....and am leaning toward making my own charcoal. (You either invest time or money and only one I have a bit of excess of right now). I would like to build a propane forge at some point but not at this time. Frosty, I'd never get started if I waited to get a real anvil as cash is pretty tight right now. =) I've rounded up two items to use as an anvil, one is a piece of RR track that I shaped a horn onto. The other is a piece of 6in round stock about 16 inches long. The round was a piece of scrap used to make a machine shaft. I need to face it as it still has the saw marks of the end from where it was cut, ( I think a light polishing with a flapper wheel will suffice once I round up a grinder I can use at home, or I may just use it as is and let the hammering smooth it out). I will post a picture of both once I can get them uploaded. I do have limited access to a welder (used it to weld up a firepot out of scrap steel). I'm sure my forge idea will turn a few heads even if its just to tell me how crazy I am. I started by researching firepots like those commercially sold and used them to get my overall dimensions. (again I have some pictures taken just need to upload). My project this weekend will most likely be putting together the material I scavenged for a table/stand for my firepot. I'll have to purchase some stove bricks so may not get as far as I'd like this weekend. So far I have $0 invested just some time and a lot of scrounging. I really think I can get a decent beginner setup for under $100 and have set that goal to see where I can get. The most expensive hurdle is past since I obtained the round stock. It won't be Ideal but it will let me practice hammering techniques etc while I learn, which will save me from destroying a perfectly good anvil if I was to start beating on one from the get go. =)
-
Hi, I have just started getting things together to set up my humble work area. I have been interested Blacksmithing since I was little but have never attempted it. I am currently gathering up some basic (I really do mean basic) supplies to try my first steps into the craft. I appreciate all the information posted on this site as it has helped to give me ideas and steer me as I begin. I'm currently working on putting together a simple forge (charcoal) from scavenged materials. I have limited access to equipment while putting it together but I think it will work out in the end. I'm sure I will be asking lots of questions once I try to fire it up and will take any and all advice available. I learn best by attempting something and then adjusting my mistakes, of which I'm sure I will make more than a few with my first attempts. (I really do a lot of reading and studying and try to formulate a plan based on my research, it just doesn't always turn out the way I'd hoped). I'm still learning to navigate the site and will post pictures of my progress once I figure out where they need to go. I'd like to consolidate a lot of the beginnings of my progress into one post to show how I start. Anyway I look forward to your comments and any advice you feel like throwing my way. Regards, Bobby